The MGA With An Attitude
MGA Guru Is GOING MOBILE - (February 16 - February 29, 2024)
Friday February 16, 2024:
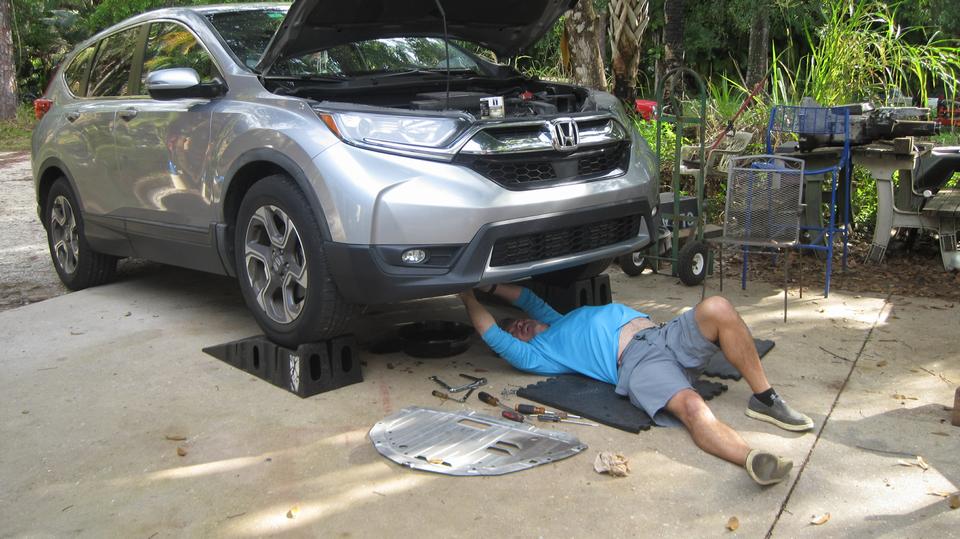
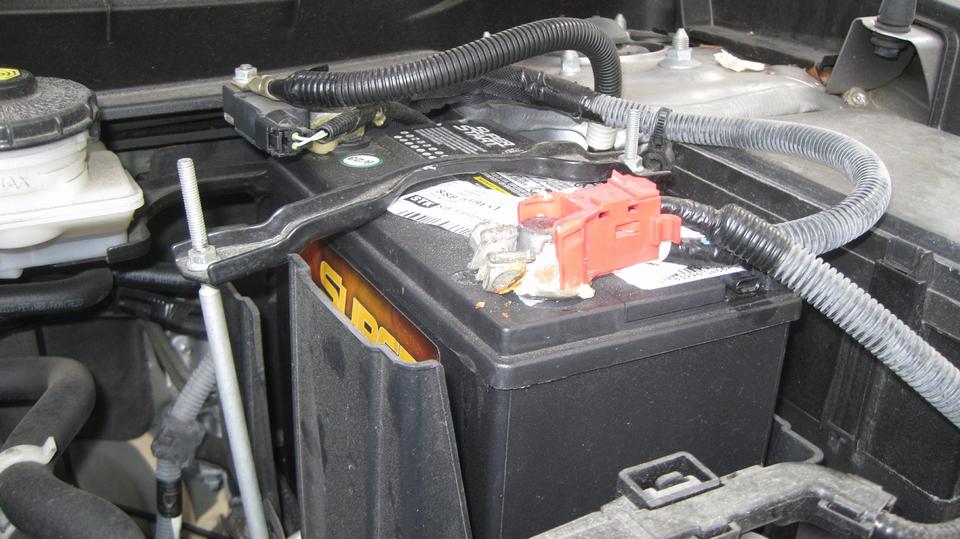
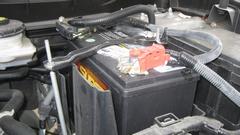
Day at Tech Central again. Start with an oil change, a badly corroded battery terminal, and another oil change.
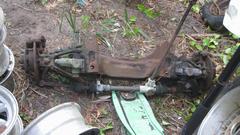
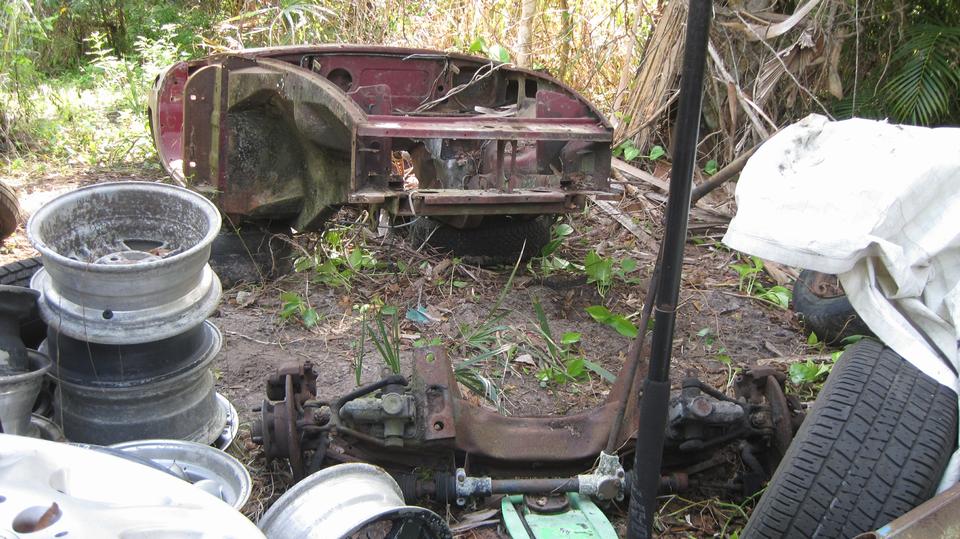
 Out in the weeds, we were jacking up a crusty old MGB parts car to unbolt the front suspension cross member, as one of the guys wanted to refurbish the whole front suspension unit before swapping it into his car.
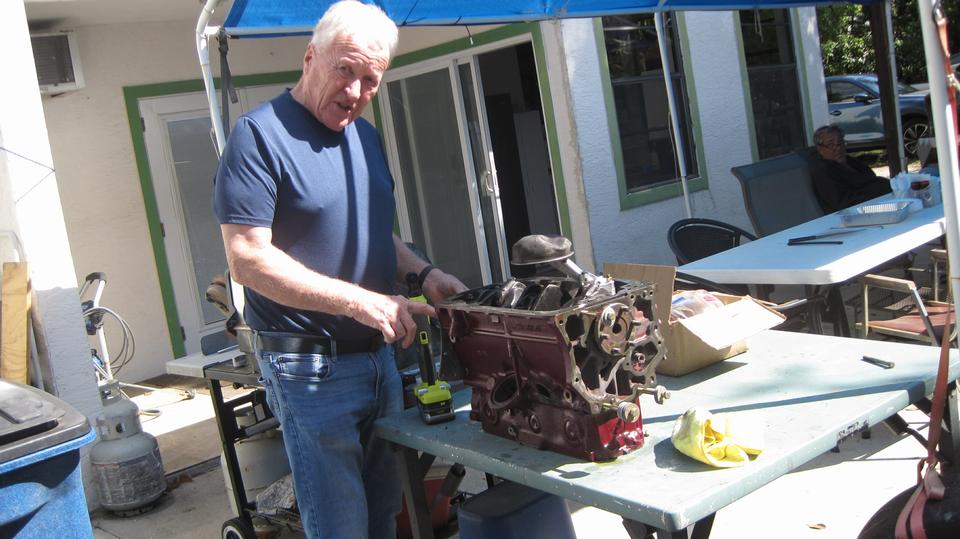
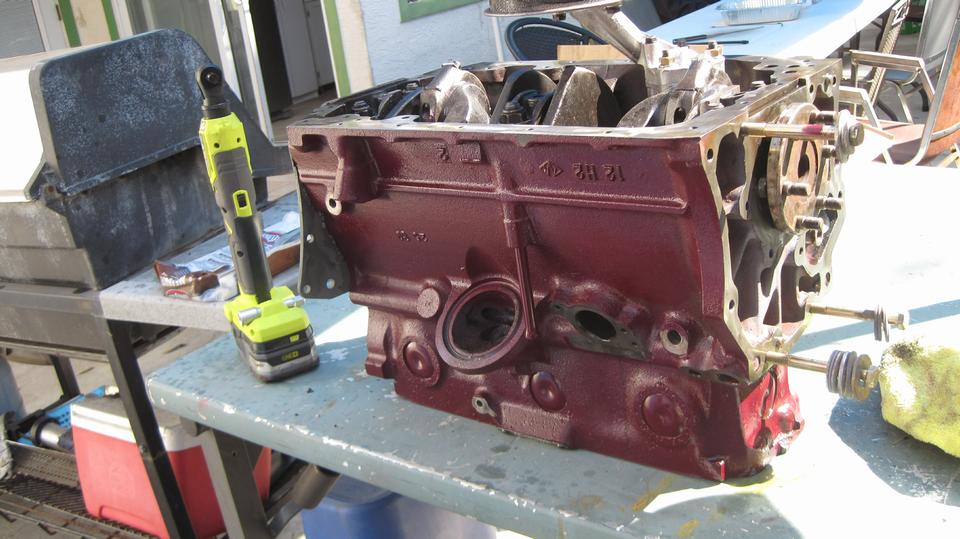
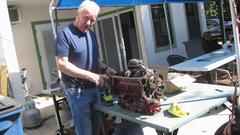
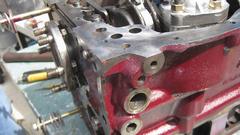
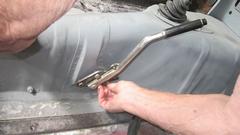
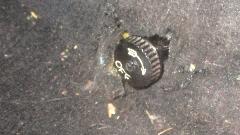
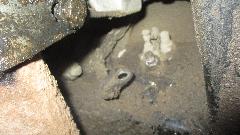
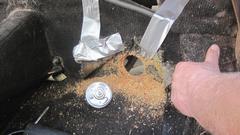
The more time consuming project was an MGA (or MGB?) 3-main bearing engine nearing end of rebuild where the owner decided it might be a good idea to remove the brass oil plugs to clean out the drilled oil galleries. Something that should have been done before machining, or at least some time before reassembly, but okay, we'll give it a shot. A 1/4-inch screw will be good to use for a plug puller. Center punch near as possible to center of each plug, and drill a small pilot hole, then drill out to #3 (0.213") tap drill size. Didn't have a #3 drill handy, so next closest 9/64 (0.203") will do.
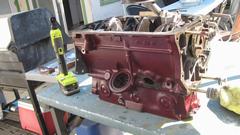
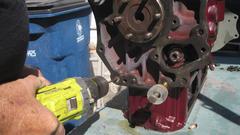
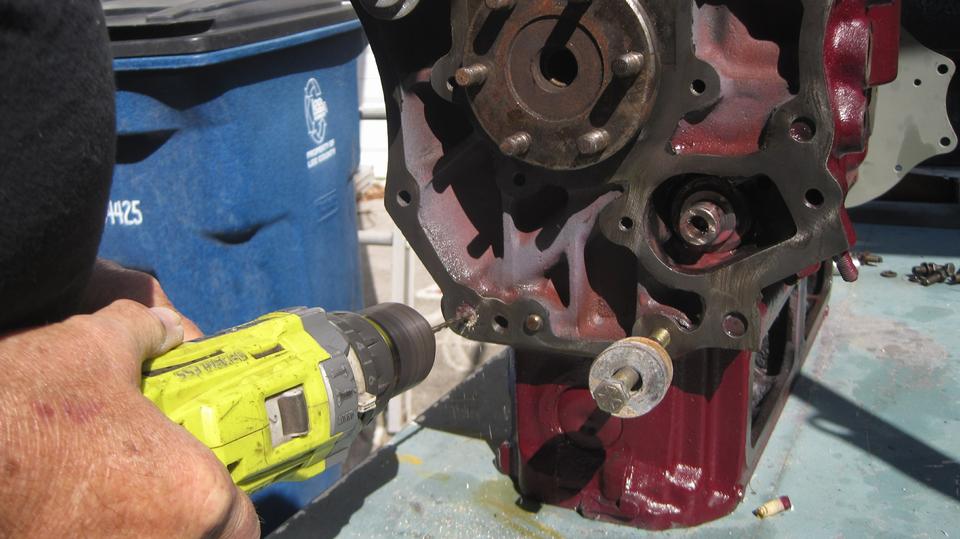
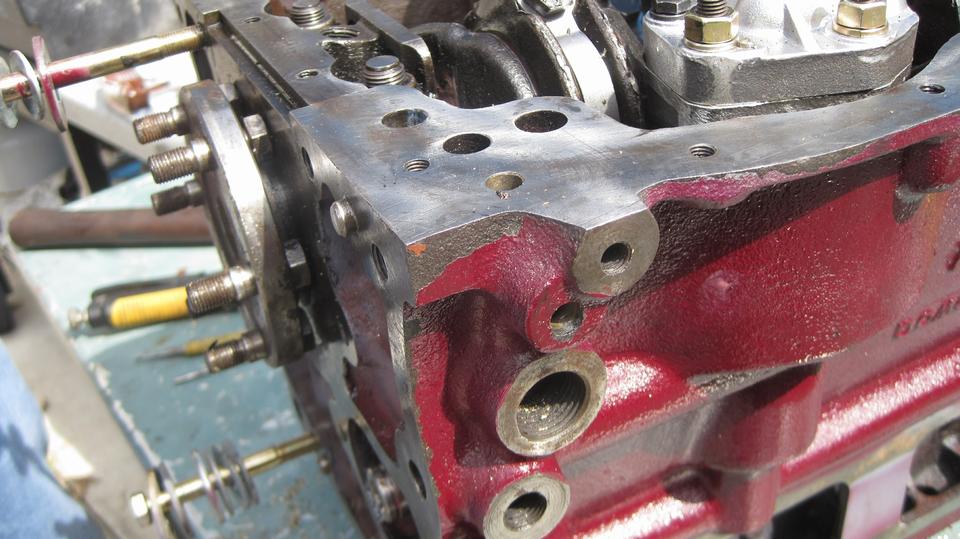
Tap through 1/4-28-UNF, install a 1/4-28 screw, and pull the plug out with your favorite (or most handy) puller tool. You can use a crow bar, or a slide hammer with a 3-jaw puller for quick work. Or get a wrench socket big enough for the plug to fit inside, place the socket over the plug, and a flat washer, and a longer screw going into the tapped hole in the plug. Then wind the screw in to pull the plug out of the block into the socket. There are brass plugs in five sides of the engine block, 12 drilled oil flow ports and 15 plugs for the MGA (plus a few more in the cylinder head). See tech page OF-101A if you want to see all of them. Out of time today, so put the toys away, and we will take up the cleaning and re-plugging next week.

Saturday February 17, 2024:
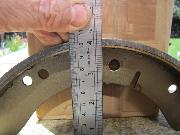
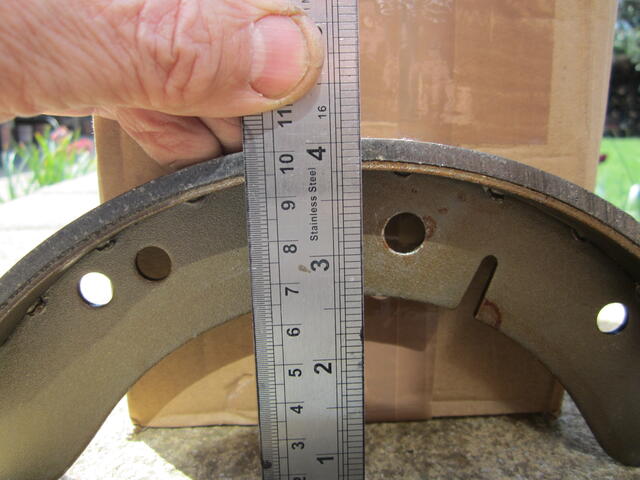
Getting more reports of Faulty Replacement Parts undersize brake shoes. This problem has been hanging around for at least 10 years, probably longer. Looking like it may never be fixed. Thousands of people by now are individually having to modify and shim up brake adjusters just to enable parts vendors to continue to sell faulty parts. Not enough people sending the junk parts back and demanding a refund. If these were new cars there would be a class action law suit demanding a fix for the safety issue.
Sunday February 18, 2024:
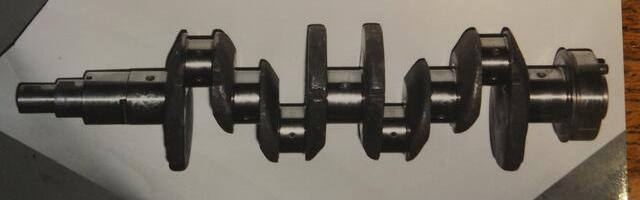
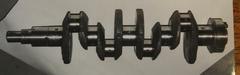 A very interesting part. Bill Spohn in W. Vancouver, BC, Canada came up with this picture of his special crankshaft. It began life as a factory MGB 5 main cross drilled nitrided race crank, then adding a special nose extension grafted onto it to carry the Twin Cam engine sprockets. The stock v=crank nose of the B crank is intact. Just created keyways in the add on extension and made it a press on.
Monday February 19, 2024:

A new Faulty Parts tech page for carburetor Brass Floats that leak and sink. I've had this problem since early last year, now getting more reports of the same problem parts. This affects a long list of vintage British cars using SU H4 and H6 type carburetors. I have officially reported the problem to Moss USA (presume same parts as Moss UK). Suggest use of Nitrophyl plastic float for these applications.
More head scratching today with another Faulty Replacement Part. This problem has been around for at least ten
 years, and has never been fixed. The MGA heater control lever interferes with the back of the heater control panel. The control switch and lever are okay, while the molded plastic panel is the wrong shape. Someone bought a complete kit with all parts of the assembly including switch and panel and some tube spacers and screws, but even then the parts included together in the same package do not fit together properly. The kit has since been discontinued, but the same parts are still available separately, and the plastic panel is still wrong. More photos and notes here.
 Some good news and bad news. My new leather seat covers are (were) supposed to arrive today. Bad news is, rescheduled for tomorrow. Some good news and bad news. My new leather seat covers are (were) supposed to arrive today. Bad news is, rescheduled for tomorrow.
Tuesday February 20, 2024:

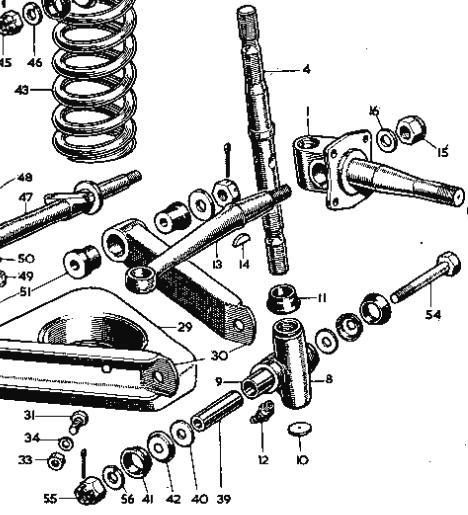
Something was keeping me busy, as I didn't have time to post here until next day. Some chat about how to replace the aluminum skin on the MGA doors. More chat about replacing front suspension swivel pins, how to separate the press fit pin from the knuckle. That evolved into how to lower the front suspension by lowering the swivel pin, or raising the position of the knuckle on the swivel pin. After all that, he wasn't trying to lower the ride height below normal, he was just fighting with the wrong (too tall) front coil springs. But this did turn into a new tech page for Lowering the Front Suspension by Raising the Knuckle.
Yes, the new leather seat covers arrived, but kind of late after dark. Quick side trip to snatch the package and tuck them inside for security. Job for another day.
Wednesday February 21, 2024:
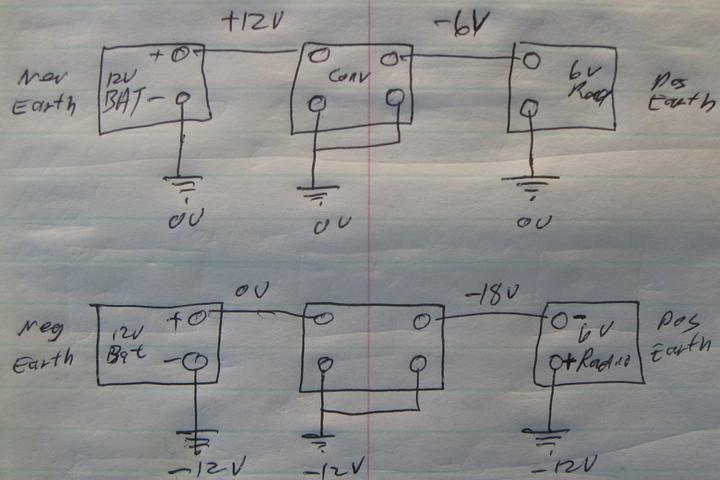
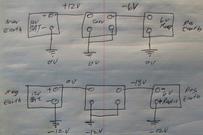 This should get you scratching your head. We have dealt with voltage converters in the past, usually to convert 12V positive earth to 12V negative earth (or vice versa). Today someone wants to install a New Old Stock 6V positive earth tube type AM radio (from the 1930's) into a 12V negative earth car (1931 Chrysler that was previously converted to negative earth). Don't ask why, just see if you can figure out the diagram. It will change +12V to -6V, an 18 volt change, with a single 12VDC to 6VDC power converter. The plan is finished, but I don't know yet if it may become a new tech page.
Updated the new tech page for MGA Twin Cam YD1.700 (tag SVD878) with more photos and notes. It now has a complete history of ownership and competition since new.
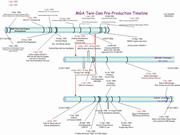
Here's another one to boggle your mind. Mark Hester has conjured up a Pre-production Timeline for the factory development of the MGA Twin Cam. You cannot imagine the amount of time and research needed to collect the information before making the illustration.
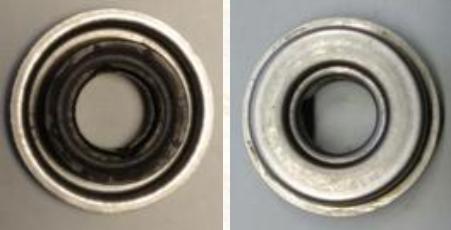
Wait, not done yet. Someone sent a bunch of pictures of four different seals for Water Pump Seals for MGA Twin Cam. So of course I had to post a new tech page to preserve the information.
Thursday February 22, 2024:
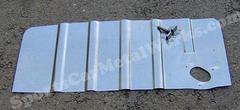
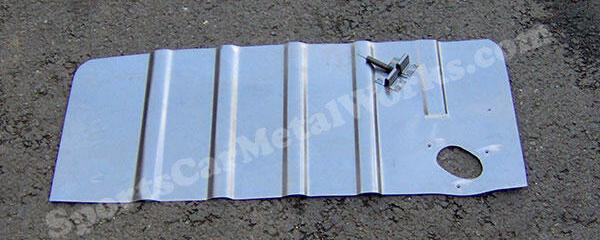
I was creating a new Restoration Panels tech page for Boot Floor Sections from Metal Mickey (Sportscar Metalworks in the UK). While I was at it, I got a little carried away and updated more than 50 Panel tech pages to add cross links to more information on each vendor. Maybe no one will notice, but it's a nice feature. See link at bottom of that tech page.
Spent a few hours late night with a persistent tech question about why there are six short tube spacers (thick washers) under the clutch cover on an MGA Twin Cam. Also when to use them, and when to delete them, depending on what kind of non-standard clutch might be installed. Given enough time, this essay should probably get posted as a new tech page, so people can stop asking.
Friday February 23, 2024:
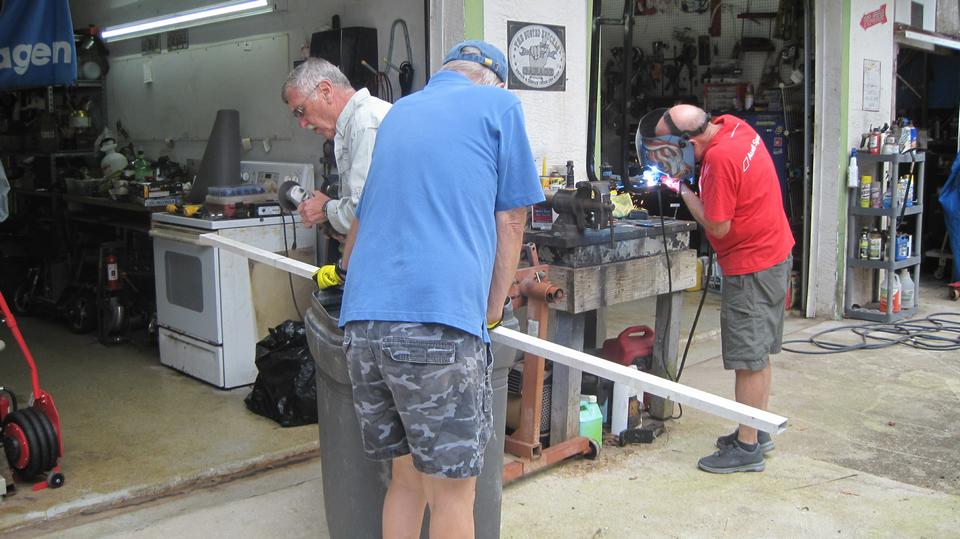
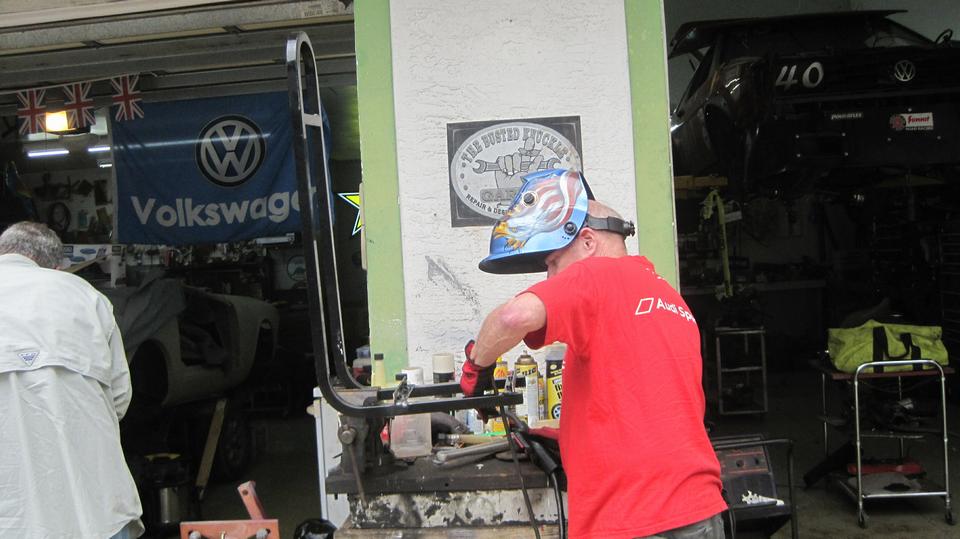
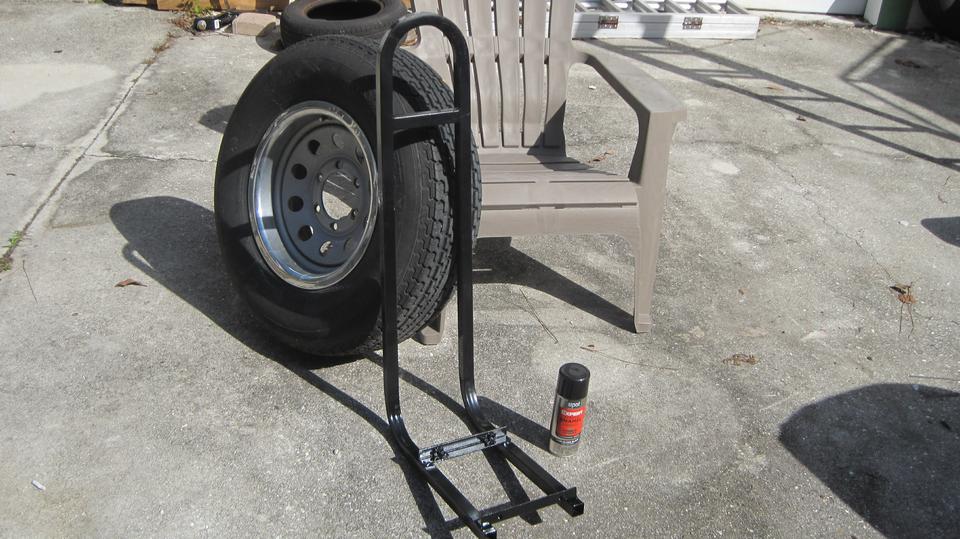
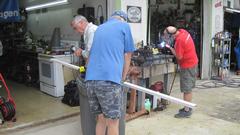
The guys got an early start at Tech Central, bunch of busy beavers by the time we arrived. Cutting some aluminum tubing, I don't recall what it was for. Cutting out welds and re-welding on a golf cart accessory frame, because two angle pieces were positioned 1/8-inch to far apart, so it couldn't be installed. It is a grab handle for rear facing rear seat passengers. That came out well after clean up and repainting.
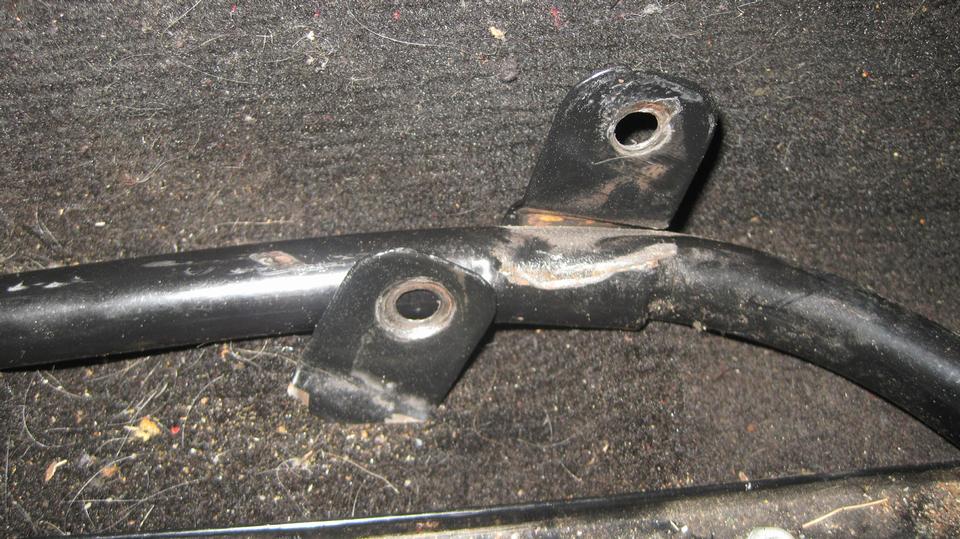
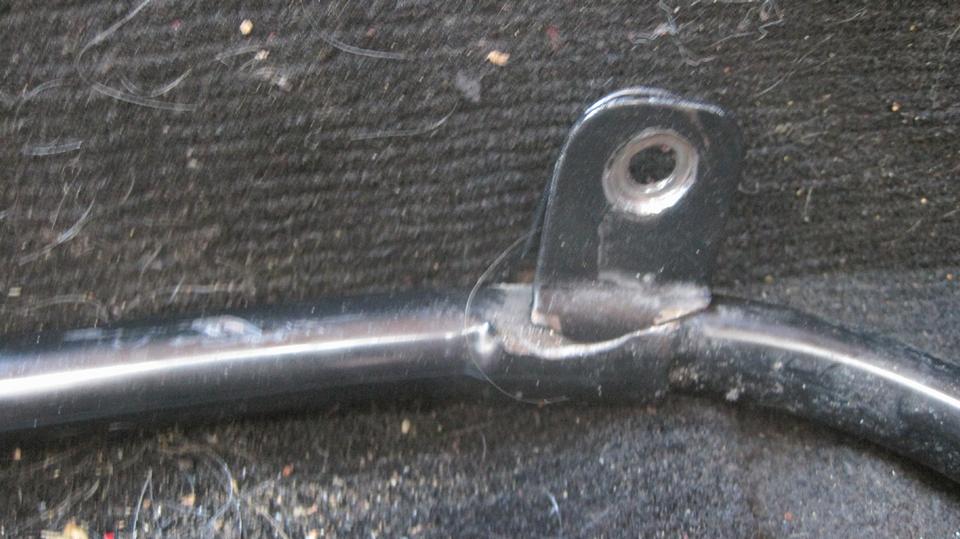
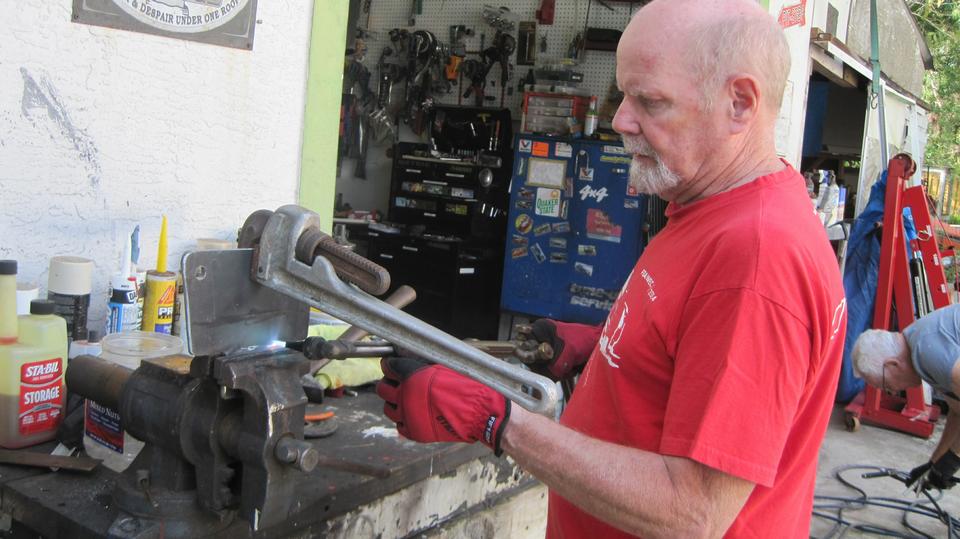
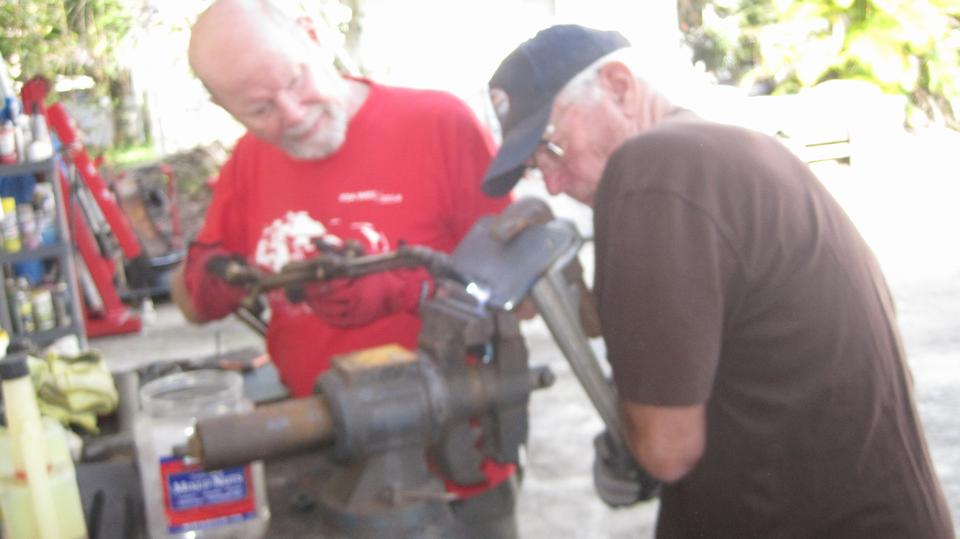
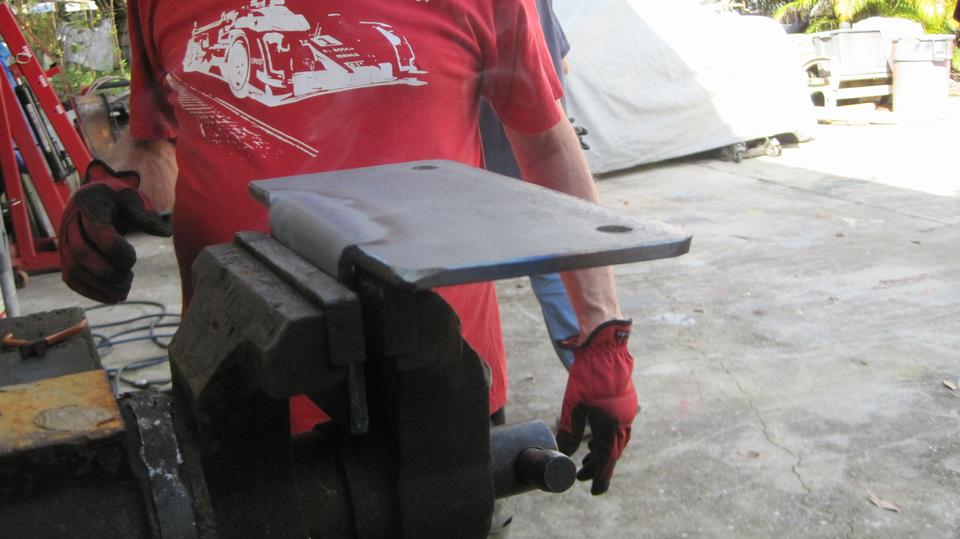
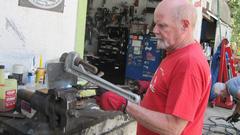
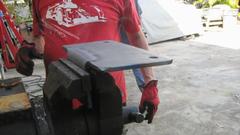
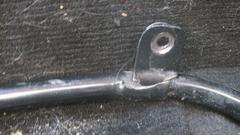
Heat, beat, and bend to suit. This is one of two custom brackets for mounting a TR6 front sway bar onto an MG Z Magnette. The perimeter and holes were water jet cut. It will attach with original bolts for the forged front bumper brackets, dropping down then horizontal to hold frame bushings for the sway bar. Quarter inch steel plate may be overkill on a unibody chassis, but it will never break or bend. The vice was still warm a half hour later.

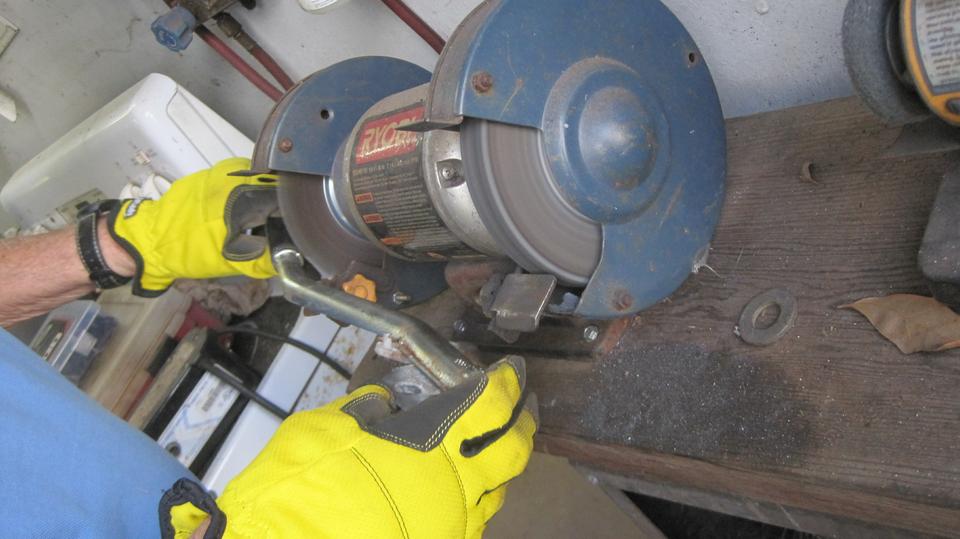
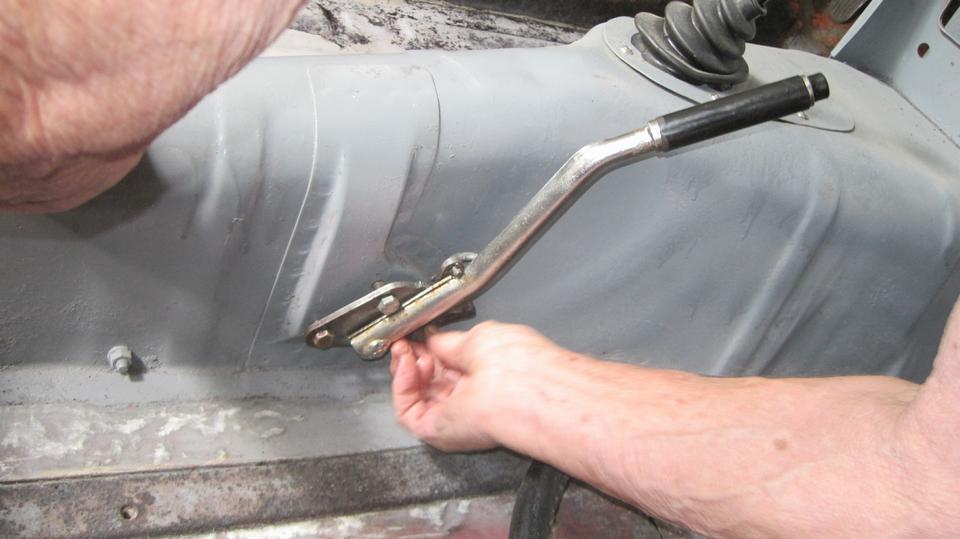
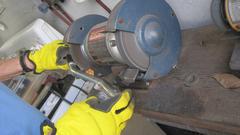
Wire brushing rust from a chrome hand brake lever. That came out pretty nice. It was for "Tina", the MGB wannabe race car. Drilling out rivets to remove snap buttons for side trim that will be deleted. That was funny, because last month (Jan 5) we were drilling and riveting to install the buttons and side trim on another car.
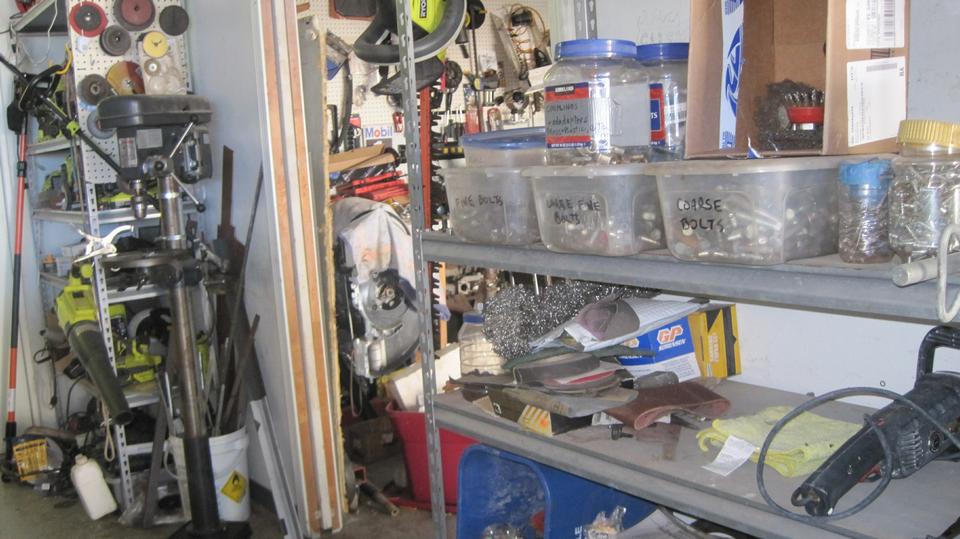
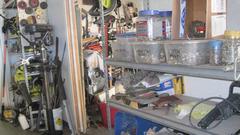 A dull drill bit wouldn't drill, and we couldn't find the new ones when looking. That turned into another case of the "might-as-well", leading to some significant clean-up and re-organizing of the tool stores area of the shop. Come on guys, put stuff back where it belongs so we can find it when needed.
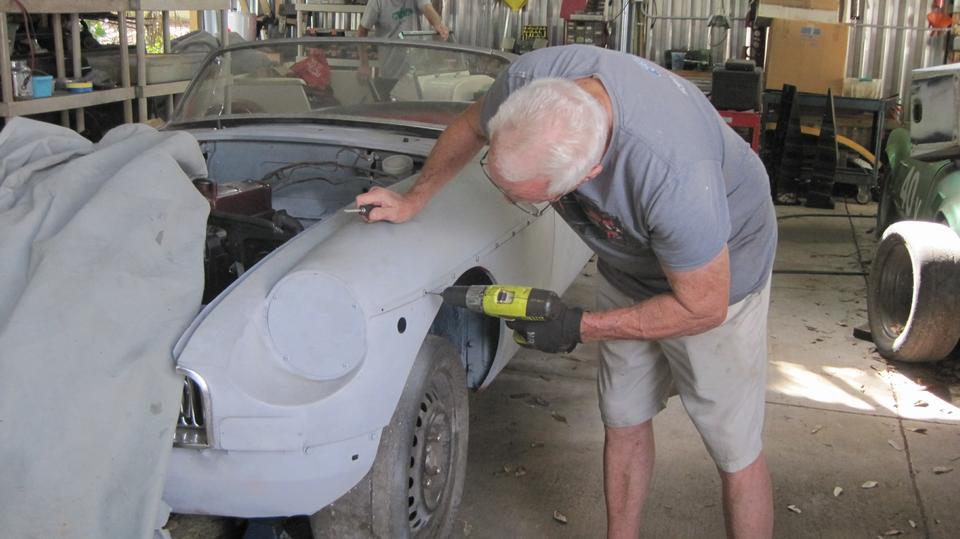
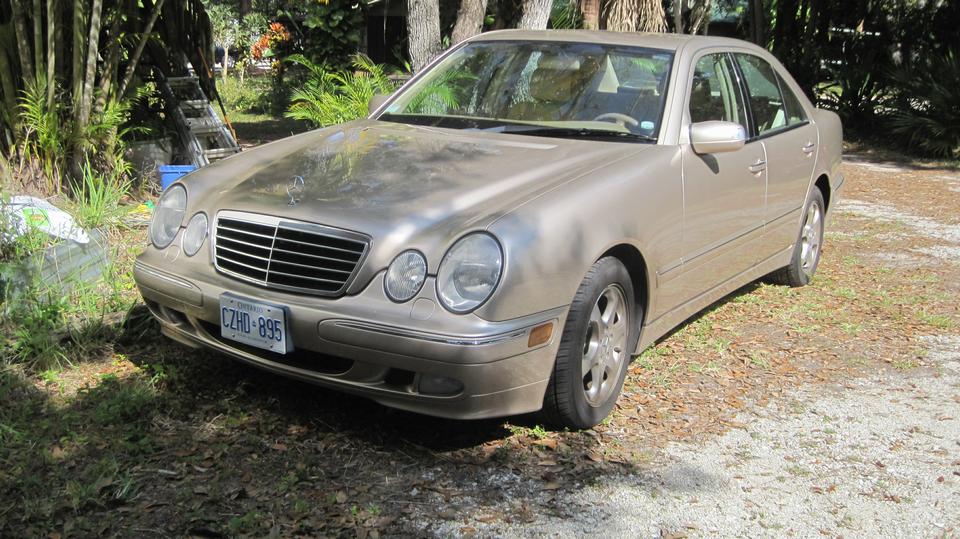
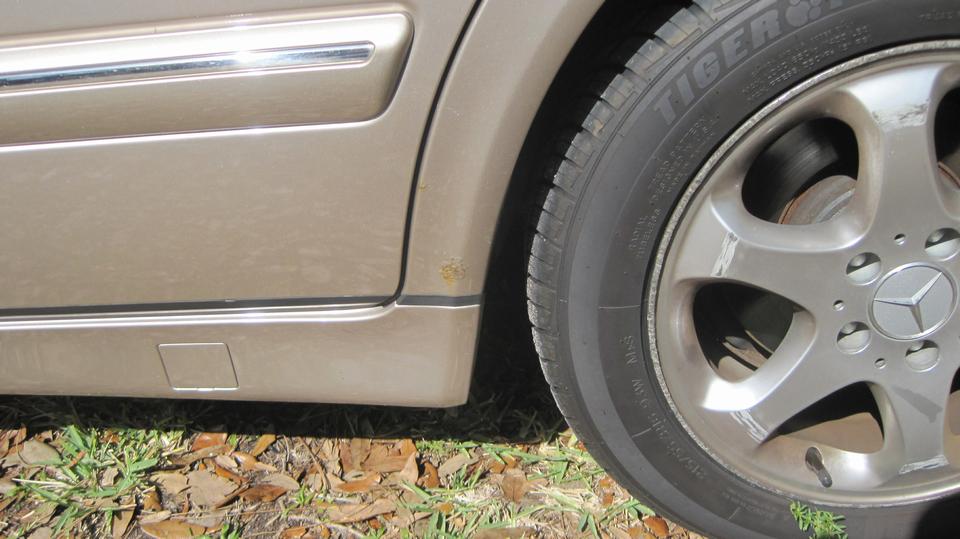
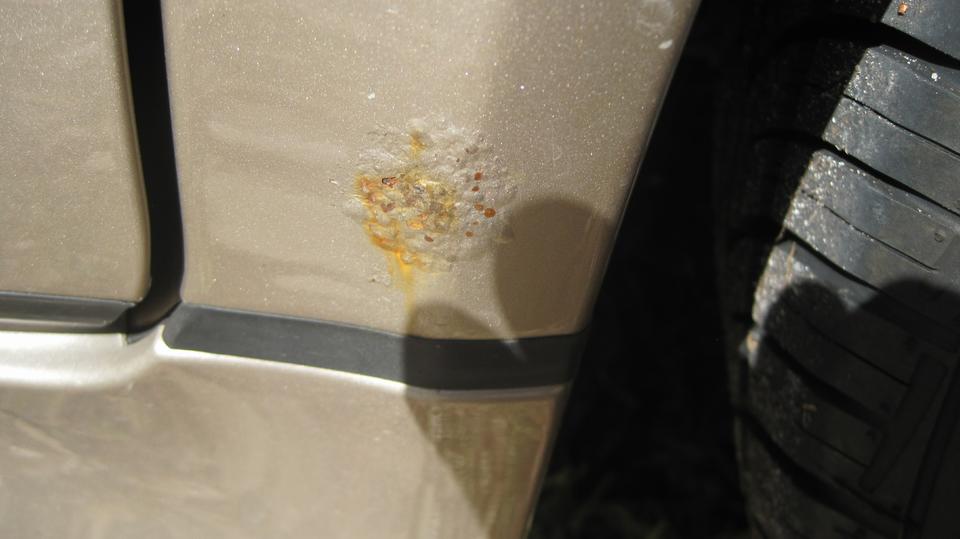
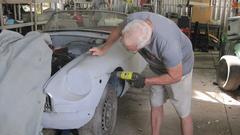
Then we had a "need-your-opinion" tour of a moderately used Mercedes Benz that belongs to one of the guy's daughter. First issue here was a bit of rust beginning on the LR dog leg. It doesn't look like much, but the paint is beginning to blister. That means there are pin holes through the metal, meaning craters and very thin metal due to rust from behind. Sanding off the blisters and grinding out the pits will leave a hole you can put a finger through. Then decide how much longer you want the car to last. Maybe "One-Step" treat remaining rust to turn it from Fe-O2 to Fe-O3 (red iron oxide to black iron oxide), bend the edges down and JB-Weld (glue) in a sheet metal patch to Bondo over and repaint. This guy is pretty handy, and thinks he can handle that himself.
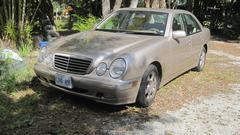
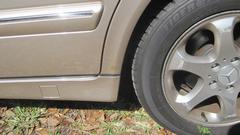

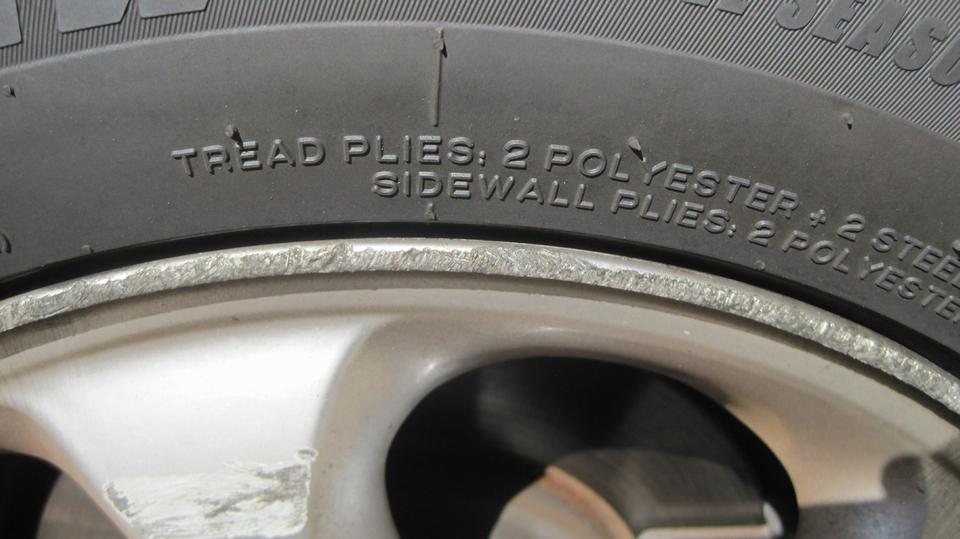
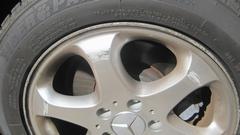
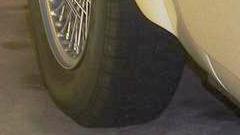
Looking at the wheels, they have severe curb rash all around. Apparently the daughter has a habit of "park by feel". You have to remove the tire to fix this, but otherwise it's mostly grunt work. Grind out the rash on the rim edge, and round off the corners to look decent. Sand the outer face of the wheel to suitable smooth finish, and repaint the wheel. Yeah, the guy thinks he can do that himself as well, since professional wheel repair service is quite expensive. -- Modern cars with low profile tires regularly suffer with this. But my vintage MG never has this problem. My taller profile tires have more bulge on the sidewalls, so the scuff wall of the tire hits the curb first, which protects the wheels.

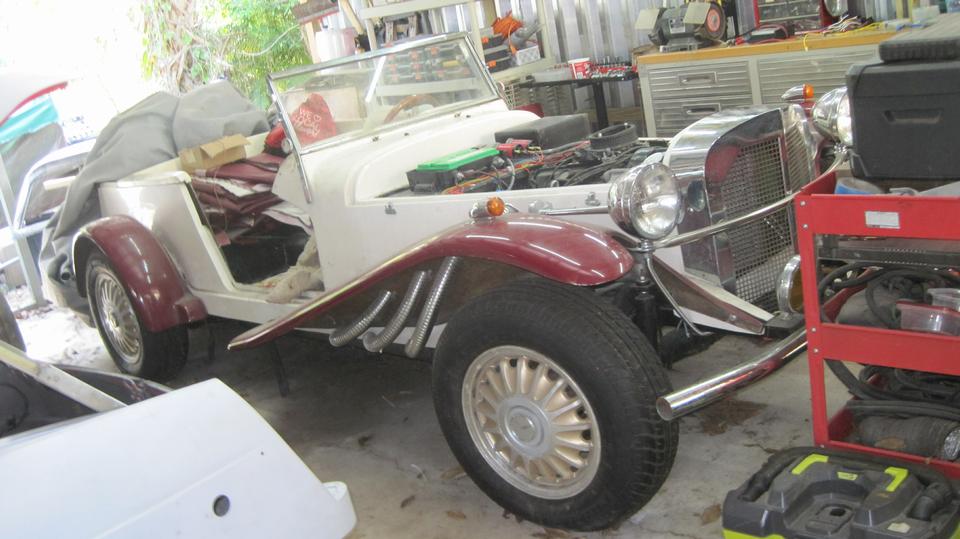
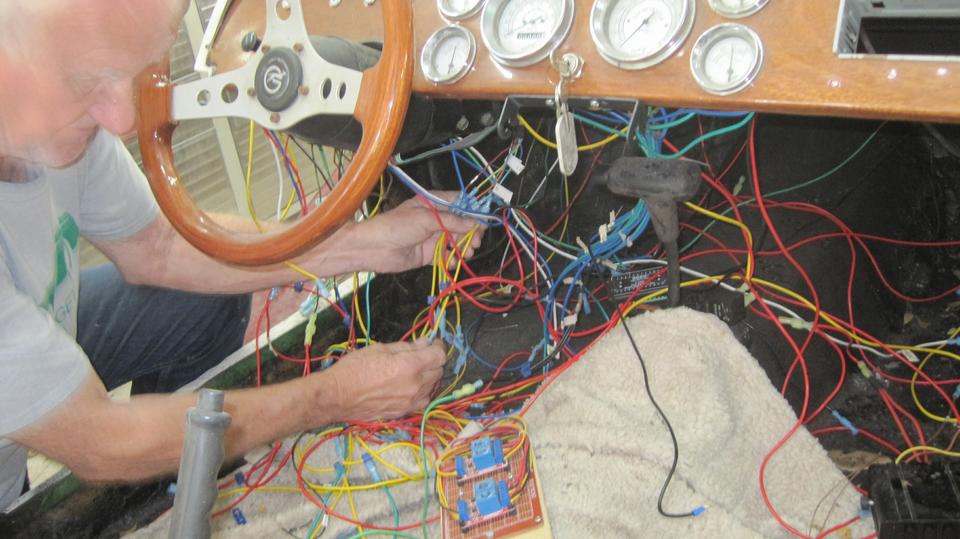
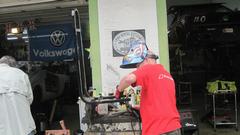
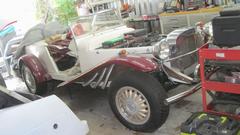
The Excalibur/Chevette kit car was proceeding slowly with more electrical wiring. This is not even a universal wiring harness, but is being pieced together from single wires and separate connectors. I try not to say these guys are cheap, but it all looks like a hobby where they have more time than money. Not being rude, just saying I like these guys who like to work with their cars. Oh, and the new work space car port they put up after storm damage last year is also progressing nicely.

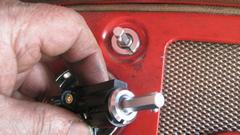
Once everyone else left it was back to my car where navigator and I were replacing another failed lighting switch.
 Still working with Moss Classic Gold parts, which are often classic Chinese junk. This is at least the fourth failed
lighting switch in recent years. Two of them just went intermittent with no lights. But this is the second one that has shorted the input power terminal to ground with bad effect to the (always hot) power input wire. -- The first time the heavy wire burned off like a fuse near the switch terminal, leaving a half inch of scorched wire that had to be cut back and re-stripped to reconnect for the new switch. This time slightly different. It was dark, and when the lights would not come on, I didn't leave the switch on for very long. -- Apparently it was very hot for a short period of time.
Still working with Moss Classic Gold parts, which are often classic Chinese junk. This is at least the fourth failed
lighting switch in recent years. Two of them just went intermittent with no lights. But this is the second one that has shorted the input power terminal to ground with bad effect to the (always hot) power input wire. -- The first time the heavy wire burned off like a fuse near the switch terminal, leaving a half inch of scorched wire that had to be cut back and re-stripped to reconnect for the new switch. This time slightly different. It was dark, and when the lights would not come on, I didn't leave the switch on for very long. -- Apparently it was very hot for a short period of time.
|
The thick power wire was somewhat cooked near the switch terminal, but not blown off. The terminal screw was fused into the terminal block. With wrench on the square terminal and Vice-Grip on the screw head, enough torque finally broke the screw, so I had to cut the wire to disconnect it. And they are still supplying the wrong style bezel nut, so I continue to re-use the old one. -- I will be reporting this to Moss Motors (again), and I will not be buying any more lighting switches from that source. Maybe just lucky that I haven't had to replace a burned wiring harness, yet.
Saturday February 24, 2024:
Catching up with Friday's photos and notes (above). Added a newly found carburetor shop to my Shops list. Say hello to Jimmy Hilton SU carburetors in Aledo, Texas. We will plan for a visit there later this spring.
Sunday February 25, 2024:

Had some time to spare this morning, so I posted a new Monster Variant tech page for the 1977 Jeep CJ7 conversion found on Facebook Marketplace. Someone did a pretty nice job of the fit and finish and the trim level. I'm tempted to take a 10 minute go-anywhere off road jump in the thing, just for the one time life experience.
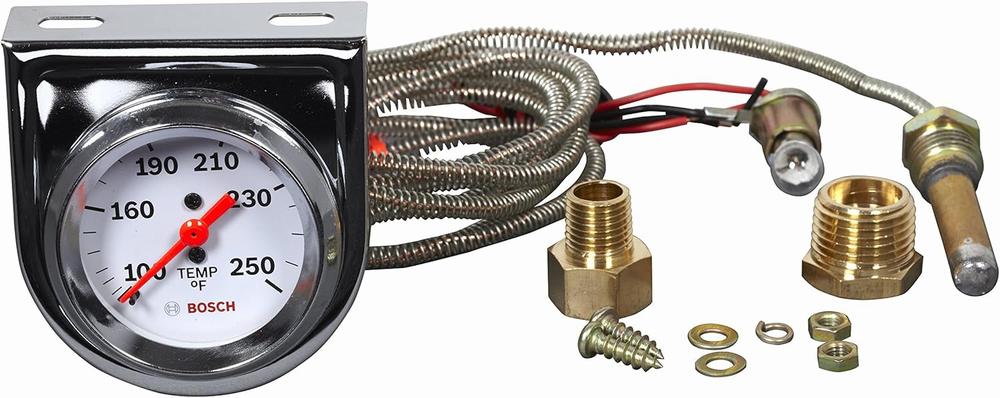
 Some chat on the forum about repairing an analog temperature gauge using a cheap Bosch gauge as donor for the thermal bulb and pipe and nut, and the working fluid inside. That reminds me, I still have another failed Jaeger gauge in the Magic Trailer that needs to be fixed. Could make a good tech session somewhere. But not very high priority.
Monday February 26, 2024:
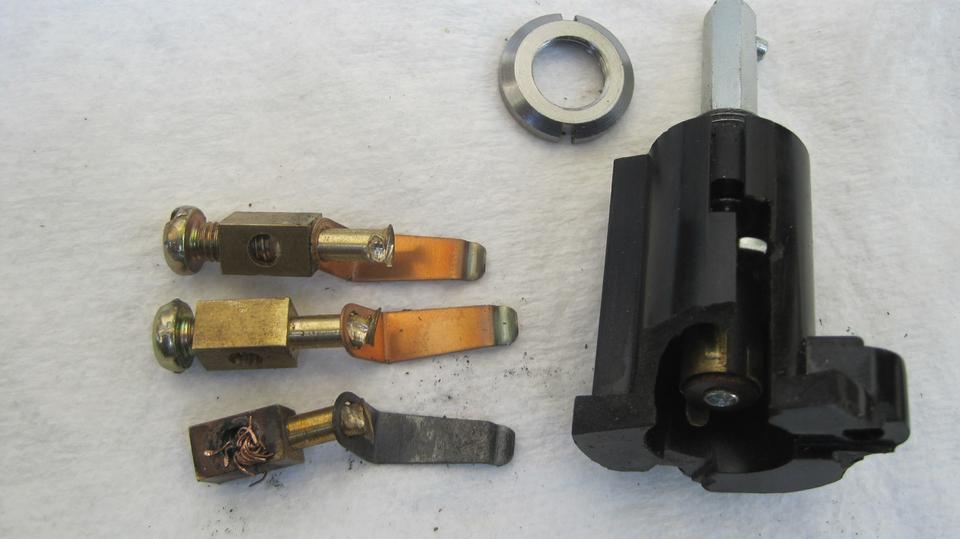
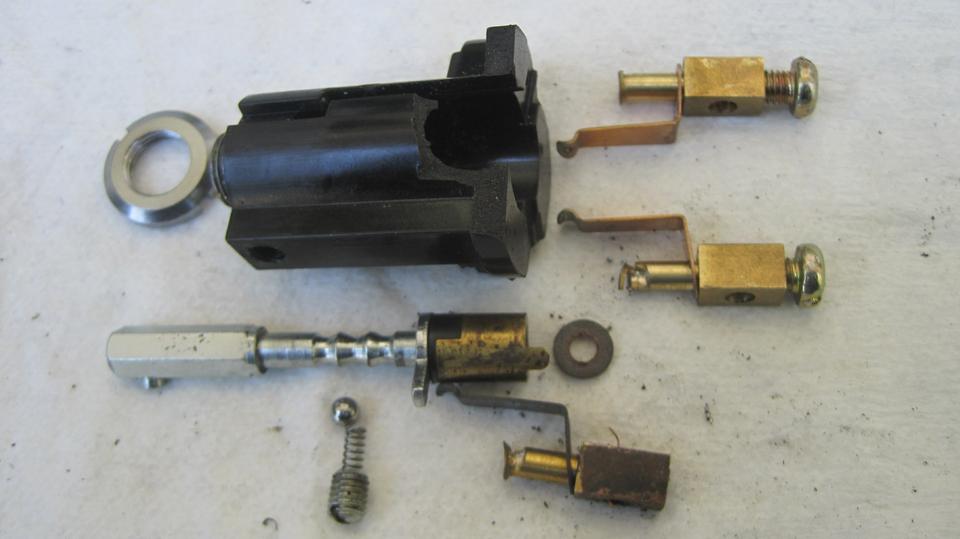
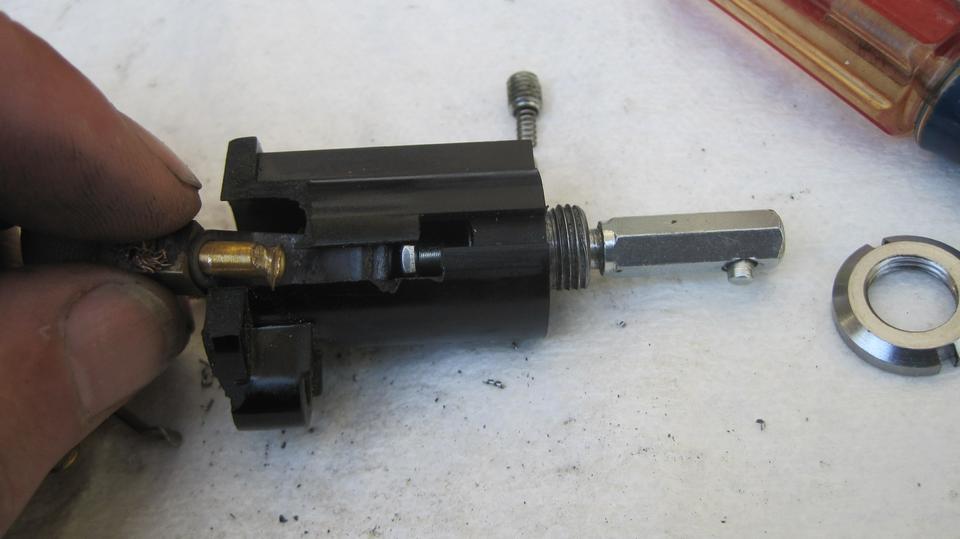
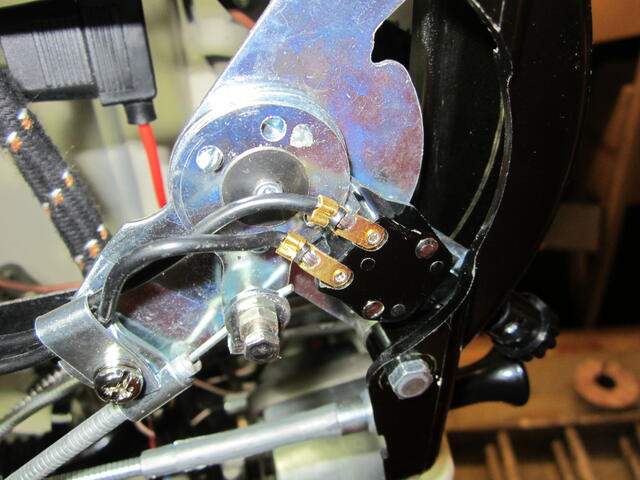
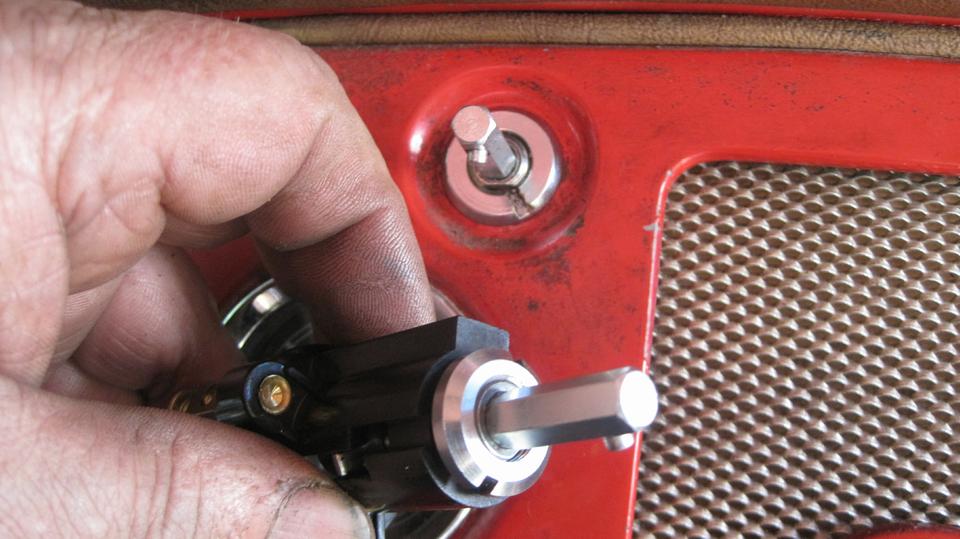
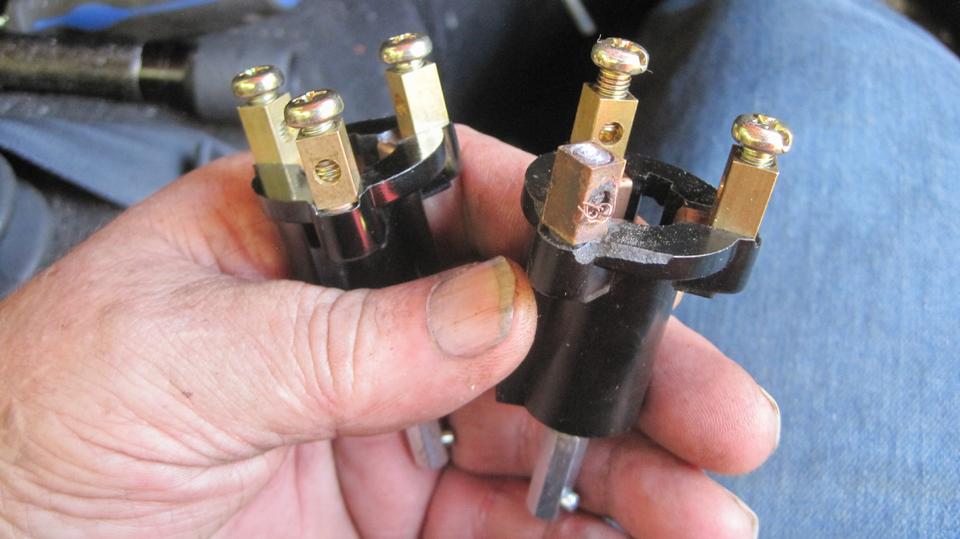
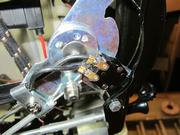
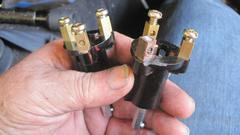
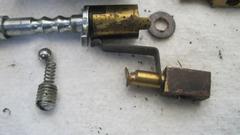
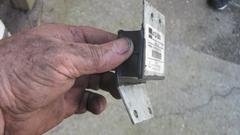
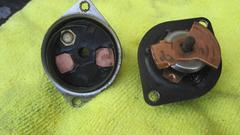
Bit of a late start near 11-am, and bound to be a busy day, we started by dissecting the failed lighting switch we had swapped out on Friday. Drill out the rivets to remove the terminal posts, and the inside contact blades come along with. Then drill off the peened/swaged over tail end of the center shaft (was a hex nut here on OEM switches), to remove the internal parts, and pull the shaft out the front. The small set screw and spring and ball on the side are the 3-position snap detent. The cylindrical plastic part with brass wrapped around it provides the moving contact surface. Notice the flat silver part that looks like a flat washer with a finger sticking out one side. This is the guiding key that rides in the slot on one side of the housing to control the pull-turn-pull mechanical function of the three-position switch.
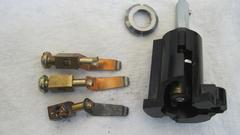
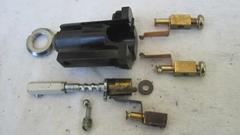
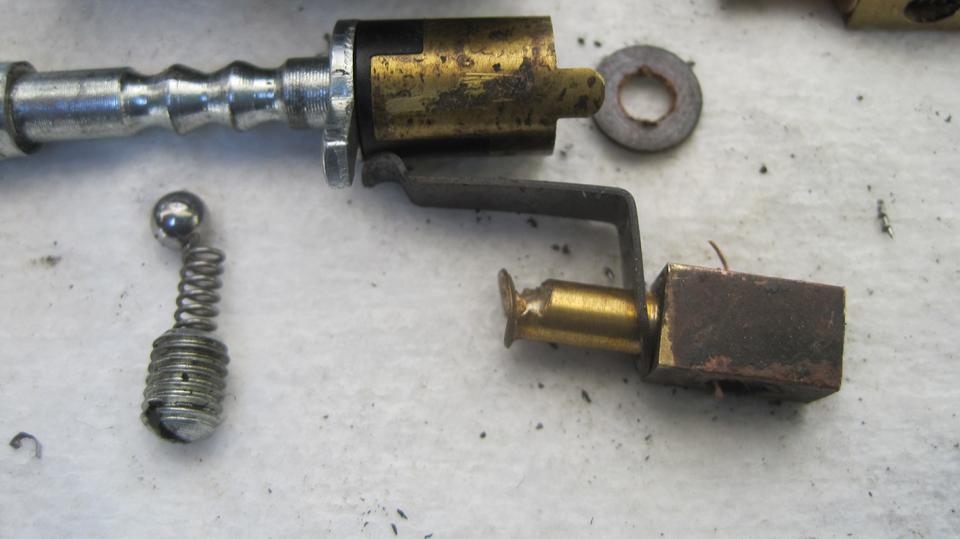
The obvious problem here is the power input contact finger is perhaps a bit too long, so it can touch the steel keying finger. This keying part is grounded through the shaft and the front threaded mounting bushing and panel nut (when the dash panel itself is grounded to the chassis. Switch off, and touch the keying finger to the tip of the power input contact, and the input power wire is shorted to chassis ground. The browN/blUe 14-gauge power input wire for ignition and lighting switches is unfused, and will carry enough current to cook the switch to "well done" at the same time as it over heats the power wire.
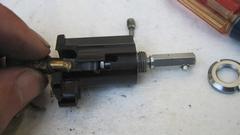

If you're lucky, it may burn the tip end off of the input contact finger to break the circuit like a fuse. Or it may burn off the power wire at the lighting switch terminal, or at the ignition switch (which is used as a terminal block for these power wires). Not so lucky, it could melt down any or all of the brown wires from the lighting switch back to the control box, and back to the battery power cable on the starter switch. That would be expensive to repair or replace the burned wiring harness (if it doesn't start a fire). This is at least the third short-to-ground failure I have documented for this part. See Faulty Replacement Parts item FT-088. It is once again being reported to Moss Motors, but I seriously doubt they will ever do anything about it, most likely will continue sales of the same faulty part (until someone may sue them for damages to their car or life). If we (customers) keep buying this junk, they will keep selling it. Meanwhile, all I can say is, PLEASE, do not install this part in your car.
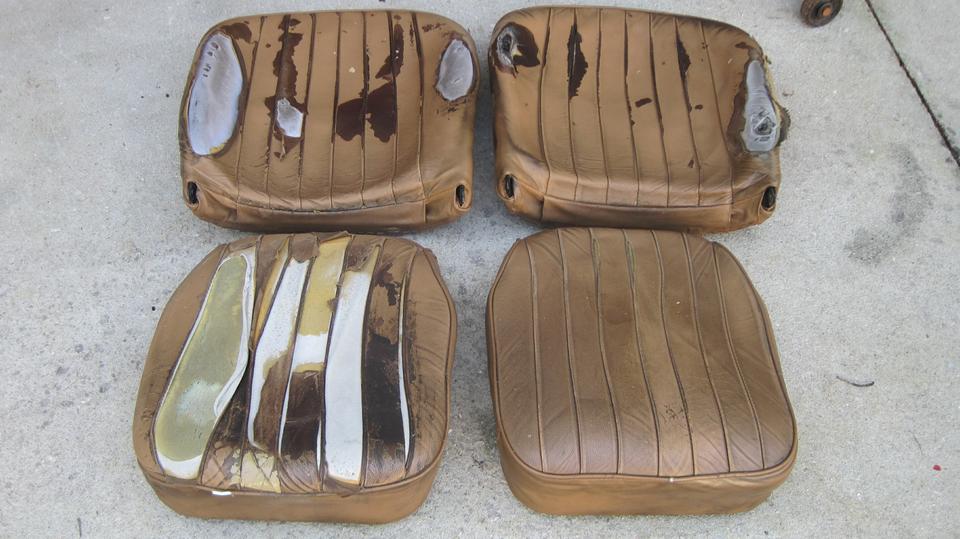
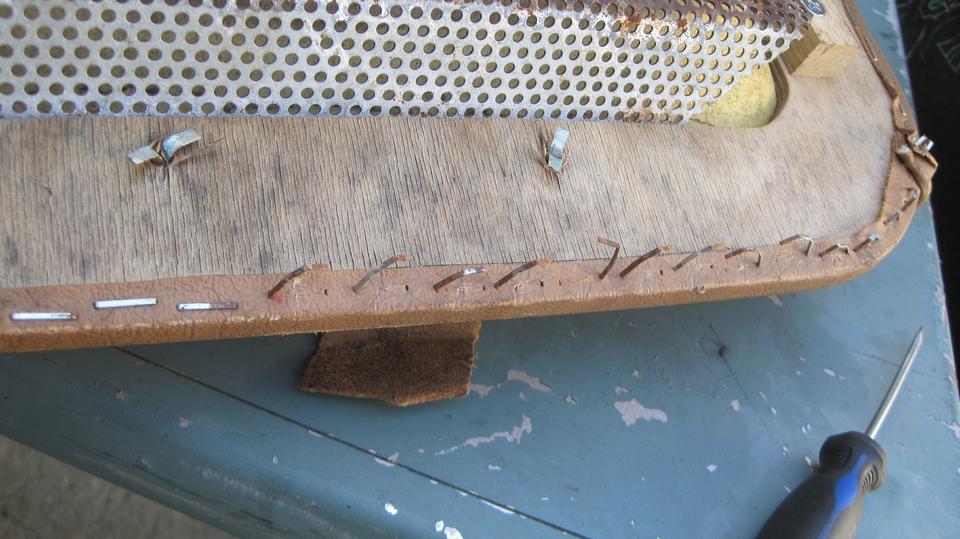
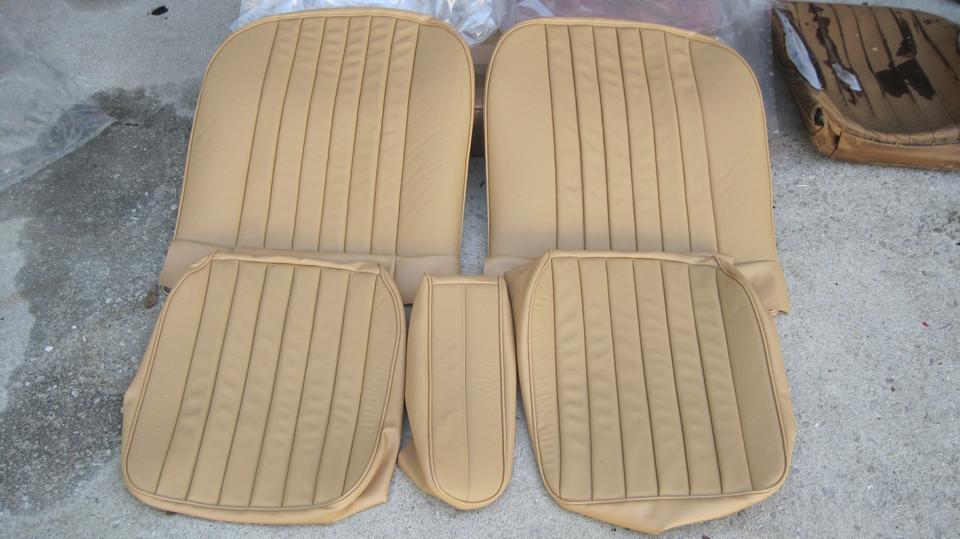
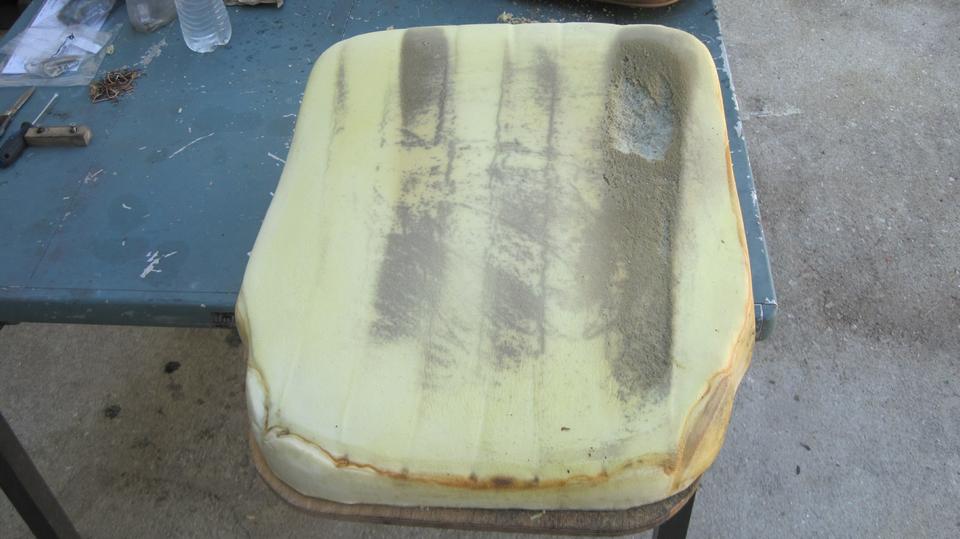
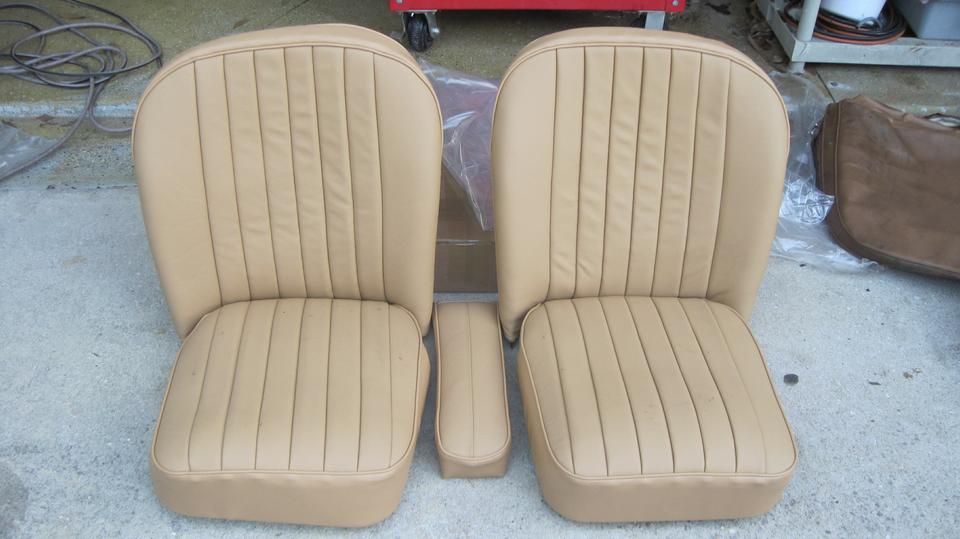
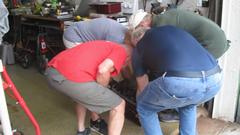
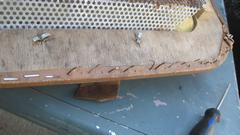
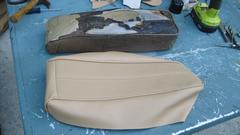
Past noon, on to the major project for the day, replacing the badly failed (junk) seat covers that came on the pair of very expensive complete seats we bought from Moss Motors a few years earlier. Remove two hinge bolts each side, and the back rests and bottom cushions and arm rest were all on the bench in short order. Followed by lots of grunt work to pry up and pull out about a thousand staples.
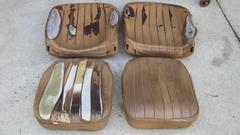
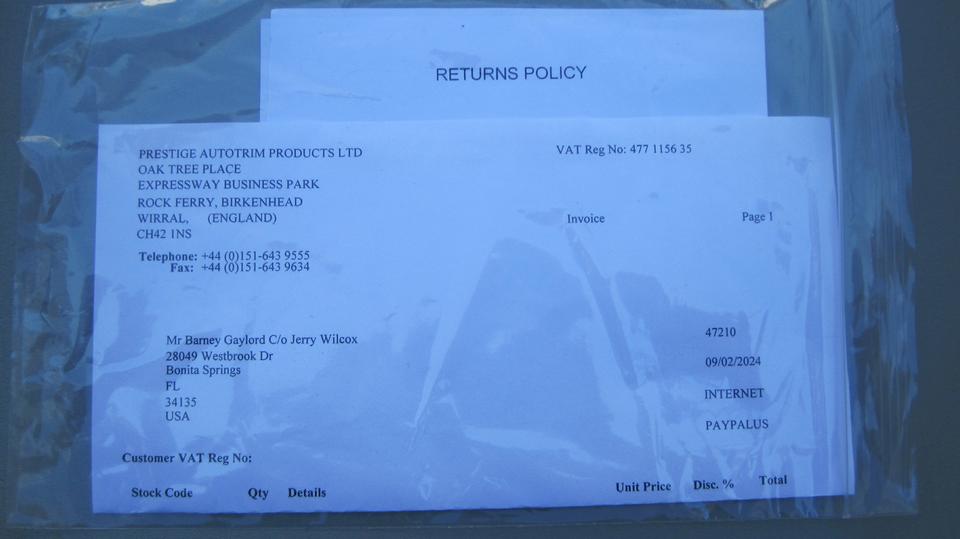
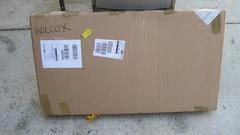
The new covers came from Prestige Autotrim Products, Ltd in England, ordered through a corporate distributor in Canada. The package was shipped on the next working day from England via DHL Express, and arrived in three working days. Good service, and good quality product as well. The material is "leather faced", meaning leather on the contact surfaces with vinyl on the sides and back, same as original factory issue.

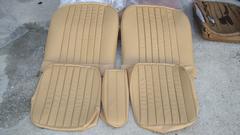
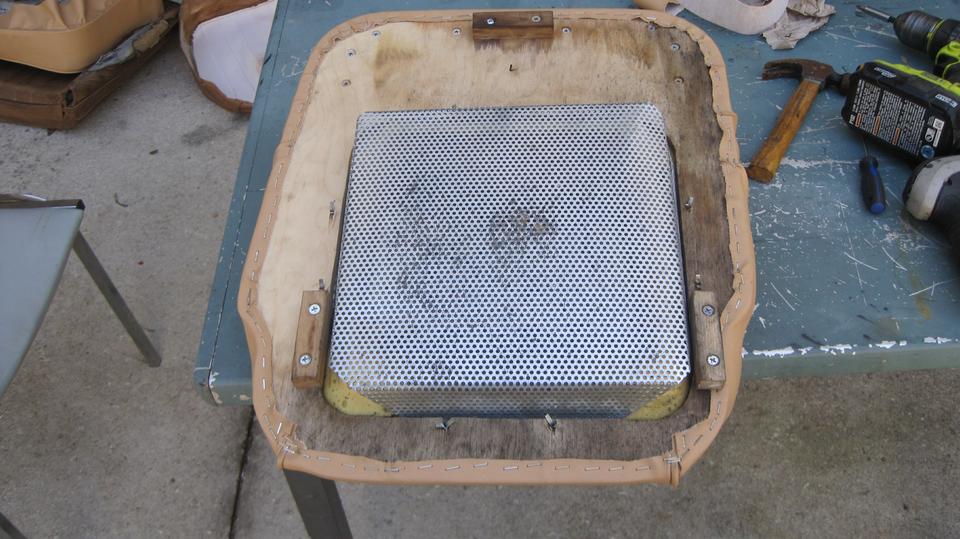
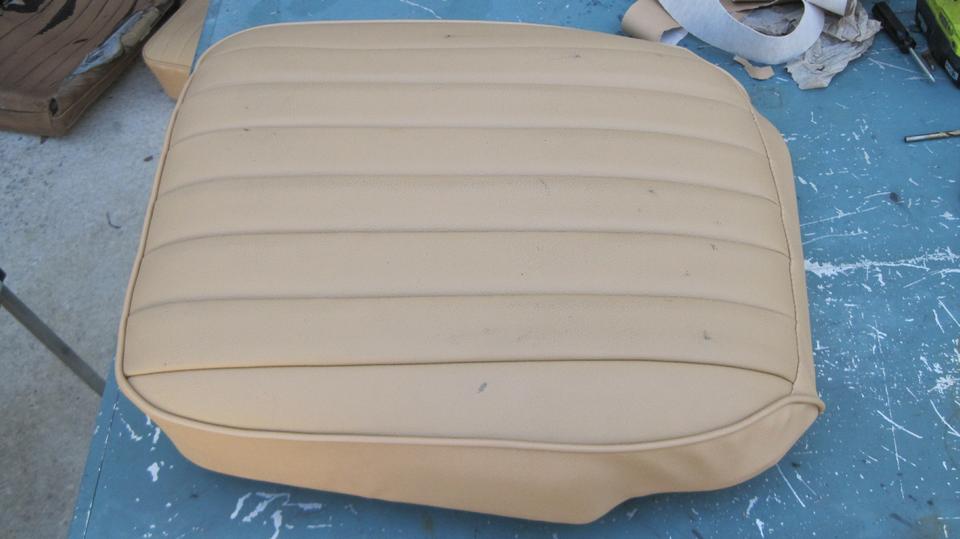
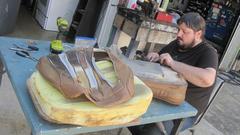
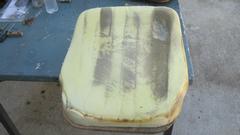
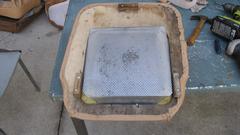
Here is the first seat cushion, top, bottom, and finish wrapped, using stainless steel staples. Then as the day was running away, we got very busy and didn't take pictures much until the covering and stapling was finished.
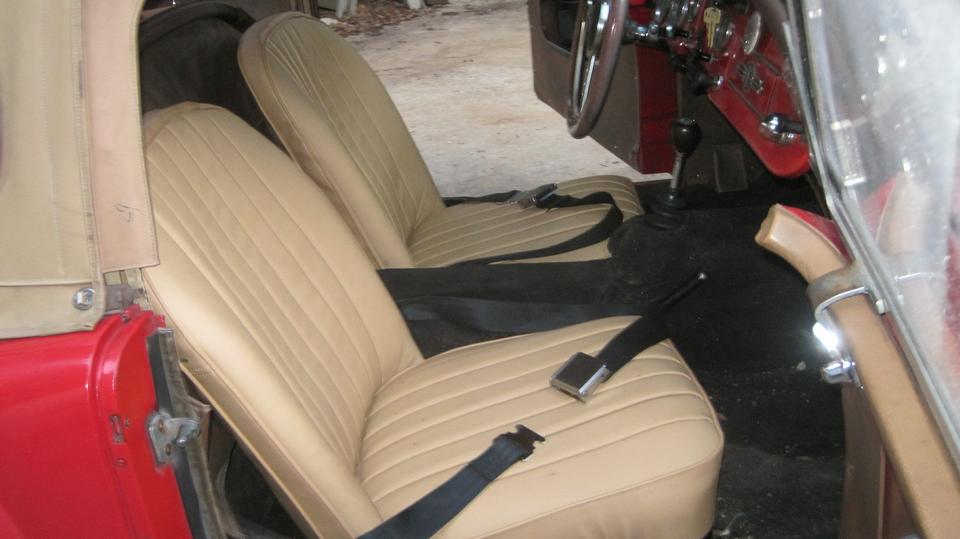
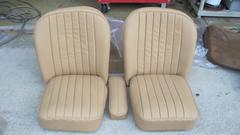
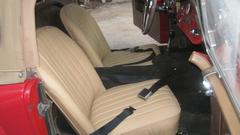
I was surprised to see but very pleased that the armrest cover was included in the 5-piece leather cover kit. On their web site it was called a 4-piece kit, including back rest and seat cushion covers, but no mention at all of the arm rest. But there it is in all its glory, snuggled between the major players. that was about the time the sun dropped below the tree tops with lots of shade, and we were working with a flashlight to get the four hinge bolts installed in the car. by the time we got the tools put away and cleaned up the place, this is the best final picture I could get with the weak flash. Navigator appreciates the fact that he no longer has to sit on tears and wrinkles.
Tuesday February 27, 2024:
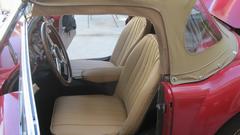

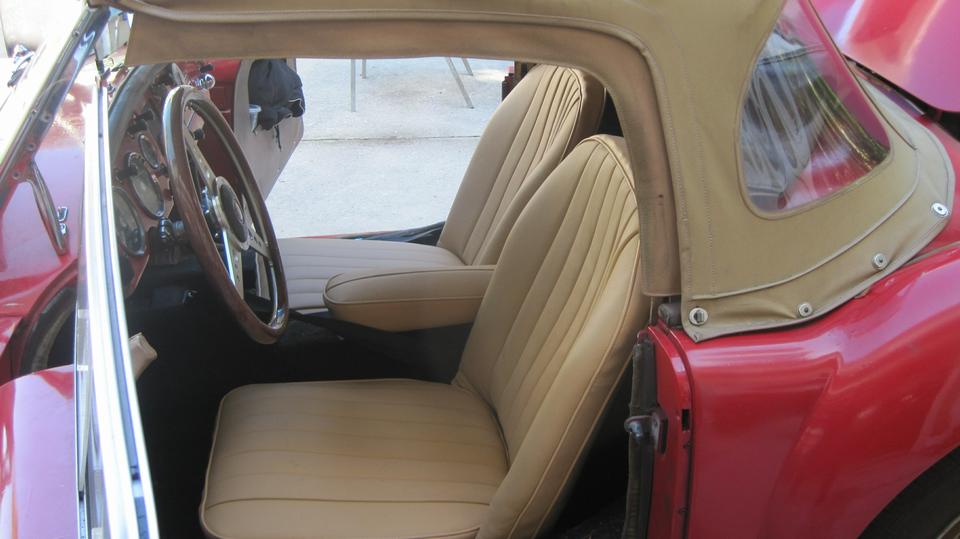
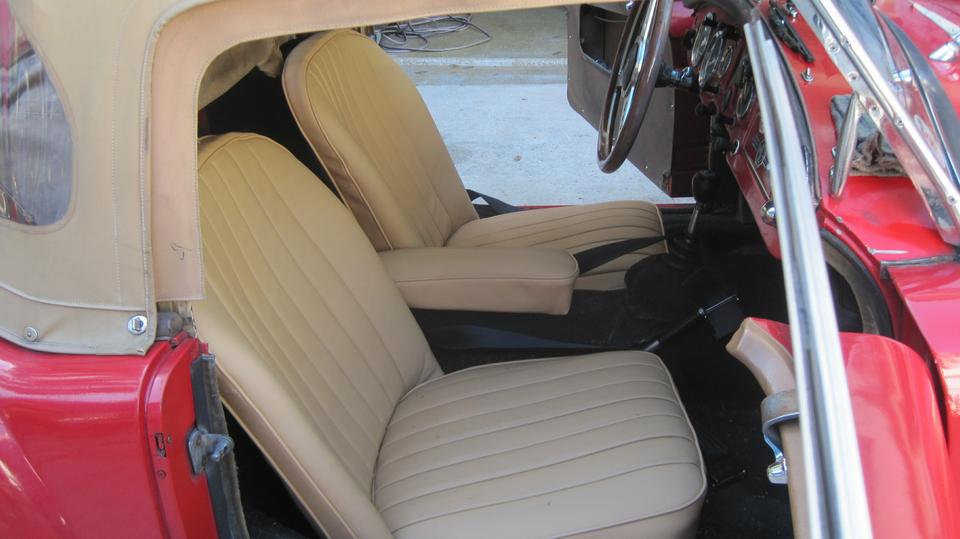
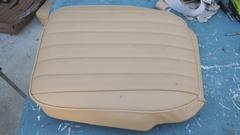
Good morning, here's better pictures in the light of day. The color is called "Biscuit", but it is really Tan, somewhat darker than it appears in these pictures. Now I just have to get navigator to clean the interior vinyl panels.
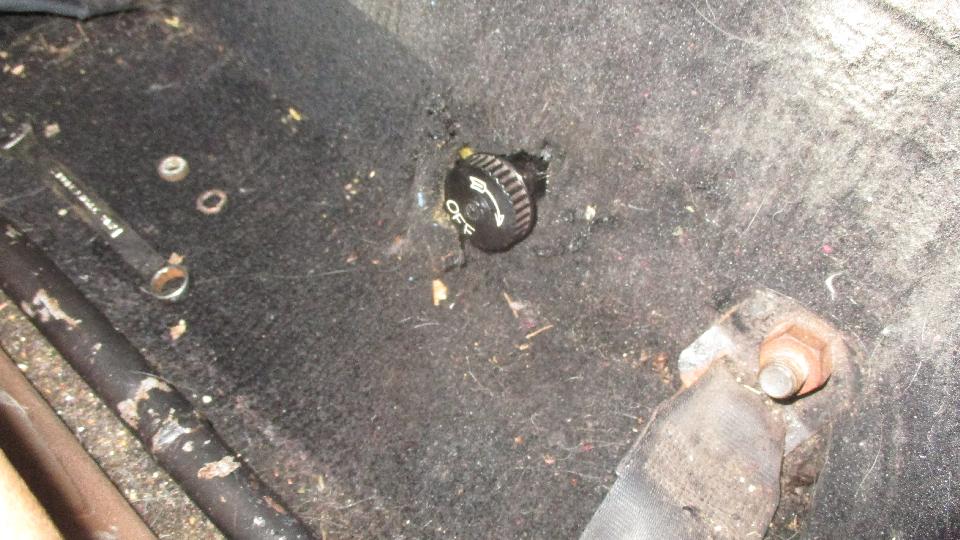
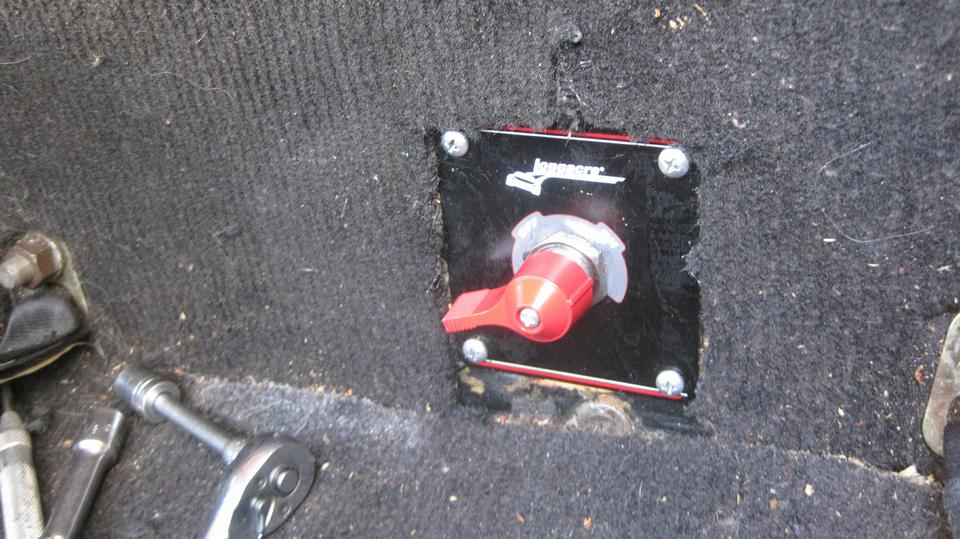
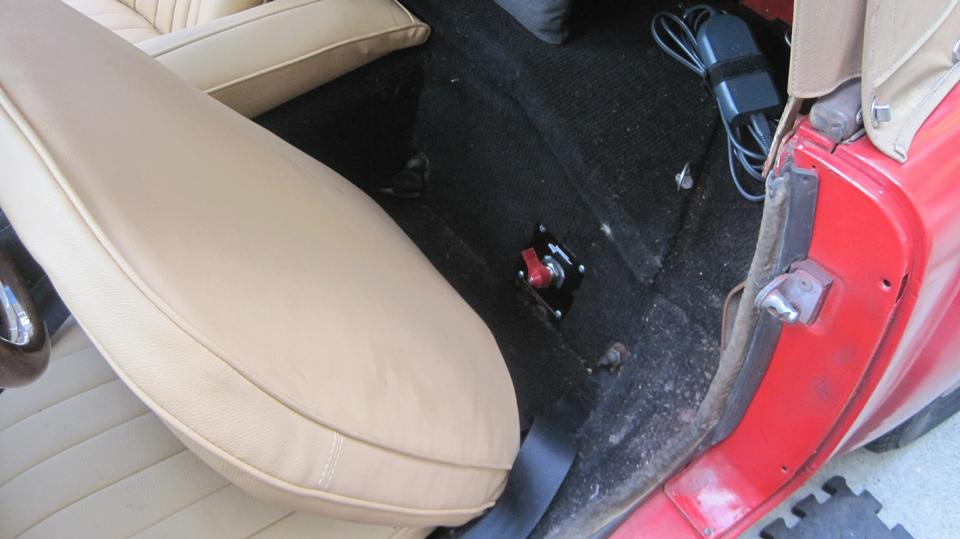
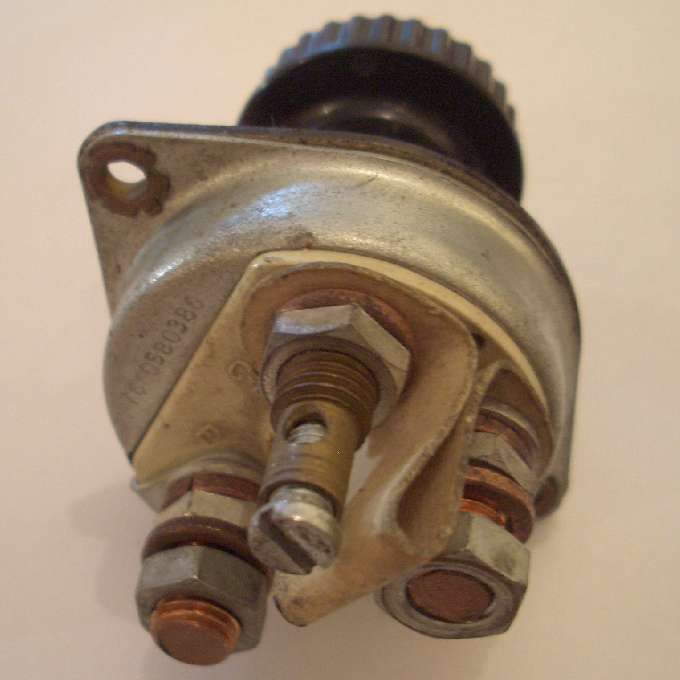
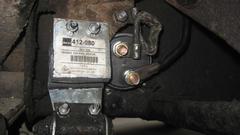
Now the major project for the day was to replace the junky Lucas battery cut-off switch that has failed and been replaced at least four times since 2017. At $65 a pop, I'm not buying the junky Chinese made Lucas branded switches any more. The first one was installed in the late 80's when the car still had twin 6-volt batteries. It was located very near the chassis grounding point behind the left side seat. The switch mounting flange was screwed
to the front side of the rear vertical floor board, with the body of the switch mostly contained within a hole cut through the wood panel, and the terminals behind the panel. It was a very neat and compact installation at the time, and it served well for about 20 years. When it did finally fail, the replacement parts of the day turned out to be very poor quality with short life, guaranteed premature failure. For years since I have continued to use same type switches, just because it was convenient for the style of custom installation. No more, please. Bite the bullet and figure out how to install a better switch.
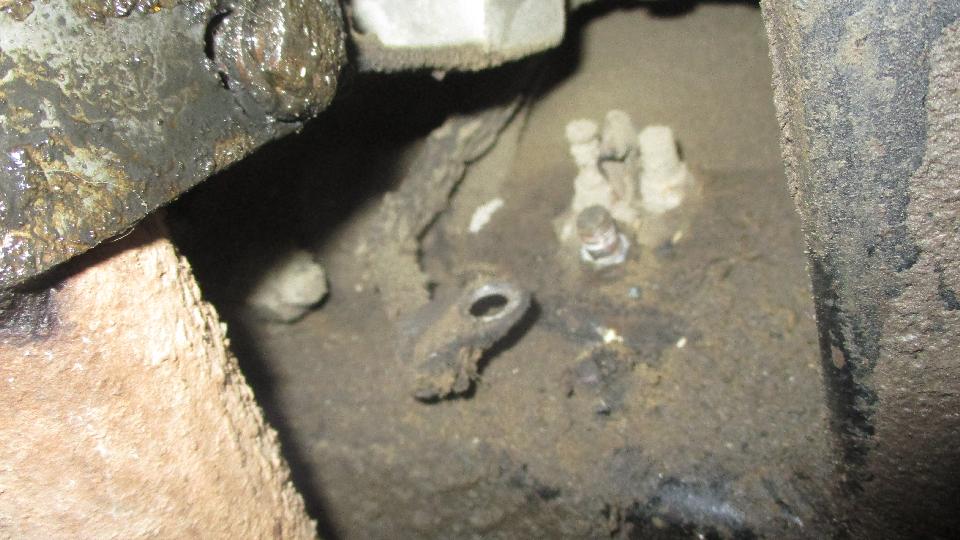
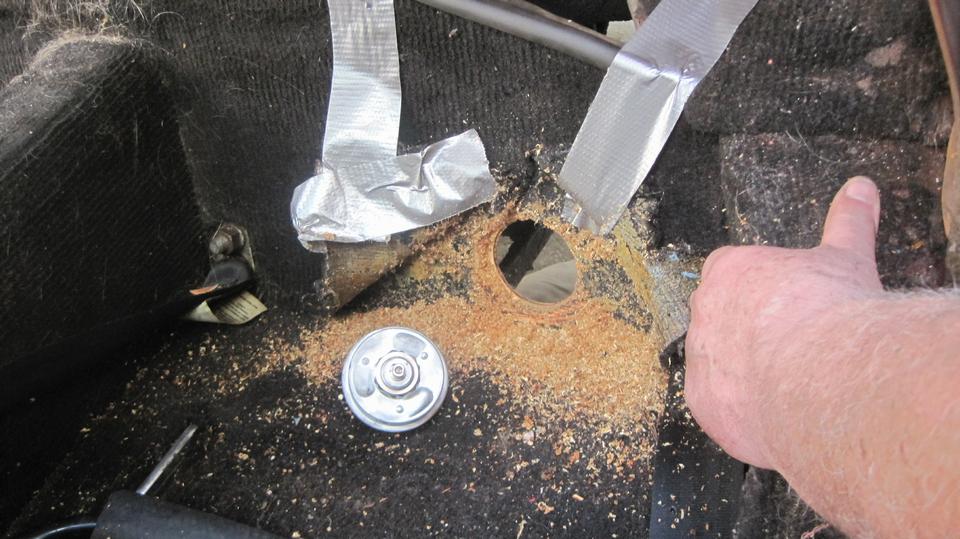
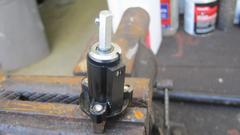
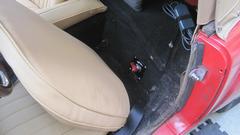
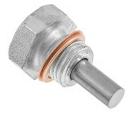
 The new switch is Longacre brand, recommended by some racing enthusiasts. The new switch is much larger, and when installed the body of the switch will be entirely behind the plywood bulk head. With insufficient foresight, I thought it would be a good idea to bore out the mounting hole to install the new switch close to the old switch location. After the fact, this turned out to be a bad idea, and we may get around to changing it later. But for now just remove the old switch, chuck up a hole saw and bore a larger hole slightly higher and slightly more inboard. See through the new hole, the location is very close to the left side battery tray.
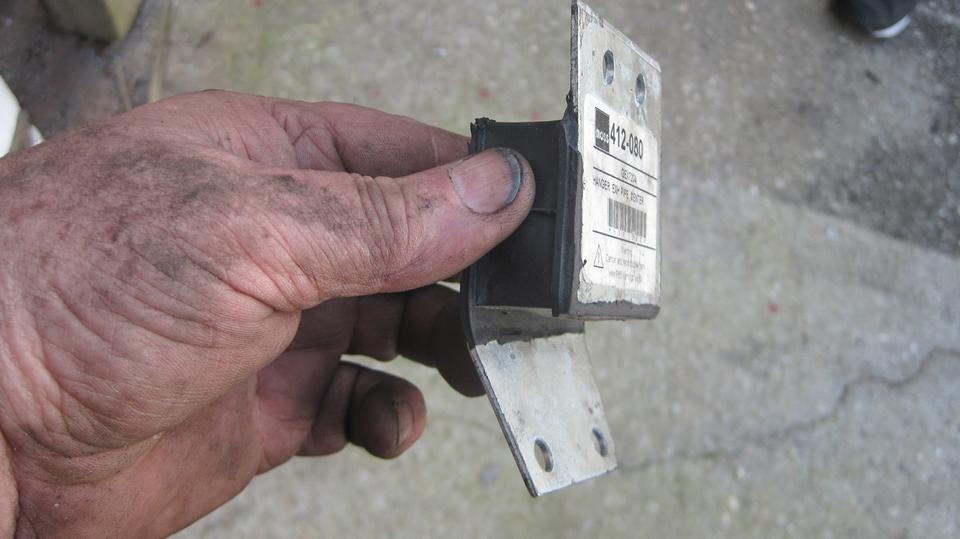
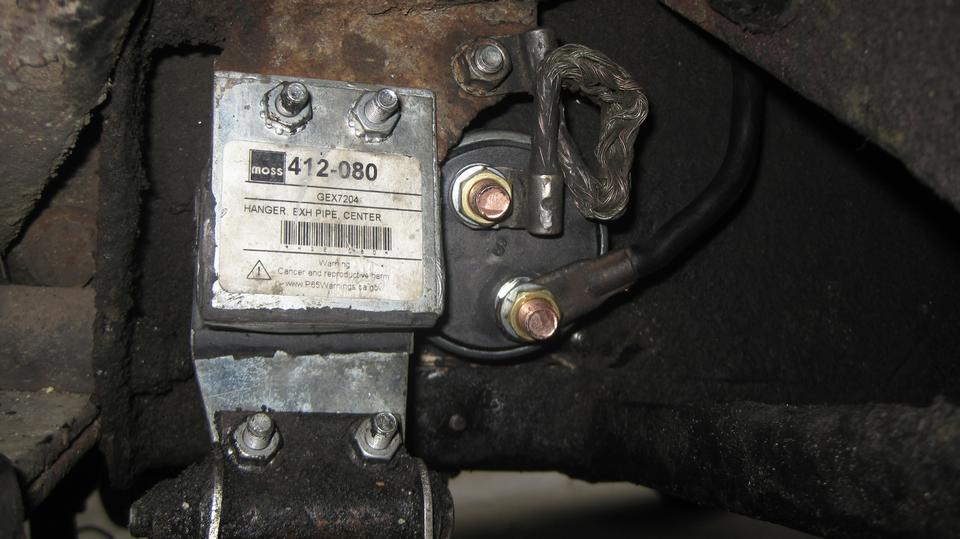
There would be a short delay as I replaced a broken rubber center exhaust hanger (another frequent problem part). I have to bend the bottom end of the standard mount, because the Moss Motors stainless steel exhaust pipe has the center hanger welded on an inch too far rearward. Bad enough the hanger top bolts are difficult for wrench access, with the bolt heads on the hidden side just above the rubber block. But now look where the new battery switch is located. The switch would have to be removed to change the exhaust hanger. But the switch knob and mounting nut and mounting plate have to be removed to get the switch out. That is a royal PITA, so next time either the hanger or the switch have to be removed, that new switch will be relocated (and the large hole will have to be closed). But at least it's happy for now.

Time to reinstall the seat backrest. But hey, notice the broken bracket on the seat base frame. There is currently one of these broken on each seat, and the remaining unbroken leaf is weak and flexible and already bent out of place. Thin metal here is another quality problem with the current issue replacement parts. Add note to the "to-do" list to make and weld in four new heavy steel brackets at first opportunity.
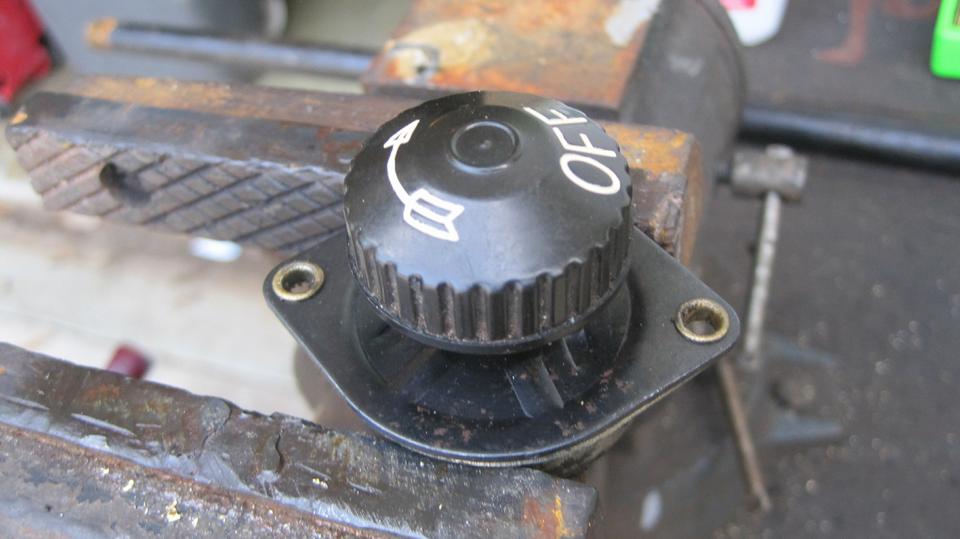
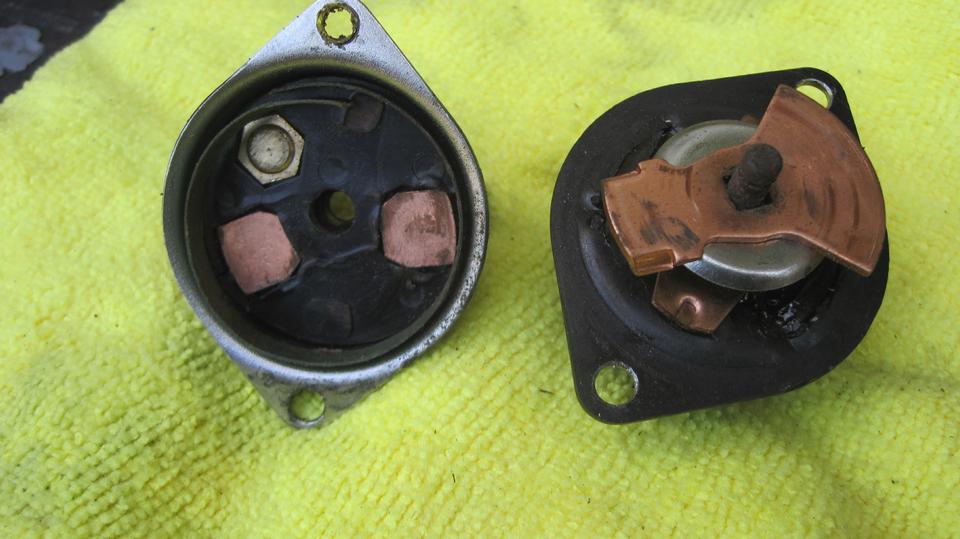
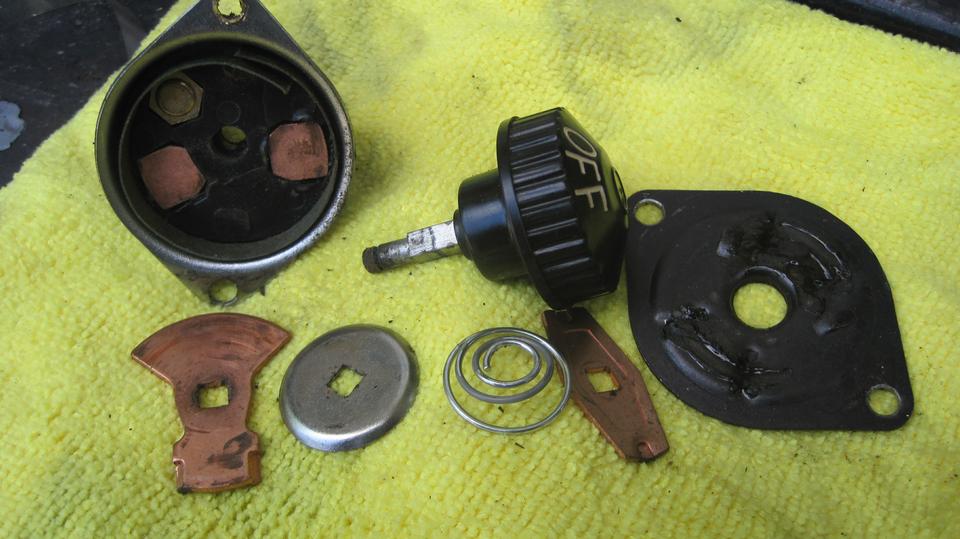
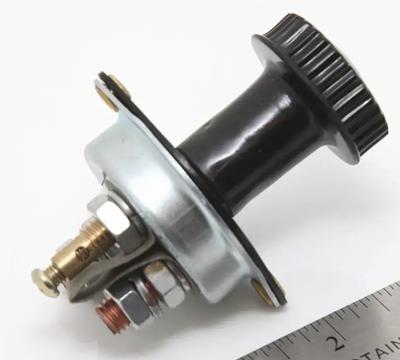
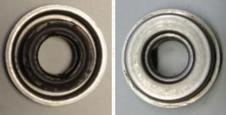
I think we have half an hour available to dissect the failed "Lucas" branded battery cut-off switch. Drill out two eyelet rivets and remove one small E-ring in back to separate the housing. Inside you see the large copper (or brass) contact plate that rotates to make connections on the studs in the lower housing. It looks simple enough. Separate the moving parts from the front housing. From back to front we have the brass contact plate, a steel cup washer for nesting the large diameter coil of a conical coil spring, then the spring, followed by a brass detent plate, which provides the click stops at both extremes of rotational travel. Physically it works fine, but electrically it had no contact.

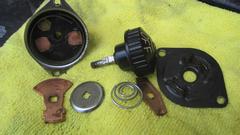
The culprit here (I think) is the conical coil spring, which can be easily depressed with a simple pinch of your thumb. Apparently there is not enough spring force to make a reliable electrical connection to carry up to 200 amps current to crank a starter motor. In fact the final failure condition didn't even make a connection good enough to run the fuel pump or ignition coil, no electrical connection at all, even with repeated mechanical switching on and off. Maybe the contact plate was stuck on the square shaft so it could not be pushed down by the spring. Or, maybe plastic in the lower housing between the power studs was touching the contact plate to hold it up as not to touch one of the power studs. In any case, 100% electrical failure of every switch I've had in my car in the recent years is enough to recommend to the world at large not to buy these junk reproduction switches, guaranteed to fail.
Wednesday February 28, 2024:
Most of the day spent catching up photos and notes for the past two days work on my car. Also got a start on composing a few new Part Numbers tech pages for some of the threaded plugs and ports on the outside of the MGA (and MGB) engines. -- Some time discussing the Twin Cam coolant remote pressure release valve, and how to operate without it if you don't have one.
Someone's MGA engine idling nicely with moderately low oil pressure went, "clunk, clunk, clunk", and then locked up. Starter gears not to blame. Head off, stuff up top looks okay. Pan off, oil pump out, stuff underneath looks okay. Next move is to remove the timing cover to check the chain and tensioner. If that's okay, then I suppose the engine has to come out to check flywheel and clutch parts. This will be an interesting investigation.
Thursday February 29, 2024:


What to do with the extra leap day when no one has anything scheduled? Take the opportunity to spend the whole day, a very long day, composing and up loading some new Part Numbers tech pages, mostly for the odd threaded plugs and ports on the outside of the MGA (and MGB) engines.
2F4249 changed to 2A380 then 88G257 with a modern part number 2F4249X Drain plugs for engine oil sump.
2H4685 Drain plug for Twin Cam engine oil sump.
6K431 Copper crush washer for Twin Cam sump plug, also used for oil pressure release cap nut, all MGA & B.
6K638 Copper crush washer for Transverse oil hole, Oil pressure signal union, and standard engine sump plug.
That kept me up till midnight, and would you bleive thousands more parts to do (if I can ever get to it).
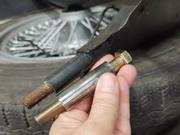
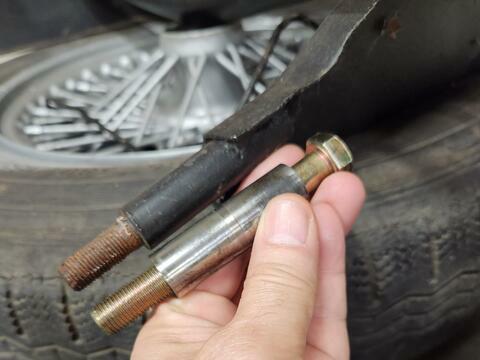
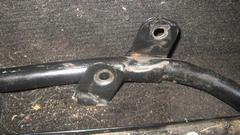
Here's an idea that bears mentioning. Bob Campbell in Dalton, GA, USA is re-using some old worn out parts to make some different new parts, very creative. He is using cast aside front suspension trunnion bushing steel sleeves to create shoulder studs to weld into the front frame extension for new bumper mounting studs. Give that man a cigar.
|