The MGA With An Attitude
| MGAguru.com |
|
MGAguru.com |
MGA Guru Is GOING MOBILE - (December 1 - December 15, 2024)
Sunday - December 1, 2024:
A little earlier start today, we gave the new engine a better tune-up, reset points and timing, and took it for longer test drive, several miles. Rough idle, low torque and some misfire below 2000 rpm, but it takes off like a shot above 2500 rpm pulling strong right up to red line.and this behavior is very consistent. Now I'm thinking this short block 18G engine with reground cam must have come to me with a performance grind, possibly a fast road cam.cam. Sorry, but I cannot appreciate rough running and low torque while driving around town and towing a trailer, and 2000 rpm idle setting is not appealing.. So today we will be pulling the stock grind cam and tappets out of the old engine and installing them in the new engine.
 Pick the 1600 engine off the floor, set it on the table and strip the front end timing chain and sprockets parts. Pick the 1600 engine off the floor, set it on the table and strip the front end timing chain and sprockets parts.
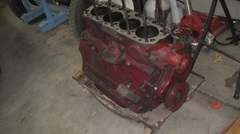
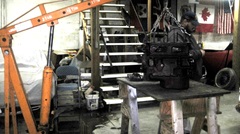
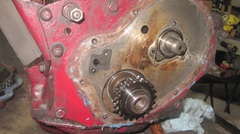
Remove the distributor drive gear, tappet covers and tappets, tagging each tappet in sequence to keep them in order.
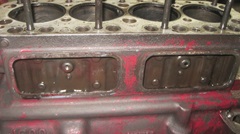
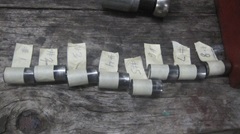
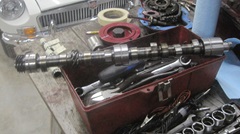
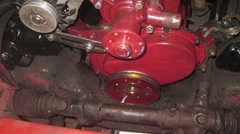
Set the old engine back on the roller dolly to clear the table, and get to disassembling the car. Drain and remove radiator, fan and pump pulley. Remove crankshaft pulley, timing cover, chain and tensioner and and sprockets. Remove distributor and drive gear, carburetors and heat shield and the intake manifold and tappet covers.
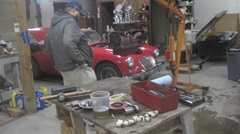
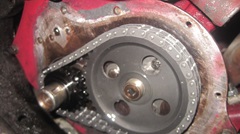
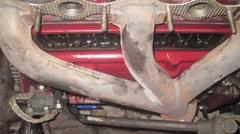
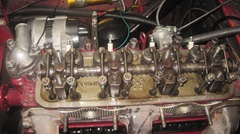
Remove valve cover, loosen head bolts slightly, remove rocker arms assembly and pushrods.
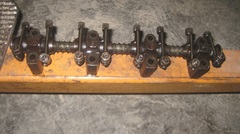
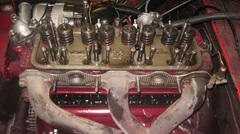
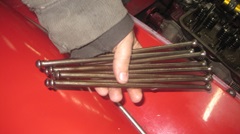
Remove tappets, again numbering them to keep in order. Remove cam timing plate, and pull the camshaft out the front. At this point we were inspecting the 1600 stock cam and he 18G reground cam, but couldn't see any difference by casual view without some serious measuring instruments.
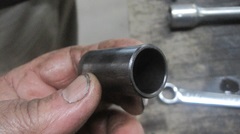
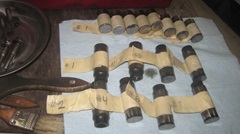
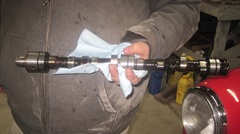
Install 1600 stock camshaft and tappets in the new engine then the pushrods and rocker arm assembly. Then reassemble timing chain and sprockets and tensioner, oil thrower, timing cover crank pulley with locktab and crank dog nut. Rather cold and tired, that was enough for one day.
Monday - December 2, 2024:
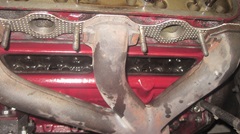
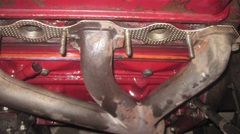
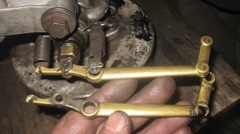
Place another parts order for an 18G type water pump and a few gaskets and seals. Then back at it again, reinstall the tappet covers, not having removed the exhaust manifold, that was a bit of a chore. Going to install the carburetors, notice the rear choke arm badly worn, so time out to replace hat part, just before it was going to break.
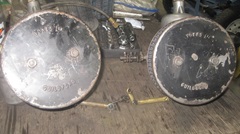
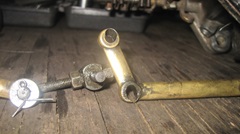
Finally got the carburetors installed, then the distributor drive gear, dizzy base casting and clamp, and the distributor back in place. Just need to reinstall the radiator? That's when we stopped to consider shimming the radiator forward to accommodate the 3/8" longer 18G type water pump we intend to install in the near future.
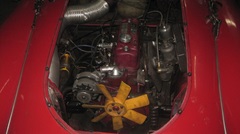
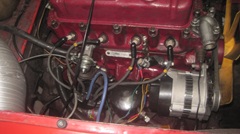
The drain petcock would hit the air pan during radiator installation if the radiator was farther forward. But, could install the radiator in normal position without the bolts (very close to the new fan position), then move the radiator forward with spacers at the mounting bolts, while the drain cock moves forward below the air pan. Strip spacers would work for that, sliding them down from the top before installing the mounting bolts. 1/4-inch forward limit before the radiator bottom tank would hit the air pan (without having to cut the air pan). the strip spacer would need to be 1/4" x 1" x 10" long with three drilled holes for the bolts, two pieces please. Will sleep on that idea, might do it later, just install the radiator normally for now, since it will have to come out again to install the new water pump.
Tuesday - December 3, 2024:
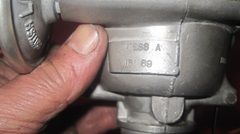
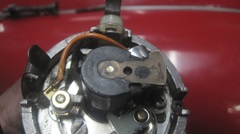
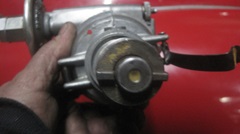
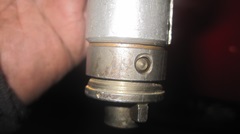
Having swapped in a known original stock spec camshaft, it was time to to reinstall the radiator, top it up , fire it up again, which we did. But it still had an irregular misfire at slow speed.even though it ran well on throttle. W spent some time fine tuning it, and it did run better but not good at low speed. To eliminate another possible failure point, we decided to replace the distributor. Trying to install our spare distributor, we found it would not physically fit, because it had some deformation on the bottom drive dog that could not mate with the drive gear. This was a bit embarrassing, because we had been carrying it as an emergency spare, but it obviously had never been installed and could not be installed. Additionally the drive dog was misaligned, rotated about 20-30 degrees out of place, with the cross pin hole drilled wrong in the shaft, so the drive dog on bottom was not aligned with the rotor on top. There were at least half a dozen used distributors sitting around in a box, so we proceeded to assemble a good new distributor from an assortment of the best used parts (Frankenstein). The 41288A distributor seems to be from 1966-1970 MGB (production data 46th week 1969), which should be good, because it begins with pre-emissions vehicles.

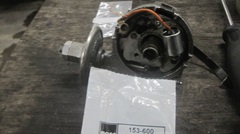
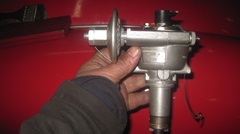
 Long story, but we found 25D unit that was seized, but managed to soak it with penetrating oil to get it us-stuck. Once cleaned up the body looked like new with a very nice shaft bushing with no wiggle at all. The mechanical advance weights likewise cleaned up nicely and appeared to have no wear. And the two bias springs (one soft one stiff) controlling the advance curve were in good condition. With that all assembled, we found a good breaker plate assembly with an in tact flex ground wire and wear-free rotation for the vacuum advance breaker plate, and put that together with new points and condenser. We had 4 or 5 new points sets, none of which would fit to work well, so spent an hour or so elongating adjuster slots and clipping frame tails to eliminate interference for the adjustment motion. The final part was a new vacuum unit that we have been carrying as a spare part. the end result is a complete distributor that looks like brand new right out of the delivery box, for which I am very proud. Long story, but we found 25D unit that was seized, but managed to soak it with penetrating oil to get it us-stuck. Once cleaned up the body looked like new with a very nice shaft bushing with no wiggle at all. The mechanical advance weights likewise cleaned up nicely and appeared to have no wear. And the two bias springs (one soft one stiff) controlling the advance curve were in good condition. With that all assembled, we found a good breaker plate assembly with an in tact flex ground wire and wear-free rotation for the vacuum advance breaker plate, and put that together with new points and condenser. We had 4 or 5 new points sets, none of which would fit to work well, so spent an hour or so elongating adjuster slots and clipping frame tails to eliminate interference for the adjustment motion. The final part was a new vacuum unit that we have been carrying as a spare part. the end result is a complete distributor that looks like brand new right out of the delivery box, for which I am very proud.
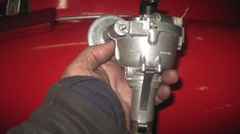
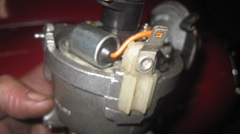
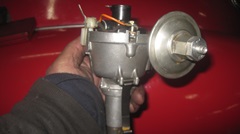
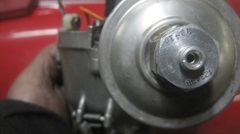
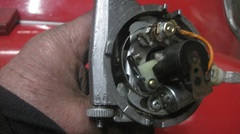
 With the new distributor installed and tuned up, it ran better but still with irregular misfire at low speed. So I was shorting spark plug connectors to ground and found inconsistent spark results. One plug terminal would produce a healthy spark jumping up to 1/4 inch to ground, another was maybe half a strong but probably functional. A couple would produce only a tiny spark to ground, similar to a bad condenser, likely the source of misfire. We have a good side entry distributor cap with brass terminals and solid core HT wire and multiple rotors and condensers for testing, but still have low speed misfire and stumbling at idle. Time to call it a night, but we have more diagnostic plans for tomorrow. With the new distributor installed and tuned up, it ran better but still with irregular misfire at low speed. So I was shorting spark plug connectors to ground and found inconsistent spark results. One plug terminal would produce a healthy spark jumping up to 1/4 inch to ground, another was maybe half a strong but probably functional. A couple would produce only a tiny spark to ground, similar to a bad condenser, likely the source of misfire. We have a good side entry distributor cap with brass terminals and solid core HT wire and multiple rotors and condensers for testing, but still have low speed misfire and stumbling at idle. Time to call it a night, but we have more diagnostic plans for tomorrow.
Wednesday - December 4, 2024:
Still bound and determined to banish the gremlins and inconsistent spark results. off to a local NAPA store top pick up a set of Autolite 63 solid core spark plugs. Install the new plugs and try it again, finally getting a strong spark on all four cylinders, and after warm up it ran much better. Time for a test drive, couple of turns, onto a thoroughfare, two blocks down it was running well. Just giving it some free rein when it shut down, and we coasted around a corner to a safe side street. The distributor had popped up and lost mechanical drive, because we forgot to tighten the clamp after setting the timing. Oops. Easy to stuff the dizzy back into place to run again, make a U-turn and get back o the garage.
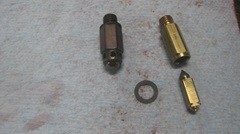
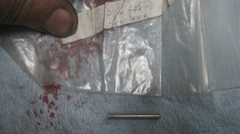
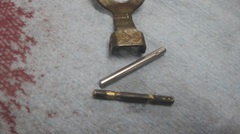
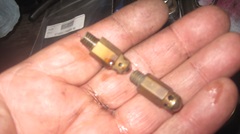
 About then the front carburetor was dumping fuel on the floor from the float chamber overflow tube. Damn, what else? Remove front float cover to verify, sure enough fuel to top of the float chamber, so we will change the float valve. I think these Gross Jets had been in there for 35 years with no problems, but we will now swap in new float valves with Viton tipped pins and spring loaded tails. The float arm dropped too low, so the shut-off pin fell down far enough to jam the arm in open position. Pull the hinge pin and re-form the arm to suit. Notice necked down hinge pin needing replacement, and wondering why we only have one spare hinge pin, but change it out anyway. Back in service, no longer flooding, going to change the rear float valve as well. The rear float is a modern Nitrophyl plastic float, while the front one is brass, so I recon we had changed the rear float recently. The hinge pin for the rear float arm was also a new one, so I guess I must have renewed that piece at the same time as the float change, which would explain why we only had one spare hinge pin. Okay, put two more hinge pins on the wish list for future reorder. About then the front carburetor was dumping fuel on the floor from the float chamber overflow tube. Damn, what else? Remove front float cover to verify, sure enough fuel to top of the float chamber, so we will change the float valve. I think these Gross Jets had been in there for 35 years with no problems, but we will now swap in new float valves with Viton tipped pins and spring loaded tails. The float arm dropped too low, so the shut-off pin fell down far enough to jam the arm in open position. Pull the hinge pin and re-form the arm to suit. Notice necked down hinge pin needing replacement, and wondering why we only have one spare hinge pin, but change it out anyway. Back in service, no longer flooding, going to change the rear float valve as well. The rear float is a modern Nitrophyl plastic float, while the front one is brass, so I recon we had changed the rear float recently. The hinge pin for the rear float arm was also a new one, so I guess I must have renewed that piece at the same time as the float change, which would explain why we only had one spare hinge pin. Okay, put two more hinge pins on the wish list for future reorder.
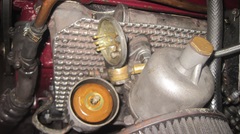
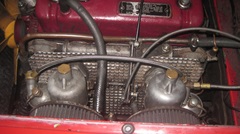
Carburetors back in order, fire it up, reset timing, shut it off and tighten the base clamp. About to head out for the test drive when navigator noticed an oil dribble on the ground. Rats, one of the tappet cover gaskets leaking, so back in the garage and shut it off again. This is going to require removing carburetors and manifolds for access to the tappet covers, but not tonight, make that a job for tomorrow. Meanwhile, two parts orders from Moss have arrived, as well as the new license plate sticker for the car.
Thursday - December 5, 2024:
Two parts orders from Moss came in yesterday (as well as the new license renewal sticker for the MGA). First business today was to paint the new water pump for MGB 18G/18GA engines. Then into the garage to fix the tappet cover leak we encountered yesterday. Jack the car up (with jack stands) and wipe up the oil spill first, then disconnect the exhaust pipe from Manifold before dropping the car back on its wheels. Not long to remove carburetors and heat shield, and dismount the manifolds. The rear tappet cover was the culprit with the rubber gasket squeezed out of place, likely from over tightening it. I have always figured that cork gaskets work perfectly well, no deed to spend more for rubber or silicone, but Michael had these rubber ones sitting around and encouraged us to use them. My first time, and last time, we are going back to cork for guaranteed good results.
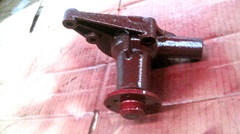
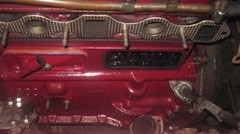
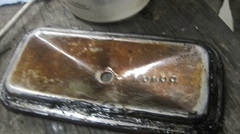
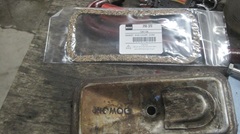
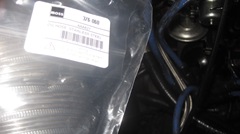
Notice the new cork gaskets from Moss Motors are individually packed in a form fit zip lock plastic bag to (hopefully) prevent the cork parts from drying out and shrinking (as cork is prone to do in open air). That may be true, or perhaps these parts might be from very recent production, but in either case the new cork gaskets fit perfectly. Not long to clean the covers and glue the new gaskets to the covers with a thin smear of "blue stuff", apply a light smear of oil to the flip side so it will release easily next time, and a few minutes later they were snug in place. Reinstall the draft pipe with one nut secure to side of the block (get the sequence right. Reinstall three studs in bottom of the exhaust manifold, set it in place with bottom end seated on the nearly new donut seal, and attach the two end studs or bolts to the head. Jack up long enough to install three nuts tight to secure pipe to manifold, then three more nuts jammed to the first ones to assure they will not vibrate loose. Clear out and drop the car with wheels back on the floor. Install heat shield, carburetors with linkages and fuel hoses, you've seen carbs often enough, no need for more pictures.
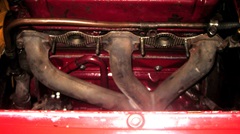
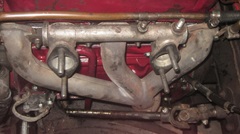
Fire it up, adjust timing by ear, one final check of idle speed and fuel mixture, and it was time for another test drive. This run was 15 miles including a run five miles south on I-77 at speed in traffic. Exit and re-enter northbound including three miles up hill on 5% grade at 70-mph in top gear. Not bad for a slightly stiff engine not fully run in yet.
 We spent a little time re-indexing the distributor drive gear one tooth anticlockwise to get the vacuum unit away from the dipstick, straight up below the heater valve (to navigator's preference). Looks correct now, don't know why we had it misaligned yesterday. Readjust timing, and it runs well. Mostly out of curiosity I wanted to check timing with my set back timing light to see how close I come to 32d advance at 3500-4000 rpm (road speed). That's when I discovered my Inova set back timing light was wacky (again), showing near 45d BTDC at idle, which is impossible, because it would not crank over to start with that much advance. Time to knock off for dinner and do up the photos and notes, with a good feeling that the new engine runs well. We spent a little time re-indexing the distributor drive gear one tooth anticlockwise to get the vacuum unit away from the dipstick, straight up below the heater valve (to navigator's preference). Looks correct now, don't know why we had it misaligned yesterday. Readjust timing, and it runs well. Mostly out of curiosity I wanted to check timing with my set back timing light to see how close I come to 32d advance at 3500-4000 rpm (road speed). That's when I discovered my Inova set back timing light was wacky (again), showing near 45d BTDC at idle, which is impossible, because it would not crank over to start with that much advance. Time to knock off for dinner and do up the photos and notes, with a good feeling that the new engine runs well.
Friday - December 6, 2024:
I believe we just spent half a day updating the inventory list and stashing new spare parts in the Magic trailer. Catching up a few days backlog of messages on the MGA forum and email. Trying to recover from the past few days working in a cold garage, and there might be a frozen water pipe. Might be warming up a little come Sunday.
Saturday - December 7, 2024:
Contemplating return to the road trip come Monday, or Tuesday latest, because Tuesday evening the bottom will drop out of the thermometer again. --
Finishing up loose ends, with a little help from our host we made some wood spacers to move the MGA
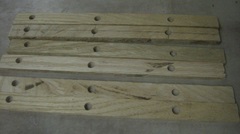 radiator forward a bit to accommodate the 3/8-inch longer MGB water pump (not yet installed). Best estimate is 1/4-inch clearance between the body air pan and face of the radiator bottom tank, so we should be able to move it that far forward without cutting the air pan. Drop the radiator in first, then move it forward where the drain cock will fit below the air pan. Then slip in the new spacer strips and install longer mounting bolts. We have spacer strips 0.200. 0.250, 0.375-inch, so we will see what may fit. Two inches extra length for the top end of the spacers to serve as a handle for easy insertion or removal. We may trim off an inch or so later once we find how it works.
Sunday - December 8, 2024:
So we have those sticks shown above. roughly 1/4' thick x 1" wide by 12" long. An appropriate radiator shim would be 10" long with holes 1" from each end the third hole in the center. These shims have an extra 2" on the top end for a handle, making it easier to insert and align during installation (and easier to remove later). Trying for 1/4"thick. an initial saw cut error made the first ones 0.200 thick. Second pass was indeed 1/4" thick, and third pass was 3/8" thick. I knew 3/8" would not fit without cutting the air pan, but it did follow the MGB water pump being 3/8" longer than the MGA water pump (in case I might decide to cut the air pan). --
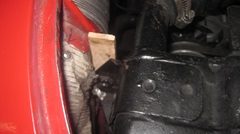
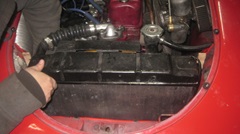
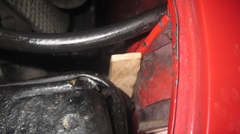
As it turned out, the 1/4" shim was uncomfortably tight on the left side, so I switched to the thinner 0.0200 " thick shims. Likely no one knows this car had front end damage twice before I bought it in 1977, again in 2014, 2021 Summer, 2021 Winter, and 2024 when we hit a deer. So don't expect this car to be real straight on the front end. -- In the end, this shimming came out well. Also the plastic fan may be a bit thinner than the original steel fan, so there is plenty of space now between fan and radiator to accept the 3/8" forward fan position with the new MGB water pump (whenever it may be installed),and still get a new fan belt between the fan and radiator.
 A few more small details to attend. We changed the A few more small details to attend. We changed the
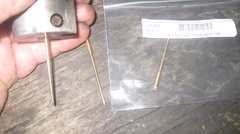
carburetor fuel metering needles from #5 to MB, which should be correct for the 18G type engine without PCV valve. We installed a new oil pressure signal hose, because I was tired of getting fingers pricked by frayed jacket wires whenever I gad to service this hose. And the gross Jets which were removed last Wednesday finally found the dust bin.
Remember the forlorn 1600 engine that has been sitting on the floor with half its parts missing, and a junk block where the machinist in California screwed up the eyebrows in 2022. Now it was back on the bench for more surgery as an organ donor. Toss the rubber engine mounts in the trash, and the steel engine mount brackets and front plate in the iron recycling bin. Bag and tag the harmonic balancer crank pulley and its retaining bolt,and the nearly new MGA water pump. Salvage all head studs, bag 'em and tag 'em for future use. Remove sump and recently new oil pump and pick up screen, bag the pump and screen, already reserved for Michael's next 1800 5-main engine build, Release big ends and push pistons out the top, wrap and save the nearly new con rod bearings. Knock the pistons off the rods and strip the piston rings and wrist pins for iron scrap, pistons go to aluminum recycling, bag and tag a good set of MGA 1500/1600 con rods. Remove main bearing caps to lift out the crankshaft. Wrap and save the nearly new main bearings and thrust washers, bag and tag the main bearing caps, just in case someone might need them, either the set of three, or the rear cap which sometimes has the scroll seal surface damaged. Wrap up the perfectly good 1600 type crankshaft , then bag and tag the main and rod bearings and thrust washers, and attach those to the wrapped crankshaft as a complete 1600 crankshaft kit, ready for installation whenever needed. The newly reground camshaft was already set aside along with new long tappets and short pushrods as a kit ready to install.
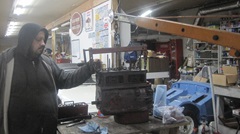
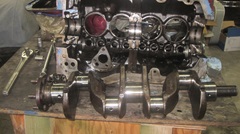
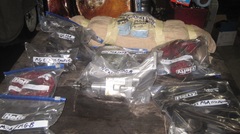
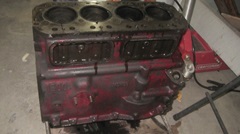
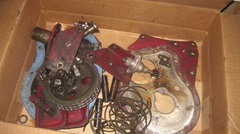
There remains only the bare damaged 1600 block for scrap iron, along with a box of other miscellaneous bits for scrap. Then we were into breaking down the engine hoist to stow away until it might be needed again,
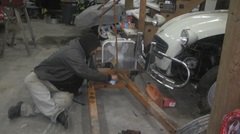
Clean up time, and stash away parts and tools in the Magic Trailer. With a few hours to spare we were into some deferred plumbing maintenance around the shop building, just something we could do for our gracious host. Then knock off for the day, time for very late lunch in the evening.
Monday - December 9, 2024:
Supposed to be a "laundry day", easy, simple, getting ready to hit the road. Toss the laundry bag in the trailer, back the car out, hitch up the trailer, cough sputter, and the engine was dying. What? It was running perfectly last night. Looked like it was out of fuel, so dump a half gallon in the tank, and the gas station is just a block away. Still hard to start, but finally revving up and running okay, not great, but good enough to the gas station. Fill the tank and the small can for the boot, Reset trip meter, start engine, cough sputter and die. Huh? Now what? Start, cough, sputter and die, repeat a few times, but still no go. Under the bonnet, open float chambers, fuel at correct height, must be an ignition problem. Pull HT wire from center of distributor cap, hold near a grounding point, switch on, crank, get a short spark, doesn't look too bad, put the wire back. Pull off HT wire from #1 spark plug,insert screwdriver in the HT connector and hold the screwdriver near the spark plug, get only a tiny little spark, then same for #2. -- Okay, weak spark, grab the test condenser, clamp it onto the alternator bracket, connect wire to down stream side of he ignition coil, crank start, and it fired right up to run well. Go figure. After assembling an immaculately nice new distributor, the old condenser was bad. Duh, such is life.-- Leave the test condenser in place, get on over to the laundromat, and we will install a new condenser later. Napa was right there on the next corner, so also pick up a new oil filter for the 500 mile oil change in a day or two. -- Tonight we are packing up clothes and parts and tools, installing a new condenser, getting ready for morning departure. Finally had just enough time to make a phone call to tech assist to renew domain name registration for "MGAguru.com", pay it up for another nine years in advance, and one less thing on the worry list.
Tuesday - December 10, 2024:
On the Road Again! Three cheers. Cleaned up the apartment, changed the failed condenser, jammed the distributor back in and took a quick guess a timing. Packed everything in, said goodbye to the cats. Going to back out, didn't want to start, too much timing advance, kicking back. Reset timing more retarded, then it fired up and ran okay, lets get out of here.
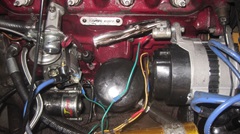
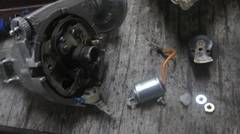
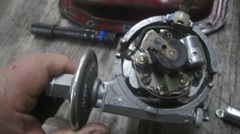
Out of garage at 1:00-pm, hitch up the trailer, drop off the key and head for the expressway. The car seemed to be doing well, just can't get used to MGB 70-psi oil pressure when we have been used to MGA 50 to 60 for past decades. We were running full throttle up a few long hills several miles at a time of full throttle 4th gear and 3rd gear when the coolant temperature was rising until it pegged the gauge and began to steam up. Half throttle in 3rd gear wasn't helping, so I recon it was still too much timing advance (seen this before). Just 25 miles down, take a short break on the next exit ramp for a better tune up. Back off the timing to something more reasonable while idling, fine tune the fuel mixture, reset idle speed, top up coolant, and we were back on the road. Much better behavior, running hills on 5 and 6% grades at full throttle 4th and sometimes 3rd gear, no more overheating.
 Short banking stop in Statesviille, NC at 144 miles, after which the traffic went to pot. The next 58 miles lost us an hour and 40 minutes off schedule with incessant stop and creep traffic, commonly too slow for idle in 1st gear. Damn that was bad. At 202 miles we found a Loves truck stop with a Subway at Fort Mill, South Carolina., stopped for fuel and very late lunch at 6:30-pm. Been raining some, so I think we're done for the day. The good news is, the first tank of fuel on the new engine gave us 18-MPG in spite of all the adversities noted above. Wahoo! That must be exceptionally good.Also it looks like it used no oil, still spot on the High mark (but maybe it wasn't parked exactly level). Can't wait to see what it may do on less congested expressways. Short banking stop in Statesviille, NC at 144 miles, after which the traffic went to pot. The next 58 miles lost us an hour and 40 minutes off schedule with incessant stop and creep traffic, commonly too slow for idle in 1st gear. Damn that was bad. At 202 miles we found a Loves truck stop with a Subway at Fort Mill, South Carolina., stopped for fuel and very late lunch at 6:30-pm. Been raining some, so I think we're done for the day. The good news is, the first tank of fuel on the new engine gave us 18-MPG in spite of all the adversities noted above. Wahoo! That must be exceptionally good.Also it looks like it used no oil, still spot on the High mark (but maybe it wasn't parked exactly level). Can't wait to see what it may do on less congested expressways.
Wednesday - December 11, 2024:
My computer mouse died in hand before we could order breakfast, so grab the spare mouse out of the trailer and carry on. Still raining this morning, not going to quit until noon to 1-ish, so sit tight. Need to scoot ASAP when it does quit raining, wanting to go near Savannah, Georgia by about 4-pm, where we intend to do do the 500-mile break-in oil change. Then intending to do another two hours south to Jacksonville, Florida for the evening. The pressing issue is trying to stay ahead of an Arctic cold front crushing through today, due for at least 30dF temperature drop. Going down to 40dF over night in Jacksonville. Sure glad we're not still in West Virginia where it is already snowing, and going down to 24dF tonight.
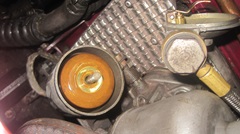
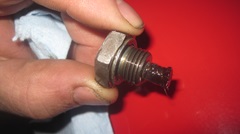
 We jumped the gun a bit and took off by 11:30 when it was still raining gently. Onto the expressway and continue to cruise south at steady 70-mph when possible. 160 miles on we hit a Walmart for a jug of oil, a jug of antifreeze, a wrap of red shop rags, and a new computer mouse, then continue on. 248 miles down, getting very good fuel mileage, but good time for refiling in Richmond Hill, Georgia. 10.6 gallons makes it 23.4-mpg. Engine oil level was 1/16-inch below the Full mark, almost no oil used in 450 miles. Not bad for a new engine during its break-in run. Carry on. 50 miles more found us pulling into a rest stop near Brunswick GA to do the 500-mile break-in oil change. Jack up, remove drain plug, get the picture of the magnetic plug to see what may come out of a new 500 mile engine, surprisingly little actually. Set down level, remove oil filter, drain, install new filter. Jack up, reinstall drain plug, set down, refill with fresh oil, run engine to assure no leaks, shut down, top up oil. Funnel the used oil into the jug we just emptied, and put it back in the trailer for later recycling. Pick up, clean up, stash the tools, record miles, and we were out of there in 35 minutes. We jumped the gun a bit and took off by 11:30 when it was still raining gently. Onto the expressway and continue to cruise south at steady 70-mph when possible. 160 miles on we hit a Walmart for a jug of oil, a jug of antifreeze, a wrap of red shop rags, and a new computer mouse, then continue on. 248 miles down, getting very good fuel mileage, but good time for refiling in Richmond Hill, Georgia. 10.6 gallons makes it 23.4-mpg. Engine oil level was 1/16-inch below the Full mark, almost no oil used in 450 miles. Not bad for a new engine during its break-in run. Carry on. 50 miles more found us pulling into a rest stop near Brunswick GA to do the 500-mile break-in oil change. Jack up, remove drain plug, get the picture of the magnetic plug to see what may come out of a new 500 mile engine, surprisingly little actually. Set down level, remove oil filter, drain, install new filter. Jack up, reinstall drain plug, set down, refill with fresh oil, run engine to assure no leaks, shut down, top up oil. Funnel the used oil into the jug we just emptied, and put it back in the trailer for later recycling. Pick up, clean up, stash the tools, record miles, and we were out of there in 35 minutes.
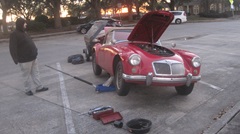

Another 50 miles put us across the next state line into Jacksonville, Florida to stop for the night at another Love's truck stop, 550 miles from start in Princeton, WV mid day yesterday. Got to be feeling real good about the new engine by now. Call a couple friends, and time for dinner. The rush is off. Should get down to 39dF tonight. We now have 8 days to make less than 400 miles to Bonita Springs, FL where it will get down to 46dF tonight, so most of Florida is similar weather. Good night all.
Thursday - December 12, 2024:
Frost on the trailer , must have been 35dF of less at 7:30-am. Intending to go south then southwest, navigator turned us west. What? Soon on I-10 West. Then we missed an exit due to a change of configuration of an interchange which the Garmin GPS did not catch. Add 15 miles to get off next exit and come back. Finally south on US-301, stopping for breakfast at Baldwin, FL, 50 miles from start. That was more than our programmed mileage allocation for the entire day, just to get to breakfast. Sit tight, and maybe do some planning. Good time to download updates for the Garmin.
Friday - December 13, 2024:
Moved along a bit to Gainsville, FL. Catching up BBS and email. not much else.
Saturday - December 14, 2024:
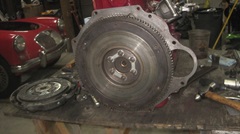
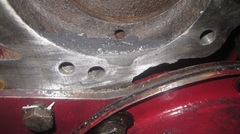
Took some time to whip up a new tech page for Transplanting an MGB 18G/18GA engine into the MGA. BTDT now, so might as well pass along the experience and recommendations.

Sunday - December 15, 2024:
Bad news. I Just received word that the owner of Union Jack Ltd in Roanoke, VA, John Eldredge, is deceased 12/14/2024. Future of this business is currently indeterminate. Ned to update my Shops List.
|