The MGA With An Attitude
Transplanting the MGB 18G-18GA Engine into the MGA - PP-201@
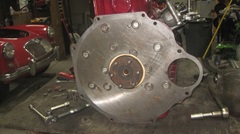
Having now done this conversion myself in late 2024, I can offer the following photos and notes and advice for navigating the pitfalls for installing an MGB 18G or18GA engine in the MGA. Being the earliest production MGB 1800 3-main bearing engine, it is by far the easiest 1800 engine to install in the MGA, but still has a few significant pitfalls. The first key ingredient will be to use the engine rear plate that matches the face of the bellhousing on the MGA gearbox. There will be either low starter position for early and/or mid production MGA 1500, or high starter position for MGA 1late 1500 and/or 1600 and/or 1600-MK-II.
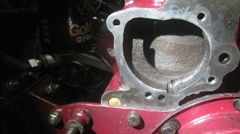
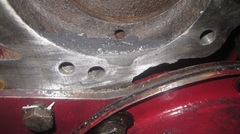
On the front of the engine, do not believe anyone who may tell you to use the MGA water pump. The open water cavity on face of the MGB 18G/18GA engine block is a larger aperture with a narrow depression at the bottom where coolant may run out just at the bottom of the MGA water pump mounting flange. To make that work you may have to fill that small depression with some stout epoxy. like JB Weld for instance, finishing it smooth and flush with the front face of the block. Even then the paper gasket will have a very narrow available mating surface with some risk of not sealing properly, either with initial installation of some time down the road. It will be better to use the early MGB water pump that belongs with this 1800 block.
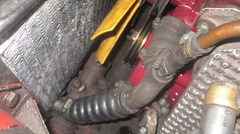
That said, the early MGB water pump will be 3/8-inch longer than the MGA pump from gasket surface to the front pulley mounting flange, 4-1/8" vs.original 3-3/4". For this you will also need the early MGB water pump pulley (3/8" longer) to position the fan belt in the correct plane with the crankshaft pulley and generator pulley. This also puts the fan 3/8" closer to the radiator where it may or may not eventually touch or rub to damage the radiator core, but could make it more difficult to replace or tension a fan belt.
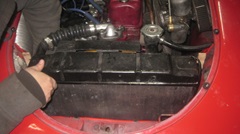
For this situation it would be desirable to shim the radiator forward up to 3/8-inch. But the body horizontal air pan originally has a nominal clearance of only 1/4-inch from the bottom face of the radiator, so you would have to cut and/or roll down the back edge of the air pan to get the radiator that far forward. Most people will settle for shimming it just 1/4-inch forward, and settle for the fan being 1/8" closer to the radiator core. Otherwise maybe avoid using the early 1800 type wide 3-blade fan, instead using the thinner 6-blade fan from the MGA or 1968-1973 MGB. There is also a 7-blade plastic fan available that may give more clearance.
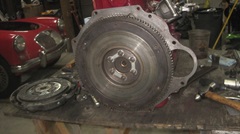
You can use all of the original MGA flywheel and clutch parts from the crankshaft flange back to the front face of the 3-synchronizer gearbox. Use a clutch friction disc that matches the splines of the gearbox input shaft. The late production MGA 1622 engine flywheel was machined to be 8-pounds lighter (20 pounds vs. 28 pounds (a good thing), and it will bolt up to the MGB 3-main crankshaft. The early MGB 3-main engine flywheel is nearly identical. except it has 3 alignment pins for the MGB clutch vs 2 for the MGA clutch. It is simple machining to bore holes for the flywheel to accept the different arrangement of clutch alignment pins.
Alternately you can use all MGB flywheel and clutch parts. However the MGB pressure plate is thinner, and the clutch release bearing and release arm will be different. This also requires changing the gearbox front cover to the early MGB 3-synchro gearbox style to position the arm pivot point farther forward. this likely also requires filing the bellhousing side hole slightly to allow passage of the MGB release arm clevis end. MGA and MGB use the same clutch slave cylinder and pushrod and rubber dust boot. See notes on MGB clutch transplant and possible interference inside of bellhousing (at bottom of that page).
At left side of the engine, the MGB long-center-branch exhaust manifold will not fit into the LHD MGA without some rather severe modification, where the LHD MGA steering column is in the way. the MGB exhaust manifold may work for a RHD MGA, but then requiring modification of the MGA exhaust front pipe. But the MGA 3-branch exhaust manifold will work quite well, likely better than most people would think. The MGA manifold might even be slightly better at high engine speed. You would need a dynomometer to tell the difference, likely only of interest if you were building an uprated engine.
The MGB engine will run well using MGA H4 carburetors, with a change of fuel metering needles. Use HB needles for the 18G engine, or #5 needles for the18GA engine. Difference is, the 18G engine has a draft tube on the front tappet cover (like the MGA), while the 18GA engine would originally have a PCV valve (with matching air draft connection and valve cover breather parts).
Use the original MGA starter motor, or a modern gear reduction starter. If mating the MGB engine to a low starter gearbox, you may need to grind a bump off the side of MGB engine block, or grind a bit from the starter motor mounting flange to clear the bump on the engine block.
Photos below compliments of Andy Bounsall in Ontario, Canada
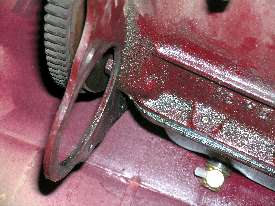
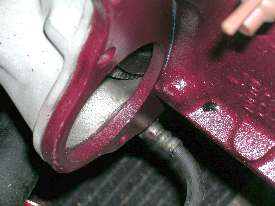
Above, 3-main block with small bump --- 5-main block with large bump
Below, 5-main block starter no fit --- 5-main block ground down a bit
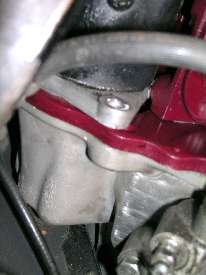
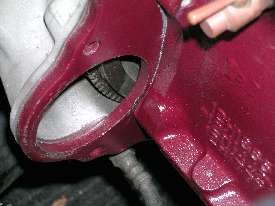
Test fit gearbox to engine after installation of all clutch parts. Test rotation and function of the clutch before installation in car. With MGB clutch cover and MGA 1600 high starter gearbox, there might be a small interference inside the bellhousing very near to the starter motor aperture. Snug up bolts gradually while testing rotation of the crankshaft. If you encounter rubbing or locking up of the rotation, the interference can be relieved by light sanding or grinding inside the bellhousing.
|


