The MGA With An Attitude
Transplanting the MGB 1800 Engine into the MGA - PP-201
At 12:49 PM 1/10/02 -0600, Rocky Frisco wrote:
>"Any advice about placing an MGB engine and transmission in a Mk II MGA? .... Am I right in assuming I will need to make up motor mounts and possibly an odd-length drive-shaft?"
The earlier the MGB parts, the easier is the job. Any B-series engine can be a bolt-in, with the right combination of parts, when mated to the original MGA 3-synchro gearbox. There are a lot of MGA 1800's running around with either 3-main or 5-main engines. Just not so many MGA's with 4-synchro gearboxes.
You need to use the engine rear plate that fits the front of the gearbox. To attach a 5-main-bearing engine to the MGA gearbox you use the rear plate (modified to carry the rear seal) and starter motor (inertia starter) from the MGA engine. 1965-1967 was a transition period when the first 5-main engines (GB series) were used with a small flywheel while still being mated to the earlier 3-synchro gearbox. Also see article on the MGB clutch transplant (optional).
For 1965 or later MGB engine, use the '65-'67 MGB electric tachometer, as the 5-main-bearing engine does not have a mechanical tach drive. The early MGB electric tach has the same face appearance as the MGA and early MGB mechanical tach, except the electric tach says "Smiths" on the face rather than "Jaeger".
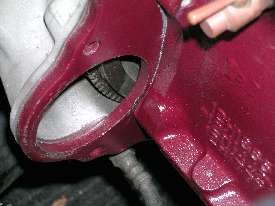
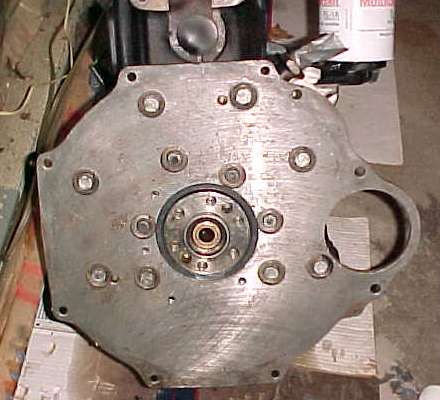 MGA 1500 rear plate with low starter position. Bore out the center hole from 3.938" diameter to 4.125" diameter to fit the rear rubber seal for the 5-main bearing crankshaft. The center hole is bored out to accept the rubber seal.
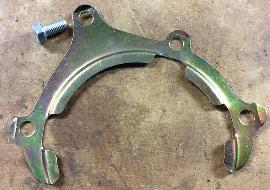 Also notice the four tapped holes (below) added for screws to mount the MGB seal retainer. I will not speculate about why the factory thought this part was necessary. --- You can turn the retainer to a different position with the holes in between original bolts, then use the retainer as a template to locate the new hole locations. Drill and tap four new holes in the rear plate, 5/16-24-UNF threads, and use short bolts to install the retainer.


 For original MGB installation the retaining plate is installed with the longer bolt ear at upper left using existing back plate bolt locations. But the MGB rear plate is flat faced, while the MGA rear plate is counter-bored for bolt heads. To install the plate in original position you need four spacer washers to fill in the counterbores. Make 4 spacers 0.750" OD. 0.328 ID, and 0.225" thick, and use longer bolts.
Addendum, December 2011:
Nine years later I have a response.
On 12/22/2011, John Smith wrote:
"You stated that you could not comment on why the oil seal retaining plate was needed. I found out 6 weeks ago. I have had the car nearly 40 years and I have rebuilt it a few times with various degrees of success. About 25 years ago, I got an MGB 5 bearing engine and thought it was a simple drop in job and discovered it wasn't. Being young and poor I opened up the hole in the A back plate with a hand held electric drill and flap wheel sander until the hole was just big enough to take the oil seal. I had been worried about this bodge for years, but it carried on working. I took the opportunity recently to fit a 5 speed box and, as the MGB bell housing cost the same as the MGA one, I took the opportunity to do the job "properly" and refit the B back plate and put in a new oil seal. Unfortunately over 25 years I forgot about the retainer. Anyway, within 200 miles there was a large pool of oil under the car - yes the oil seal had come out - you can get away with a home engineered tight fit, but in the B plate, on my engine at least, it is not tight enough. Not a disaster, but a huge irritation I could have done without. -- Best Regards, John Smith
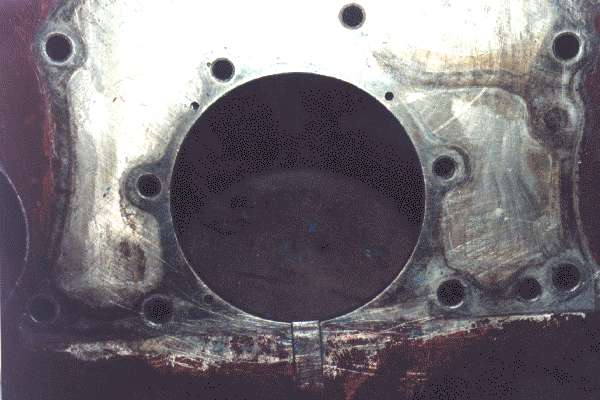
Front side of rear plate after machining.
The shallow slot at the bottom of the big bore is the original drain slot in the front of the plate to allow oil that has sneaked past the mechanical seal (3 main bearing engine) to drain out between the engine block and the rear plate before it gets back to the flywheel and clutch area. During final assembly of the newly modified parts you will be plugging up that shallow slot with silicone sealant so no oil can escape from the engine. A more permanent fix would be to weld up the slot and machine the face of the plate flat.
For post 1975 engines you change the engine front plate to the earlier type so you can use the earlier rectangular engine mounts.
For 1962-64 3-main bearing engines, you can use the MGA water pump and pulley (remove two alignment pins from the MGB block). Otherwise use one of the short nose MGB water pumps to avoid fan interference with the radiator. Do NOT use the long nose water pump from mid-production MGB engines. The MGB pumps are longer with longer pulleys to match so the main V-belt always lies in the same plane. The short MGB pumps are still a bit longer than MGA pump, so use the short single groove MGB pulley with the short MGB pump, and shim the radiator forward about 1/4-inch with the use of multiple packing strips part #AHH5144 (296-110).
For 1965 and later 5-main bearing engines, use water pump either part #GWP117 (434-035 for 18V engines, 1972 to mid-1974) or GWP130 (434-045 or 434-047 for 18V engines, 1974-1/2 to 1980 MGB). Also use matching fan pulley part #CHM56 (434-325) and pulley spacer from the MGB electric fan model (1977 on). You will need to drill two additional holes in the pulley to match your original fan 4 hole pattern (using 2 existing holes). You could also install the MGB plastic 7 blade fan part #12H4744 (434-340) without the spacer. Another alternative would be the 6 blade steel fan part #BHH1604 (434-330) as fitted to the MGB.
A different length fan belt may be required depending on which crank pulley is used, size of generator pulley (or installation of alternator with smaller pulley). Either the 5" or 6" size crankshaft pulley can be used, just be sure you have the matching timing cover so that the timing marks match the crankshaft pulley TDC mark. Use of the MGB harmonic balancer crankshaft pulley may run interference with the MGA steering rack during removal and installation of the engine (but is okay once installed).
Use a clutch plate that matches the splines on the gearbox input shaft. Use an adapter bushing for the spigot bearing in the back end of the crankshaft. For the 18GB engine the spigot bushing needs to be (1.125" to 1.126" OD x 0.625 ID x 1-1/2" long). For all 18V engines the spigot bushing needs to be (1.125" to 1.126" OD x 0.625 ID x 1-1/8" long). MGA clutch cover uses 2 alignment pins on the flywheel, while MGB clutch uses three pins. Use of MGB diaphragm type clutch in the MGA requires gearbox front cover and release arm (and release bearing) from any pre-1968 MGB.
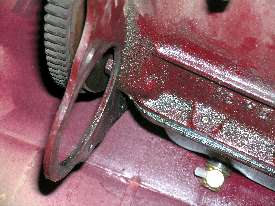
Internally the MGB 3-synchro gearbox (through 1967) is virtually identical to the MGA gearbox, with all of the parts between the front and center main ball bearings being interchangeable. The noticeable differences are the input shaft where the splines and pilot diameter are different (but adaptable), and a bit of a difference in the positioning of the manual shift lever. Most significant is a difference in the gearbox rear mount, where the MGA has a lateral rubber mount with a single bolt, and the MGB uses small rectangular rubber mounts. Most people end up cutting the MGA frame and fabricating a removable cross member for the MGB gearbox mount. The MGA 1600 gearbox rear housing can bolt up directly to the early MGB three synchro gearbox, effectively converting it to a MGA MK-II unit which will bolt it without any modification to the frame. This also allows use of the late production MGB 3-sync box (last half of 1967 production year) with the slightly larger layshaft with four oil holes and four needle bearings.
If using an MGB gearbox, also use the matching MGB engine rear plate, and keep in mind that the MGB gearbox mount is softer than the MGA mount. In the event of a front end collision this may allow the engine to move forward enough for the fan to hit the radiator. To prevent this, install the MGB (68-74) engine mounting recoil brackets part #AHH7890 (413-075).
Fitting the later MGB 4-synchro gearbox into the MGA is more of a PITA, mostly because of the larger bellhousing. I have seen this done, but the bellhousing is a very tight fit in the tunnel (without modification of the tunnel), such that it appears impossible to R&R the engine, unless you have a removable cross member under the frame for the gearbox mount. But like they say, where there's a will there's way. In any case, use the drive shaft that goes with the gearbox you're using.
A more difficult combination would be trying to mate a 3-main-bearing engine to a 4-synchro gearbox. Problem here is the small pilot diameter in the back of the crankshaft, and the larger pilot on the gearbox input shaft. You cannot swap input shafts between the 3-synchro and 4-synchro units, so you have to have the pilot nose of the input shaft machined down to fit the bushing in the crankshaft. I also do not know personally if there is any engine rear plate that would work with this combination. I believe the standard plate for 5-main engine and the 4-synchro gearbox will work if you counterbore the bolt holes similar to the MGA plates so the bolt heads will clear the earlier flywheel.
Addendum 23 Aug 05:
European Car magazine ran a full article on how to convert your MGA to 1800 power the correct way. It also list part numbers and suppliers. You might contact them to see if a back issue is available.
European Car Magazine, April 1993, Volume 24, Number 4
The article starts on page 35 then finishes on page 118/119.
Addendum 21 Apr 09:
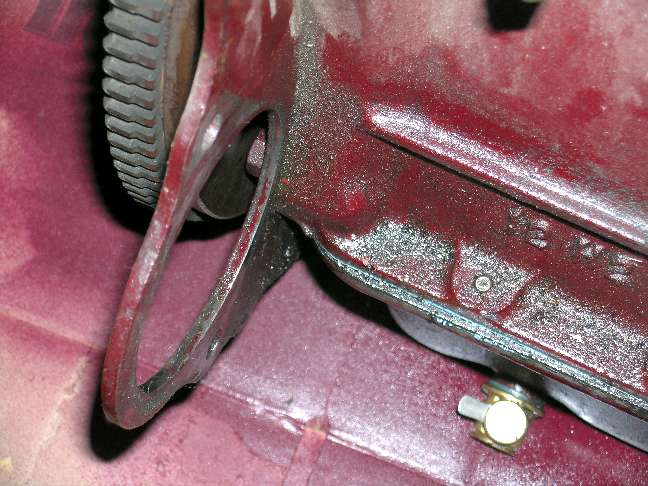
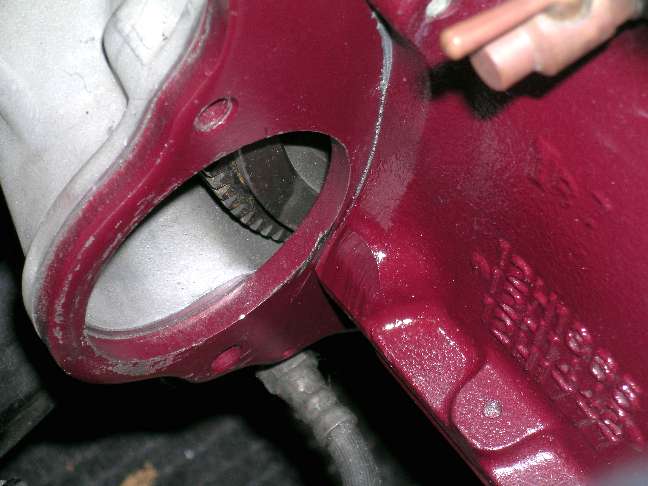
This note pertains to mating any five main bearing engine (1965 GB engine or later) to the early or mid 1500 gearbox with low starter position. The 5-main blocks have a bump low on the side that interferes with installation of the starter motor. This is where one of the rear plate attachment bolts goes into the block. It is in the same position on all B-series blocks, but just has some extra iron around in on the 5-main engines. You will need to grind away a little of the iron to reduce the bump enough to allow the starter motor to slip into place. This is of course easier done with engine and rear plate out and free before installation in the car.
Photos below compliments of Andy Bounsall in Ontario, Canada
Above, 3-main block with small bump --- 5-main block with large bump
Below, 5-main block starter no fit --- 5-main block ground down a bit
Addendum December 2011:
The MGB iron exhaust manifold will not fit in the left hand drive MGA due to position of the steering shaft. The MGA 3-branch iron exhaust manifold is actually pretty good, probably better than many people think. The MGB long center branch manifold has a slight advantage at low to mid range engine speeds, but the MGA manifold is slightly better at higher speeds. There is very little to be gained by using a tubular exhaust header on a street engine, unless it is accompanied with significant (and expensive) porting of the cylinder head. Enlarging the tube size of the exhaust manifold slows down velocity of the exhaust gas which may actually have a detrimental effect on scavenging of the combustion chamber. It is important not to make the exhaust header tubes too large. The tubular header will also be noisier and will dump more heat into the engine bay.
|