The MGA With An Attitude
MGA Guru Is GOING MOBILE - (February 16 - February 28, 2022)
Wednesday, February 16, 2022:
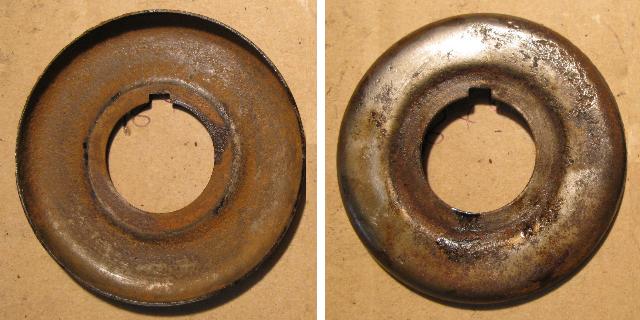
 New Part Numbers page for Oil Thrower Ring for late model MGA 1600-MK-II with external rubber seal in timing cover.
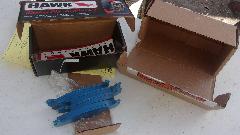
 Some email correspondence on starter ring gear installation that didn't come out right from a pro shop, but car owner finally installed a new one himself. Some email correspondence on starter ring gear installation that didn't come out right from a pro shop, but car owner finally installed a new one himself.
 Nice feel good day.
Received a few pictures of worn parts, and updated a tech page on rebuilding the gearbox.
Thursday, February 17, 2022:
Just some email tech stuff, and casual BBS chat, nothing to write home about.
Friday, February 18, 2022:
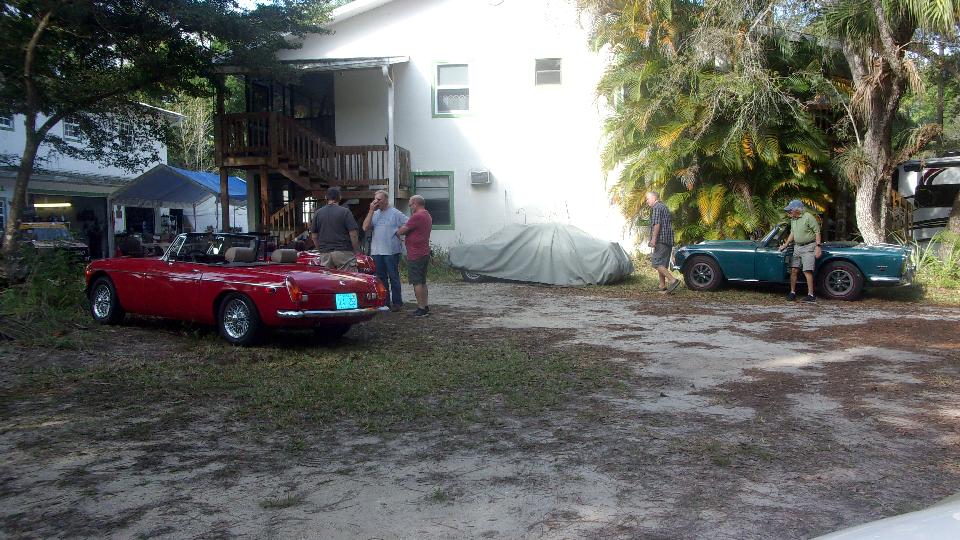
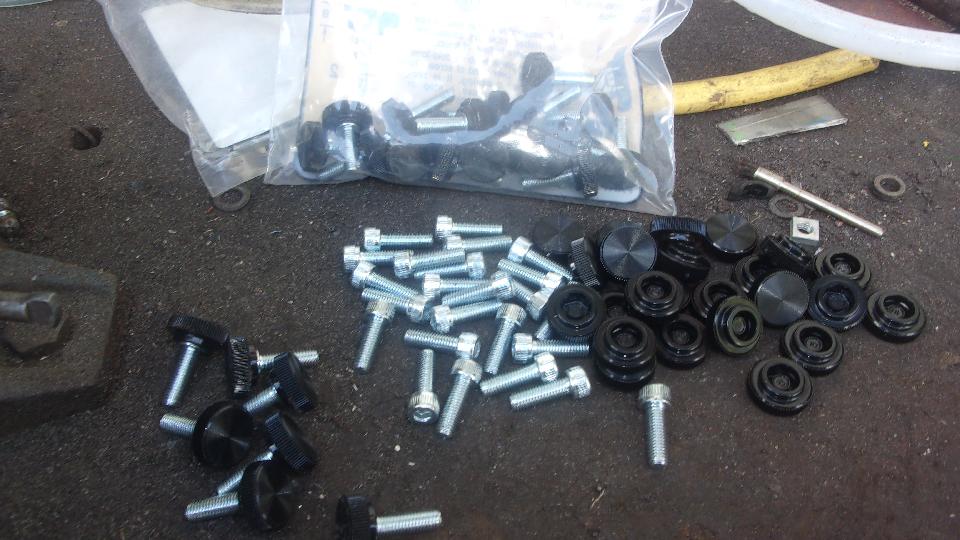
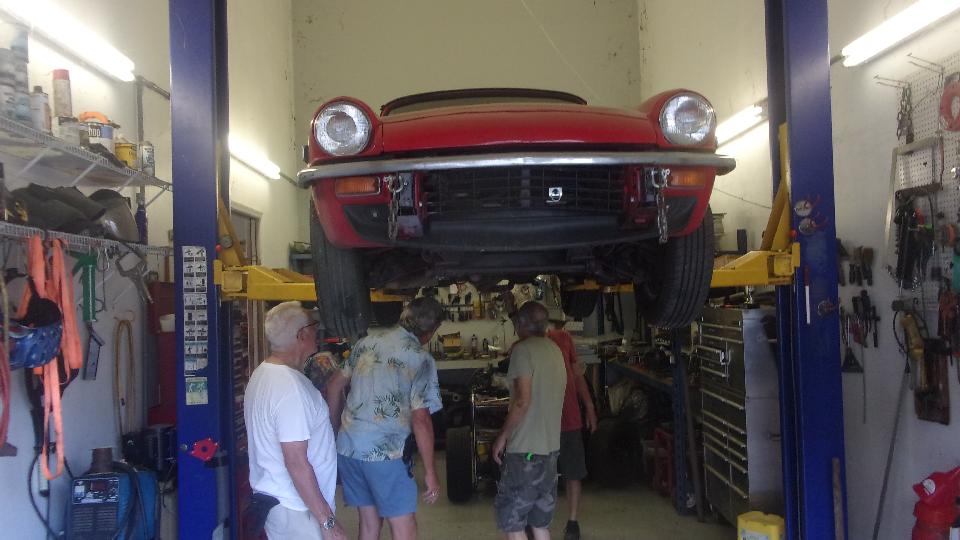
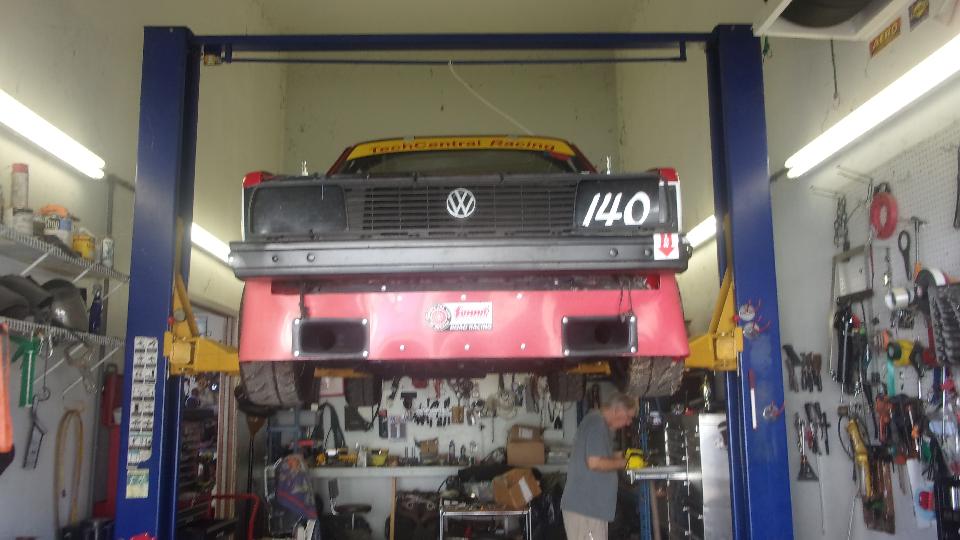
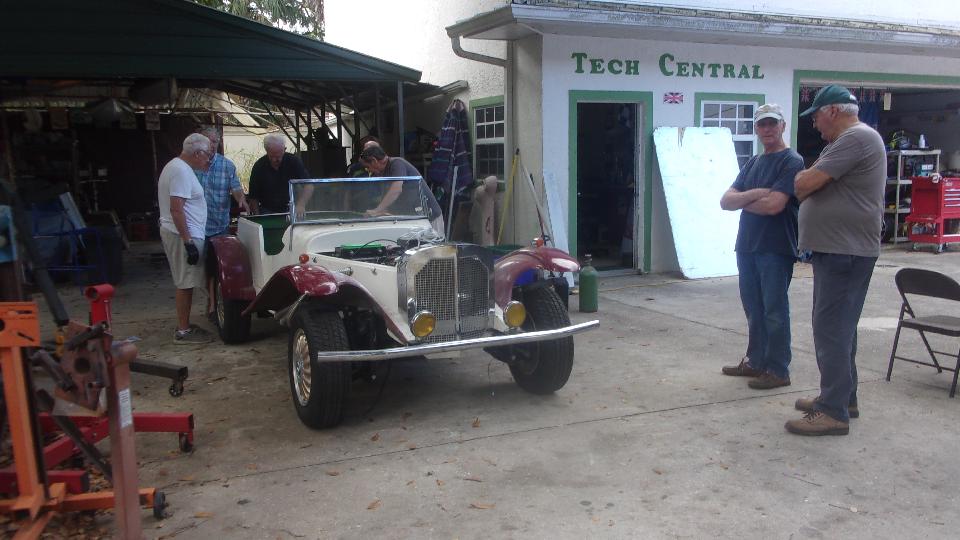
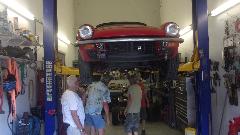
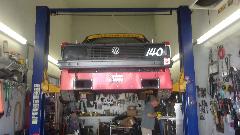
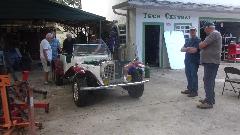
Tech Central Friday again, so let's see what they are up to now. Up front the customary two red MGBs, one chrome and one rubber bumpers and a TR250 on the side. The rabbit race car off the trailer and heading for the lift for some repairs after the racing week end. I received a small order of hardware bits from McMaster-Carr and immediately got down to assembling thumb screws from #10-32x5/8 socket head cap screws and 5/8" diameter knurled plastic caps. Hold the screw head up in the vice, place the plastic cap on top, tap it a few times with a flat faced hammer, and then squeeze it gently in the vice for final seating. These make nifty quick change screws for the bonnet and boot lids on the MGA. Didn't take long to assemble 50 pieces (6 or 12 per car).


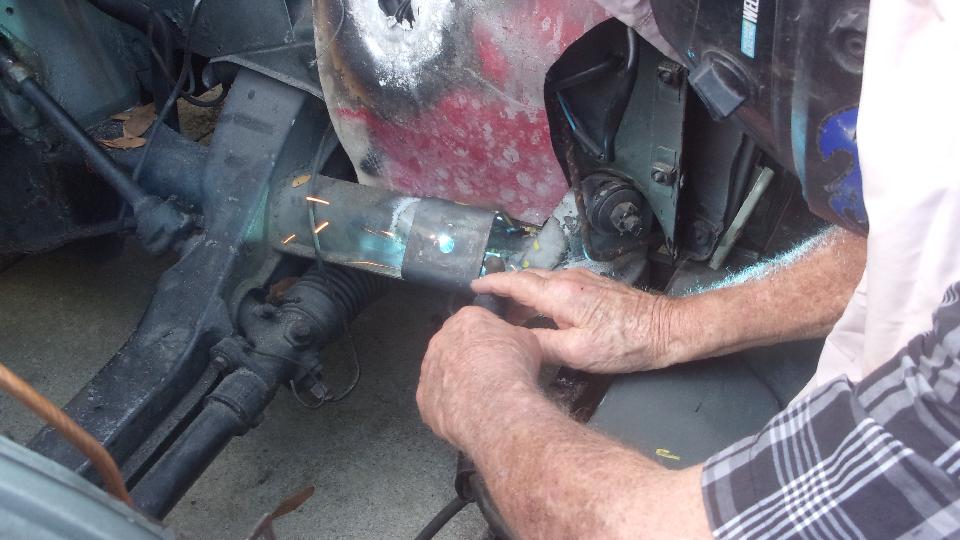
Meanwhile, the team was welding the new engine mount pedestals in the ZB Magnette.
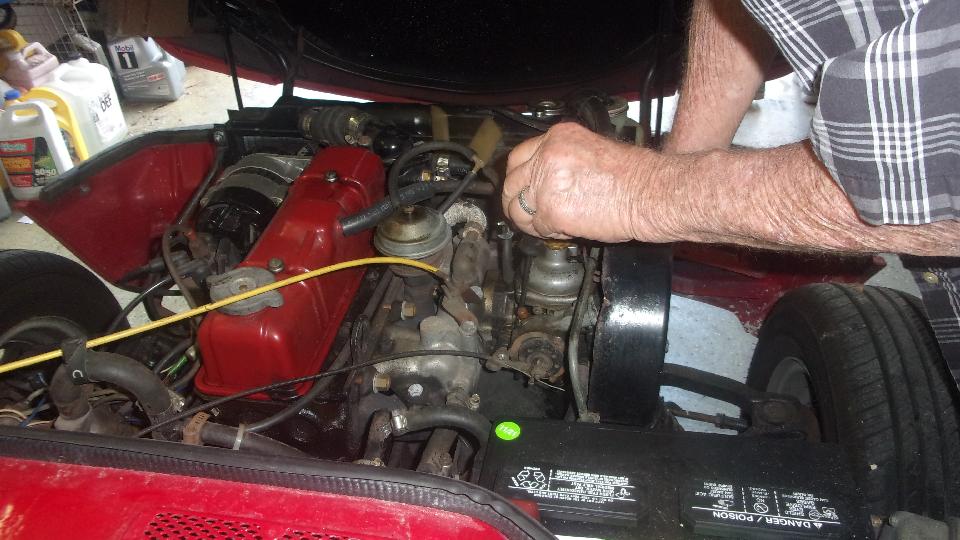
We had a Spitfire on the lift to discover and replace a missing clevis pin at the right rear parking brake cable end. Also in dire need of a tune-up, running bad, getting 11 MPG fuel mileage? Wow! We backed off the fuel mixture adjustment on the Stromberg carburetor about a dozen turns, running much better but might still be running rich. It also loses oil from the carb damper in short order, so order up some new o-rings for the fuel metering needle, and put it back on next week's work list.

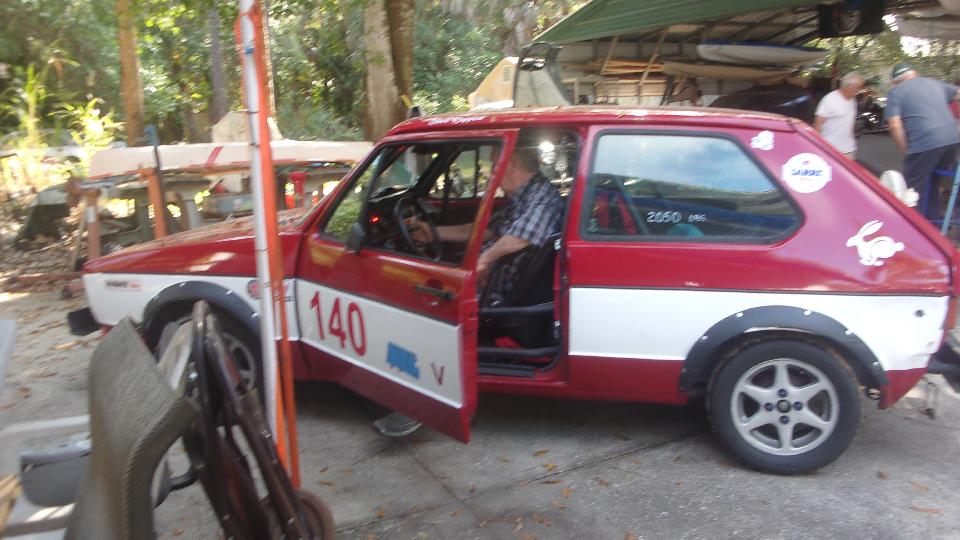
Then it was the racing Rabbit's turn on the hoist, needing to R&R the exhaust headers to weld a broken header tube. Got the rear pipe disconnected and a couple bolts out of the top flanges before we noticed a badly worn RF wheel bearing. Need to order parts for that, so make it a good time to set that aside.

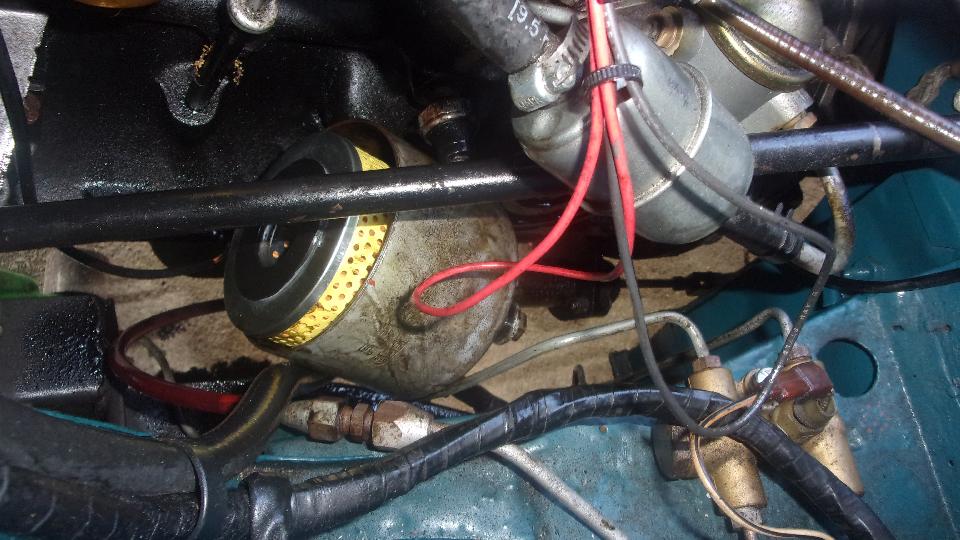
The TR250 made a visit to the forecourt for a badly needed oil change and new oil filter. The old canister type filter was in a tight spot, so Jerry shed a little blood for that effort.

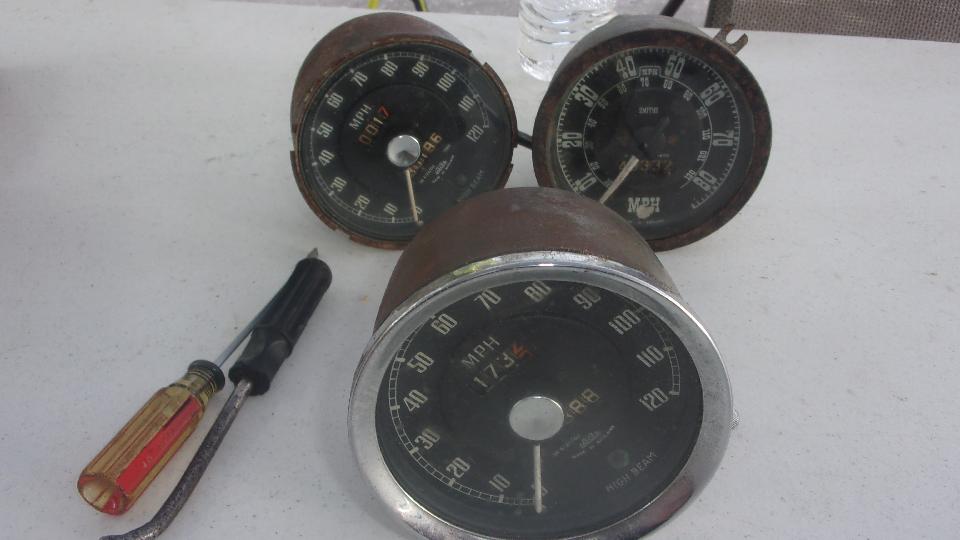
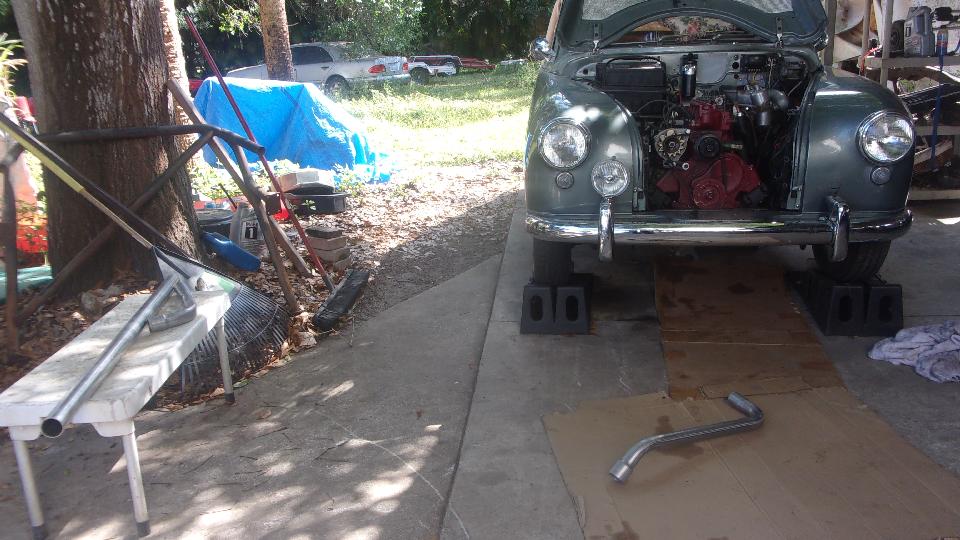
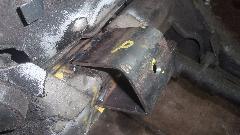
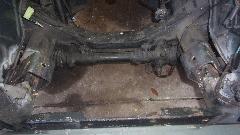
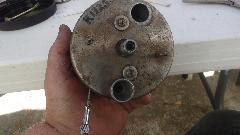
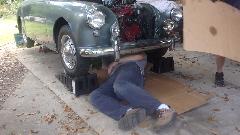
I suppose I forgot to mention that after Tuesday's job replacing core plugs and installing a new Nylon fan and fresh coolant in our MGA, the car lost all the coolant two days later due to a misplaced clamp on the lower radiator hose. That was fixed immediately, but refilled with mostly plain water, so today we got to drain the radiator to install enough fresh antifreeze to bring it up to 50/50 mix. I also searched the attic to borrow a couple of crusty looking speedometers that might supply spare parts to repair the misbehaving main odometer in the MGA. We intended to do a tow-in check/adjustment on the MGA, but had enough for one day, so off to WiFi.
Saturday, February 19, 2022:
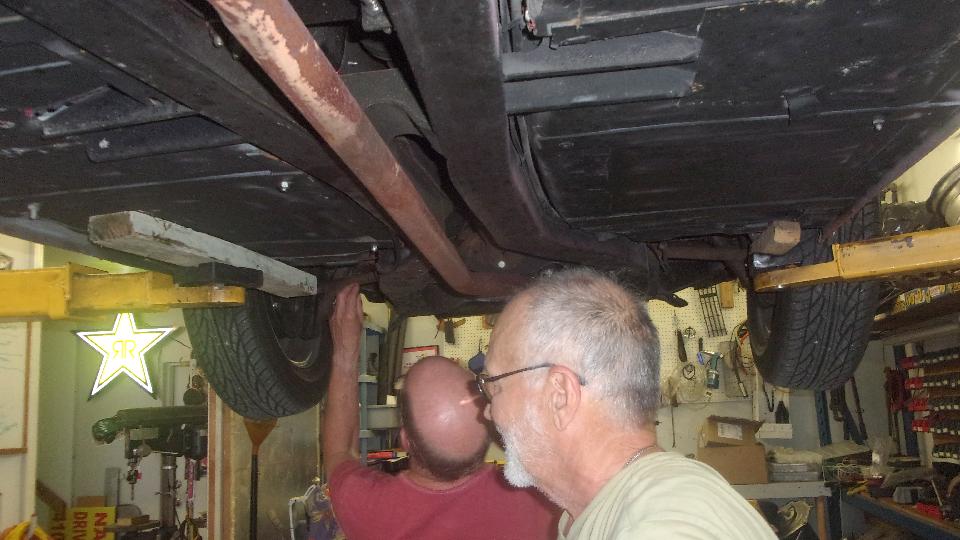
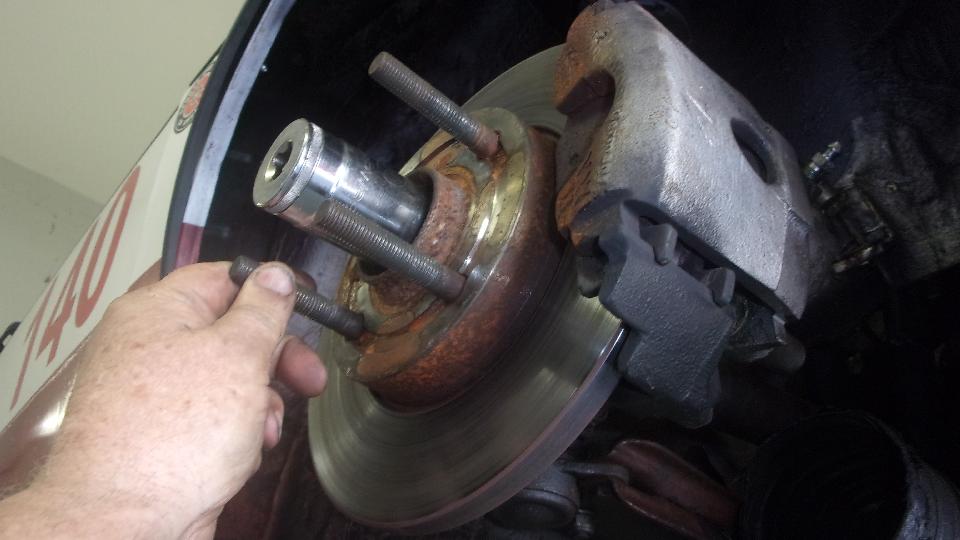
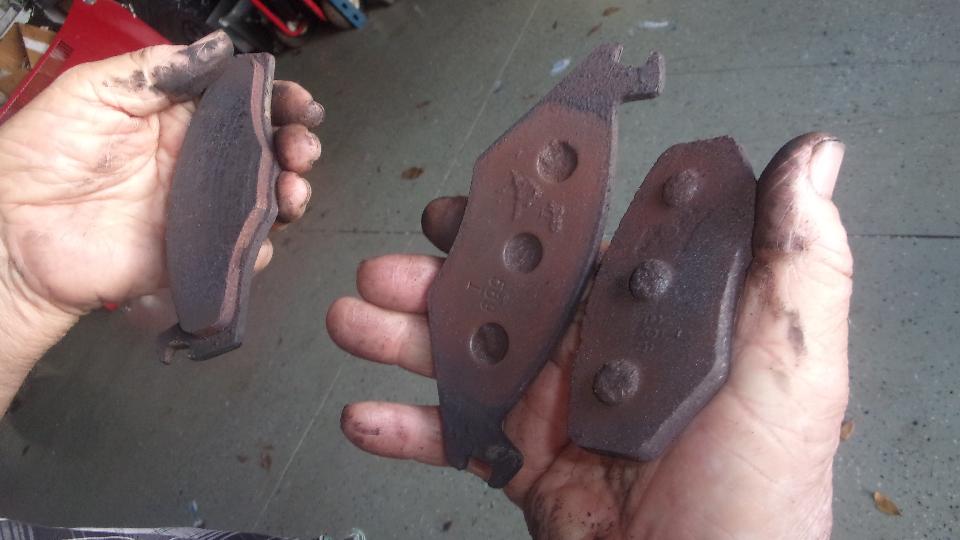
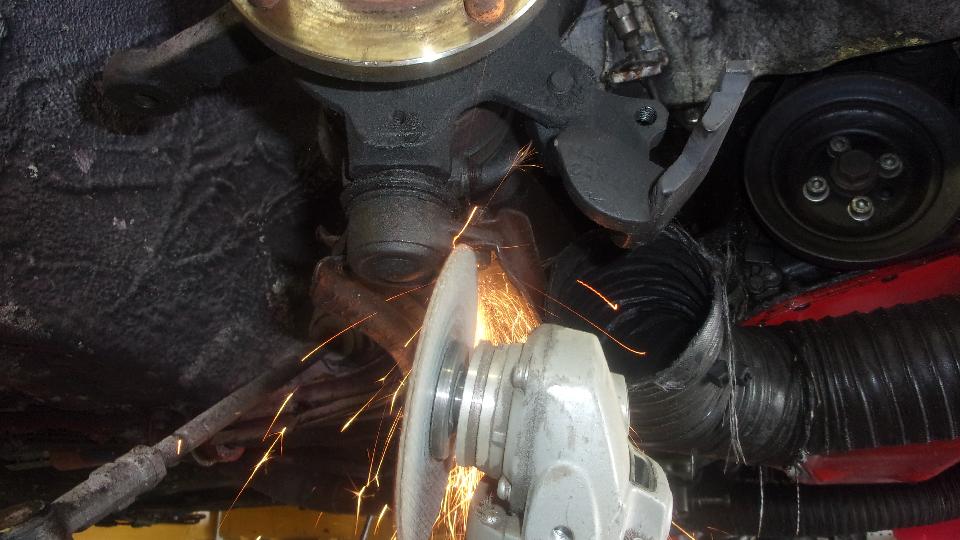
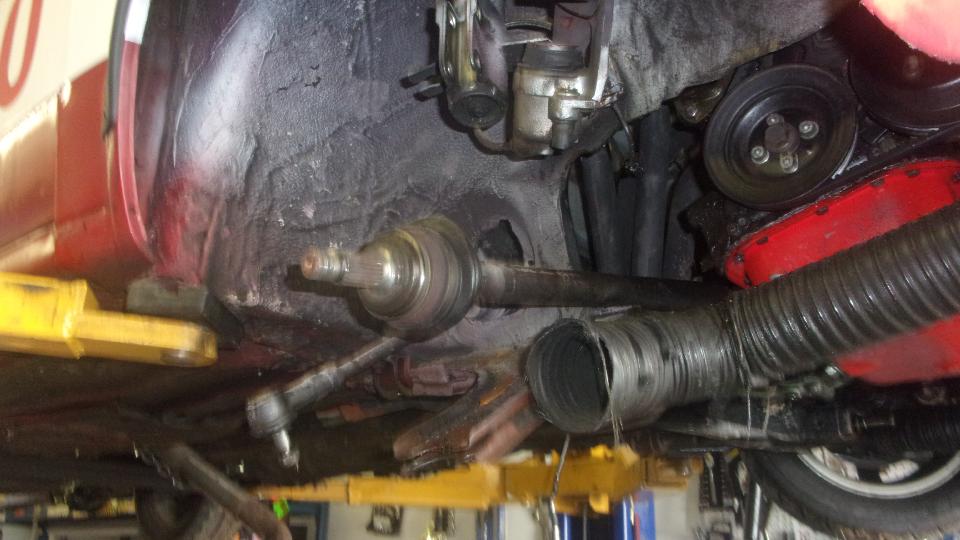
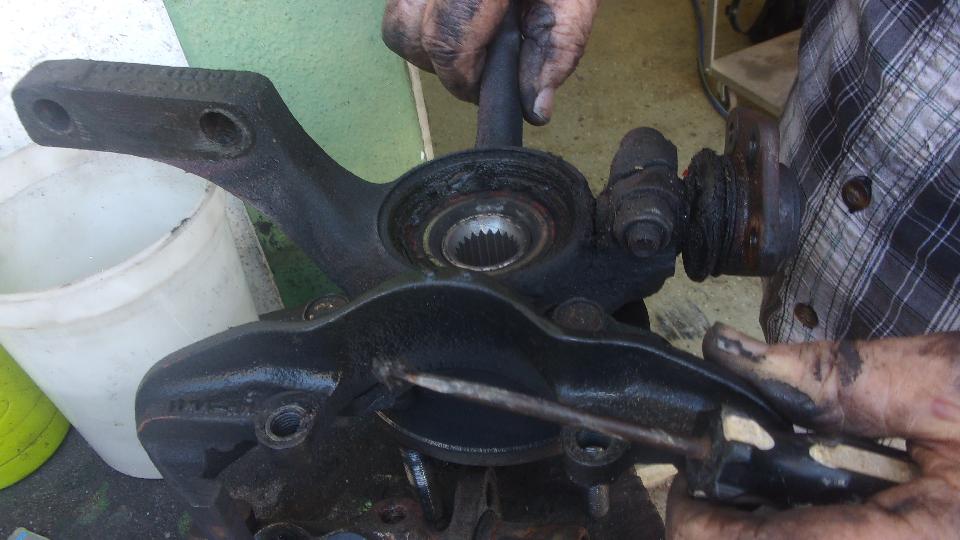
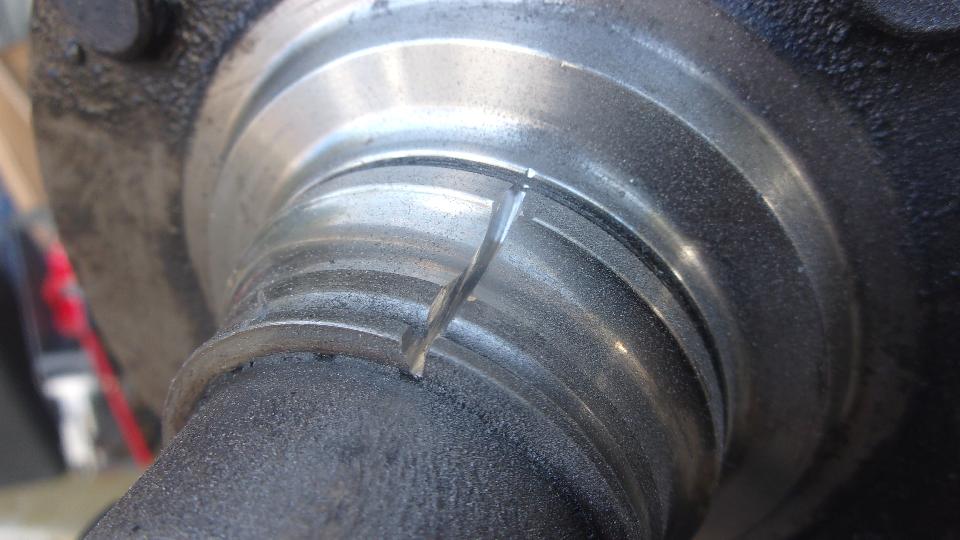
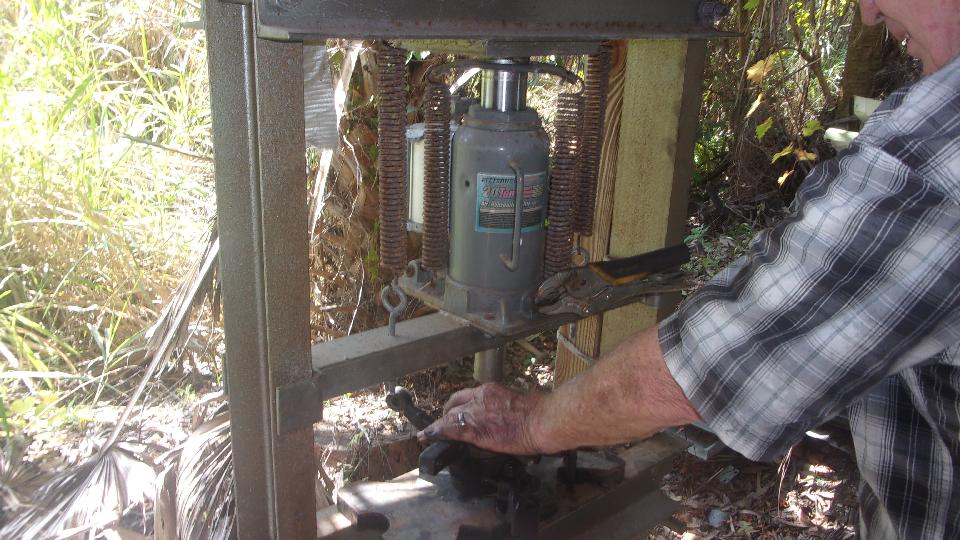
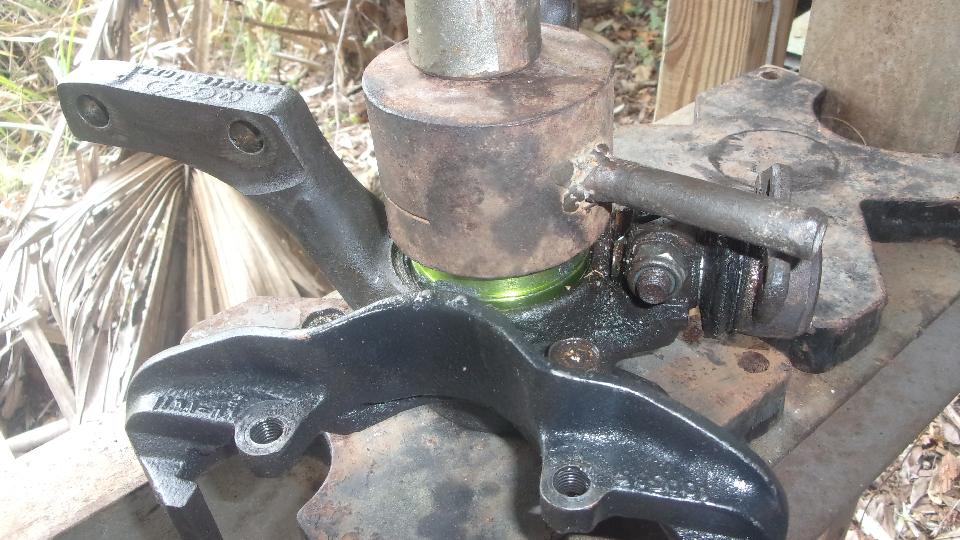
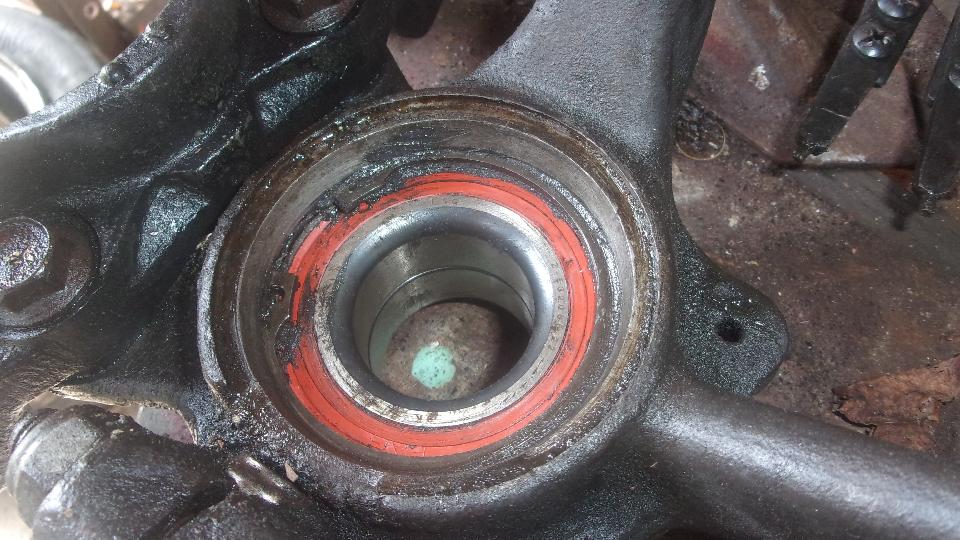
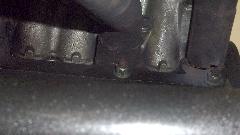
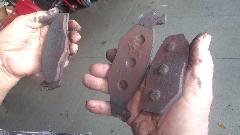
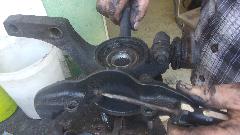
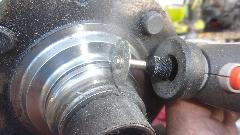
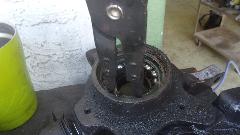
Got to help change the wheel bearing in the racing Rabbit today. An American guy with a British car working on a German car? Well, I have also had a few Japanese cars over the years, so I must be multi-national. --- Always something. Removed the brake caliper to find a detached brake pad (another $100 pad set please). Three small bolts securing the lower ball joint turn out to be 7-mm bolt with 11-mm hex head and Nylok hex nut. One thread stripped so the nut wouldn't come off.
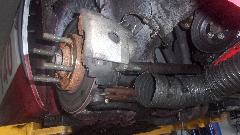
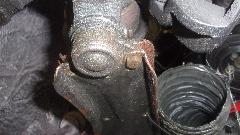
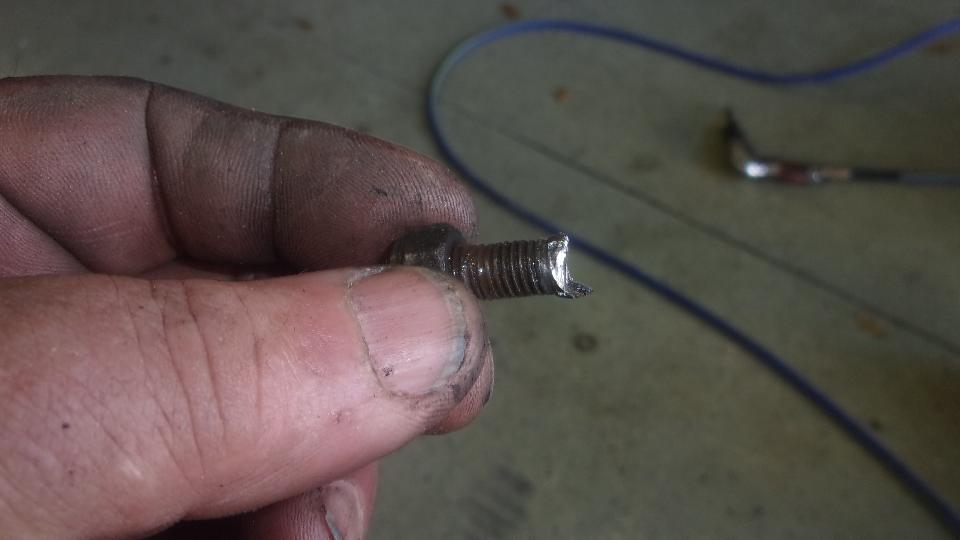
Grind the head off and punch out the screw, 7-mm looks like it might be a dealer exclusive part. Tie rod disconnected, bearing hub pulled off the splined drive knuckle.
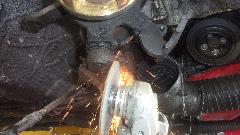
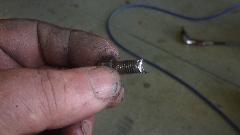

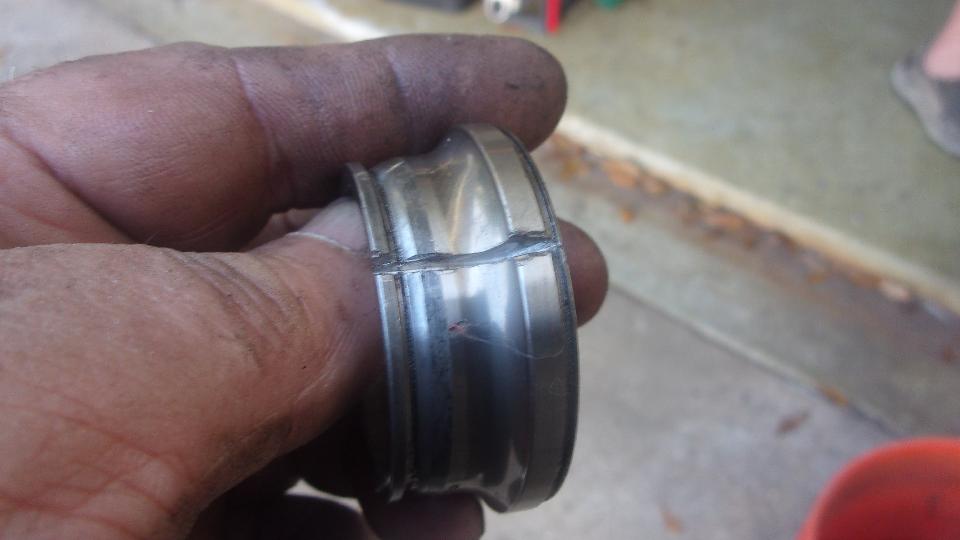
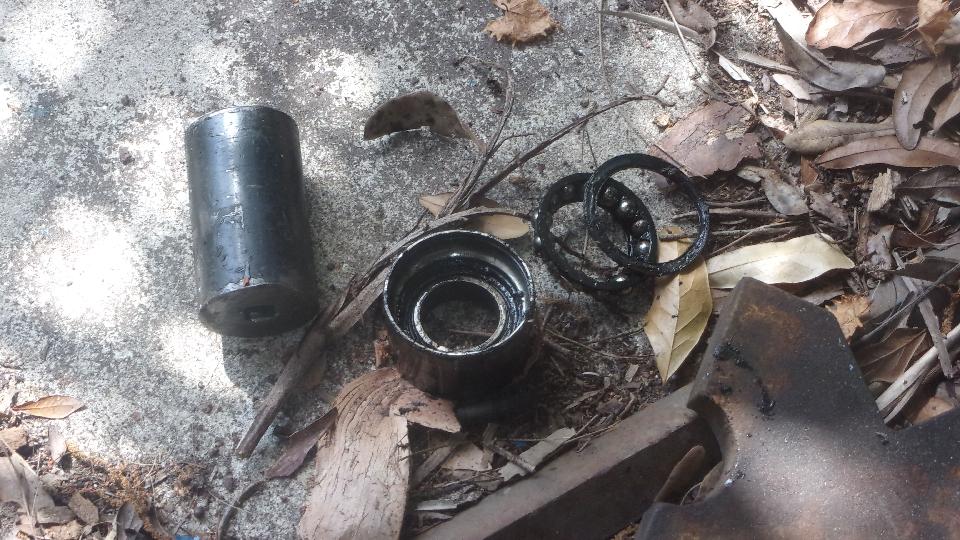
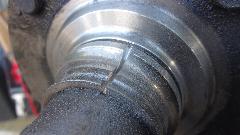
Punch the splined hub out of the bearing, and the worn bearing just came apart. This should be fun, having to cut the inner bearing race off the hub.
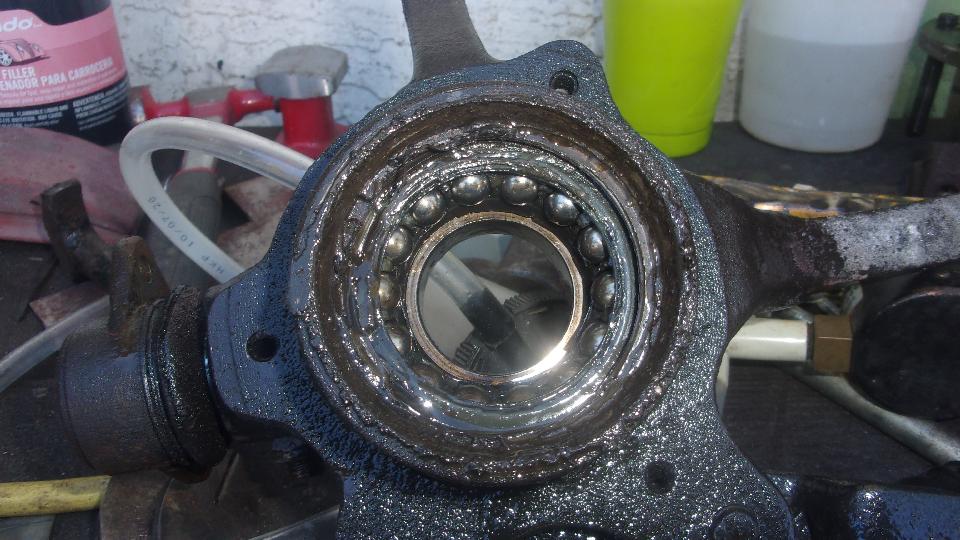
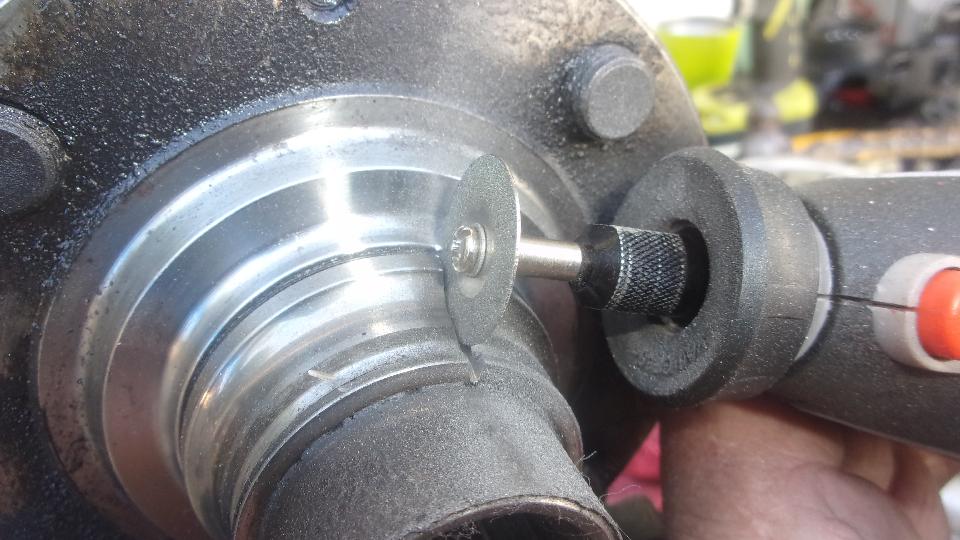
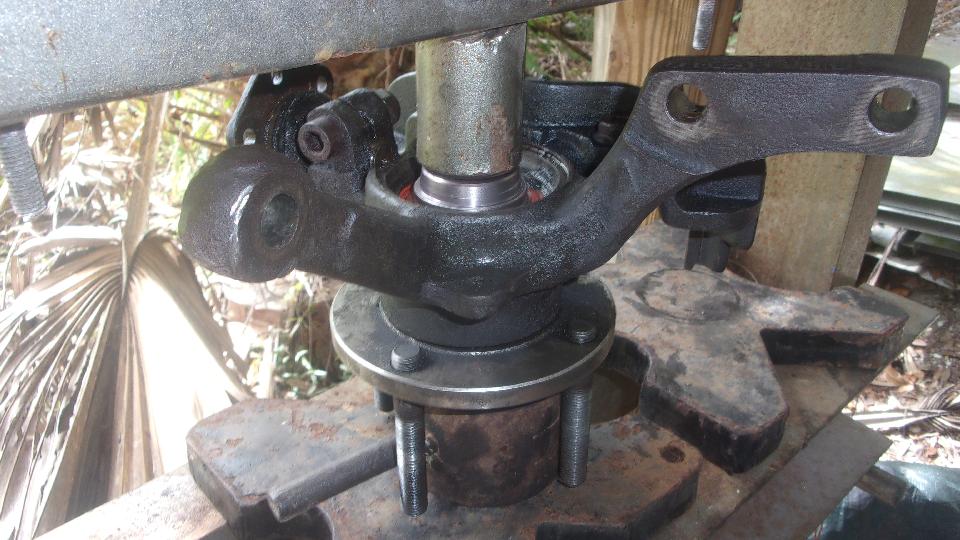
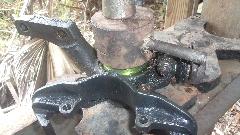
Not so bad. Ten minutes with a neat little diamond abrasive wheel in the Dremel, and a couple whacks with a cold chisel cracked the ring to allow it to fall off.
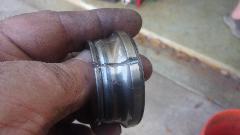
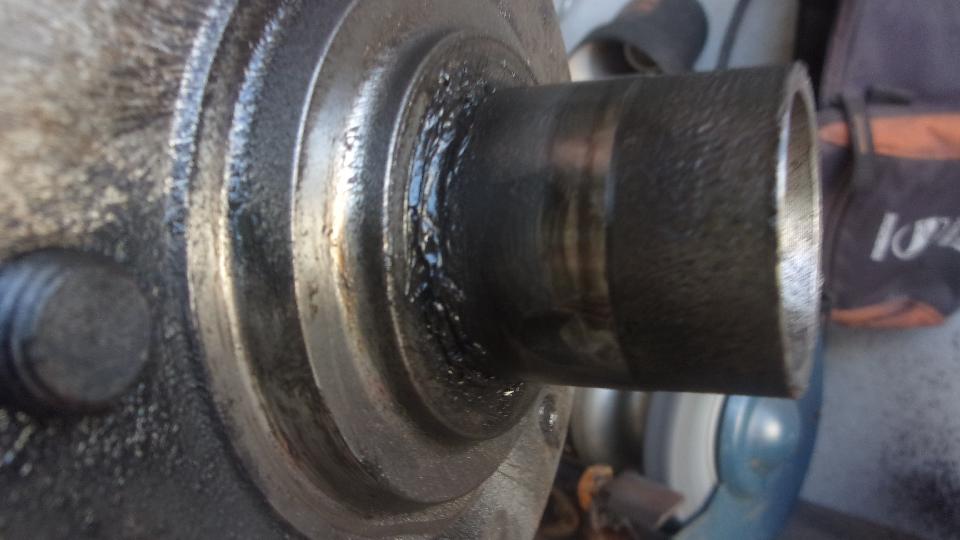
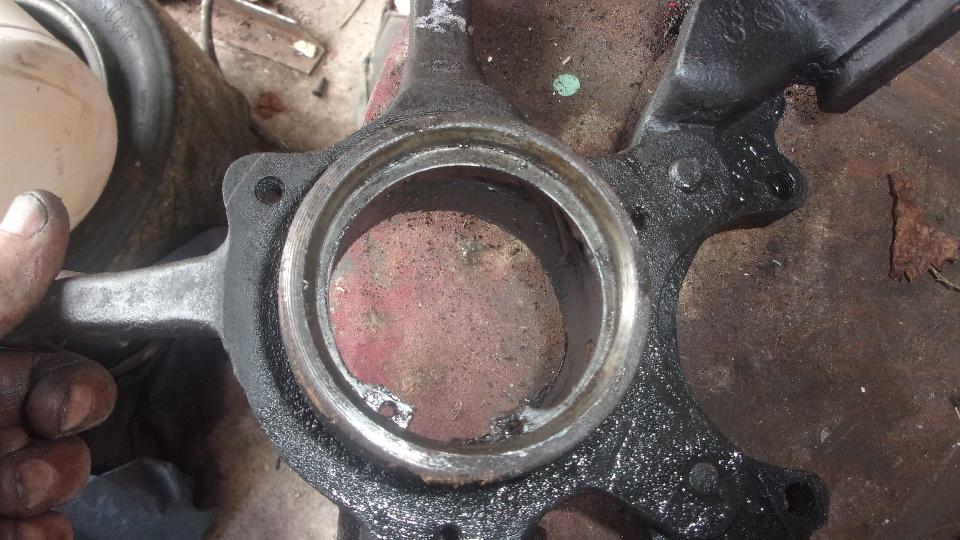
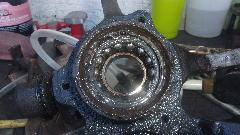
Clean up the rotating hub, ready for the new bearing. Remove snap rings both sides of the fixed hub.
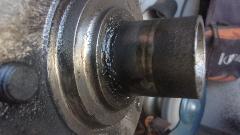

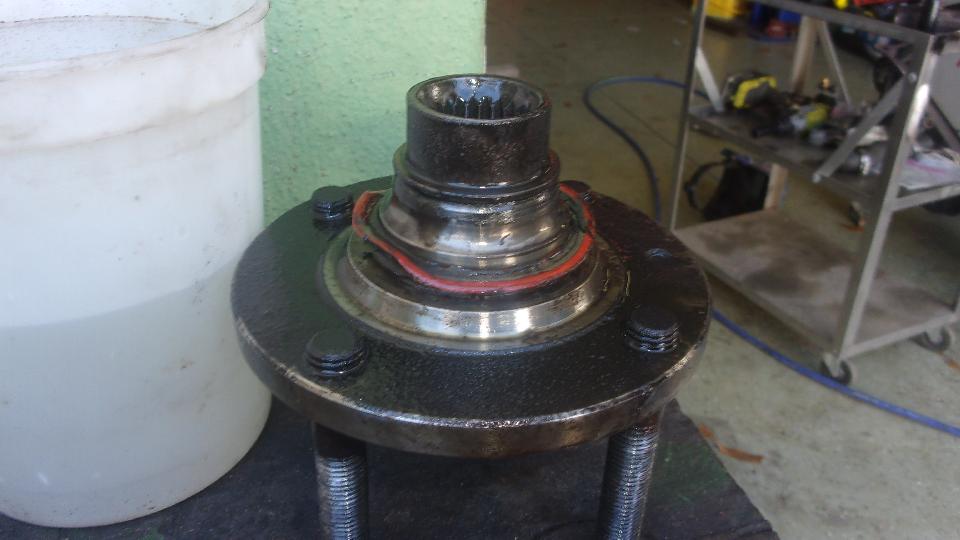
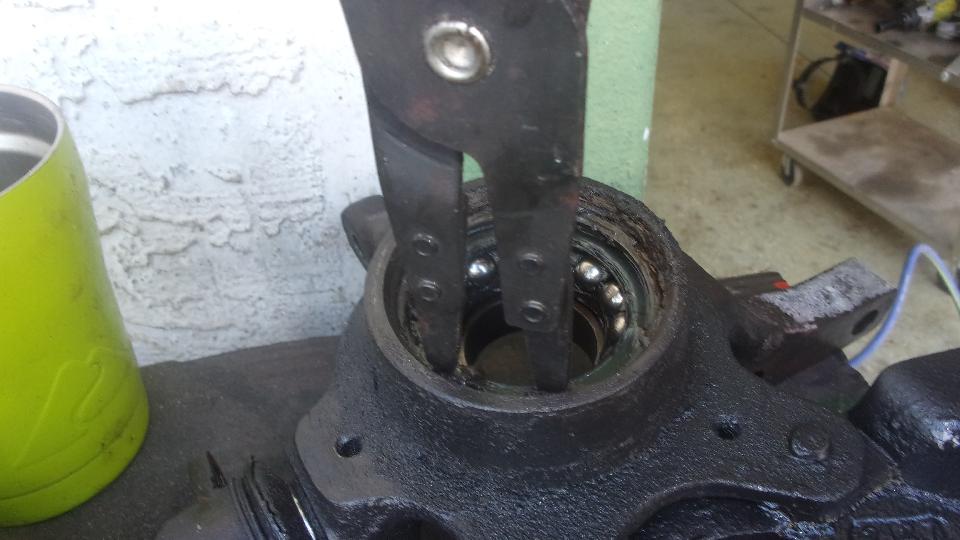
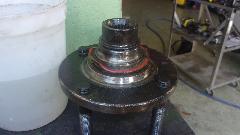
The 20-ton hydraulic press with pneumatic powered pump is real handy. Minutes later the failed bearing was on the floor. Clean out the fixed hub, and put one of the snap rings back in place.
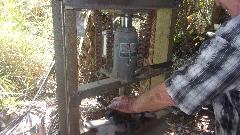


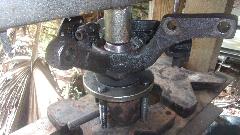
20 tons, no contest, just push the new bearing right back in place, and reinstall the second snap ring. And few minutes later that new bearing is pressed onto the rotating hub, ready to go back into the chassis. A few bolts later the knuckle assembly we loosely back in place, waiting for a couple new bolts and brake pads, time to quit.

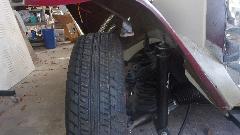
Checking out a very low tire on right rear of the MGA, having lost most of the air in the past 12 days. Couldn't find the leak last time, so now back to check again. Wheel off the car, another ten minutes with soapy water finally reveals two prior tire plugs, both leaking slightly. So punch out and re-do the plugs, doubling up on one of them. Not absolutely certain of perfect seal, but back on the road anyway. Now having a RR tire that may have a slow leak difficult to fix, and LR tire that is suspect of rolling slightly out of round, either a factory defect or possibly a mild carcass failure. If these give us any more problems it may be time for a couple new tires.
Sunday, February 20, 2022:
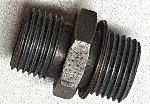
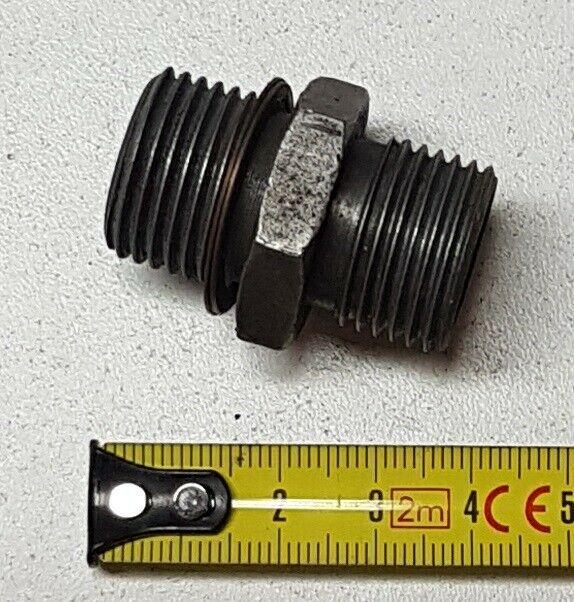
Posted new Part Numbers pages for oil hose adapter union and seal washer. This fitting is used at the oil filter when an oil cooler is installed. -- Two people asking about dysfunctional turn signals and brake lights.
Monday, February 21, 2022:
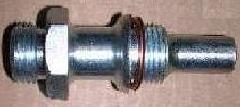
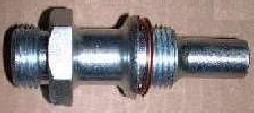
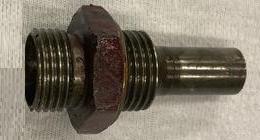
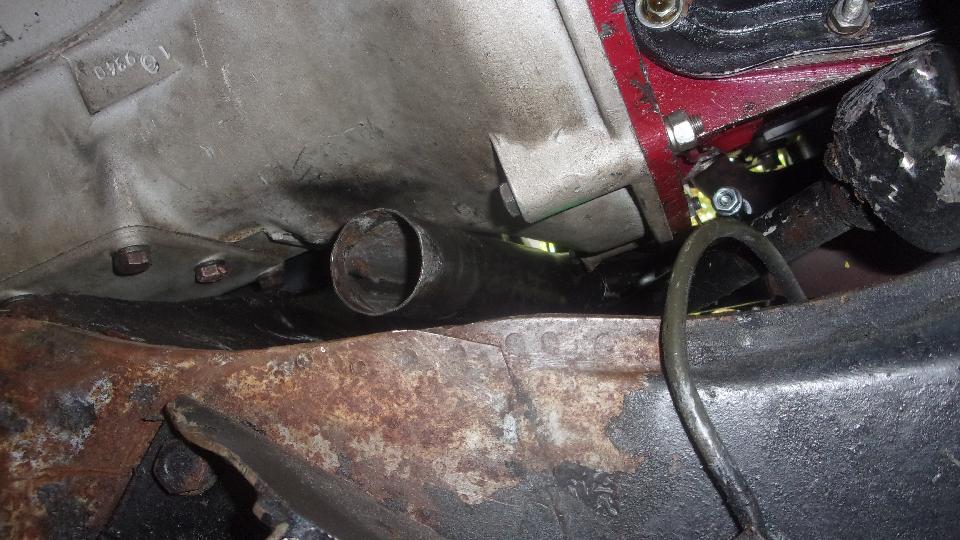
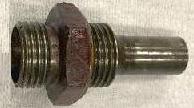 Posted new Part Numbers pages for oil pipe and hose adapter fitting early and adapter fitting late. These fittings are installed at right rear corner of engine block where the rear cross drilling brings out pressurized oil from the oil pump (after the pressure relief valve). Purpose of the long narrow tube extension is to block oil passage from the rear drilling into the main oil galley, so oil must come out into the external oil pipe routing to the oil filter.
Some discussion about fuel level sender unit sealing.
Finally remembered to sit in on John Twist's UML zoom tech session in the evening.
Tuesday, February 22, 2022:
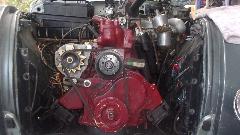
A friend in Germany has an MGA with a 48G-series engine (Gold Seal factory replacement engine). This needs some clarification before the car can satisfy the officials so it can be registered in Germany.
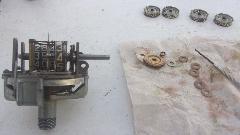
Another friend was trying to identify the style and vintage of an MGA gearbox before tear down, to be sure he will get the correct parts for rebuild.
Wednesday, February 23, 2022:
Good news. The All British Swap Meet and Autojumble in Wheaton, Illinois is definitely on for March 27th. See here for details: http://britishcarswap.info.
Thursday, February 24, 2022:
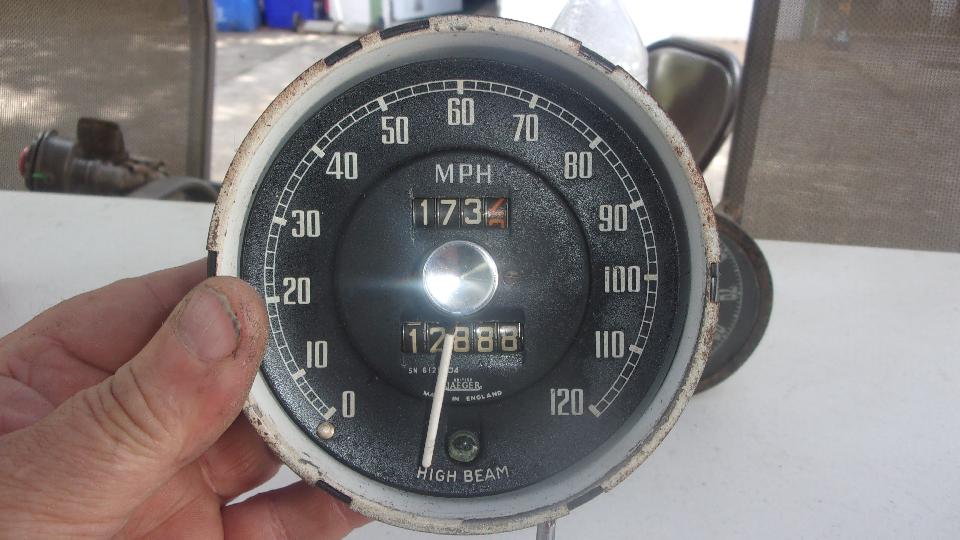
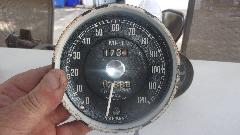
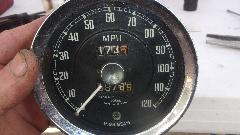
Today we finally get to look into a problem that has been bothering us for 17 months, and just wasn't high enough priority to before now. Beginning early September 2020 the main odometer began tripping up extra miles with every fuel stop. It might be anything between 30 to 400 extra miles recorded for 200 miles traveled. The excess was always in 10-mile increments, so we knew it was tripping over the 10's wheel extra times, but very tricky to ever actually catch it when happening (we did once or twice). I was pretty sure I knew what it was doing, and how it could happen. The "catch" that holds the 10's number wheel in place was losing its grip and letting the wheel trip over occasionally when it shouldn't. Result is that it has recorder nearly 44,000 miles in 20,000 miles actually traveled. Now I get to fix it, and since I took a lot of pictures, I also gt to write the new tech article..
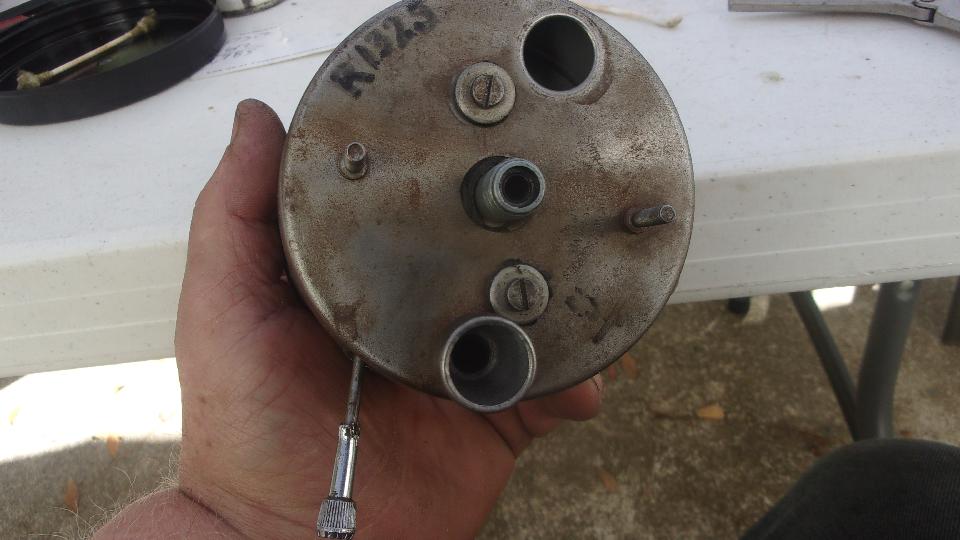
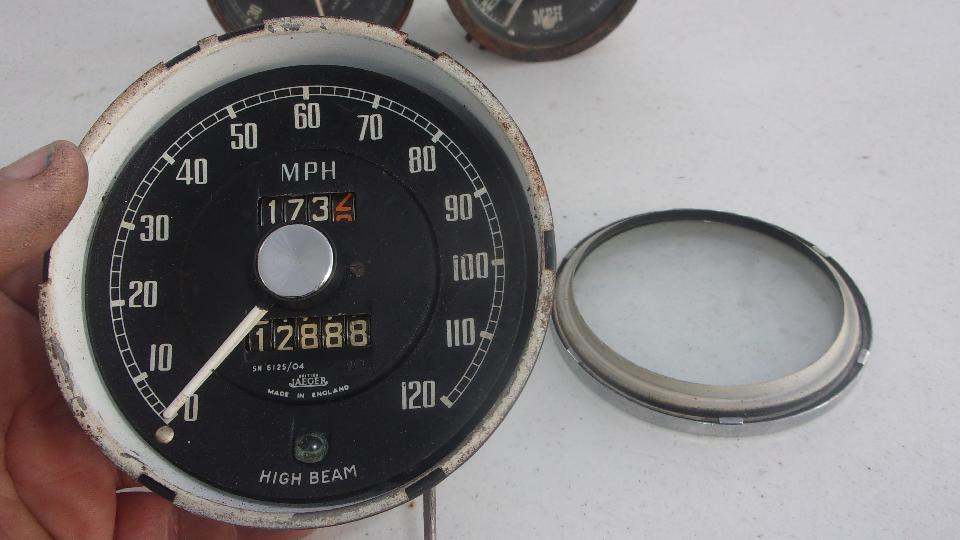
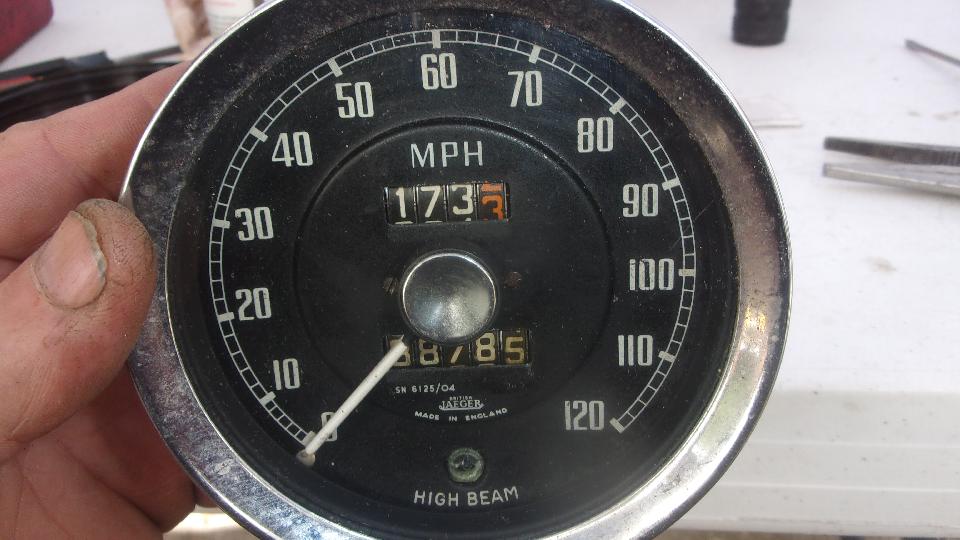
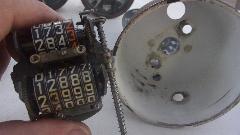
Took a few minutes with fingers to remove the instrument from the dashboard, Also one flight of stairs to the Tech Central attic to retrieve a couple scruffy looking used instruments, in case I might need some spare parts. The "R1325" written on the back of the instrument is Revolutions Per Mile from recalibration of the instrument in March 2004, following change of final drive ratio from 4.3:1 to 3.9:1. A twist of the trim ring removes the front lens and light shield showing trip miles since last fill up, and total miles (512,888 since first restoration in 1979-1986) including the recent overage.
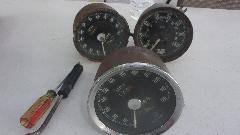

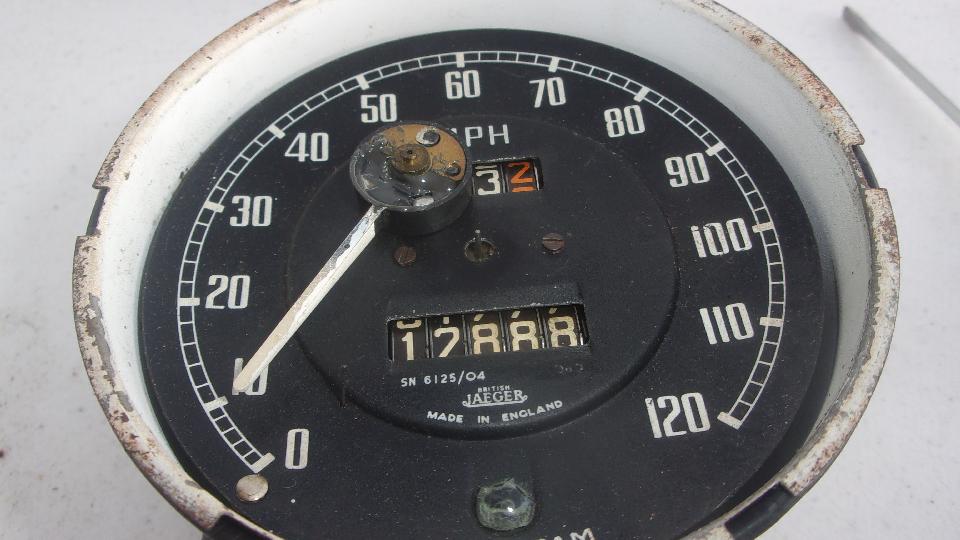
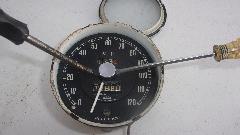
Before removing the speed needle we need to find and record the current set-up position for the needle. The
 needle normally sits against a stop pin when pointing at "0". The bright spot near the "O" mark is a rivet holding a spring wire. The wire comes through the face plate radially inboard of the "0" at the circular step in the face plate. Depressing the pin allows the needle to drop past it by gravity. Holding the instrument straight up gives the set=up position of the needle, somewhere below the "0" mark. There is tiny white dot located below the "0" at about minus 5 mph. That would be the normal set up point for the needle when new. But since this instrument was recalibrated for different cable speed in 2004, the set-up point is now different. Notice the needle pointing to "H" in "High Beam". That's where it has been for the past 18 ears, and that's where we want to put it when reassembling after service.

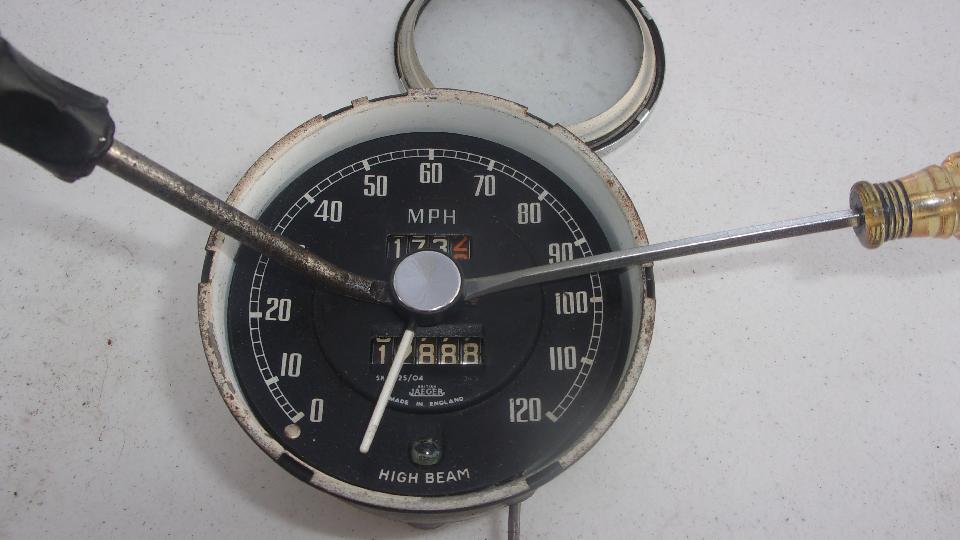
 I have a flat blade screwdriver with bent blade that is very hand for pulling the needle. Tuck in behind and give it a little nudge to pull straight forward on the brass hub, avoiding any pull on the plastic needle, and then needle is off the spindle in a few seconds without damage. Removing two tiny screws gets the face plate off.
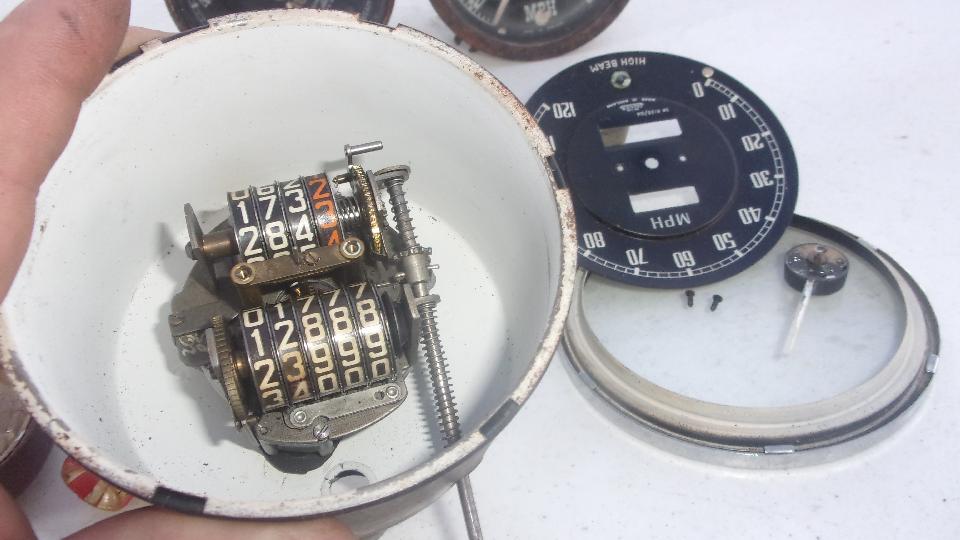
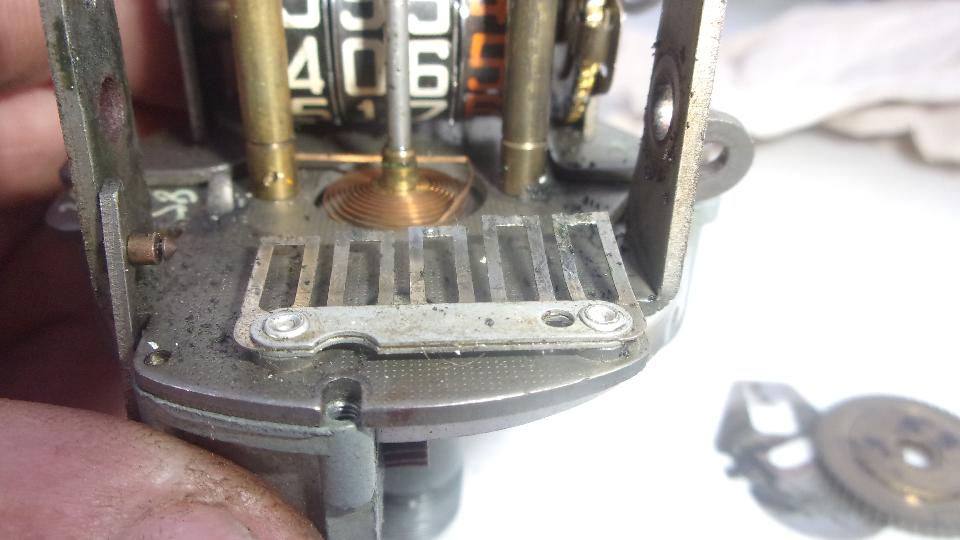
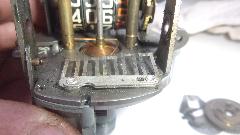
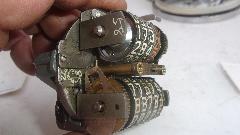
 Before removing the mechanism from the case, the reset knob needs to be removed from the shaft. This is originally secured with a small screw or a thin tapered pin, either of which can be difficult to remove after decades of corroding in place. I will skip extended recommendations and leave that to your ingenuity. Then removing two shoulder screws from the back with fat washers and rubber grommets gets the works out the front. There should also be a rubber gasket between the works and the back shell, all part of a slightly flexible damper scheme.
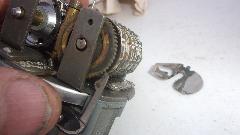
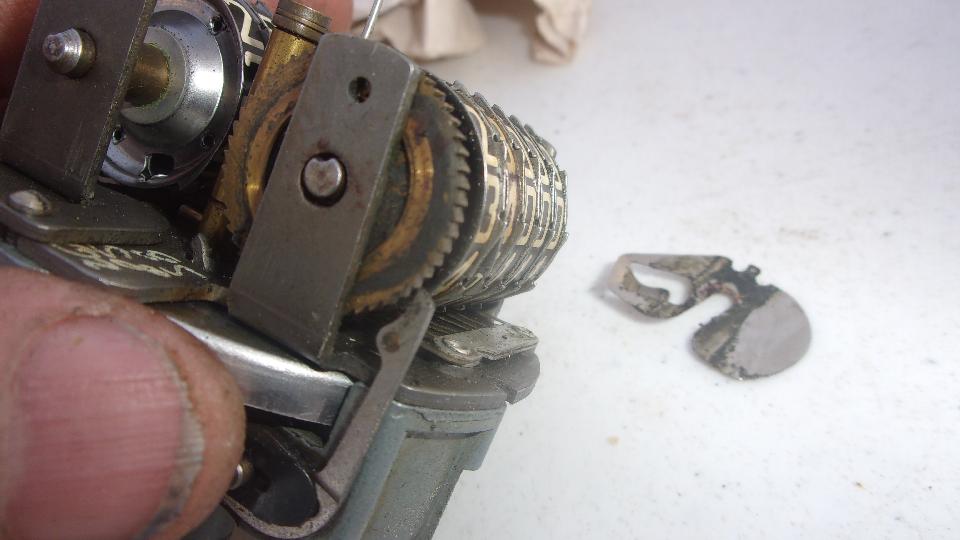
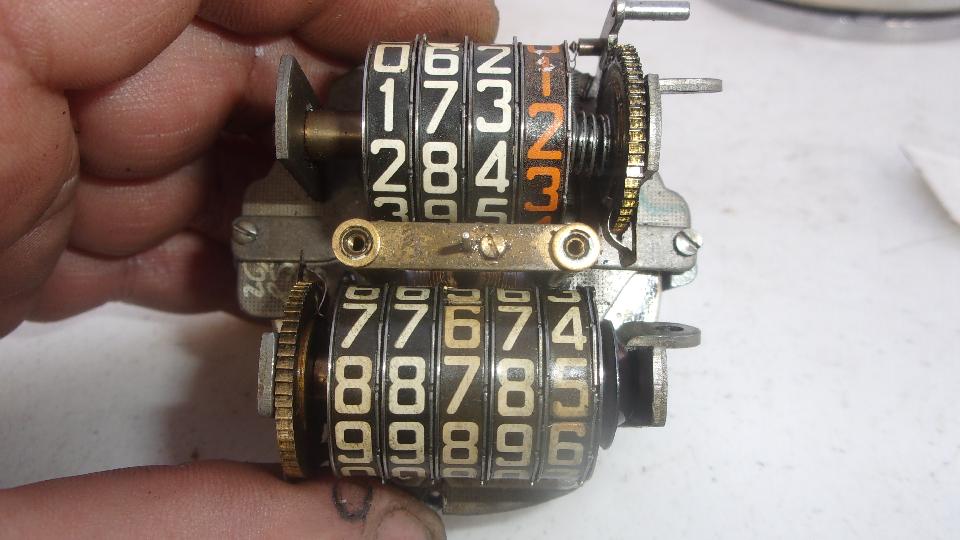
 Notice a ratchet pawl at top of the center picture at right, and another one at bottom of the picture at far right. This is a good time to disconnect the tiny springs and get the small ratchet arms out of the way (both of them). Then the trip reset shaft has to come out, because it is definitely in the way of removing the lower odometer shaft. For that remove the split pin from theh reset gear, and slide the shaft out the top.
Next task is to remove a thin spring steel shim from the left end of the odometer main shaft. This piece serves as a retaining ring, locking into a groove in the shaft, as well as carrying a friction finger to provide a little drag on the ratchet wheel.
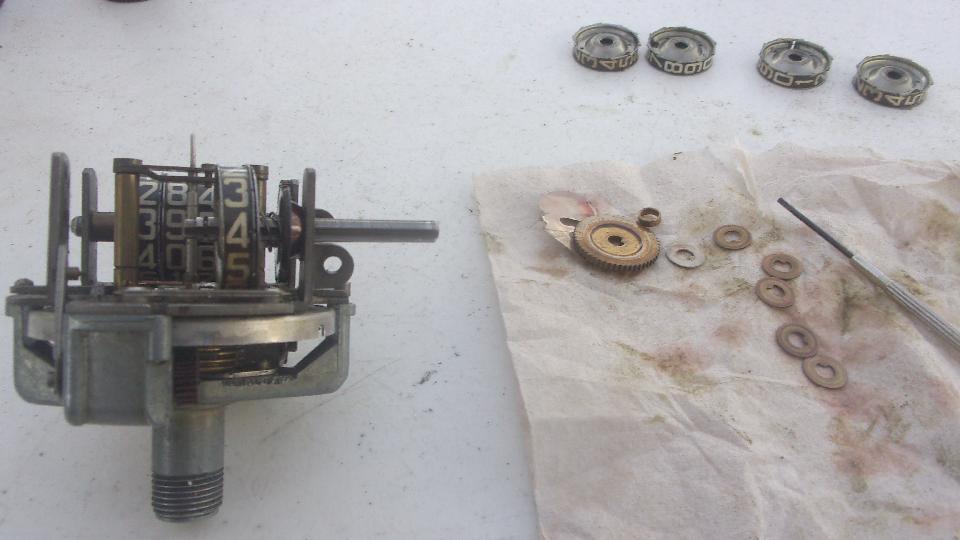
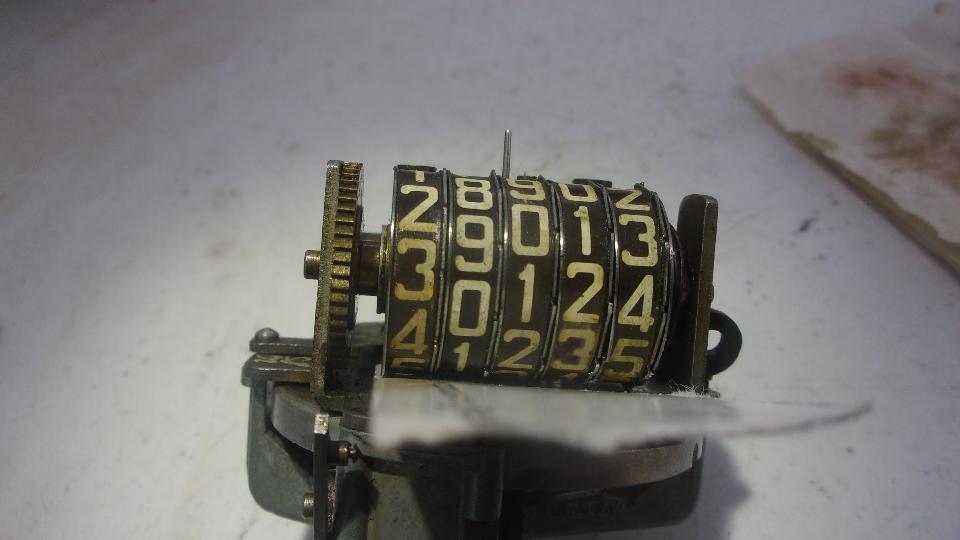
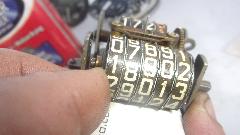
Then begin pulling the shaft out the right side while removing and collecting and recording all of the little parts
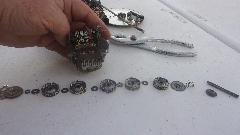
 that will come off the mechanism. Retaining friction shim, ratchet wheel, short tube spacer, steel washer, brass washer, number wheel, brass washer, wheel, washer, wheel, washer, wheel, washer, wheel, washer (did I get up to 7 washers and 5 wheels yet?), followed by a thin driving disc a coil spring, a cup washer, and of course the shaft.
That got us down to the meat of the problem, the five finger comb that locks each of the number wheels in
 place when they are not supposed to move. In this case the two fingers on the far right were substantially depressed, not doing their job, especially the second from right that should control the 10's wheel. Solution here was easy enough, gently pry the comb fingers upward to give better sprig contact force with the number wheels. If you ever get into one of these things, don't be surprised if the comb may be in much worse condition from dirt, and corrosion. I cleaned all the metal parts with lacquer thinner (not touching the visible face of the number wheels). When dry, all the little bits got a minimal touch of light oil just rubbed on between fingers before reassembly.
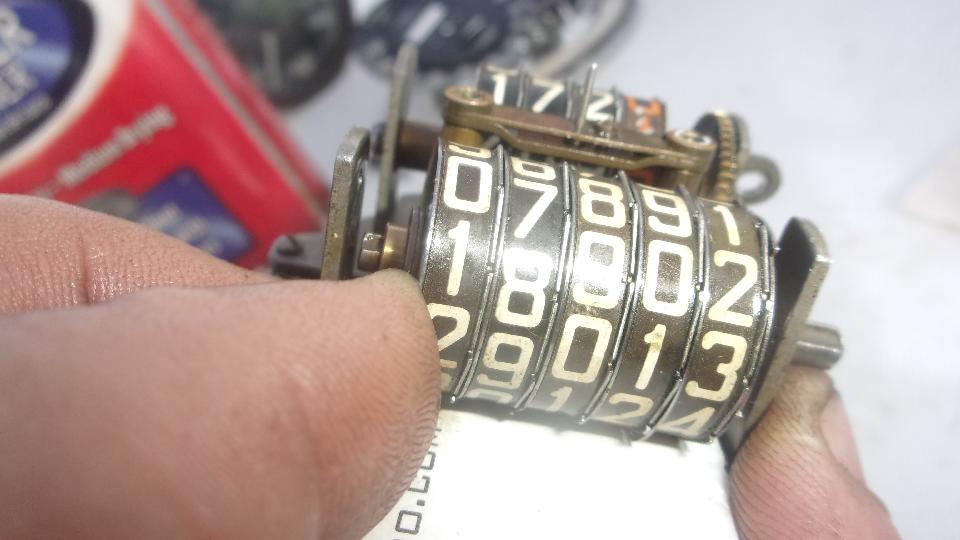
Reassembly is the reverse of disassembly. Start the shaft from the right, and begin installing cup washer, coil spring, driving disk, brass washer, number wheel, washer, wheel, etc. Near the end, brass washer, steel washer, spacer tube, ratchet sprocket and the locking friction disc. The astute observer may notice a piece of a business card just below my fingers, inserted between the number wheels and the latching comb. Not absolutely necessary, but it makes it a lot easier to assemble the wheels with latching teeth all around each one, and it allows easier repositioning of the number wheels to set the odometer number you want afterward.

Last piece on the shaft is the friction shim disc engaging the groove in the shaft. Turn the disc around until the

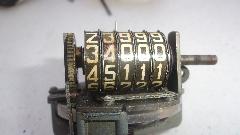
 little protruding finger latches into the retaining hole in the side bracket. You may notice the numbers 25 and 58 written on the mechanism. These are the factory numbers for original reduction ratio, 25x58=1450 for original Turns Per Mile for the original 4.3:1 final drive ratio. The 58 tooth ratchet sprocket has more recently been changed to 53 teeth for the lower ration 3.9:1 final drive gears, 25x53=1325 TPM. Also notice I have not disturbed the prior 173 miles on the trip odometer, but I have reset the main odometer to show true current total mileage. You will have to imagine a "4" in front of that, and I do not claim the additional 150,000 miles on the car before I bought and restored it.
 The rest of "reverse of disassembly" requires re-installation of the reset shaft and gear (with springs), and the delightful little chore of reinstalling the two little tension springs on the ratchet pawls. For that you can get creative with a sewing thread or a long thin screwdriver from an eye glasses repair kit. Finished and reinstalled back in the car, only driven 6 miles in slow traffic before posting this report. Both odometers work okay (so far), tripped over the 10's wheel exactly one digit as it should. Not sure yet how well I positioned the speed needle, will have to wait for that report.
Friday, February 25, 2022:
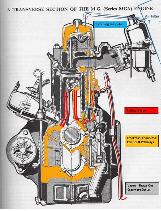
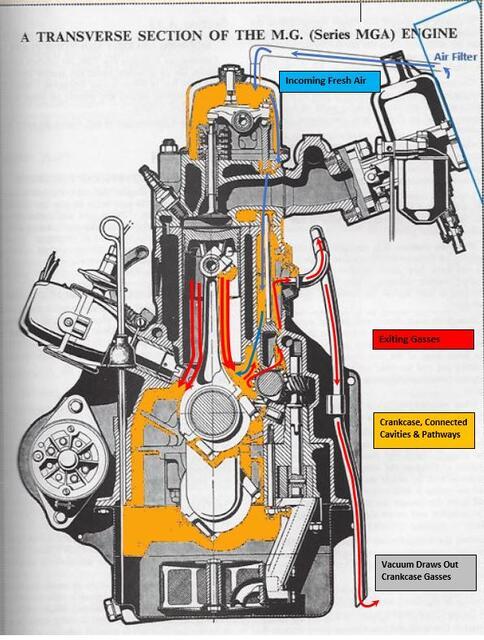
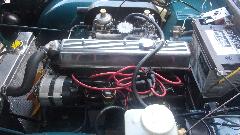
Start the morning with a neat illustration of crankcase ventilation in the MGA and early MGB engines. Illustration is compliments of Bob Shafto in New Hudson, MI, USA. (Click for larger image).

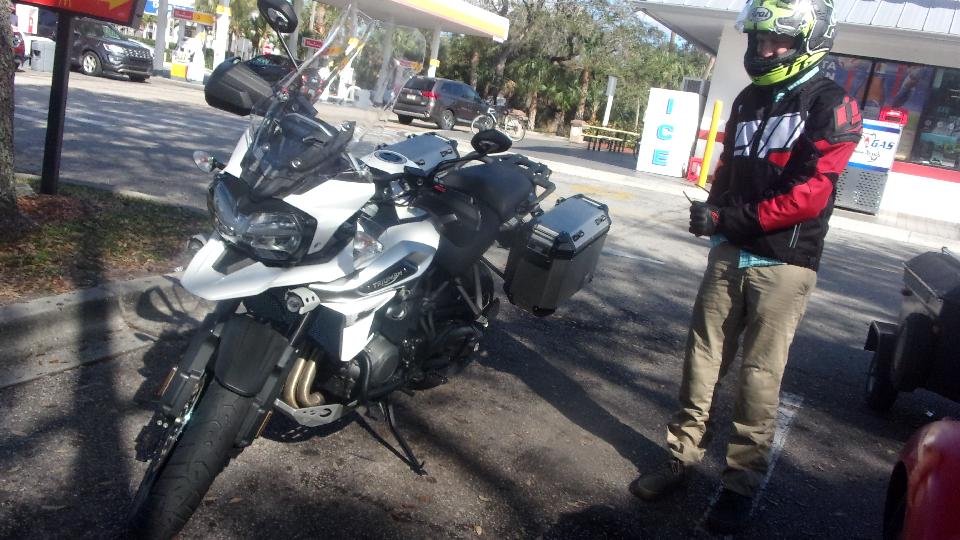
Incidentally we bumped into a new Triumph motorcycle, 2018 model in the car park. Story is it got stuck in a shipping container during the 2019 Covid fisco, and this guy recently bought it cheap at auction. Like a new car, all electronic with lots of neat features. Push a button and the windscreen slopes down to racing position, or rises up for touring position. Oh, and seat heaters?
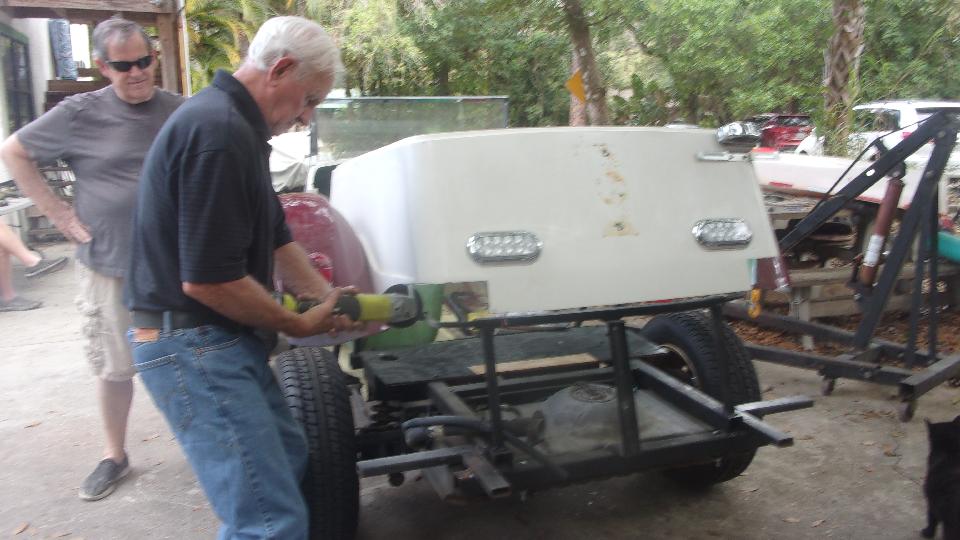
Then off to Tech Central, knowing we won't get to do anything for the MGA on a Friday. Hey, the Chevette Excalibur seems to be getting closer to drive away. A little trimming around the back to clear frame extensions while fitting rear bumpers. By day's end it would have the spare tire mounted on the rear end. Some consideration on changing the original Chevette coil springs to get the front end lower.
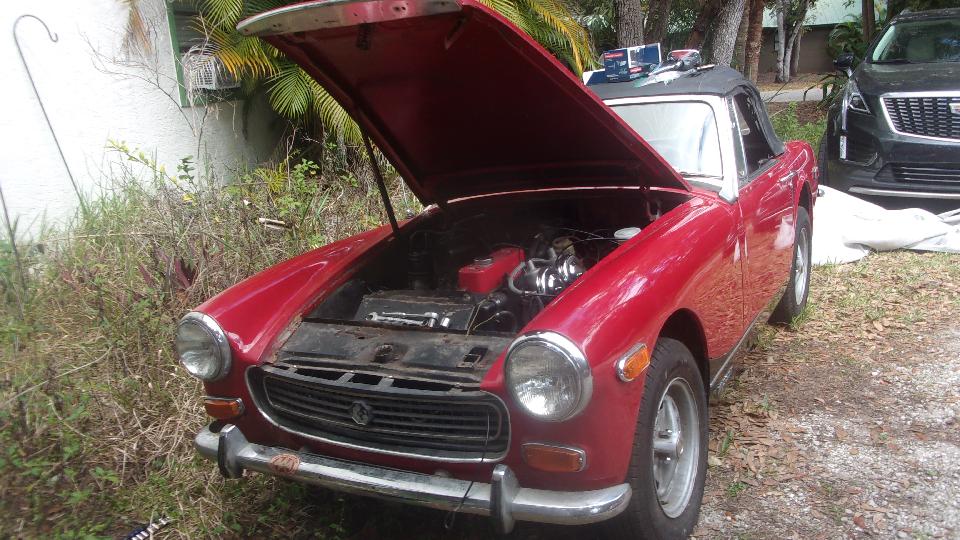
The MGA friend showed up today to pick up a dozen of the thumb screws I put together a week ago. The rusty Midget is still here, tightening the fan belt to squelch a squeal, and likely still needing some more clutch bleeding. New brake pads for the Rabbit race car showed up, $140, ouch, just because one of the old ones delaminated.

The Magnette has the front engine mounts secured (again), now working to repositioning the gearbox rear mount, shortening the propshaft (for the third time), and re-routing and hanging the exhaust system in a more preferred configuration. A Jaguar dropped in with a complaint about a clunking noise in the left front when hitting road bumps. Not sure anyone figured it out yet, but suspect rotted rubber bushings in the anti-sway bar.
Saturday, February 26, 2022:
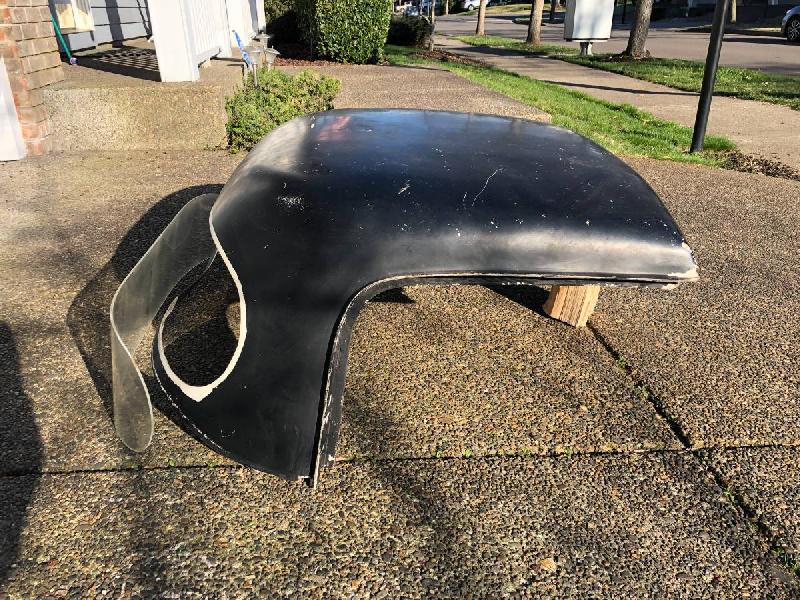
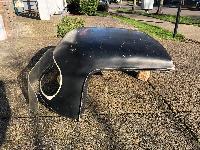 Started the day with some new pictures lifted from a current Craigslist ad of an unknown MGA hardtop that we first found 14 years ago. Still not restored, still unidentified, looking for a new home again. Hopefully some day someone may restore this one and give it a new life back on another MGA.
Last night when I tried to charge my cell phone the charge port connector went bad (broken) so it cannot be plugged in. Okay, been there done that before, and sure it cannot be repaired, so off to buy another new cell phone (#5 since 2014).

 By now I know well enough not to walk into another Verizon store, and the nearest Best But was not opening before 11-am (what's the world come to?), so we ended up in a Walmart to pick up a cheap compatible replacement phone (just taking the easy way out). Charge the new phone, and in the meantime upload (push) the old phone Contacts List to the Cloud for backup. Swap the SIM chip from old Orbic phone to new TCL phone, and the new one immediately works to make and receive calls (score one for the good guys). Now needing to download the Contacts List from the Cloud to the new phone (maybe easier said than done). Something to keep Navigator busy for a while.
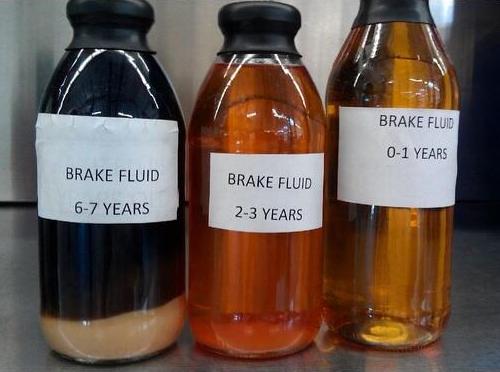
 While he was monopolizing my phone, I was uploading a new tech page on periodically flushing brake fluid, not about how, but more about why it is important.
So navigator is systematically learning what it's like to spend hours on the phone with tech assist (who don't know what they're doing), having to call back, negotiating to get them to do anything useful, and finally finding his own way to solve a problem after tech has failed. (Good thing he likes new toys). He got a $5 credit to connect to the Cloud, which didn't help. But he did get two dumb phones to connect to each other with Bluetooth, and managed to transfer the required Contact List (in multiple pieces from different folders?). Give that man a cigar. The new phone is working (all in one day), and now just a matter of getting used to the new op-sys, adjusting a few sittings, and feeling better about getting back to normal.
Sunday, February 27, 2022:
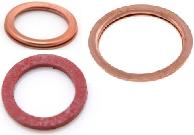
I finally finished it, the new tech page for Sealing Washers, copper and fiber, used on MGA (and some other cars). These are now indexed by size, ID x OD x Thickness to help identify the part numbers and where they are used, and maybe facilitate local sourcing.
Killed another hour plus dealing with Verizon web site and chat and customer service and tech assist, trying to find and download the Users Guide for the new model cell phone. Simple instruction, last line in the introductory booklet, said,
 "Download a User Guide from Verizon.com/support", but of course it wasn't on that page, and no obvious link to find it anywhere. Chat said Dunno, but gave me a phone number for Customer Service, and then left me hanging. The "800" number was multiple choice through multiple menu, disconnected me twice, but I finally got through to a live voice. Result there was "Cannot send you the User Guide", followed by sending me 10 email messages, each with a one-line tip for something unrelated. Then I was transferred to Technical Assistance (with another long wait), then transferred once or twice more before some nice lady would finally look at the first web page referenced in the introductory pamphlet, and figure out the route through the directory tree to the link for the user Manual. While I was on hold a lot of that time, I just Googled for the document and found it on a different web site, a 76 page booklet. Go figure. As usual, do it yourself is often quicker than the standard information channels. I may figure out how to work this thing yet.
Monday, February 28, 2022:
Quick fix to the Sealing Washers data for size of the copper washer for carburetor lower jet bearing. Apparently the ones I had in hand to measure were incorrect, a bit too small, but someone set me right on that point. Put a couple of new ones on my next order list.
Then a trip to Tech Central on a not so busy day. The Magnette was being fitted for some new pipes/ I think they did not quite fit, even after a second pass, but the owner is very persistent, so eventually it will. The Excalibur was getting rear bumpers installed, avd I think that was finished today.

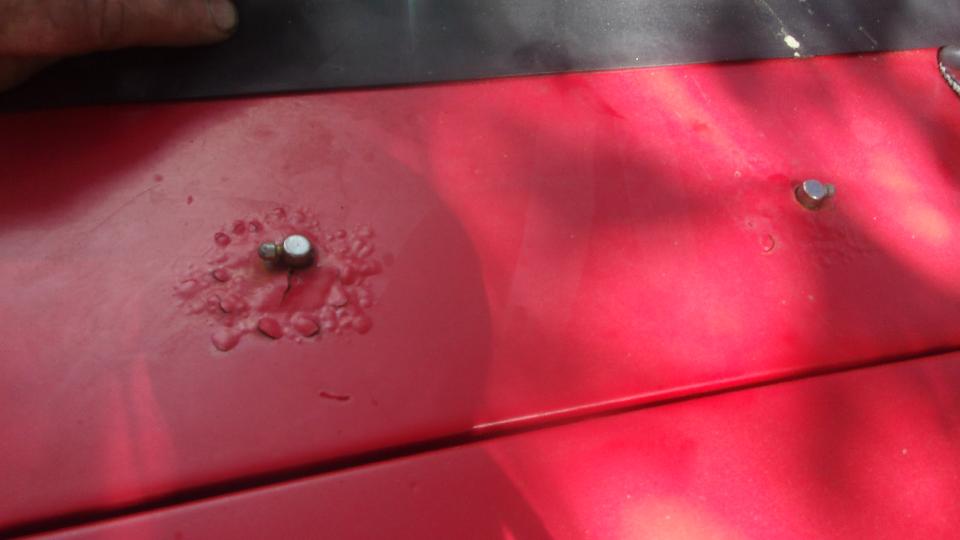
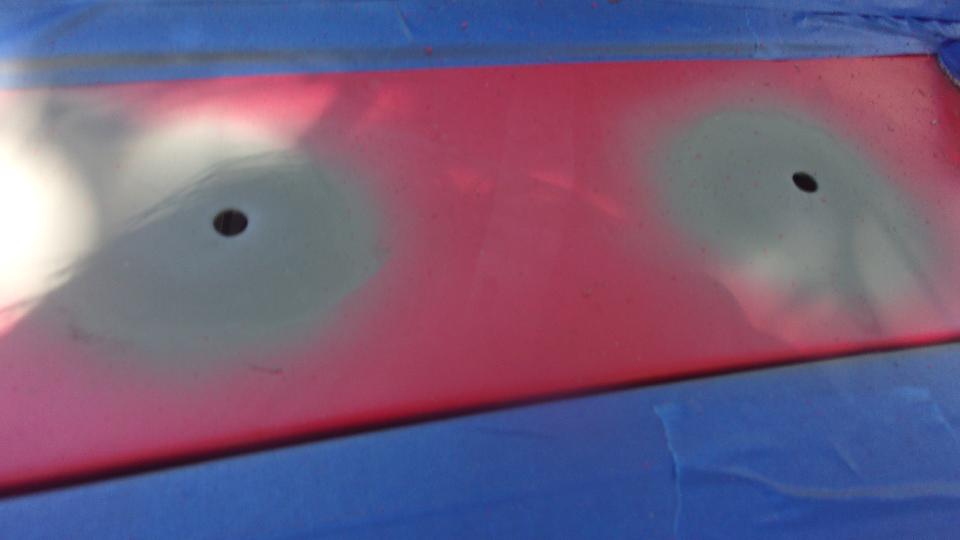
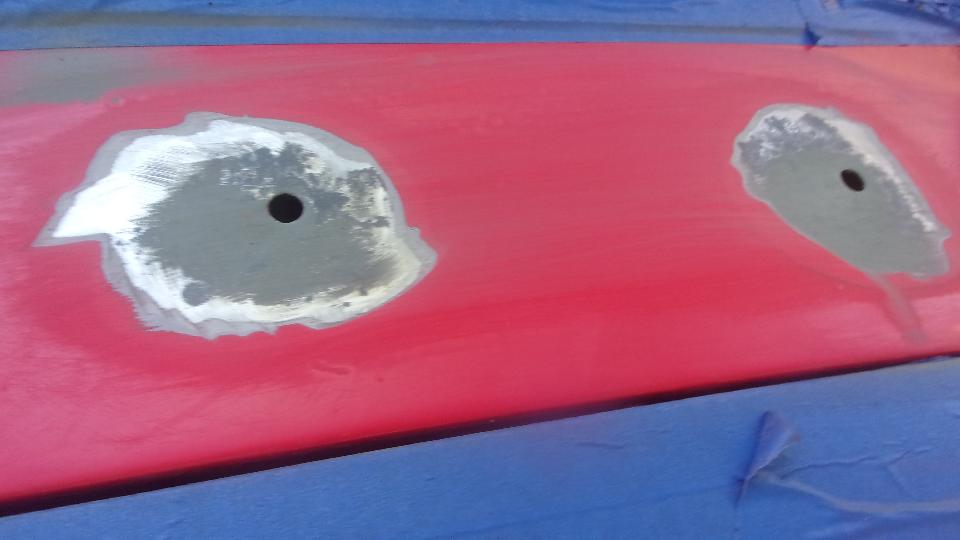
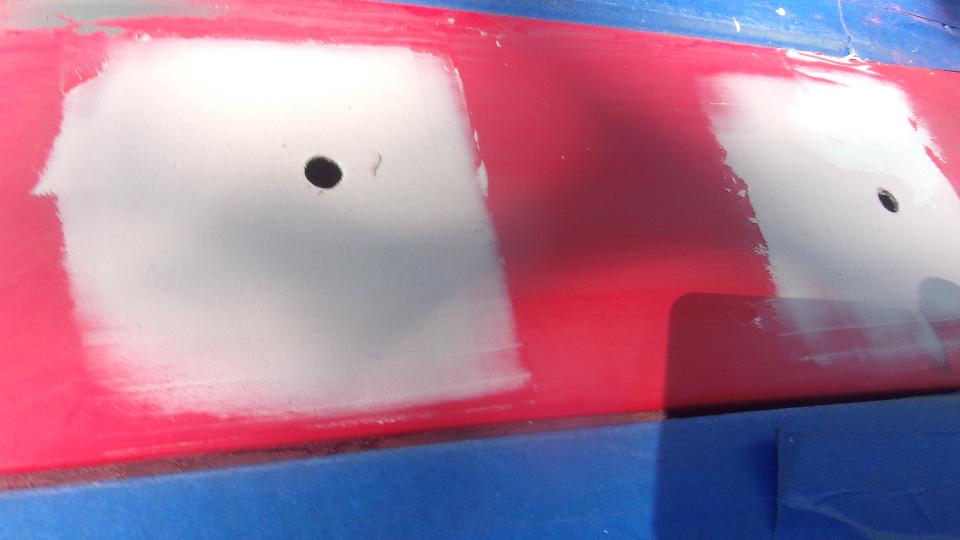
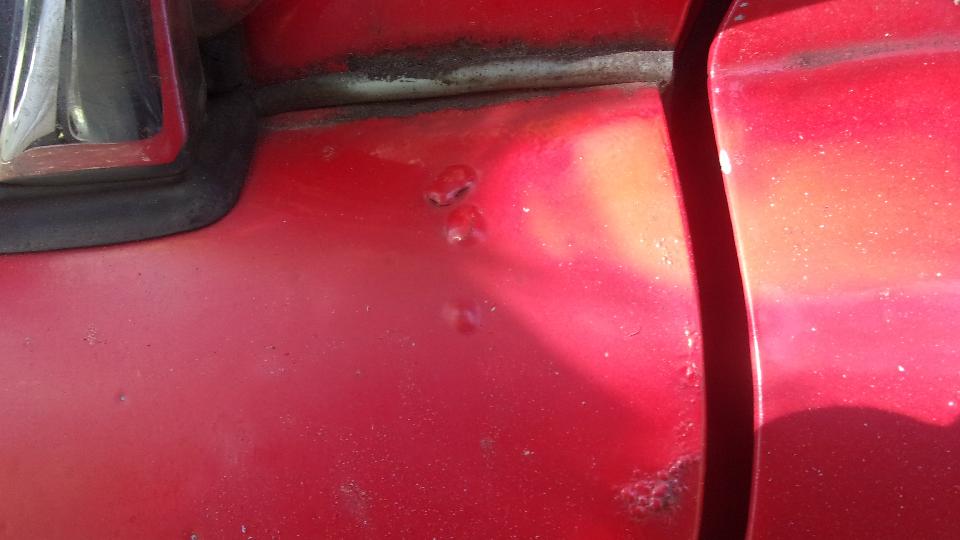
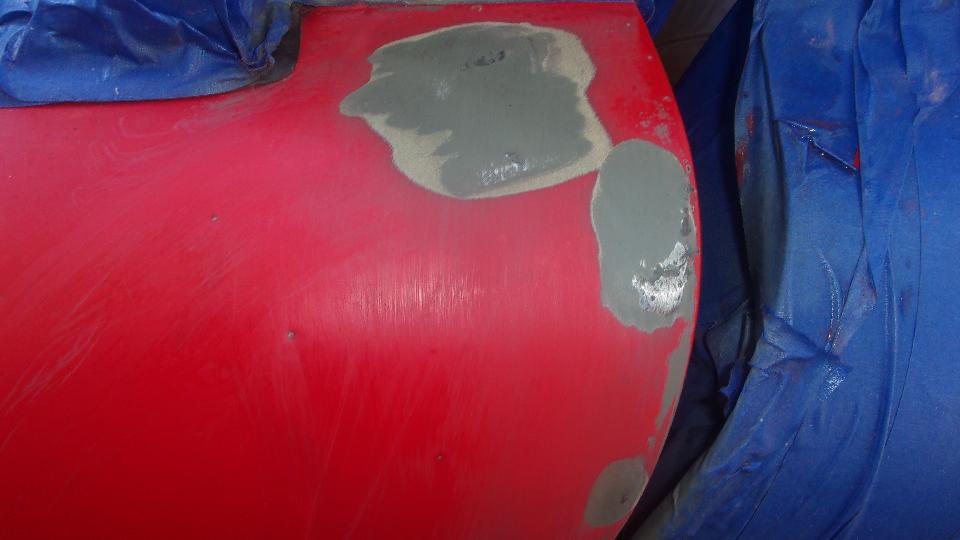
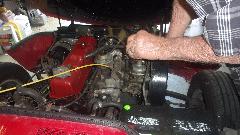
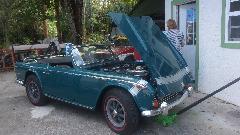
On to my MGA to do some sanding, grinding, primer, filler, sanding, primer, etc to fix some blistering paint around the screen washer jets. It wasn't all that ugly, and surprised me that it wasn't perforated, but best to fix these things before the sheet metal goes away. Grind it a little more, not to bury too much rust.

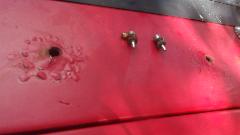
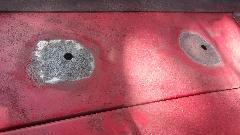
I washed it lacquer thinner to bare metal, then gave it a shot of etching primer to attack and hopefully bind to any corrosion than might be remaining in the pits. Sanded flat for inspection, looking pretty good, so on with bit of bondo to fill it flush with original paint surface. And a bt more primer before running short on daylight.
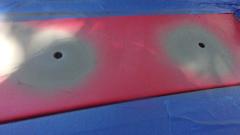
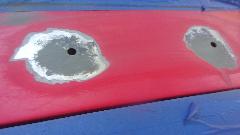
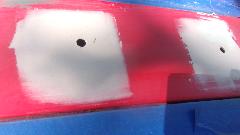
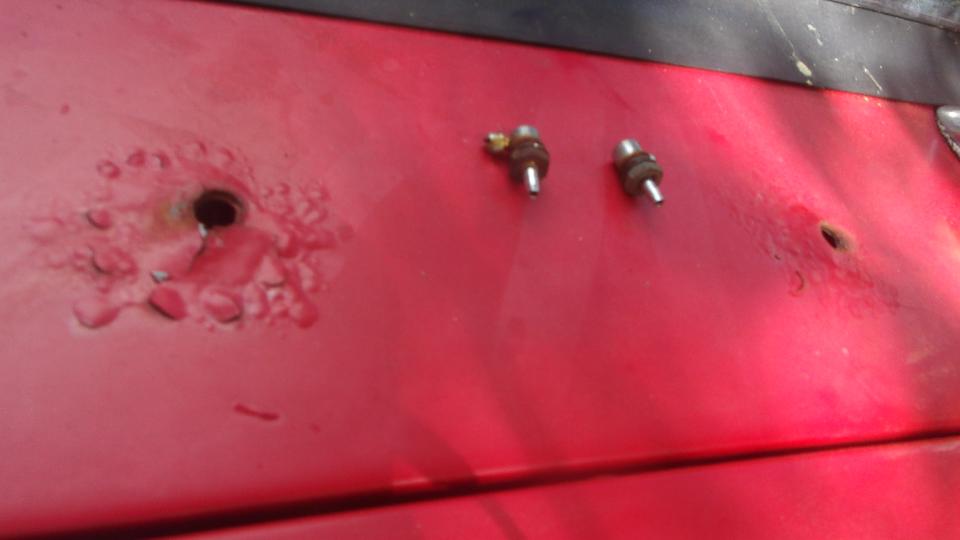
Meanwhile, another spot on top of the left front wing, just in front of the door was getting similar attention. It did have a couple of pin holes here, but easy to fill, and I hope they don't come back any time soon. Not finished yet, likely take this up again tomorrow.


In the evening another little chore to update the CMGC club web site for upcoming Spring Chicken Run, and the season driving schedule (as it exists so far).
|