The MGA With An Attitude
MGA Guru Is GOING MOBILE - (April 1 - April 15, 2018)
Sunday April 1, 2018:
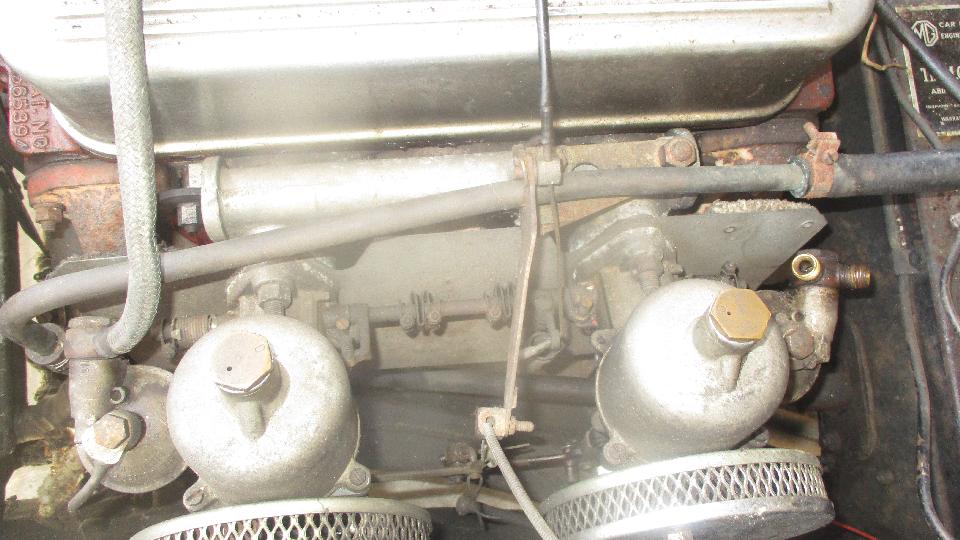
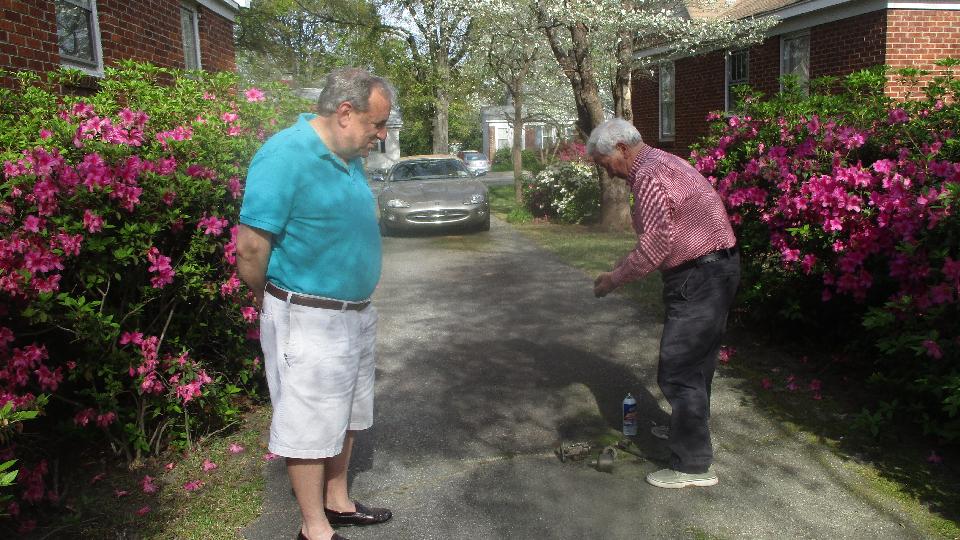
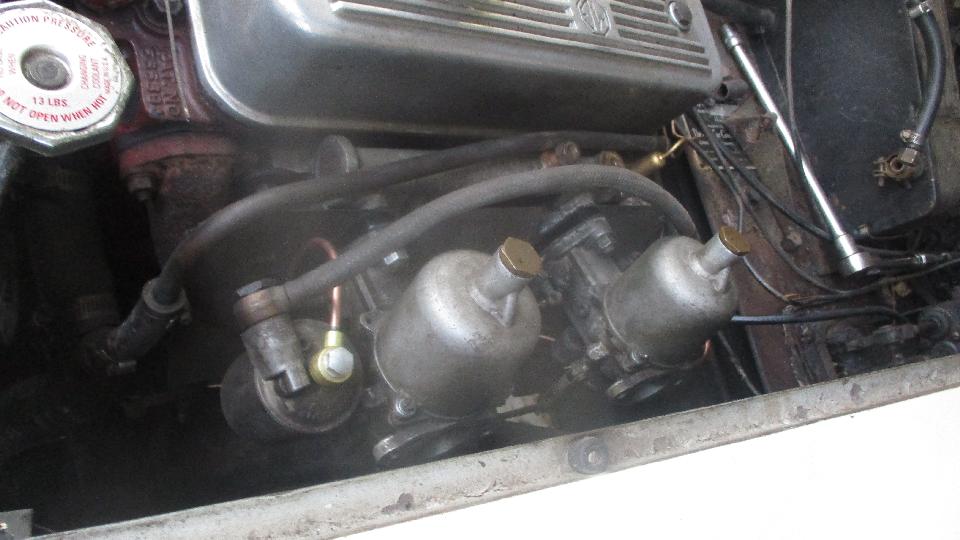
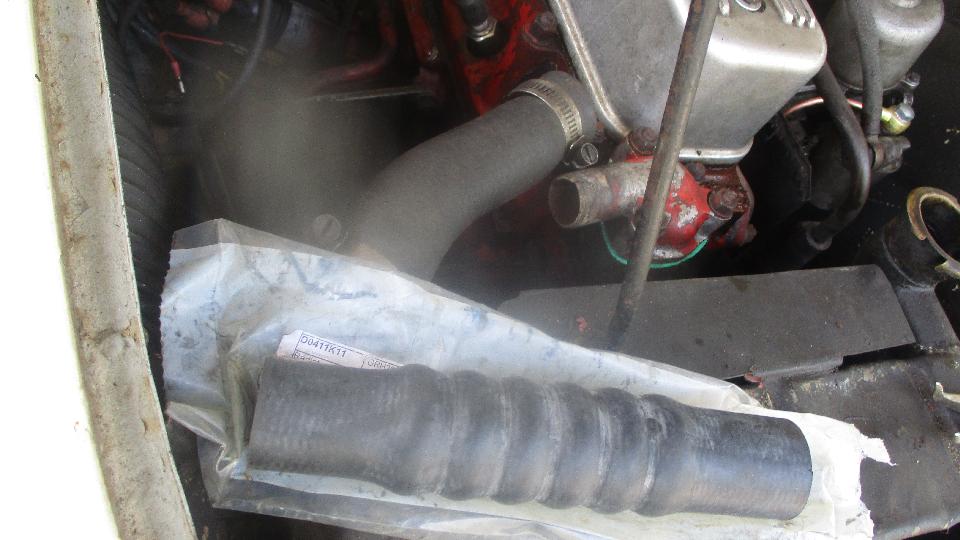
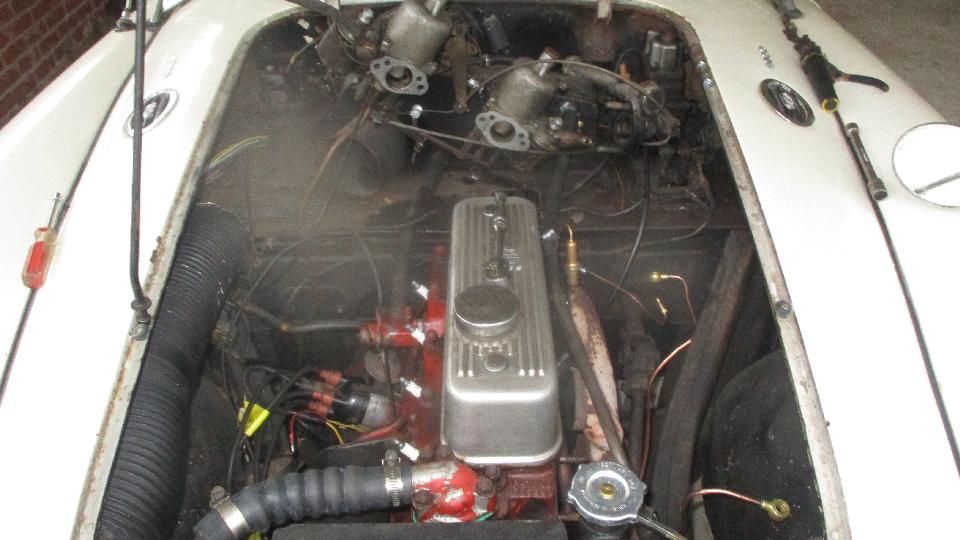
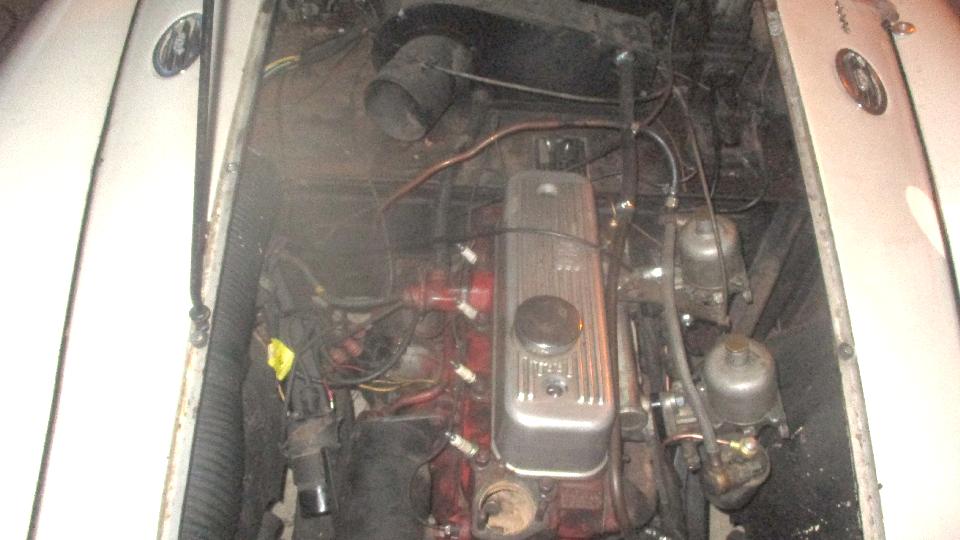
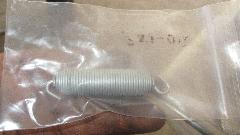
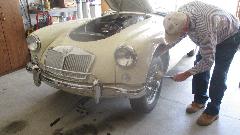
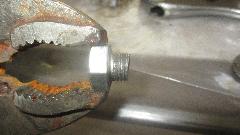
Back to Ansel Gantt's MGA in Columbia, SC. I dunno how he can always be so cheery in the morning. Determined to rebuild carburetors today, and it turned out they had lots of problems. Float chambers were loose so fuel was dribbling out of the banjo bolt joint. Control cables had been attached with crimp-on end fittings, so had to cut the wires for disconnect. Heater return pipe ran through the throttle bracket, so had to disconnect hose. One throttle return spring was disjoint and non-functional. One choke return spring was missing with the carb stuck on full choke. One vent/overflow pipe with banjo fitting was missing as well as the fast idle cam and associated fittings. The grin was about to be erased from of Ansel's face. Carburetors removed, those pancake air filters have got to go, front and rear choke arms had been swapped. Rear float chamber cover bolt had been hacksawed to half length to hold the cover without the vent banjo, and I have no idea how the float chamber could have been vented other than to leave the cover bolt loose.


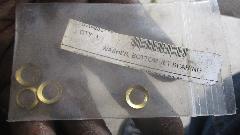
I began by collecting some parts that would be needed for the rebuild. Yes I keep these things in the trailer, because we do lots of carburetor repairs. One choke return spring, four Viton grommets for float chamber banjo bolts, two float cover gaskets, two fiber vent washers and two aluminum washers for vents on float covers, and two cork gaskets for the jet bearing gland nuts, two lower jet bearing seal washers, one upper jet bearing seal
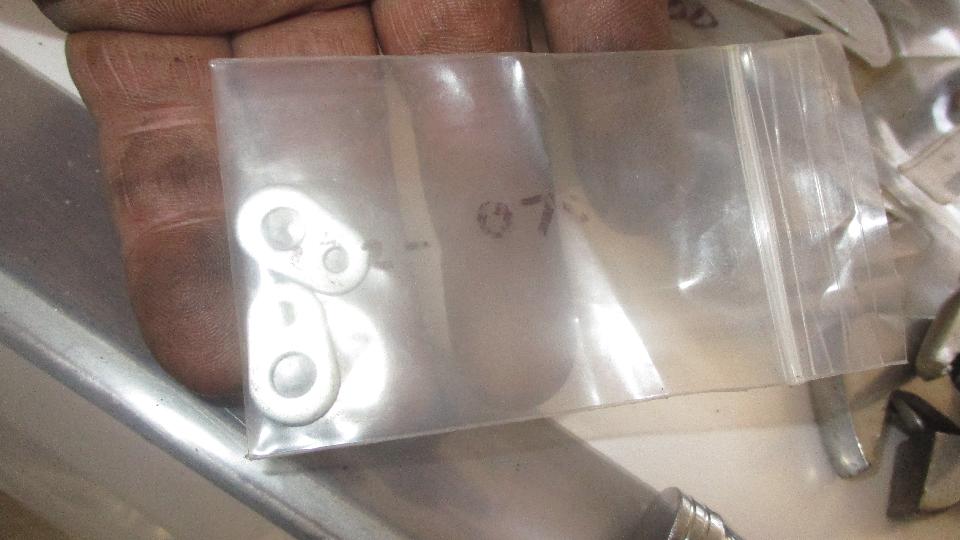
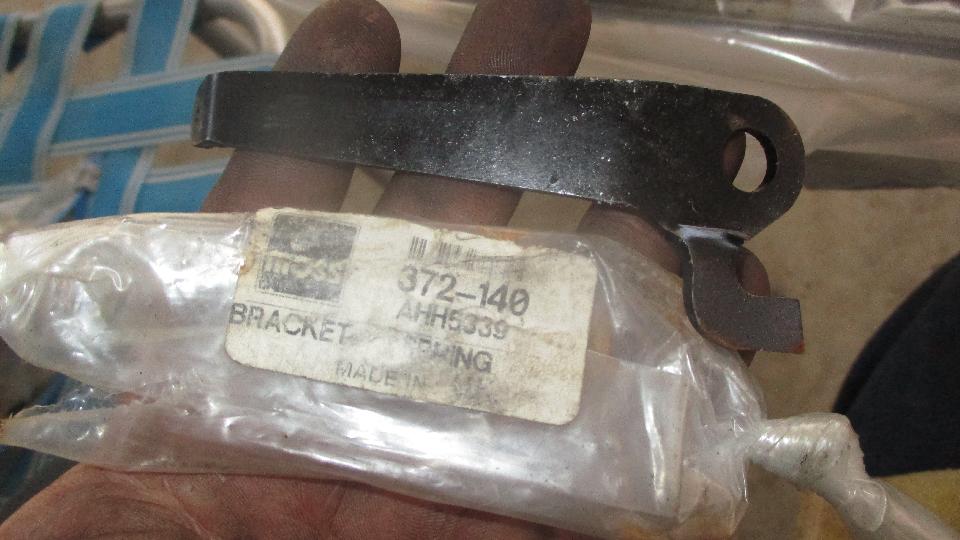
 washer, and half a dozen internal tooth lockwashers for the dashpot cover screws. I noticed the float chamber banjo bolts were 1500 style (on this 1600 car), so pulled out the metering needles to check the part number. These turned out to be #6 needles, correct for the 1600, so we had hybrid carburetors (not a big surprise by this time). Also collect one new throttle cable return spring one spring upper connection fitting, and the spring bottom bracket that goes on the rear carb lower mounting bolt.

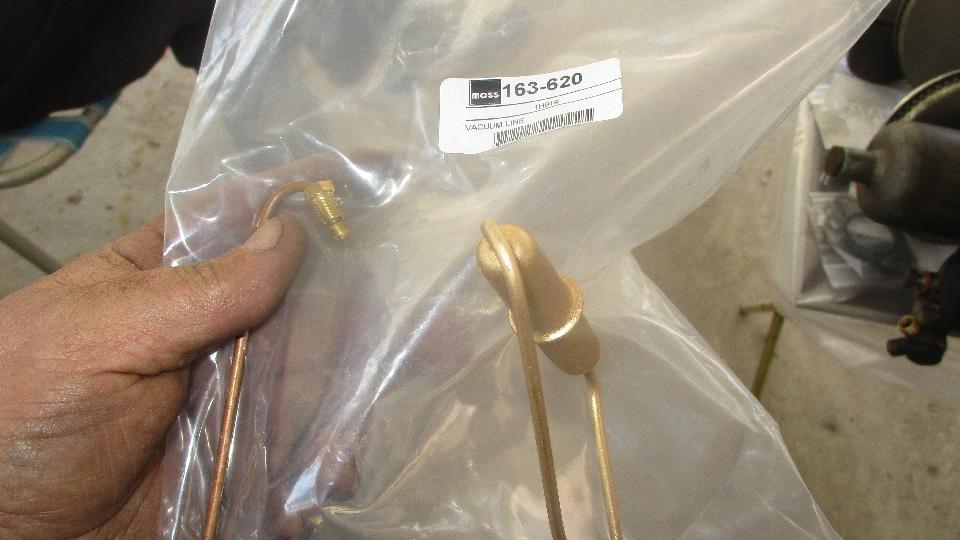
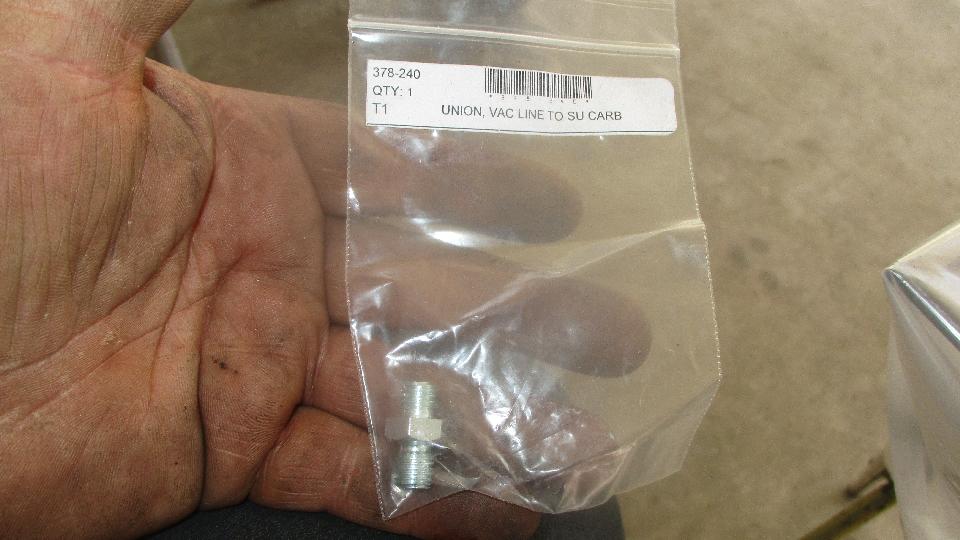
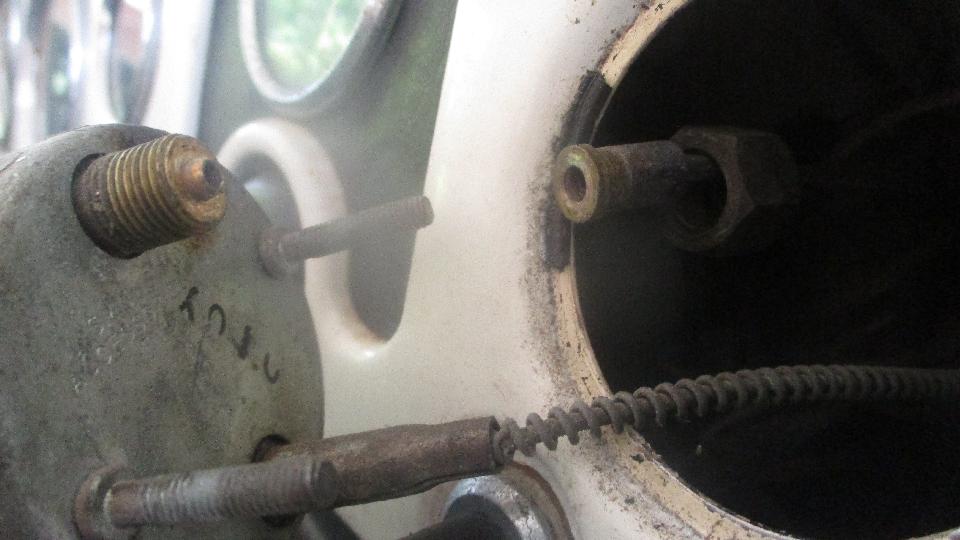
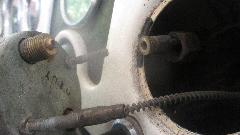
Wanting to install a new vacuum advance signal pipe, I retrieved a new adapter fitting for the rear carb vacuum port.
 I knew there were two alternate threads in the throttle body and this adapter was too large, no go. Fortunately the new vacuum pipe has a small male threaded flare nut and compression olive that would screw right into the port on the carb, so that was good. now I suppose there is only one adapter fitting for the alternate larger thread (and that adapter would require a female flare nut on the vacuum pipe).
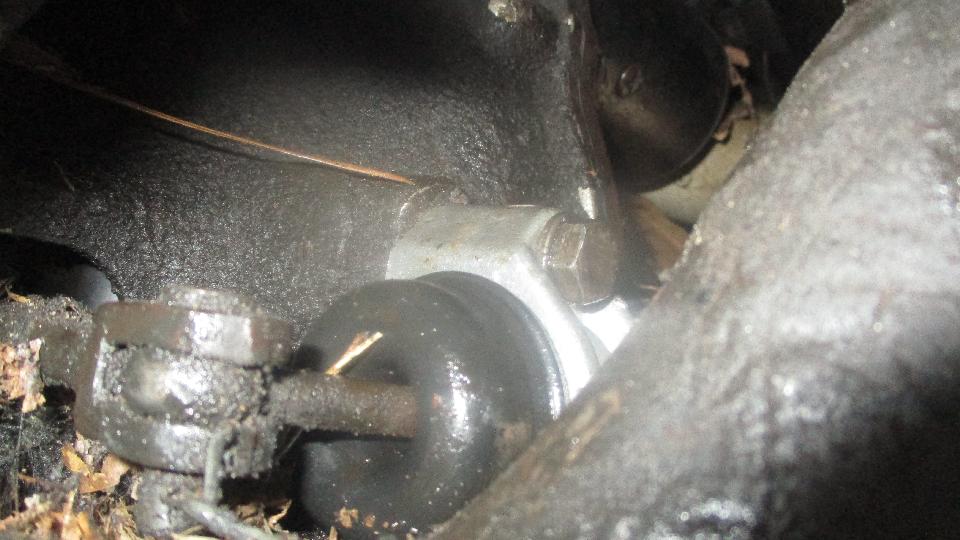
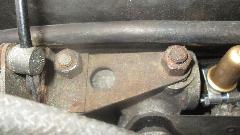
 The engine ground cable was attached between the heater shelf and rear stud on the cylinder head, so we had to relocate that to the proper location across the left engine mount. That left the rear stud on the cylinder head available for the P-clip to secure the vacuum advance pipe (as original). Not too long then to attach the vac pipe to the distributor and route it around back of the engine to the rear carburetor location, and attach the P-clip at the back and the bracket for the fuel separator bulb on manifold bolt second from the rear. Neat (but no picture yet). The engine ground cable was attached between the heater shelf and rear stud on the cylinder head, so we had to relocate that to the proper location across the left engine mount. That left the rear stud on the cylinder head available for the P-clip to secure the vacuum advance pipe (as original). Not too long then to attach the vac pipe to the distributor and route it around back of the engine to the rear carburetor location, and attach the P-clip at the back and the bracket for the fuel separator bulb on manifold bolt second from the rear. Neat (but no picture yet).
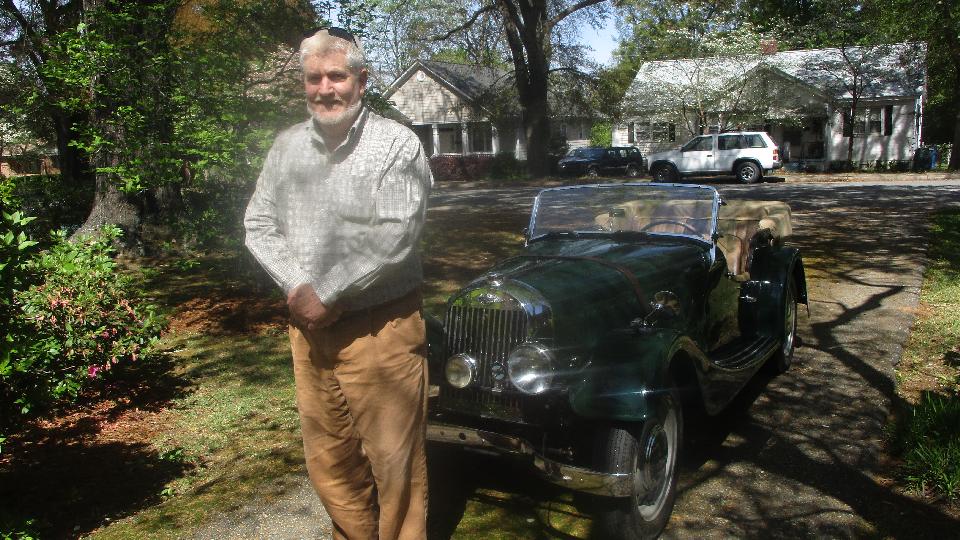
Some friend was summoned, just wanted to drop in to meet and greet. He was driving a Miata,
 readily acknowledging it was a modern substitute MG.
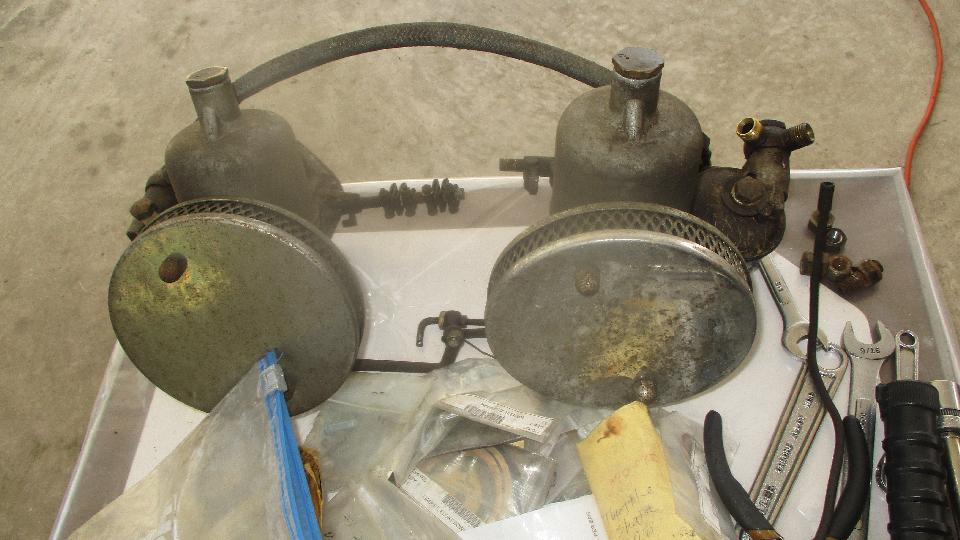
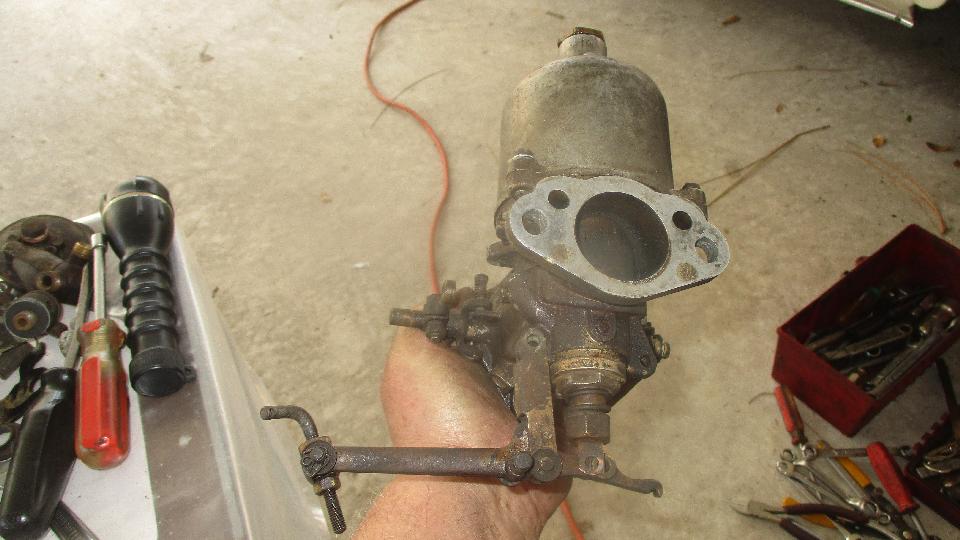
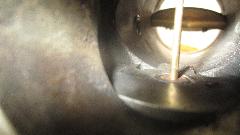
Began to disassemble carburetors, remove air cleaner canisters, no air cleaners inside, why am I not surprised? No one knows how long this car was driven with no air cleaners before it was parked, but apparently a long time. Remove banjo bolt and float chamber, missing split pins or clips on some of the clevis pins, wonder why the choke linkage hadn't fallen apart. Disassemble jet bearing assembly to discover two missing lower seal washers, one missing upper seal washer,and one missing seal cup washer.

 Collect some more parts and continue on. Ansel ran off to pick up some carb cleaner, heater hose and lunch, then set on to cleaning carbs. We got another sidewalk supervisor for a while, friendly folks in this neighborhood.
About to swap choke arms front to rear when I discovered a more serious problem. Reason there was no

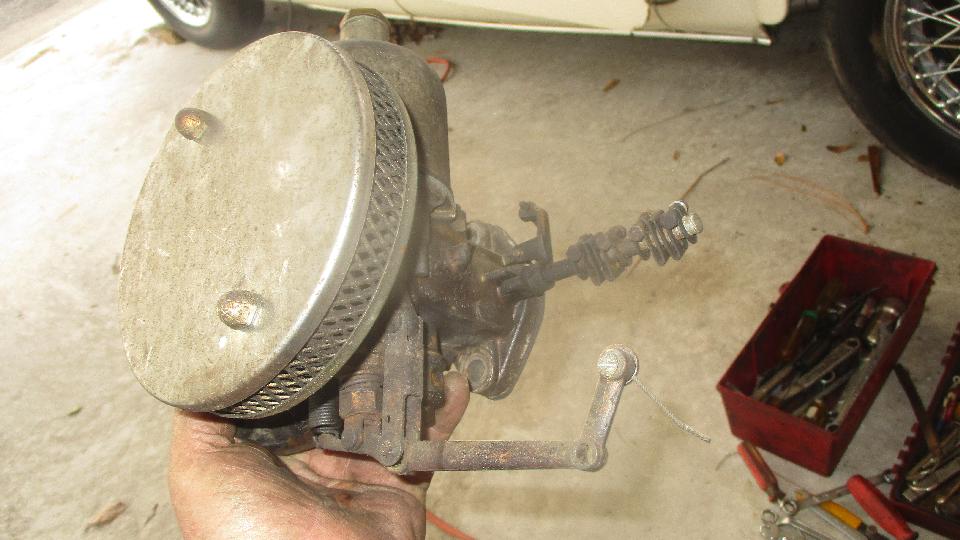
 fast idle cam was because the mounting boss on side of the front carb was broken, would not hold the shoulder bolt, and the hole had been plugged with epoxy. Grrrr. Trying not to curse the DPO (or the DPM), will think about a possible fix for this later. Meanwhile, get the carbs cleaned up a bit and reassembled with nice Teflon O-rings for jet seals, and all new gaskets. Keep adding bits to the shopping list for a Monday order for more parts.
Before reinstalling the carbs we needed to install a new tach drive cable. The old one had apparently been disconnected for along time, the adapter fitting on the engine was pretty dirty, and a broken end of the old inner cable was stuck in the drive spindle. Okay, unbolt and pull the adapter out of the block, extract the drive spindle from the housing, and drill out the fragmented wire fibers of the inner cable end. After fighting reassembly for a while, souse the male threads with carb cleaner, wire brush the threads for about five minutes to get the new cable nut to screw onto the adapter. Nothing is easy with old cars, and everything takes longer than anticipated.

Finally got that back together, hung the carbs on the studs and called it a night. Will place another parts order tomorrow.
Monday April 2, 2018:
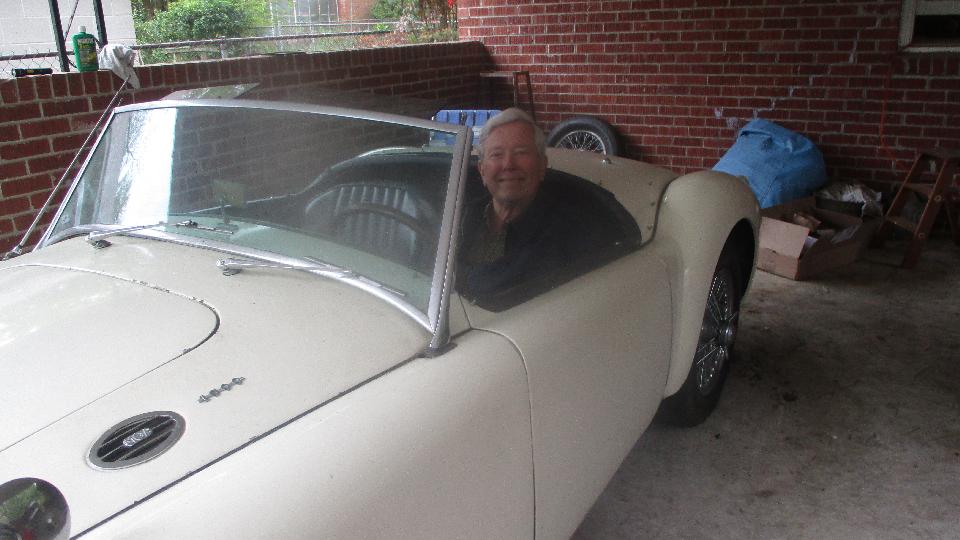
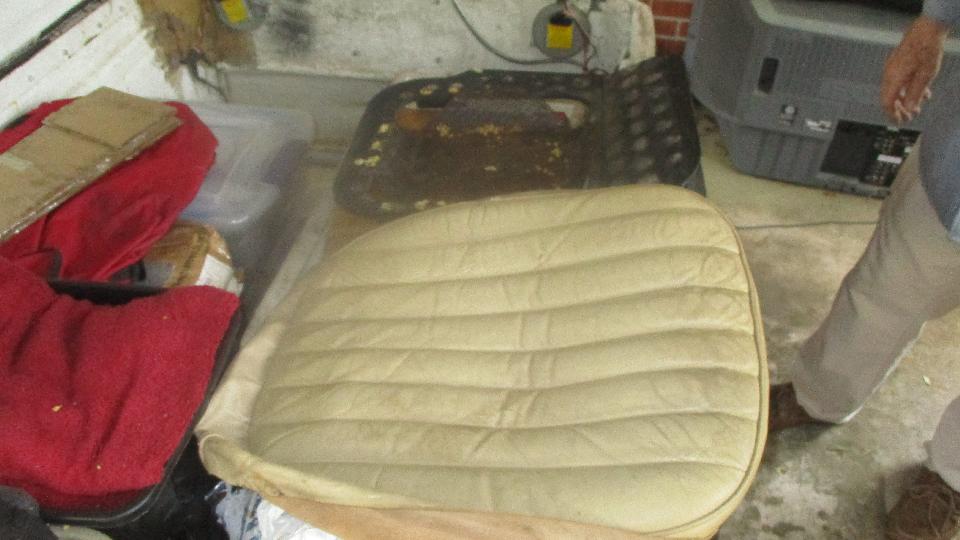
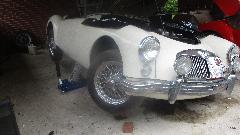
The important push his morning was to review yesterday's photos and put together an order list for mostly carburetor parts, and see that they got ordered today. In the process, I noticed Moss Motors has begun their annual Upholstery Sale. Yee-haa! Time to order the new seats and convertible top for my MGA, pushing 20 years old and tatty, way over due.
Tuesday April 3, 2018:
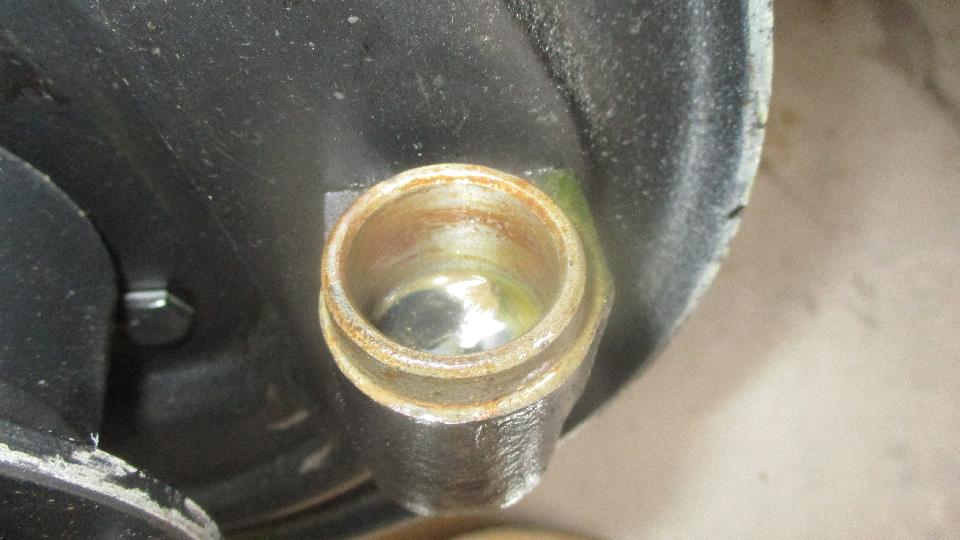
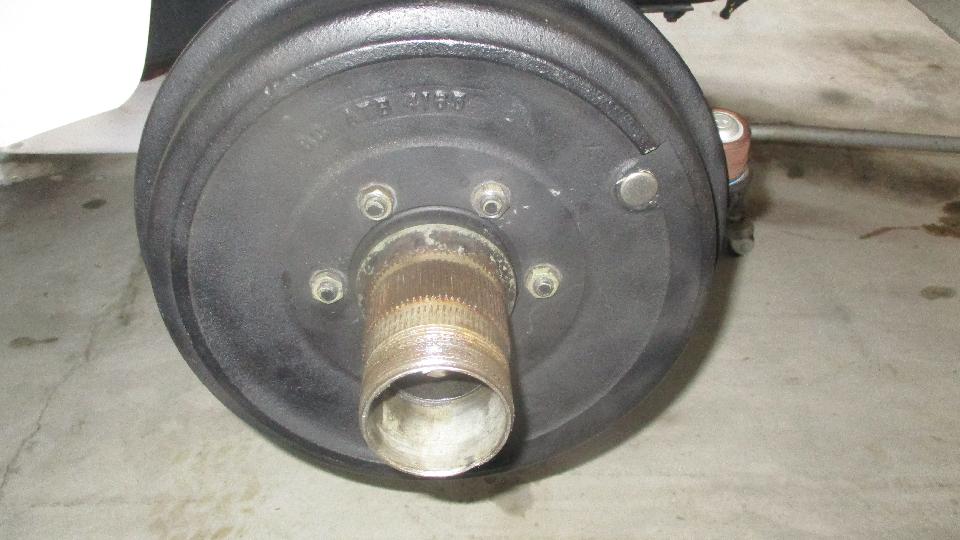
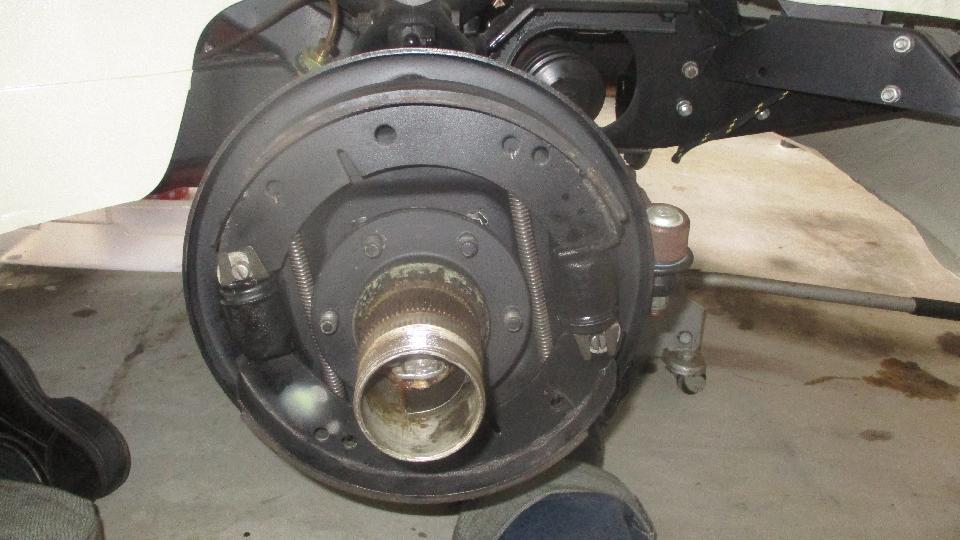
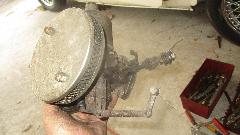
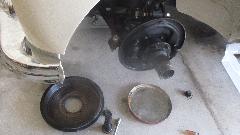
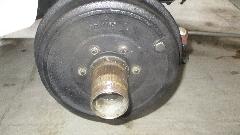
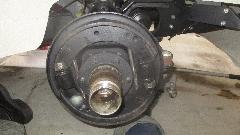
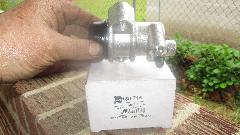
Yes! Got my new seats and top ordered, in stock, shipped, should arrive Thursday. Got call from George Lawson. His brake parts have arrived, so something to do on an otherwise slow day. Jack up, knock off wheel, remove brake drum and shoes. Sure enough, brake fluid sneaked past the seal cup in the new wheel cylinder (that had been sitting in the garage for years without use). So we repacked four front slave cylinders for good measure.

 Back together in short order. Then we wanted to check the control box for proper voltage regulation, but my (fairly old) compact DVM had crapped out. So off to town hunting for another small DVM, with not much luck.
Finally decided to try the nearest Harbor Freight, where we had a coupon for a free
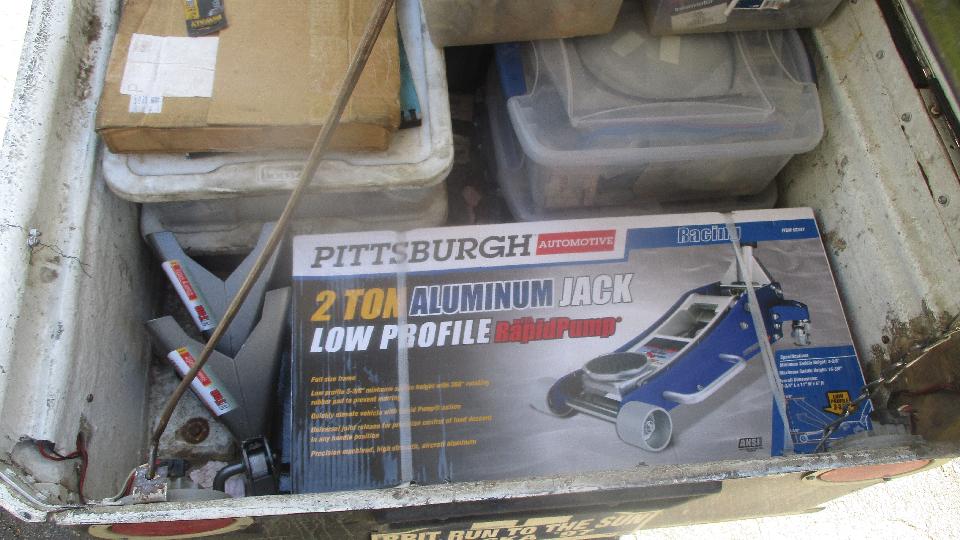
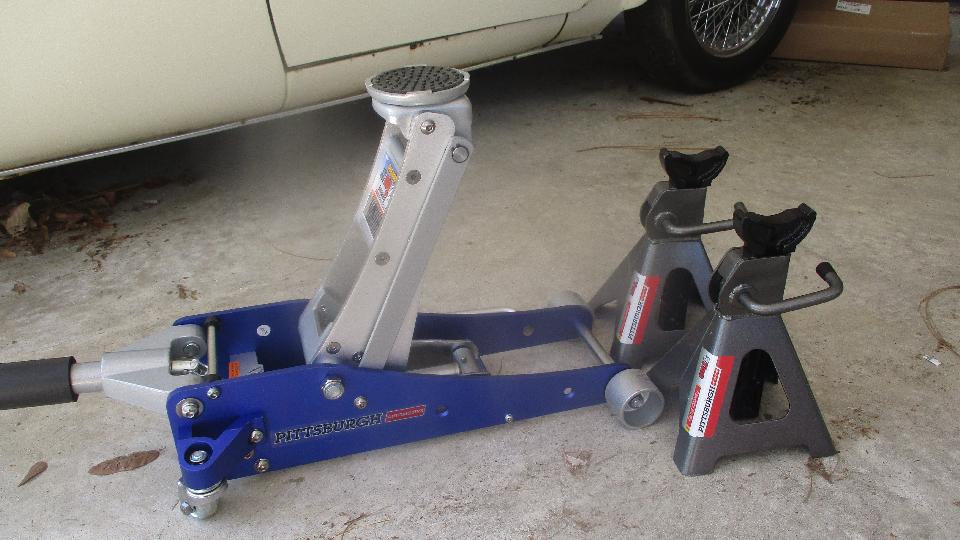
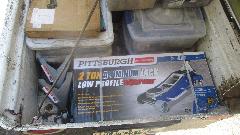
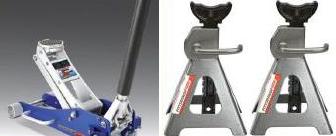 DVM with any purchase. You should know how this goes. You can't walk into a H/F store without spending at least $50 before you get out. I bought a nice aluminum floor jack (medium lift) and a pair of jack stands (small size). These were to be my traveling tools, long overdue. Now I have to figure out how to fit them into the magic trailer (without throwing out anything else). That ain't easy.
Back at the ranch, the (free) DVM turned out to be rather useless, because in the lower voltage range the resolution was in 1-volt increments, reading 12 or 13 volts, but nothing in between. Bummer. Sometimes free is not such a good deal. Will have to keep looking. We did have time to set timing on George's MGA, as well as fine tune the carbs and verify that the vacuum advance works well. The engine would run on a bit when shut down, so we also did a compression test. It has 150-PSI test pressure on all four cylinders, a bit higher than normal. Not flat top pistons, but maybe a shaved cylinder head. Need to drive the car some to see how it behaves in the real world. In the end it may want premium fuel.
It was getting late, but Dave Daniel had dropped in to check things out. Not to waste his time, we took a look at his MG TF charging system. No volt meter, but the car does have an ammeter. It reads slightly negative when idling, comes up nicely with increasing engine speed, Peaks very briefly around +30 amps, but drops back immediately to stabilize at 15 amps at higher engine speeds, so we figure the regulator is working okay. I remember my first MGA had an ammeter, and it behaved the same way. You just have to understand that generators don't charge much at idle speed, and mechanical relay regulators are a little fickled.
Wednesday April 4, 2018:
Got a call from Ansel Gantt saying his carburetor parts had arrived, but it was 2-pm and he was somewhat busy, so we will get back to his car tomorrow. Otherwise I was catching up email and tech questions, posting up a couple new web pages (including another page on electronic ignition), and getting yesterday's photos and notes in the the trip log.
Thursday April 5, 2018:
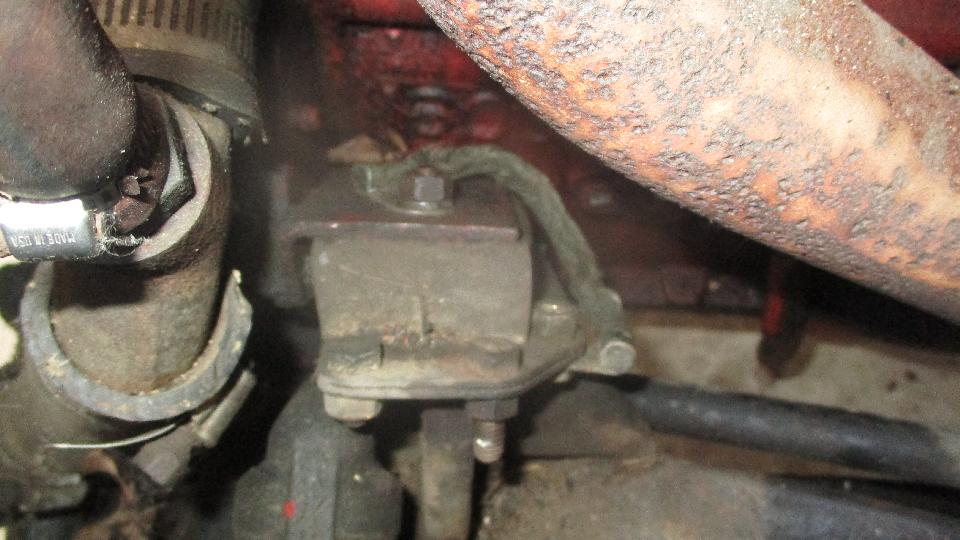
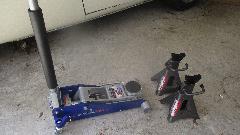
Full day working on Ansel's non-running MGA. But first I got to play with the new aluminum floor jack. It got a lot smaller once we tossed out the box. Pretty good lift at 16-1/2 inches. Got to use it later in the day for changing the center exhaust hanger. Hey, it's a one-hand jack, easy to use, and not difficult to toss back into the trailer.

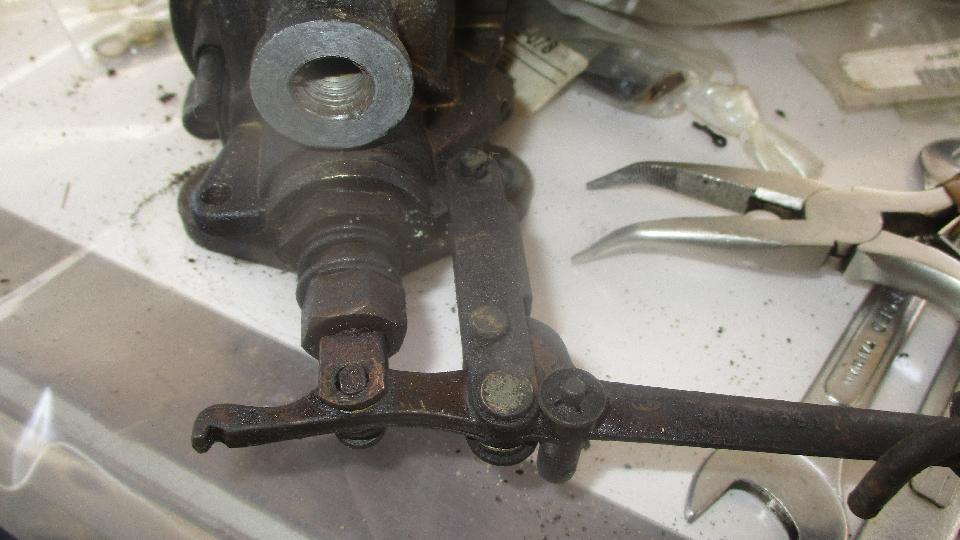
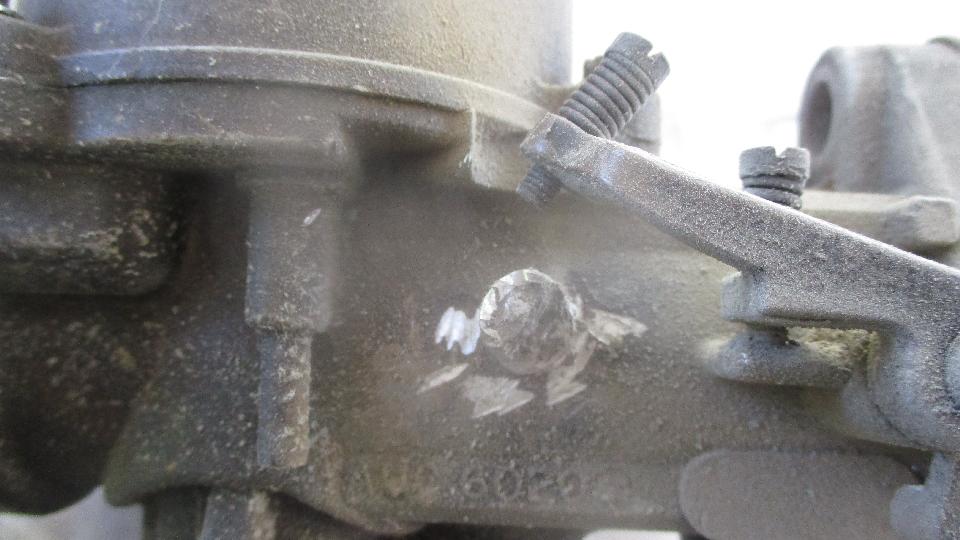
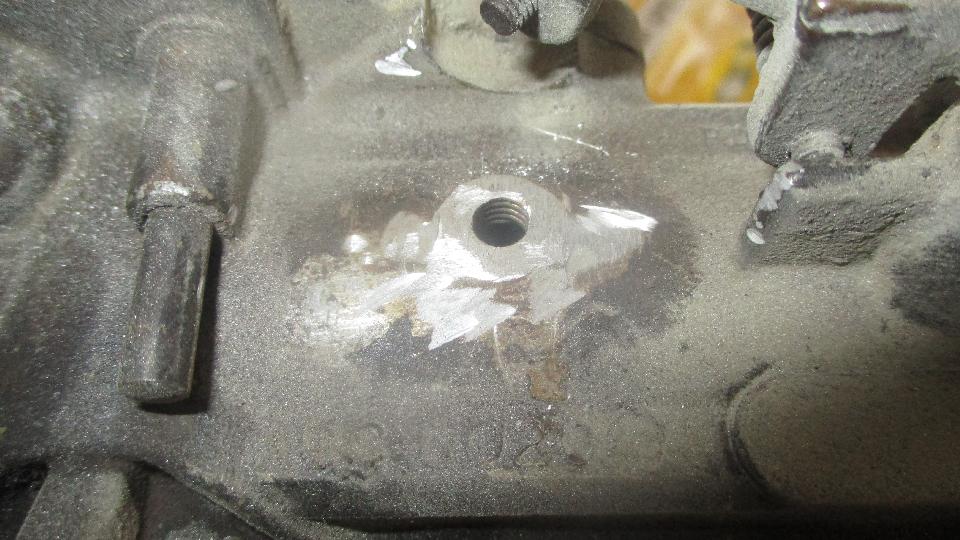
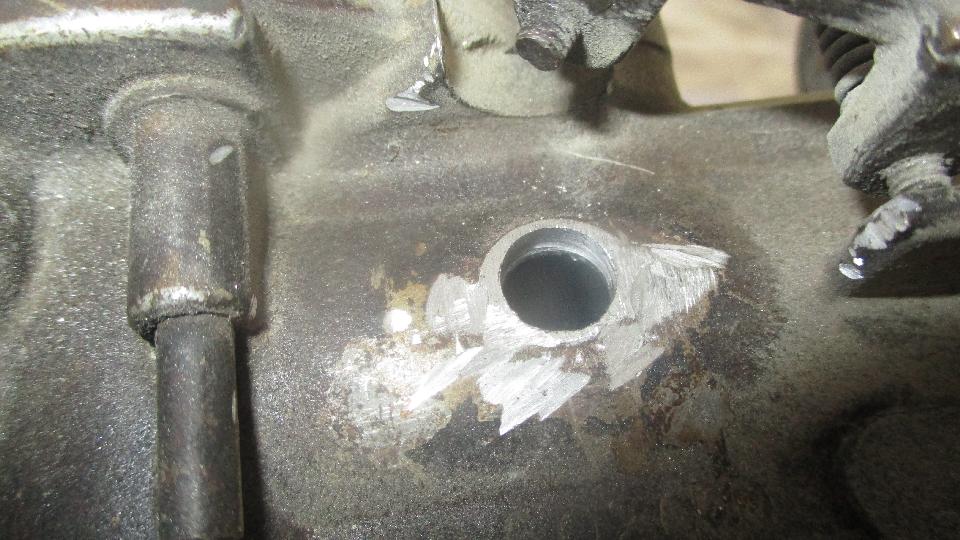
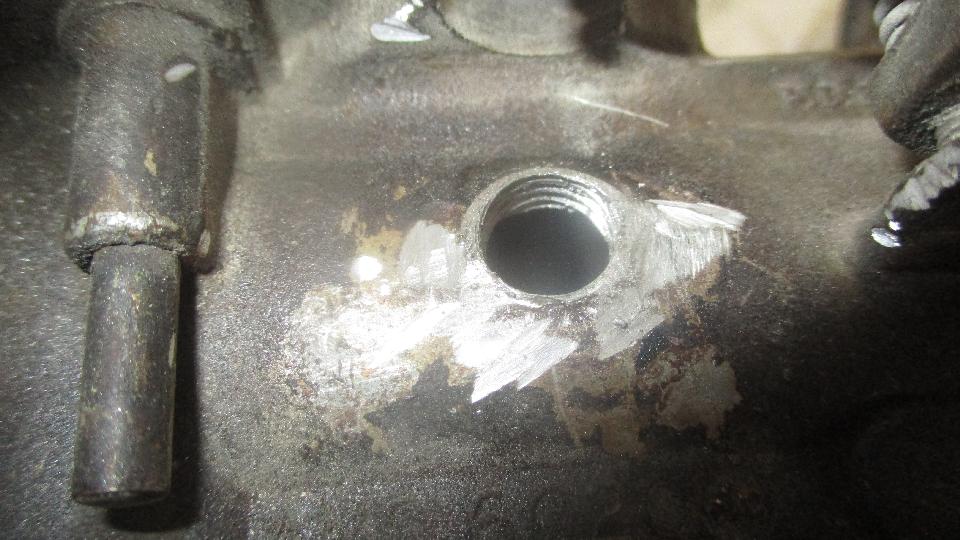
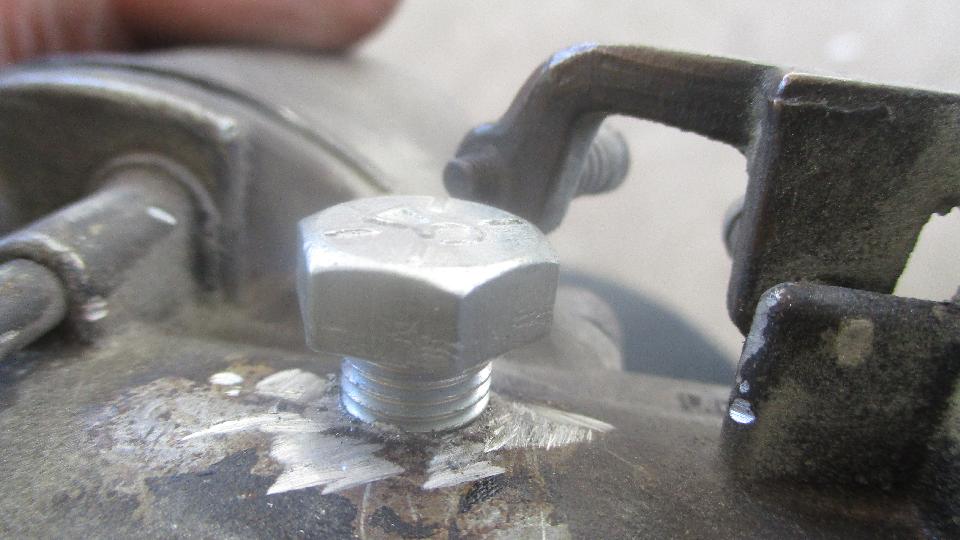
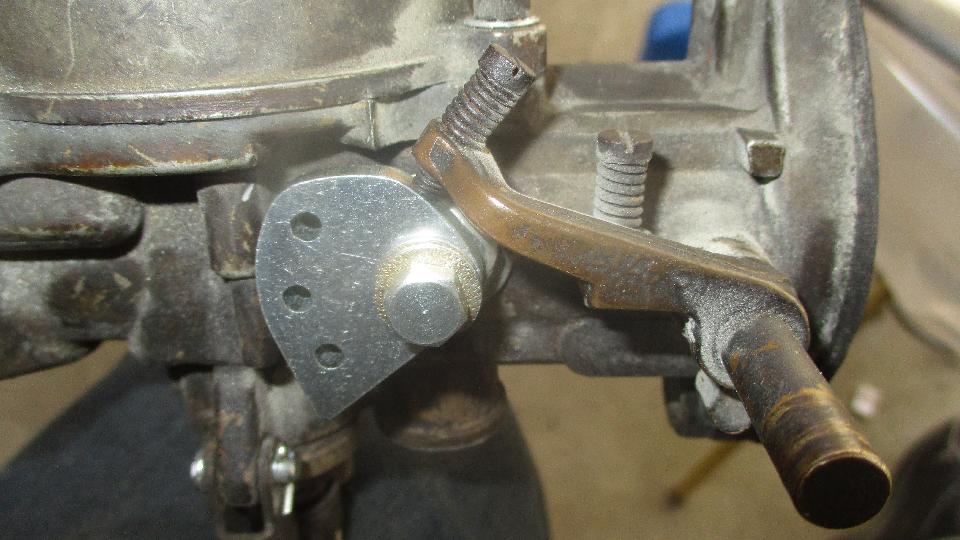
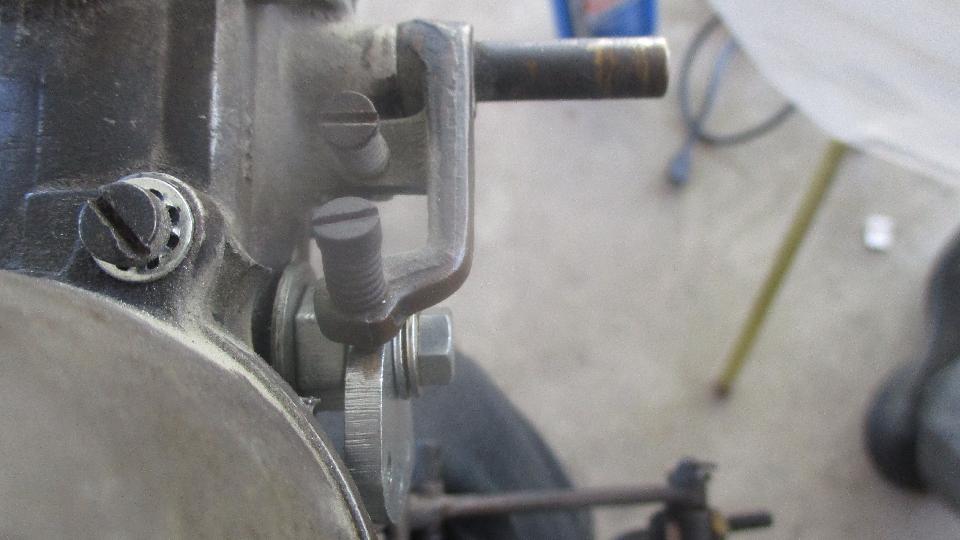
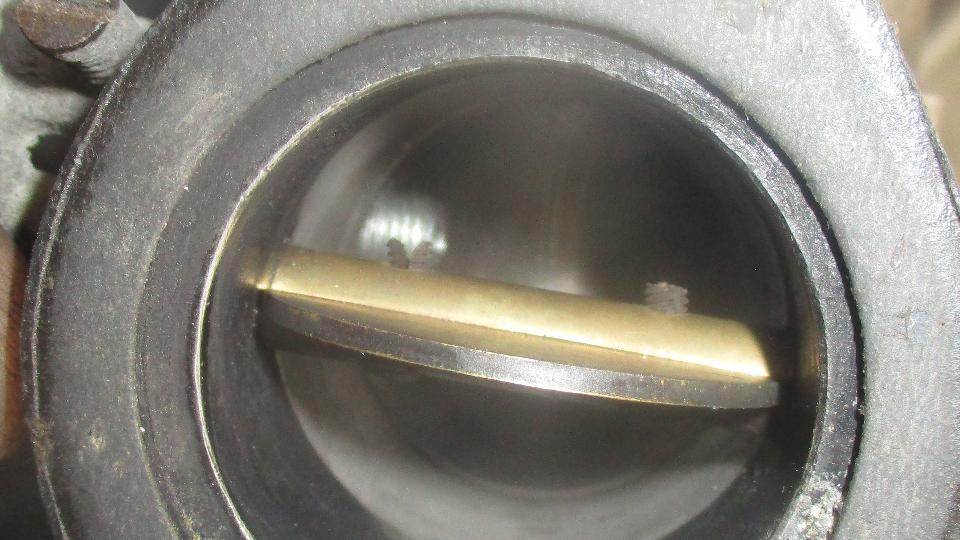
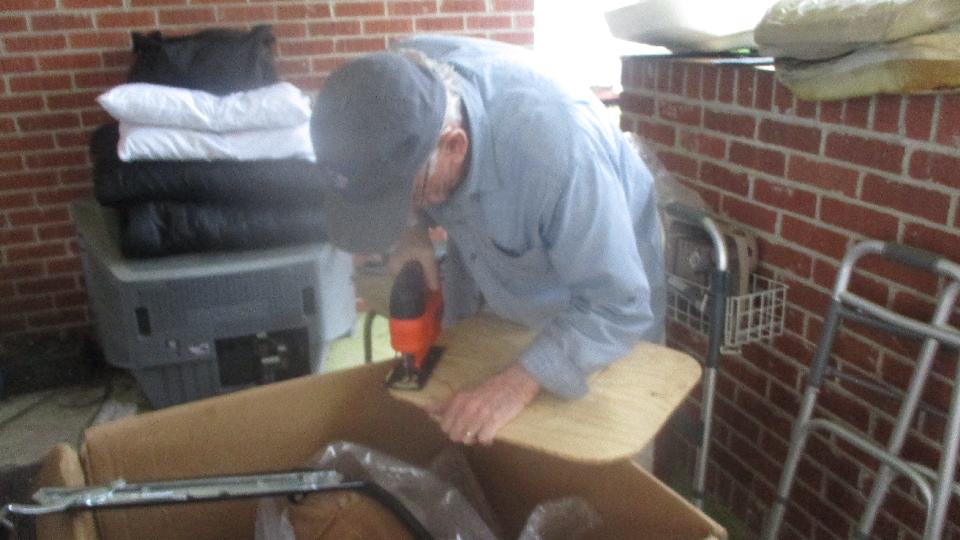
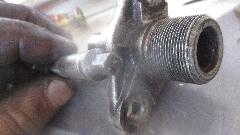
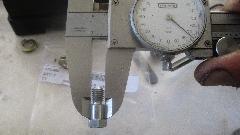
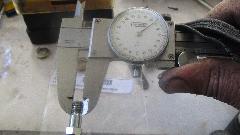
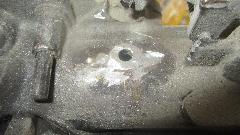
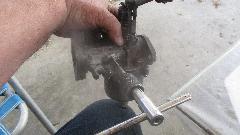
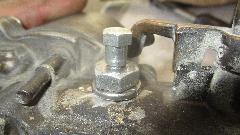
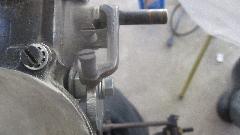
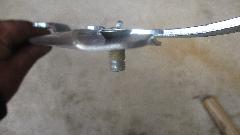
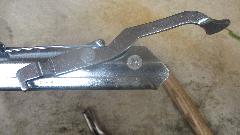
A little late getting started (noonish), but we would make the best or time allowed. Much of the afternoon was spent working on the front carburetor throttle body to repair a broken boss for the fast idle cam attachment. Nice fix, but time consuming. So now you get a tech session on how it was done. This is the little shoulder screw that will hold the fast idle cam. It has 0.273" diameter shank (0.003" smaller than 7-mm) and a 6x1-mm thread. Quick off to the local hardware store to buy a 6x1-mm tap and a tap drill.
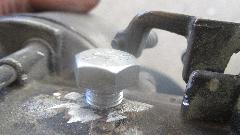
Start by grinding the broken boss down flush with the side of the throttle body. I was surprised that the original 6-mm thread went all the way through. Then drill through 21/64" (0.328"). Or a letter "Q" drill (0.332") would also work. Then tap the hole for 3/8-24-UNF thread, being very careful to keep the tap straight and threads clean in the thin wall of the pot metal casting.
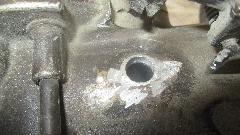
Sweet clean thread, a new hex head bolt screws in with finger tips. Then dust off the makers mark and grade 5 markings with a light touch of the Dremel grinder, finishing with a light touch of a hand file to assure it is flat.

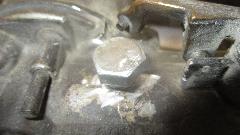
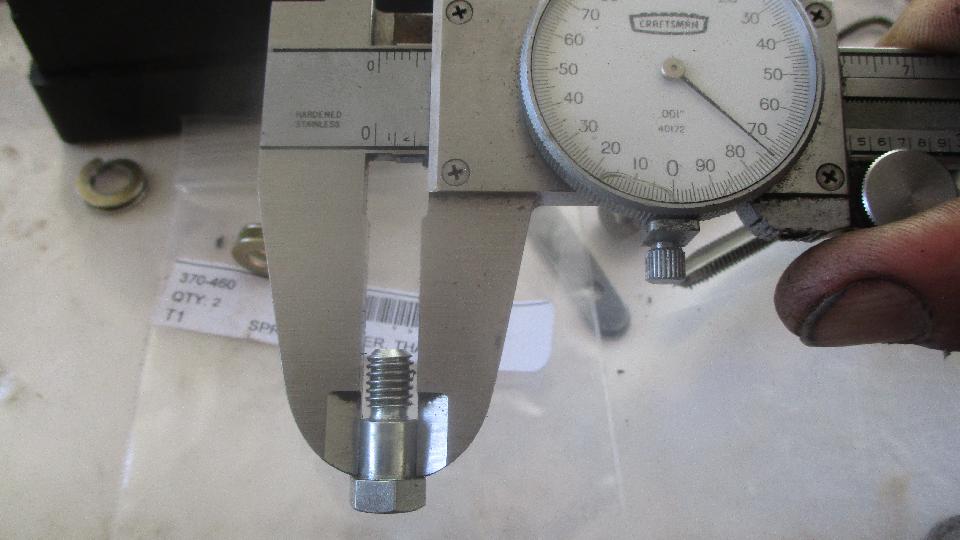
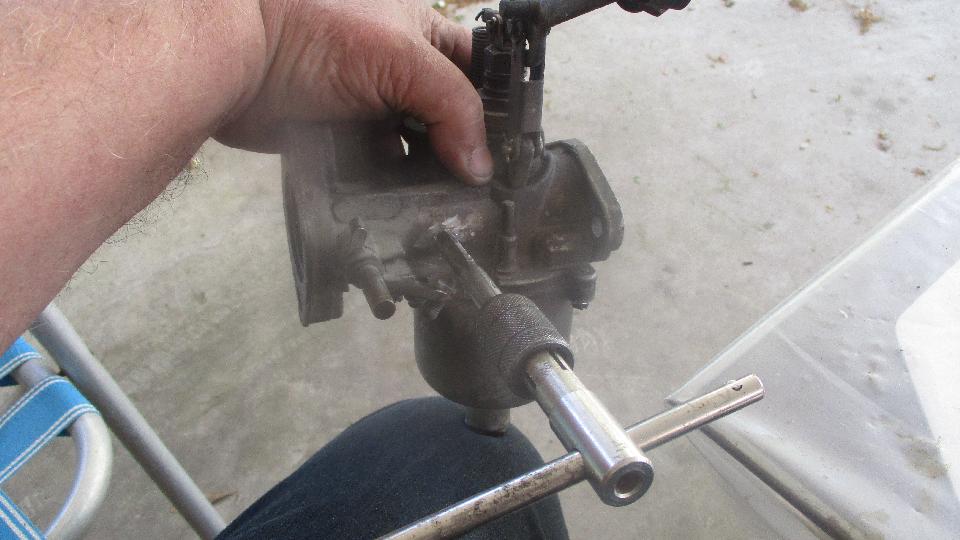
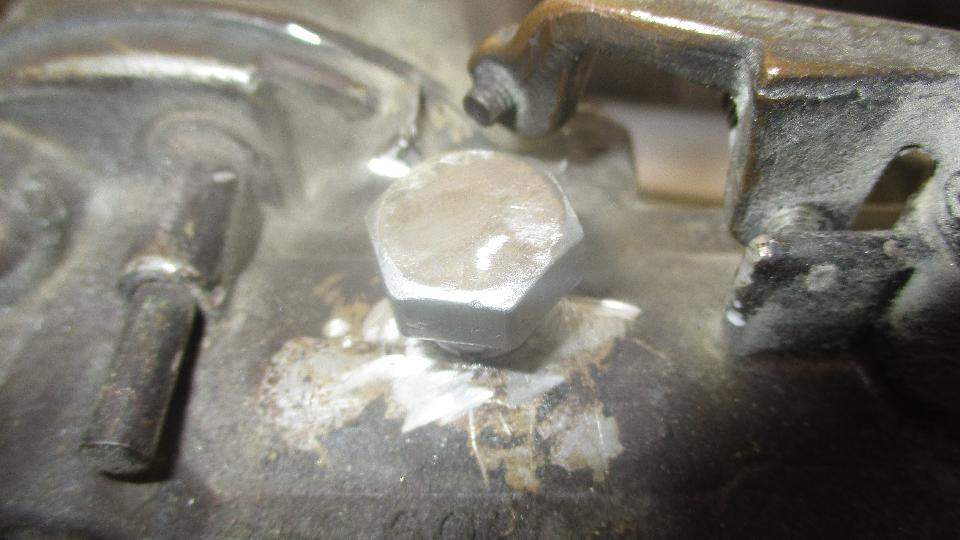
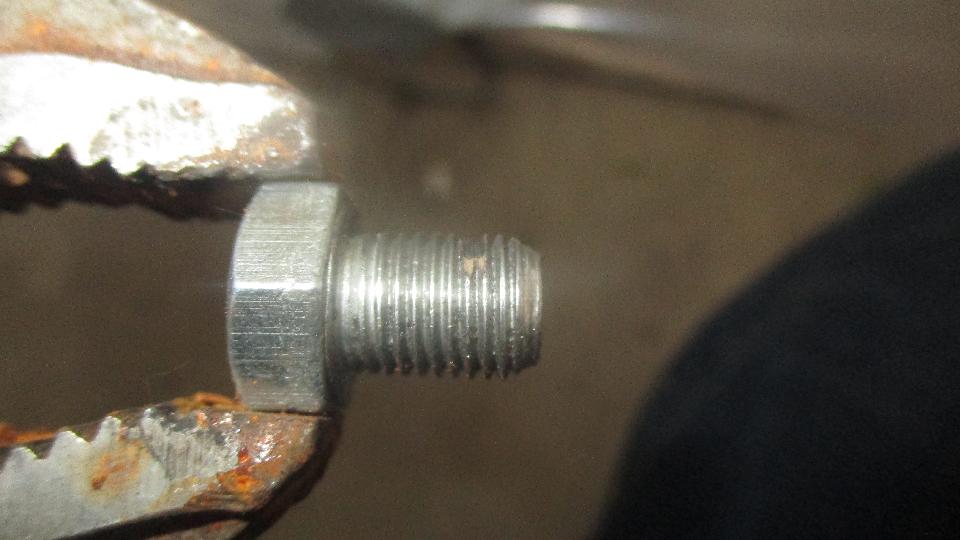
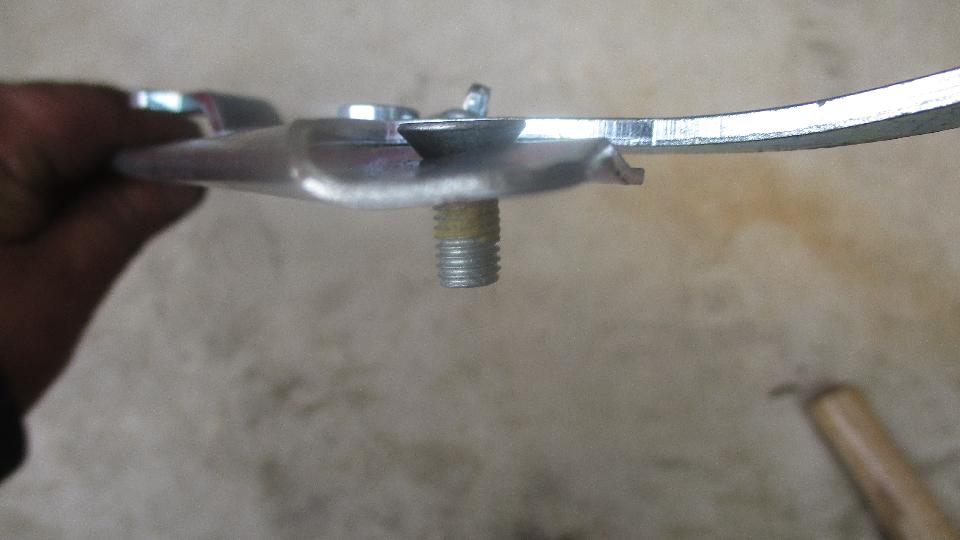
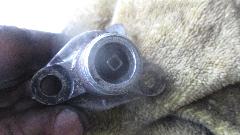
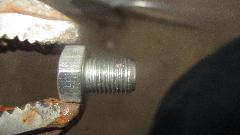
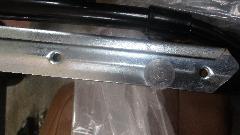
Then my hands were busy for a while, so just one picture of the finished 6x1-mm tapped thread dead nuts down the middle of the bolt (below), but I will tell you how I did it with simple tools. Chuck the bolt in a 3/8" power drill and get it spinning. Touch it near the center with a sharp scribe to mark a tiny circle in the center. Make a small prick mark in the center of the circle, verify center, and then tap it once with a center punch. We then chucked up a small diameter drill bit in a 1/4" power drill, but didn't other to plug it in. Get the larger drill spinning the bolt, then go at it with the smaller stationary drill bit to drill the hole. Use lots of cutting oil to preserve the cutting edge on the small drill bit, stop periodically to clean/clear the chips and re-oil, and continue on (patiently) until the drill bit pops through the far end of the bolt. Don't be surprised if the little drill bit may catch and break just as it cuts through the final surface. You could do better with a drill press or a lathe, but this will do for a shade tree job. The spinning bolt will keep the drill bit going right down the center, so don't be surprised when it pops out the other side still dead nuts in the center of the screw.
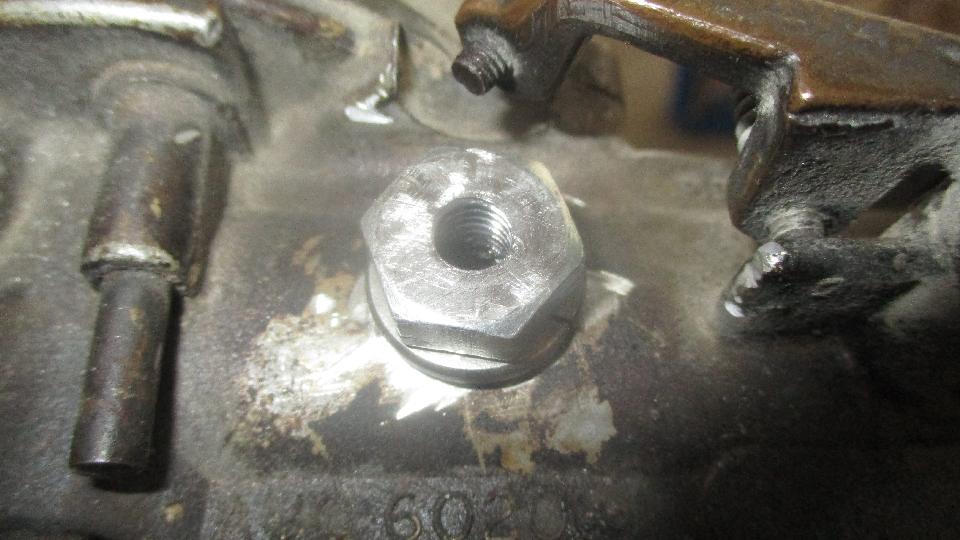
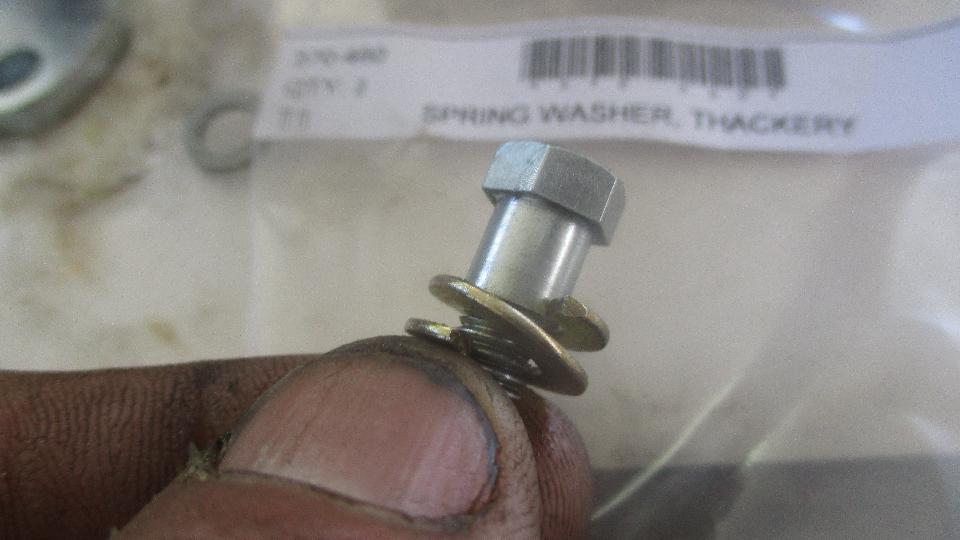
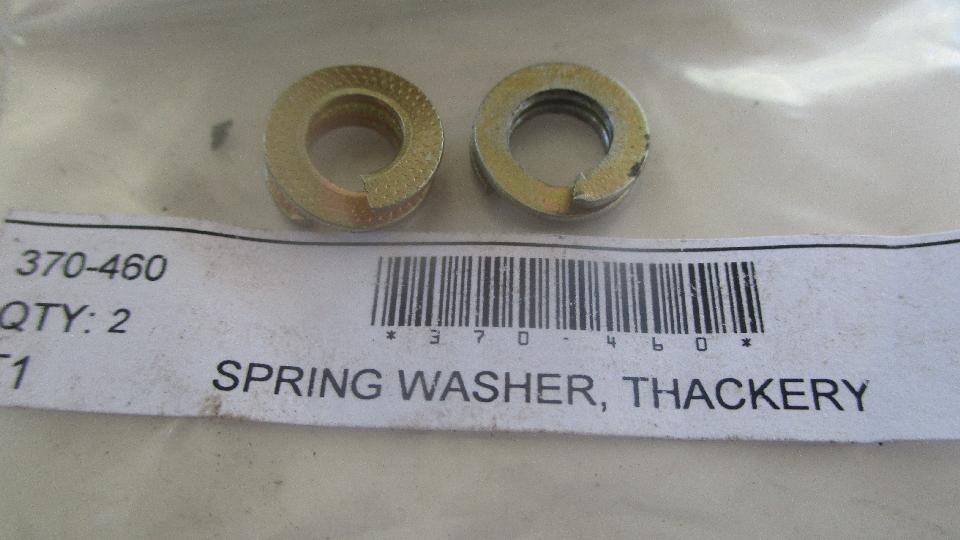
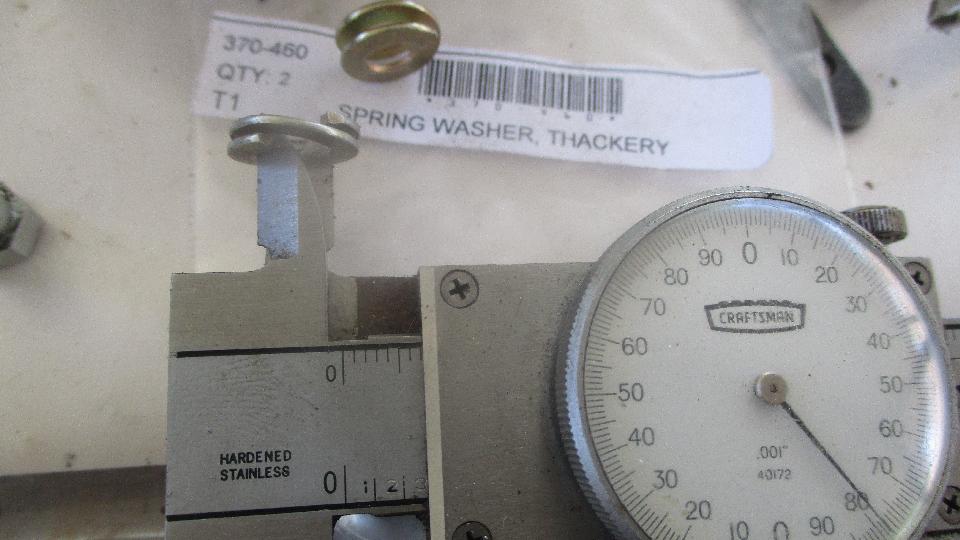
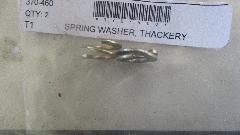
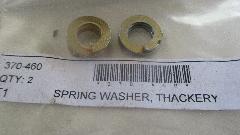
Then grab a tap dill for the 6-mm thread. This can be 5-mm, 5.2-mm, #8, or 13/64 drill. Simple from here, use the hand drill to drill right through using the pilot hole for a guide, then tap the M6x1 thread deep enough to receive the full length of the threaded end of the little shoulder screw. My first estimate on required height of the base bolt led me to install a 3/8" helical spring lockwasher under the bolt head (flattened washer with no bite). Then another problem, the double coil spring washer supplied by Moss was a cheap imitation of a Thackeray washer, too tall and no offset in the center coil. This needs to apply very light spring force on the fast idle cam, just to keep it from rattling. The spring washer was also too small ID to fit onto the shoulder screw.
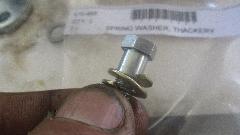
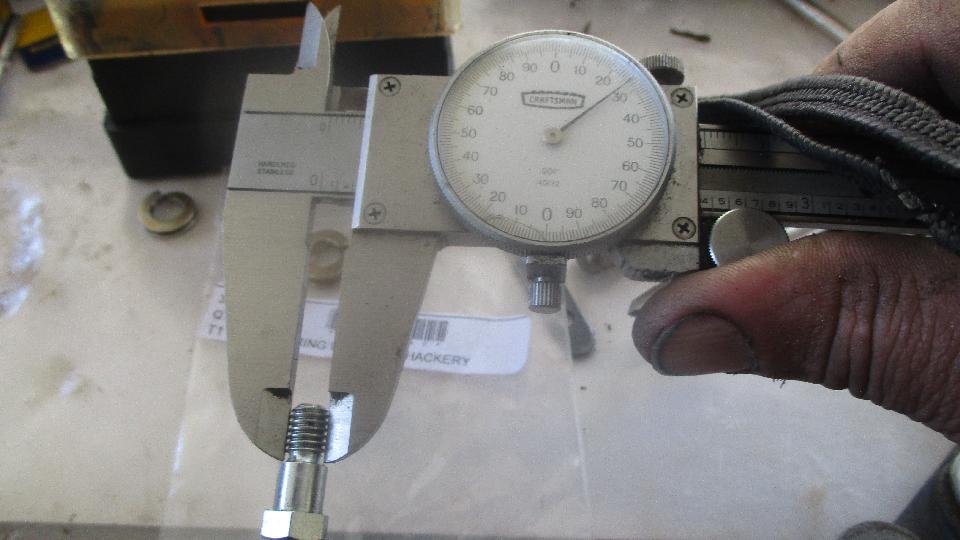
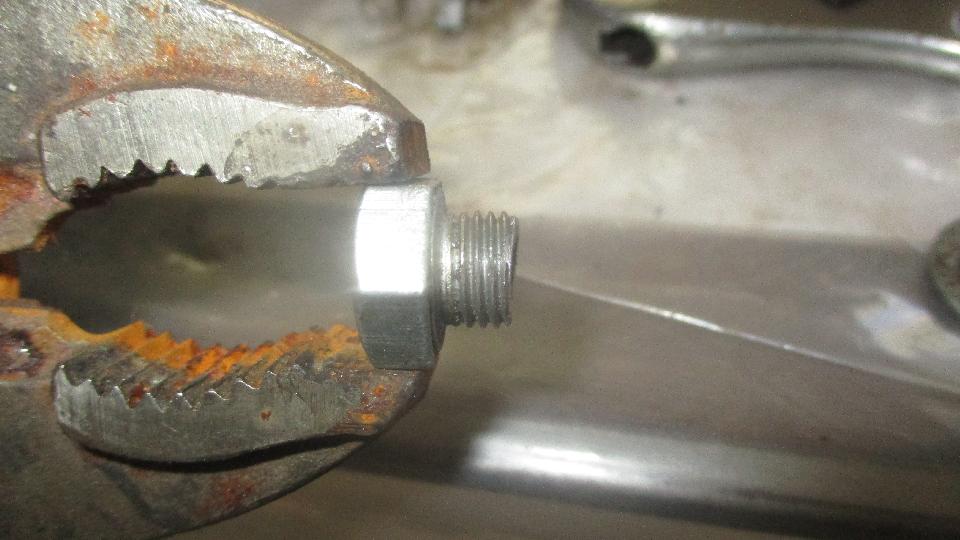
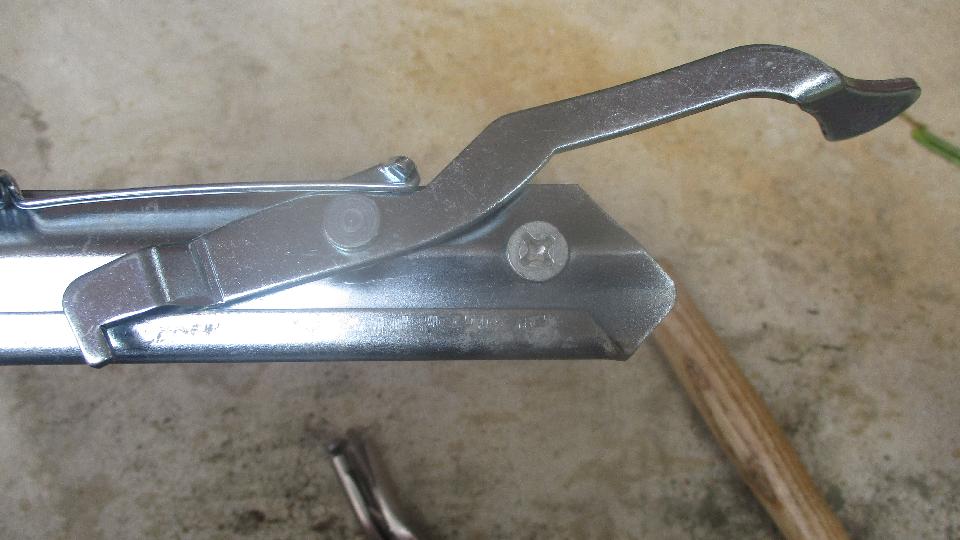
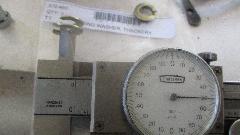
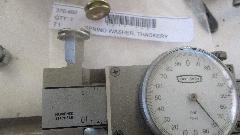
0.272" diameter shoulder. 0.250 ID spring washer. Bummer all around. Solution to this is to squeeze the spring washer hard in a vice, then lay it flat on an anvil and hit it with a flat face hammer. This will put the offset in the center coil, proper shape for a real Thackeray washer. If you think it may be too thin afterward, you can pry the coils open a bit with a screwdriver. Final operation was to open up the ID of the spring washer with a Dremel grinder to fit over the shoulder screw. All in all, a lot of messing around to fix such a simple part that was so wrong as delivered.
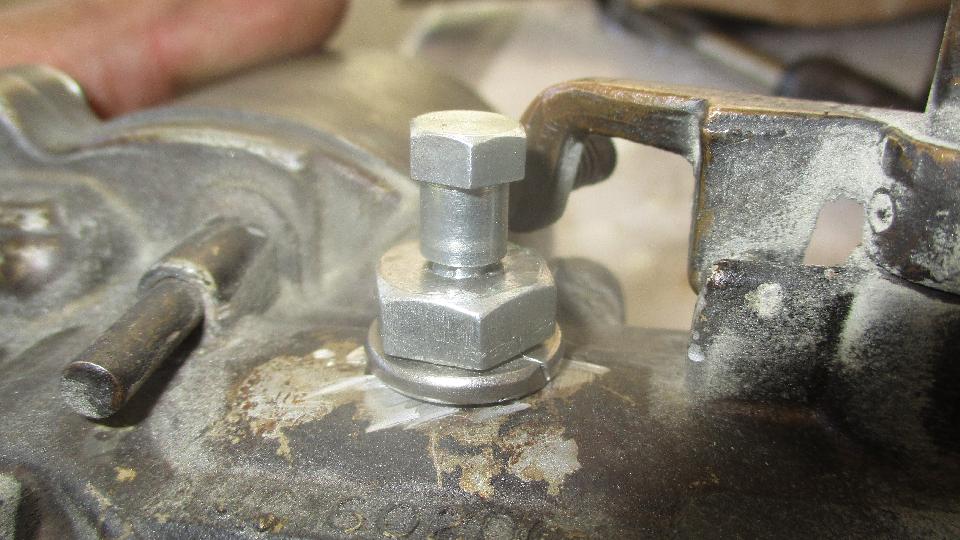
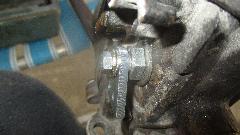
Finally with a Thackeray washer that will work, the next test fit had me changing the 3/8" lockwasher to a thinner flat washer to lower the bolt head a bit, making the fast idle cam line up with the screw on the fast idle arm.
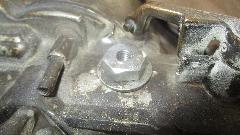
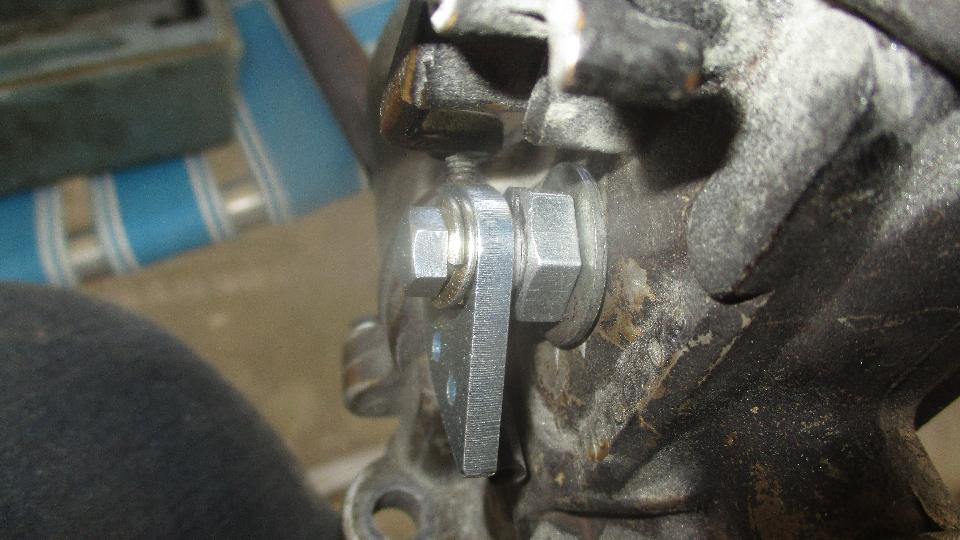
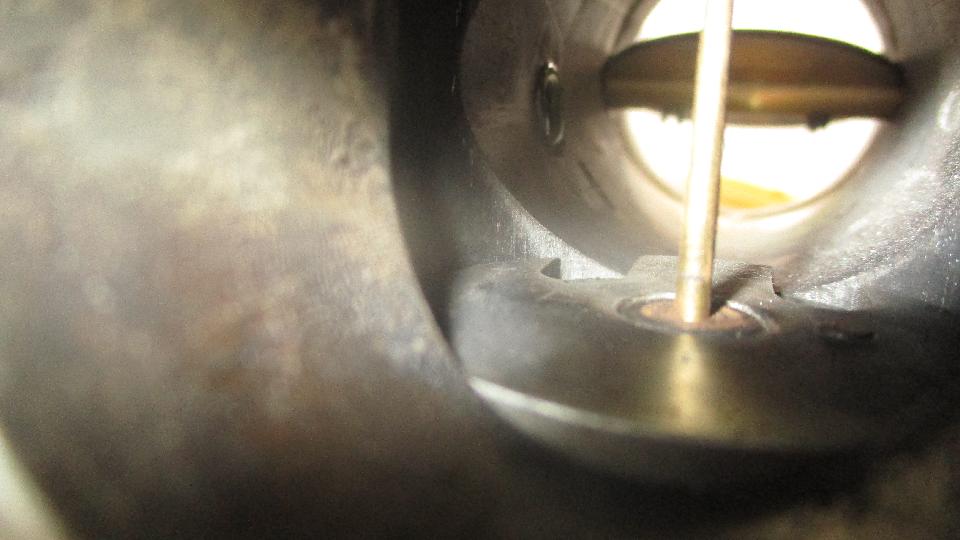
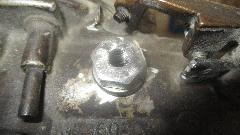
Notice there is a small flat washer behind the cam to make minimal bearing surface area for easy motion of the cam. The cam does not fall by gravity alone (although it might do so with a little vibration). It does drop easily with the force applied by the throttle return spring. With that settled, the next step was to trim off the excess length of the 3/8" bolt where it was protruding inside the throat of the carburetor. Make a mark on the bolt head to remember which side is up, and disassemble please.
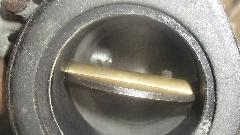
The bolt was now a tube with a substantial hole down the center, so it was easy to cut off with a thin abrasive wheel in the Dremel. Then using a grinding wheel in the Dremel to contour the end of the bolt, a couple test fits later it was nicely flush inside the carburetor throat. Touch off the burrs with a half-mill file.
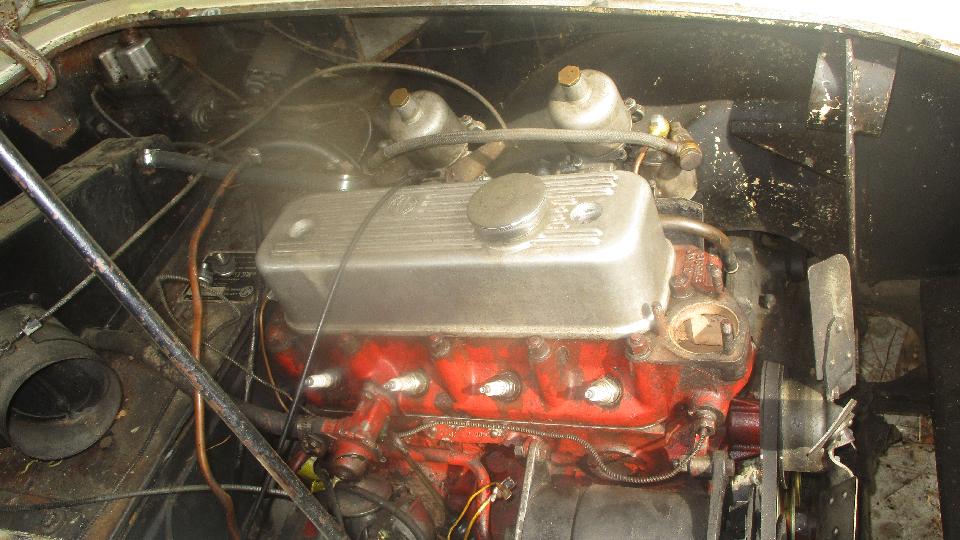
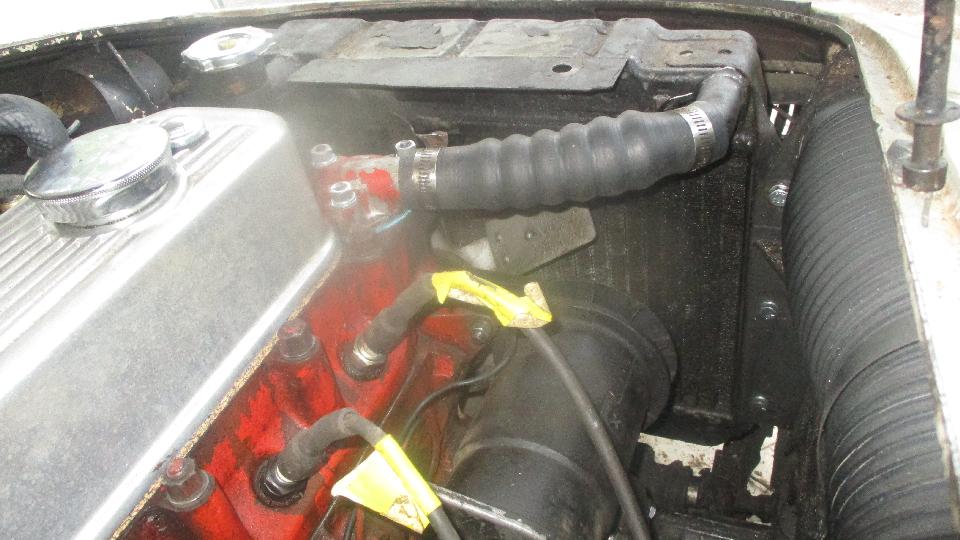
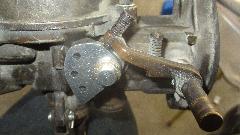
 The rest of this was back to normal grunt work, installing the carburetors with new fuel vent/overflow pipes. I formed the pipes to run back near the heat shield leaving space under the carbs free to get an arm in there to adjust fuel mixture (and easier access to lots of little choke mechanism fittings). Kind of a pain but good to make it right with the pipes in the P-clip on side of the engine block and trimmed below the oil pan flange about flush with bottom of the chassis frame.
This was to be first use of my new aluminum jack, and I gotta say it's nice to one-hand it with ease. Near end of day we changed the failed center exhaust hanger, a real B of a job because some prior muffler shop had botched it by welding something such that the lower piece of the mount could not be detached from the pipe. About an hour fight with rusty bolts in tight places, but persistence ultimately wins, and now the exhaust pipe will not fall off.
Friday April 6, 2018:
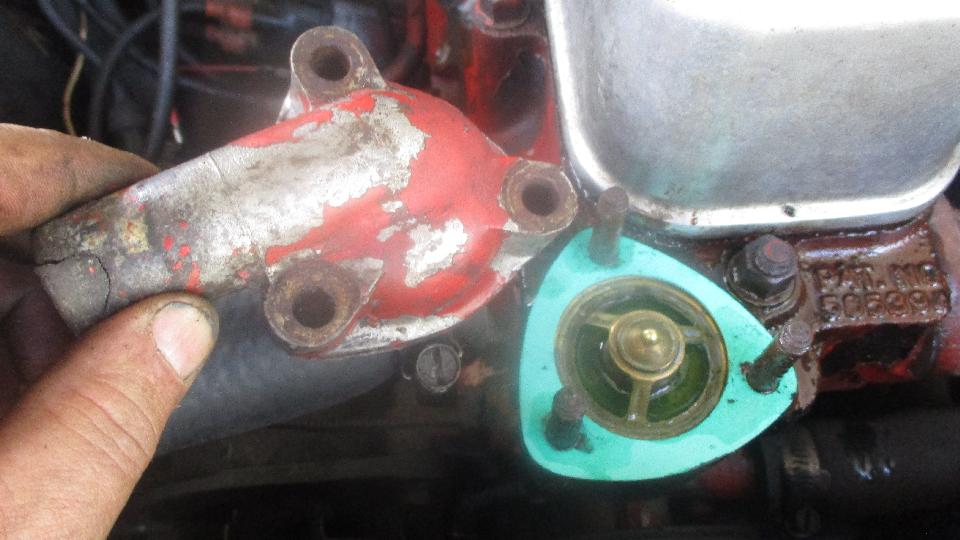
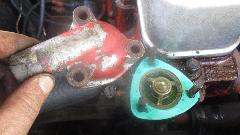
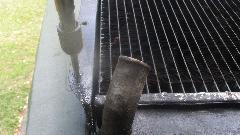
 Today was definitely the day to get Ansel's MGA running (even though we know it has no compression on #3 cylinder). Begin with dressing out the throttle and choke cables with new cable trunnions, throttle return spring with brackets, new heater hose and hose clamps. Watering the radiator, noticed a 13-psi pressure cap, and changed it to 7-psi. Noticed the old cap was short neck type, guaranteeing zero pressure, which (partly) explains way it had prior overheating issues. Clean the contact points and fiddle a few wires to get spark, crank it with a little persistence, and it was running (roughly). Common carburetor adjustments after warm up had it running pretty good (on three cylinders). But it wasn't coming up to normal running temperature, so pull off the thermostat cover to discover no thermostat present. Install a 180dF thermostat and button it back up with a new top radiator hose.


 Found a very loose top starter bolt, tightened that. Better check the bottom bolt too, that was tight, but found a missing bolt in the oil pan. Trying to replace that one, found a stripped thread, so that will wait for later. Time for a test drive?
 No brakes or clutch, so put DOT-4 in the reservoir and commence bleeding. Brakes bled all around, no problem. Clutch didn't want to burp. Oh yeah, the sidewalk supervisors were there again, wanting to see this thing run for the first time in 10 years. Send them off to look for 1/4-inch hose and late lunch. While they were gone,
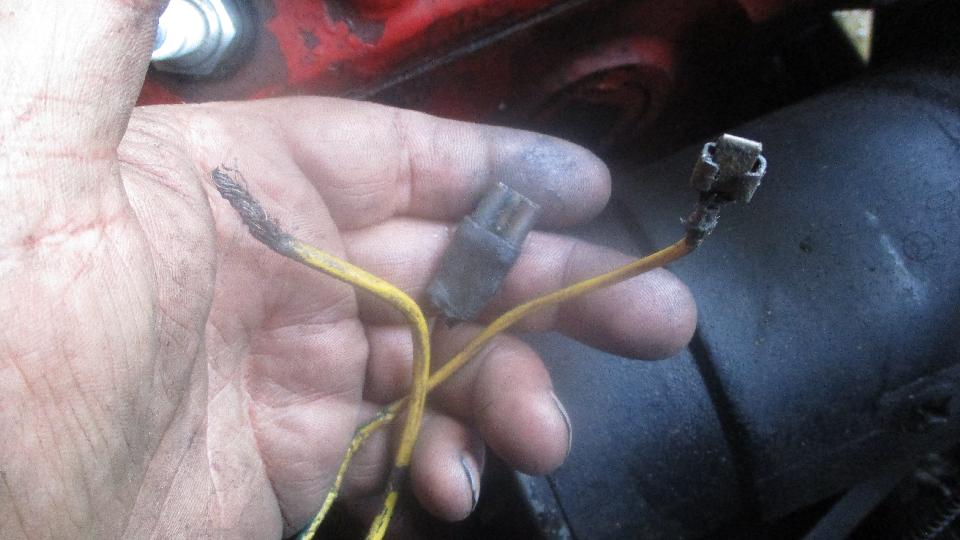
 fix the wire connectors to get the generator reconnected.
Ansel made a couple of phone calls to local machine shops. Looks like plans to get a valve job early next week. Seems like the old guys were getting tired near day's end, so we were out by daylight this time, having time to catch up two days worth of photos and notes. Hope you enjoy the tech sessions and entertainment.
Saturday April 7, 2018:
Lots of stuff going on today. Determined that Ansel's car will be out for a test drive today. Clutch beading didn't work yesterday, nothing but air in that circuit. So we did reverse bleeding the easy way. Connect a hose between RF brake bleed nipple and the clutch slave bleed nipple. Open both bleeders and pump the brake pedal for a while. Watch the air bubble up through the reservoir, and keep pumping until all you see is a little liquid geyser. close bleed nipples and remove the hose. Crack the clutch slave bleeder, and give the clutch a couple pumps to expel the last bit of air from the slave cylinder. Hold pedal down while closing the bleeder, and it works.
While the right side was still jacked up (with left still on the ground), select neutral, and turn
 the rear wheel to be sure it free-wheels. Select any gear and push the rear wheel to assure it does not turn. Depress clutch pedal, and give the rear wheel a push again, and it should free-wheel if the clutch is working. Clutch worked fine, but the slave cylinder was leaking.
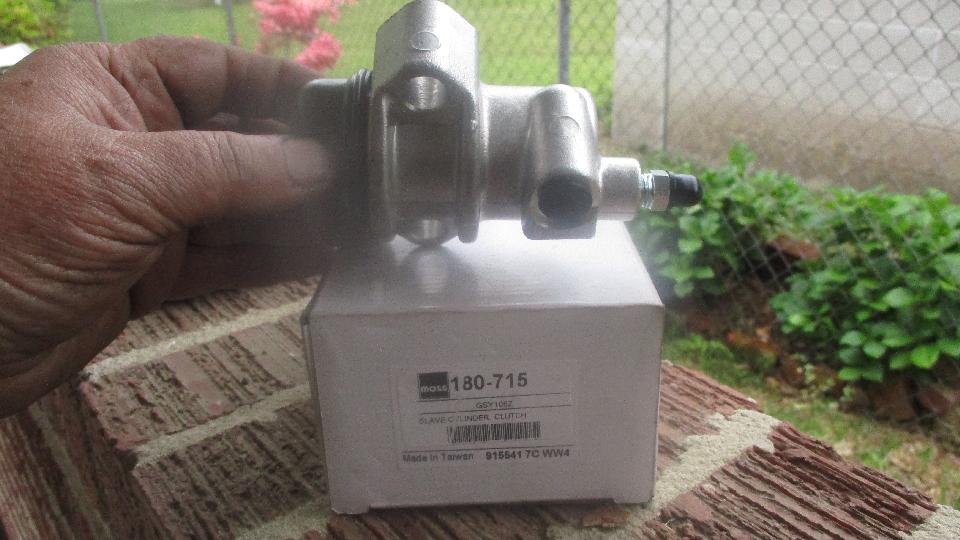
Not much sense tying to repack the slave cylinder when a new one is now under $20, so we just installed a new one, did a quick re-bleed. (Don't forget to relocate the bleed nipple from end port to side port).
the rear wheel to be sure it free-wheels. Select any gear and push the rear wheel to assure it does not turn. Depress clutch pedal, and give the rear wheel a push again, and it should free-wheel if the clutch is working. Clutch worked fine, but the slave cylinder was leaking.
Not much sense tying to repack the slave cylinder when a new one is now under $20, so we just installed a new one, did a quick re-bleed. (Don't forget to relocate the bleed nipple from end port to side port).


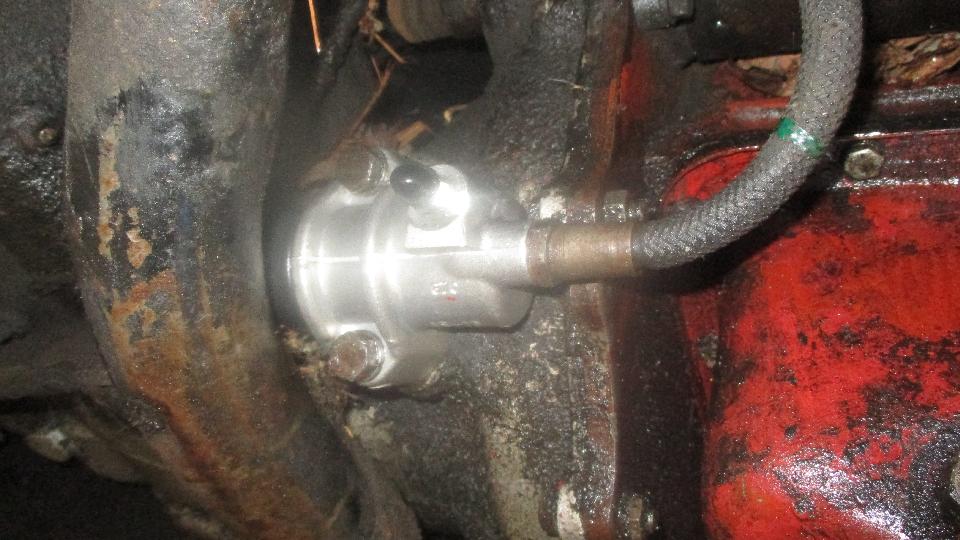
I got lucky this time with this one, having the thread end up in the right orientation with no twist in the hose, so no need to reorient the top end of the hose. Didn't even have to disconnect the pushrod.

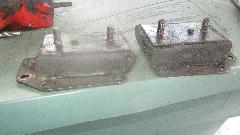
Ansel was all excited about the prospects, so hop in. As always, first trip around the block after ten years in hibernation is jolly good fun. Brakes, clutch, synchronizers, steering all work well. Ansel claims it still has the same power it had when he last drove it (always three cylinders), like he was not particularly disappointed, but we will likely be getting the valve job done anyway. Just a mist when we pulled out, but by the time we returned it was raining pretty hard, so get it back under the car port. Crankshaft pulley still rattling, and a big oil leak from the front of the engine. Making out another parts list for a Monday order, including new engine mounts.


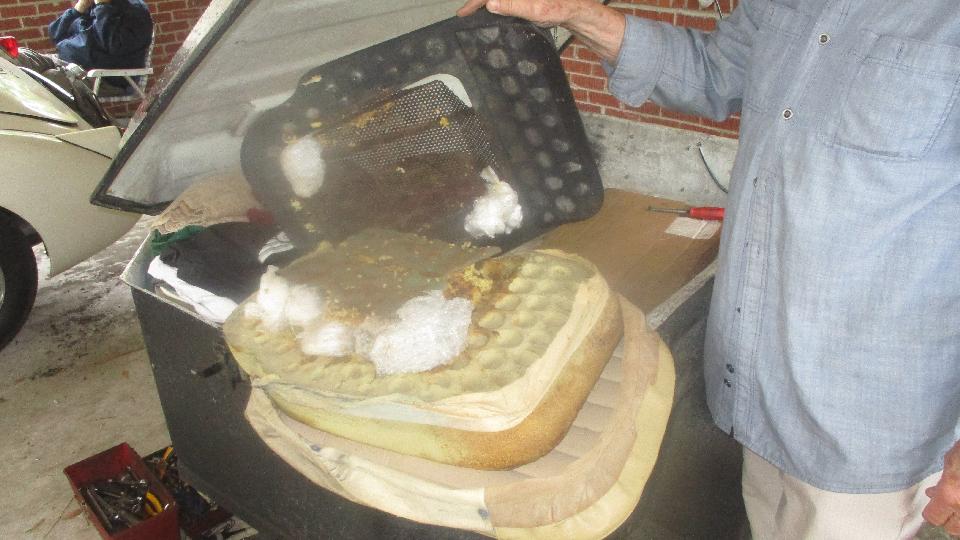
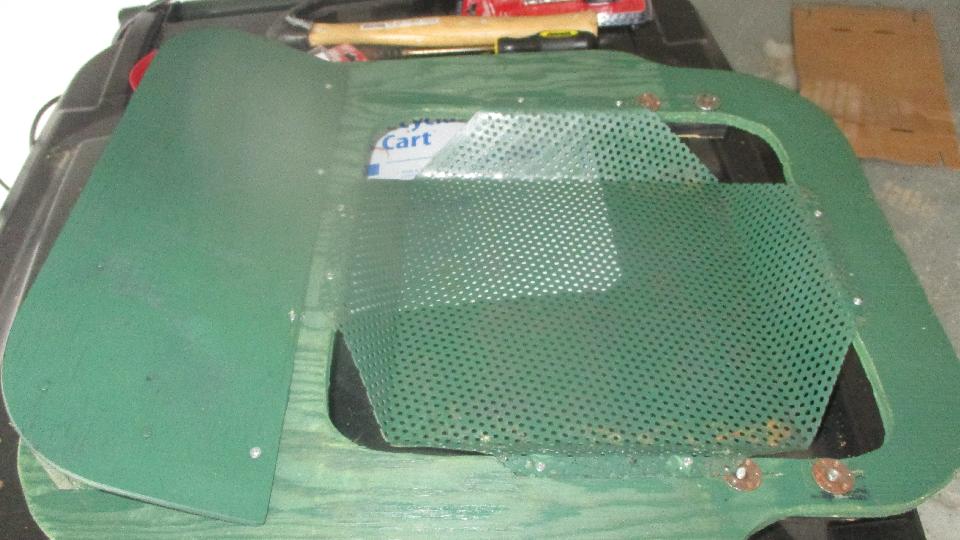
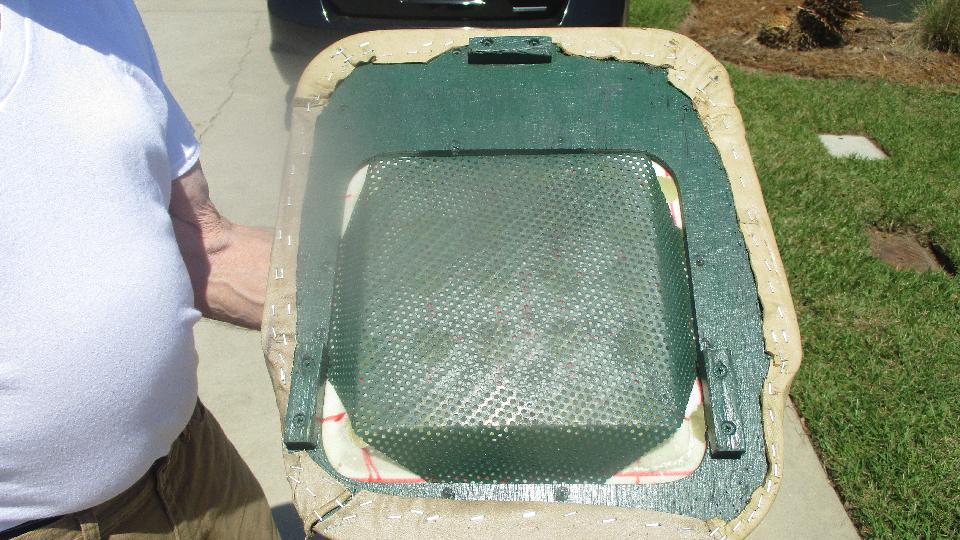
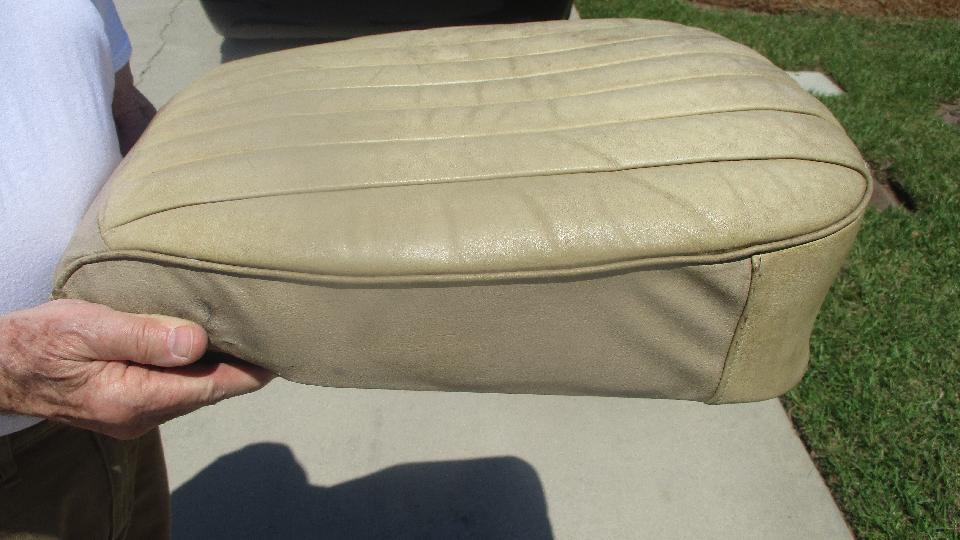
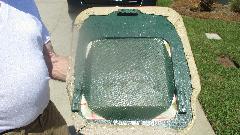
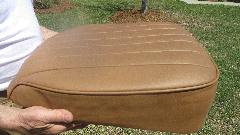
Don't suppose I mentioned that Dave Daniel had brought over a huge box containing our new seats and his seat bottom cushions. He also brought along his old seat cushion assemblies and was busy on the side pulling out staples. Those are original Dunlopillo Latex cushions, fairly well deteriorated, and someone had previously been stuffing them with bubble wrap. The leather covers were in good condition with a wonderful patina. The screens and baseboards were replacement type, considerably more recent issue. Screens were good, just needing leaning and repaint. One board broken, one board good, and all of ths riser parts good.
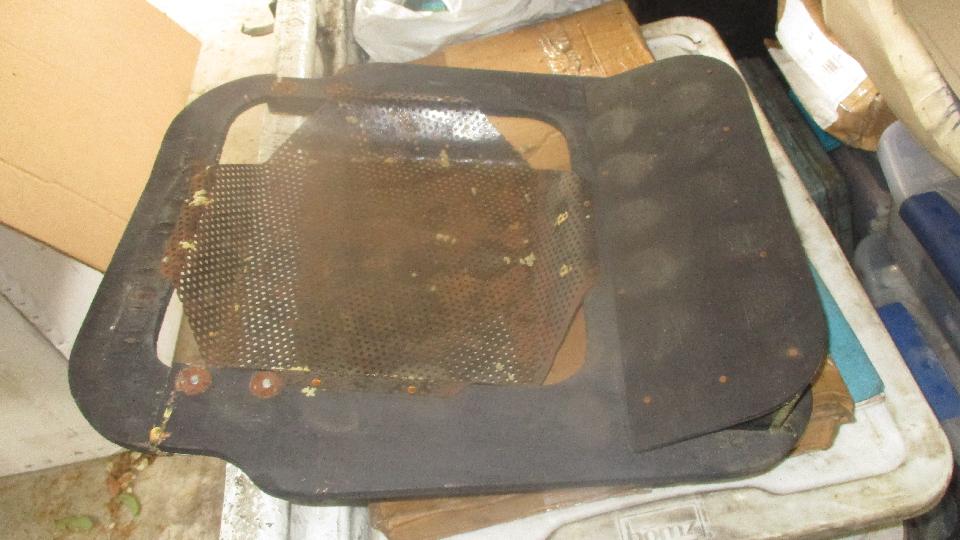
Disassembling the one broken base, all of the screws came out okay, so we can re-use the screws and T-nuts (just pry them loose). Removing the screen, easier to grind off the rivet heads that to dig the split ends out of the board.

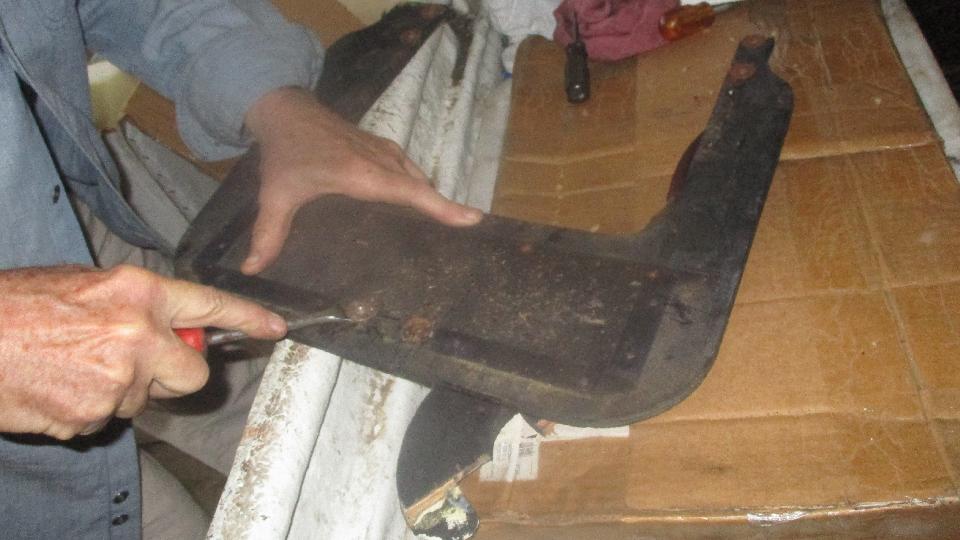
 The broken board was all there, good for a tracing template. A phone call to a friend found a suitable plywood blank, and the convenience of a band saw that make short work of trimming out the perimeter. Dave picked up a cheap sabre saw from Harbor Freight, so not long to trim out the center hole. We were test fitting the new foam rubber cushion and vintage cover to the good base board. The new board still needing some drilled holes and reassembly when Dave had to leave.
 Meanwhile we were on to trying to install our new seats. Navigator was taking a personal interest here, beginning to sort out the fasteners and checking out the new slide rails. The idea here was to assemble 16 screws to attach the rails to the seats, and 8 bolts through the plywood floor. We had allowed a couple hours to do this casually. Yeah, sure. First problem encountered was the punched holes in the top rails had very shallow countersinks so the flat head screws would not fit flush.
 No big deal maybe, except the one in front of the outboard rail stuck up to prevent operation of the latch lever. I didn't feel like getting the countersink cutter out, so I applied a few whacks of hammer and punch to mash down the central rib and straighten the edge afterward.
Second issue with the top rails was the countersunk holes were too small for the 1/4-inch screws to pass
 through. I could muscle a fat Phillips screwdriver through the holes to just get the screws through (but still no clearance). Third issue was the countersunk holes did not line up with holes in the seat base. Slightly different spacing added up to half the diameter of a hole misalignment by the far end. Never took the time to figure out which part was wrong hole spacing. Holes in the seat base were properly oversize, so we could install the first two screws but had to run a drill through the other two holes in each rail to seat base joint, drill through eight holes total. This of course screws up the zinc plating on the rails and the powder coat paint on the seat base.
Speaking of zinc, notice the rust in the photo above. These new rails had been kicking around in the trailer for just eight months. I can imagine how rusty these things will be after ten years in service. Obviously the thin zinc flash plating was only there to preserve the parts in storage before retail sale, otherwise having no benefit for corrosion resistance.
Time to drop the seats in and screw them down. The next issue is just honorable mention, that my original floor rails had three wood screws in each end to attach them to the plywood floor, while the new rails have just one larger hole each end for a single bolt. That might be acceptable, except that the bolts supplied in the fastener kit were short 5/16" bolts for attachment in a car with weld nuts in the steel floor pan (screw set not suitable for sale for use in MGA). When I tried longer bolts I found the forth problem, the holes in the floor rails were again too small and had to be drilled out (messing up the plating again).
Sent the guys out to buy longer bolts (fine threaded please), some large diameter fender washers, and late lunch. Drilling through the floor and dropping a couple bolts into the outboard floor rail, it was immediately obvious that distance between the slide rails was nearly an inch less than the original setup. Problem number five now had to be in construction of the seat bases. This had me thinking that the track width dimension may have been taken from MGB (just a guess). The outboard rail seemed to be in original location while the inboard rail was misplaced, same for both seats.
 So then we had to remove the elevation wood strips I had installed 25 years earlier, and trim back some carpet padding. Kind of a PITA, but just more grunt work caused by faulty replacement parts. Bolts the guys brought back were coarse threaded, and I didn't have coarse threaded nuts, so there was immediately a mad dash back to the hardware store before they closed at 6-pm. Navigator was beginning to remove the wood strips while we were gone, but still more of that to do when we returned.
Then we were working after dark, finally drilling more holes in the floor to install the hold-down bolts. Reinstalling carpet under seats, cleaning up, packing away tools and re-stuffing the trailer, finally on our way around 9-pm. So the two hour seat installation turned into a five hour job, and my car now has some extra holes in the plywood floor, all due to the faulty replacement parts needing constant fettling every step of the way.
The new seats look nice, but the bottom cushions are so tall and stiff (covered in the tech section) that even
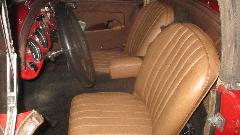 after removing the elevation spacers we are now sitting at least an inch higher (not good). The backrests are also much more upright, making elevation seem even higher yet. Impression is too much padding near top of backrest, and maybe missing the lumbar support pad in the lower part of the backrest. Having to slide the seats farther back to get behind the steering wheel (may need to adjust that), there is less space behind the seat, so I may have to stow my computer elsewhere. I knew that seating would be different and would take some getting used to, but this is rather dramatically different. Will give it a few days to soak in before panic or rework.
Sunday April 8, 2018:
This was supposed to be electrical day for Ansel's MGA. We got started late, 2-pm, on electrical stuff, but soon got sidetracked. Like the guy with the Morgan dropping in to chat for a while. Then Dave Daniel dropped in to work on his home made seat base, which was proceeding slow but sure, and the electrical stuff slowed so almost a stop. We were going to try out my new power stapler which I have been hauling around in the trailer for 16 months, and it didn't work. Bummer. I opened it up to see if it might be something simple, but found a servo motor and a funny circuit board inside. Wiggled a few connectors and reassembled it, but no go, so the dust bin was right over there, and I will have to buy another one.


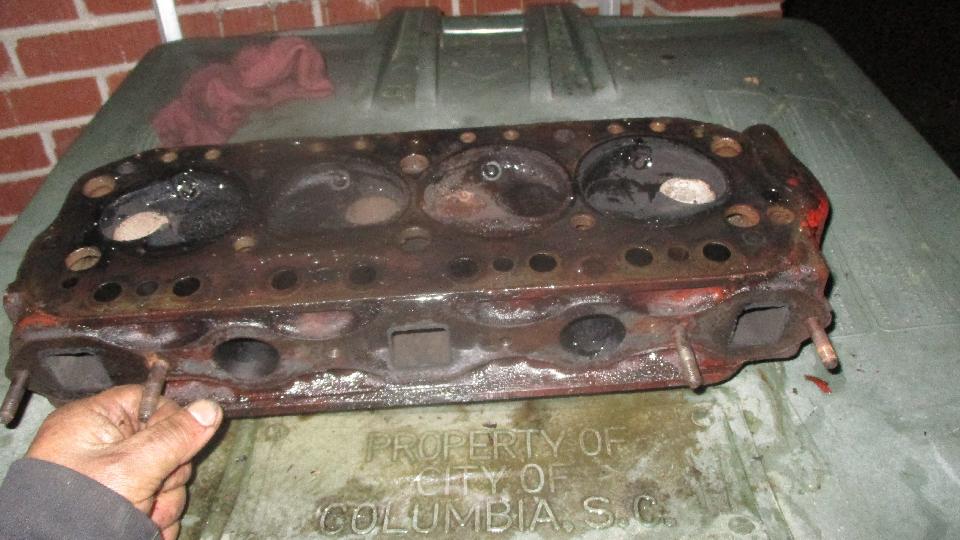
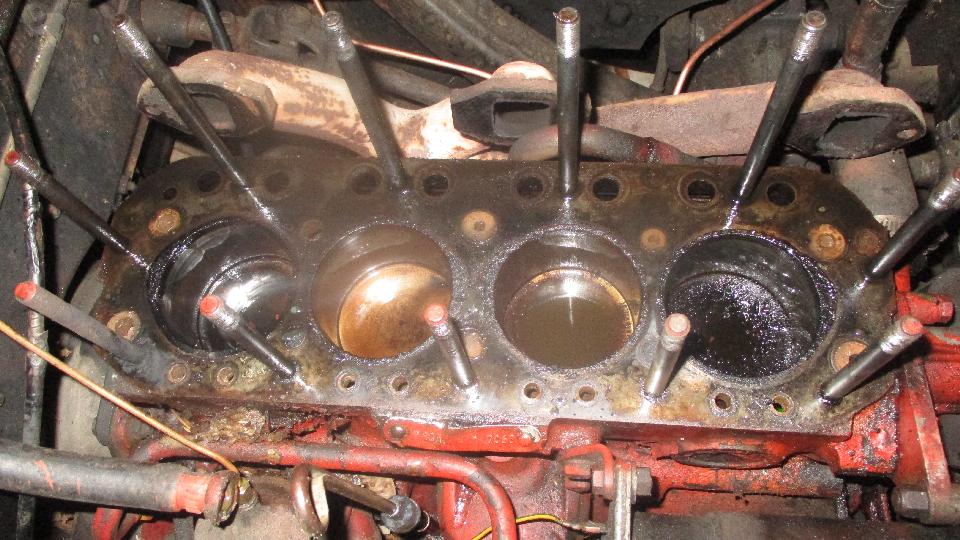
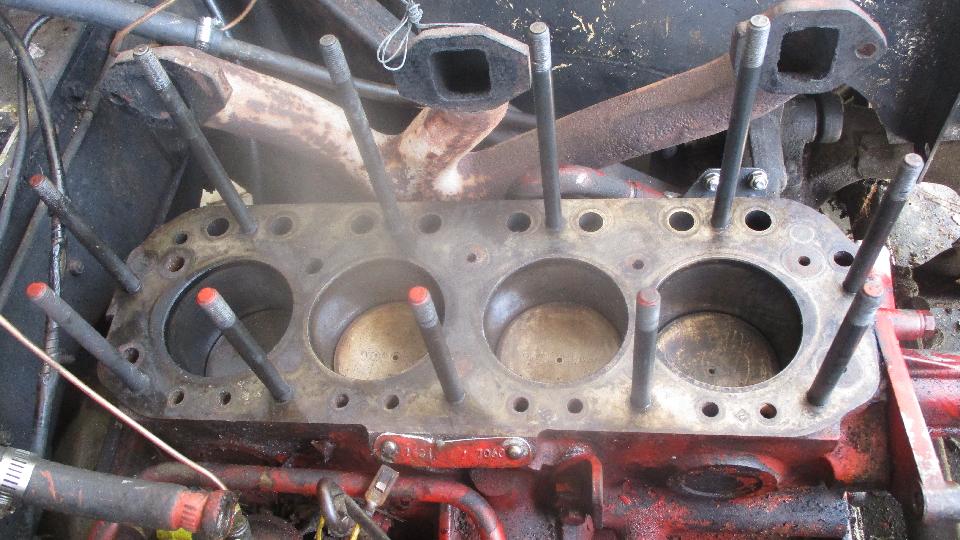
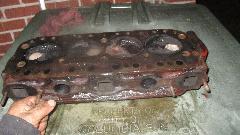
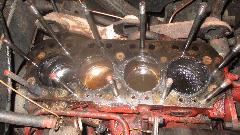
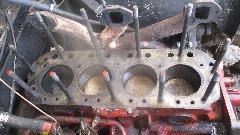
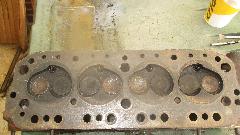
Running out of day, so decided to yank the cylinder head off of Ansel's MGA to investigate the low compression condition on #3 cylinder, thinking we intended to get the head to a machine shop tomorrow morning. Half an hour to remove the carburetors and manifolds, another half an hour to get the head off (with a few stubborn bits along the way).
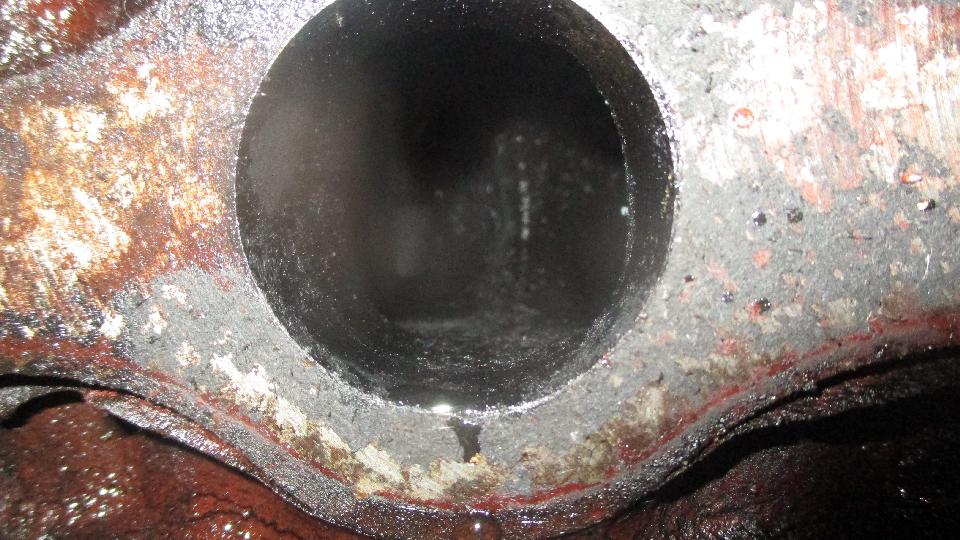
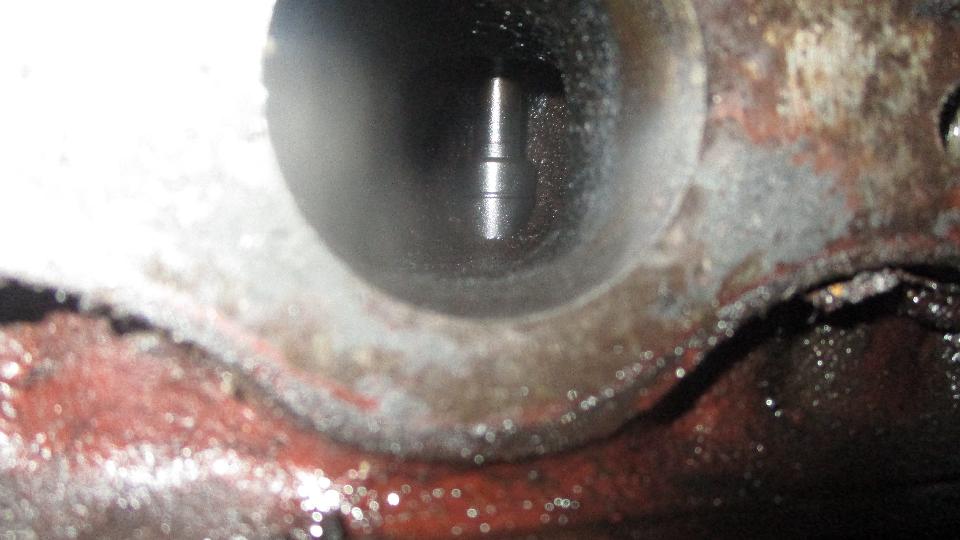
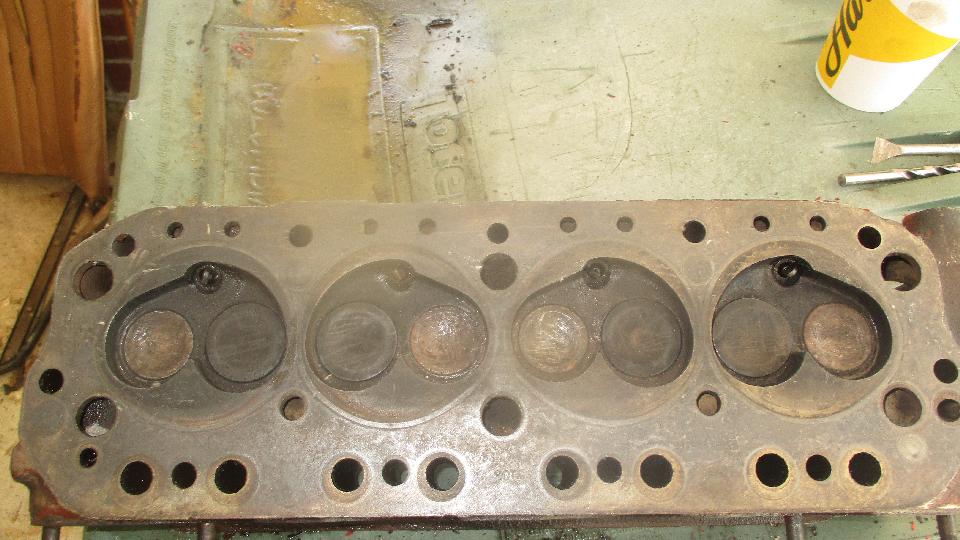
Flipping it upside down, it was a little crusty inside the combustion chambers, somewhat worn valves about flush with the chamber, not as bad as I expected. So we filled the chambers with water, and .... Lo and behold, nothing ran out through the ports. No leaky valves. Go figure. The head gasket wasn't leaking either, far as I could tell.
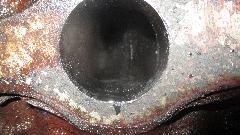
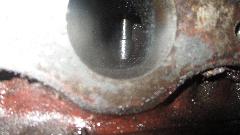
So we turned the engine to half stroke, got a cup full of fuel, and poured a couple ounces into each cylinder.
 It took less than a minute to leak down on #3, about 2 minutes on #1, and about 5 minutes for #2 and #4. It did have pretty good compression on #1, so maybe 2 minutes to leak 2 ounces is not too bad. #3 cylinder wall had some staining, like very light surface rust, so that must be the one that was sitting long term with an open intake valve. We decided the head is not going to the machine shop at this time, and it's not worth pulling the engine for a rebore or ring job just now. So we will clean this up and put the head back on it, and see if the #3 rings might loosen up and seal better after some running time. Might get gutsy and run an ounce of Bon Ami cleanser powder through #3 while it is running to see of it will clean up the cylinder wall and help seat the rings again.
Monday April 9, 2018:
Posted off another parts order for Ansel's MGA by mid day. Catching up email and BBS when I was noticing some discussion about installing new Moss seat cushions, and some related questions about solid foam rubber or cutting out core holes to soften and lower the seat. Having two day's experience sitting on new Moss complete seats (which seemed to be too high and too stiff), and a friend with new cushions in process of installation, it was a timely opportunity to do a little experimental investigation. So I called Dave Daniel and made arrangements to pick up a 1-1/4 inch hole saw, get courageous and maybe carve up one of his new seat cushions.
 For the set base that Dave had just rebuilt, he had the base board upside down, ending up with two right hand seats. So we took a few minutes to disassemble and reassemble it again to be a left hand seat.
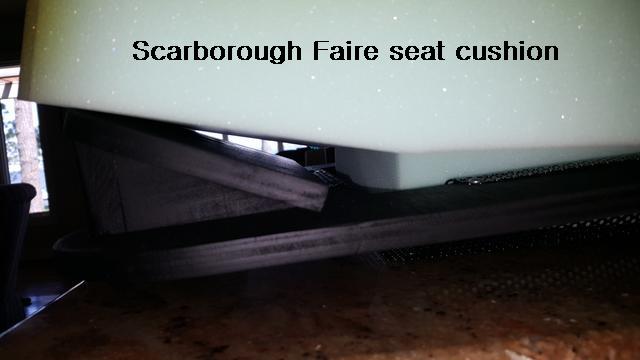
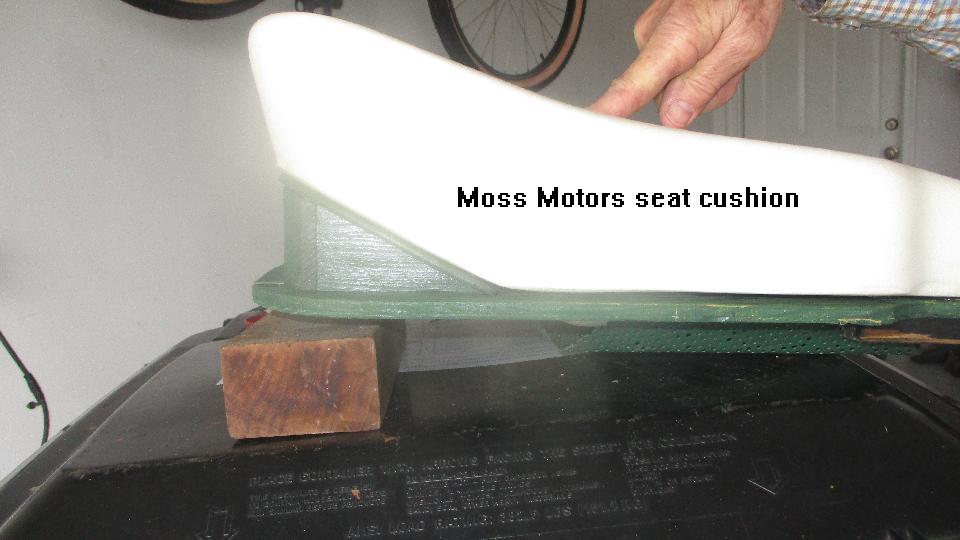
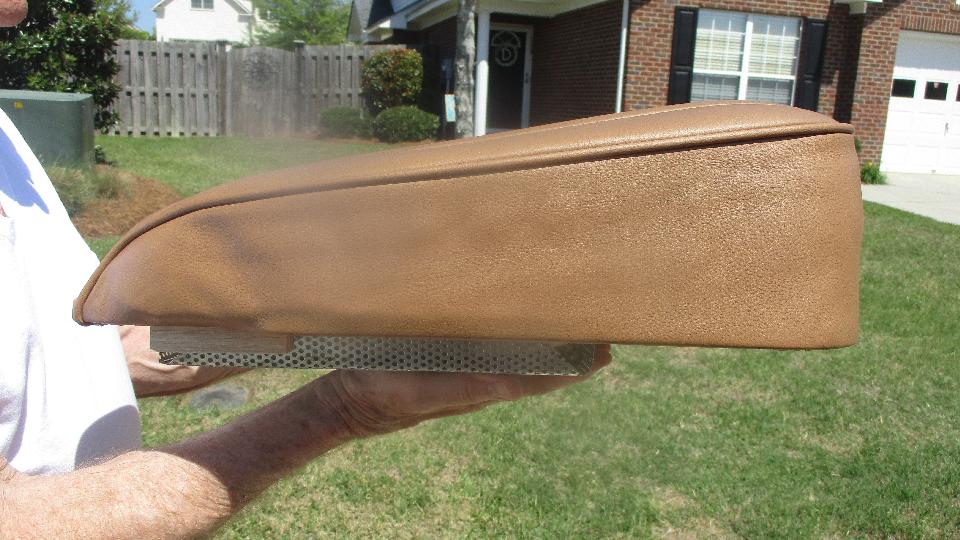
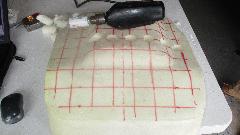
The next few pictures should answer a BBS question, that there is nothing wrong with the ramp angle on the bottom of the new Moss seat cushion. This would be a problem with the Scarborough Faire cushion.

First we assembled a new solid foam rubber cushion from Moss onto the seat base, put that in the car, and sat on it for reference. It seemed softer than the new complete seats in my car, so we put the leather slip cover over it and tried sitting again. Big difference. This is when it felt like sitting on a rubber ball that would bounce but was reluctant to compress. My take on this is that the foam rubber is not breathing, but compressing the air that is trapped inside.
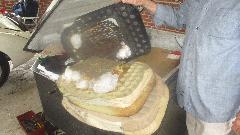
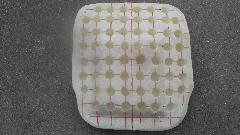
So we decided to try coring one of the cushions for comparison. Since the passenger side will be used less, we did that one first. If it came out too soft, then maybe not do the driver side, and some years later they might settle to similar height. The hole saw made very quick work of this, boring 60 holes in a matter of minutes. Like cutting air, bore the hole, then poke fingers in all the way to the bottom and pull out to core plug. Holes in the thickest part of the cushion are 2-inches deep. Holes in thinner parts are 1-1/4inches deep. This leaves at least 1-inch thick foam at the top of the cushion. Holes are 1-1/4 inch diameter on 2-inch center distance, 8x8 grid minus the four corners. We decided not to attack the 9th row at the rear edge, as it will be under the backrest where no one would sit on it anyway.
Then reassemble the two cushions, and get back to the sits testing. Big difference. Sitting on the cored cushion results in immediate squash of about an inch, and no bouncy feeling. I'm sure this is mostly due to air breathing out instantly. If you intentionally hop up and down on it, the cushion changes thickness almost instantly, like a good shock absorber should (so to speak). No more hard bouncy ball feeling.

The rest I think is up to the passengers' preference for ride height. In this case Dave elected not to core the driver side seat cushion, because he is shorter stature and likes the higher perspective. Do give him credit for allowing me to carve up his passenger side seat cushion (for benefit of the MG community at large). People of taller stature in particular may like to know that the seating height can be lowered at least an inch just by coring the bottom of the cushion (as original). If you like the softer feel but do not want to lower it so much, then maybe use smaller core holes for good breathing but retaining more material to retain more support (less squash). This is also a good time to pop a few breather holes in the front ramp board if your replacement seat base does not have them.
The "new" high quality electric stapler from McMaster-Carr that I had been carrying around in the trailer for 16 months just waiting for this opportunity didn't work. Say WHAT? After fiddling for a while I took it apart for a peek inside, but it looked perfectly pristine, so put it back together, but still not working. Ordered up a new one.
Tuesday April 10, 2018:
Day off (just means no appointments). Waiting for a parts delivery. Spent most of the day posting CMGC April newsletter on the club web site.
Wednesday April 11, 2018:
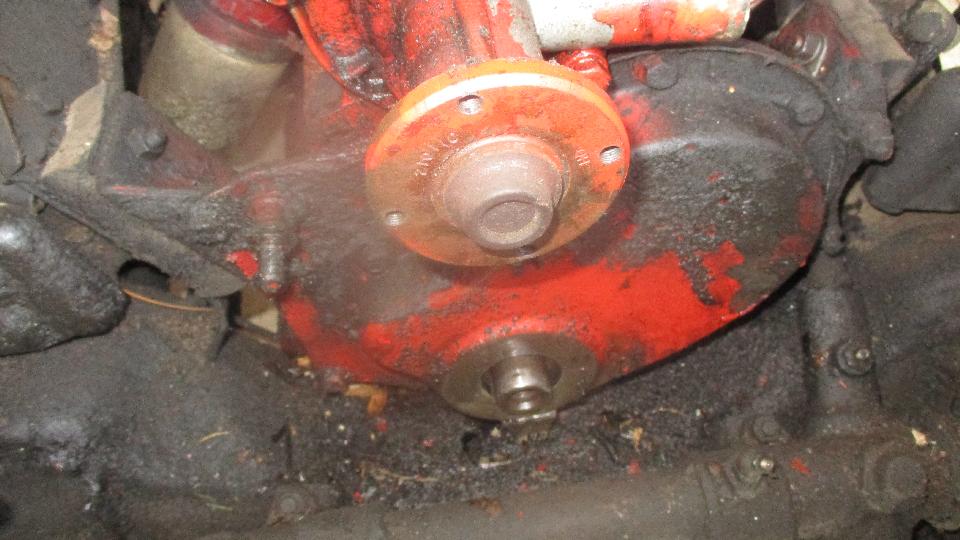
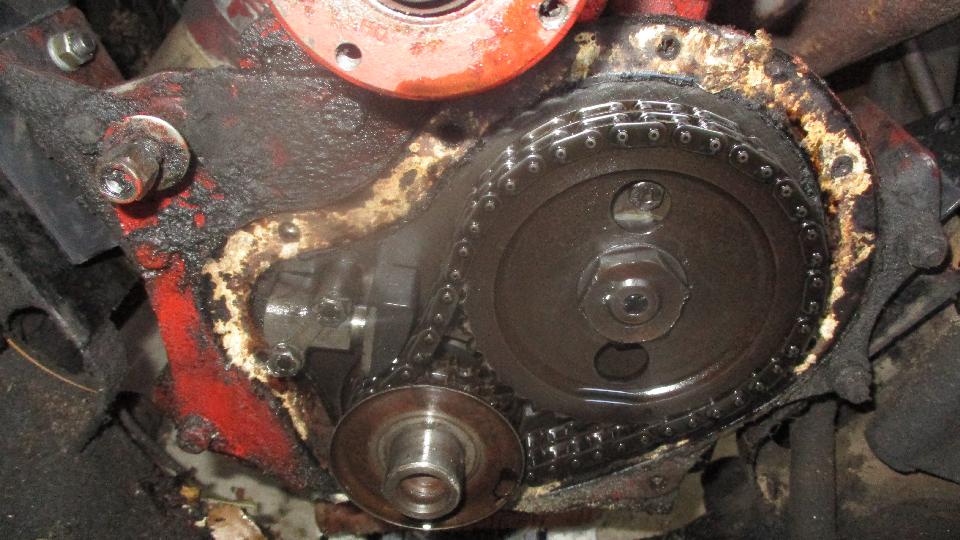
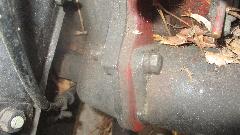
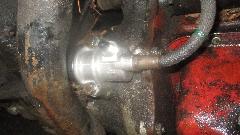
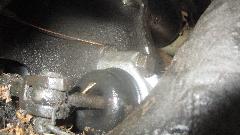
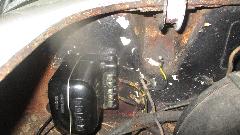
Finished the newsletter thing by mid day. Early pm parts delivery, so late start 1:30pm on Ansel's MGA. Began with removing radiator, fan, some hoses, generator, and crankshaft pulley. Before working on timing cover, it was a good opportunity to change engine mounts, and while it was jacked up it would be easier to do the timing cover thing. Got the engine mount bottom bolts out, and jacked up the engine, then removed the timing cover. Found a chain tensioner in very good condition, nearly new, with a used locktab not bent up on the bolts. Off for inspection, then reinstalled and set the locktabs this time.
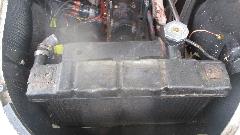
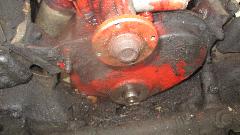
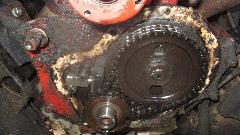
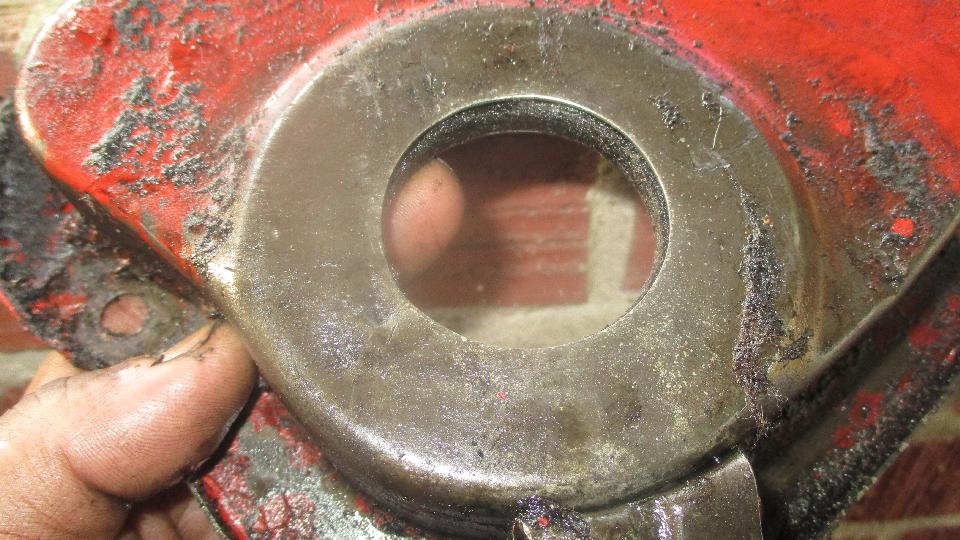
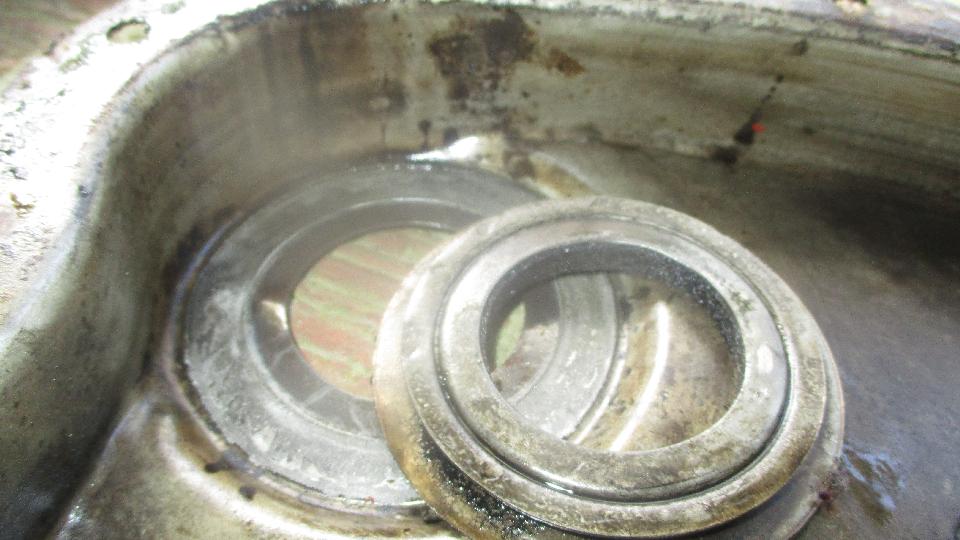
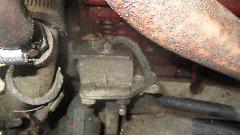
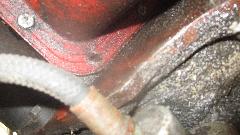
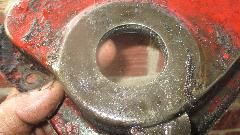
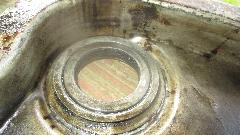
It didn't take long to discover why there was such a bad oil leak up front. The felt seal was sort of so-so, maybe not so bad as to leak that much. But a quick look inside revealed the metal shell holding the seal was broken loose from the cover (where it should have been welded). Duh? I have never seen one of these come loose, so it makes me wonder if it was intentionally disassembled by the DPM. Plan to find a radiator shop to solder it back together tomorrow.

 Meanwhile, sent Ansel out for a box of 5/16" lockwashers, as there are nearly none on this car. Clean the gasket surfaces, finish replacing engine mounts and get it bolted down, then ran out of daylight, so we will take this up tomorrow. Put a pair of steering rack seals on the next parts order.
Thursday April 12, 2018:
Ansel was busy this morning, so we dashed over to Dave Daniel's place to pick up the new electric stapler and finish reassembling his seat bottoms with the new cushions. The new stapler didn't work either. Duh? When all else fails, read the instructions. The last one I had removed from the package to take less space in the trailer. Thinking I knew how to use a staple gun, I had tossed the user's manual (safety warnings, instructions, warranty info, etc). So we read the instructions, and guess what? This one has a safety trigger built into the working nose of the tool, so you have to press it against the work piece before it can fire. Go figure. Call Ansel to see if his trash bin has been emptied yet. We may now have two working staplers.
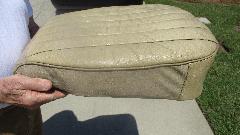
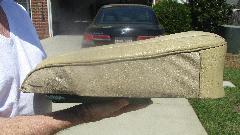

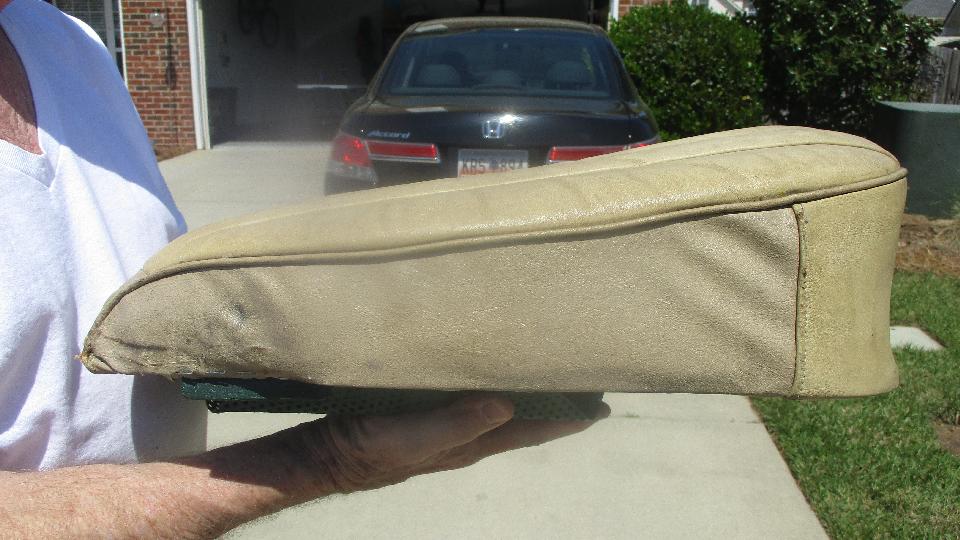
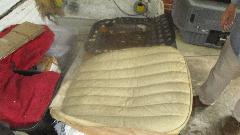
 It is not a coincidence that Dave's vintage cover with the nice patina is similar profile to my new cover, as they both have the new Moss Motors cushion inside. Notice the high front end and slight dip in the center (even with no load on it).
We took turns sitting on the cushions with new solid foam and new cored foam. Dave likes the solid foam, even though it is more firm and bouncy, because he is shorter stature and likes the higher sitting position. Navigator likes the solid cushion (by comparison), saying he sinks through the cored cushion, like hitting bottom (but do consider that he weighs at least 250 pounds). I like the softer cored cushion, but I also like the higher sitting position, so if I was to core my seat cushion I would have to put the riser blocks back under the slide rails (because I'm a shortie too). There can of course be variations in between if you use a smaller hole saw or fewer core holes.
Friday April 13, 2018:
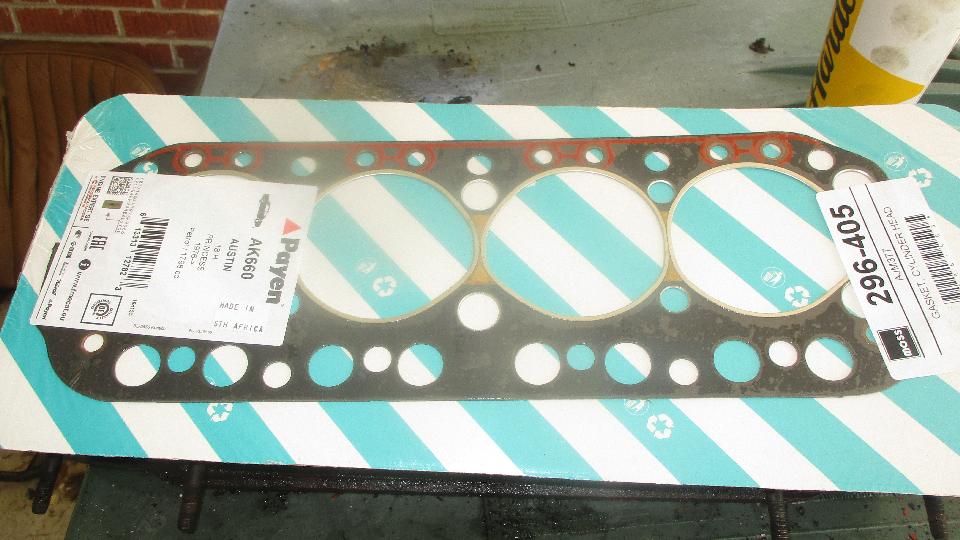
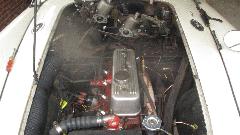
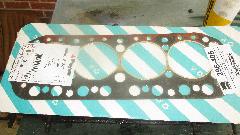
Did a 10 to 8 on Ansel's MGA today. Often too busy to take pictures, but was trying to get the engine back together to run, and didn't quite make it. Cleaned up top of block and pistons, and oiled the cylinder walls. Cleaned up cylinder head surface and combustion chambers. Put it back together with a nice new Payen black fiber head gasket.
Made a lot of trips to the magic trailer for minor parts. Locktab for the timing chain tensioner, a few replacement nuts and bolts, couple of threaded studs, locking plate for rocker shaft set screw. Ansel tracked down a replacement timing cover, so got to clean that up and install a new felt front seal, dig out some new oval washers and a couple more small bolts. Finally got it all assembled with new gasket, new crankshaft pulley and locktab.
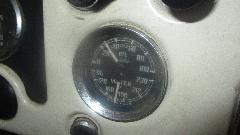
Installed the heater valve with new gasket and proper clip for the temperature sensor tube. Temporarily installed the temperature sensor bulb (that doesn't work), run the line along the head gasket joint, under the heater valve. Pull a recently repaired temperature gauge out of the trailer, recon we will install that one tomorrow in exchange for the non-working one (to be repaired later).
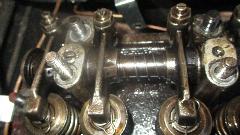
The rocker shaft aluminum pedestals were a mess. Led a rough life I guess, heavily embossed on top, deeply depressed and constricting on the studs, was difficult to remove. Spent time rat tail filing the holes and grinding down and filing the top surfaces to restore a flat seat for the proper heavy flat washers. Came out okay in the end.
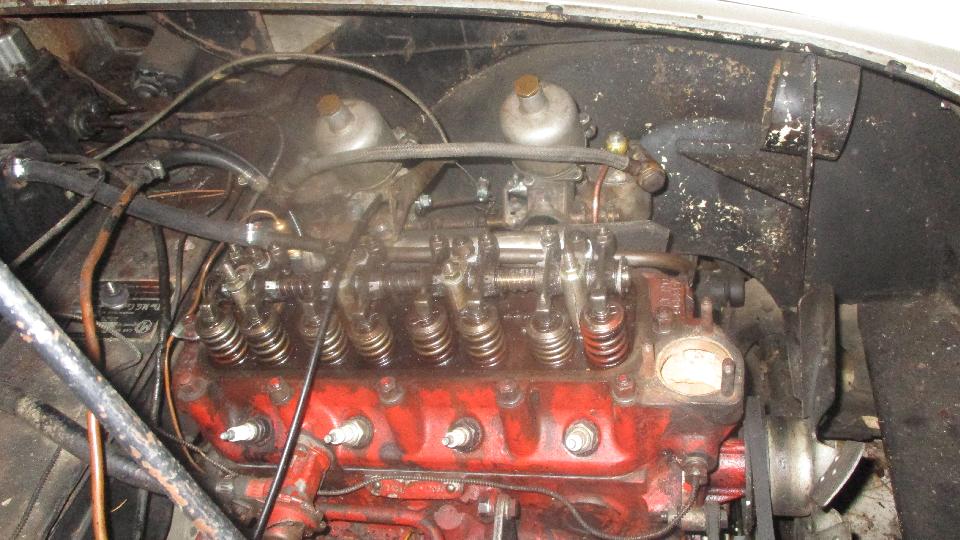
 Installed water pump pulley and fan, generator and belt. Sent Ansel out for a late lunch and some flat washers (and his torque wrench). Diligently installing the carburetors, oops, one step back, bummer. Took them off to install the heat shield, and install again. Running out of daylight, couple of simple things at dusk, then put the valve cover on to keep dirt out, and call it a night. I probably missed a few things, and I don't know why this sucked up 10 hours, but that's the way it goes with old cars. However long you think it may take, double it and add 50%, and you might be close.
Saturday April 14, 2018:
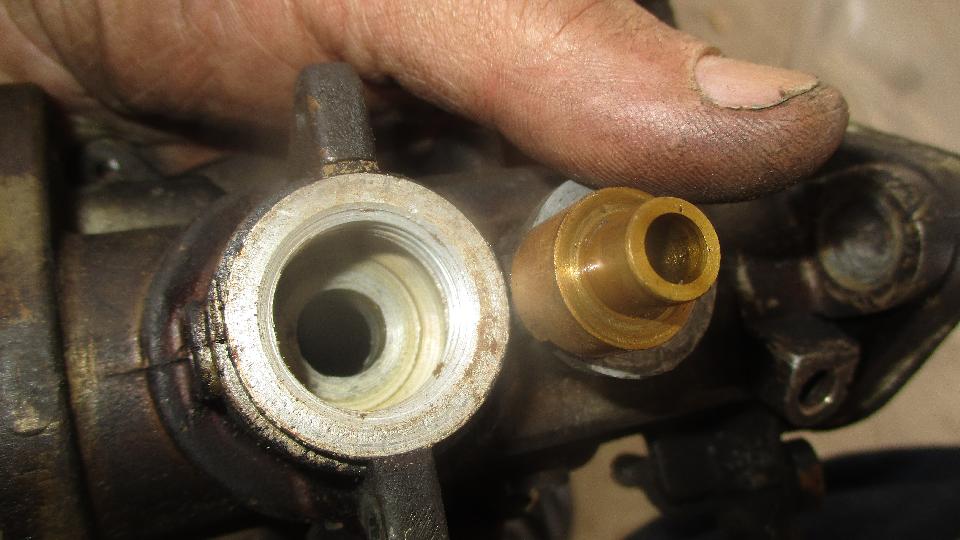
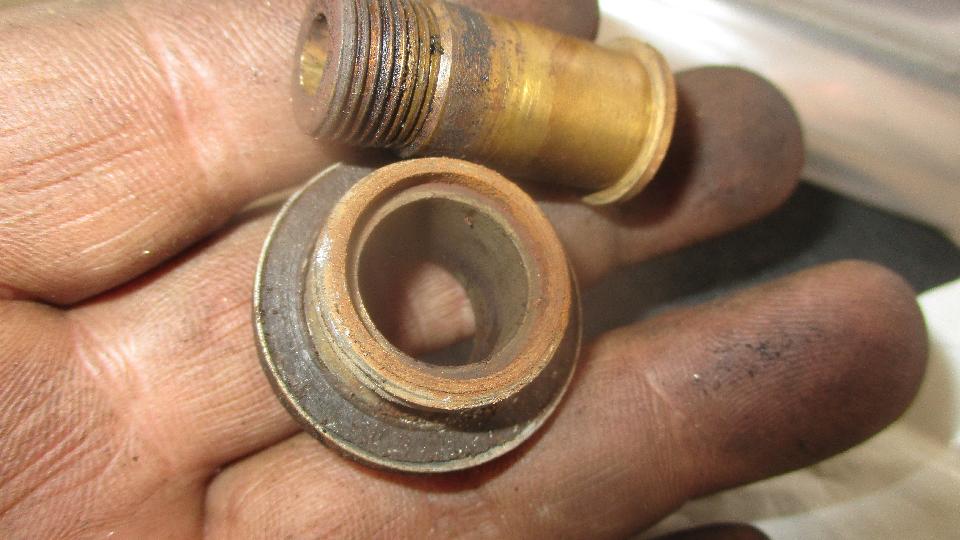
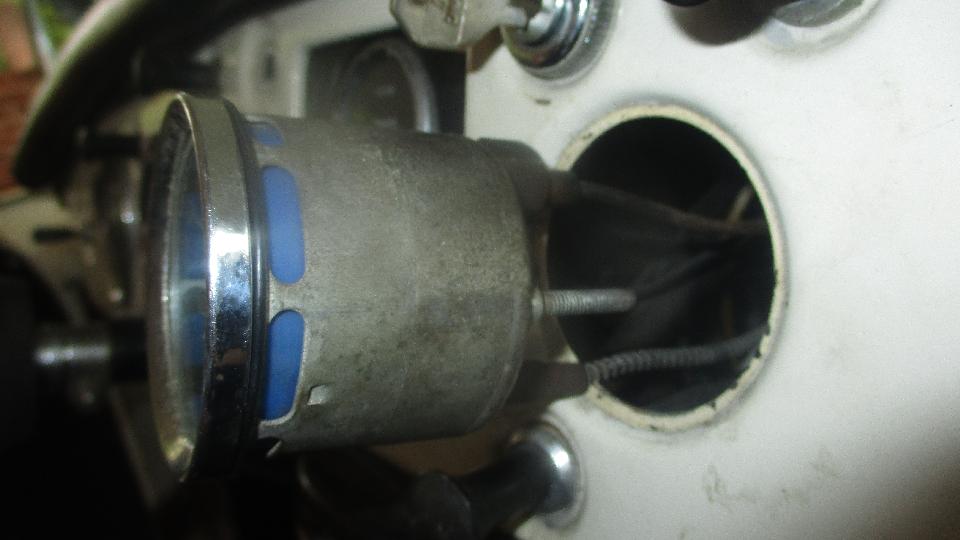
Intending to get Ansel's MGA running (again) today, 10am start, got sidetracked a few times, still didn't get it done (just so you know up front). First business today was to replace the defunct temperature gauge with one I
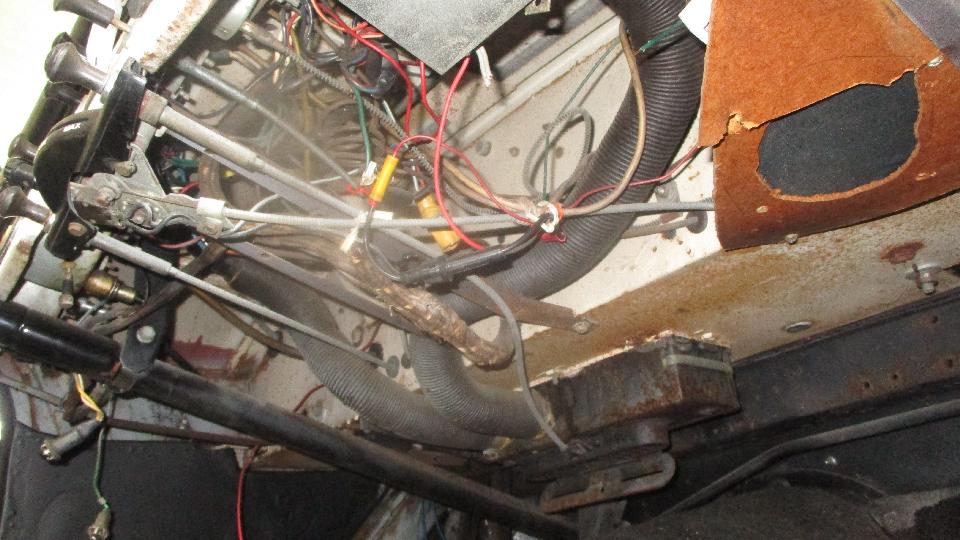
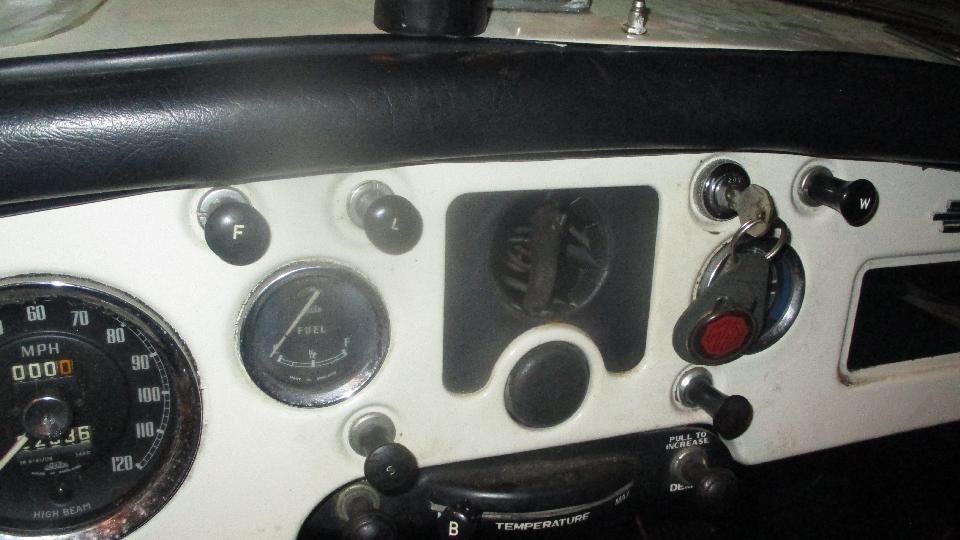
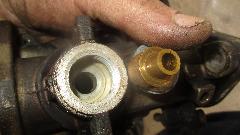
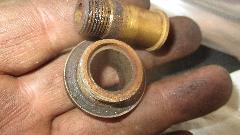
 had repaired recently. A little struggle to release three P-clips, one rusted screw actually came apart, another one had to be cut, and one aft of the bulkhead was no problem. Disconnecting the oil pressure line from the gauge, once again brass on brass with no leather packing washer. Ran the new signal pipe through and installed with P-clips and a new rubber grommet. Also had to space the short flare nut out with a 1/4-inch lockwasher again. I recon we forgot to reinstall the replacement gauge in the dash, but will certainly get that later.
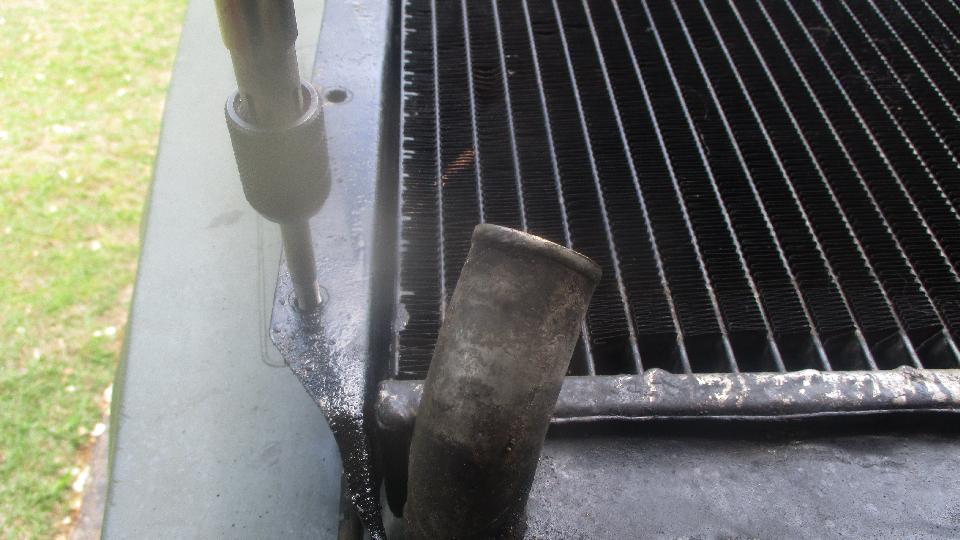
Prepping the radiator, one mounting hole had the correct 5/16-24-UNF bolt, two holes were cross threaded with coarse thread bolts, and three holes had #10-32 screws with washers and nuts. We would discover why later. Got fine threaded bolts started straight, then ran the 5/16-24 tap through the holes, and they all came out okay (just lucky).
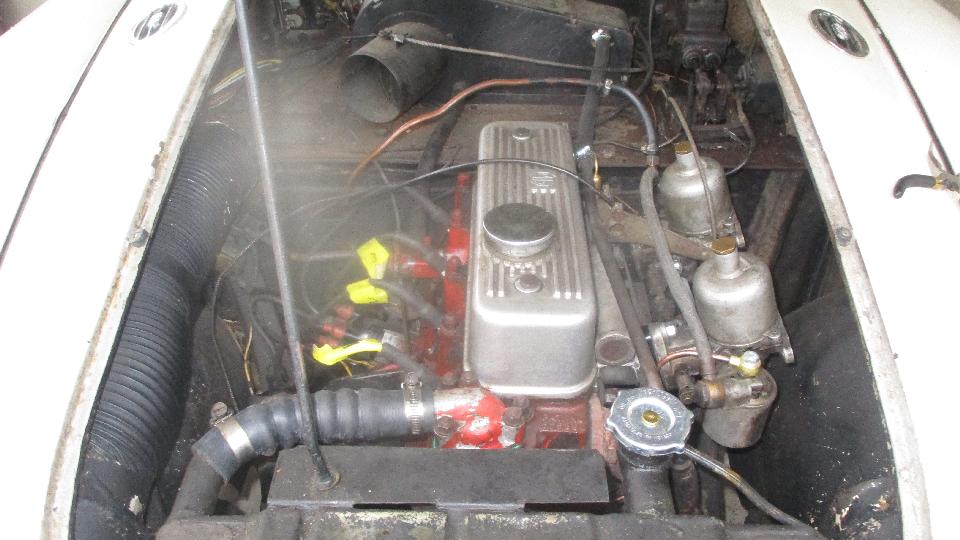
Next we were determined to restore crankcase ventilation, so needed to install a vent fitting in the alloy valve cover. The vent hose is an odd diameter, 7/16-inch bore size? Considered a 1/2-inch hose barb, too fat. Trip to local hardware store to pick up a large bore 3/8-inch hose barb with male pipe thread base, and a drill bit in tap drill size for my 1/4-NPT tapered pipe tap.
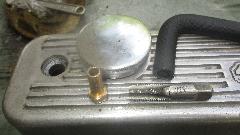 Back to work, pick a good vent location between #2 and #3 rocker arms, pilot drill, tap drill, tap the pipe thread, repeat a few times to find the desired depth for the male threaded fitting (about flush inside). Use blue stuff to glue the new cork gasket to bottom of the valve cover, and get it installed. Notice the deep counterbore holes for the attachment nuts. Original cup washers for rubber grommets do not fit inside these holes, so we had procured the extra length cap nuts. Final parts fitted included two rubber grommets, one cup washer, no spacer, and one extra long cap nut for each bolt.
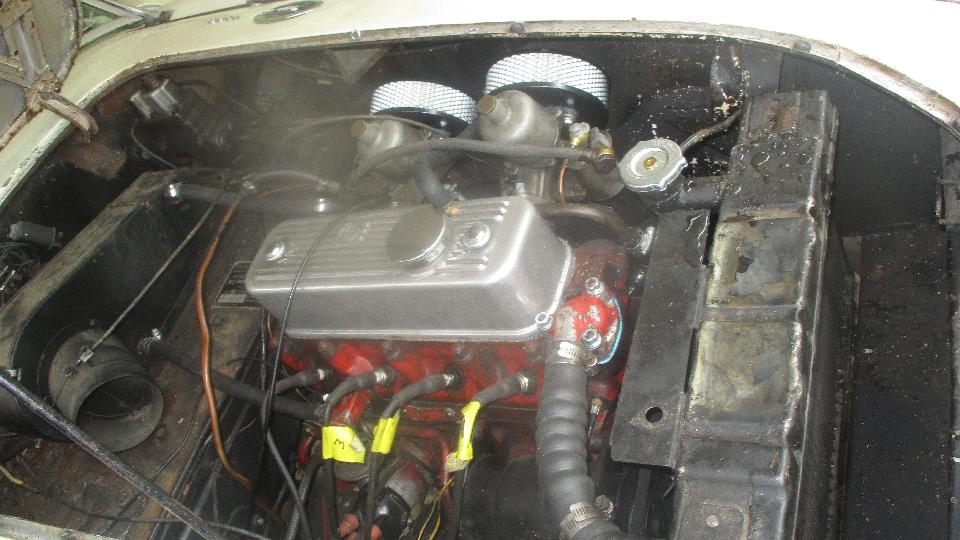
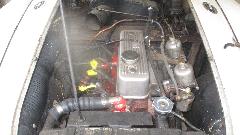
On to the new Volkes air cleaners, four short bolts included with each unit, toss out two and find longer bolts to attach to the carburetors. Yes, the little scrunched up air filter inside does expand to fill the metal mesh shell. Dave Daniel dropped in for a while, and then Ansel had to leave, but Dave and I kept on scarfing knuckles. As is common with replacement parts, no chamfer on the tapped holes, so it would be difficult to get the screws started. Spent too much time fiddling with the bolts for the rear air cleaner, but finally got it. Rear bolt for the front one was even worse, finally removed the front carb to attach the air cleaner and reinstall, much quicker.


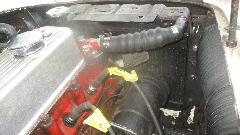 Then we figured it would be nice to install the radiator before quitting for the day, just six bolts, easy, right? Well, no. This is when we found out why it was previously installed with a few #10 screws. Had to use a crow bar to align holes for top right screw. Then a larger crow bar to align holes for bottom left screw. The car had apparently been pranged in a past life, and never quite straightened. But persistence pays, and we eventually got it assembled with six 5/16 inch bolts as original. Installing the hoses was easy by comparison. Leave the coolant and engine start for tomorrow.
Sunday April 15, 2018:
Late start, noonish, a lunch run to sit out the worst of a storm front, then tinkering until 8pm. Being able to see what we were doing by daylight, we put water in the radiator and verified no leaks, then finished connecting the oil pressure line to the gauge, and installed it in the dash. Oddly enough it ran very well for 3-1/2 cylinders. Will have to do a compression test again later. Verified the oil pressure and water temperature safety gauge was working.


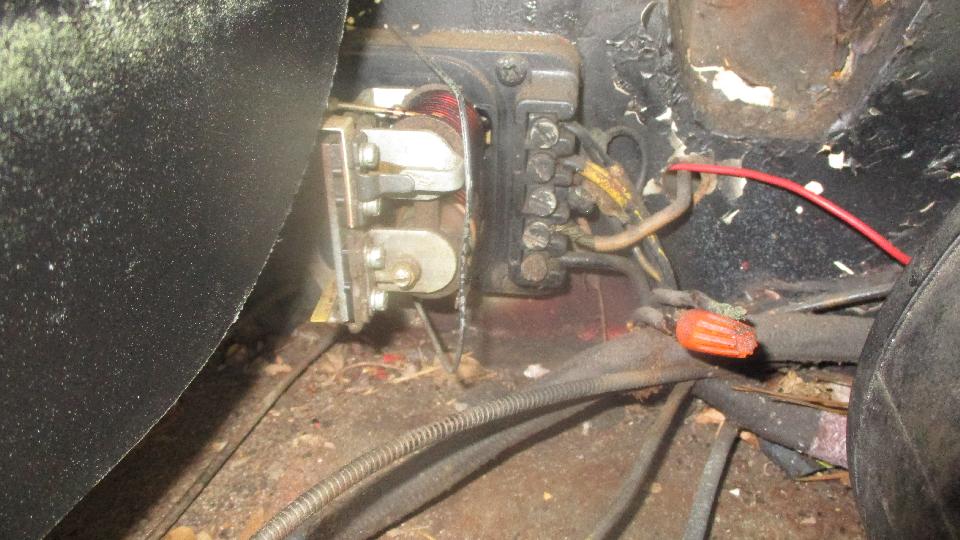
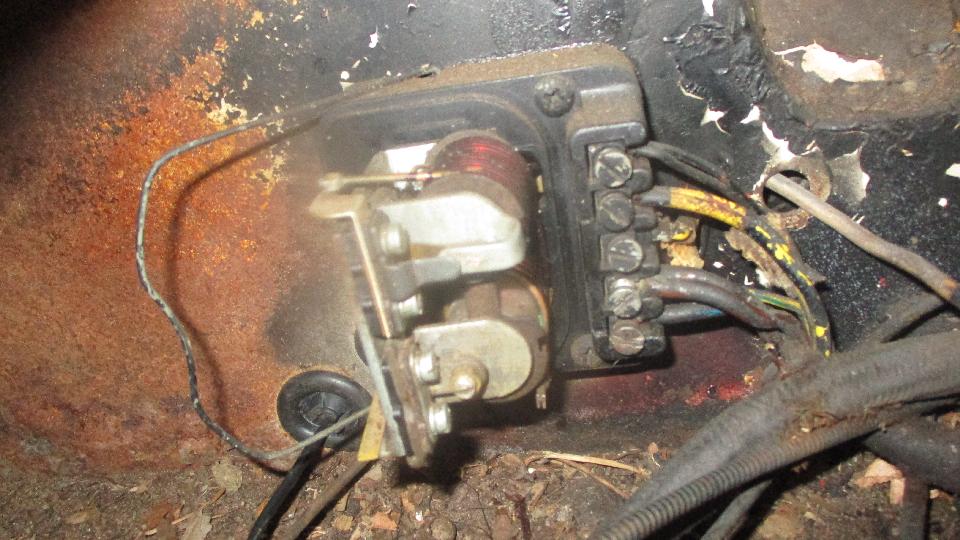
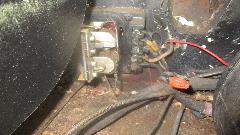
Out with an old defunct control box, and in with a new one. Like the instructions say, clean the contacts before use, and also re-polarize the generator, since we had changed the batteries to negative earth, and voila, the charging system was working. Spent time removing a lot of extraneous wires. Removed the radio and speaker, temporarily. Removed the power inverter that is no longer needed. Tossed out the broken lighting switch, installed a good used one, and spent time retrieving errant wires here and there to restore them to original connections.

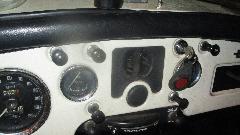
Spliced some broken wires back together at the dipper switch re-wrapped that part of the harness, and tied it back to a body bolt. All the crawling around under the dash was beginning to pay off. Got dash lights and front parking lights, high and low beam headlights, and brake lights. No tail lights or turn signals yet, but it gives us something to look forward to tomorrow.


|