The MGA With An Attitude
MGA Guru Is GOING MOBILE - (February 1 - February 15, 2023)
Wednesday, February 1, 2023:
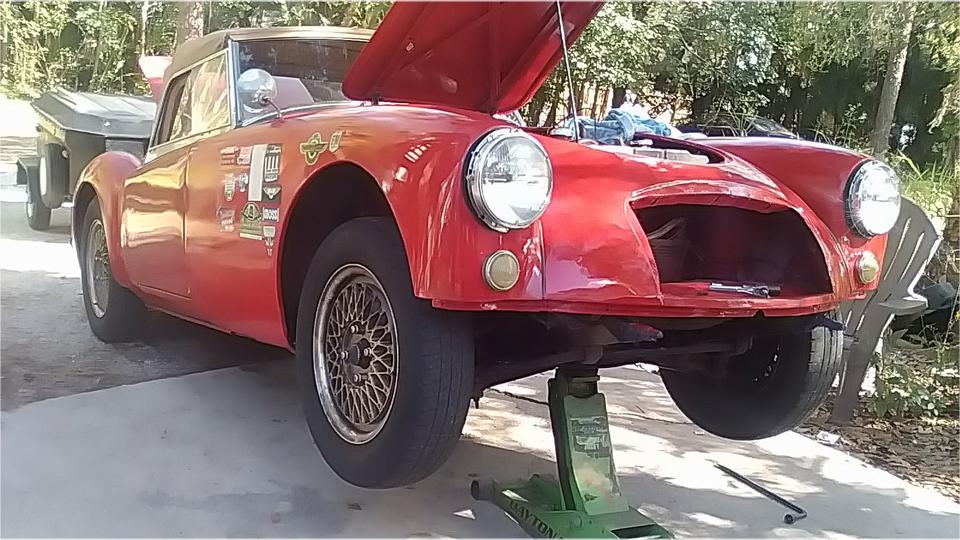
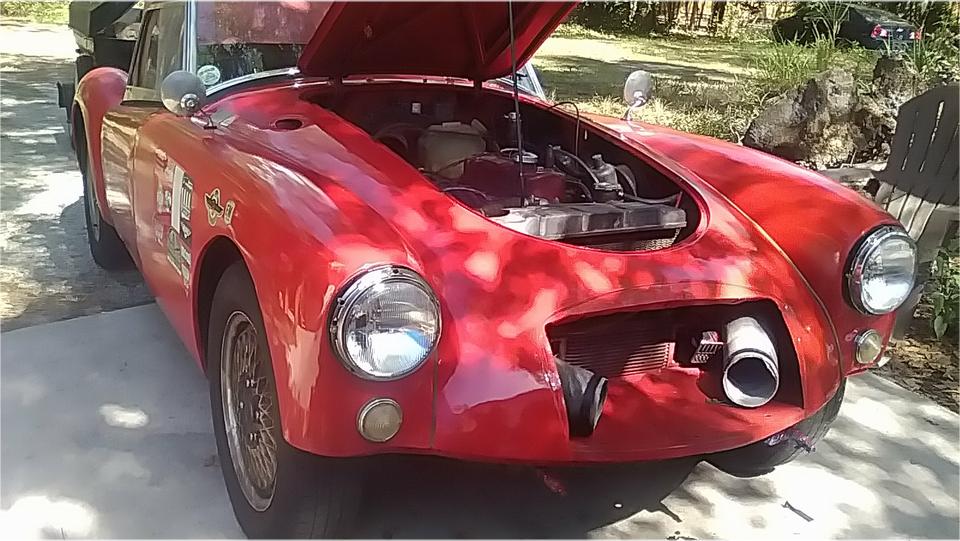
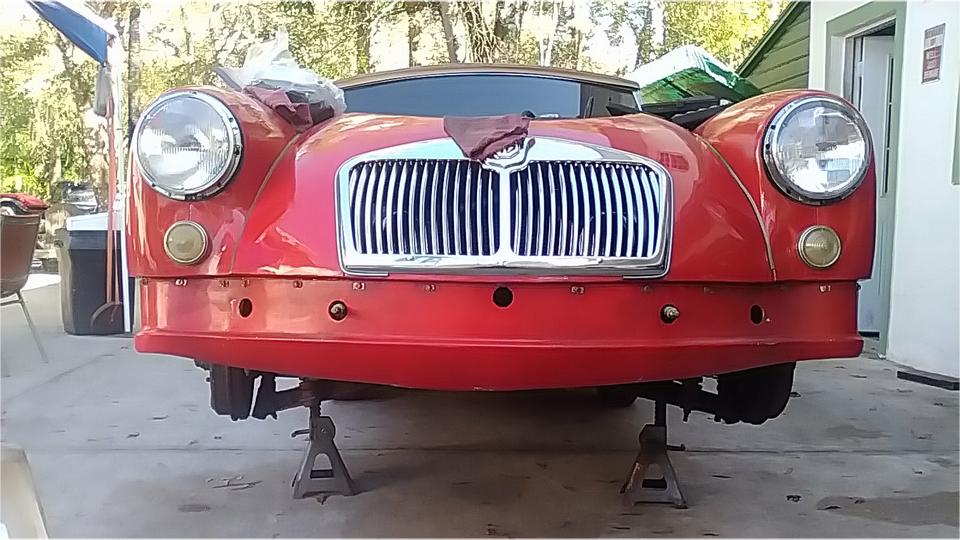
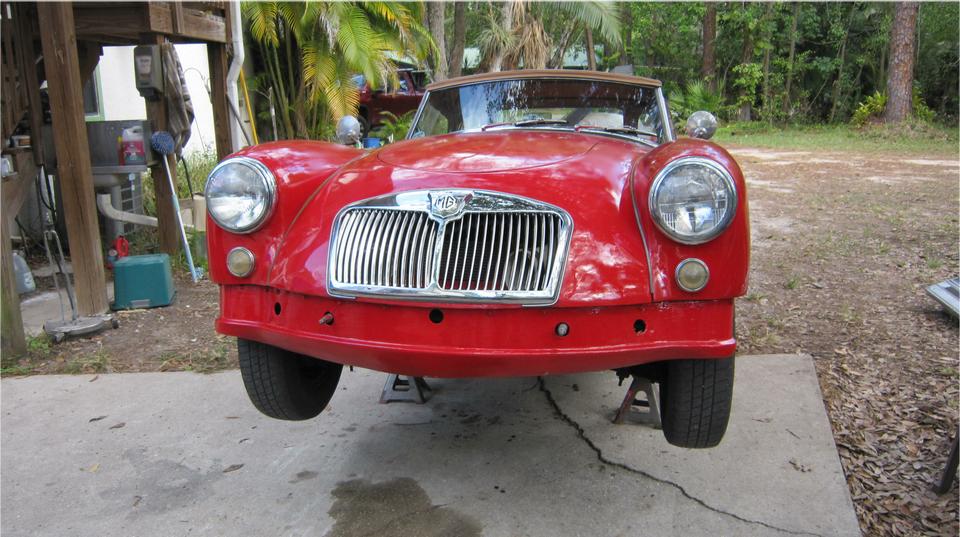
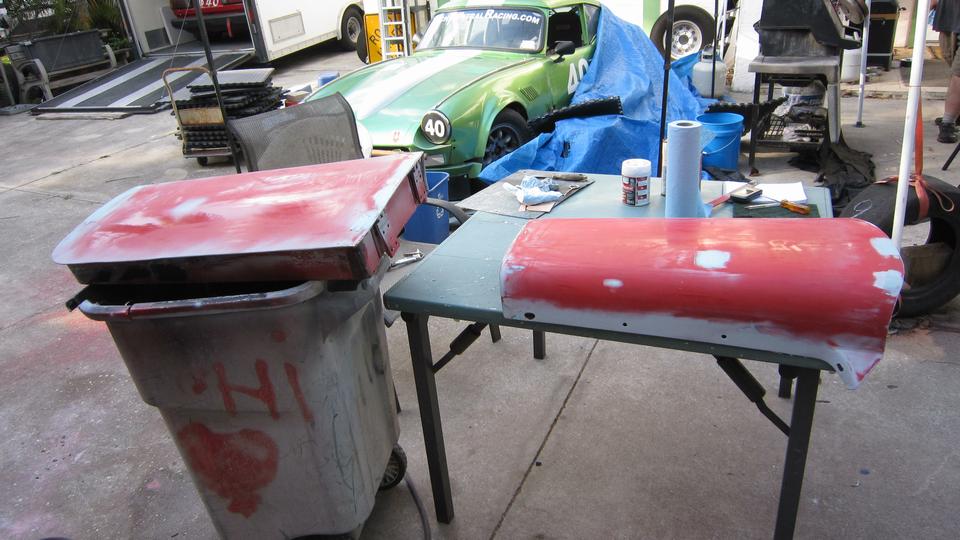
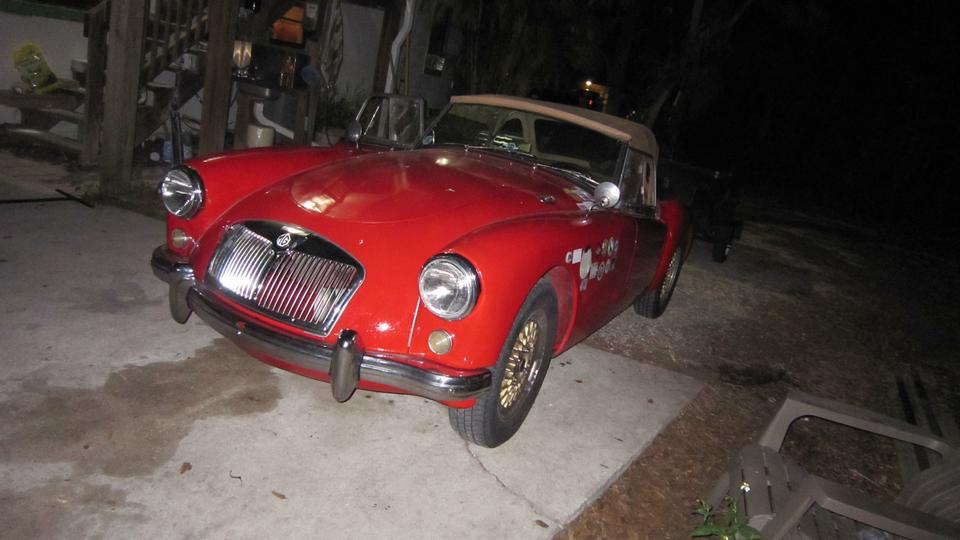
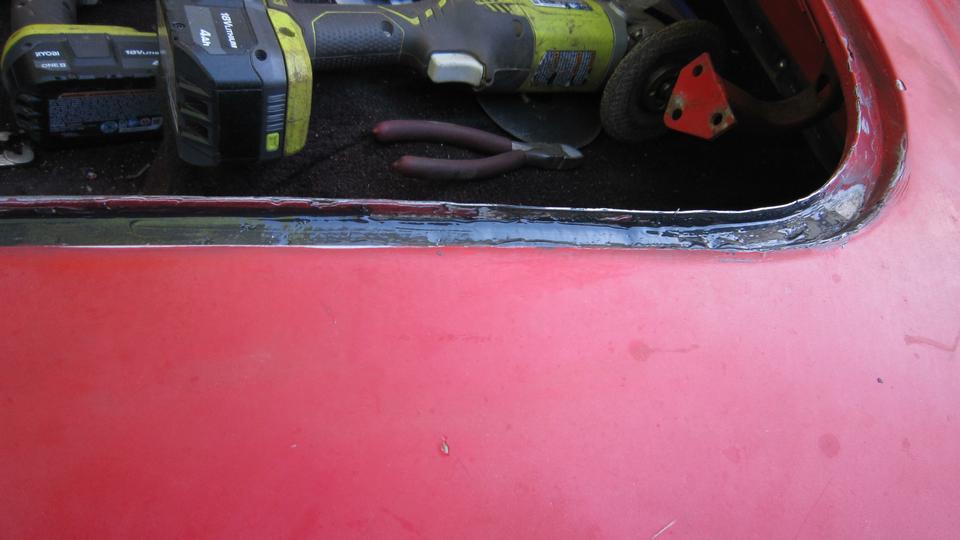
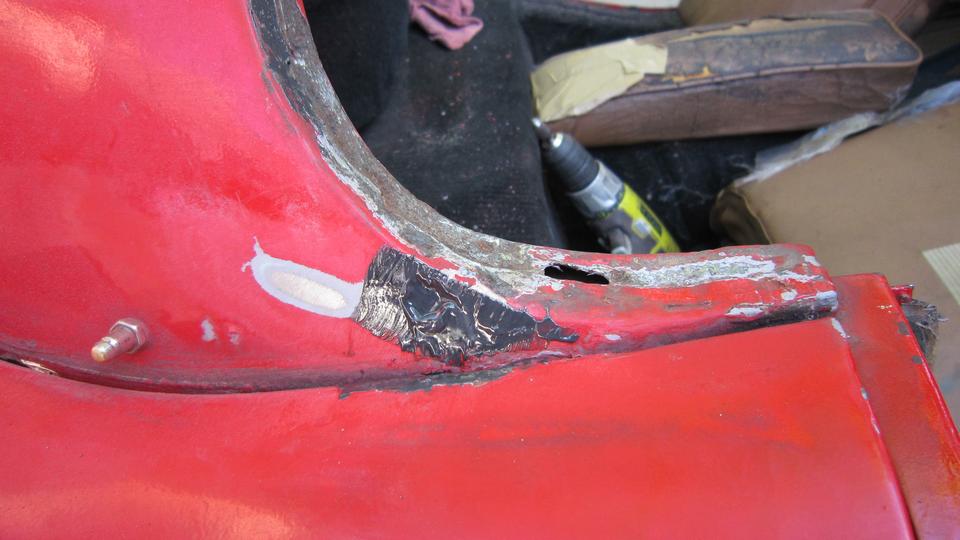
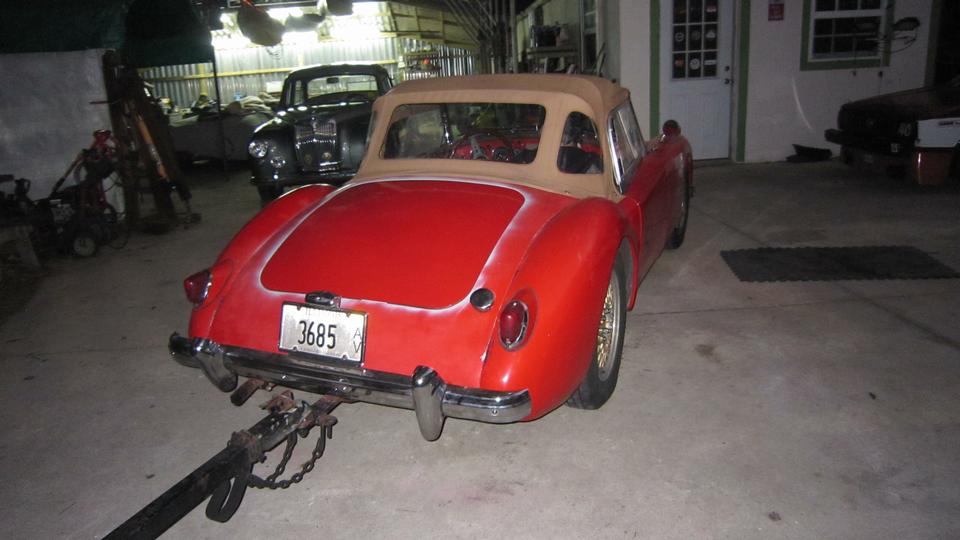
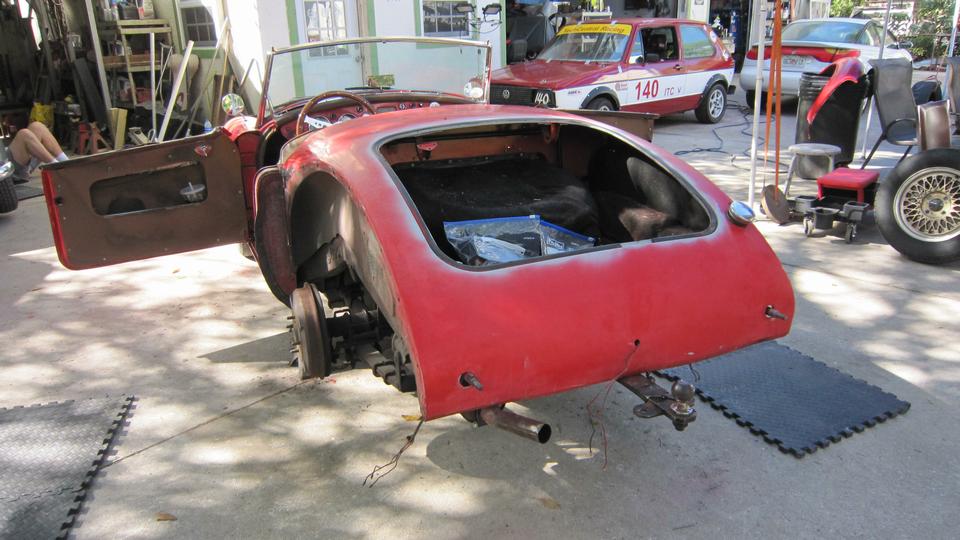
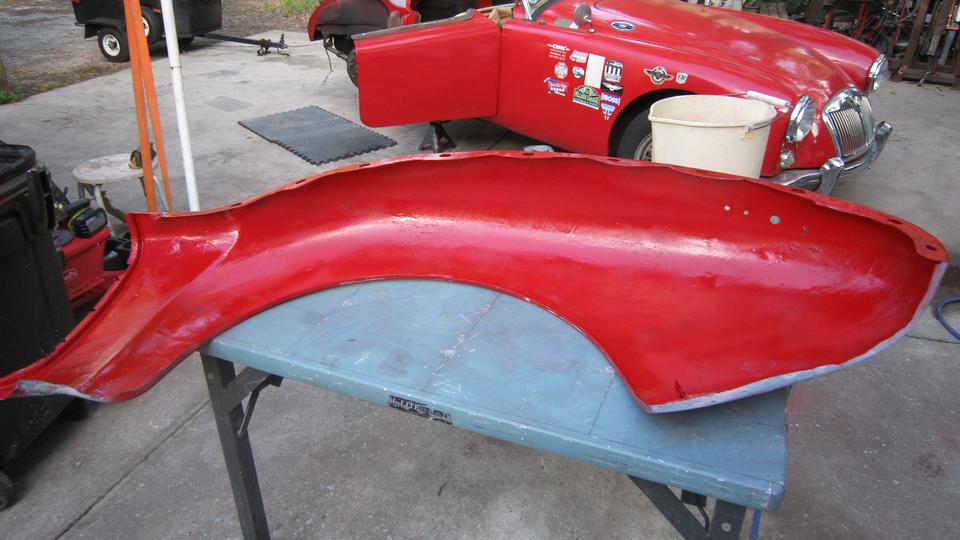
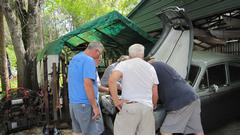
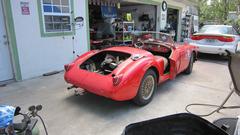
Yesterday we got the front wings bolted up along with wing mirrors, splash guards and the bonnet painted underneath in the morning and installed in the evening. Now we were after body front end reassembly. First grab a small paint brush to finish off the chin flange where the front valance panel will fit below the nose. Also reach inside the nose to paint over the small spot of JB KwikWeld used for the minor rust repair last week. Notice the MG is sitting on the outer edge of the cement apron. No wonder why.
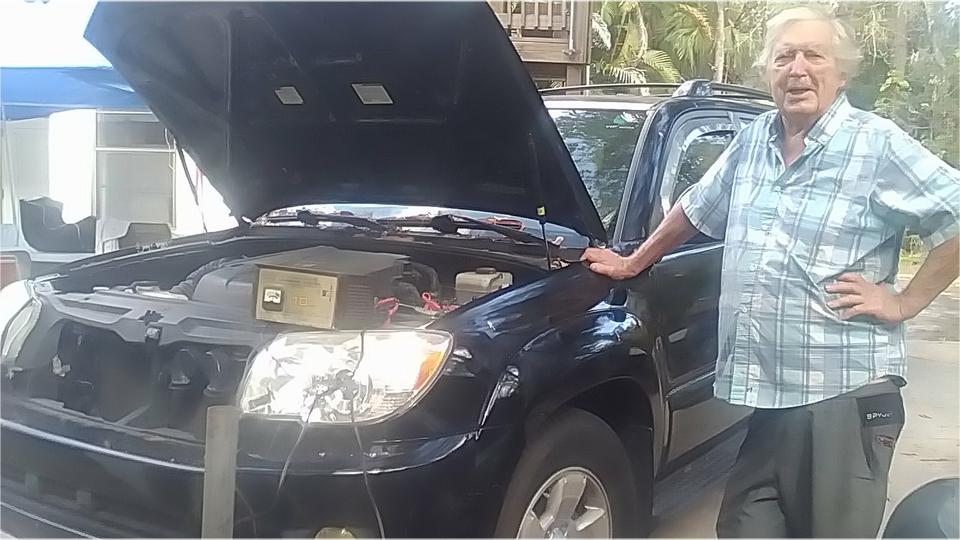
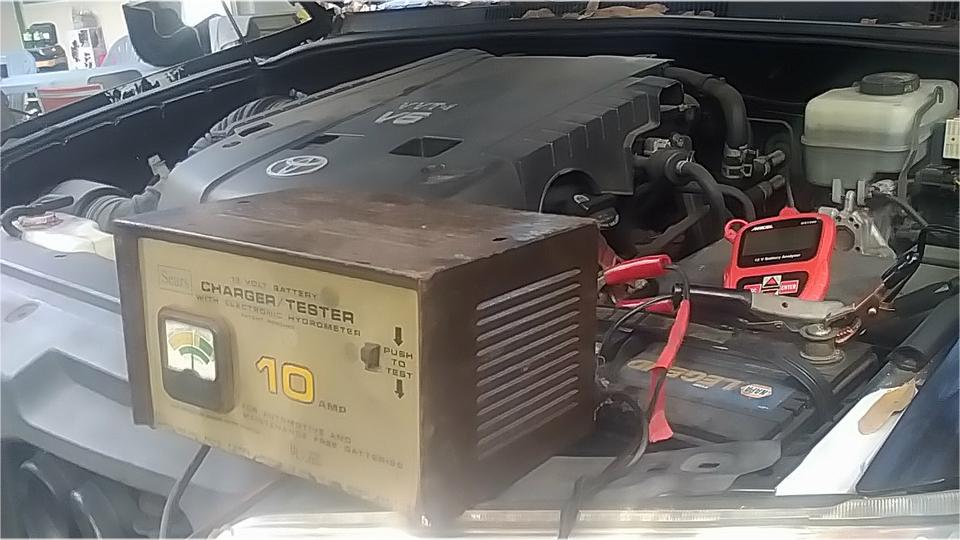
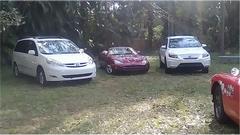
The big Toyota was still here and still blocking our preferred shady work space. Its battery was still discharging while sitting overnight. Not sure if it is a bad battery or some unknown power drain while parked. So get it back on the charger, and ante up my little red battery tester. Check back later once it is fully charged.
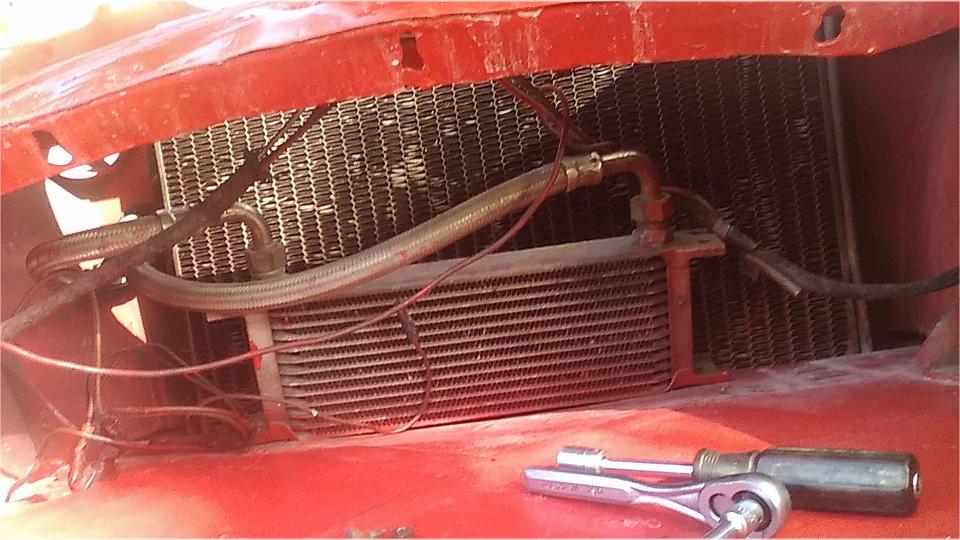
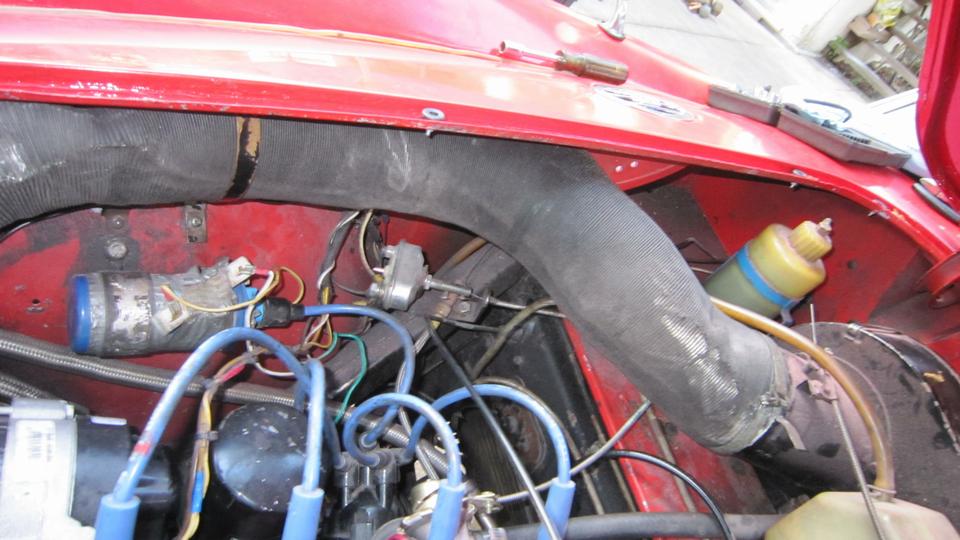
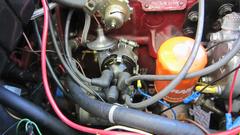
For an hour and a half off fiddling we bolted down the oil cooler, installed the two small electric horns (hooters), tape wrapped the front crossing wires for the horns, and re-installed the two 4-inch air hoses forward of the radiator. It strikes me as rather odd that the air hoses that were black paper covered and new in June 2021 have now faded to nearly white (very light gray). The longer air hose for the heater air supply in the engine bay is still black. Just sun through the grille I guess.
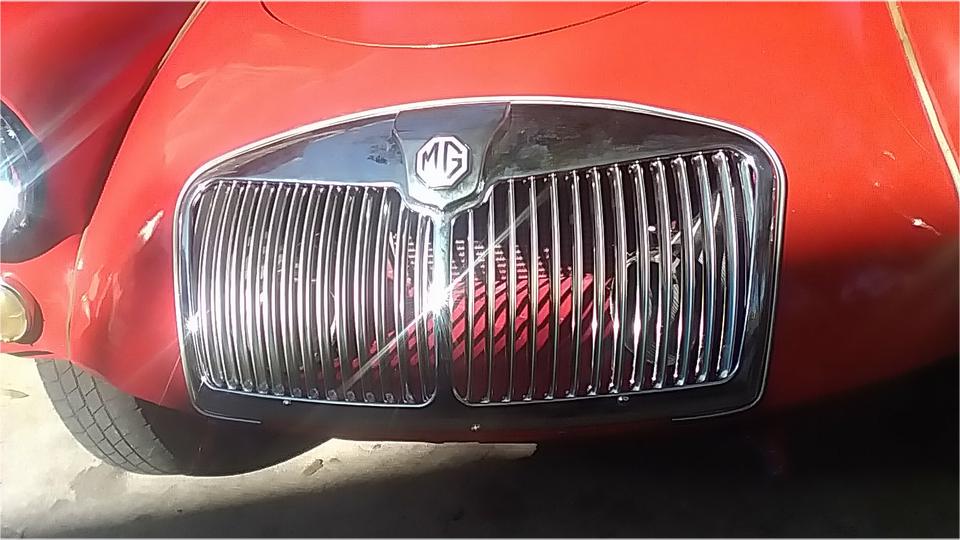
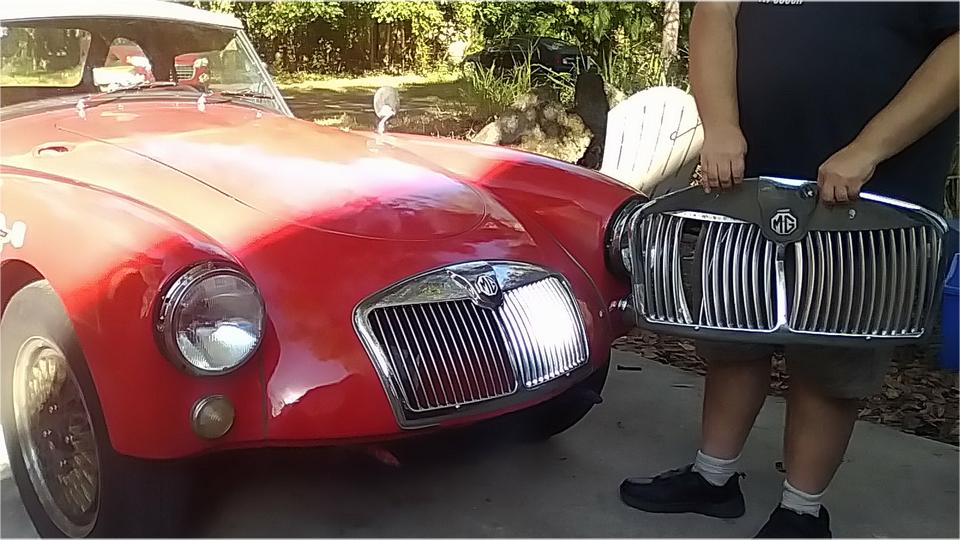
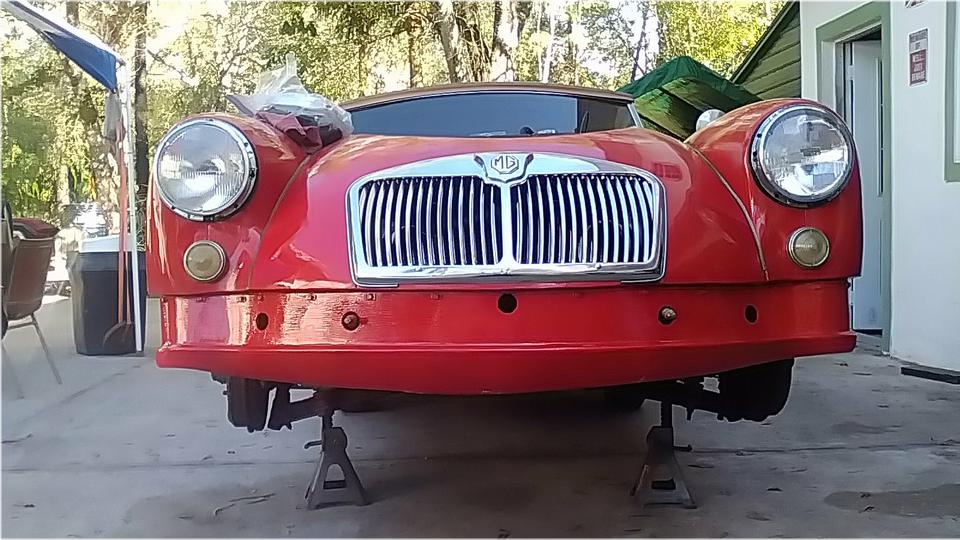
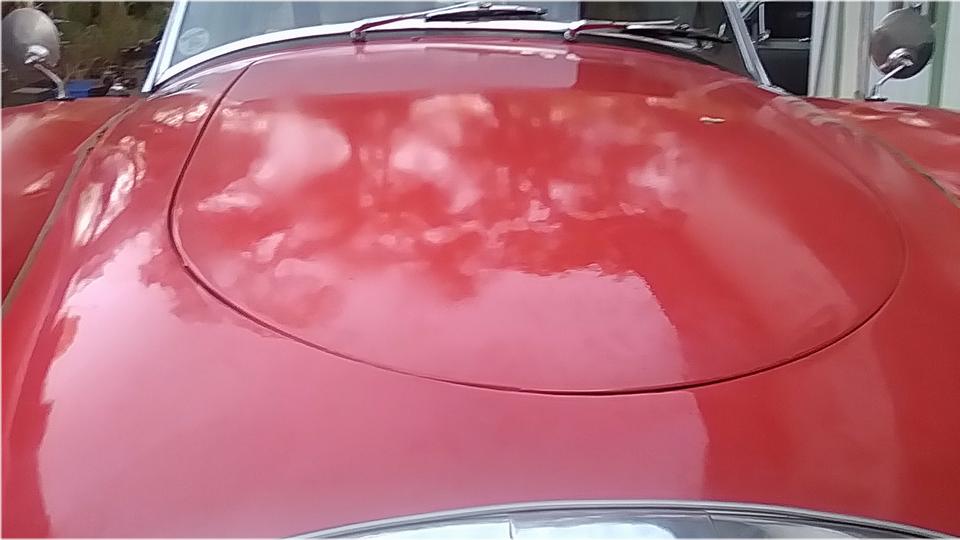
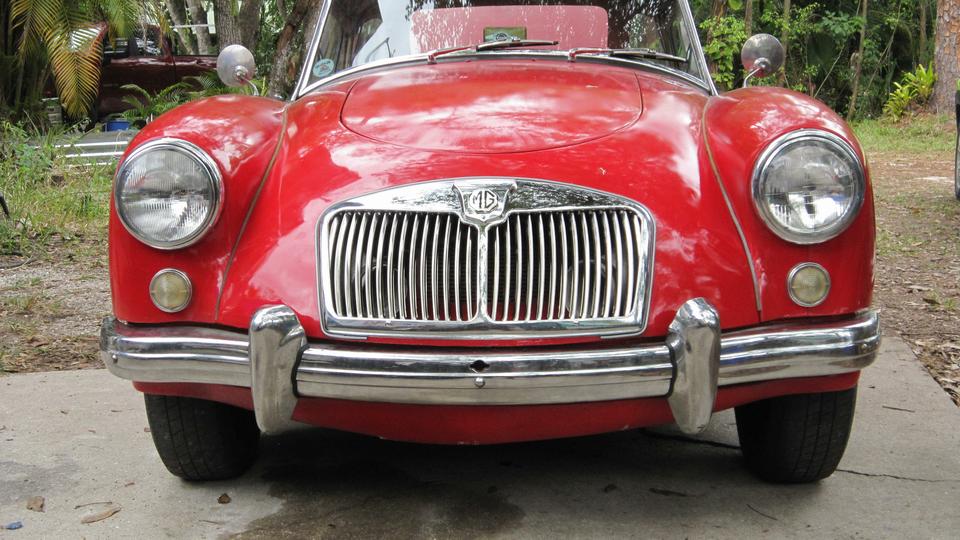
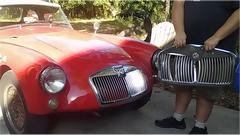
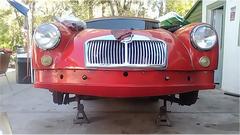
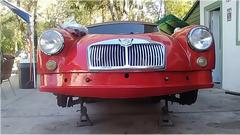
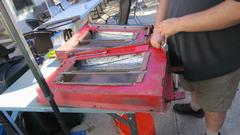
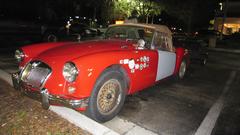
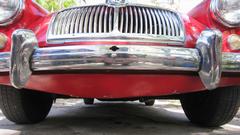
 Finally we got to install the new grille that has been hanging around for a month. Where has the time gone? This grille is supposed to be notoriously difficult to install, but having done it several times, two pairs of hands can sort of force a new grille into a newly remodeled body nose in an hour (or two). Yeah, it's a bit of work, but nothing like impossible. I install it with only five bolts, leaving out the one at top center hiding behind the bonnet latch support parts. If you think that one is hard to install, try getting it out after the nose has been smashed. And it's often amazing how well a piece of plastic piping can hide a multitude of sins in the body shape. Finally we got to install the new grille that has been hanging around for a month. Where has the time gone? This grille is supposed to be notoriously difficult to install, but having done it several times, two pairs of hands can sort of force a new grille into a newly remodeled body nose in an hour (or two). Yeah, it's a bit of work, but nothing like impossible. I install it with only five bolts, leaving out the one at top center hiding behind the bonnet latch support parts. If you think that one is hard to install, try getting it out after the nose has been smashed. And it's often amazing how well a piece of plastic piping can hide a multitude of sins in the body shape.


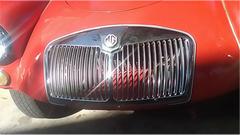
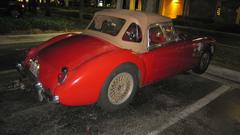
There you have it, the before and after shots. I may have to name this car "Christine" (see the movie). After working an hour or more in the strong afternoon sun, we had enough and decided to pack it up, and (hopefully) get the rest done tomorrow.
Thursday, February 2, 2023:
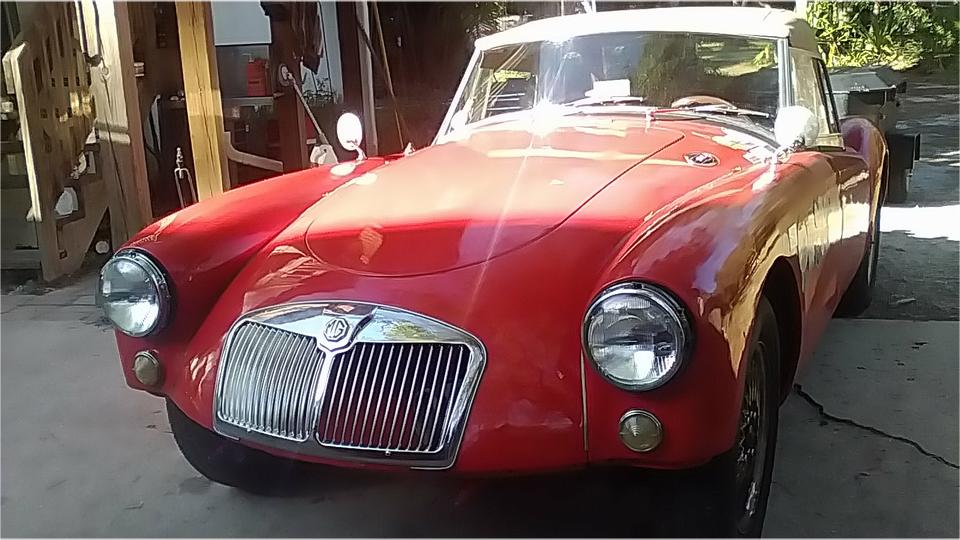
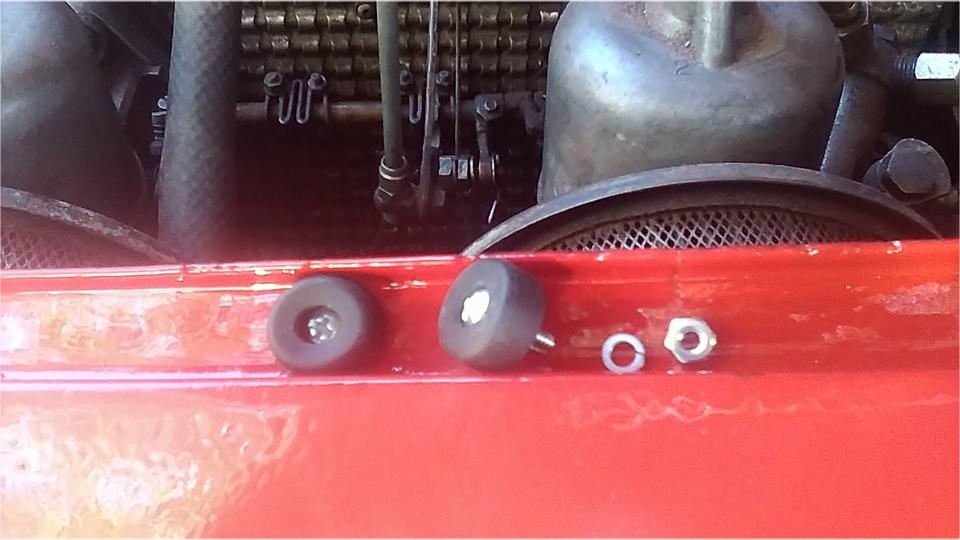
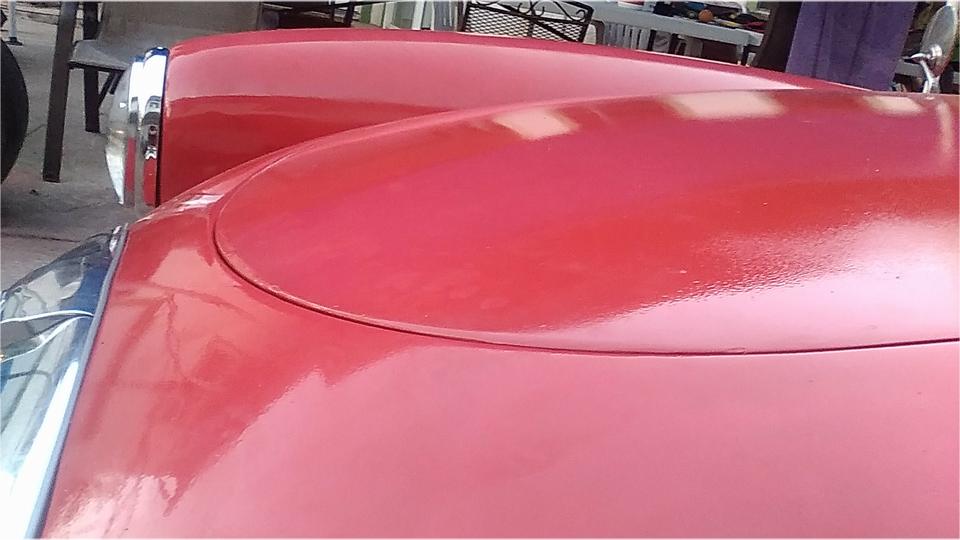
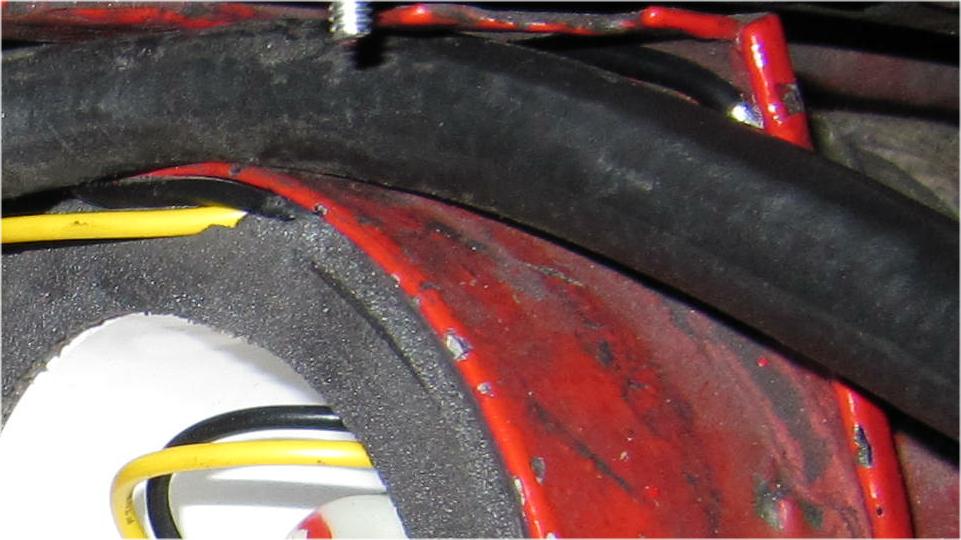
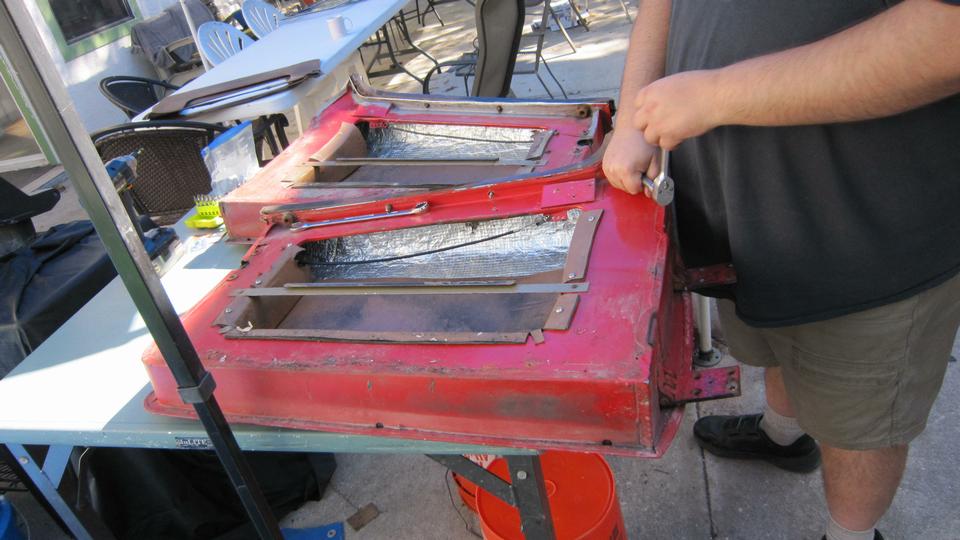
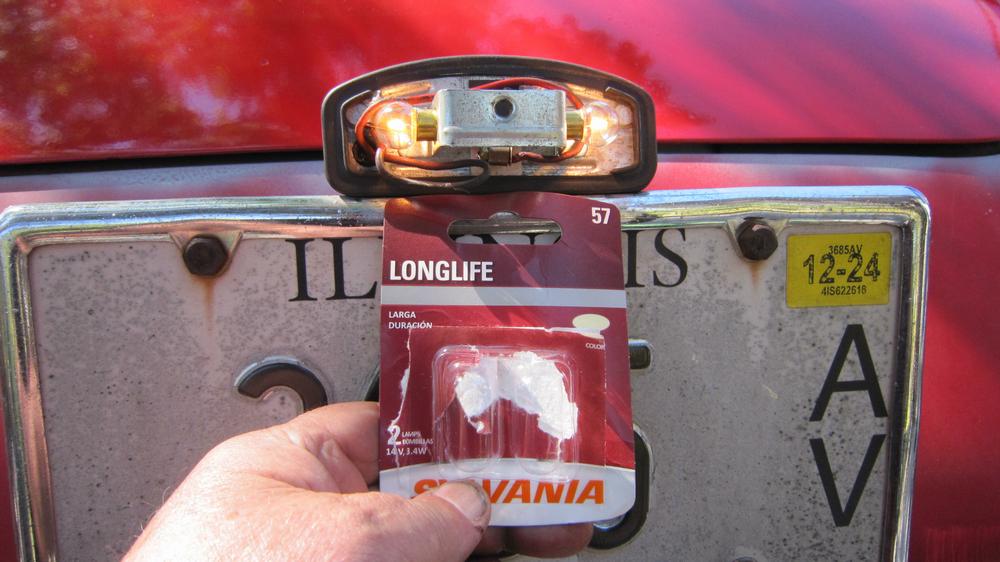
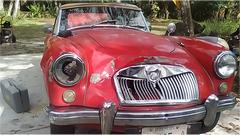
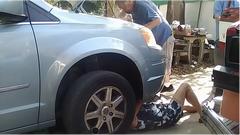
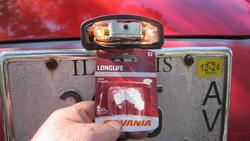
A few things to finish on the front of the MGA today, starting with installation of the bonnet buffers. The older buffers were a bit too tall, causing the bonnet to sit a bit too high. The new buffers are shorter, as original, and a wee bit smaller diameter as well, making easier installation without squeezing to fit within the gutter space. Will be back to check on this later. We also had the nose up and front wheels off while taping up the wiring behind the front lights. Then had to put the wheels back on for the bum's shuffle.
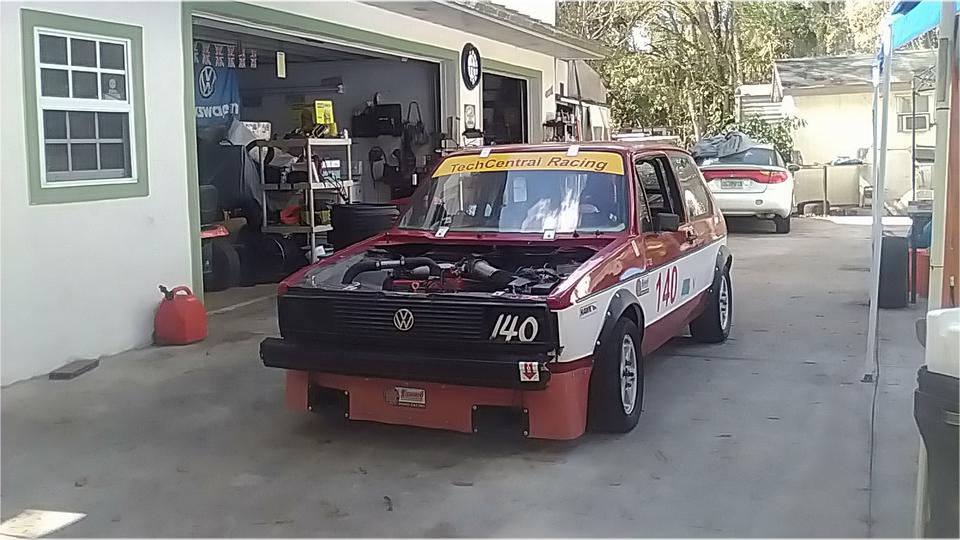
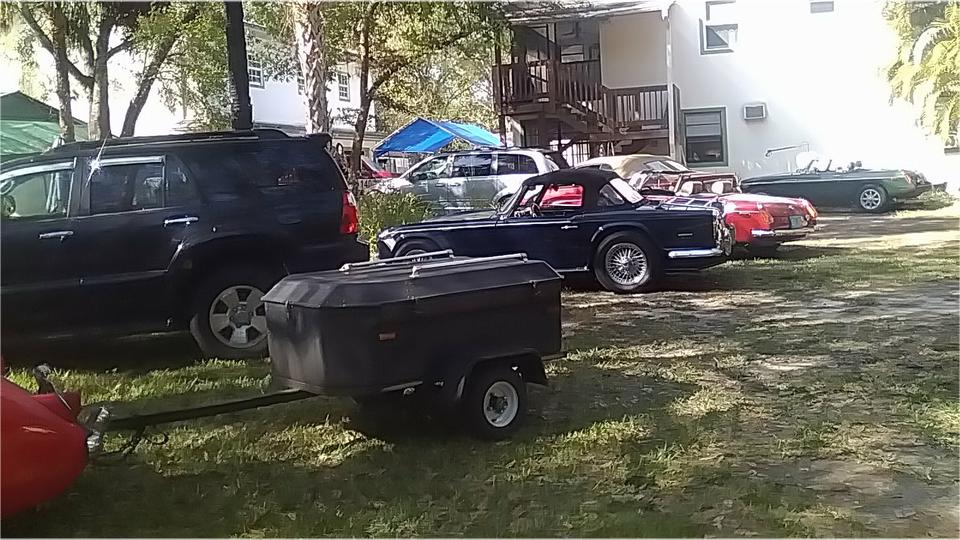
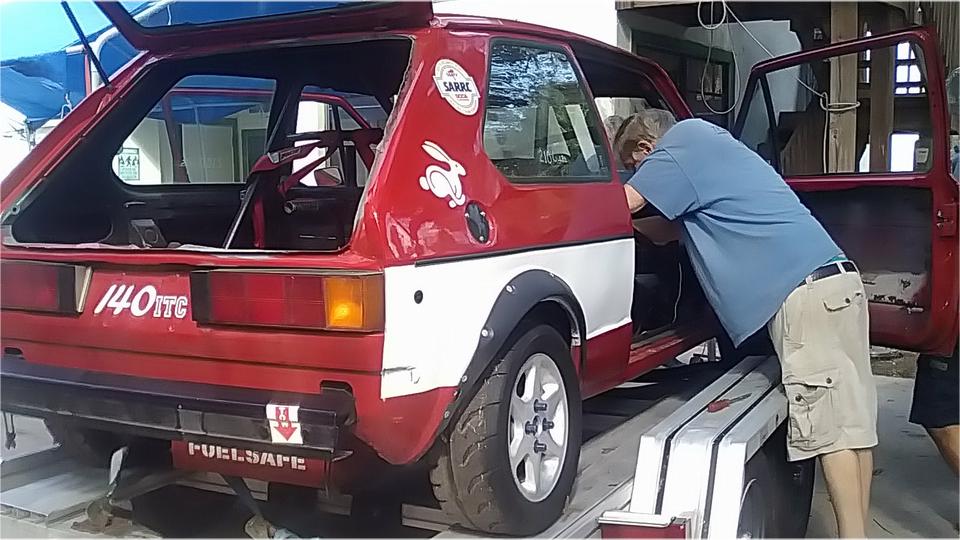
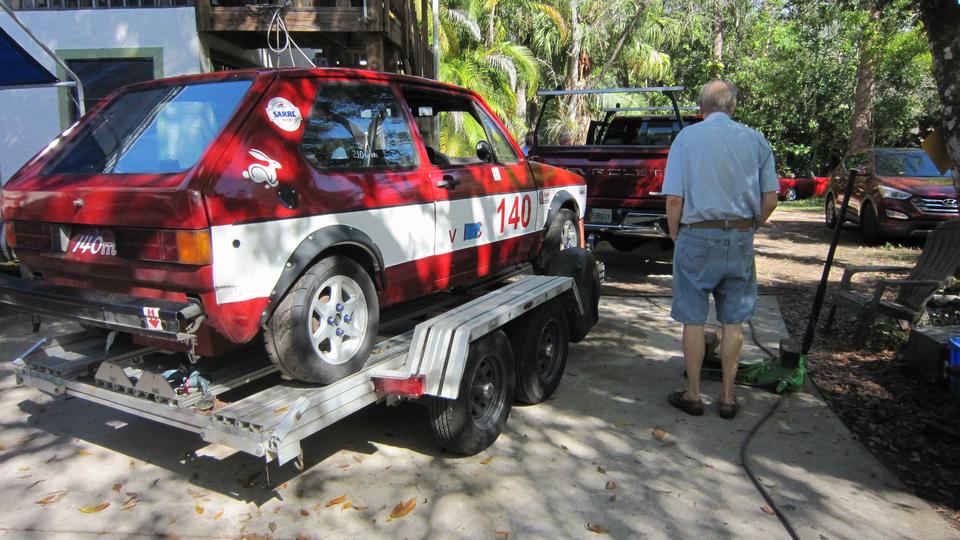
A short pause to move a few cars around to get the racing Rabbit out of the shop and onto a trailer. That was heading from Bonita Springs to North Napels for a quick tech inspection before next race date. It was back in an hour with smiles all around.

Meanwhile we moved the MGA into the shade and jacket it up again when we went to work cleaning threads before installation of the front valance and bumper. Easy enough to install 14 screws to attach the valance panel.
Then for the standard magic trick; grab a small paint brush and make the fasteners disappear. Also brush paint the whole face that will be behind the bumper, down to the lower protruding lip. Guess we missed a few scratches on the bottom edge, but maybe get that later. While reinstalling the bonnet, I installed two additional rubber buffers an inch ahead of the radiator. Now 12 instead of the original 10. Hoping this may give better positioning of the front end of the bonnet.

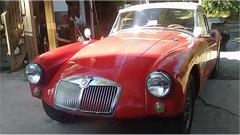
Looks like it works very well. The bonnet is now dead on flush all around the front end. We had a bit of a tussle with the new headlight trim rings. They fit over the light bulb retaining ring okay, but no way to get them to snap past the edge of the buckets at sides and bottom. The expedient solution was to take it to an anvil with a cloth pad, and beat down the inside edge of the trim ring with a ball peen hammer. That worked a treat, fits now, and I don't think anyone will notice the inside hammer marks (unless the chrome plating might yield to rust later).

Wet paint still on the front valance panel, and we were losing the day light. so it seemed like a good time to quit, and attend to the front bumper another day. Wheels on, jack it down, pack up tools and clean up the place before heading for dinner and WiFi.
Friday, February 3, 2023:
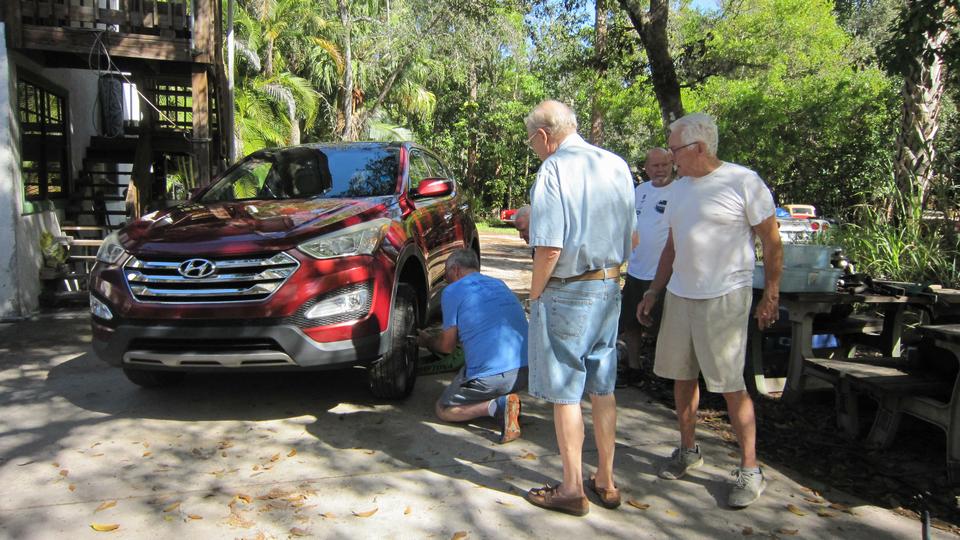
Tech day at Tech Central, and a very popular event today. Early walk around counted 15 visitor cars (bit of a parking issue). We still had 12 people for lunch, so pretty good turn-out.
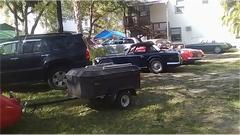
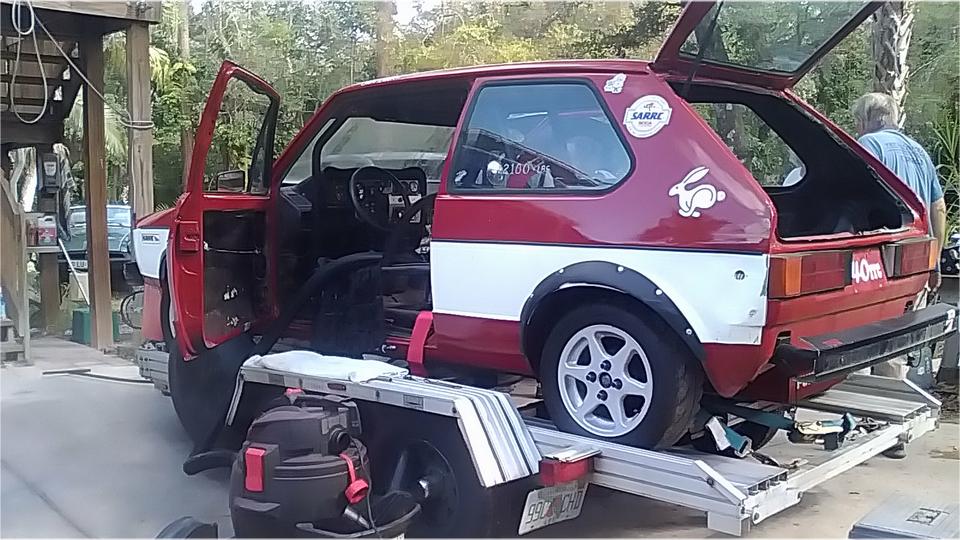
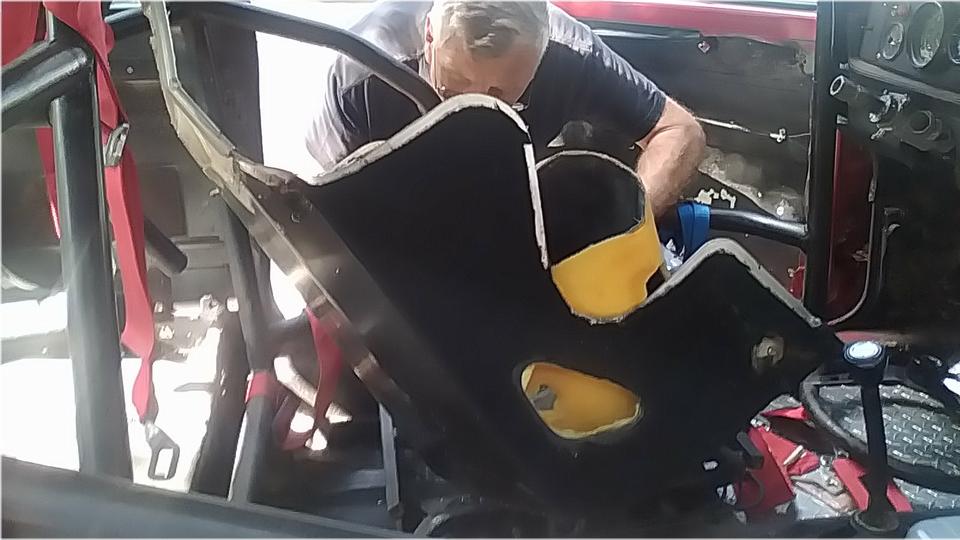
The racing Rabbit on trailer was sitting on the forecourt for work, so our MGA was not getting in for front bumper installation (yet). Not unusual, as we commonly don't work on the MGA much on tech Fridays. The Rabbit was up for minor roll cage mods, safety harness relocation, and installation of a new driver seat (and maybe a second seat as well).


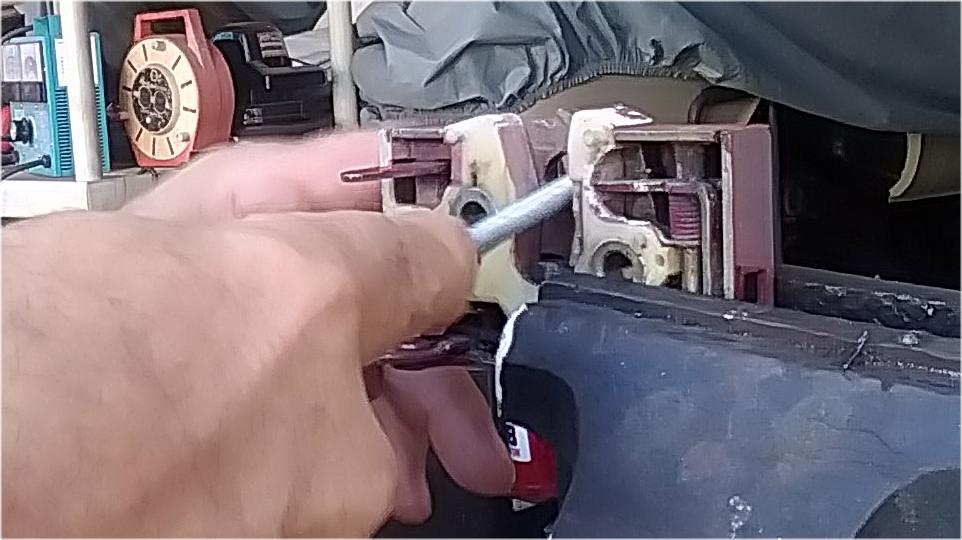
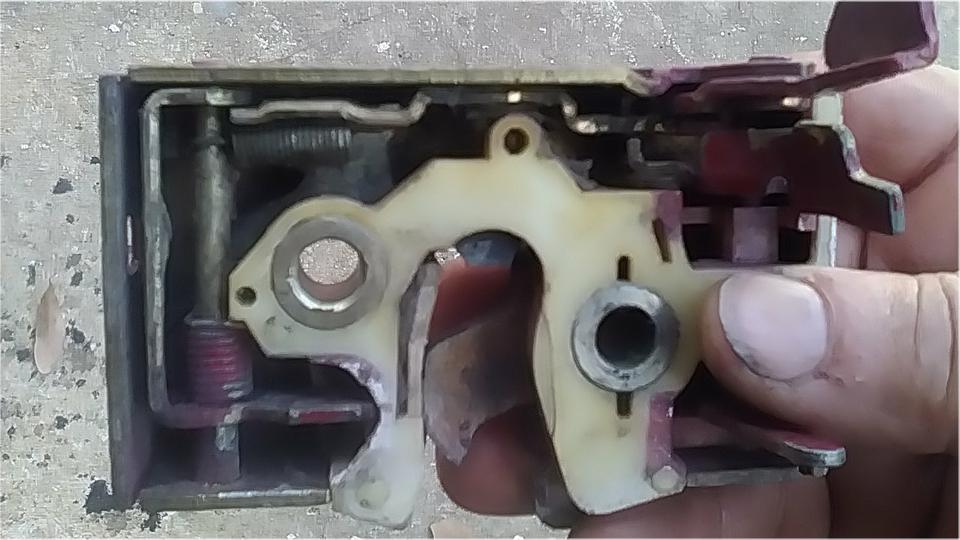
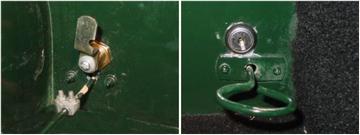
A notable maintenance issue was the right side door latch that was often locked shut refusing release. We took a shot at defeating the lock function while retaining the latch function. In the end we failed, killing both functions at the same time, as they shared a common mechanical link (which we had removed). Stuff happens when you let people not familiar with the model hack away at it (yeah, that includes me). Final solution was to raid a replacement latch from another spare Rabbit door. You know how rabbits are, there's never just one.
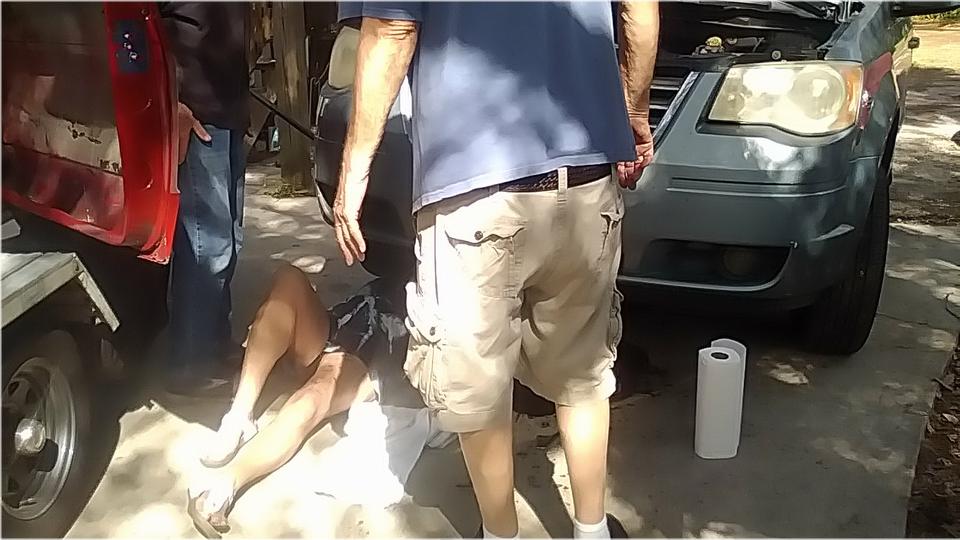
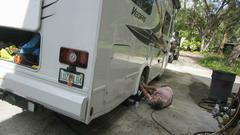
Amy Vandivier had sold her MGB, so her mini van was now used for daily service, and it needed an oil change. She was under there working the drain plug and filter change when the large oil drain pan got bumped and dumped lots of oil on the pavement. She got soaked, but carried on to finish the job. Brave lady, working on her own cars (when needed). I got to help with the clean-up (don't ask) -- John Shoemaker was busy with wiring for the overdrive and reverse light switches on his ZB Magnette.
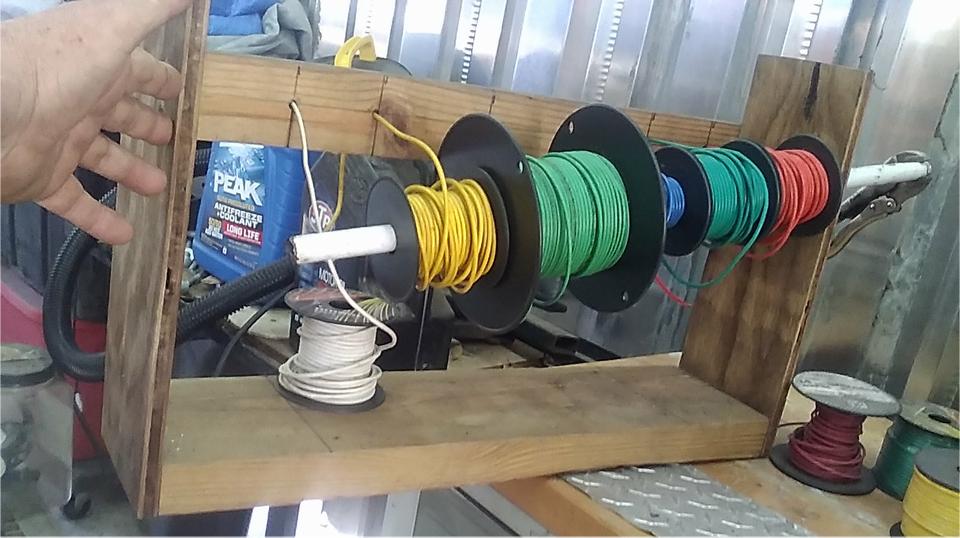
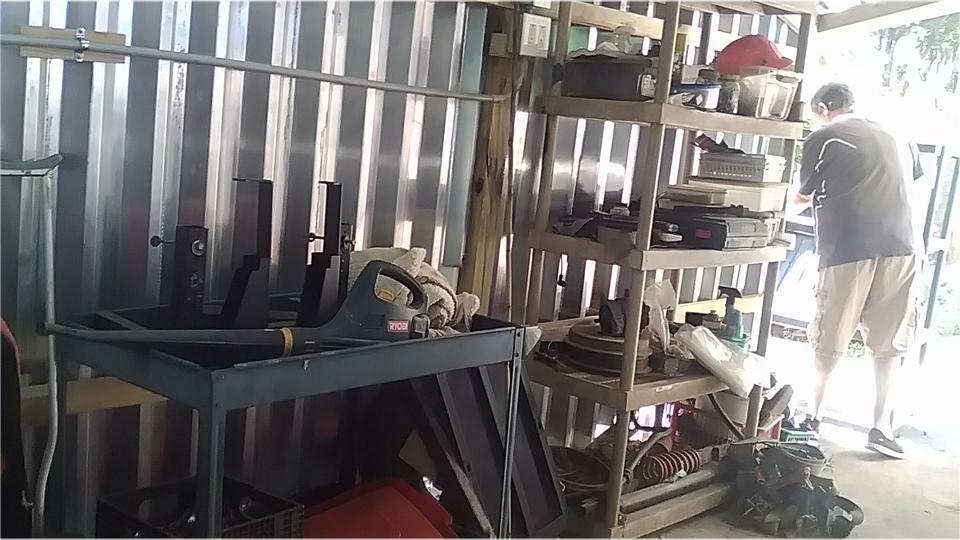
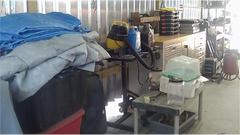
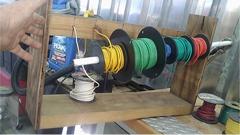
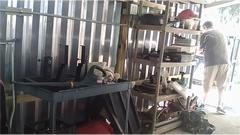
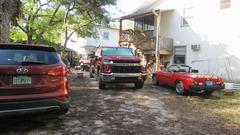
More improvements in the back patio with the new portico cover. The whole rear wall is now lined with equipment and tools, and it appears to be limited double parking in front of the work bench (needs more consideration). The spool wire dispenser was getting a touch-up, the tubing axle being too tight for easy service. A new shelving unit was being cleaned up, moved in and out a few times, and the guys were already fighting over the shelf space. No junk allowed! Try to keep this place in order (for a change).
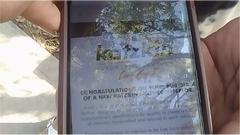 This last picture is a reminder for me, still looking for new seat covers for the MGA. The company "Katzkin" is being recommended, but should order through one of the resellers for a better discount. Just been too busy to get seriously onto this problem. -- Since the Rabbit wasn't moving from our favorite work space, we decided not to work on the MGA front bumper, wimp out and put it off for another day. But I did have just enough time to place another parts order with Scarborough Faire for chrome cowl vents and lower body finishing strips, and a few other spare parts, and I think it did get shipped out before closing time.
 Hey, remember when we couldn't find a replacement camera in the stores around the holidays? Been using the somewhat inconvenient dumb phone camera for a while now. Well, someone just gave us a good slightly used camera, low mileage older model, but higher end with more features. This may take some getting used to, learning to use some new whistles and bells (or maybe just ignore the extra features). Never used a touch screen camera before, and some motion sensor shake features to sequence a slideshow and start/stop video playback (never do video anyway).
Saturday, February 4, 2023:
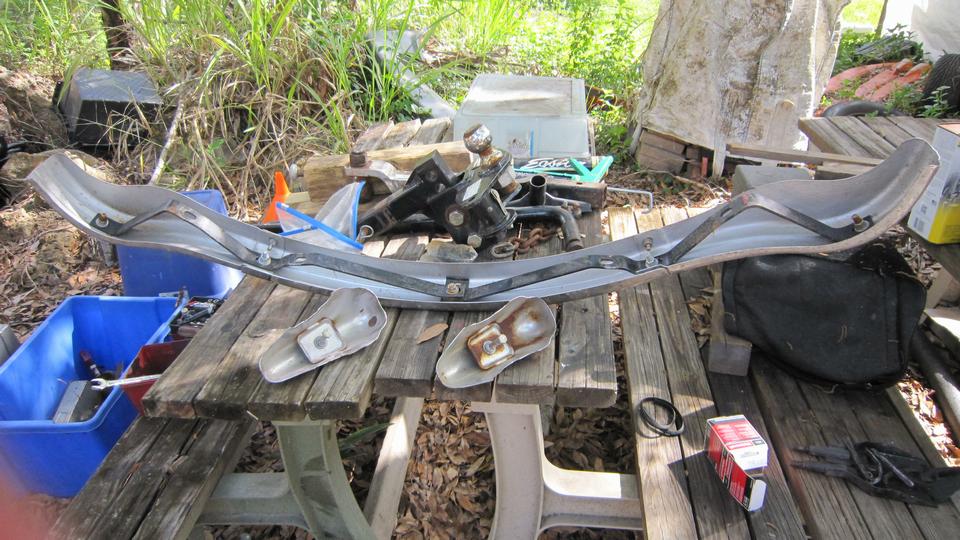
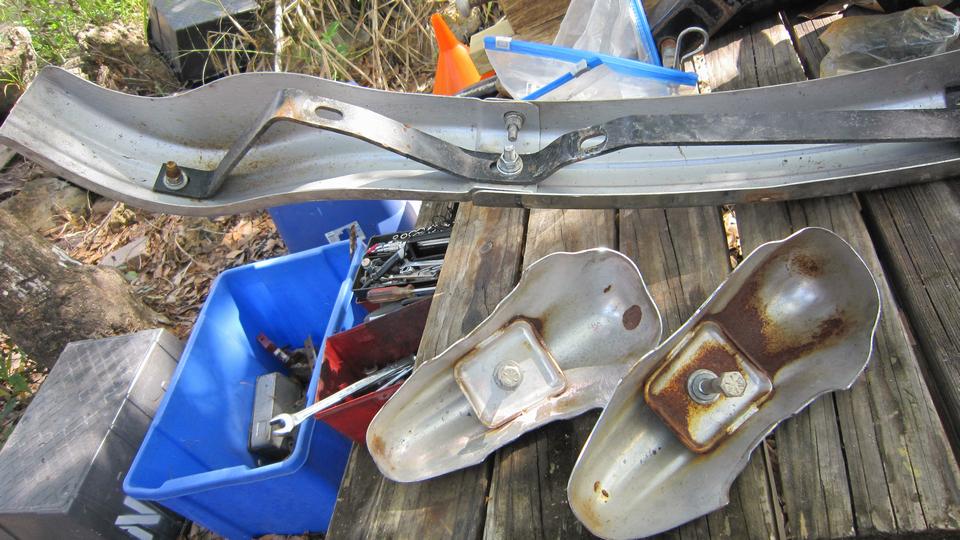
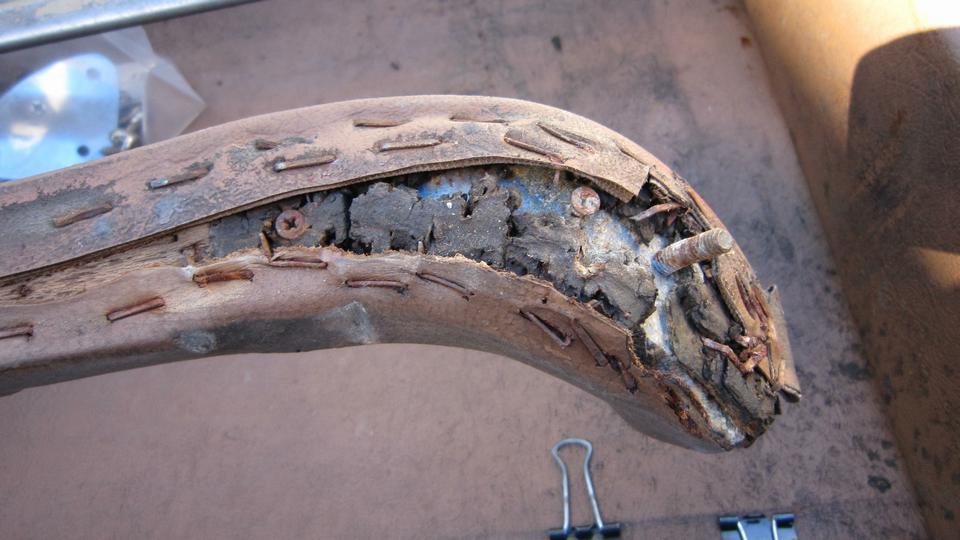
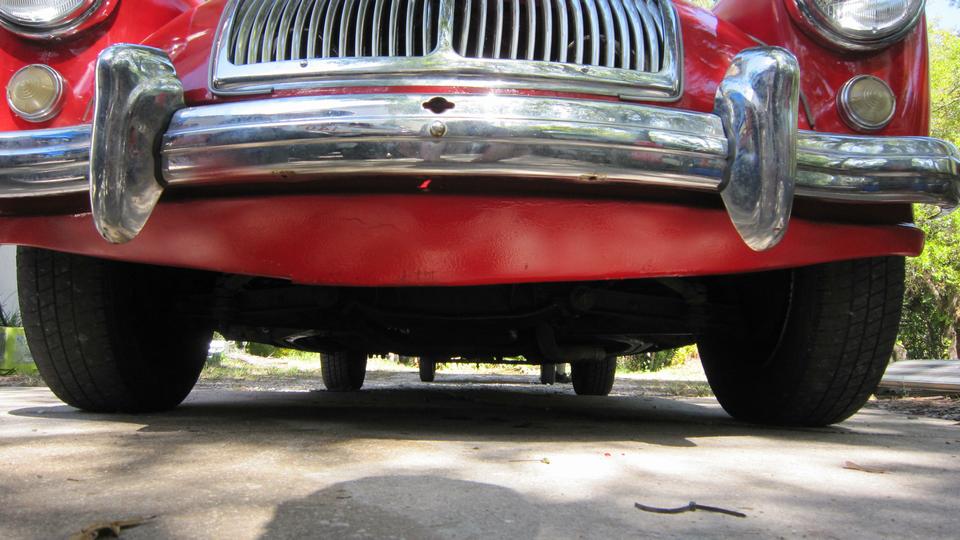
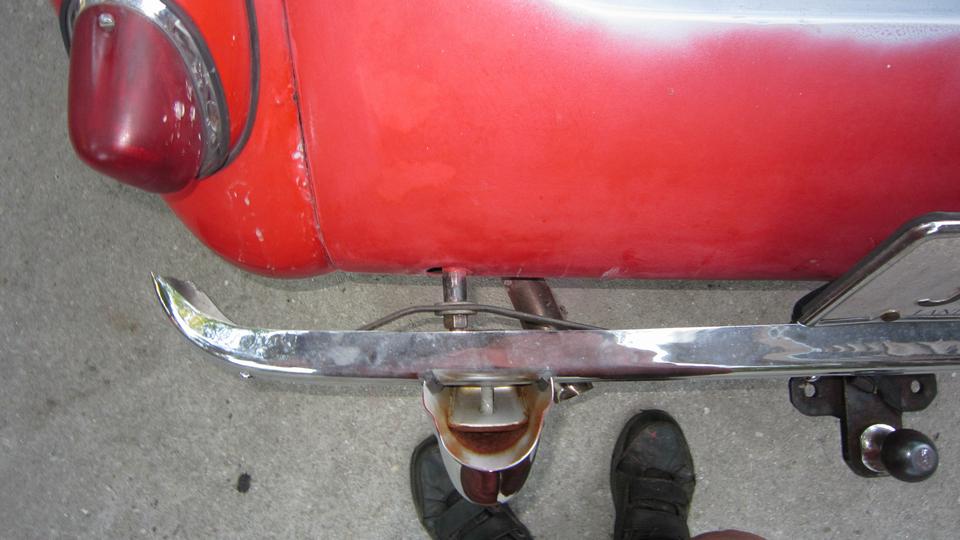
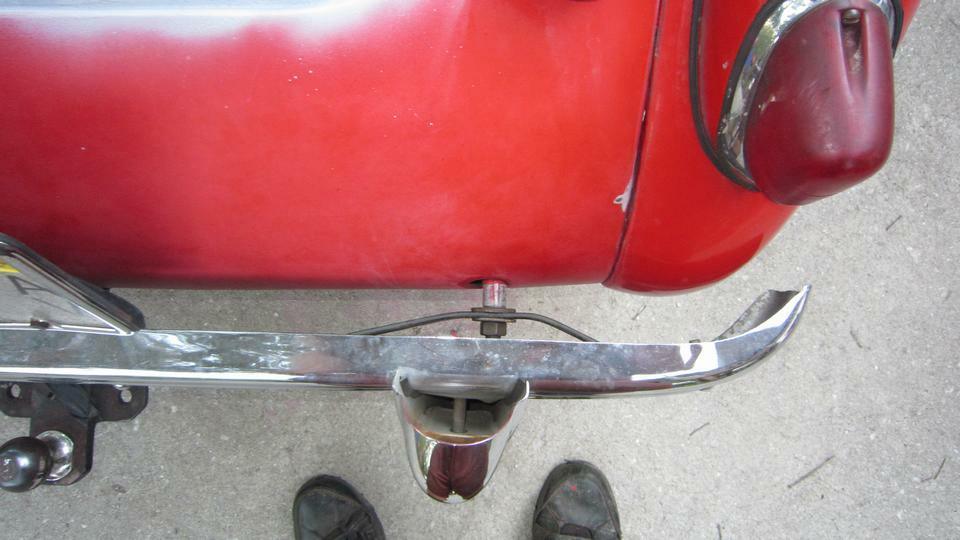
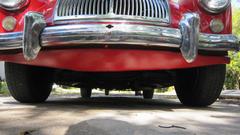
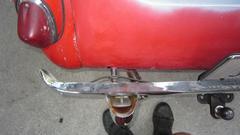
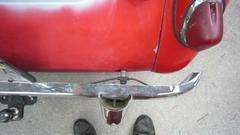
Late start at 11-am, but nice working weather, warm enough, and overcast to begin, shed the sweat shirt. Main task today is to install the front bumper. Having done this several times before, I was hoping for no more than four hours, but it might be more after the4 body smash and repair. Lay out the goodies, and first reinstall the overriders we removed four weeks ago. Moss parts, new 2-1/2 years ago. The face bar is reasonable, having been painted inside. But the overriders are badly rusted inside. I wonder haw many people might toss them out after one year outdoors.

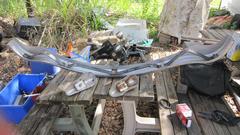

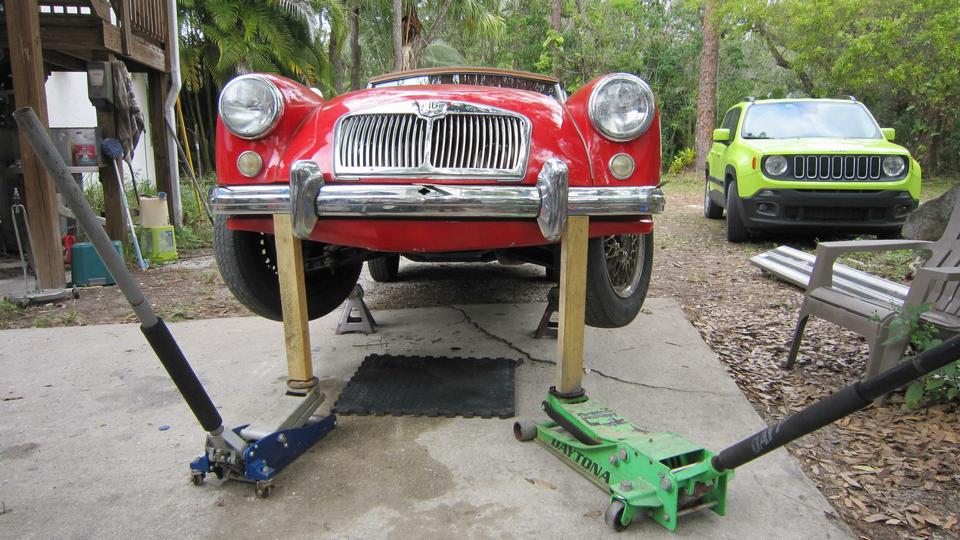
Assembly the whole bumper with overriders and spring bars off the car with loose bolts, nudge it into the best expected alignment, and then tighten all the bolts. I was not expecting it to fit right on the first try, but it did. Nice surprise! I recon the accident damage was all on the body, not having touched the bumper this time. Load the bumper assembly loosely onto the two main frame studs (a large rubber grommet, two large flat washers, a lock washer and hex nut on each stud). Then install the side brackets (three bolts to the frame each side before the large washers and nuts up front).
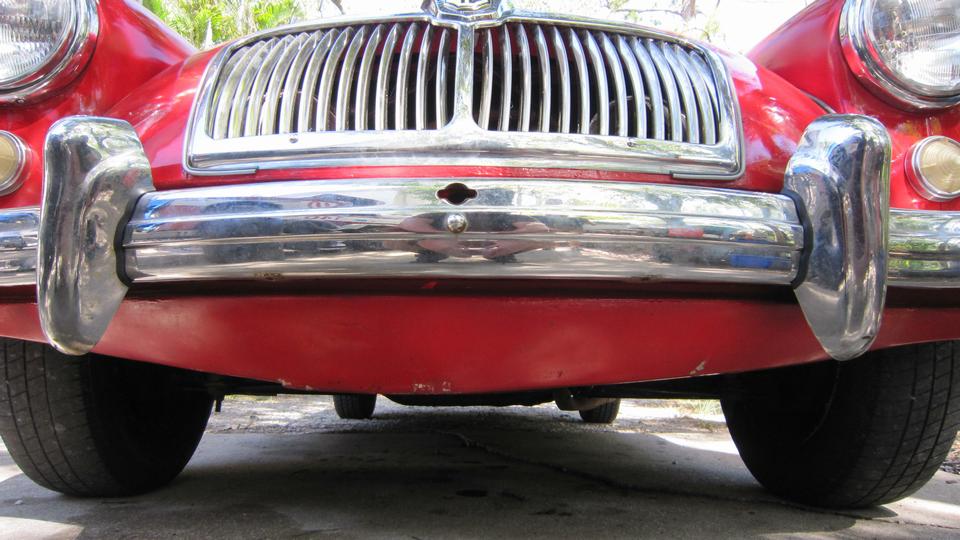
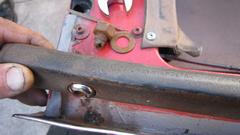
While all the mounting bolts are still loose, jack the bumper up gently, and nudge it around as necessary for alignment. Then tightening all the bolts before removing the jacks. If you look closely, I had three paint mixing sticks between the bumper top and the body lip (center and both ends). Surprise! With some finesse it worked on the first try. I believe this is the best front bumper alignment this car has ever had (especially considering it was bashed twice before I bought it in 1977, and three more times since.


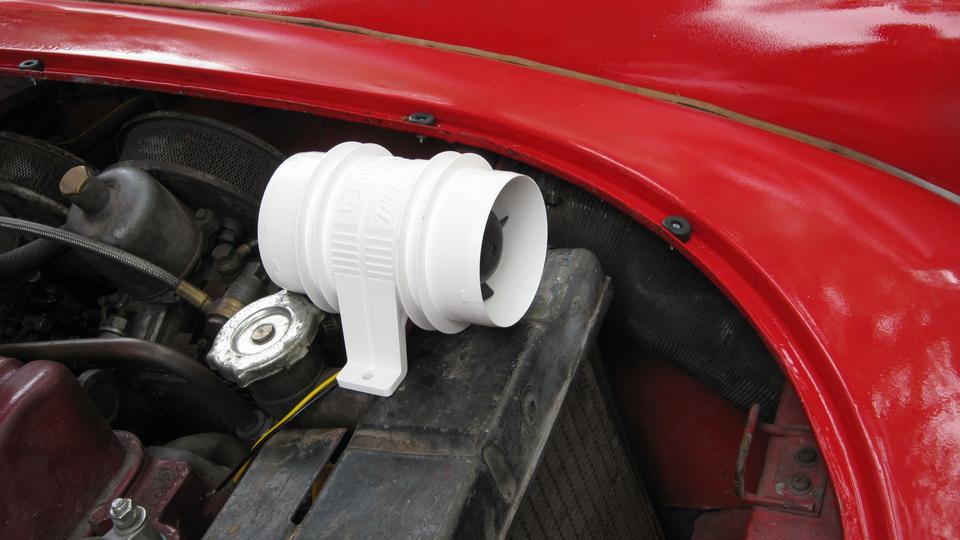
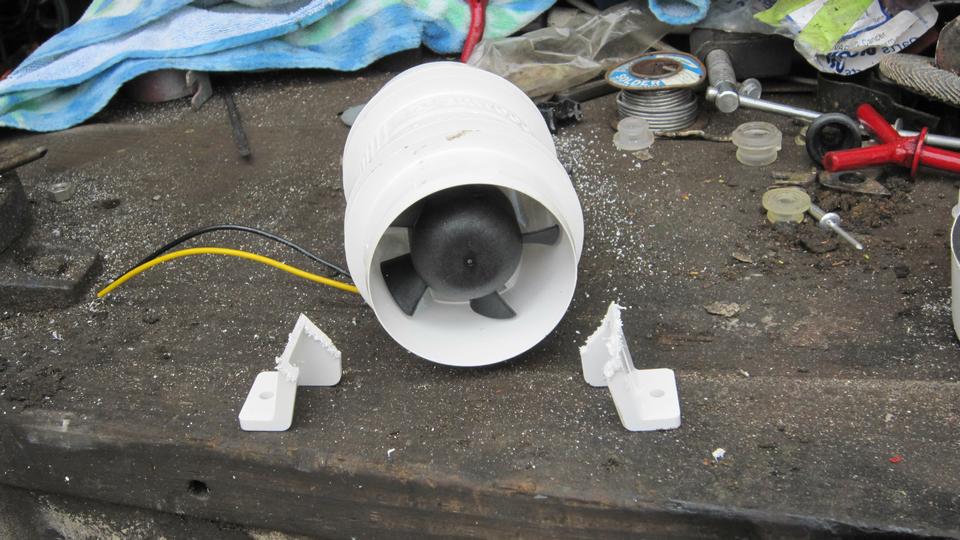
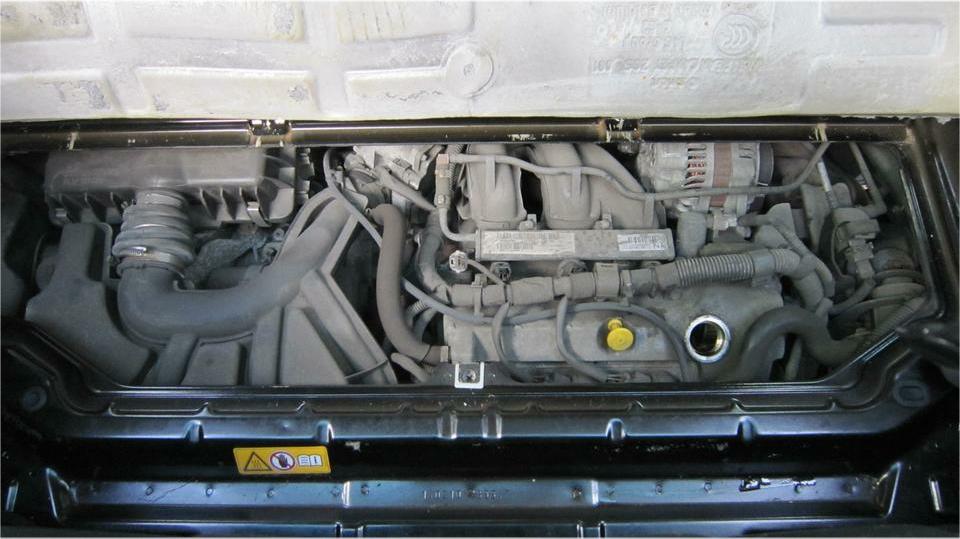
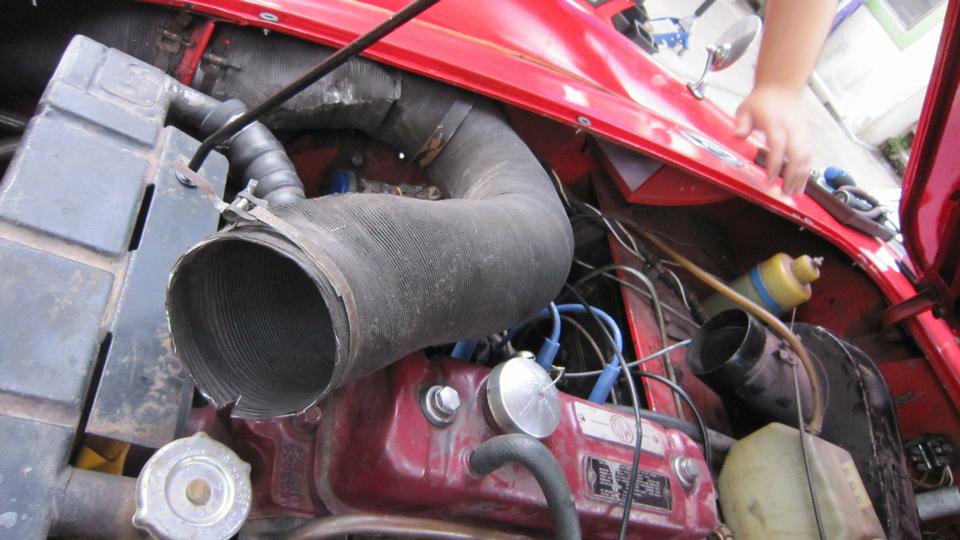
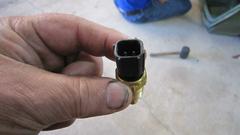
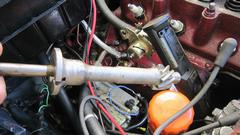
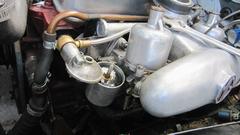
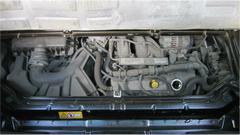
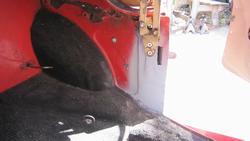
The bumper install went a bit better than I expected, so we still had some daylight to pick up a few other odd jobs. Good time to install the replacement Attwood Bilge Blower (the last one burned out after 10 years, 260,000 miles). Start with cutting off the two mounting legs. Then wrap the outside with a half inch of sticky foam rubber. In this case it was one wrap of 3/8" followed by a second wrap of 1/8" rubber (what was immediately on hand).
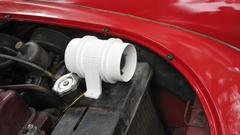

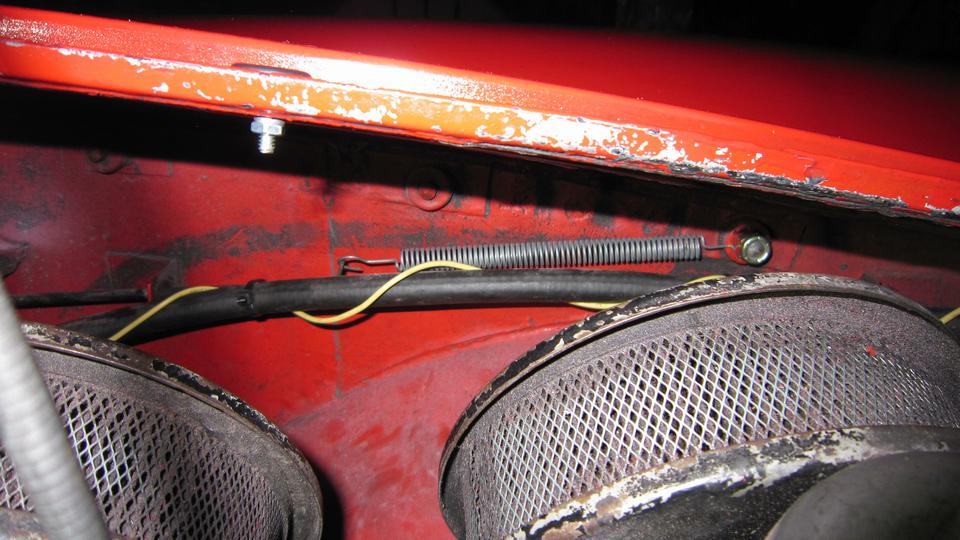
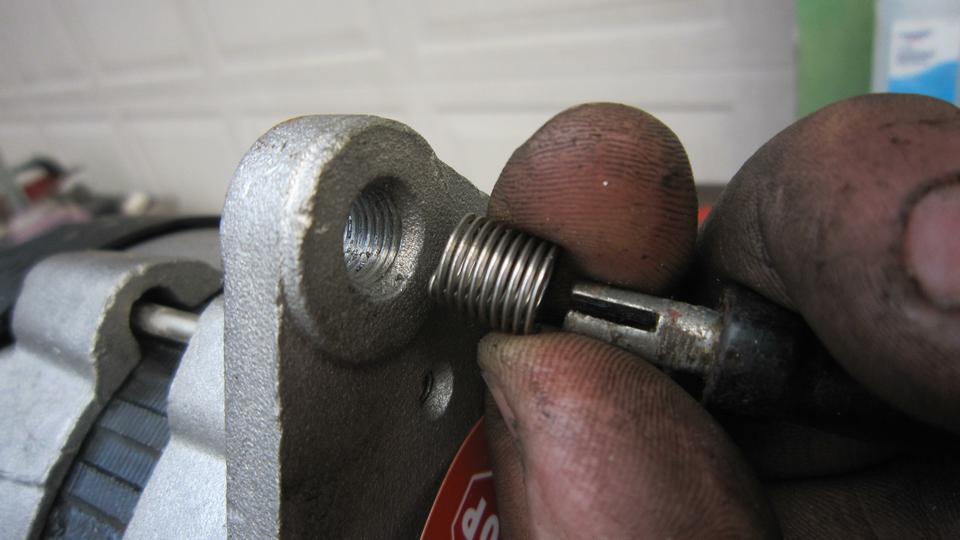
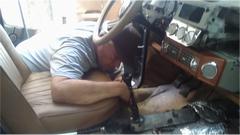
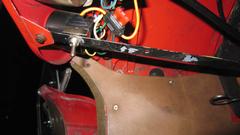
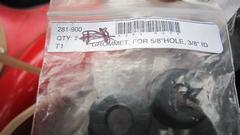
Stuff it firmly into the air duct immediately forward of the carburetors. Ground the black wire locally on a sheet metal screw (almost hiding behind the coolant overflow hose at upper right). I ran the power wire along the coolant recovery hose (which goes back to an overflow bottle on the heater shelf). At the heater shelf the wire runs past the outboard side of the master cylinder, and through the bulkhead rubber grommet with the speedometer cable. The recovery hose and the wire are tie-wrapped to the bonnet release draw rod. Yes, I know it moves when pulled, but it has been working this way for 10 years, and this is another new wire and rubber grommet. While we were tinkering around there, I also installed the draw rod return assist spring (which had never been present since I have owned the car).

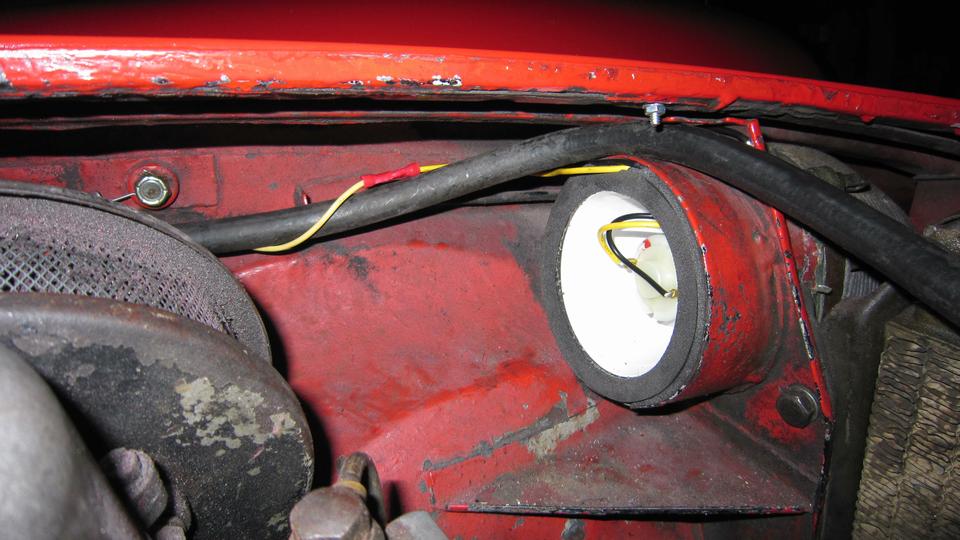
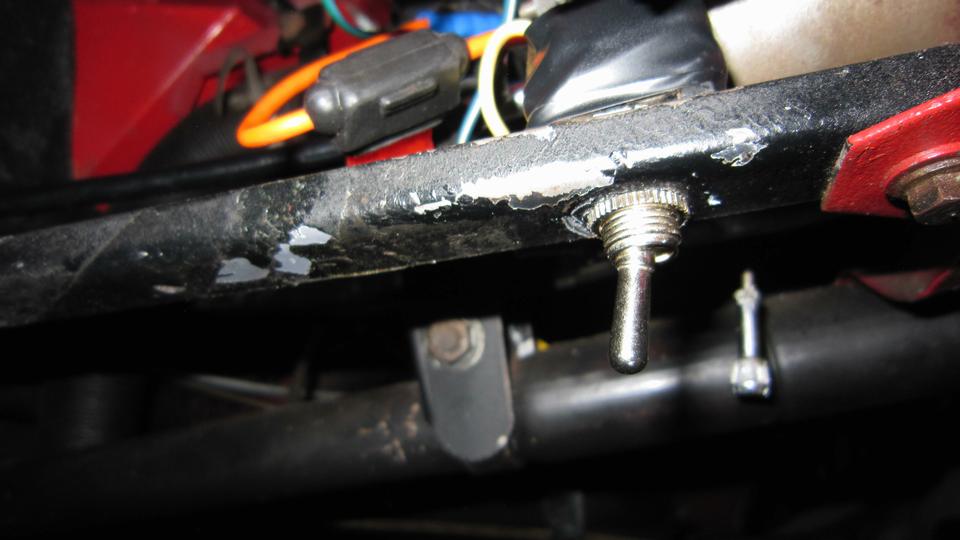
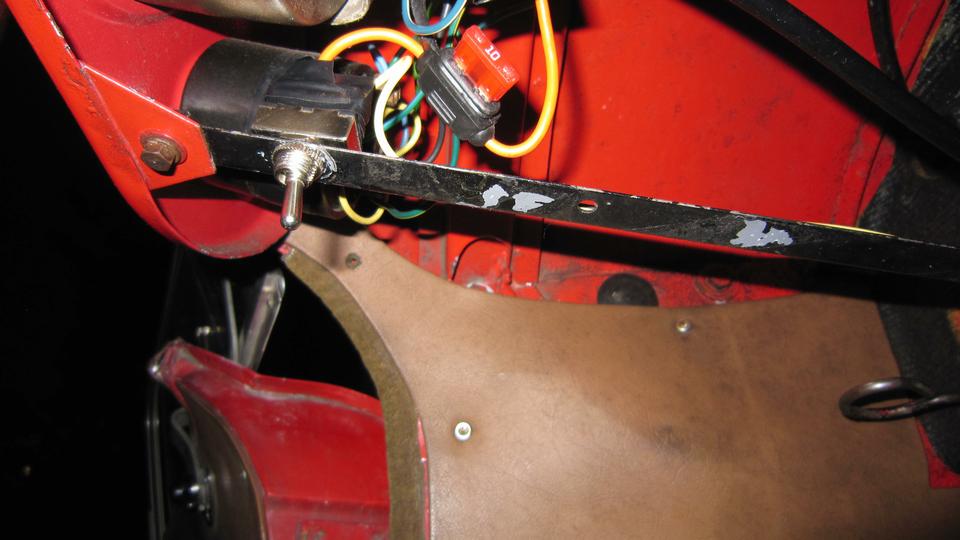
I have a toggle switch and fuse under the dash, attached to the under dash brace near the turn signal switch. I also just replaced the switch for good measure. The old switch would short from power terminal to switch body ground when switched off. Fortunately the dash brace and end mounting parts were well painted during the last restoration, so the dash brace was not grounded to the body, so no short and no blown fuse for ten years. I discovered this condition about two years ago, and immediately bought the replacement switch, just never got around to installing it until now.
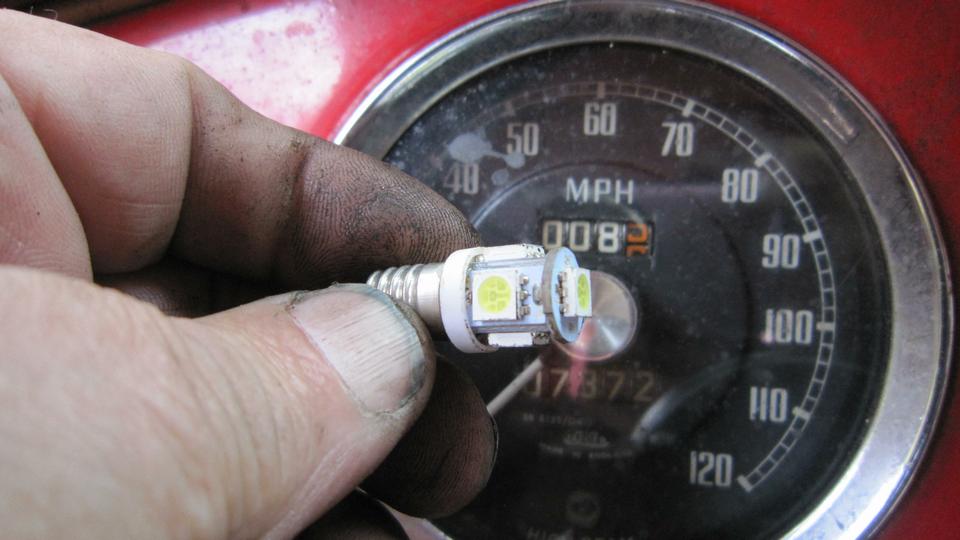
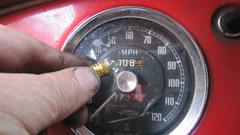
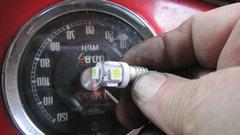
Along with (and after) all the pains of crawling under the dash and steering wheel, it was easy to replace another failed LED with an original type screw in incandescent bulb for speedometer illumination. I have lost track of all the failed LEDs in the dash, but certainly more than a dozen (maybe 20) since late 2014, and not a keeper in the bunch. At $5 a pop, I ain't buying any more of that type LED bulb. The standard bulbs last a lot longer and work okay, as long as the instrument case is painted white inside.

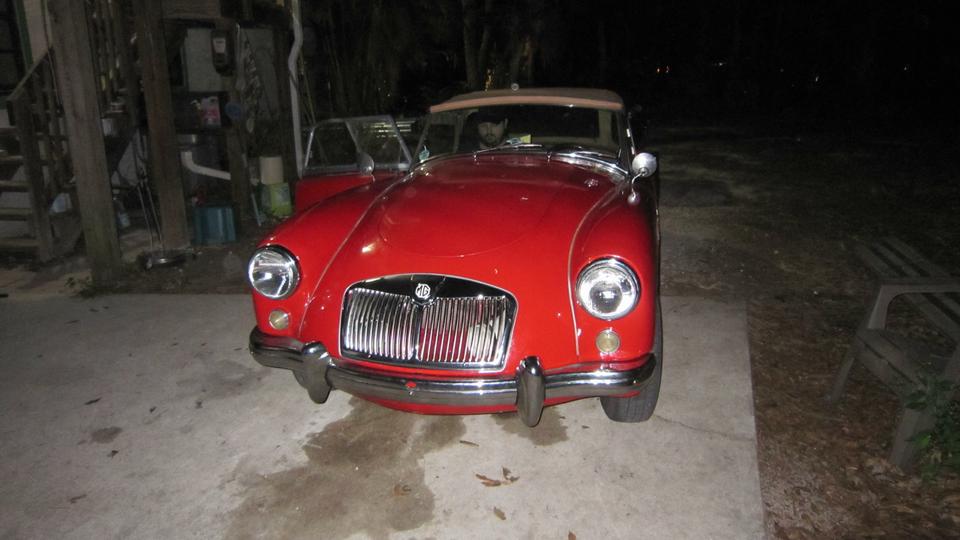
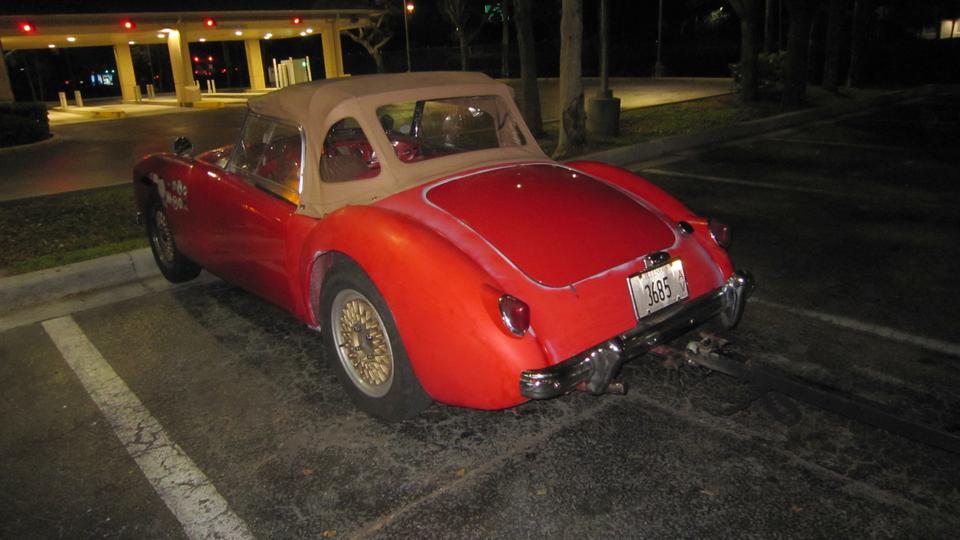
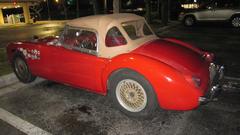
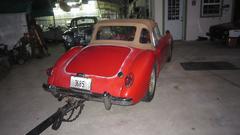
Okay, it wasn't that dark when we were backing out, but the camera flash lit up the car, making the background look much darker than it really was. Just getting the bumper installed made this a very good day.
Sunday, February 5, 2023:
Body repair work is done, so taking a day off to catch up with the "fan club" (BBS and email). Someone asked about a mod to add a lock for MGA boot, but the linked website has since disappeared, so I pulled the information out of the internet archives to post it as a new tech page.
Spent a few hours in the evening getting a start on transcribing the CMGC February newsletter from Publisher format into HTML code for the club website.
Monday, February 6, 2023:
Spent most of the morning posting a new tech page for disassembly of the MGA Coupe door window assembly.
Then most of the day was consumed finishing up transcribing the CMGC February newsletter and getting it on the club web site (a few days late).
John Twist UML Zoom tech session tonight.
Tuesday, February 7, 2023:
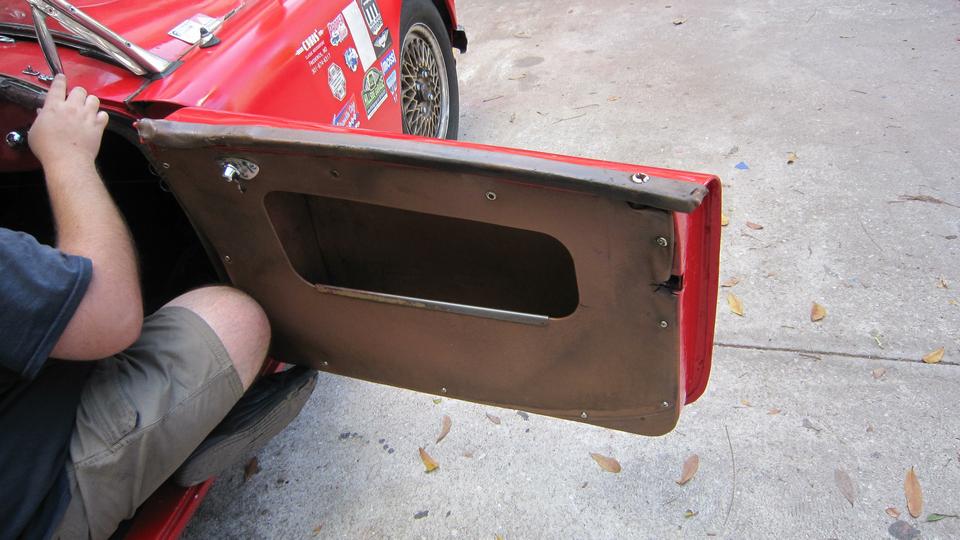
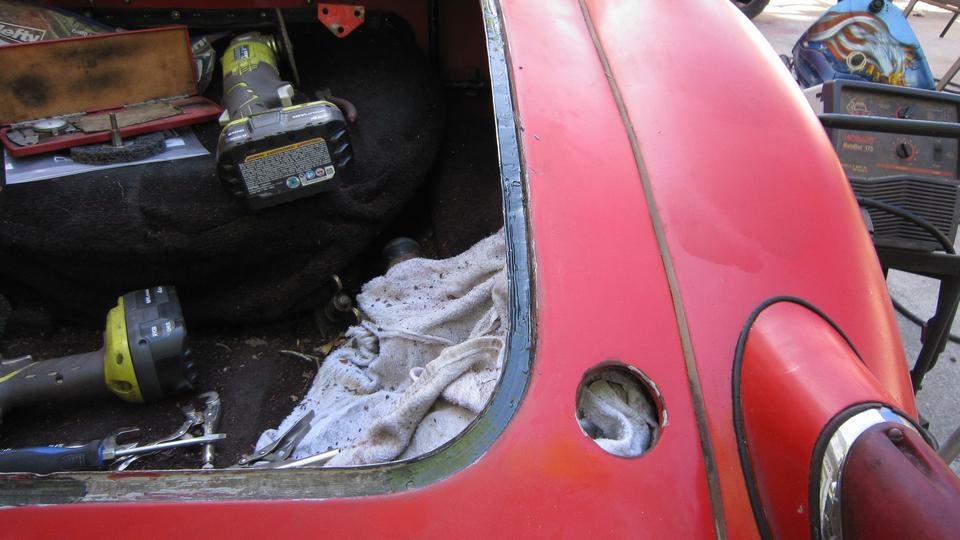
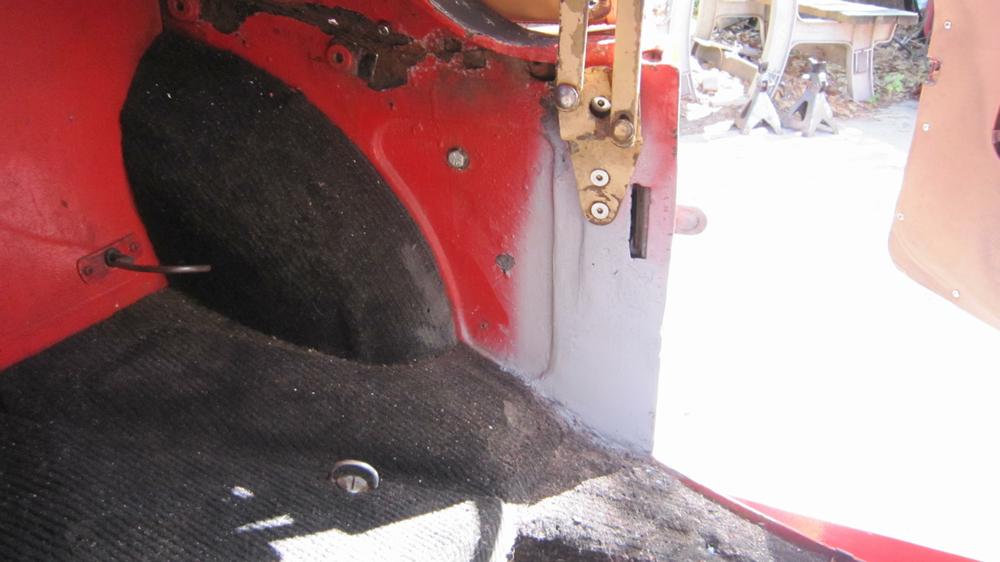
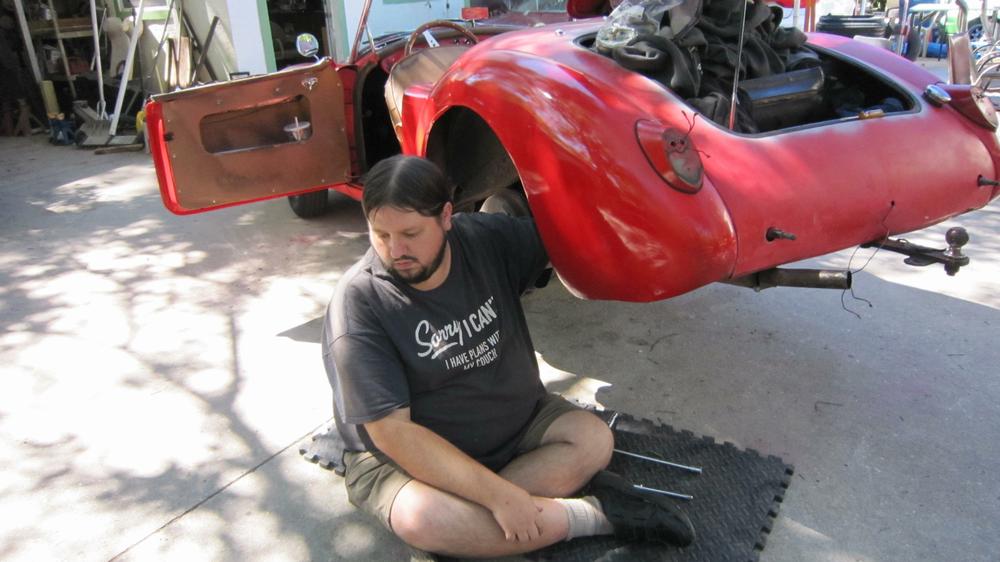
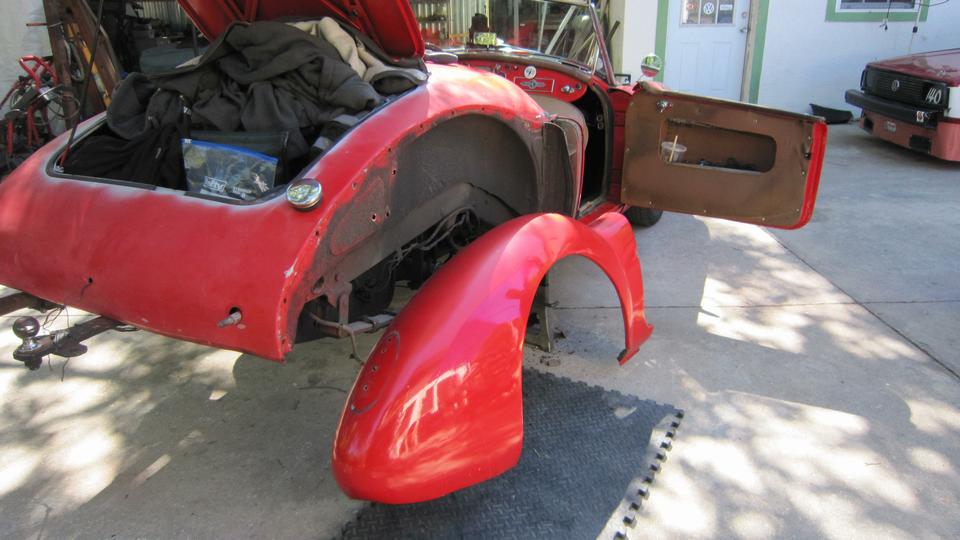
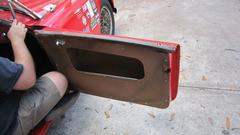
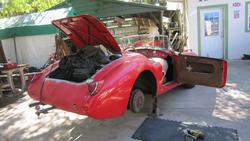
Back to some serious work on the car again. We removed the doors to do a bit of body work before repainting them. This time we drilled a 1/8-inch alignment hole through each door hinge and the A-pillar and nut plate to allow quick re-alignment when it came time to reassemble. A bit later we were short on Bondo and primer paint, so we drove the beach buggy to the local auto parts store (kind of fun). Then had to remove interior door panels and door-top trim rails.
When removing the left side trim rail the side curtain peg socket was rusty enough that it ripped apart in the middle. Oops. And the rust had expanded so much that it had split the wood rail. Oops again. Well, the wood rails had survived 36 years and half a million miles, and two or three fabric re-coverings, so I recon they don't owe us anything, just order up some more new parts.


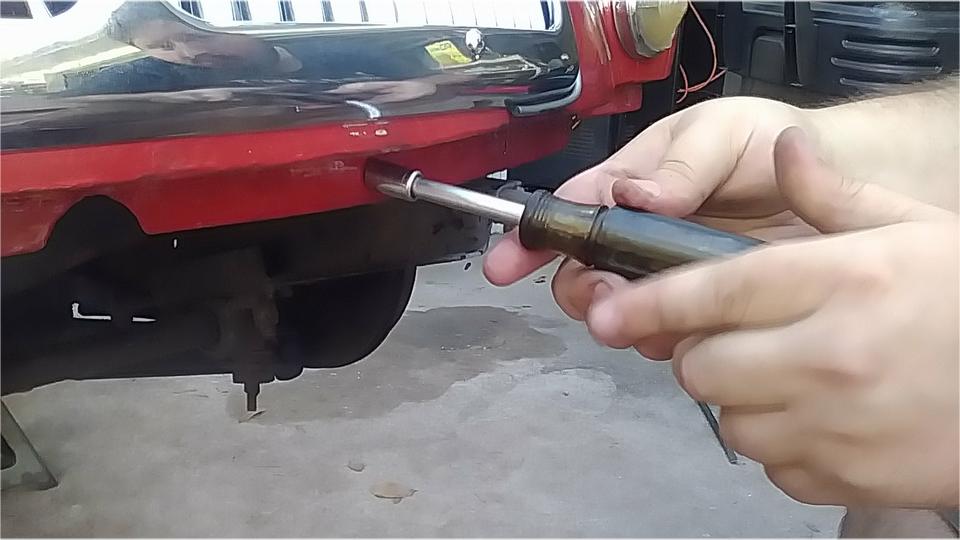
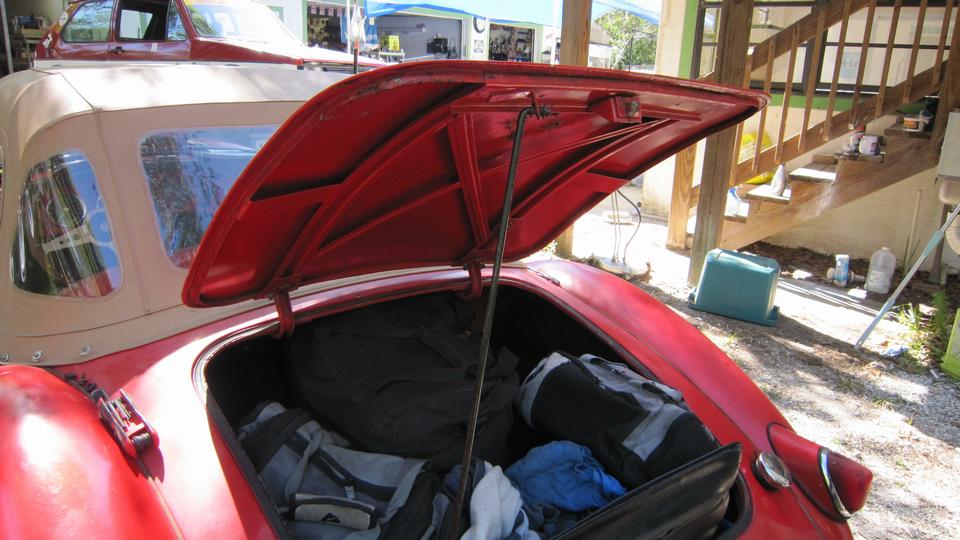
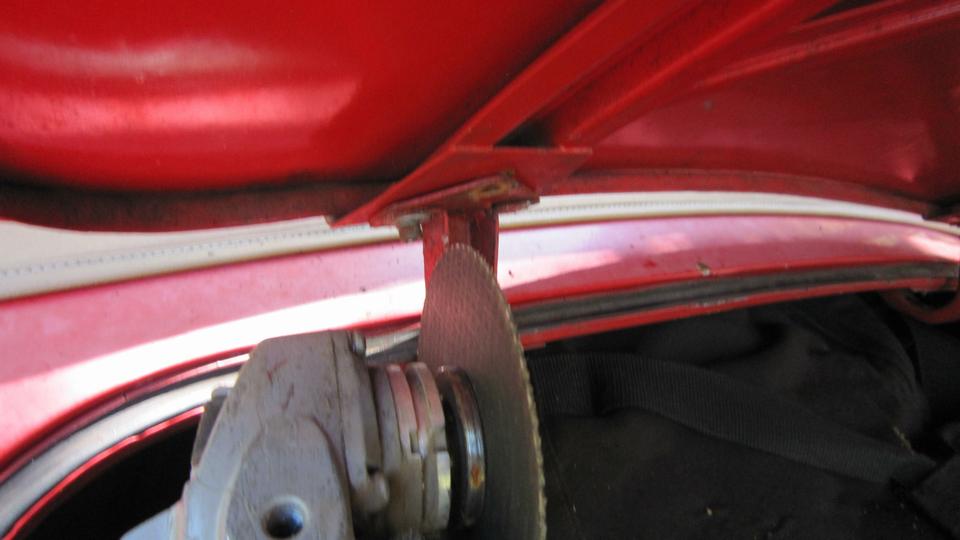
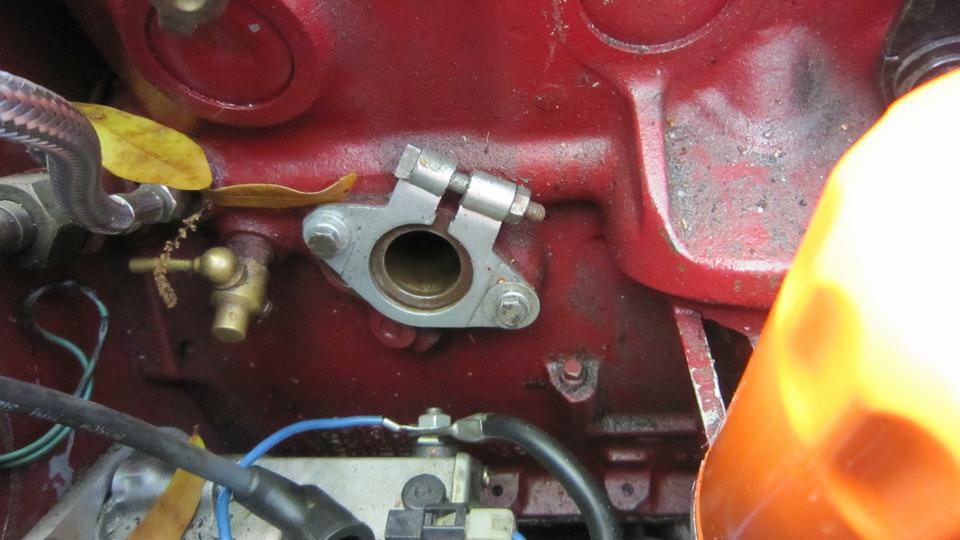
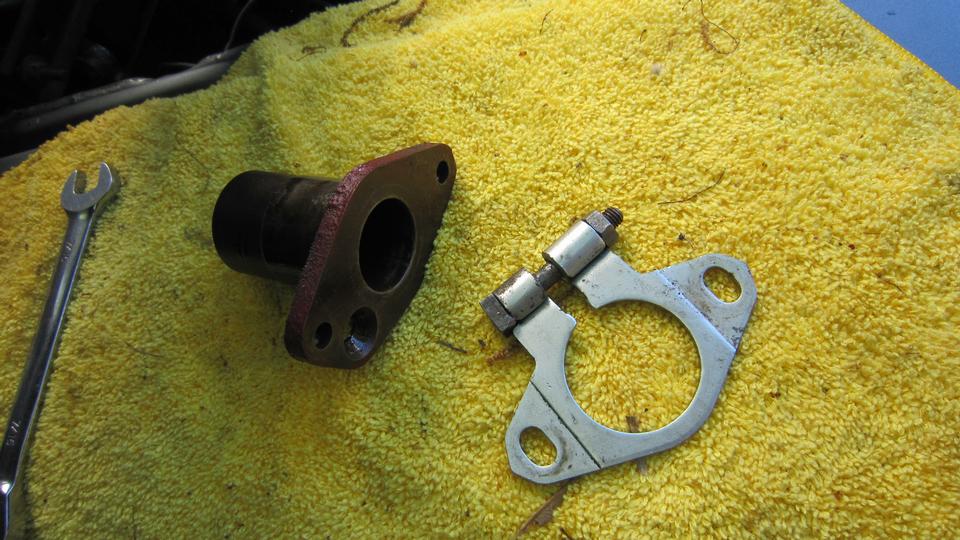
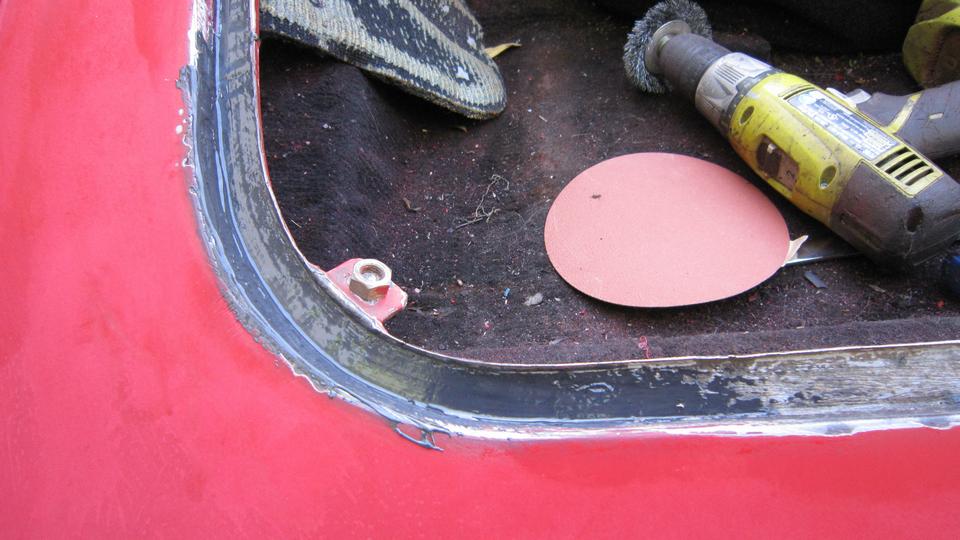
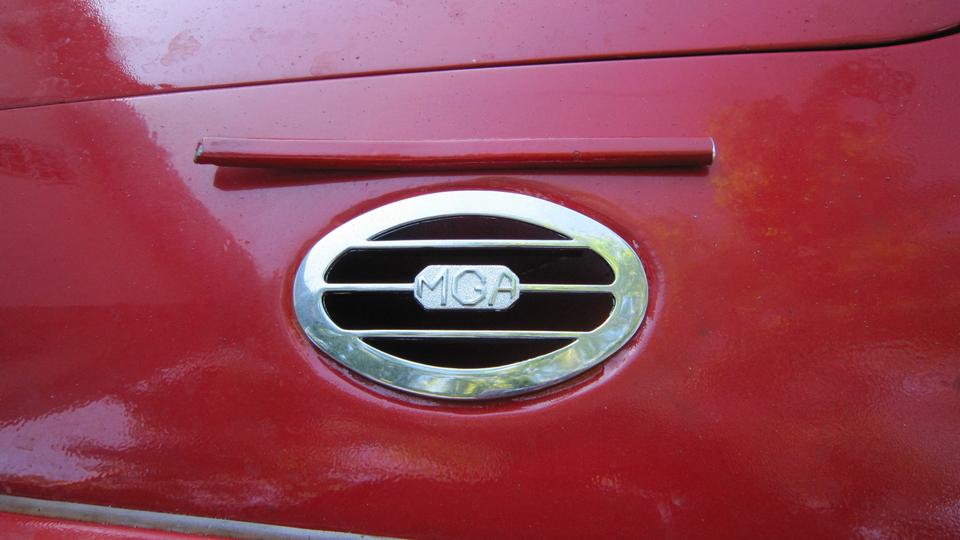
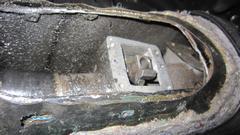
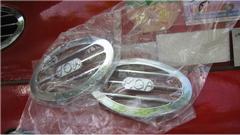
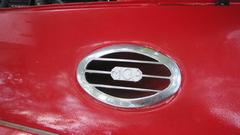
The ding on the trailing edge of the right side door was leftover from when a hit and run truck and trailer clipped it in California last summer, so get out the hahher and dolly to fix that. We were removing the boot lid to remove the "MG" octagon emblem before repainting. One of my quick-release thumb screws was stuck and stubborn, so I ripped off the plastic cap and went after it with an Allen wrench.
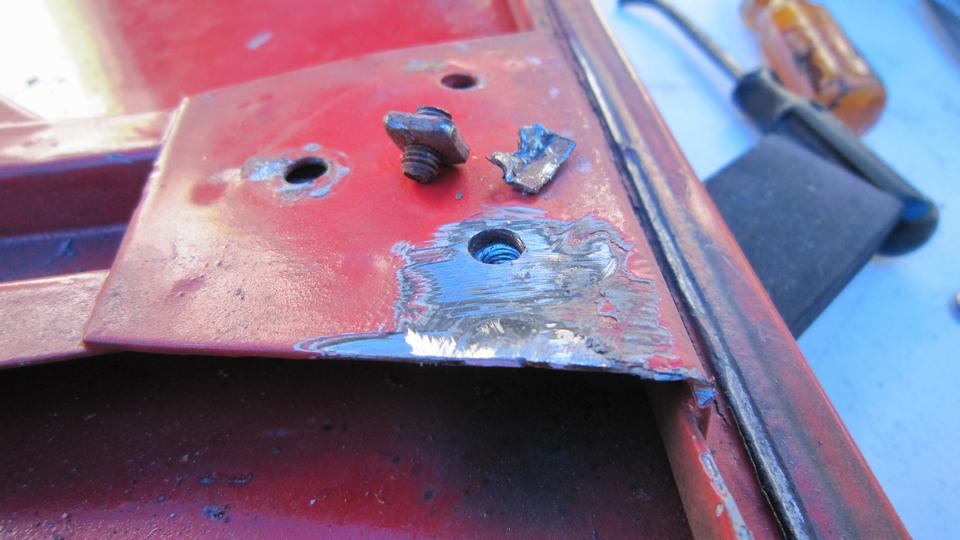
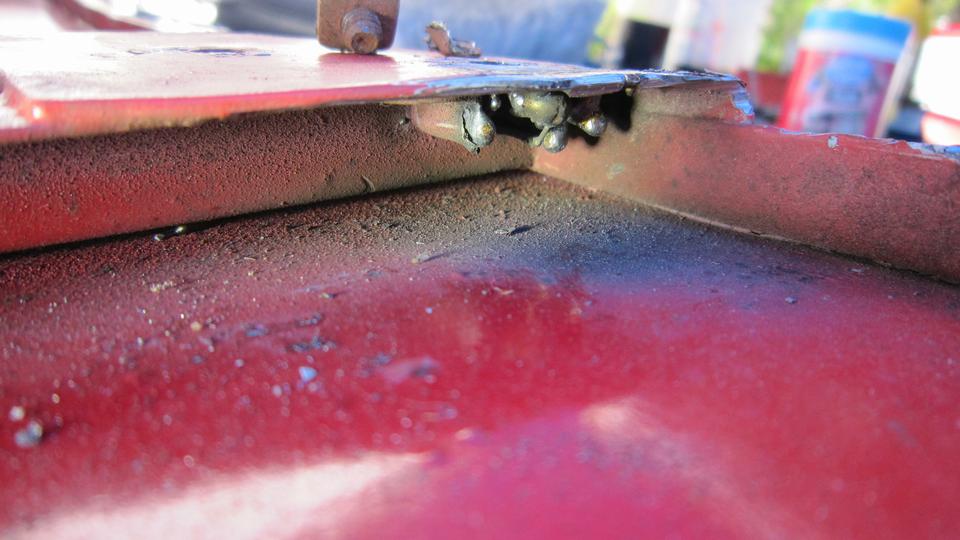
Then the captive floating square nut turned in the cage, refusing to come out. So we ground the head off the screw to get the lid off and to the work bench. Those screws may have been in there since the last body-off restoration work in 2008, going on 15 years and nearly 300,000 miles. I know they were not removed for the quickie repaint in 2015. Picture below center shows the remains of the cut-off screw and square nut after I pried open the cage for removal. The cage broke from the bending, so the new #10-32-UNF square nut got tack welded in place using the MIG welder. We were ultimately successful removing the Tinnerman type push nuts to remove the MG emblem without breaking any of the mounting pegs.

Then we could finally get busy with a little body work and surface finishing on the doors. Those were finished and in primer coat before sun down, ready for finish paint, hopefully early tomorrow. While the primer was drying we re-installed the boot lid and began clean up and packing tools. Right at dusk we were reinstalling the doors and door top trim rails and side curtains, thanks for the drilled alignment holes. And we get to do it at least one more time tomorrow. The rolling restoration is not quite as efficient as doing it all at once, but it does let us drive it every day (and better than trying to refinish the doors in situ).

Wednesday, February 8, 2023:
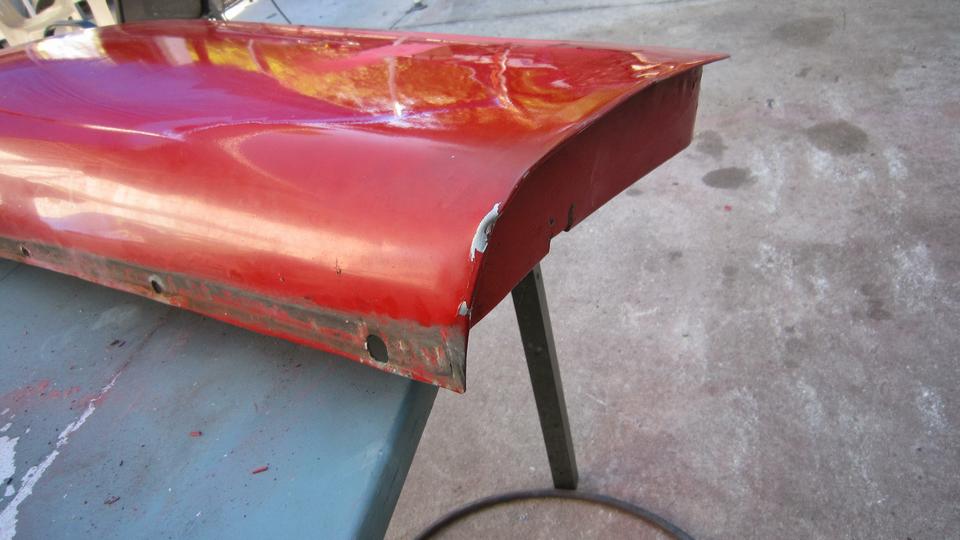
Nice workday, great weather. Doors and boot lid off. Once over the doors quickly with 500-grit wet sanding,
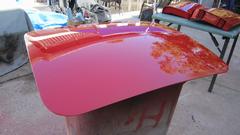
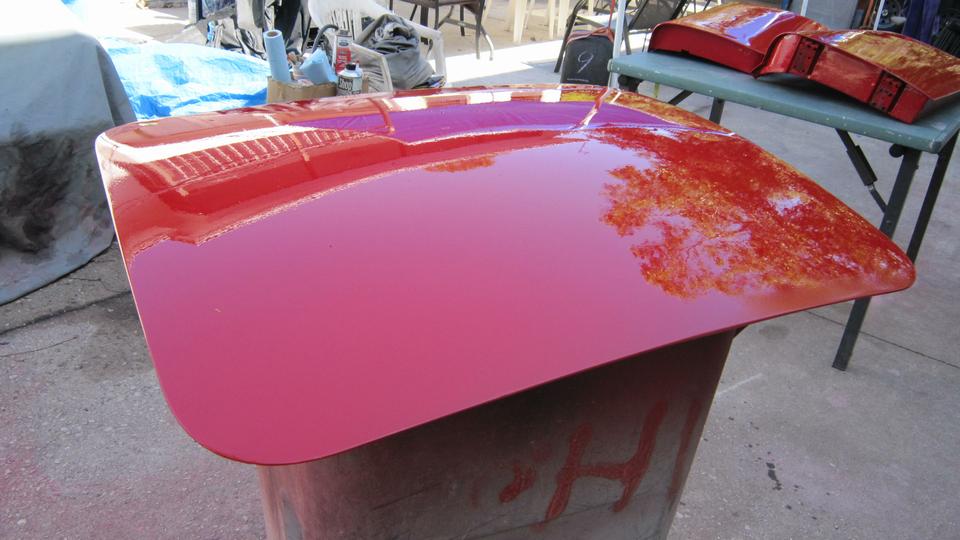
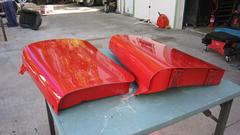 rinse down and blow dry. A little more vigorous 500-grit wet sanding on the boot lid to remove old oxidized paint surface, then rinse and blow-dry. All three panels sprayed red by noon, as planned.
 Had a little paint left in the gun, so I sprawled out in front of the MG and sprayed the scuff marks on bottom edge of the fiberglass front valance panel (just a little camouflage). And we even had time for a lunch break.
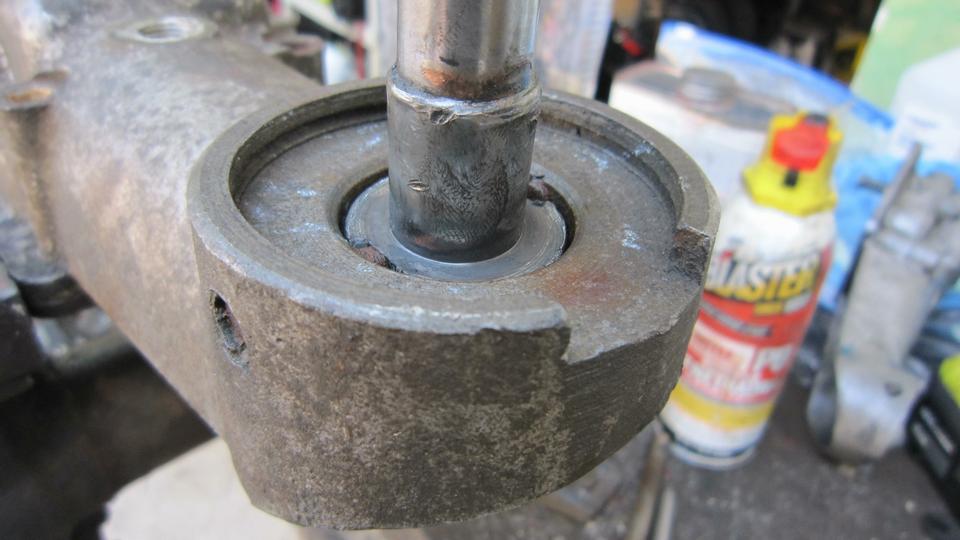
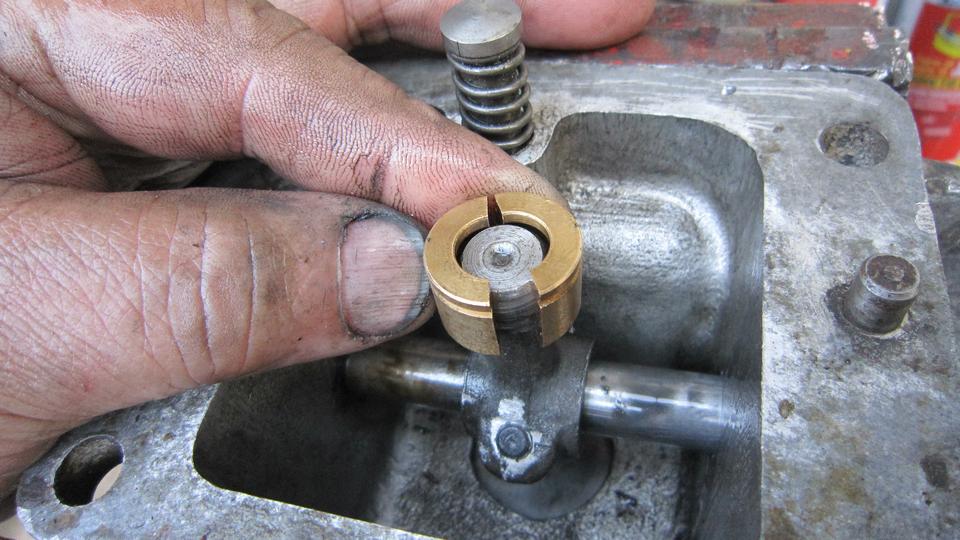
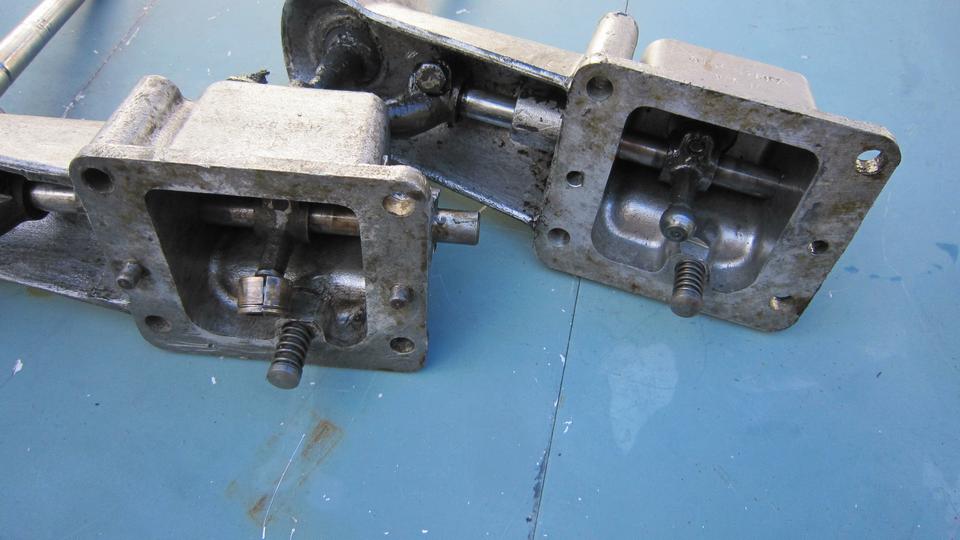
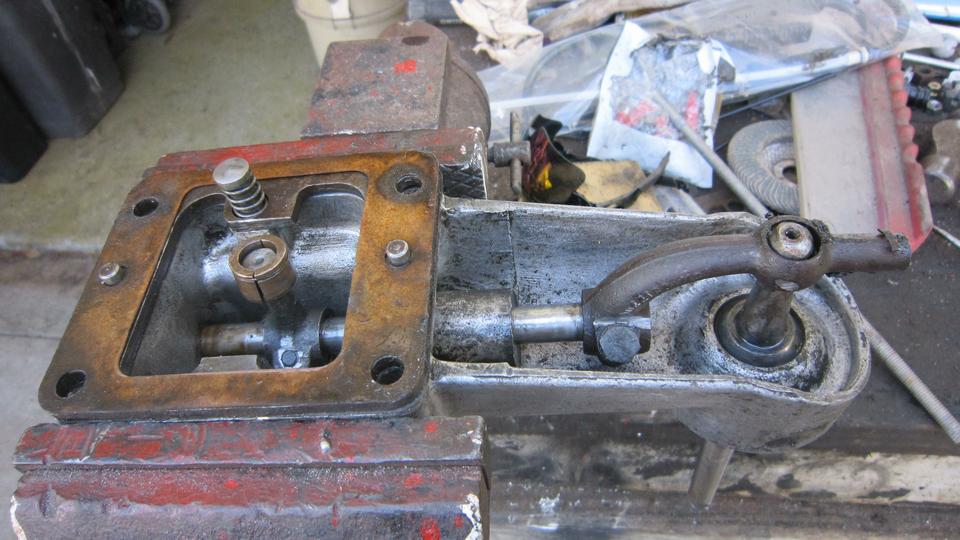
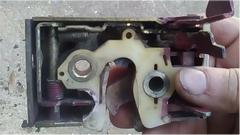
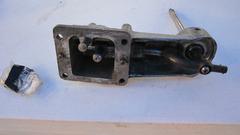
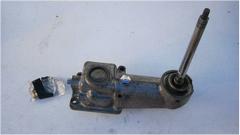
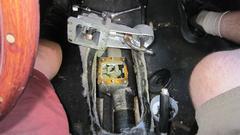
Intending to wait 6-hours for the top coat paint to set up some, we jumped into the chores of cleaning up two well used gearbox shift extension assemblies, hoping we could make one good one out of three abused ones (including the broken one remove from the car in September). First one was crusty and rusty, soaking in penetrating oil for a few days. Finally got it disassembled with a couple big hammers, spent an hour scraping with a knife and washing it in lacquer thinner. Yield from this was one serviceable housing plus two good levers.
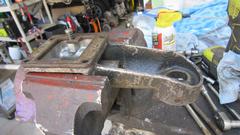
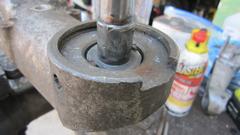
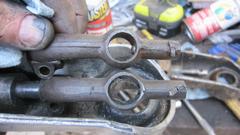
Second one came from my car with half a million miles, moderately worn in the shaft bores, very badly worn in the spherical hand lever nest, badly worn rear lever (above right), broken front lever. The only yield from this one was a clean shaft and a worn housing good for a core return for re-machining.
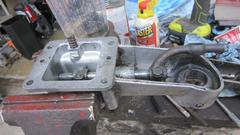

The third one was very high mileage with more wear in the shaft bores than I had even seen before, excessive wear in the hand lever spherical nest, and badly worn rear lever. Yield from this one was a serviceable front lever (good for a spare part), and another core housing good for re-machining.
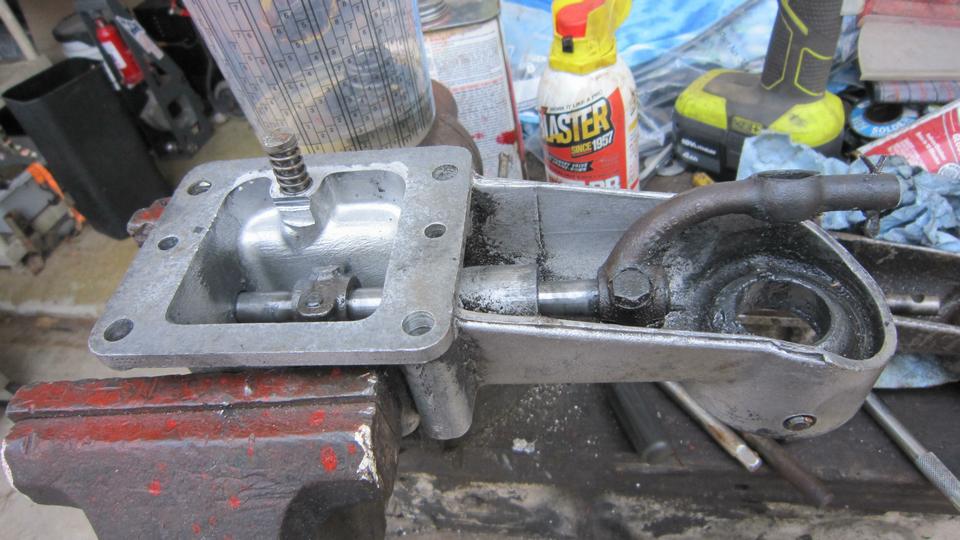
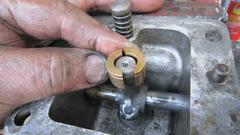
For the final assembly I used the housing and two levers from the crusty beast, the shaft and hand lever that came out of my car. I had a new split bronze bushing that I bought from Moss Motors two years ago as a spare part, but that didn't fit, having too-small spherical inside diameter. Well, when I swap this Frankenstein assembly back into my car I can "borrow" the bronze bushing from the loaner assembly I picked up in September (but need to return). And I know where we can get new bronze bushings.
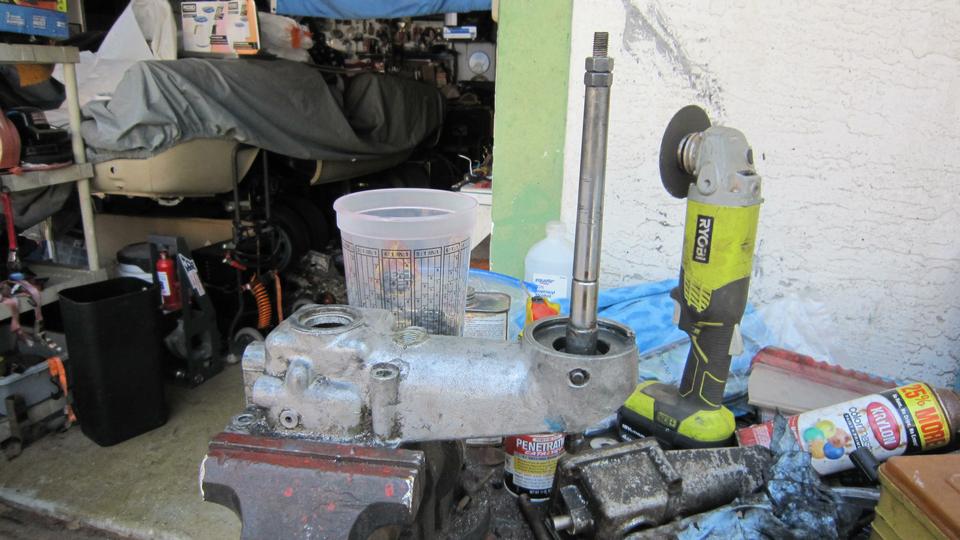
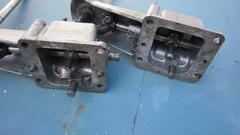
Last picture has two core housings boxed up ready to send to the guy in Wyoming to be re-machined.

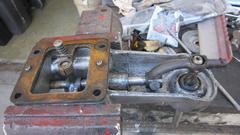
Finished shifter assembly, ready to install in the car (some other day, please).
6-pm time to re-install the doors and boot lid (with 6-hour old epoxy urethane red paint), carefully touching only the inside surfaces, Keep repeating, "Do not touch the outer skin". Navigator holding the doors, driver working the shims and screws and alignment pin and power driver. 35-minutes to install two doors (including door-top trim rails and side curtains), and 10-minutes for the boot lid with thumb screws. Not bad, sure to get more pictures by daylight.

Thursday, February 9, 2023:
Taking a break to catch up with the world. Two days in a row we accomplished what we intended, pretty good feeling. I called Moss Motors to discuss the split bronze bushing that didn't fit. Surprise! The part number isn't even an MG part, it belongs to a big Healey. Guess I made some hurried rash assumption two years ago when I bought it with such enthusiasm. Oh well, toss it in the dust bin and carry on.
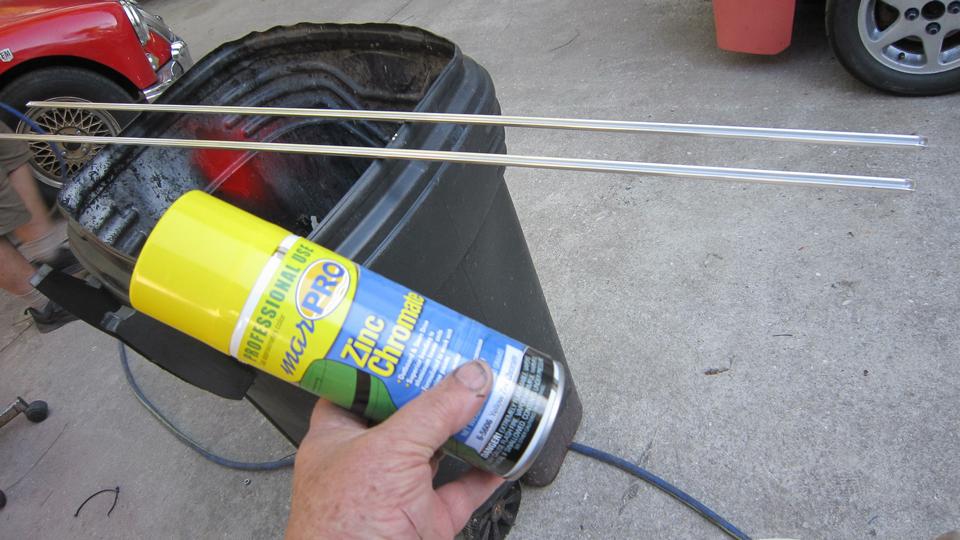
Couple of phone calls and a trip to the automotive paint supply store looking for a spray can of Zinc Chromate primer to paint the new lower body trim strips (bare aluminum extrusions). Wasted trip, as they didn't have it, so I just ordered it via Amazon for delivery next week.
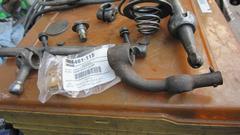
Took a while to get together another parts order for Scarborough Faire, mostly for all of the parts to replace the door-top trim rails (kind of expensive parts). That should be shipped tomorrow.
And it rained this afternoon, so it turned out good to be taking the day off (so to speak). Late evening, catching photos and notes from yesterday. Do enjoy, please.
Friday, February 10, 2023:
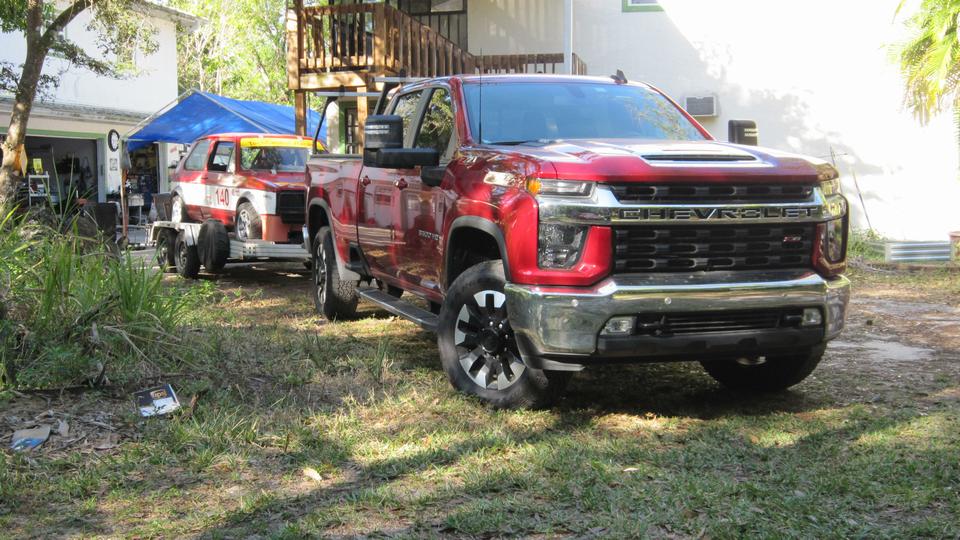
Tech Central Friday. Wondering why the Heavy Duty Chevy 3500 was sitting there? Ah, hitching up the trailer with the Rabbit race car, going racing at Daytona for the week end.


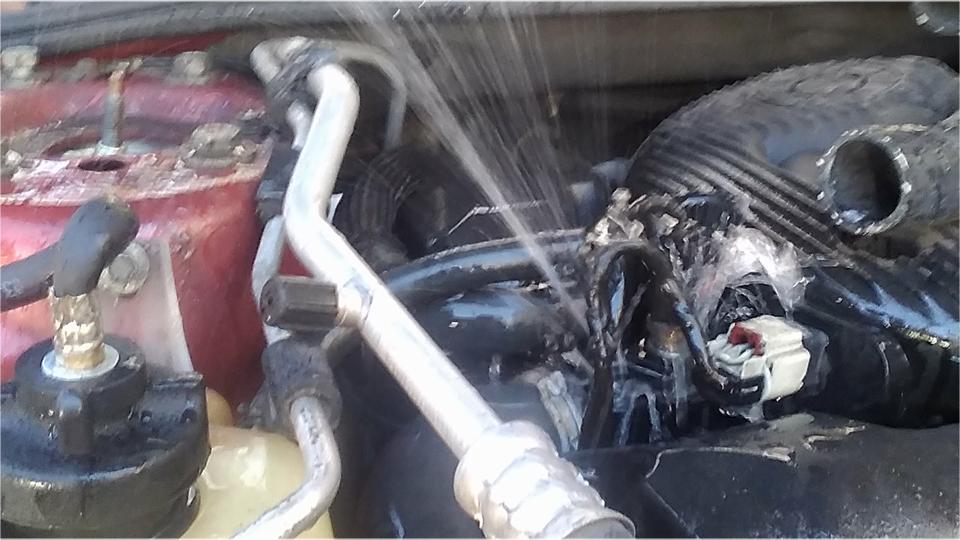
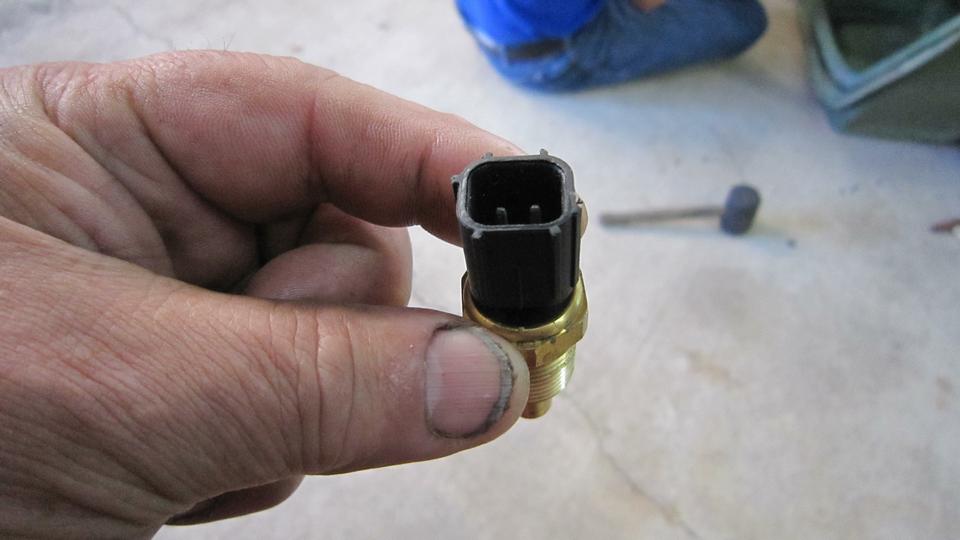
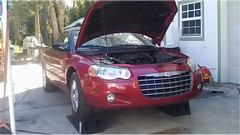
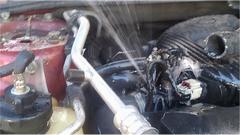
Hey, remember the Chrysler Sebring that had all the cooling problems for the last 5-1/2 weeks? After replacing the leaky top housing it was still indicating overheat on the dashboard. That turned out to be the brand new thermal safety switch that came with the new top housing. Last time we unplugged that switch, and the car was back to normal driving. This week another new safety switch was installed, and the car is doing just fine. Cursed bad new switch (sign of the times).
Hey, the Chevette Excalibur kit car is making more progress. Getting rear and trimming installed now. If it had a seat it could be driven. Later in the day they were working on fuel filler connections.
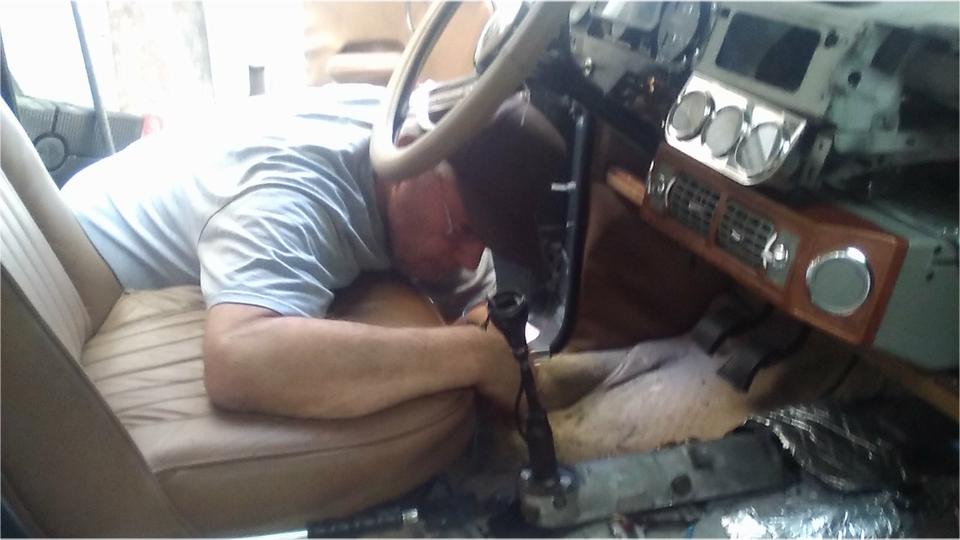
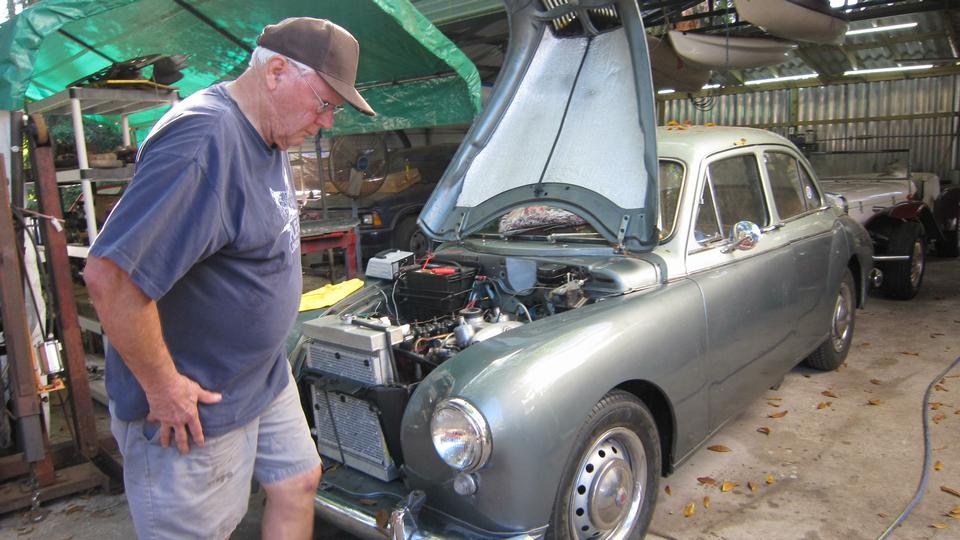
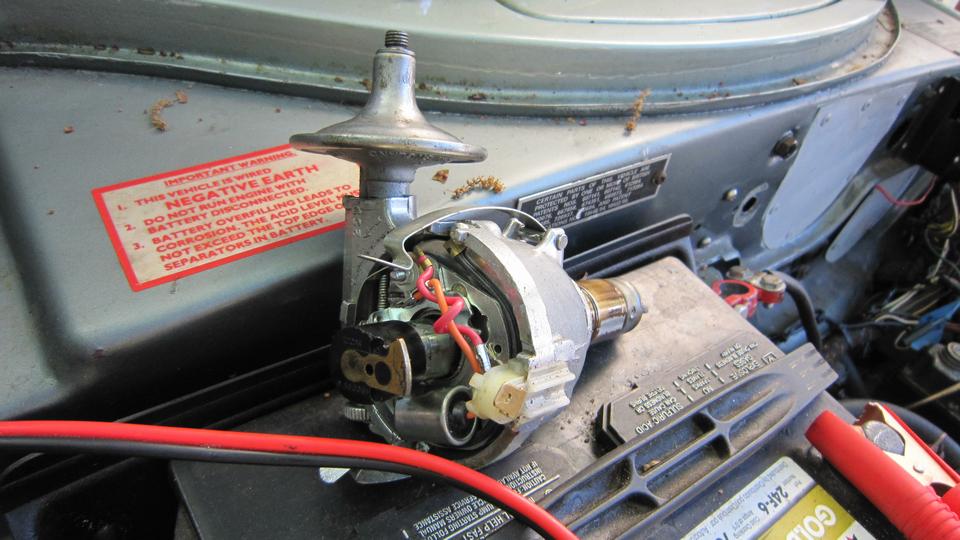
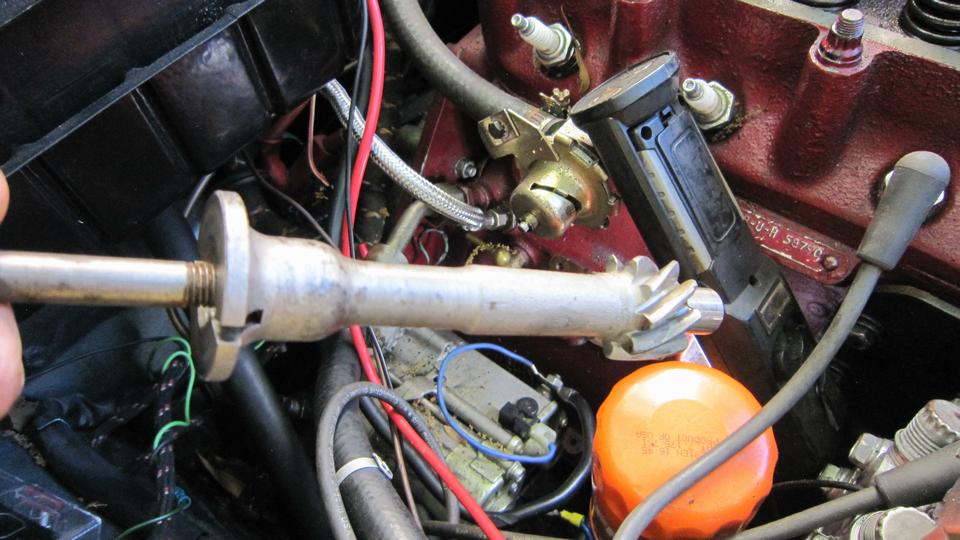
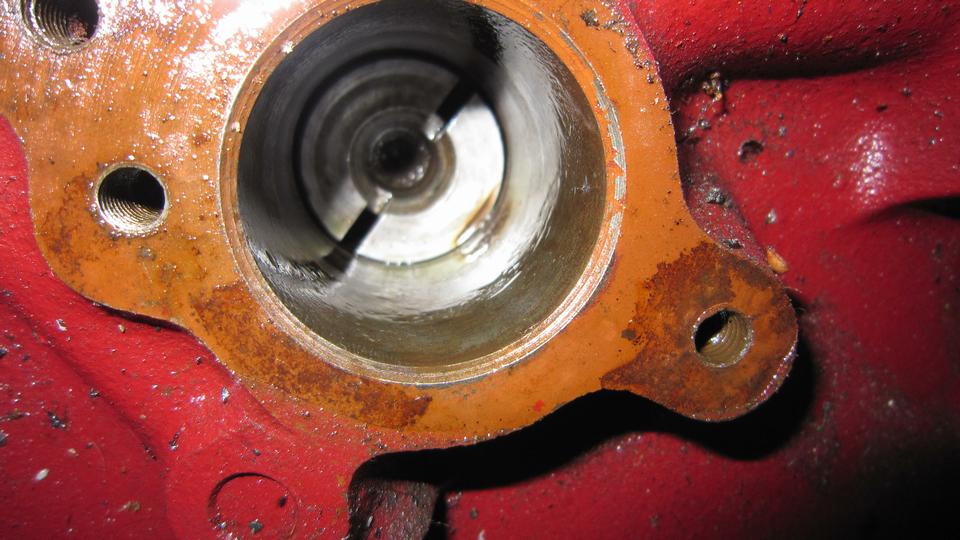
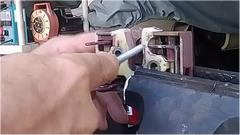
The MG ZB Magnette needed attention,installing the distributor. First set the crankshaft at TDC, then insert distributor, and the rotor was pointing in the wrong direction.


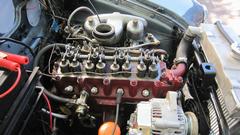
So dig in to re-orient the drive gear, and put it back together. Getting to be old hat by now, but a new tech session for some people. Remove distributor base clamp and the mounting housing, and pull out the drive gear.

Reinstall the gear, "larger offset upward" (key slot below center), with the key slot pointing in direction of #1 spark plug. Reinstall the base and clamp plate and distributor with vacuum unit pointing upward. Still missing the olive and flare nut for pipe to vacuum unit connection, and a P-clip to secure the pipe to rear stud on the head.

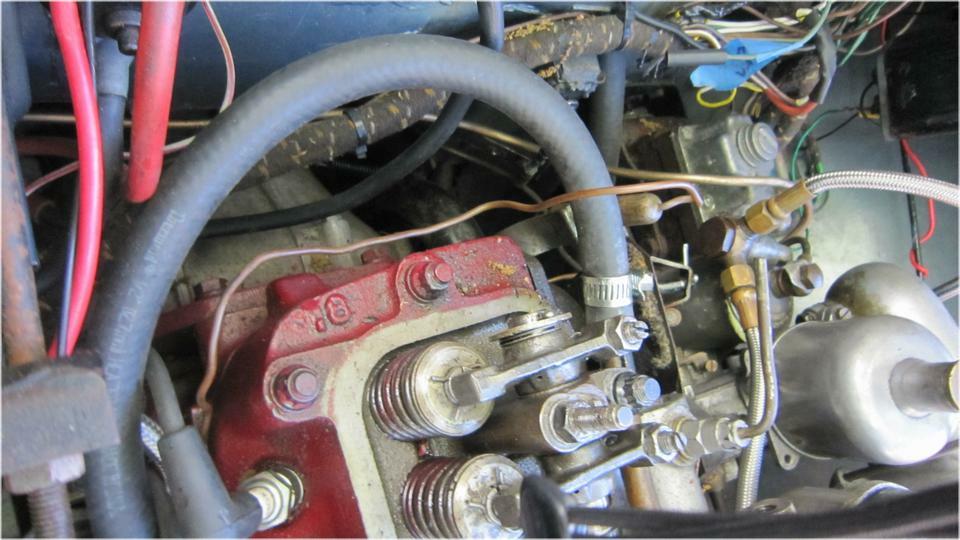
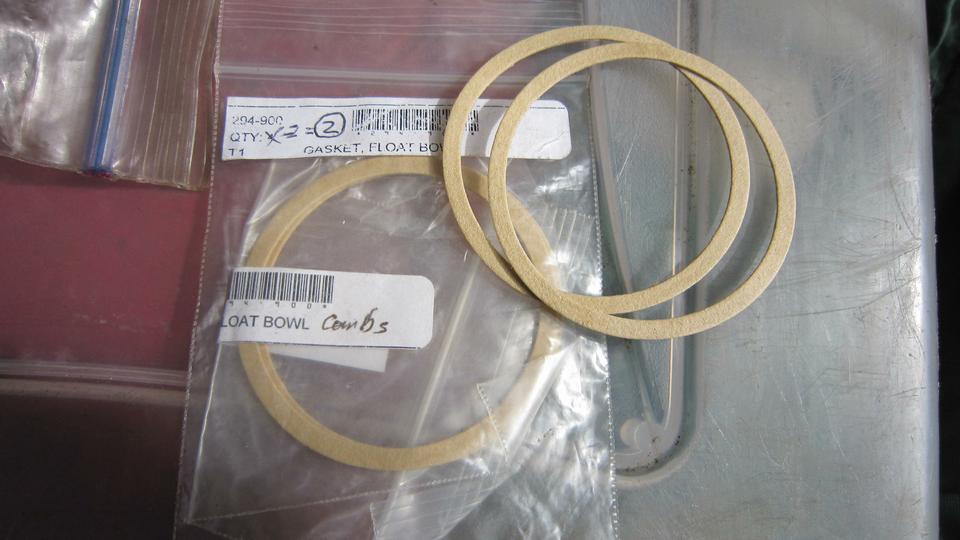
Ready to start, key on, fuel running out of both carburetor float chamber overflow pipes. When was it last

 running? Couple of months. Pull the float covers off, clean and adjust float valves. Float arms dropping too far down, so the valve pin was binding against the arm. Grind a pair of short slots in hinge end of the float arms to make a bendable adjustment tab to limit downward travel of the arms, and put it back together. Two new float cover gaskets contributed by the Magic Trailer.
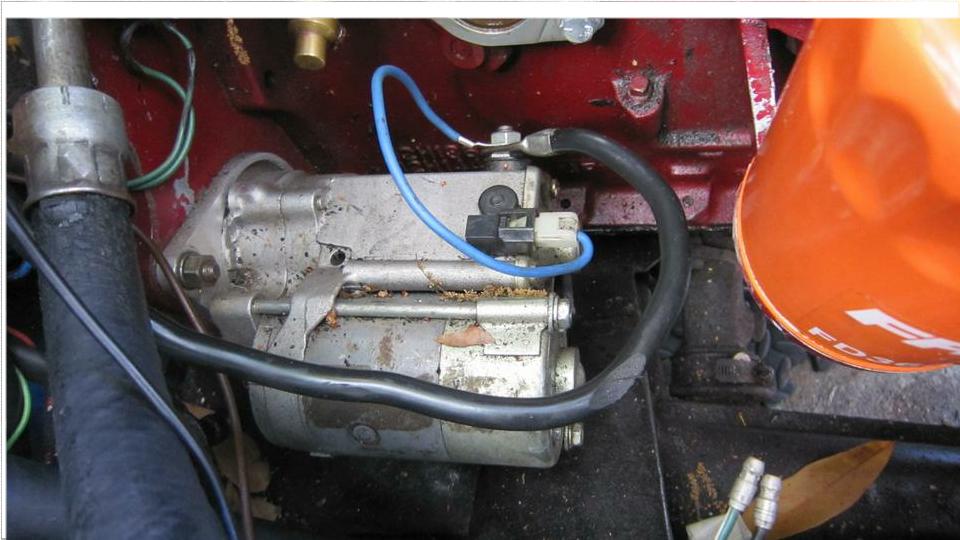
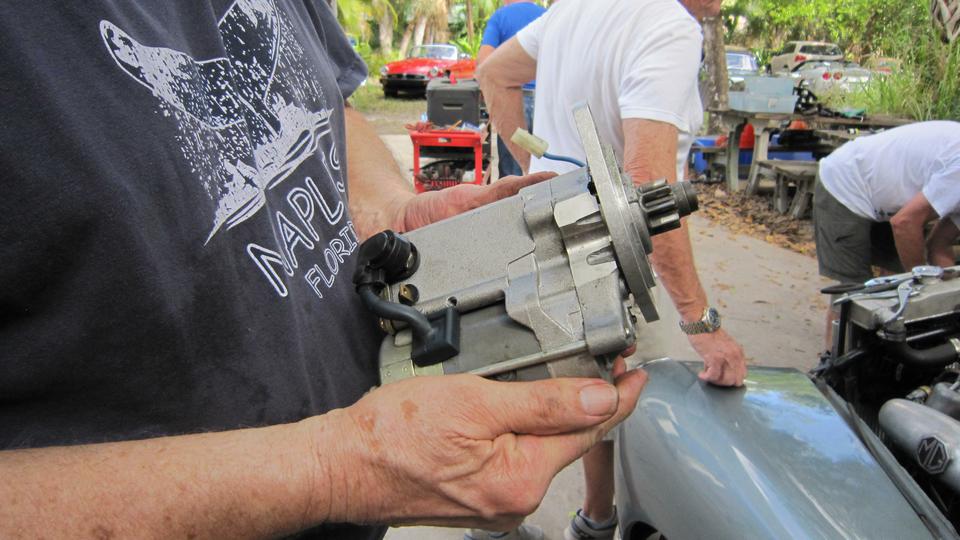
 Switch on, fuel pressure up, no leak. turn to "Start", solenoid on the firewall clicks, but starter motor not cranking. Volt meter reads 12.6 volts on the battery cable, dropping to 10.1 volts when attempting cranking. That looks like high current draw by the starter, but no movement. Check voltage at the starter motor, 10+ volts on the input terminal, no motion, a bit of crackling at a battery terminal clamp (which was getting hot). Sure enough, internal short in the nearly new high torque gear reduction starter motor. End of that project for the day. Five guys to remove a starter?
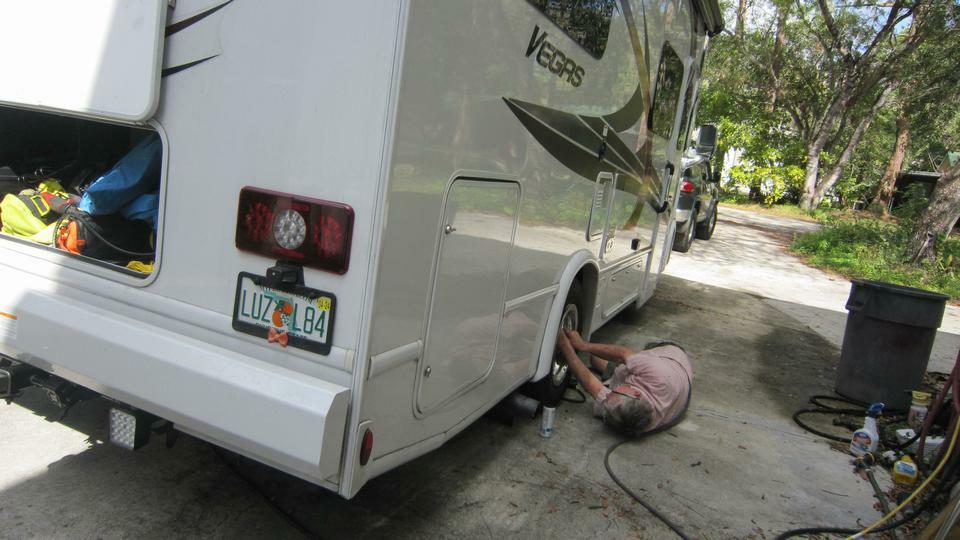
A Honda sport ute came in with some nasty clunks in the left front suspension. I think they were tightening some loose bolts around the McPherson strut, and apparently the noises were banished. Jerry was adjusting tire pressures on the motor home, which can tow a second race trailer (but maybe not for this week end). The caravan was off for Daytona, and everyone else left by mid afternoon.
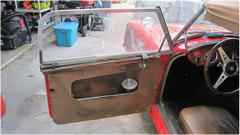
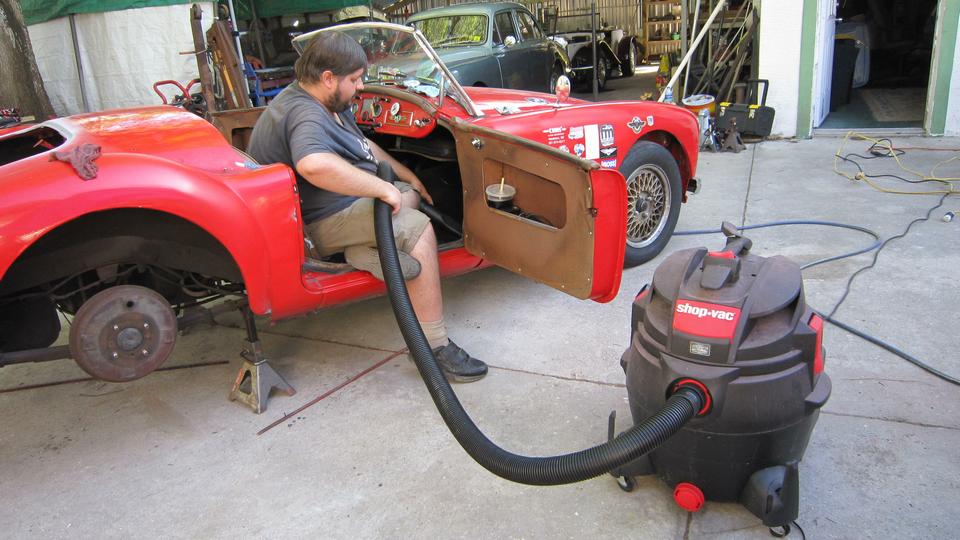
Since we had the place to ourselves, we could do a little work on the MGA (not common on Fridays). So we reinstalled the door interior panels (giving us back use of the door pockets).
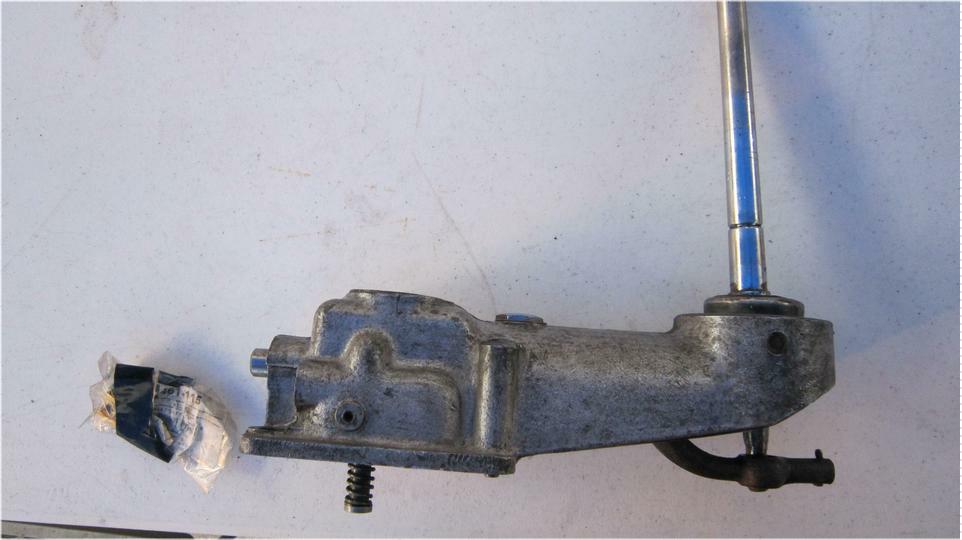
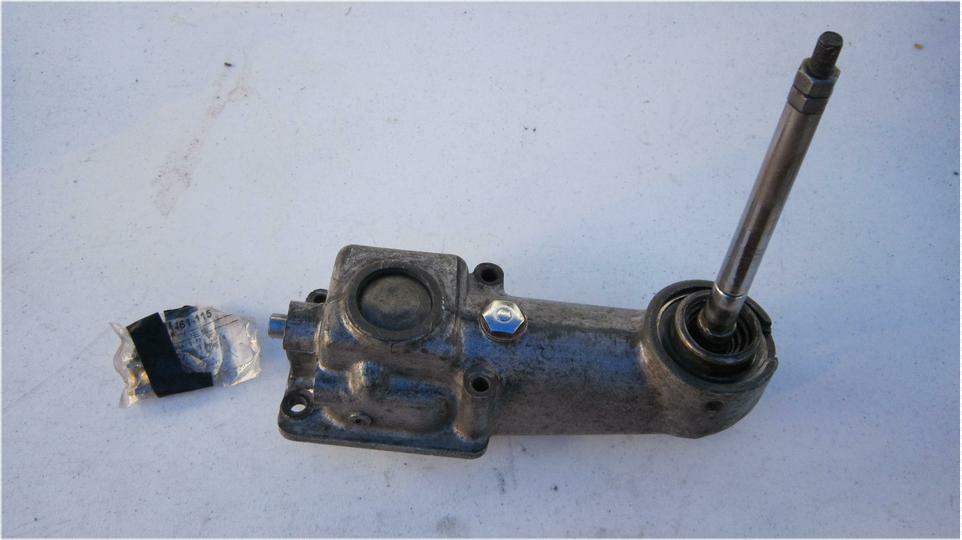
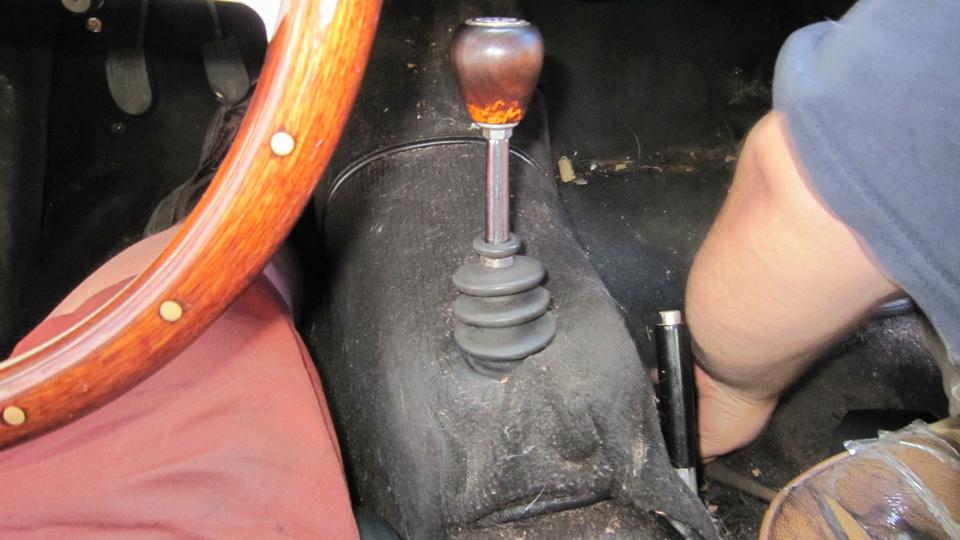
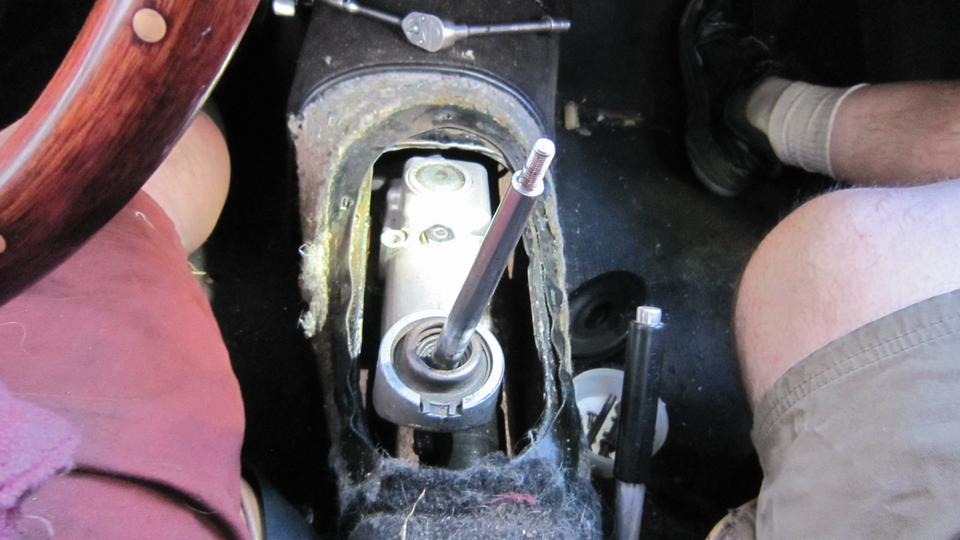
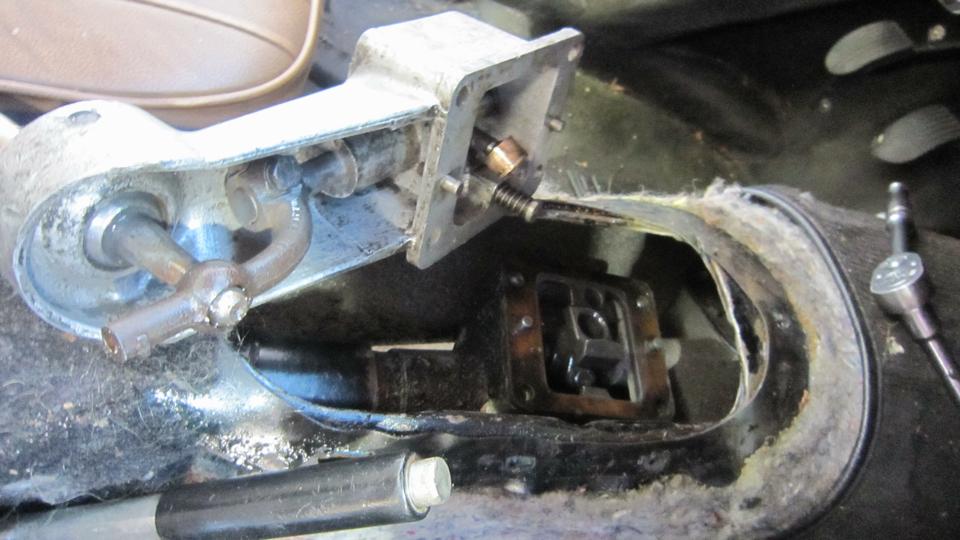
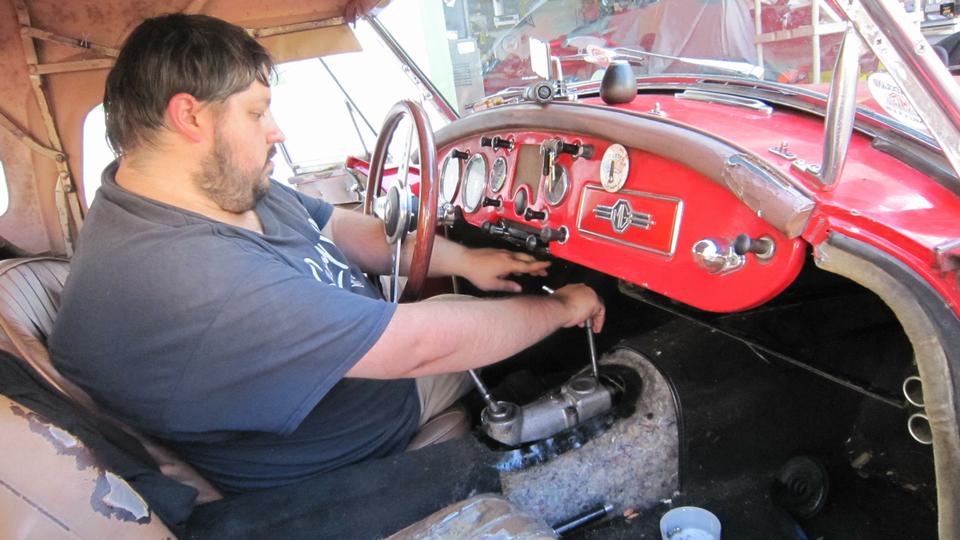
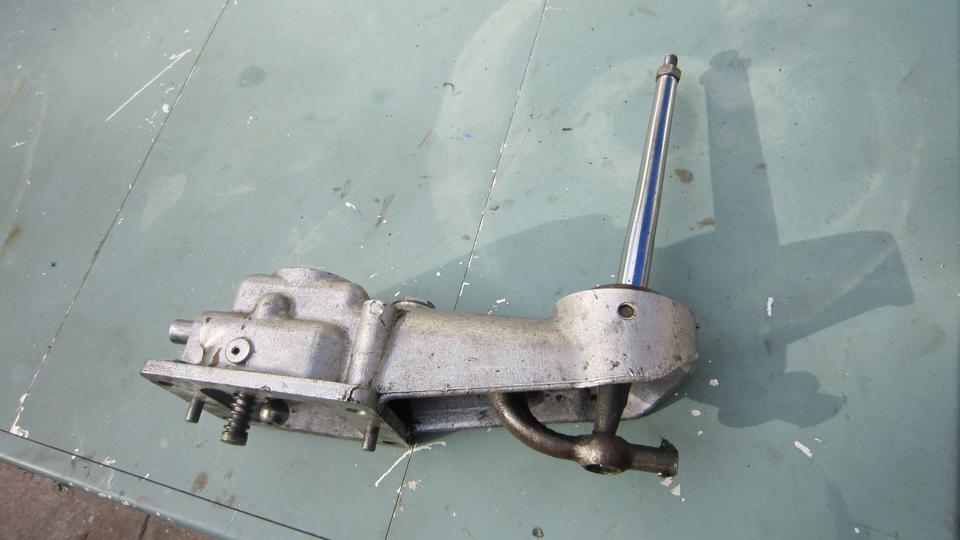
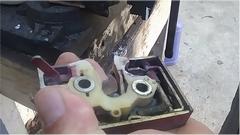
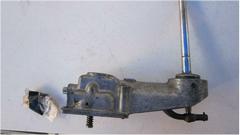
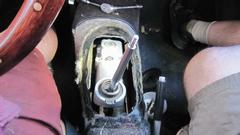
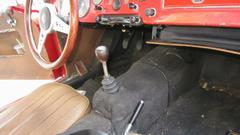
Then we proceeded to R&R the gear shift extension assembly, so we could return the loaner part to the owner in Oklahoma. Remove shift knob, tunnel center carpet, rubber boot, and the tunnel cover (eight #10 screws). Remove four bolts and lift off the shifter extension assembly.
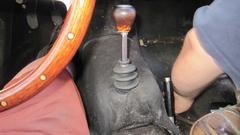
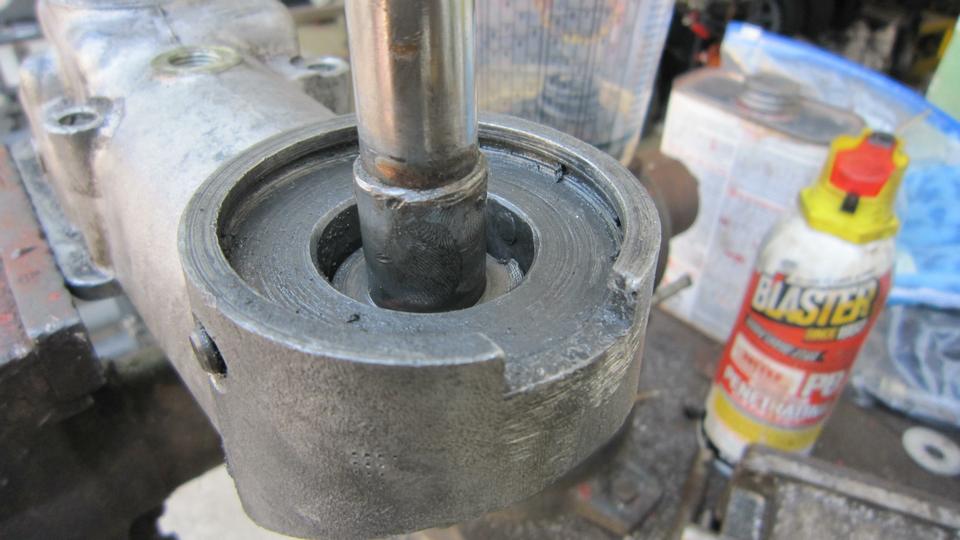
Over to the bench to swap the split bronze bushing from the loaner assembly to the Frankenstein assembly. First attempt to install was a no-go, having dowel pins in both the gearbox and the shifter assembly. Oops.

Not long to fix that, putting the intermediate plate on the shifter and pulling the redundant pins out of the gearbox. Just a bit of a fiddle to get the bronze bushing to drop into the mating socket. More fiddle to install eight screws into floating nuts to secure the tunnel cover. Not too long for two guys to tuck the carpet back into place. The newly assembled shifter is crisp shifting with an extra pound of push, but that will loosen up to finger tip shifting with a day or two of use.

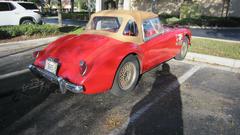
The loaner shifter cleaned up nicely, ready to ship back to Oklahoma where we got it. But first we have to find the missing split bronze bushing that disappeared a few days ago. And here are daylight pictures of the car with freshly painted doors and boot lid.


Saturday, February 11, 2023:
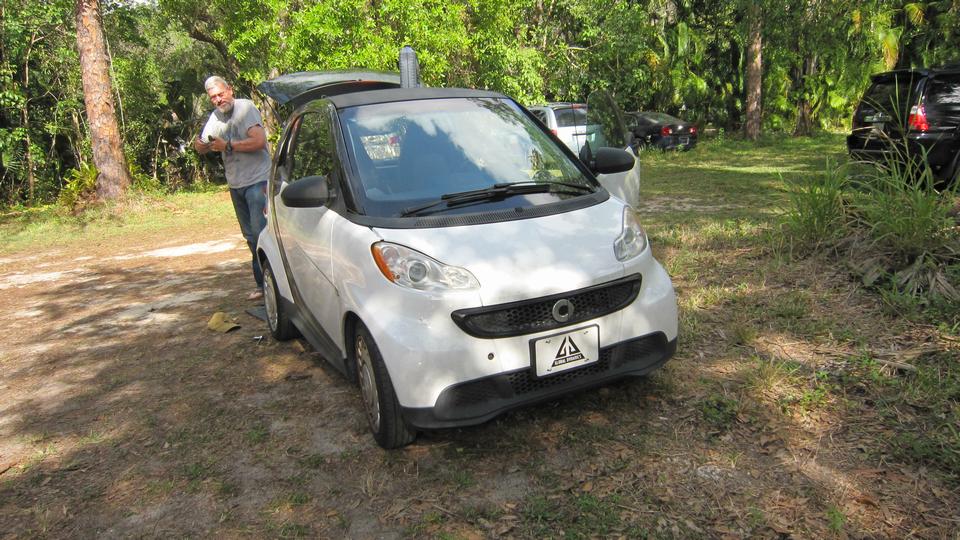
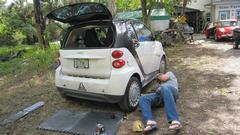
Started as a casual day, just needed to pick up an alternator (between 3-6 pm), and wanting to ship out some shifter housings. Stopped by the shop to pick up the shifter parts. Bumped into a friend working on his Smart car. He was just doing an oil change, but it was a good opportunity to get a peek at the power unit in the tail end below the luggage compartment.

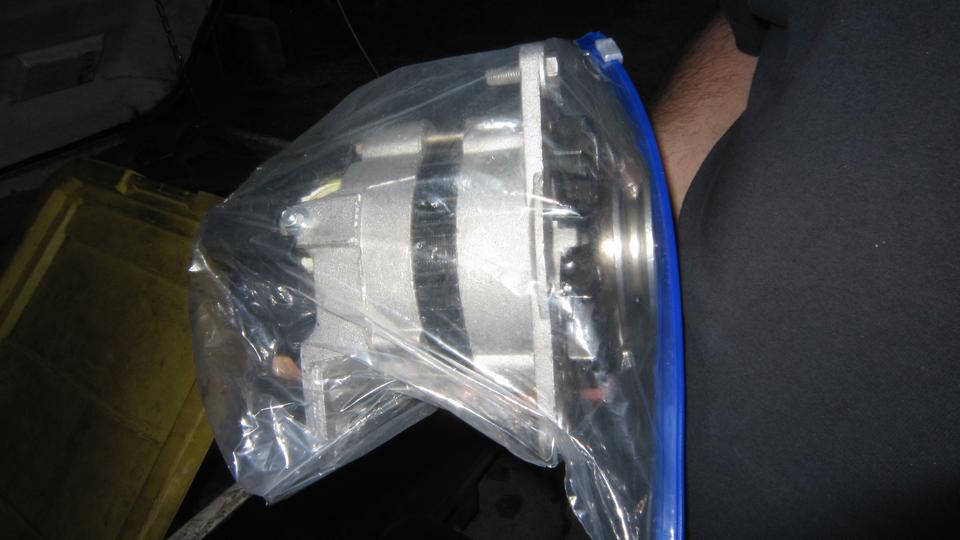
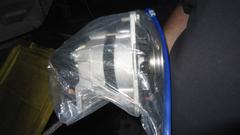
Then we headed to O'Reilly Auto Parts for the alternator (that we had ordered two days earlier). Good news is that it was not only there, but they accepted my story about the front thread being stripped before we could get to use it, and honored the "lifetime warranty", so it was a free exchange (saving us about $100). I also picked up a foot of 3/32-inch plastic tubing (more on that later). Arrived at the UPS Store at 3:45-pm to find they closed at 2-pm on Saturday. Rats, but not the end of the world.

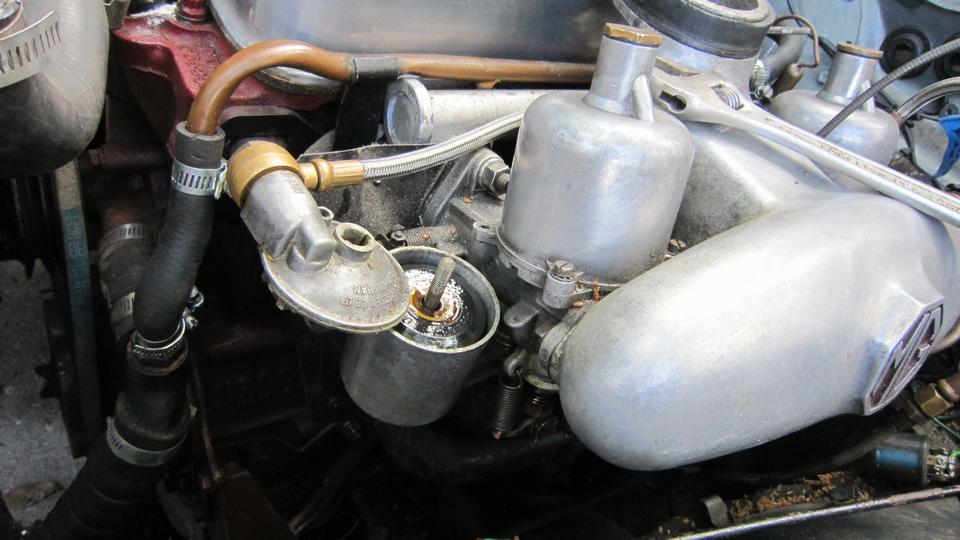
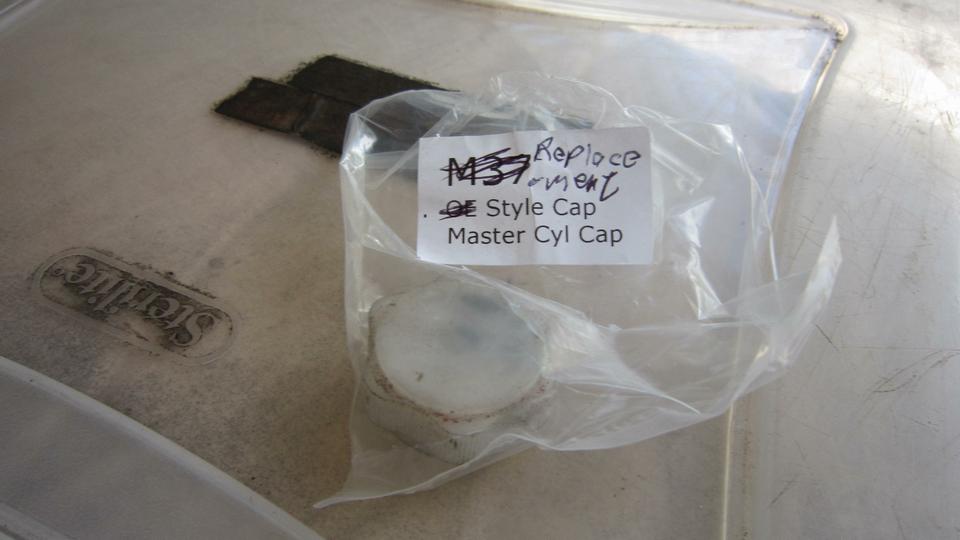
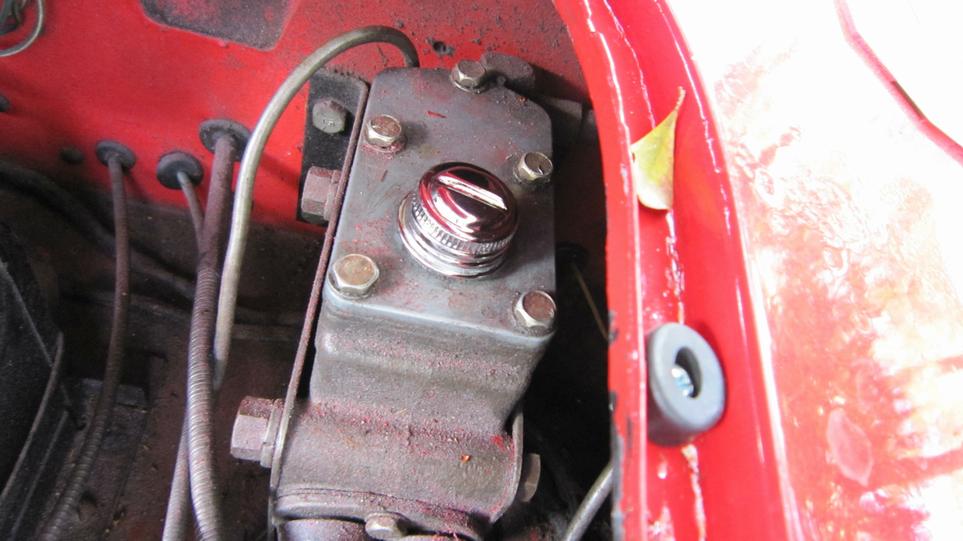
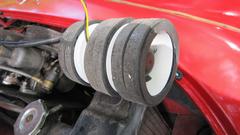
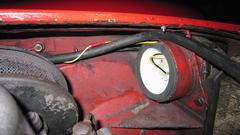
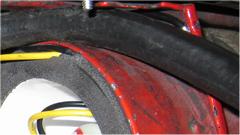
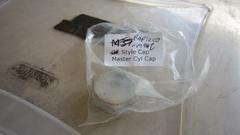
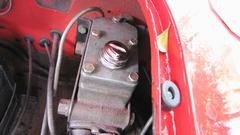
Back to the shop. Pull the last parts shipment out of the office to inventory and stow away the spare parts. A shiny new metal cap for the master cylinder. Nice new pair of MGA cowl vents this time, so set about installing those.
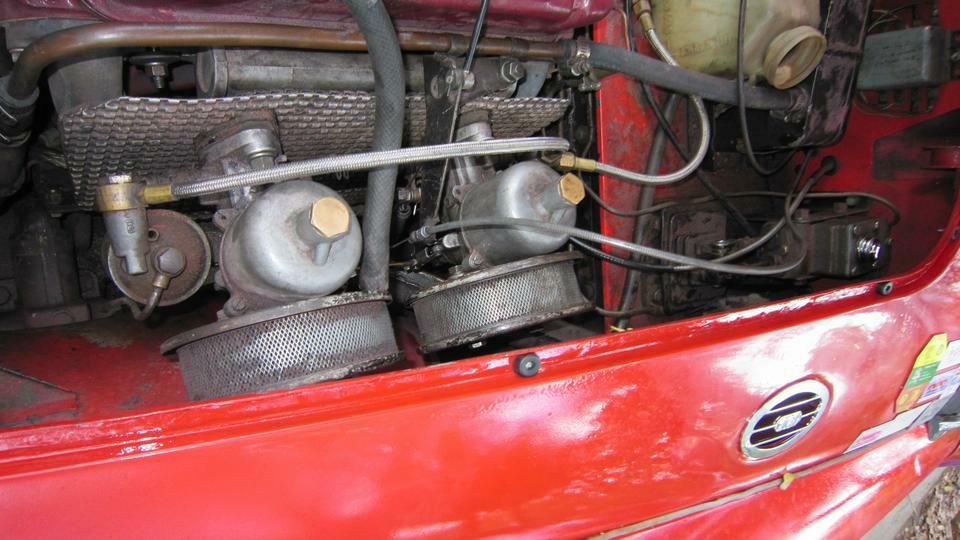
Had to R&R the rear air cleaner and throttle bracket for access underneath the left side air scoop. Had to R&R the
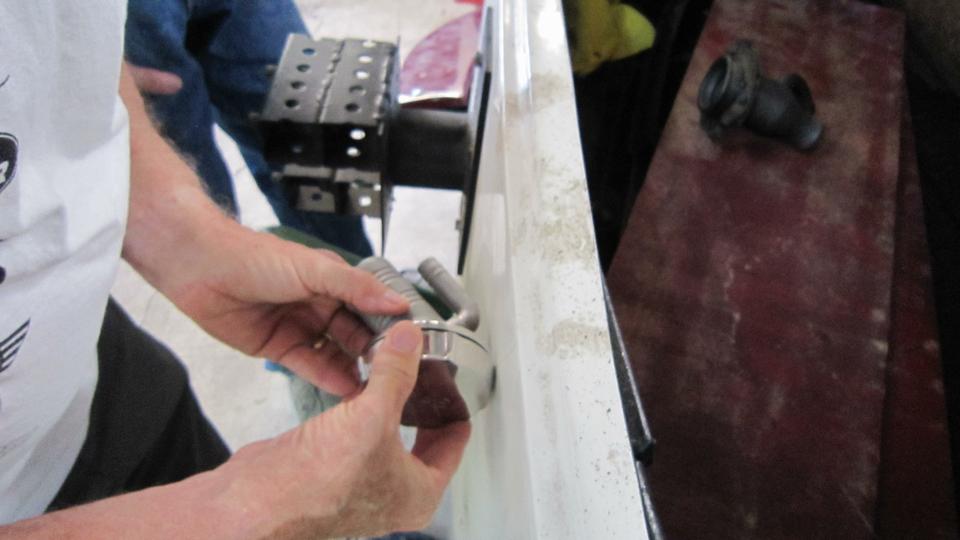
 4-inch heater supply air hose for access underneath the right side air scoop. Then it was a matter of contortionism to reach underneath into the air scoops to push short bits of 3/32-inch plastic tubing onto the retaining pegs to secure the cowl vents in place. Nice.


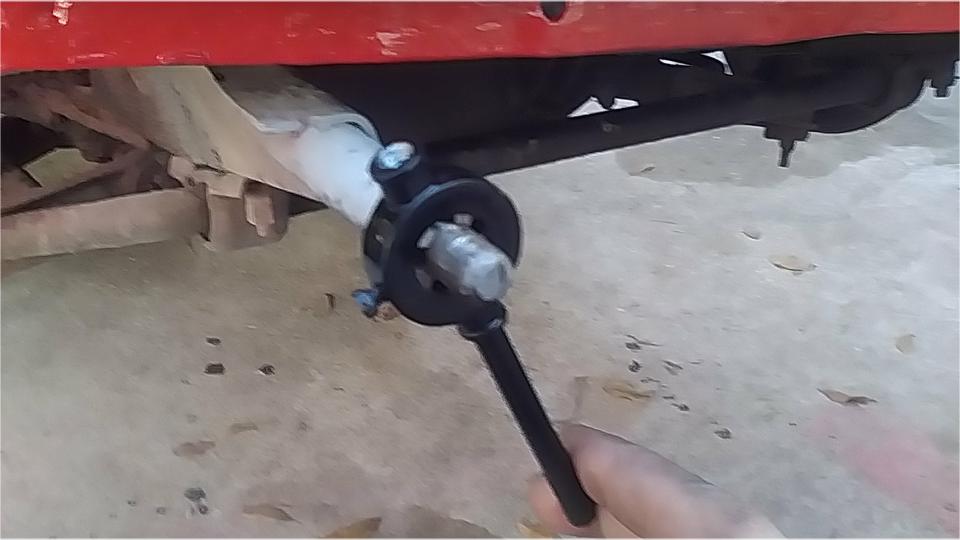
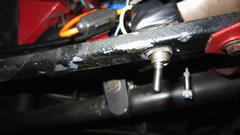
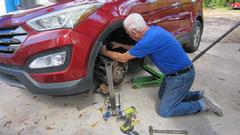
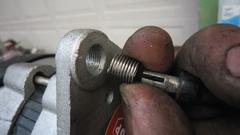
Drill out the hole in the alternator for attachment of the adjuster bracket, and install a 5/16-24-UNF Heli-Coil (tradition to prevent stripping the thread). Install the shaft key, fan, pulley, lock washer and large nut in front. Run it tight with an impact wrench, and mark across the nut for alignment reference. Bag it and toss it into the trailer for spare (and hope it works next time we have to install it).

Late start, and now out of light, time to pack up and get back to WiFi.
Sunday, February 12, 2023:
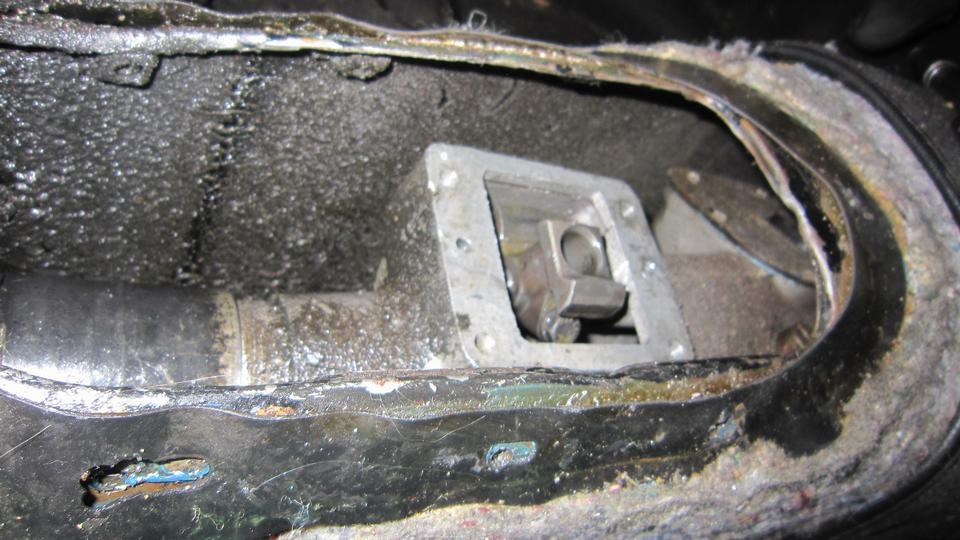
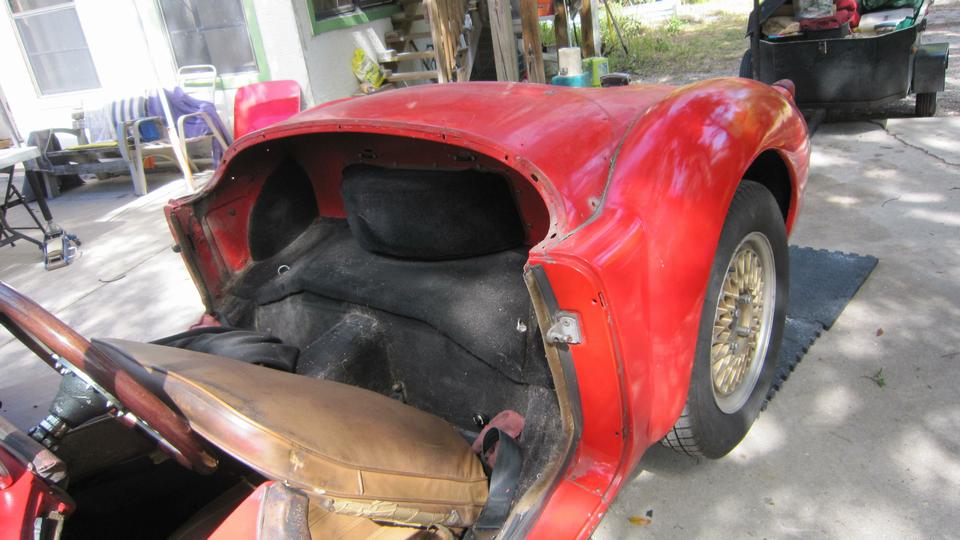
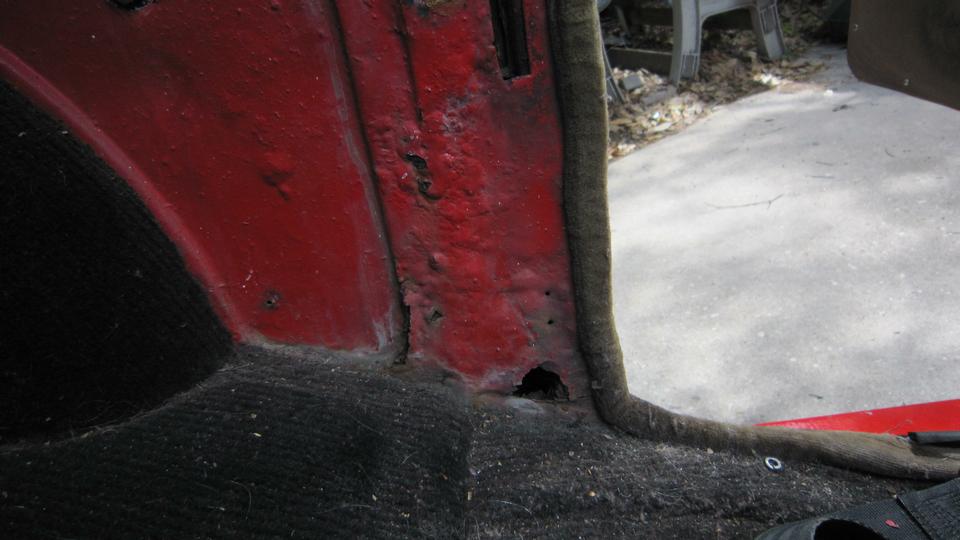
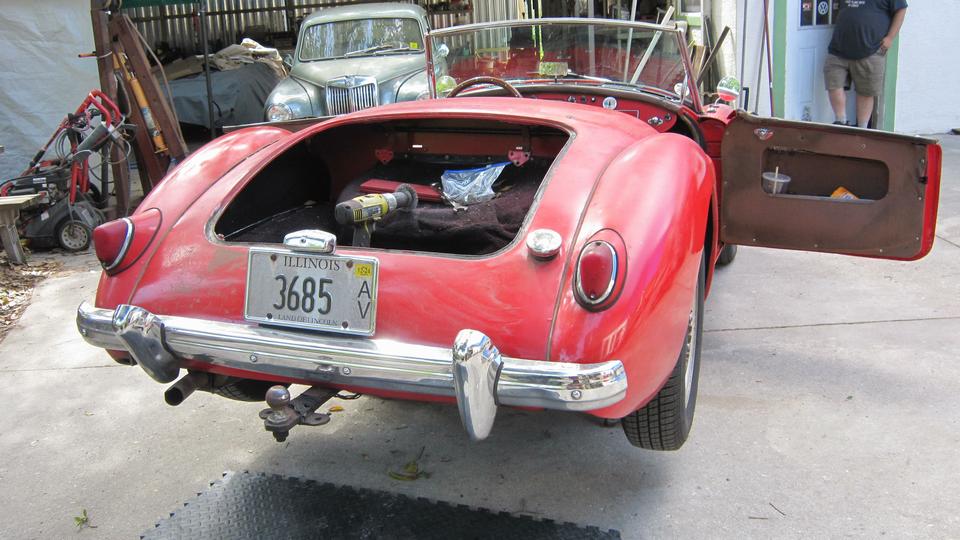
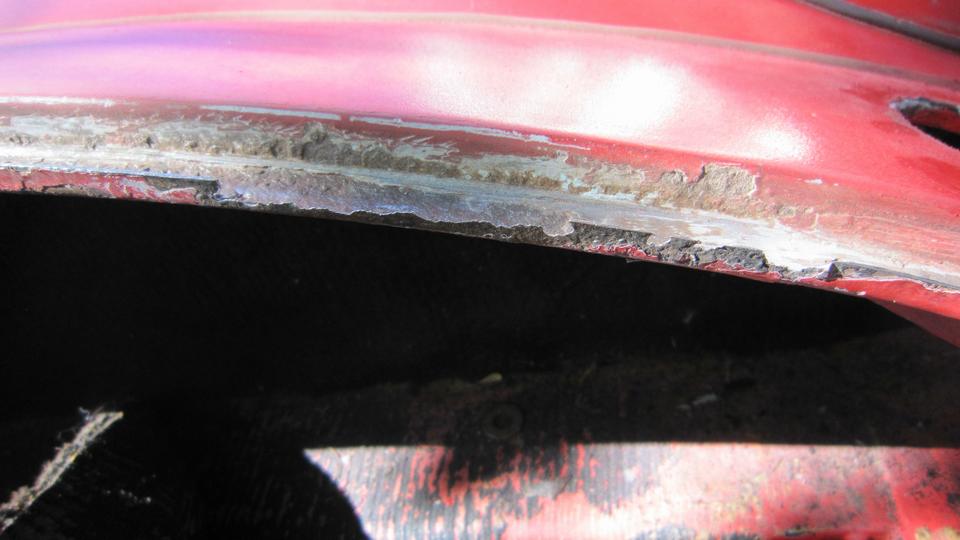
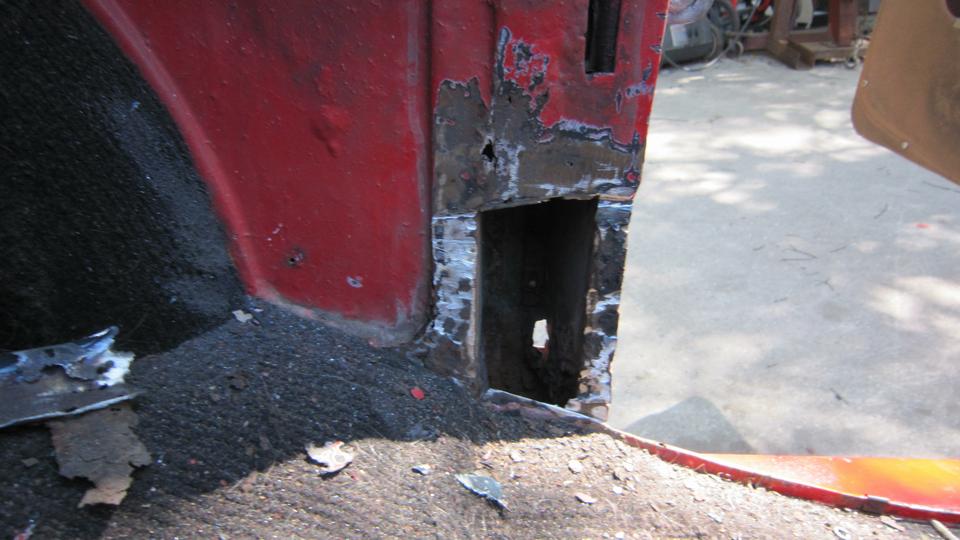
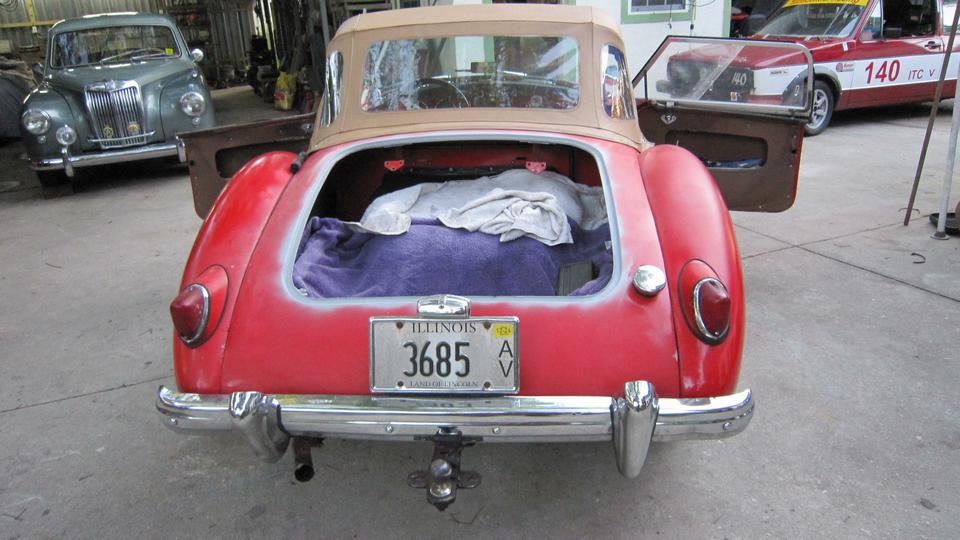
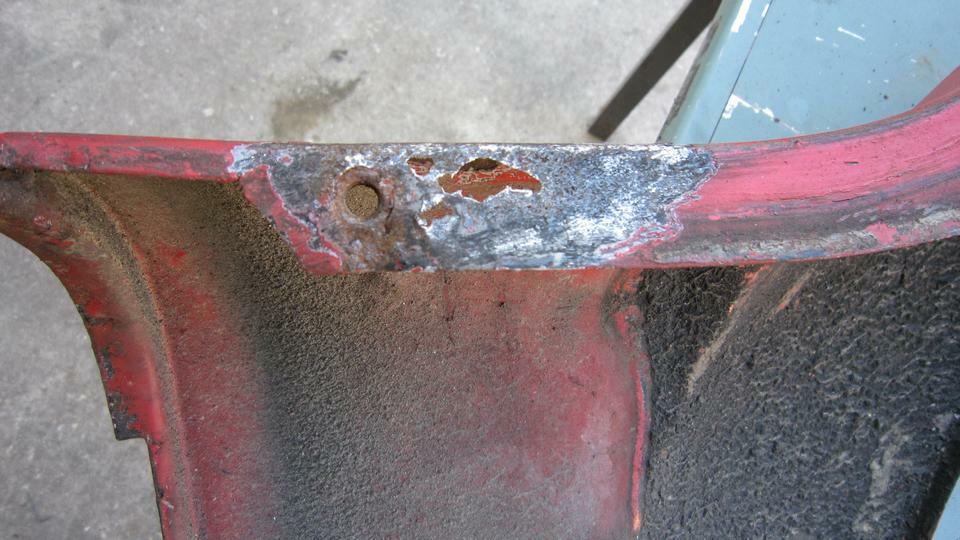
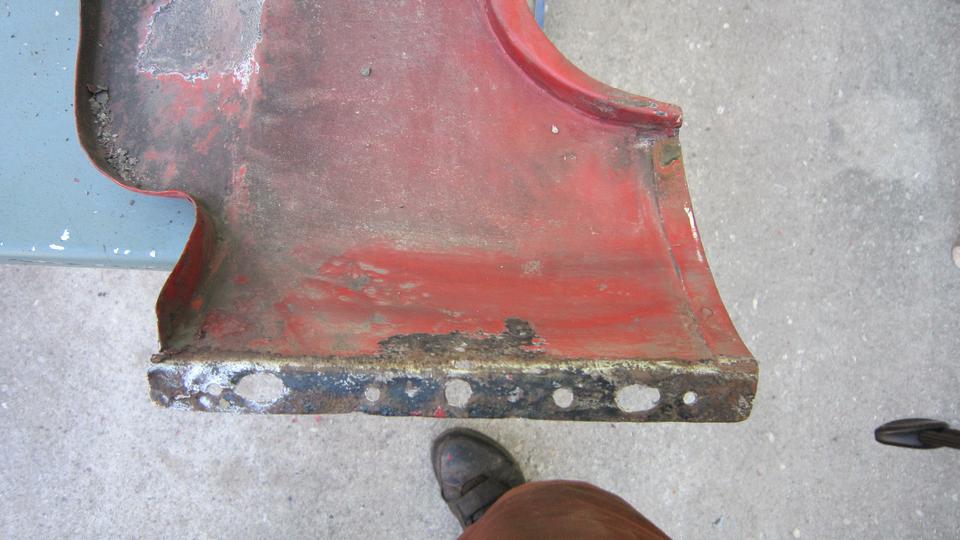
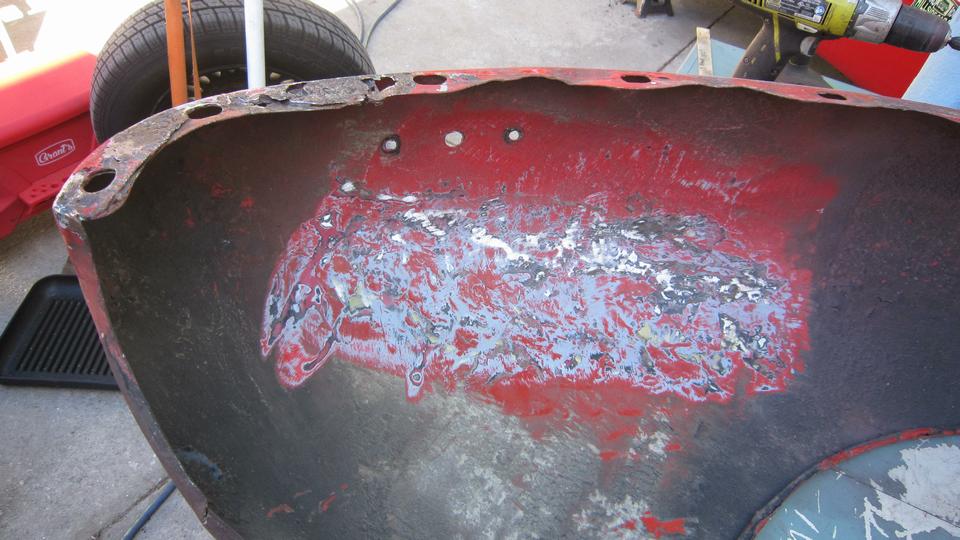
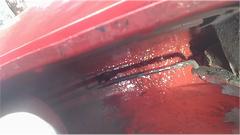
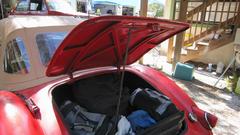
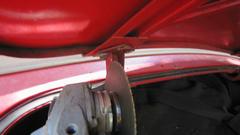
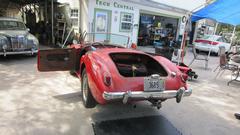
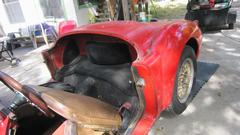
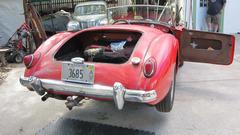
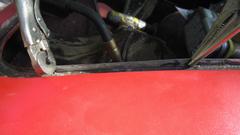
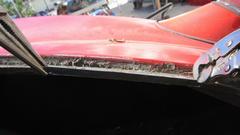
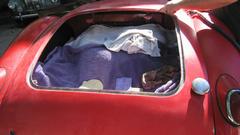
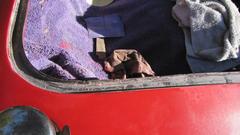
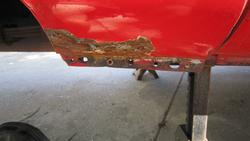
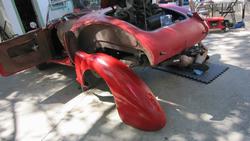
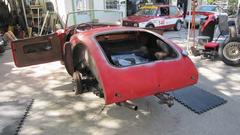
Back to work on the car, this time to attack the rear half in the interest of making the whole car one color again. At minimum, we need to separate the rear wings from the main body to clean and paint in between (not to paint over the piping). Jack it up, and start disassembly from the rear. Remove the rag top frame, rear kick panels, cockpit rear trim rolls (including the side curtain stowage bag). Nine years since the last outer body full repaint, and 15 years since the last body off full inner and outer repaint. So we were expecting to find some other aberrations, and we did. Start with a rust hole hiding behind the rear kick panel down low behind the driver door (where there was a small screw securing the kick panel).
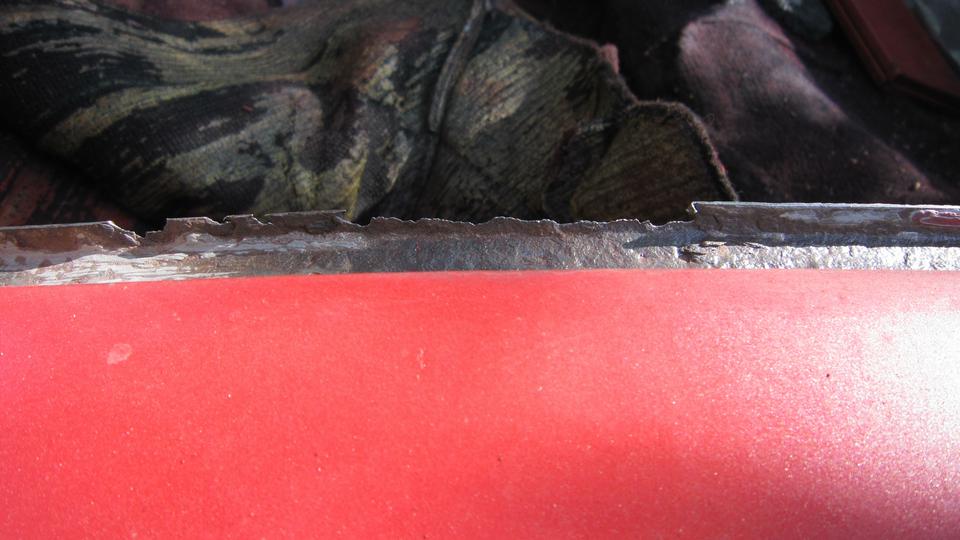
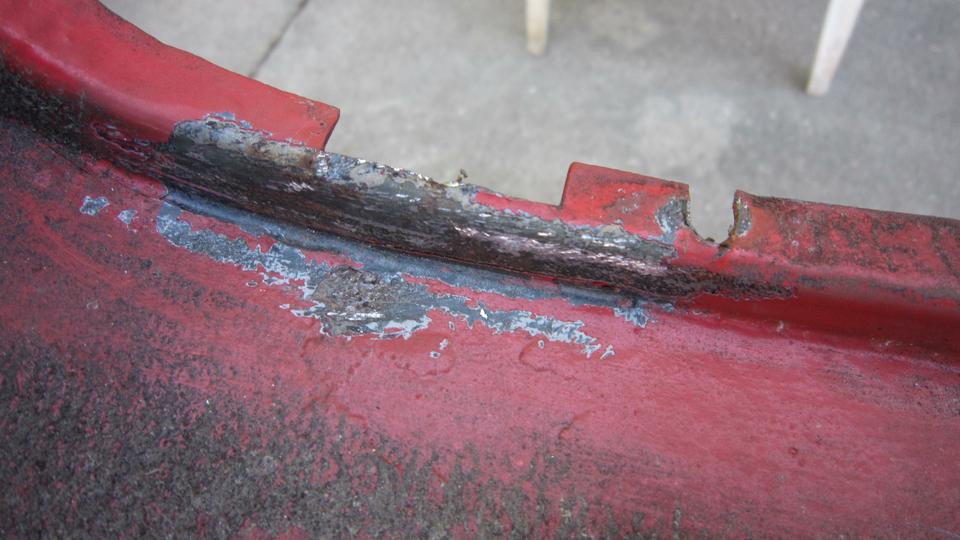
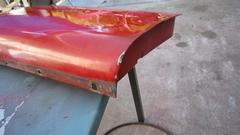
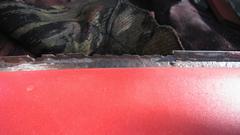
We also found a 5-inch stretch of the boot lid seal gutter rusted away, begging for replacement sheet metal.
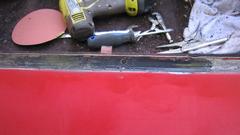
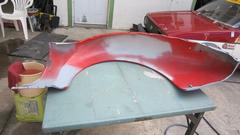
As Elliot was removing rear splash panels and lots of wing bolts, I was removing the rear bumper and power sanding the body tail below the boot lid. This is where a few years ago I was too hurried and applied a second coat of red paint before the first coat was properly cured, resulting in some puckering and wrinkled surface. Now we have the opportunity to fix that problem.
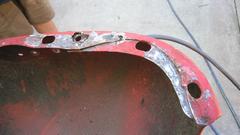
About half an hour spent cutting a metal patch piece 5/16" wide and 6" long, and meticulously grinding it to fit the vacant space. Just as I was going to hit the new patch panel with the MIG welder (2-pm), the sun popped up in my face, so we had to put the wheels back on the car long enough to move it into the shade. Then getting on to welding in the new patch piece.
Got busy welding and didn't any pictures for a while, but the gist if it is, metal alignment and clamping, then tack
 welding the patch in place. Then tacks between tacks inside and outside of the joint corner until it was all continuously welded. Then grind, grind, grind inside and out until it looks like a gutter again. Then one of my favorite tricks, applying JB Weld to seal up any remaining voids in the welds, and to fill and seal up rust pitting areas. No way any moisture will get through the JB Weld to cause future rust. We'll get around to sanding it down and priming it tomorrow.

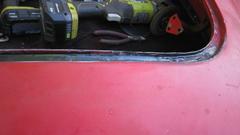
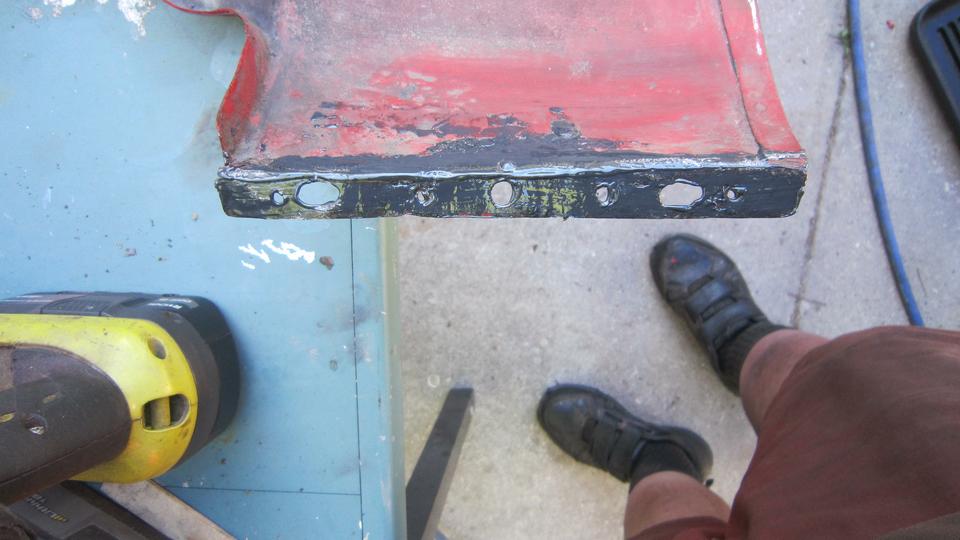
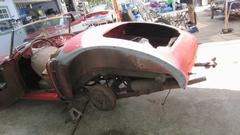
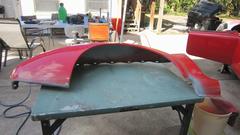
We did get all the rear wing bolts removed, and managed to pull out the piping all in one piece, both sides. We had at it gently with an orbital sander smoothing the shoulder of the body panels along the piping joints. That went well with few surprises, but we were running out of daylight, so time to reassemble the car enough to drive it overnight. We should get more pictures tomorrow. Two bolts in each rear wing was enough, two large nuts (and flat washers) for the rear bumper, two wires for the tag light, six screws to reattach the rag top frame, and two studs for LTD fasteners (one each side). Put the side curtains on, pack up the toys, and ready to roll.
Monday, February 13, 2023:
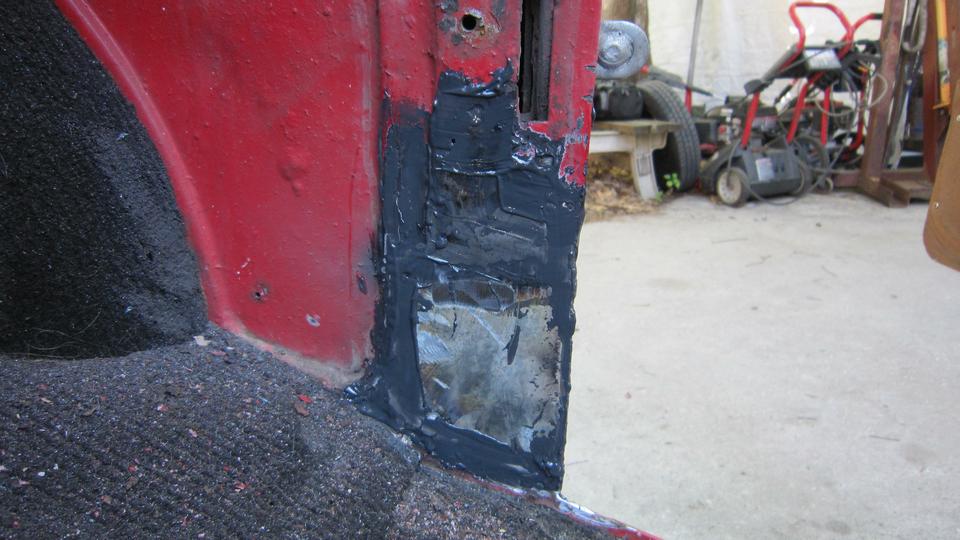
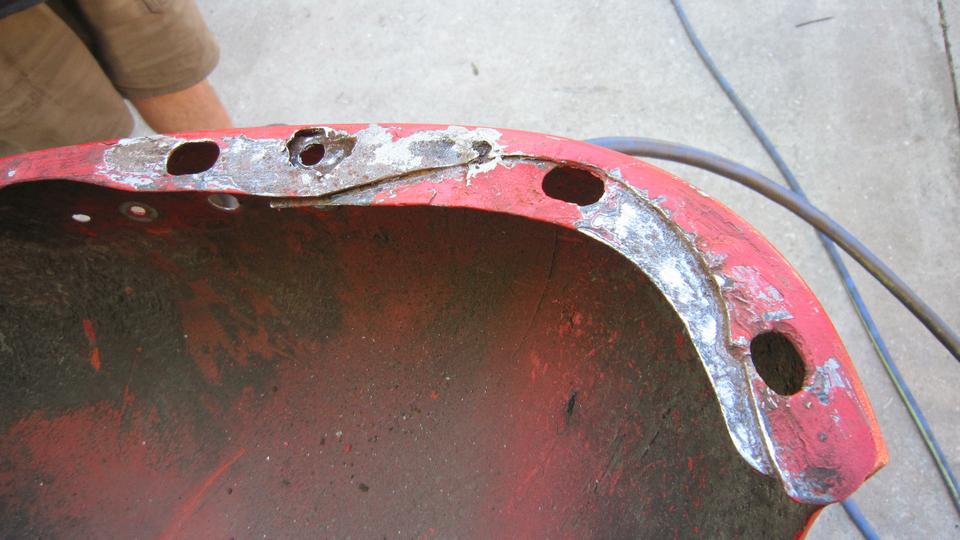
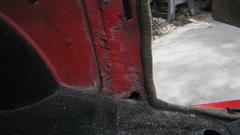
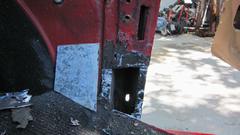
 Tech Central this morning found a big rig sitting in our desired work space. So take a little time to kelp unload the Rabbit and stow the trailer in the back lot. Then we jacked the rear end of the MGA up for more convenient access. Remember that little interior rust hole we found yesterday? Time to fix that before it gets any worse. By the time I had picked out all of the loose rust and thin metal around it, this would be easiest to fix by replacing sheet metal all the way across the B-post flanges. The patch piece would be 3-1/2" wide and about 5" tall.

Grind clear old metal. Cut new metal and trim to fit. Clamp and tack in place, weld all around, grind smooth, and dress the weld voids with JB Weld to prevent moisture intrusion (at least from the exposed side). A little later, grind smooth and prime, and we have new solid metal where there used to be an ugly rust hole.
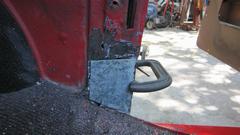
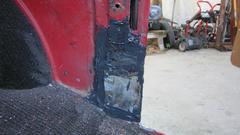
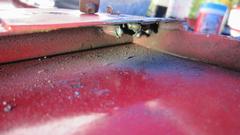
Found a paint blister just above the wing piping aft of the RH door that turned into a finger size hole when ground out to solid metal. We plugged that one with JB Weld, to be ground smooth and painted both sides later. Went after the boot lid gutter with sand paper and a vengeance, and soon had that cleaned up all around. Photo below right is the area of yesterday's rust repair.

We had been making a fair amount of dust from grinding rust and paint, so a little clean-up was in order.
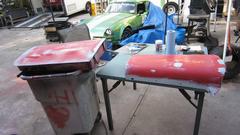
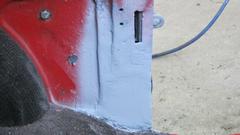
 About then our special order primer paint arrived, so we took a few minutes to clean the new lower body trim strips with lacquer thinner, blow dry, and give them a quick coat of Zinc Chromate primer. Bit of a bonus here. While chopping up the old trim strips for trash, we saved one piece that had been repainted recently. That would be on the edge of the trash can rim, the red strip which we will keep for a color sample. Some day we might run across some matching red paint in a spray car (wishful thinking) that we might use for touch-ups.
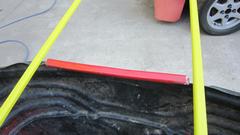
I walked the piece around the car to various locations and lighting conditions, and it seems to be a good color match with the new paint.


Gave the boot lid gutter a quick spritz with primer. Also did some re-forming of the left side spring bracket to make the rear bumper stand proud and equal on both sides. It wasn't dark yet, but we seemed to be running out of steam and had some shopping to do, so time to call it a day, reassemble things, and pack up to get rolling.

Tuesday, February 14, 2023:
Did a bit of shopping last night and this morning, so we can do this. Yesterday's internal B-pillar panel replacement got a coat of red, courtesy of a spray can of Rustoleum. Color name on the can is Sunrise Red, and available at Walmart no less. Go figure. Easy to match touch up paint now, for a while at least, but only for my car. It looks like a fairly close color match, and I bought it for less than $10. Very handy in aerosol form, and good enough for hidden panel repaints. Before removing the rear bumper, replaced the two bulbs in the rear tag lamp, one of which was burned out and the other heavily silvered and close to be following.

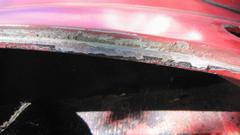
Tail up, sitting on jack stands, rear bumper off. Since the lower body trim strips were already removed, it was easy to drill out a few pop rivets that were securing the bottom flanges of the rear wing dog legs. Passenger side looked pretty good, because we had just repaired a dent and repainted it last July. Driver side not so good, eight years since the last full body repaint, but this panel has been repainted more recently.
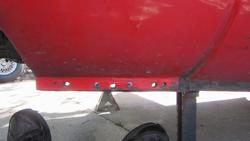
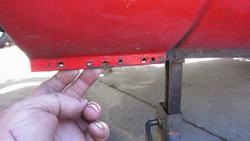
Two large nuts and two wires to remove the rear bumper. Six screws and three wires to remove each tail light assembly. Loosen three screws on the outboard flange of each B-pillar shut-face plate. Remove two bolts from each rear wing, wiggle a little, and they're off. We're getting good at this stuff.


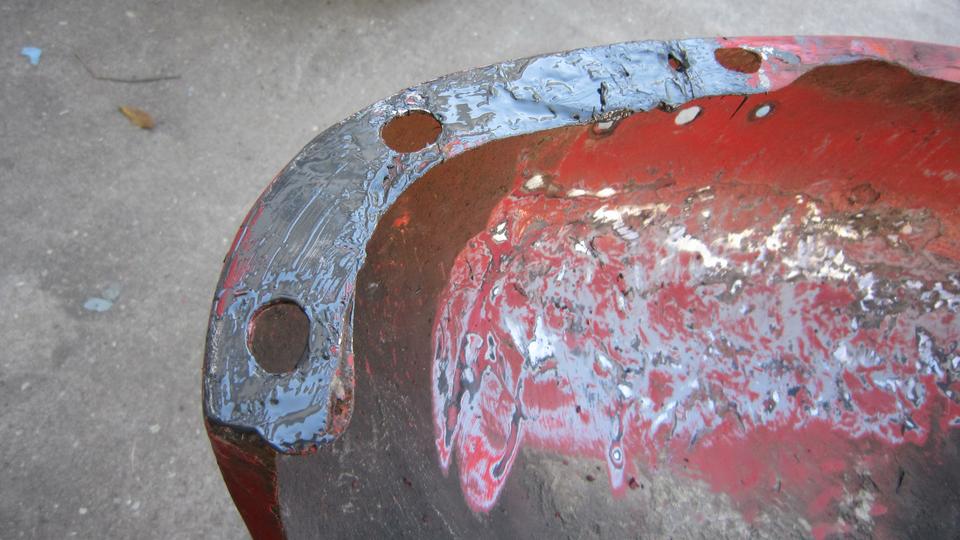
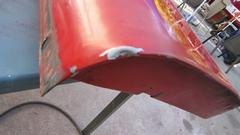
A view of the right rear wing tail end flange after rotary rasp grinding away most of the blistered paint and

 underlying rust. Not bad, except the small round hole where the rasp broke through, but which we will fill with JB Weld. The second picture is front end of the top flange of the right rear wing after grinding. The perforation here was matched with similar perforation on the main body at the mating point. This is a real good time to catch this early rust when it can be sealed with JB Weld before it gets worse and would need metal replacement.

 Next looking at the left rear wing with the dogleg in very good condition. Upper left corner of that picture is where it got the dent repair last summer. The second picture is just an example of removing a little blistered paint with only minor rust underneath.
This picture (at right) shows the left rear flange needing quite a lot of rotary rasping to remove rust and dig
 out a couple points of perforation. This is about as bad as it gets when I think I can patch it with JB Weld. Otherwise a proper repair here would require removing (grinding away) one layer of the lap joint to remove rust in between the layers, then welding in replacement metal for the second layer. -- The inside surface sanded for inspection had me thinking back to when I was in a rush and did such a sub-standard panel beating repair. That was a few days before we started this road trip in 2014, when I backed the MGA into my then for sale RX7 and dented the left rear fender on both cars at the same time. We were in process of closing the house just before hitting the road, so these repairs were quite rushed at the time. But it was a solid repaint, no finish failure, just a bit too much filler on the outside. And for now it will stay that way.

 This is what the same flange looks like after rasping and sealing with JB Weld. Still a bit more to do to finish filling the last hole. We had a few hours of this kind of work, with a short lunch break in between, including filling some minor perforation on the main body just aft of the doors. Too busy to take more pictures, but you get the idea.
By 4:30pm we had all of the rust in the piping joints banished, took a 20 minute rest break to let the JB
 Weld cure some more, then began reassembly. This could be easier and quicker than you might think. Slip the rear wing onto the slot behind the shut-face plate, and install two bolts to secure the wing, ditto the other side. Two small bolts for each tail light plinth, two small screws for each rear lamp base, three wires for lamp connection, and two screws to attach the lens. Two large nuts (and washers) to attach the rear bumper, two wires to re-connect the tag light, one screw to close the light cover. Including clean up and pack up we were done (just) before dark this time.
Wednesday, February 15, 2023:
 By now you know the routine. Remove rear bumper, tail lights, rear wings and boot lid (maybe 25 minutes). Navigator got to work wet sanding the rear body tonneau from the cockpit to rear valance, while I was power sanding any exposed JB Weld on the outer surfaces. Then I was seriously washing the underside of the rear wings, very filthy, should have done that a long time ago. That exposed a few more paint blisters (rust spots) which we promptly rubbed out with the power rasp and coated with a smear of JB Weld for sealer.
Time stamp for the first picture was 10:15 AM, vs. 2:10 PM for the second one, so nearly four hours work
 in between. By this time I had a can of primer in hand and was coating any exposed metal or JB Weld, and the mating surfaces for the wing joints. Inside of the wings got power sanded vigorously to remove any loose paint, paint cracks and chips (lots of road rock chips), and primer on any exposed metal. Outside of the wings got wet sanded to scuff the entire surface to accept new paint. By late afternoon we were getting very close to our objective for the day, to be ready to spray the finish coat tomorrow morning. Pics below show fruits of the day's labor.
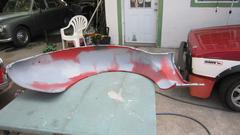


Now this is where it gets interesting. I grabbed the can of close match dark red Rustoleum that I had picked up at

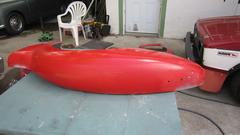 Walmart, and sprayed the outside of the front flanges. This is where the wings tuck into the shutface panels on the door latch posts. I also painted the inboard side of the bolt flanges on the wings, and also the mating surfaces on the car body.
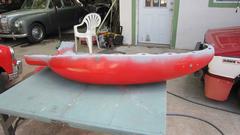
Then navigator nearly fell out of his chair when I sprayed inside of the wings red. He thought we would have to sit there until midnight waiting for paint to dry enough before we could install the wings to drive away for the night. Oh ye of little faith. The objective was to finish paint under the wings so we wouldn't have to remove them from the car again before final painting, save a day off the calendar.
Then I told him we could install the wings any time he was ready. Say WHAT ??? Well they are not wet on
 the outside. I will tuck the wing into the shut face flange and hold it while he was to install two bolts underneath, without touching the fresh wet paint. It took a little encouragement, but he finally did. Leave the bolts loose please. Oh, and also two more small bolts each side for the tail light plinths. The rest was back to normal. Install the tail lights and bumper, tear drop hooks for the rag top, and the boot lid (with gasket). Put the top up and side curtains in, put the wheels on, kick it off the jack stands, and lets get out of here.
|