The MGA With An Attitude
MGA Guru Is GOING MOBILE - (February 16 - February 28, 2023)
Thursday, February 16, 2023:
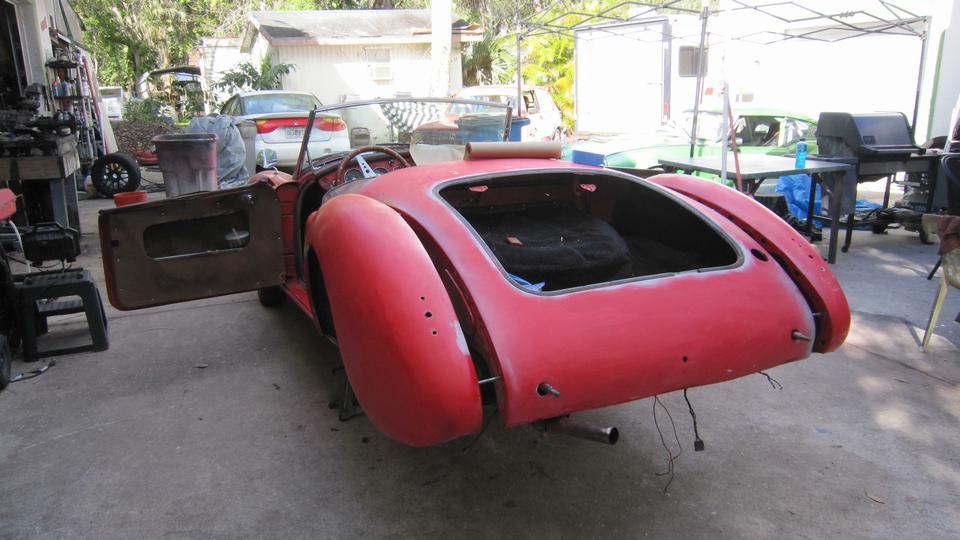
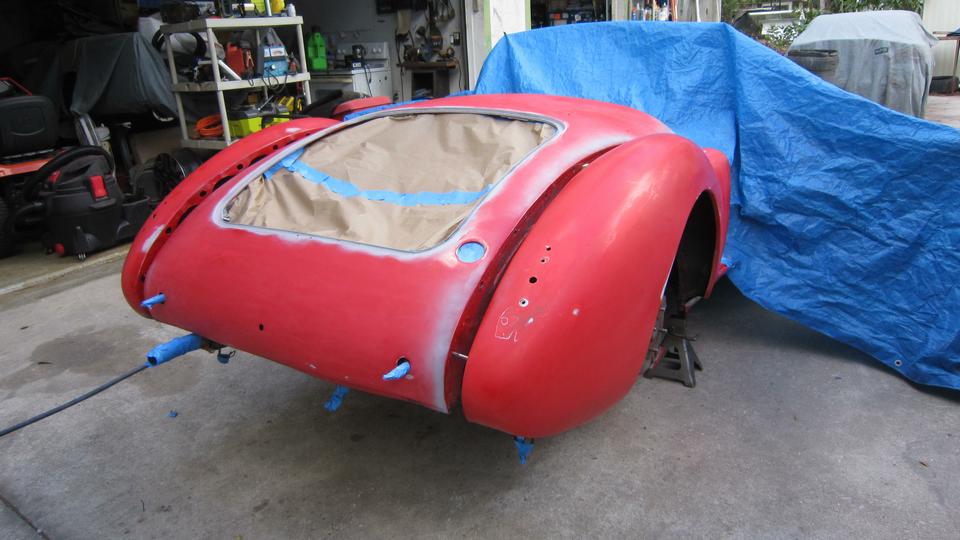
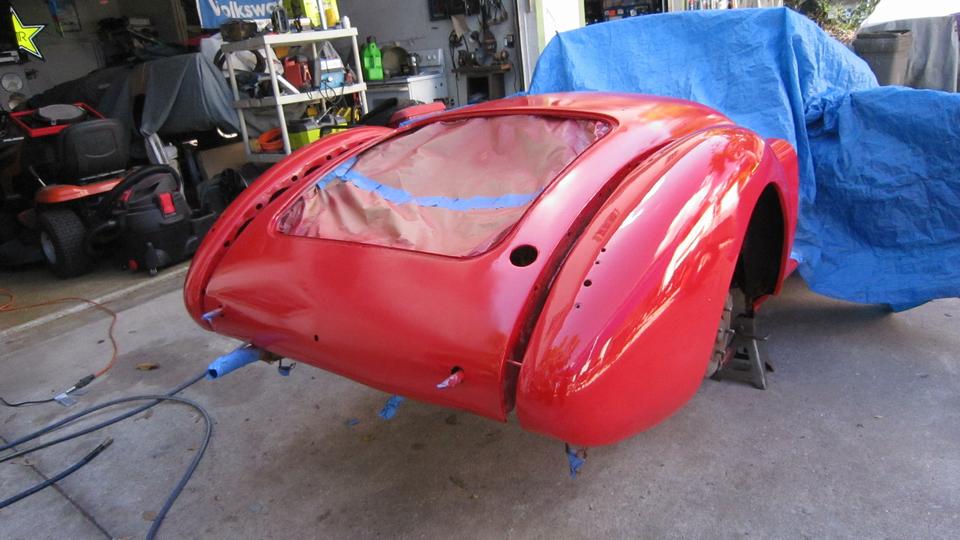
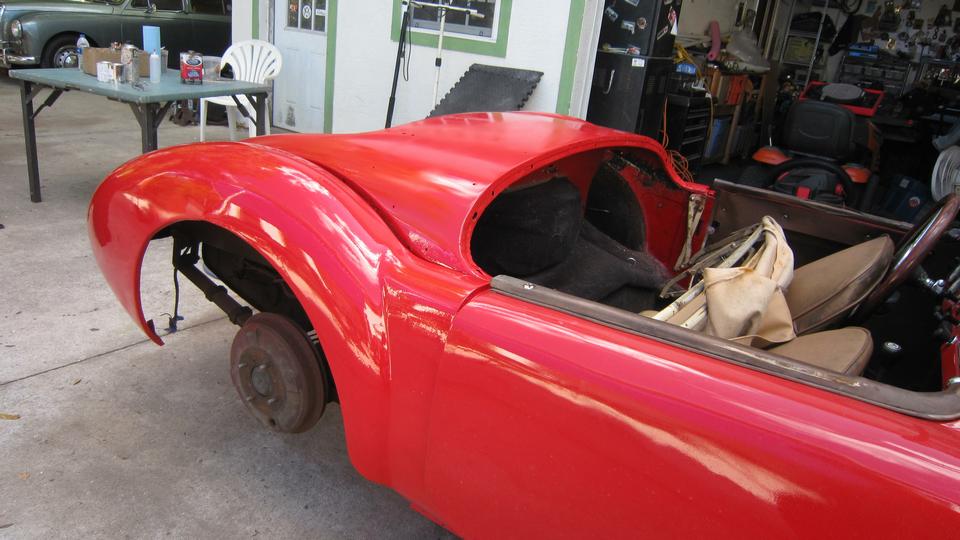
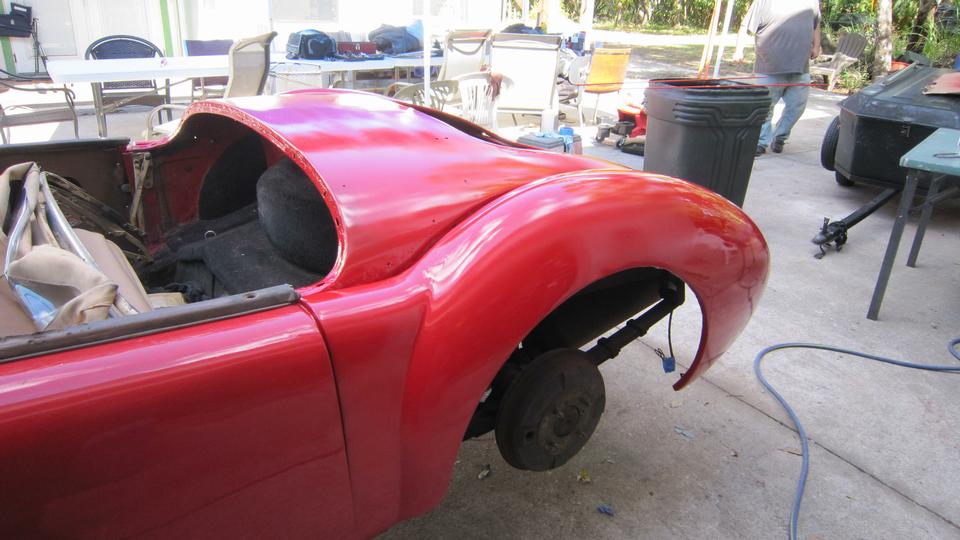
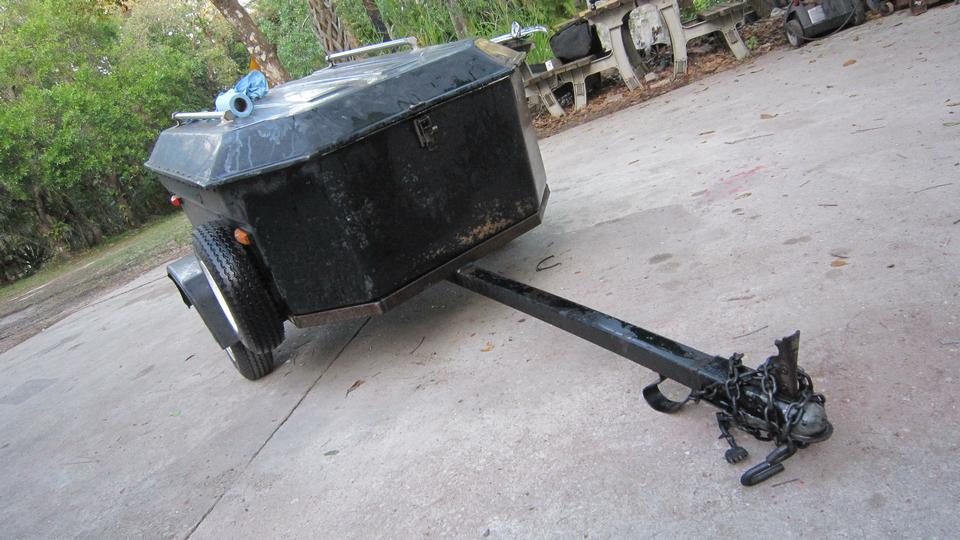
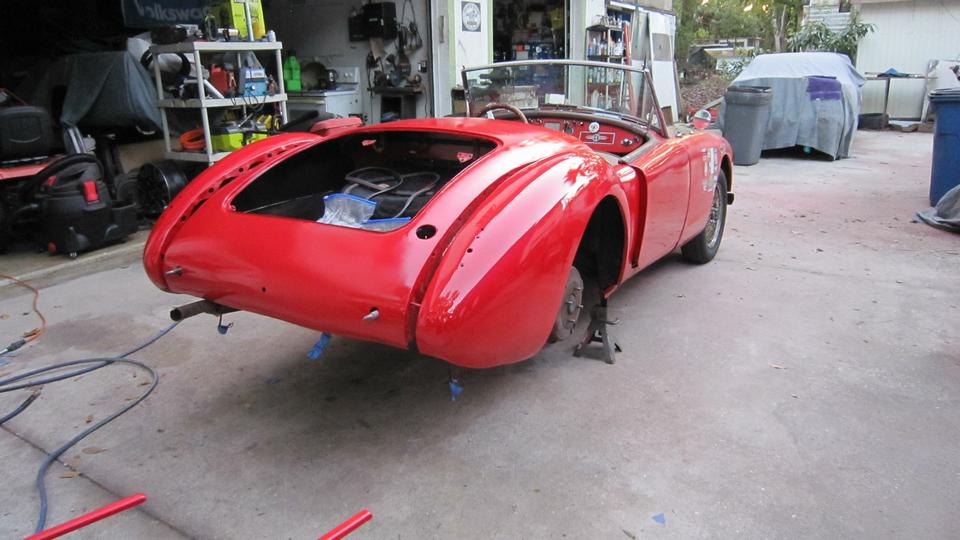
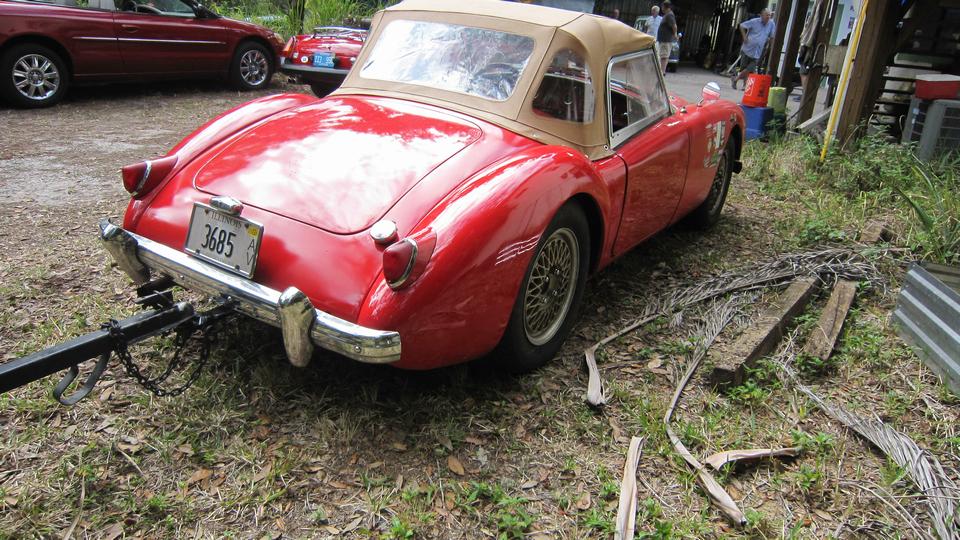
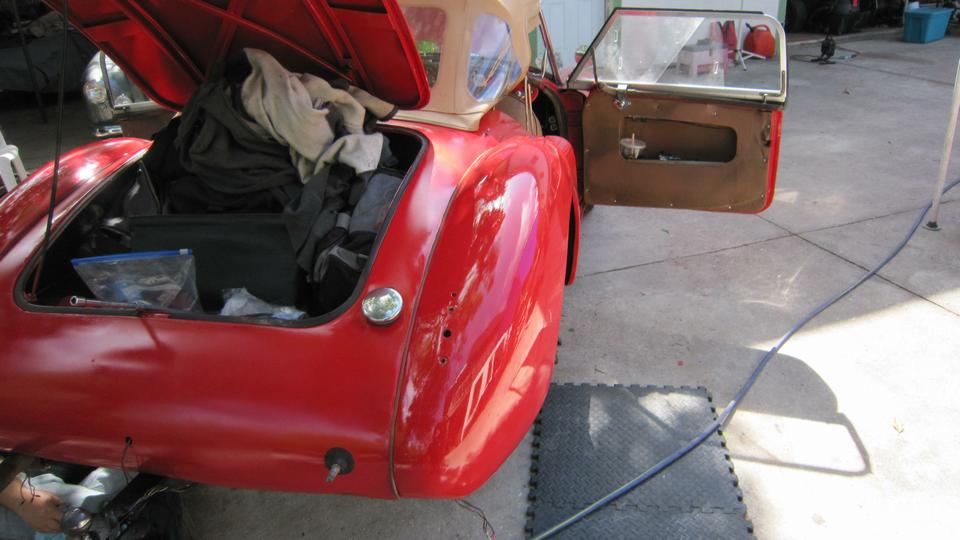
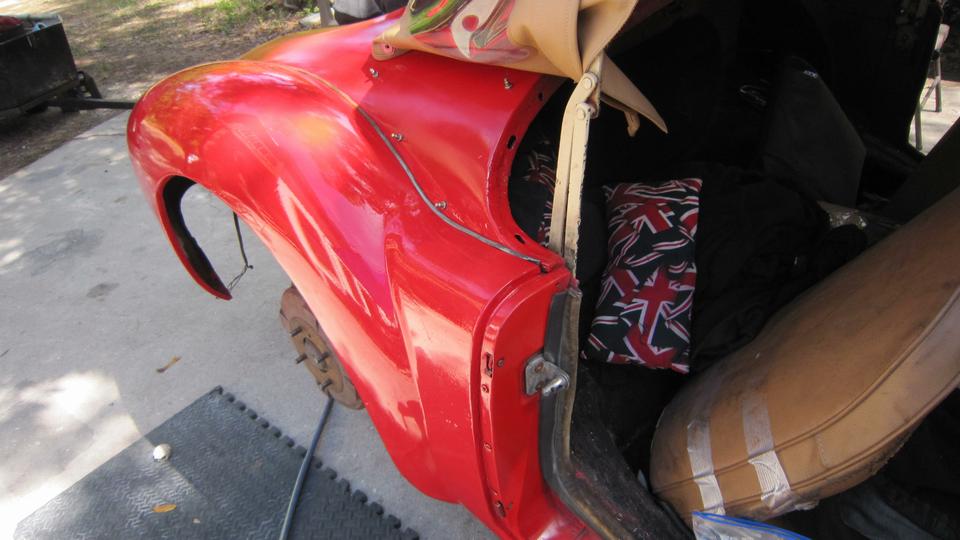
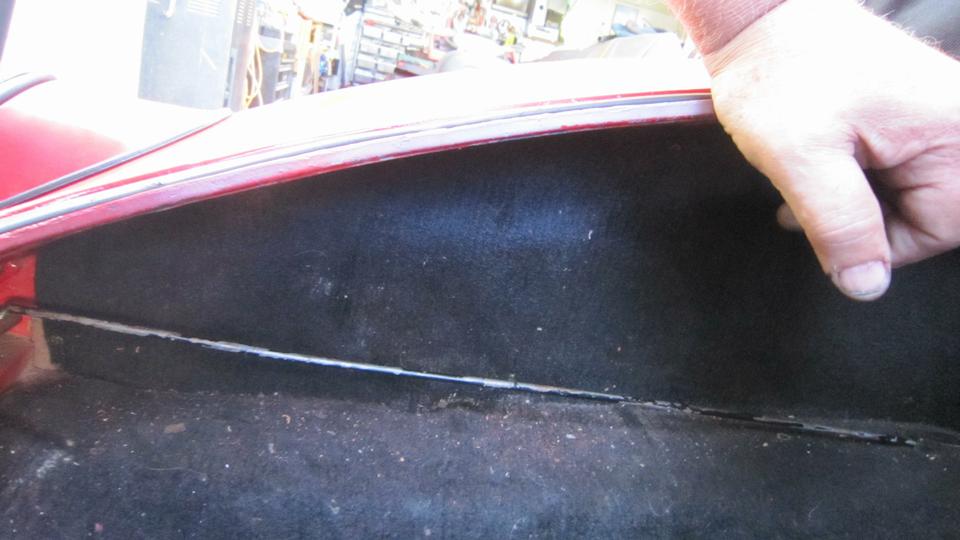
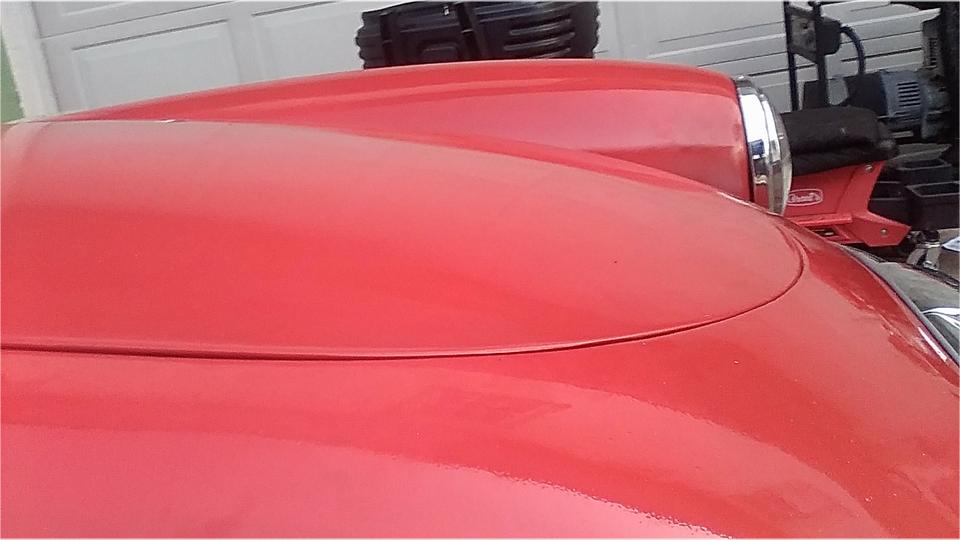
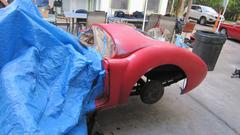
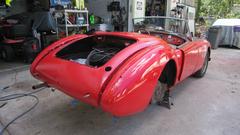
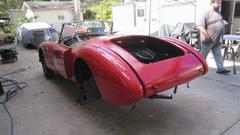
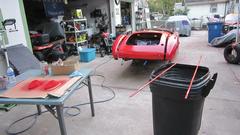
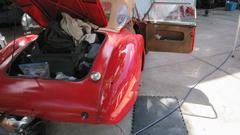
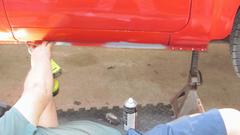
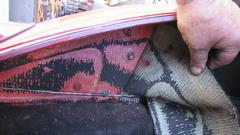
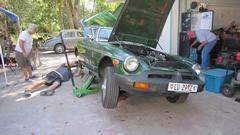
Today is the day the car is scheduled for finish paint on the rear half. Morning dew is blowing away as we have breakfast. Arrive at work spot to begin disassembly around 9:30am. Not long to remove rear bumper, tail lights, deck lid, and two bolts from each rear wing. Also two large bolts to remove the trailer hitch bar this time. The rear wings are still tucked into the shutface plates at front end. Rear end of the wings are held on the longer rocker pedestal studs with fender washers and nuts. The wings are spaced out in the center with small wood blocks underneath.

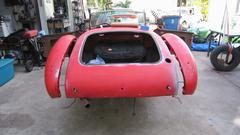
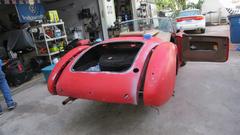
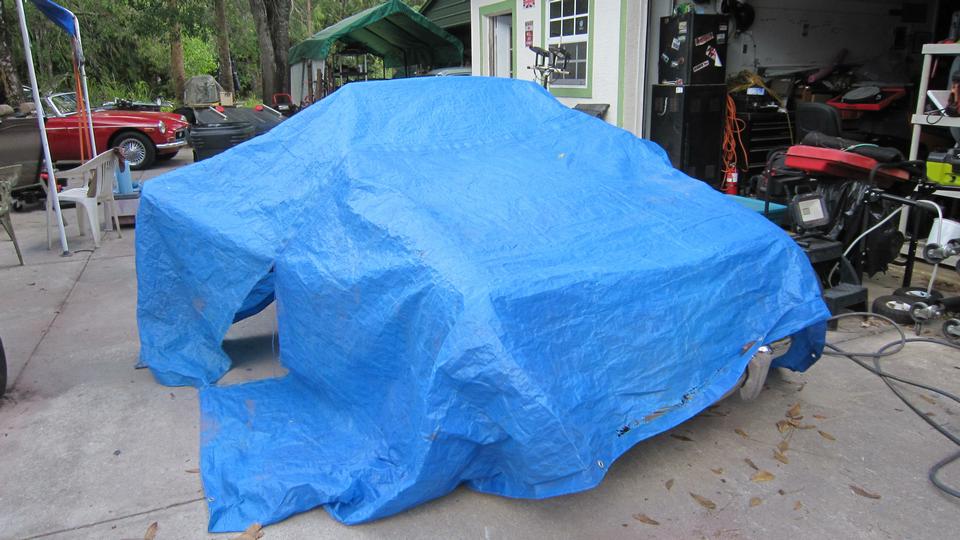
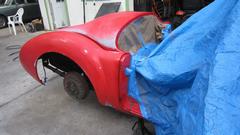
Cover the front end with a plastic tarp back to the lowered rag top assembly. Also cover two other cars that are within 15 to 20 feet of our outdoor spray zone. Mask off rear of the cockpit with paper and tape. Ditto for boot opening and fuel filler aperture.


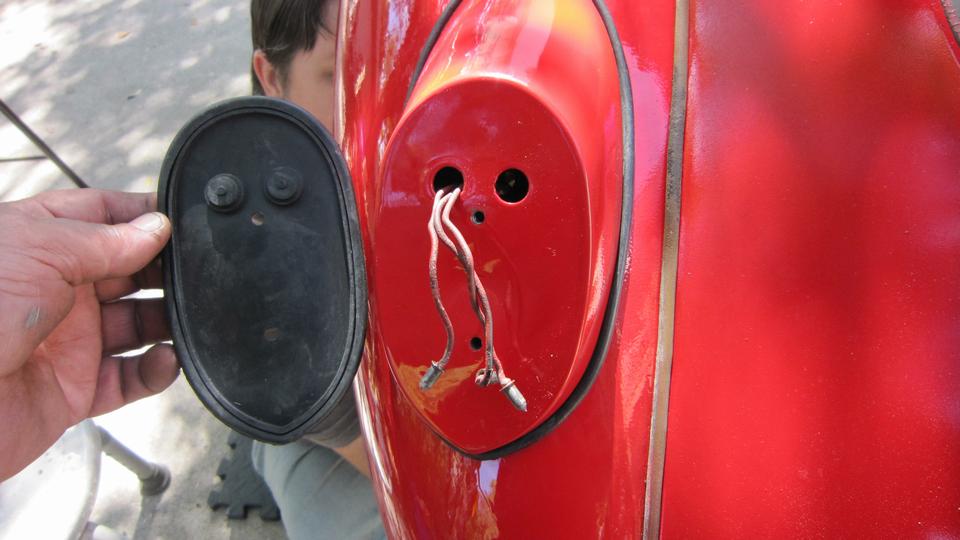
 Tape over the bumper support studs, some dangling wire ends, the stainless steel tail pipe and the door latch striker plates. That should do it, time to give it a shot. Wait, somebody yelled "Lunch". Take a short break, and then let the friends clear out before we start fogging mosquitoes.
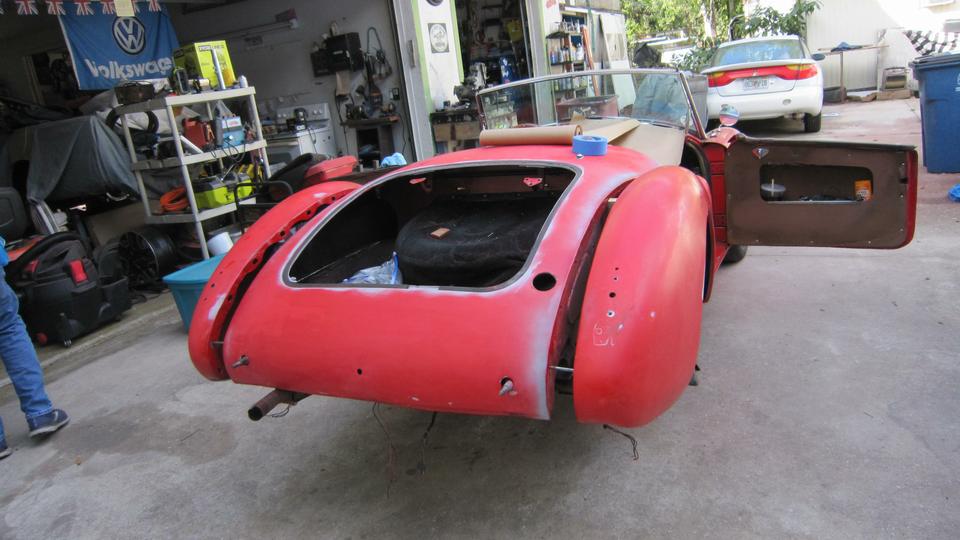
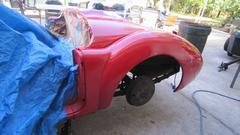
 Paint around the edges first, beginning with rear cockpit flange and front end of wings tucked into the shut face, and the dog legs. Paint the gutter around the boot aperture, then both sides of the exposure between wings and main body. So far so good. Paint around the edges first, beginning with rear cockpit flange and front end of wings tucked into the shut face, and the dog legs. Paint the gutter around the boot aperture, then both sides of the exposure between wings and main body. So far so good.
Then what should have been a simple spray job got out of hand pretty quick. Shadows on the left side, somewhat difficult to see so go there before the rest of the larger areas. Just when I couldn't see very well the spray gun began acting up. Seems it was spraying paint but not much air. Then it was spraying only paint and the trigger felt funny. Stop, get the gun to open lighting for a better look. Rats. A small piece of the trigger had broken, disabling use of the tool.


Then a hell of a quick scramble to grab another paint gun. That one was a HVLP gun (gravity feed with reservoir on top) and suspect of not being cleaned well by the last user. A few choice words with a couple tools to break loose a tight thread, and then it might work. No local pressure regulator on this one, so I wound up doing the rest of the spray job with too much pressure, but it worked well enough to get through.
Give it a half hour while cleaning paint guns before we carefully pull off all the masking and removed the tarp. Kind or PO'd about several paint runs in rather obnoxious places, but we may just leave it that way as part of the character of the car. It may not be any worse than the chicken pox it has been wearing for the past eight years.

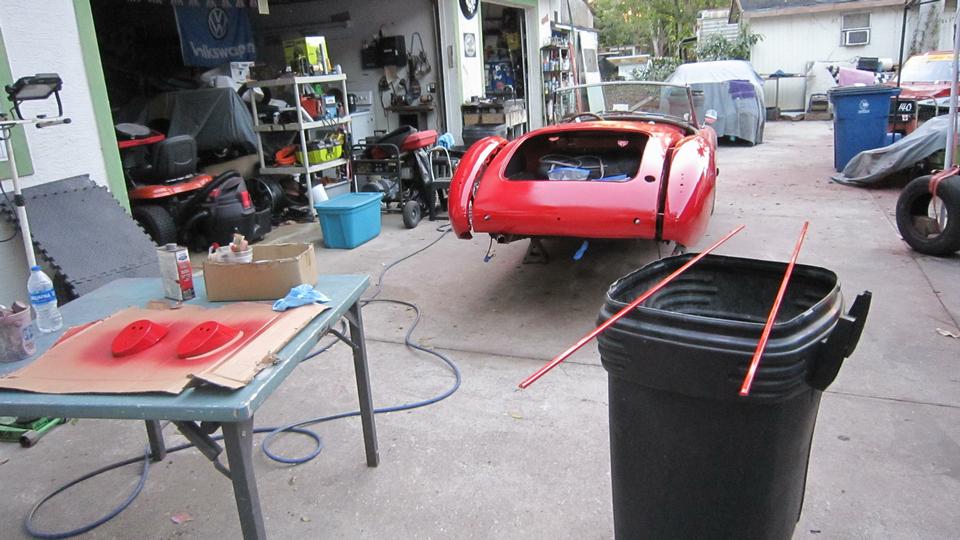
Now we get to walk away and not touch it for at least six hours before reassembly with a few bolts to drive it away tonight. Give us a couple days to decide if we want to wet sand the runs and spray it again. Time to clean up the hitch bar and rear splash panels. And I can post these photos and notes while we're waiting.

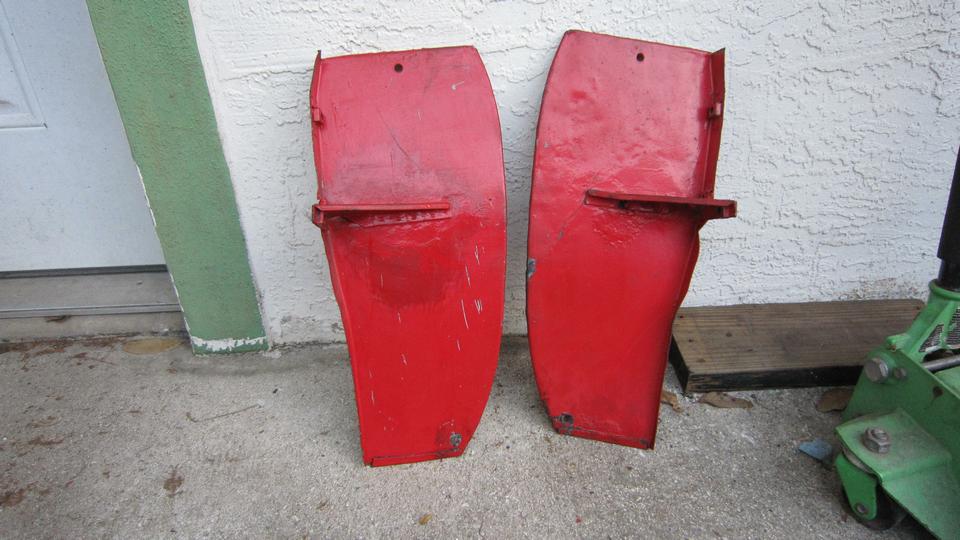
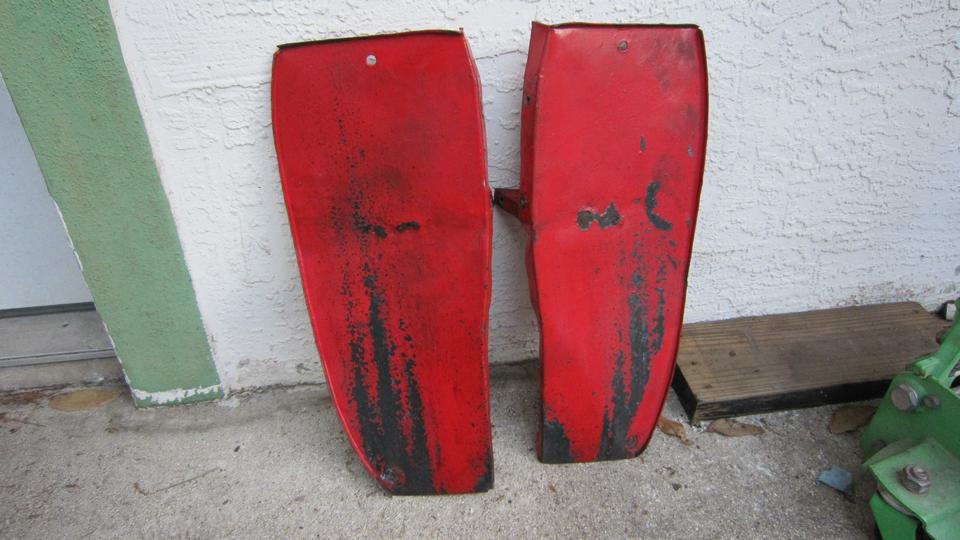
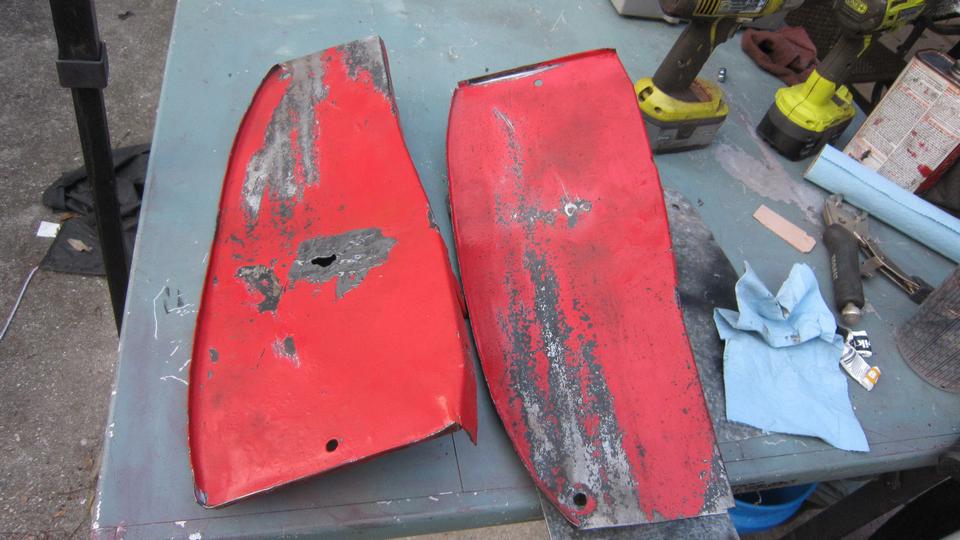
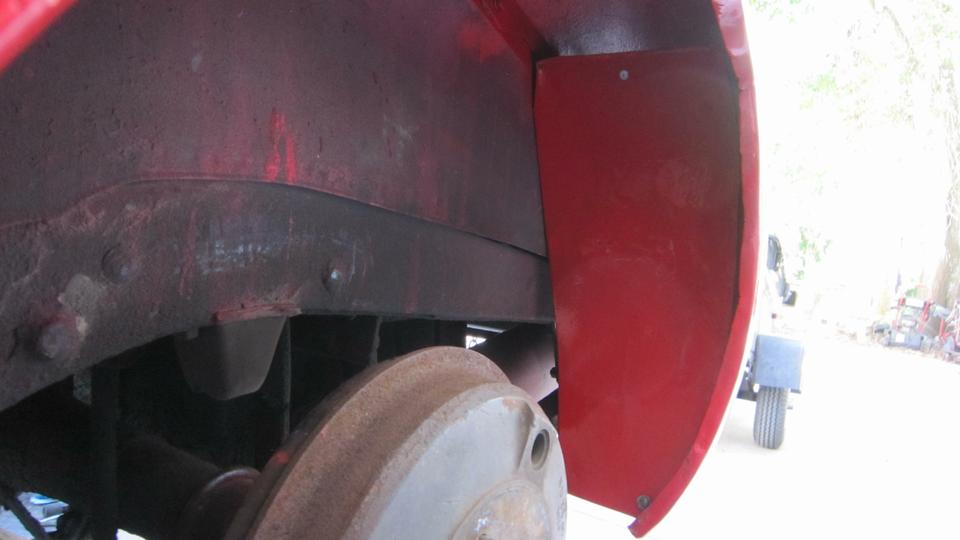
Had some daylight left, so spent some time scrubbing oily dirt off of the rear splash panels. Don't recall right off
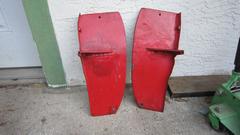
 when these were last serviced. They do have rust pitting on the front side where they get hit with road debris and rocks from the car tires. Will have to go after these with the rasp to remove rust and loose paint, and maybe give them the JB Weld treatment to see if it helps them hold up longer (but not today). They do look a lot better on the back side.
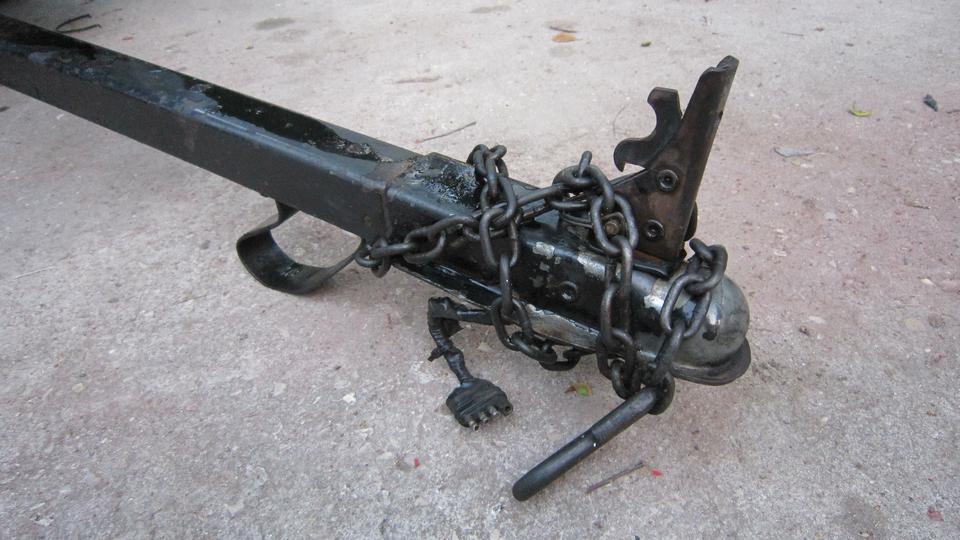
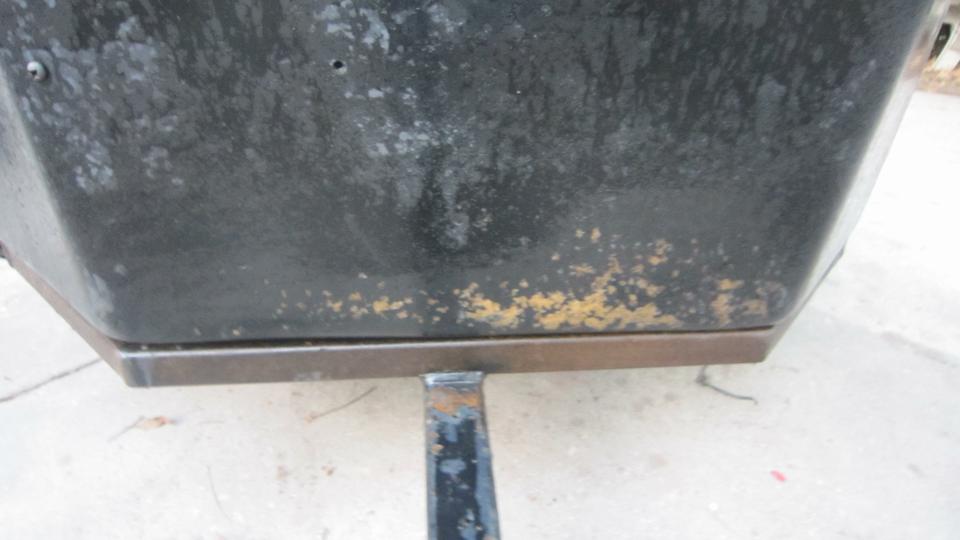
`Spent more time scrubbing oily dirt off the trailer hitch and hitch chains and tow tongue and front of box and frame. I guess we'll just spray some black paint on this and be done with it.


6 pm, considering bolting up the wings after 5 hours drying time. Nah, not in that big of a rush. Give it a couple more hours, and we'll just reassemble it after dark, no big deal.
Back at it 7:30pm. Took us two hours to put it back together in the dark this time. Had some problem with 1/4-inch bolts securing the plinths to the wings. Very odd, because these were finger screw-ins before. Thinking
 maybe some paint got into the female threads, we ran the 1/4-28-UNF tap full into those threads, but the bolts still would not go in without great wrench torque. I know we didn't paint the bolts, because they were in a zip-lock baggie with the rest of the tail light parts. Regardless, we ran the bolts through a threading die, and then they would go in with fingers only. Go figure, just a mystery.
Not entirely back together, only two bolts holding each rear wing, no piping, no dogleg screws, no plinth gaskets, no rubber grommets, no lower body trim strips. Once the new paint is better cured we will take it apart again to do it up right.
Friday, February 17, 2023:
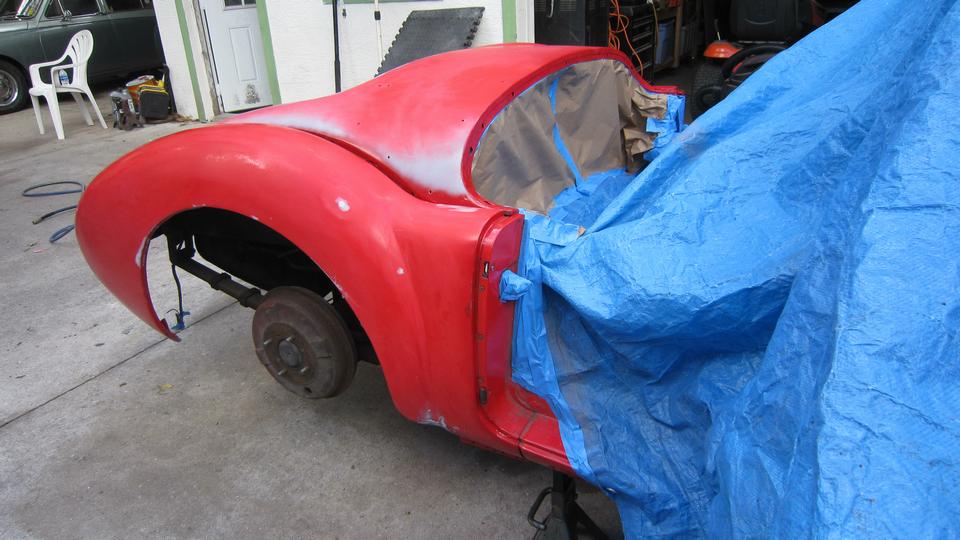
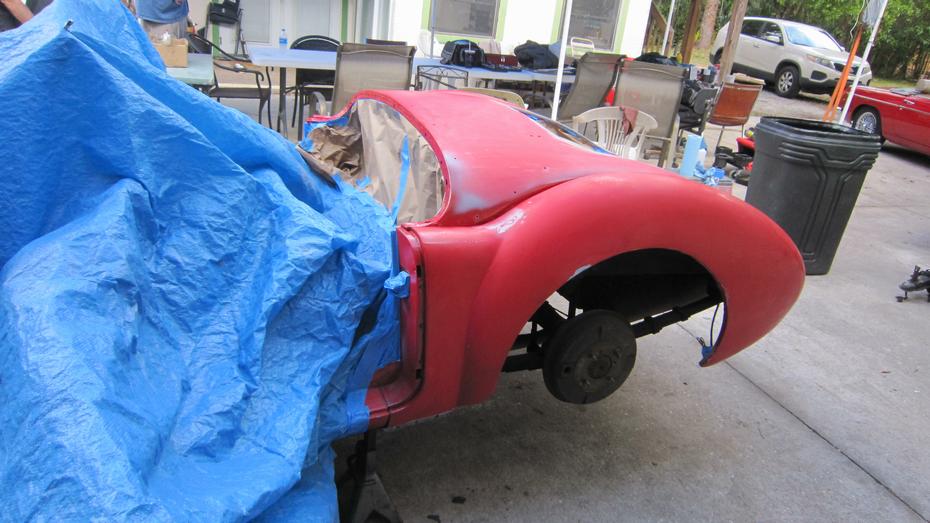
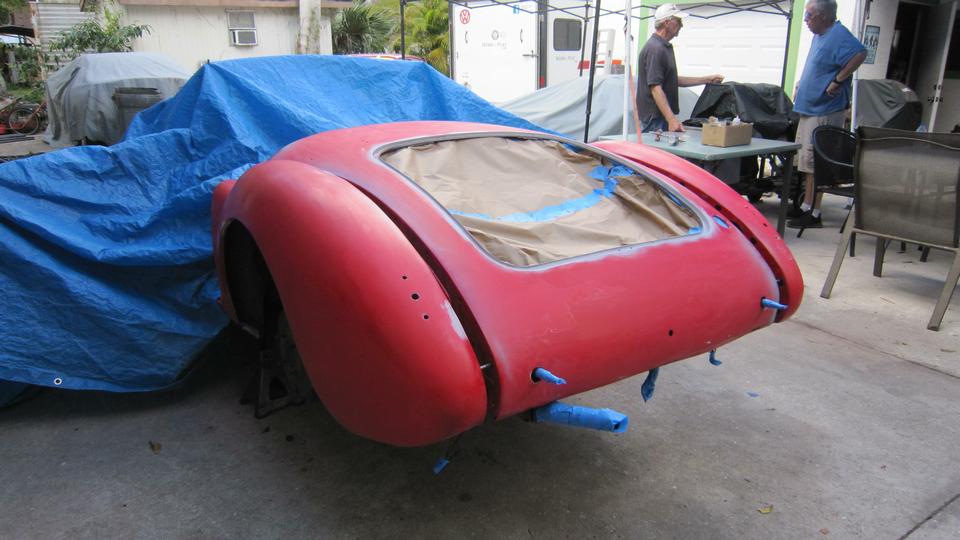
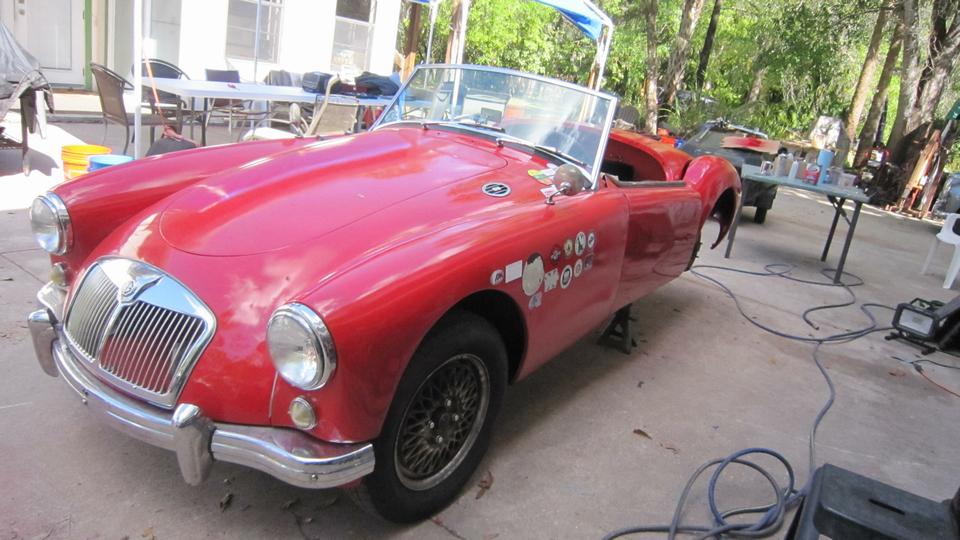
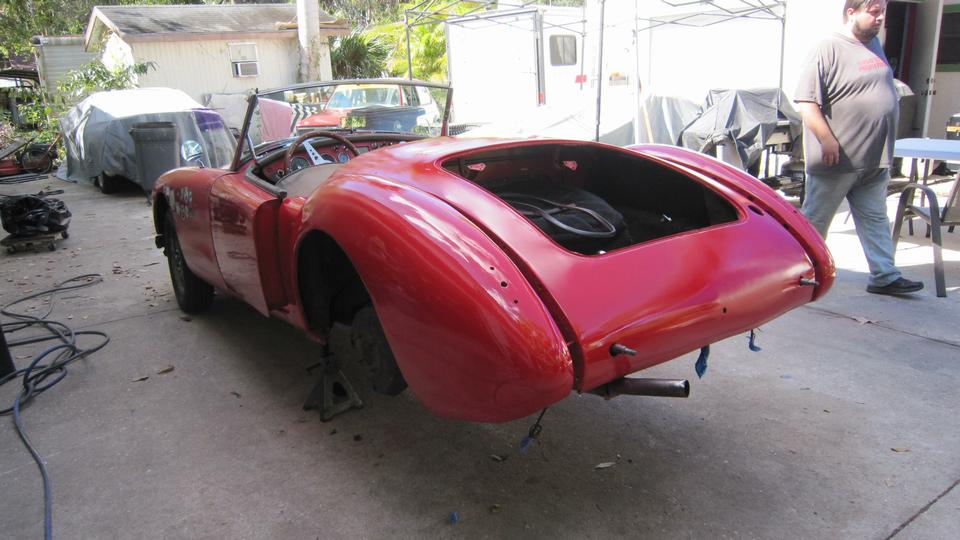
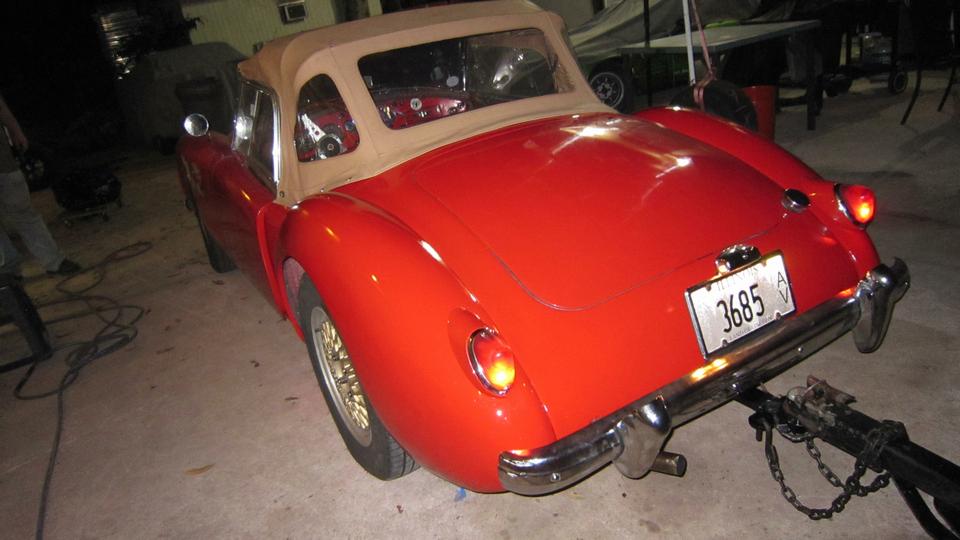
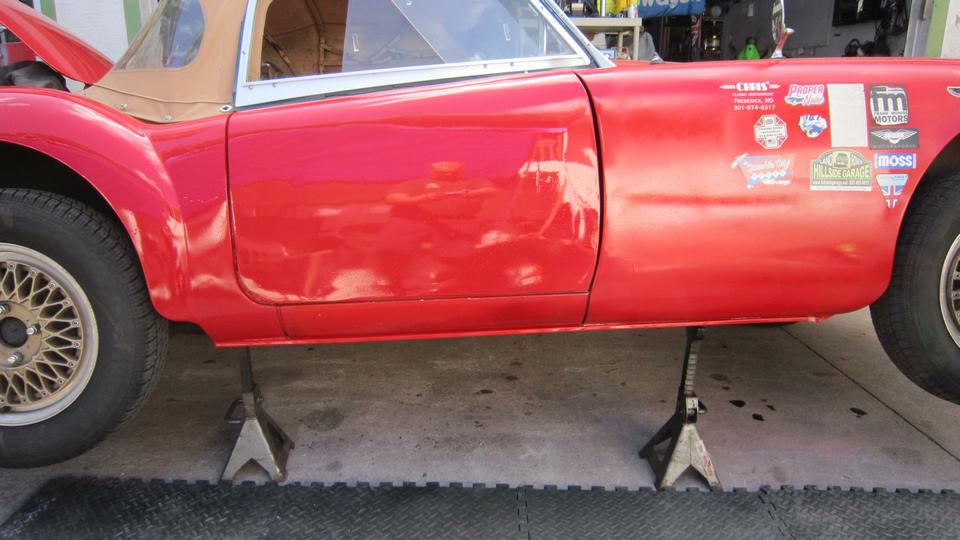
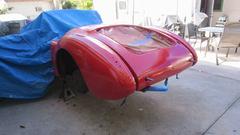
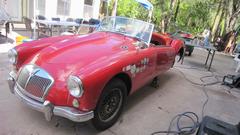
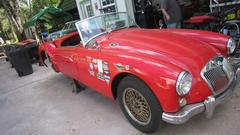
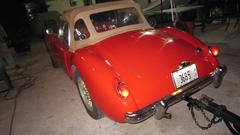
By plan, watching the paint dry day happens to coincide with Friday tech day. We parked the car up front where everyone could see it (why not show off all the work?), so here's what is looks like in the light of day. If the rear wing looks slightly different color, bear in mind it has been less than 24 hours since it was painted.

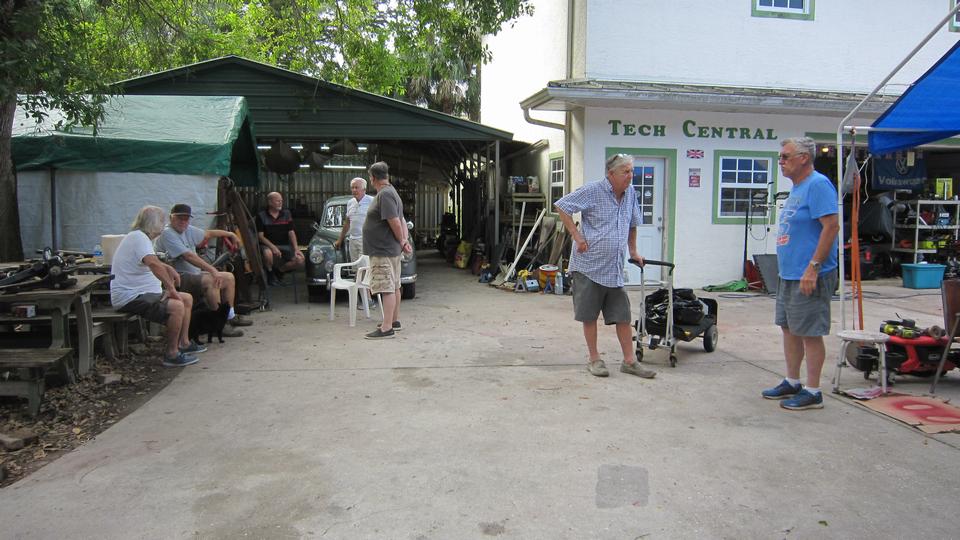
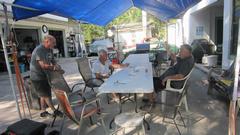
Fairly early, but there's most of the regulars doing what they do best. Aside from lunch a little later, that's pretty
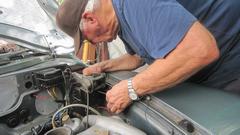
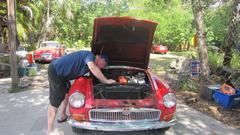
 much what they did for the day. Well, it was a hot day, so stay in the shade. But there was one pressing project left over from last week, John Shoemaker's Magnette starter motor. This was a new high-torque gear-reduction starter motor less than a year old with an internal short to ground in the motor circuit. John was trying to get a warranty exchange (or buy another new one if necessary), but the seller was out of contact for a while, no go. So I said why not take a crack at fixing the bad one?
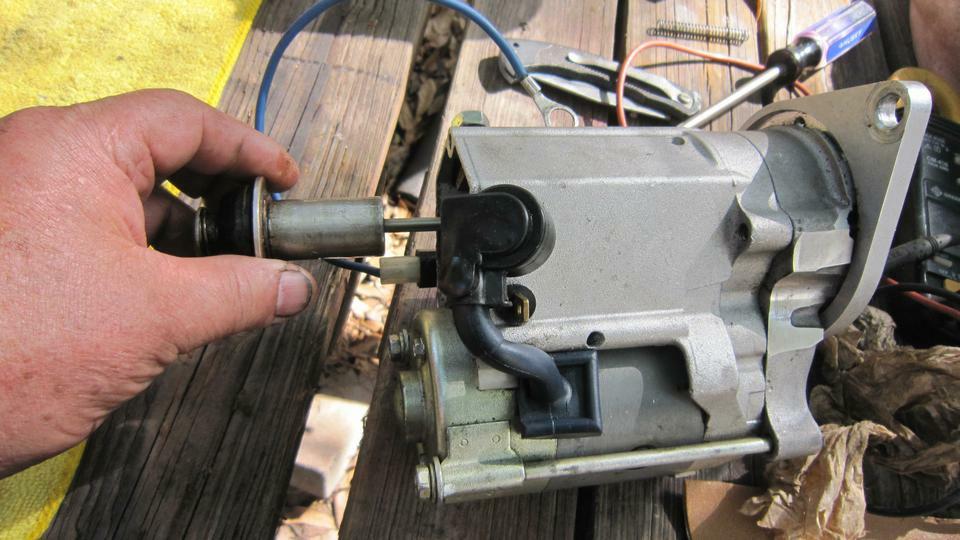
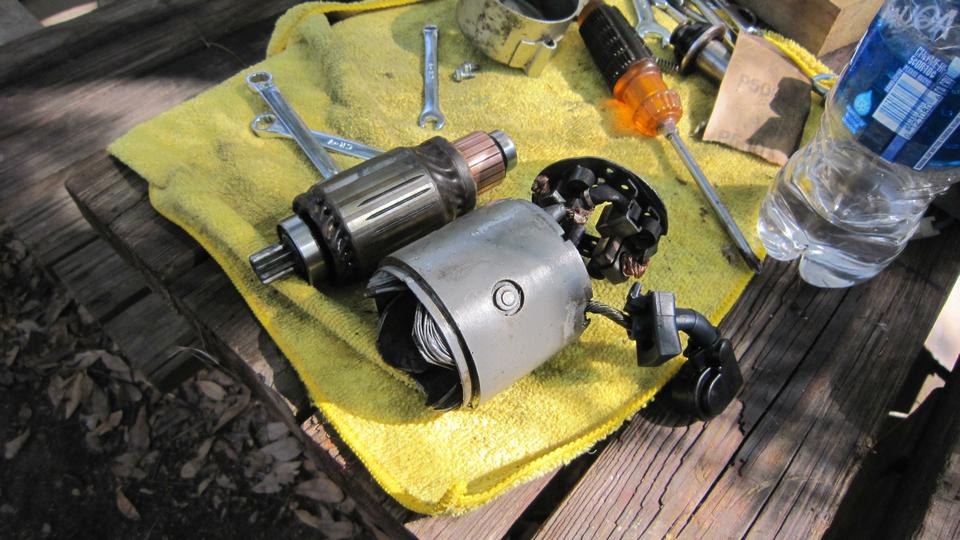
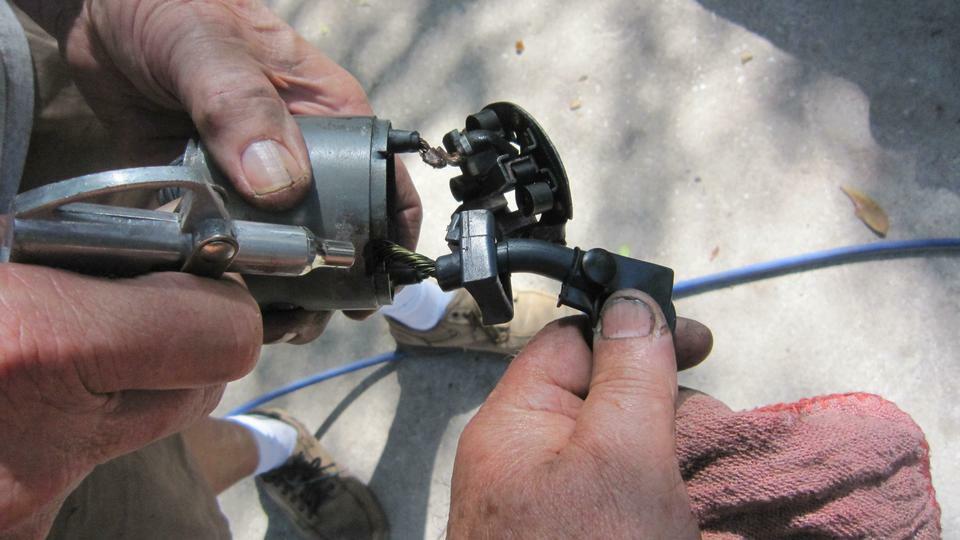
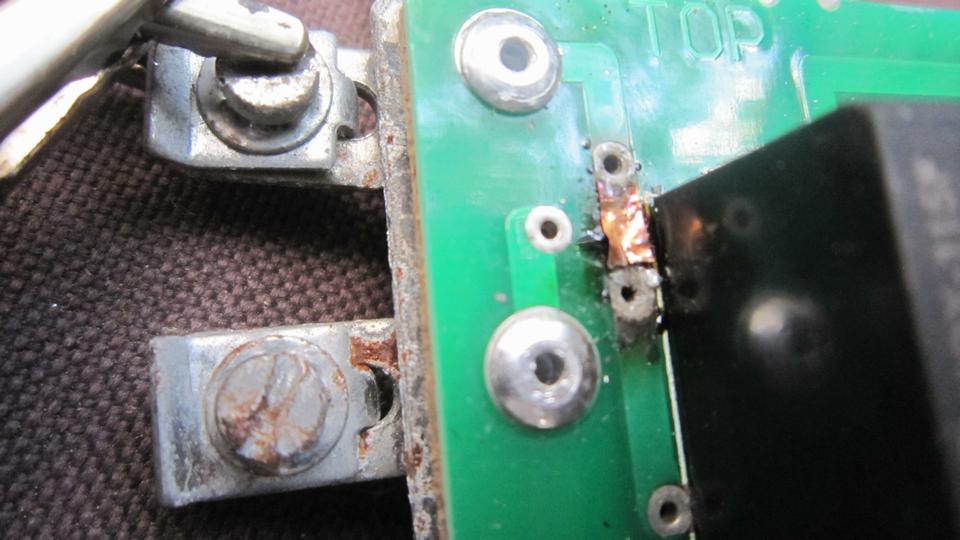
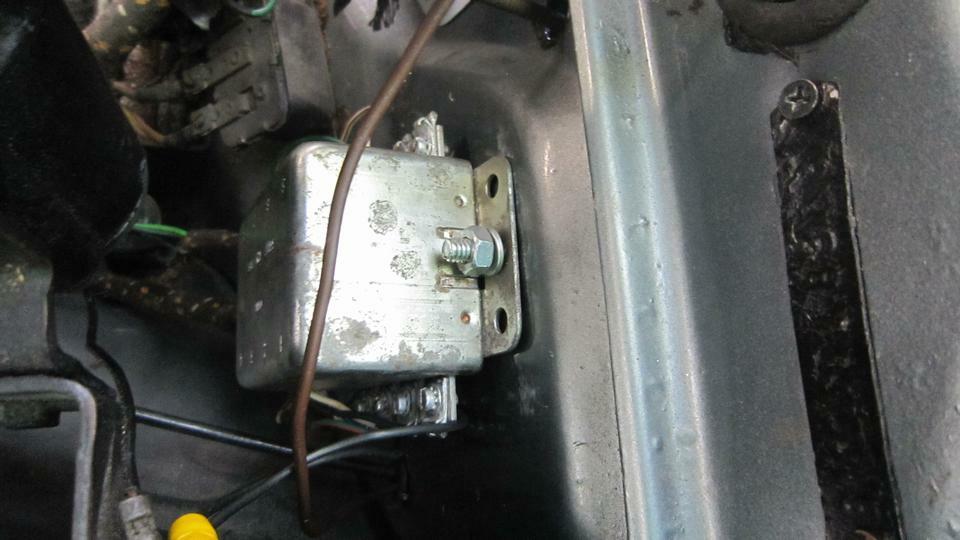
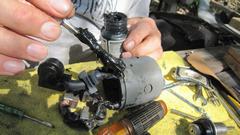
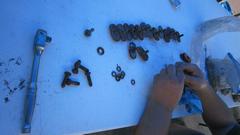
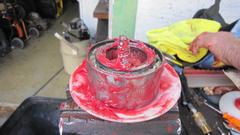
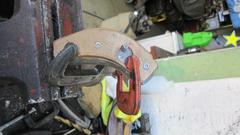
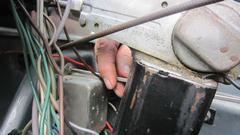
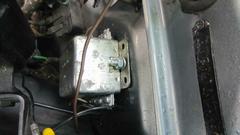
Three screws to remove the tail plate where we could clean the internal power contacts of the solenoid and check continuity of the power terminal pass-throughs. Small terminal lower left is input from ignition switch "Start" position to trigger the pre-engage solenoid. Big terminal upper left is battery cable power input. Big terminal on right is power out from the solenoid contactor to run the motor (after full pre-engagement). Small terminal lower right is power out which can be connected to ignition coil to bypass a ballast resistor (not used in this car).
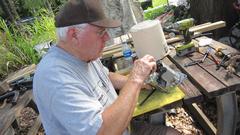
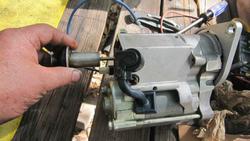

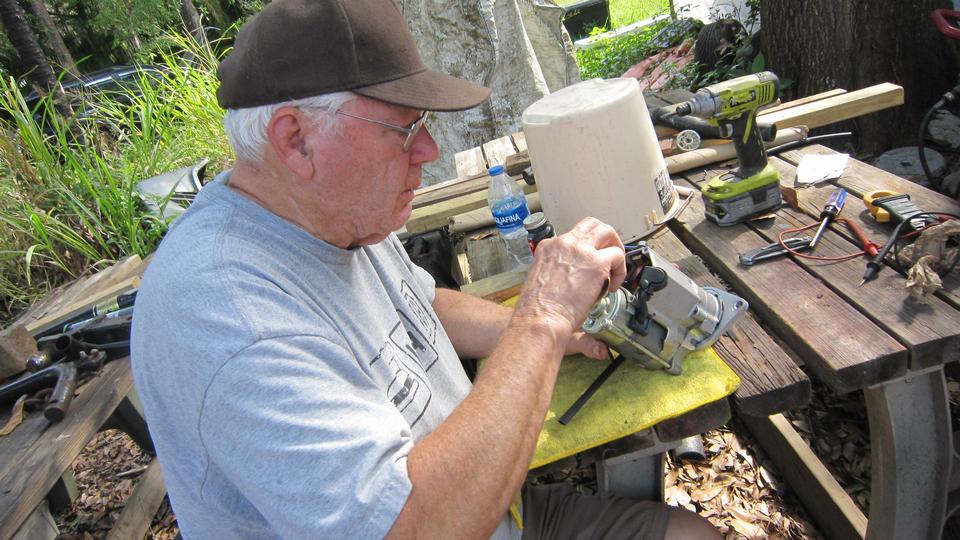
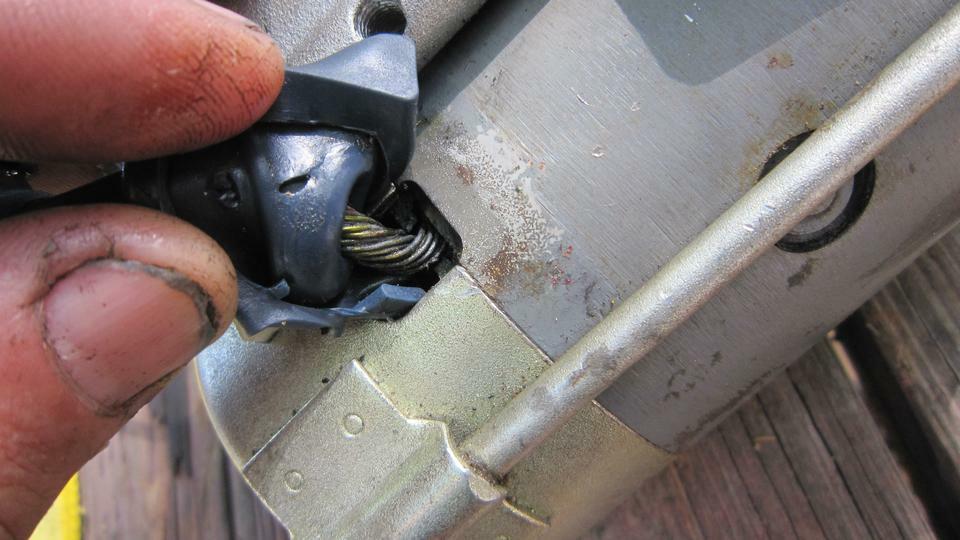
Diagnostic with test light and ohmmeter show the pre-engage solenoid and contactor parts to be okay. The short to ground would be in the cable from solenoid out to motor input. Didn't take long to find the fault point, which was a bare cable passing through the motor shell where a plastic insulator had broken and departed its post. So we need to disassemble it enough to figure out how to get the bare cable insulated again. Wrenches please.
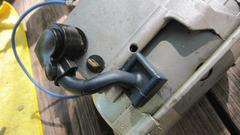


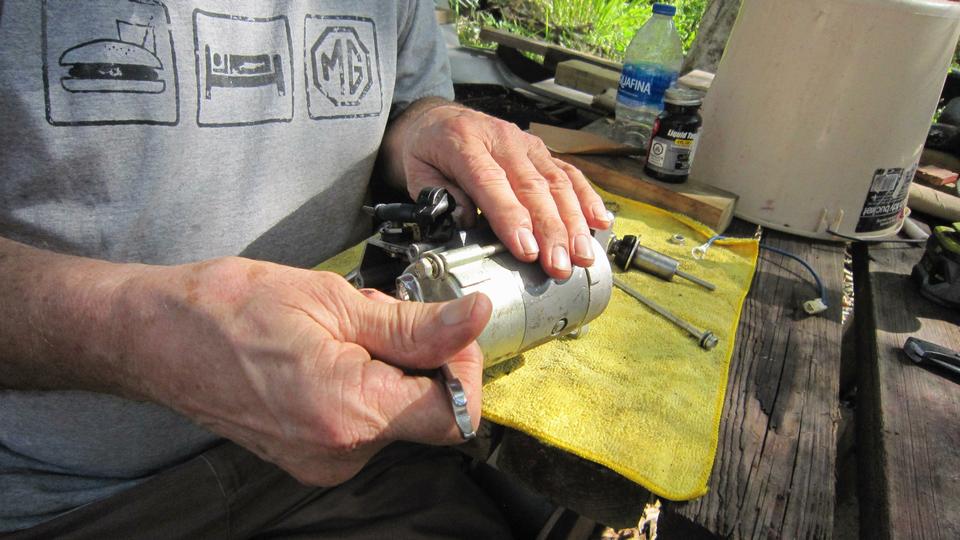
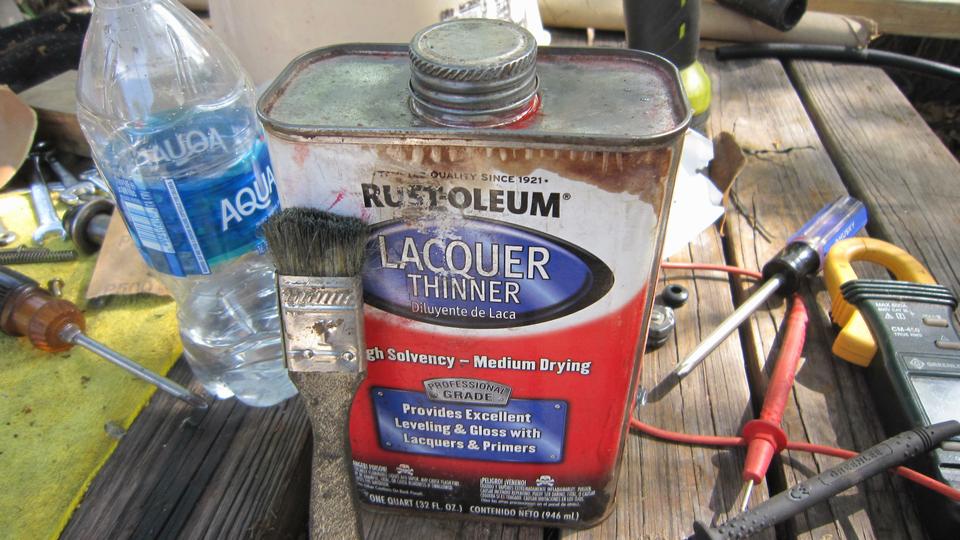
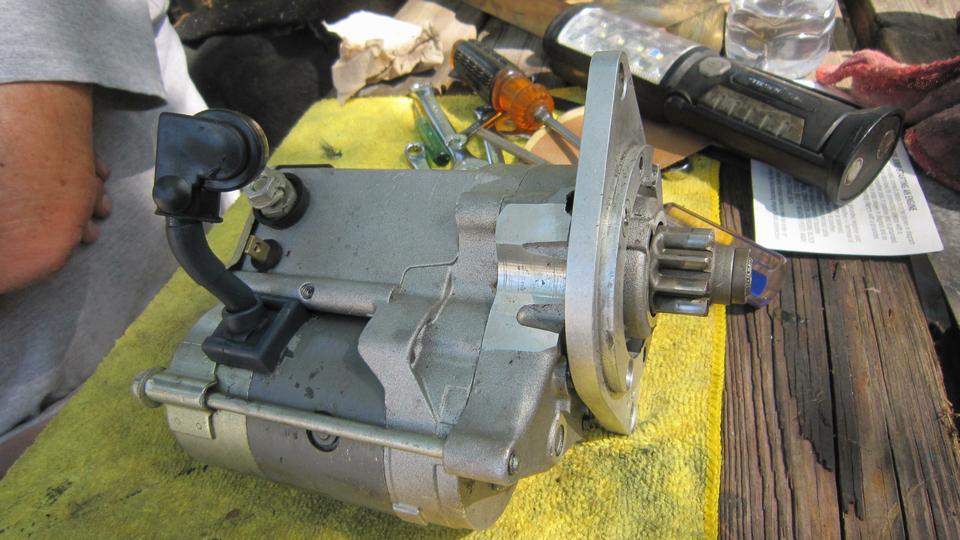
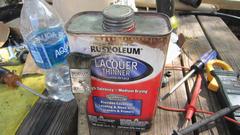
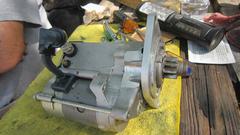
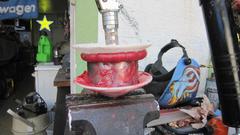
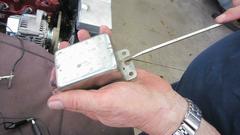
Two long tie bolts separate the small motor from gearbox. Two smaller screws separate the end cover (and bearing carrier) from the motor brushes assembly. That exposed the bare cable for better access. Cleaning time, scrub the three exposed internal cables with stiff brush and lacquer thinner.


Blow dry thoroughly, then coat the bare cables with "Liquid Tape" (no kidding, someone has to try it sometime). After lunch break (good timing), add a second coat of Liquid Tape, and more time to dry. The stuff sets up pretty quick, kind of like thick rubber cement. Then reassemble with the motor armature installed and brushes set on the commutator, end cover (bearing carrier) installed and motor assembly mated to the gearbox. Time for another personal touch, adding a dab of JB Weld to the point of pass-through to immobilize the cable (all this to replace a missing plastic insulator). After 20 minutes to let that set up, we added a dab (glob?) of black stuff (RTV) to seal everything under the rubber cover grommet. Let that set for a bit before reconnecting the motor cable to the solenoid housing. Looking good, time for the test.

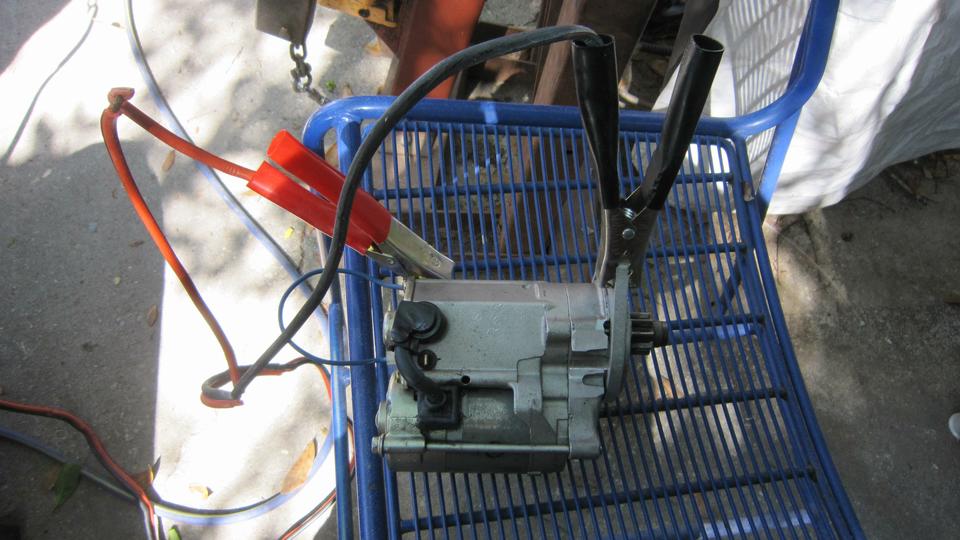
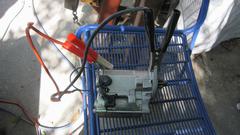
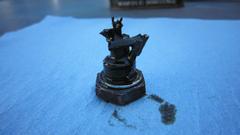
Jumper cables from the car battery fired it right up, spins like a charm. Go ahead and install it in the car. 90% installed, the bottom mounting bolt bottomed out a few turns short of full in. Pretty sure it is same bolt in same hole as before, so a little head scratching going on there as we were leaving. Find out tomorrow I suppose.
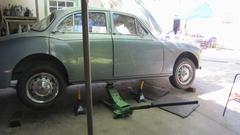

Saturday, February 18, 2023:
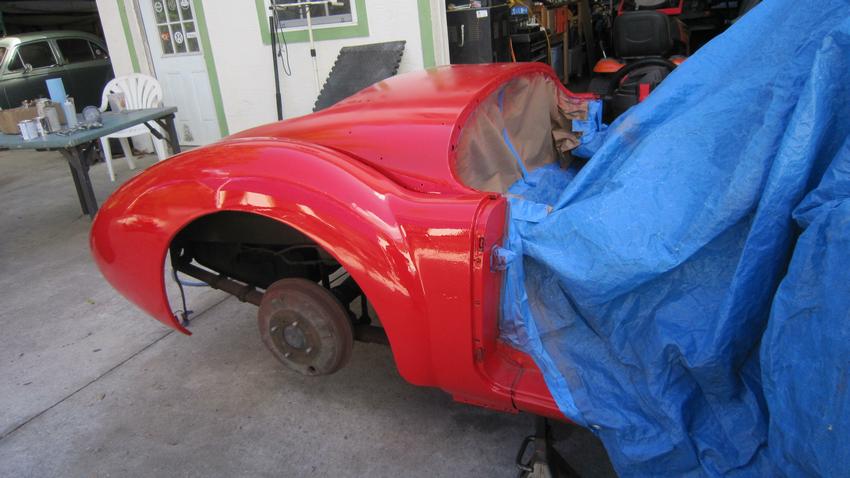
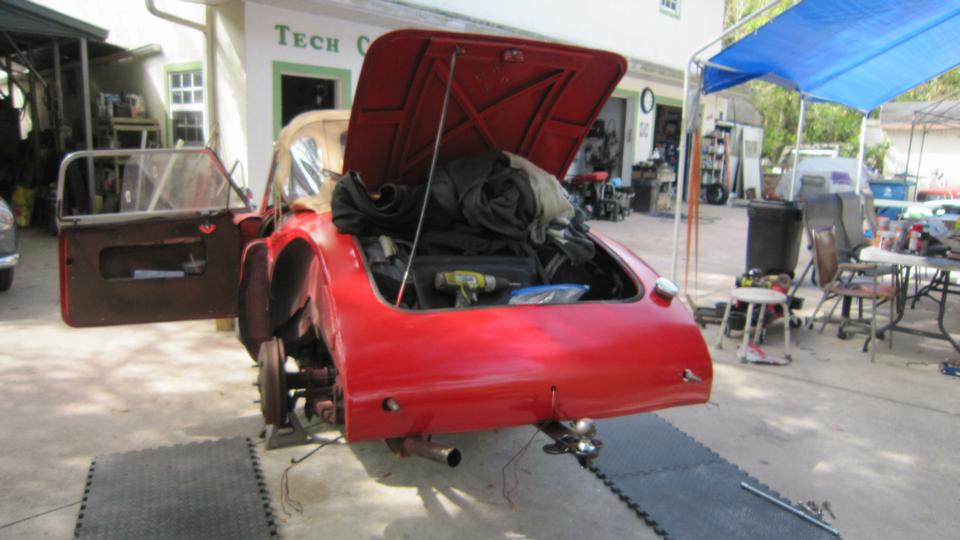
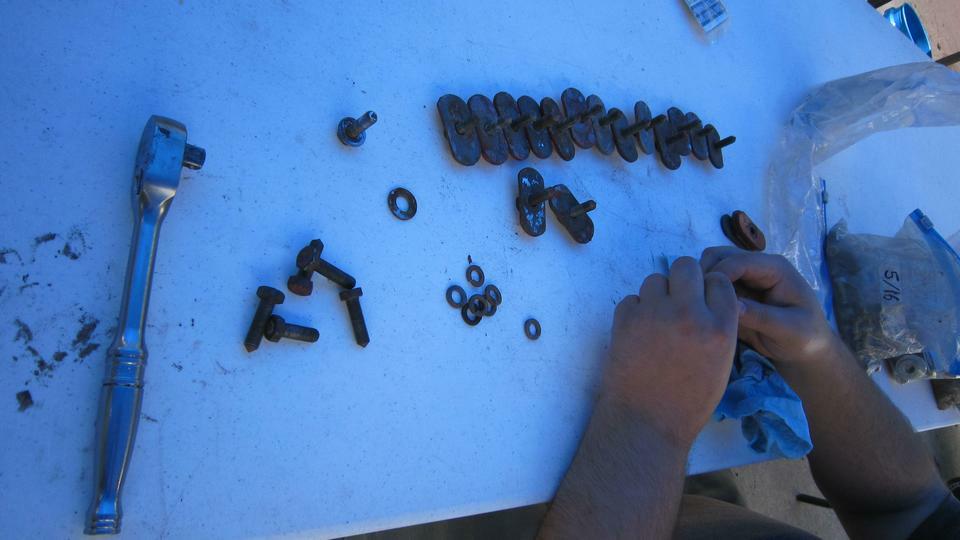
Day and a half for the paint to cure, so now we get to finish the assembly for real. Typical start, remove bumper, tail lights and fenders. Promptly grab a 5/16-24-UNF thread tap, chuck it up in a power drill, and clean the paint (and rust) out of 20 captive nuts on the body (and one more at the front of each wing). Then put a nut driver in the power drill, and grab a 5/16-24-UNF thread die in a substantial die handle, and run every bolt into the threading die to clean all the dirt and rust off of the threads on the bolts. Yeah, it takes half an hour, but it saves lots of time and aggravation during assembly.


Installing the wings goes pretty quick with two people. I was holding and aligning the wings so Elliot could screw the bolts in with fingers only. We were reusing the old fender piping, mostly just drop it in place and hold it down tight while the bolts were being tightened. Then snug up the screws at the shutface plates.

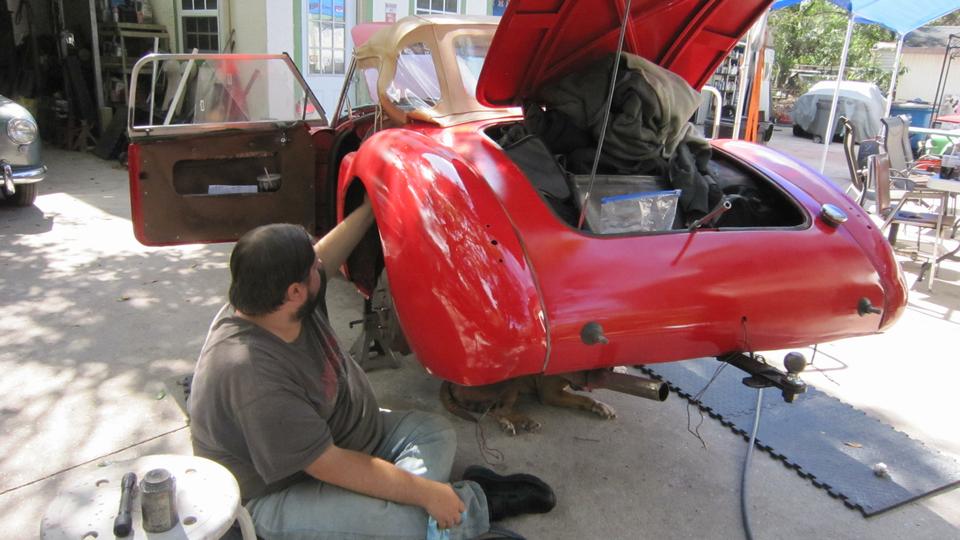
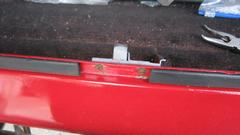
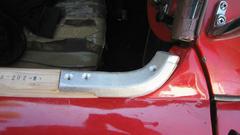
Tail light install is also pretty quick with two people (well practiced by now). New rubber gaskets this time, and new grommets in the pass-thru holes in the wings. Pass the wires through first (and hang on to then to assure they do not slide back down). I held the plinth on top while Elliot installed the screws underneath. While he was tightening the bolts I slipped the wires through the new lamp base gasket and through the lamp base, and installed two screws to hold all that in place. Poke three wires into the contact sockets, and install the bulb. Repeat for opposite side, test the lights, and install the leases. The rear bumper went on at the same time, testing lights in the tag lamp as well. -- Then it was time to put the wheels on, kick it off the stands, and move the car from direct sun into the shade. Then I got to install pop rivets to secure the dog legs, which was super simple and quick, just like it had been there before. For this application, the four pop rivets are much easier then the standard two screws with washers and nuts.


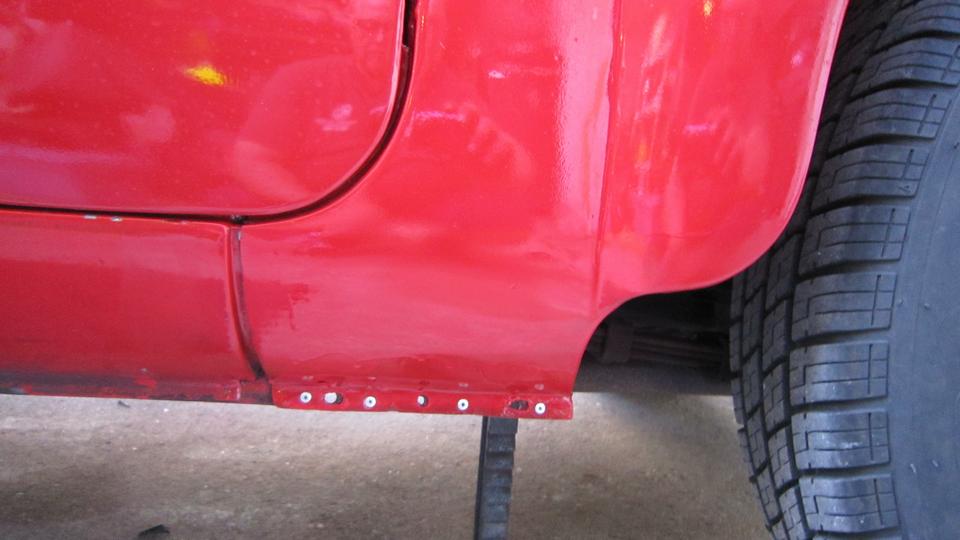
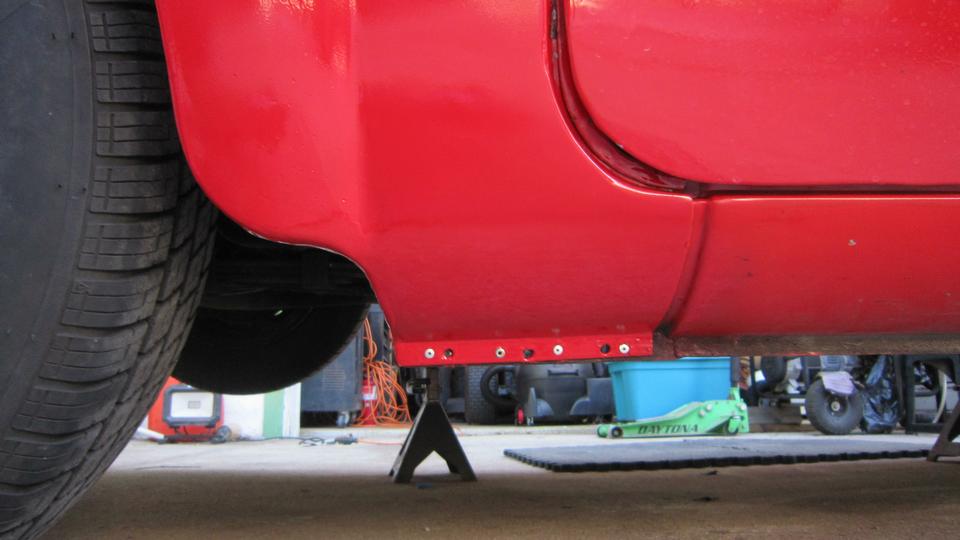
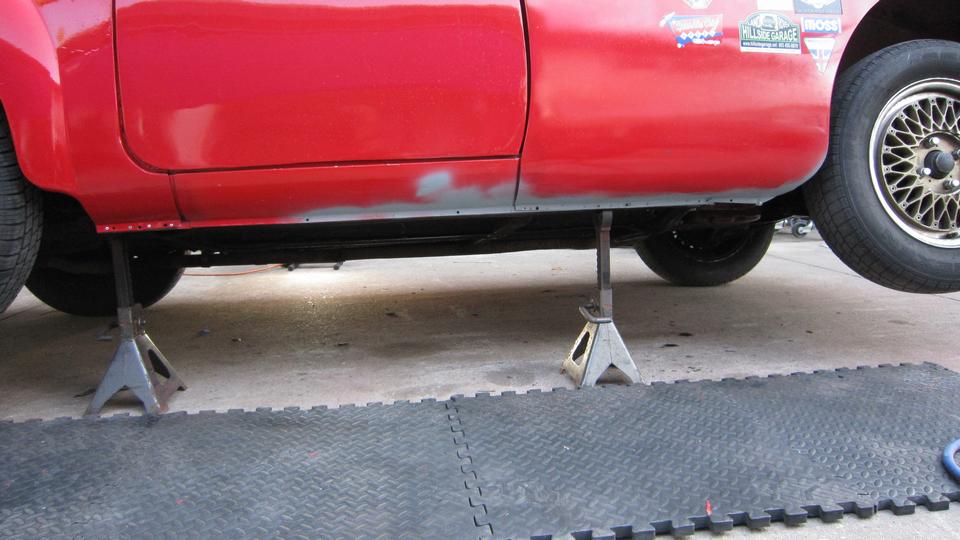
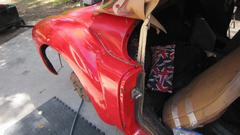
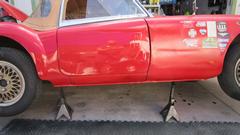
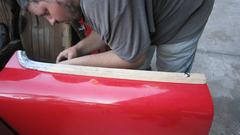
We spent at least an hour straightening the body sill bottom flanges with Vice-Grips, adding as few more pop rivets to bottom flange of the rocker panels, and going after a few small spots of surface rust. I was surprised how good condition this was in, considering it hadn't been touched for seven years, 177,000 miles. Spray a little primer on the bare metal spots, repeat opposite side, and finally spray on a little red paint. The spray can paint "Sunrise Red" is slightly darker than the "Hot Red" the whole car was sprayed with. But in this case it looks much like a slight shadow on bottom side of the body sill. We will likely get the trim strips installed tomorrow.


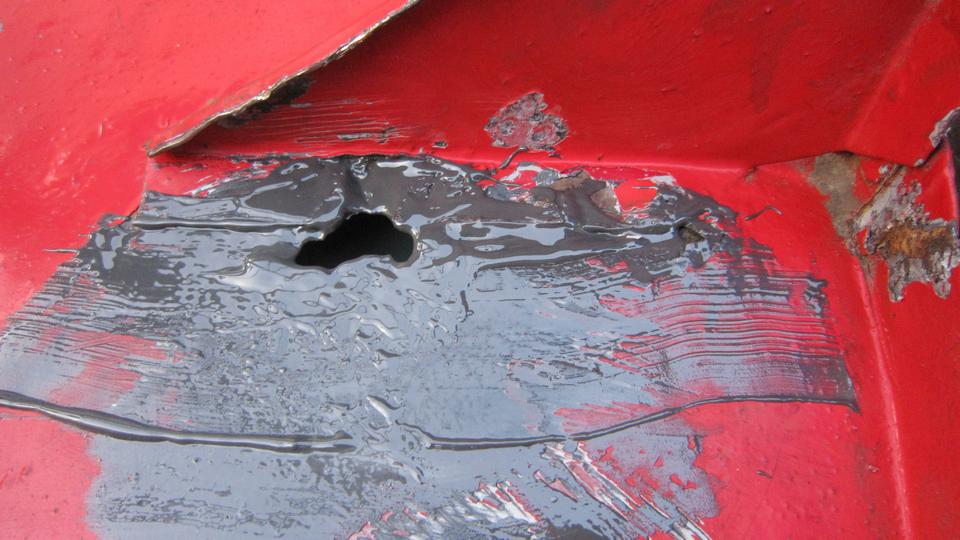
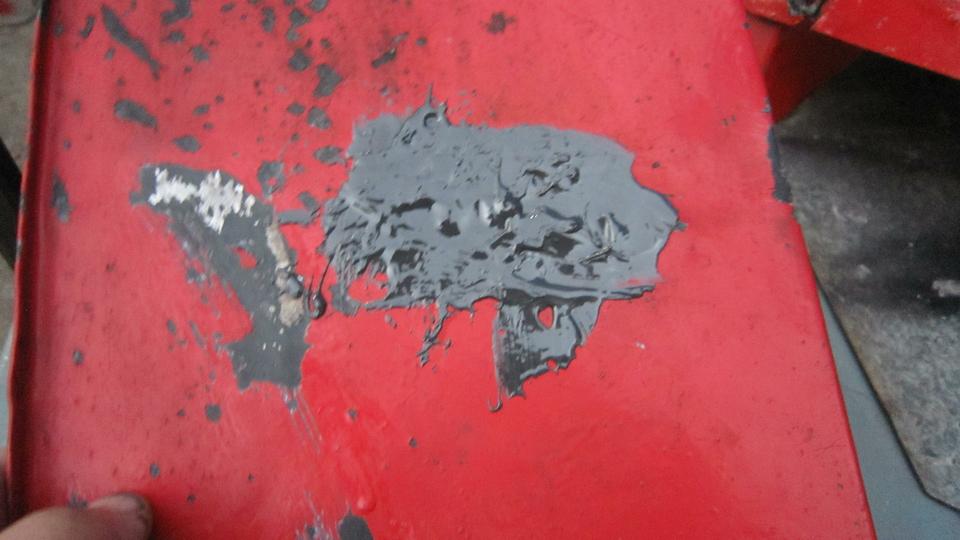
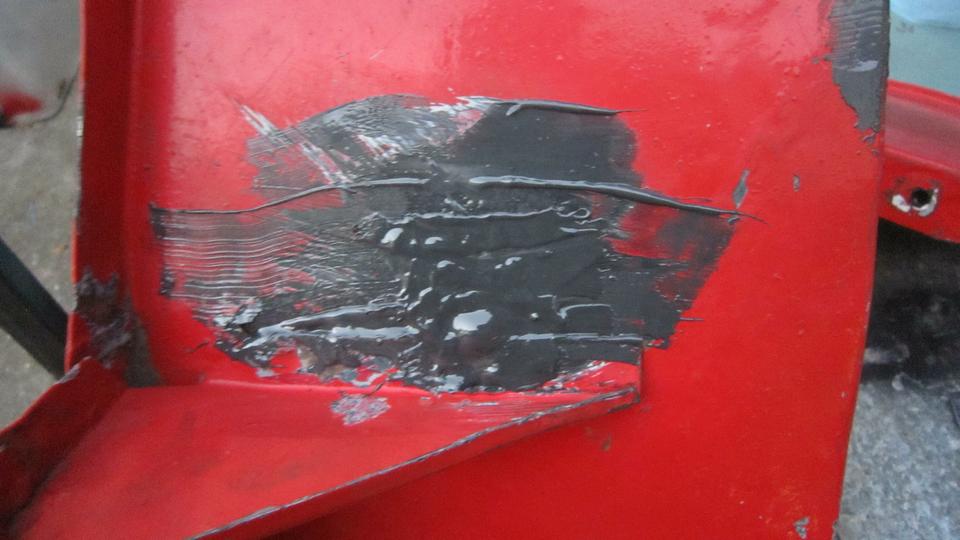
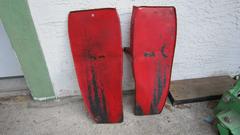
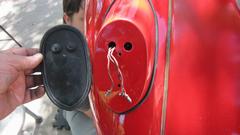
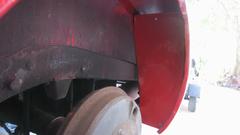
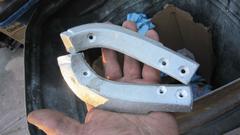
With nearly an hour of daylight left, we had time to go after the rear splash panels. After rasping off a little rust and any loose paint, we had one finger size rust through hole. Again, not a structural location, so just fill it with JB Weld, as we were smearing a little JB Weld on all of the bare metal spots.
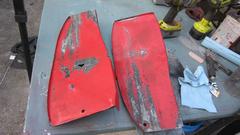
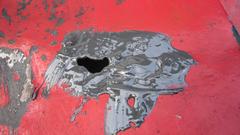

Surprise, it only needed two passes of JB Weld to fill this one. It was handy to be able to hold the panel and rotate it around in various positions so the goop would not sag and fall out before it cured enough to stay put. Two screws in the boot latch so that works again. Dusk is time to pack up and haul out, come back tomorrow.


Sunday, February 19, 2023:
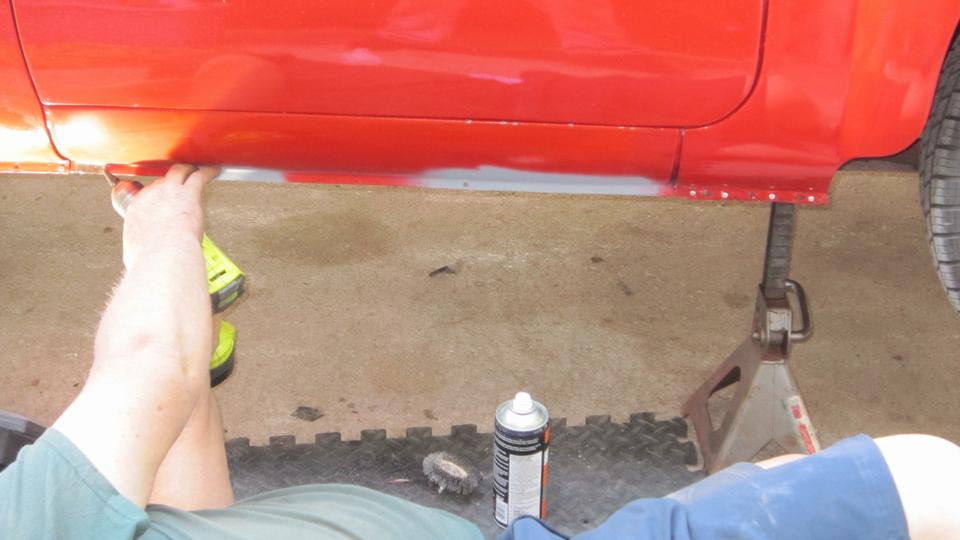
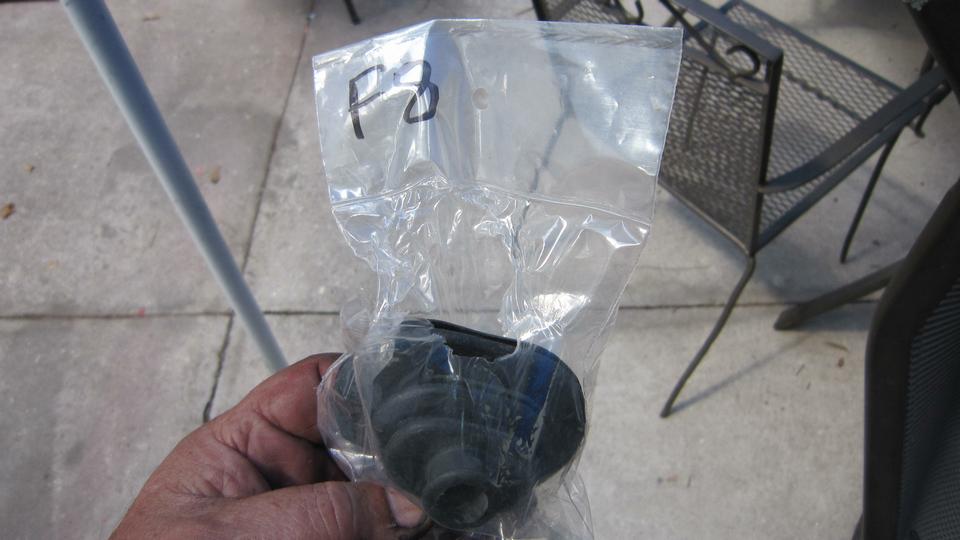
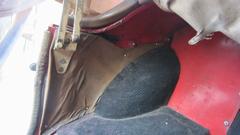
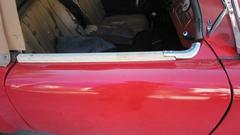
Getting close to finish, a little more reassembly work today. Start with power sanding the forever pesky rear splash panels and put a little primer on any bare spots. While those were drying we installed the new lower body trim strips, very effective camouflage to make the bottom flanges and fasteners disappear. While the right side of the car was up, it was a good time to install the rubber excluder boot on the clutch release lever.
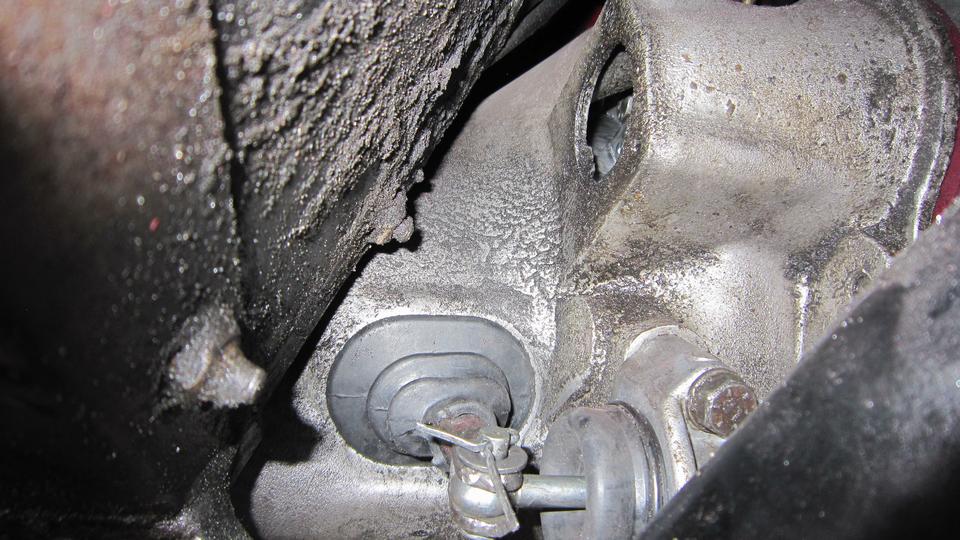
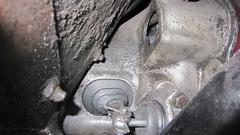 Don't ever volunteer for that job, a royal PITA with engine and gearbox in the car. What made it tough was trying to avoid destroying another rubber boot. For that I was grinding the corners off of the square clevis end on the release lever, when there is no access clearance for a grinder to fit in there. The picture makes it look easy, but just because you can see it doesn't mean you can reach it.
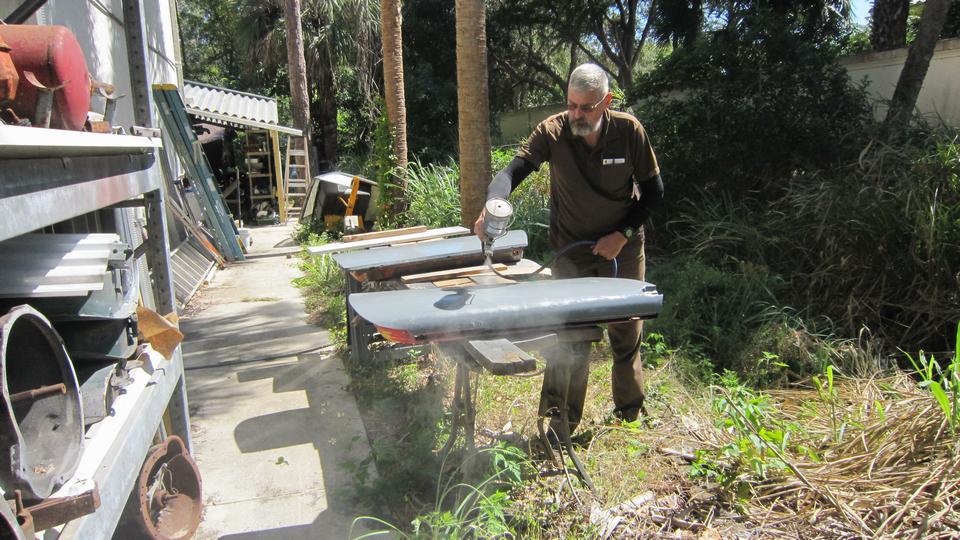
Took a short pause to go spray red paint on the rear splash panels (didn't get the picture, but maybe later).
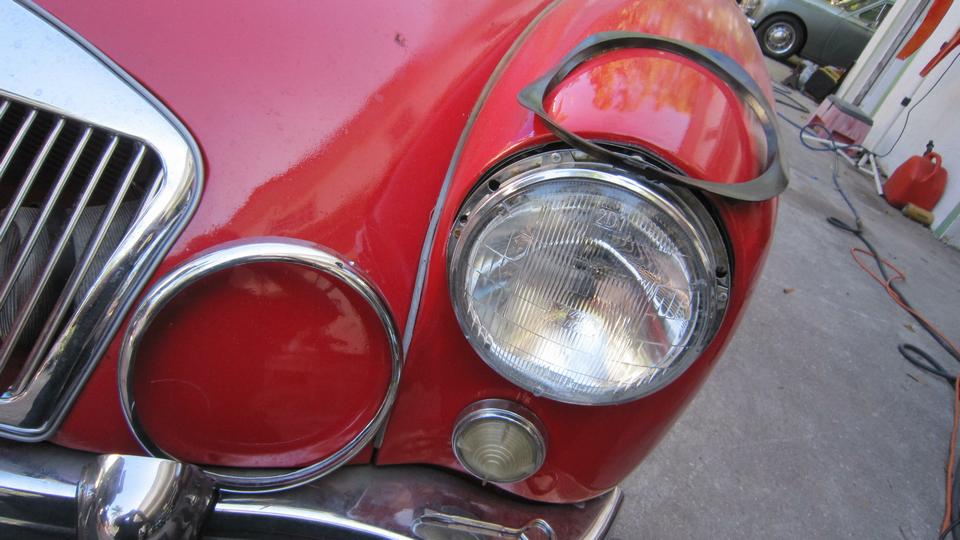
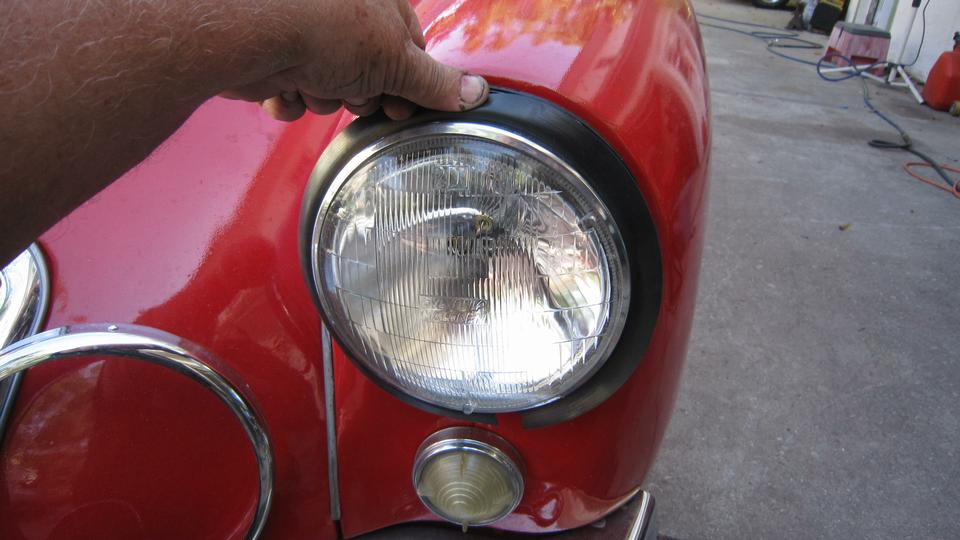
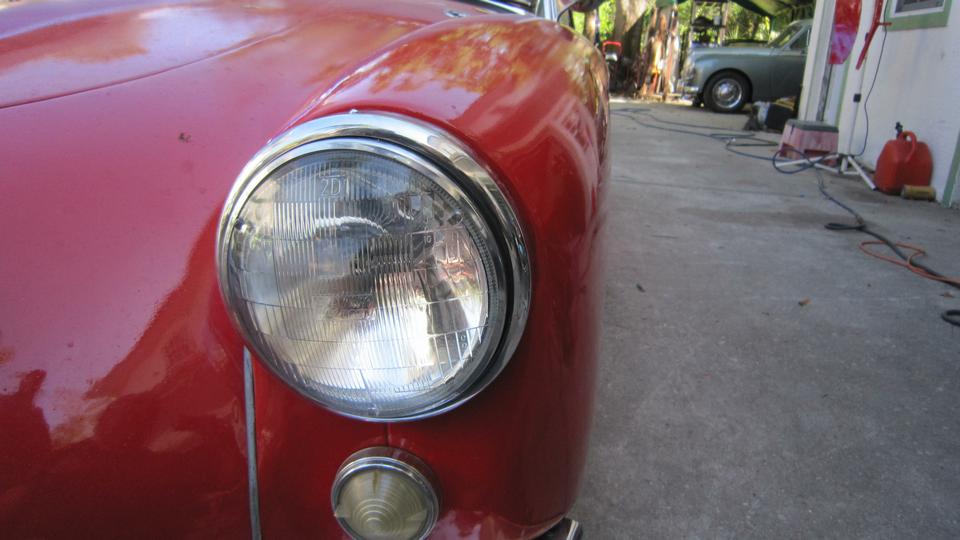
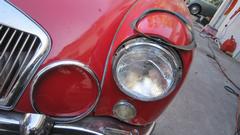
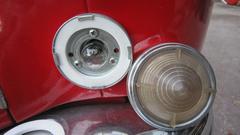
To tidy up a bit of unfinished business, we needed to install a missing dust excluder ring on a headlight. Having forgotten which one it was, we pulled the trim ring off of the wrong headlamp, had to put it back and do the other side. But otherwise not too difficult.


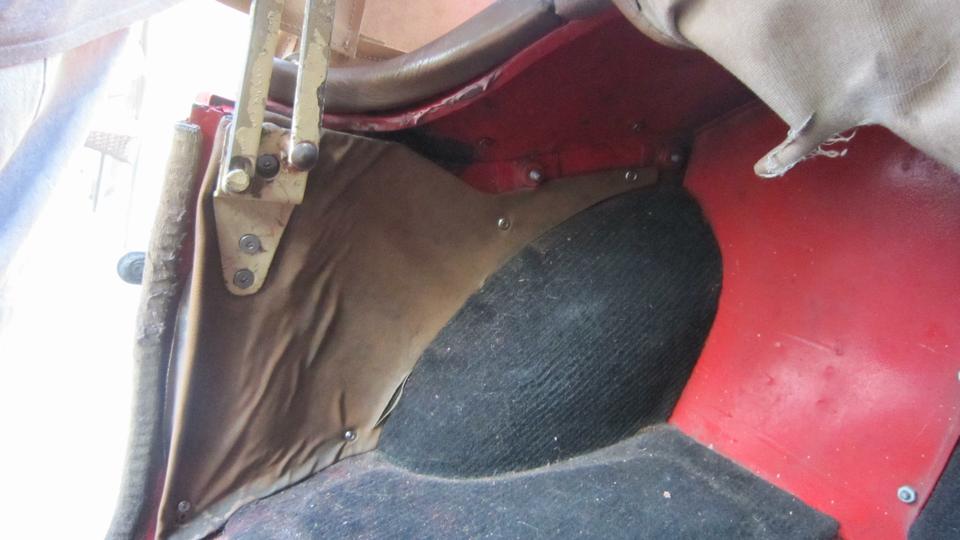
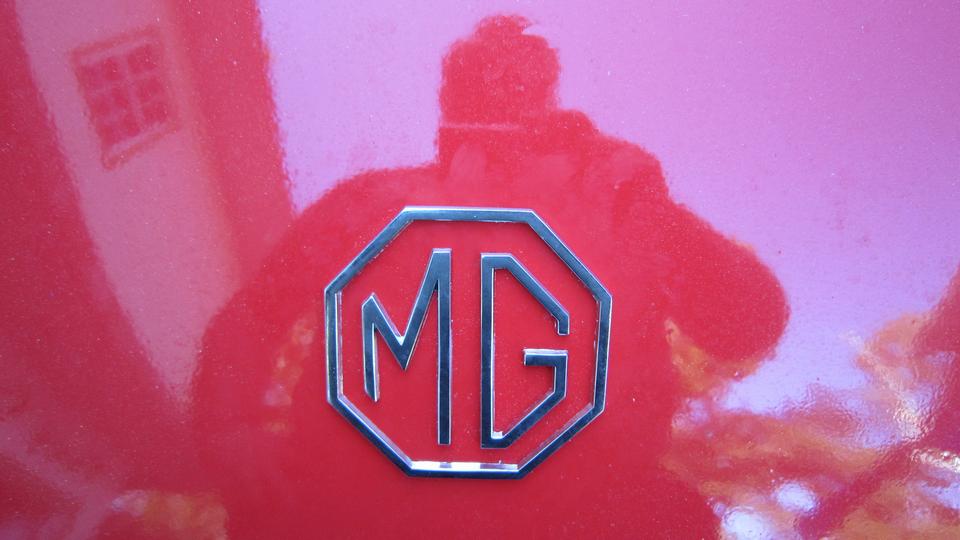
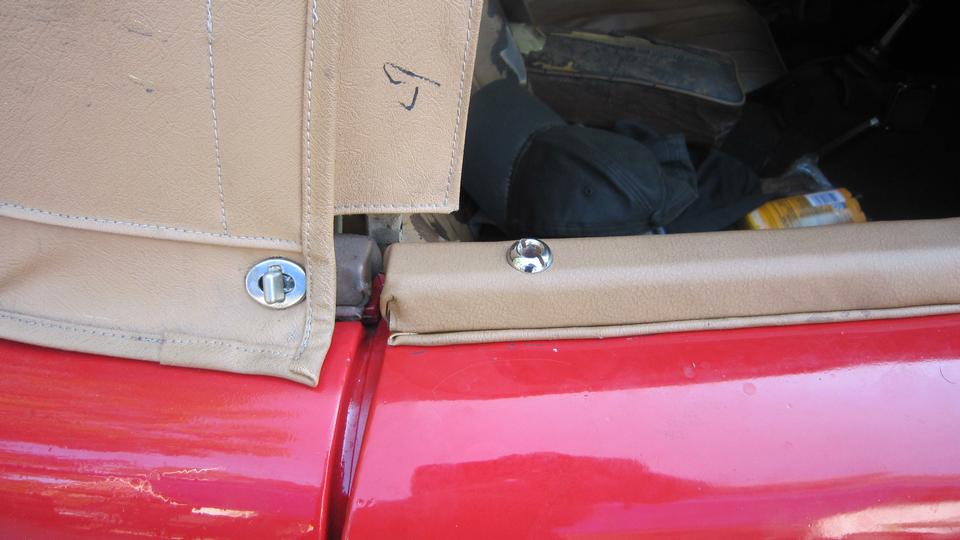
Then we got to install the cockpit rear trim rail (holding the side curtain pouch) and the rear corner rails. Also needing to re-install the rear kick panels (drill a couple holes and replace a few screws). The worst part of that was having to remove and reinstall the convertible top, only six screws but kind of a pain, good to have an extra set of hands for that chore. Then I finally finished assembling my all new "MG" (emblem on the boot lid).


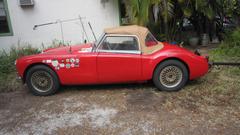
Not quite finished yet, but there were a couple of tough chores on a hot day, so had enough and decided to call it a day. But you know, it kind of looks like a car again (feel good moment).
Monday, February 20, 2023:
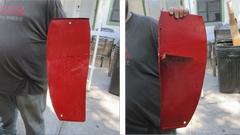
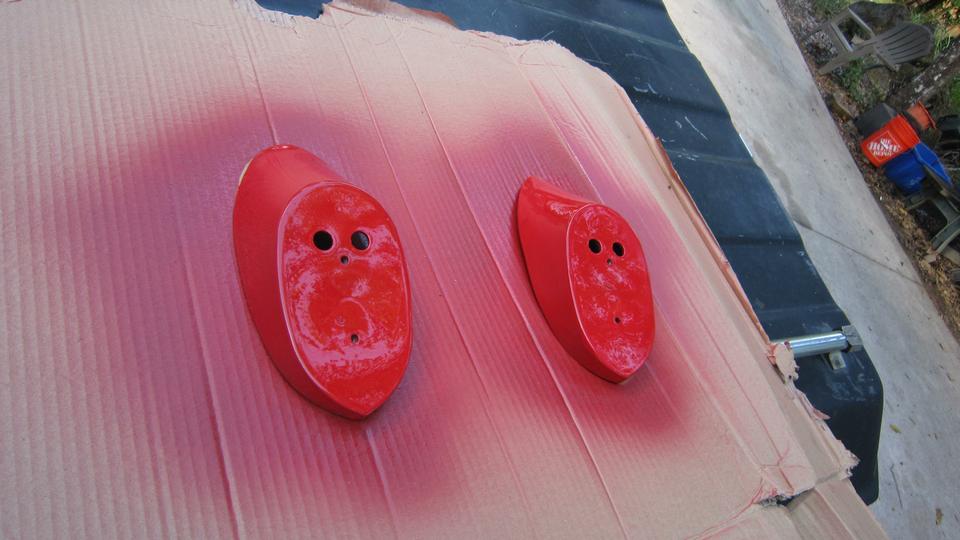
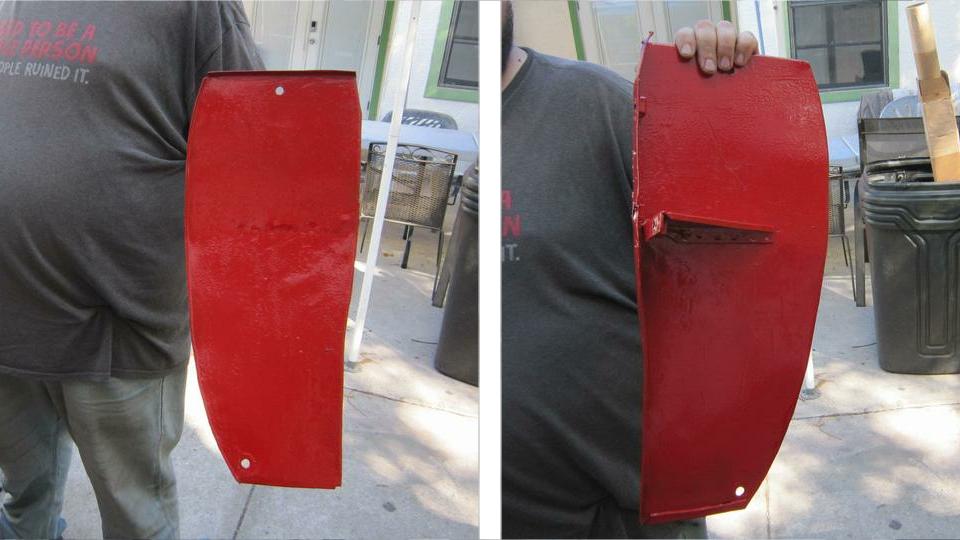
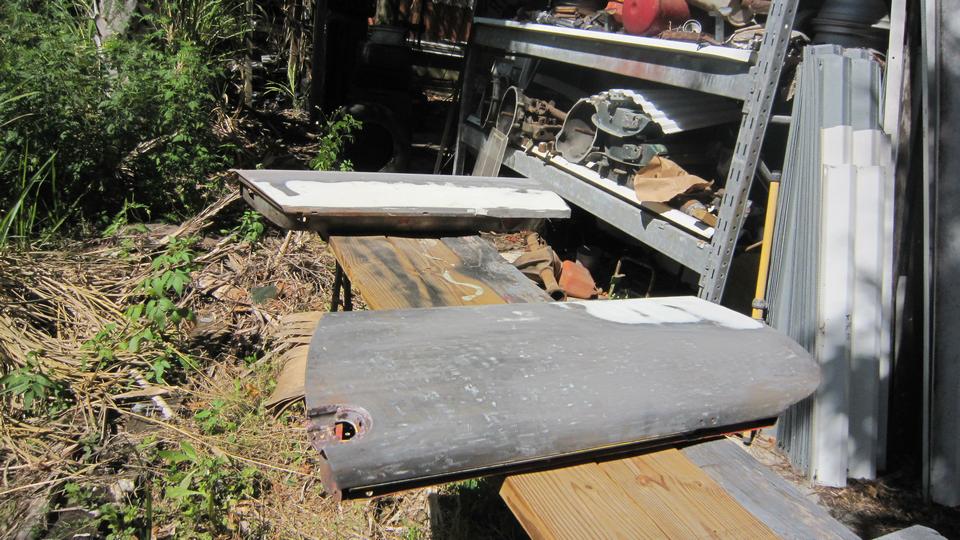
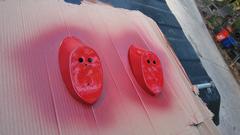
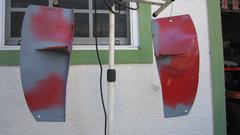
Getting down to the finishing touches on the full body repaint. Here's a picture of front and back of one of the rear splash panels we painted yesterday. Get to install those today. That was pretty easy, three bolts in the boot and one at bottom corner of the rear wing on each side. Poke the side carpet back into place, and ready to reload the boot space. Oh, we didn't get the weather seal glued down yet; note to do that later.

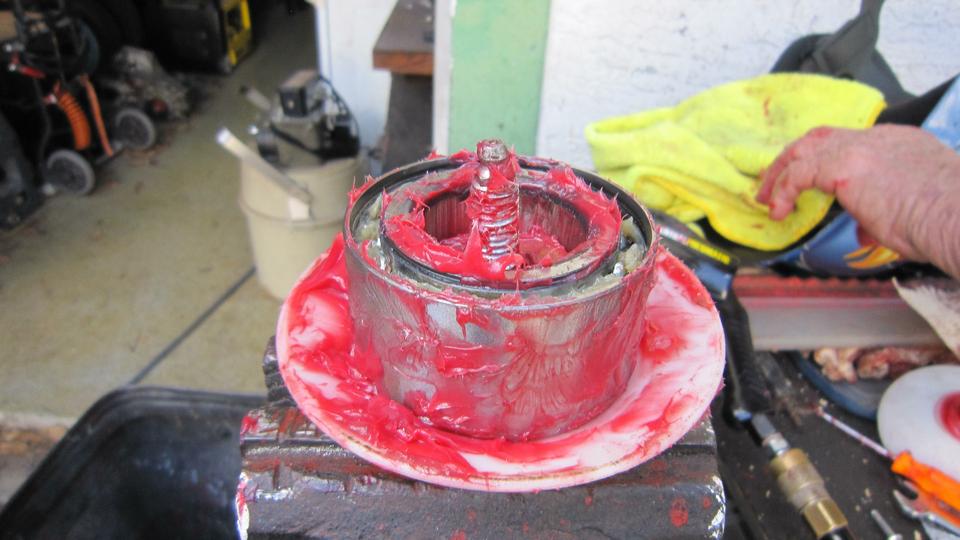
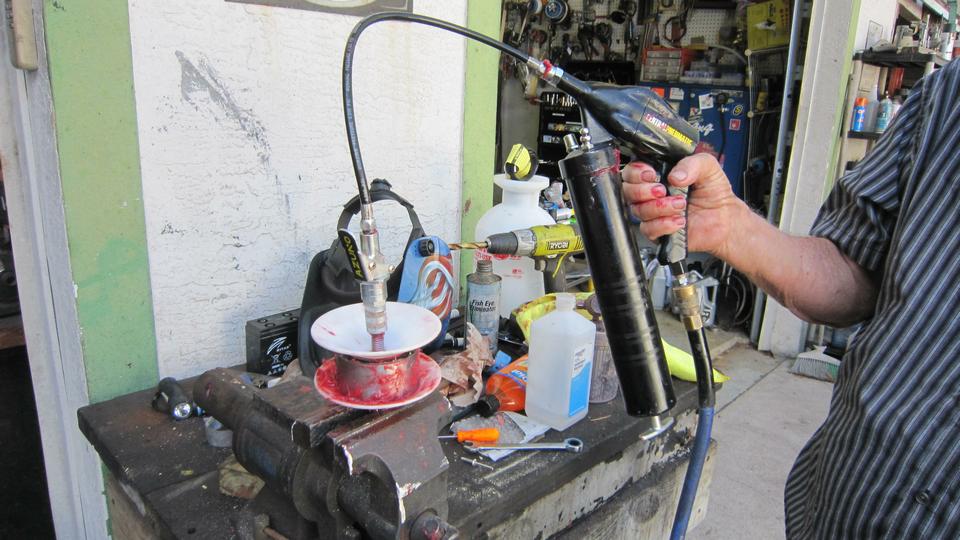
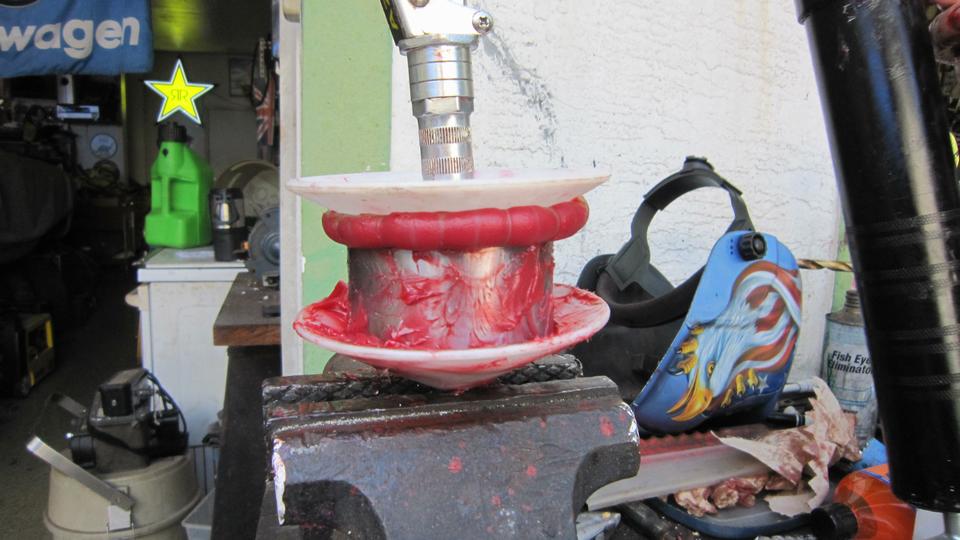
A brief diversion as Jerry was packing wheel bearings for his VW Rabbit race car. He was enjoying his automatic repeater air powered grease gun, just pull the trigger and watch the grease roll out, perfect for this application.

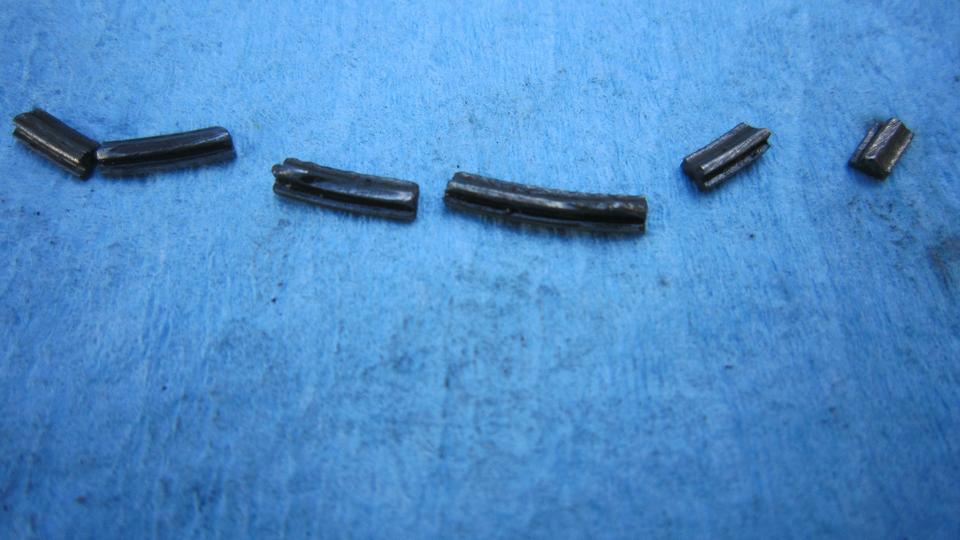
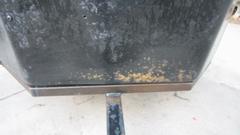
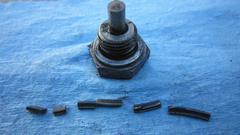
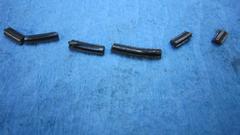
Finally we got to change engine oil, filter and lube the chassis at 4500 miles, about 500 miles overdue (but we have been pretty busy the past six weeks). Found some curious debris on the magnetic oil drain plug (which may have gone unnoticed without the magnetic plug). After the late August engine rebuild with sleeves and standard size pistons, we did oil changes at 466 miles, 3961 miles, and now 4505 miles. For the last two oil changes there was nothing but iron fuzz on the drain plug (and precious little of it last time). This time no iron fuzz at all, just these little broken bits. My best guess is these are bits from one of the compound 3-piece oil wiper rings, bottom ring groove of the 5-ring pistons. We haven't noticed excessive oil consumption, so as long as it keeps running well we are not going to tear it down just to check the wiper rings. That might end up causing more harm than good (and I'm basically lazy anyway). Anyone have any better idea what these broken bits might be?
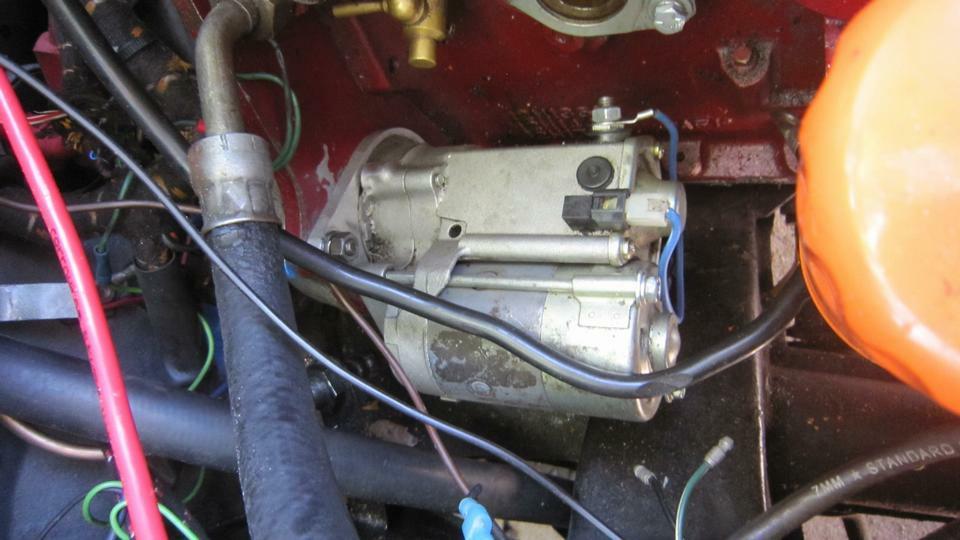
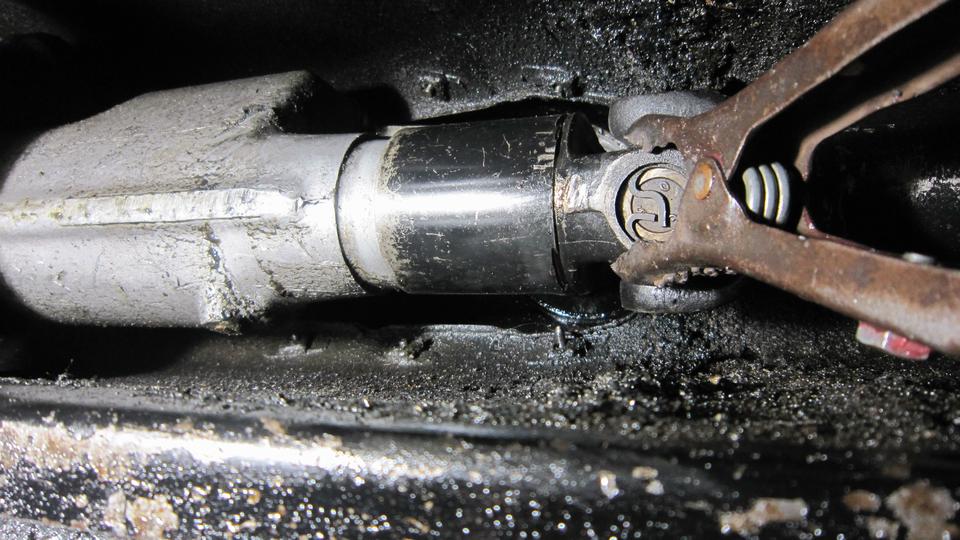
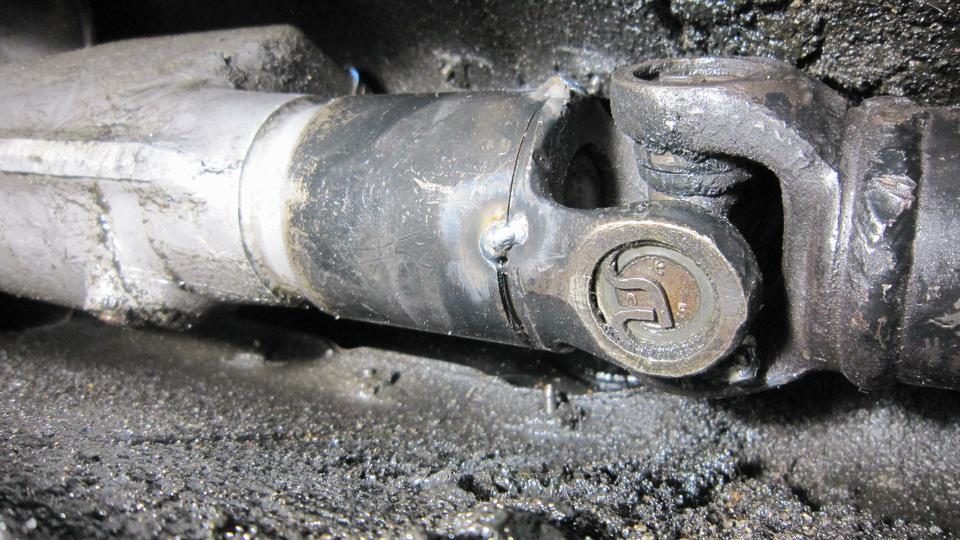
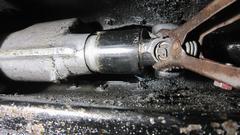
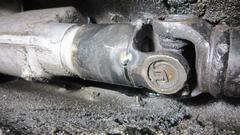
Having changed oil and lubed the front suspension with front of the car jacked up, we jacked up the right side to grease the propshaft U-joints and hand brake cable. Then I found the cylindrical dust cover at front end of the propshaft was loose and free spinning on the front U-joint. Very convenient at this time to haul out the MIG welder and spot weld the dust cover back in place. -- As we were finishing up, John Shoemaker was just getting his MG ZB Magnette fired up, being very happy that we had managed to repair his starter motor on Friday.

As we were just about finished with all the work on the MGA, it was a good time to clean up the place, pick up all of our "stuff" that had been lying about for the past several weeks, and pack it all back into the boot and trailer. Then we were off to the UPS store to ship two badly worn shift extension housings to Wyoming for machining, and one loaner shifter assembly back to Oklahoma where we had borrowed it last September (always nice to have friends when you need them). Having lunch at dinner time tonight with plenty of time to post the day's photos and notes (and catch up with BBS and email).
Tuesday, February 21, 2023:
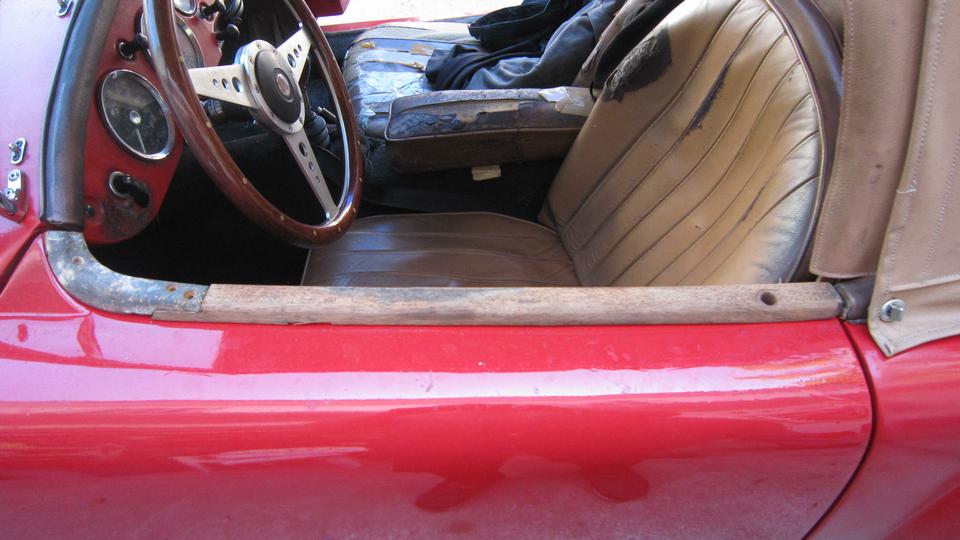
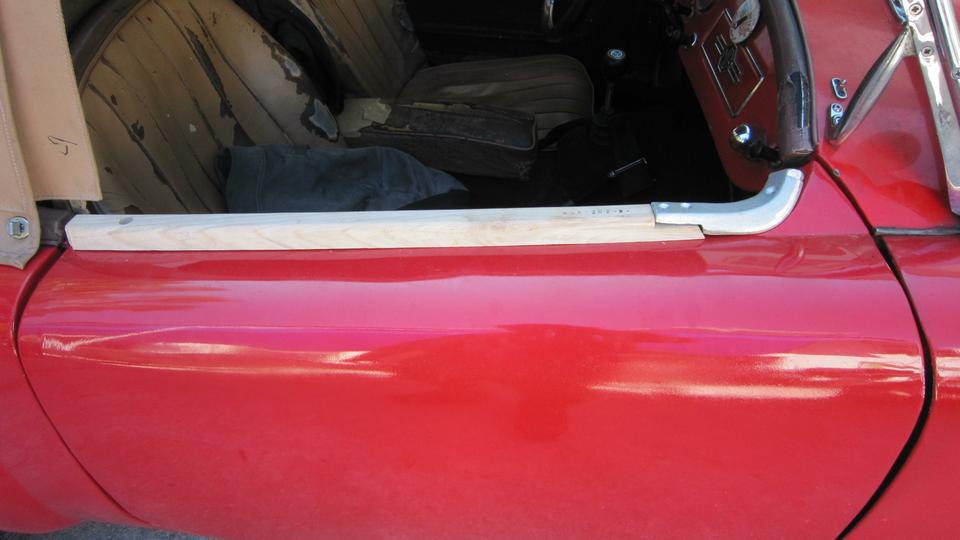
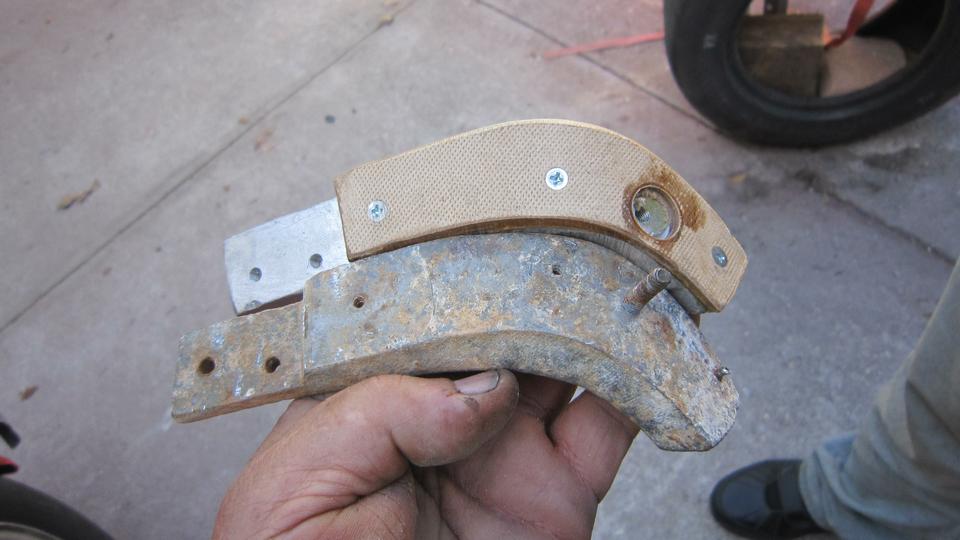
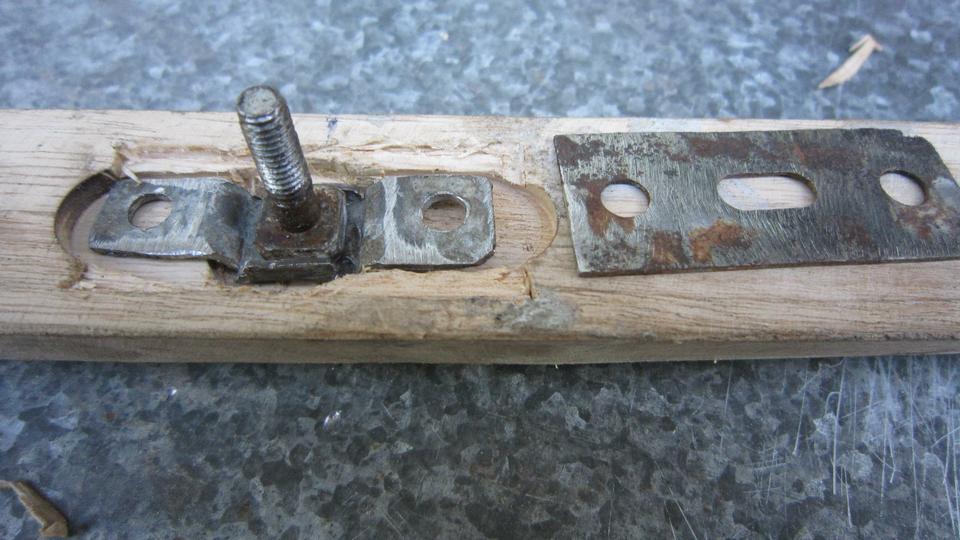
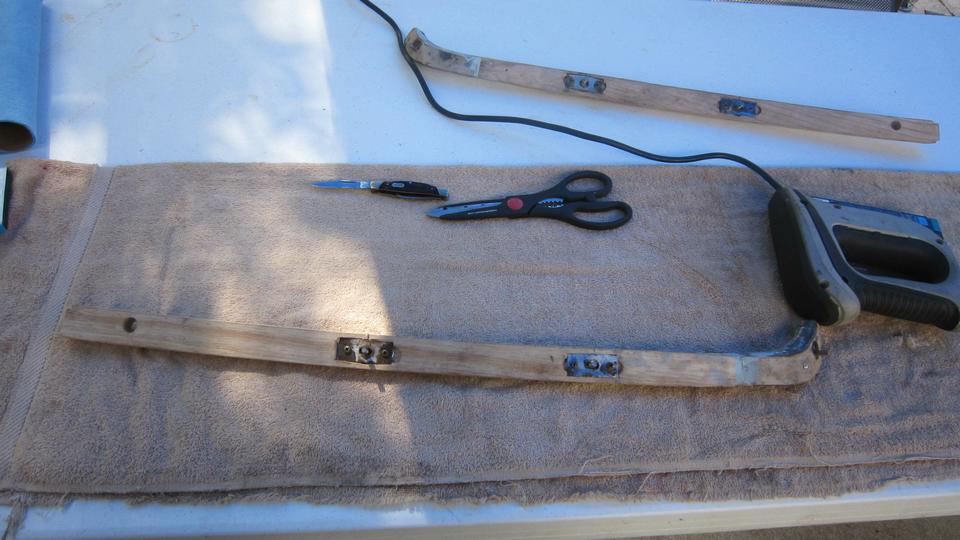
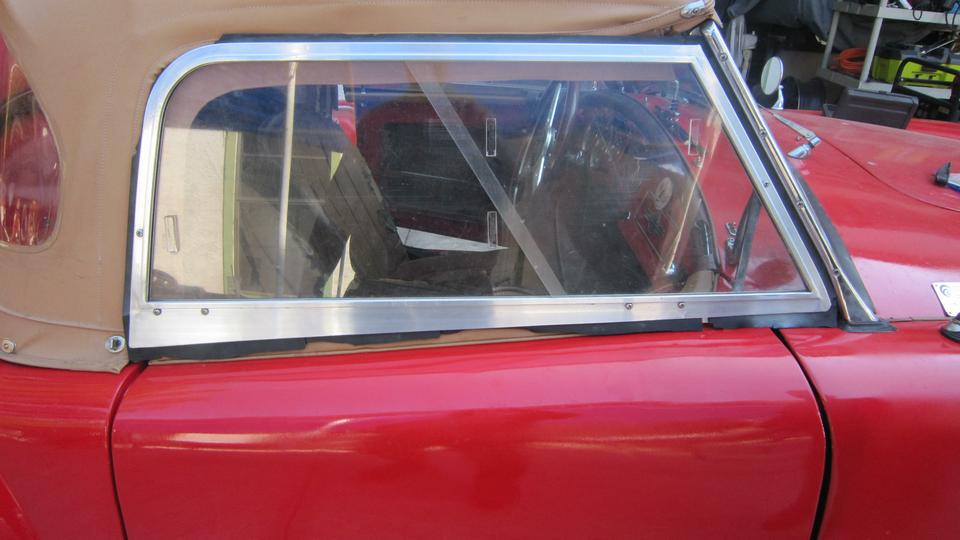
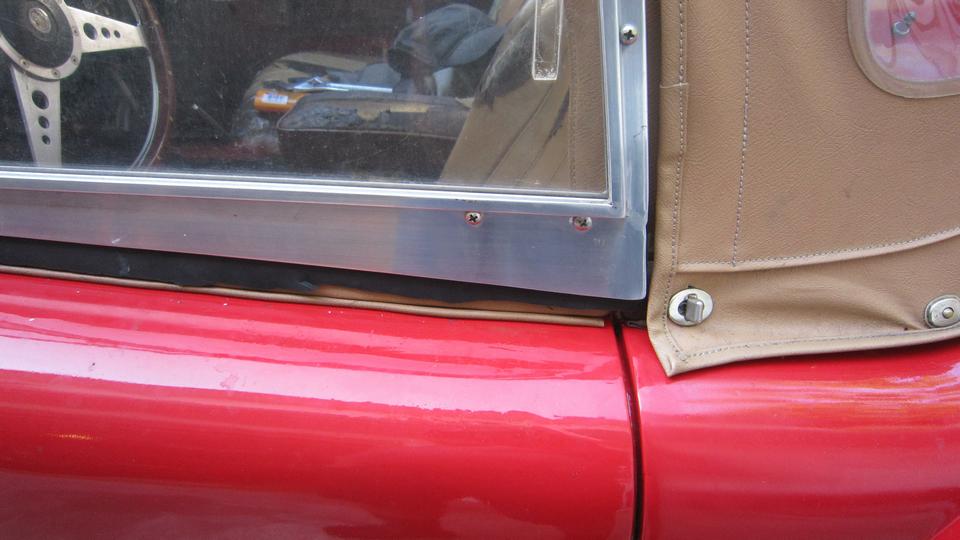
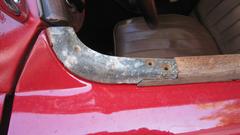
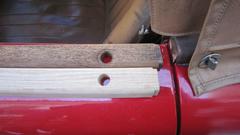
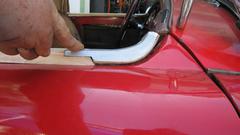
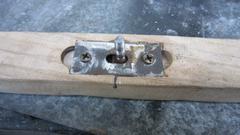
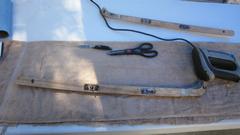
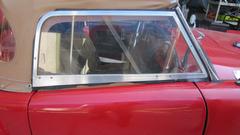
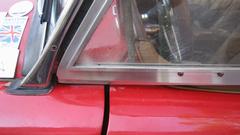
One task set for today, to replace the ailing and aged door-top cockpit trim rolls. I had procured new wood rails and aluminum front corner rails from Scarborough Faire, all from the same vendor, with hopes that the parts might be a matched set and may actually fit as intended without too much fuss. On the same parts order I also asked for all necessary hardware, but already had the leather fabric wrap materiel, so skip that.
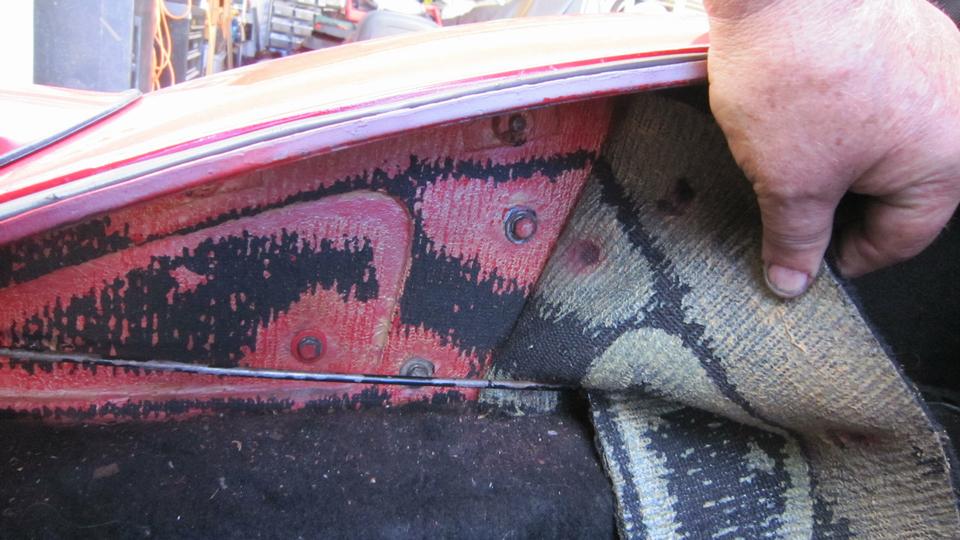
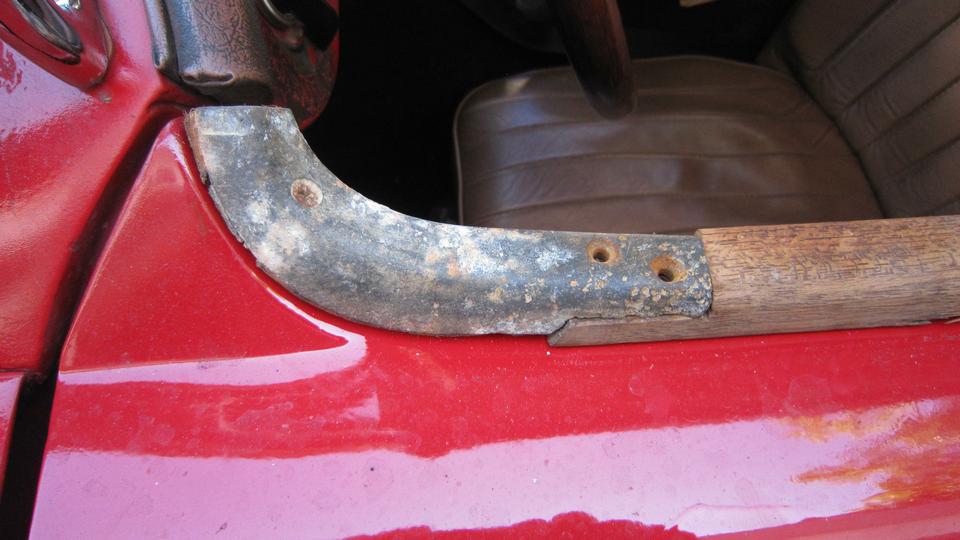
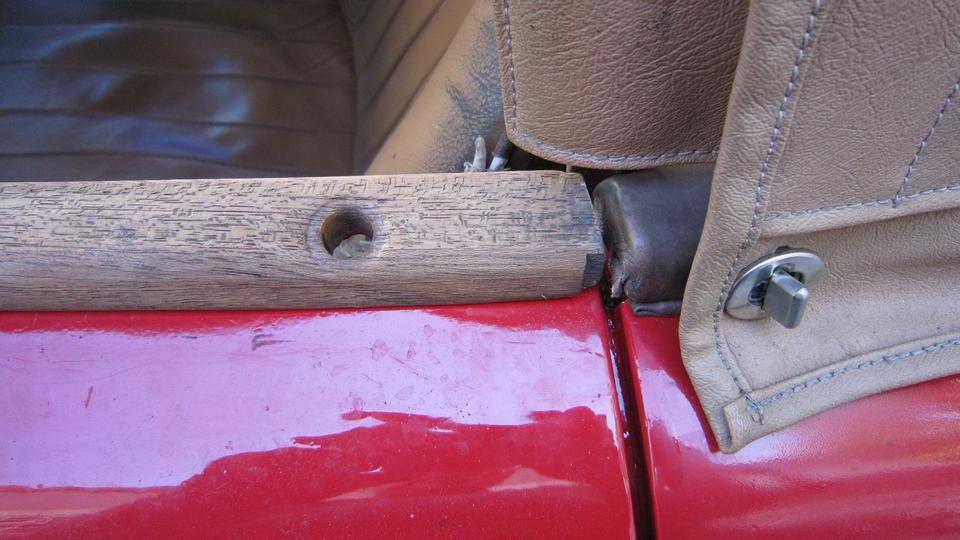
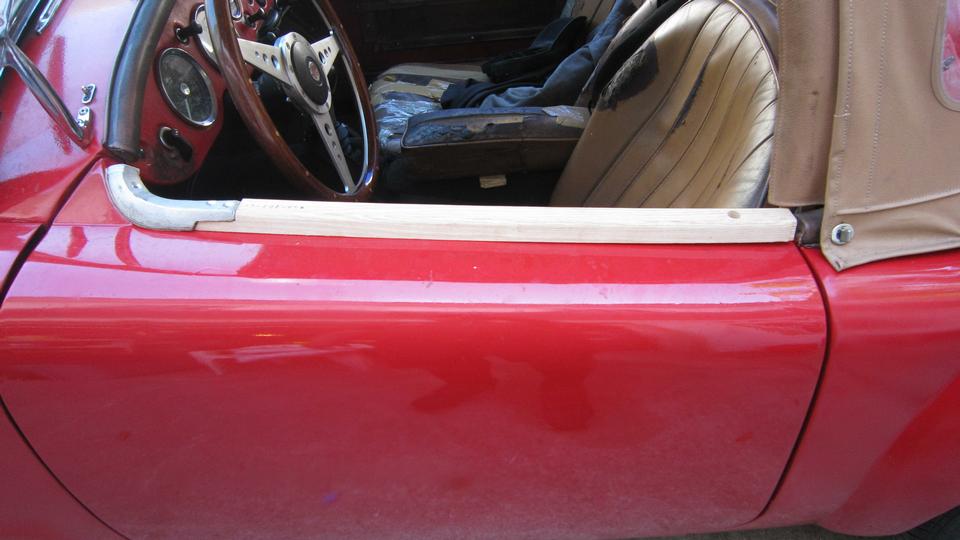
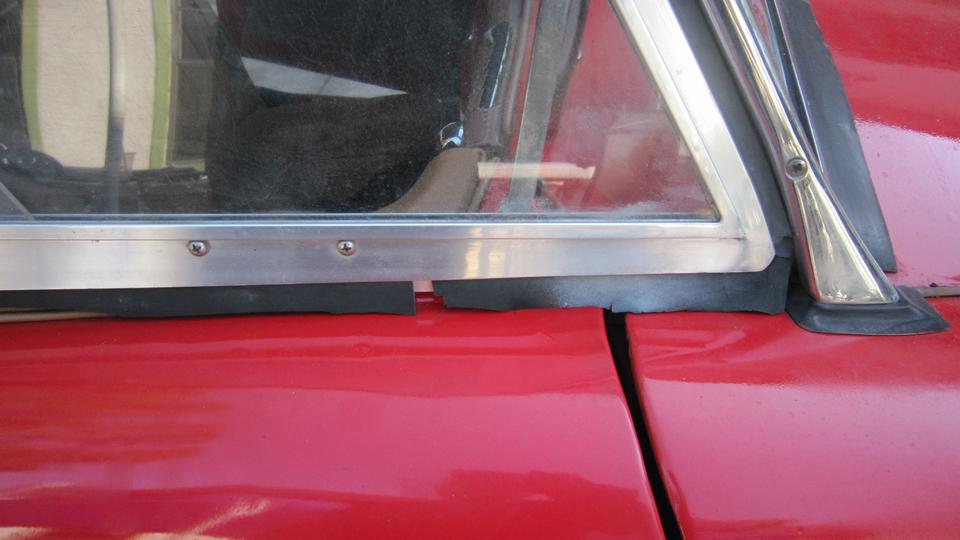
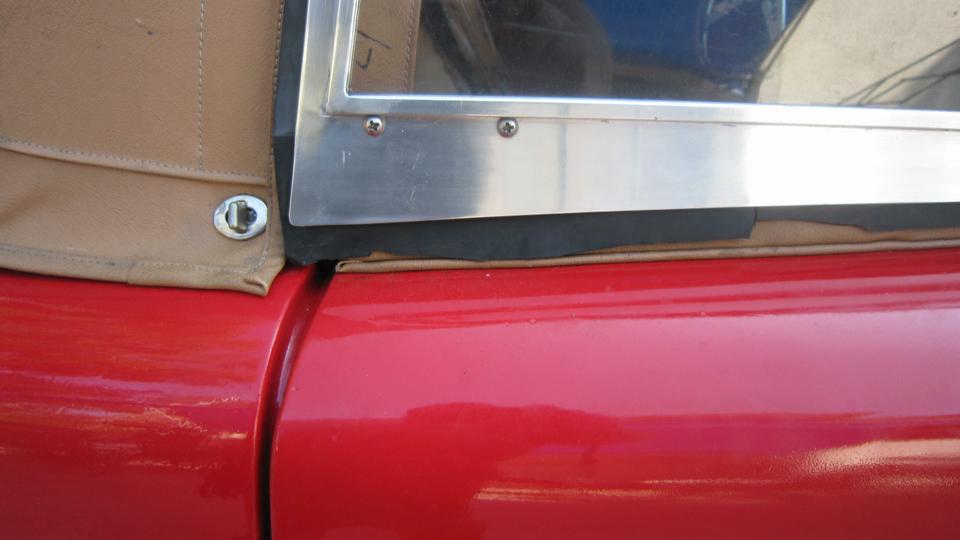
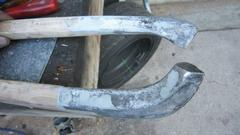
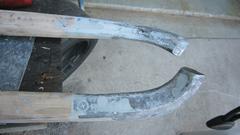
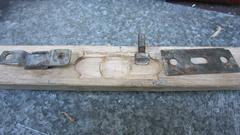
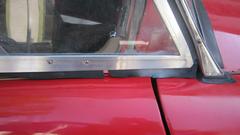
First business was to strip all the old fabric from the old rails, and separate the wood and metal parts. Here the left side parts are placed back on top of the door to show what they look like and how they fit. The aluminum part is sitting just a tad low in front because the deteriorated stapling pad has been removed from the bottom side. Otherwise shape and angles are about right with acceptable end gaps. I believe the metal corner rails are original from late 1957 production, and the wood rails are 1986 issue parts from Moss Motors. The wood piece is a bit too thin (known since time of installation), not quite flush with top of the metal part. The right side wood rail was a mess where the side curtain peg socket had rusted badly, and expansion of the rust had split the wood rail.

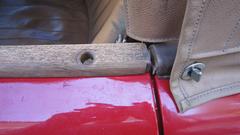
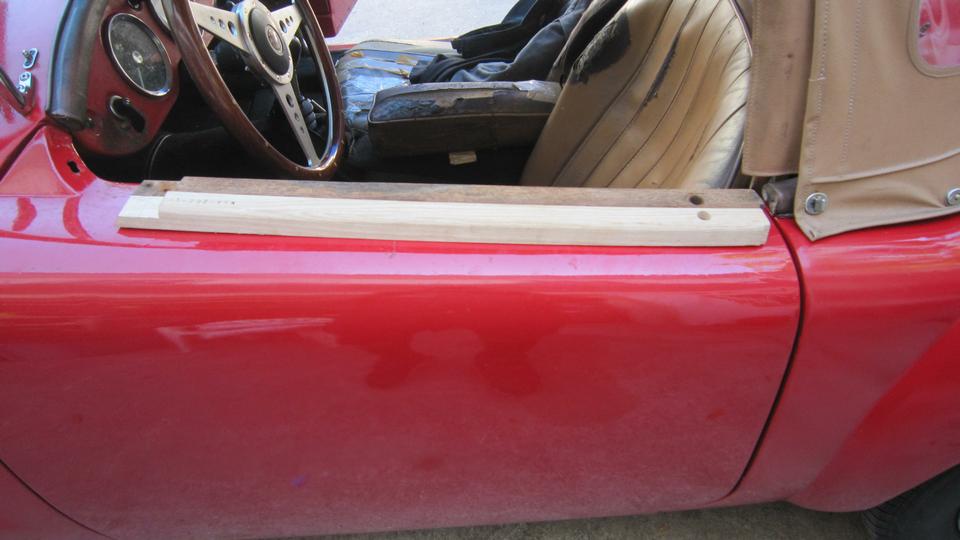
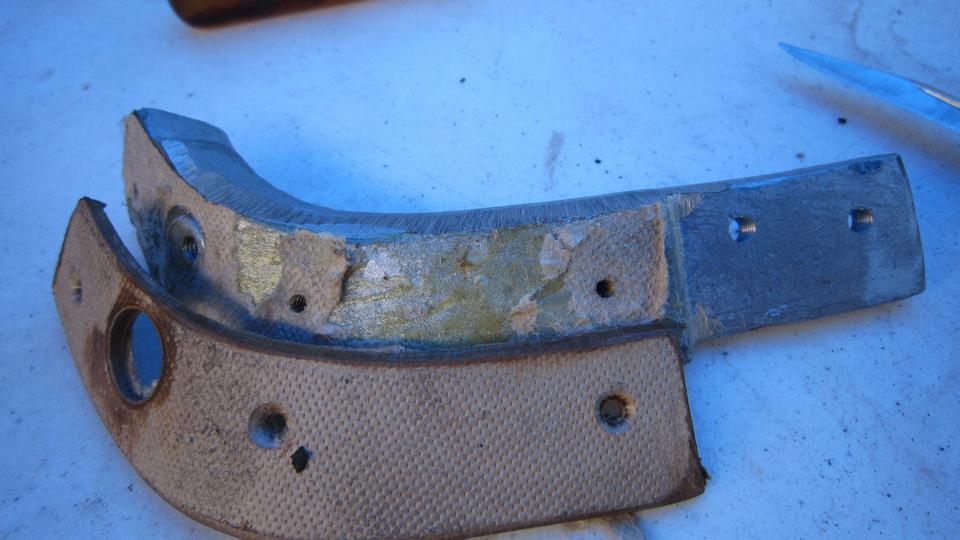
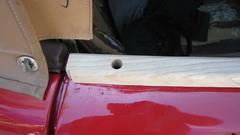
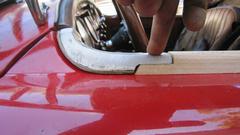
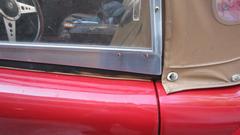
Here are the old wood and new wood parts together for comparison. First notice is the new rail is about 3/8-inch shorter on the tail end (aft of the socket hole). Strike #1. There is an oversize hole on the door, so this part may be repositioned fore or aft if needed for final alignment.
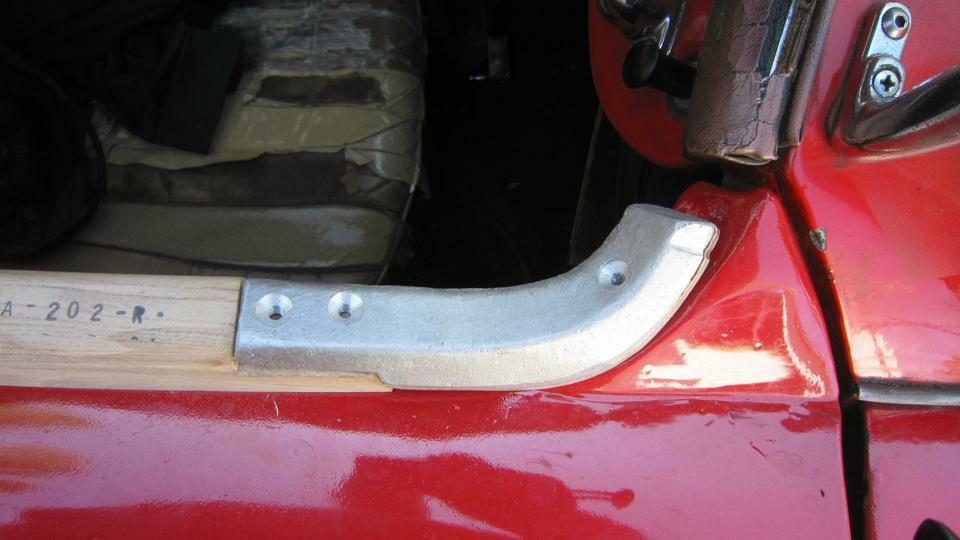
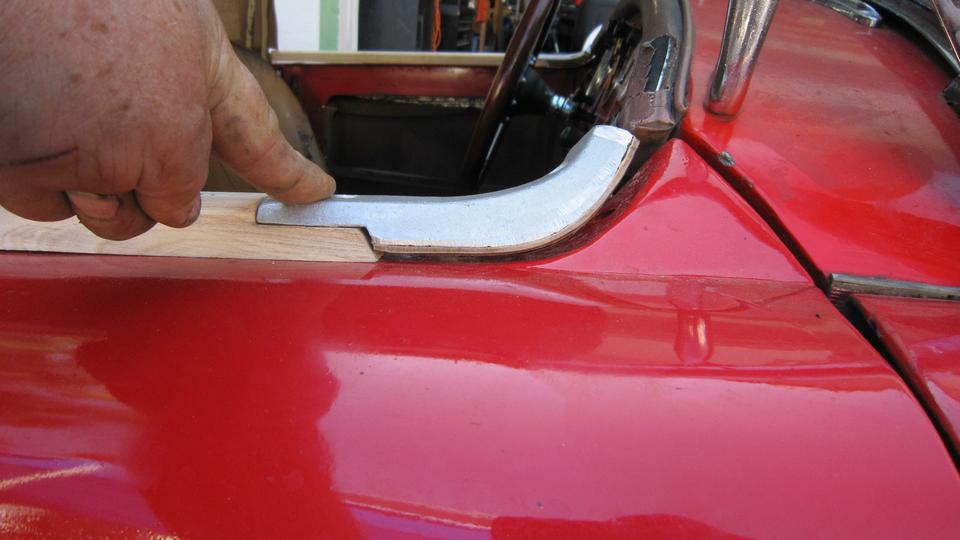
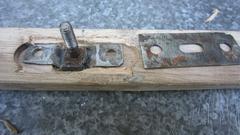
Next pictures are the right side new wood and metal parts sitting loosely in place for trial fitting. With the wood rail set wit a "reasonable" large gap at the read (put one finger in the open space), there is a much larger gap at the front. Here the metal rail is shorter in front by at least 1/2-inch compared to the original part, and I can't see any way to make it longer to fit properly. Strike #2.
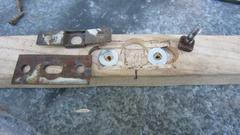
Next notice is the new wood rail is substantially thicker than the old one, with all of the excess thickness on the bottom, which will require significant trimming to get that to fit properly. A finger on the tail of the metal part accentuates the excess thickness of the wood rail. Similar comparison on the left side shows same results, too short metal rail and too thick wood rail. Strike #3.
The original metal rails can be salvaged, and the new metal rails have a nice new tacking pad. So I did the expedient thing, removed screws and shaved the glue joint with my pocket knife to remove the new tacking pads and transfer them to the old metal rails. JB Weld wins the day again.


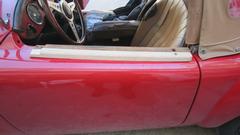
 Old metal and new wood rails finally screwed together, aggressively sanded on the bottom (and a little sanding on the sides) to be flush, filled with Bondo all around, and sanded smooth across the joints. After this we need to install two floating studs on bottom of each wood rail.
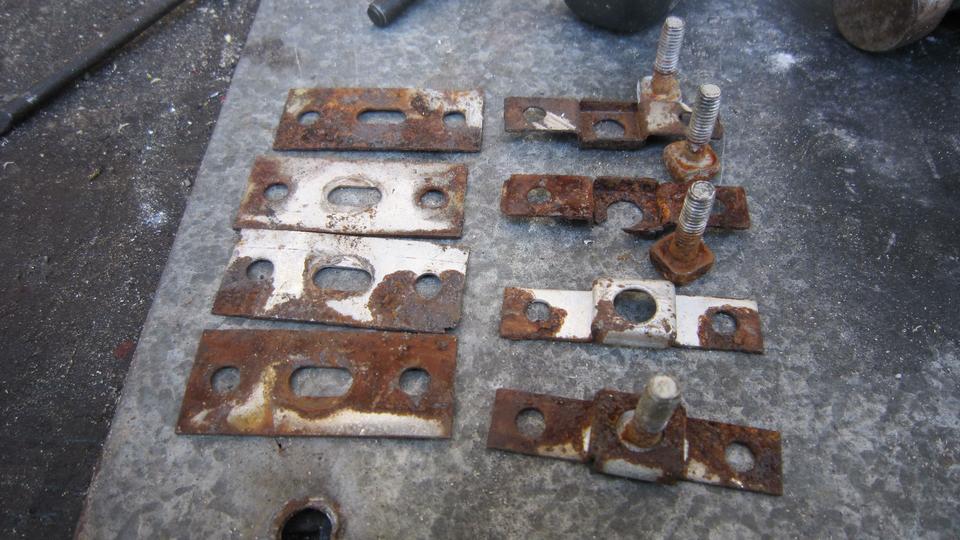
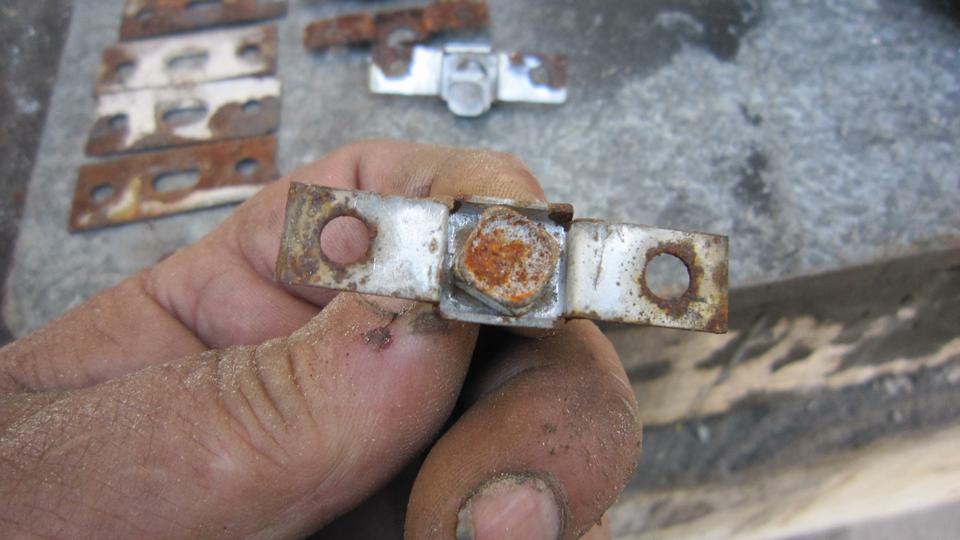
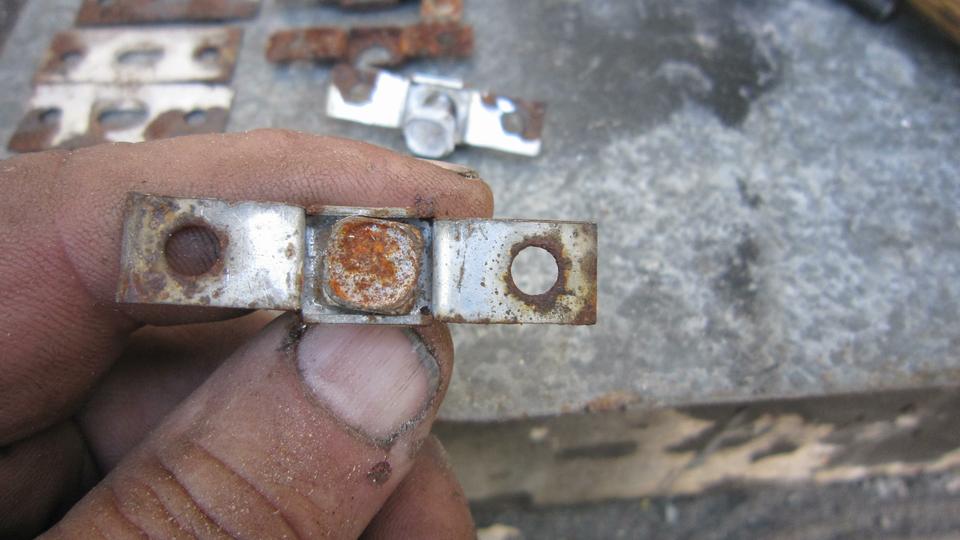
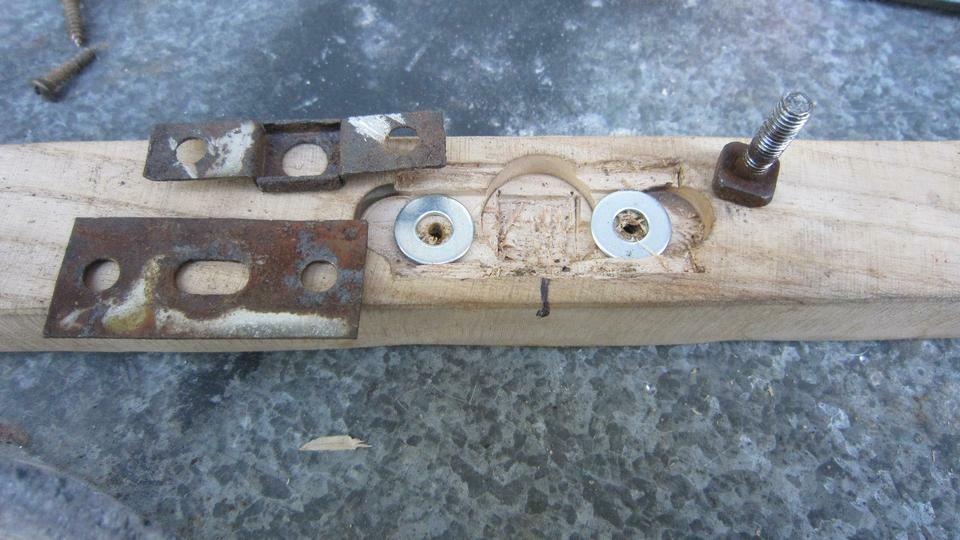
No parts supplied for the two floating studs on bottom of the wood rails. The Service Parts List says they are same parts as used for the rear wood rail. Scarborough Faire says they are different, and they do not have the parts to secure the side rails. Reuse the old parts? Not likely as the old parts are 65 years old, having been reused with first restoration, now rusty, and I would much prefer to have all new fasteners. In fact the old fasteners now removed are indeed the same as for the rear rail. A hint of deception here, more about this later.
Well, if I clean off some surface rust and run a threading die down the square-head studs, most of the parts do appear to be reusable, except for one cage bracket, for which I will have to make a new one. The square cages are on the large side, which can allow the stud to rotate, especially when trying to remove rusted nuts later. So I like to squeeze the cage slightly in a vice to remove some clearance. Works like a charm.
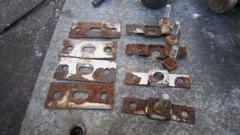
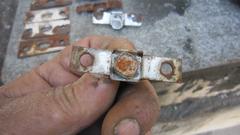

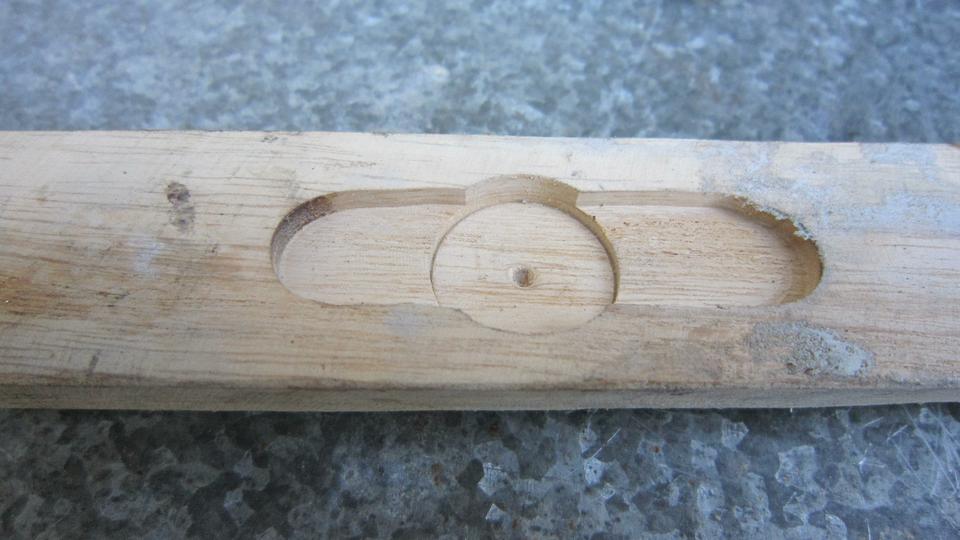
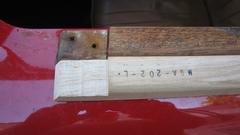
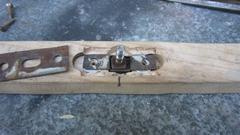
Another problem with the new wood rails, machining underneath for installation of the floating studs was all wrong. Strike #4. At least one of the slots was too far forward (or back), so good thing I did a trial fit on the doors before installing these fasteners. The milled slot was correct width for the cage bracket, but there was no relief for the flat metal closure plate. (That's the new cage bracket I made in the center picture). The counter-bored center hole was also not quite deep enough for the cage bracket, so this was going to require some effort for hand chiseling to make the brackets fit.

Then the milled slot was too deep for two layers of metal brackets, the fix for that was a pair of #10 flat washers dropped into the slot before the metal parts. Finally a decent fit. Rinse and repeat three more times.
Looks like the parts are going to work out okay after all the fettling. Navigator busy installing all the fiddly little washers and nuts underneath.

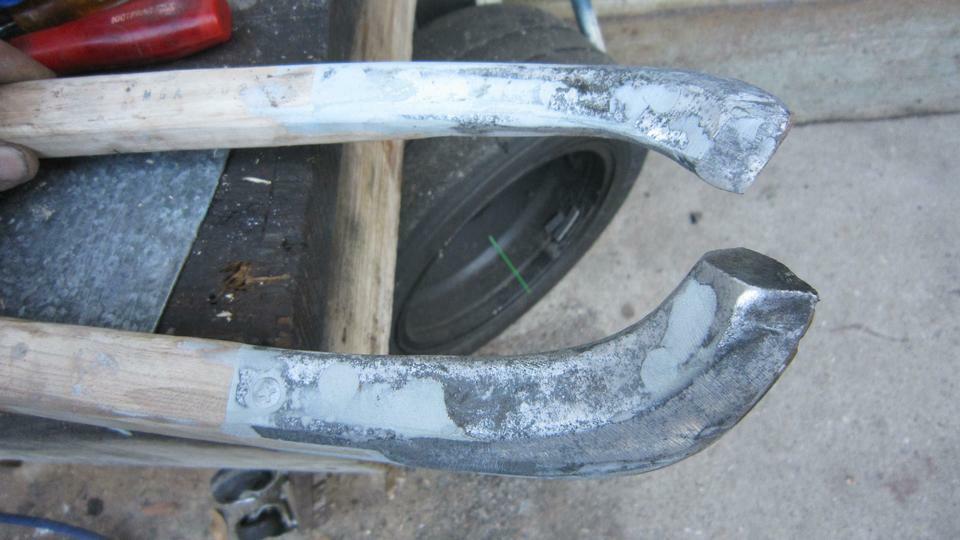
Now for the left over new aluminum front corner rails, just drop them right into that garbage can please. More then $20 each, and all we got out of them was the hard board tack strips. Live and learn. Take a few minutes to install new packing in the front parking lamps as we were stowing some other new order parts into inventory. And look what just showed up, some split bronze bushings for the gearbox remote shifter assembly.
Running out of light, so fabric wrapping the door rails will have to wait. Pack up and head for late lunch and WiFi.
Wednesday, February 22, 2023:
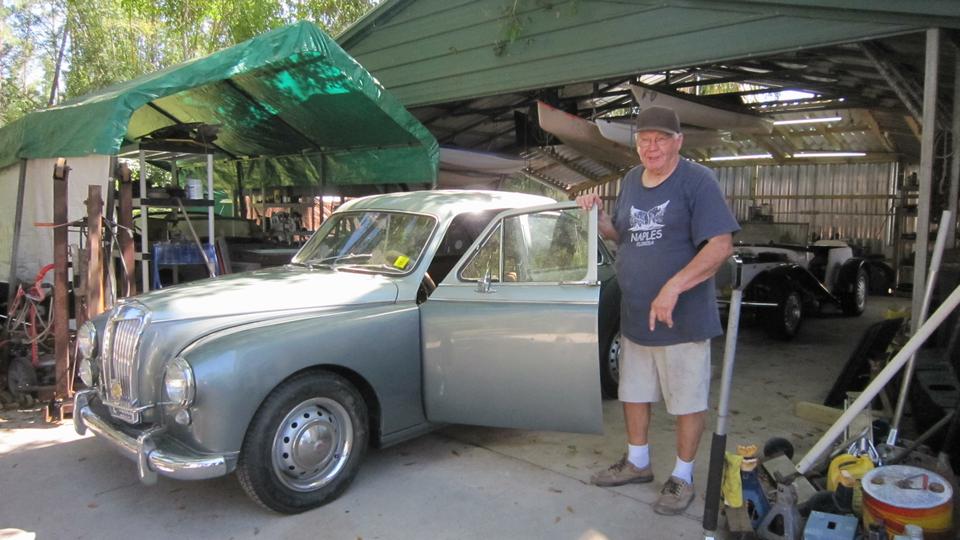
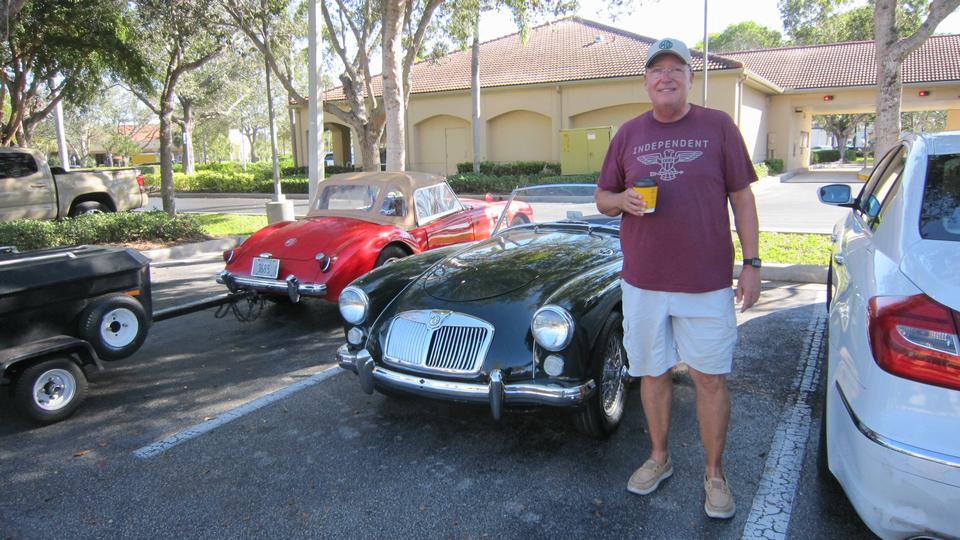
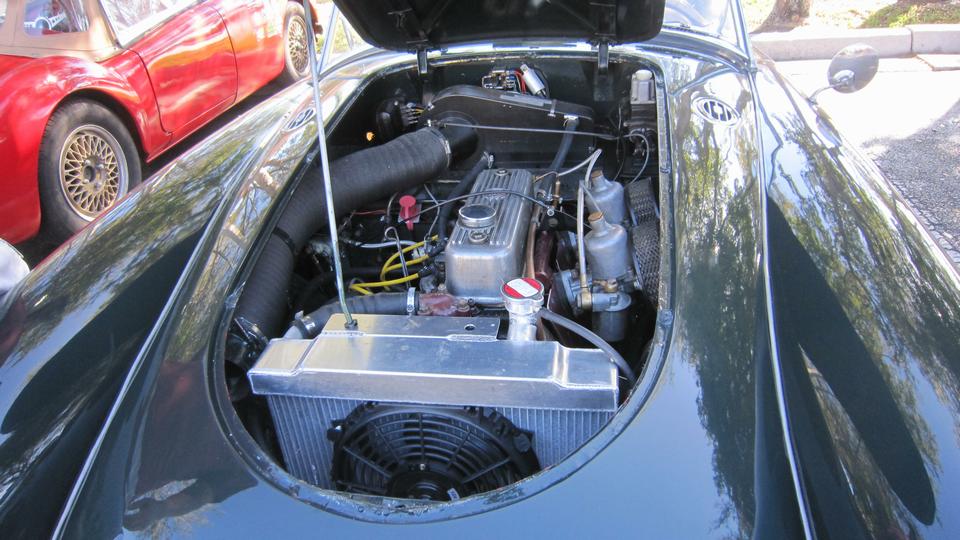
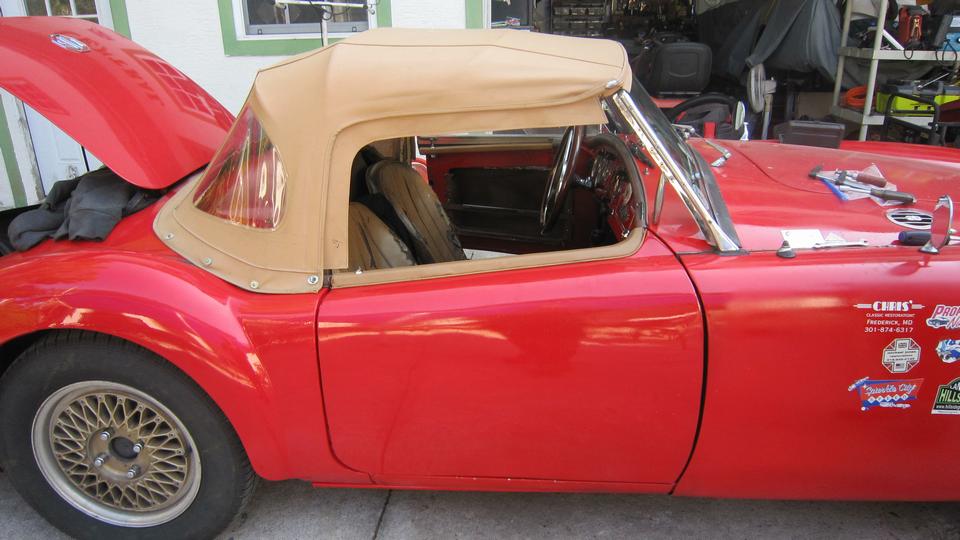
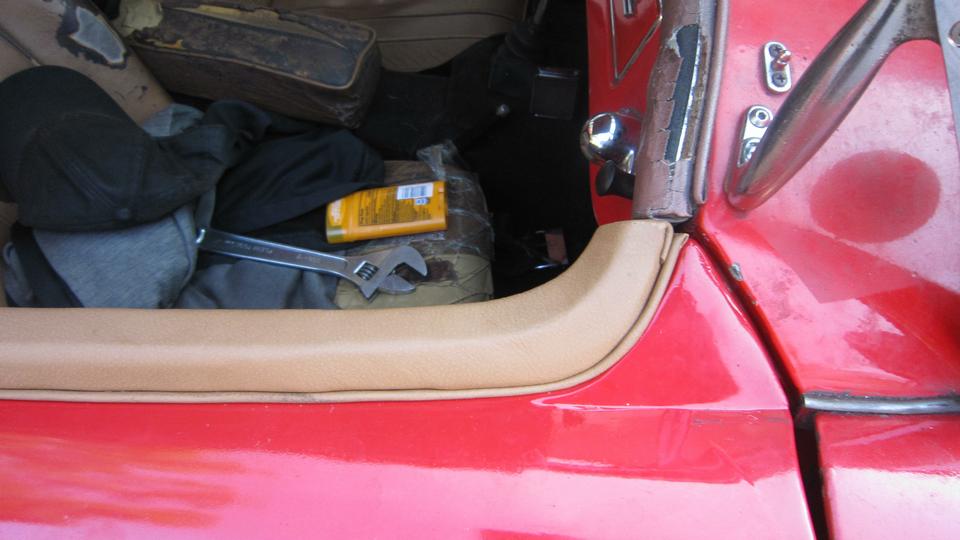
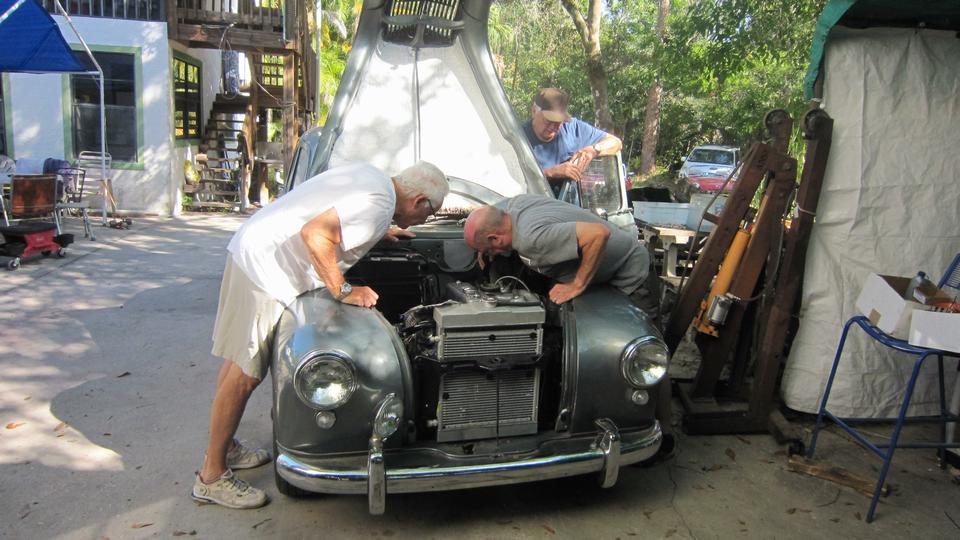
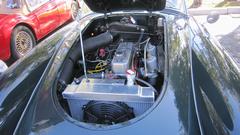
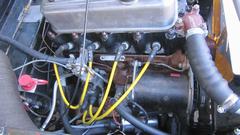
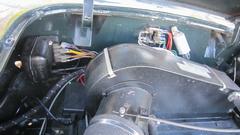
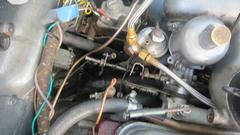
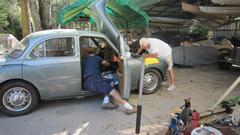
Programmed day off (sort of). We had a couple of visitors today, someone coming to see us for a change. First up was David Dillon from Naples, FL. He bought this very nice MGA 1600 recently from a "reputable dealer".
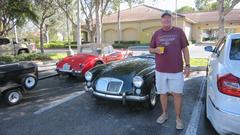
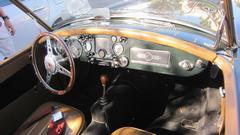
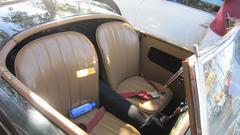
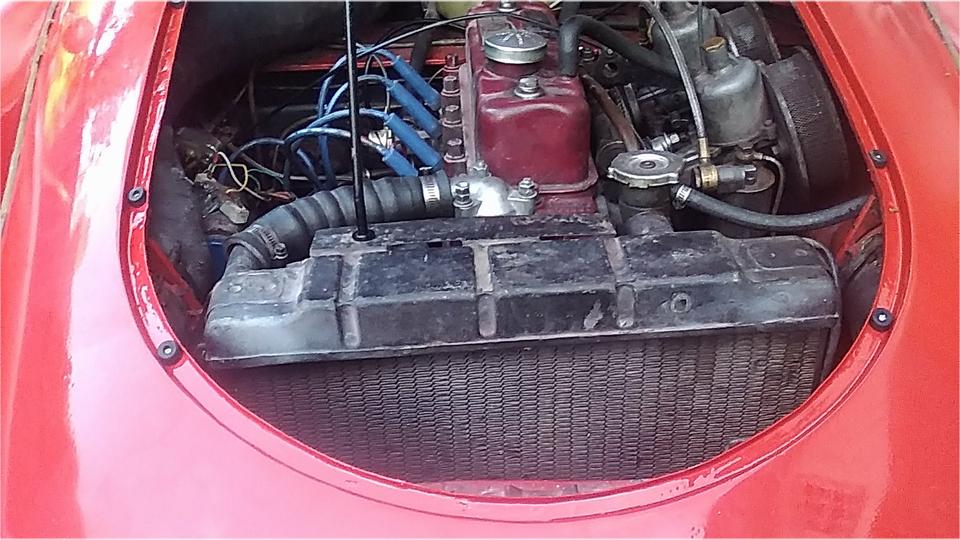
It came with non-functional first and second gear (loose bolt in the shifting fork), and cracked cylinder head. Wonder why the seller was so adamant about installing an aluminum radiator with electric fan (that still did not fix the overheating problem). All fixed now, and enjoyable driving for that past two months. I like the battery hot cable jumper terminal easily accessible in the engine bay, and the fuel filter just below it (not always a good omen). Nice alloy valve cover, but no crankcase ventilation from valve cover to air cleaner?
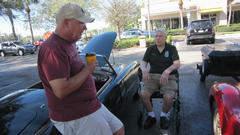 While we were chatting about the cars, our next friend arrived. Say hello to Conrad "Sandy" Sanders also from Naples, FL. He has a British car shop, but pretty much shut it down after some health problems. Now selling the shop, and the buyer intends to keep it going into the future.
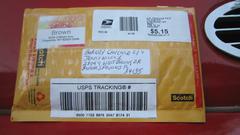
Most of the rest of the day was escaping quickly as I was trying to fix a UPS delivery problem. The package we sent to Oklahoma Monday afternoon is apparently being sent to a non-deliverable address due to a mapping program data error (a UPS problem, not my fault). First I couldn't log into the UPS web site. Had to change my password to fix that, then discovered that I am not the "sender" of that package. The UPS store is the sender, and they will have to request re-routing of the package.
So I called the UPS store to make the request, and they said they can't do it, because it is a franchise store, and once the package leaves the store responsibility for it transfers to UPS corporate. For the rest of the day the nice lady at the UPS store was busting her buns calling and negotiating with UPS corporate to get the delivery rerouted to a different address, including seemingly unlimited reasons why it could not be done. Still unresolved at day's end, and it is scheduled to be delivered tomorrow. Sheesh!
Thursday, February 23, 2023:
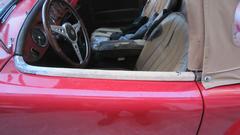
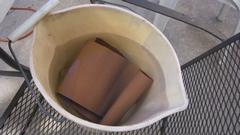
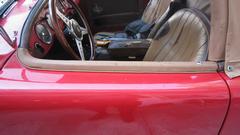
Determined to get the door trim rolls covered with leather today. Pull the door rails off the car, and start with a bucket of water to let the leather soak for a while to be easier to stretch over the contoured trim rails. Tools will be scissors, pocket knife, a razor knife with some extra blades, electric stapler with short staples, and some adhesive to put the piping strips together before attachment. Then we got real busy with two guys and four hands, and next time we could take a picture was after the rails were finish covered with the piping installed and bolted to the car. Not to worry about the tech session though, as this process has long since been documented in the tech section of this web site.

You may recall from Tuesday's rail assembly session that the wood rails were thicker than original. I power sanded the bottom near the front to match thickness of the front corner metal rail (tapered gradually thinner near the front). Figured the rest of it would look okay being thicker, but forgot about length of the chrome socket at the back end. First I installed the chrome socket through the hole with the flat washer plate and nut on the bottom. Then tighten the nut rather dramatically to pull the top flange down, depressing the leather and making a slight counterbore style depression in top of the wood rail. Then install it on the door using a C-clamp to pinch it down tight so we could get the large flat washer installed underneath with the big nut turned on at least one thread. Then tighten the big nut, hoping to get it on maybe three turns to be secure. If I had to do this again I would take the time to thin down the whole length of the rail to proper thinner spec as original.


Don't mind the old fractured rubber bottom seal on the side curtains. These were the new old stock parts sitting around since the 80's just unwrapped and installed last July. That's when the rubber cracked up and fell apart as we were trying to trim it to fit.

Then similar pictures on the other side, but I think it fits a little bit better on the left.

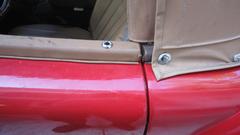
Ideally the bottom rubber seal should be trimmed to cover the piping but not quite touch the paint. Finicky trick if you can pull it off. We may get to try installing new rubber seals, if we can find a source these days.


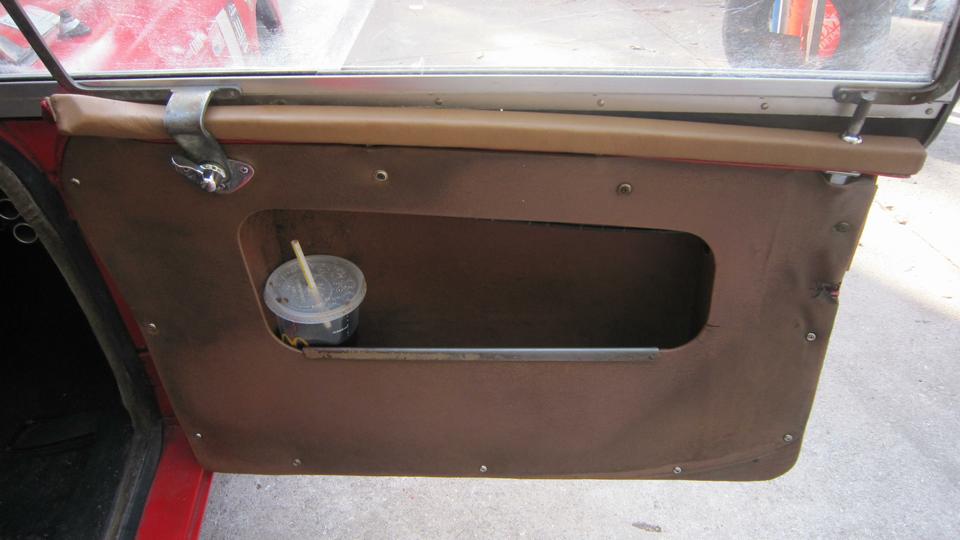
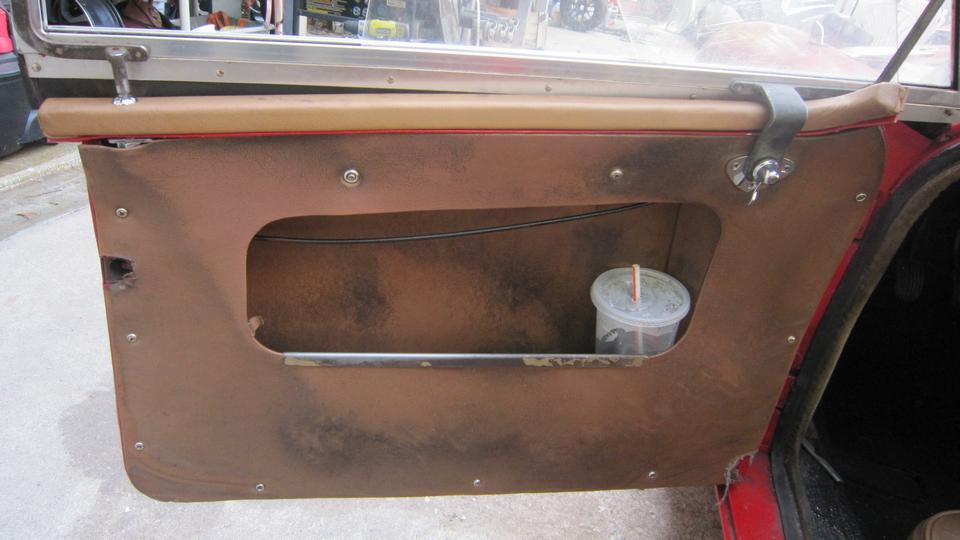
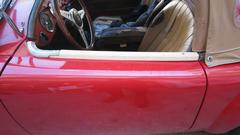
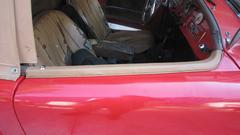
 There it is back together with door panels and side curtain brackets installed. Uh, that was a rude awakening. Maybe we should try cleaning the old panels sometime. At least we got our door pockets back. Hot day, so pack up and off to WiFi.
Friday, February 24, 2023:
Tech day at Tech Central, time to play with other cars (if we can get the guys motivated). Reworking the mechanical throttle linkage on John's Magnette agian. Cut and weld for another bell crank rocker angle this time.


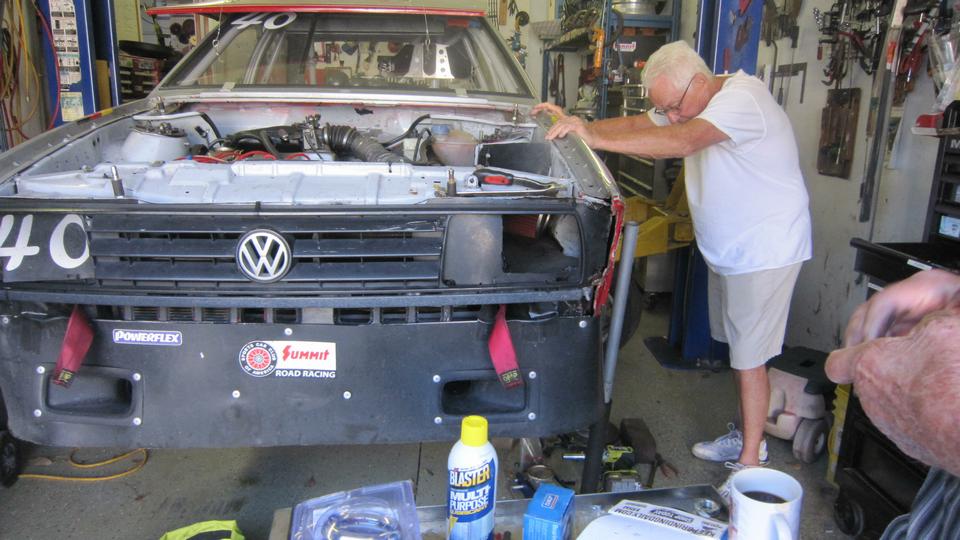
The racing Rabbit was getting a custom Heim joint replaced on the left lower A-arm, and installation of the wheel bearing that was freshly grease packed a few days earlier.
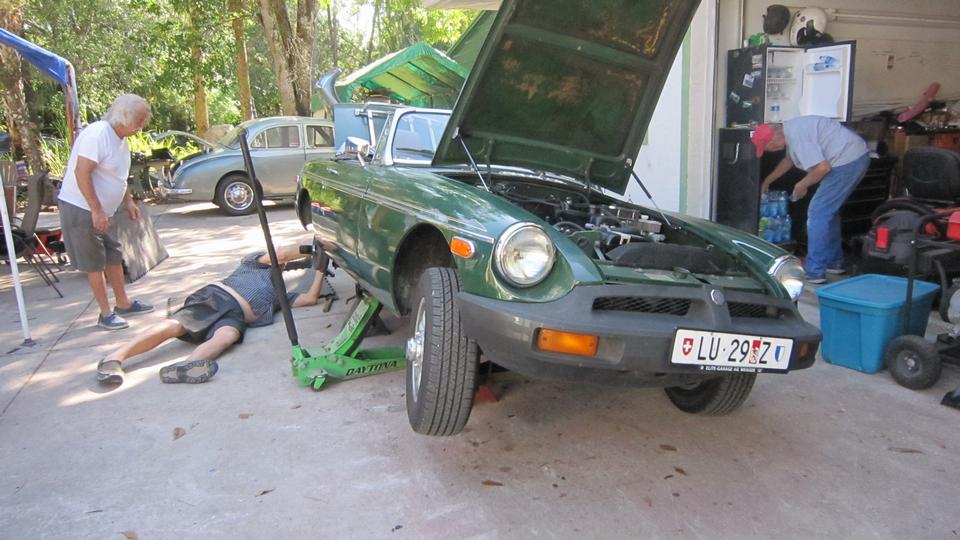
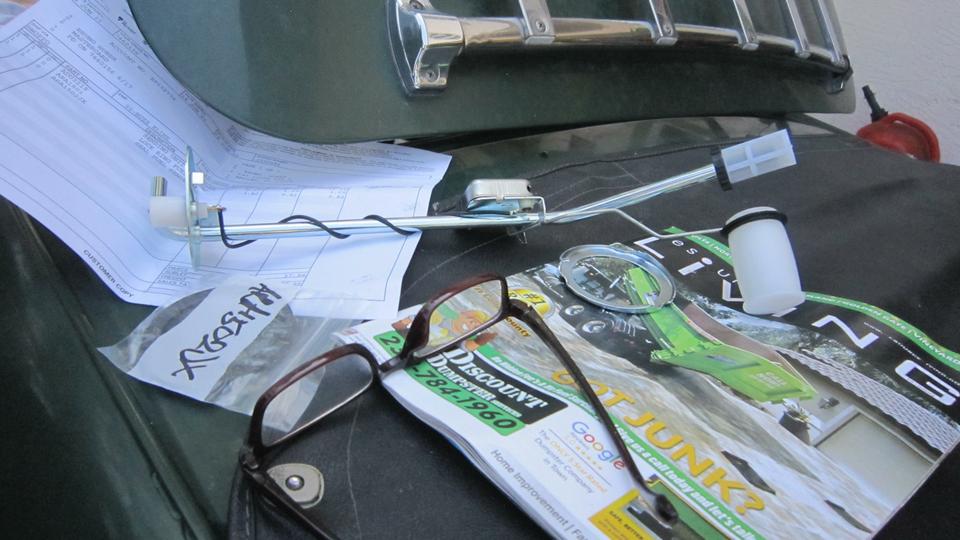
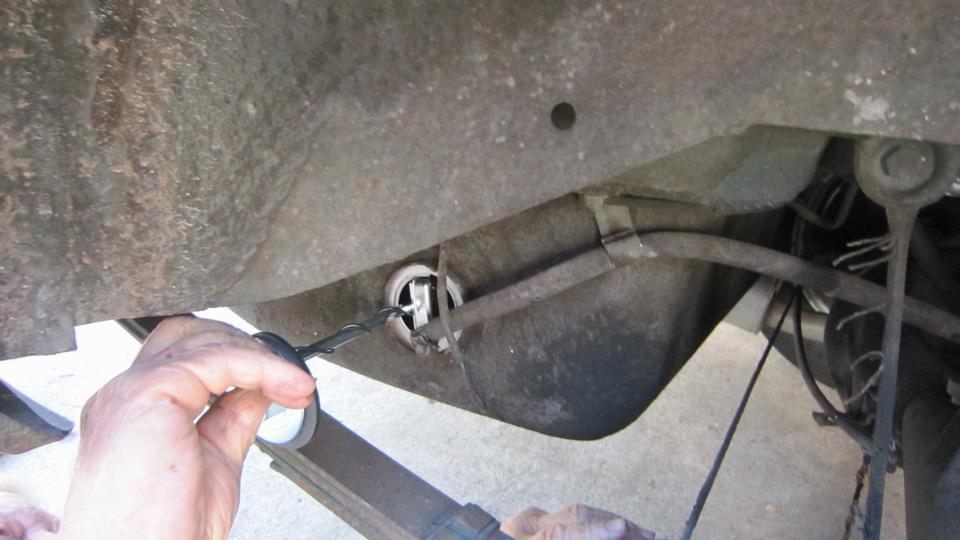
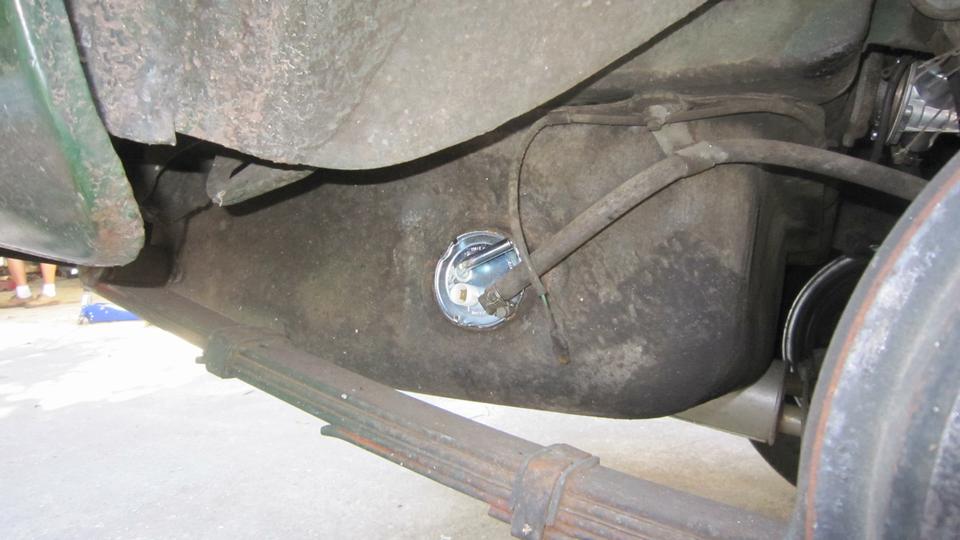
An MGB was getting a new fuel level sending unit, jolly good fun.

All buttoned up, reconnect the fuel hose and signal wire. Three cheers when the fuel gauge actually worked for the first time in 10 years. Say goodbye to the old plastic float with the fuel sloshing inside.


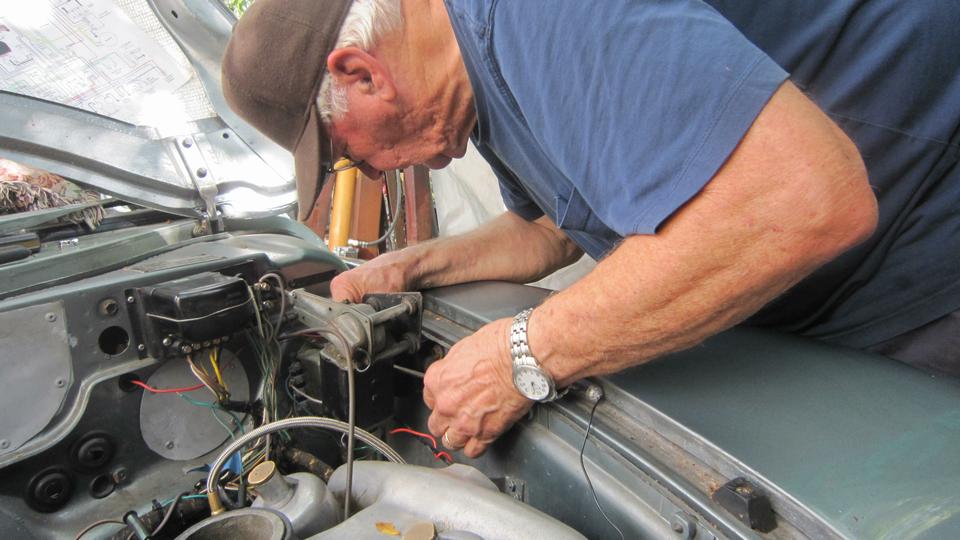
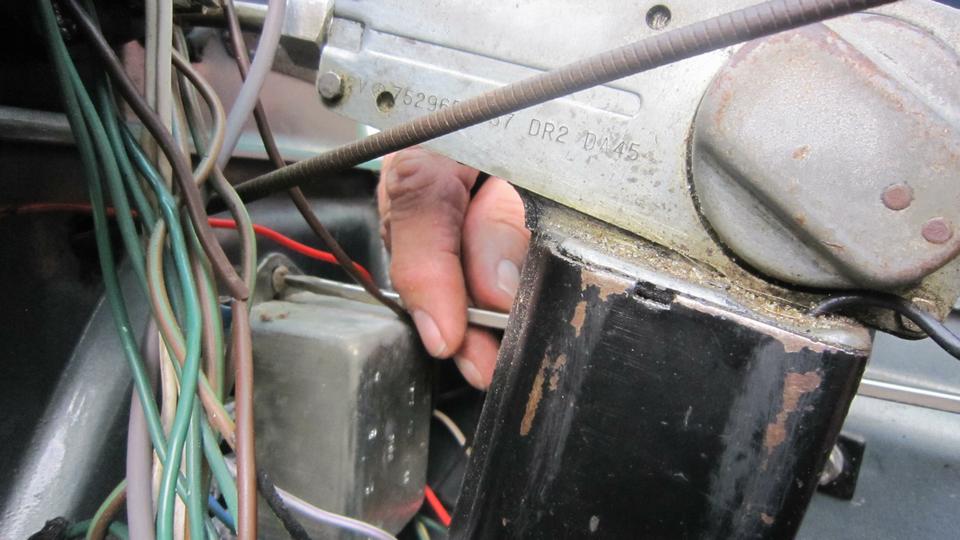
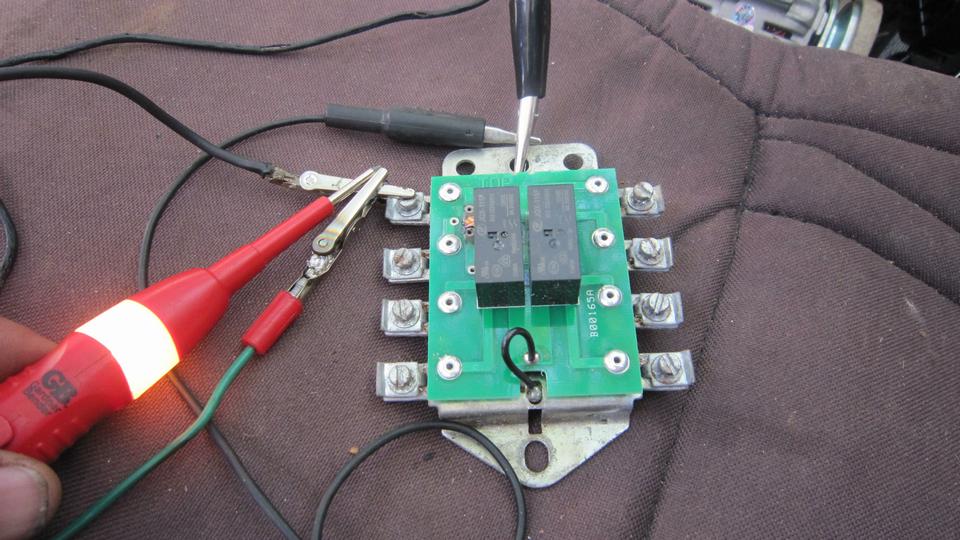
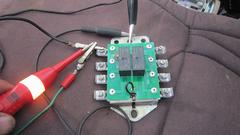
More work on the Magnette, debugging a flaky turn signal relay. No connection for the brake lights, looking like a corroded contact in one of the relays. Need to remove it from the car before removing the cover.
When we opened it up we found a replacement type unit from Moss Motors with miniature relays on a circuit board. Circuit testing turned up a burned track on the circuit board. A glob of solder to bridge that gap got it working, then reinstalled and back in service.


 A 1967 MGB had a generator not charging. Testing in and out of the car revealed a non-functional generator, rather unexpected since it had just been rebuilt. The owner ran out of time today, so we put it back in the car so he could drive it home.
Once everyone else had left I had a few minutes to check my turn signals that quit working last night. Changed a flasher unit to get it to blink again. Also reconnected a wire from small relay to turn signal switch to get the 4-way flashers back on line. --- For some time we have had a dash indicator light (pilot lamp) that would only blink for left turns, not right turns, even though the outside lights were blinking properly. Pretty sure that would be a failed diode that I had installed on back side of the turn signal relay nearly 20 years earlier (so we could use a 2-terminal flasher unit). I dismounted the relay unit to verify the dead diode, and apparently broke the other diode in the process, so now the dash indicator does not flash at all. Grrrr. Problem for another day.
In the evening I got a call from one of the organizers for NAMGAR GT-48 (coming up in June in Memphis, Tennessee). Yes, I will be there as a presenter of one of the tech sessions. This was mostly a reminder that I still needed to register for the event, which I did. But also spent two hours on the phone discussing organization of the event and problems with their event web site. Then I got to eat a cold dinner before posting today's photos and notes.
Saturday, February 25, 2023:
I think we have the weekend off. Time to relax for a change and smile while thinking how much work went into repairing the MGA body work and making it all one color again (and feeling so good about it being finished). Answering a few tech questions, and beginning to plan ahead.
Sunday, February 26, 2023:

Laundry day (has to happen occasionally). Sometime in the evening I posted a new tech page for MGA part number AFH2579, special washer for mounting the MGA side curtain and door trim rail on top of the roadster doors.
Monday, February 27, 2023:
 Went to Tech Central because John Shoemaker wanted to poke around his ZB some more. Having to R&R the turn signal relay bux a few times, John took my suggestion to heart and made a captive bolt mounting bracket,so it can be changed from the engine bay without needing a second person under the dash to hold the other end of the fasteners. Unfortunately, the relay unit is still duff, so that stopped his enthusiasm for the day.
As the Porsche 914 has been making some progress on body work, the doors were getting epoxy primer paint.
After the party broke up, we got to tinker with the MGA a bit. The simple (not easy) task was to R&R the rubber bonnet buffers to install two #10
flat washers under each one to raise the bumper height a bit. This was needed because the rubber parts supplied by Moss Motors were too thin, barely as tall as the depth of the gutter. The washers raise the bonnet enough to be flush with the front body cowling.
That done, the turn signals were dead and needing attention again. Another dead flasher unit. Solution there was another trip to the parts store to buy a couple more flasher units (more poor and rapidly failing parts).
Tuesday, February 28, 2023:
Most of the day spent transcribing the MS Publisher copy of the CMGC March newsletter for posting on their website.
|