The MGA With An Attitude
MGA Guru Is GOING MOBILE - (July 16 - July 31, 2021)
Friday, July 16, 2021:
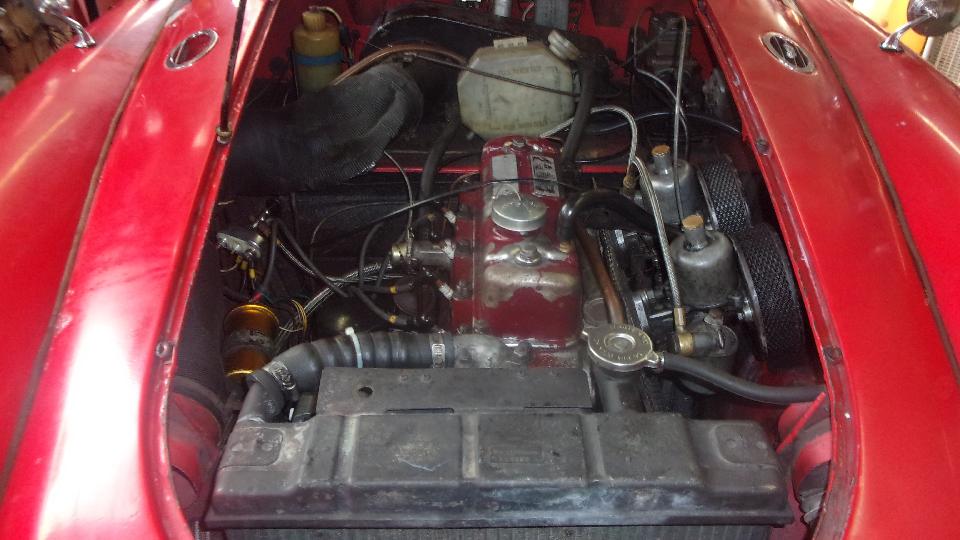
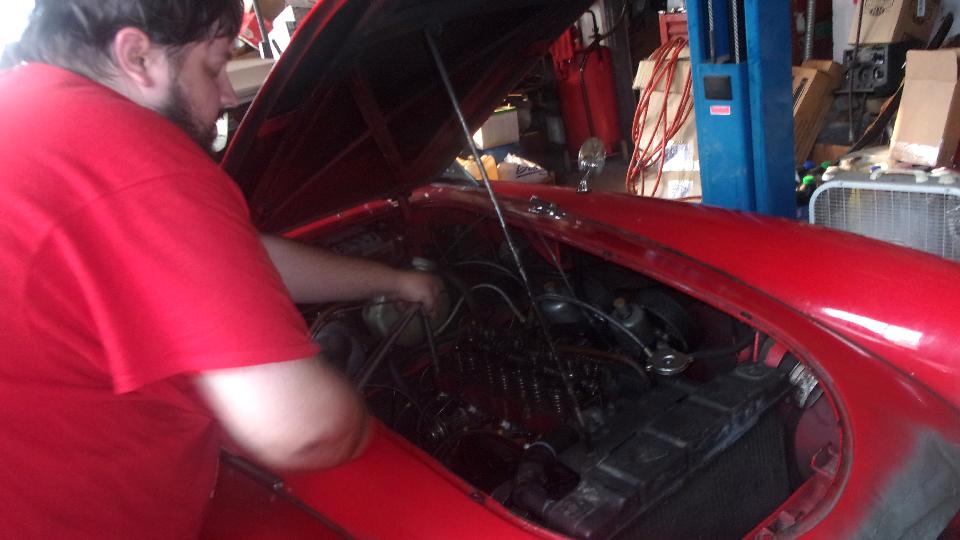
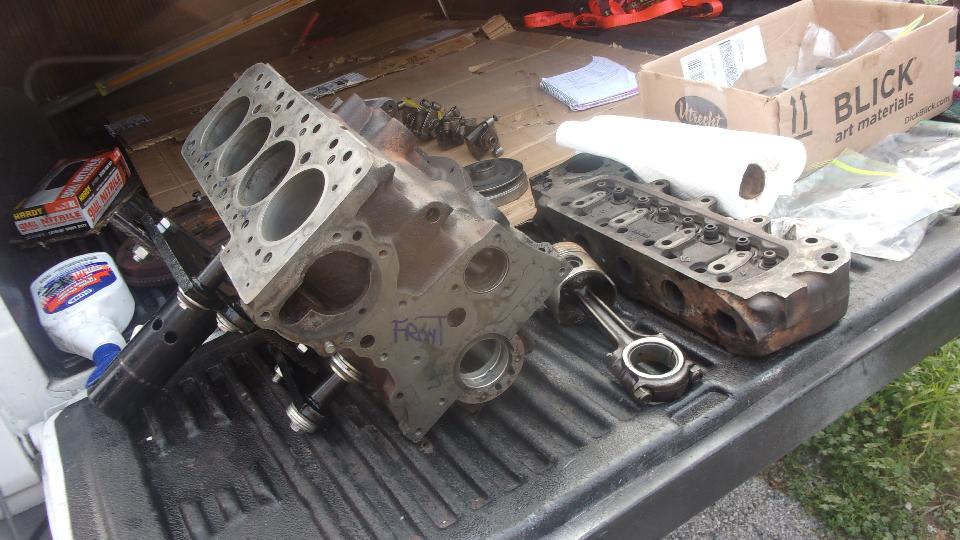
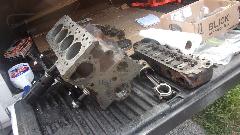
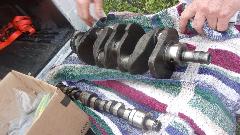
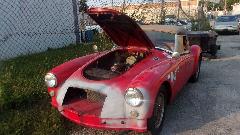
Back to the garage in York, Pennsylvania to continue assembly work on our MGA engine. New rocker shaft, camshaft, tappets and pistons were installed the day before (Thursday) after the late Wednesday parts delivery. Things were going a little slower than optimum due to heat (94dF by late afternoon) requiring periodic rest and re-hydration breaks in front of big fans, and a few "sidewalk supervisors" and helpers with good intentions engaging in tech session questions.
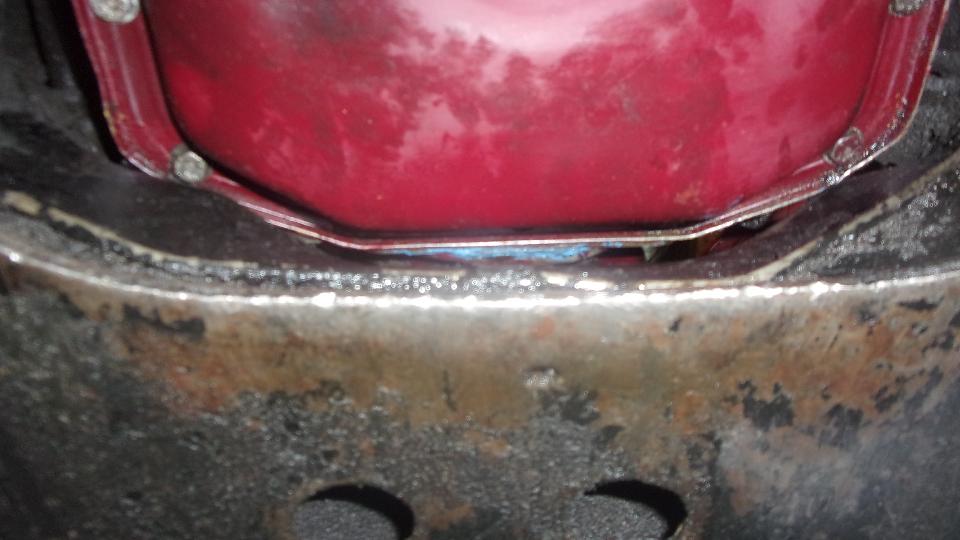
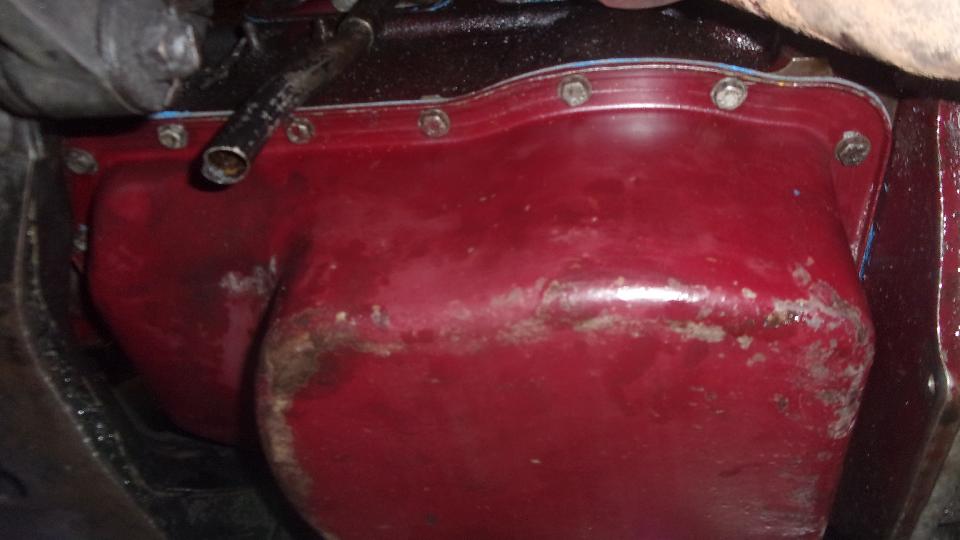
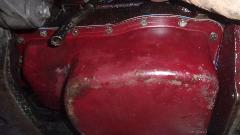
 First discovery was that when navigator was cleaning parts he didn't remove gaskets form the timing cover and sump, so there was some time required for scraping flanges before the sticky stuff and new gaskets being installed. Tappet covers were first (just a matter of convenience), then the timing cover (with only a few skinned knuckles). Place a small block of wood between crankshaft and engine block to hold the crank still while torquing up the front crank nut. install the oil pump, and finally the sump (with lots of swearing at the difficulty installing the two front corner screws). First discovery was that when navigator was cleaning parts he didn't remove gaskets form the timing cover and sump, so there was some time required for scraping flanges before the sticky stuff and new gaskets being installed. Tappet covers were first (just a matter of convenience), then the timing cover (with only a few skinned knuckles). Place a small block of wood between crankshaft and engine block to hold the crank still while torquing up the front crank nut. install the oil pump, and finally the sump (with lots of swearing at the difficulty installing the two front corner screws).

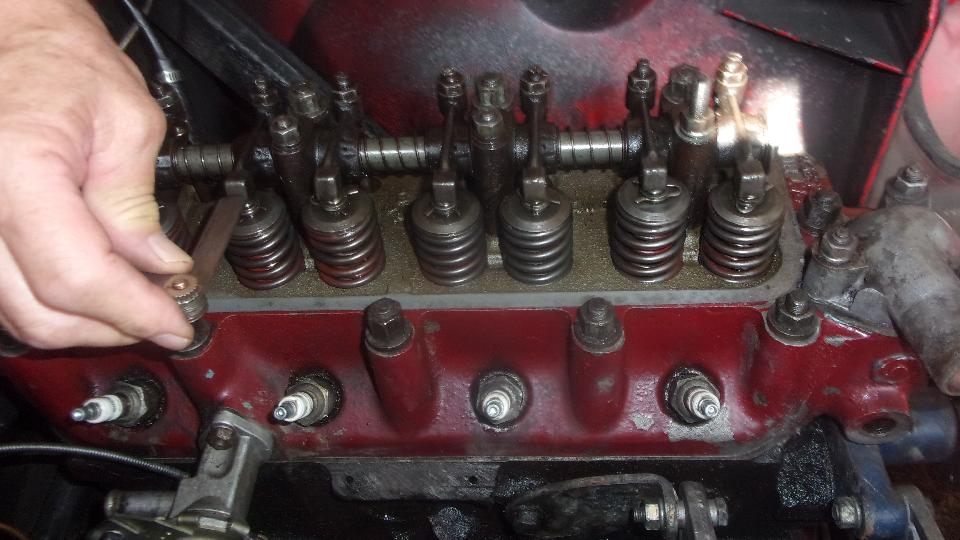
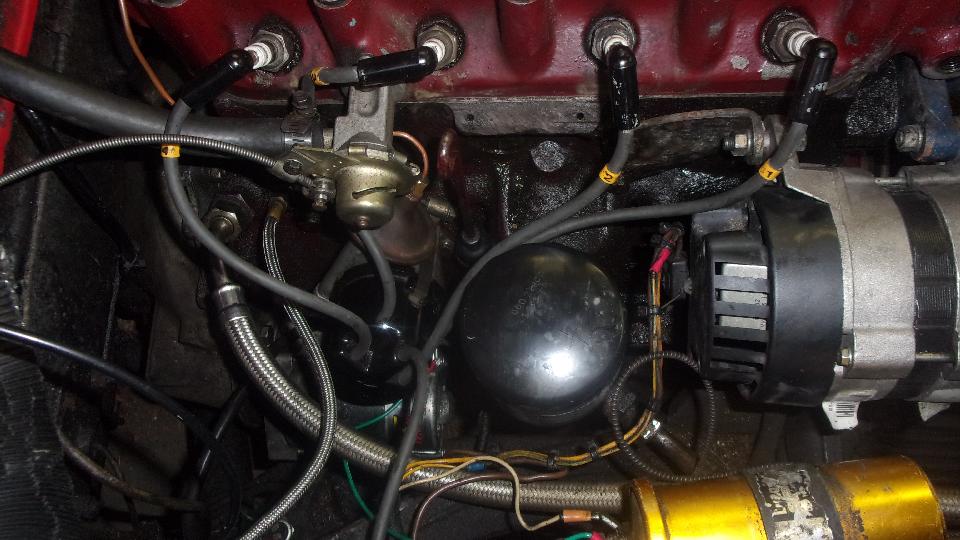
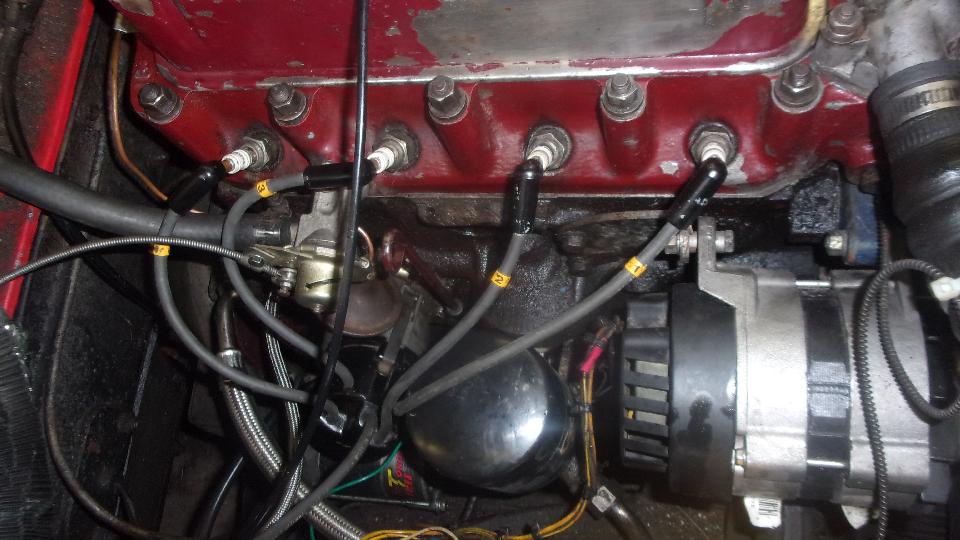
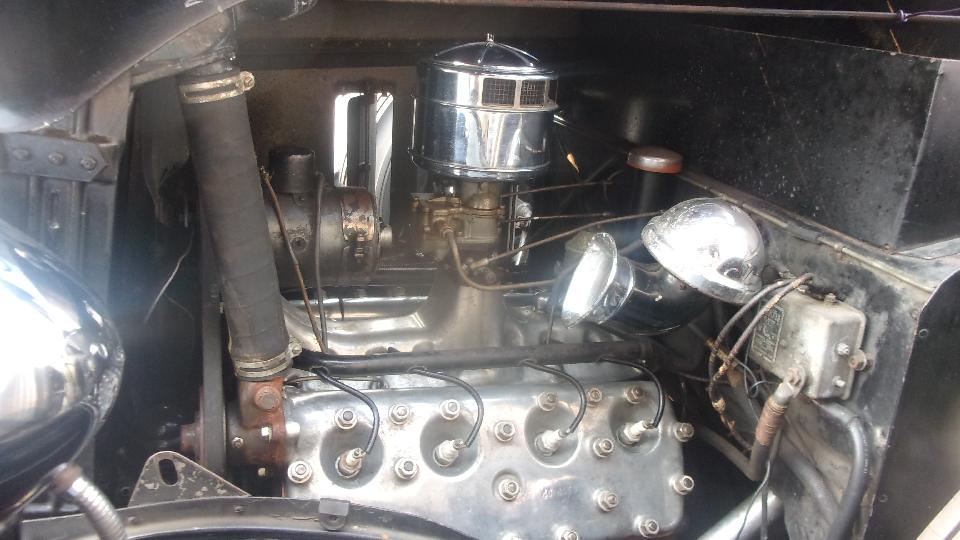
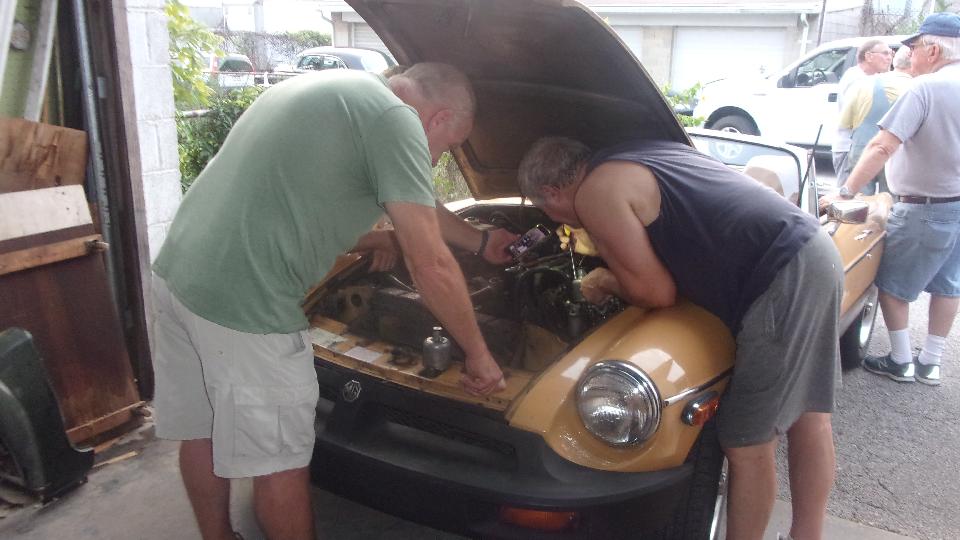
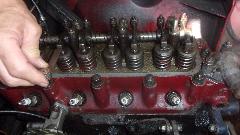
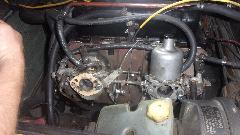
Then clean and reinstall the cylinder head (one of the easier chores for the day). This was immediately followed by a tech session demonstrating how to adjust valve clearance without a feeler gauge (the feeler gauge being used to check and verify the results). Another tech session demo'ing installation of the distributor drive gear. Some redundancy and fiddling around may have resulted in a timing problem that would haunt us later. But finally distributor in and static timed, cap and wires on, heater hose and control cable connected. On the other side, install the new exhaust manifold and (old) intake manifold, followed by hooking up the exhaust pipe to manifold joint. All that fairly straight forward stuff.
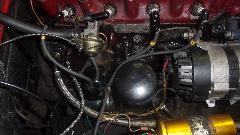

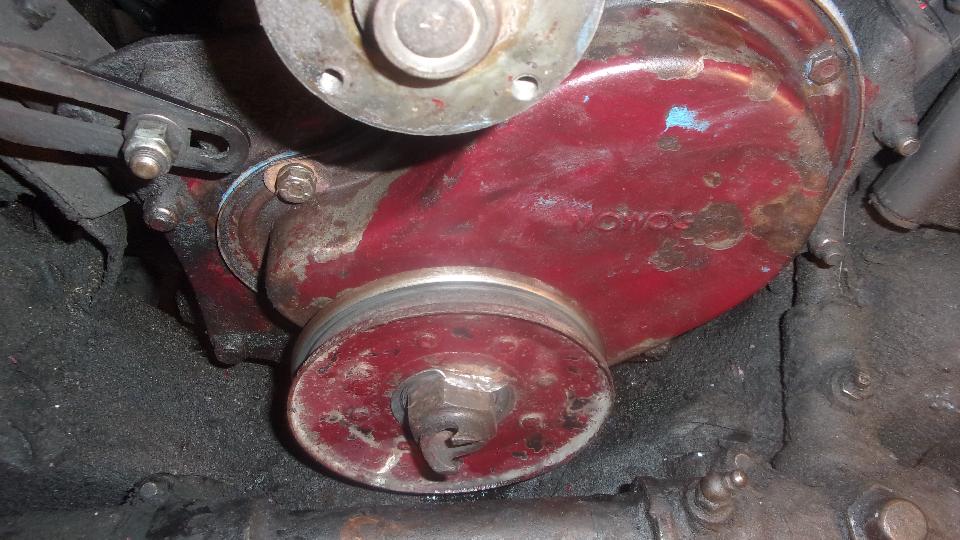
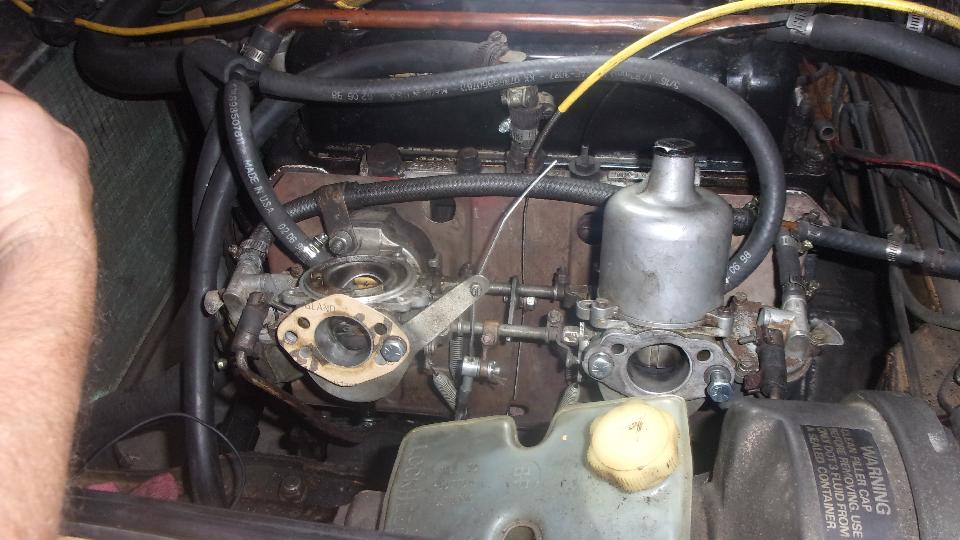
Then we really got busy, thinking we could get it finished and drive away by end of day (wishful thinking), and I didn't get any more pictures (oops). We installed the carburetors (sans air cleaners), then the water pump pulley and fan blade (without moving the alternator). The belt was a little loose, so we took a few minutes to re-adjust belt tension (while it was most convenient without the radiator in the way). Then install the radiator and all hoses and the fan shroud (kind of a pain in itself). Then a quick four small bolts to secure the oil cooler, and pour in the coolant. Surprise, coolant leak. Forgot to install the temperature sensor in the head, but that was quick and easy, and top up the coolant.
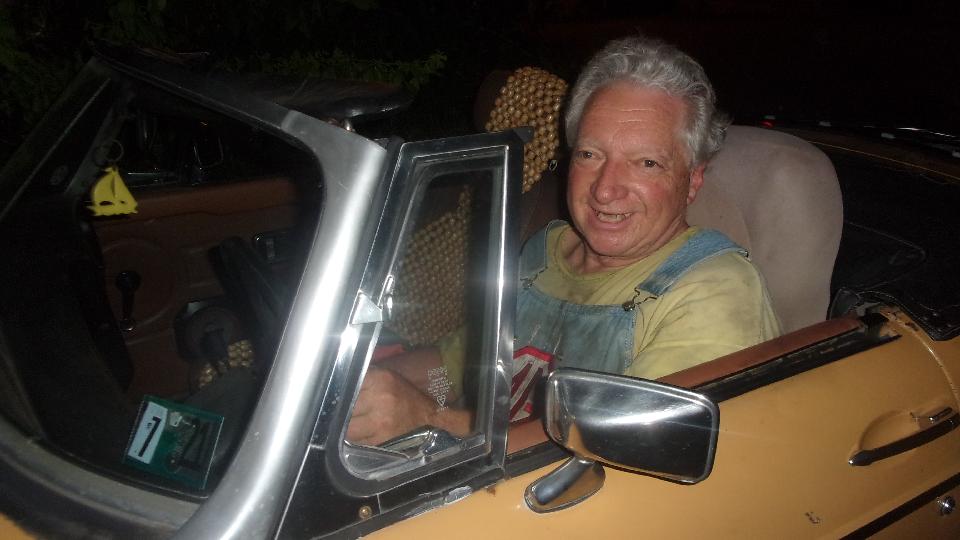
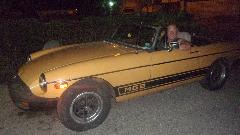
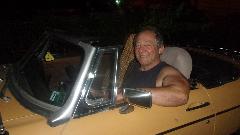
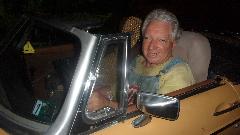
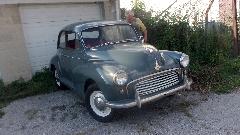
Late night by this time, and a couple of supervisors about to call it a night, but we were going to try cranking it up. Grinding noise? Oops, fan shroud touching the fan blade (one of the helper's mistakes). That killed another 15 minutes realigning the fan shroud. Less than a minute of cranking brought up oil pressure (big grin). Key on, fuel pressure up, apply a little choke and a bit of throttle, and give it a serious crank. Wonderful cranking, but no fire, not even a single pop, and the bottom instantly fell out of the enthusiasm. It was 11-pm, everyone hot and tired, so we called it a night before trying to do diagnostics (when we were all tired and might be making mistakes). Okay, clean up a bit, grab a clean shirt, borrow the Morris again, and head out to catch some sleep.
Saturday, July 17, 2021:
Another hot day, destined for 92dF high (and rain). Tomorrow should be no more than 80dF for high, so I recon
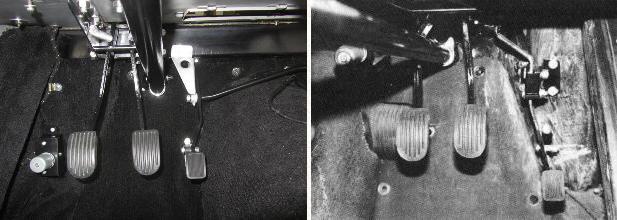
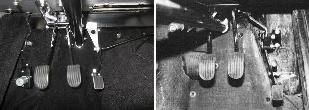 we will take today off to recuperate and catch up clerical work. Added a new tech page showing difference of pedal positions for RHD and LHD cars. Then doing up yesterday's work day photos and notes (above). Spent some time updating my parts inventory list after order receipt, and rebuilding carburetors and repairing engine. And there are a lot of BBS messages and some email pending, so plenty to do while resting up.
Sunday, July 18 2021:
Nice working weather today, so back to the garage and start with diagnostics. Cover off, check valve clearance and valve/cam timing, all okay. Spark looks okay to me, but navigator is bugged about bad condensers, so I jump-wired in a new condenser, got very good spark, but still no fire. And it won't even start with a sniff of starting fluid. Scratch head, and do a compression test, just to be sure, Say WHAT??? Nice regular 60-psi compression on all four cylinders, and discouragement hit a new high.
 Knowing that the head and valves are okay, and it has a new head gasket, that can only means "faulty" or weak connection between piston rings and cylinder walls, leaking compression downward. Really not wanting to pull the pan and head and a piston out for measuring things. Try squirting a generous dose of oil into the cylinders to verify leaking rings. Sure enough, compression jumped from 60 to 90. So at least we know the problem. Seems like rough honing the cylinders left the bores a little too rough. It makes sense, just surprising, as I have never had that problem through many times honing cylinders over past decades.
Not going to fire with 60-psi compression. Generous oil in the cylinders brought compression up to 90-psi so we gave it another good crank-over, and it finally fired a few times, then began running weakly, and quickly picked up running on all four cylinders. Huge cloud of white smoke out the tail pipe of course, but that would abate in a few minutes. Enthusiasm picking up, as we will not have to disassemble the engine again, just keep it running for a while. Set idle speed to 2000-2500 rpm, and let it run at least 20 minutes to bed in the cam and tappets, and be sure the tappets will continue rotating.
Set idle speed back to normal (well, 1000-rpm minimum for now), fine tune fuel mixture and spark timing, then shut it off with crossed fingers. Reinstall the air cleaners, pack up the tools and toys, hitch up the trailer, fire up the engine again (YEE-HAA). Back it out of the shop, and leave it running while we clean up (shovel up) the floor. During the extended clean-up time, the engine and carbs got warmer, dropping idle dramatically, and it died (oops). Lots of fiddling to get it running again, including compression test and putting more oil in the cylinders, but we finally got it going again (with another big cloud of white smoke). It needed some running time, so we filled the fuel tank (while running, don't mention it), and headed up the expressway 20 miles to one of our known functional WiFi spots. Switch off, then crank it, and it started up again, so hopes now higher.
Updated a tech page for two-speed wiper installation (just a mounting plate revision).
Not running for two hours, but it did start again, hauling us a few miles more to out pre-planned night spot.
Monday, July 19 2021:
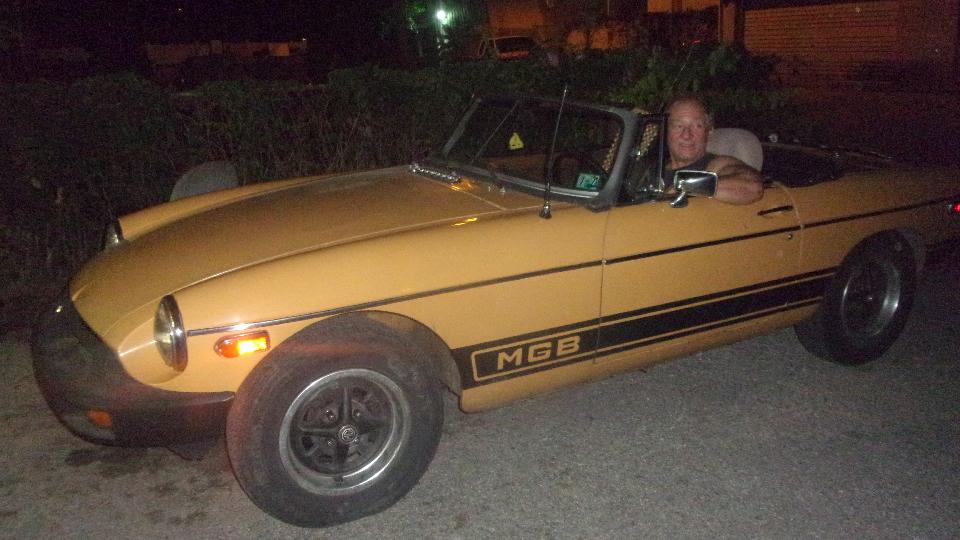
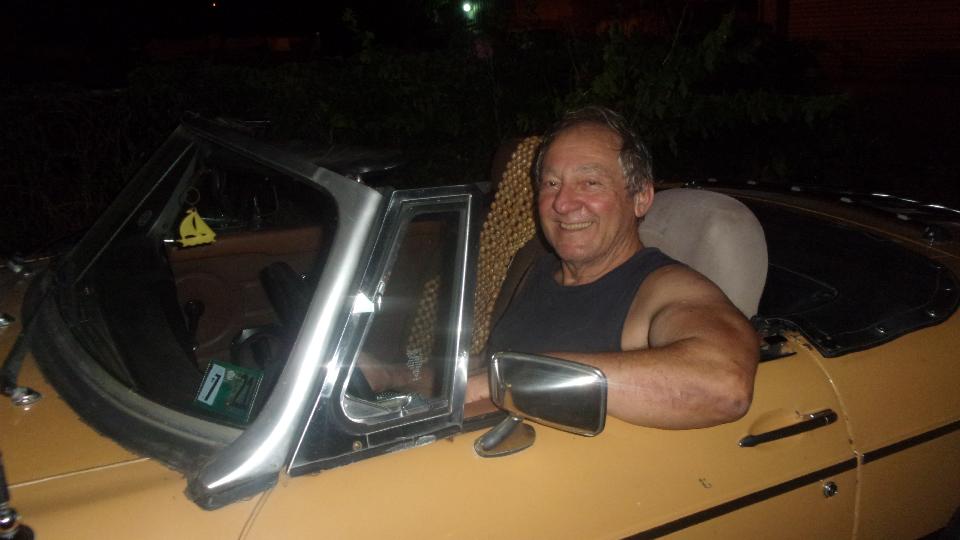
Good news to start the day, the car engine fired right up this morning with not much fuss, so last night's 25 miles driving must have done some good. Feels good to start the day on a high note rather than skepticism or depression.
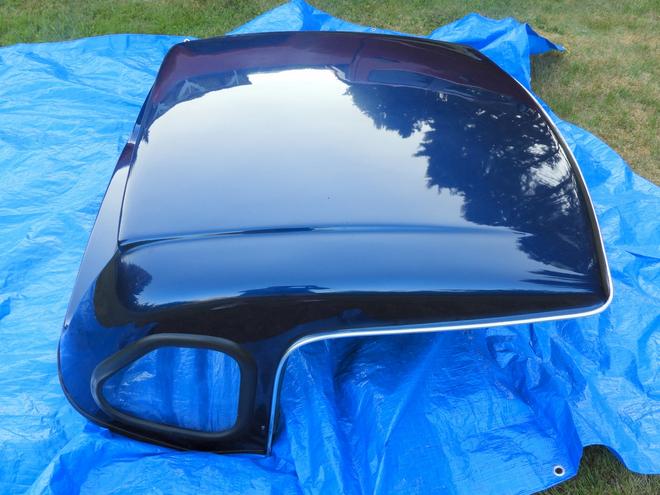
Found another variant of Thompson Fiberglass hardtop with different shape quarterlight windows. This came up on eBay with a resto-mod MGA with V8 engine and luggage trailer. Spent some time adding the hardtop pictures to a tech page.
20 miles north of York, hard rain in mid afternoon, and temperature dropped bit. When it quit raining we headed back into York, picked up some engine oil and shop supplies and oil filter and a feeler gauge (to replace one that went missing). No rain in York, and still hot, so we didn't luck out this time.
Back to Darrell's shop with the MGA, no one there, so we took the opportunity to run the Morris to the local shop for some non-alcohol fuel. Then off with the MGA valve cover to re-torque the
 cylinder head and re-adjust valve lash. Yeah, that's navigator running the wrench, getting pretty good at torquing head bolts in the correct sequence. Quick job, put the car back outside, still no one there. Couple of phone calls and another half hour wait, and two more folk showed up (including Darrell). We had a little discussion about needing a bit of brake work on the Morris, but it didn't get done. Did some shop cleaning, removed some old motor oil (55 gallons) for recycling (actually to be used as heating oil for the shop across the alley). Got late, near dark, still hot, so had a nice break outside, until it got to be later. All good intentions, but not much done. Will come back tomorrow night for the weekly gang meeting.
Tuesday, July 20 2021:
Spent half the morning updating the CMGC club web site calendar after they changed the monthly date for Natter 'n' Noggin, because the dates are on the calendar two years in advance. Also changing location of the monthly membership meeting. getting back to in-person meetings. -- Had some rather involved questions about MGA seat mounting and slide rails. Had to measure the parts in my car for the answers. Someone has a latch rail that is too short, not an MGA part.
Supposed to be laundry day, but that wasn't going to happen. At 3-pm the car wouldn't start, mostly dead battery, failed alternator again. The reason we didn't notice the failure earlier is because it is the lighting circuit failure (the terminal for the dash ignition light). When that goes the dash light does not work to warn you of the failure. This is second time for this failure mode, leaving us stranded, luckily not on the side of the road this time. Pushed the car down steep hill to get it started, drove back to the car park for testing, then burning hands on everything while installing a new alternator (from the magic trailer). Then visiting auto parts stores trying to get the duff alternator tested ti verify failure mode. First stop, broken testing machine. Second stop, machine just said "May be bad ground", which it obviously was not. So save it for another day.
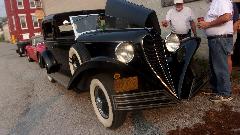
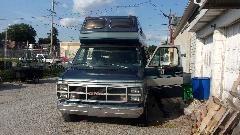
Back to Darrell's Garage for club night. The special car tonight was a 1934 Brewster Town Car, belonging to Don & Diane Weir in York, PA. Open driver cockpit, and very nice appointments for the passenger(s). V8 engine (likely fairly low power output). Something like 67 of this model ever built.


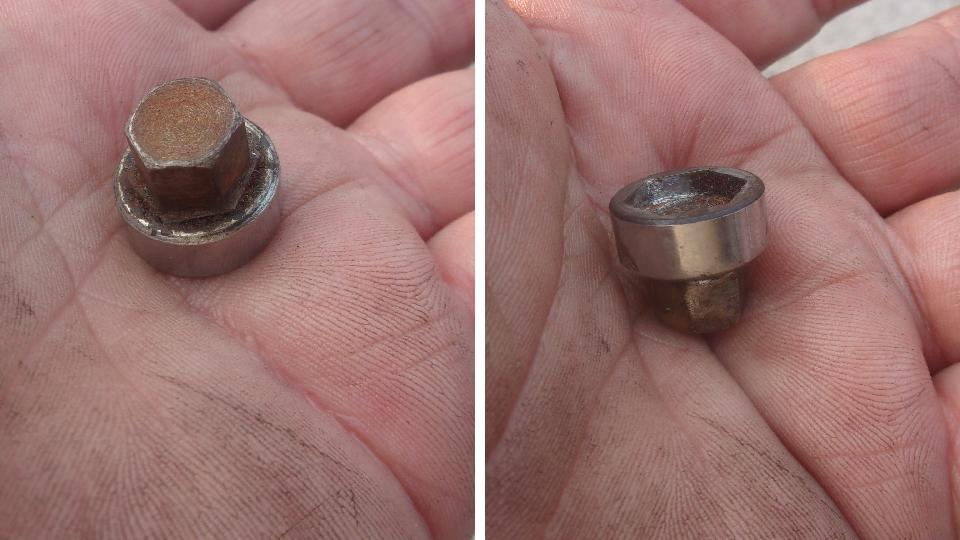
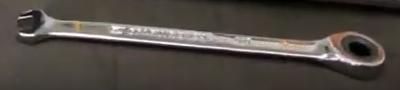
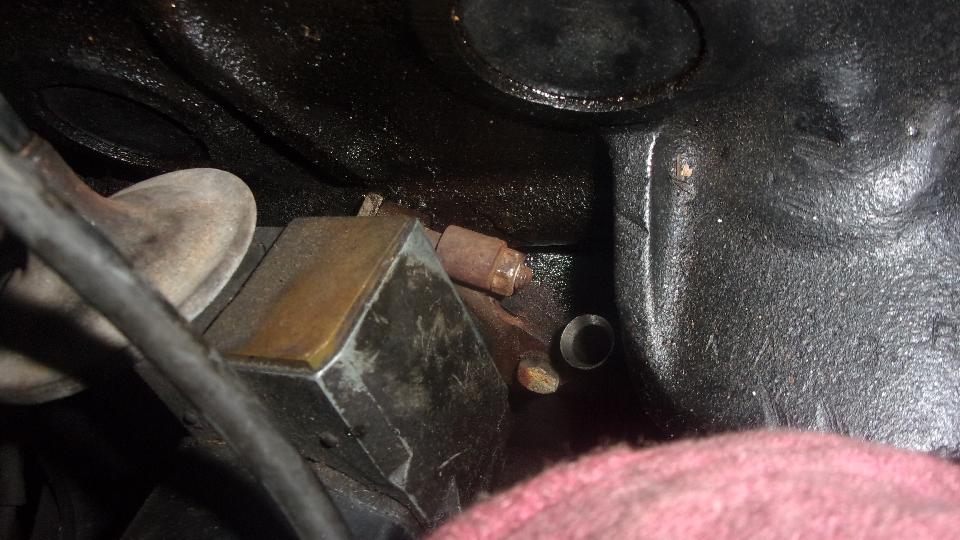
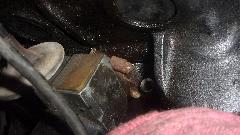
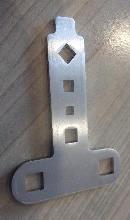
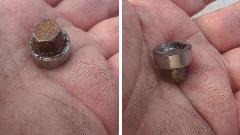 Here we have what may be the world's lowest profile wrench socket. It began life as a standard 7/16 socket, cut down, welded together with the hex rod, and re-machined to
finished size. The open end is 6-point 7/16-inch very shallow socket. The drive end is 3/8-inch male hex intended to nest into and be driven with a 3/8-inch gear wrench.
Here we have what may be the world's lowest profile wrench socket. It began life as a standard 7/16 socket, cut down, welded together with the hex rod, and re-machined to
finished size. The open end is 6-point 7/16-inch very shallow socket. The drive end is 3/8-inch male hex intended to nest into and be driven with a 3/8-inch gear wrench.
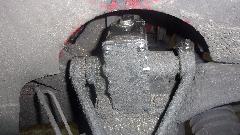
 The special use for this little wrench is to remove and install the two front corner bolts on the MGA engine sump (oil pan) where the front row of bolts is located above the front suspension cross member.
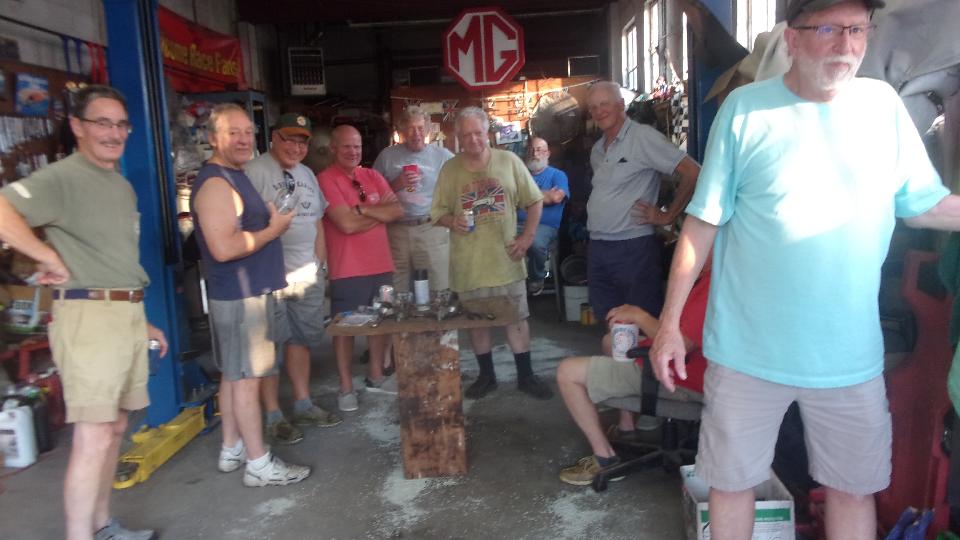
A few more of the regular visitors, and a little show and tell with a stripped down Austin A-Series 1275cc engine.
Then we were on to the project of the night, a rubber bumper MGB that had been converted from single Stromberg carb to dual SU HS4 carbs, and didn't run for crap. Running rich and rough at idle, and no torque down low, almost dying when you touched the throttle from idle. Trying to tune the fuel mixture, the front jet wouldn't screw all the way up, but it did go up high enough to be just within the desired tuning range. The rear carb had a front dashpot cover, obviously a mix of bitsa parts here, but we did finally get the mixture, flow balance and idle speed right, Ignition timing was WAY advanced, like 35d BTDC at idle. Once we reset timing to the proper 32d BTDC at road speed (vacuum disconnected), it idled okay. But when the vacuum was reconnected on the distributor it bogged down badly and was almost undrieable again.

Not long to realize it had a mismatch between distributor type and vacuum source. It had a "normal" vacuum advance distributor (not vacuum retard type), but it was getting vacuum from the intake manifold, so it was dramatically advanced when we set timing at idle speed. First touch on the throttle dropped the vacuum causing severely retarded timing, clearly explaining no torque off the line. Vacuum signal needs to come from the carburetor venturi, but that port was plugged on the throttle body. So we just disconnected the vacuum signal hose and plugged the port on the intake manifold, reset ignition timing, and ran it without the vacuum signal for now. Still somewhat rough and unstable idle until we set it to idle around 1200-rpm. Then I asked, and someone finally revealed that it had a mid-range camshaft (half race maybe), and the required fast idle made sense.
The owner took it for a test drive, then Darrell took it for a brisk run, and then the owner had another go at it with a bit more vigor. They both had the same reaction, "Runs like a raped ape". There will be a bit more work,(later) to connect the float chamber vents to the carbon canister, and reconnect the anti-run-on valve. Some day we may change the plug in the throttle body to a vacuum hose barb to get venturi vacuum hooked up to the distributor. But for now man, are these guys happy!
Wednesday, July 21 2021:
Finally laundry day, thank goodness, feels better all over. And very nice to have a day off.
Thursday, July 22 2021:
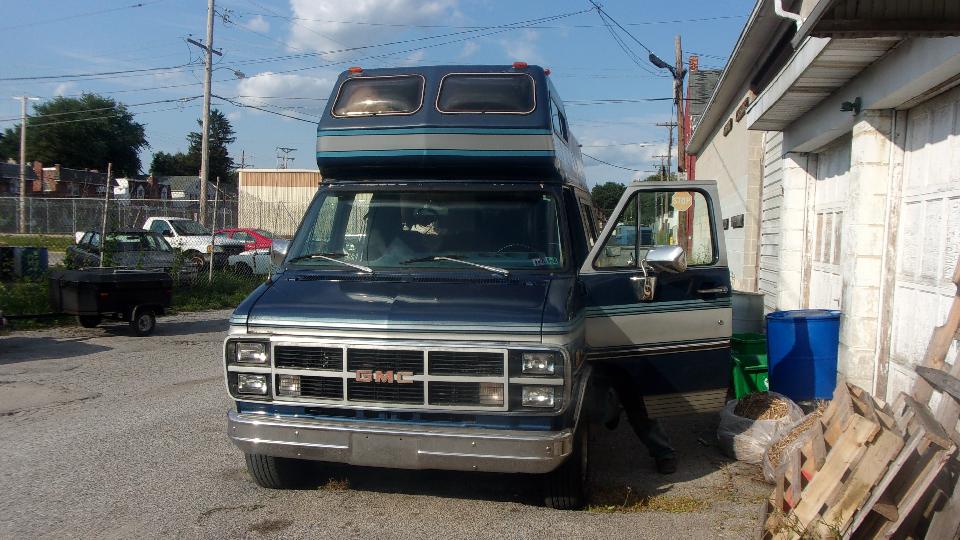
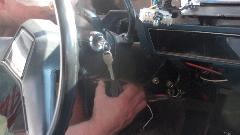
Things turned out a little backward tonight. Darrell and Jeff were supposed to fix the starter switch on the old
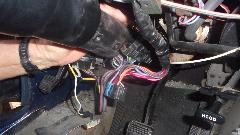
 Dodge motor home last night, and we were supposed to be working an brakes of the Morris Minor now. I guess the replacement ignition switch was on order, so they fixed up the Morris last night (stops well again), and we got to work on the van now. Had to drop the steering column, because the push-rod driven starter switch was farther down from the key switch, and the starter switch was hiding inside of the columm mounting bracket. Aside from a few skinned knuckles, we got the job done okay. We also took advantage of the situation to R&R the instrument cluster to replace illumination bulbs (a whole box full of them).

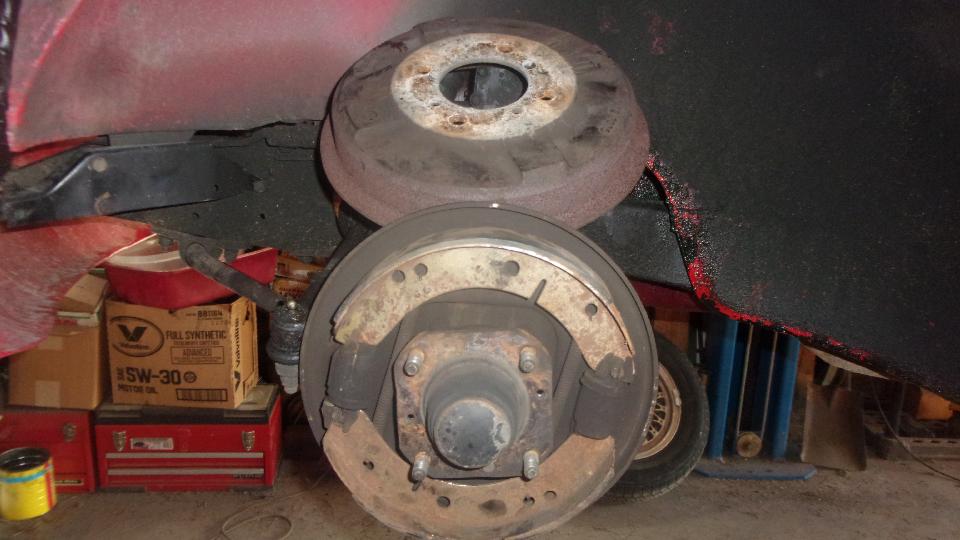
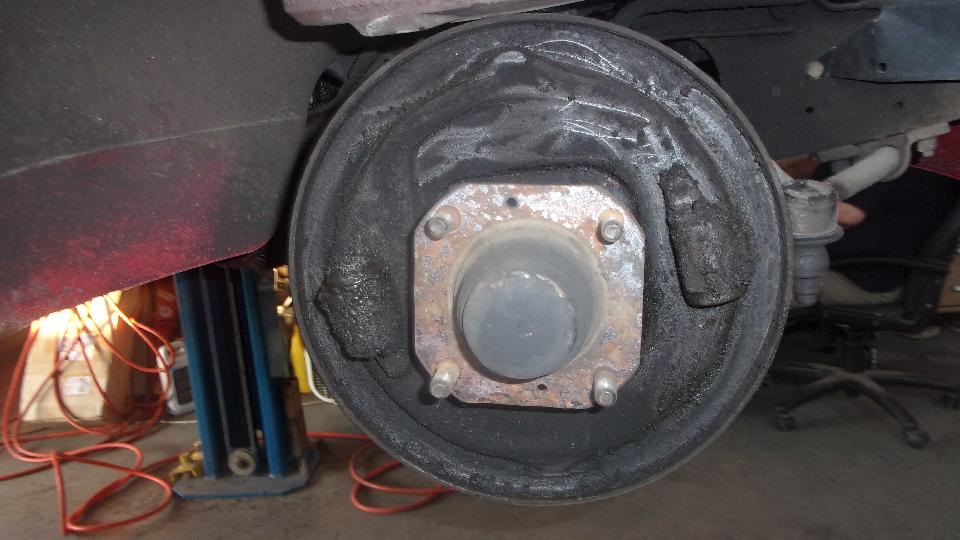
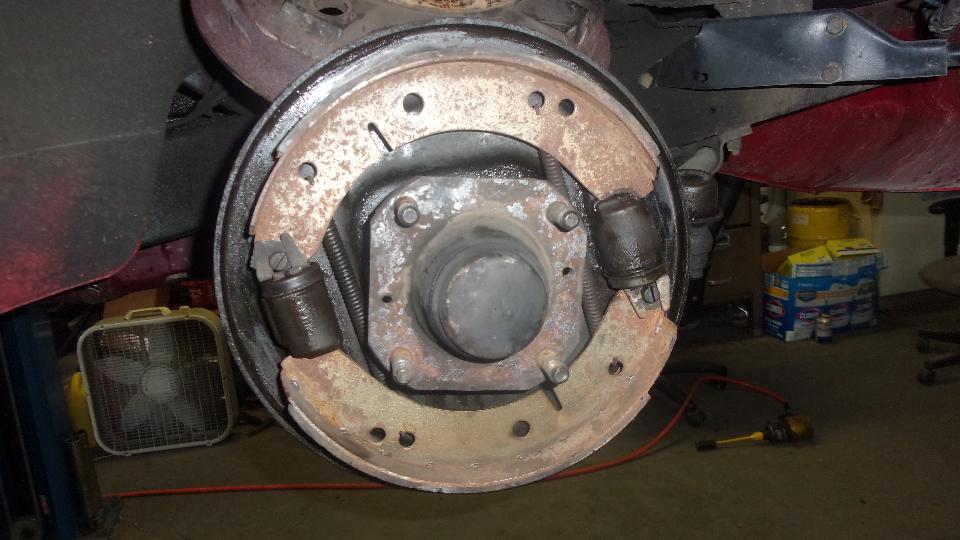
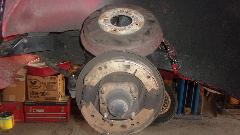
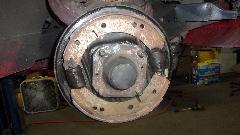
 Then our favorite superisor Jeff showed up in Tuesday's project, and we still can't wipe the grin off his face. With the Morris and the Van fixed, and a bit of open shop time available, we put the MGA on the lift to pull the wheels and adjust the brake shoes. And while at it, take the opportunity to repack leaky brake slave cylinders on the right front. Yuck! No wonder it would pull right and lock up prematurely. And we also replaced the front brake shoes. Looks much better when cleaned up, reassembled adn not leaking.

 Not quite finished yet, seize the opportunity again to oil the front shocks. Last time was less than 10-months and 10,000 miles back, and they have been empty and bouncy for some time now. Note to self, keep the shocks in mind to note next time they go soft. It may be about time to have them rebuilt (or swapped out) again.
Friday, July 23 2021:
Lots of time today updating my parts inventory list after recent order and parts installations, adding a few more bits to the next order list.
 Added new tech page on Ground Clearance, specifically under the rear end from rear tires back to the tip of the tail pipe, and why the pipe its pointing upward.
Called Moss again to check on the replacement alternator, and discovered they used the wrong delivery address. Then spent time on the UPS web site, and a call to UPS customer service, and another call back to Moss, all trying to get the address fixed before UPS picks up the package. Moss checking with the warehouse, supposed to call back, but no word yet. I sure hope it doesn't end up in Illinois when I'm in Pennsylvania.
Just received word of what happened in last night's Zoom meeting that I missed. The committee chair lady registered two more domain names that we have no use for, chicagolandmgclub.org and chicagolandmgclub.net, presumably to "protect the integrity of our web site". But these new domains have been redirected to the root directory of our main web site, meaning we now have three different active domain names to confuse search spiders and split the SEO statistics. And I certainly hope that the club will keep paying the registration fees forever, never let them expire. Some people may know what can happen to expired domain names in the hands of a domain name pirate/scammer.
Saturday, July 24 2021:
Car is running better now, starts okay, idles well, pulls hills in top gear, must have much improved compression, might be time for another compression test, just out of curiosity. Engine repaired, hydraulic leak fixed, brakes changed and adjusted, shocks oiled, the to-do list getting shorter, good feeling all around these days. Now time to get back to the body nose repair, so made a couple of phone calls. Have appointment for Sunday night social meet, maybe bleed brakes on one or two cars, and pick up the grill from Darrell's garage. Monday will then be the day to do the finishing work on the body nose and get it primed. Let that dry/cure for a day, Tuesday night regularly scheduled garage group session, and then likely do the red finish paint on Wednesday. Feels good just doing the scheduling to see the light at the end of the tunnel.
No call back from Moss last evening, and Moss is now closed for the weekend, no one answering the phone. The tracking number now says the package has been picked up and is being shipped, to the wrong address in Illinois. Now what? I called UPS again to tell them I had registered for My Choice service, but could still not get their web site to redirect the delivery address (and then their tracking system went dead for a while). They said the shipper had to do the redirect, of course that could not even be attempted again until Monday. Pretty sure by that time the package wil be reported to be "On the truck for delivery", and could not be stopped before it was dropped at the wrong address. After a few more minutes of grovelling, another option was revealed. UPS can on request of the recipient stop delivery of the package and have it returned to sender. Yeehaa! Kill it and send it back to Moss. Now come Monday morning I can call Moss again to see if they will send me another one (to correct address), or if I have to wait until the current package lands back in Virginia to be re-processed.
Added a new tech page for a novel method of holding tension springs in place while installing brake shoes. Real simple. Got a few spare pencils? Added another page for reproduction of a vintage tool for brake adjustment.
Sunday, July 25 2021:
Some questions this morning about low oil pressure (answers already on my web site). A general question about leaky rear hub seals on a Twin Cam (same as any other MGA hub seals).
Some comments about some information on my Shops List being invalid (closed shops)? That's weird, as it is all very current and should be kept up to date at all times. Please do tell if you find errant information in any of my links lists, so I can fix it.
My spare alternator UPS Tracking now says. "Return to sender requested", so that's good, not to be delivered to the wrong place.
That brake adjuster tool led to a bunch of time spent discussing Cottage Industry type items for car parts and tools, things we need but are not available. But the people who used to do that don't work cheap any more, so you can't get small volume production parts without high price tags. Only occasionally we luck out (temporarily) when someone volunteers to do it for cheap.
Added an off site link to a video for making your own ehaust manifold gasket. Looks real easy if you have the right nibler machine. But even if you don't, it has some good ideas.
Monday, July 26 2021:
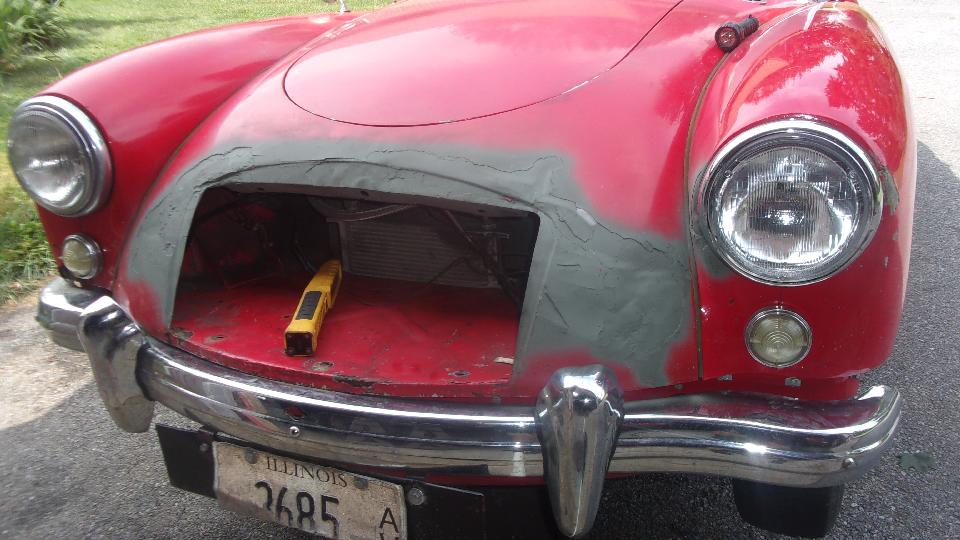
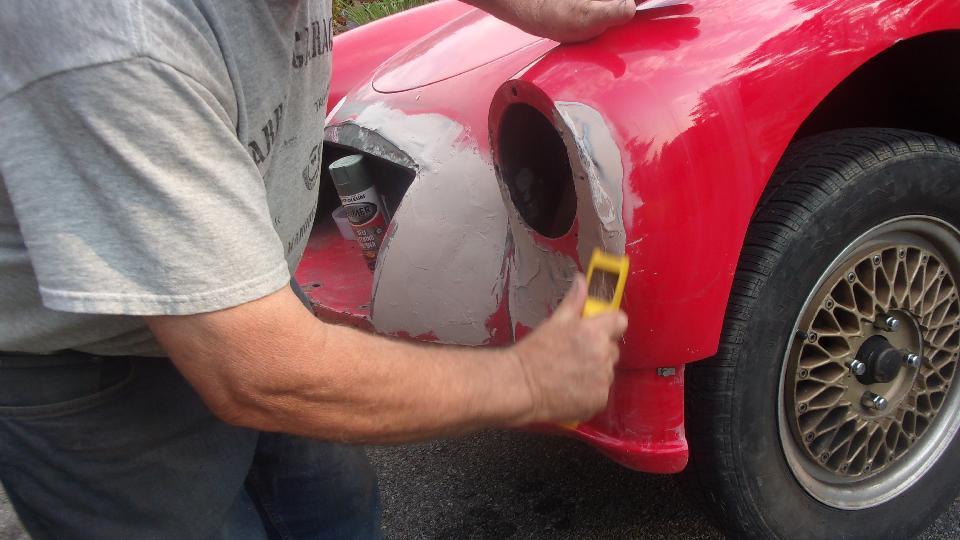
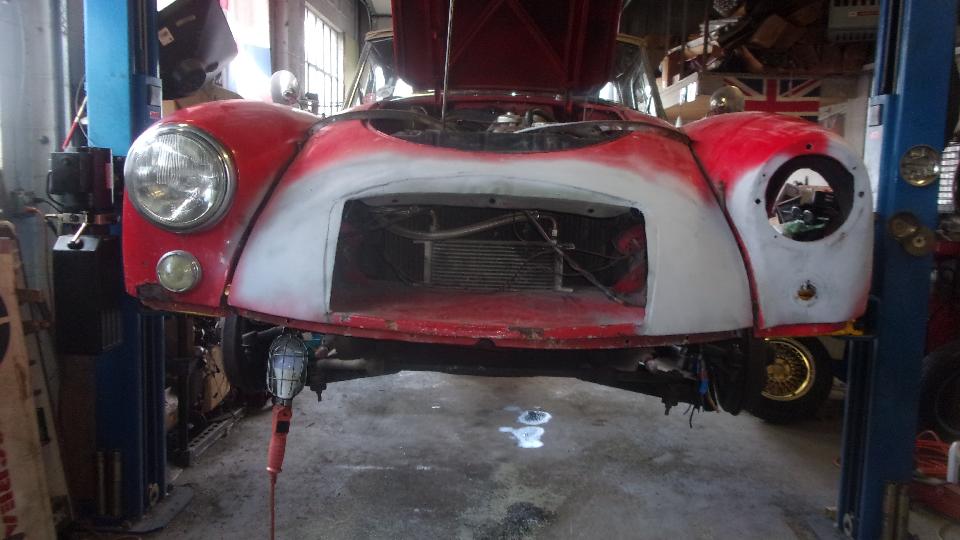
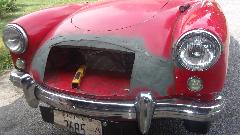
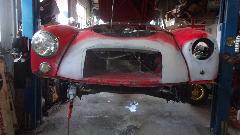
Finally comes the day to get serious about final repairs to the body nose from left over damage from five weeks earlier. Dang, there was a lot happening in between, but this has to be done sometime. We took the car back to John Valentine's place at 10-am (still in York, PA), because he has all the tools for body work. Nose up, wheels off, bumper off, headlight and parking light out. The first big boy took at hand was the air chisel with flat face punch to push out the front wing below the headlight opening. The intention here is to angle the headlight upward a bit so it doesn't point at the ground so much (which you might see in the first picture). That was a residual left over from six years ago when the headlight surround patch "eyebrow" replacement was installed a bit too far forward. Easier now to move the lower panel forward than to relocate the eyebrow.

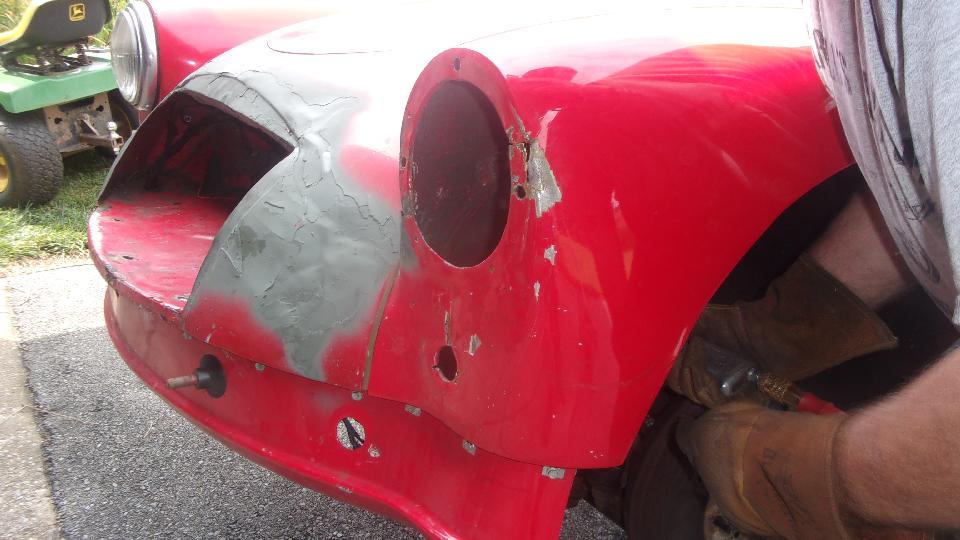
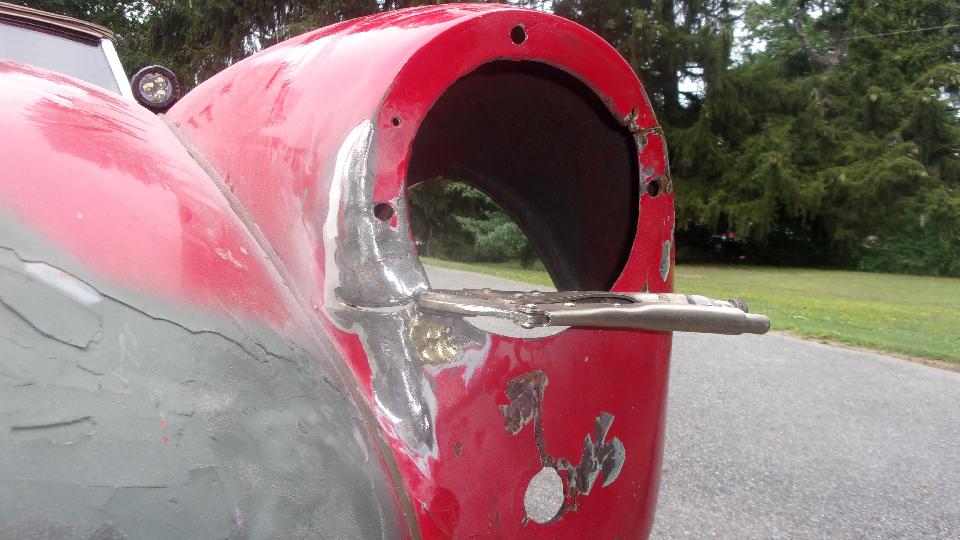
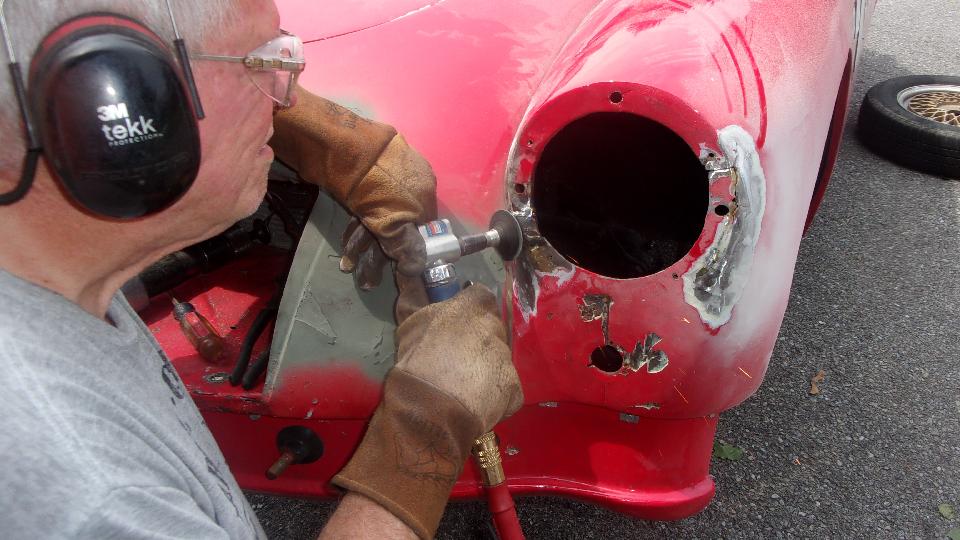
Then we were after welding up a few cracks that were negligently left over from the same prior body work (and maybe a couple more from the recent shunt). Weld, grind, weld, grind, getting there.

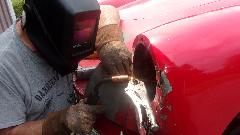
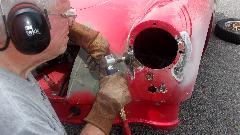
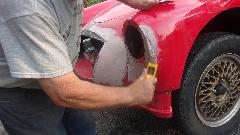
We moved on to straightening the grille surround panel for better grille alignment, pull here, push there, weld some cracks, do some grinding, and some hammer and dolly work. Stuff was getting done, slowly but surely about as expected, except by 2-pm we had lost the morning shade and were working in full sun with ambient tempearture in the mid 90's. Suffering from heat stroke, we had to call it off about 2:30, put the wheels back on the car to go find air conditioning and lunch, and we will be back a little later.
Back at 6-pm, sun dropped behind some trees so we can work again. First pass at some filler, one minute to mix, and about two minutes tops before it set up to not be spreadable. Wow, never seen the filler set up that fast. It's what you get with 90dF and the filler being warm because it was in the trailer. So mix a smaller batch and work faster, clean tools and repeat a few times. Really fast curing time, about 15 minutes to being sandable. Run a DA sander over it, still some low spots, so do a second pass on filler. More DA sanding, not quite there yet, but running out of light. Spray some primer on it so it's "not as ugly", and a few minutes later get after reinstalling the two light fixtures. Done for the night, not installing the bumper, but set the grille in place to get the feel good picture about 8:15. That's a heck of an improvement over what it looked like this morning.

Tuesday, July 27 2021:
After working in yesterday's heat, taking most of the day off to recover. In answer to an interesting question, I uploaded a new tech page in the "Care And Feeding" tech section, a catch-all article for "Engine Dies, but Not Out Of Fuel". That took a while to compose, but mostly a collection of other smaller individual tech tips.
Now some good news. About mid day I received an automated email form Moss Motors saying my replacement alternator had been shipped, en-route to Sandwich, Illinois, expected delivery on Tuesday. But that's the one I stopped delivery on, to be returned to sender, because Moss had not called me back on Thursday or Friday, and it got shipped to the wrong address. Results of the tracking number clearly say, "Delivery Cancelled", and "En-route", which I presume means reverse direction and get back to Moss at earliest opportunity. Ten minutes later I received another automated email from Moss saying my replacement alternator had been shipped (Monday), en-route to York, Pennsylvania, expected delivery on Wednesday, and it had a new tracking number. Really? I guess as soon as Moss knew the first one was being returned, they immediately shipped out another one to the correct address. Result of that tracking number said, "Out for delivery", meaning hey, it arrives today, Tuesday, a day earlier than expected.
 Off to the Tuesday night fest at Darrell's Garage. Fifteen minutes
 early, and we might be first ones there, but the door is open. Show and tell time
as I was reducing idle speed, and a few people wanted to see the bilge blower carburetor cooling fan, and few smiles over the repaired body nose. Then Darrel came strolling up with a box which he set on my car, one spare alternator, thank you.
early, and we might be first ones there, but the door is open. Show and tell time
as I was reducing idle speed, and a few people wanted to see the bilge blower carburetor cooling fan, and few smiles over the repaired body nose. Then Darrel came strolling up with a box which he set on my car, one spare alternator, thank you.
I then held out my hand with the new brake adjuster tool in it (that someone had just sent me as a gratuity) and asked, "Got any use for this?" There was a resounding "YES"!!! and the tool disappeared instantly, and nearly took my hand with it. Good deal, it found a good home in the community tool crib. I might only use it once a year, and I've been getting along without it for decades, so better there than dragging all over North America in my traveling tool kit.
Okay grab two alternators and some tools, transfer the pulley and fan to the new spare alternator, and go after drilling out one odd metric thread and installing a 5/16-24-UNF Heli-Coil for the bolt attaching the adjuster bracket. Then I asked Darrell if he had any suggestion for the failed alternator that needed a regulator circuit card (the Moss didn't want to pay return shipping), and he said. "Yes, give it to me". So I did. He works in an auto parts store (part time), so either this part has a nice core return value, or he may know how to replace the internal regulator that is supposed to be not field serviceable, but only factory rebuildable. Have to ask him later what he's doing with it.
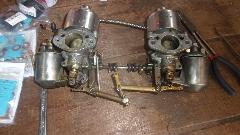
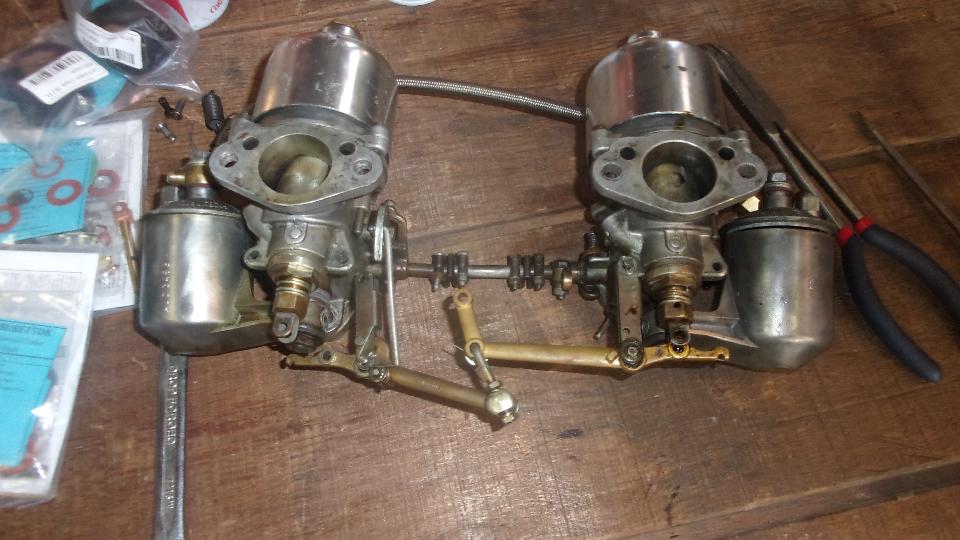
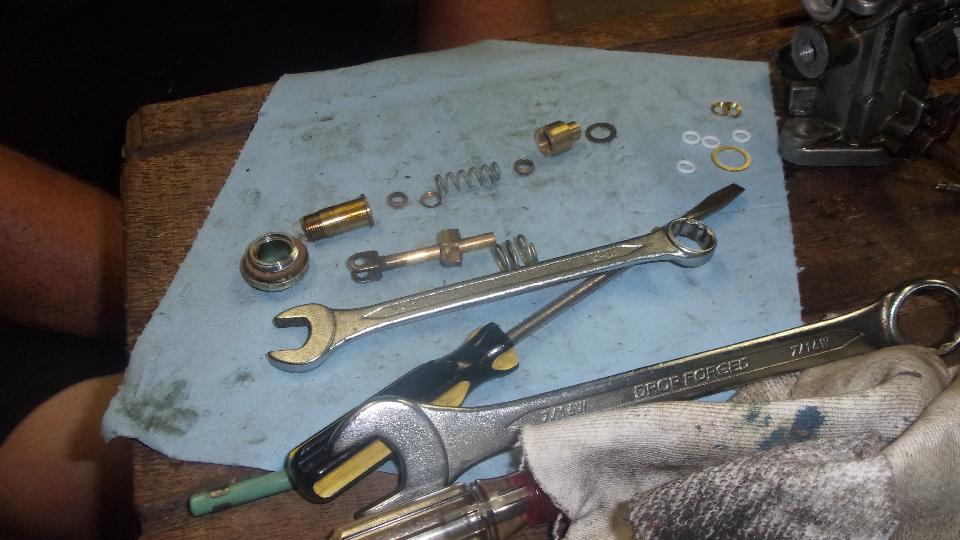
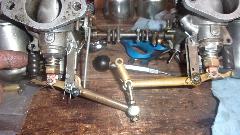
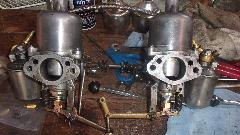
 Then into Party Hall (the garage) where quite a crowd had gathered. I recon the word was out that I would be rebuilding MGA carburetors tonight, and everyone was up for the tech session. Start by removing the funny polished aluminum dashpot covers.
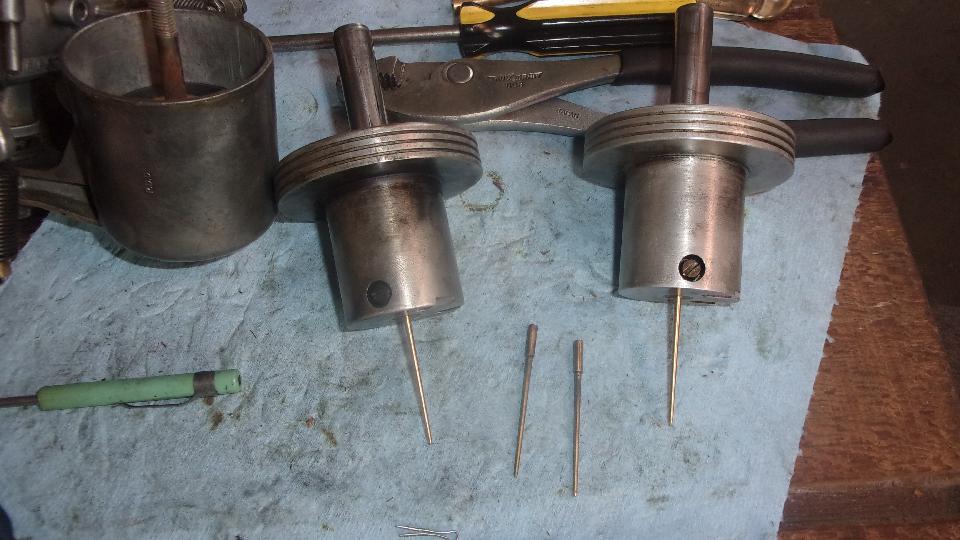
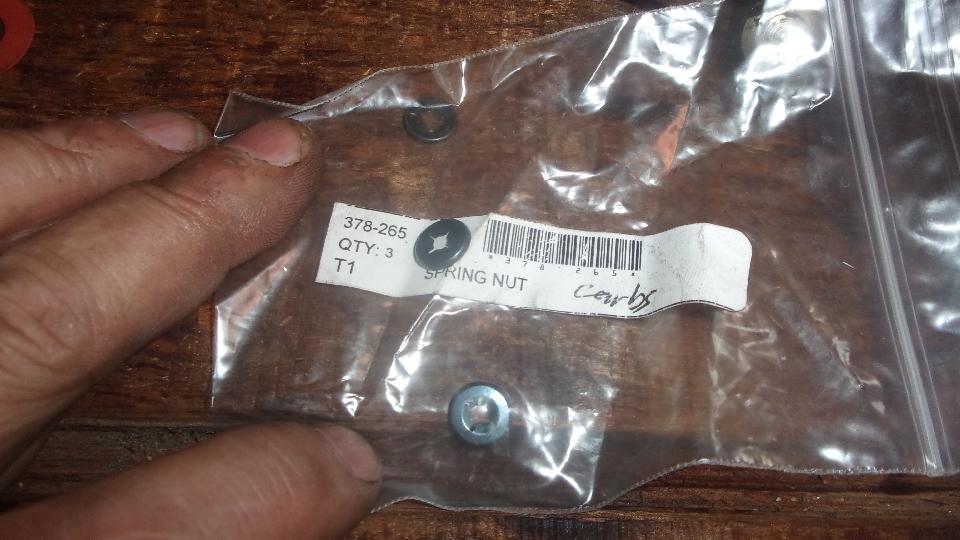
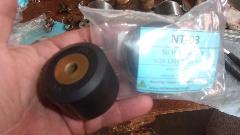
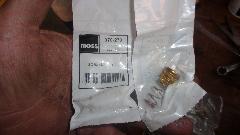
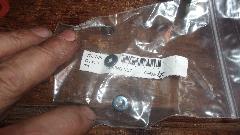
Lots of curious noses here with lots of questions, so the one-hour carbs rebuild was going to take a few hours. Gotta love it, this is what tech sessions are all about, scratch and sniff, and teach a dozen people how SU carburetors work and how to rebuild them. These had been reworked before, and maybe never put in service, as they were certainly not functional. Both carbs were missing the thin copper seal washer on the lower jet bearing (would definitely leak fuel out the bottom), and one was missing a constriction washer on a jet seal (spring pressing directly on the soft cork seal). On the plus side, they had Gross Jet float valves installed which we will opt to keep. One of the original brass floats was sloshing with fuel inside, definite leak and a sinker, but we do have new Nitrile rubber floats (yes Nitrile NBR synthetic rubber, not plastic, look it up), so good to go. Two complete rebuild kits in hand, including new jets and needles, so no worry about the old jets and needles being worn (just toss them out). Missing some of the internal tooth lock washers for dashpot cover screws, so pull some of those out of the Magic Trailer, along with some Teflon O-rings for the jet seals. Nice to have a couple of real Whitworth wrenches in hand, no need for the more clumsy adjustable spanners.


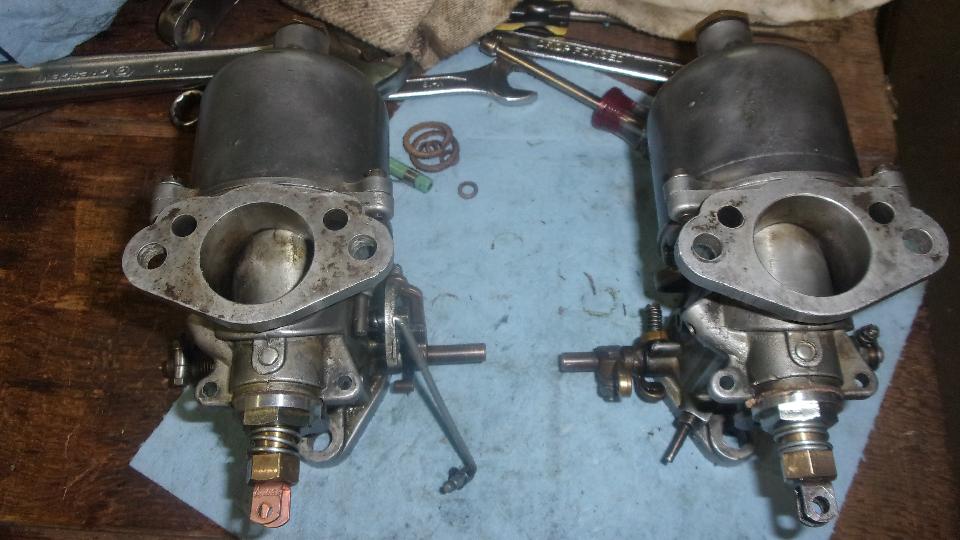
Kind of busy, didn't get many pictures, but carb rebuilds are well covered in the tech section. Throttle shafts were in good condition, so didn't remove throttle plates or shafts, just wound up the torsion springs a little tighter. The guests were gradually trickling away with time, and Darrell had a 10-pm appointment, so we knocked off with 20 minutes of reassembly left to go. Will take this up again tomorrow evening.
Wednesday, July 28 2021:
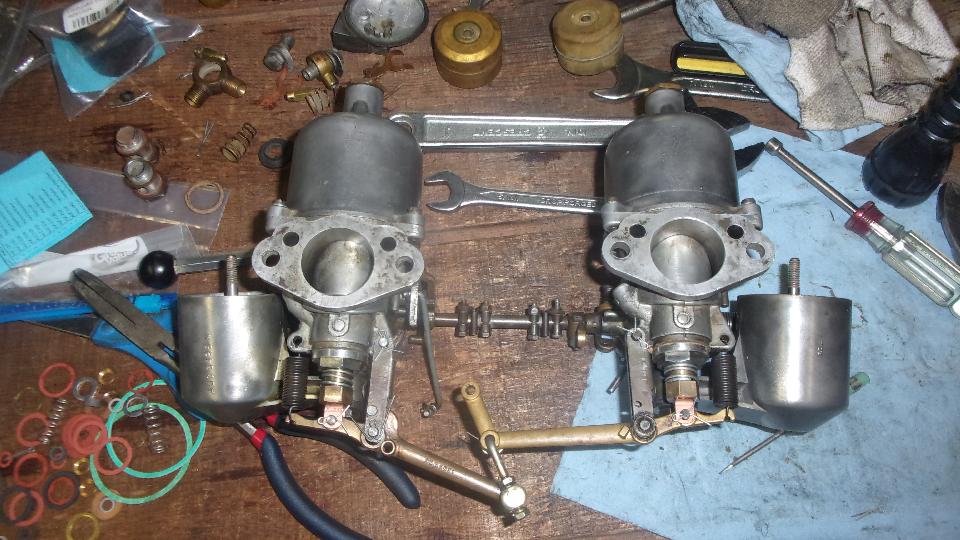
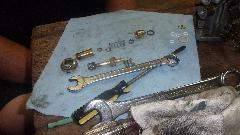
This turned out to be a bit shorter day than anticipated. On appointment we were back at Darrell's Garage at 5:30-pm to finish reassembly of the MGA carburetor set. It didn't take long, maybe an hour tops. Drop in new Nitrile rubber floats to replace the old brass ones. Install new fuel meeting needles from the rebuild kits to match the new fuel jets. Fetch a pair of new inlet screens from the trailer.

install one new Tinnerman press washer to reconnect the fast idle link. Reinstall Gross Jet fuel inlet valves, float arms, float chamber covers, overflow/vent banjo fittings and fuel hose between carbs, and they were ready to go. Then expecting to go install them on someone's car, but apparently there was no appointment for that, so no-go.
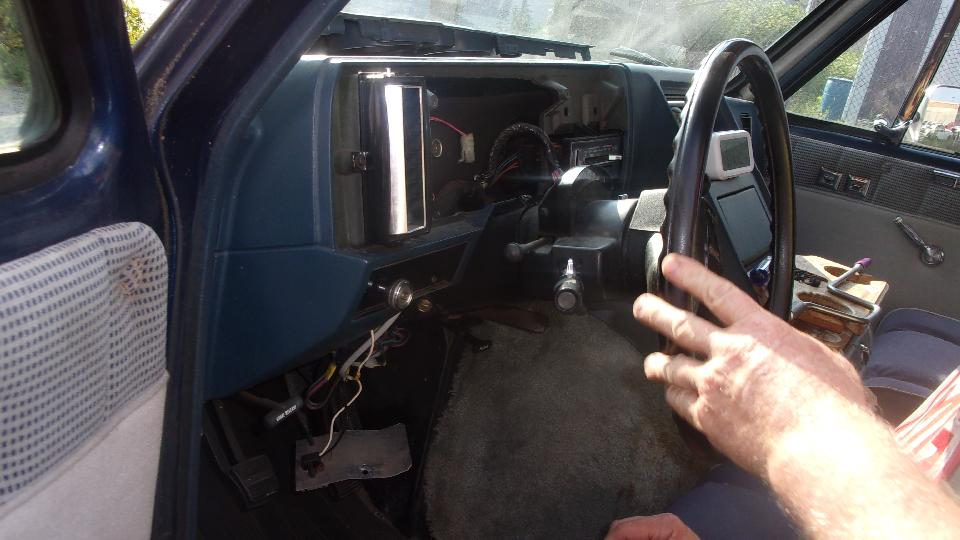
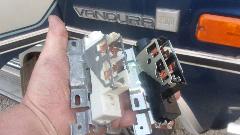
Time available, so we took a look at possibly installing the replacement ignition switch on Darrell's motor home. Old one on the left, new on on the right, very similar and same mechanical motion and switching action, so must be the right part. Right side of steering column, not here. Left side of steering column has the pull rod and screw locations. When presented in the seemingly correct location with the link rod connected, it seemed to pull when it needed to push, and the link was nearly an inch out of alignment, so no-install the screws. Something wrong here, like maybe the crank on the key lock was 180 degrees out of position, but no one had disturbed the link or key lock, so we all had a puzzling head scratcher. With three people all saying, "We gotta ask someone else", it was time to call that effort quits for the day.
The rest of the evening turned into mostly a social chat, and some discussion about the weather (hot and stormy), and maybe Friday would be the best work day (cooler and dry) to finish the nose job on the MGA.
Thursday, July 29 2021:
 Still crummy weather, hot, humid, scattered T-storms. Tomorrow should be a better day for body work. And it's coming up on a week end, so it was time to get the red paint. On Darrell's recommendation we dropped in to BAPS Auto Paints and Supply in York, PA, got the car scanned for current color (since red paint fades darker with time), and picked up a quart of .Red urethane enamel (single stage) with hardener, a quart of reducer, and a few minor painting supplies items. We likely won't get to the finish coat tomorrow, but very likely on the week end.
Friday, July 30 2021:
Bit of a revelation today. Posted a new tech page for a Service Bulletin, BMC Australia, C-116 - Non-Interchangeability Of Gearbox Gears. Apparently gears manufactured in Australia (for Ausi-built gearboxes), are not compatible with English built gearboxes. That means you can't use Australian manufactured gears in an MGA gearbox. Most important in Australia of course, where you would have to import your MGA gearbox replacement gears from somewhere outside of Australia.
Okay, very nice working weather in Pennsylvania today, so getting back to the nose job (front body work). Arrived at Darrell's garage 11-am when he took a few minutes off of work to unlock the place. Put the Morris Minor out in the alley, unhitch trailer, get the MGA on the lift, and remove LH headlight and corner lamp. Remove front valance panel and half a dozen bolts from each front wing, wedge the wings out a bit and move half of the wing piping out of the way. That was off to a good start. Caught navigator working on the car again. This time he was cleaning out inside of the front wings, grinding out dirt and ruse with a knotted wire wheel, otherwise keeping busy with wheels of, wheels on, and packing tools and other stuff out and back into the trailer, helping mix filler and cleaning tools between applications. I recon he's learning lot today.
Couldn't find the DA sander (although I think there is one here somewhere). Haven't been able to buy a flex file sander, not even at the auto paints store. And no running water available here. So we were doing things the old fashion way with a sanding block, couple of rubber pads, tub of water, rinsing the sand paper with a small paint brush. But I have plenty of time, and patience, and as long as it is comfortable temperature we can put in a lot of hours. Took an hour out for a shopping trip, and another hour for lunch break when a friend dropped by for a bit of chat.
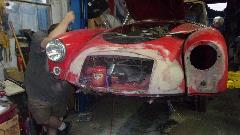
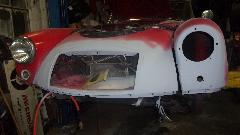
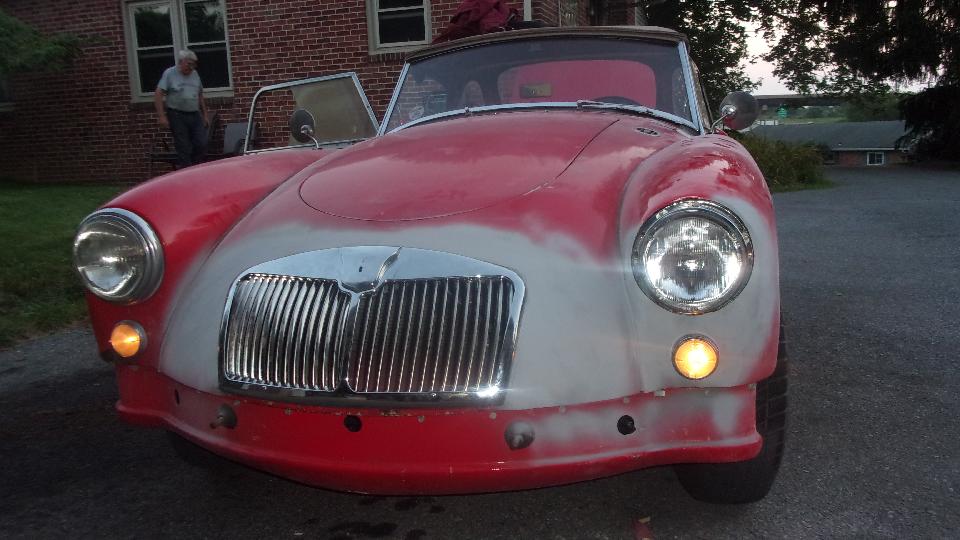
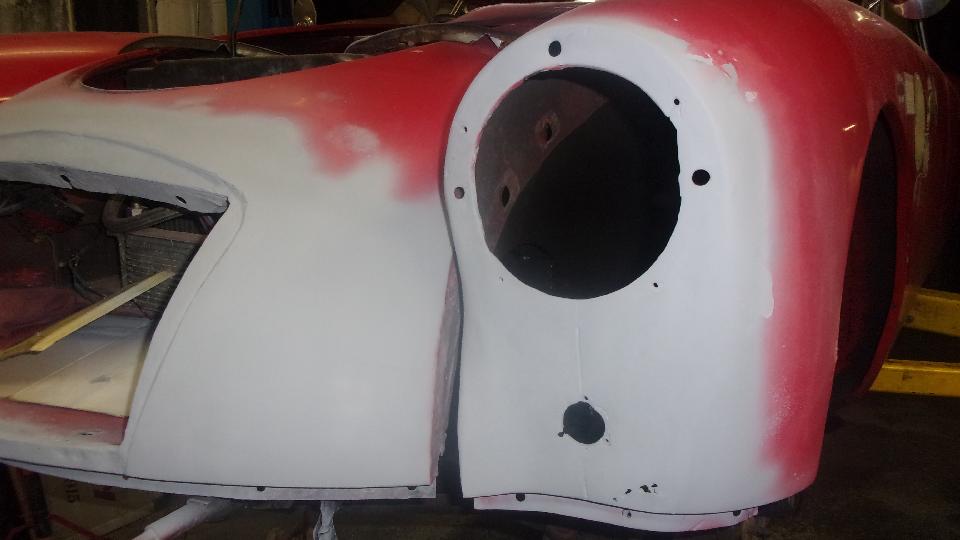
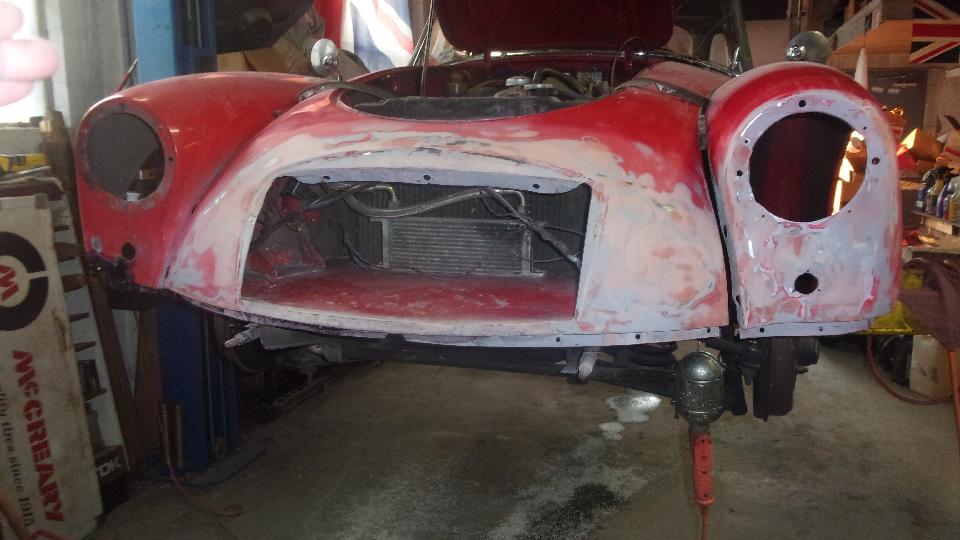
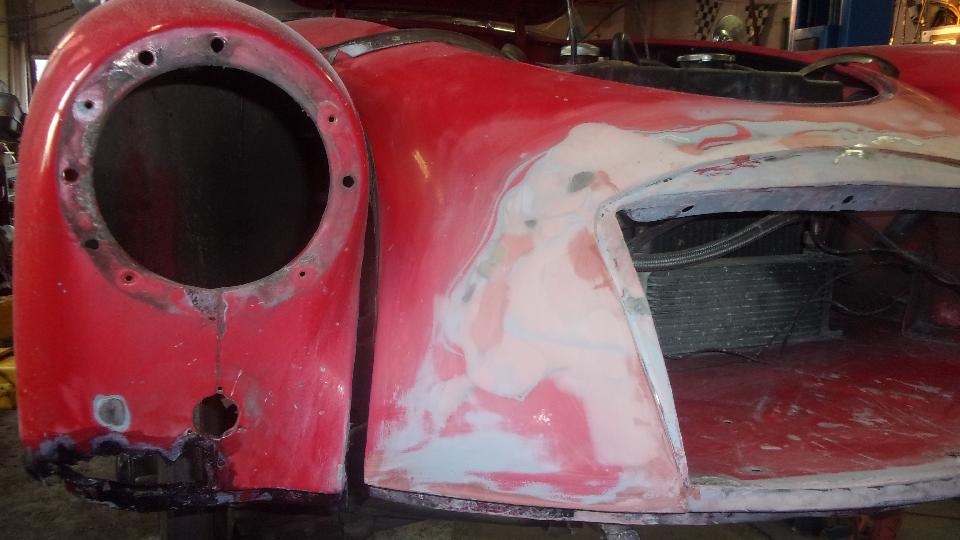
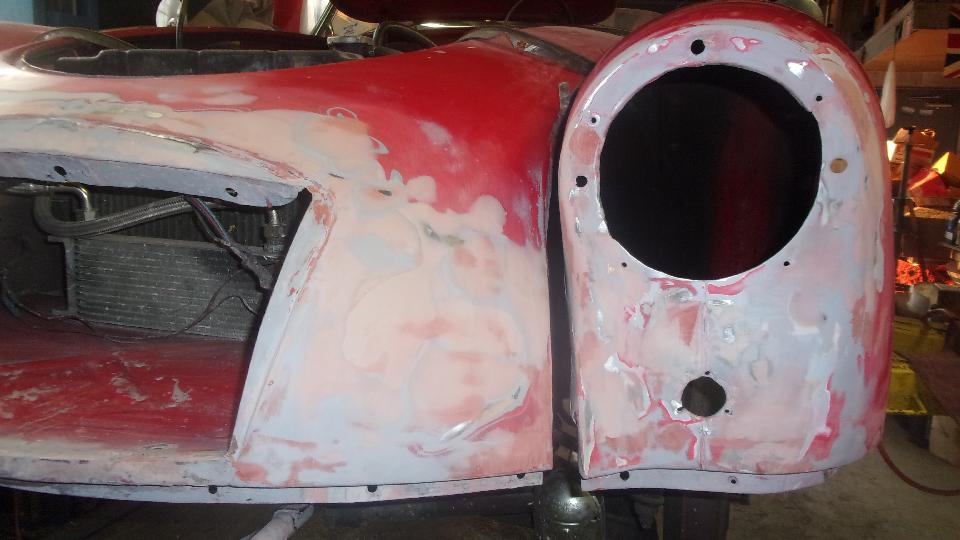
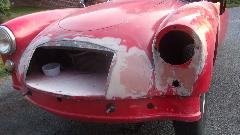
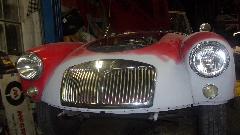
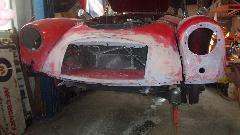
Above left, noonish start. Above right, 9-pm quitting time, after several hours of serious piddling around.. Kind of hard to tell the difference when we keep adding primer paint to be "not-as-ugly" when we go out in public.but it sure looks a lot better close up after another day's work. Of course I'd starve if I was running a body shop, but it's my car, and my pride (for whatever that's worth). But more important, it's what I preach, a heavy dose of independence and sweat equity. Do it yourself and save a bundle. Three views in the evening just before roll out. It still needs a bit of filler in few low spots, which should be easy in a half day tomorrow.. Always looks better with the lights and the grille in place (and one bolt near front of each wing). Grab a smile and feel good before putting the grille back in the box.
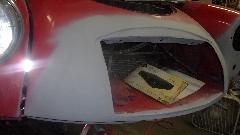
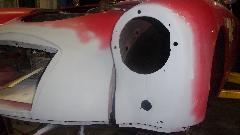
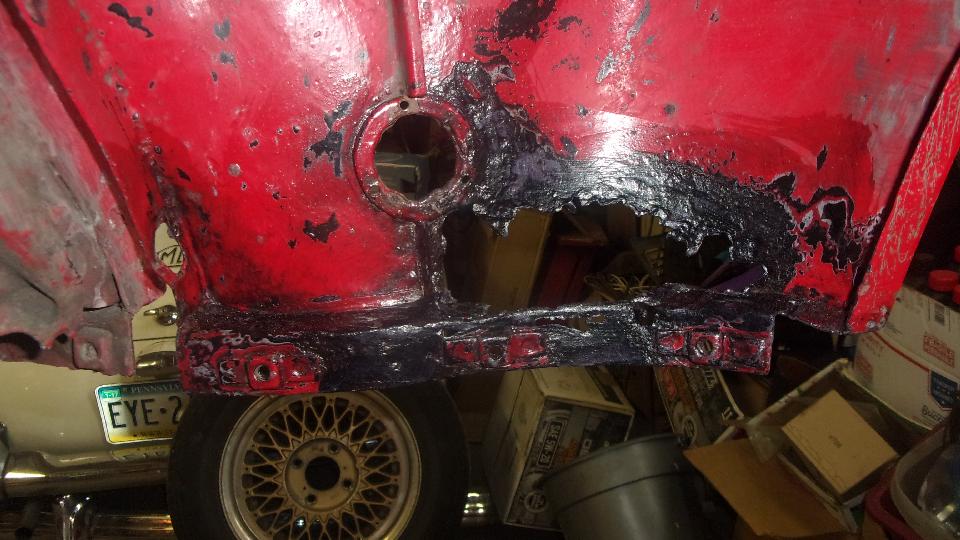
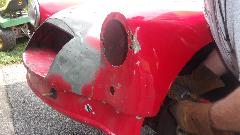
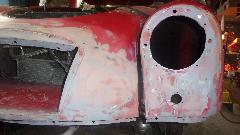
You might notice the left wing has a few small holes near the bottom edge. That was left over from a shortcut in 2015 when friends crammed some bondo in there, and left a golf ball wad of bondo behind the panel at that point. Guess it wasn't all bad as it lasted six years with nobody noticing (including me). On the RF wing there is 3 or 4 fingers size rust hole in similar location. Maybe they should have bondoed that one at the same time, but didn't. I thought for a while there was going to be a lot of rust in the chin bar in front. But that turned out to be several layers of paint over a bit of filler (from 35 or 40 years past) that had come loose, and only a touch of surface rust behind it which all sanded out quite nicely with original solid metal still in place.
Part of tomorrow's scheduled play time will be cardboard face mold and fiberglass backing layers before bondo on the bottom corners, because I don't have the appropriate patch panels in hand, and not enough concern to take time to make the sheet metal parts right now.
Saturday, July 31 2021:
Back at it again. Today we were going to attack the rust hole under the corner lamp on RF wing. Decided to try a "field fix" rather than welding in new sheet metal. The idea is to grind away all loose rust until we hit solid metal (with ragged edges), then hit what remains with Rust Converter to turn FeO2 to FeO3 (black oxide). Then (hopefully) line the outside front and underneath the lip with slick cardboard, followed by stuffing the inside with a few layers of fiberglass cloth and resin for the structural shape. Then strip the card stock off the front and finish with a little filler and paint. I suppose the procedure will be a bit of a pain, but we'll see how it goes.
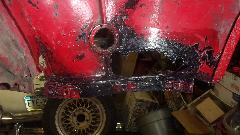
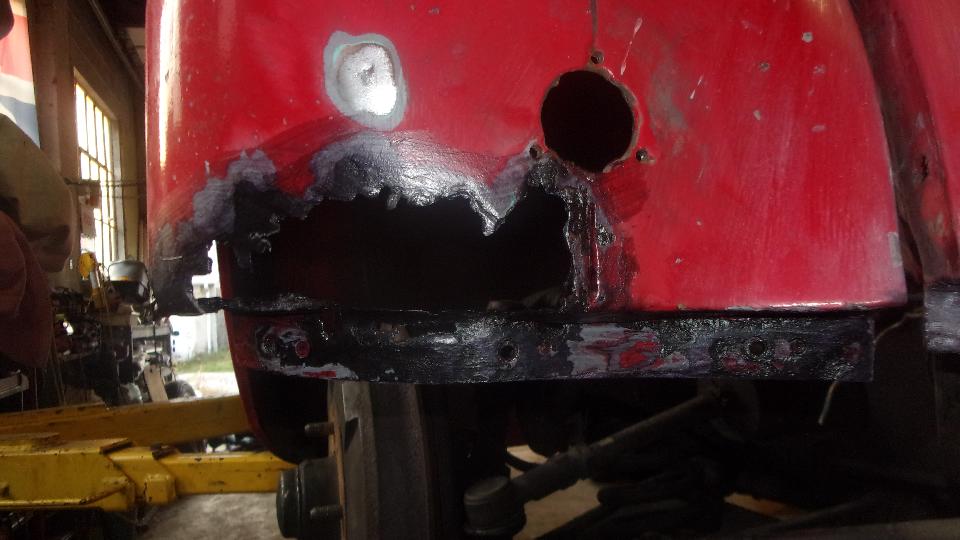
 So here are the pictures after the rust converter application. Man, that stuff really works. Instructions say there must be some rust for it to work, but holy crap, I didn't think there was that much rust left. Even the surfaces that appeared to be clean sheet metal had turned black. Then the part of the instructions that disappointed me, saying wait 24 hours before overcoat.
Okay, so back to the slow-going surface finishing. And these are the pictures you're not supposed to show anyone, one minute before applying primer paint to hide everything. If you have ever seen this, the surfaces are smooth, but the various colors and patterns hint at the extent of the damage before repairs, and the irregularities on the surface even after repair needing to be smoothed over. A few minutes later it was monochrome in grey primer again, and after some drying time we got to put one bolt back in each wing and re-install the lights to be street legal again tonight. Sorry, just got too busy and didn't get any more pictures, but check the last picture form yesterday to get essentially the same view.

|