The MGA With An Attitude
MGA Guru Is GOING MOBILE - (July 1 - July 15, 2021)
Thursday July 1, 2021:
Good news. The British Car Club of Delaware has finished updating its new web site http://bccdelaware.org.
 Interesting tech problem. A fellow has an MGA with one of the three dash mounting screws broken off in the captive nut in the main boy shell dash flange. Or it might be a broken tap, as it cannot be drilled out. A stripped thread would be easy enough, just open one side of the cage and replace the floating nut. But a screw or tap extending through the nut and cut the back side of the cage cannot be slid out the side of the cage. Tricky issue. Maybe an abrasive cut-off wheel could be used to cut off the extended tip of the screw (or tap), then pry the cage up a bit to allow the nut to be extracted from the side. Interesting tech problem. A fellow has an MGA with one of the three dash mounting screws broken off in the captive nut in the main boy shell dash flange. Or it might be a broken tap, as it cannot be drilled out. A stripped thread would be easy enough, just open one side of the cage and replace the floating nut. But a screw or tap extending through the nut and cut the back side of the cage cannot be slid out the side of the cage. Tricky issue. Maybe an abrasive cut-off wheel could be used to cut off the extended tip of the screw (or tap), then pry the cage up a bit to allow the nut to be extracted from the side.
After two weeks of silence (car shows and vacations) we had another CMGC web site committee meeting tonight. The guy who may one day be the new webmaster couldn't be there, and the rest were groping in the dark, so not much happened. Check back in another week.
Friday July 2, 2021:
Two working weeks past since ordering my car parts, and no delivery. Being a holiday weekend, I surmise no chance of delivery now until at least next Tuesday.
Saturday July 3, 2021:
Someone looking for dimensions to fabricate a welded-to-frame fuel pump bracket for MGA Twin Cam. I suspect this is going to be a quite weekend while I'm killing a few more days waiting for parts.
Sunday-Monday, July 4-5, 2021:
Quiet two-day holiday here. Hope y'all enjoyed the fireworks. Amazing how many people are talking about the color of brake calipers for the Twin Cam.
Something a bit strange happened with our MGA. We understand the engine has been low on compression for a while (90. 110. 75, 75 psi), which needs fixing sometime soon. Kind of sluggish getting started from cold, but still runs surprisingly well on the road. Last time we had this problem a few years back it turned out to be leaky intake valves, looking like it may have been thermally distorted valve seats. Not too hard to fix. Now Sunday night late trying to start it didn't fire right off, then did a single mild backfire style "pop", and still didn't want to start. Some persistent cranking for it to run, but then seemed to be running on maybe two cylinders. Not far to travel, so we limped it "home" for the night to be investigated in the morning.
Next morning compression test gave same numbers, not changed much in the past few weeks. Ignition system seemed to check out okay, so we fired it up (on to cylinders?), nursed it out of parking, and ran a few miles on the expressway. When we hauled in for breakfast it was back to running like a day or two before (more like two and two halves cylinders), not such a big concern, so we chose to ignore it for a while longer. Just a little mystery, and more important concerns at the moment.
Tuesday, July 6, 2021:
Time to find out what happened to our parts order from two weeks ago. Stuff ordered from Scarborough Faire on Monday June 21, billed and shipped a week later on Monday June 28. Never did get any communication form the supplier, just the billing on my bank card, which I rashly assumed would have been the shipping date. So I had to call the supplier to get the tracking number, and it turned out the package was delivered two days later on Wednesday last week (kudos to UPS). Really? Called out friend in York, PA to inquire, and indeed it was delivered, and he had called, but I missed the call (and no voice message). But at least the stuff is here, and we will be getting together with the guys again tonight.
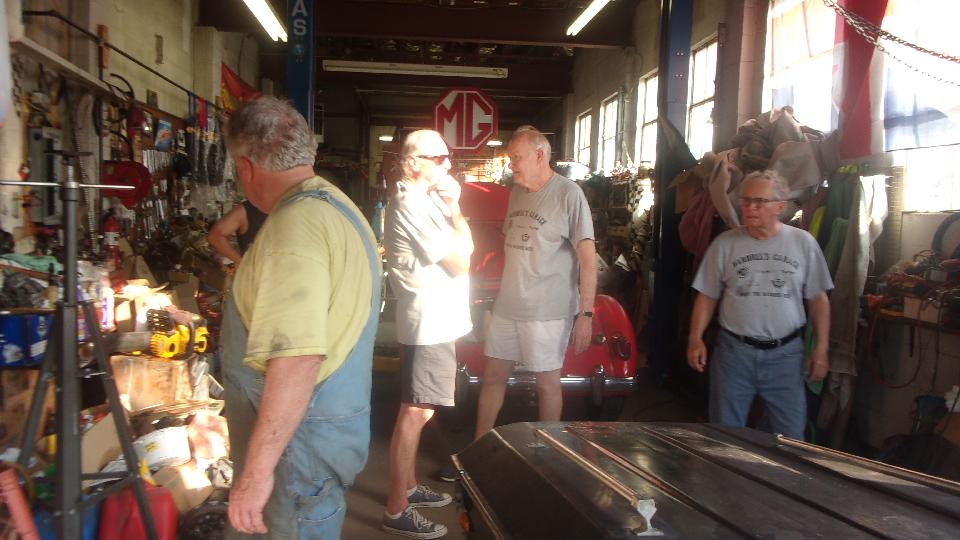
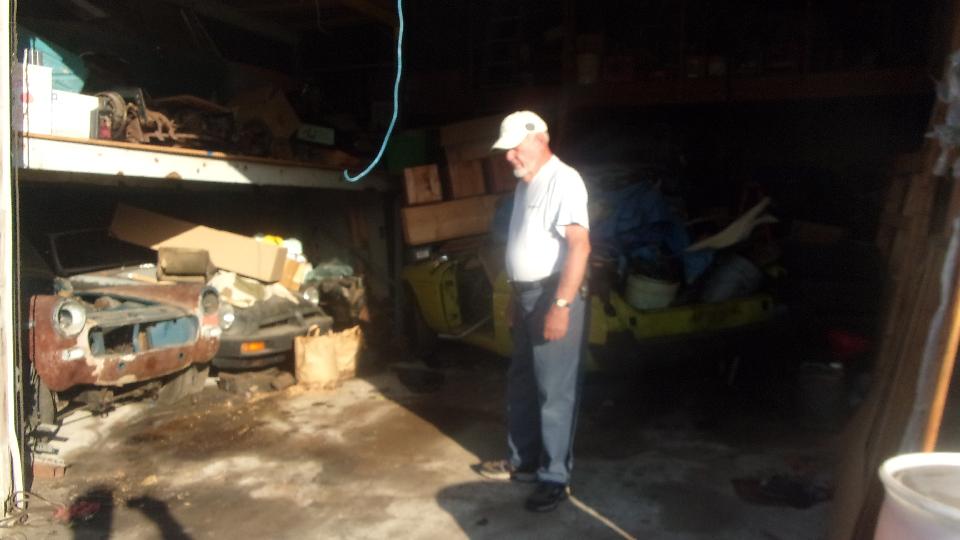
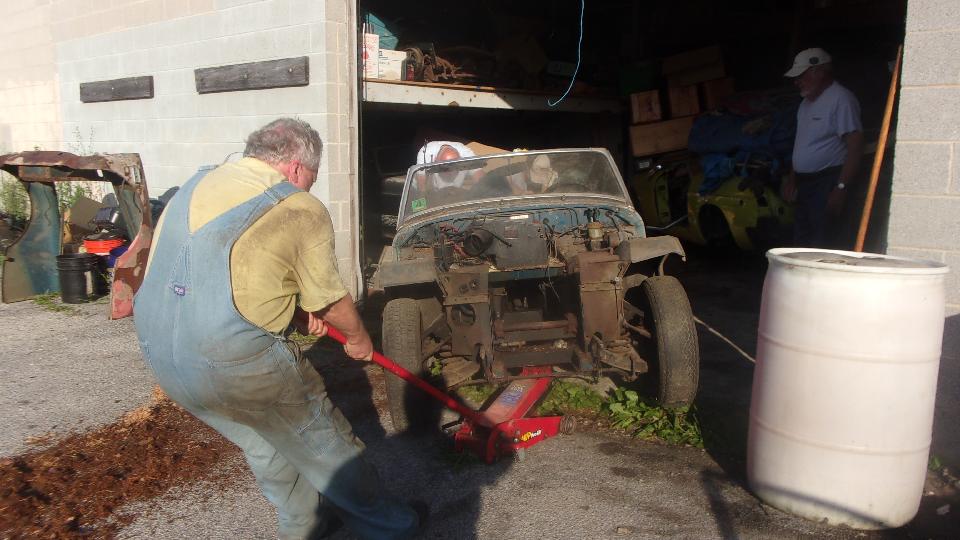
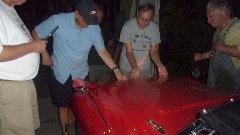
Okay, Tuesday night in the alley in York. Must be at least 15 people here, and all of the home boy cars are just parked in the shop space.

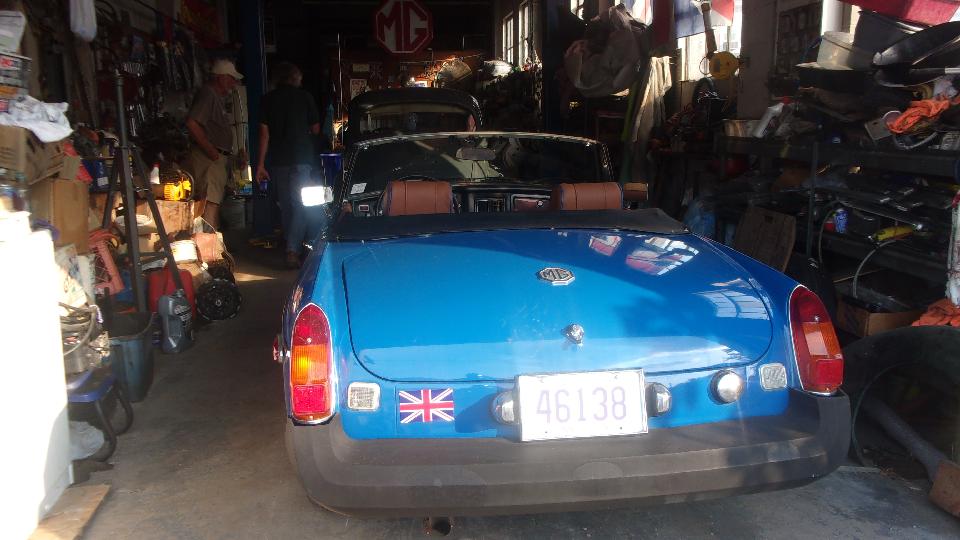
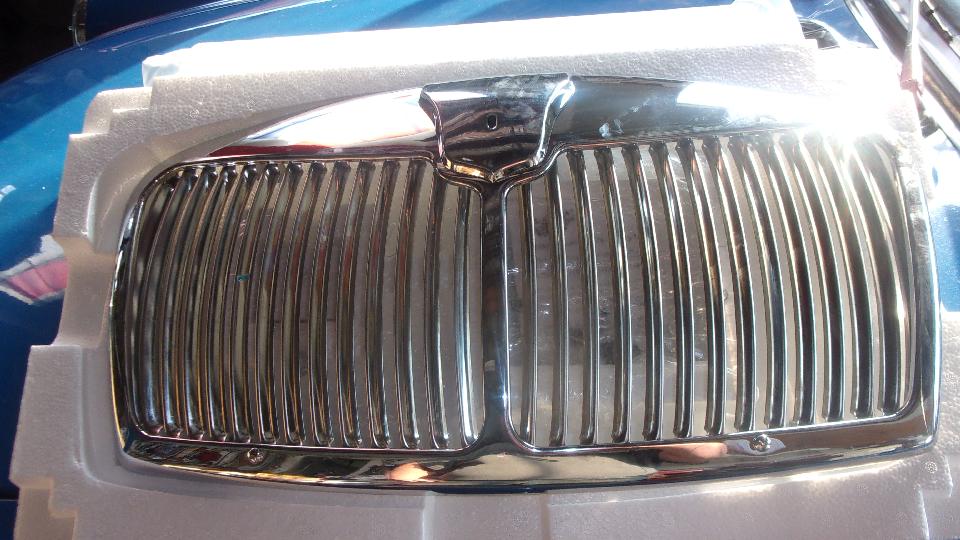
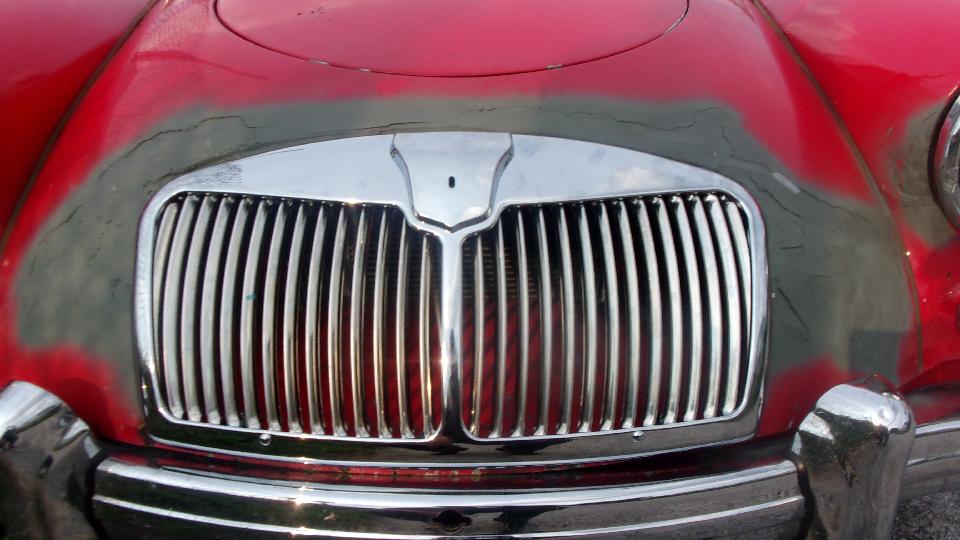
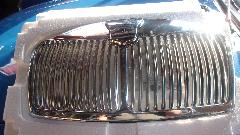
I got to open the packages to inspect receipts. Got the new grille and some large air hoses, but the headlight assembly wasn't there. That wasn't a bad first try at getting the body nose contour right with no body filler. Too dang hot to work on anything, but we can dream now and work later.


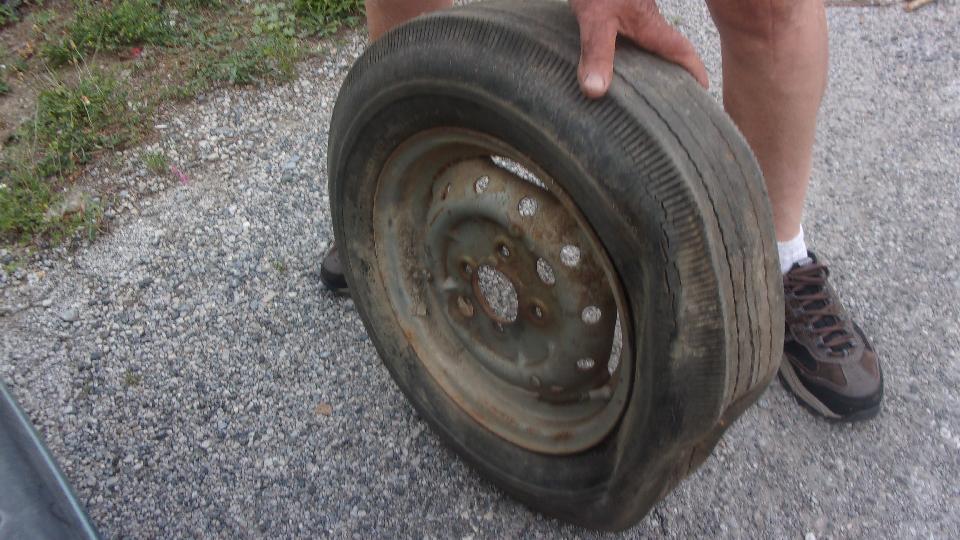
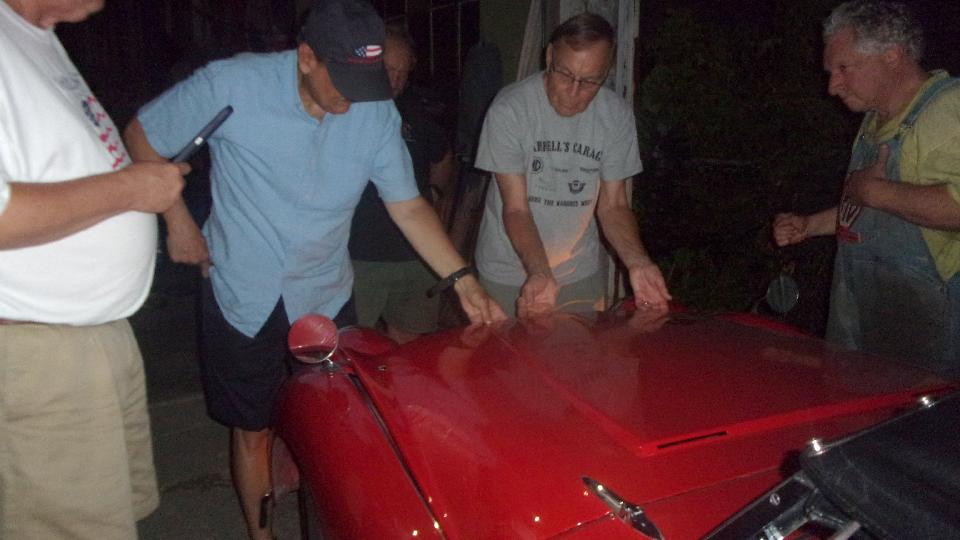
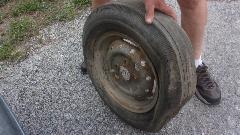
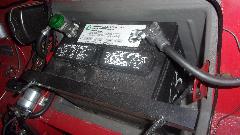
One 13-inch wheel for an AH Sprite just found a new home. Late night departure time, and a TR3 wouldn't start. Just a loose cut-off switch on a battery post connector. Easy fix, but needed multiple hands to press the bonnet down to get the Dzus fasteners latched.
Wednesday, July 7, 2021:
Received some photos and notes, and posted a new tech page on how to reconnect the MGA boot lid release pull rod if it becomes disconnected locking you out of the boot.
July newsletter for CMGC came in tonight, so something to do tomorrow putting that on the club web site.
Thursday, July 8, 2021:
Much of the day spent putting the CMGC July newsletter on line. It was a smaller issue, 16 pages rather than the more common 20 pages, so I lucked out and had it done in less than 8 hours.
Another CMGC web site committee meeting tonight. The new guy is gradually getting into WordPress and PHP files, but slow going. Everyone wants to do their homework in study hall (live during the meetings).
Friday, July 9, 2021:
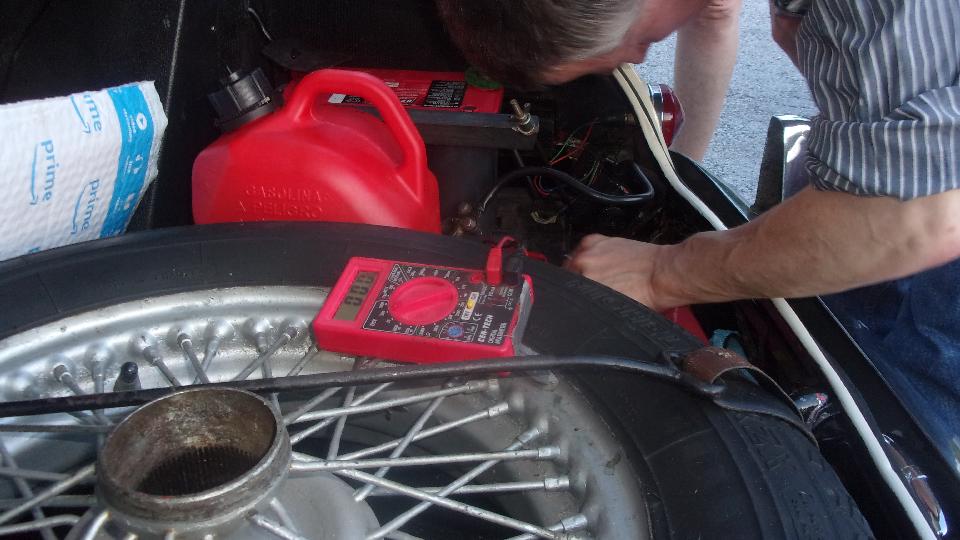
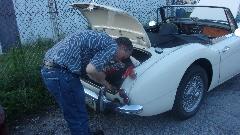
Thus morning on the way to breakfast, the car took to running on two cylinders (again). Initial invensigation shows no fire on #3 and #4, so maybe no fuel in the main jet of the rear carburetor. Also the rear carb is leaking fuel, so maybe the rubber grommets on the float chamber banjo bolt have deteriorated, and may be clogging the flow hole in the banjo bolt. Laying plans to fix it, but heavy rain this afternoon, so it might wait another day. Late night we ran downtown York, PA (running on 2 or 3 cylinders) to be close to our friend's shop in the morning.
Saturday, July 10, 2021:
Began the day by adding some pictures and notes to a tech page for early style heater controls with the Push & Turn air control switch. Some discussion on why Armstrong lever shocks were designed to leak and likely always will. Then we got into investigating our car problems and repairs.
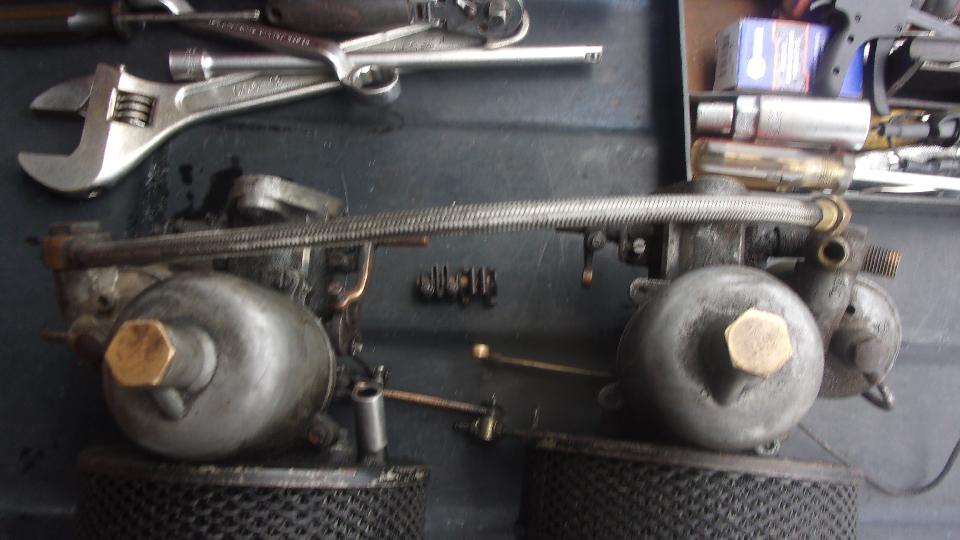
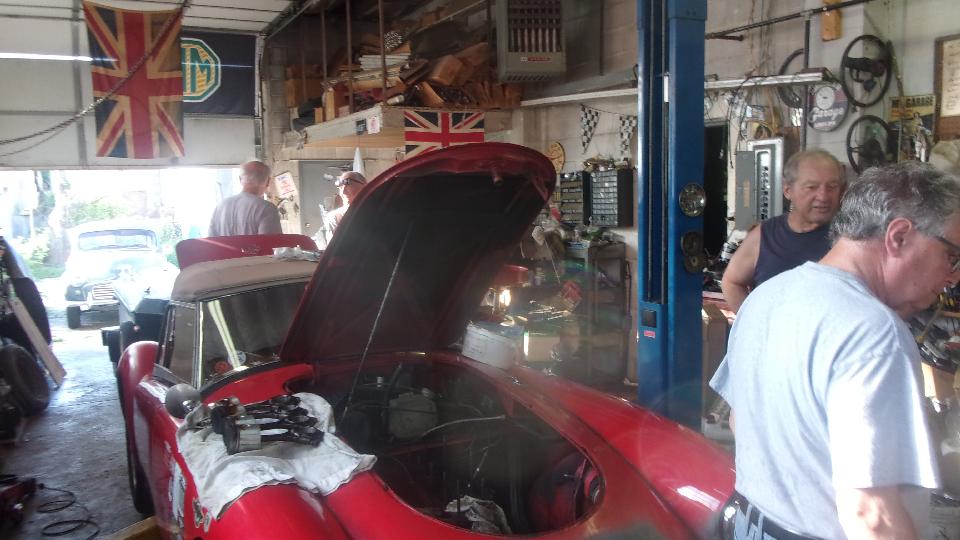
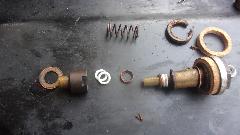
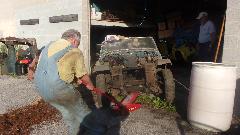
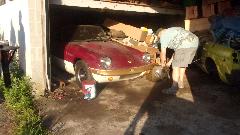
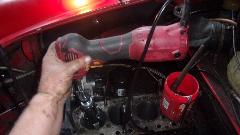
We cruised over to our friend Darrell's garage for workspace. Knowing the carburetors were leaking a bit, and needed to come off to check the suspected cracked exhaust manifold, that would be a good place to start. With the carbs on the bench, the first think I noticed was the rear carb dashpot cover was missing the three screws that should be holding it in place. Easy to fix, just pull a few screws and lock washers out of the magic trailer. But now I'm thinking it may have been that way for some time, and could be a contributing factor in the demise of the rear cylinders of the engine.
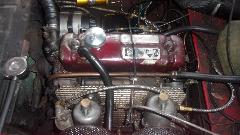
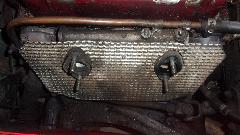
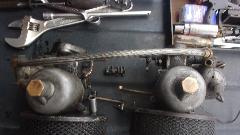
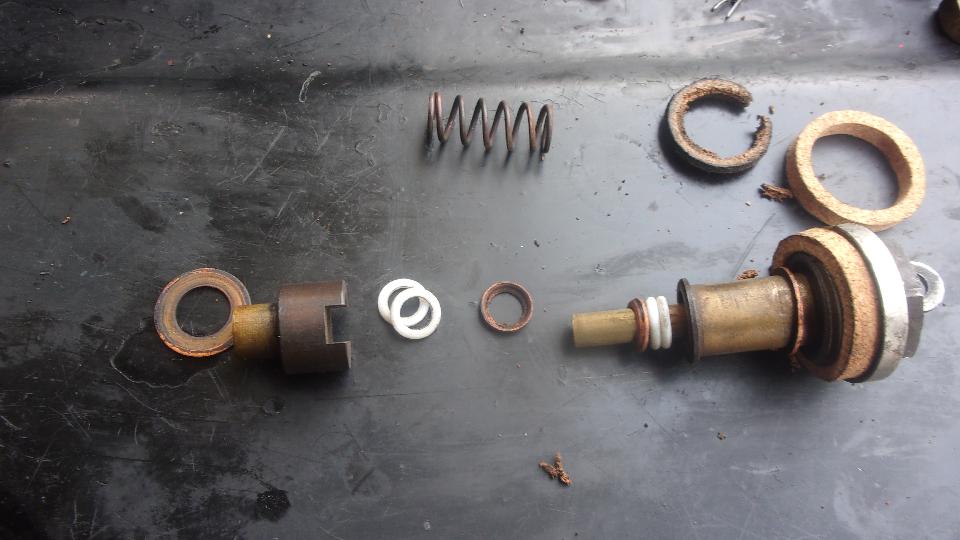
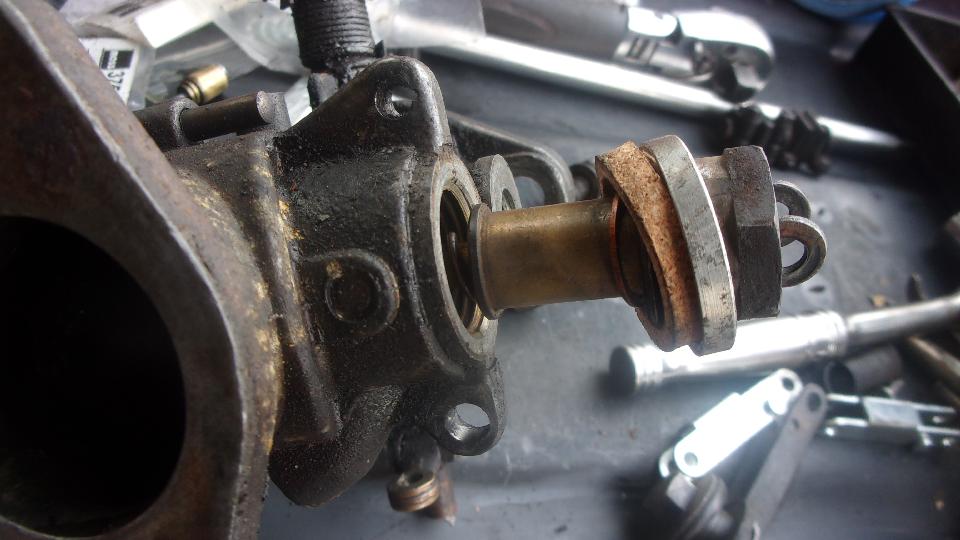
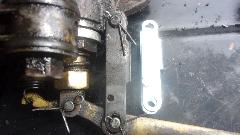
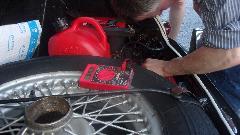
Next was to replace the two mounting links for the choke levers. I noticed last time the carbs were off for service that the holes for clevis pins were badly worn, and we procured replacement parts some time ago, so put those on now. And since jet seals are cheap, I tend to replace those em mass whenever we see the first leak. This looked like the cause of the significant leak under the rear carb must have been from a broken cork seal at the bottom.
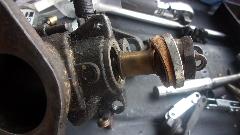
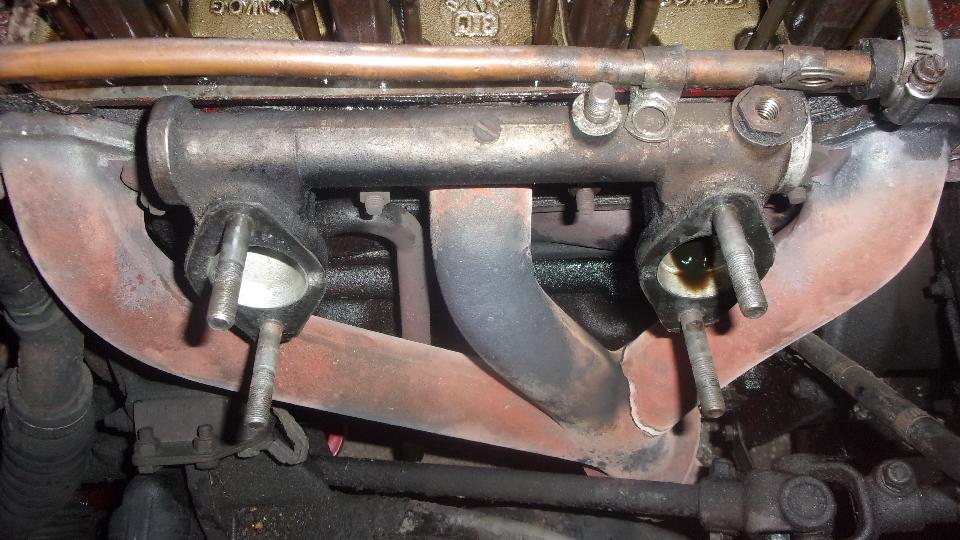
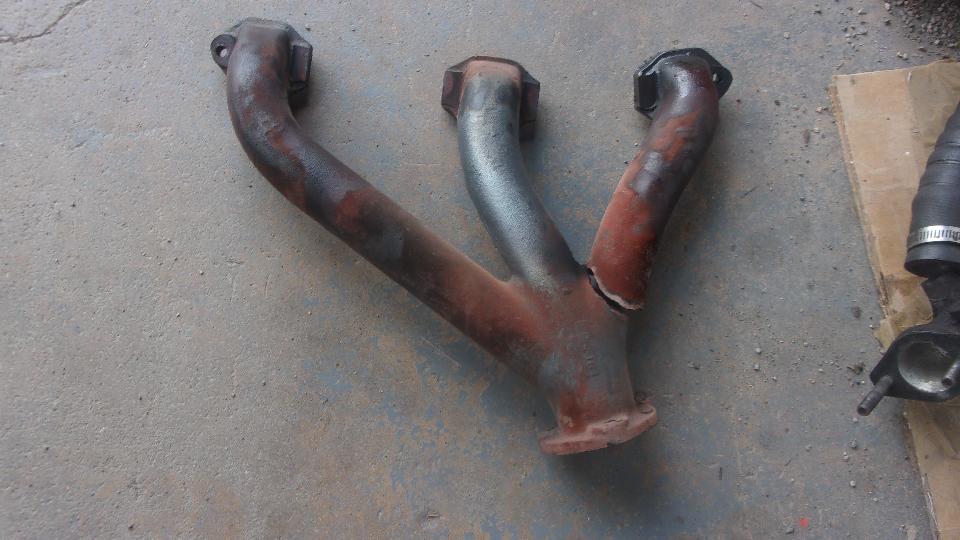
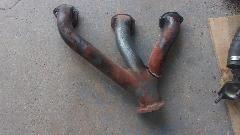
With the carbs back together and ready to reinstall, I removed the heat shield to get a look at the exhaust manifold. Sure enough, there was the break, right where it was expected with the rear branch broken completely off at the junction. These things are about $240 a pop new, and I'm pretty ticked at having to replace them too often. So Moss Motors tech guys are going to get a phone call and a good talking to about this issue. Meanwhile, put another on the upcoming order.

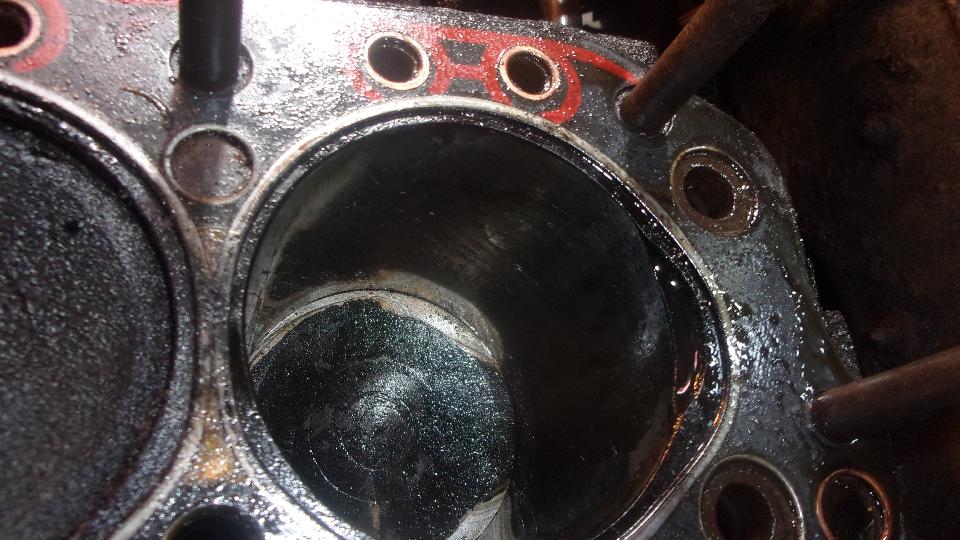
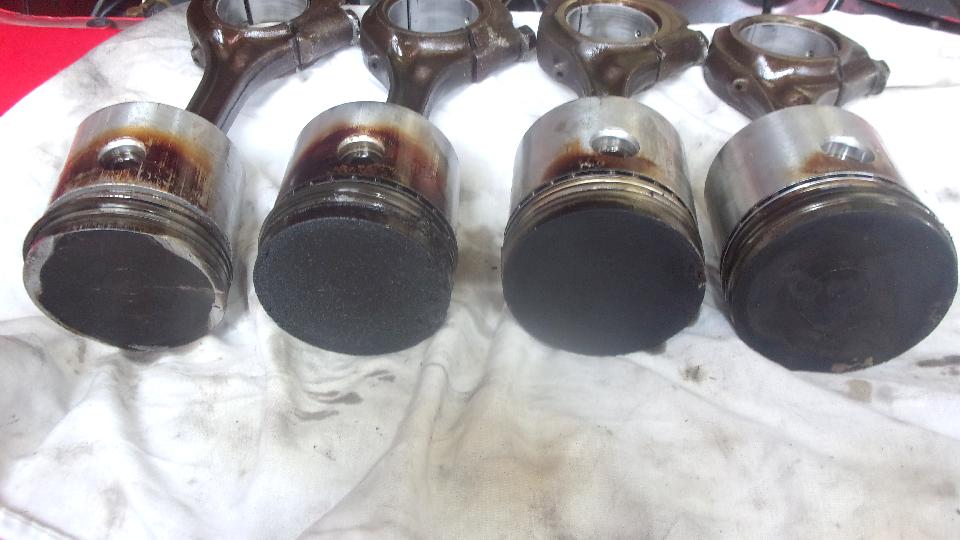
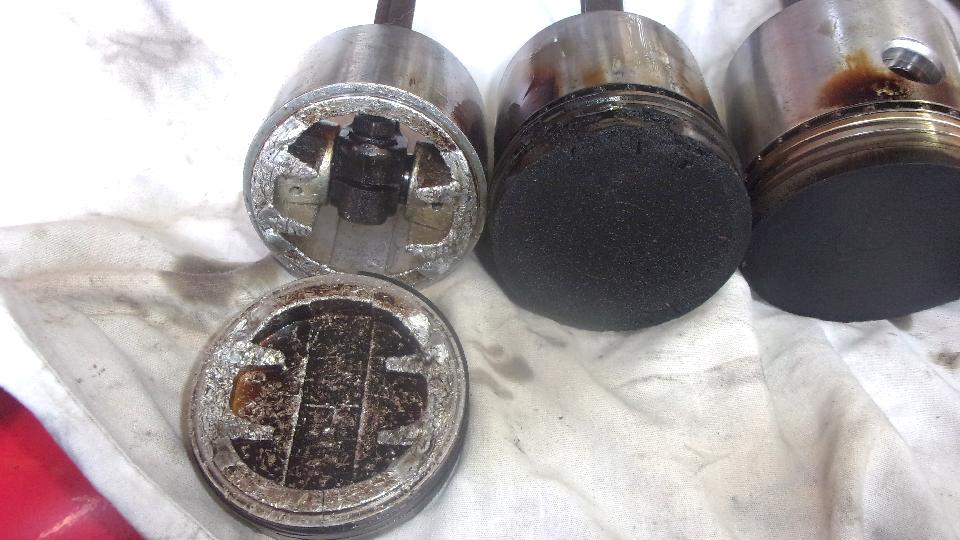
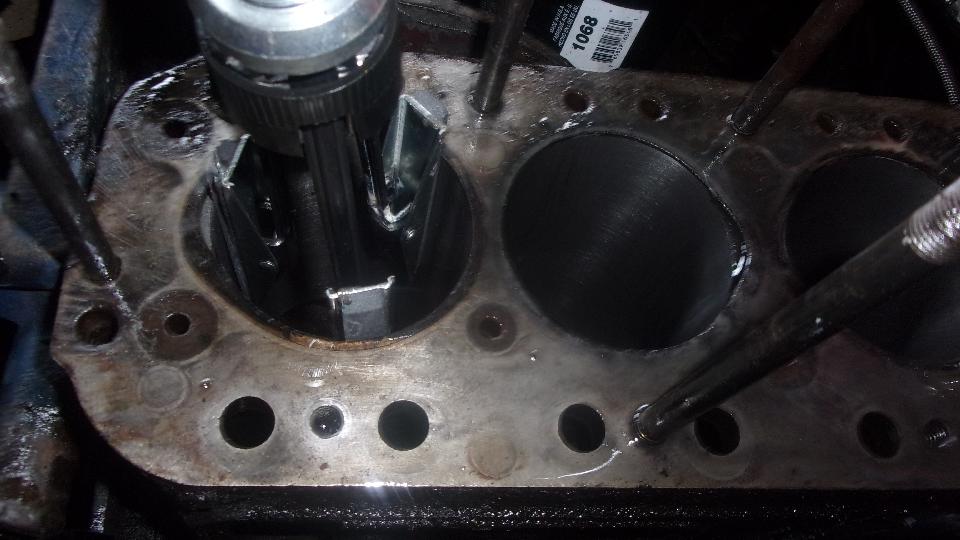
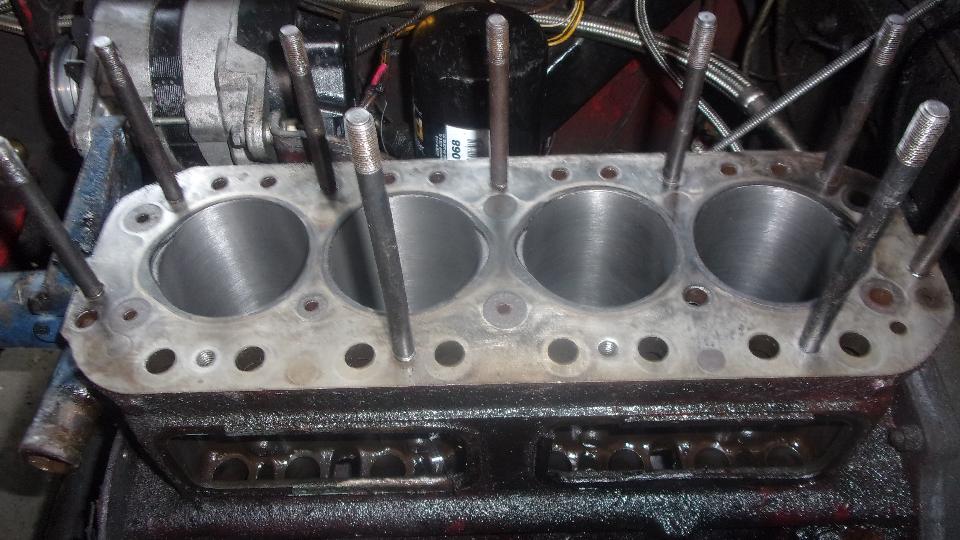
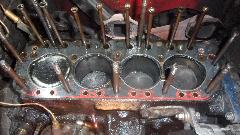
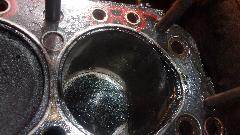
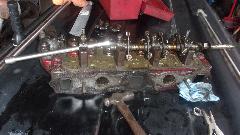
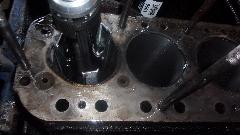
Then off with the head to get a look at the #4 cylinder that had zero compression. One of these thing does not look like the others. Obviously #4 piston was broken with the top of the piston stuck up in the top of the cylinder. I was expecting a broken ring and burned piston, but this is pretty much the same effect, needing to replace the piston(s) as expected. And I have been here before, so no real surprise. Push the piston top all the way down to inspect the cylinder wall, and the good news is no scratches, so this should hone out okay to install new piston.
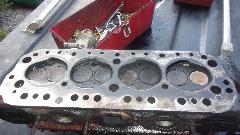
Then I set the head upside down and filled the combustion chambers with water to check for valve leakage, which I was expecting. Surprise, not leaking. One intake valve would drip one drop in 30 seconds or so, which is not serious enough to mess with it, so the head is okay and can go back to service as is. But that means the low compression on #3 cylinder must be from the piston rings. That's okay, as I will be buying new pistons anyway.
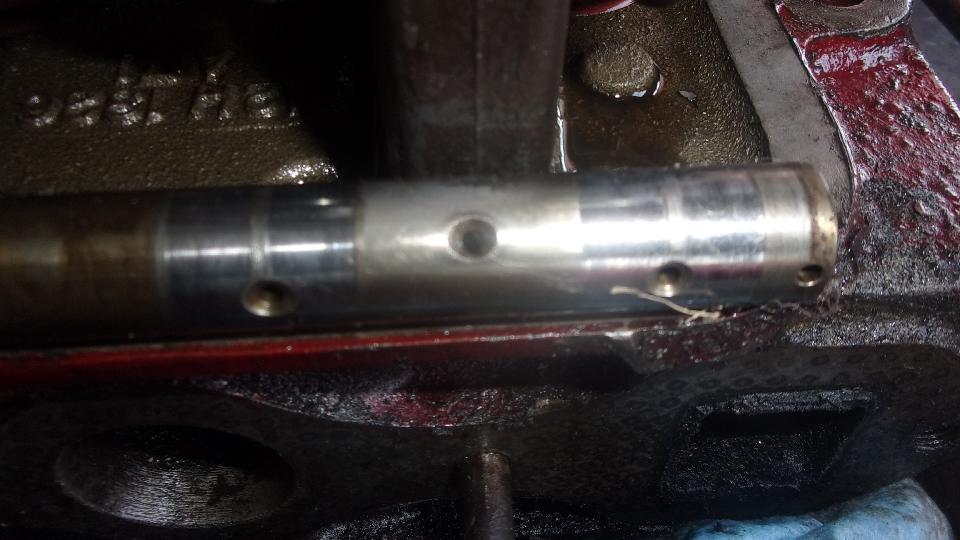
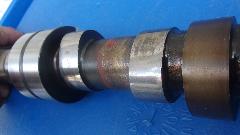
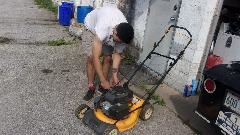 Time for a short break to help the contract lawn mowing guy fix a broken cork on his mower recoil starter. Man they're making those cords tiny these days. Then we pulled out the dial caliper and spent some time measuring valve lift on the pushrods. As expected, 3 or 4 of the cam lobes were worn with sub-standard lift, so put a new camshaft and tappets on the order list. Smile an bless the parts, they don't owe us anything, having run 212,000 miles in the past seven years. One last look, and enough for today, we know what parts we need to order, so knock off and take this up again later.
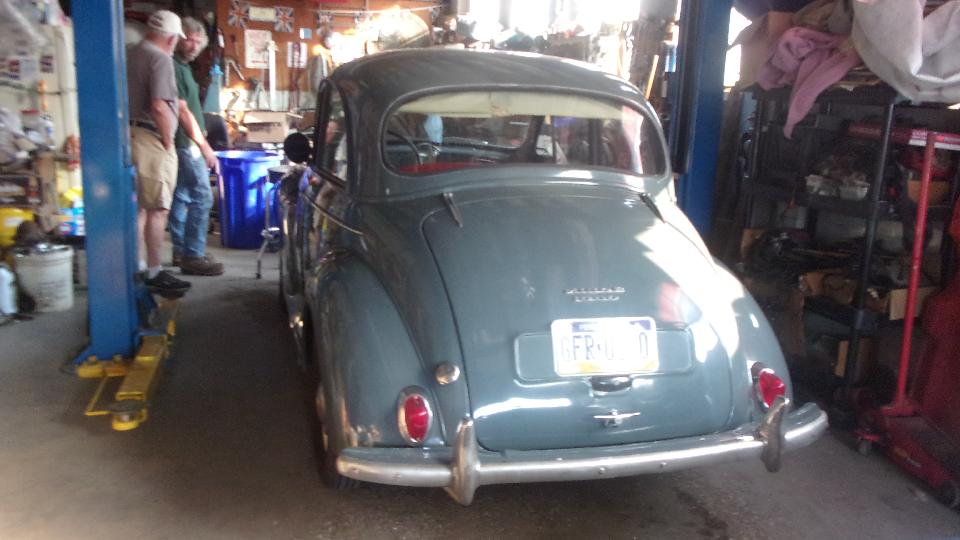
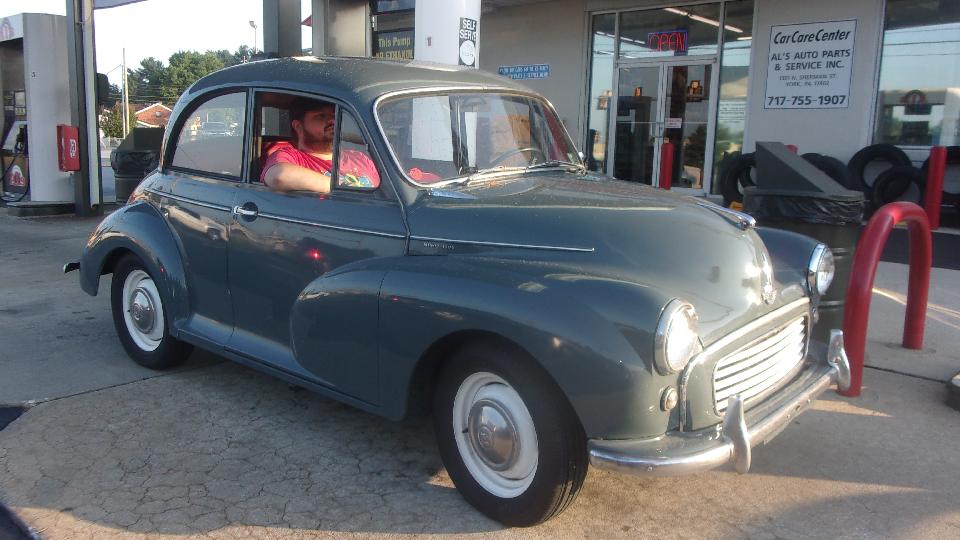
Since the MGA was going to be down for a while Darrell was nice enough to lend us his Morris Minor 1000 (with 1275 engine). We needed to deposit some cash in our bank, which is Bank Of America, but there are no BOA branches in Pennsylvania (only two sidewalk ATMs in Pittsburgr and Philadelphia, and we were not about to drive that far. We we putzing around York, PA visiting other bank ATMs for a while, trying to make the deposit, but no go, just being whacked for a couple of ATM fees. After calling BOA we got no hope from them, except the nearest BOA with an ATM was 40 miles south across the state line in Maryland, so that became the plan for tomorrow morning. Spent the rest of the evening catching up on email and BBS.
Sunday, July 11, 2021:
Spent most of the day making out a parts ordering list, which won't be placed or shipped until Monday. That was time consuming, along with checking current inventory list, and adding parts from our prior wish list Keeping up with the documentation is a bit of a pain. Also took a short trip back to Darrell's place for a chat after he got home from working late, after 10:30-pm, and that ended up well past midnight.
Monday, July 12, 2021:

 Early morning (7-am) short run to an almost local fuel station (pumps in front of a service garage) to get non-ethanol gasoline for the Morris. I was surprised it was only about $0.25 per gallon more thn the common E10 fuel, and would likely get 4% better fuel economy as well, so this looks like a pretty good deal (when you can find it). Then we were off southbound on the side roads, avoiding the expressways running through the hills and small towns, occasionally getting around 55-mph on a few open stretches. All around fun run, 12 miles into Maryland for our bank viisit, then returning to York, PA by mid morning.
Then on the phone to Moss Motors to place the parts order with all around good news. Looks like Moss is pretty much back in full swing with everyone working in the offices, good chat on the ordering line, and another good chat with a tech guy about the chronically cracking exhaust manifolds. Everything we need was in stock, except a Payen head gasket, and I do have one of those on hand, so good all around. One part, a clutch slave cylinder, will ship out of California rather than Virginia, but that's just for a spare part, no rush, so no air shipping required.
All that done, we then checked into the nearest local motel for at least the next four nights stay. And now Darrell came over to visit us late night.
Tuesday, July 13, 2021:
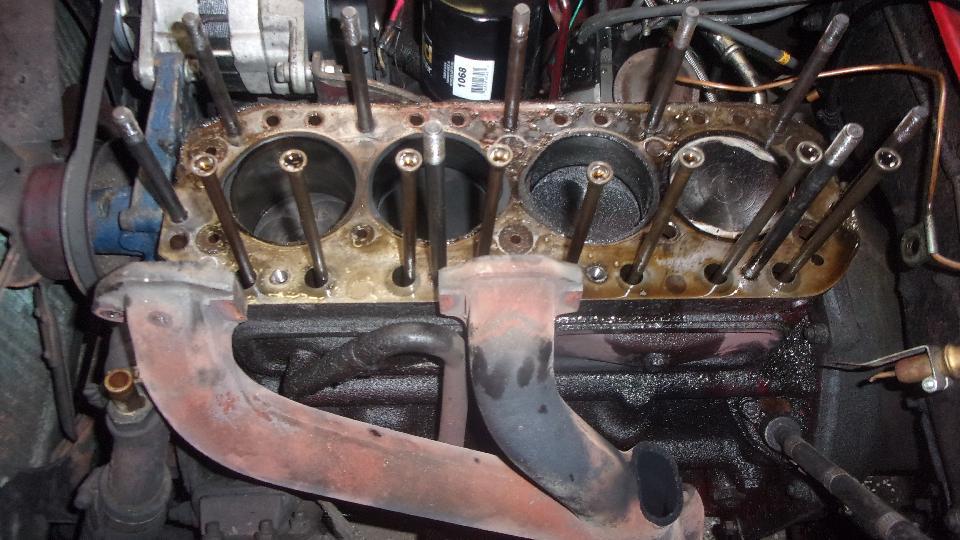
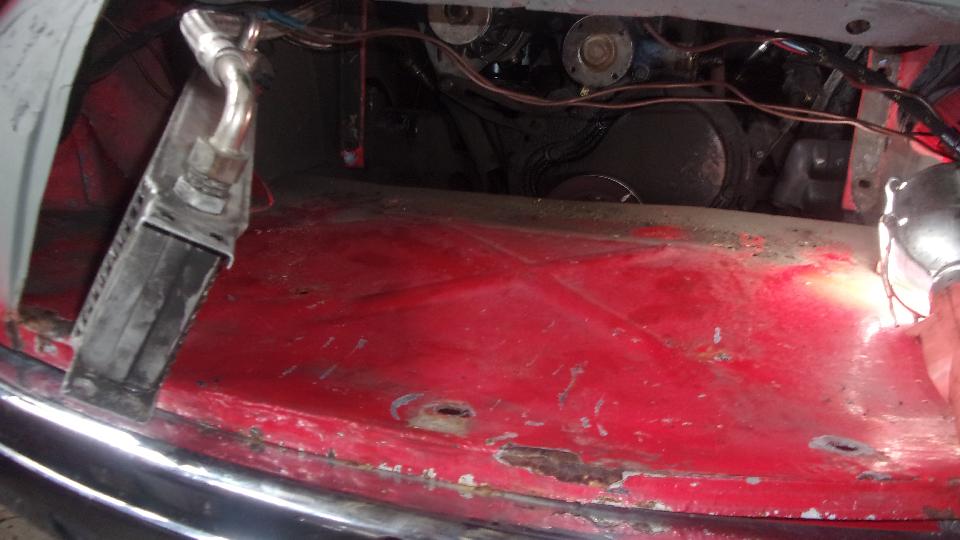
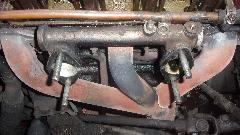
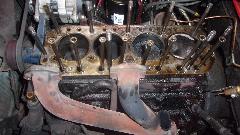
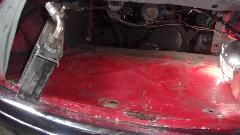
More disassembly work today, and I took a lot of pictures, so hang on. First, Moss Motors wants pictures of the failed exhaust manifold (and more pictures of prior failed parts as well). Then radiator out,and oil cooler swung forward out of the way. Put a wrench on the crank nut and hit the starter to unscrew it. Actually this didn't work on the first try, as the big adjustable wrench slipped off (and I think it was opening up the jaws at the same instant). So I used a 1-5/16" socket with a 3/4" T-bar handle, and it worked like a charm.
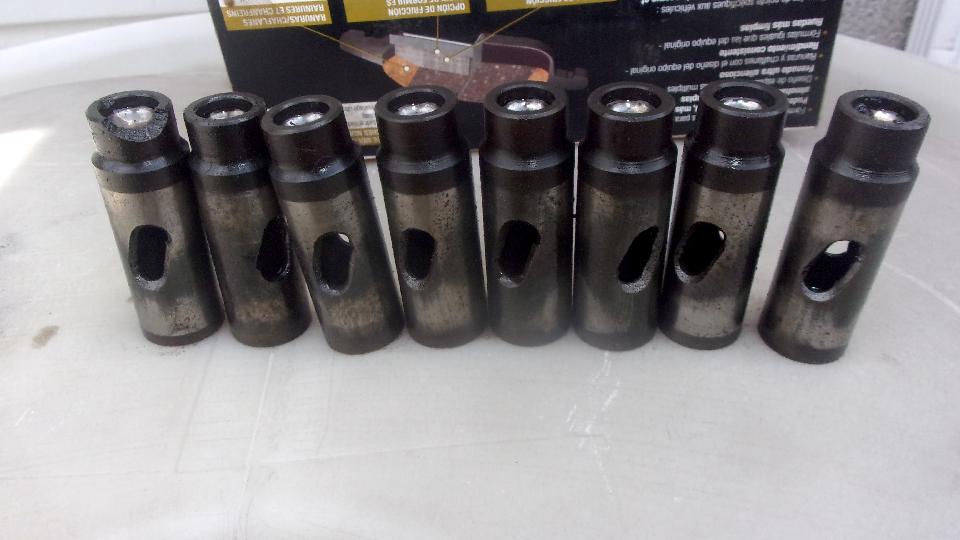
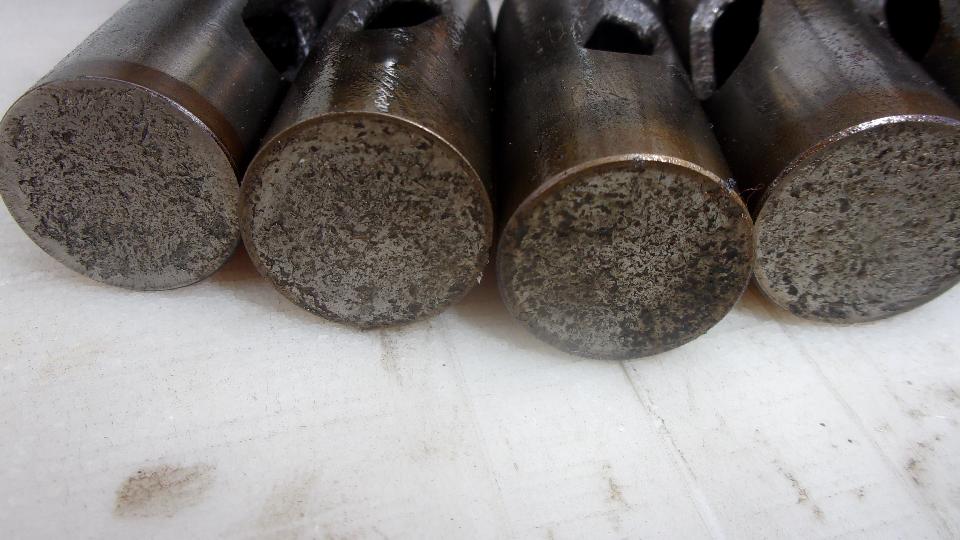
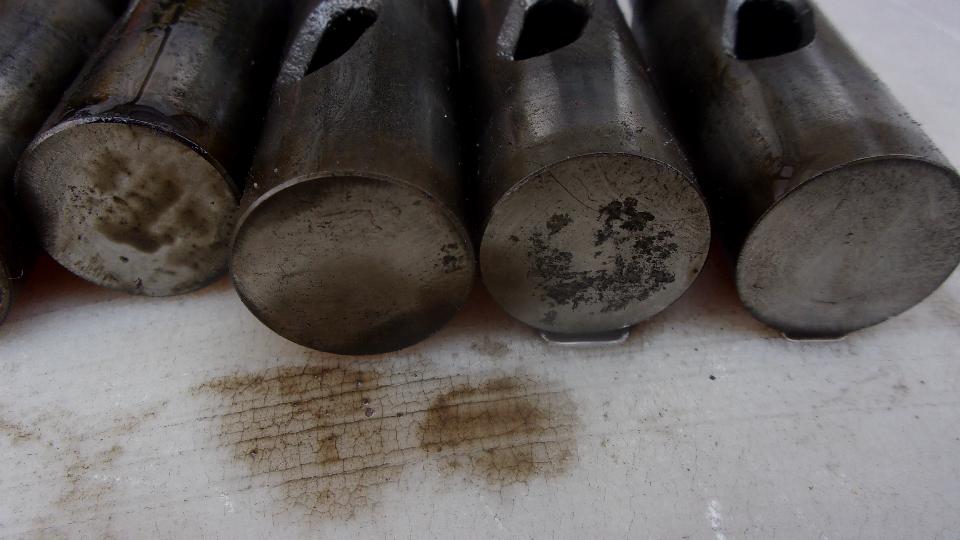
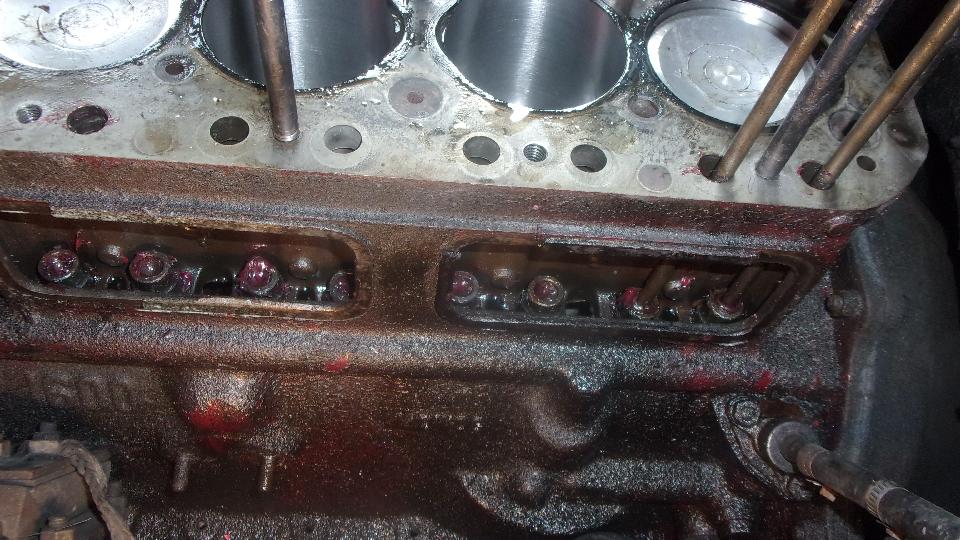
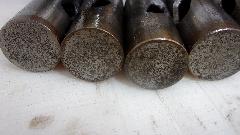
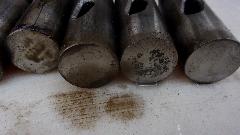
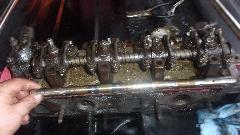
Then we pulled the side covers to get the tappets out, and took the pictures just for demo. The ones up front were well butchered while the ones farther back were still pretty decent, but all will be tossed out.

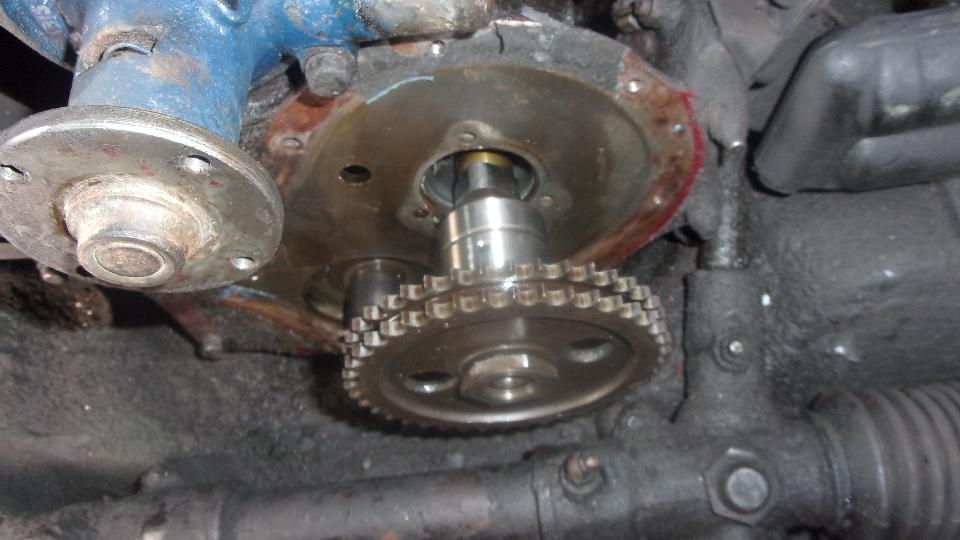
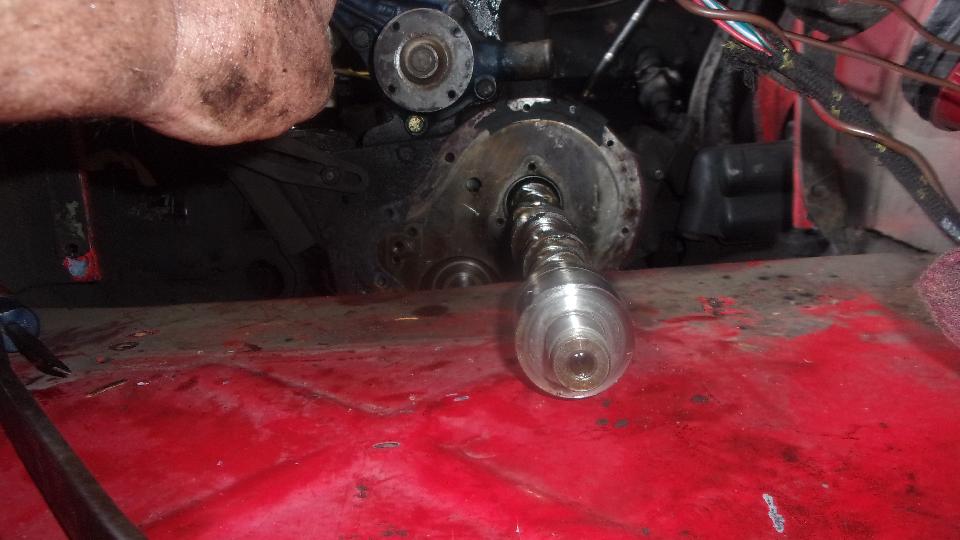
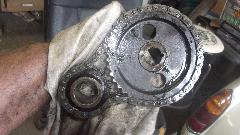
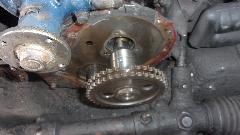
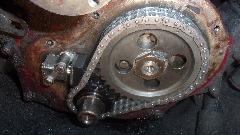
Removed the crank pulley, timing cover, chain tensioner, and the cam drive chain and sprockets. I couldn't find any records of last time the sprockets were replaced, so maybe not since turn of the century. Already ordered new ones. The chain and tensioner were new in 2014 (over 200K miles back), but getting new ones anyway. Notice the cam sprocket with dual keyways and dual timing punch marks, definitely an aftermarket part. After removing the can thrust plate, reinstall the cam sprocket loosely as a handle, and pull the cam out the front. You do have to remove the distributor and the distributor drive gear, but I pulled the cam here without removing the sump or oil pump, just to prove it can be done. Also notice the cam comes out just above the body air pan, so all of this can work without pulling the engine out of the chassis.

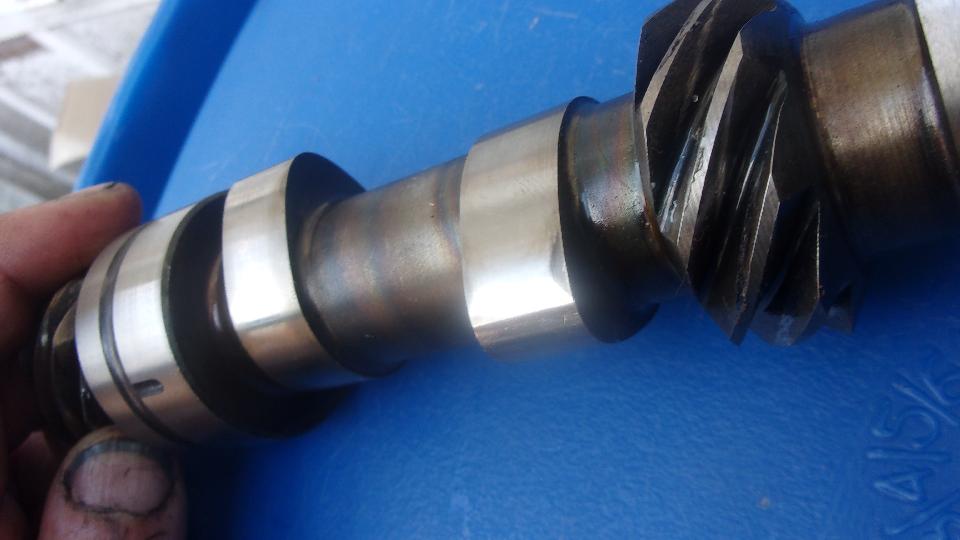
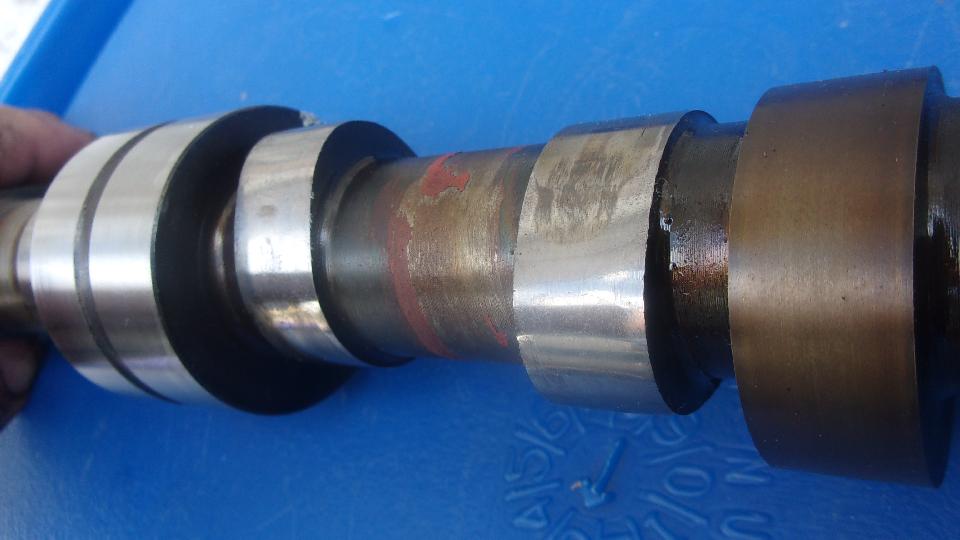
Then I took pictures of the cam lobs, just for grins. The four in back were in pretty good condition, while the four up front were e absolutely shot, some of them work down to half height. Also pull the relatively expensive tach drive gear to use on the next cam. While we were removing the front and rear woodruff keys, I was prying pretty hard on the front one when it popped out and bounced off the car windscreen. Figuring it was a goner for sure, I pulled a new one out of the magic trailer, and then the old one immediately appeared sitting on the body piping on the LF wing, so the new one went back in the trailer.

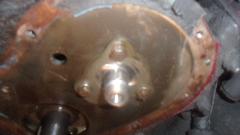
Not too long to remove the oil pan, with the normal fiddling time for the two front corner bolts above the chassis
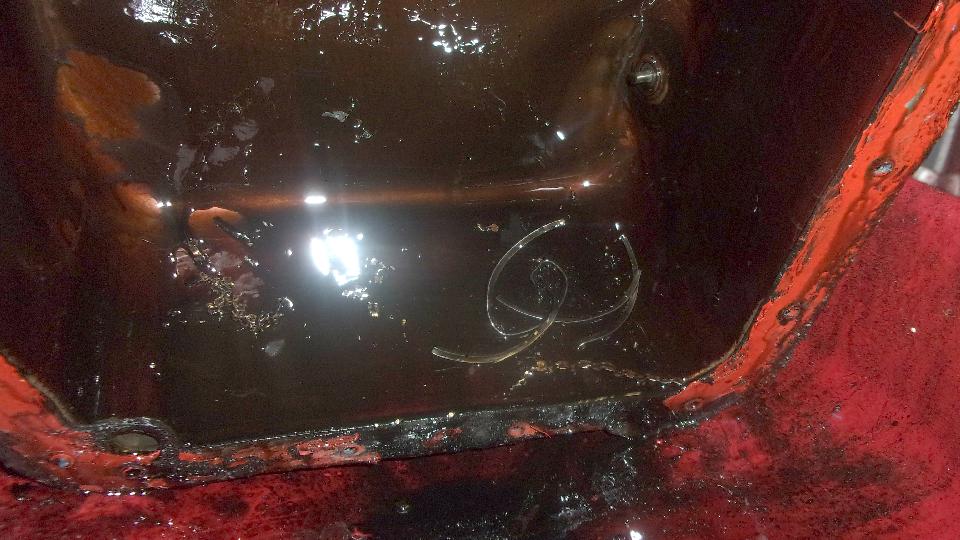
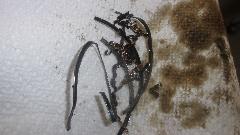
 frame. Kind of dark in the sump, but that's where we found the remains of the oil wiper ring, so now we knew exactly where the #4 piston broke. Remove 3 nuts to extract the oil pump (as a matter of convenience). Knock down 4 locktabs, undo 8 bolts from the big ends, and push the pistons out the top. #4 is the pop-top model. #3 has significantly burned edges matching 2 broken compression rings, which must account for the low (75-psI) recent compression reading. Someone else ultimately noticed that #2 also had a broken top ring with a small amount of corrosion around that ring groove, but that was the cylinder with the best compression reading.


The Tuesday night 6:30 tinkering party began arriving at 6:10, so that was the end of the MGA disassembly work. The only thing left to do is to hone the cylinders before reassembly, and no immediate rush for that, so it was show and tell time.

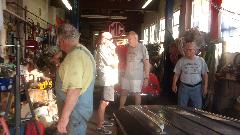

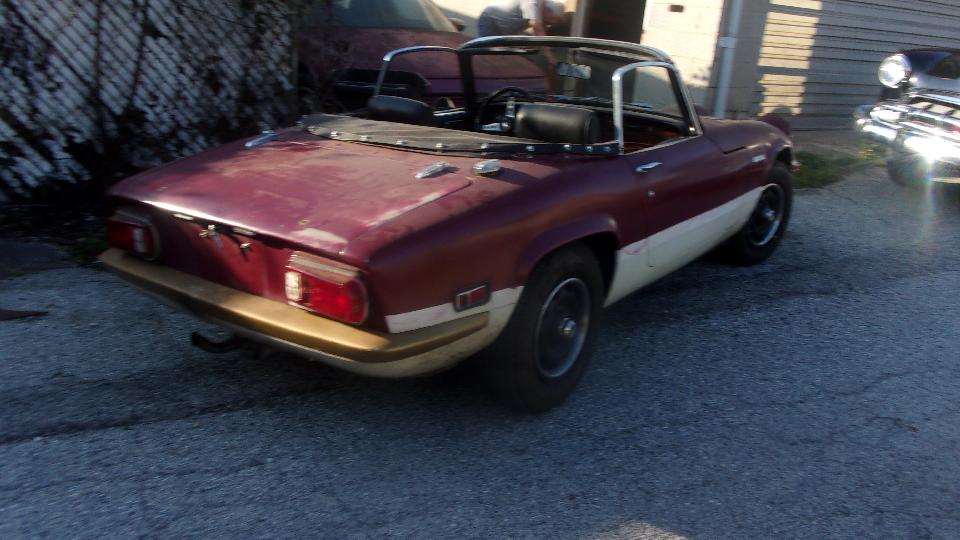
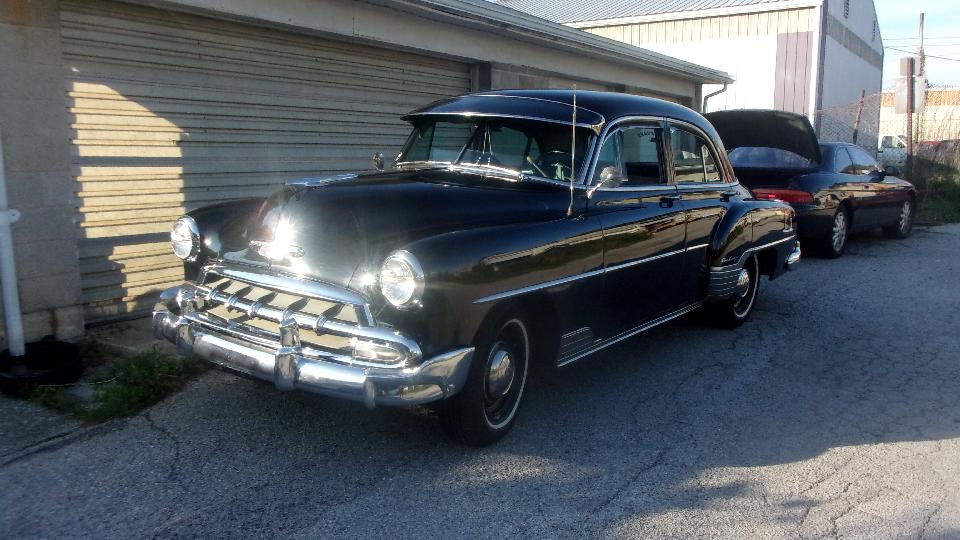
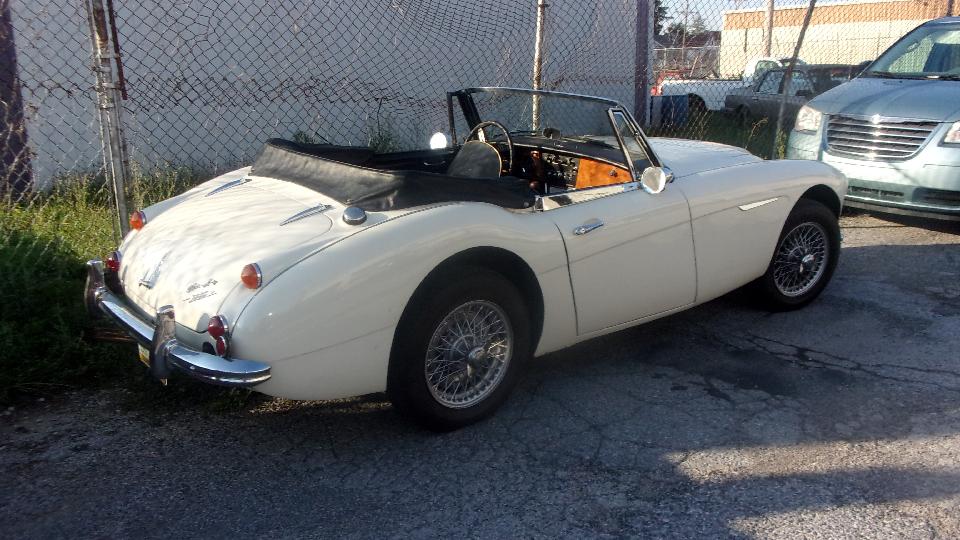
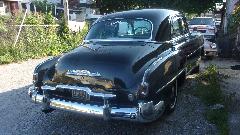
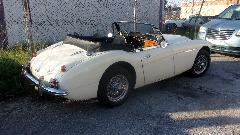
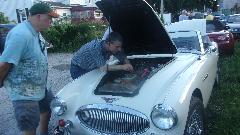
We had a few new classic cars tonight like the Lotus Elan that was running with some smoke, and the very nice Chevrolet Bel Air 4-door with Power Glide (automatic transmission), must have been about 1953. The big Healey was also very nice, may have been here before.

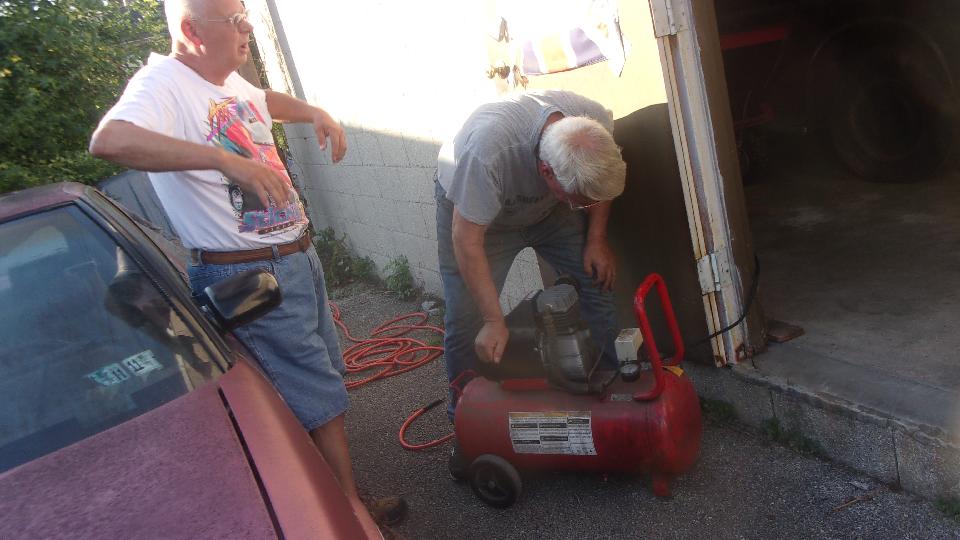
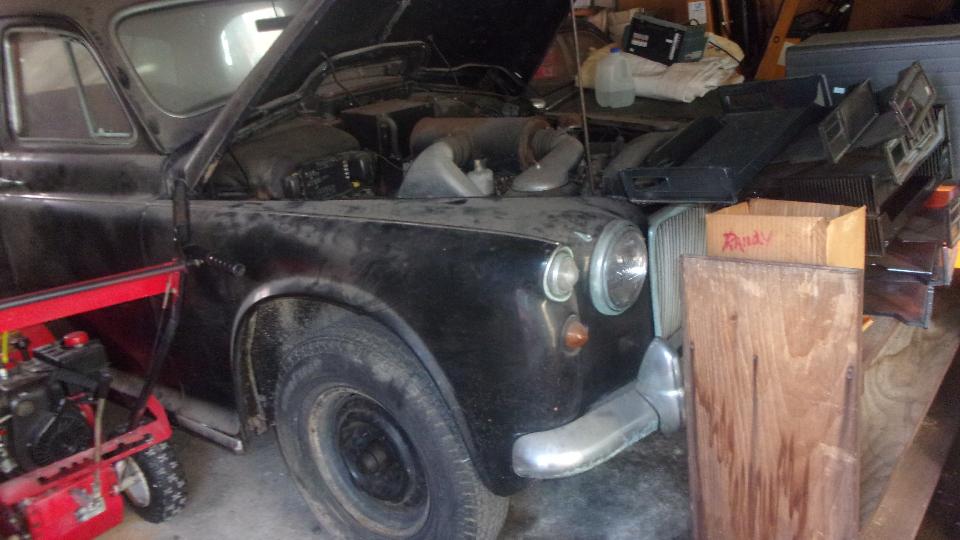
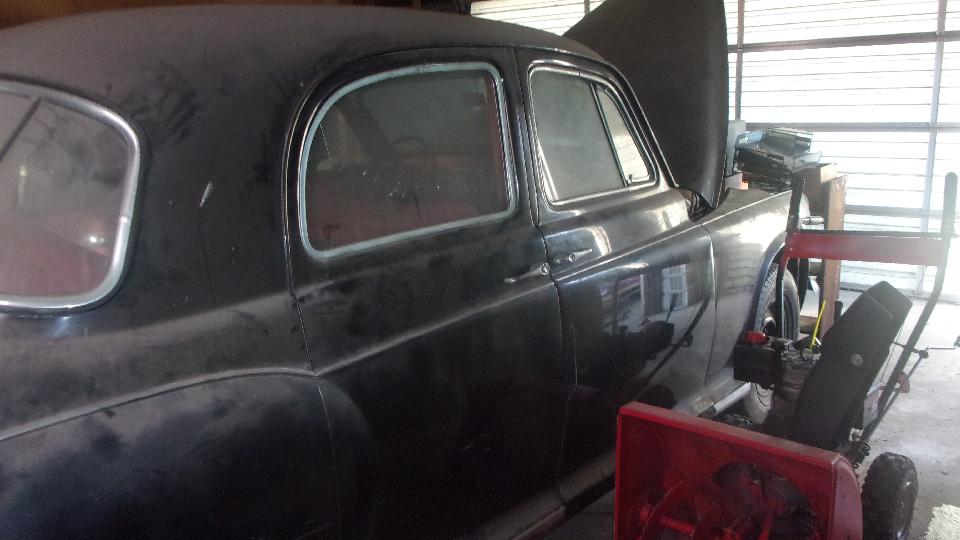
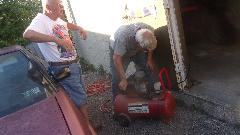
Had to get an air compressor running, as they were about to move some old cars around, so I got a peak inside the 4-car garage. I don't remember the Rover 105 being in there.
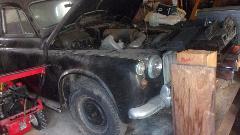

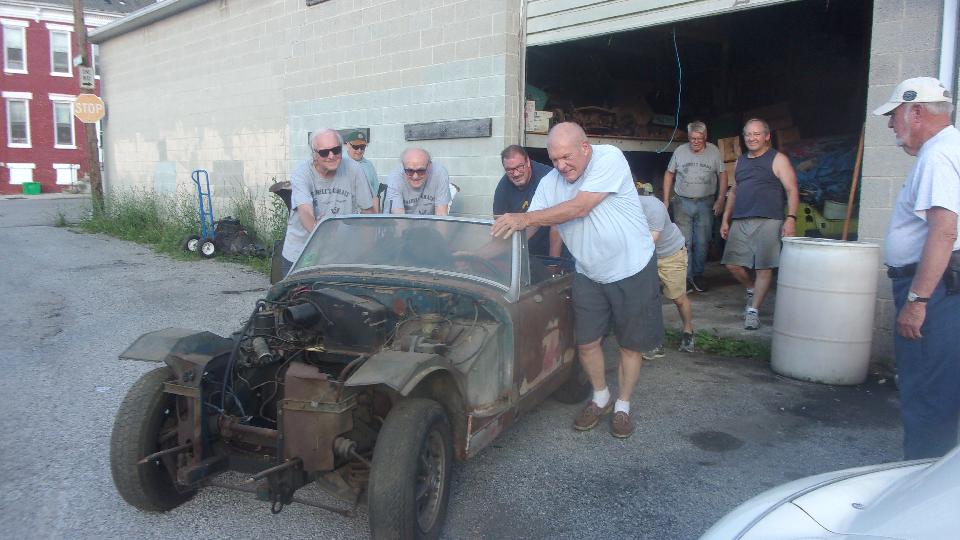
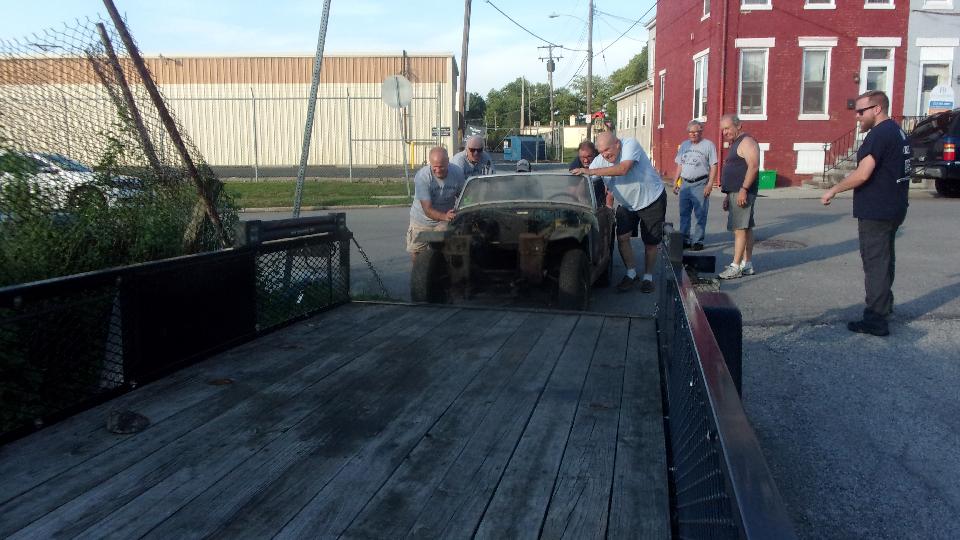
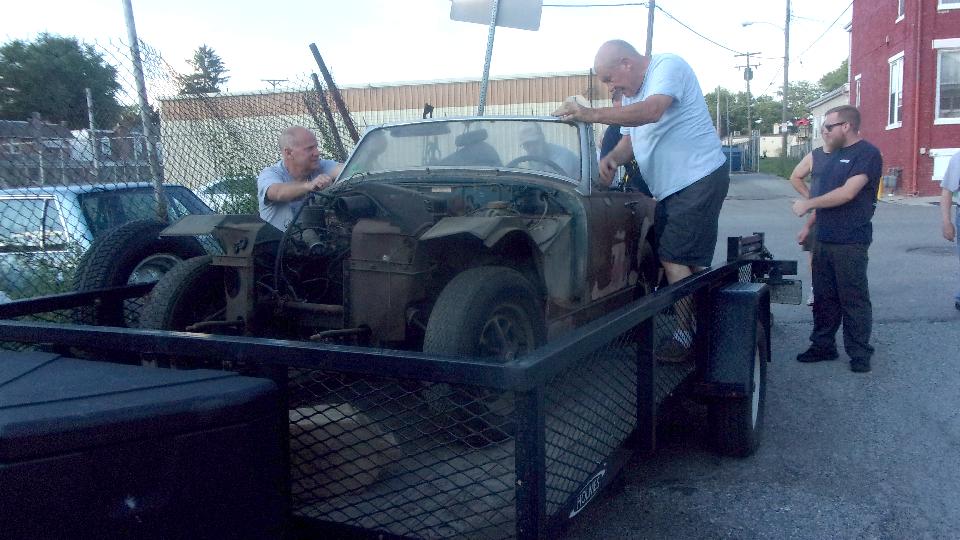
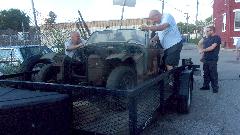
The prize tonight was in another building. That Midget had to come out of there, and where there's a will (and enough manpower) there's a way. The front clip came out first, followed by the rest of the car on rollers.
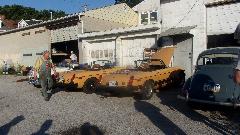

With some more air in the tires it was push onto the trailer for a ride to a new home where is is going to be restored, possibly better than new as a show car. This one was surprisingly solid with very little rust.
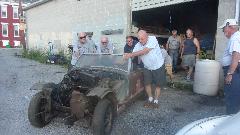

The Lotus was supposed to get parked in the space where the Midget was sitting. The game of inches turned into fractions of an inch, and it didn't quite fit, but close enough for now.
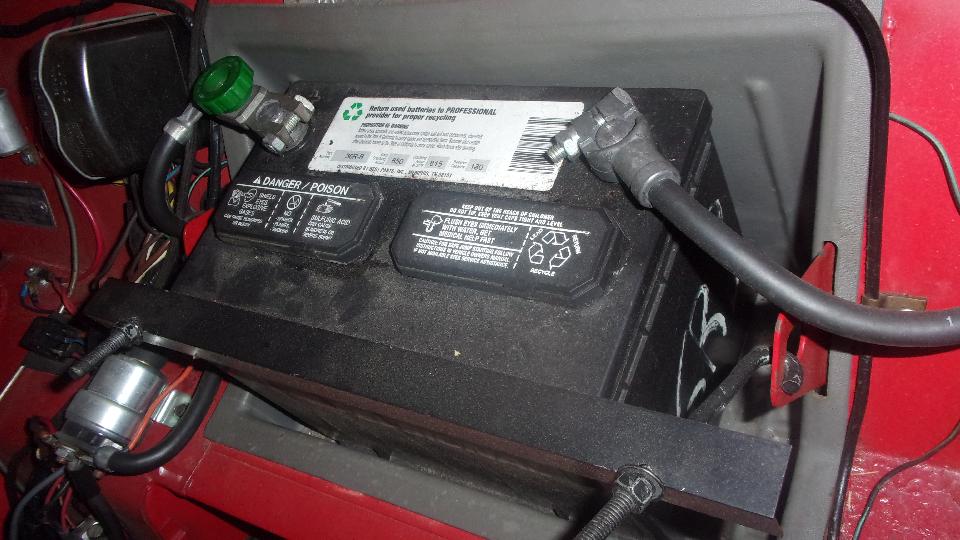
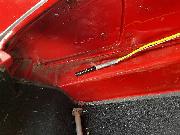
Then the big Healey wouldn't start. The original factory issue Lucas battery cut-off switch had already been bypassed (because it was duff), and the now 2-piece battery ground cable had a loose connection at the body shell grounding point. That took a while to clean the rust out, but eventually was reassembled, fired up and ran home.
Wednesday, July 14, 2021:
Finally this morning I got the email verifying my parts order, and that it was indeed shipped on Monday, and is today out for delivery. Then it was a waiting game, regularly checking the tracking number to see when it might arrive. Meanwhile, I spent nearly the whole day catching up email and BBS and photos and notes for the past three days for this trip log for your enjoyment. The phone rang at 5-pm, Darrell saying my package just arrived that minute, and he was going to stick it in the garage. Good timing. But it was pretty late in the day, so we decided to make it a social and get to work on the car tomorrow.
Thursday, July 15, 2021:
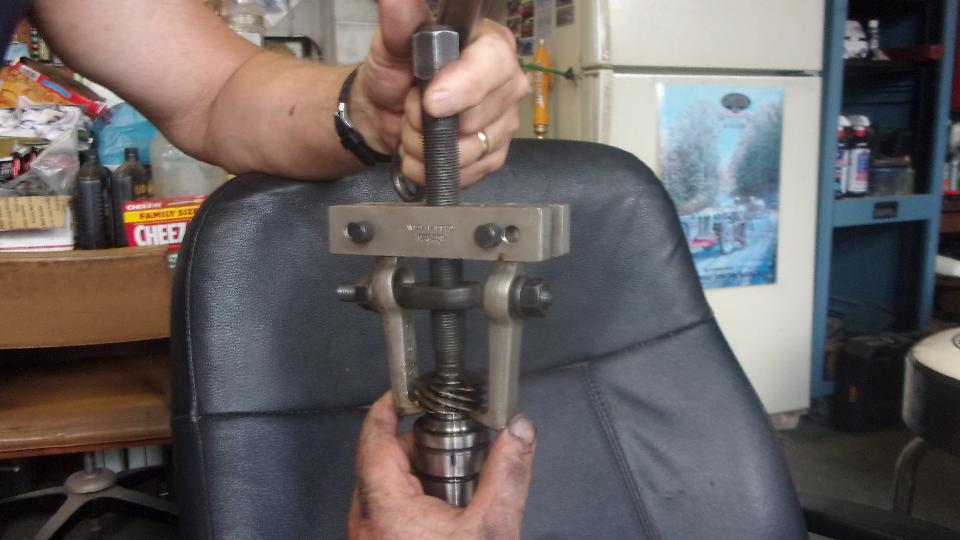
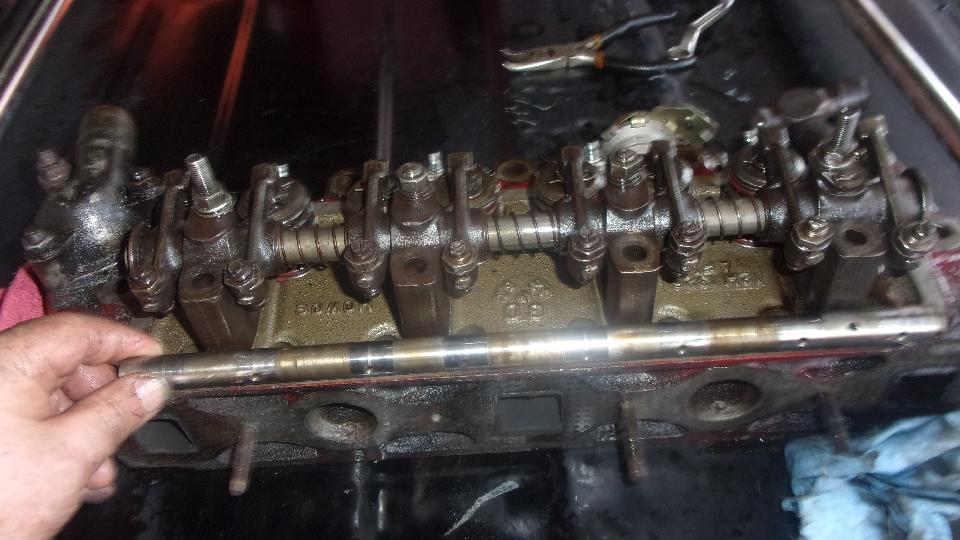
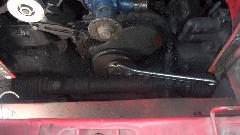
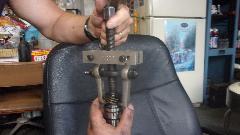
Early rise, quick breakfast, email check, and off to the garage by 10:15 (well.10:30 by the time it was unlocked). Getting started with something we could have done yesterday, installing a new rocker shaft on the cylinder head. A bit worn on the bottom, but not a bad as i had anticipated. Some time ago I had procured a new Tuftrided rocker shaft, just wanting to try it out to see if it might be worth the extra cost. If my records are correct, the old one has been in service for 20-yr 9-mo and 319,000 miles. Well, if a standard rocker shaft can last that long, the "better" one may not be worth the effort, especially if you have to wait 20 years to see the return on your investment. Keep your oil clean, folks. As usual the rocker bushings were worn maybe half as much as the shaft, still a fairly close fit on the new shaft, so the priority dropped way down, and I am not going to change the bushings at this time. As I always say, change the rocker shaft twice for one change of the bushings. That didn't take long.

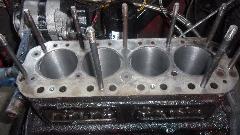
Then on to honing the cylinders. Rotate the crankshaft sideways. Get under and lay rags over top of the crank, 1 between front and center main bearings, and another between center and rear main bearings. That covers the entire exposed part of the crankshaft. Then chuck up the big 3-stone hone in a 3/8-inch power drill and have at it with a generous dose of kerosene for washing the walls and stones in process (to prevent clogging the stones). Hone a little, wash a little, hone a little wash a little (sounds like the Music Man). There weren't any top ridges or scratches, just a few buff marks, so it all honed out nicely in short order. Final rinse with kerosene, then wash with soapy water and rinse with clean water. Remove the rags underneath (toss those into the dust bin), and wash/rinse the crankshaft with soapy water and clean water. After dry, oil down the cylinder walls and bearing journals before they can start to rust. Pretty in there.
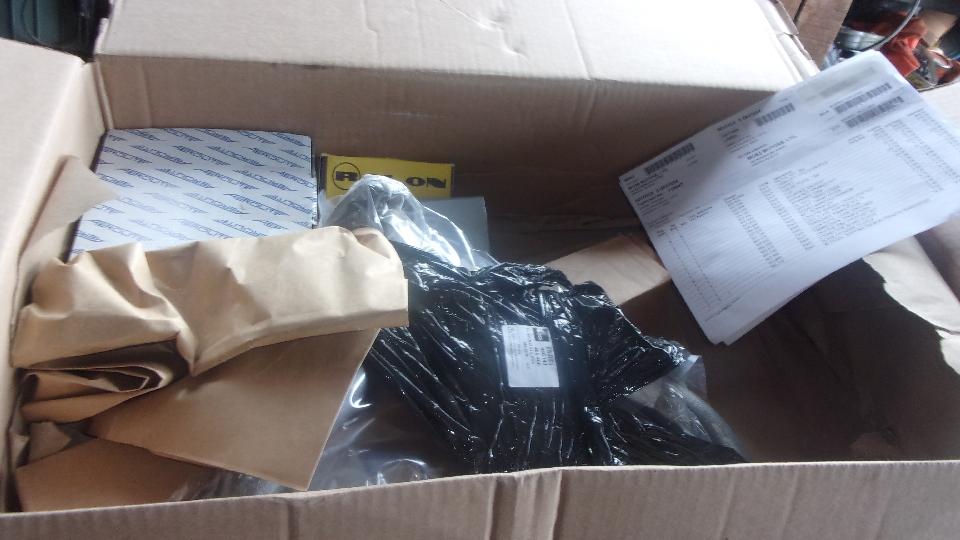
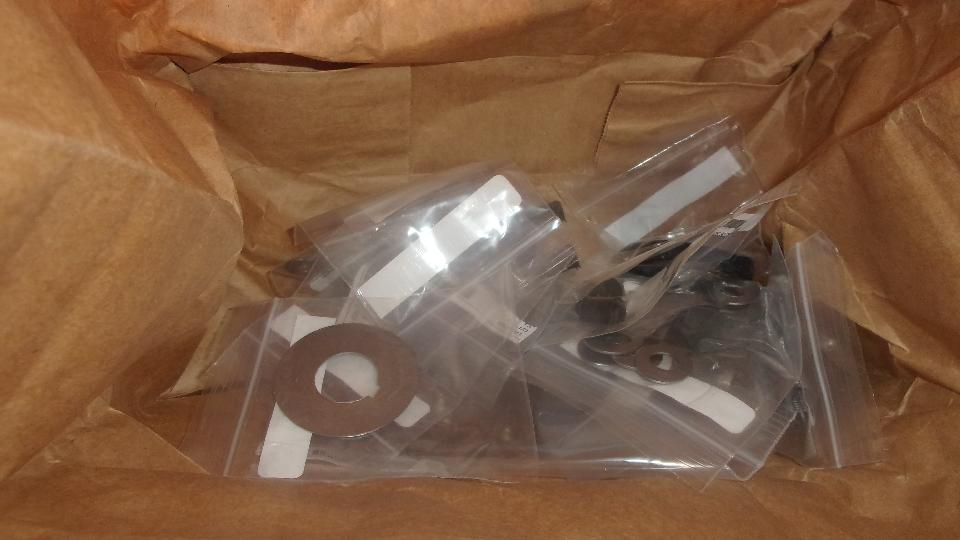
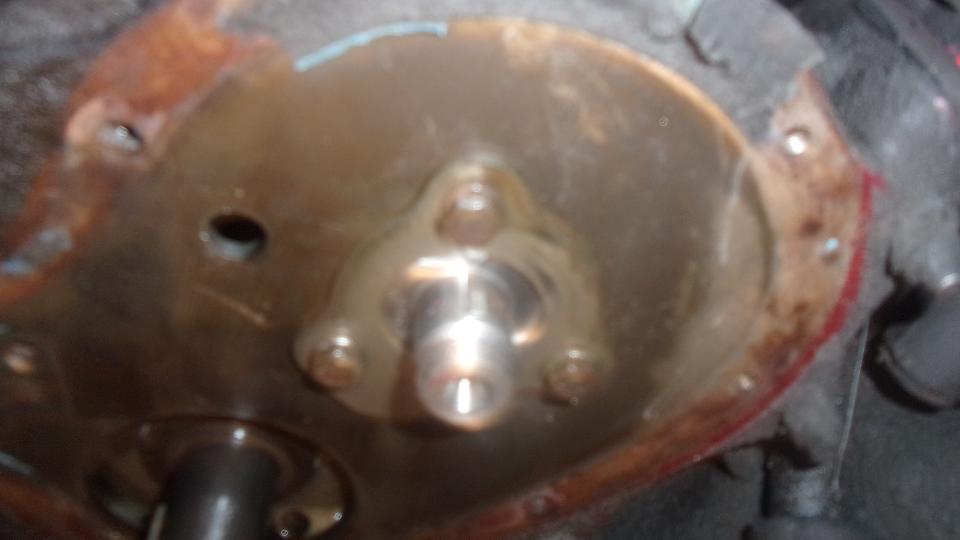
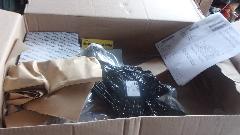
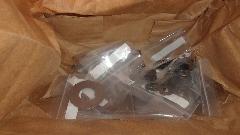
Then it was time to attack the package of new parts. I took lots of pictures to verify the inventory, and everything ordered was there and correct parts. The part in the white and black plastic wrapper is the new exhaust manifold. Next picture is the small bits inside the paper bag. Last picture is the front end after the new cam shaft was installed. Sorry, kind of busy and maybe didn't take enough pictures here. For the new cam, install front and rear woodruff keys, the tach drive gear and retaining ring on back end. Then grease the heck out of all the cam lobes and bearing journals and the two gears. It slipped right in even easier than it came out, as the oil pump gear was not in place this time. Install front thrust plate before sprockets.
 Remove and replace one pinch bolt to push out wrist pin and change in new pistons for old. Install oil ring spacer, bottom and top thin rings in the oil ring grove, #3, #2, and #1 compression rings on the piston. Repeat 4X. I'm sure ll that is documented elsewhere (including instructions that come with the pistons and rings). Oil the big end bearing, lots of oil on the piston, Apply piston ring compressor, drop it into the cylinder, tap down with wooden hammer handle, install the big end bearing cap with new lock tab, torque to spec and cinch up the lock tab. Repeat 4X. Install the oil pump assembly, and ready for the oil pan.

 Get the cam timing right, install timing chain and sprockets, check timing again before final lock down and tensioner installation. Ready for the front cover. Check pushrod bottom end fit in all of the new tappets (some have been no-go recently). Look okay, so grease the crap out of the tappets and drop them into place. Ready for the side covers.
Then I found out that navigator had not removed old gaskets when he was cleaning sump and timing covers the other day, so stuff got bogged down while we were scraping gaskets. I did get a new timing cover seal installed, and the side covers installed, but ran out of time at 7:30-PM (after 9 hours in the heat). Had to clean up and get on our way, as I had a 8:15 appointment for a Zoom meeting with the CMGC web site committee (which was kind of a bust again anyway). The daily dose of email and BBS, followed by finishing these photos and notes at 2-am. Good night folks.
|