The MGA With An Attitude
MGA Guru Is GOING MOBILE - (May 16 - May 30, 2018)
Wednesday May 16, 2018:
Long day yesterday had me up most of the night catching up on email, tech questions, and photos and notes for the past couple days. Late rising, checked the tracking number. The next day air delivery UPS plane that left California last night 24 hours late arrived Lexington, Kentucky at 2-am. Don't know if that was a programmed stop or unplanned landing, but then reporting a mechanical problem and another delay, so no package delivery today either. Bummer. Going to be delayed another day, there were some smaller things we could catch up with.
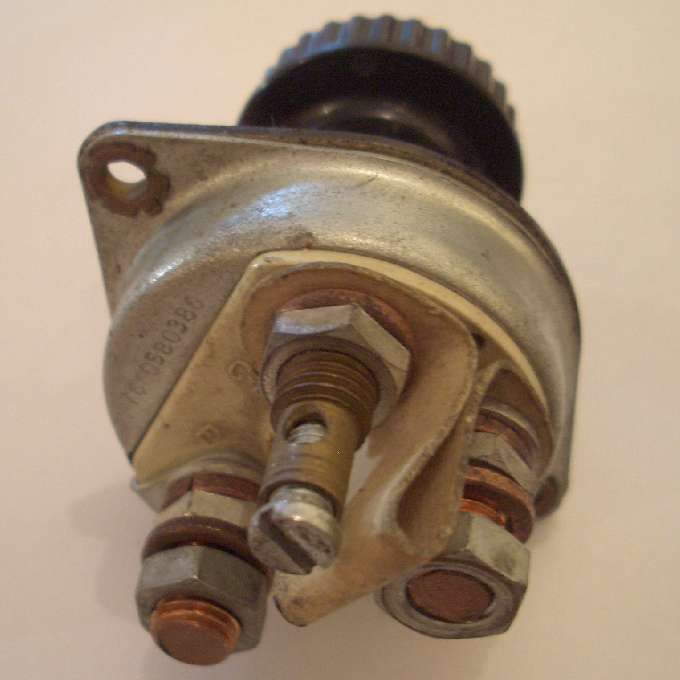
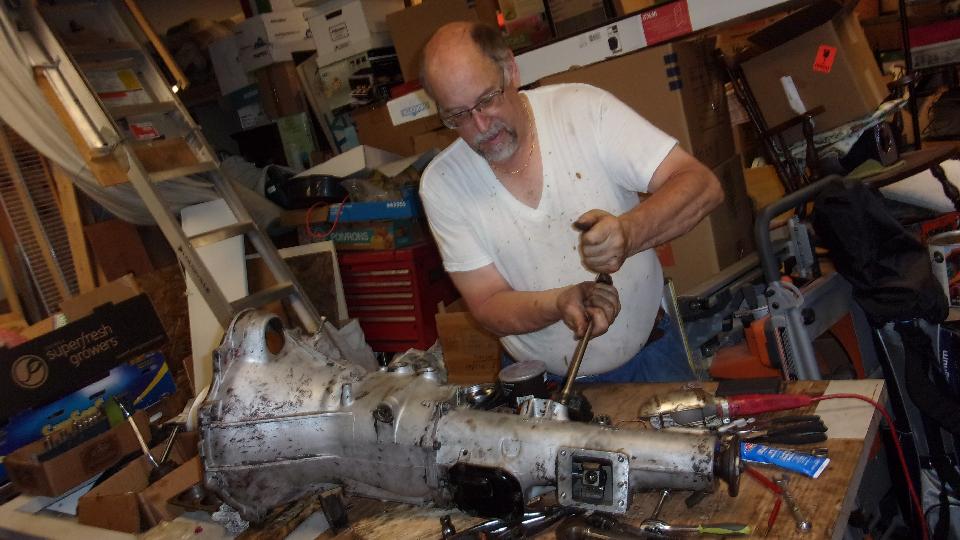
 I spent some time going up/down installing a battery cut-off switch (to replace the third failed one). That allowed reconnection of the battery cable and replacement of the battery cover. Then a bit of time swapping parts between two turn signal switches, installing a better contact block and a housing with good panel threads on the existing switch that had good vacuum timing function and bad panel threads. While groveling around the trailer looking for the new cut-off switch and turn switch, and getting things a little more organized to be easier to find, I finally found the rear seal for the gearbox and got that installed. I spent some time going up/down installing a battery cut-off switch (to replace the third failed one). That allowed reconnection of the battery cable and replacement of the battery cover. Then a bit of time swapping parts between two turn signal switches, installing a better contact block and a housing with good panel threads on the existing switch that had good vacuum timing function and bad panel threads. While groveling around the trailer looking for the new cut-off switch and turn switch, and getting things a little more organized to be easier to find, I finally found the rear seal for the gearbox and got that installed.
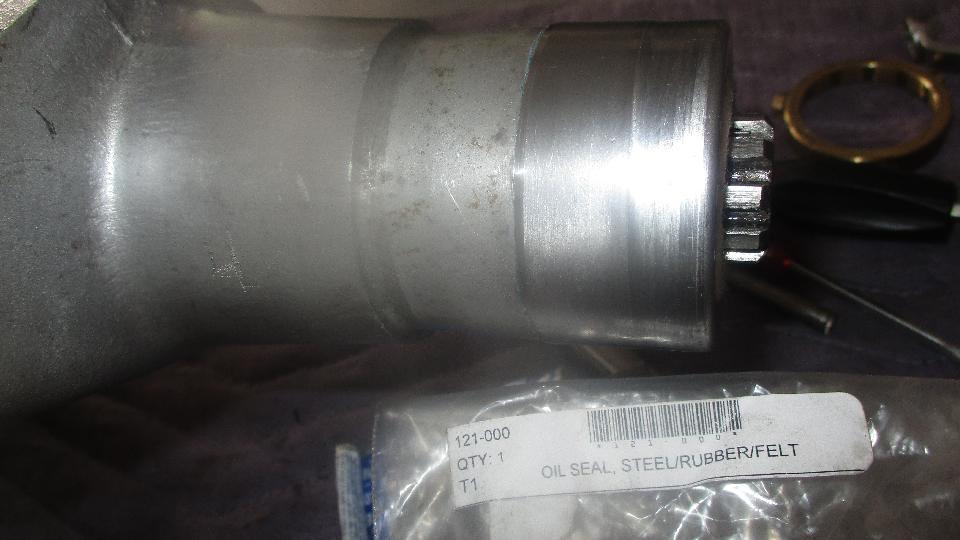
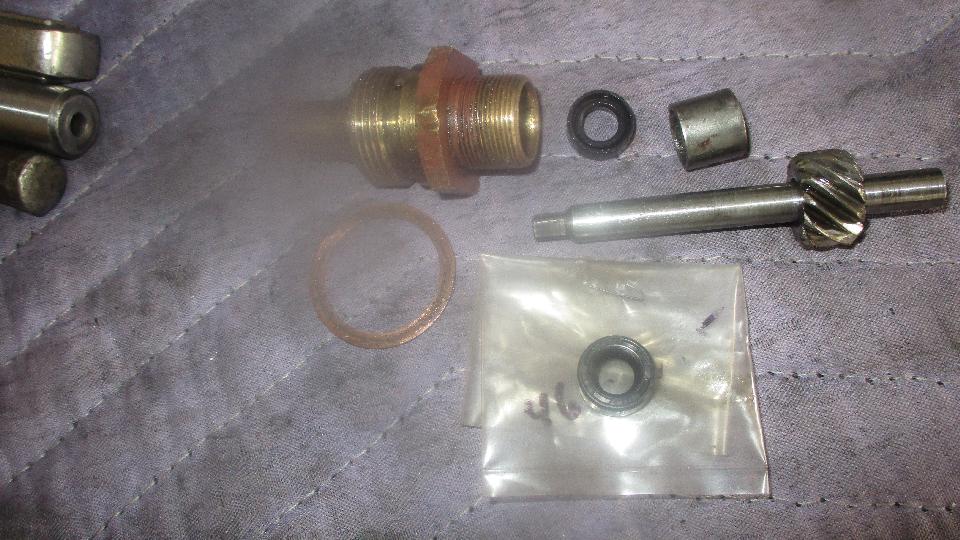
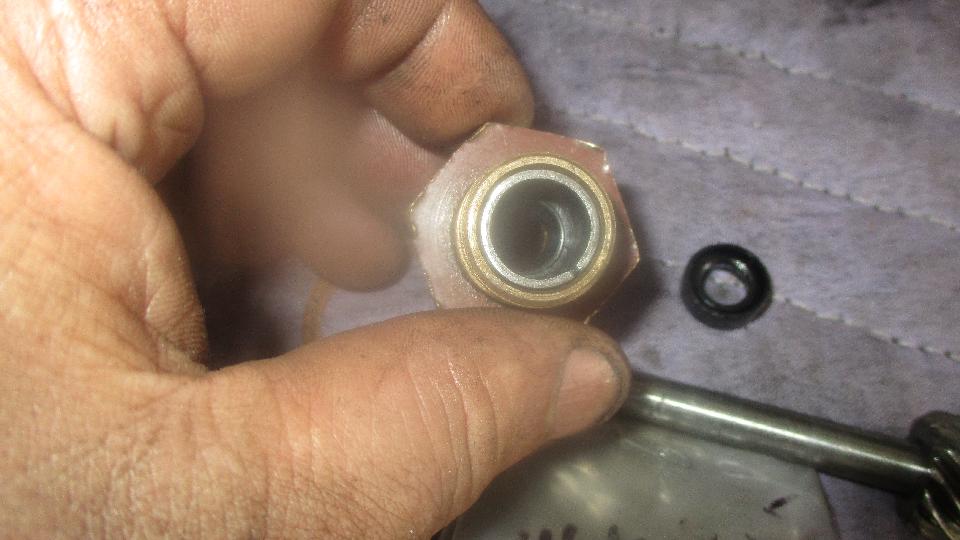
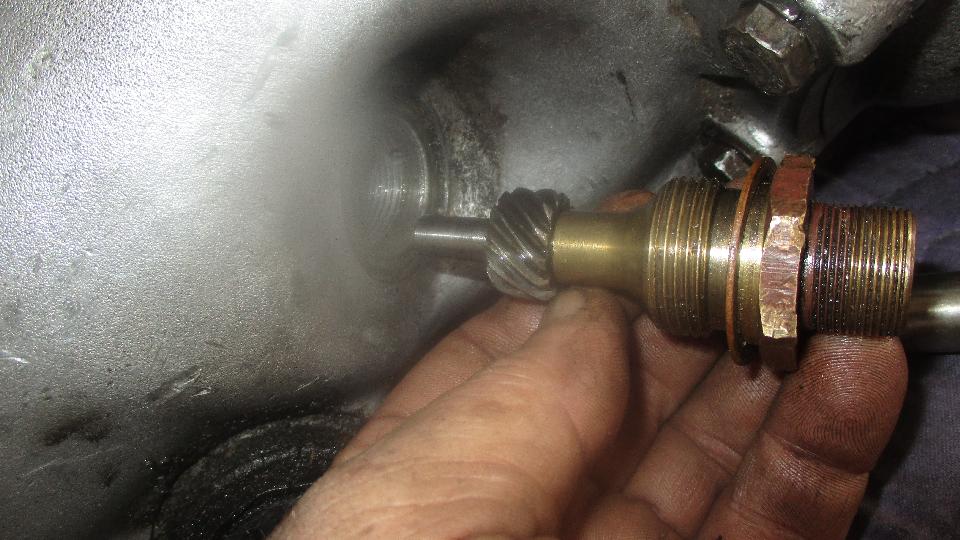
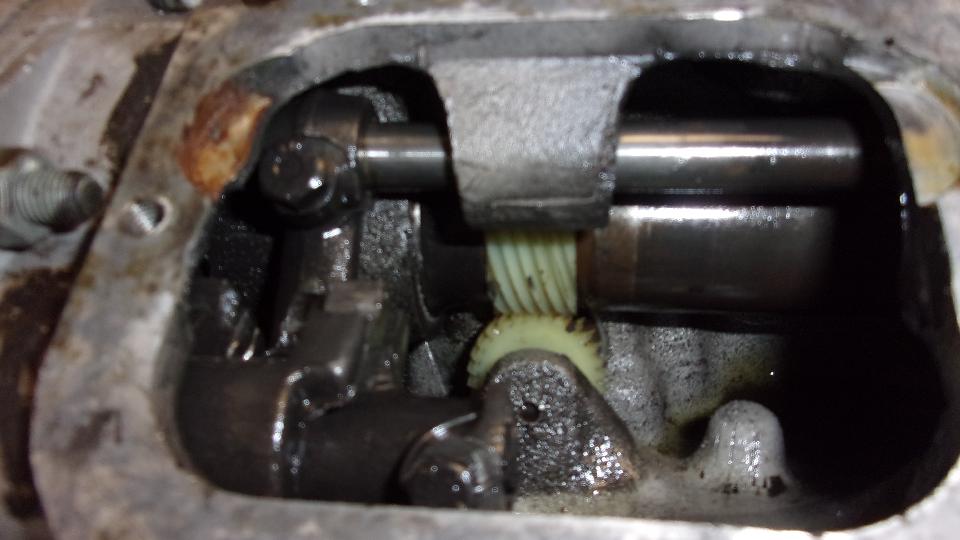
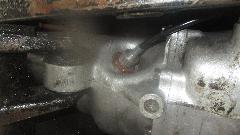
Having found the rear seal, only the front seal was still missing. So, consult the MGA Guru web pages to find cross reference numbers for the front seal. Called NAPA to check on a NAPA number, not in stock, and all of our other numbers kept referring back to the NAPA number. One was a Ford part number, and there was a Ford dealer nearby, so we tried that. Not in stock, but the Ford guy referred us to O'Reilly Auto Parts for a National part number. Not in stock at O'Reilly either, but they can get it first thing tomorrow morning. Yahoo, beat the airplane. Also installed a new seal on the gearbox speedometer drive pinion shaft. Really needed it I guess, because after removing the retainer sleeve the seal fell out by gravity, not sealed around the OD, so I suppose that will stop another small leak (below oil level).


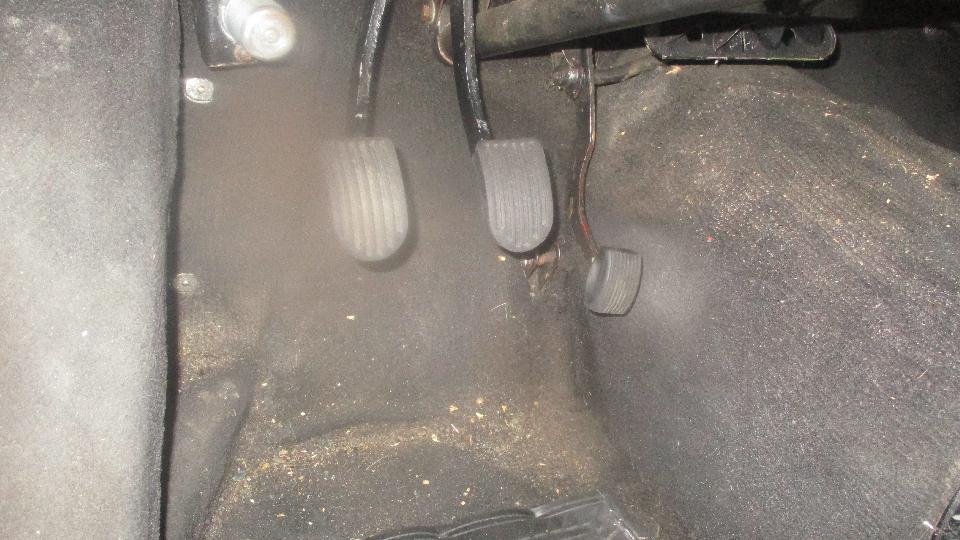
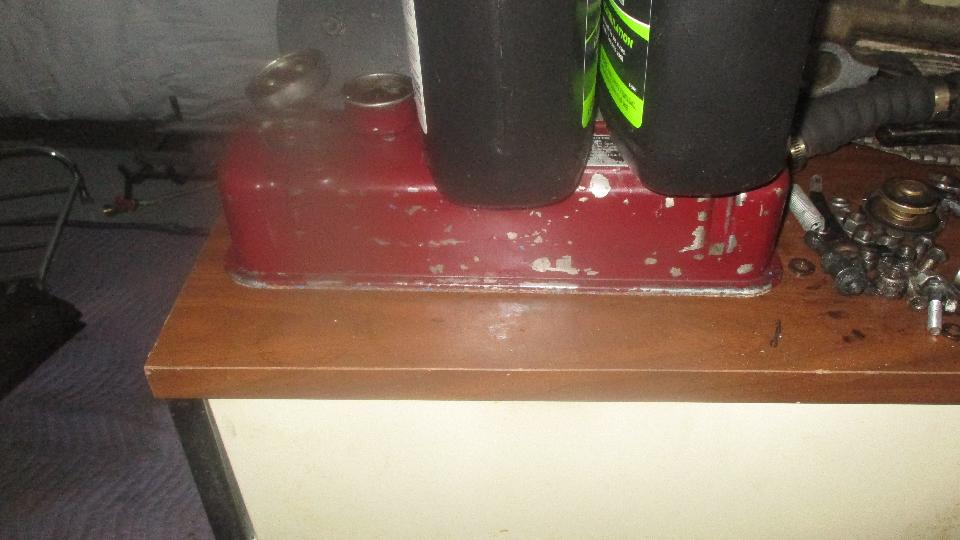
Another finishing touch on the gearbox, installing the shift motion limiting plate with gaskets. Glue the pedal pads onto the pedals to prevent them from continuously falling off, and put a few staples in loose carpet. That ran into dinner time, but evening had enough time left to clean the valve cover and glue on a new cover gasket, and weight it down so it will be flat and dried in the morning.


Thursday May 17, 2018:
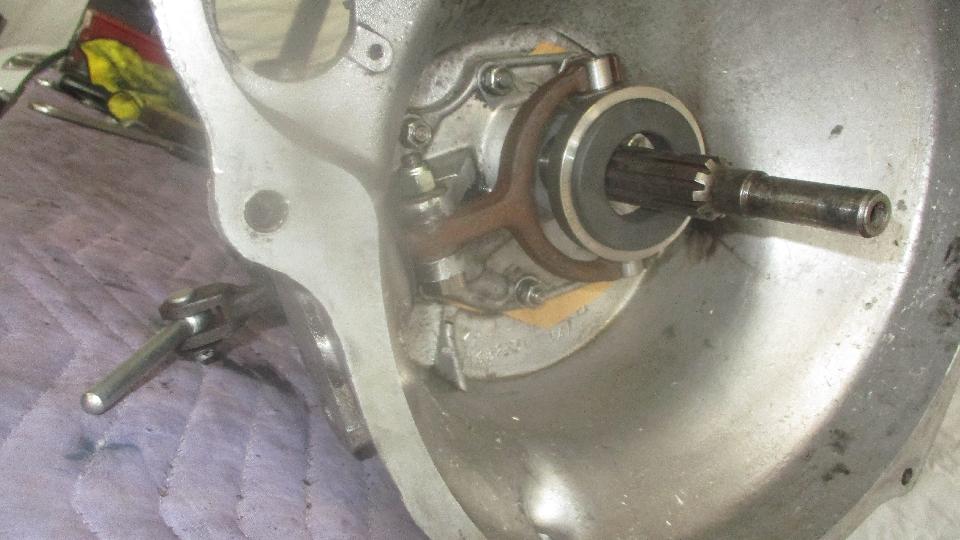
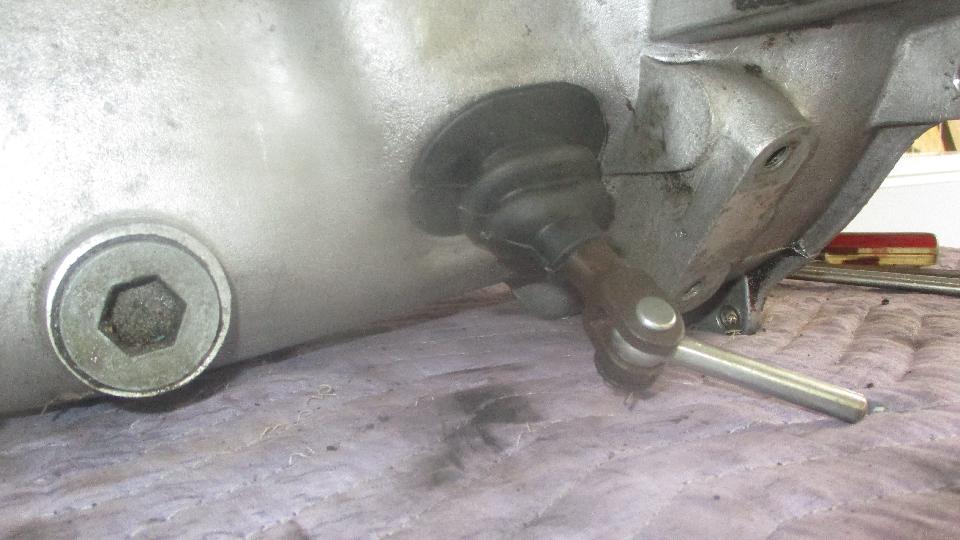
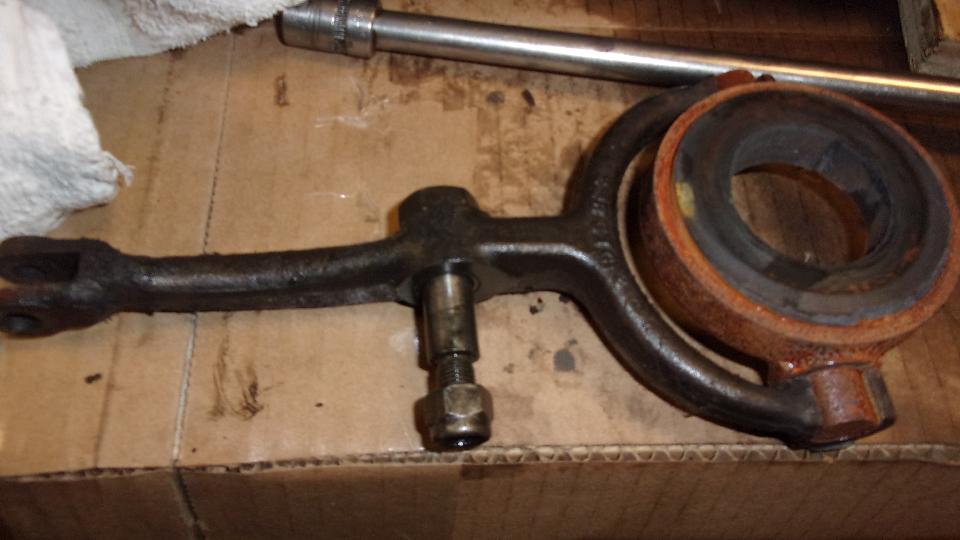
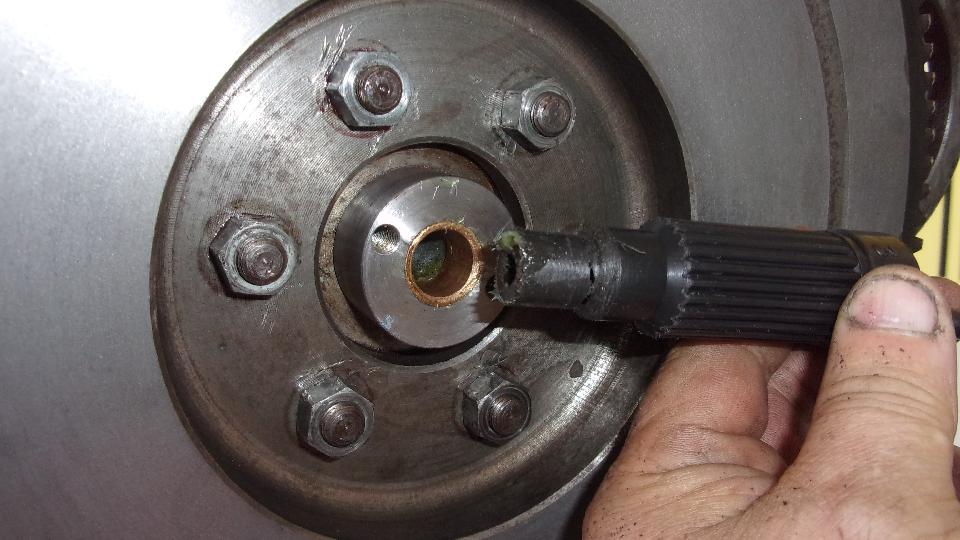
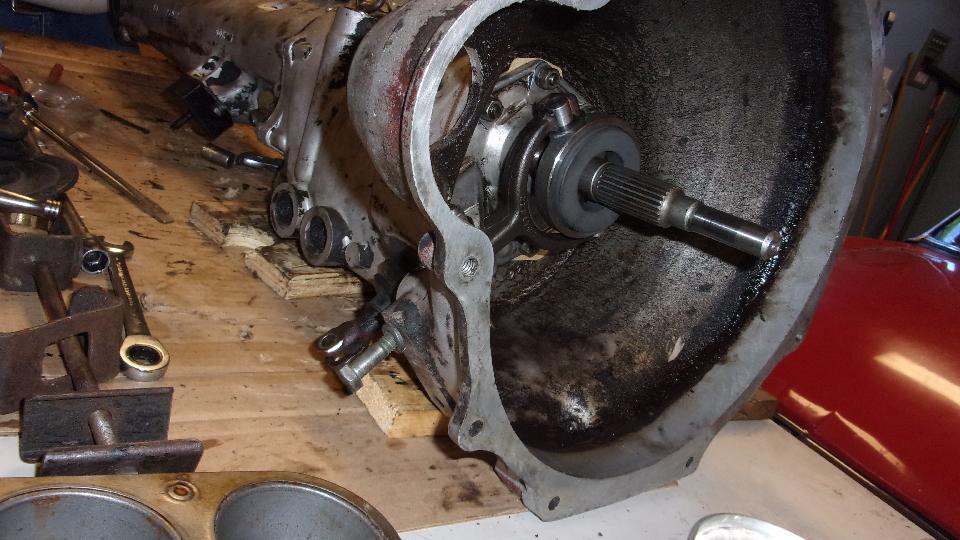
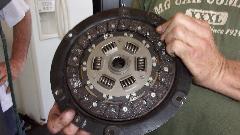
Big day today, determined to get the car back on the road. Early morning trip to O'Reilly Auto Parts to pick up the National seal(s) for gearbox front cover (also snatched up a set of stubby end wrenches while there). Not long to change the front cover seal and install the front cover (with bearing shims). Installed a replacement clutch release arm (good used part carried from Bonita Springs, Florida last December). The prior half million mile part was worn loose in ears, likely a result of rattling a bit for the past two years due to a broken retaining clip. New release bearing, new rubber dust boot, new slave pushrod and clevis pin. A few minutes later it was sitting in the chassis, shortly to couple the sliding joint to propshaft, install rear mount bolt, connect speedometer cable, lift the bellhousing onto a 1-1/2 inch wood block, repack the clutch slave cylinder (because the outside dust boot was ruptured), and remount the slave cylinder.


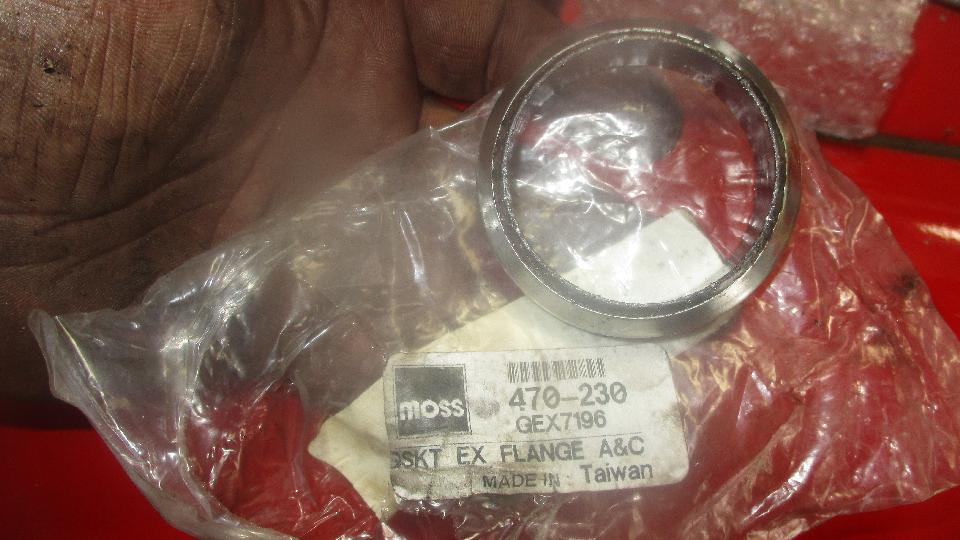
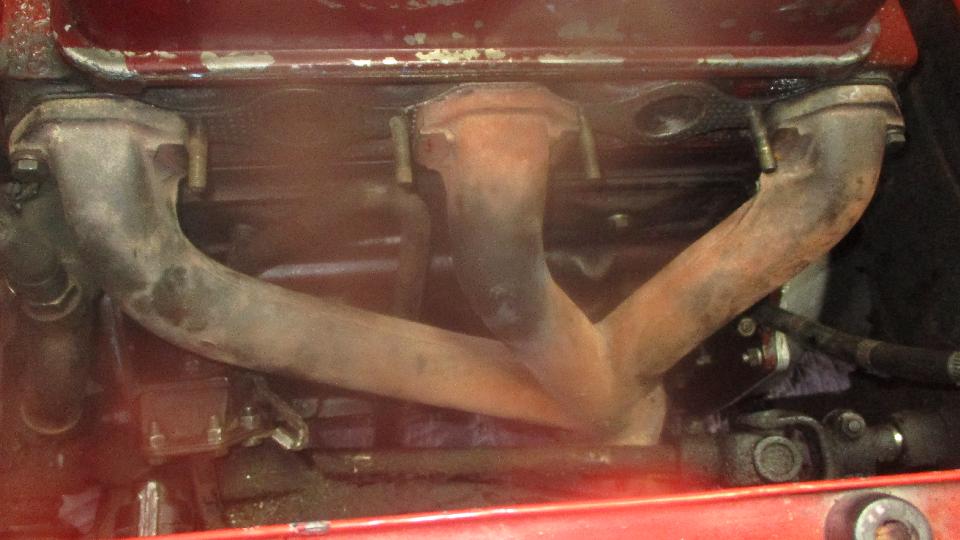
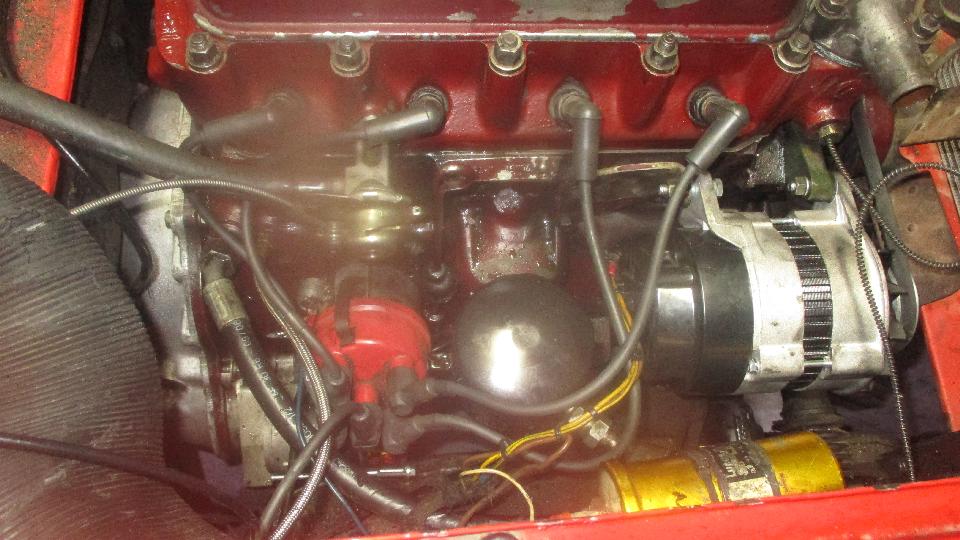
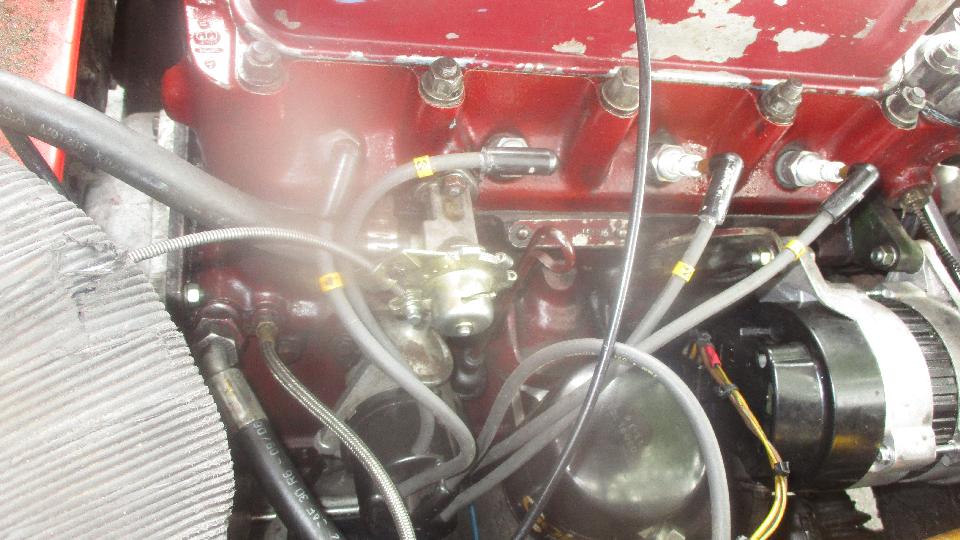
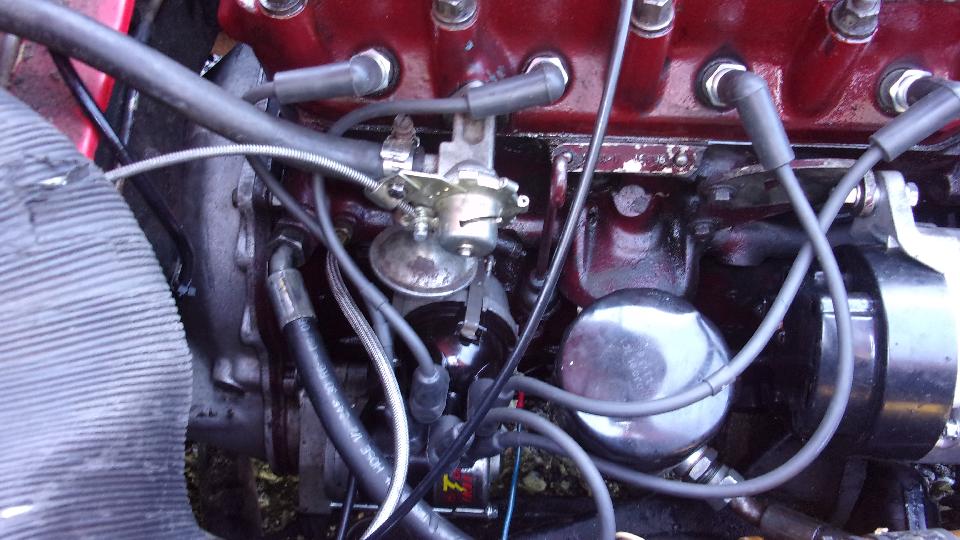
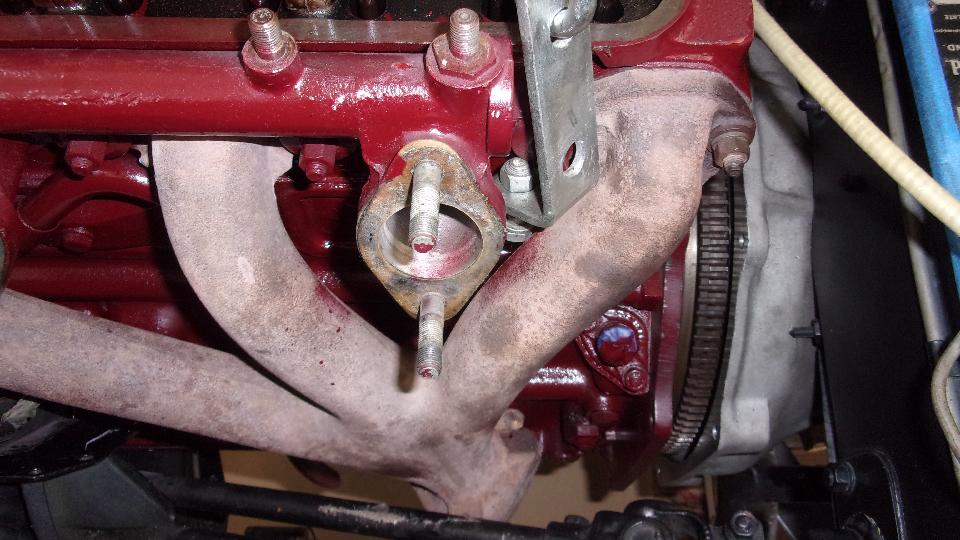
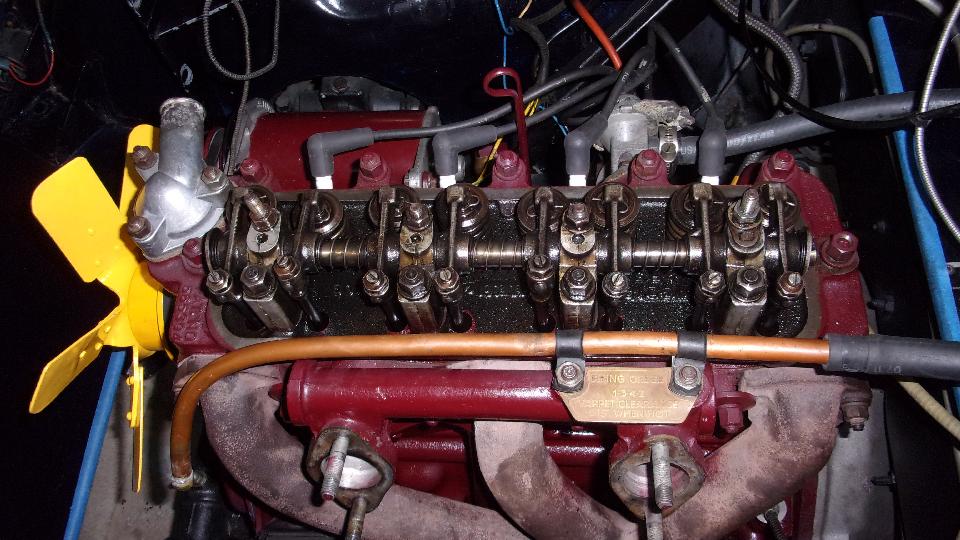
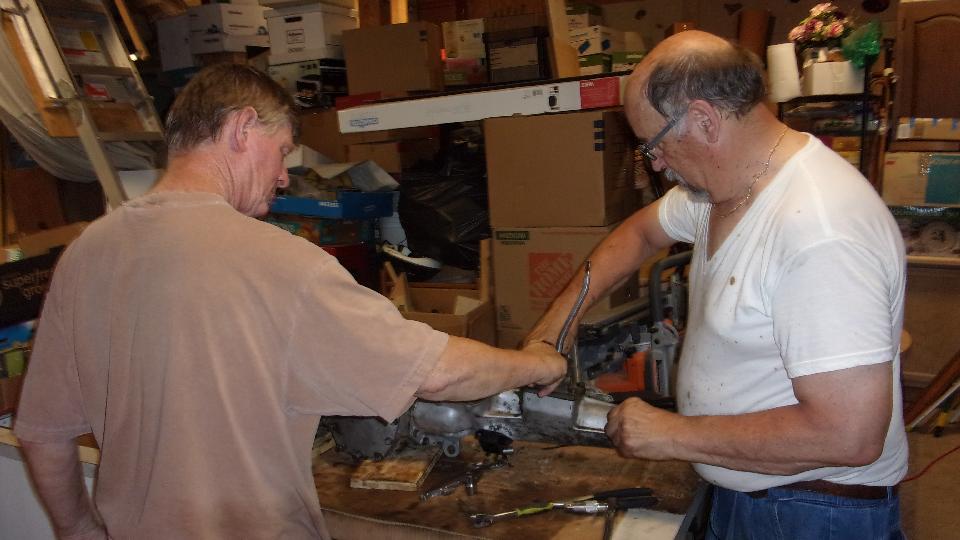
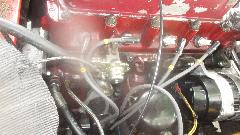
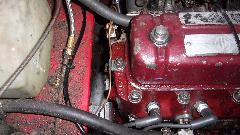
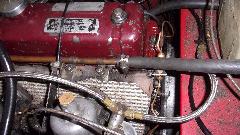
Good progress, too busy to take pictures, but insert the engine, lash up the bellhousing bolts and starter motor, and get the engine mounts bolted down (with the ground cable, thank you), the draft pipe and valve cover. Exhaust manifold was a bit of a fiddle, requiring rat-tail filing the the front and rear holes to accommodate the normal and expected front to rear shrinkage (the second time in two years. Notice crack in the manifold in the rear "Y", two years and two weeks since it was installed (going to have to notify Moss Motors about this issue). Closing in on the finish, exhaust to manifold connection with a new seal, oil cooler hoses, oil pressure signal hose, alternator, water temperature sensor, distributor cap and ignition wires.


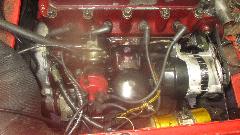
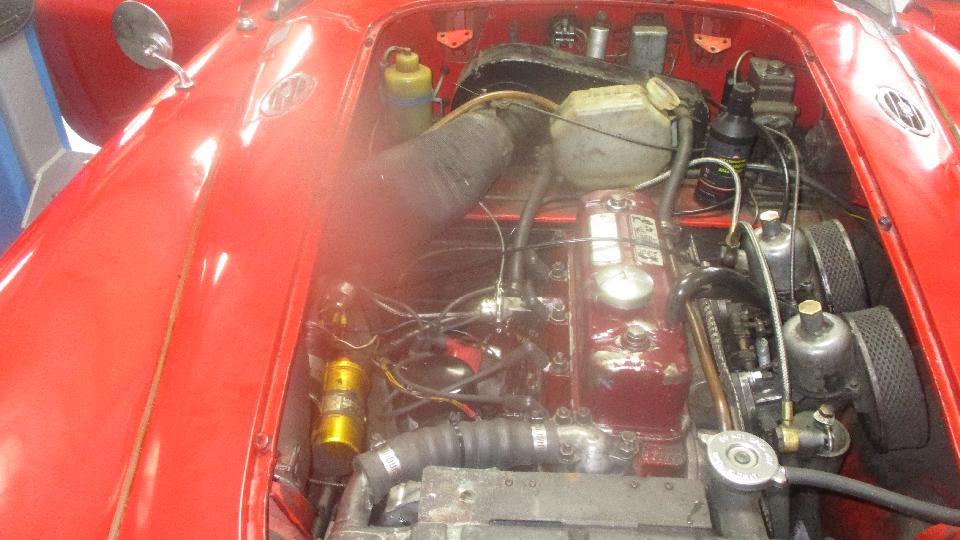
On the other side, finish exhaust hook up, intake manifold, speedometer cable, heat shield, carburetors and linkages. Up front, radiator with a new lower hose (less than one year old but looking quite bad), fan shroud, and fresh coolant solution. Then the fun of installing the gear shift extension assembly (without losing the split bronze bushing inside), scraping off old cork gasket, installing new rubber gasket (with a few misaligned holes) and the tunnel cover (with the eight pesky little screws). Finish this off with new rubber shifter boot, good old wood shift knob, stuffing the tunnel center carpet back into place, and putting oil in the gearbox.

When we fired it up it was hard to start and ran like crap, very puzzling because it ran reasonably well before we took it apart. After checking spark on all HT wires (all okay), we installed new spark plugs, and it ran like a champ. Go figure. Checked resistance on the old plugs, all between 6000-6500 ohms, looked good, couldn't believe they were bad, but into the trash anyway. A little disappointed, as they only lasted two years, 73,000 miles. On the road again, we're outta here at 8-pm. It's only maintenance, but we will be chatting with Moss Motors about continued premature failures of their layshafts.
The air flight package finally arrived after three days, too late to use the parts of course. Will keep the parts for spares, but must see if we can get a rebate on the next day air shipping cost. On the road again (and remember, it's just maintenance). Off at 8-pm to find dinner and a WiFi spot.
Friday May 18, 2018:
This day started off bad, having bailed out of the WiFi spot, five miles on the engine began sputtering and finally died, leaving us on the side of the interstate in a construction zone, and it was raining. Figuring it may be another failed condenser, I jumpered in a known good condenser, but no improvement, so put the extra condenser back in my pocket. Fairly good spark from the coil, but very weak spark from the plug connectors. Swap in a used rotor, no change. Swap in a used distributor cap, but no change. Ran out of new tune-up parts for the Mallory distributor (by intention I recon). I wanted to disconnect the condenser while jumpering in a good one, but it was raining, so decided to install the spare (original) Lucas distributor. That one had the drive dog 180 degrees out, so had to knock out the pin to turn the dog around and re-pin it. Dropped it into the engine, and it fired right up, so we were on or way again.
Several miles up the road, off for the night. Late night (early morning) chat about adventures of the past few days, feeling good about the refreshed engine, clutch and gearbox. Now I'm thinking maybe the Autolite spark plugs were not bad, and new plugs having 0.025" gap rather than 0.035" gap may have made the difference to let it run well for 20 miles before it crapped out again from weak spark.
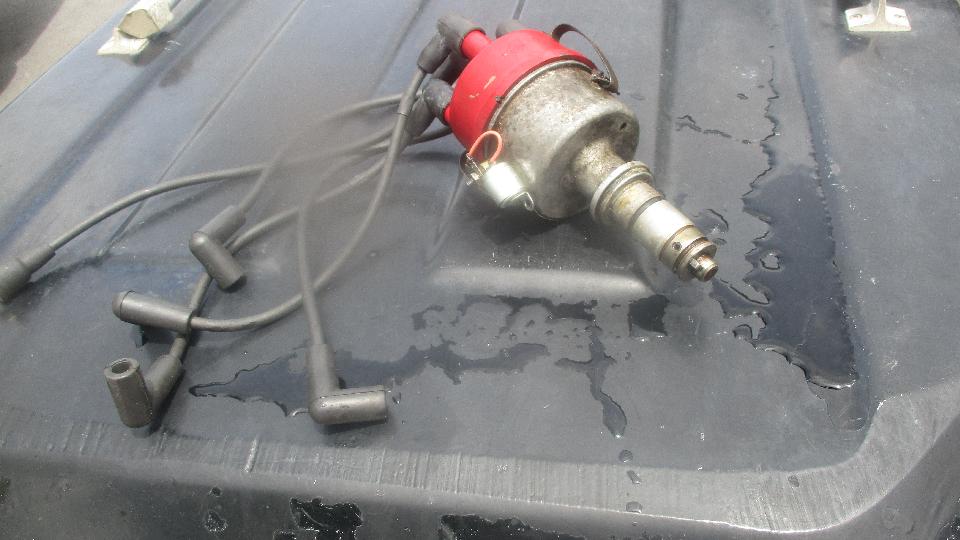
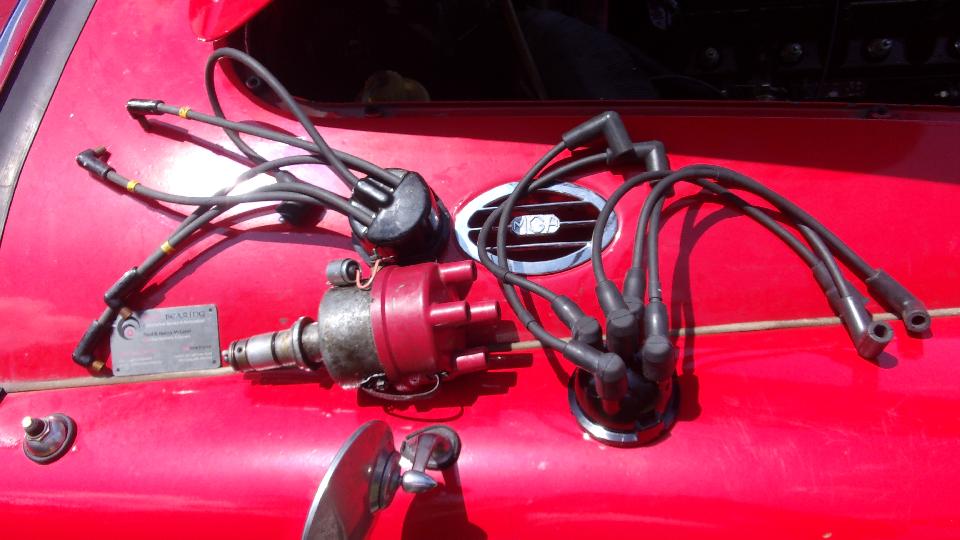
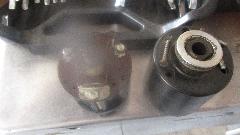
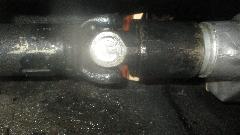
Slept well, and things look a little different by the light of day. Pulled the Mallory distributor out of the boot
 for pictures, and water ran out of it. Guess it was raining harder than I thought last night. No vacuum pipe for the Lucas distributor, because I installed the spare on someone else's car last month, and then forgot to re-order. But I think we will be in Petersburg, VA before noon tomorrow (Saturday), planning to restock parts in the magic trailer again.
Got a call from Albany, GA, about the MG Midget we put back on the road last November. It was running bad recently, could be a bad condenser by the symptoms. Check back later.
Called Moss to arrange rebate of shipping charge for next day air delivery that didn't happen. Also reported the cracked exhaust manifold to Moss. Two weeks out of the warranty period, sorry no warranty, but offer a discount if I want to buy another one. Since it appears to have all of the same problems of the original issue parts, I am more likely to go back to sourcing good used parts for relatively cheap.
 Finally time to buy a new camera, least expensive gadget that will serve the purpose, and computer screens are limited to low resolution. Best Buy was going nuts on pricing with the lowest priced digital camera being the same model I already have, Cannon Power Shot 180 for $110, nothing in the store under $100. Obviously a constructive pricing policy. If they don't make enough money selling cheap gadgets for cheap prices, the solution is to sell cheap gadgets at inflated prices. No sale.
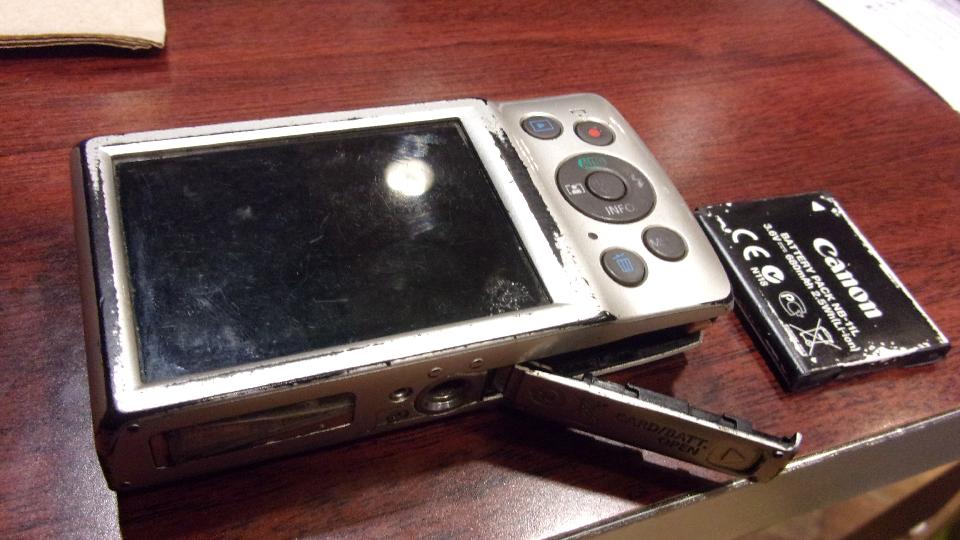
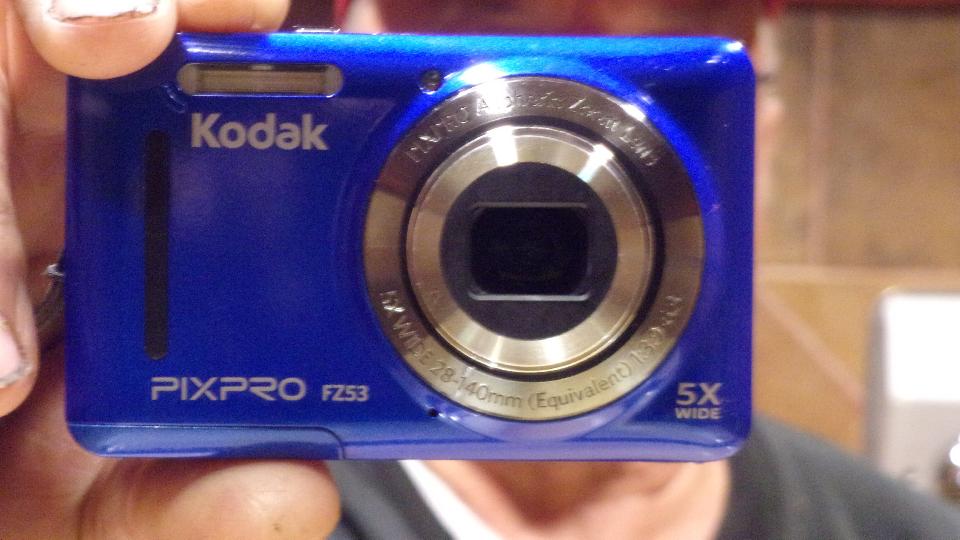
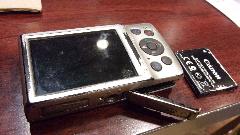
 Next stop was Walmart to pick up oil for the car, and while there check out the digital cameras. Same model Cannon Power Shot 180 for $199. Huh? So much for "We sell for less, always". But there was a Kodak Pix Pro FZ53 for $79. Sold. Looks like it may have been manufactured three years ago in April 2015, but it still has the 1-year warranty. Two feet away, no flash, nice background. Two feet away, fill flash, a bit much. Six feet away zoomed in with flash, I can live with that. Bye-bye Cannon. Thanks for the memory (card). And bye-bye fuzzy glare. Tomorrow we will see what it will do in daylight.


Saturday May 19, 2018:
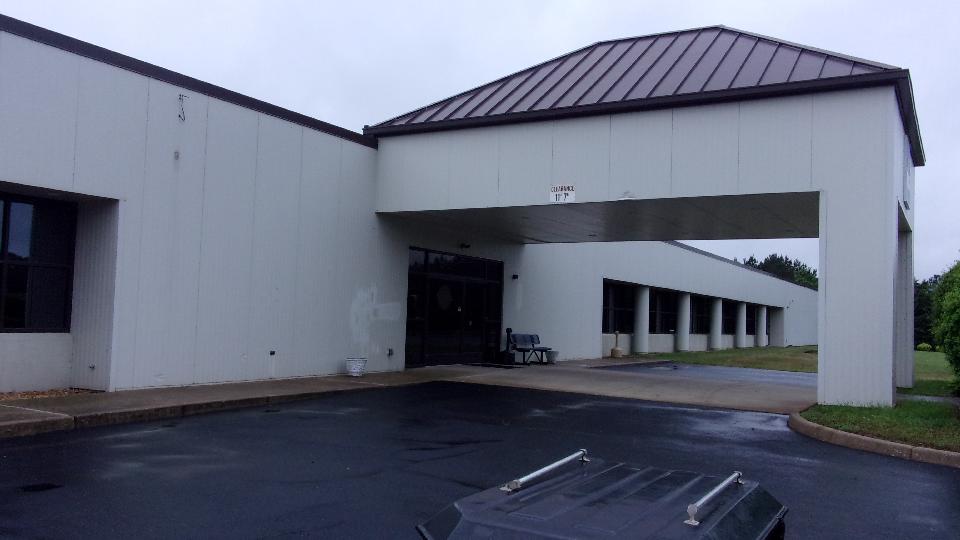
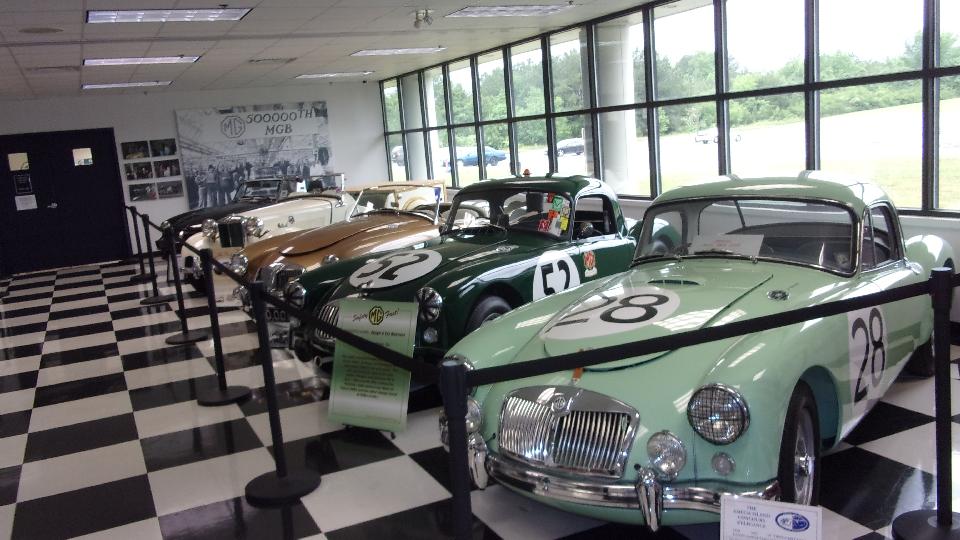
A few hours up the road, the only appointment today was to stop in to the Moss Motors warehouse in Petersburg,
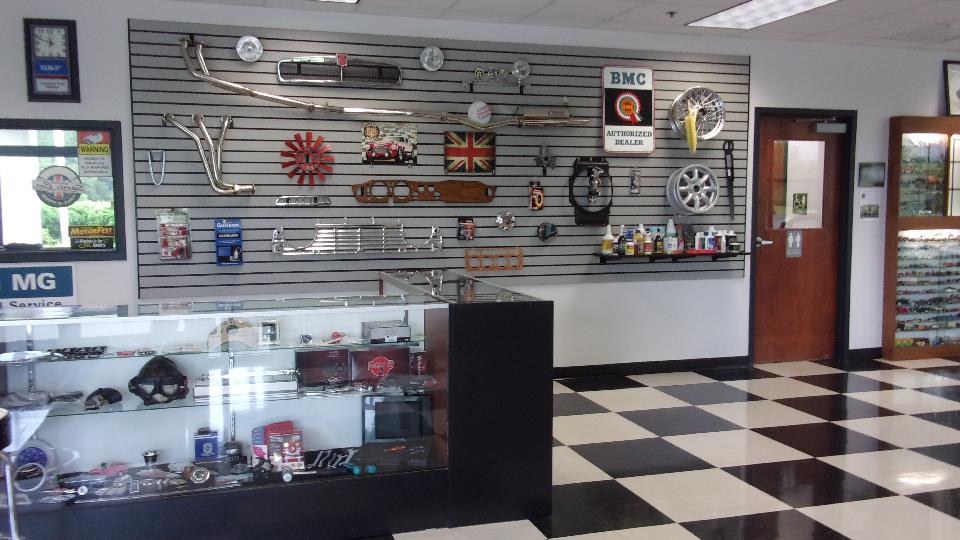
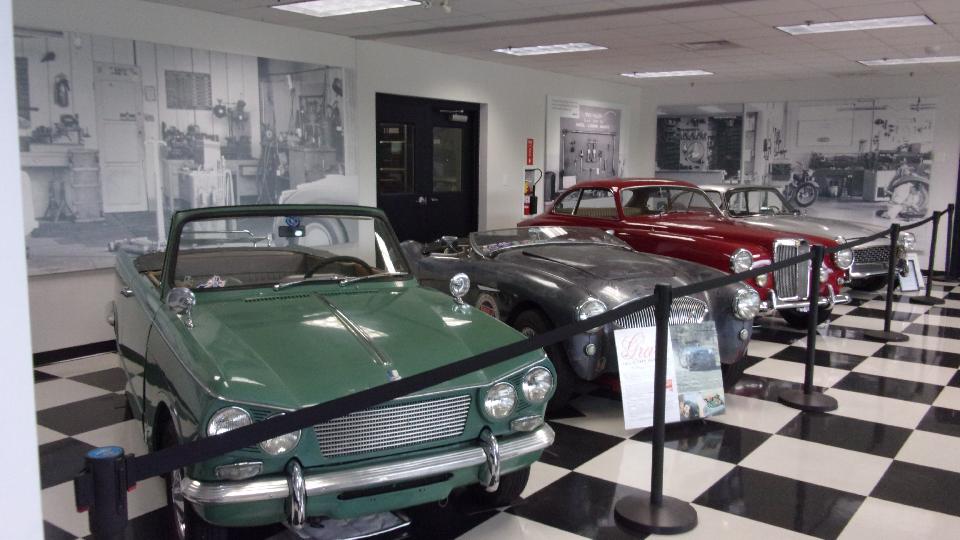
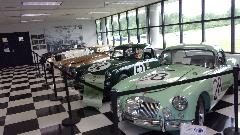
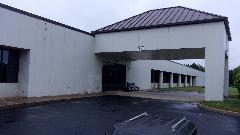 Virginia to restock the magic trailer. While waiting for parts I always bop around the display floor to see if there might be anything new. On the left was the Triumph Sports Six, the Austin Healey 100 "Grace", the MG Arnolt Coupe, and the Triumph Italia 2000 Coupe. On the right were twp Sebring MGAs, the 100,000th MGA, the Moss Motors MG TD pickup truck, and what may be the lowest mileage MGB on the planet. Nice, but they have all been here before. Find the earlier pictures.


Not having time earlier, I spent a couple hours reviewing my photos and notes for a few recent "visit" projects and browsing through the MGA parts catalog to make the order list. Then spent some time chatting with a few other customers. When my parts order was brought forward for review there were a few surprises. Like the nice Felpro-Payen head gasket was out of stock. Bummer, because I really need one (or two) as spare. Not too surprising the little locktabs for reverse gear shaft bolt was N/A (indefinitely). These come and go, mostly not available, so when I find them I try to buy several. Tune-up parts for my nice Mallory Dual Points distributor are no longer available through Moss, so I will have to find another source for those, as I don't want to toss a perfectly good distributor in the trash.
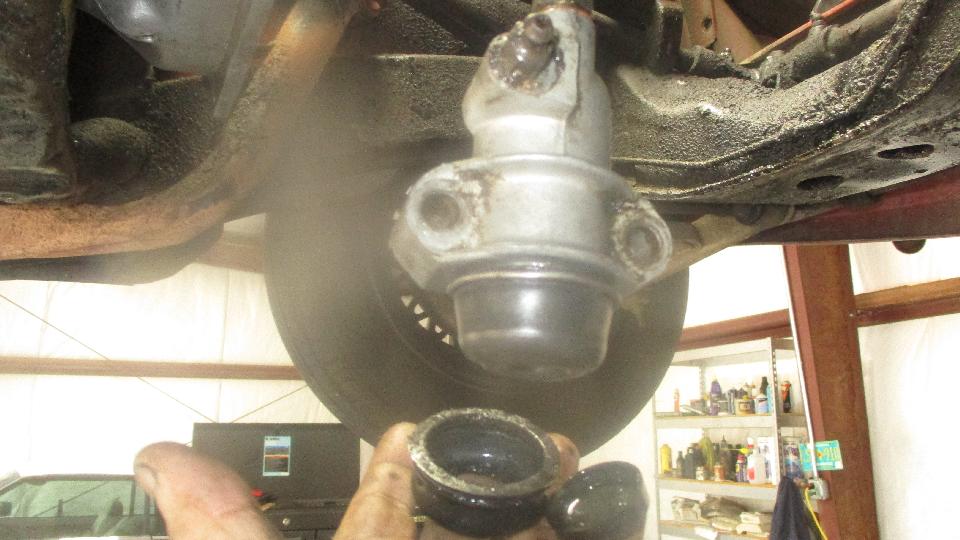
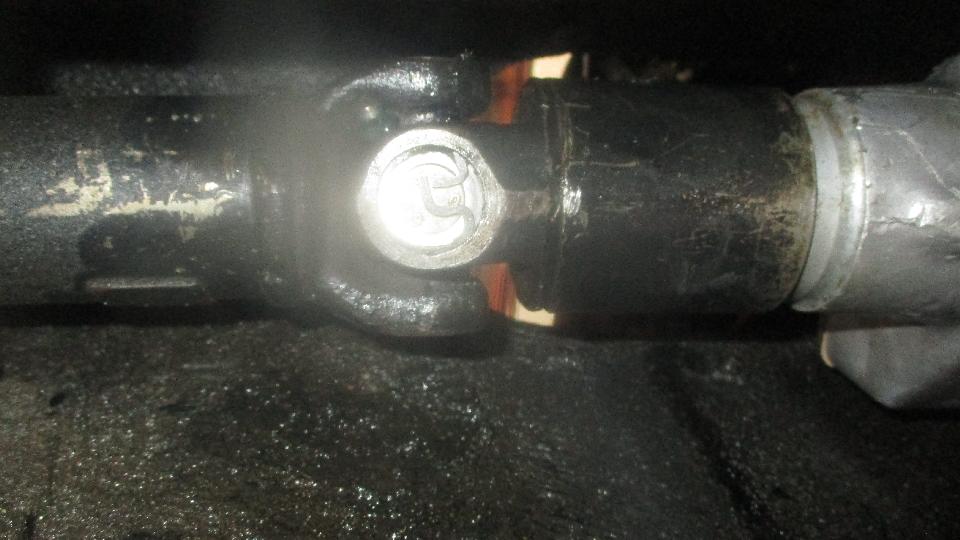
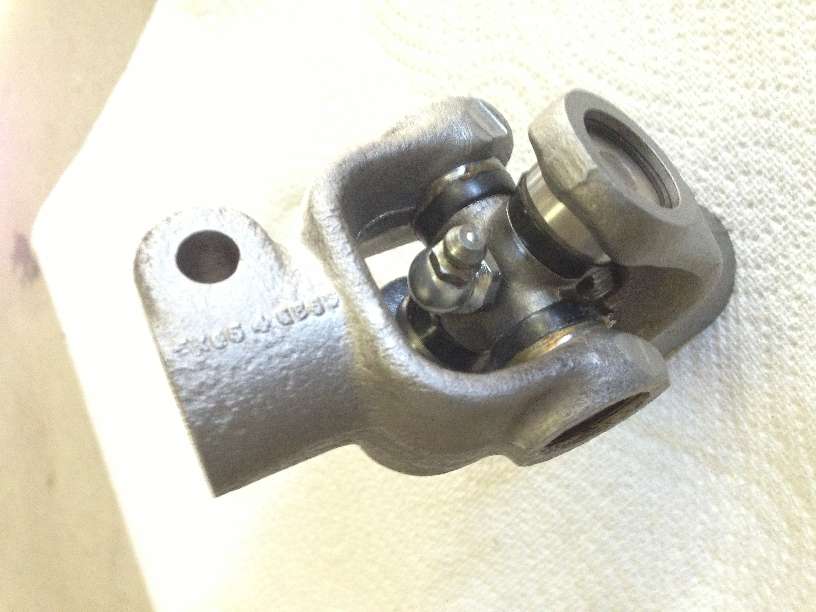
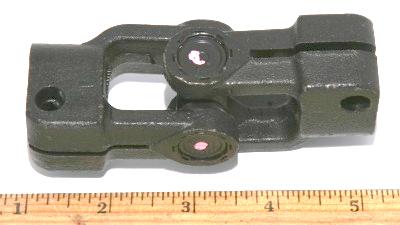
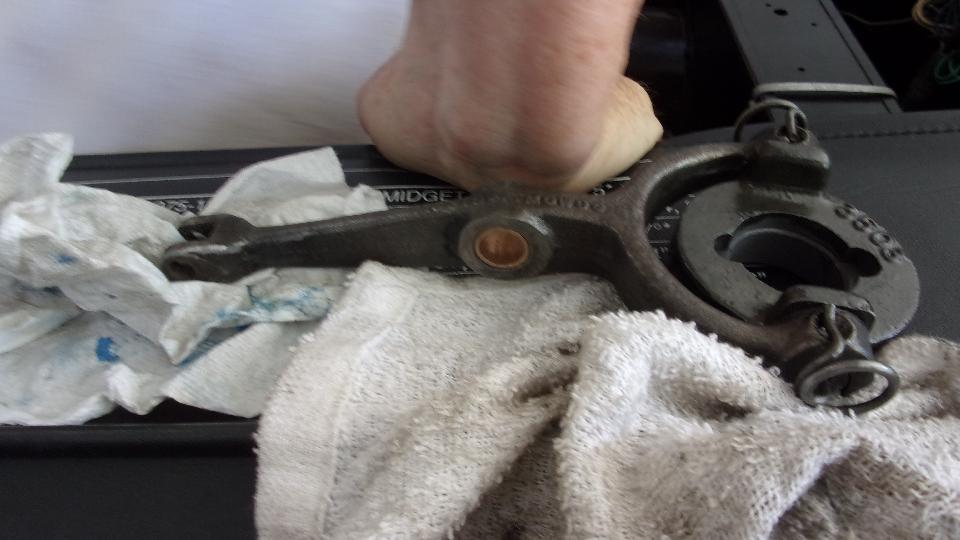
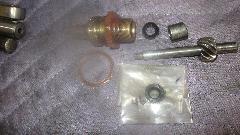
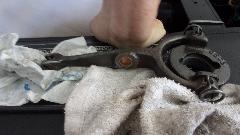
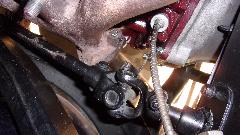
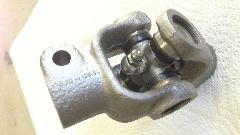 The last item was a new universal joint coupling for the steering column. Mine was loose in the splines, which does have a prescribed fix (if you want to spend a little time fiddling with it), and the bearing spider was a little loose needing replacement (more fiddling). I had just bitten the bullet to pay $129.99 for a new one when they brought out this little aftermarket replacement part. It is the right length with the correct
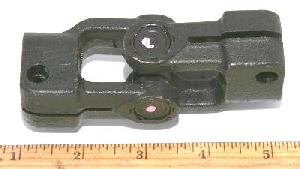 splines and clamping bolt, but I couldn't believe how tiny the bearing spider was, must be pencil size bearing spigots. Looks like it might break the first time your front wheel hit a parking curb, or might wear out in a year with the mileage I drive. Having worn out a a couple of the standard size spiders, there is no way I would install that thing in anyone's MG. Take it back, and I will look elsewhere, even if I have to refurbish a used one.
Done here, grab my new parts collection and run. Just received a message from a friend in the Chicago area with questions on inspecting, possibly rebuilding, and installing a gearbox in his 1967 MGB. We happen to be heading that way in a couple of days, so that may be our next assist project. After bit of WiFi catch up, no more pending appointments, we headed west out of Richmond in the general direction of Chicago.
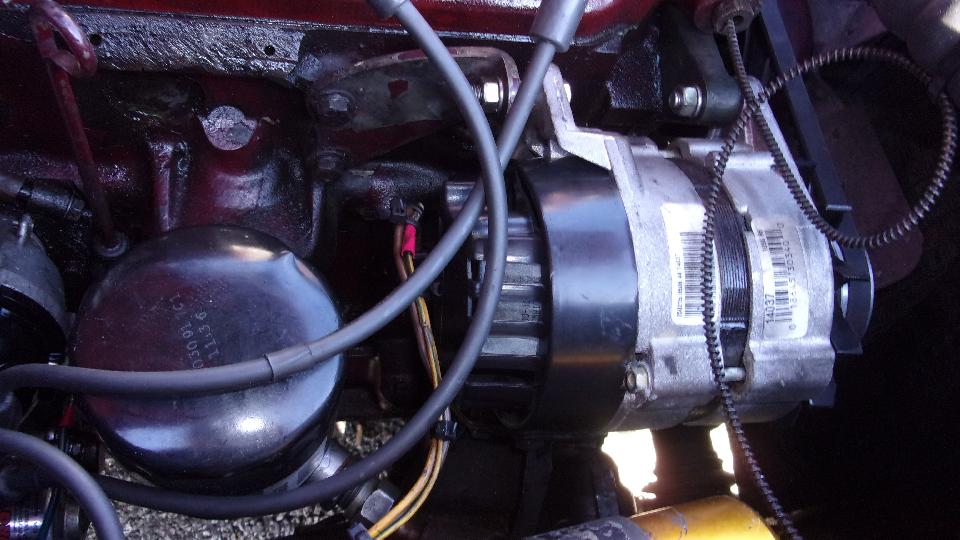
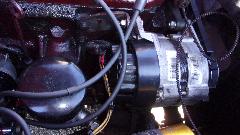
Sun going down, switch lights on, and shortly thereafter the new Lucas alternator began acting up. Occasionally the headlights go brighter while the fan belt squeals for a second. A bit later, bright again with another squeal. We plugged in the volt meter to watch, discovering system voltage going to about 18 volts when that happened, and the happenings were getting more frequent. Pulled off at a rest stop to investigate, and voltage went high with long squeal as we were slowing down. Checking wiring and connectors, nothing obvious wrong, so the internal regulator must be toast, by that time idling at 17 volts. Boo, hiss, can't drive like that for fear of roasting the expensive sealed AGM battery. So we unplugged the alternator (02819 on the odometer) and drove on. A little up the road stopping near Charlottesville, VA, the biggest town in the area. Will be hunting for another alternator in the morning. Pretty disappointing since the alternator is a day shy of 8-weeks and just over 2000 miles in service.
Sunday May 20, 2018:
Sitting near Charlottesville, Virginia, searching local parts stores for a Lucas alternator, but no go. They all said can order it for Tuesday arrival, but we aren't killing another two days here. Switch off everything except ignition and fuel pump,and see how far we can drive in daylight with no charging.
A little up the road a spark plug wire fell off (for the third time), so it was time to ditch the vintage plug connectors. This was the reason I bought the top-entry distributor cap yesterday. Installed the top entry cap on the Lucas distributor, and swapped in the HT wires from the Mallory distributor, and good to go.

Cruising mountain hills in the western part of Virginia, we noticed the temperature gauge rising higher than expected. Okay, I got the timing too much advanced the other night when changing the distributor in the rain. Quick stop to use the timing light to set timing to 32d BTDC at 3600 rpm, and we were off into the hills again, full throttle 3rd gear on some of the steeper hills with no overheating, good going.
Keeping an eye on the volt meter plugged into the power jack, and cruising some state highways, we stopped momentarily in a few parts stores we were passing along the way, but no luck on an alternator. Another fuel stop, and I was pleasantly surprised about how well we got on with no charging. This is where my advice on retaining the full size battery pays off. At 8-pm we stopped in Jamestown, Ohio, just short of Dayton, hoping to find a new alternator around Dayton come Monday morning.
Monday May 21, 2018:
In Xenia, OH this morning. Checked the odometer, 04306, 487 miles since unplugging the alternator, still have almost 11 volts, and the starter still cranks. So far so good. Going hunting again. Made a bunch of phone calls to parts stores around the Dayton area, but no luck. Then a guy from O'Reilly Auto Parts said he would have to get the part from the warehouse, and when I asked where the warehouse was he said Indianapolis, IN. Yeehaa! We were heading that way, so we called ahead to an O'Reilly Auto Parts in Indy to have them get the alternator from
 the warehouse, and it was waiting for us when we arrived two hours later, on the east side of Indy. We may have just set a new record for distance driving on battery power with no charging, 600 miles in 9 hours of running time (everything switched off except ignition and fuel pump), and it still had 10.5 volts, and would still crank start the engine. Sorry about no pictures here, but it's just an alternator, and we were busy installing it, and then anxious to get rolling again.
In retrospect, I was a bit surprised about charging voltage immediately after the new alternator was installed. Couldn't get it to run higher than 11.5 volts, due to the state of discharge of the battery. When engine was revved up the voltge would rise from 11.0 to 11.5, so it must be working. Reasoning that the 45-amp limit of output of the small alternator would raise system voltage about 1-volt above battery open circuit voltage, which would then be charging the battery at a rate of about 40 amps (max) as we were driving. With time and miles and subsequent recharging of the battery, system voltage was gradually rising. By the time we arrived in Chicago area we had 12.3 volts. After driving some more next day it was finally back up to 13.6 volts when running, and we were feeling much better.
Thinking we had plenty of time, we took the scenic route west from Crown Point, Indiana into Illinois (to avoid some of the Chicago area traffic). There were a few traffic delays, but with the change in time zone we managed to arrive in Elmhurst, IL exactly at 7-pm CDST in plenty of time for dinner before the CMGC monthly club meeting. We had 33 attendees not counting the wait staff.
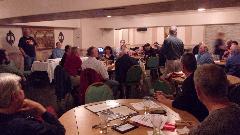


 The young guy with the beard and two kids in tow is Seth Jones, curator of the www.SpridgetGuru.com web site. Single guy in foreground is a new member, all excited to own an MG. To top off the evening, the person who won the 50/50 raffle donated the proceeds as a gratuity to the bar-keep, and boy was she happy. We had a lot of old friends and a few new ones to chat with, and I recon we were the last ones out sometime after 10-pm.
Tuesday May 22, 2018:
We really needed a day to catch up, so we call this Laundry Day. Come to think of it, we actually did laundry. Otherwise there was catching up on photos and notes, lots of back email with tech questions. And we now have a few appointments while we kill most of the week waiting for another parts delivery.
Wednesday May 23, 2018:
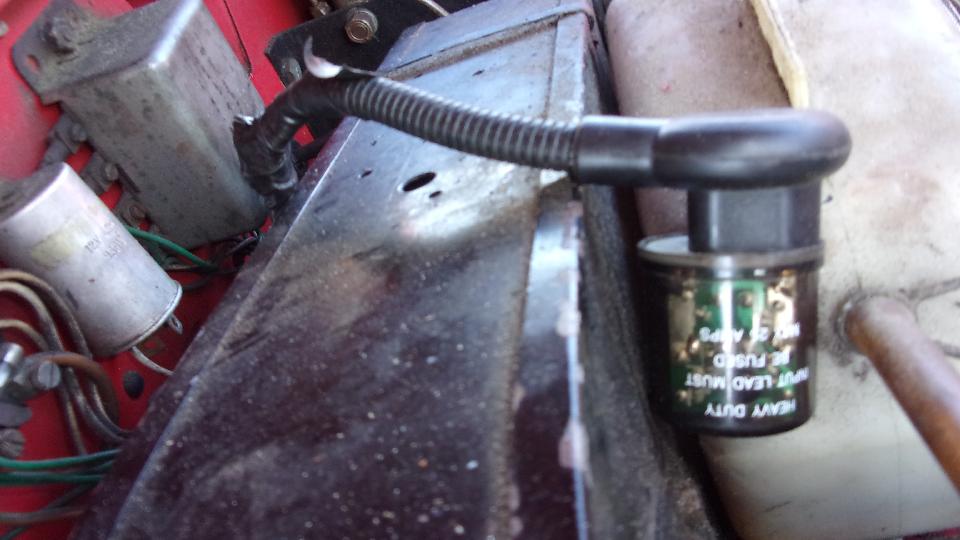
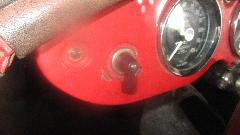
 Here's a gentle reminder to self that we need to attend to a wiring problem sometime soon. The turn signal flasher has been intermittent lately. Wiggling the wires in just the right direction can restore flasher function for a while before it fails again. I recon there is a faulty connection in one of the crimp connectors used to install the convenient plug-in socket for the replacement flasher unit. This stems from the fact that original style replacement flasher units are quick to fail and a pain to replace.
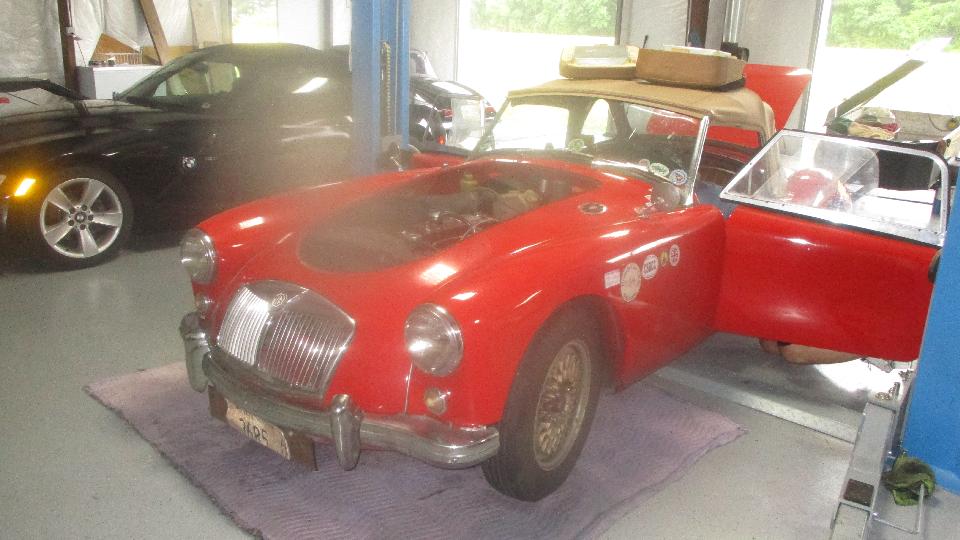
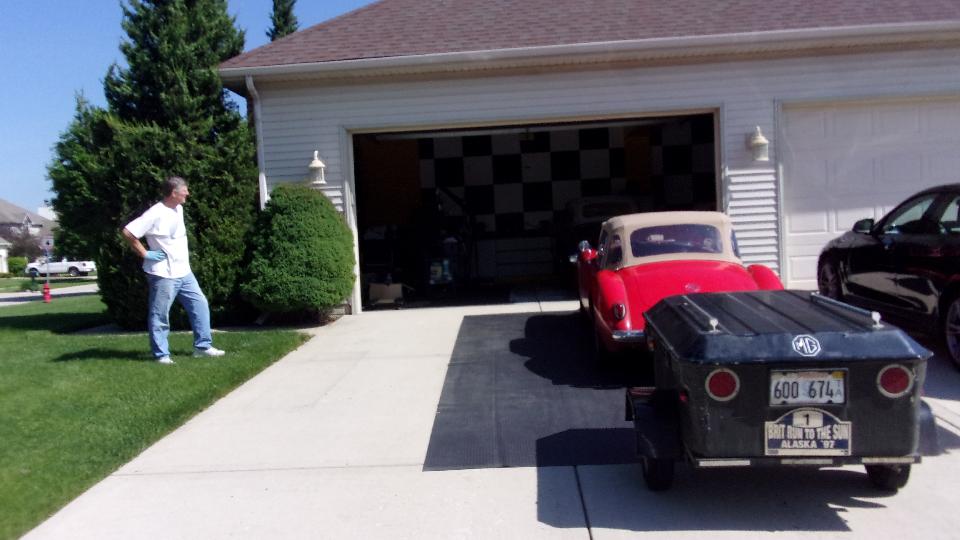
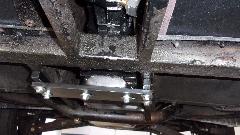
Late morning arrival to visit Chuck McCallum in Plainfield, Illinois, welcomed by a nifty large rubber drip
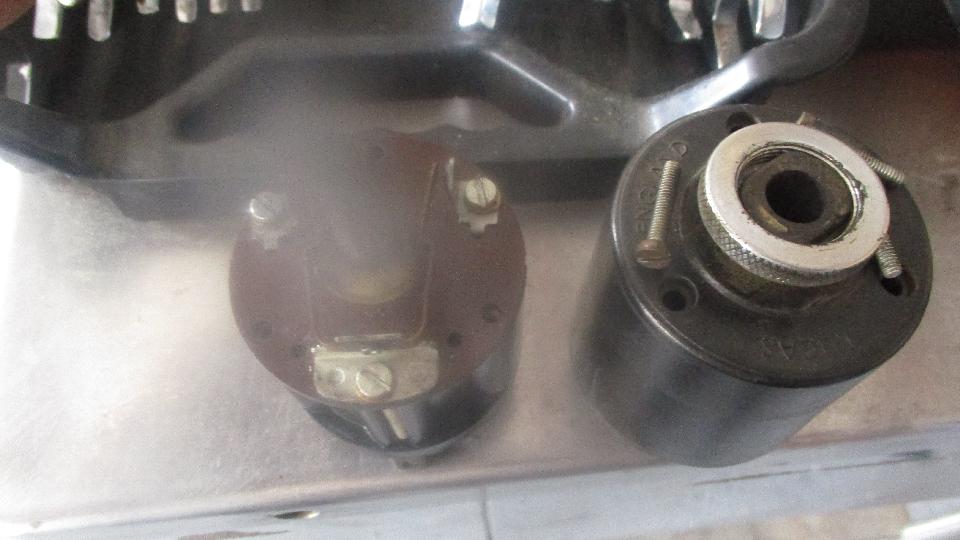
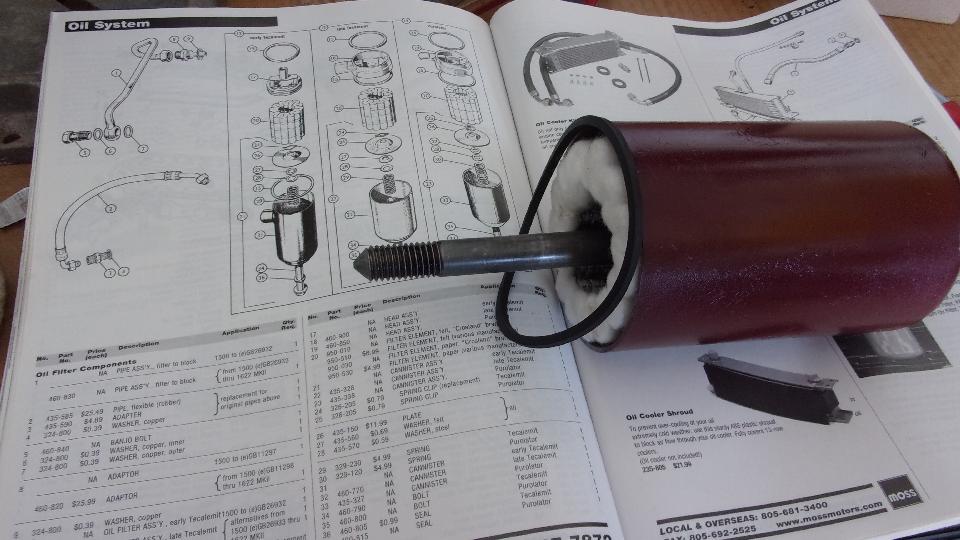
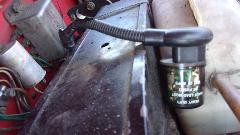
 mat on the forecourt. We were here before, last time to borrow the shop space to install a replacement differential in our MGA (still working nicely). First business today was checking out the new felt oil filter, finding all of the required parts to go inside of the canister, but also discovering there was a splash plate missing from the filter adapter head. Bummer. Apparently this car has been running with a dysfunctional oil filter for lots of years past. Will need to fix that before running again.
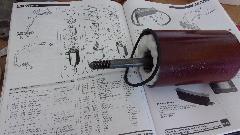
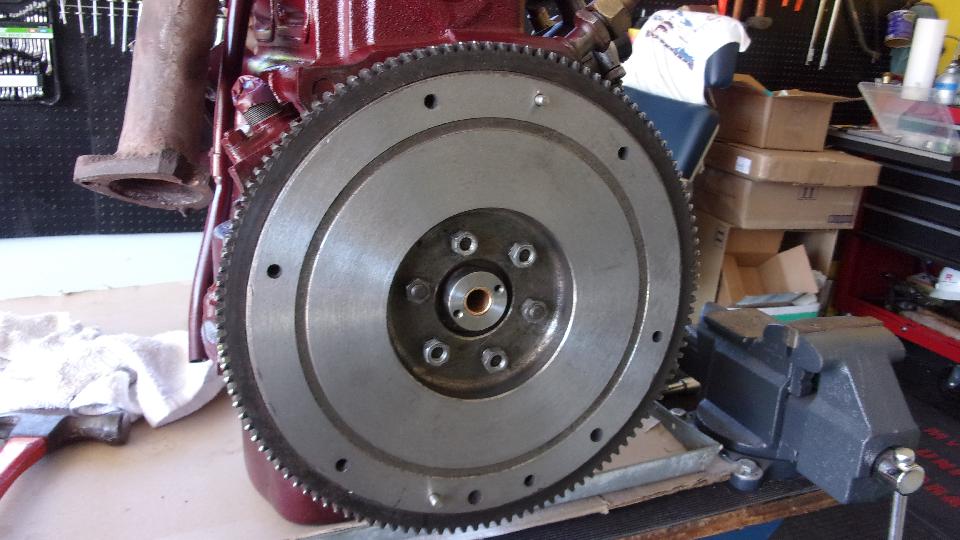
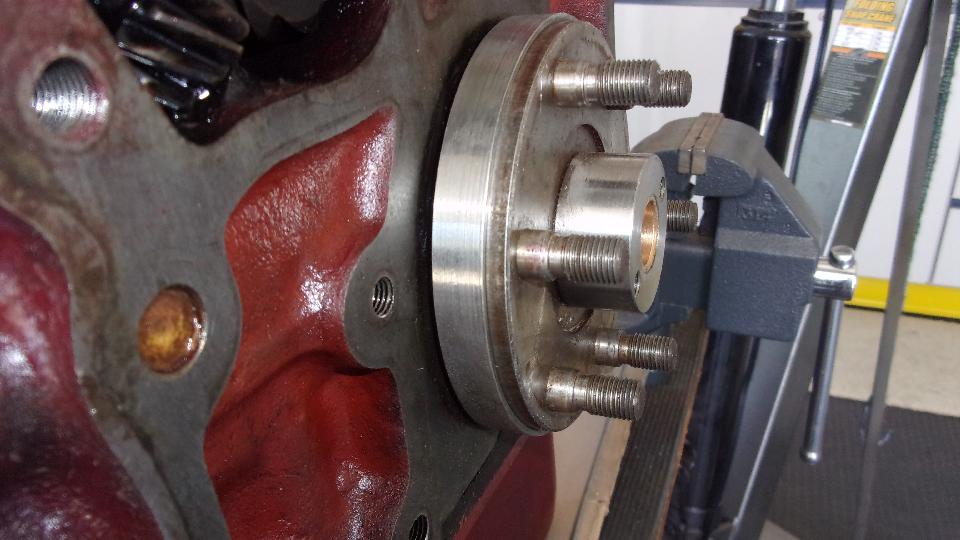
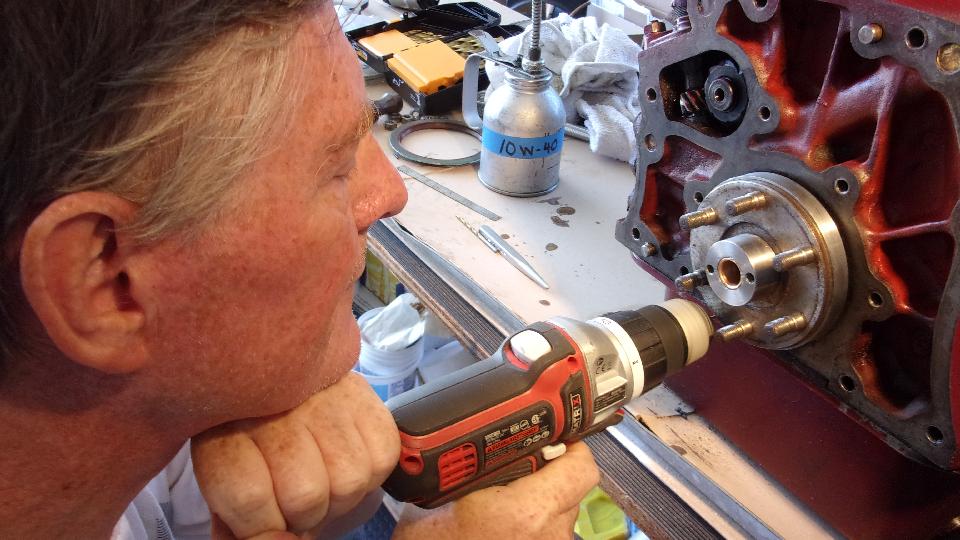
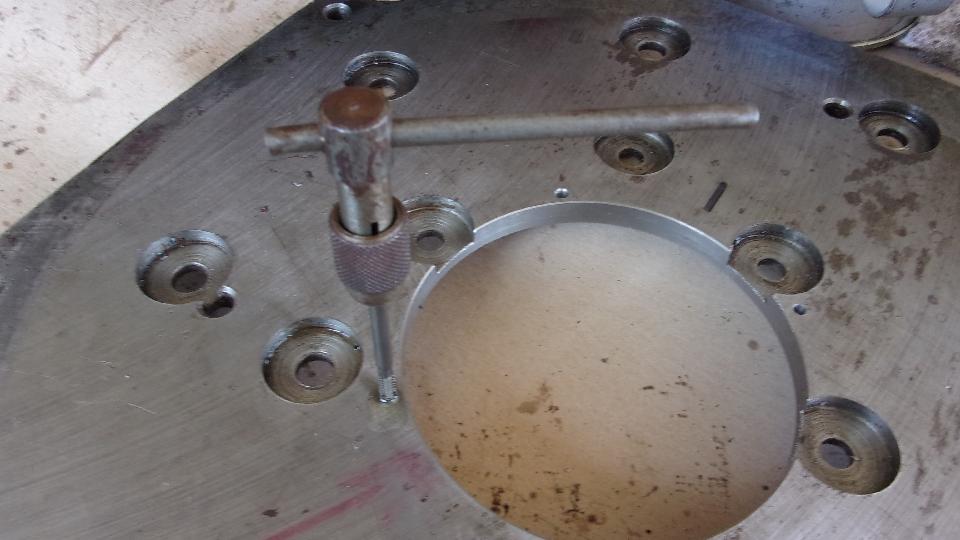
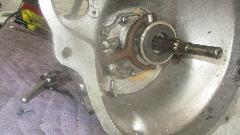
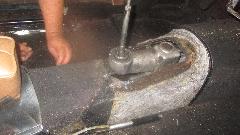
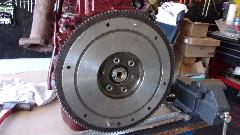
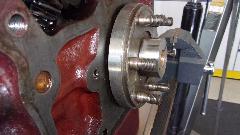
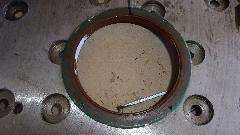
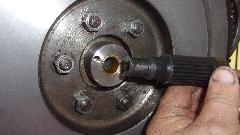
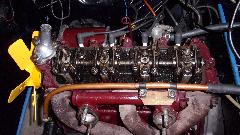
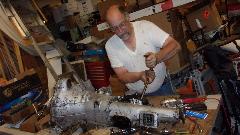
Today we would be helping to install a rubber seal modification for rear of the crankshaft in Chuck's MGA 1600-MK-II. Machining had been completed for the slip ring, enlarged hole in the rear plate, and modification of the shaft seal. We still needed to locate, drill and tap a bunch of holes before final installation. First move was to install the tight interference fit slip ring on the rear of the crankshaft. A bit of persistent gentle hammering and tapping got the slip ring started onto the crankshaft rear flange. Continue gentle tapping all around to push the ring farther on until it was flush with the crank flange. Then install the flywheel where tightening of the bolts pushes the ring farther to the final resting position, overhanging forward near the engine block while still hanging onto the forward half of the crank flange (the part not occupied by the flywheel pilot counterbore).
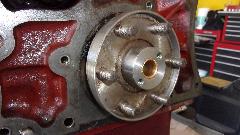
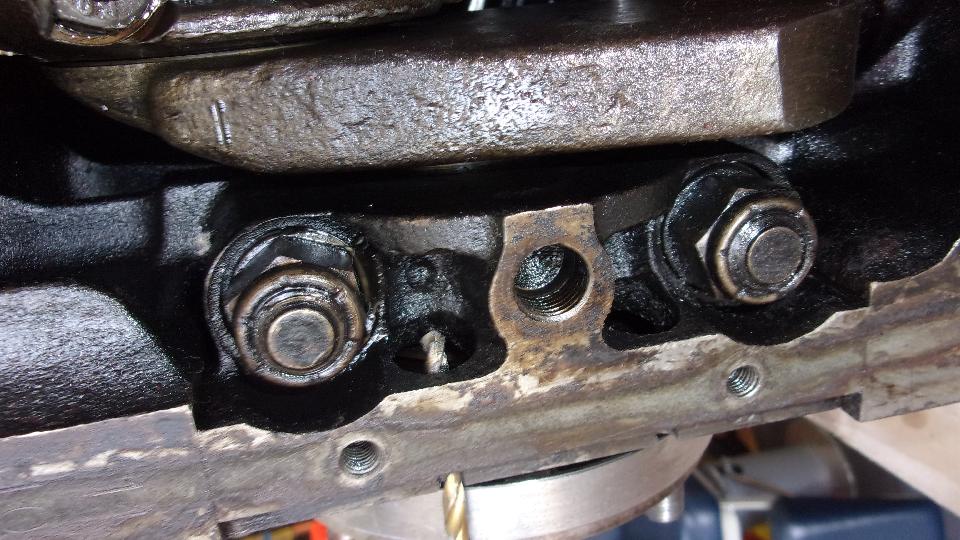
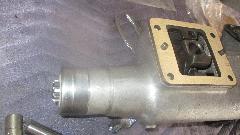
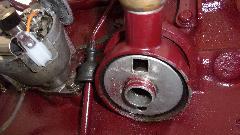
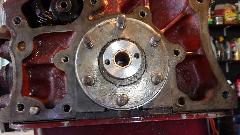
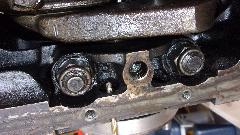
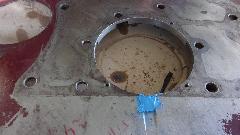
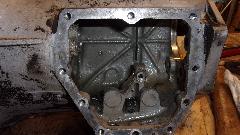
Then we needed to drill two small oil return drain holes in the rear main bearing cap, which would have been easier if it was done before installing the slip ring. Be very careful to drill in exactly the right location just above the cork seal, and do NOT touch the polished seal slip ring in the process. Slow going with a tiny pilot drill first with frequent stops to clear chips and oil the drill bit. Final drill through with finish size drill bit. Picture below right shows the 1600 type rear main bearing cap with two drain ports and no center drain pipe.
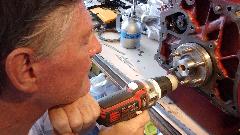
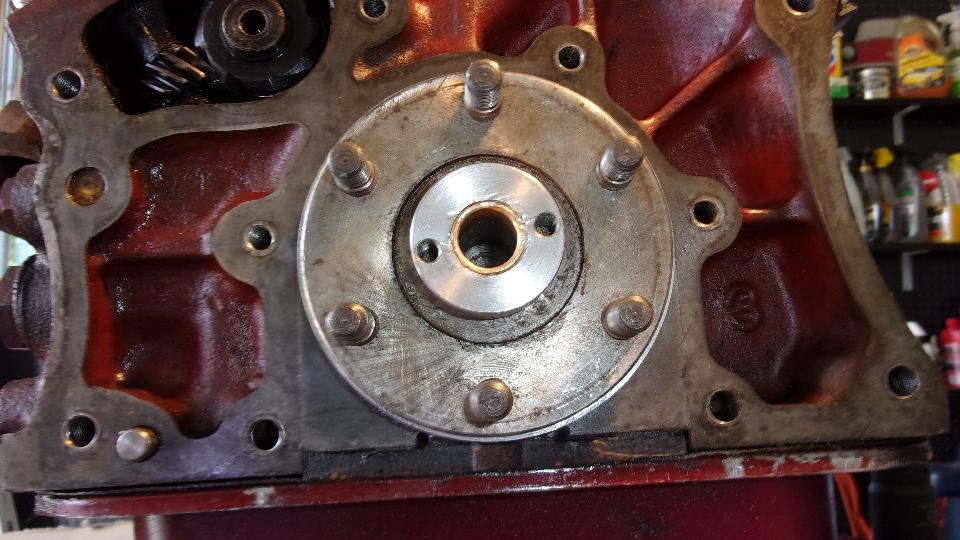
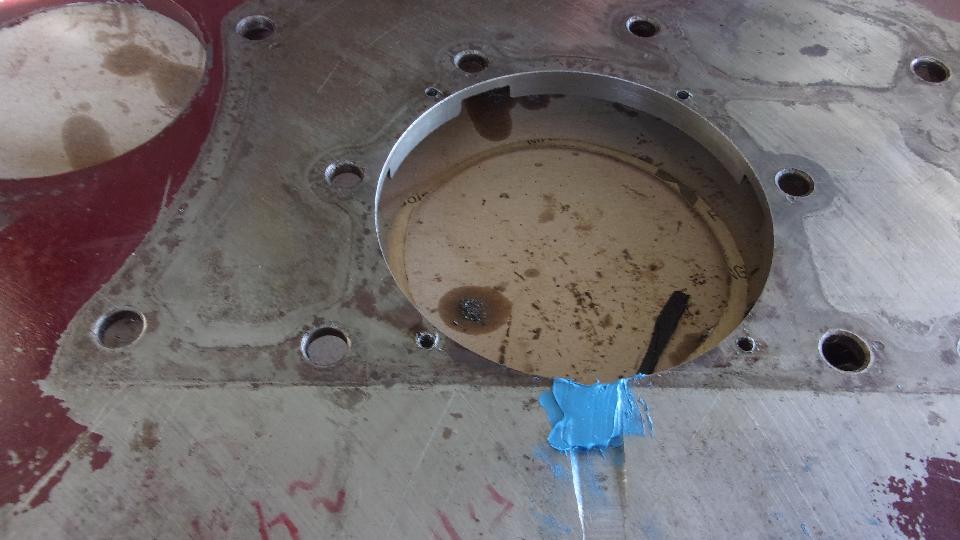
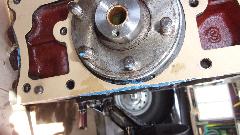
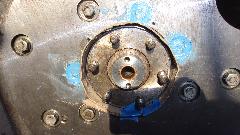
The new seal had been previously modified to remove most of the shell leaving only the flange on one side, but it had not yet been drilled for the mounting screws, and the rear plate also had not been drilled yet. Procedure here was to temporarily install the engine rear plate, then place the seal in position using the slip ring as a guide to center the seal. Locate the screw positions (roughly), and center punch where we wanted the screws. Since we would be drilling in situ, exact screw locations are not critical. This only comes into play if you need to change the seal later, in which case the new seal screw holes need to be drilled in matching locations. We began by drilling small pilot holes, then drilled the clearance holes in the seal flange, then drilled pilot holes through the rear plate (slow going with the small drill bit), followed by drilling out to tap drill size. The plate was then removed for hand tapping the #8-32-UNF threads. Finally flip the plate over and apply some blue stuff to plug the original drain slot in front side of the rear plate.

We placed the new paper gasket on the plate and used a razor knife to trim around the enlarged center hole. Leaving only a thin web of paper at the bottom, we used a little more blue stuff to assure a good seal there in assembly (over the original style cork seal). The rear plate was then installed, leaving lock washers off of the three bolts where the bolt heads need to fit behind the seal flange. Secure those three screws with a drop of thread adhesive. The new seal with only one side flange would be secured with button head screws and needs some sticky stuff to seal between the flange and the plate. To avoid getting globs of blue stuff inside to interfere with the garter spring and lip seal, we placed a thin cardboard ring inside of the center hole of the rear plate, then filled the counterbores with blue stuff. Leaving that to cure overnight, seal would be installed later. It was time to clean out and reinstall the sump. We also spent a little time finessing the felt seal ring in the timing cover. Looks like this will be ready to drop into the car during a club tech session come Saturday.

Thursday May 24, 2018:
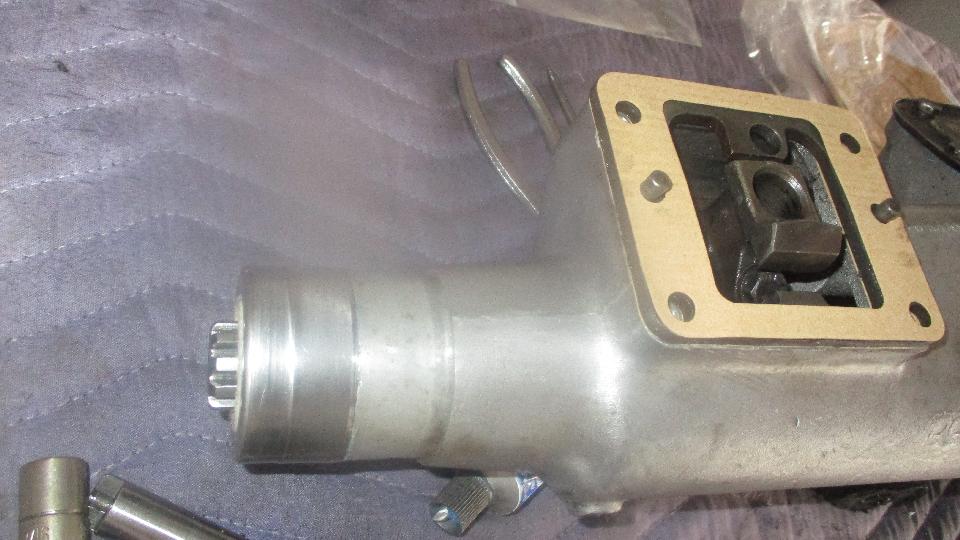
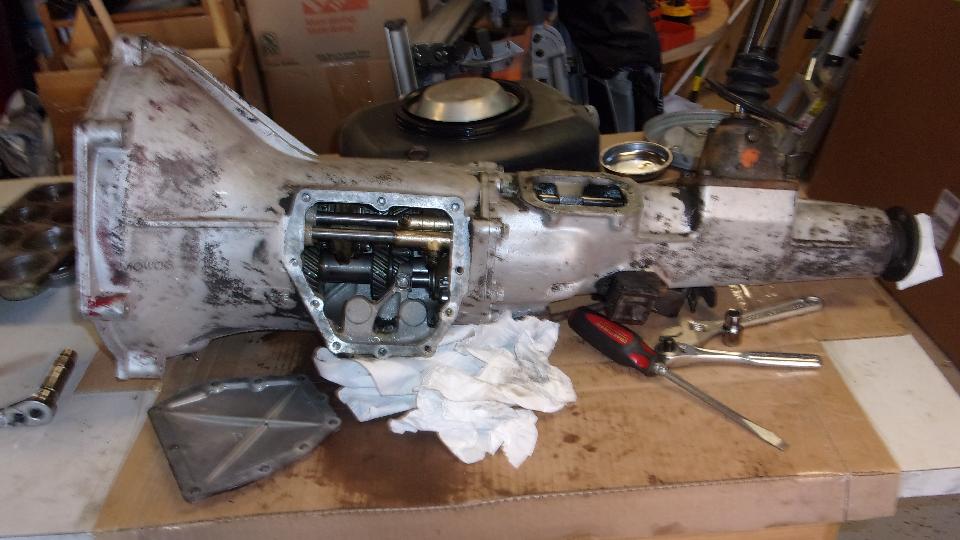
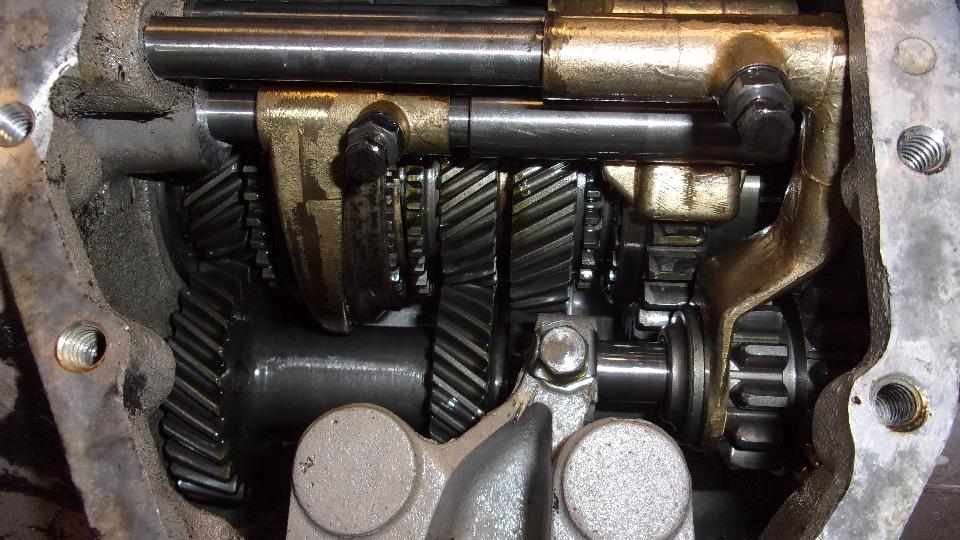
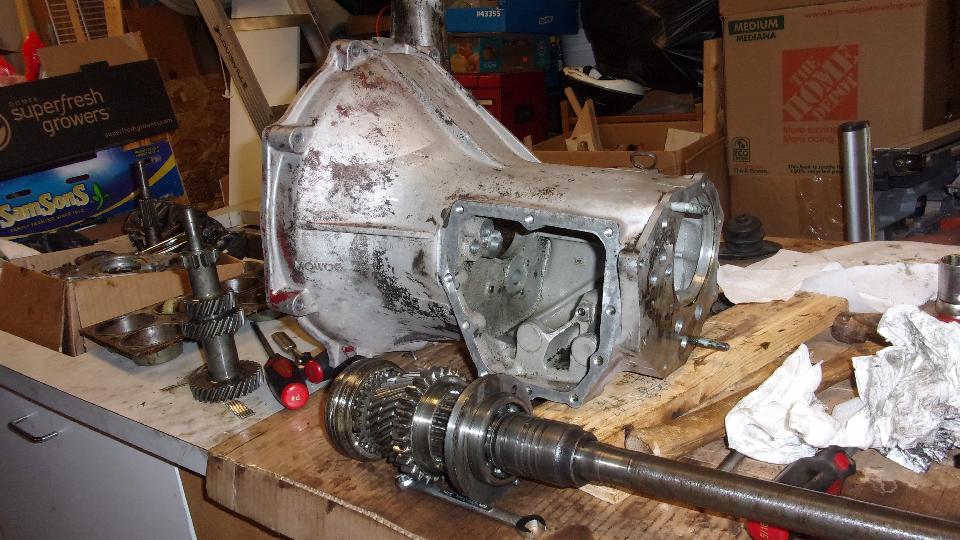
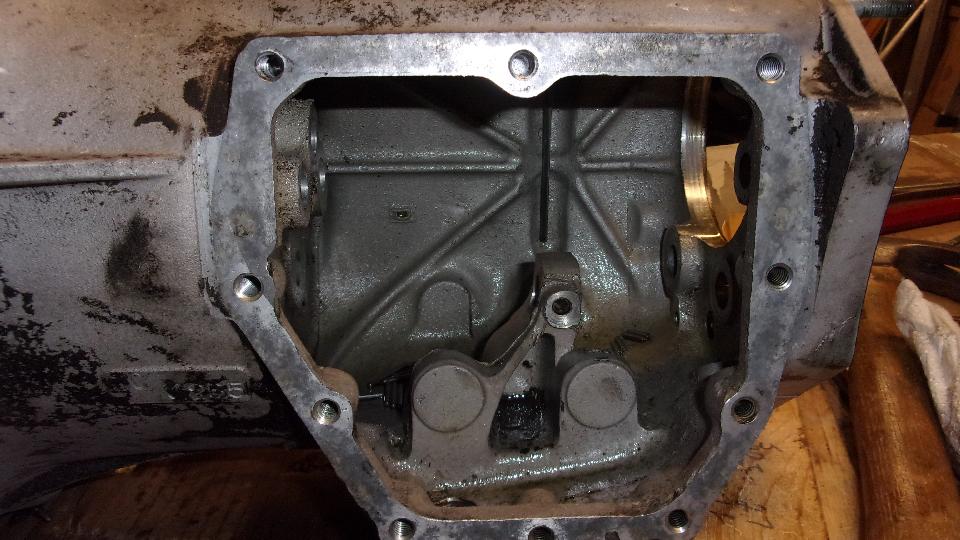
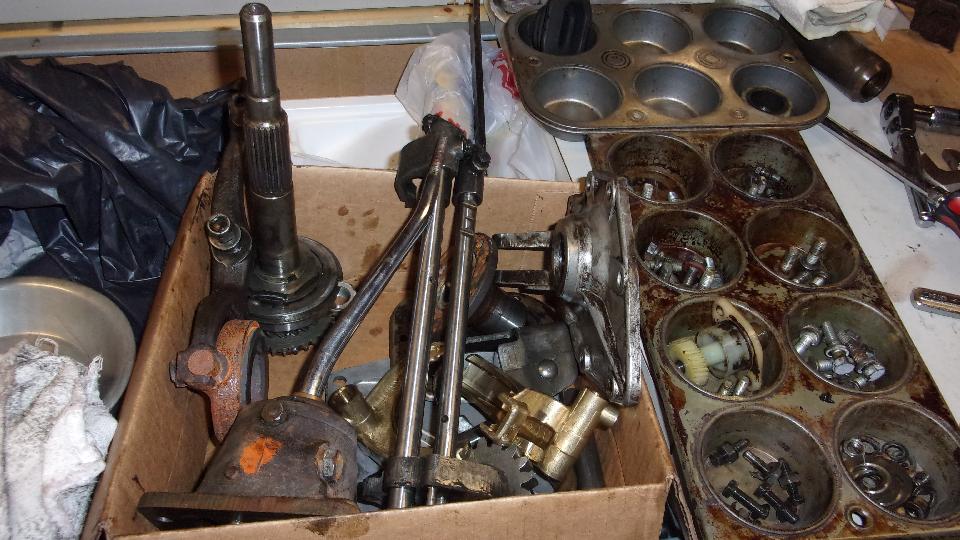
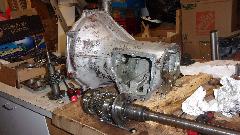
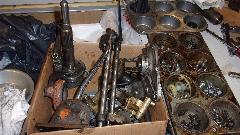
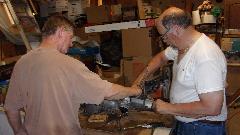
 Fifty miles farther north today we dropped in to visit Vic and Penny L'Heureux in Crystal Lake, IL. Last time we were here (2-1/2 years and 90,000 miles back) we were rebuilding my gearbox. Today we would be disassembling a spare early MGB gearbox for inspection to see what parts would be needed for rebuilding it. Started by removing side and top covers for a peek inside, and counting teeth in the speedometer drive gears to be sure it was the correct model to match the speedometer in Vic's car.
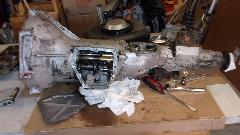
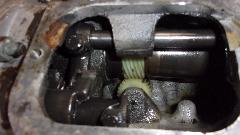
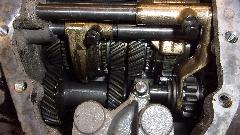
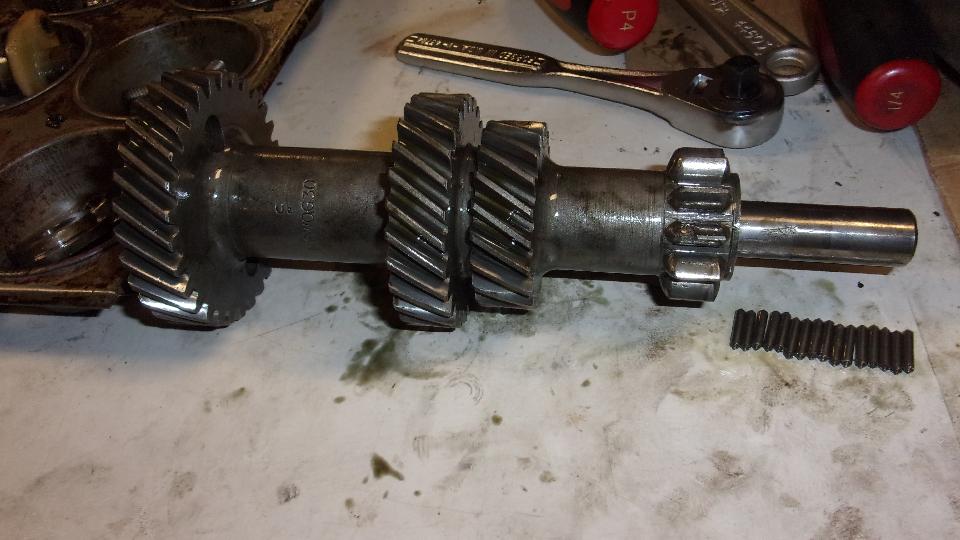
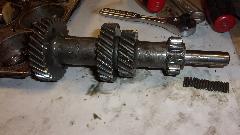
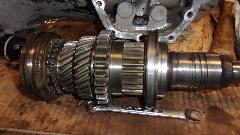
Looks like it has all of the original gear teeth, 3rd and 4th synchronizer rings were in good condition, only 2nd gear synchro needing to be replaced. A pair of pry bars revealed a small wiggle in the laygear, not a lot but indicating some wear on the layshaft (pretty common with these units). So we proceeded to tear it apart starting with removal of the shift interlock arm up top, then lock it into two gears at once while we removed the big nut and output flange at the rear. The rest was like Tinker Toys when we were kids, just try to keep the loose parts organized as it magically disassembles itself. Clutch release arm, front cover, rear housing, rear seal, shift rods, shift forks, reverse gear, laygear shaft (dropping laygear into bottom of the box), mainshaft out the back, input shaft out the front, then lift out the laygear. Finish by retrieving lots of needle rollers that inevitably fall into the bottom of the housing.

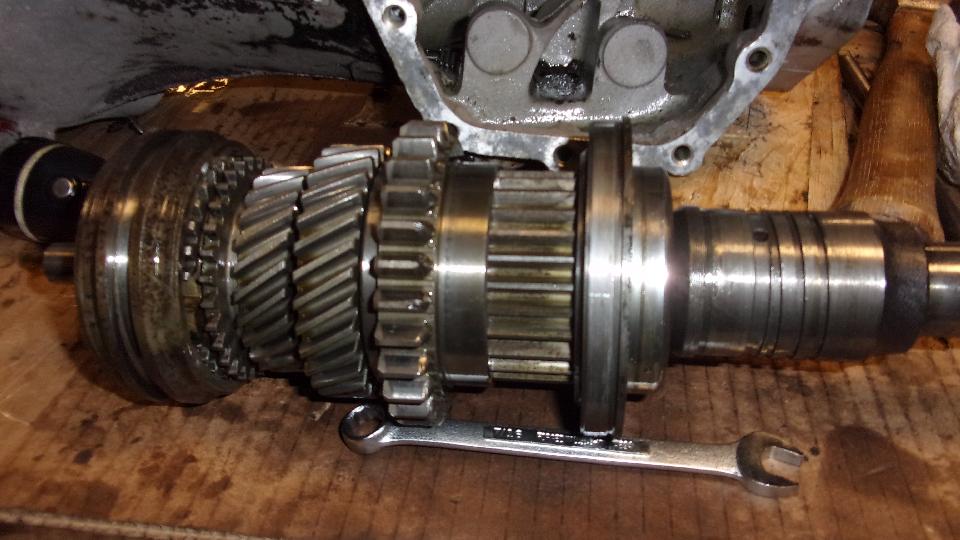
Once disassembled it was apparent that the layshaft indeed had some wear and wants to be replaced. Also of the three needle bearing assemblies on the layshaft, the single rear bearing roller set was showing brinelling marks on the rollers, so at least one bearing needed to be replaced. Not too long to unlock and remove the 3rd gear retaining thrust washer from front of the mainshaft assembly, then pull off 3rd ger, followed by pulling off 2nd gear, which forces extraction of the 3rd gear bushing and intermediate bronze thrust washer. That done, the worn 2nd gear synchro ring is readily in hand, and we could proceed with reassembly (if we had the parts).
 Only 90 minutes for disassembly including lots of time for scratch and sniff and explanations about how everything works. Remember I said keep the loose parts organized. I recon we had access to most of what was needed, except no replacement layshaft handy. A subsequent check with Moss Motors revealed that the good one was out of stock. Bummer. Time to settle back and consider options. Tripped out for a nice dinner at a local bistro, reassembled the mainshaft parts so they would stay in order, more chat about parts to be ordered before reassembly, and next thing we knew it was well past 10-pm. Seems like we managed to kill about 8 hours for the 1-hour disassembly job and subsequent discussions.
Friday May 25, 2018:
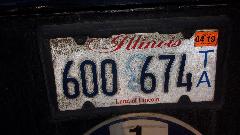
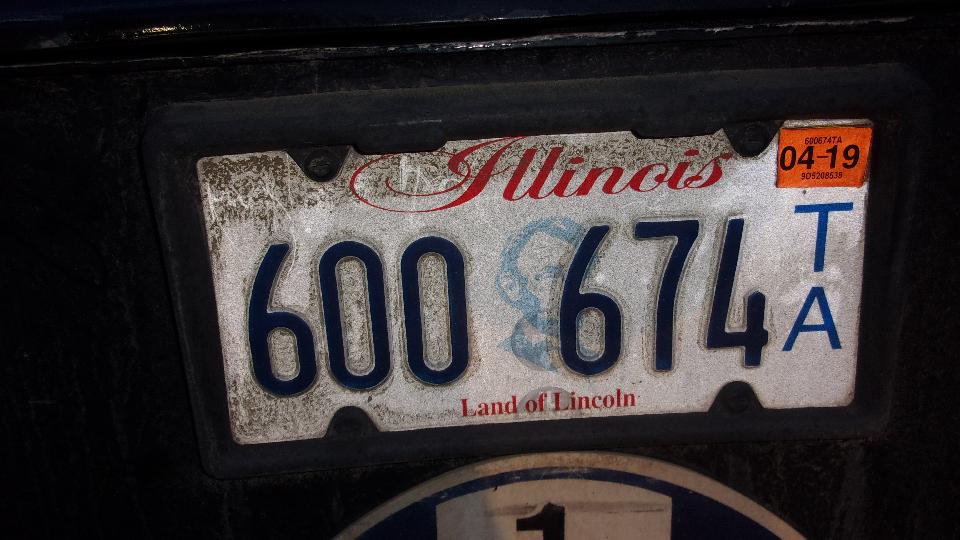
 Most of the day spent catching up photos and notes, email and tech questions for the past couple of days. In the evening we were off to visit my older daughter in Sandwich, IL (my official legal residence), and to pick up the renewal sticker for the trailer registration. Nice chat, good way to pass the rest of the day away.
Saturday May 26, 2018:
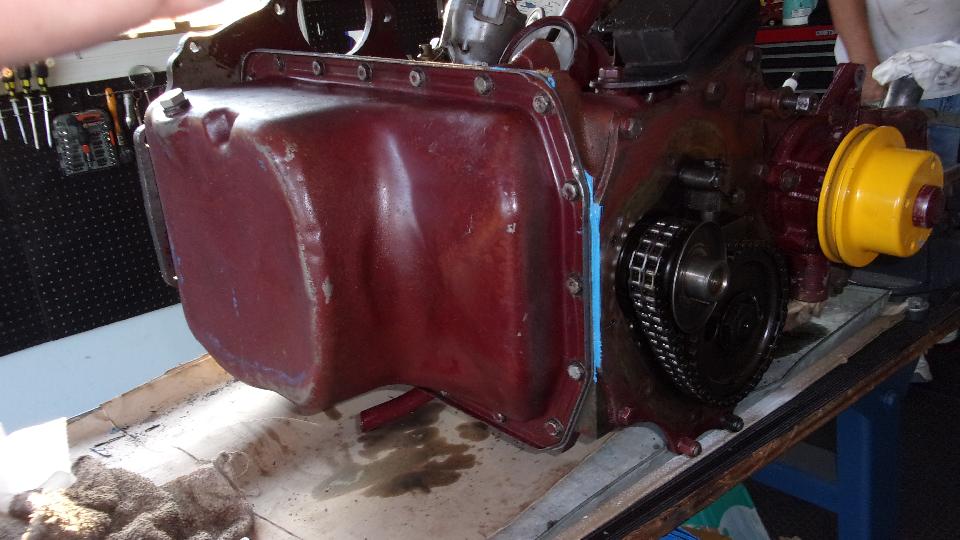
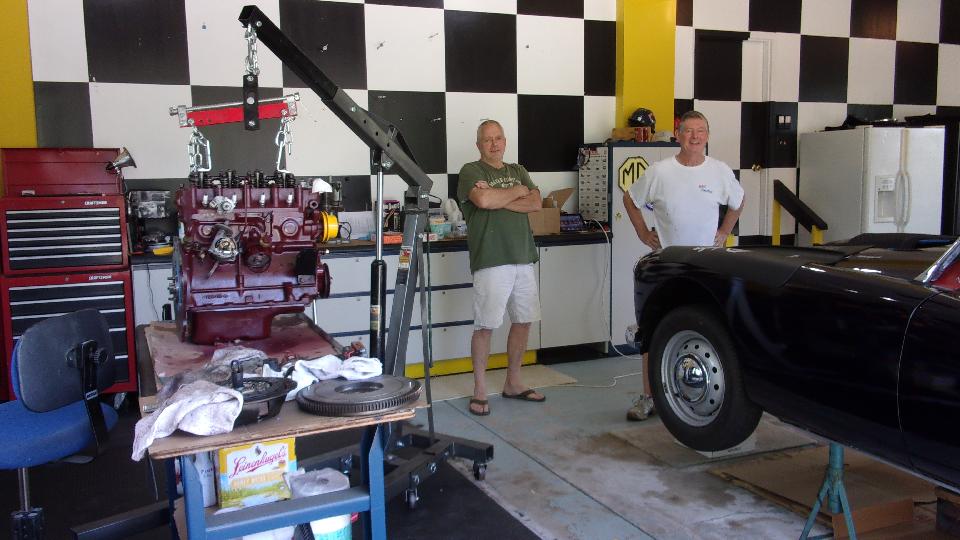
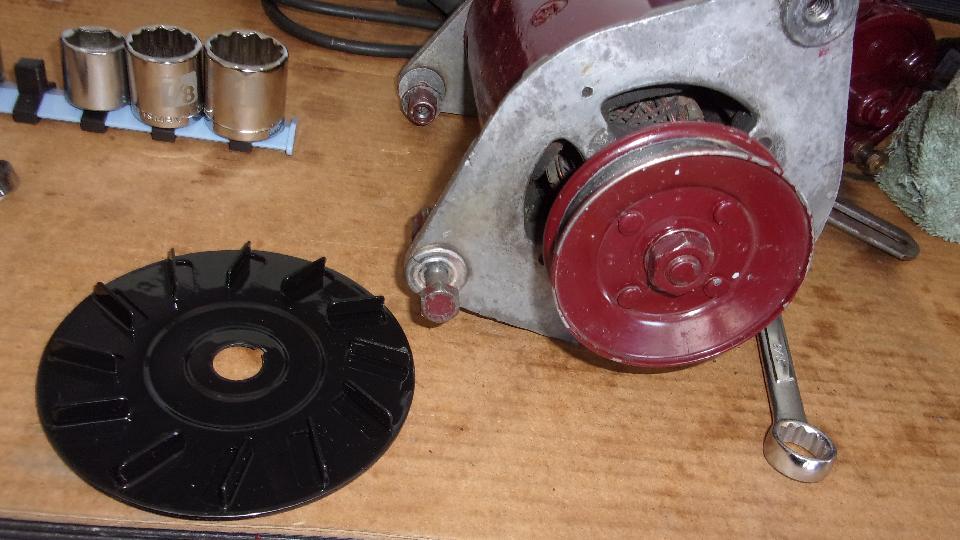
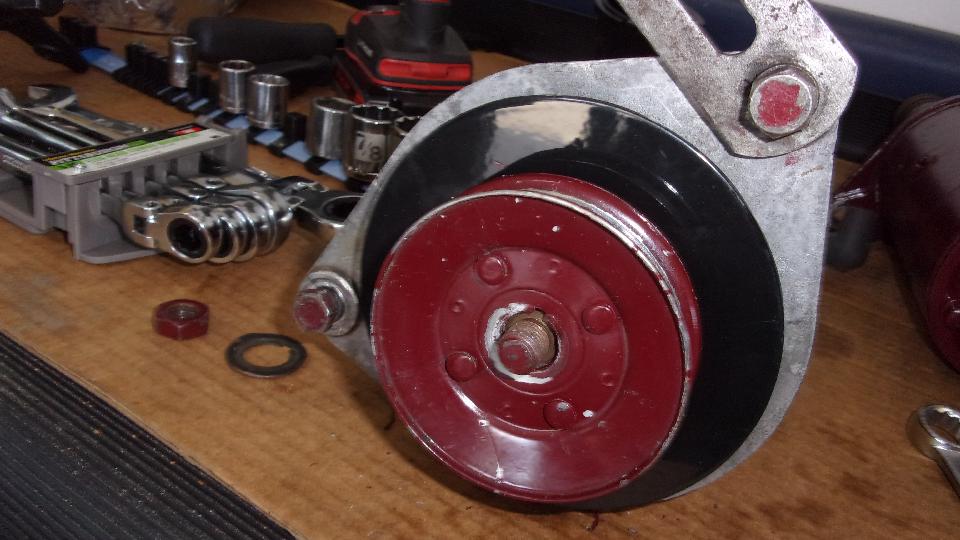
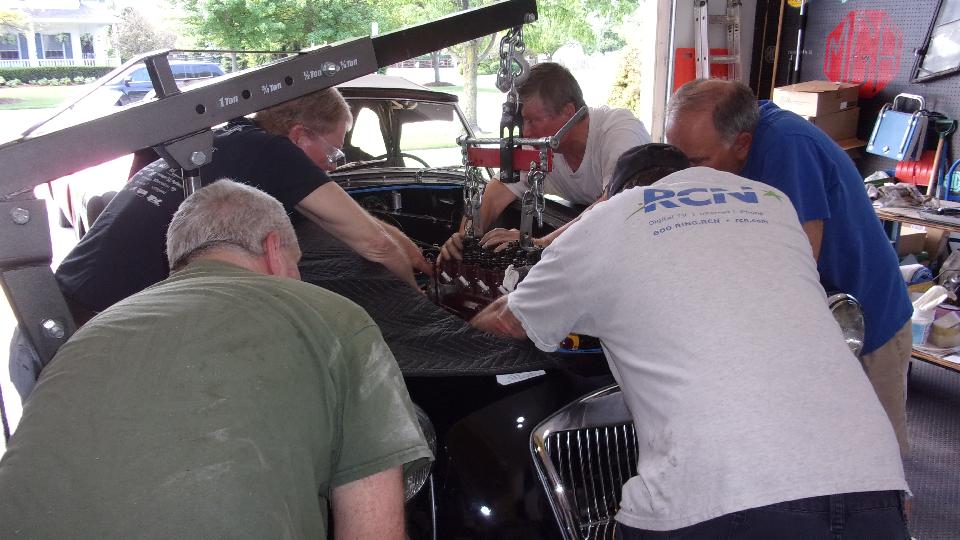
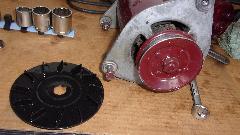
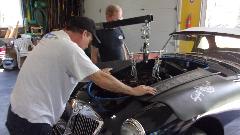
Back to visit Chuck McCallum in Plainfield, IL. This started out as a follow-up to Wednesday's rear crankshaft seal installation. By now the rear seal was finished as well as the timing cover, and the engine was ready to be installed in the car. This was slated as a CMGC club tech session, only announced at the Monday club meeting, so short notice limited it to a few friends. A quick little side job first, needing to install the cooling fan on the generator (after someone at Moss Motors told him it wasn't needed, bah, humbug).
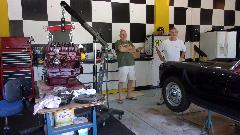

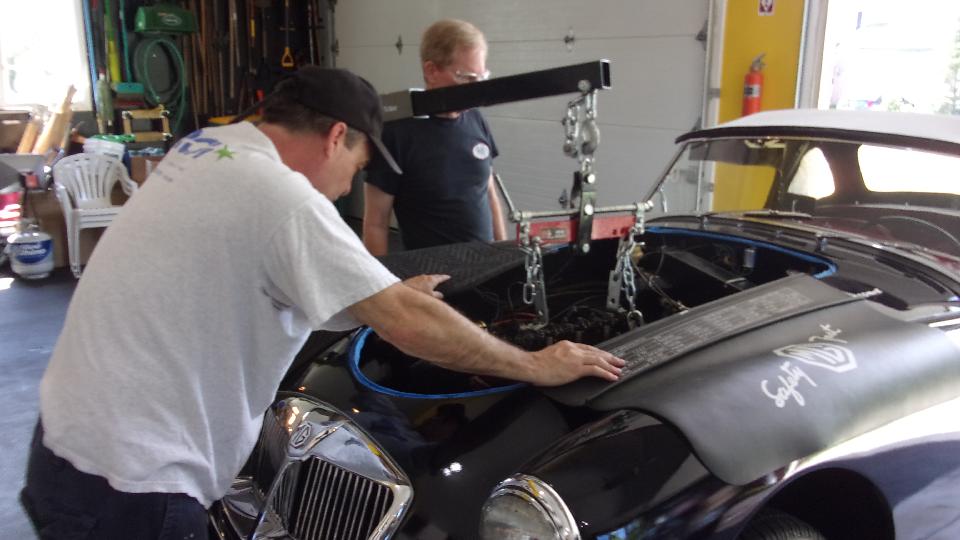
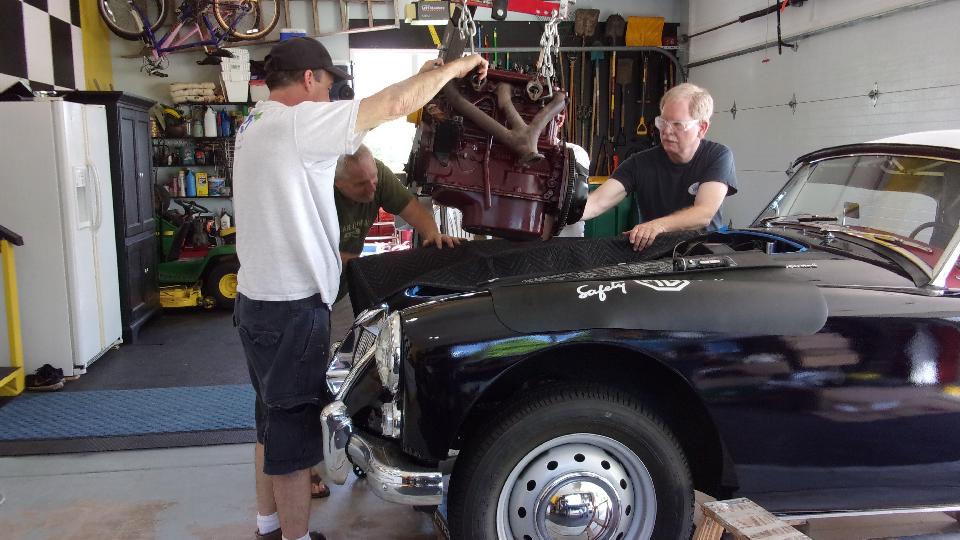
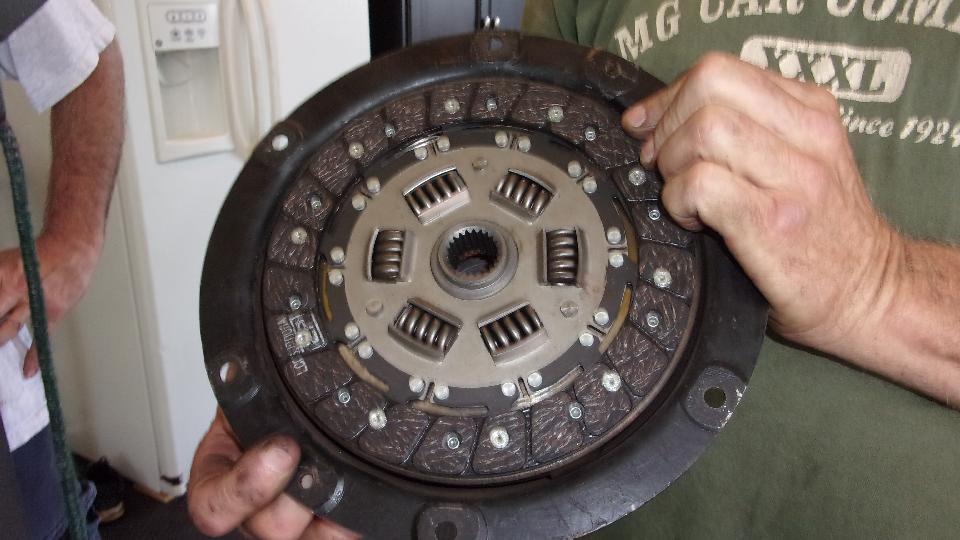
Meanwhile the guys had assembled the flywheel, clutch disc and pressure plate on the engine and were intent on dropping it into the car. After a lot of pushing, shoving an sweating, it was decied to be a lost cause when the gearbox input shaft wouldn't engage into the spigot bushing of the crankshaft.
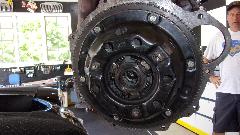

Someone admitted they didn't have the proper clutch alignment tool (rats), so we pulled the engine out for rework. We chucked the standard alignment too in a power drill, spun it and ground it down and cut it off with a hacksaw and file, and got the clutch back together again with proper alignment.
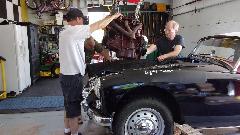
While that was out there were second thoughts about the clutch release arm, and that came out to install a new pivot bushing and a fresh pivot bolt. Finally the engine was back in, clutch engaged, bellhousing mated, engine mounts secured. Then the party began breaking up, most of the extra hands heading home. Lunch break.


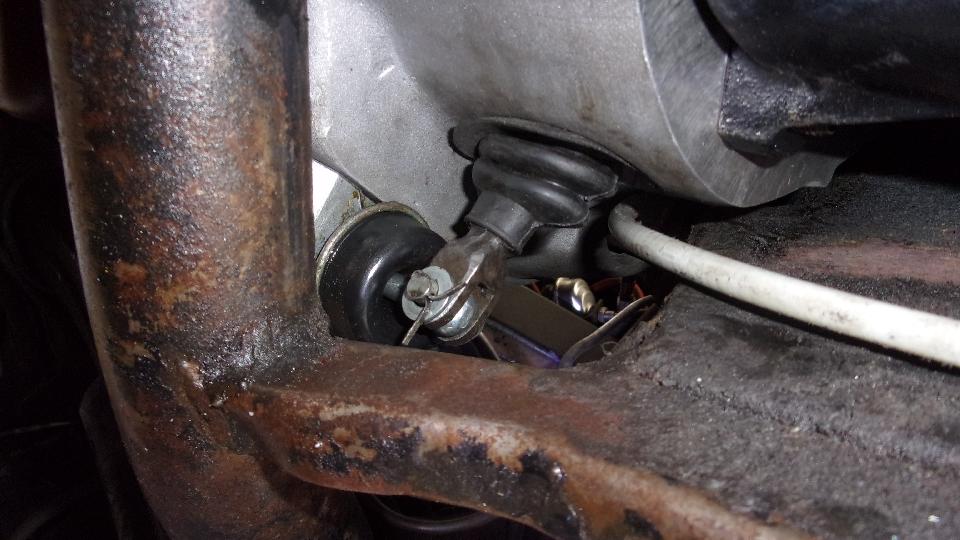
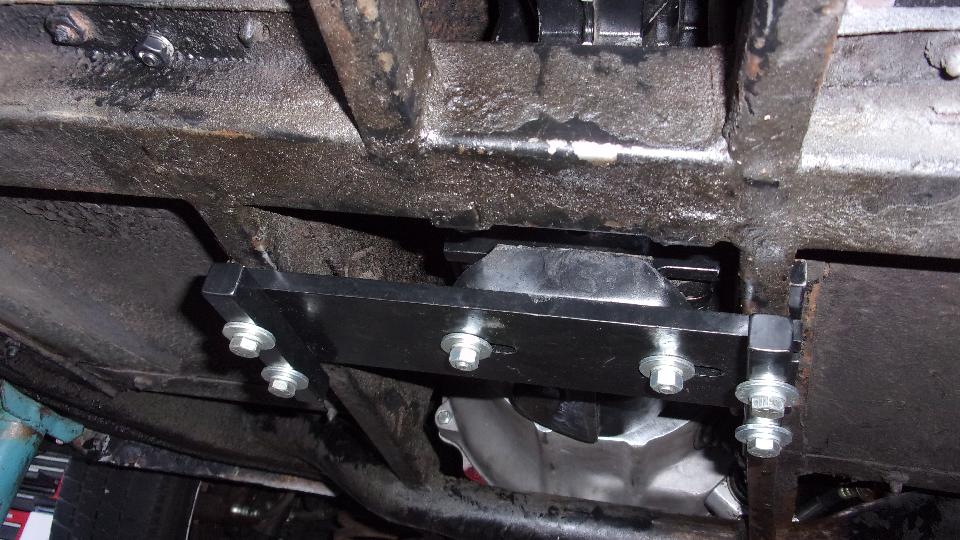
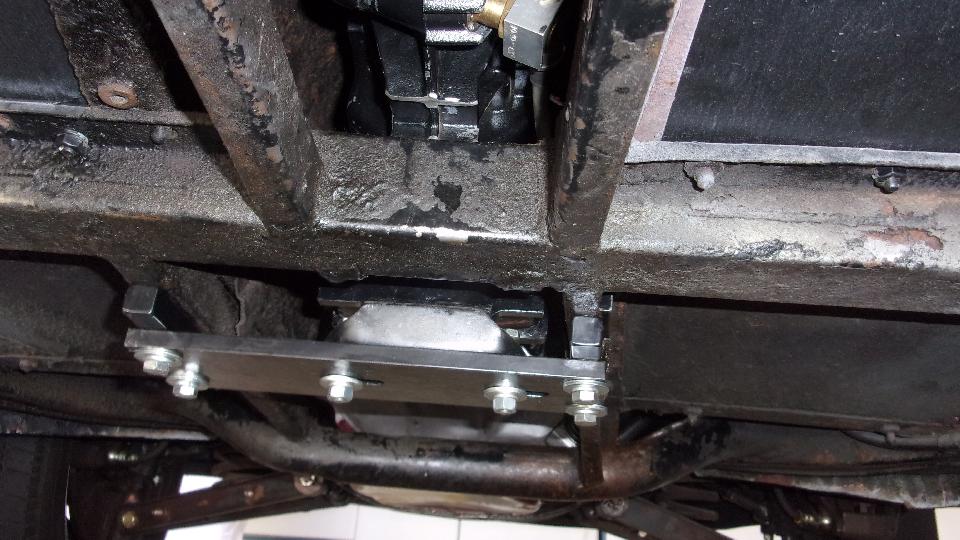
There was a momentary pause of concern when the clutch slave pushrod didn't line up (not to take the engine out again), but that was resolved with a pry bar to push the salve cylinder piston back to rest position. Then another delay while we re-arranged incorrectly installed 5-speed gearbox mount parts to drop the gearbox 3/4-inch.
Tach cable was connected, and exhaust pipe hooked up (in spite of damaged manifold flange and odd bolts). A pair of pipe brace straps were bolted to the bellhousing. The previously missing parts may have contributed to the damaged manifold. Installing engine peripheral parts, ignition parts, generator, heat shield, P-clip for carburetor vent pipes. New fuel hose, and the rubber grommets on the float chambers needed to be replaced (correcting a few missing parts in the process). Seems like there was a dinner break in there somewhere.
Then we got busy (busier), and the work load was a bit hectic, no time for pictures. Carburetors on and linked up, radiator and hoses in and connected, fluids installed in gearbox and engine. Somewhere past 11-pm the engine fired up and ran crappy, not wanting to idle. Resetting timing helped some, at least enough to get a steady high idle where we could work with the carburetors. I figure we were maybe 20 minutes away from a sweet running test drive when it was time to call it quits at midnight. Hard to believe we spent 15 hours today sorting out a lot of odd problems in addition to installing the engine. Tomorrow should be a scheduled day off. Maybe come back Monday for the final touches.
Sunday May 27, 2018:
Been busy for that past few days, falling behind on the guru chores, so today would be a catch up day. Lot of photos and notes from Vic's gearbox and Chuck's engine, and a backlog of email and tech questions. Got to be late evening catching up with that stuff, and still something else that would be held over for tomorrow.
Monday May 28, 2018:
The high priority chore today was the monthly trip report with photos and notes for the CMGC newsletter. Mid morning start for that, killed most of the day.
Tuesday May 29, 2018:

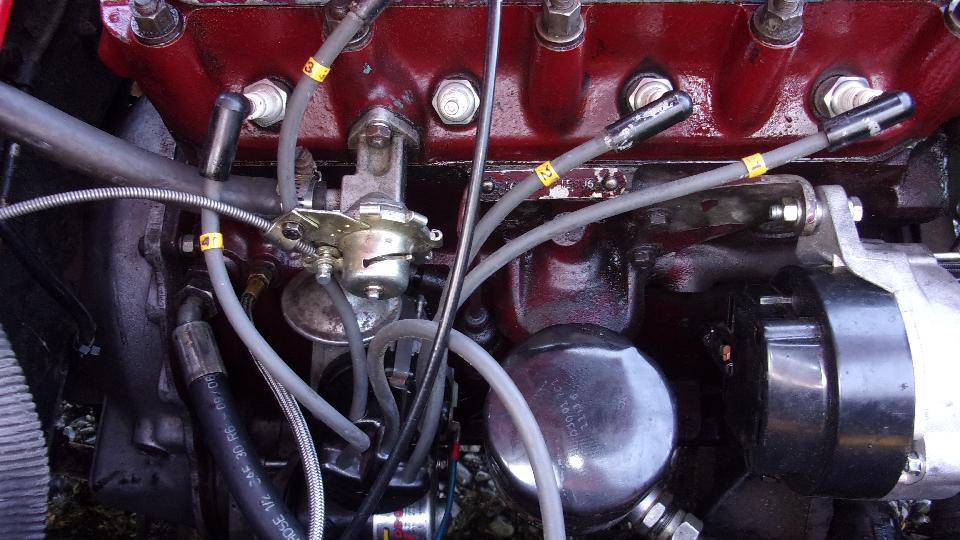
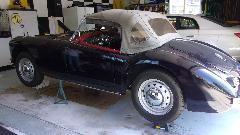
Wandered back to Chuck McCallum's place today for the unfinished business. He was driving the car a bit when it suffered from frayed throttle cable and stuck on very high idle speed. So we installed a new throttle cable, trimmed the choke cable a bit shorter, followed by nice carburetor tuning, and it runs like a champ. Took a nice cruise in the car with the new 5-speed gearbox he had not driven before, big grins all around.
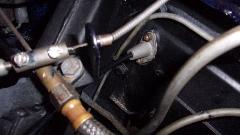
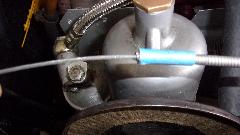
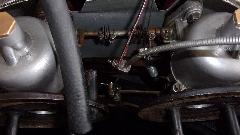


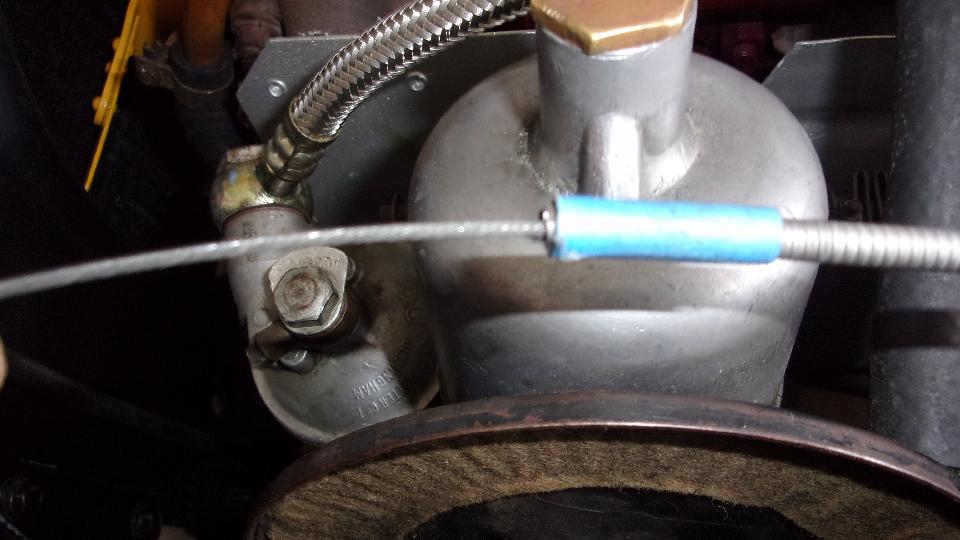
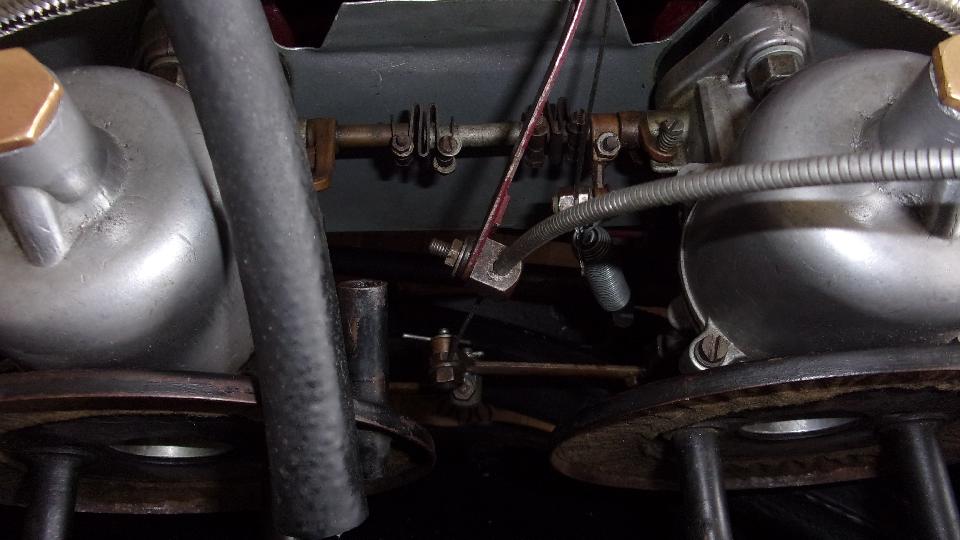
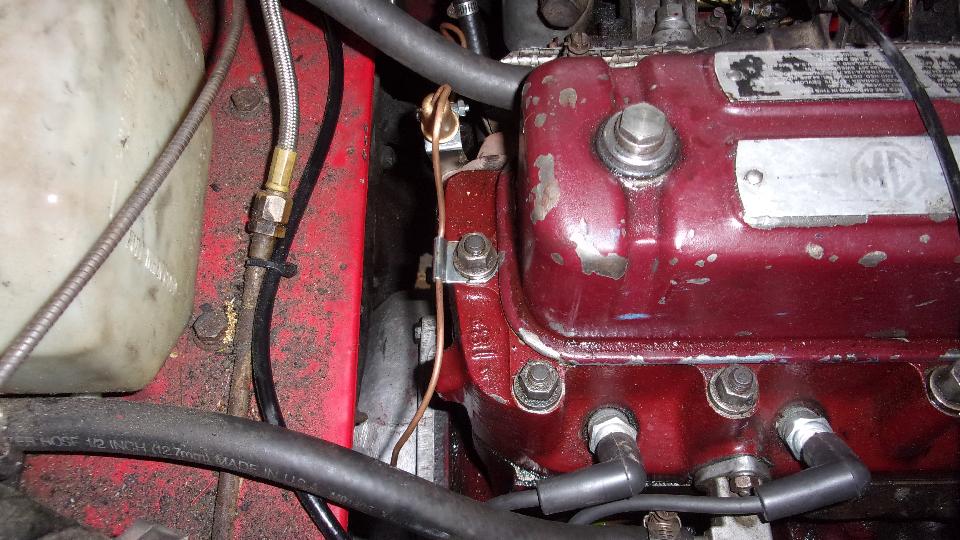
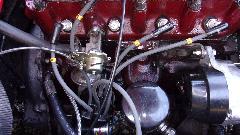
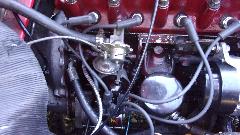
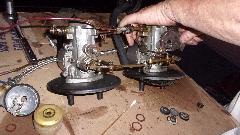
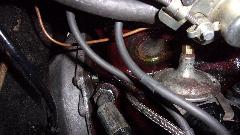
With a bit of time to spare, we set about installing the vacuum advance pipe on my car, which was needed to go with the original Lucas distributor I just recently installed. This involved a fairly quick R&R of the carburetors to assure easy access to screw the pipe into the bottom of the rear carb, as well as routing of the pipe toward the rear for best service access. Yes, I cheated a bit and put the fuel separator bracket on the rear manifold bolt rather than the second from the rear, but that is for ease of access for future maintenance. I haven't driven it enough yet to know if it improves driveability, but at least hoping it improves fuel economy.
Wednesday May 30, 2018:
A day with no appointments, so had time to post a new tech article on what the Ignition Warning Lamp does (and doesn't do). Contrary to its name, it has very little to do with the ignition system, but serves as a warning if something goes awry in the charging system. Also had a short discusson with a bloke who thought his car was running too cool, which was most likely a mis-calibrated thermostat issue.
More free time can foster the devil's workshop. Now starting a BBS thread on how to stifle the increase of faulty replacement parts. Since everyone is affected by this, it should generate a lot of dicussion, hopefully more constructive than destructive.
Thursday May 31, 2018:

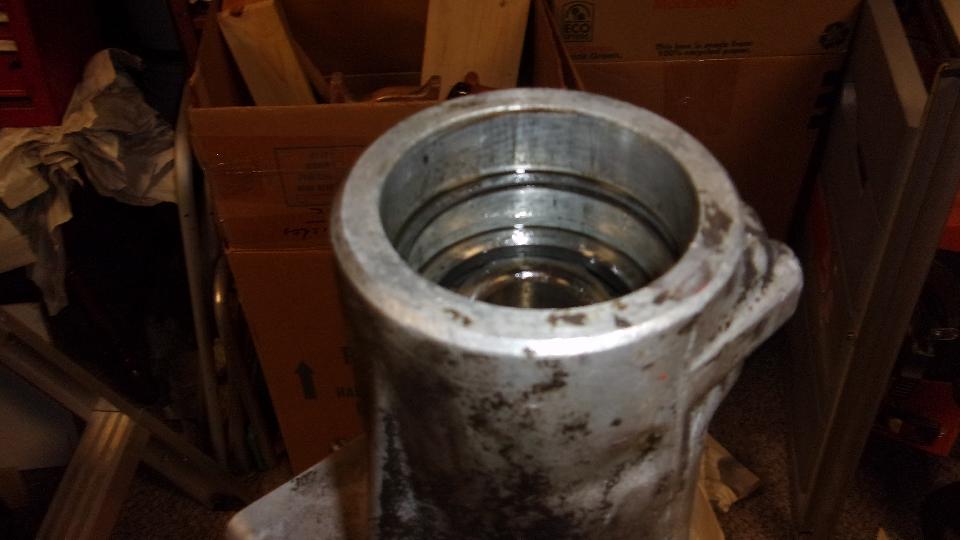
We rolled back up to Crystal Lake, IL today to visit Vic L'Heureux again, to pick up my spare alternator that arrived a few days earlier, and to reassemble Vic's recent replacement early MGB gearbox. Chuck McCallum from Plainfield also came up to observe, lend a hand, get his fingers dirty and learn something, because he has an MGA gearbox to overhaul soon. The party was waiting for our arrival a little after 2-pm.
 Not to waste too much space here as we have seen this before, it went back together in a few hours with no significant problems, new layshaft with full compliment needle bearings not cartridge bearings, new 2nd gear synchronizer ring, gaskets and seals all around, and new bolt and bushing for the clutch release lever. We set aside enough time to explain how synchronizers work, and how to carefully measure and calculate for correct shimming of the front ball bearing outer race.


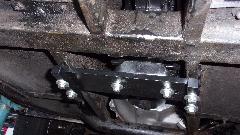
A pair of new rubber mounts installed, but still needing more rubber grommets for vertical bolt and the fore/aft stabilizer rod. All in all a good half day well spent, and a couple more people now qualified to overhaul an MG gearbox. A bit of social over dinner, and then play time over so off to a WiFi spot to catch up on MGA guru business.
|