The MGA With An Attitude
MGA Guru Is GOING MOBILE - (December 1 - December 15, 2023)
Friday, December 1, 2023:
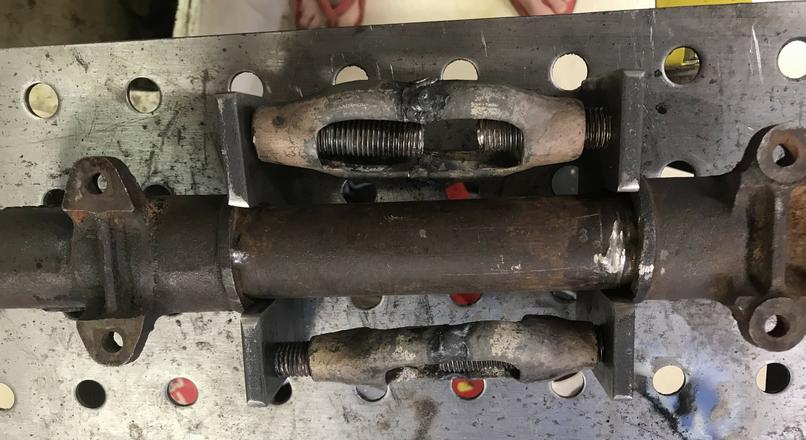
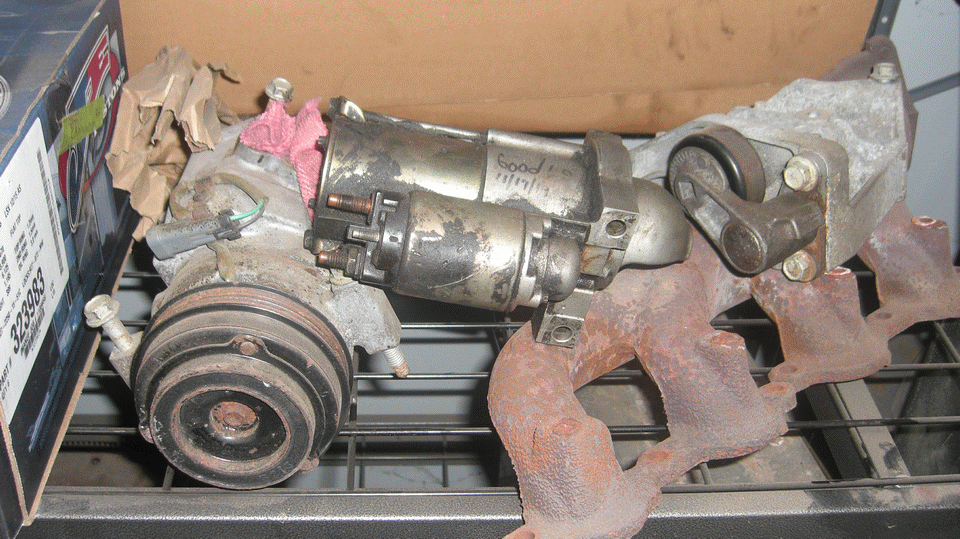
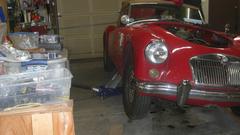
Addendum to a tech page for Steering Rack Conversion LHD/RHD to add photos of a spreading tool to split the two pieces after removing a few welds. Had a few visitors mid day.
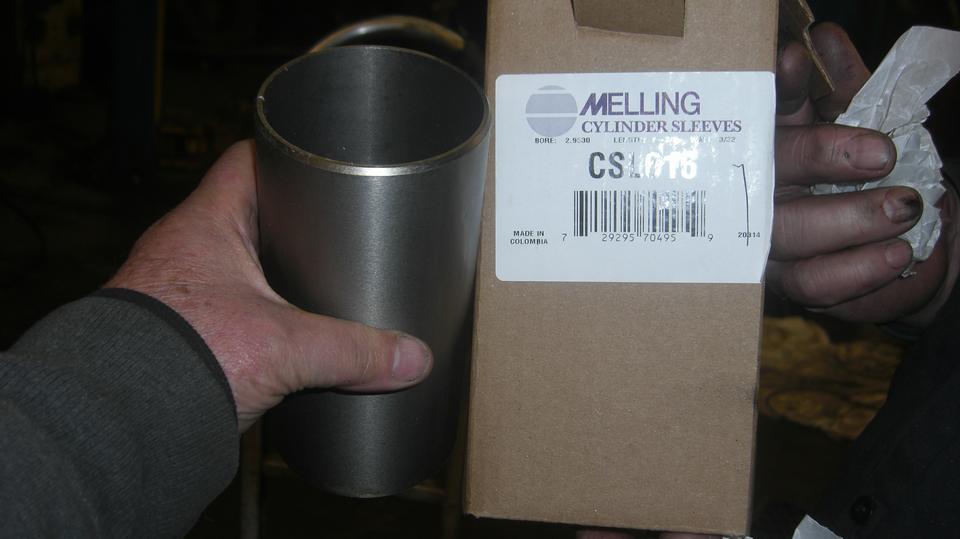
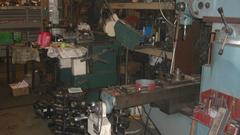
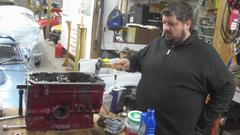
 Then a trip to the machine shop to check on my engine block. Someone was hurt at the shop earlier this week, putting a damper on machine work. The new sleeve was ordered, arrived, is in hand. But the job will not be finished today, most likely Monday morning. Then a trip to the machine shop to check on my engine block. Someone was hurt at the shop earlier this week, putting a damper on machine work. The new sleeve was ordered, arrived, is in hand. But the job will not be finished today, most likely Monday morning.

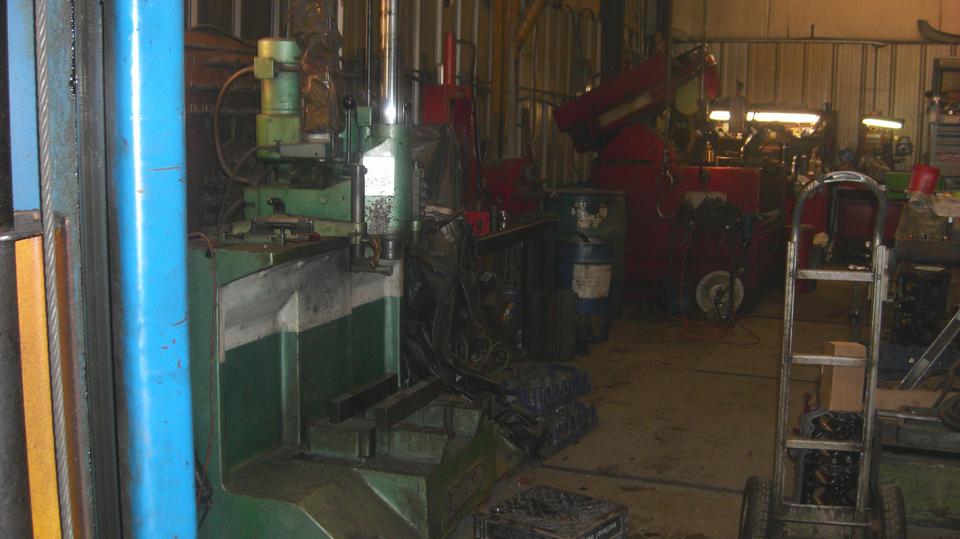
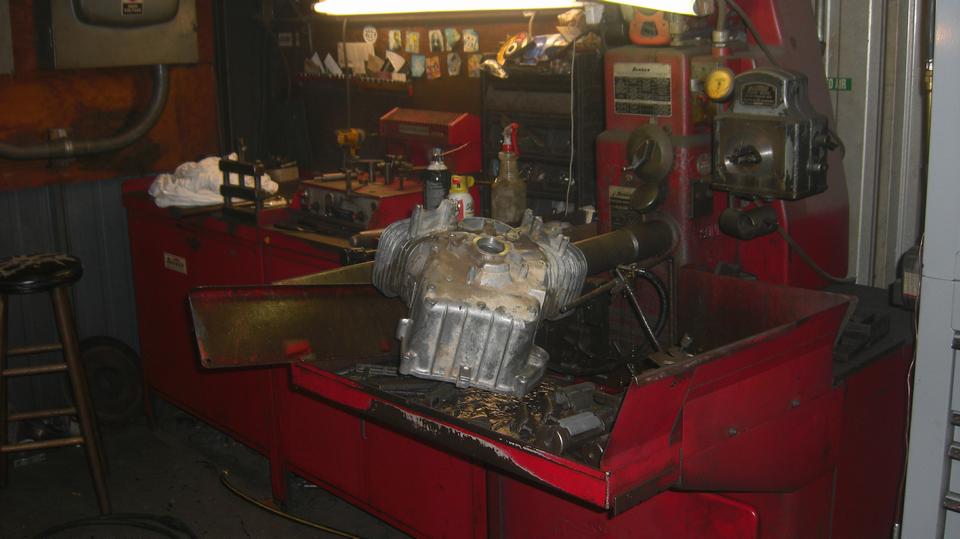
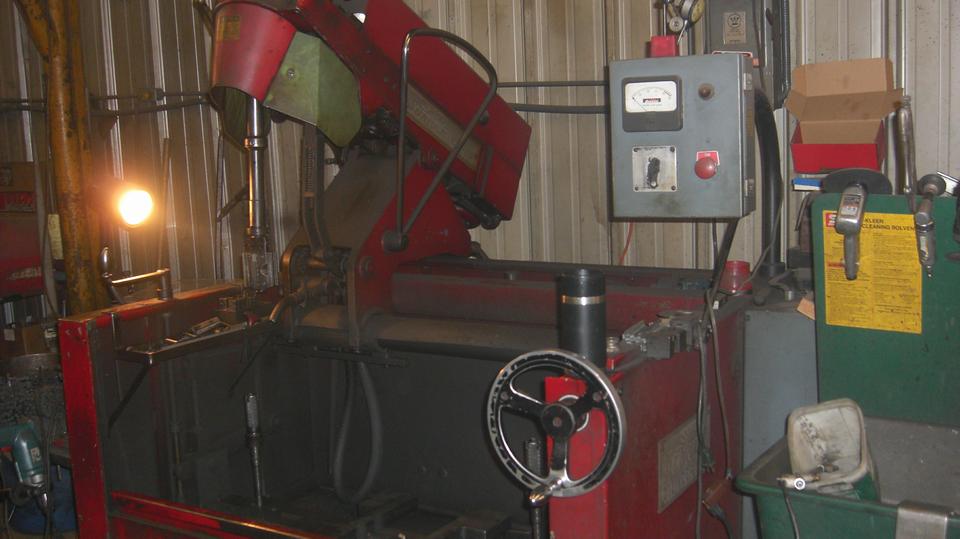
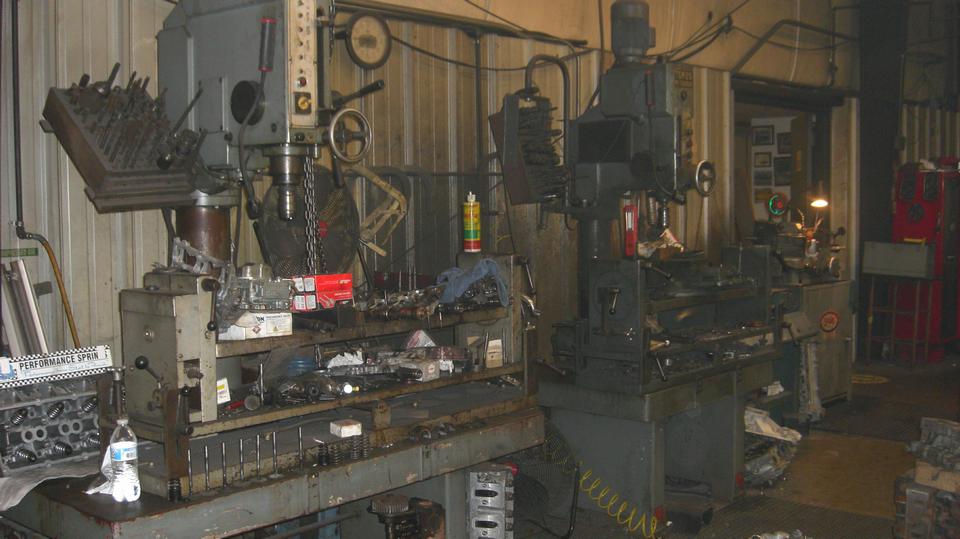
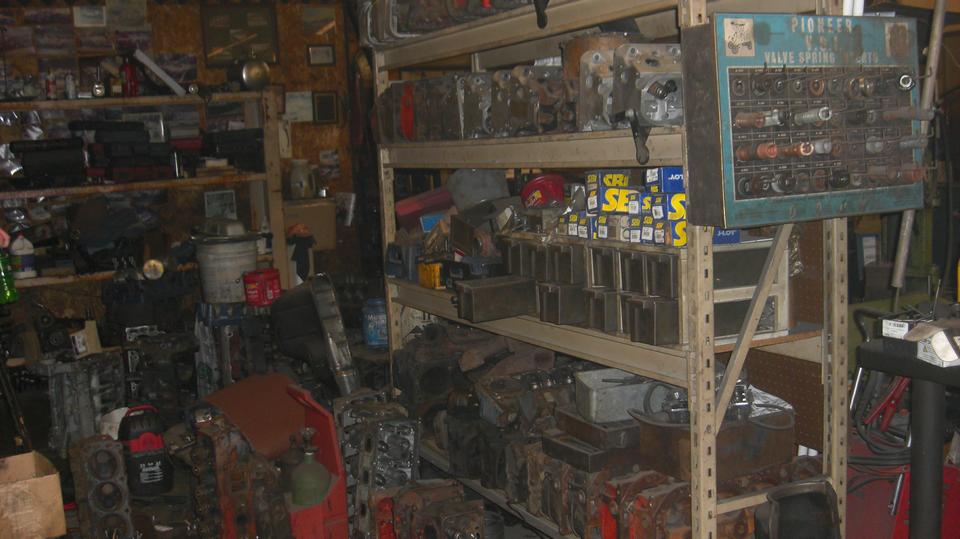
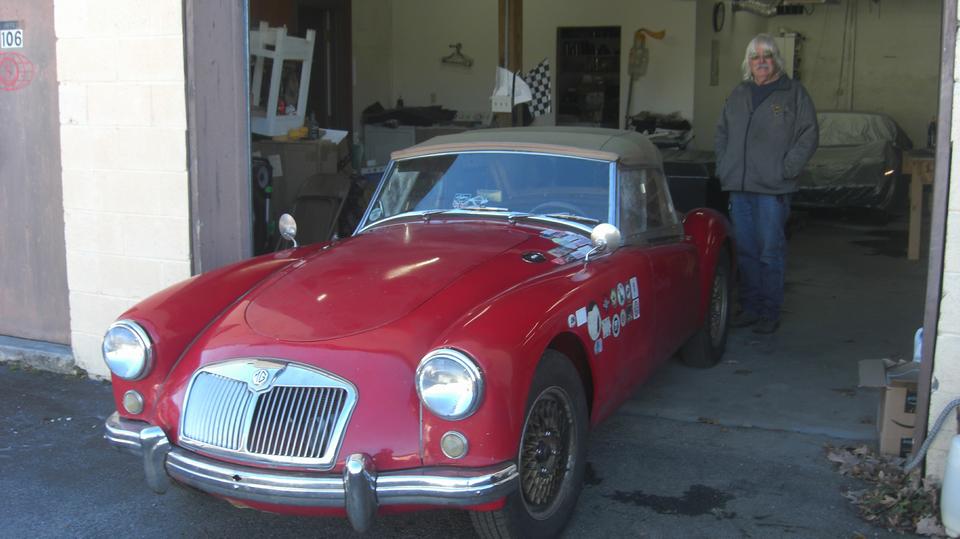
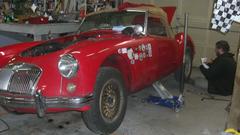
I did take the camera this time, so hello to East River Automotive in Princeton, West Virginia. Not as dark inside as it appears. Maybe would have been better if I had turned off the flash for these longer range pictures.


Saturday, December 2, 2023:
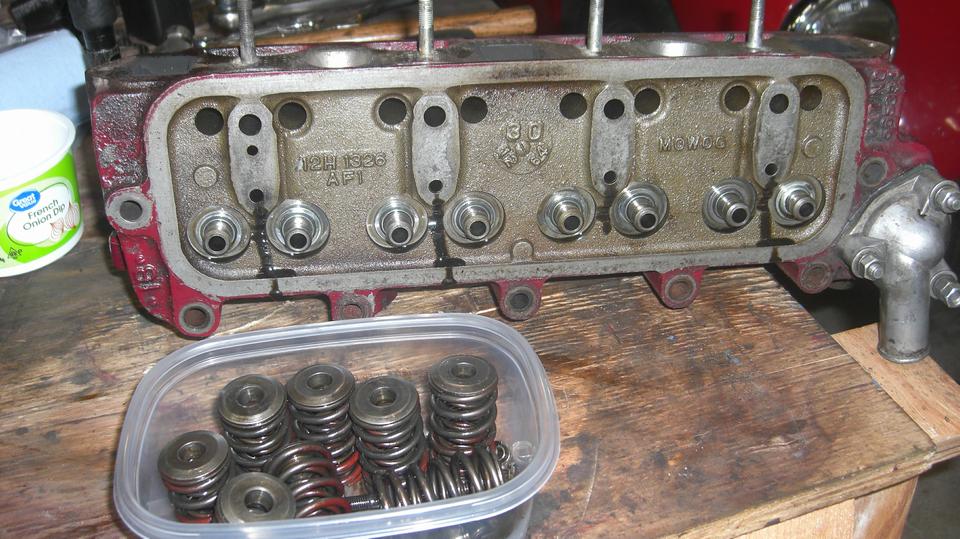
 Sheesh, I forgot a part. Early morning run to NAPA to order valve stem umbrella seals, as we are intending to install all new valves in the cylinder head before it goes back on the repaired engine.
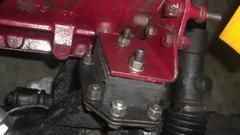
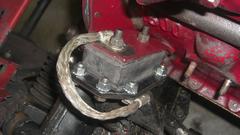
 Took a large part of the day to compose and upload an extensive revision to an Electrical tech page for installation of the 2-speed MGB wiper motor in my MGA. "I did it my way"!
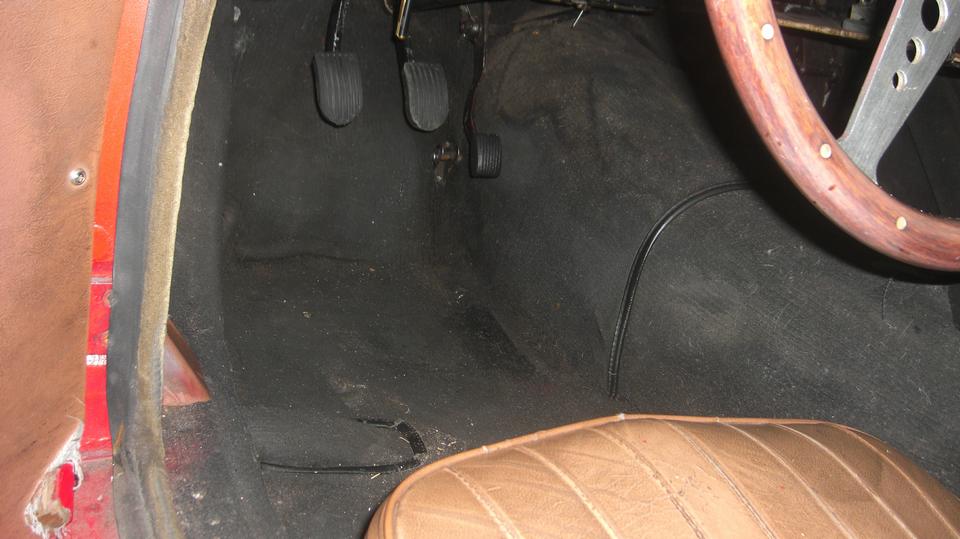
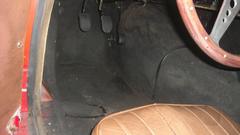
Took a break from the documentation in mid afternoon to put the floor carpet back in the car (after cleaning and drying). Looks like it could still use some more cleaning.
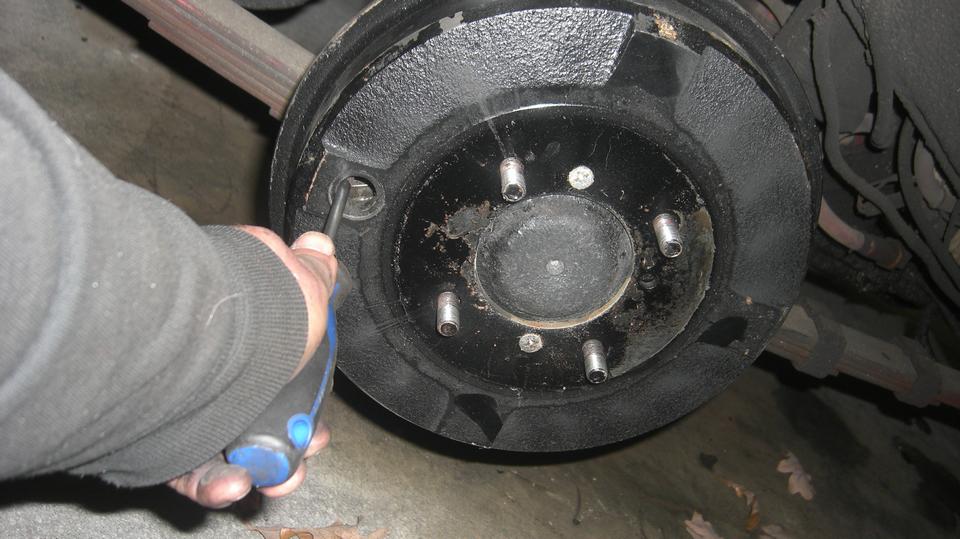
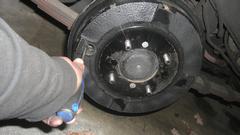
We also jacked it up to R&R the wheels for brake adjustment. That was okay, but the hand brake lever was too high. Got underneath to adjust the brake cable, now maxed out. Note to self: Next time it needs adjustment, drill another hole in the frame to move the cable jacket back an inch to gain more adjustment range. I could swear I replaed this cable a few years ago because it was stretched, but no record of it, so maybe not.
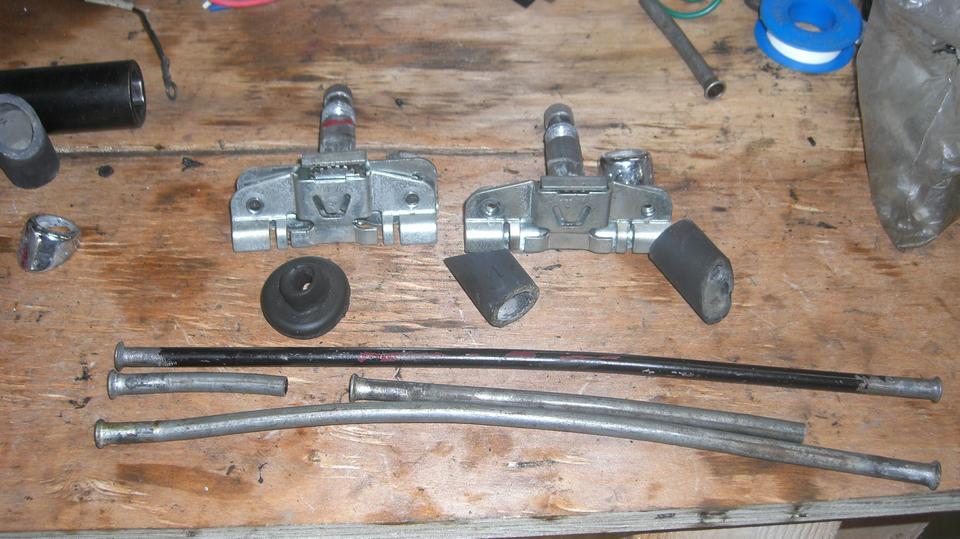
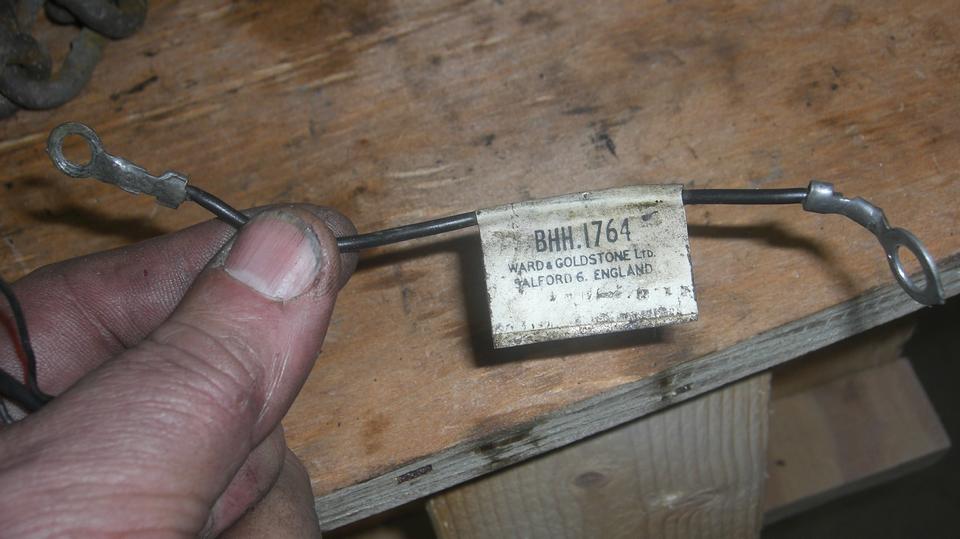
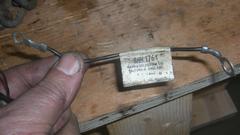
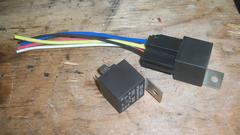
Cleaning up. Say goodby to the left over old screenwiper parts I will never use again (defective wheelboxes anyway). That's a commercial part for a ground wire that came off of one of the MGB wiper motors. We'll save that and add it to inventory. And we will keep to carry a spare relay and mating socket. The other MGB style wiper motor that parks retracted will go into some else's inventory.

Sunday, December 3, 2023:
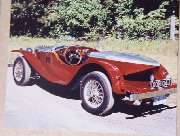
Updated a Variants tech page for a hand built "Boat Tail MGA", now into it's third owner since it was built in 1972. With aluminum body on the MGA chassis it is lighter and quicker.
Monday, December 4, 2023:
Got a call from the machine shop with bad news on my engine. It needs another cylinder sleeve, part is on order, should arrive tomorrow, but add another two days to the delay.
Another parade in Princeton, West Virginia, this one starting at 7-pm. I quickly gave up trying to take pictures in the dark with glaring lights.


The distraction of the parade caused me to miss a large part of John Twist's technical Zoom meeting.
Tuesday, December 5, 2023:
Updated a tech page for MGA rear leaf springs. After more than 25 years of being wrong, someone is finally producing MGA leaf springs with correct free height, leaf thickness, spring rate, and ride height. Three cheers for MG Owners Club, UK. Also much thanks to Donald Rosie in Edinburgh, Scotland, UK for being the first customer and guinea pig, and for providing this report.
Wednesday, December 6, 2023:
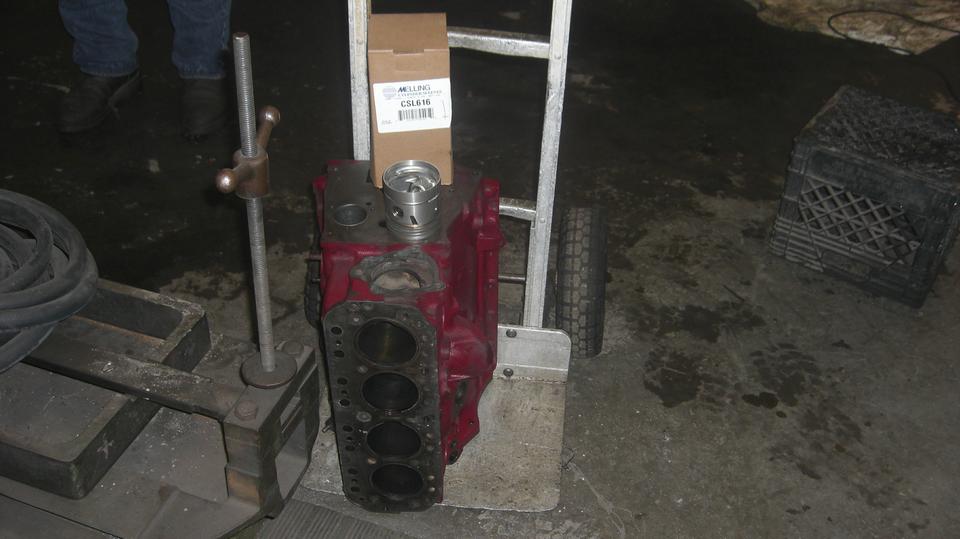
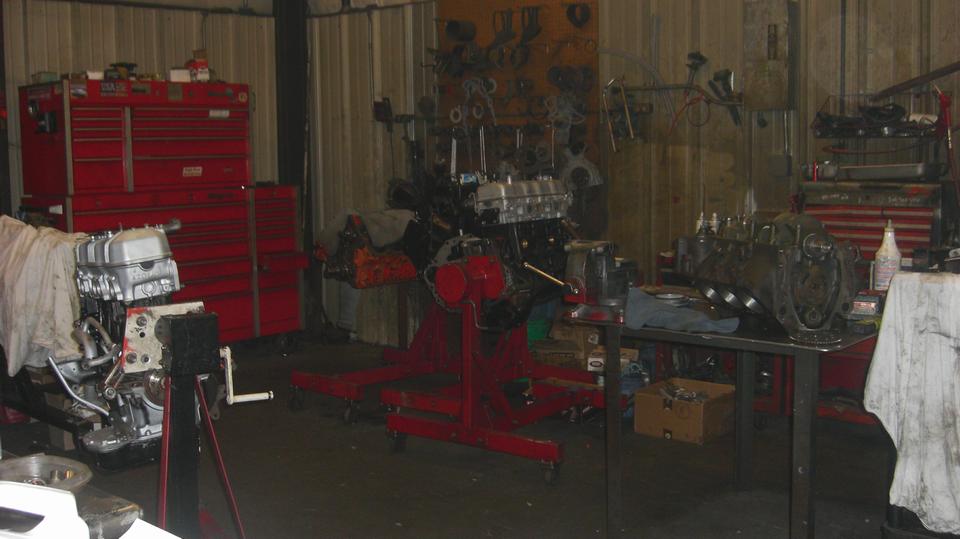
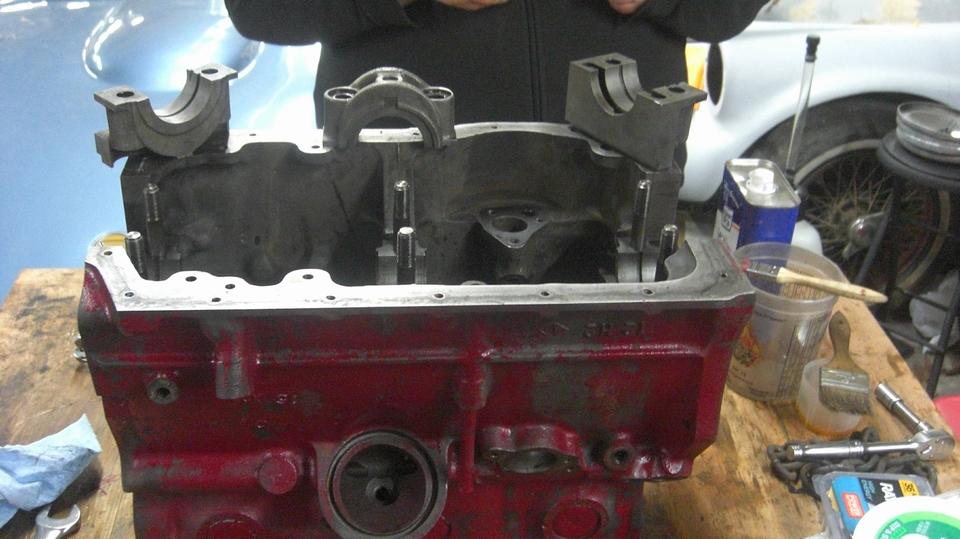
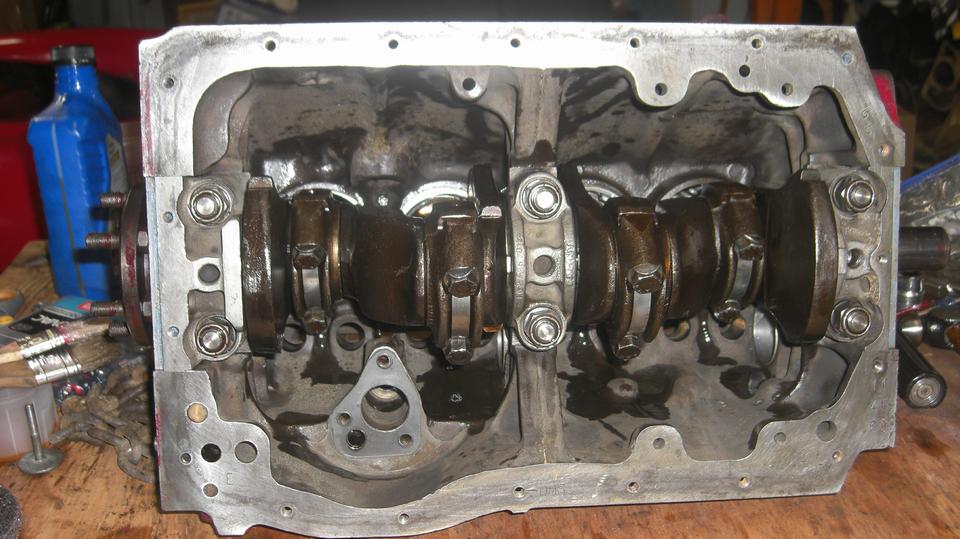
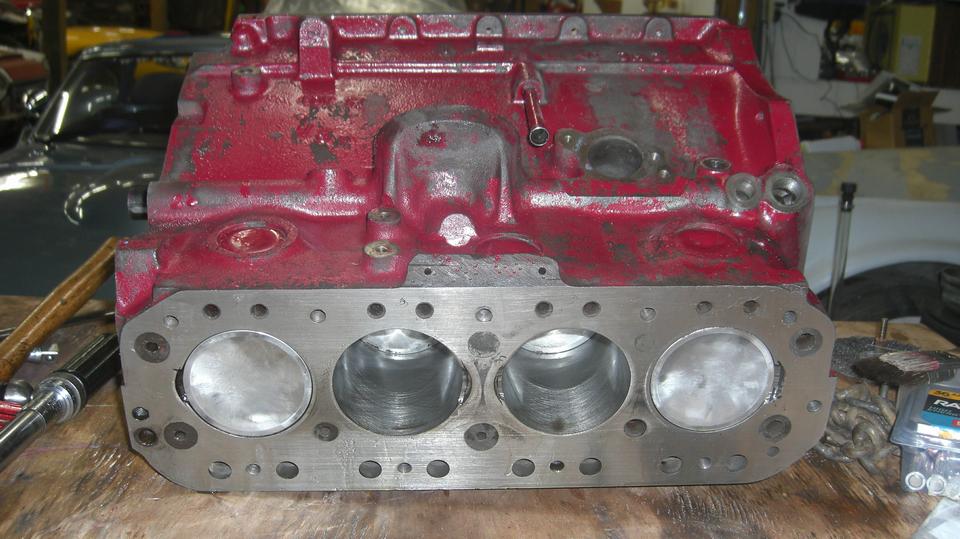
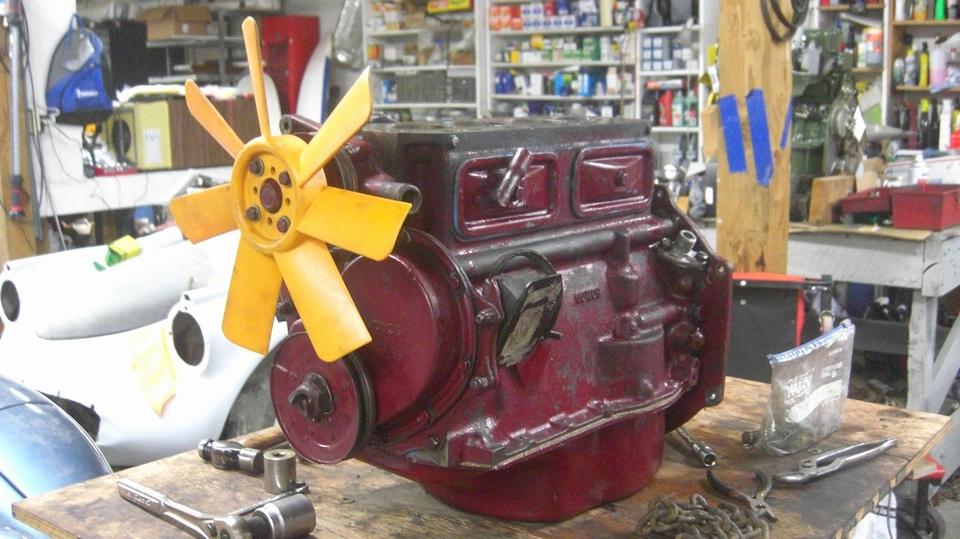
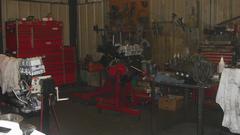
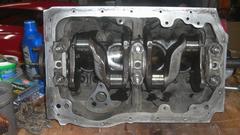
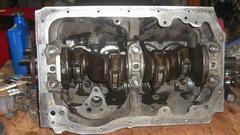
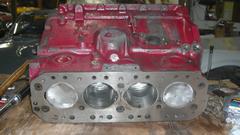
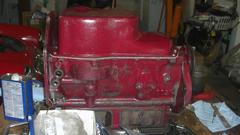
Magic day? Got a mid day call saying my engine block had been sleeved (2 sleeves, not 1) and was ready for pickup. So go drag it back and have at it. We had cleaned the block before it went to the shop, and the shop did a good job of cleaning it up after machining, so not much to do there. Pull put the main bearing caps, install new main bearing half shells, drop the crankshaft into the block with the thrust washers, reinstall the main caps, torque them up, and there was a free spinning crankshaft.
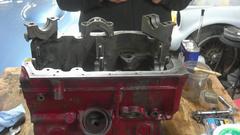
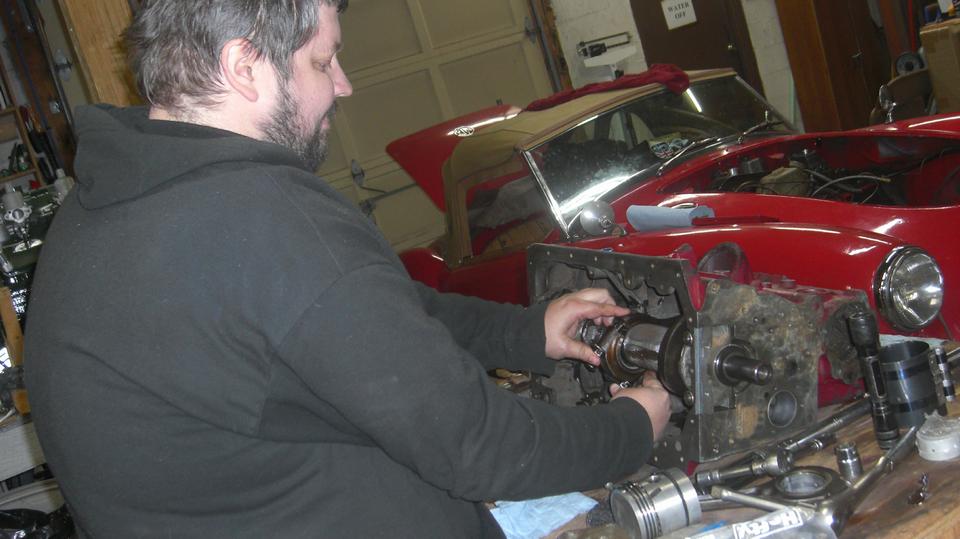
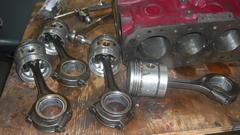
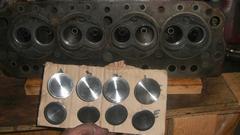
Get the one sample piston back on its connecting rod, buff a little carbon off the piston tops, check to assure the ring grooves are clean, and install all the piston rings per prescription. Knock off the number matched big end bearing caps, toss the used rod bearings and install new ones. Compress the piston rings, shove the rods and pistons into the block, and reconnect the big end caps. Bottom end complete with crank shaft, con-rods and pistons with new rings.

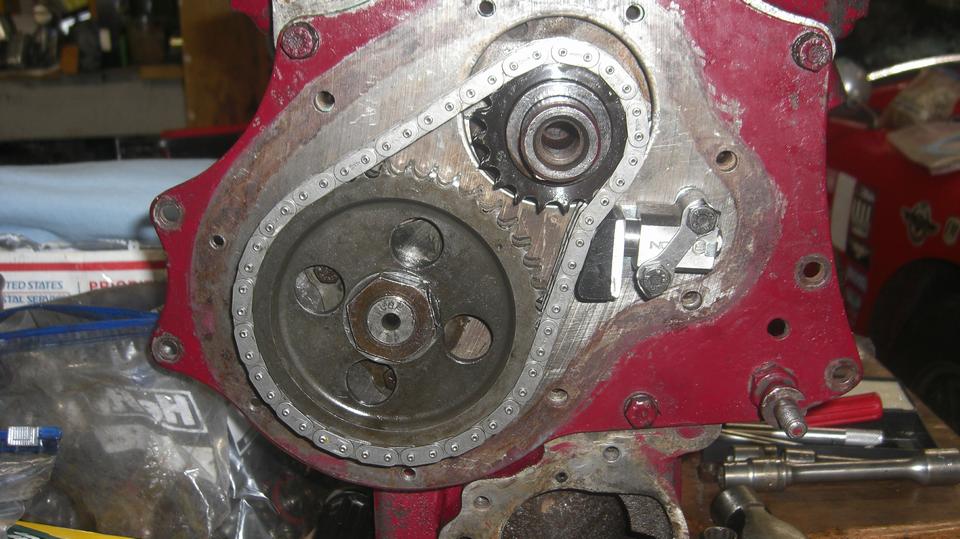
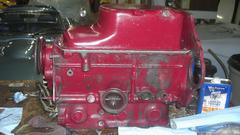
Reinstall the front and rear plates, timing chain and sprockets. Install new tensioner, discover chain has too much slack, so install a new chain, much better.
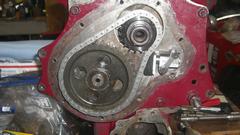

Install oil thrower, timing cover, and crank pulley. Looking at a new style locktab washer for the front pulley, but unfortunately it was non-functional. The bent finger in the center intended to catch in the pulley keyway was too far inboard, so it dropped inside the pulley bore and did nothing. Give it up, need to send it back, re-install the old lock tab washer. After 23 years, 360,000 miles, this engine is getting a new oil pump and pick-up screen (as promised last time the oil pan was off).
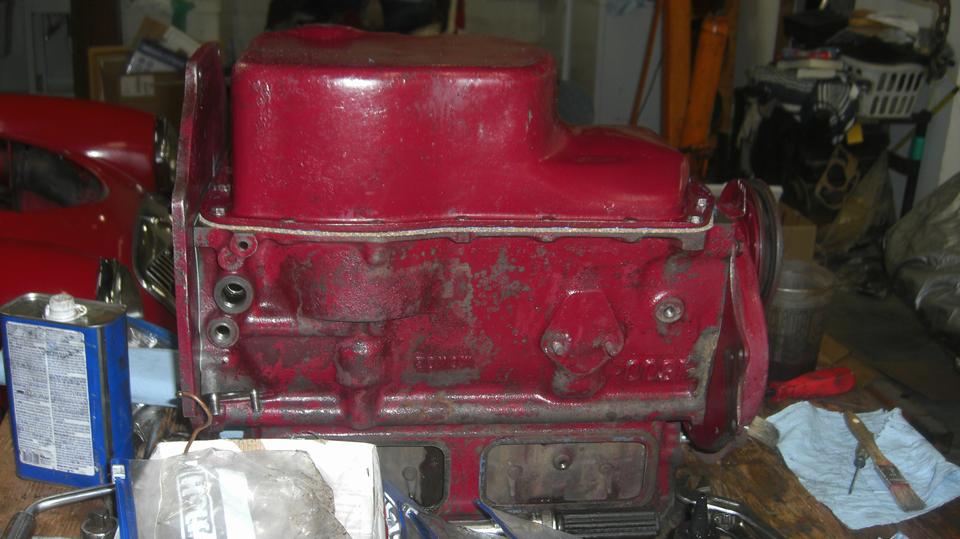
Bottom end buttoned up with the sump in place, seemed like a good time to knock off for the night so I can post these photos and notes and get some sleep.


Thursday, December 7, 2023:
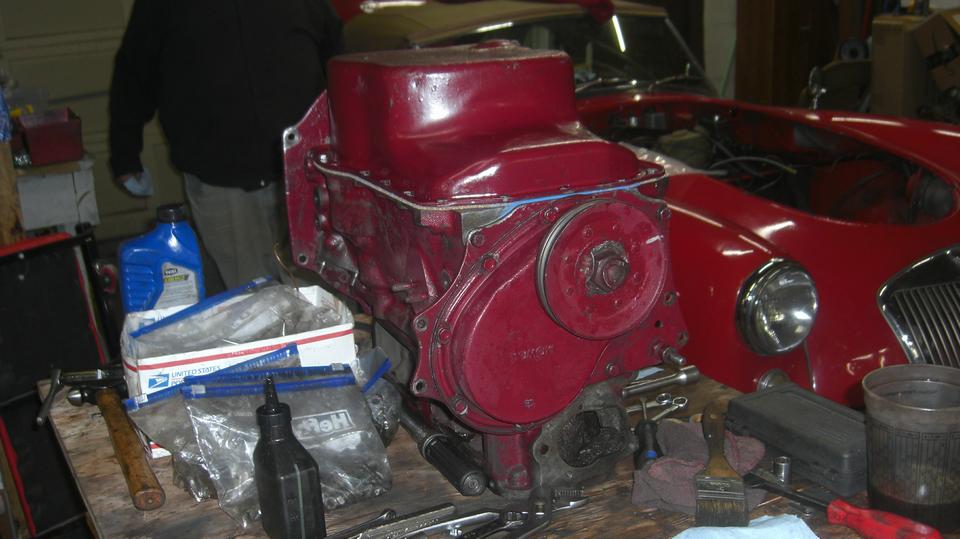
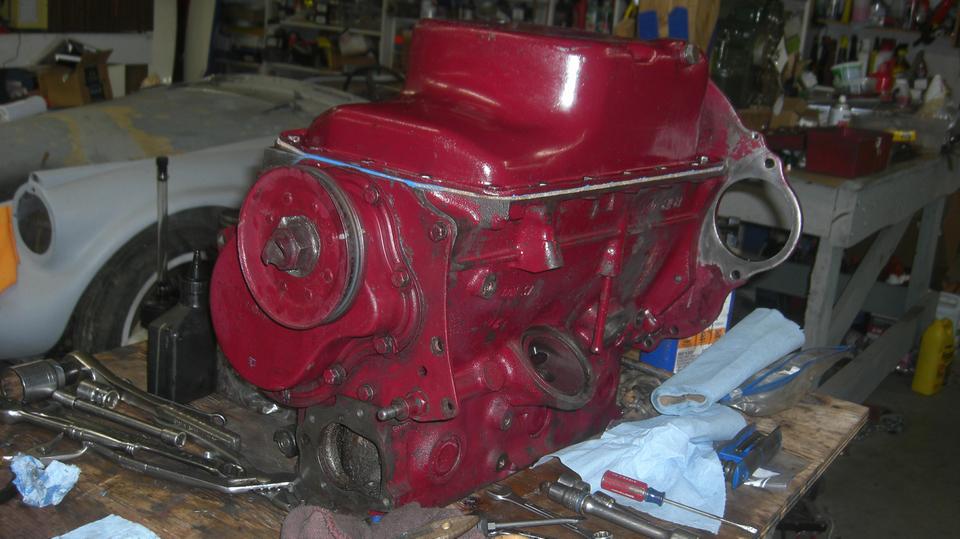
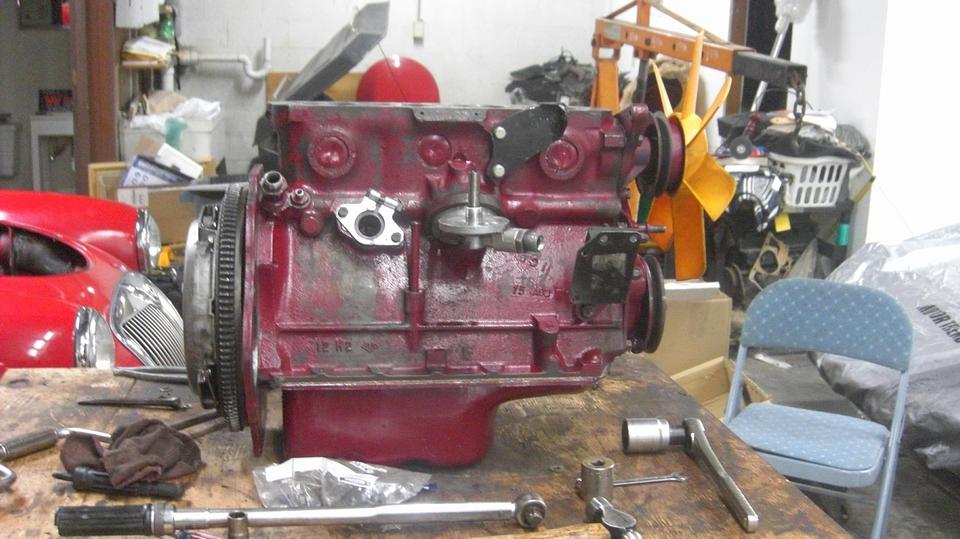
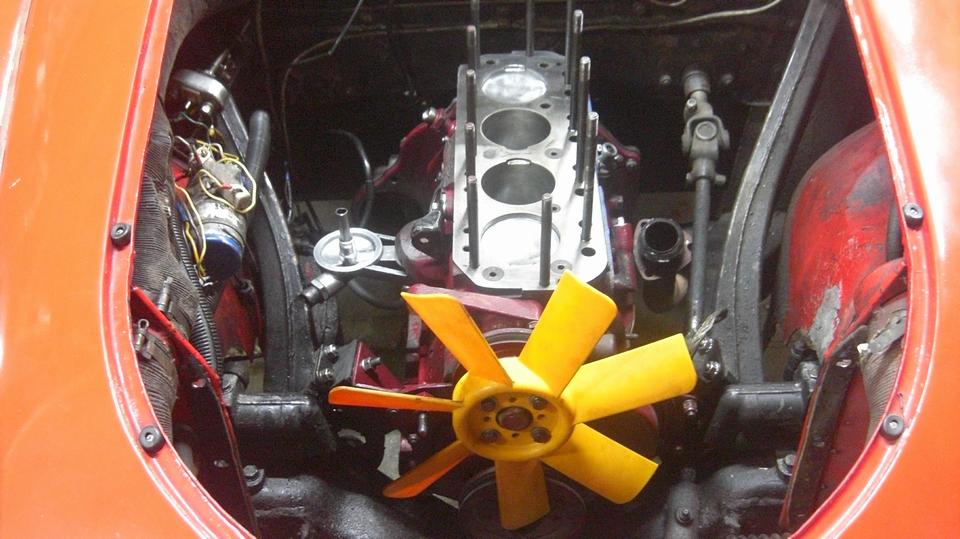
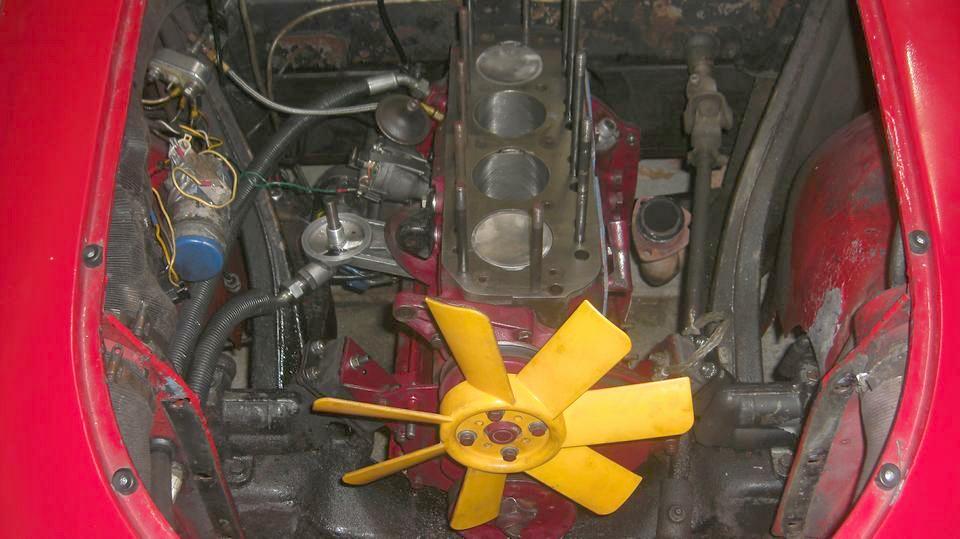
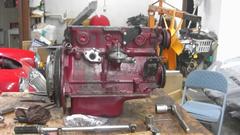
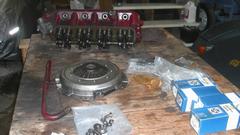
Okay,time to put the rest of it back together. Roll the short block around right side up, and proceed to reinstall the tappets and external gadgets. We decided not to paint it this time, because the weather outside is frightful, and we don't want to have overspray inside our friend's shop space. Or we might brush paint it later, after the head is back on. Last parts to install were the flywheel, friction disc and clutch cover (pressure plate). That's when we discovered the failing pressure plate with the loose center release plate. Oops. Didn't notice that when we pulled the engine out on the 13th. Too anxious to get the block to the shop then, I guess.

That has to be changed, and I don't have a new one in hand. This rather pisses me off, as is has only been 15,500 miles since this was all new clutch parts in January. I did check the carbon release bearing on the 13th. That and the rest of the clutch parts are okay. Seems like this problem is fairly common in recent years with this style MGB clutch cover. Notice the square shoulders on three sides. Moss Motors calls this one "Premium Aftermarket", but it looks very generic to me, as there are no brand name markings on it, not even a part number stamp. Too late to order and ship from Moss today. I called Scarborough Faire, but they don't have an MGB clutch cover. Going to be another sleepless night?
Friday, December 8, 2023:
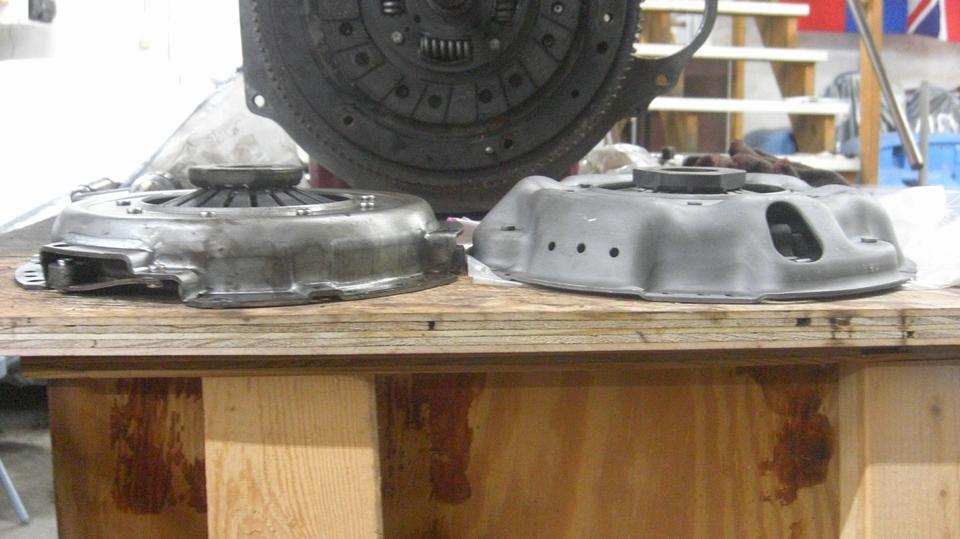
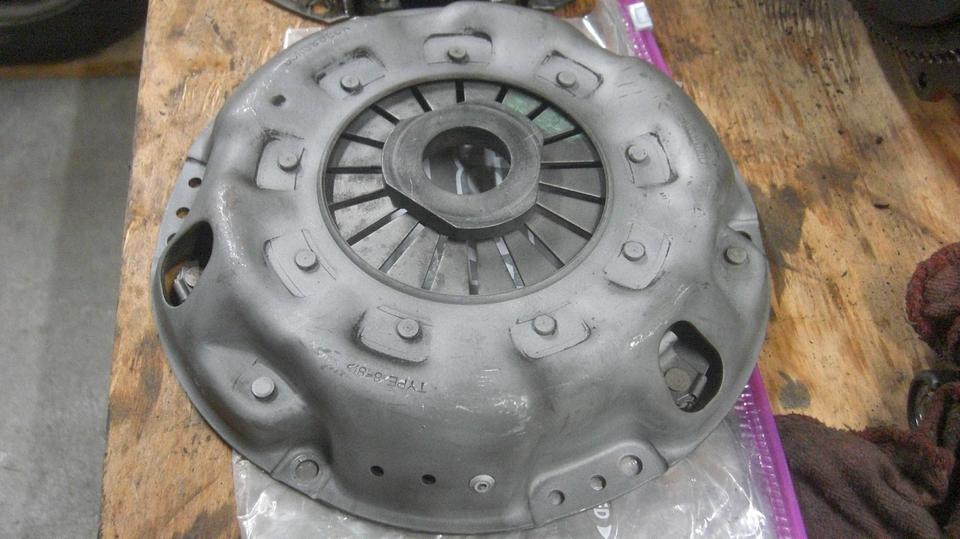
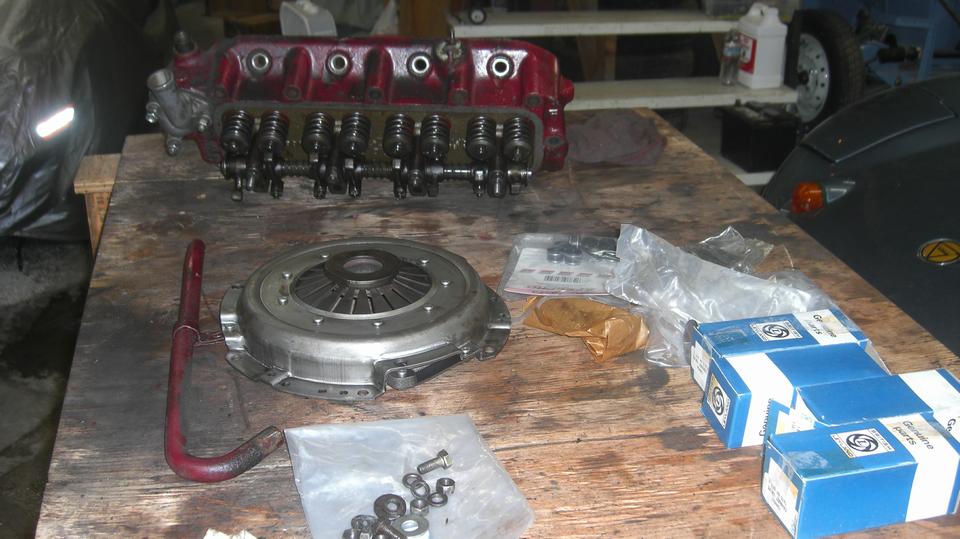
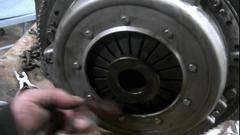
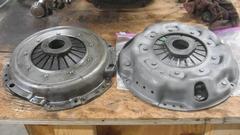
Good fortune today, as our host has come up with a new MGB pressure plate assembly so we can get on with the job without waiting another day for a delivery. Apparently he has in the recent past bought up parts inventory from a couple of service shop that were closing. Now we get to compare the failed clutch (on left) with a new one (on right). the failed clutch was new when installed in January, only 15,500 miles before failure. It is what Moss Motors calls "Premium Aftermarket" 3-piece MGB clutch kit, but not so premium in my opinion. the reason I bought it back then was because I needed a better quality release bearing after the junky Powertune part had failed. The new clutch cover (pressure plate) is a New Old Stock (good vintage design) Borg & Beck part. This one may not be commonly available any more, as B&B have sourced another supplier with a different design. Notice the dome curvature angled sides, all smooth with no protruding parts. This is more compact around the shoulders, providing more clearance inside the bellhousing. I have had very good service from this type part in decades past, so I like what I see, and I have more confidence that this one will last longer.


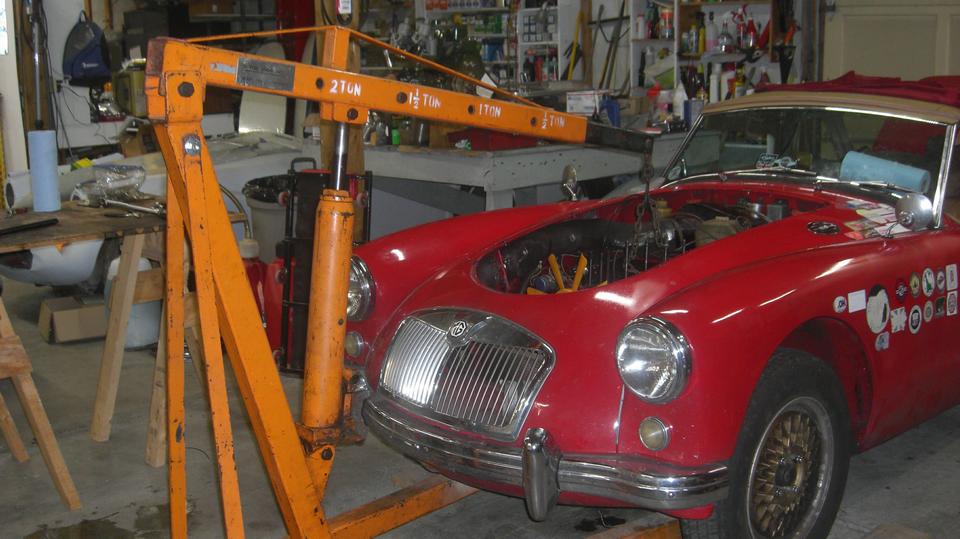
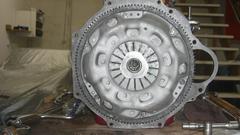
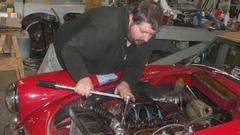
There it is on the engine with spigot bushing and 10-spline friction disc all lined up. Then we lift it into the car, gearbox jacked up with bellhousing touching top of tunnel, all lined up straight, it slipped right into place with no trouble at all. Two bolts for the starter motor, and six smaller bolts to lash the engine to gearbox.

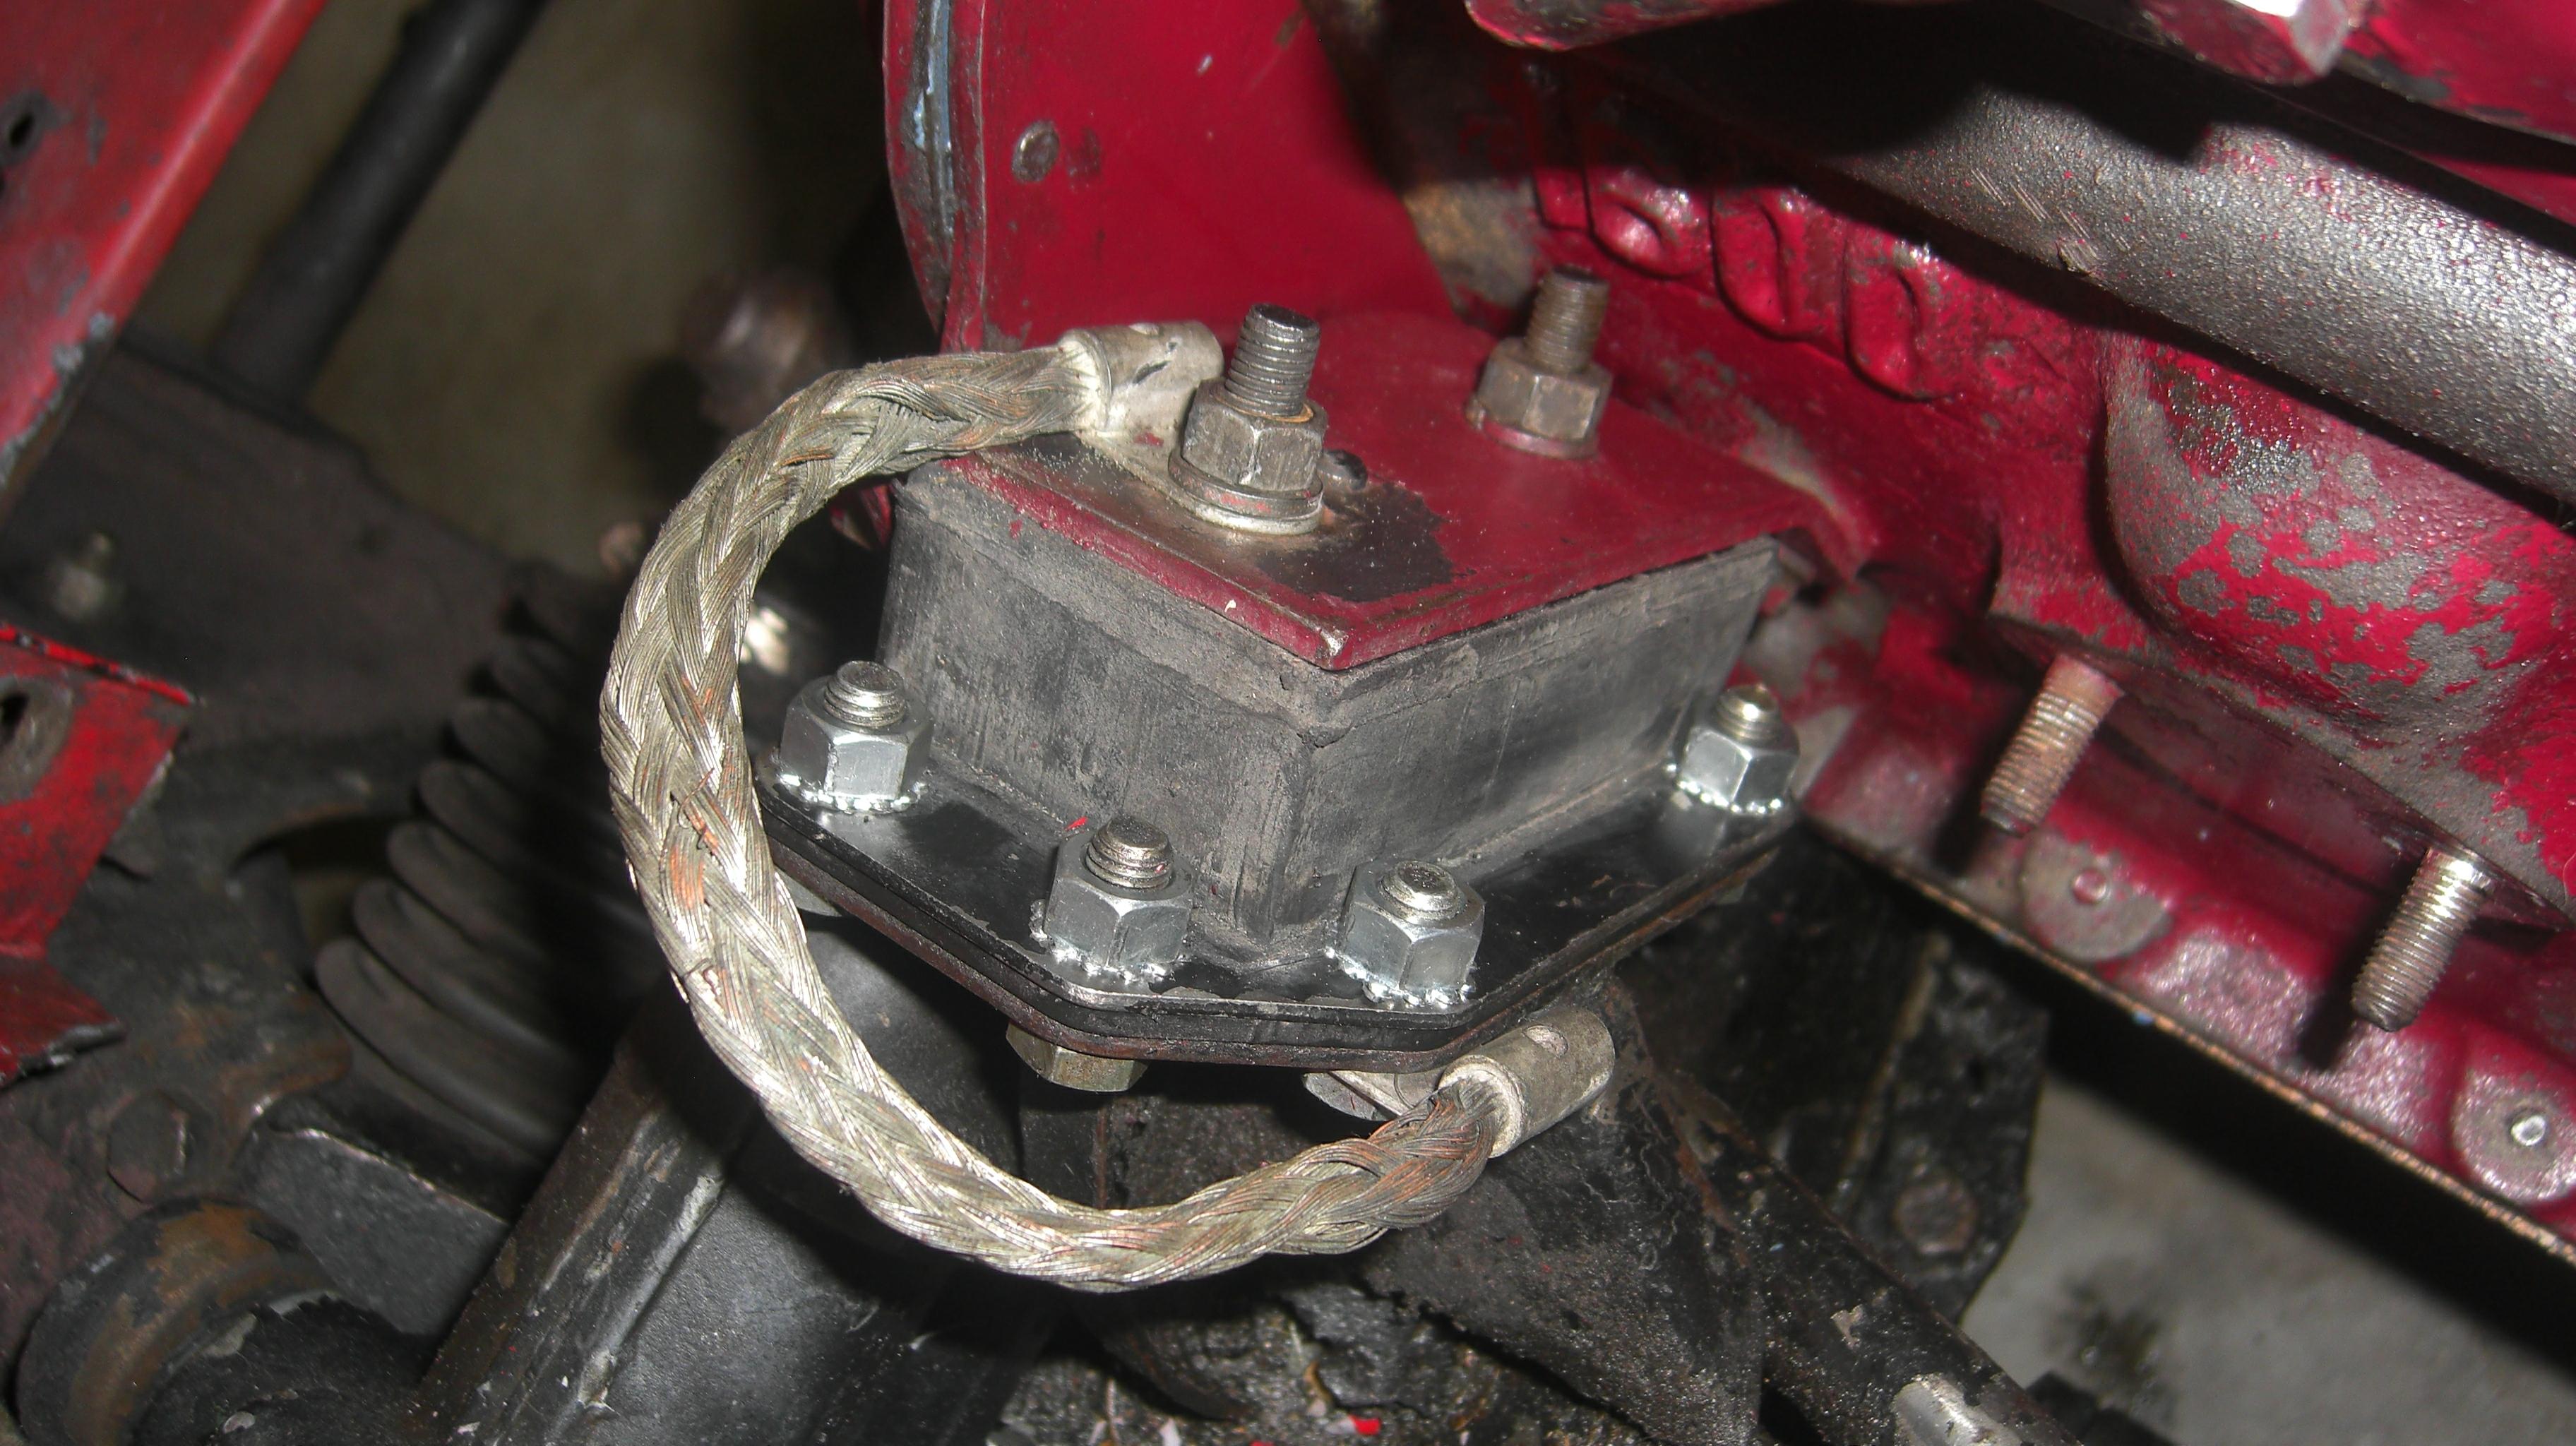
Eight small bolts to anchor the engine mounts, good story here. I like to use Keps nuts with the free-spinning threads and builtin external tooth lock washer. Makes life easier,been using then for at least the past 30 years. I hate working with prevailing torque lock nuts (original Stop Nuts or Nyloc nuts), having to wrench them continuously for every turn going on or off. Unfortunately, a couple years ago some friend helping out installed standard hex nuts with loose lock washers, and my nice Keps nuts disappeared. Last trip to the store only found two 2-packs in stock, so this time only one engine mount gets the Keps nuts (keep shopping for more).
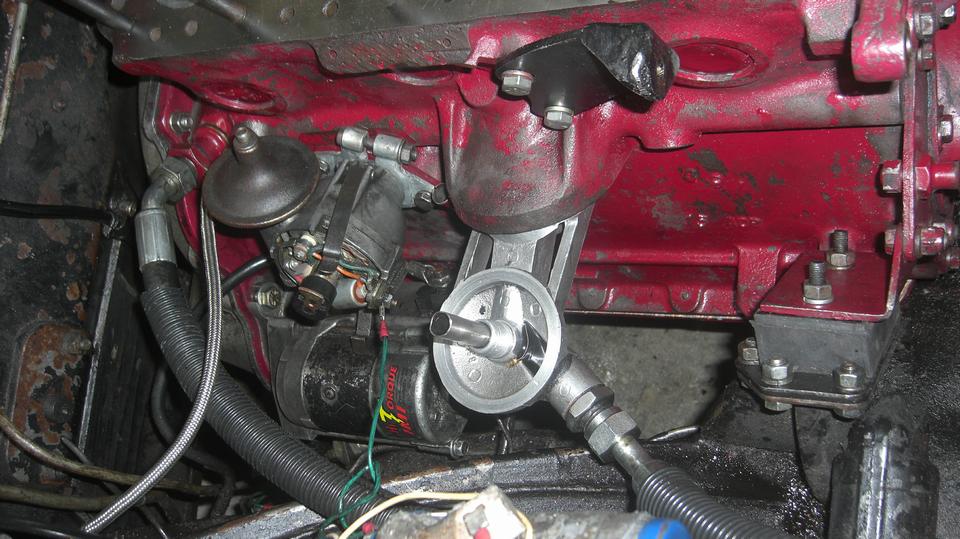
A short while later we have the peripherals installed, starter motor, oil cooler hoses, oil pressure signal hose and distributor. The alternator will wait until the cylinder head is installed. There is tomorrow's job, the cylinder head about to get new valves and valve guides, which have been owing since a year ago August when we had to reinstall used valves after getting new hard seats installed for the exhaust valves.
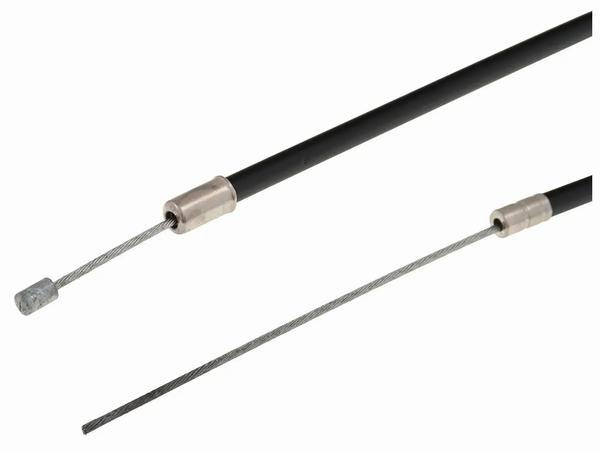
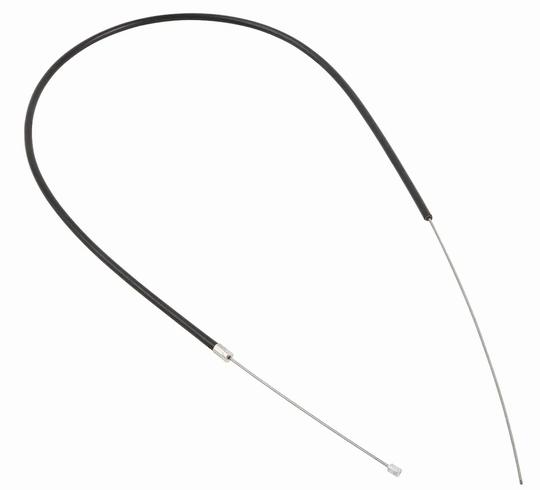
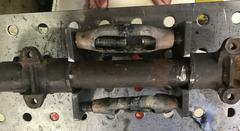
Then I have a bone to pick with Moss Motors about their "Accelerator Cable, Premium". There's that word again, and apparently it still means the same thing (something less than perfect?). This time it has another funny name on the package, "Switch, Lighting". I have no idea what that means, but it does appear to be the same old part.

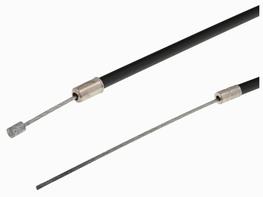

Standard with correct fittings Premium with missing fitting
|
They have another one listed
called "Accelerator Cable, Standard" that has been Not Available for a long time. In the past one of these was touted as being "Teflon lined", which was a very good item. Problem is, the only current offering, "Premium", is missing a metal ferrule at the carburetor end that is supposed to fit into the fixed outer cable anchor. Without the missing metal end the cable will not stay in place and will cause functional problems. The last few times I had to replace a broken inner cable (flex wire), I pulled the new inner out of the jacket and put it into the old outer housing. But some years on I now need to replace a rather battered outer jacket, and Moss doesn't have one that will work. So leave the old one in service for now while trying to get a good one somewhere else.
Saturday, December 9, 2023:
Felt a bit dumpy, not enough sleep in the past few days, so took the day off (or at least didn't get to the garage).
Sunday, December 10, 2023:
Jumped back on the job today, time for some cylinder head work, wanting to fix another case of "deferred maintenance". A bit of the past service record:
11/30/86 000,000  Odometer reset 00,000 with first full restoration (at ~150,000 mi).
10/28/00 159,893  Current engine installed (fresh 1600).
8/26/14	 267,160  Sleeve #4, rebore +060, new pistons. (107,267 mi repair).
4/15/16	 329,800  Rebuilt cylinder head installed (all fresh  169,907 mi).
7/4/22	 497,260  Install 4 sleeves (230,100 miles) and new exhaust seats (167,460 mi).
12/11/23 522,670  Today, 2 repair sleeves (std bore, 25,410 mi),
		  and all new valves (192,870 mi since head was new).
The only problem with the head was that we had to reinstall used valves when the new exhaust seats were installed 15 months earlier. Since the car was laid up now for cylinder wall repair, it was a good opportunity to finally replace the high mileage valves (approaching 200,000 miles in service). That's today's job.
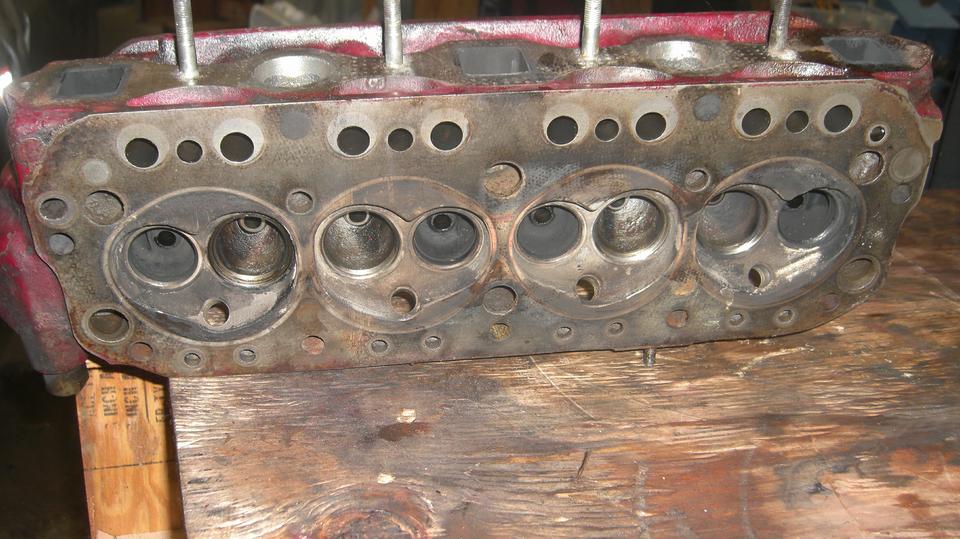
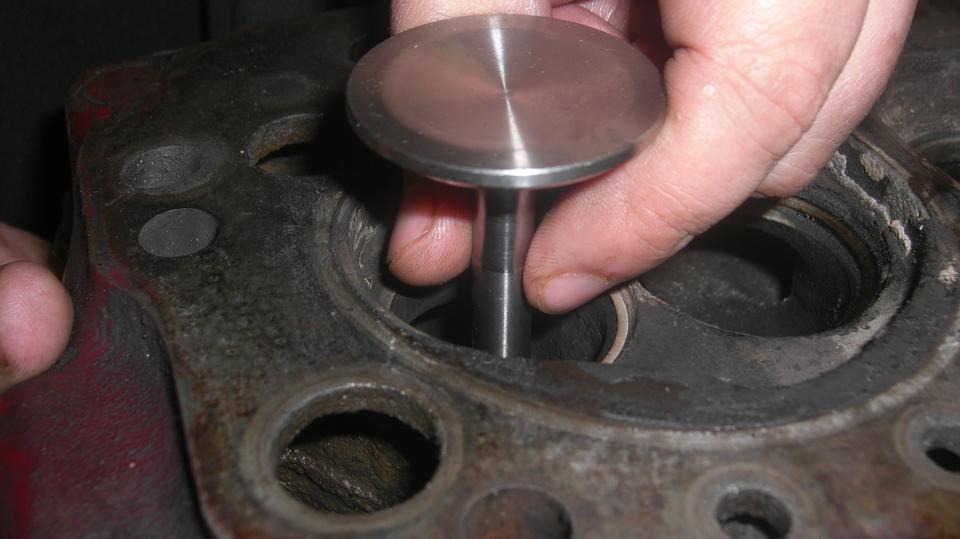
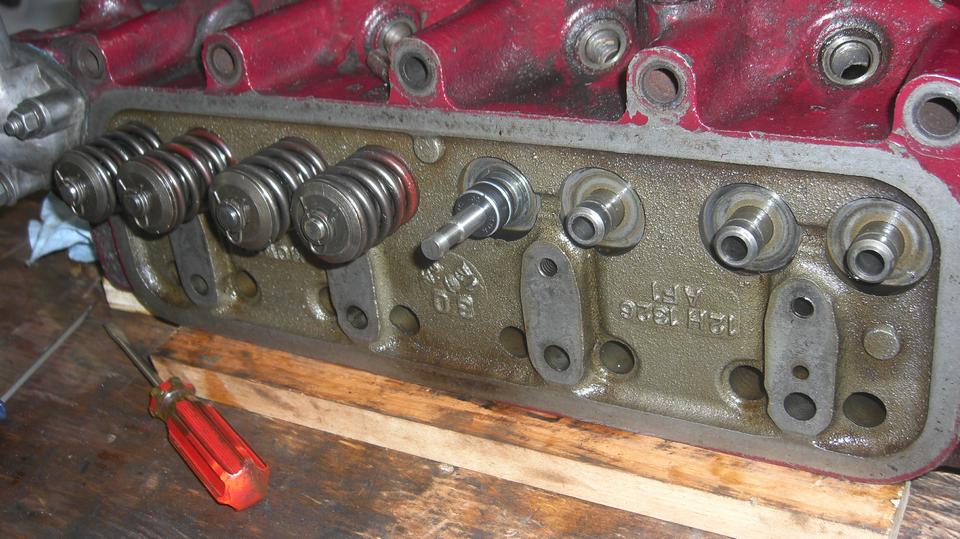
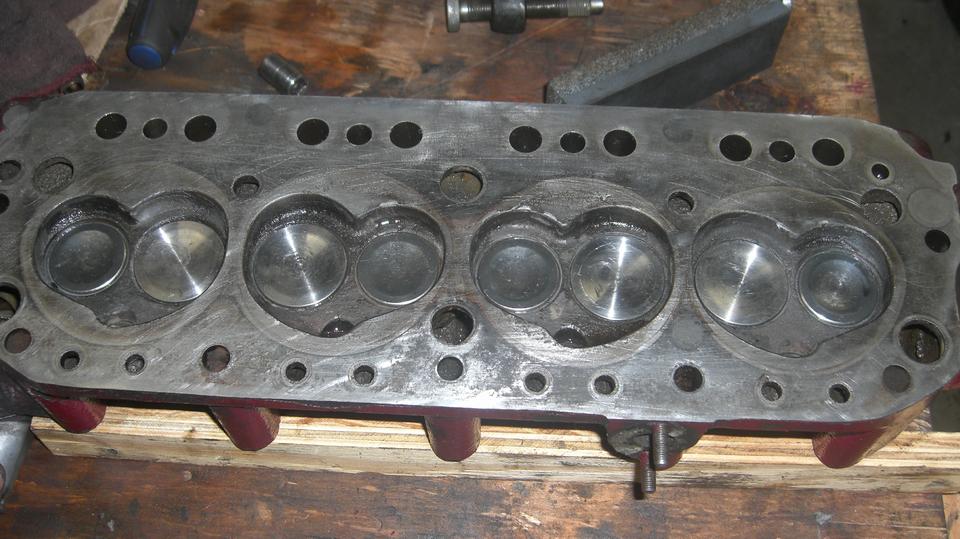
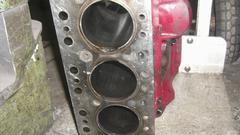
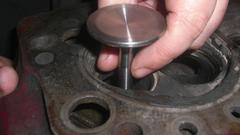
Remove valve springs, save all hardware, toss the old valves. Install all new valves, lapping them into the seats for good seal. First one in is #1 exhaust valve. Notice how thick it is at the edge of the head. Also notice how narrow is the land on the valve seat after lapping in.

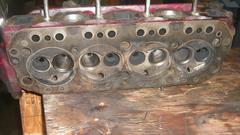
 This picture shows irregular height on the installed iron valve guides. They are supposed to be all same height 5/8" above the machined spring nest in the head. Here the exhaust guides were pressed a little lower, while the intake guides were left a little higher than original spec. I suppose the machinist who did this in 2016 knew what he was doing, and this is a mostly stock street engine (no high lift cam), so the guides seem to be okay after 192,870 mi. I was surprised to find the iron guides only minimally worn in 2022, and same today, so I'm leaving them in there as-is (again).
 Once you start lapping in new valves, they must be kept in sequence with the mated valve seats, so stick them in a piece of cardboard to keep them in order.
Once lapped, the valves can be reinstalled. Notice the rubber
 "umbrella seal" on that #3 exhaust valve guide. To do this the original "oil splash shroud" must be removed, which demands a change of the spring cap to later style to have larger pilot diameter to keep the inner valve spring centered. Some people recommend installing umbrella seals only on intake valves, allowing a little oil into the exhaust guides for lubrication. I like to reduce oil consumption, so I put stem seals on all the valves. Seems to work okay, since these iron guides are approaching 200,000 miles still in good condition.
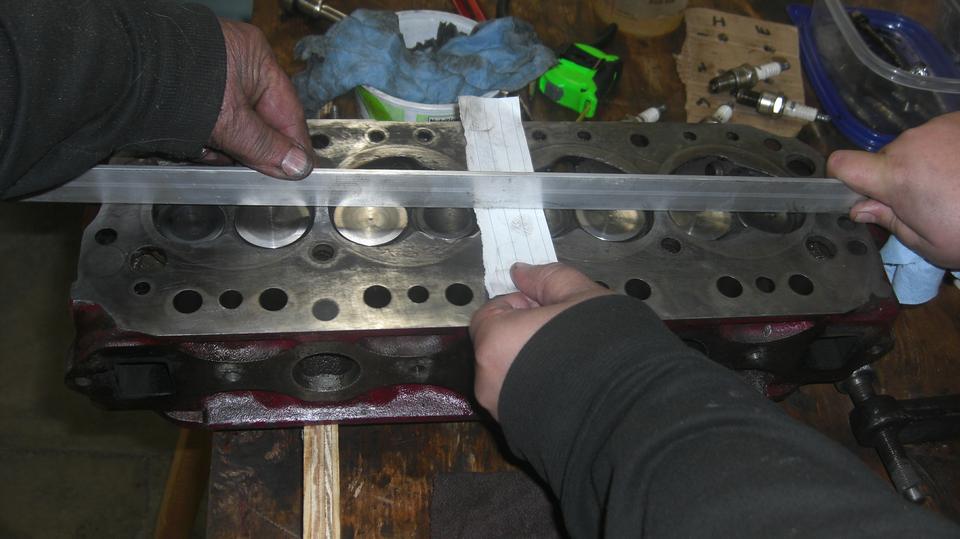
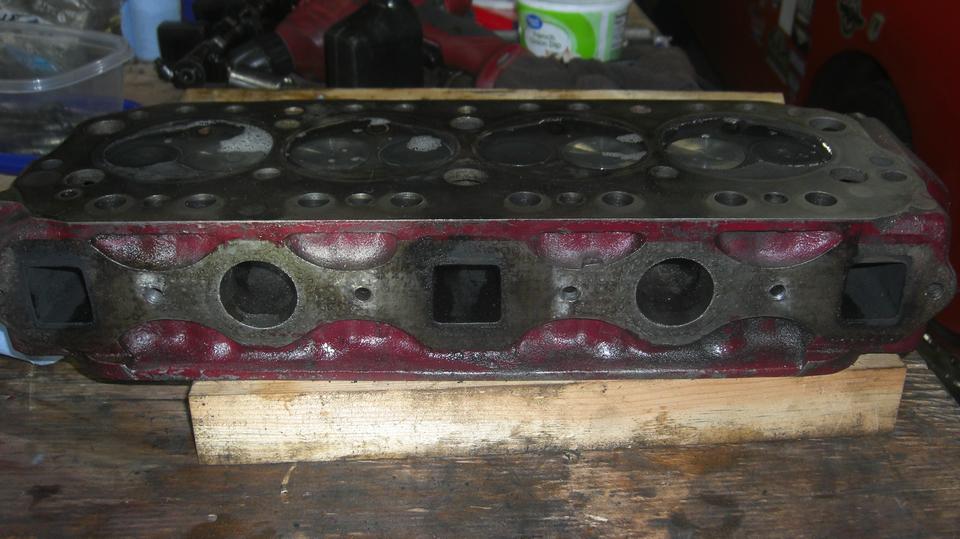
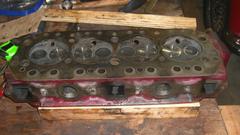 There's the cleaned up head with new valves. This head has not been resurfaced since it was rebuilt (and shaved slightly) in 2016. Being somewhat concerned about the recent blown head gasket, it was time for some special check and care. So I used a whetstone to hand hone the gasket surface for cleaning, and to give it a constant buff surface finish to assure there are no low spots.
After cleaning I lay a known good straight edge across the head, hold a bright light behind, and check to see if any light shows through
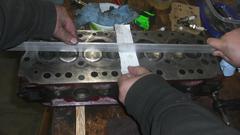 underneath (hopefully not). Then use the thinnest feeler gauge you have to check for any gaps. The thinnest feeler gauge I have handy is 0.004-in, so I use a thin piece of paper (slightly less than 0.003-in thick). Put that under the straight edge, press down gently, and see if you can pull the paper out in one piece. If the paper sticks and tears, then the gap is less than 0.003-in, which should be good for continued service with a new head gasket. Same test at the bridge point in three places between pairs of chambers.
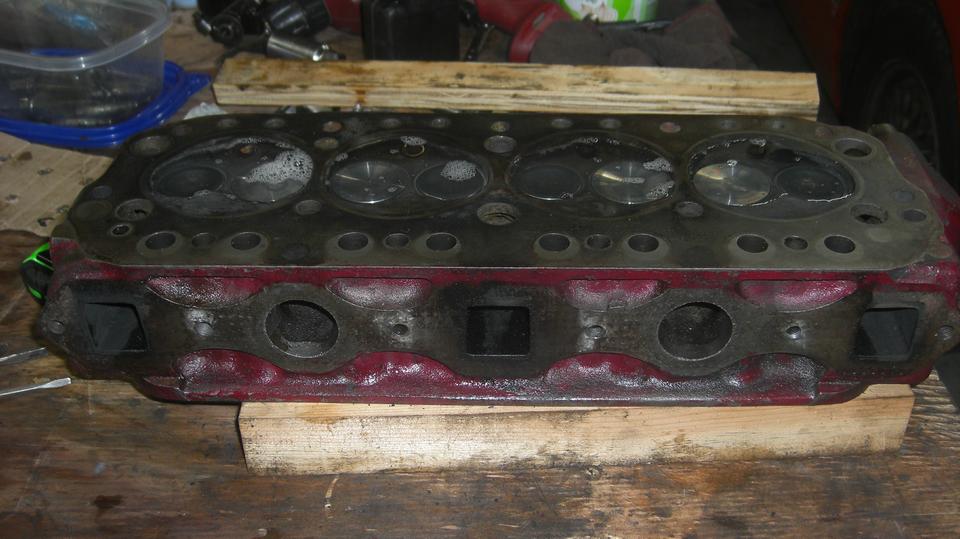
 Then the final test to assure that the freshly lapped new valves are properly sealed and not leaking compression. For this, install the spark plugs, set the head upside down blocked up level, and put water in the combustion chambers. Then wait patiently to see if any water might run out of the side ports.
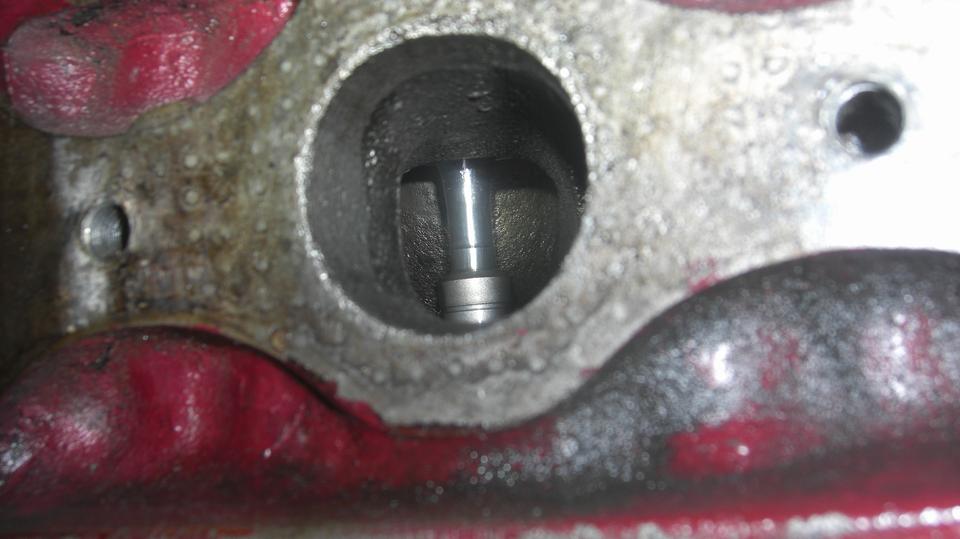
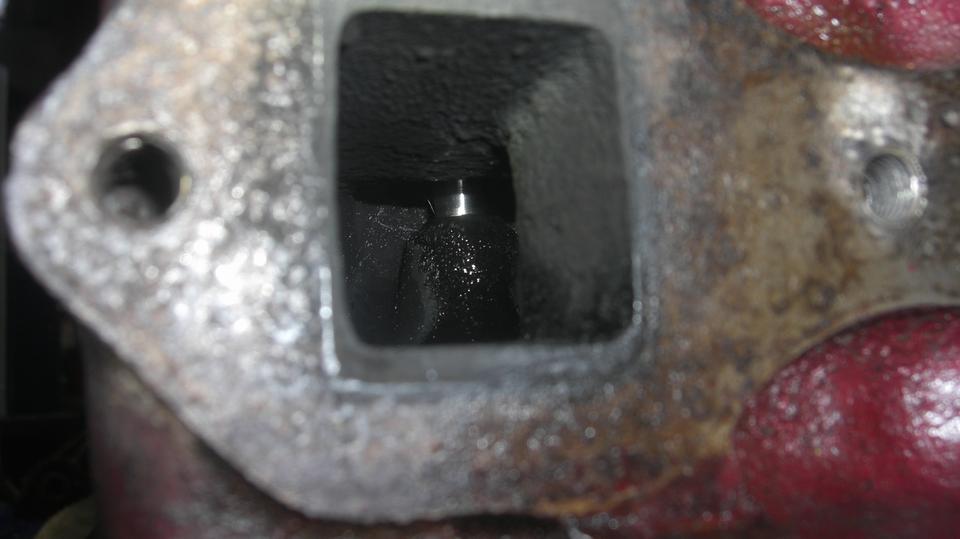
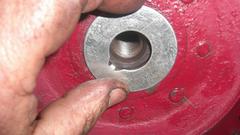
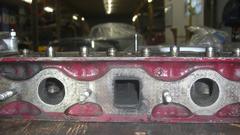
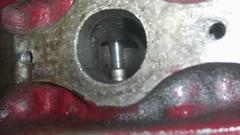
Below left is one of the intake ports (upside down) with the bottom end of the valve guide showing. If this guide was pressed in farther to the book specified height, it would protrude slightly more into the intake port. This is where an astute engine builder might machine a conical taper on the end of the valve guide to reduce gas flow restriction (as part of porting and polishing the cylinder head). Below center is a view into one of the exhaust ports. Exhaust guides are longer than intake guides, and this one was pressed in slightly more than specified, so it protrudes into the port a bit more than normal (the shiny end of the guide). Original exhaust guides did have a taper on this end (this one doesn't). Again an engine builder might machine a taper, or shorten the guide a little, or even grind back some of the casting holding the guide to reduce exhaust flow restriction. -- After 20 minutes sitting, no water leaked our of any of the intake or exhaust ports, so good to go.


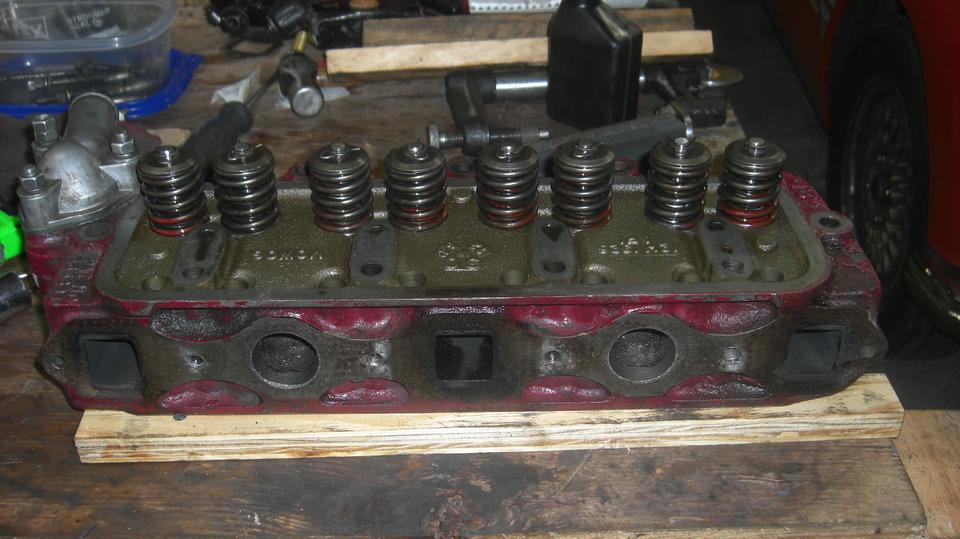
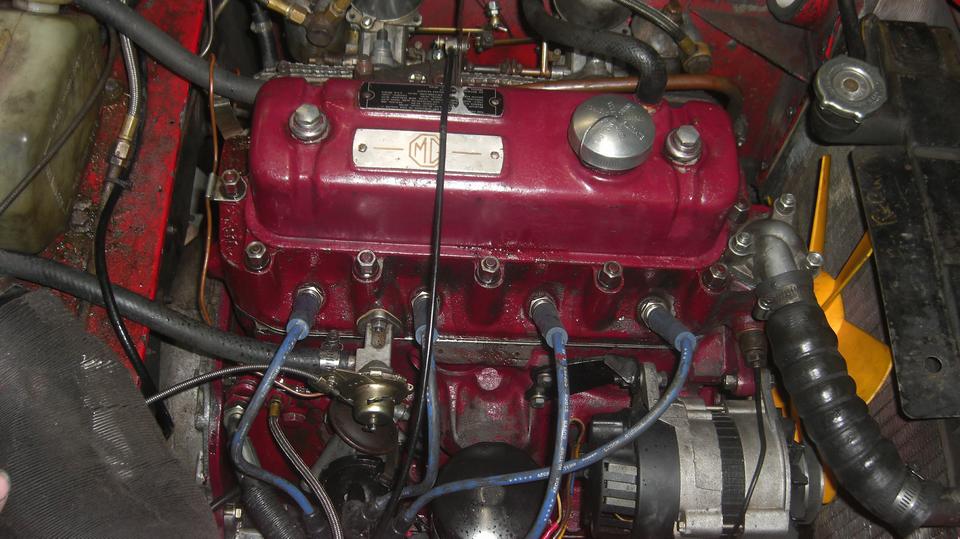
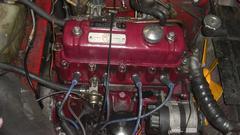
Fresh head with new valves, stem seals, and hardened steel valve seats. Gives you a warm fuzzy feeling all over. Not long to drop on a new head gasket and put the head back on the engine. Round and round with the torque wrench gradually increasing to 50 lb-ft torque (52 on the last pass for good measure). Navigator's pretty good at this by now.


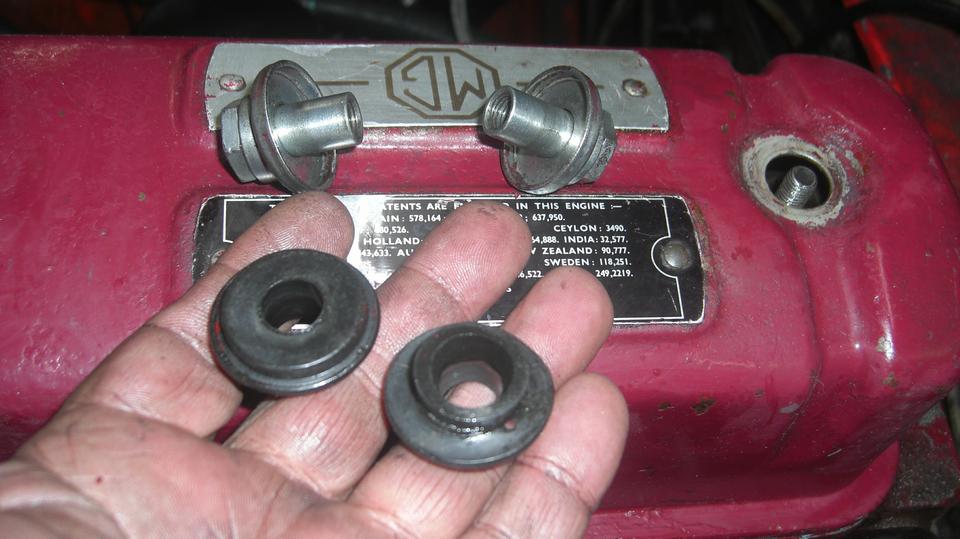
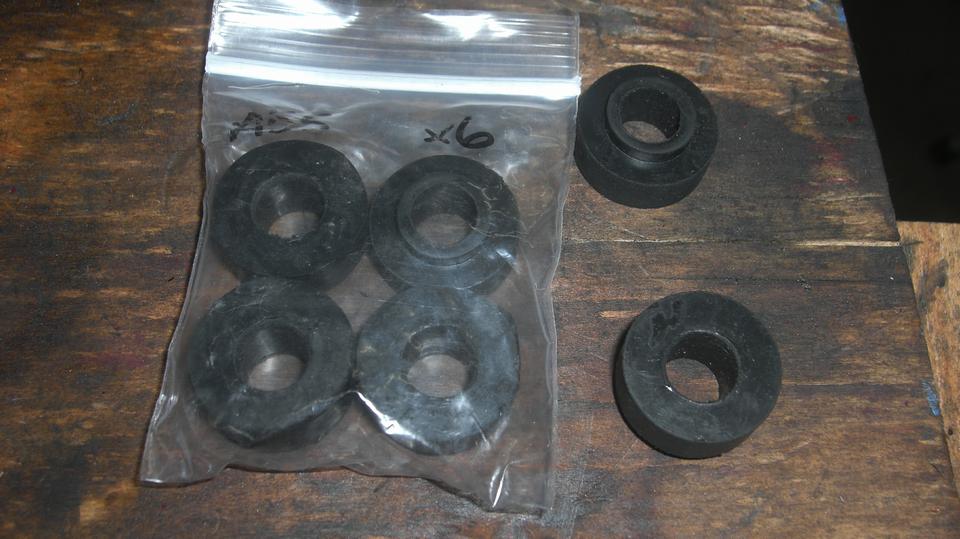
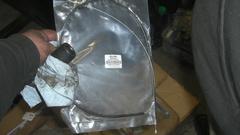
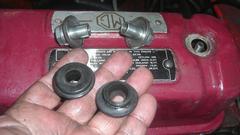
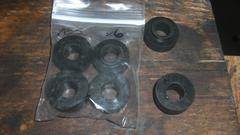
Valve cover rubber grommet seals are commonly decomposed from contact with oil (crappy rubber products). This time we are installing urethane grommets, procured from Scarborough Faire, slightly higher durometer (stiffer), and for sure more durable. Will let you know how these work out in due time.

Five full quarts of oil to fill the dry engine. Spark plugs out, reconnect the battery ground cable, and crank it with the starter. The pressure came up right on schedule at 45 seconds. I continued cranking another half minute while navigator was watching closely for any oil leaks, none seen. 55-60 PSI oil pressure at cranking speed with cold oil, all good. Call it a day and clean up a bit. We expect to have this running tomorrow.
Monday, December 11, 2023:
 Good morning. This is what we were hoping to avoid when we arrived five weeks ago, 25dF with wet snow turned to ice, day time high to be 45dF (maybe), and not likely to get much better until next weekend. But we were determined to get the MGA running today.
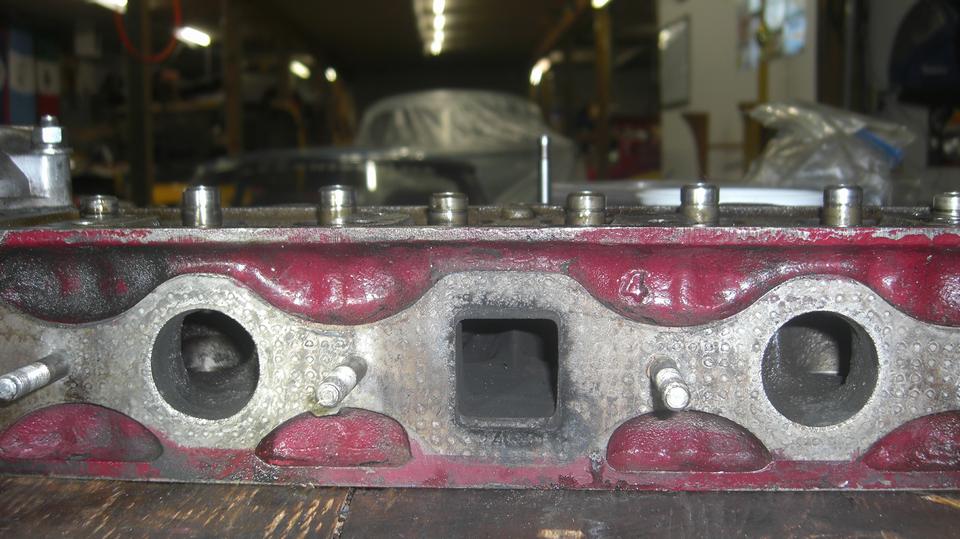
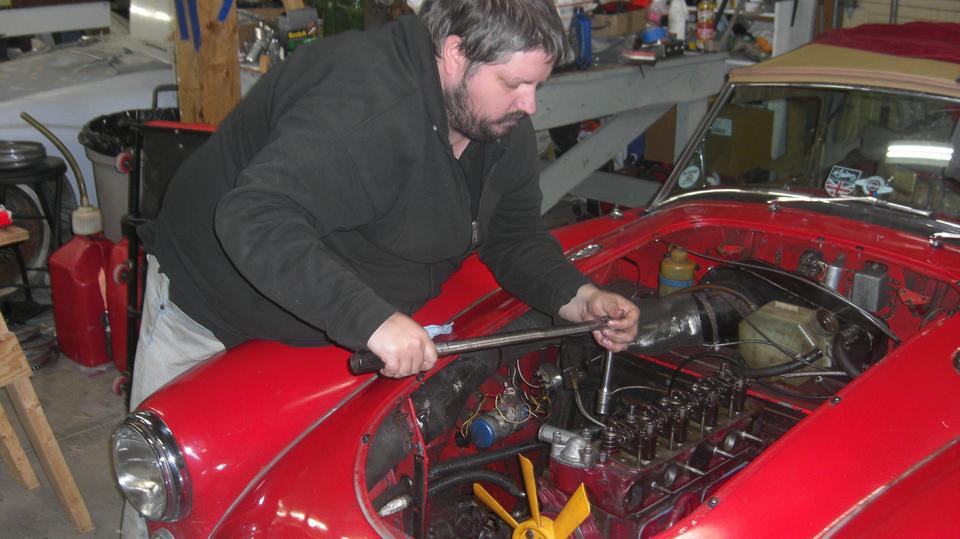
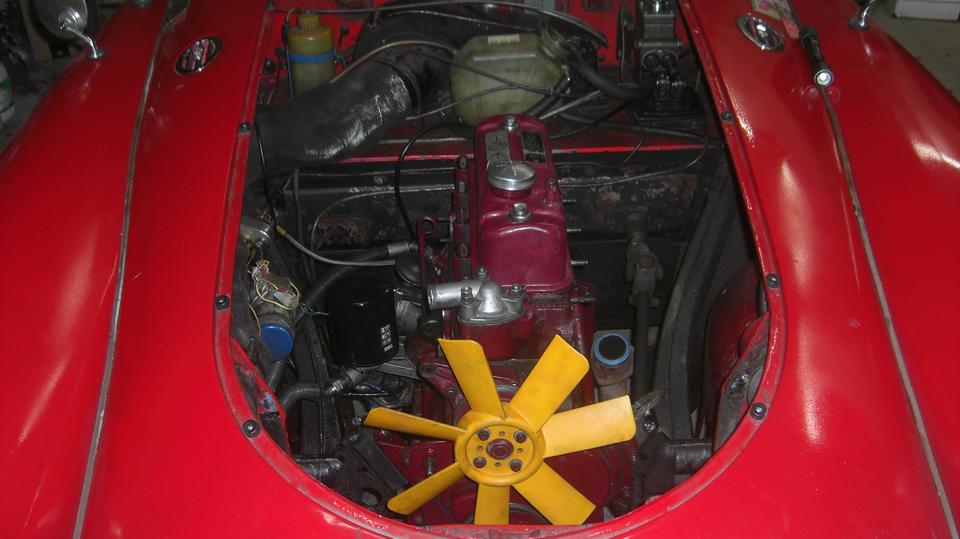
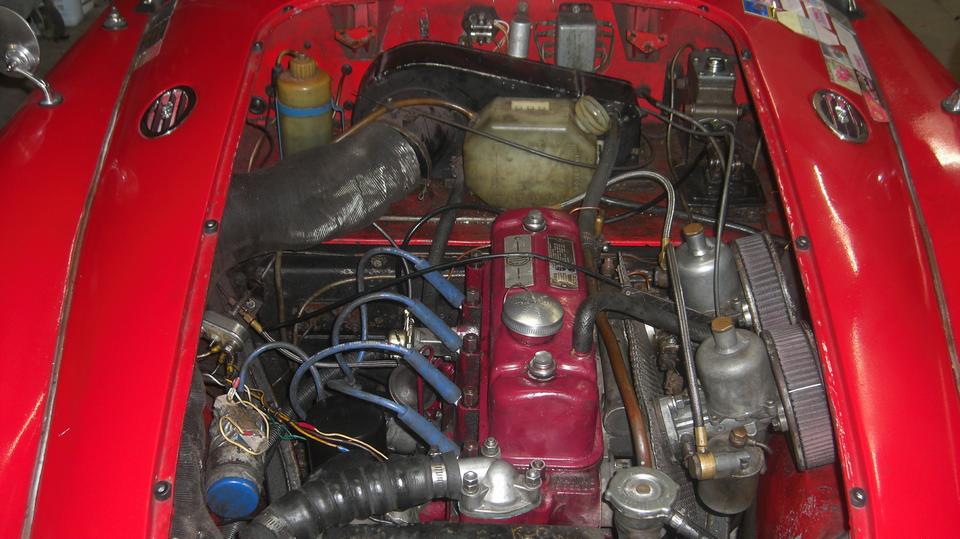
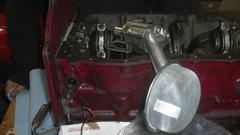
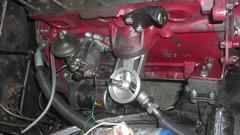
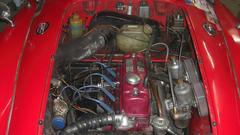
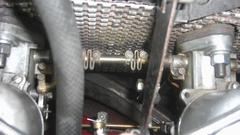
To the garage by mid day, install exhaust manifold with ring gasket to pipe and last bolt in the bellhousing for the pipe brace. Connect tachometer cable. Install intake manifold and heat shield and thermal spacers with lots of gaskets. Install rear carburetor with vacuum pipe and throttle return spring bracket, followed by top bracket for throttle and choke cables. Then the front carb and links and cable adjustments. Alternator installation before radiator (toss a coin on which one is worst going in last).
Temperature probe installed, all heater and coolant hoses connected and tight, drain valve closed, beater valve open, fill it with 50/50 mix anti-freeze/coolant. Reconnect a white wire at fuse box for fuel pump power (don't remember why we had that one disconnected). Open the garage door (brrrr), leave navigator with flashlight to keep an eye on it while I started it up. Yes it did start with nothing leaking out.
Slow start with poor throttle response like late ignition timing, points were hardly opening. Re-gap the
 points, advance timing a bit, and it was running much better. No high revving to break in cam and tappets, just 15 minutes fast idle to get up to full running temperature while new piston rings were getting intimate with the freshly honed cylinder walls. Plenty of time to fiddle with fuel mixture and ignition timing. Given enough spark advance it had much better throttle response, maybe getting better by the minute as the new rings and walls were loosening up some. Then shut it down to re-torque the cylinder head and re-adjust the valves.

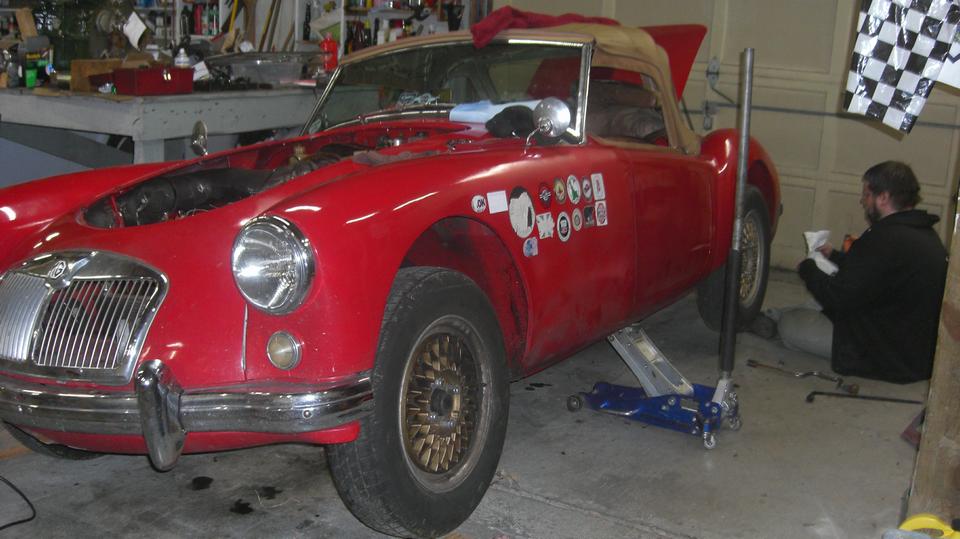
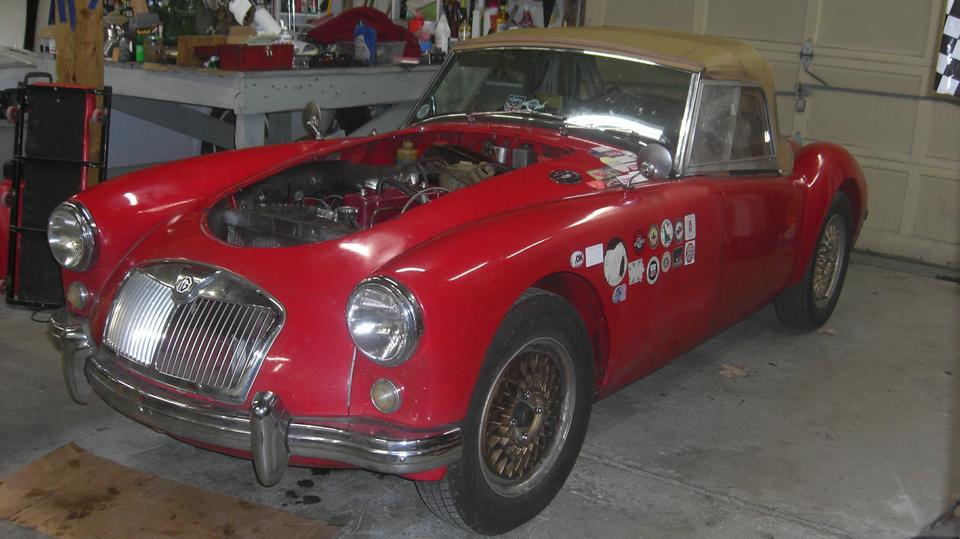
Seems happy. Does it look like it's smiling? Had do a test run to be sure it was running okay with proper torque and throttle response. So we attached the side curtains and took it for an easy 4-mile run past the McDonald's drive-up window for a feel-good grab bag before closing the shop for the night. Tomorrow we get to pick up tools, clean up the work space, re-pack the Magic Trailer, and reinstall the bonnet (6 thumb screws).
Tuesday, December 12, 2023:
Mostly a recovery day, I suppose. Consume stuff, clean out the refrigerator, catch up posting photos and notes, download and respond to a bunch of email and BBS messages we have been ignoring for a couple of days. Now that we know we can travel again, sending messages for future appointments.
Wednesday, December 13, 2023:
Cleaned up, packed up, and moving out by 11-am. Good feeling to be rolling again, after 5-weeks in the shop (too

 many delays). Very grateful to Michael Crews for his offer of the place to hold up and work on the car as needed, and to East River Automotive in Princeton, West Virginia for their service in sleeving two damaged/worn cylinders. Going to be sure to have this shop added to my North American Shops List for service to vintage British cars. Local stop for brunch (missed breakfast). A few more email messages, and we have appointments for the next few days.
Heading out mid afternoon, one fuel stop, one Walmart stop, two hours driving to arrive in King, North
 Carolina 6-pm. 120 miles on the new rings and walls, loosening up enough for idle speed to be 1500-rpm. Time to reset idle to 1000-rpm, and smile at the perfectly smooth idle with no ticky tapping noise, perhaps for the first time in 30 years. Wondering how long that may last.
Say hello to Alan Edmondson (and family) in King, NC. Didn't get that picture in the dark, but maybe tomorrow. He supposedly has an MGA in the shed since 1982, getting it running now. We may get to play with those toys later. For tonight, sit and chat for a while, pizza for dinner, then chat some more until past midnight. Time flies when we're having fun.
Thursday, December 14, 2023:

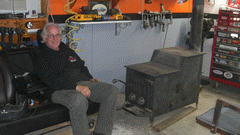
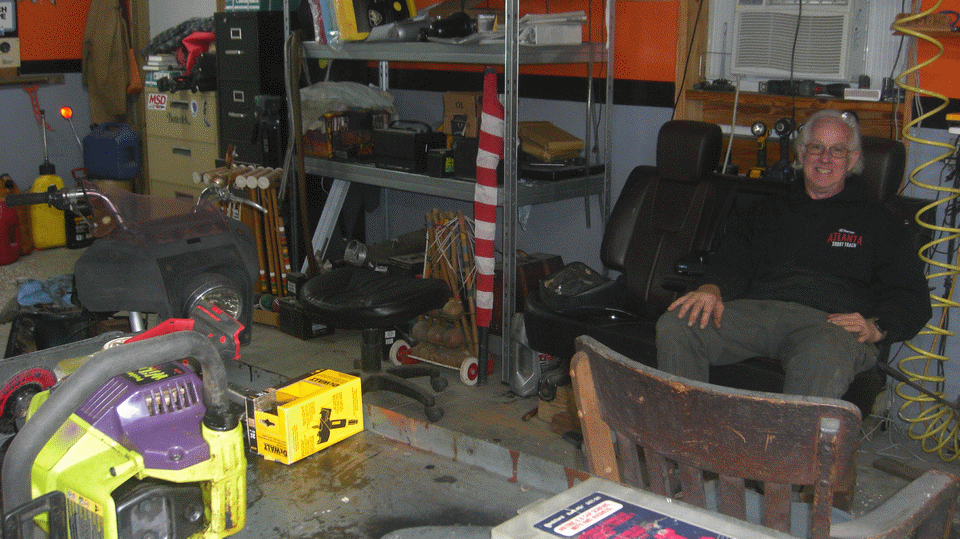
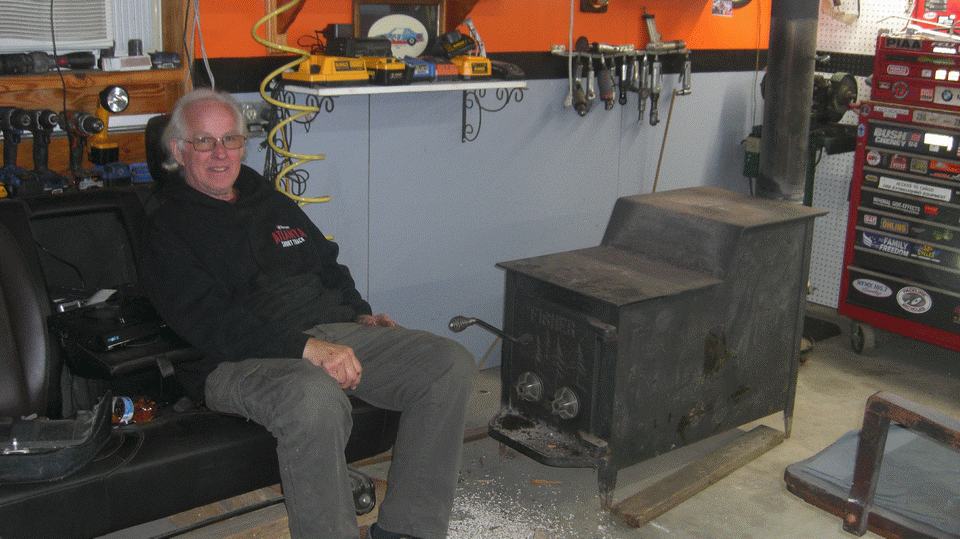
People are busy ,so day turns into evening by the time we get to Alan's shop. From the front it looks like a 2-bay garage, but gets bigger inside. On the left is the forward heated work space, with father's wood stove.
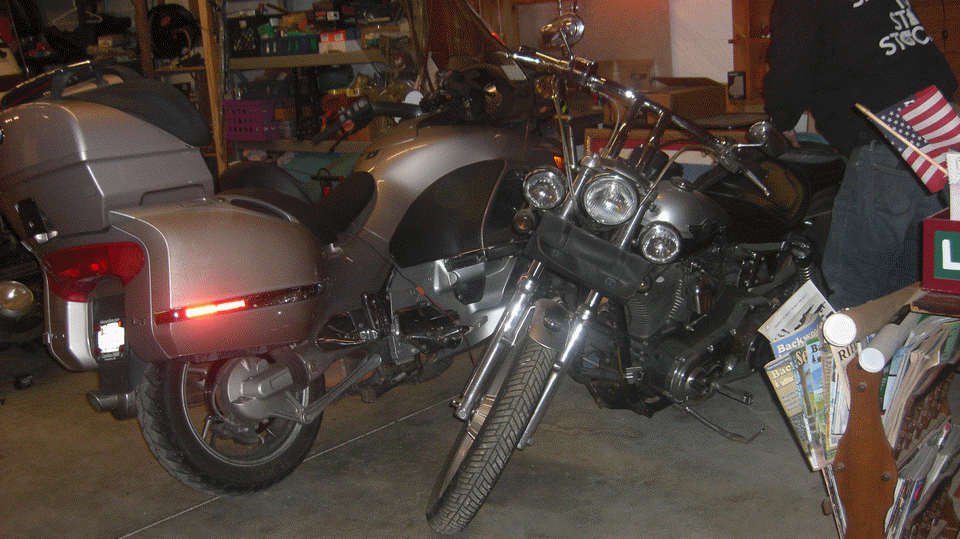
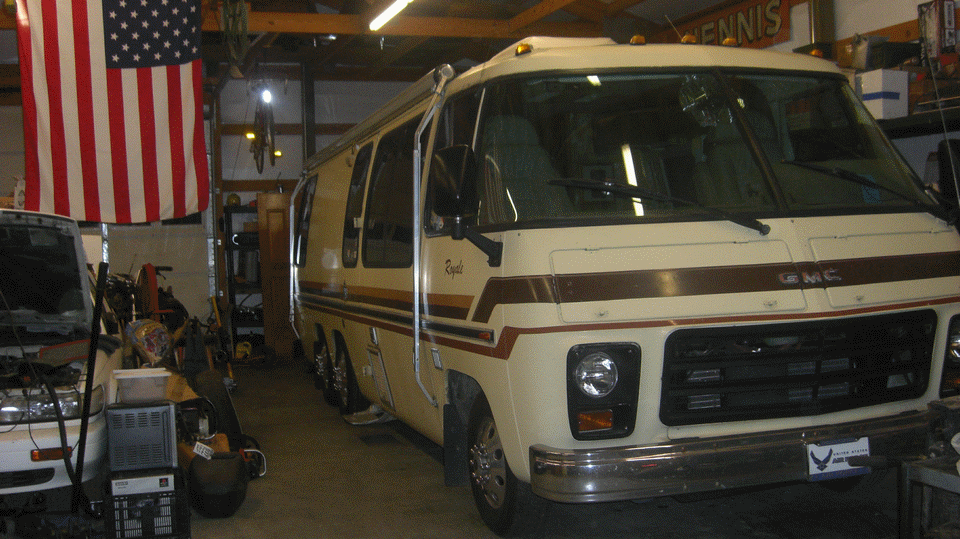
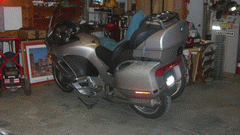
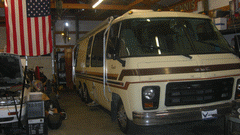
When Alan had to step out for a while, his son gave me the nickle tour. Ducking into the right bay there was a very nice 2-wheel BMW, looks like a summer vehicle to me. Next to the Beemer was a Harley-Davidson twin-V 2000 Heritage Edition Softtail Classic. Alan has a history of motorcycle racing in his blood. Farther back the shop is a deep double-ender with back doors, drive-through on the on right side, enough space for the "vintage" GMC motor home, a tour in itself. This one has a front wheel drive Oldsmobile 400 engine. Think early Olds Toronado to be in the correct vintage era.

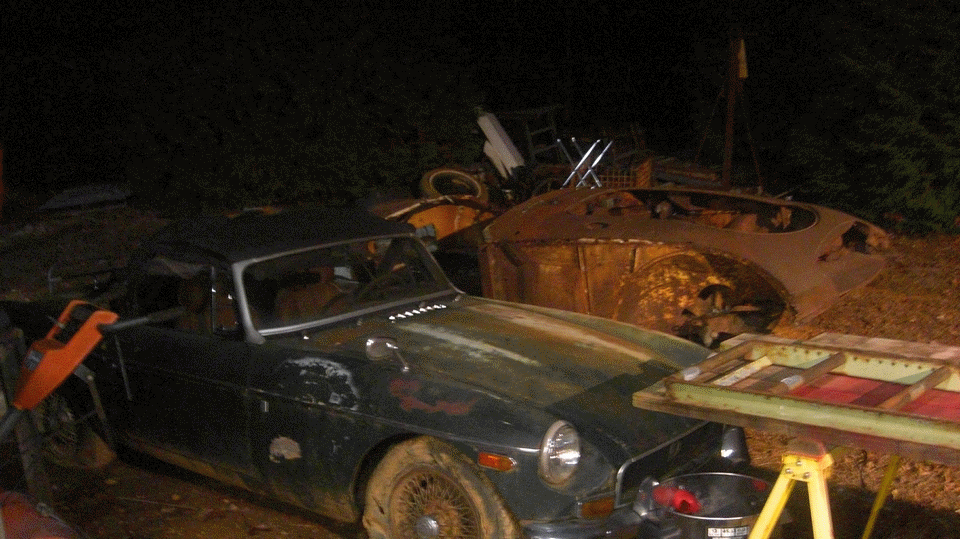
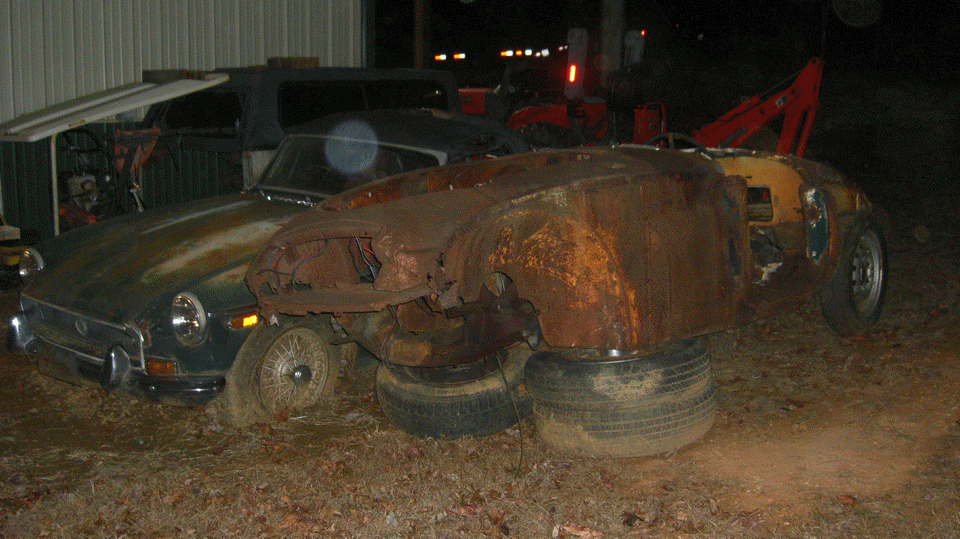
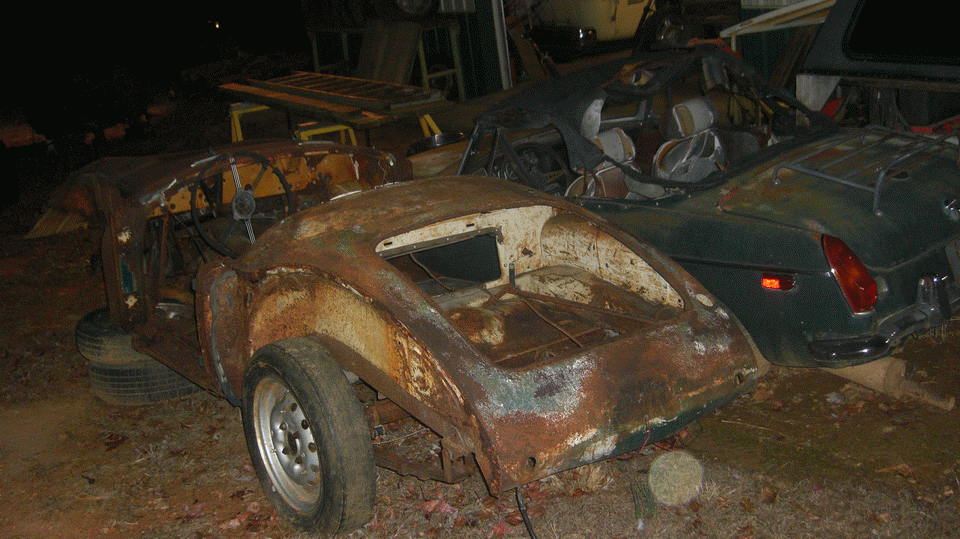
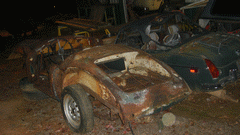
Peek out back to find what doesn't fit inside. While the MGB is sinking its paws in, the MGA has a flotation foundation (both being parts cars I presume).
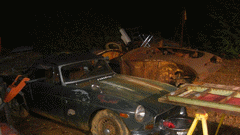

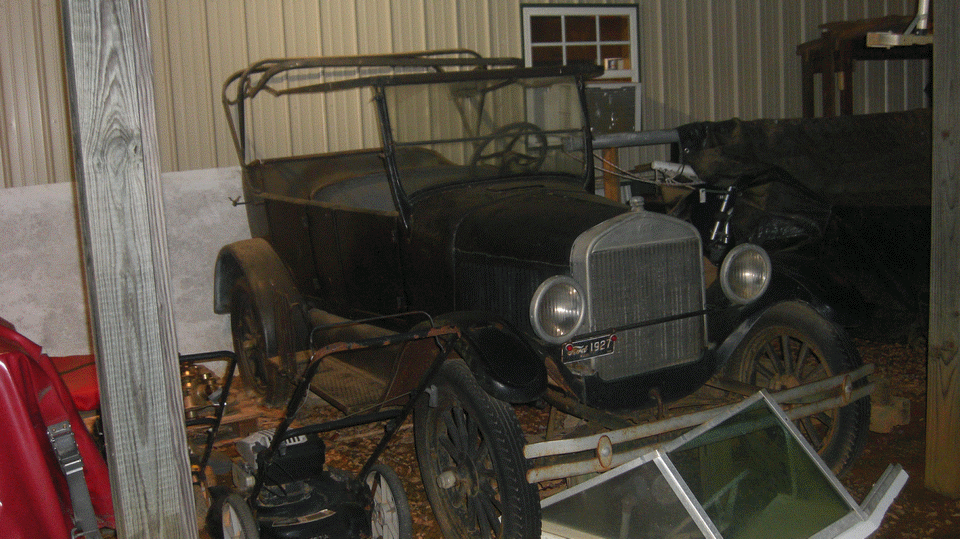
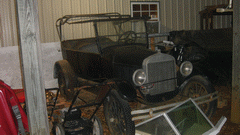 Around the side an eclectic collection,including Alan's father's 1926/27 Ford Model T. This one is definitely a complete and very original survivor car, "ran when parked" (I suppose), to be running again some time soon.
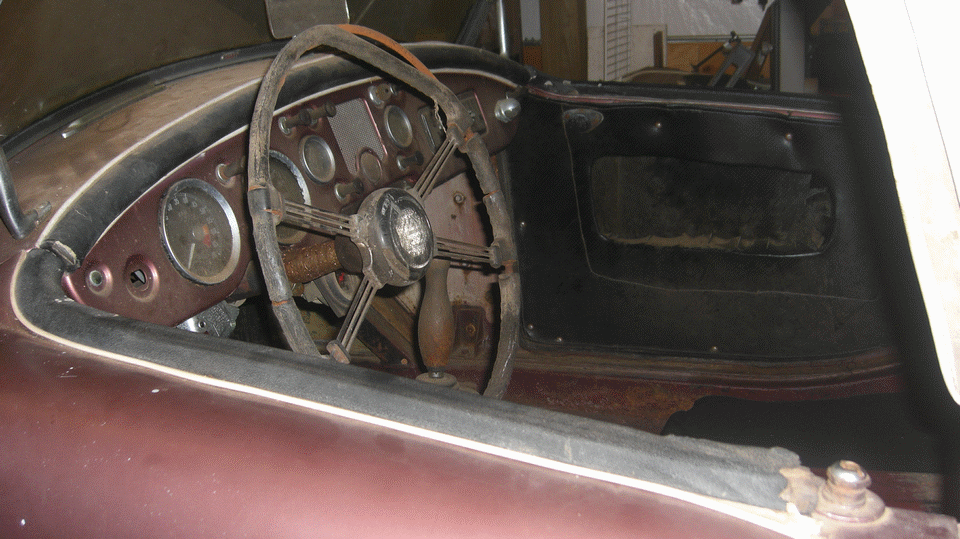
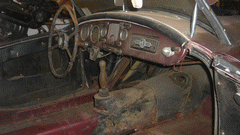
Back inside to the work space on the left (behind the heated bay). This is father's MGA, long in the family, currently a refurbishment project. Having been "painted over piping" in a past life, it will need to be disassembled enough to change the wing piping while sanding out the paint bubbles and minor rust before repainting. It is an early 1600 car that was "converted" from front disk brakes to all drum brakes, but the original parts (or some reasonable replacements) are still here to convert it back to disc brakes.
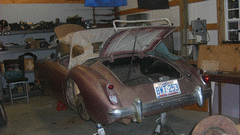

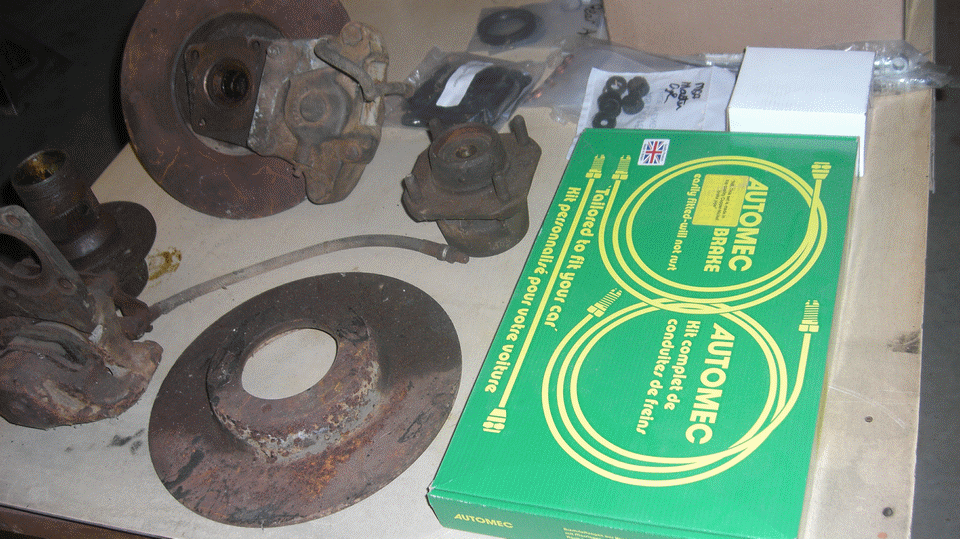
I was poking around this one for 10 minutes looking for cancer,but found none. There is minor perforation at the inboard side of the frame along the driver's side floor board, just a couple of pinkie finder size holes that will be easy to close. Underneath all of the frame and floor rails are there in tact, including weld nuts for the floor board screws. The body sills are still solid original metal, recommend removing the body for sand blasting and repaint, but apparently no metal replacement required. All original outer body panels, looks like it has never been bashed. People should drool over this one as an excellent restoration candidate. Alan wants to change the rear axle and front hubs to convert it from disc wheels to wire wheels, all required bits close at hand on the parts car outside.


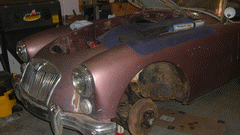
Working on this one for a while already, lots of new parts required are also in hand. The battery carriers had already been rebuilt and revised in a past life, looks like it could carry two 12-volt batteries, but will most likely get only one, and to be converted to negative earth in the process.

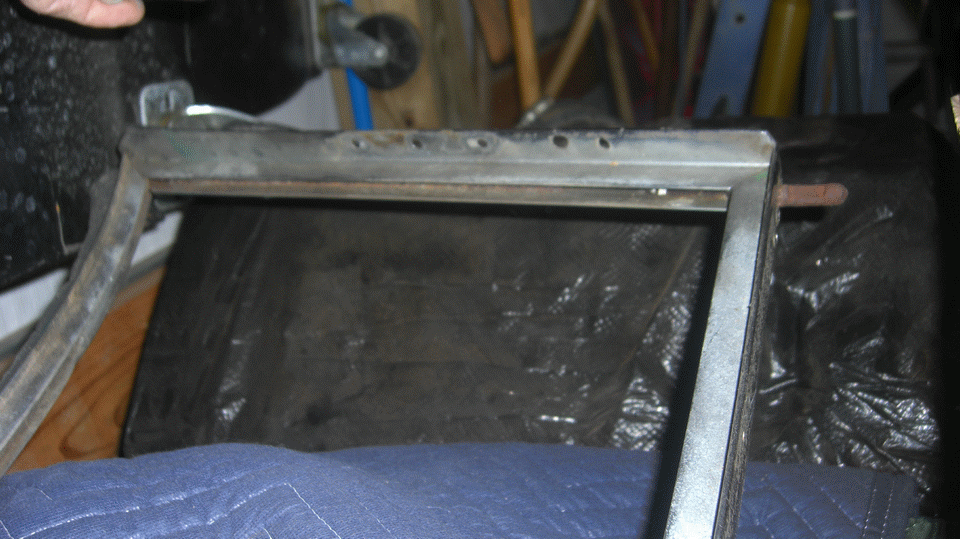
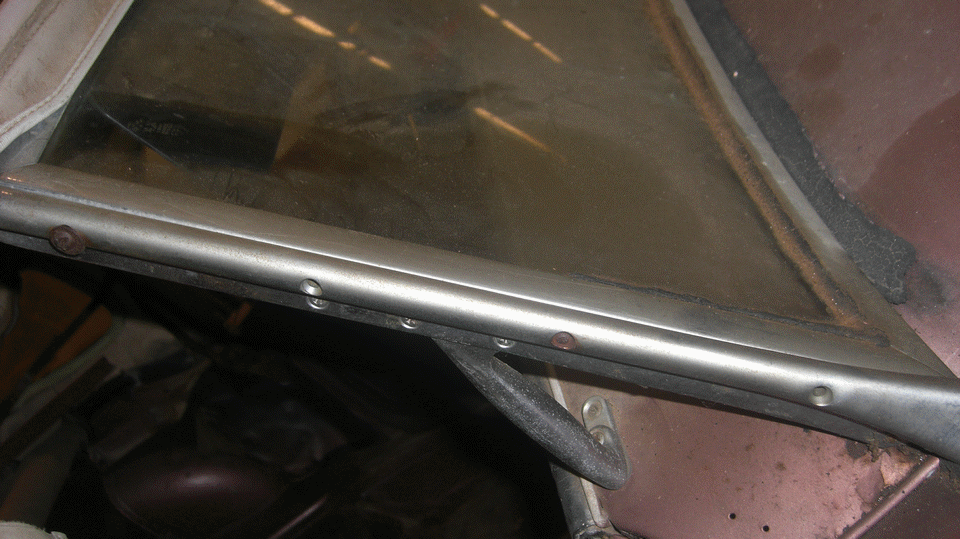
Comparing a spare windscreen against the original one, still carrying original Triplex glass. Some prior caulking/sealant there, but due for R&R to replace glazing rubber and renew all the fasteners.


 Another current project is rebuilding a stroker engine for his pick-up truck. Yeah, come on, North Carolina is NASCAR country, so everyone is entitled to at least one V8. Not to dwell there too long. Another chat session past midnight, and we all need some sleep.
Friday, December 15, 2023:
Some keyboard time late last night, some more this morning, finishing the photos and notes from yesterday by noonish. Having lunch before leaving, when someone made a phone call, and another friendly neighbor with an MGA (another MGA guru fan) showed up for chat. Passing a few more hours, getting out of town by 4:30-pm. Heading south, making another fuel stop, 200 miles later we arrived 8-pm in Lexington, South Carolina. No response to a phone message and a text message, so looks like we missed today's appointment. Okay, maybe tomorrow. Time for dinner.
|