The MGA With An Attitude
MGA Guru Is GOING MOBILE - (October 1 - October 15, 2023)
Sunday, October 1, 2023:
Catching up email and BBS, and posting photos and notes from yesterday's car show. Enough for one day.
Monday, October 2, 2023:
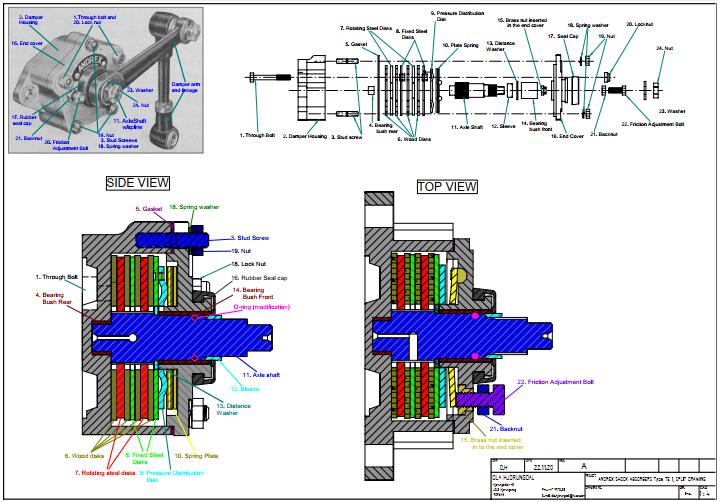
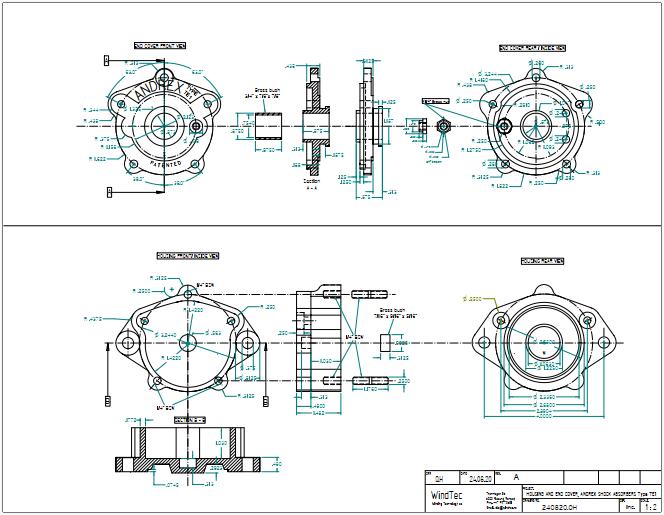
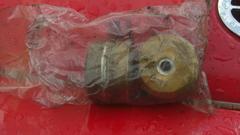
Received a nice tech item contribution for the web site a week ago, but only now found time to process it. Just uploaded a new tech page with a cross section drawing showing the internal assembly parts of an Andrex Friction Shock Absorber. It may surprise people to know there are wood friction plates inside.
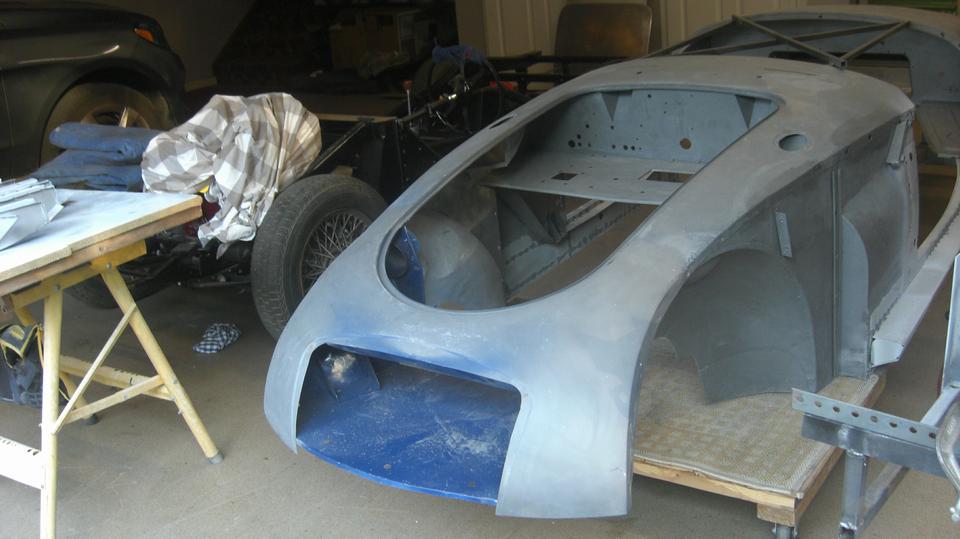
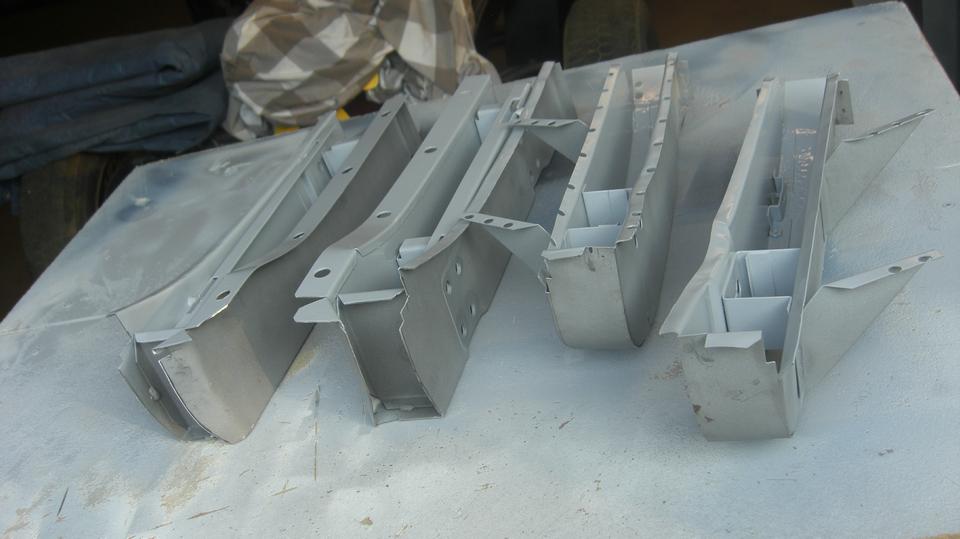
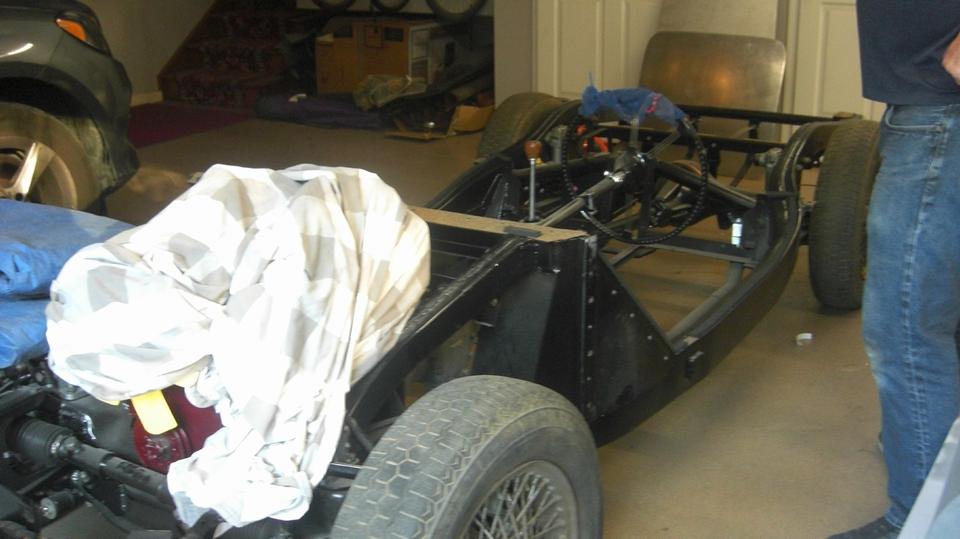
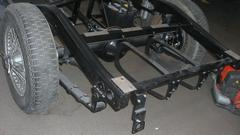
 Early evening we were off to visit Roger Nicolson in Reisterstown, Maryland. We met him at the Rocks car show Saturday. He has an MGA 1600-MK-II project car. The rolling chassis work is nearly finished, while the body restoration is about half way. Rust is gone, sills have been reworked, currently trying hard to fit up new replacement door posts (requiring a lot of fettling). Early evening we were off to visit Roger Nicolson in Reisterstown, Maryland. We met him at the Rocks car show Saturday. He has an MGA 1600-MK-II project car. The rolling chassis work is nearly finished, while the body restoration is about half way. Rust is gone, sills have been reworked, currently trying hard to fit up new replacement door posts (requiring a lot of fettling).

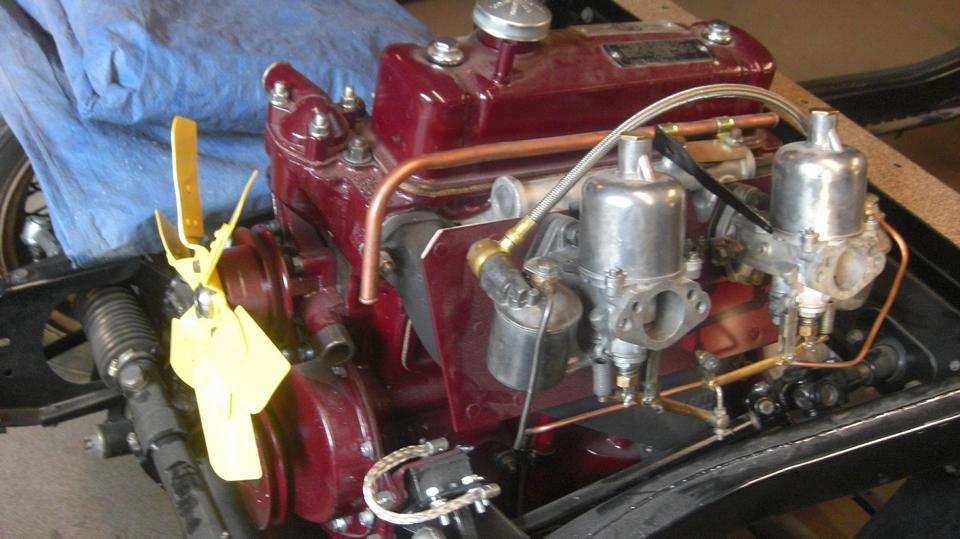
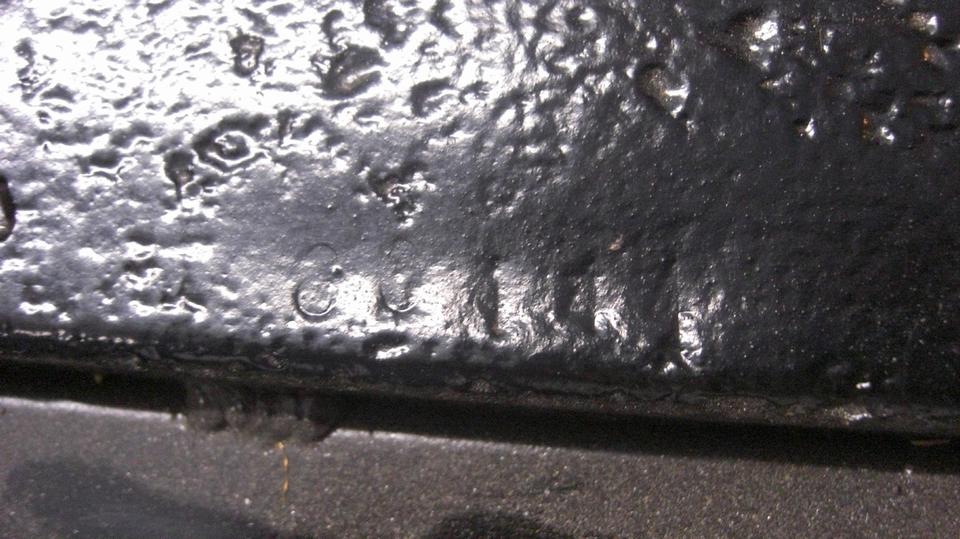
About to receive the tunnel and floor boards, looking at how standard (optional) 3-point seat belts will be mounted. Spiffy looking engine, just waiting for body install. Glory be, the chassis number stamped on the chassis rail is readable and it does match the stamped Car No. plate and the legally registered title.


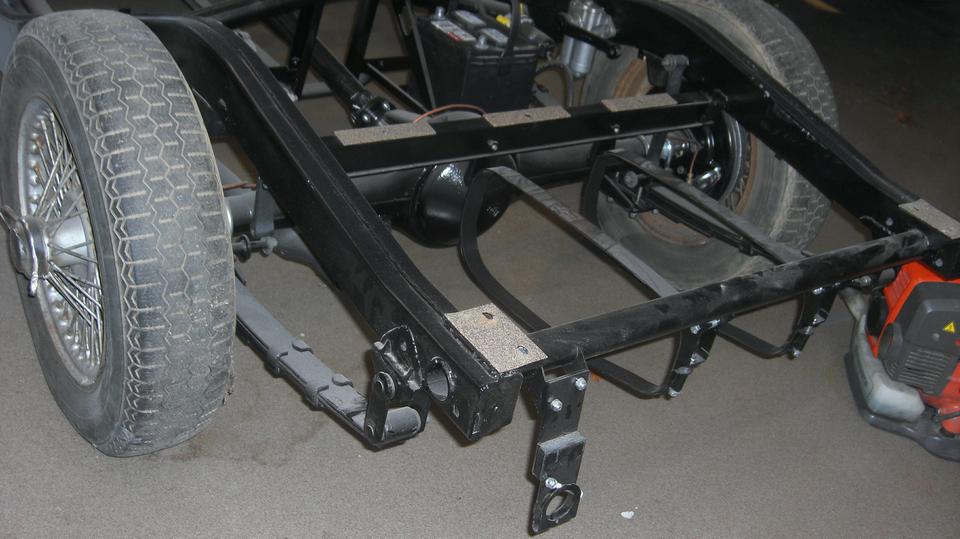
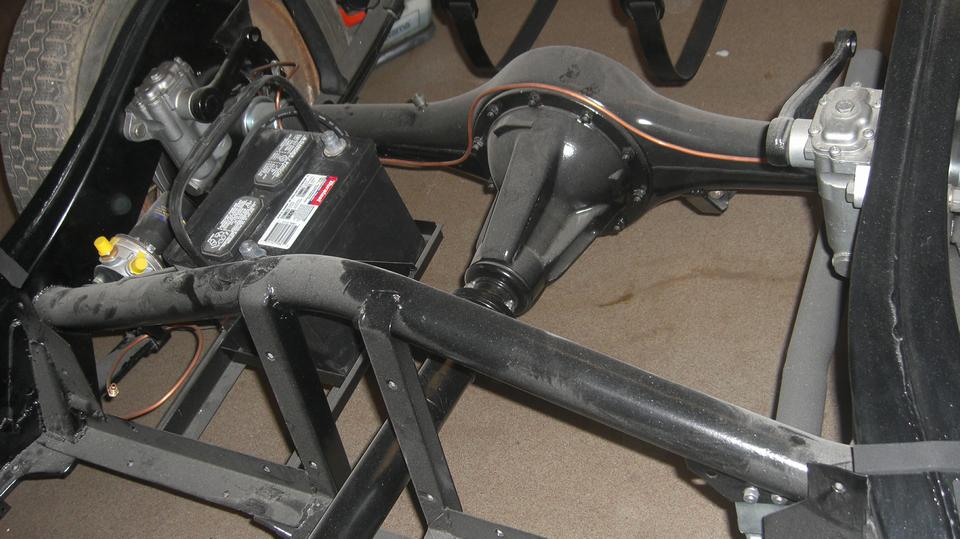
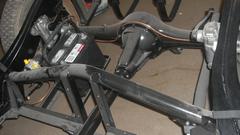 All good stuff around the rear end, waiting for new shock links and rebound straps. Had to advise him to dump the thin copper tubing and install proper brake pipes, Cupro-Nickle would be nice. Fuel tank mounting straps waiting for delivery of a new fuel tank. We will be keeping in touch to keep an eye on the progress.
Tuesday, October 3, 2023:
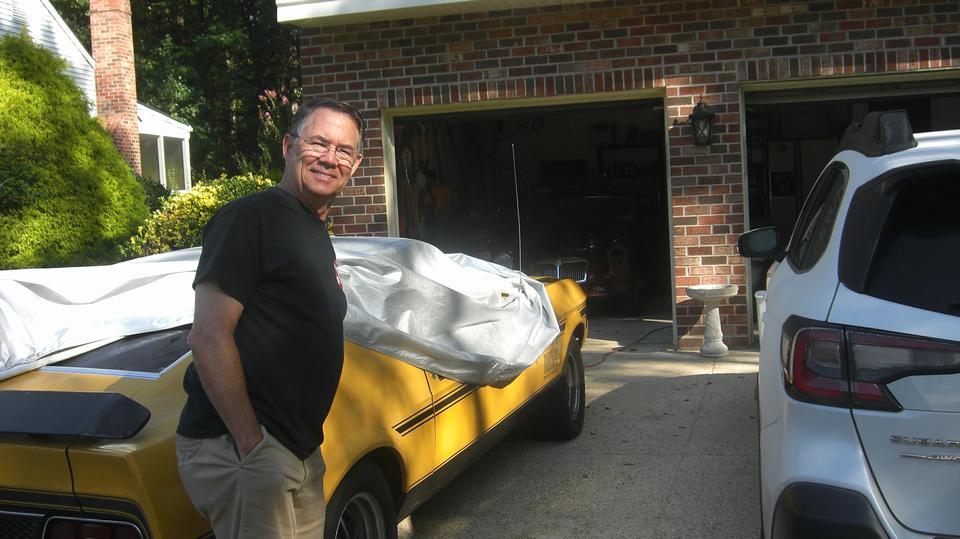
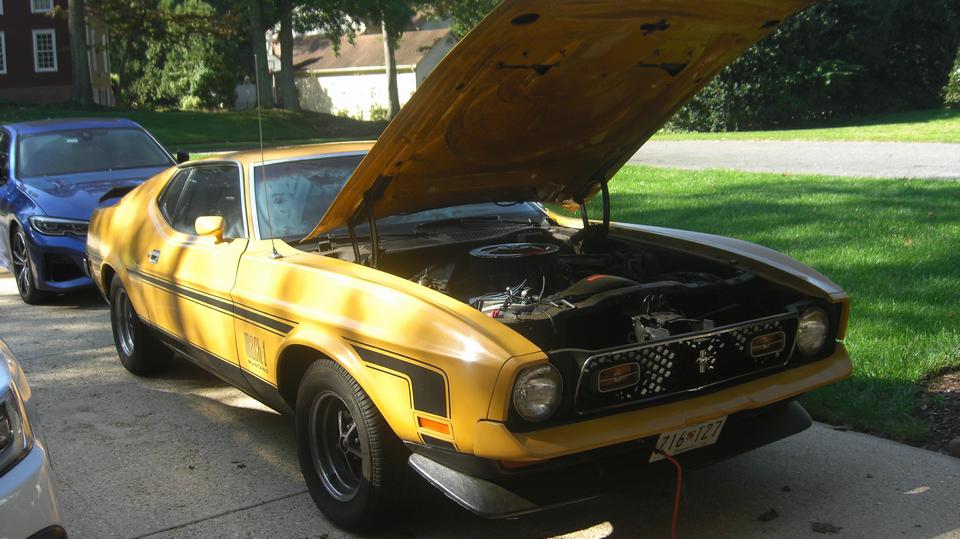
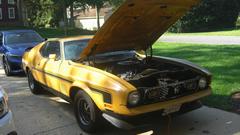
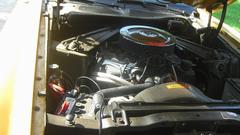
We had an evening appointment to visit Michael Mangan in Crofton, Maryland. First things first, he has this nice 1971 Mustang Mach 1. It came to him with a 302 CID engine, which he soon changed to the original type 351 Cleveland engine. Some work done in the floor pan and body sills, but it did not need external repaint, as it polished out nicely.

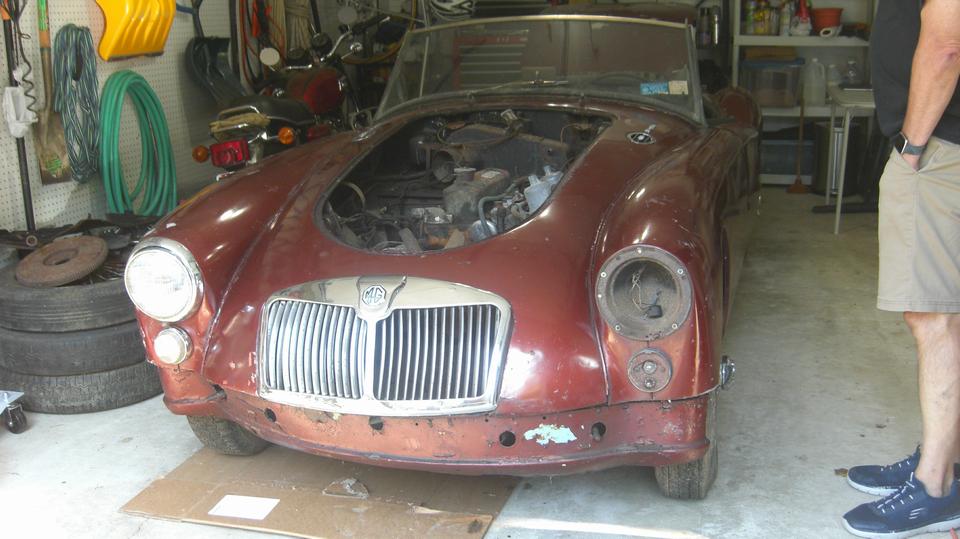
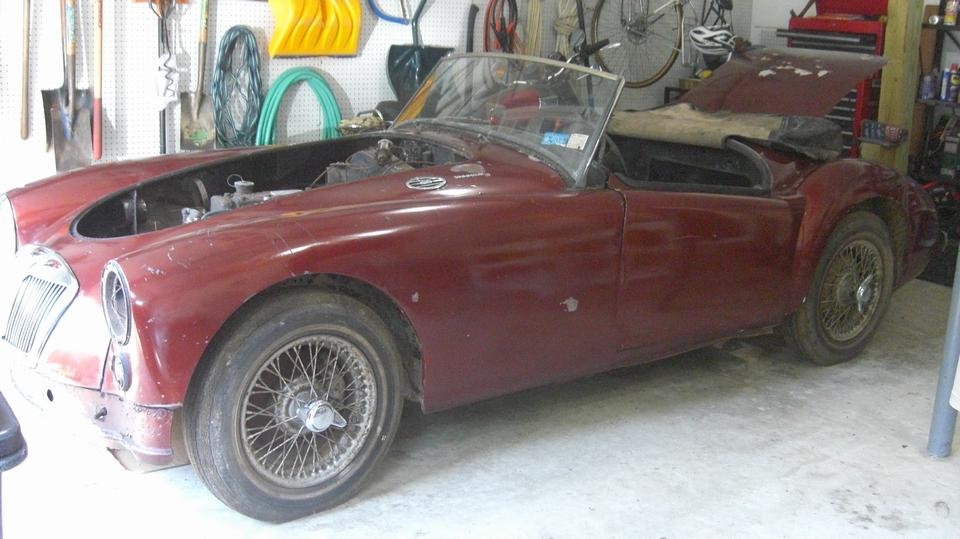
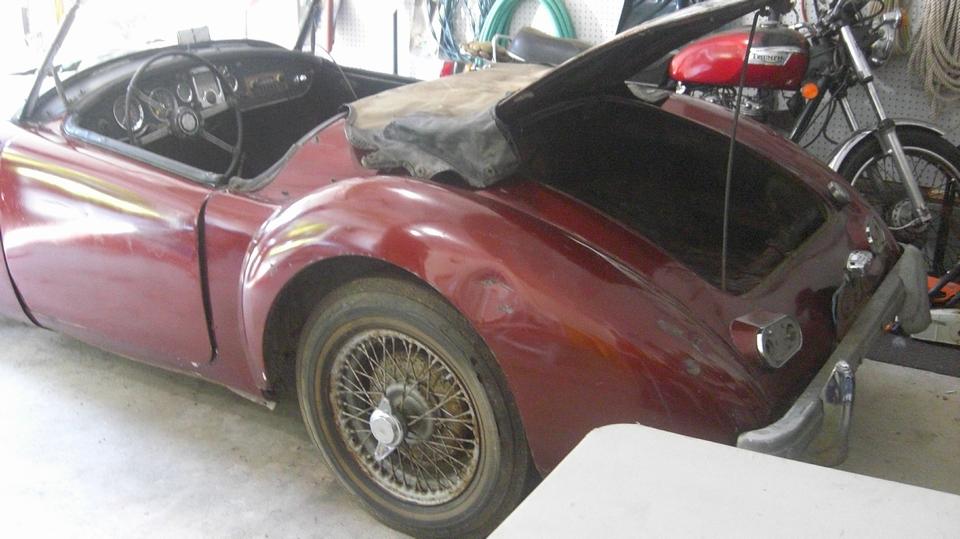
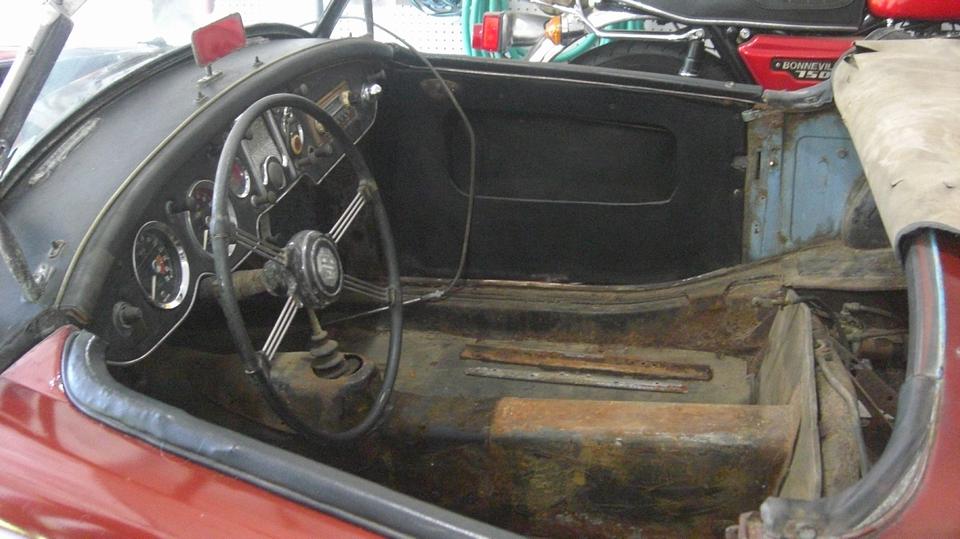
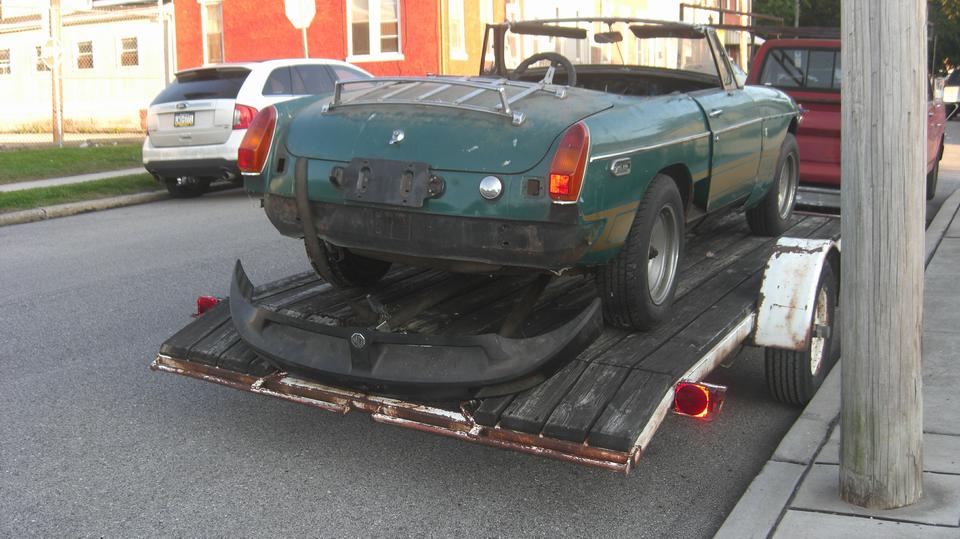
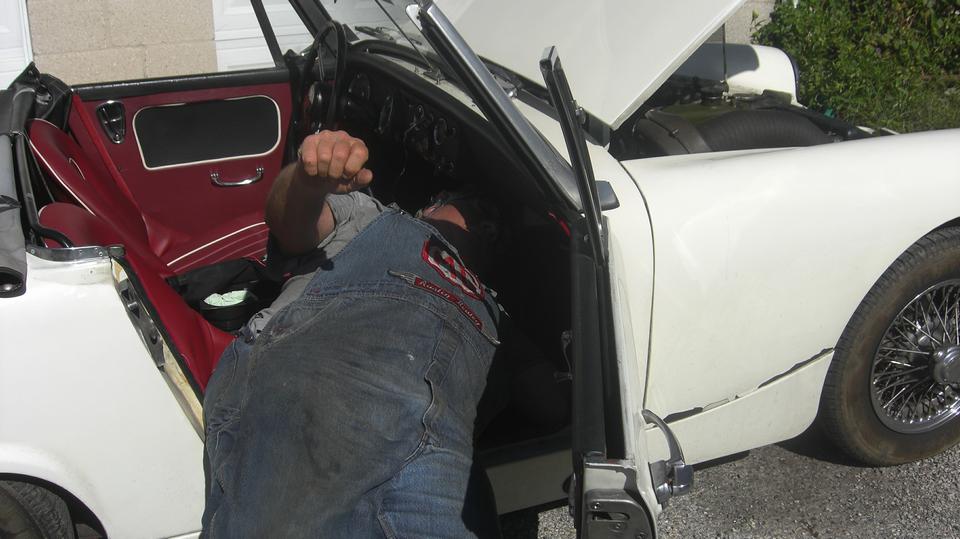
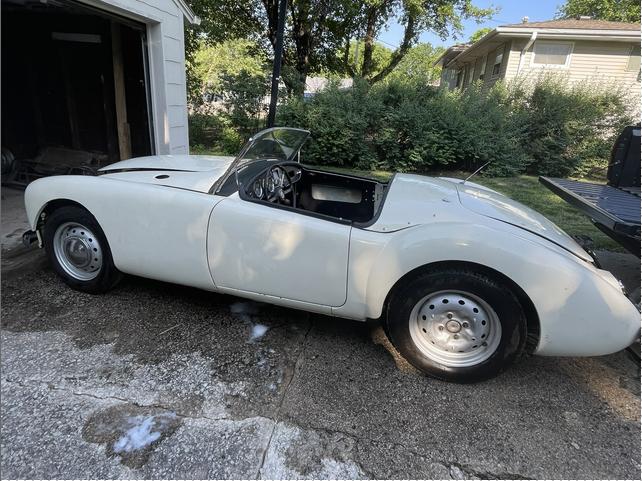
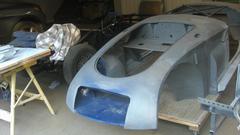
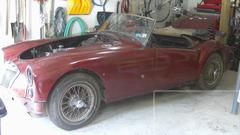
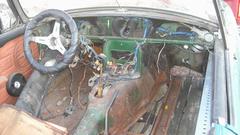
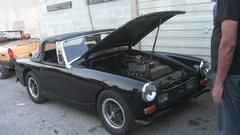
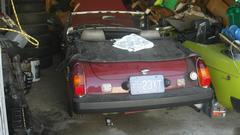
We were really here to check out his 1962 MGA 1600-MK-II project car. He acquired this one just a few weeks earlier, and made a smart move going to the MGs On The Rocks car show last Saturday where he could get intimate with some finished cars and the folks who own them. This car was originally light blue, painted dark red when after repair of a smashed front end. Painted over piping (ugh), there is some flaking paint, obviously some amount of body filler, some small dents look like easy to fix, some panels not well aligned with prior repair. The front air pan has some residual wrinkles (easy to fix, or replace with more work, and a few wrinkles on the inner wing. It will be stripped to bare metal, at least on the outside, with new body restoration.
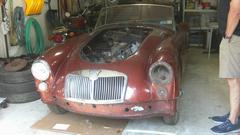

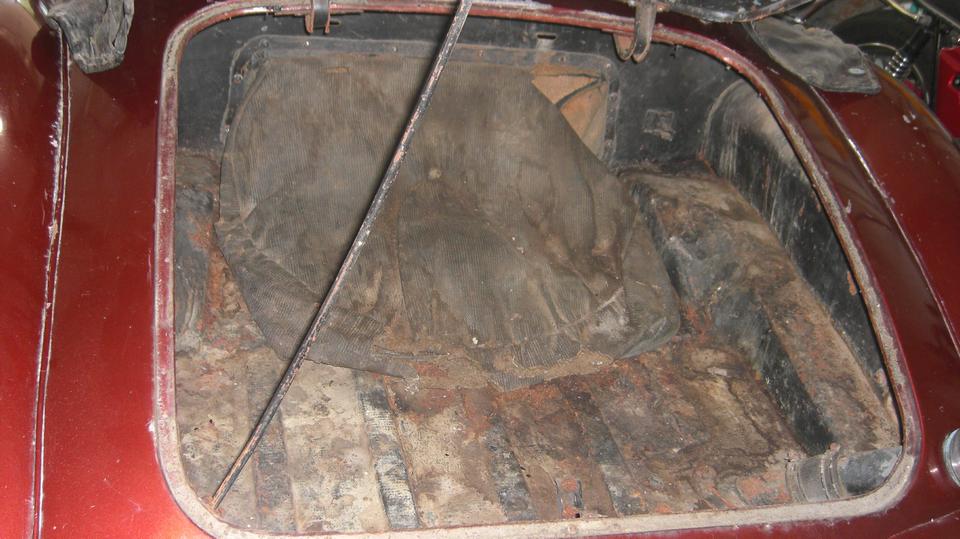
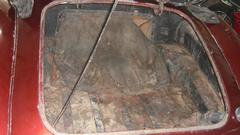
The boot floor is solid, easy to clean up and repaint, sweet. That bodes well for the rest of the body. The floorboards had previously been replaced, may be okay to continue service. Floorboard screws are wrong type, some missing, some displaced, so some broken screws will need to be removed. But the floor mount rails otherwise seem to be good, and the frame around perimeter of the floor is in unusually good condition with very little rust. Me thinks this will be an easier than normal body and frame restoration (insert smile here). Some original blue paint showing inside right, and a replacement red door showing inside left. One step ahead of the game, we were chatting some about installing seat belts.
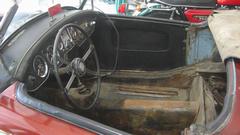
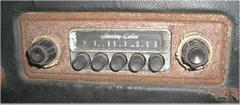
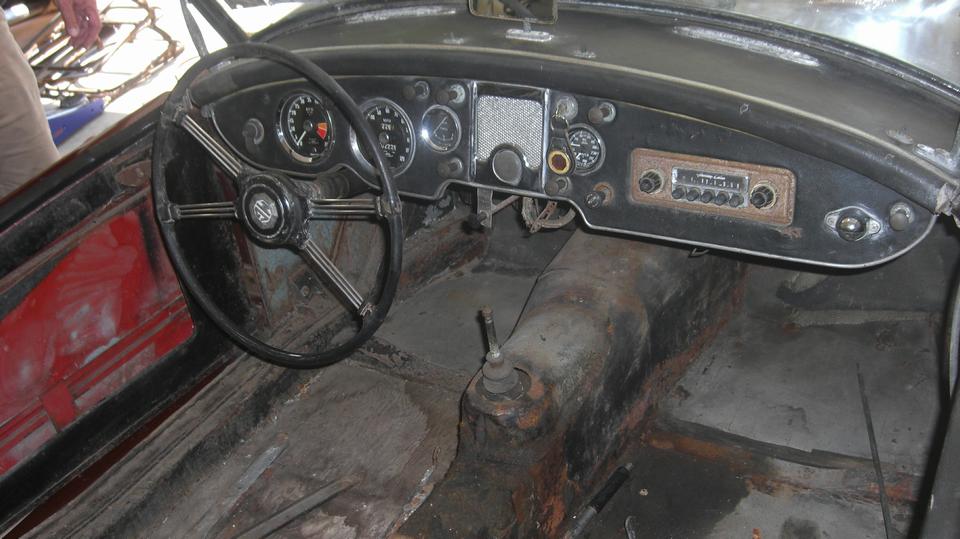
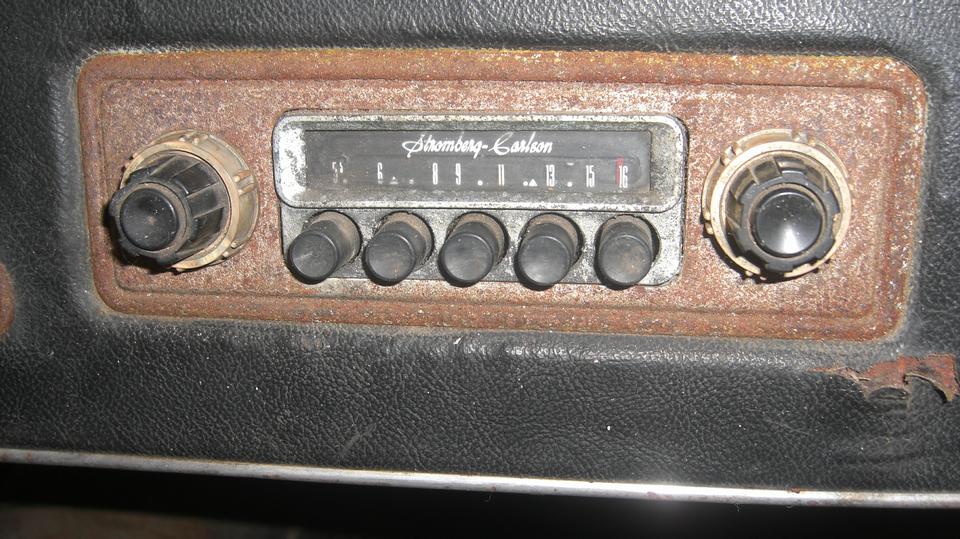
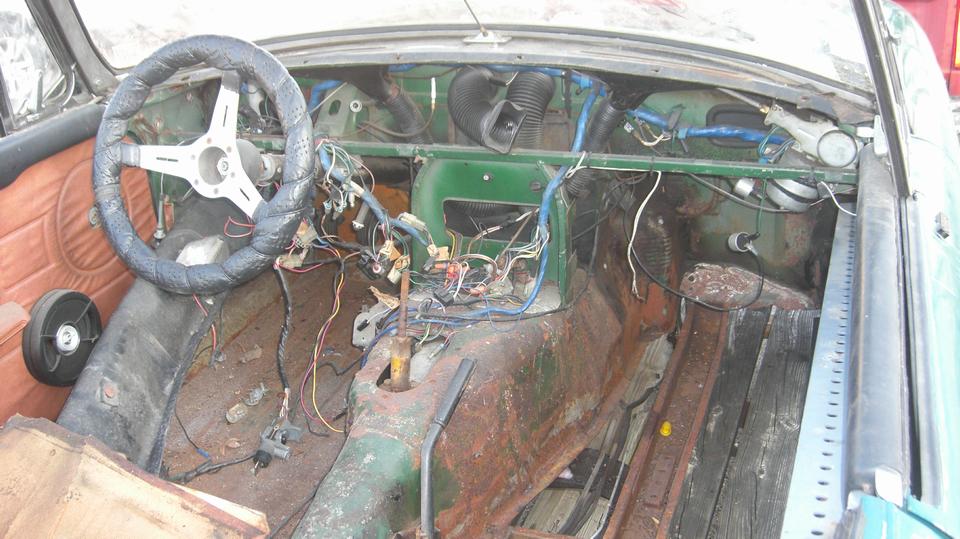
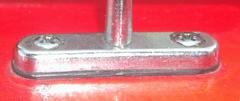
There is a period correct vintage Stromburg-Carlson AM radio. I need to add this one to my Accessories tech pages. No idea if it will work, but the (rusty) chrome mounting plate looks like standard format, so may be easy to find a new replacement part.
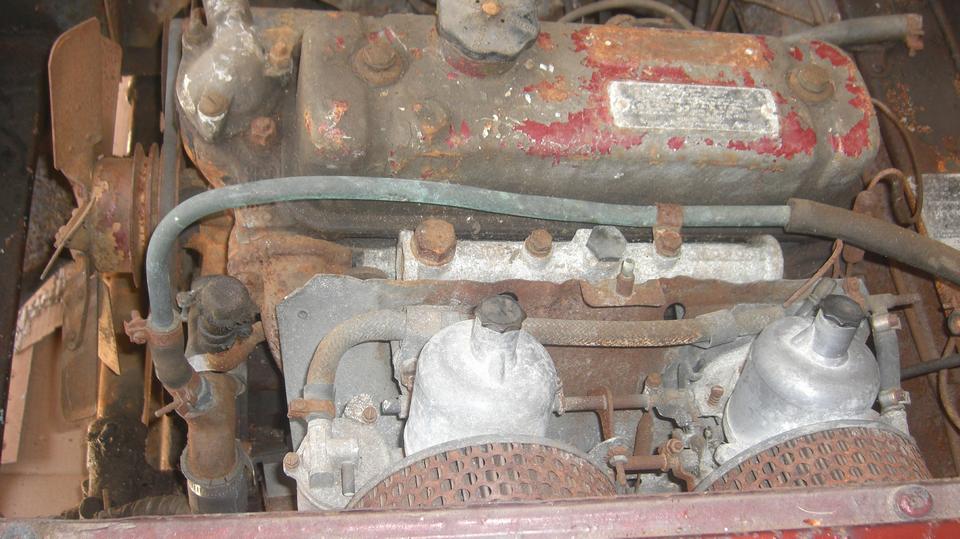
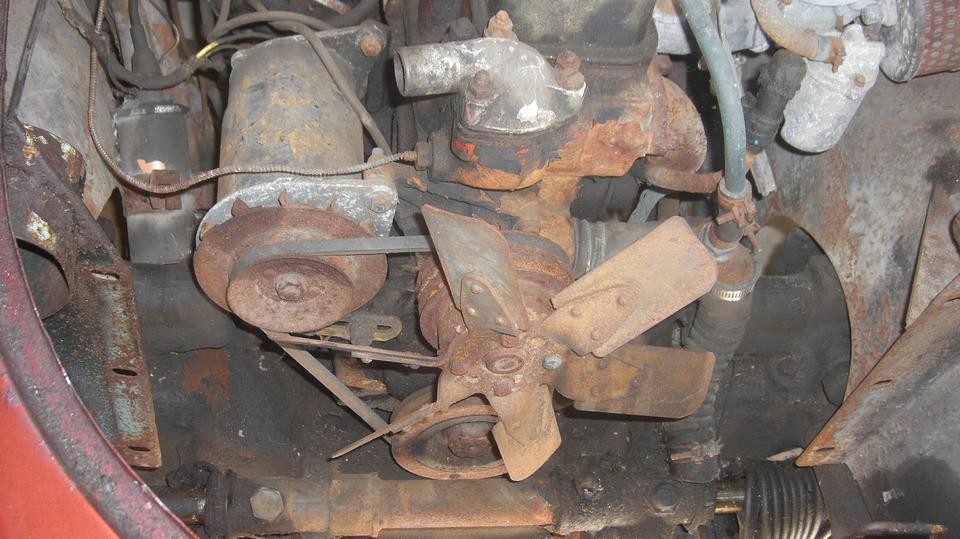
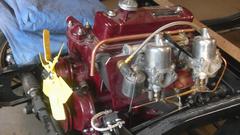
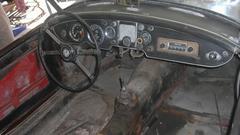
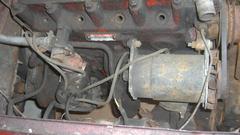
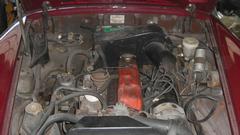
Last tax sticker from 1974, so likely this car was only on the road for 12 or 13 years before being laid up, then off the road for nearly fifty years. Spark plugs were out and the engine seized, cannot be turned with a large wrench. Inside valve cover looks not rusty, just dry oil, and the piston tops similarly appear to be dried running residue. With some luck, maybe the seizure is due to dried oil around the pistons (like tree sap), so the engine is likely a good restoration candidate.
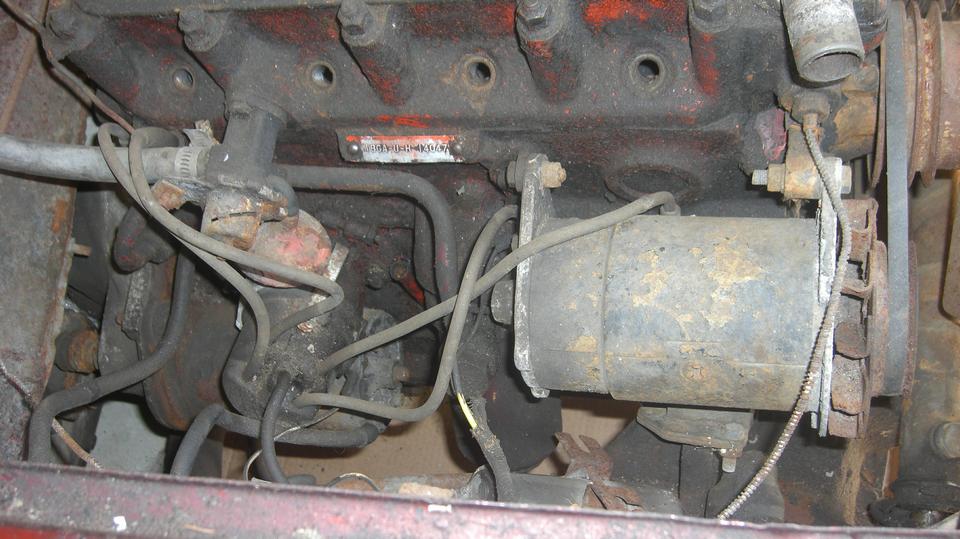
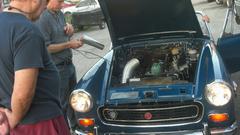
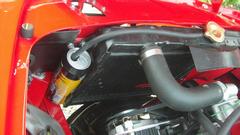
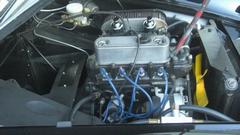
The engine is 18GA type, so a desirable 1800 three main bearing engine with mechanical tach drive. Early MGB HS4 carburetors, complete. Missing the PCV valve, but that's easy to source. MGA original type exhaust manifold and exhaust system. We tried 4th gear and a strong push to see if we might get the engine to turn. The car rolls easily, and the propshaft turns freely, but no engagement to the engine. Without pulling the engine to see, my best first guess would be a broken clutch friction disc, which could be why it was set aside back in the 70's. If so, then maybe it "ran when parked", so nothing else broken, which would be very good news.


Two radiators in hand, both original cell core type (nice). One had a dig in the front side, looks like a leak a repair with Plastic Steel. The second one had a few slightly deformed fins, but both look like they may pass a pressure test and be functionally good to use (didn't get the picture). I recon Michael has found a diamond in the rough, a very good restoration candidate. This is destined to be his serious project when he intends to retire in a year or two, but he may get enthused and get a head start on it sooner.
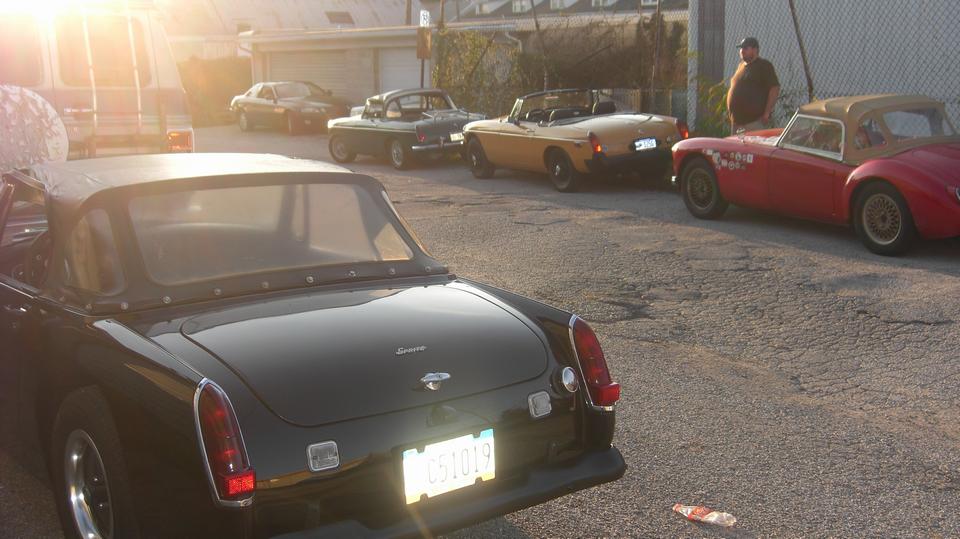
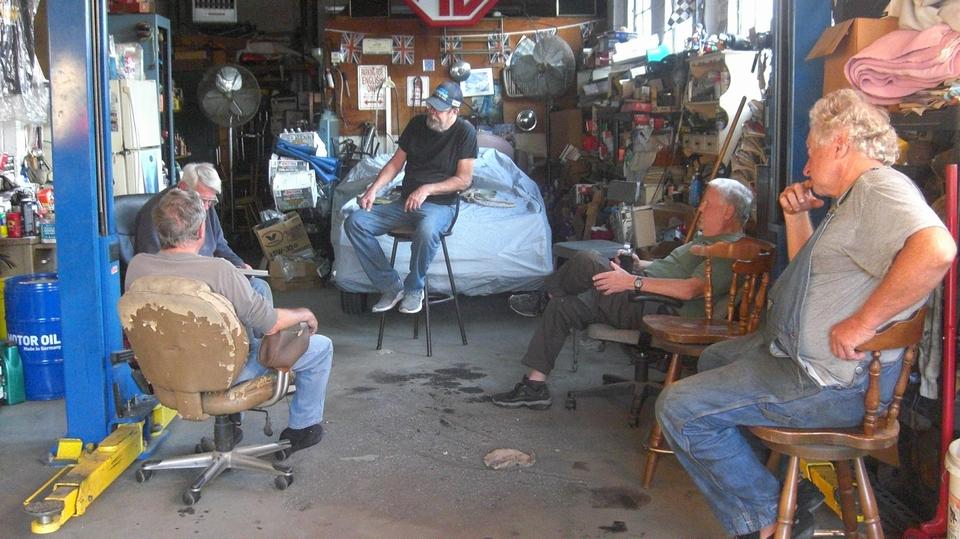
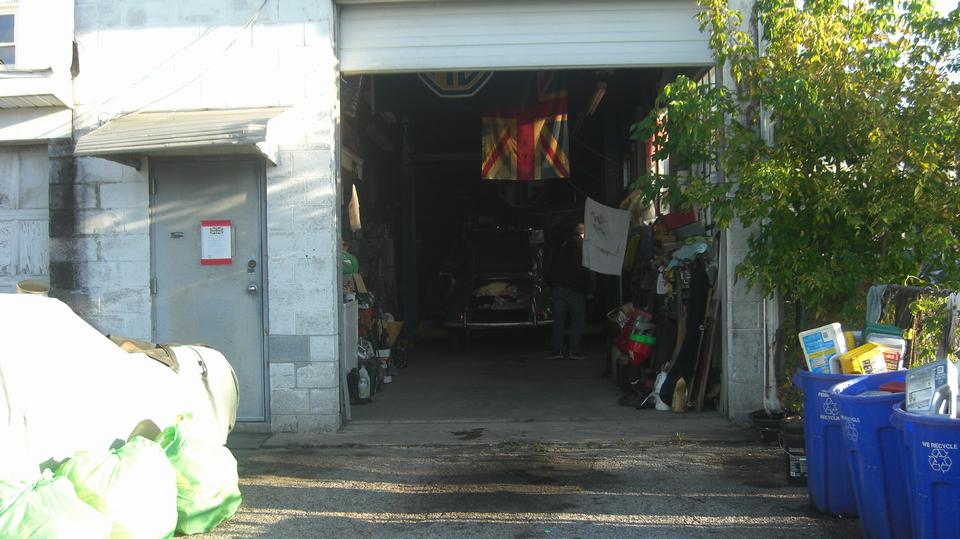
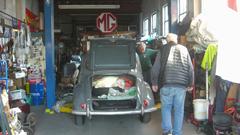
Heading north, fighting afternoon traffic with one accident and construction delays, hour and a half later we had late lunch in York, PA. Early evening back to Darrell's garage for scheduled Tuesday night tinkering with friends. Excellent weather for a change, so there was a good turnout, a dozen visiting cars. News from the past week end, Darrel's Garage received the club participation award, having more than 30 cars entered at MGs on the Rocks.


Darrell has a new toy, a rubber bumper MGB, just a little tatty, some slightly bodged repairs in the body sills, some parts missing. This one came as a spare with purchase of another car, but already decided to be parted out as a donor car.

More friends arriving, park them a little farther down the alley. The yellow MGB with nose just poking into the picture had a throttle steer problem, most likely loose U-bolts securing the rear axle, fairly easy fix. The Midget had a misfire at high speed and high throttle, not a fuel delivery problem. Using the timing light flash to verify spark on all four plugs, not an ignition problem. Lifting foot to half throttle will stop the high speed misfire. Likely running too rich at high speed, a clogged air cleaner can do that.


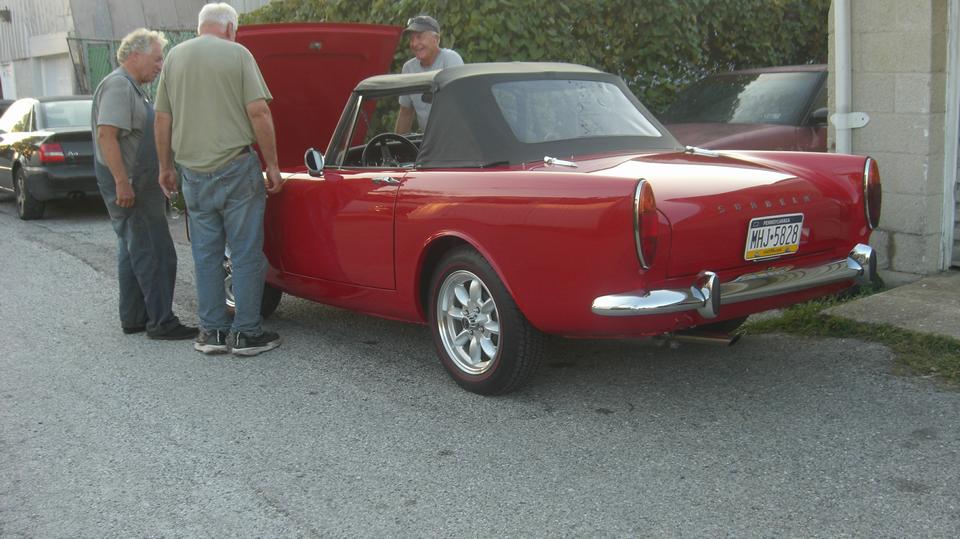
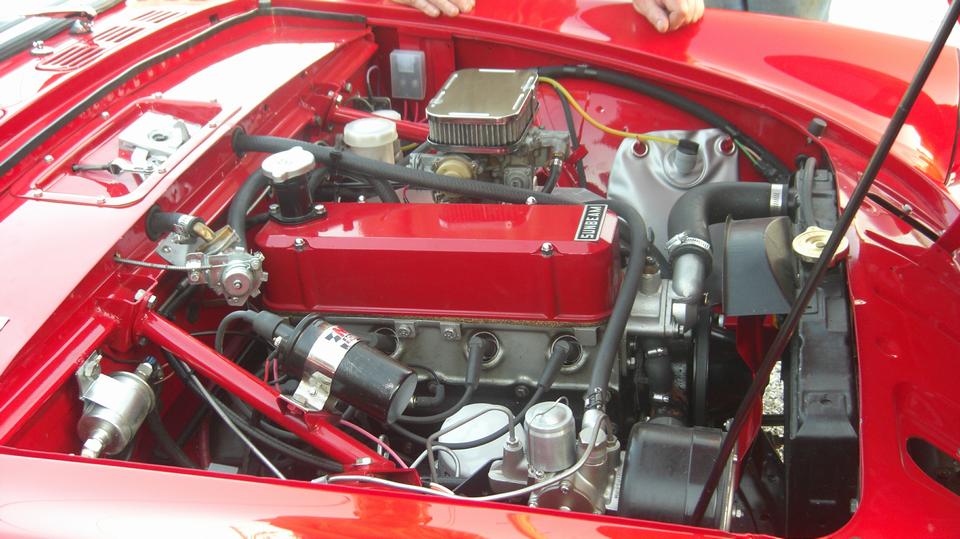
Very nice Sunbeam Alpine, another new acquisition. I suppose you can put a Weber carburetor on anything. Love the coolant recovery container.
There was a nice flat bonnet Austin Healey Sprite with some custom touches. I think it was just for show and tell, nothing needed. And there was a nice MGB GT, another recent acquisition, 1971 with no side markers, single line brake system, no air pump, right hand drive British market car, brought home by a serviceman. This one was on the lift briefly for checking out the floor pans and body sills, fortunately all good.

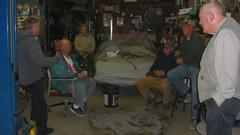
Well past the ides of September, days getting shorter quickly, lots of folks went home around dusk. Darrel and I got to sit and chat a while longer. I'm still offering to help with his Morris Minor to fix the leaky master cylinder and the leaky fuel filler hose. Would also like to help clean up some clutter in the shop space. And the ongoing discussion about possibly converting the unused upstairs apartment into a club room (maybe).
Wednesday, October 4, 2023:
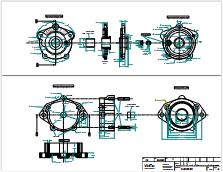
Wow. Many more drawings of the Andrex Friction Shock Absorber just received and uploaded to the new tech page.
Another new Accessory tech page for the Stromburg-Carlson radio found yesterday in Michael Mangan's MGA.
Much of the day consumed posting photos and notes from yesterday to the travel log (above), and time to catch up a backlog of BBS and email.
Thursday, October 5, 2023:
Posted a new tech page for carburetor heat shield with asbestos content. This has been an ongoing problem for people trying to import an MGA into Australia where asbestos is strictly prohibited.
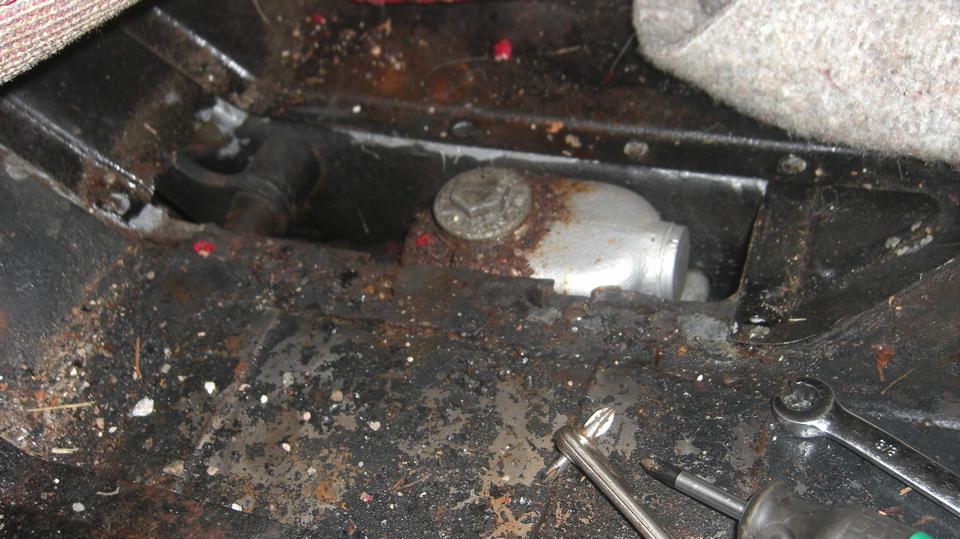
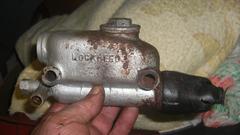
Two years ago we had borrowed Darrel Lutz's Morris Minor for a bit while working on engine repairs of our MGA. At that time the Morris ran out of brake fluid causing us some serious concern. At the time, I had to remove the seat to pull up the carpet for access to the master cylinder underneath, then adding brake fluid and putting it back together. Being rather busy at the time, we left it that way, for someone needing to fix the obstructive carpet issue later. Since then the car was not driven much, and when it ran low on brake fluid again it was just parked. With more time available now, this seemed like a good time to fix that leaky master cylinder.
 Around 6-pm we ambled over to Darrell's garage where he had moved the Morris into the shop space before leaving for some evening appointment. I knew pulling the brake master cylinder out of this car was not going to be easy, but some things just have to be done.
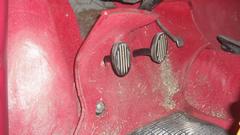
The master cylinder is hidden inside of a unibody channel below the floor. Been here before, so unbolt the seat attachment brackets to lift the carpet for access to the master cylinder top plug, which needs to be done just to check fluid level or add fluid. Note to self, by the time we finish, see if we can make the front carpet removable for master cylinder access without removing the seat.
Around 6-pm we ambled over to Darrell's garage where he had moved the Morris into the shop space before leaving for some evening appointment. I knew pulling the brake master cylinder out of this car was not going to be easy, but some things just have to be done.
The master cylinder is hidden inside of a unibody channel below the floor. Been here before, so unbolt the seat attachment brackets to lift the carpet for access to the master cylinder top plug, which needs to be done just to check fluid level or add fluid. Note to self, by the time we finish, see if we can make the front carpet removable for master cylinder access without removing the seat.
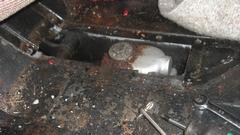 Needing to extract eight screws to remove the floor cover panel. A couple of those were particularly difficult, as I suspect someone had applied body undercoating on the threads underneath.
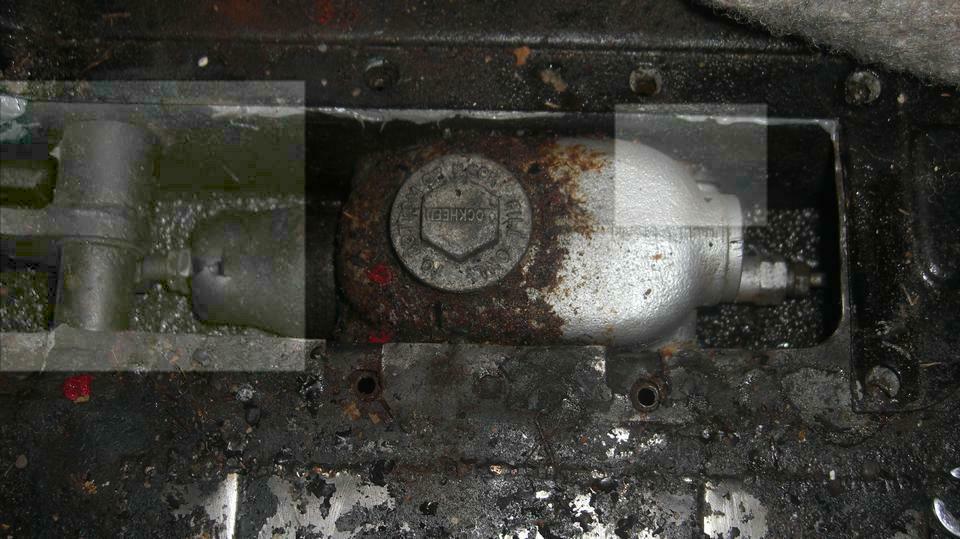
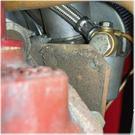
There are two pressure pipes here. One runs to the right (upward in the next picture) through the channel wall, easily accessible underneath.
The other runs to the back (to right in the picture) a foot or more down the
 channel before emerging under the floor pan en route to rear of the car. That one requires wrenching access only from the top, and the channel is very narrow, so a wrench can only move 30 degrees per swing. Flip the 15-degree angle wrench over repeatedly while turning 12 wrench movements for one turn of the flare nut, and keep that up for 10 turns or so to disconnect that flare nut. Then the pipe needs to be pulled rearward from underneath to get the pipe end out of the cylinder port. I might mention that it is impossible to get two fingers into that limited space to reinstall this flare nut.
 Are we having fun yet? From underneath, unscrew/disconnect the second pipe and pull it out of the side port. Then remove two bolts securing the master cylinder in the channel. Then hold the cylinder forward while depressing the brake pedal, and lift the rear end of the cylinder to extract it from the body channel. I wonder who conjured up that design, and who was tasked with assembling these things at the factory. And I'm sure the field service technicians had a few choice words to send back to the factory.
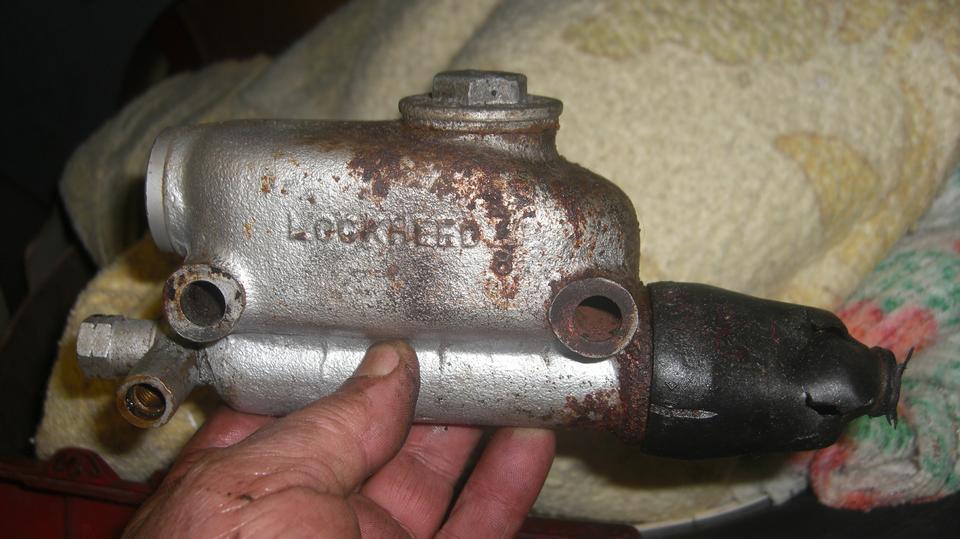
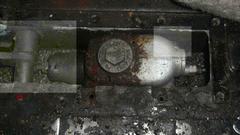
Remove the decomposed rubber dust boot and one internal snap ring to disassemble the innards. Darrell came home just in time to miss all the swearing. He said he had the master cylinder repacking kit, and he did have a few of them, but they were all for 3/4" bore cylinders, and this one is 7/8" bore. So now it looks like this job will be on hold until we can track down and order the right kit. Bummer. Time to clean up and pack away the loose bits in safe places where they won't be misplaced before we get back to it. Then off for late night dinner.
Friday, October 6, 2023:
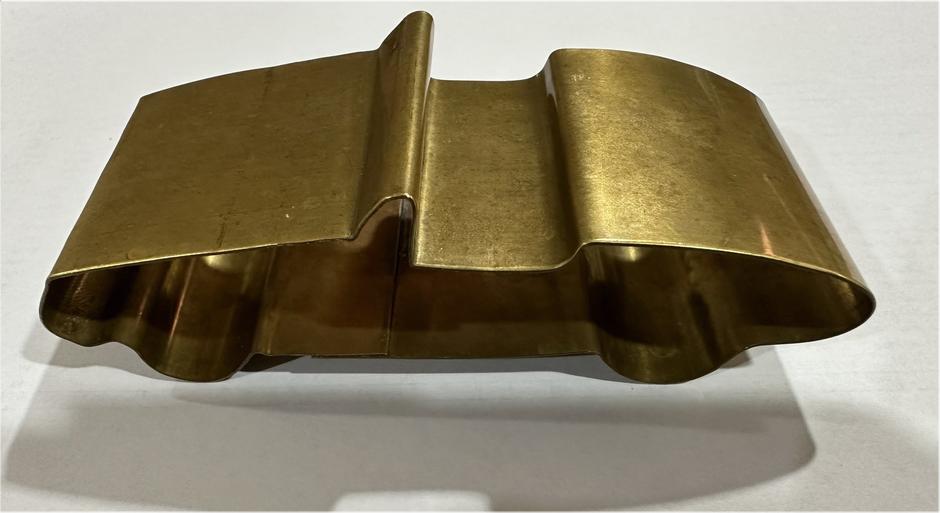
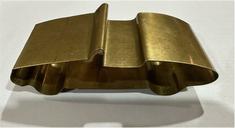 Here's one just for kicks. There is a new Regalia tech page for an MGA Biscuit Cutter.
Someone was asking how to make the MGA ride "less harsh", because he is getting older and more sensitive, and doesn't need to be so frisky. I think I spent too much time trying to figure out how to turn a roadster into a tourer. That is, making the MGA evolve into an MGB. By the time this is finished, I may have to turn it into a new web page, but I would like to be sure I have it all properly figured out first.
Saturday, October 7, 2023:
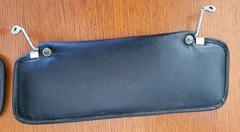
Slow day, but someone sent pictures, so I updated an Accessories tech page for some aftermarket sun visors for MGA.
Sunday, October 8, 2023:
Dragging my feet for a couple of days? I thought Darrell was looking for a rebuild kit for his Morris master cylinder, but haven't heard from him. So I got off my duff, did a little research, and ordered a rebuild kit from Mini Mania.
Monday, October 9, 2023:
Two new tech pages today, both in the interest of
 mirror anti-vibration modifications. First one is for Tightening A Loose Mechanical Joint on the
MGA dash mirror stem to base mount. Second one is for adding a Mirror Mounting Pad for the MGA dash mirror.
mirror anti-vibration modifications. First one is for Tightening A Loose Mechanical Joint on the
MGA dash mirror stem to base mount. Second one is for adding a Mirror Mounting Pad for the MGA dash mirror.
Tuesday, October 10, 2023:
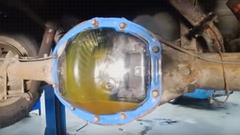
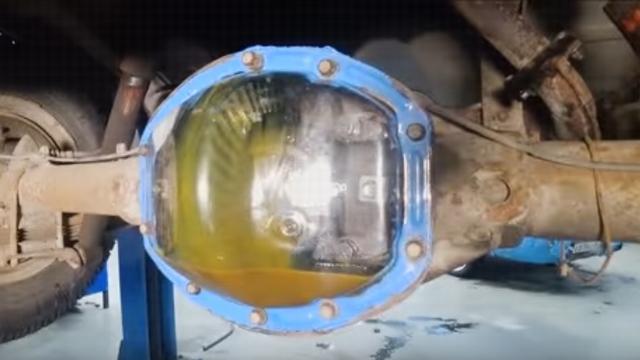
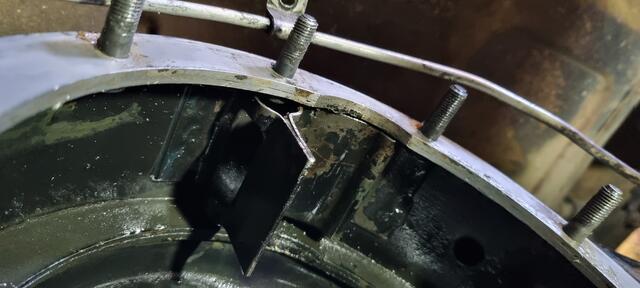
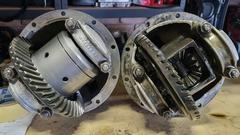
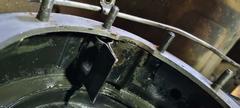 Someone asked what the baffle in the differential housing was for, and I recon I had an interresting answer, so start the day with a new tech page for Oil Flow in ihe Rear Axle Assembly.

When we have too much time to spare, you might like to check out,
You Might Be Old If You Remember These! -- 9 videos
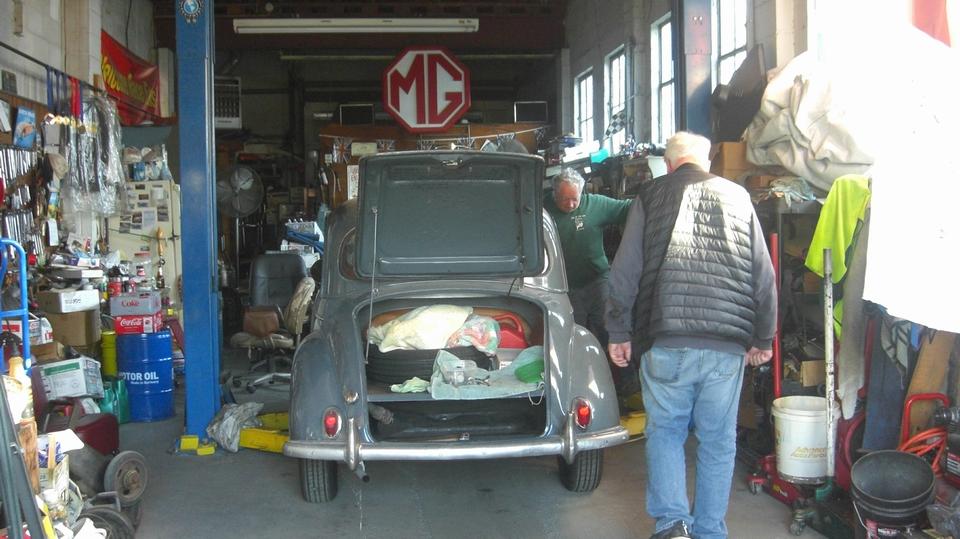
Tuesday night tinkering session at Darrell's garage. We arrived a little early. with purpose, and there were already a few doors open. The red Midget 1500 was not running, and Darrell would like to get it going so it can go home and free up the space. I think it has been sitting here for two years. First Darrell said he was not going to work on it until it got a new set of tires (safety hazzard). It finally got the new tires,but now it won't run. Fuel tank was drained,adn fresh fuel installed. It will fire with starting fluid, but not stay running, so must be a fuel delivery problem. Maybe tend to that later. -- Across the alley, the stowage space where the Morris Minor has been parked for the past two years.


Yeah, that Morris we had borrowed two years ago, the one with the leaky master cylinder that we took apart last week. No repacking kit available anywhere in this country, and it looks like 3 to 4 weeks for delivery. So we push it out of the shop space, across the alley, and back into its stowage space until the parts come in. That cleared out the shop and the party space.

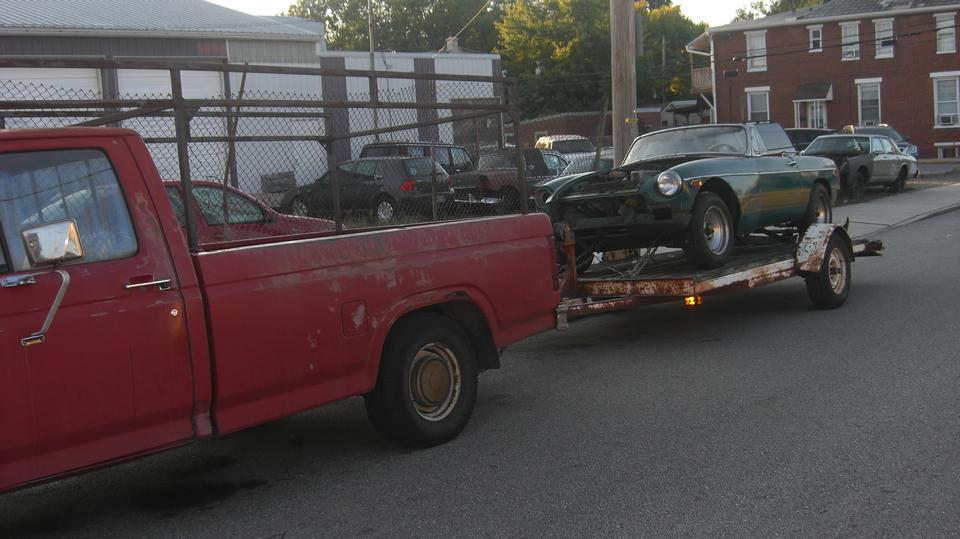
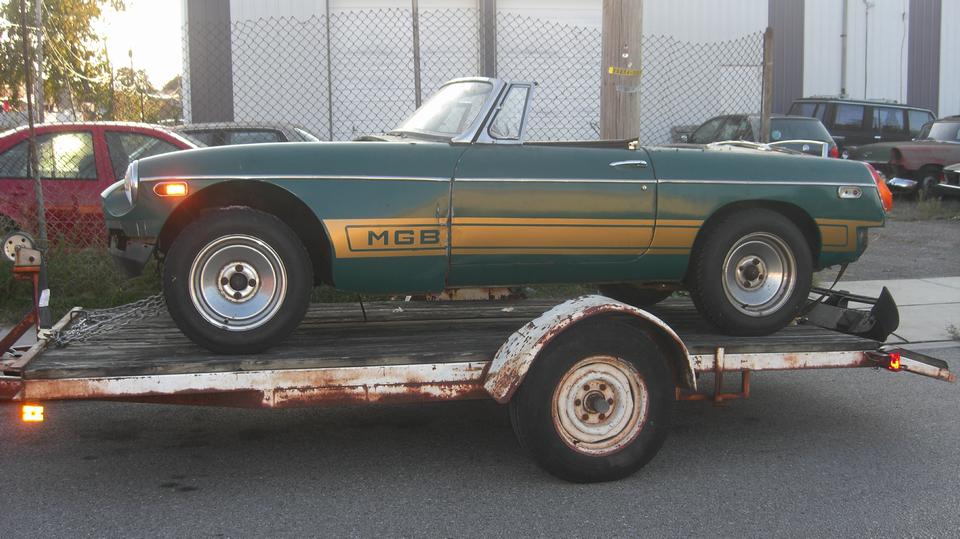
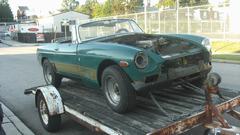
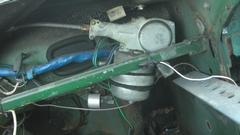
Then there was taht MGB on the trailer we noticed last week. Well, it's officially a parts car, and we could use some parts. We intend to install an MGB 2-speed wiper motor in our MGA, and we could use the motor mounting parts, the first drive pipe, and the harness connector plug with some wire attached. Not long to extract the motor and mounting parts, a bit longer to remove the wheel boxes and drive pipes, a bit longer to unwrap some of the harness to retrieve 15 to 18 inches of the colored wires along with the connector.
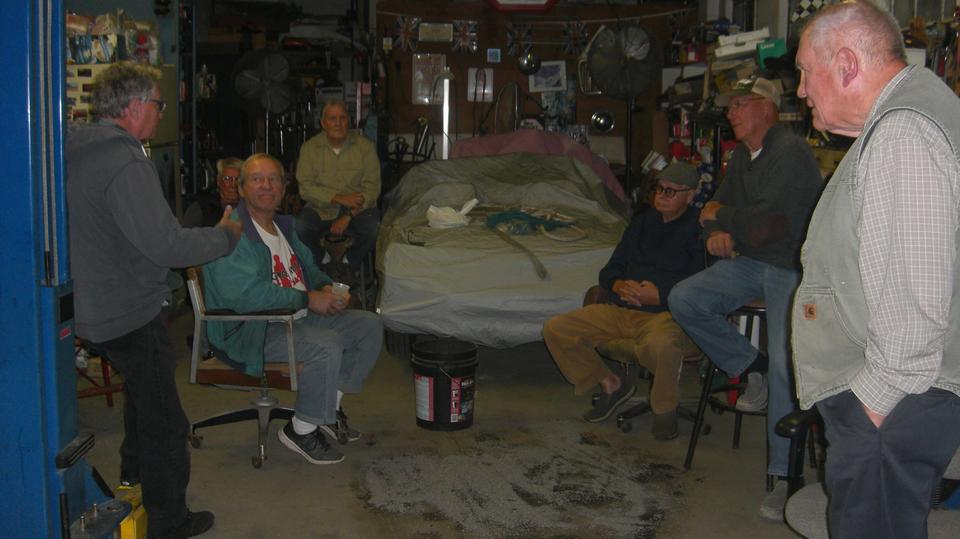
Some late arrivals. Not sure why the bonnet was up on the Triumph GT6+, maybe just show and tell. Nothing wrong with the white MGB, just in for a visit. Time to join the gang for a little BS time.


One more late visitor, the lady working on a poster for Darrell's early summer car show. Then it was time to tuck in Darrell's driver Midget for the night, and head out for late dinner.


Wednesday, October 11, 2023:
Update to a tech page for Quaife Limited Slip Differential, as someone has reported interfernce fit preventing installation.
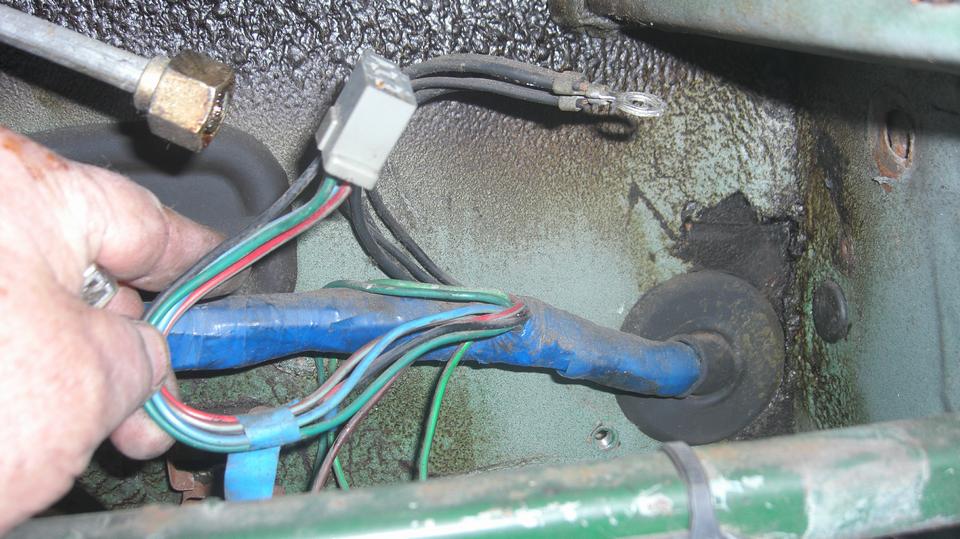
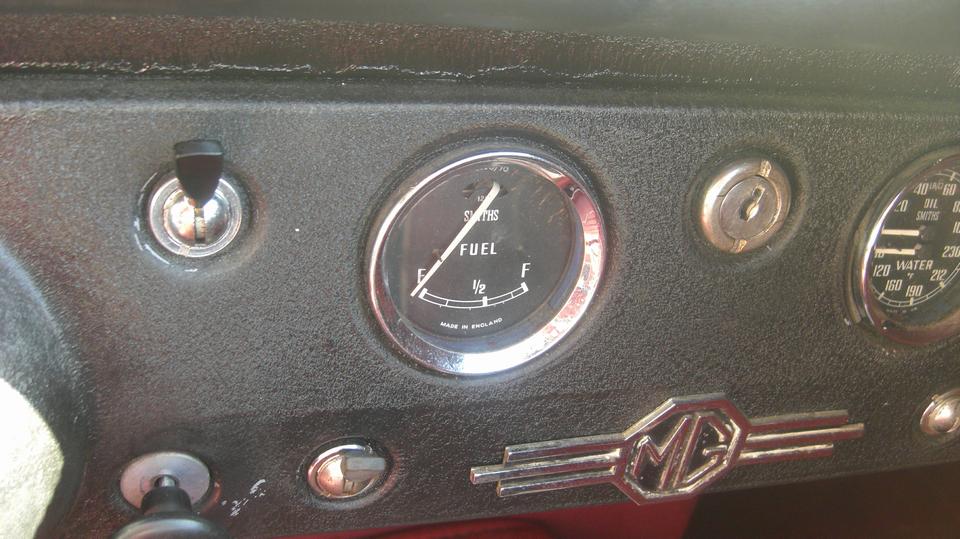
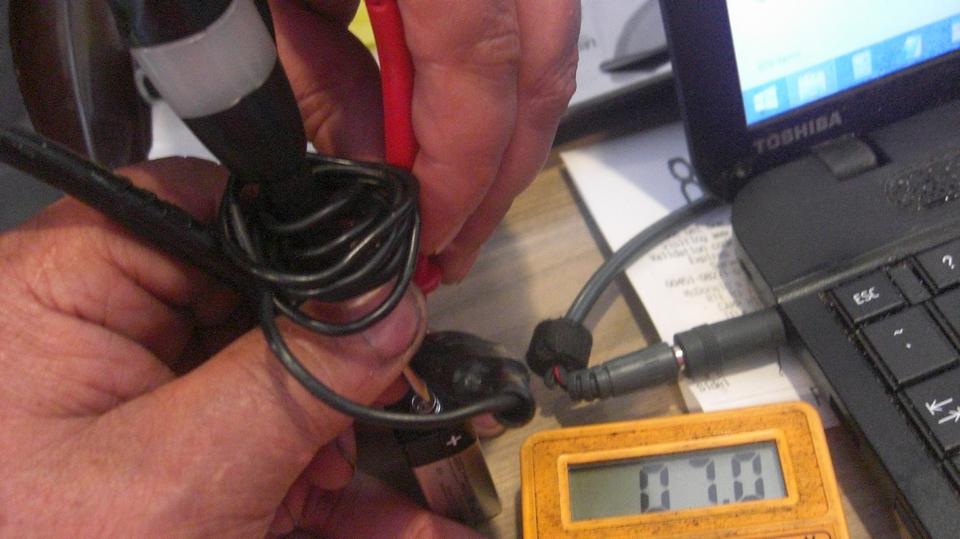
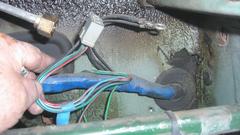
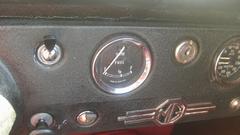
Back to Darrell's place mid morning. Need to check out his daily driver Midget fuel gauge. It never goes higher than 5/8, and often sits just below 1/8. Now it was just sitting near the empty mark, even though it was recently filled with fuel.
Poking around behind the gauge with a test light, we must have shorted power to ground, because the gauge stopped working, and the turn signals also went dead. Checking the fuse with green wires, the fuse was good, but no power to the fuse on the white wires, no power from the ignition switch. Loose battery cable? No.

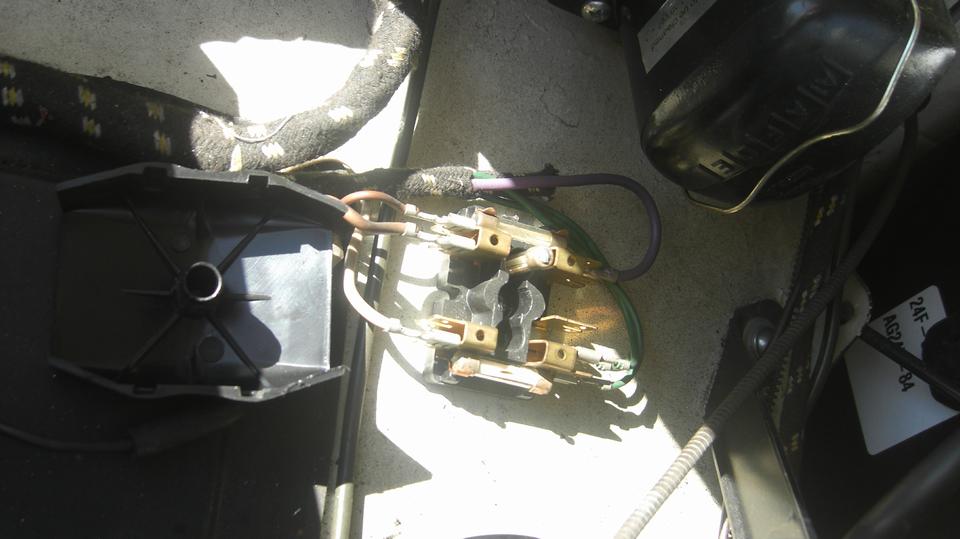
Then Darrell remembered he had installed a main line blade fuse in the heavy browN wire between the battery
 cable and the control box. That fuses everything in the car except the starter motor. Uh, no Darrell, never install two fuses in series. The Lucas slow-blow 17/35 fuse didn't blow, but his main-line fuse was only 20 amps, so that one did blow. Install a main line fuse of 30-amps capacity, and get back to work. He can change location of his in-line fuse later. It should be in the browN/blUe wire between the control box and ignition switch, also before the lighting switch. And you don't want to fuse the control box or generator circuit.
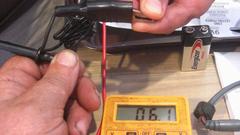
Back to probing the fuel gauge, now I had another stroke of intuition and another tech suggestion. What is the resistance of the test light? First estimate (educated guess) maybe a 2-watt bulb similar to a dash light.
2W/12V=0.167Amp --- 12V/0.167A=72ohms -- Really?
That would be very close to the 70 ohm max resistance of the sender unit with full tank. So disconnect the signal wire, ground the test light, and probe the "T" terminal on the gauge to emulate the tank sender resistance signal. The gauge jumped up to 5/8. Wow, it works. Then Darrell said the gauge never went any higher than 5/8 with full tank when it was working. So maybe the gauge needs some calibration. But before doing that, we must check the actual resistance of the sender unit. Also of course I now dearly want to check actual resistanc of my test light.
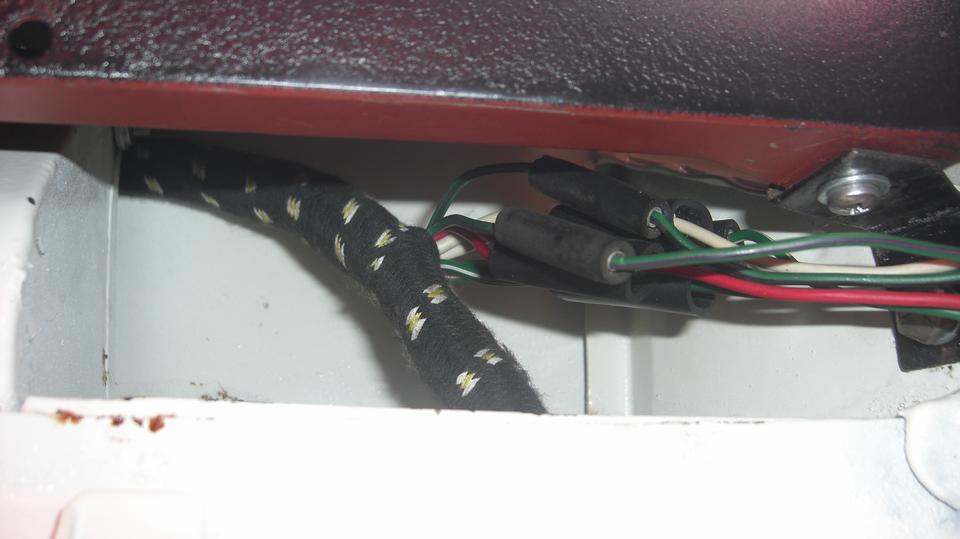
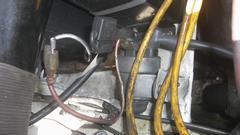
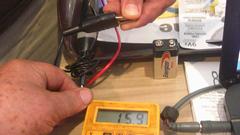
Meanwhile, check resistance of the sender unit signal, connecting ohm meter from Green/Black wire to body ground. 2.0-ohms. With full tank that should be close to 70-ohms. Maybe the sender is shorted to ground,
 and there is a little resistance in the signal wire (two faults in the same circuit, not likely). There is an in-line bullet connector between the main front harness and the side harness going to the rear. In the Midget those snap connectors are just behind the dash panel on far right. Pull out the Green/Black wire, and check resistance to body ground. 2.0-ohms. No problem here, put it back together.
That 2-ohm resistance will be at the fuel tank. We need to check the sender unit wire connection next. Waddaya mean, not today? The Midget sender unit is on top of the fuel tank, which is under the boot floor, so you have to remove the tank for access to the sender unit. We could drain the full fuel tank, but Darrell is short of time for today, so we will have to take this up again later. Maybe a good excuse to stick around a little longer before we blow town.
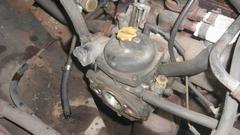
 There was one more issue we can check on today. That Midget 1500 that will start with a sniff of ether, but not keep running, and hasn't been driven for two years (must be a fuel problem). Disconnect fuel supply hose from carburetor, and put it in a catch can.
The Midget 1500 has a TR Spitfire engine with mechanical fuel pump, so it will take a bit of cranking to
 see if it pumps. Crank it on the starter for 10 seconds, no flow. Crank it another 10 seconds, not yet. About to give it a sniff of ether when it finally started to gush fuel, one sput for every four compression strokes, every second revolution of the engine. Peachy. Crank it some more, and count to 10. Check contents of the can, and multiply by 6. Yup, that looks like a pint per minute, and we likely just flushed any stale fuel out of the supply line. Reconnect the hose, give it another crank, and it started right up. Give it a smile and a pat on the butt for waking up after two years. Tomorrow it will get a warm-up run around the neighborhood before fine tuning, and then it can go home.
Thursday, October 12, 2023:
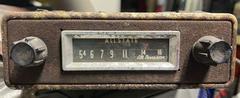 New tech page for accessory ALLSTATE radio, adding to an already long list of period correct accessory radios that were available back in the day. - Since radio transmission frequency bands were different in various parts of the world, the cars were commonly shipped without a radio. Then at pount of sale, a radio would be sourced locally to be installed by the dealer, or later by the owner.
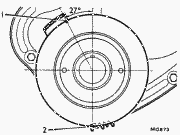
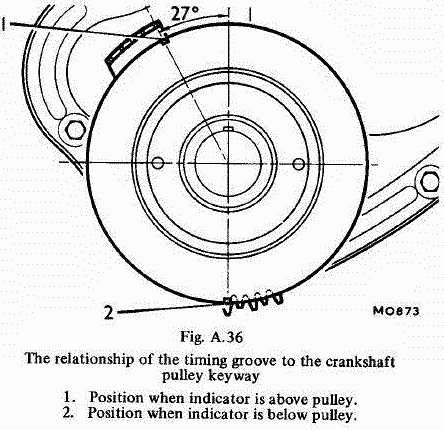
Updated a tech page for "Timing Marks For Crankshaft Pulleys to add an illustration of the timing marks location, bottom for MGA and early MGB, and top for later production MGB. This came up again because we keep calling the later marks at 10 o'clock when they are much closer to 11 o'clock. Whomever convinced BMC to move the timing marks up top should have been given a Million Pounds Sterling, or at least a gold watch and a promotion. I'm sure the world wide service techs would have taken up a collection to pay for it.
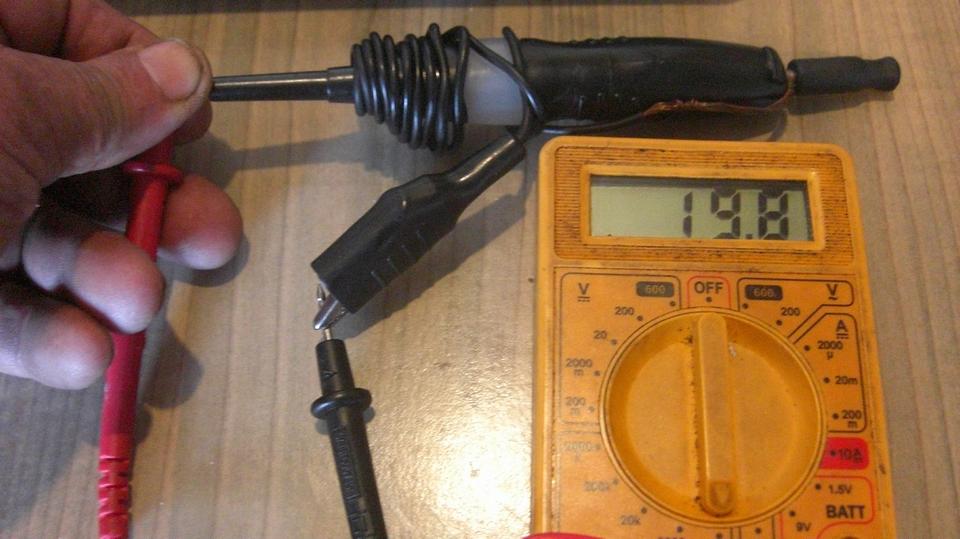
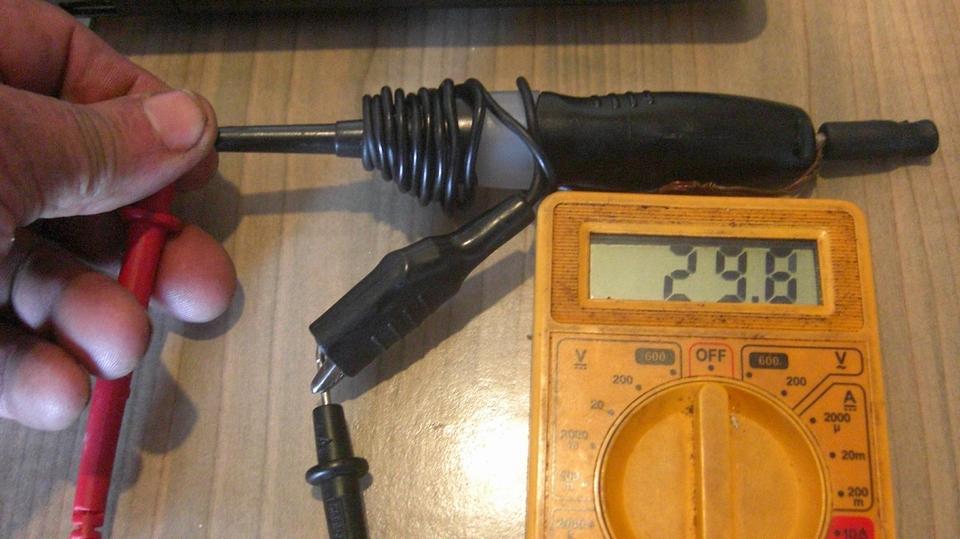
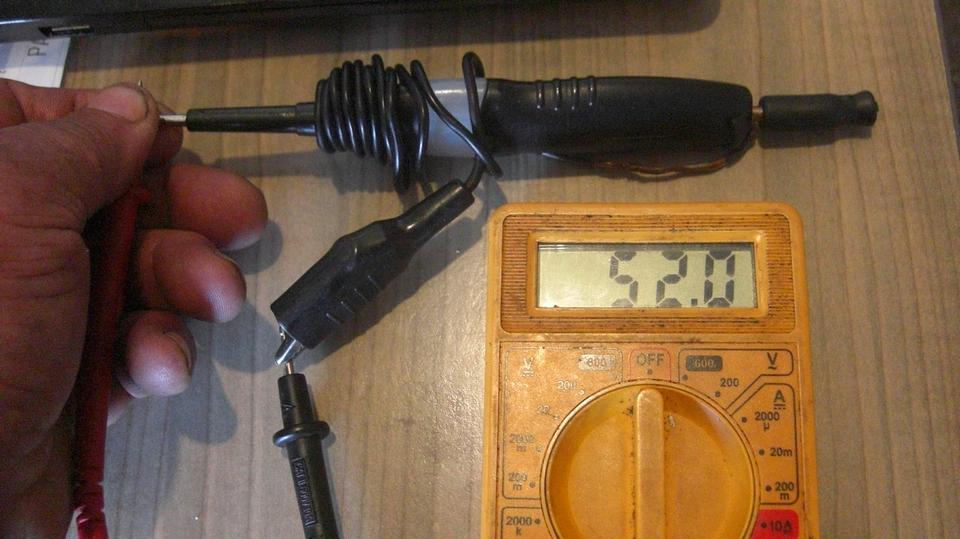
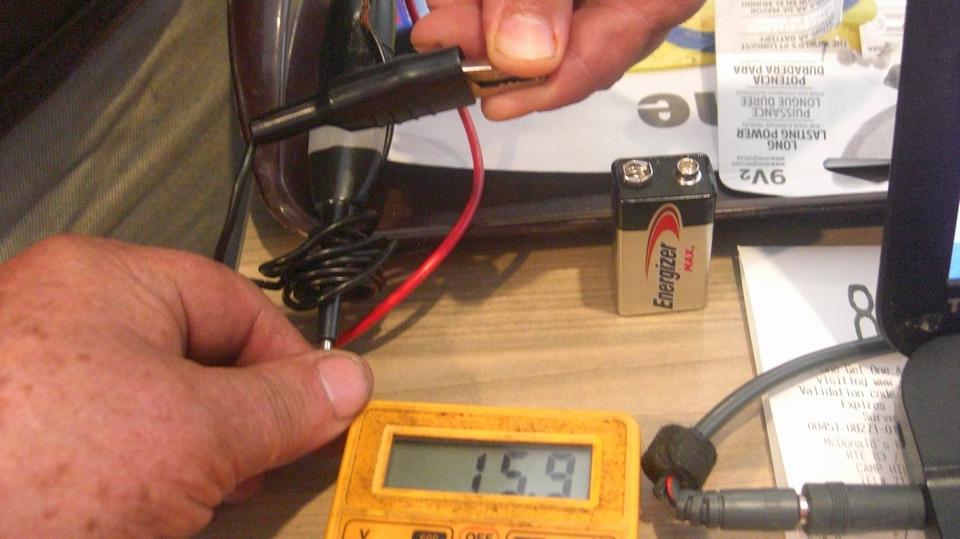
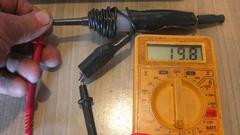
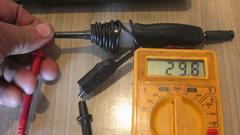
After Tuesday's fuel gauge tinkering session, I was curious about the resistance of my test light, if I was to use it as a signal resistance for testing the fuel gauge. The normal test signal device is a 68-ohm resistor (close to the 70-ohm max sender unit resistance). Two of those in parallel make a resistance of 34-ohms (half tank signal). So I connected an ohm meter across my test light. At first I thought it was reading too low, but then resistance was increasing with time, until it stabilized around 52 ohms. Maybe? That might be about 5/8 or 3/4 full signal. But then as you pass a current through an incandescent light bulb filament, resistance will increase as the filament warms up.
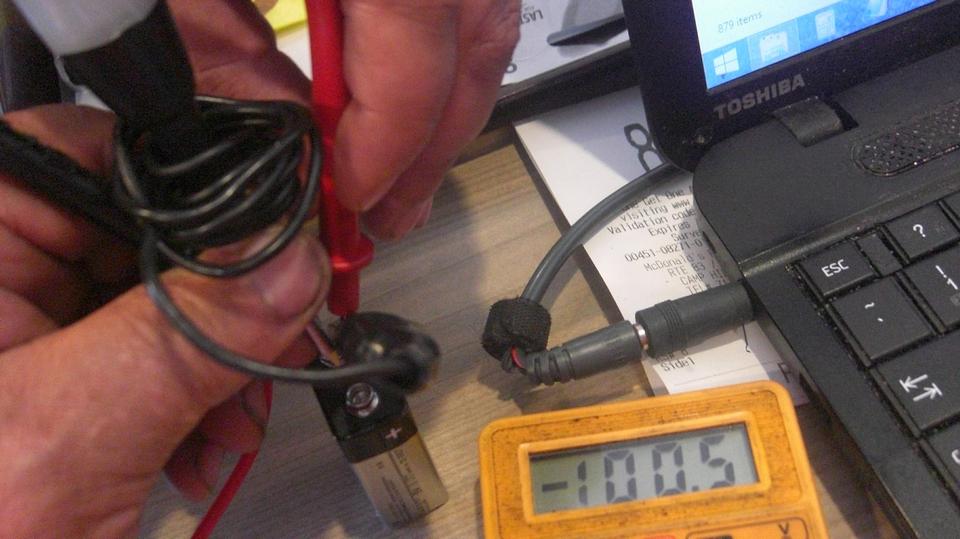
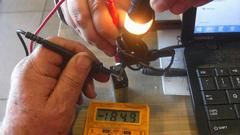
 Then I thought to try measuring the test light resistance with power on it and full heat. I recon I forgot some things from my high school Physics class, like you can't test resistance of anything if there is battery power across the test leads driving current through the ohm meter. The meter was just going wacky.

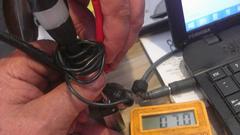
 One more try testing resistance of the test light, but the reading would still float a lot, not stable at all. So forget the tungsten filament, give it up as a lost cause, and go back to using cheap carbon resistors to test the fuel gauge.
On the web chatting about the late Todd Clarke parts inventory and tooling that went to British Miles in Pennsylvania. This stuff is needed in the MG community, but now seems to be stuck in indefinite limbo. We are all wondering how to get it back into circulation.
Friday, October 13, 2023:
Called British Miles in PA, left a message. Got a call back late evening, spent an hour on the phone chatting about status of the ex-Clarke Spares inventory and tooling, and what the future might hold for this stuff. I think we have an appointment to visit there some time next week.
Saturday, October 14, 2023:
Finishing photos and notes from Tuesday to date (above).
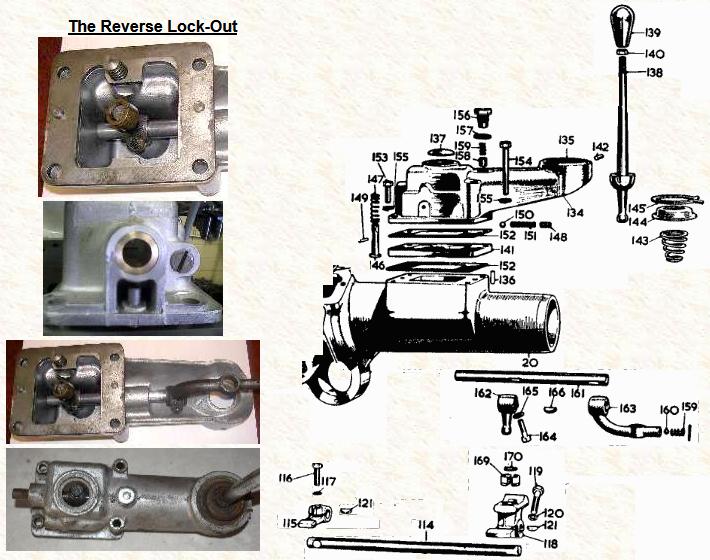
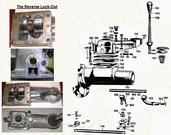
Spent time on a question on how the reverse gear shifter lockout works. Couldn't find my tech page on this item, so spent some tome typing the long answer. I was then going to post the new tech article Reverse Gear Lockout when I found it was already there. Oh well.
We only drove one mile late night, but the engine was flooding badly, had to be overflowing fuel. Will check it by daylight in the morning.
Sunday, October 15, 2023:
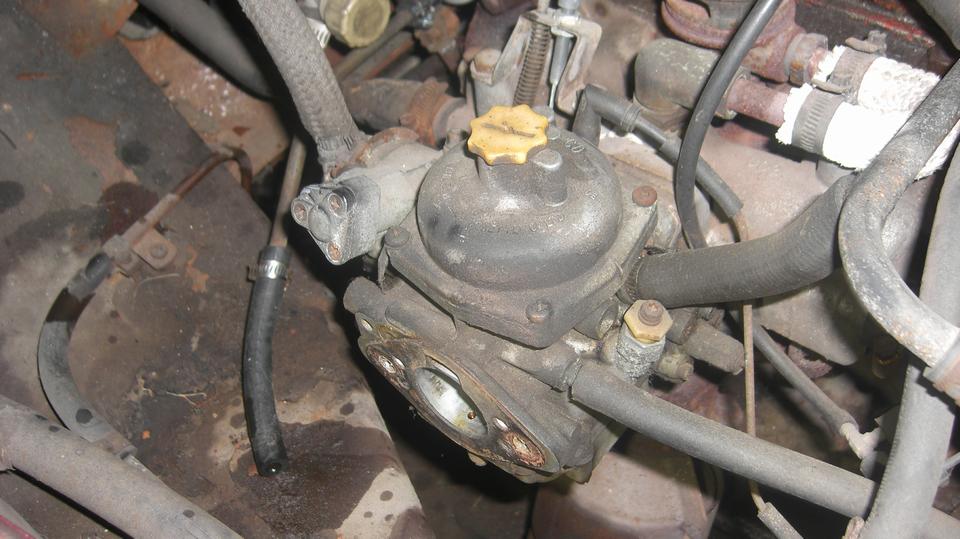
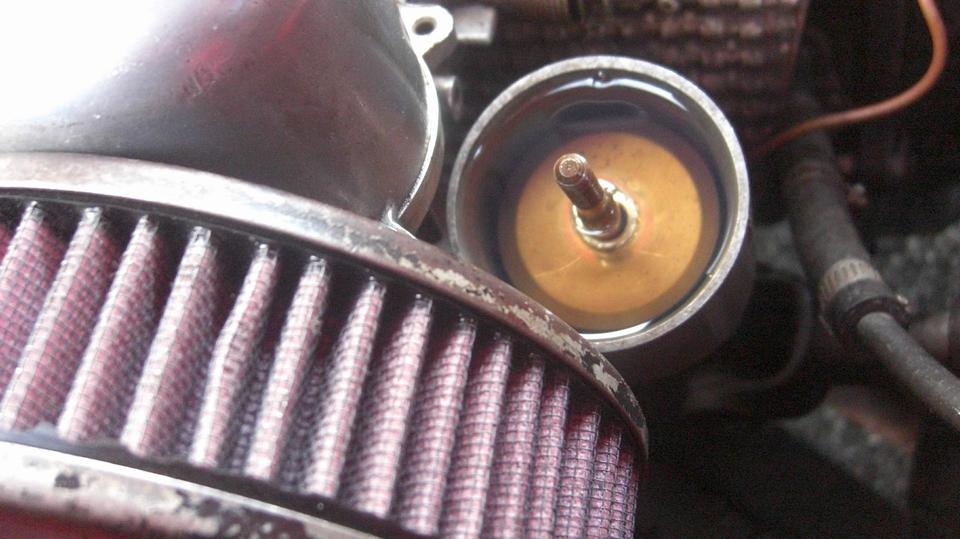
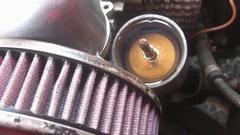
First thing, fix the carburetors before start up. Open bonnet and watch the carb overflow pipes. Switch on, pump fuel, see gusher out of the rear overflow pipe, switch off. Remove rear float cover to find the brass float sitting on bottom of the bowl. Curses for failing brass floats from Moss Motors. Two new ones were installed 5/19/23 at 13,810-mi. The front one sank 6/18/23 at 16,277-mi (failed 2,458mi, 30-days). The rear one now sank 10/15/23 at 20,479-mi (failed 6,669-mi, 5-mo). Note to self, 100% failure of Moss OEM style brass floats, buy no more. Install one new plastic float,keep 2nd plastic float for spare, hoping the good used brass float in the front carb will last a few more decades. Fire it up and drive away.

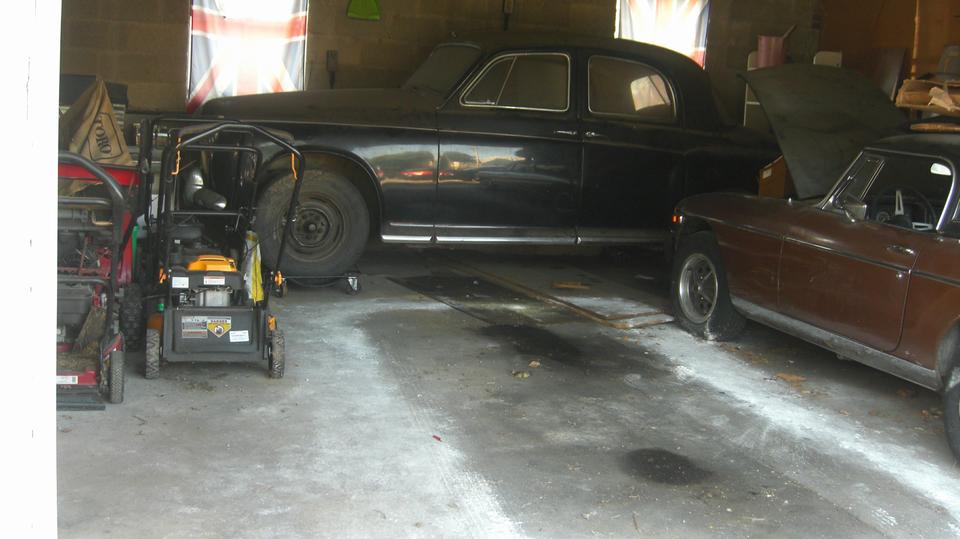
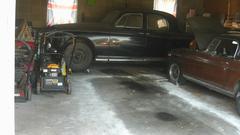
Nice vintage Rolls Royce in the car park today.


 A few phone calls today. More chat about the ex-Todd Clarke parts and tools.
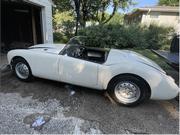
A new friend in Lee's Summit, Missouri with an MGA 1600-MK-II, been in the family forever, now beginning restoration. Got some pictures, very nice car, maybe doesn't need restoration, but he wants to make it new again anyway.
Have an appointment to visit a new friend in New Hope, PA come Wednesday.
|