The MGA With An Attitude
MGA Guru Is GOING MOBILE - (November 1 - November 15, 2022)
Tuesday, November 1, 2022:
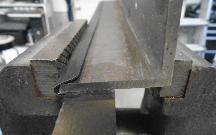

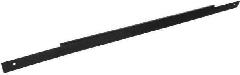
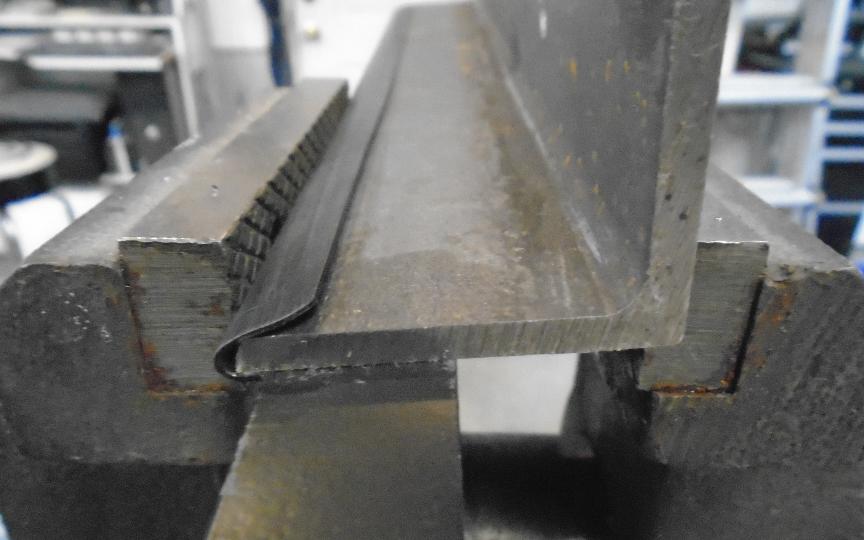
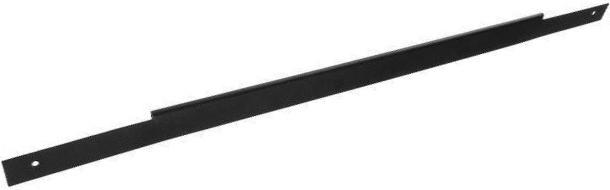
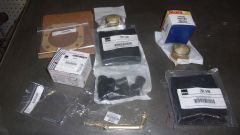
Received notice of a continuing Faulty Part from Moss Motors. This is the steel stiffening bar for the door interior trim panel (at bottom of the door pocket opening). The space inside of the fold-over edge is too narrow, making it impossible to install. The only way to use this part is with a tricky rework to open up the gap and re-form the part, followed by repainting.
Moss was notified of this problem in February 2019, but has not fixed it and is continuing to sell the known faulty part with no notice that it would need to be reworked before installation. Some of these parts may be purchased but not installed for some time, after which Moss will refuse to accept returns or credit after their warranty period has expired (which is exactly what happened when this one was reported). If any of these parts are returned, I suspect they go back into inventory to be sold to the next unsuspecting customer. Sounds like a scam business practice to me, intending to sell off inventory so they don't have to throw out the faulty parts.
My parts order placed with Moss Motors late last night, was expecting to get packed and shipped today, but not holding by breath while waiting. So far all I got was an automated "Thank you for your order" note.
Wednesday, November 2, 2022:
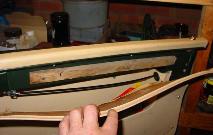
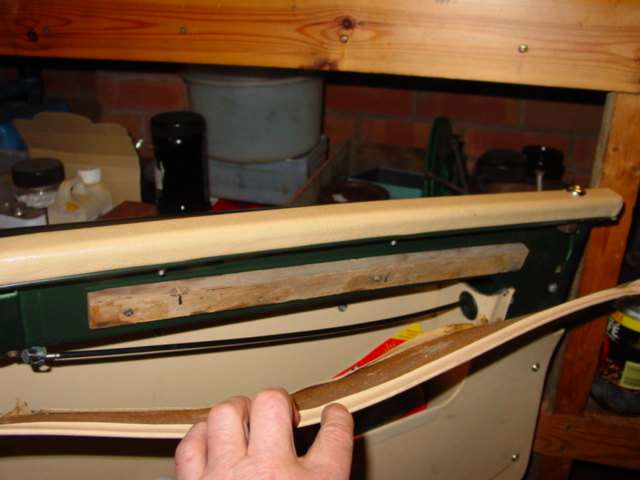
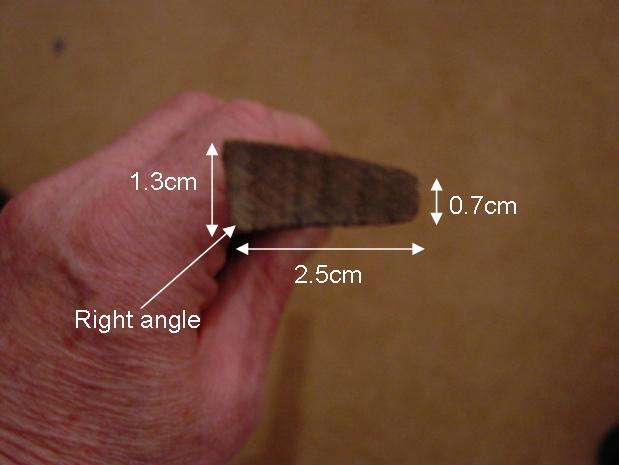
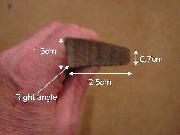 Another Faulty Part report, this time for the wood batten fitting behind the MGA door l panel. This wood piece is supposed to be tapered, 1/2-inch thick at the top edge to 1/4-in thick at the bottom edge. Current issue part is flat and only 1/4-inch thick. Moss Motors has been notified of this problem, now to wait to see what they may do about it.
My parts order must have been shipped (typically happens late evening), because my bank account was debited for the charges (still waiting for verification).
Thursday, November 3, 2022:
Found a problem with the NAMGAR web page for membership renewal. Wanting to put in my membership number and make the payment, but was required to re-type all my personal information into blank spaces. The page should retrieve my member information from their prior stored data, only needing one click to verify, but it doesn't. I notified NAMGAR, and was informed that it used to work, but now more recently does not. I did manage to pay my dues for renewal, just hope they can get it fixed to avoid inconveniencing thousands more people in the future.
Friday, November 4, 2022:
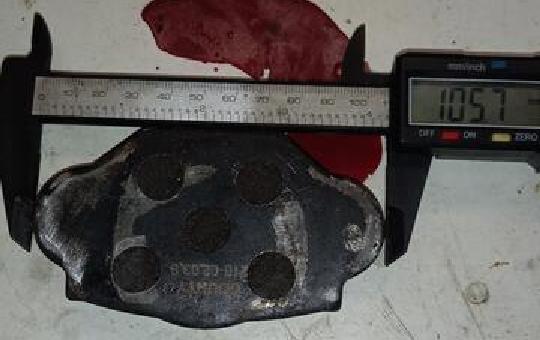
 Posted a new tech page for replacement disc brake pads that are too short so they move out of place and rattle, and cause their retainer spring clips and locking pins to fall out. This will be a challenge to get people to report which manufacturers and distributors have the faulty parts.
Good news, my parts order has arrived. Too late today to install a tonneau cover. Club meeting tomorrow morning.
Saturday, November 5, 2022:
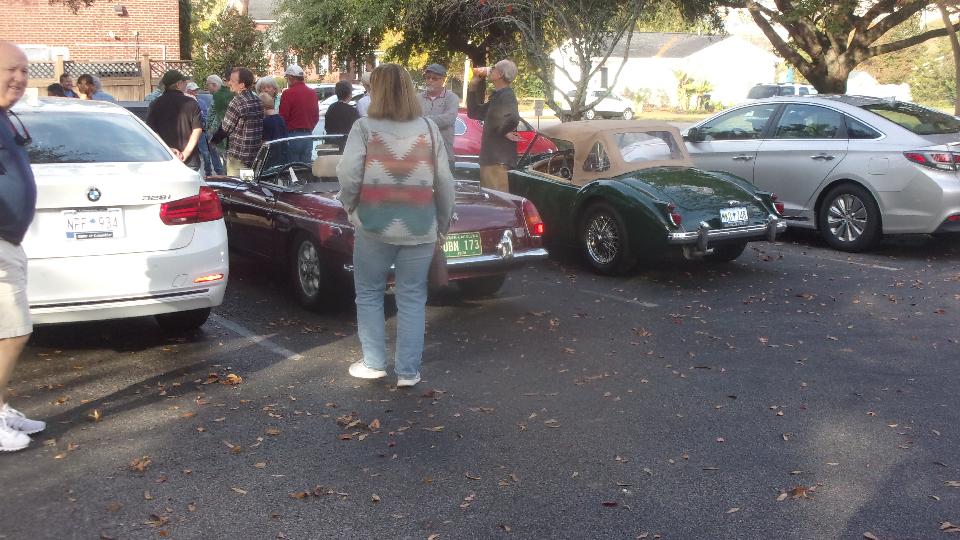
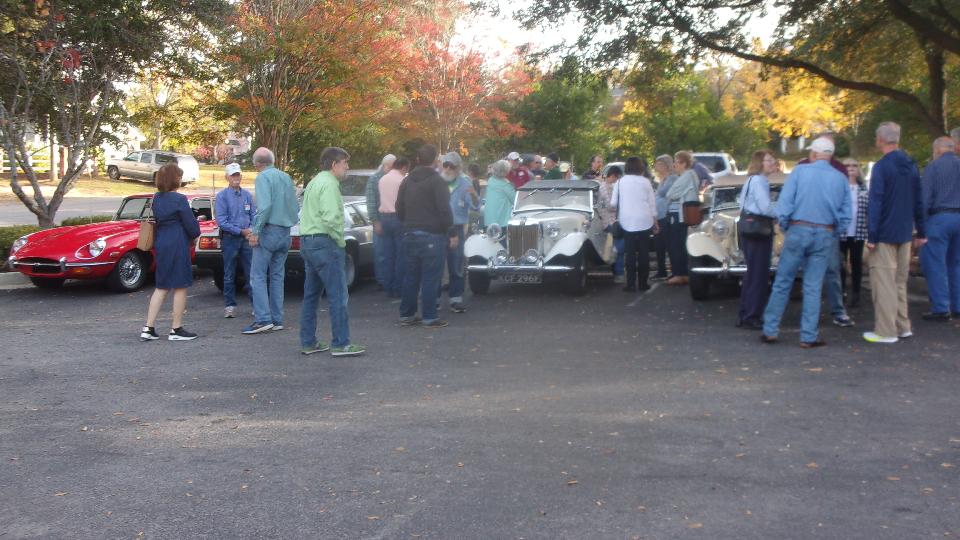
Club meeting today with British Car Club Midlands Centre, meeting at DiPrato's Deli in Columbia, SC. Been here before with this club in 2014 and 2016, each time at a different location. 9:30-am tire kicking session. Half hour later I'm sure there were several more little British cars present.

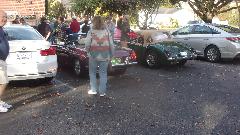

 Trickling inside at 10:00-am for brunch and a casual club meeting. I counted at least 50 chairs, and pretty sure they were all full. we have been hanging out in the Columbia area quite a lot in recent years, so we know a lot of these people already. Last club meeting was six years ago, so we were re-introduced to some more people. Good they didn't ask me to do the pony show this time.
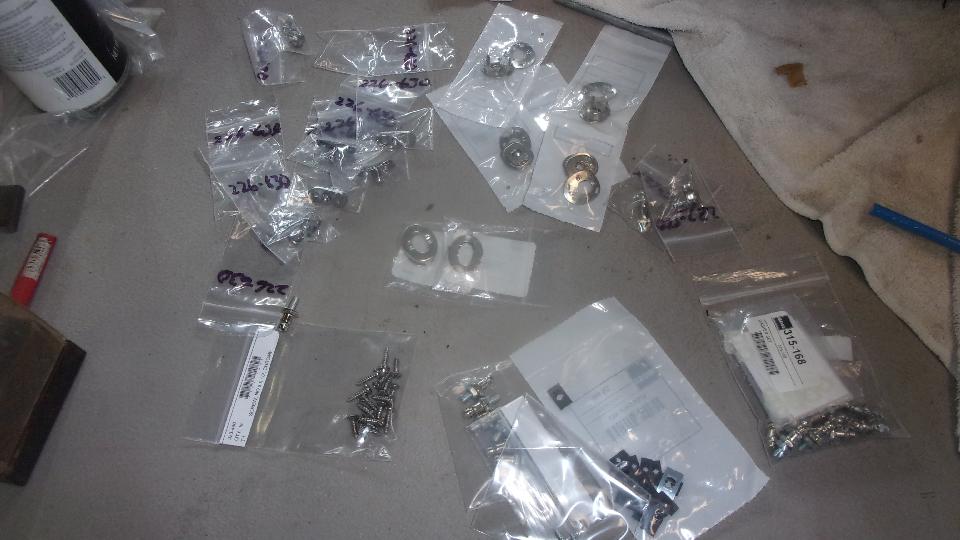
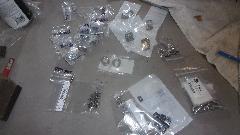
Bailing out around mid day we headed to Tim Melton's place in Gilbert, SC. My Moss parts order was dropped here, so we spent half an hour counting parts and stashing a lot of little bits in the Magic Trailer. Two missing items (cheap bits not very urgent), and one extra item I could not immediately identify. It turned out to be a fuel pump bracket for a big Healey, a $47 part, so I suppose we need to send that one back.
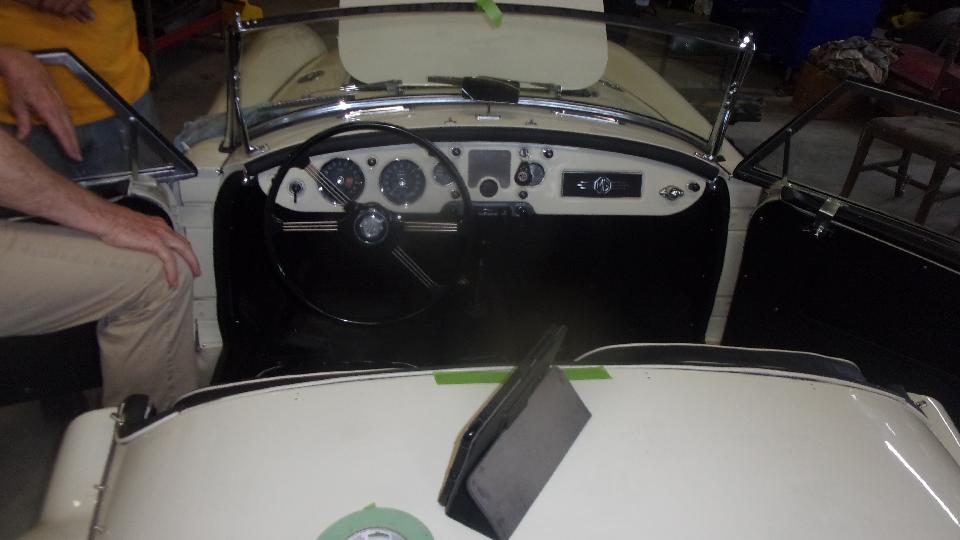
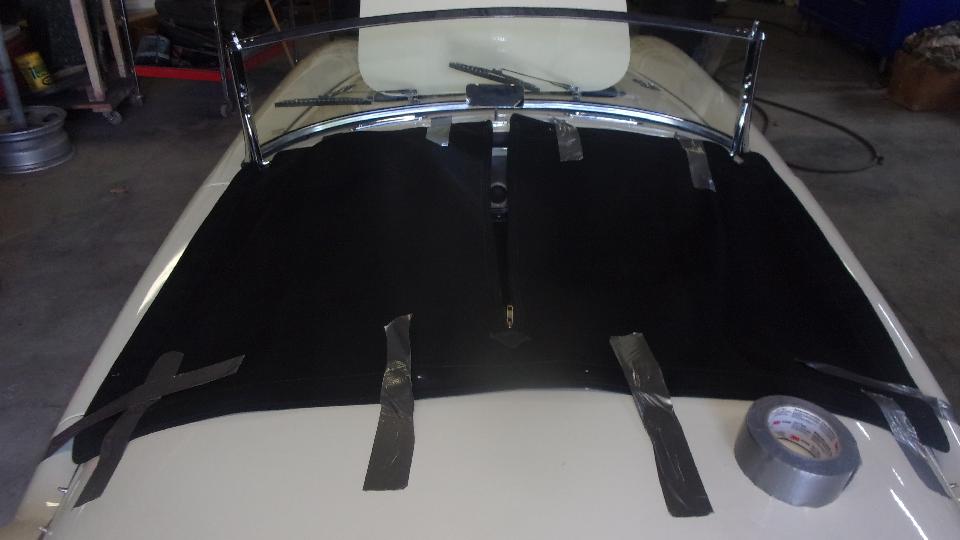
Then on to the real task for the day, installing a tonneau cover on the white MGA. All of the preexisting LTD studs were wood screw studs that were installed in the body tonneau like as if they were sheet meta screws, and they were all worked loose as wobbly studs and slightly distorted sheet metal. Boo, hiss. Each of the six rear stud locations had two small holes, like the studs had been relocated at least once, and none of those holes were in the right locations. In four places we used one of the existing holes, drilling them out to accept the #10 machine screw studs. For the two outboard locations we had to drill new holes. That left half a dozen very small holes just forward of the studs, very close to the rear cockpit rail, that will be wanting small hole plugs later.

The front tonneau studs were likewise wood screw studs that had to go. Solution was easier here, tap down any raised metal around the holes, the install new flanged studs with two new chrome grommet head sheet metal screws, covering over the earlier holes. Things will be much neater up front. The two outboard studs were easy free access, so a good place to start and practice. Think small and start with a 5/64-inch drill bit, which was too small and could not get the screw installed. Switch to 3/32-inch drill bit, which was just perfect for the #6 sheet metal screws. Not long then to install the two front outboard studs.

The four front inboard studs are under the windscreen glass, and we couldn't get a power drill in there. Also likely very difficult to drive in the sheet metal tapping screws in that area, so we may ultimately have to bite the bullet and remove the windscreen assembly for access. For now, put the toys away and quit for the night, as Dave has an important social appointment, and the rest of us seem to have sore feet. Dave left his green MGA in the barn and drove the white MGA away, as it has an appointment for more work in another location tomorrow. We'll get back to the tonneau cover installation later.
Sunday, November 6, 2022:
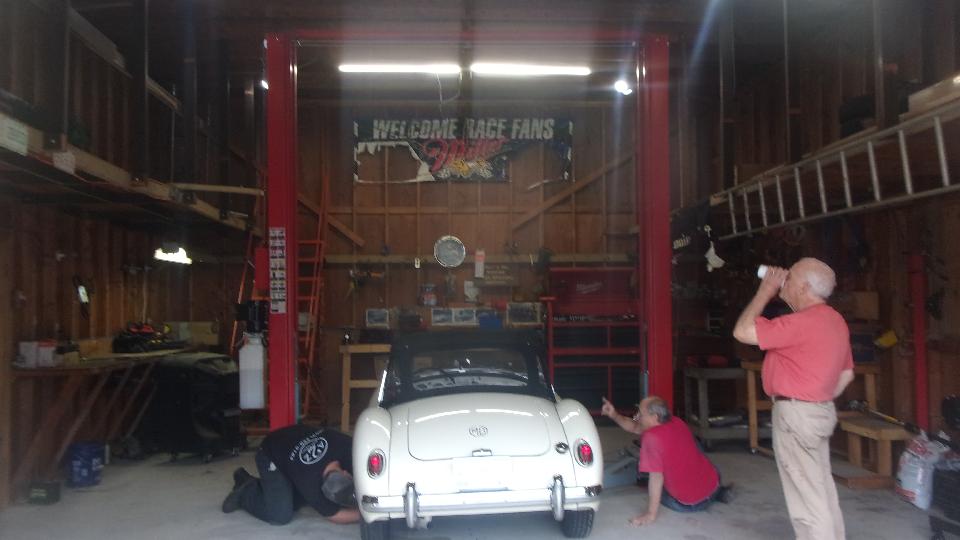
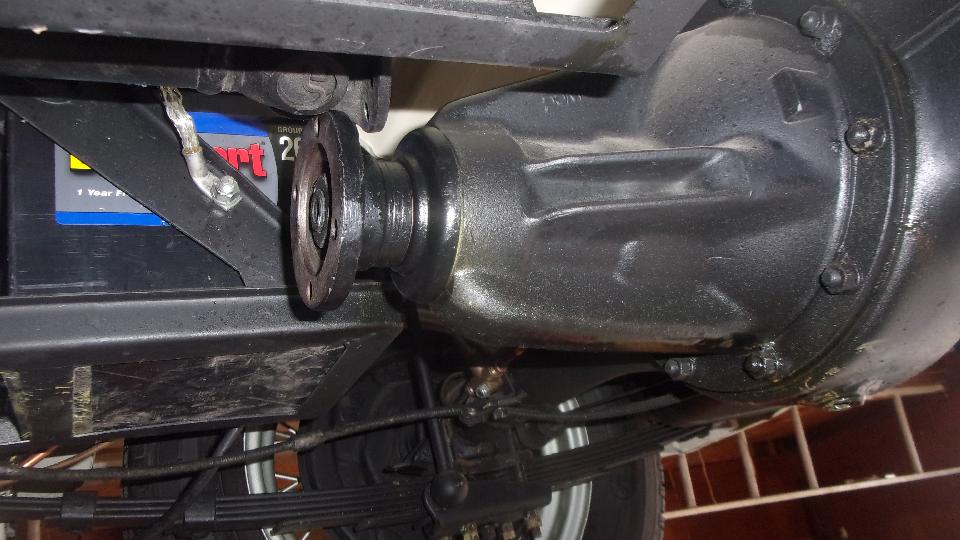
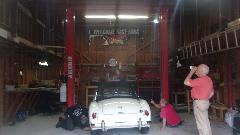
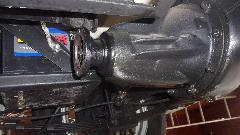
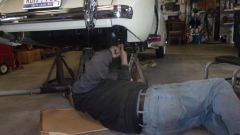
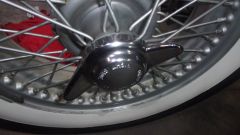
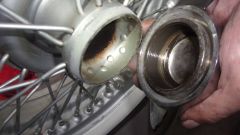
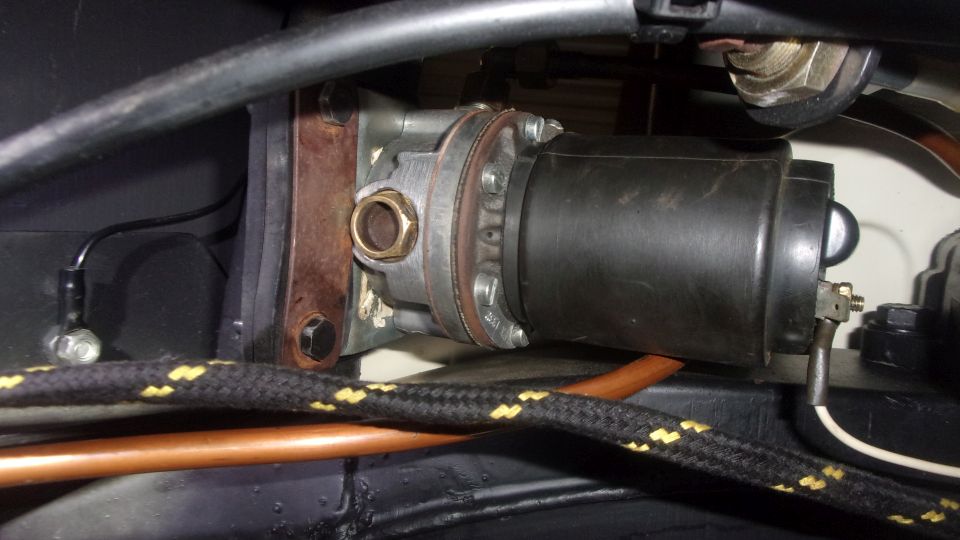
Today we got the white MGA over to Kevin Honeycutt in West Columbia, SC, because he has a lift we can use for under car work. First business was to change the leaky oil seal at front of the differential. We also swapped in a different front flange with a Speedy-Sleeve already installed.

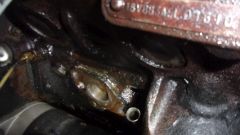
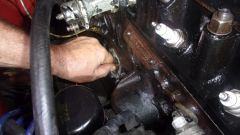
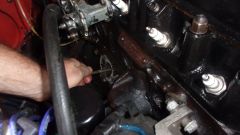
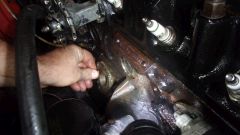
Then we took a shot at stopping an oil leak on left side of the engine, most likely leaky tappet cover gaskets. A
 long 1/2-inch wrench can reach the bolt for the rear tappet cover, if you're a bit of a contortionist. The front tappet cover is not so easy, so you also have to be a masochist to tighten that one. With enough persistence, both bolts were snugged up a couple of turns.
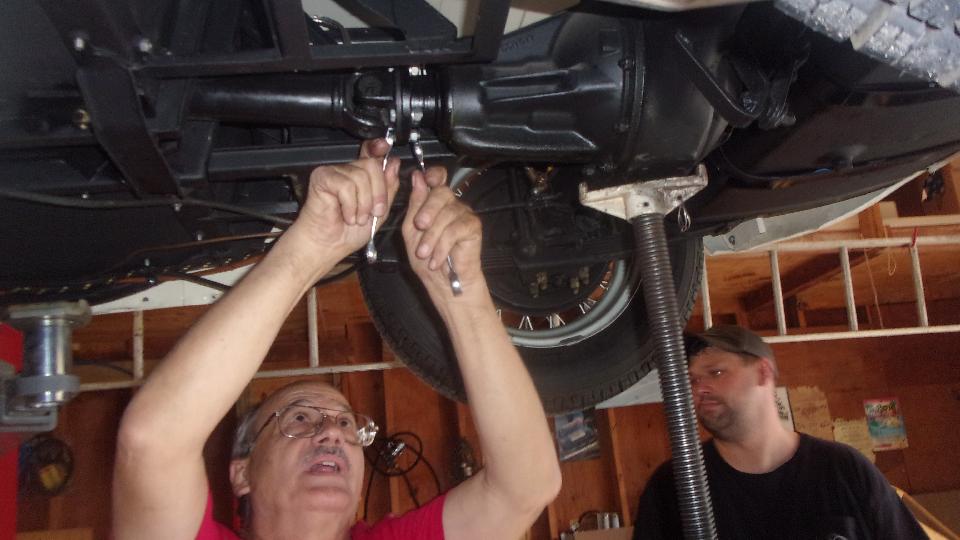
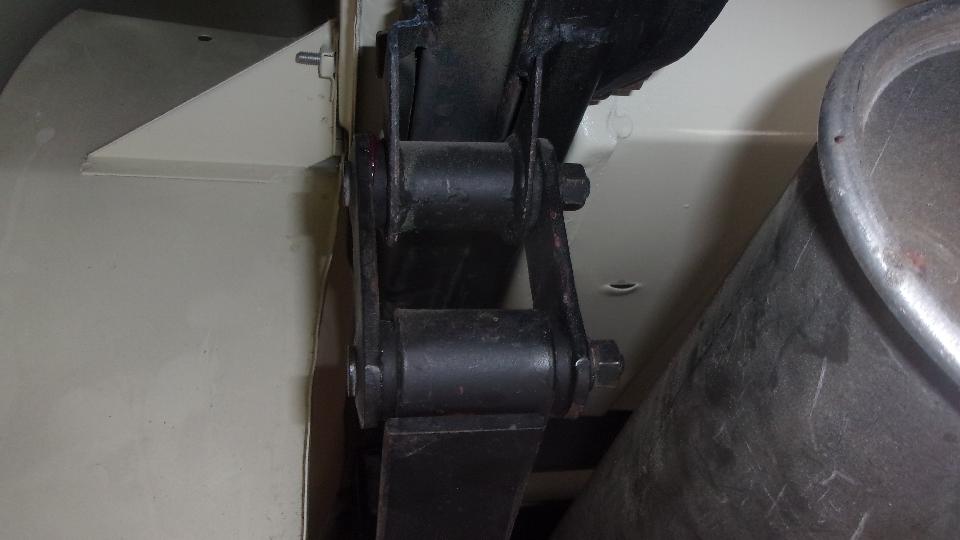
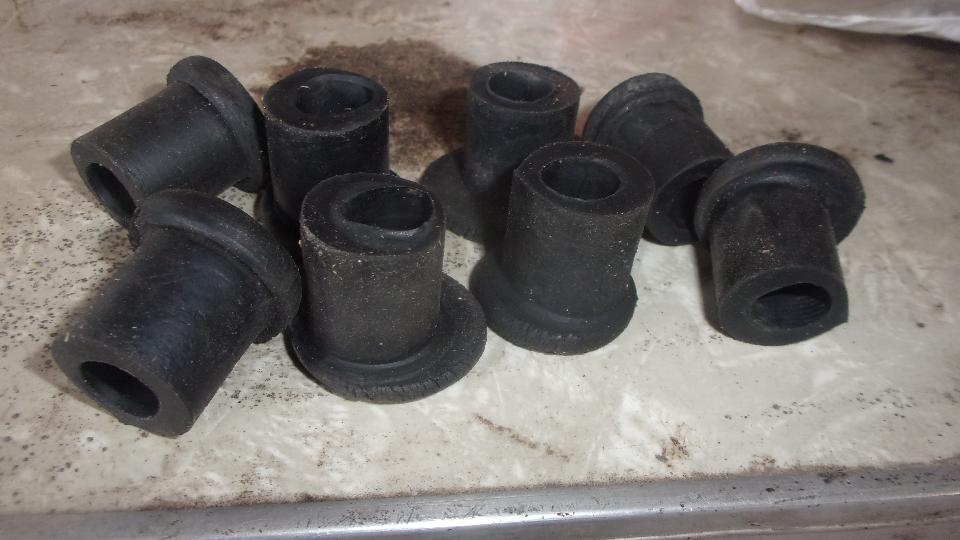
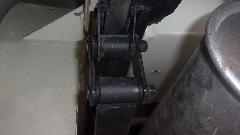
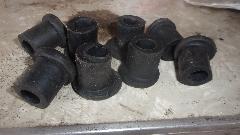
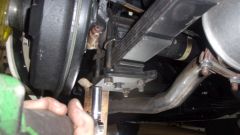
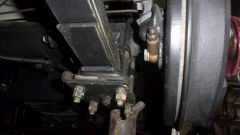
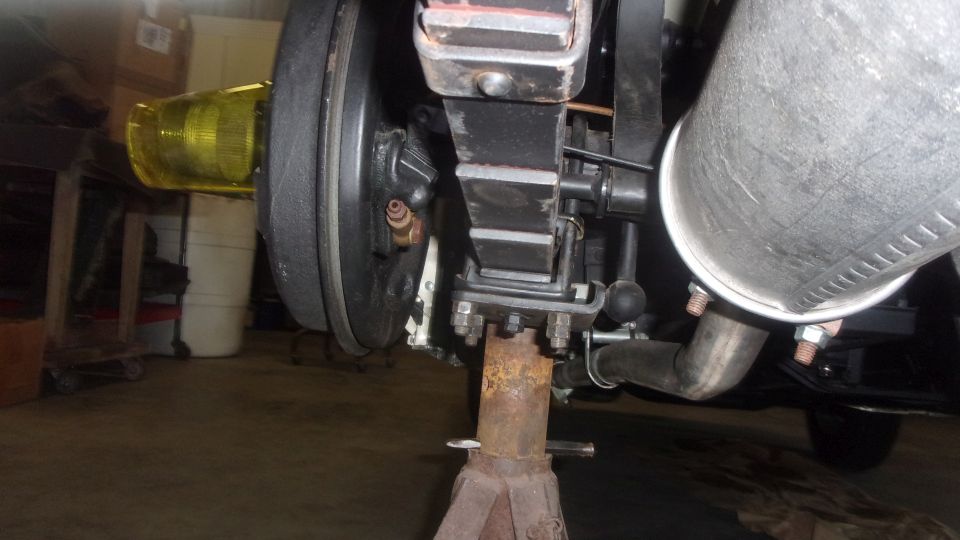
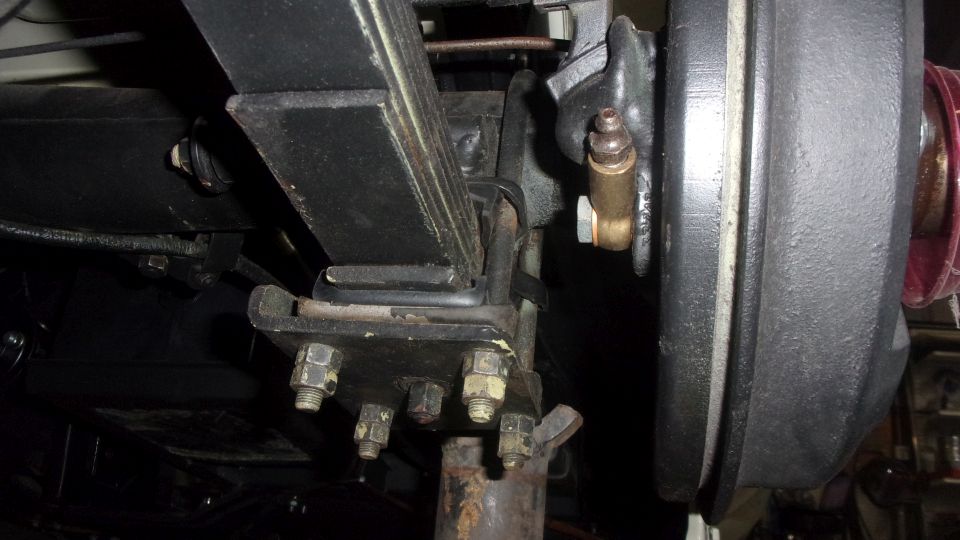
The leaf spring rear shackle rubber bushings were significantly squashed and deteriorated after 30 years, even though the car was not driven until just recently. Not such a big job here, with the help of a long pry bar, new bushings (from the Magic Trailer) were installed in short order. The old ones may be a good chuckle.
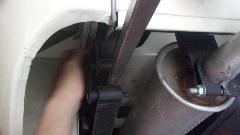
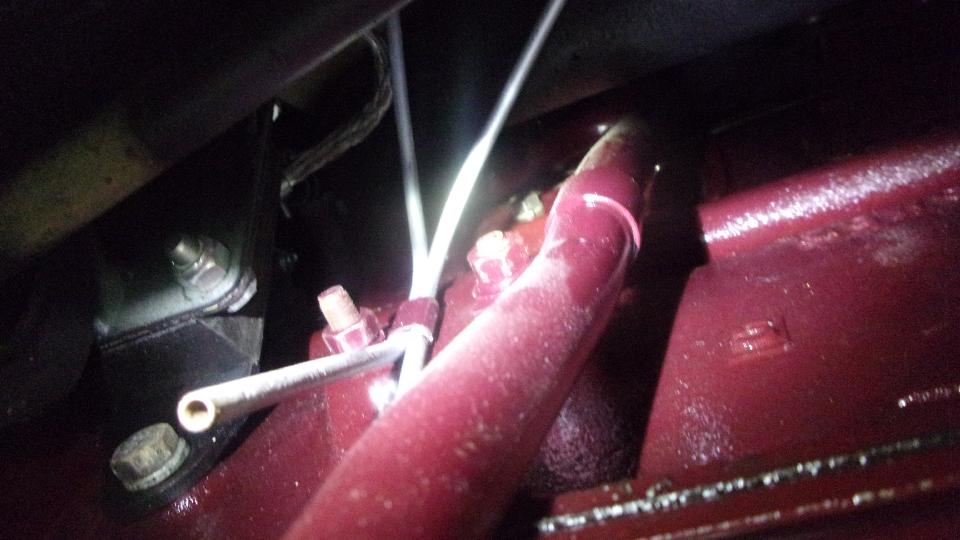
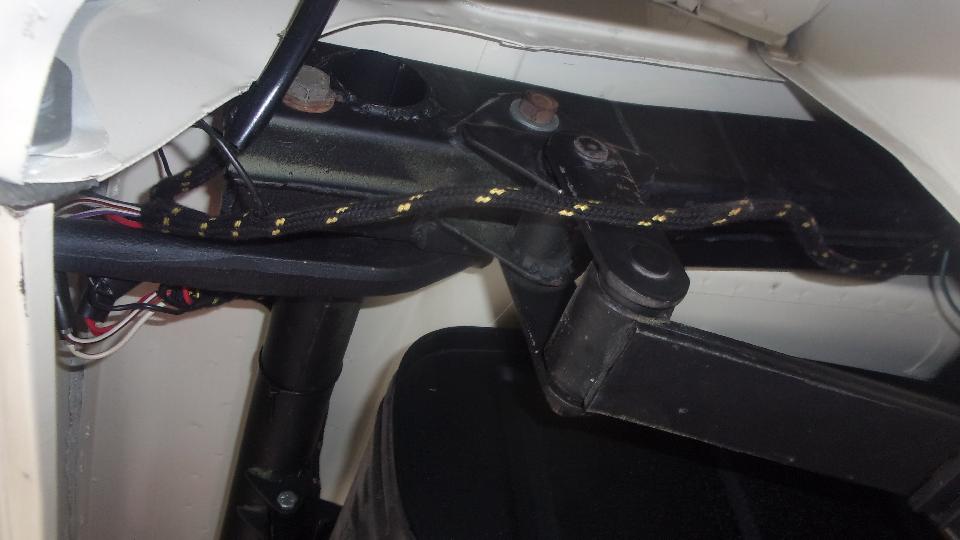
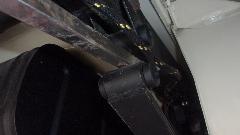
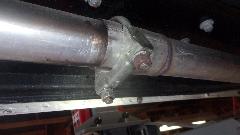
Working on the right side we found the side wiring harness had been run through the spring shackle (sure to be molested). After replacing bushings and reassembly, the harness was outside the shackle, but still in precarious position for wear. Final solution was simple enough, unplug some snap connectors and re-route the harness in the proper place over the fixed frame tube above the shackle.
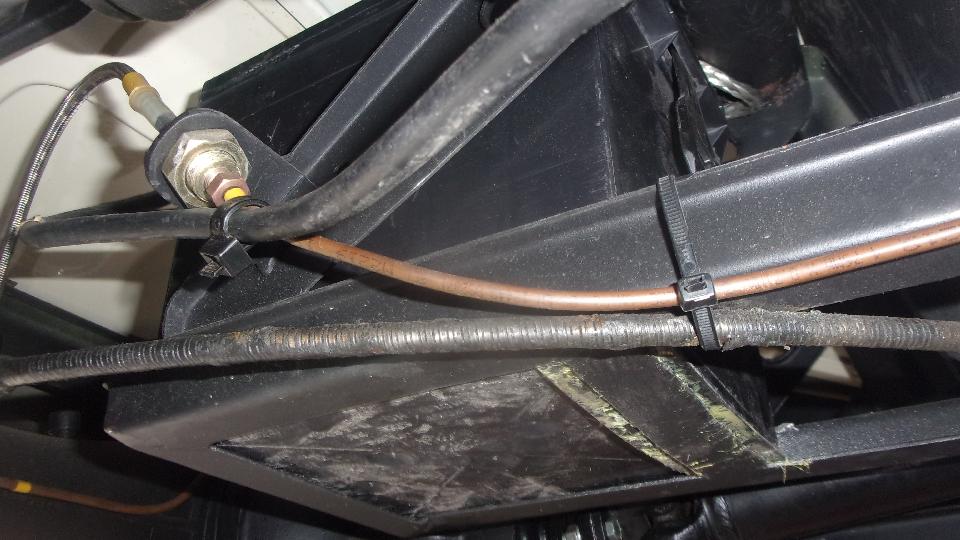
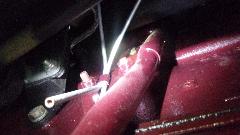
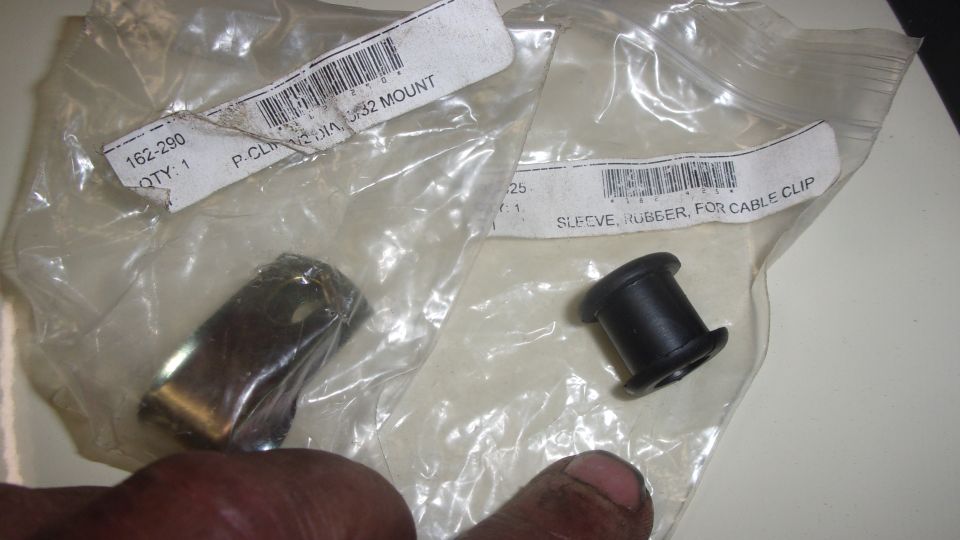
More minor fixes. It was missing two P-clips under the right side battery carrier (and related fasteners). Parts not
 immediately available, put those on the to-buy list and secure the parking brake cable and brake pipe with a tie-wrap. We also reduced an exhaust leak somewhat by tightening a pipe clamp, but it still leaks a little, so will weld the joint later (and toss out the clamp). A few people with afternoon obligations, so knock off by noon and look for a WiFi spot to catch up web site business.
 Posted a few new Part Numbers tech pages for Outer Drive Casings for the cable driven MGA screenwiper drive. That was long overdue, but current BBS discussion brought it forward some incentive to get it done. Spent the rest of the day catching up photos and notes and updating the inventory list for new parts received and which parts were used. Did not get to the club newsletter. Sometimes it's good to be busy.
Monday, November 7, 2022:
 Back to Tim Melton's place in Gilbert, SC. Primary task today would be to finish installing the new tonneau cover on the white MGA. Four flanged LTD studs were not installed up front on Saturday, because it was late and the windscreen glass was in the way of drilling holes for the tapping screws. Got a solution for that. Yesterday we borrowed a right angle drill from Kevin Honeycutt, which made short work the holes in the restricted space. The short grommet head sheet metal screws were installed using a stubby Phillips screwdriver.
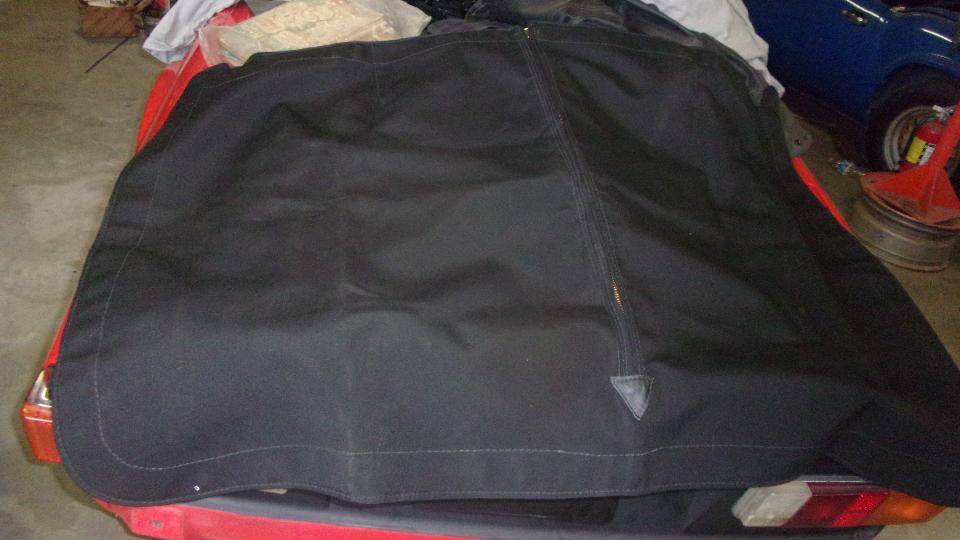
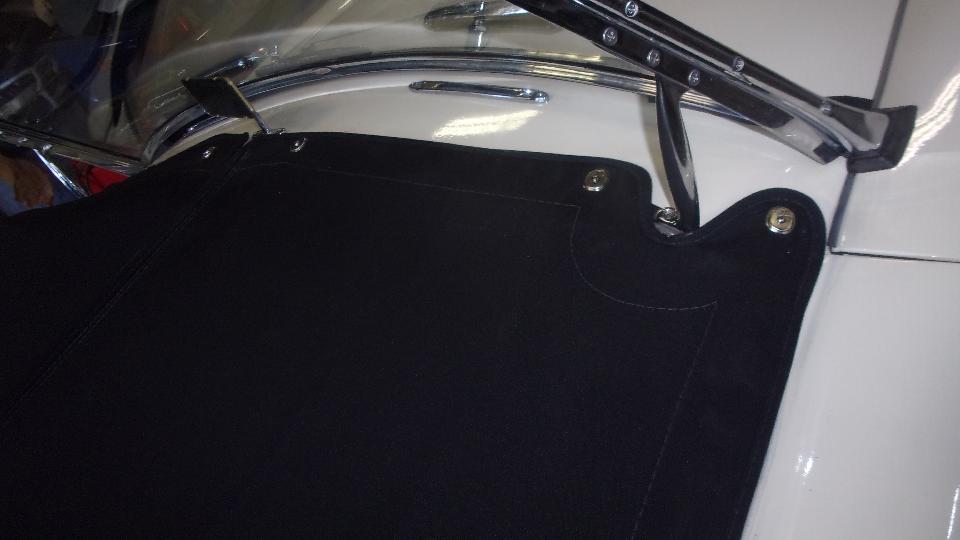
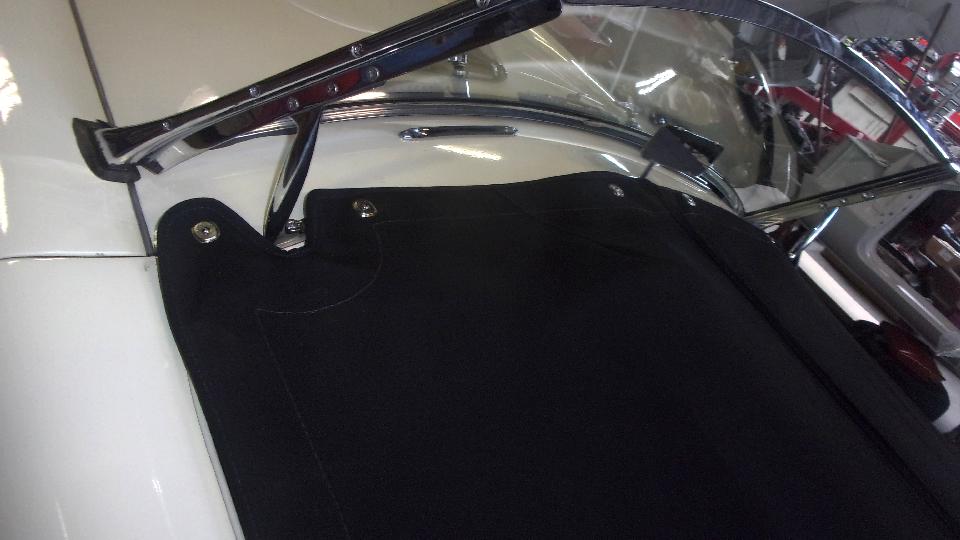
 With all the body based fasteners in place it was time to place and center the tonneau cover. When equally aligned on both sides, for some strange reason the zipper ended up dead center, which seems to be very odd. I have found it more common for the zipper to be a half inch or more off center to the right (for a left hand drive car). That may be to give the driver a tad more shoulder room when driving with half of the cover still up (but not in this case).
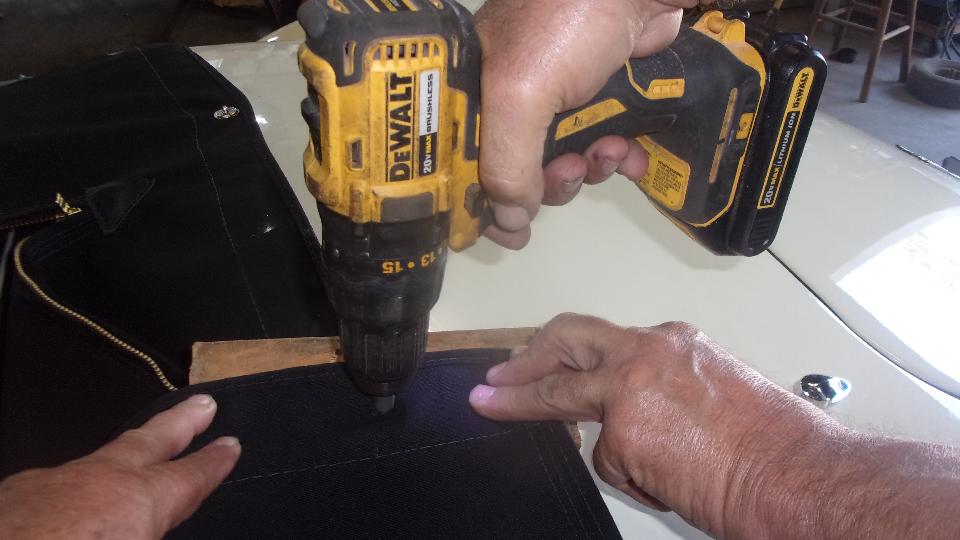
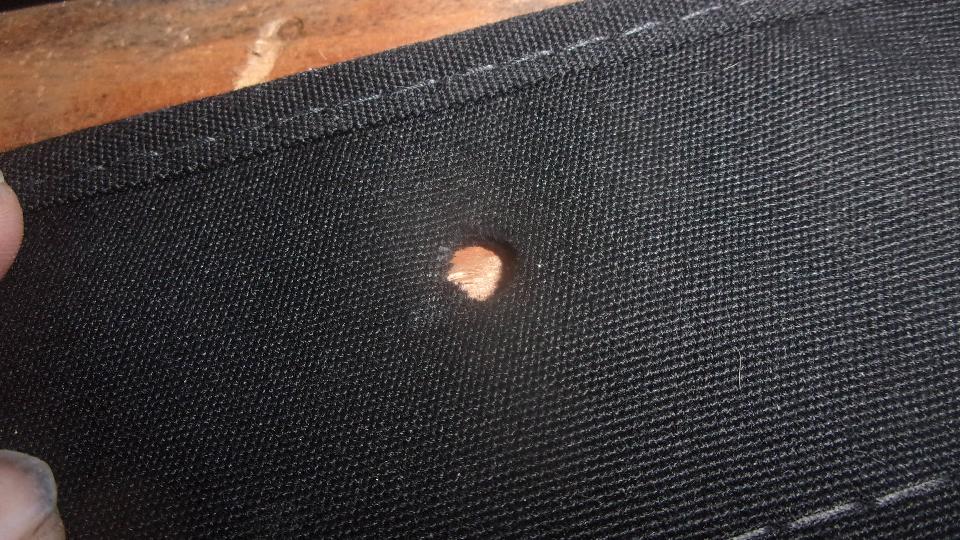
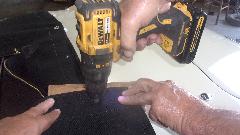
Tim had a nice set of dinking dies (sharp edge round hole punches). Put the fabric on a block of wood with the cutter on top, and hit it with a hammer ("dink") to punch the hole. I think the Pine 2x4 were were using may have been too soft, making a doughnut impression without cutting all the way through the fabric. But Tim had a slicker way of doing it. The 5/16-inch hole punch fit nicely in the chuck of a power drill, and it took only a second of trigger time to slice nicely through multiple layers of canvas.
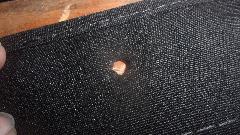
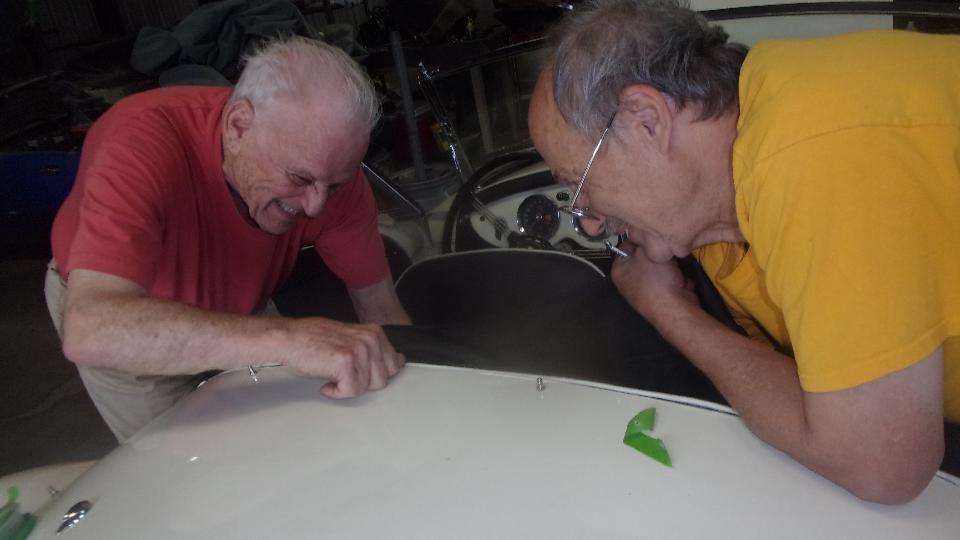
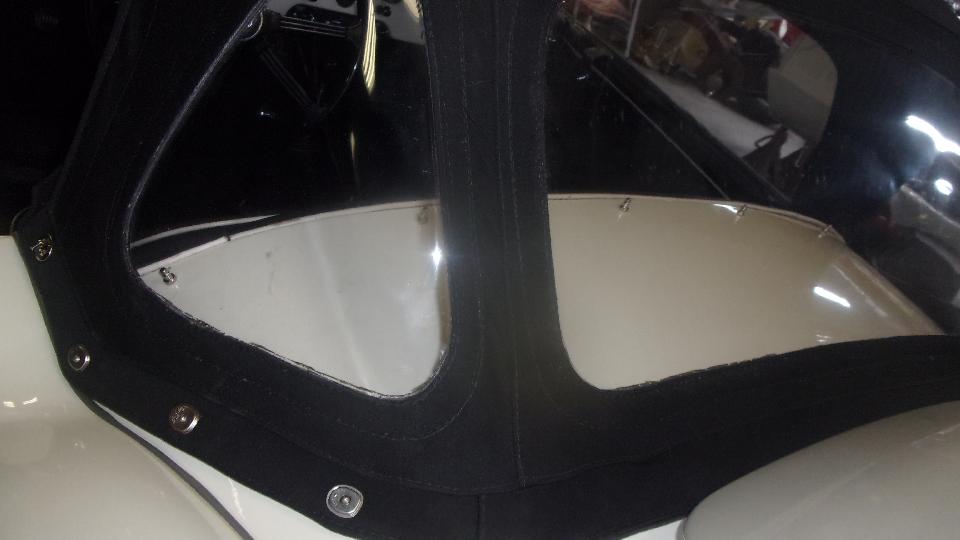
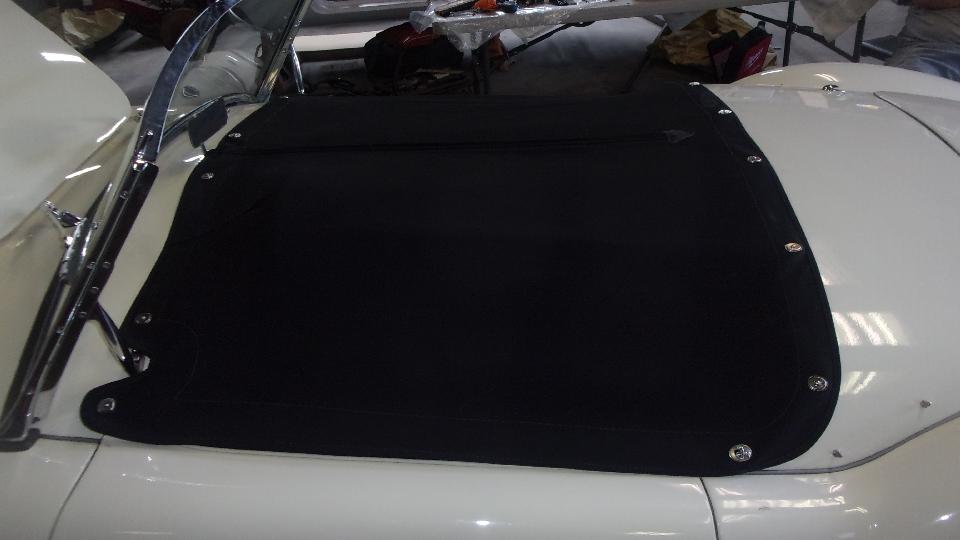
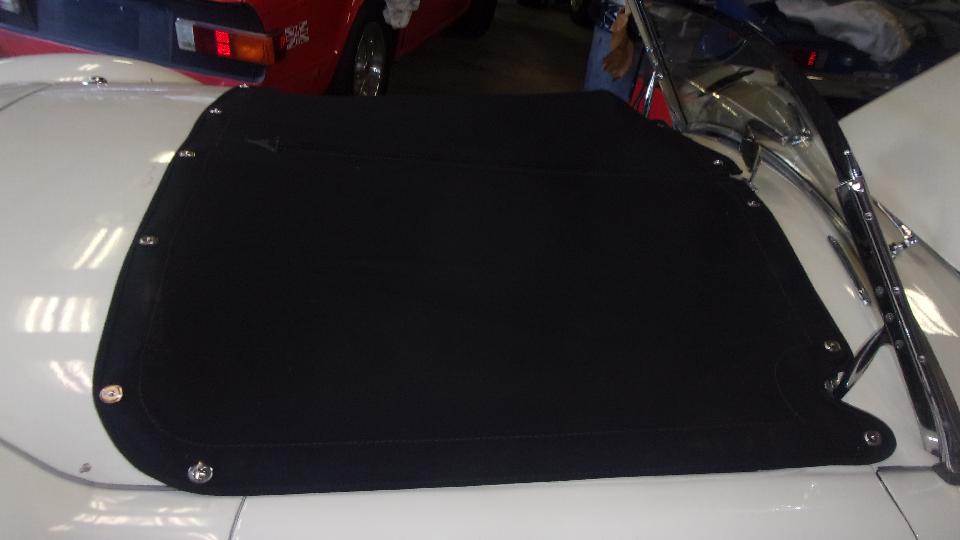
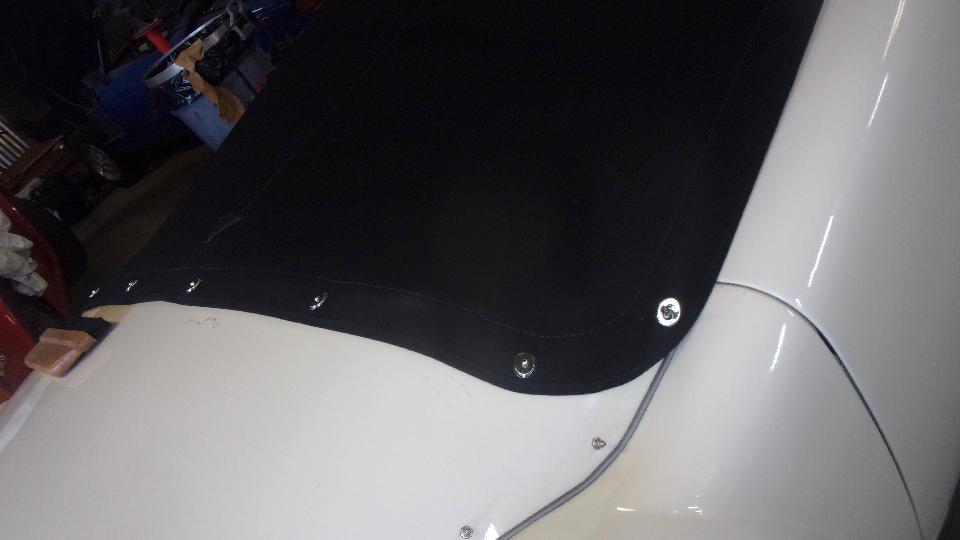
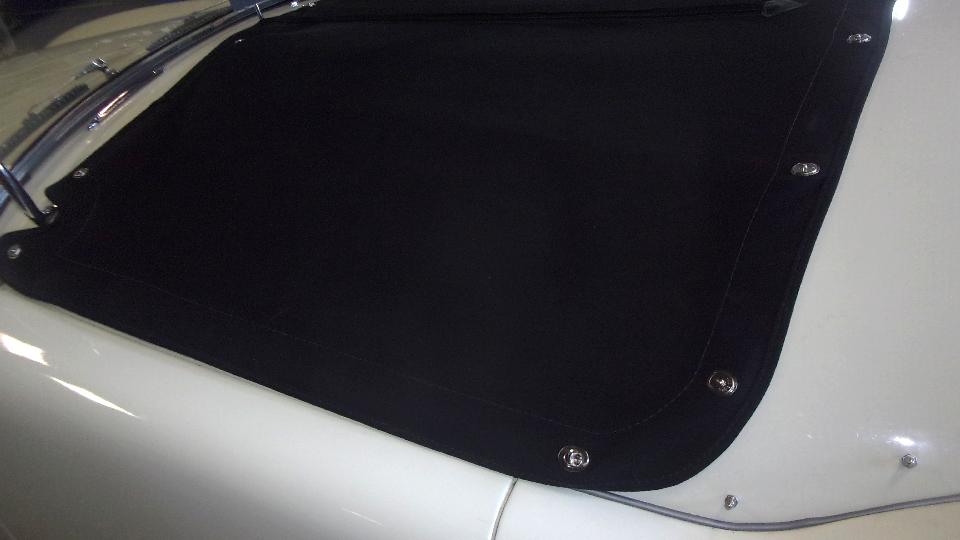
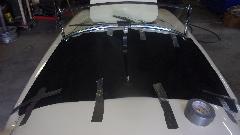
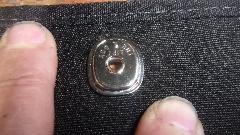
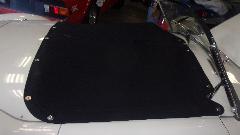
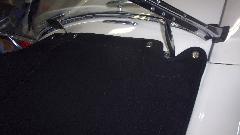
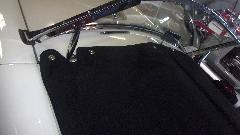
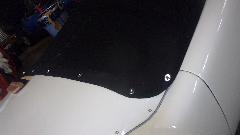
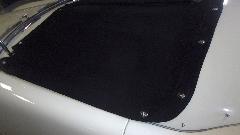
There is the first Lift The Dot fastener installed, and the rest followed suit. Front and rear center fasteners first, centering and stretching the fabric. Once those four we latched down, the rest were easy. One side front, back, front, back, stretching each in turn to assure no droops or puckers in the fabric. Then on the other side in similar fashion. The outer rear turn button and outer front stud were left to last, pulling both corners at the same time to get good alignment and stretch to get the fabric to pull up and lie straight on the door top cockpit trim rail.
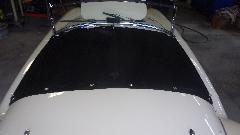
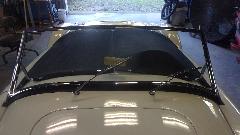
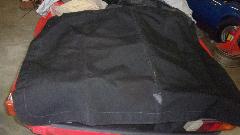
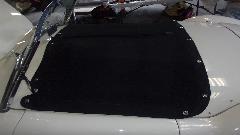
MGA tonneau covers usually come out well with nice crown for good water drainage. But this one was exceptionally nice fit. With that much work, and this sweet fit, I was certainly going to take some pictures.
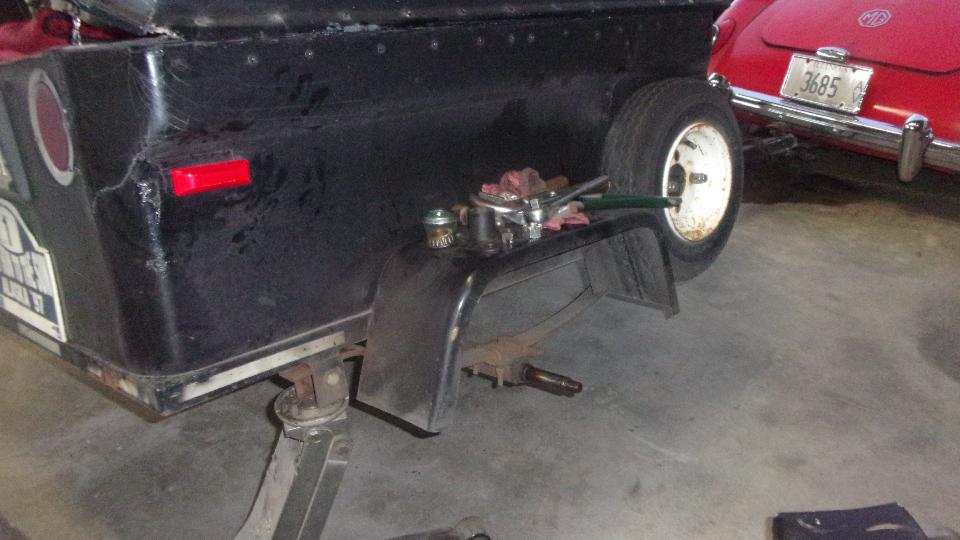
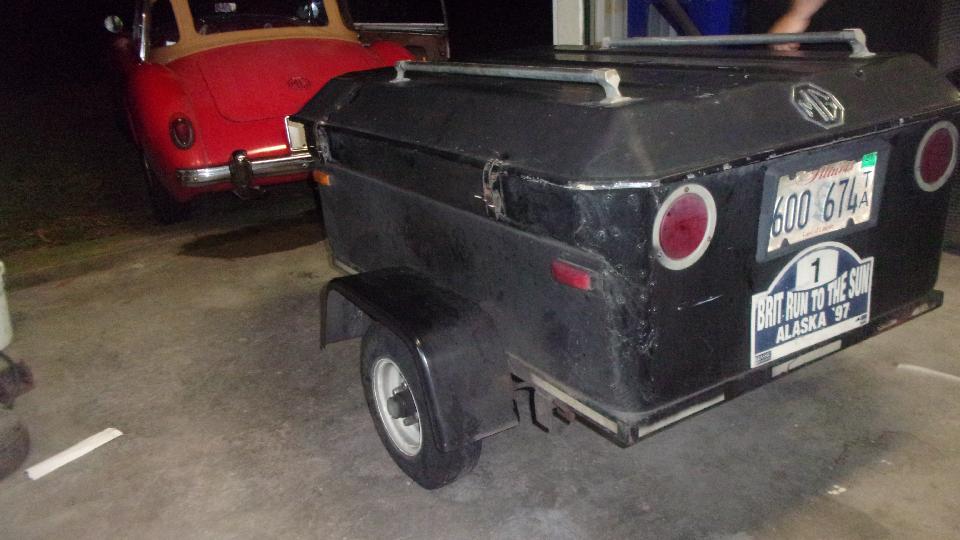
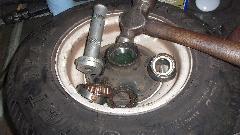
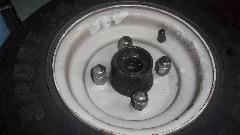
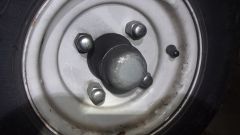
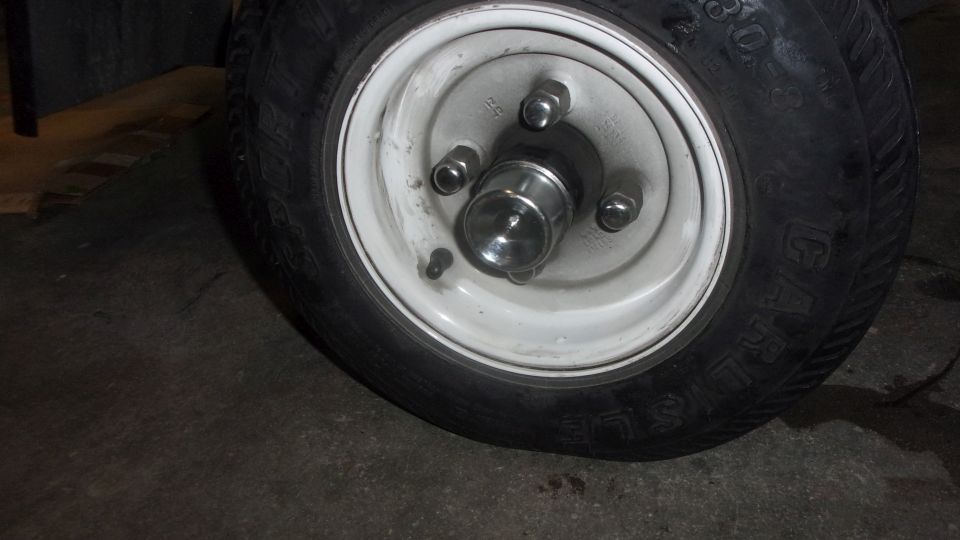
Then we had time to attend to a bit of overdue deferred maintenance. The trailer wheel bearings had been a little loose for quite some time, likely causing some excess wear on the tire. The right side tire was nearly bald, significantly more wear than the left side, so start on the right. Jack it up and wiggle the wheel, not nice. Pull the split pin, tighten the bearing nut, and give it a good spin. Rumble, rumble, oops, too much noise, so time to change the wheel bearing.
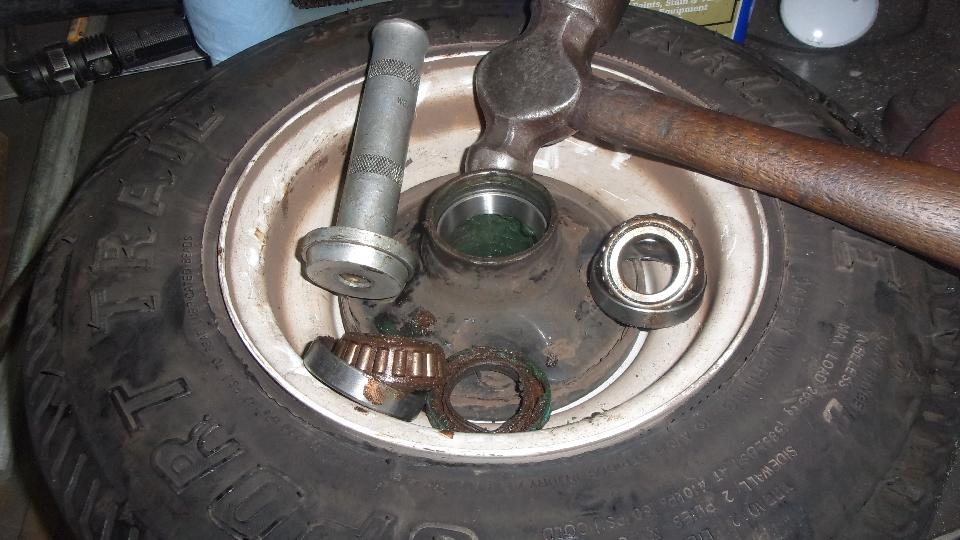
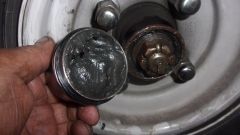
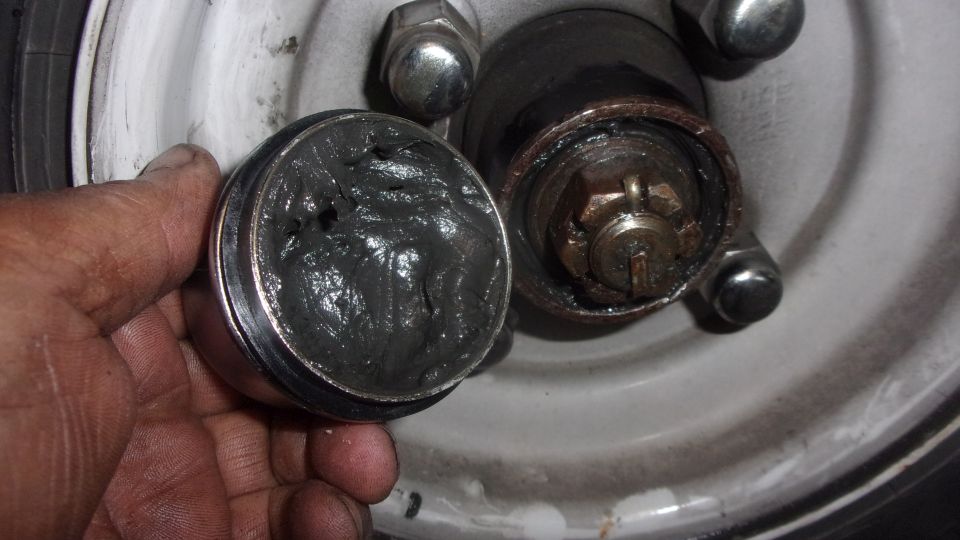
Remove the split pin, hex nut, flat washer, and pull the assembly right off the spindle (just like the front wheel bearing on the MGA). Scoop the old bearing grease out of the hub, and use a long punch and hammer to drift out the old outer bearing races. Done this before, don't even need to remove the wheel from the hub. Repack the hub with fresh grease up to slightly higher than the inner bearing races, so when the grease gets hot it will flow into the bearing. Pack the new roller bearings with grease (by hand of course, in five minutes flat). Drop in the inboard bearing, and tap in a new grease seal. drop in the outboard bearing, and head back to the trailer.

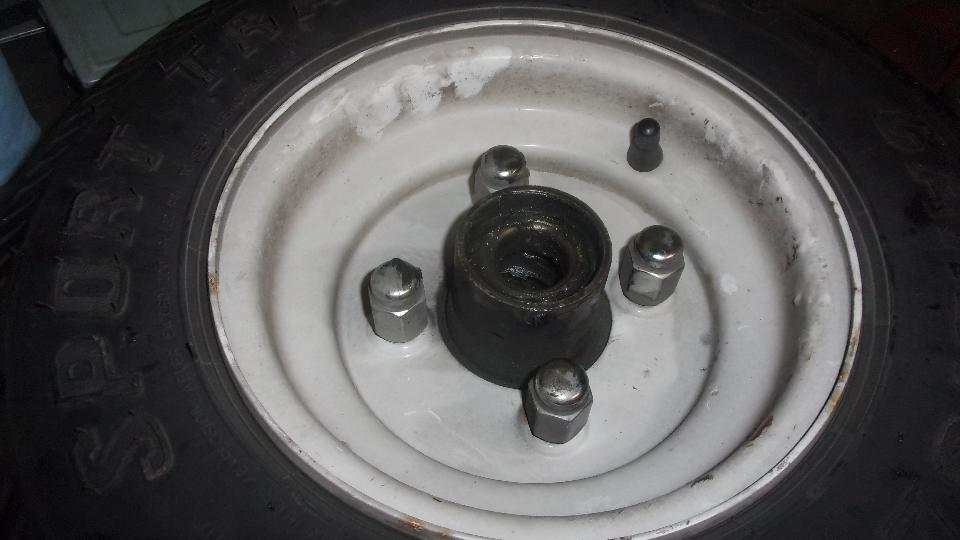
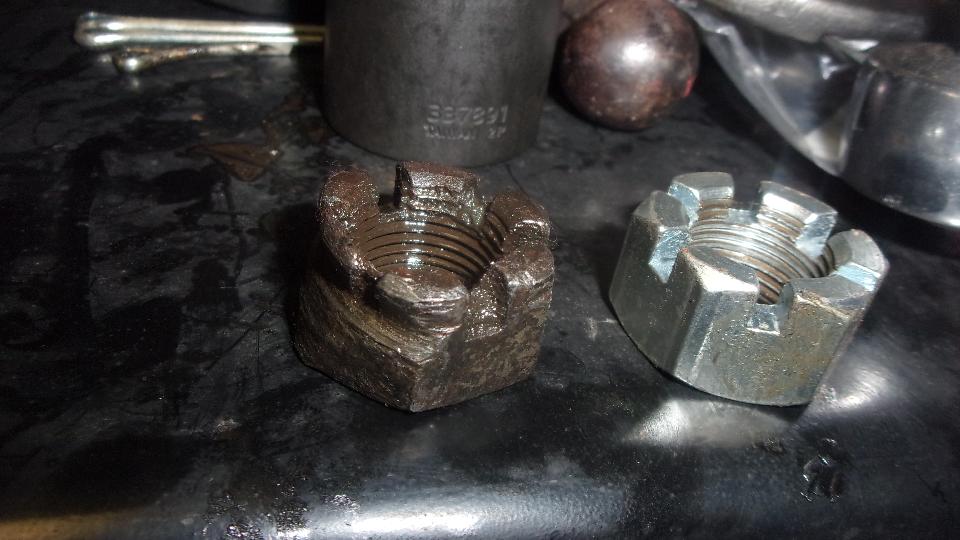
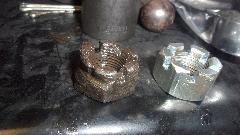
This time I get to replace the long ago damaged bearing nut. I think this one dates back to eastern Canada in 2018. By coincidence, this is the same bearing nut that fits the right front spindle on the MGA.
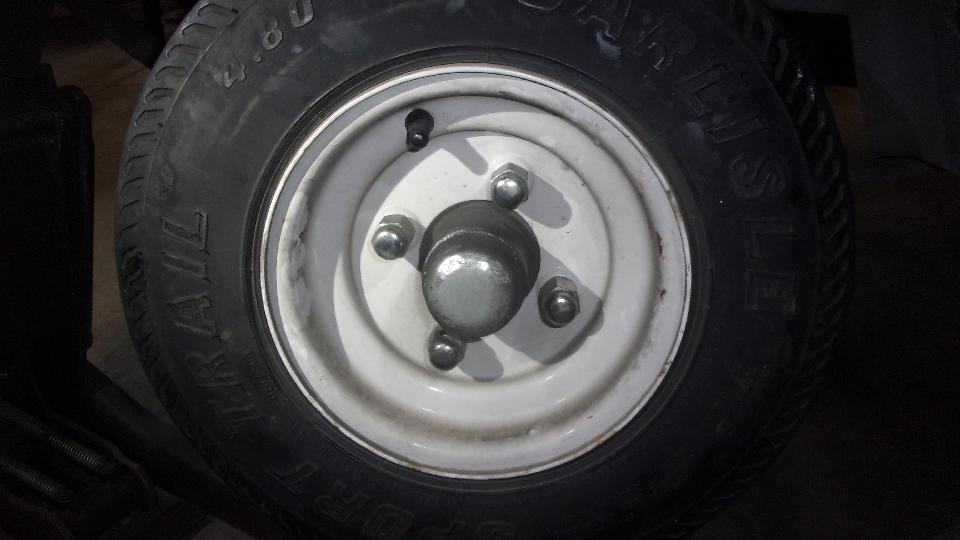
 Jack up the left side, remove grease cap and split pin, snug up the bearing nut to near zero clearance, and give it a spin. Oh, a little noisy here too, just not as bad, so make note to buy more bearings to replace the ones on the left side too. Not sure why we hadn't bought more spares after replacing the last pair some time ago. -- Long since lost the daylight, so pack everything away and get back on the road, heading off for late lunch and WiFi to post these photos and notes.
Tuesday, November 8, 2022:
Most of the day spent transcribing CMGC November newsletter from MS Publisher format to HTML web pages. Full day of grunt work once a month, and didn't get it finished.
Wednesday, November 9, 2022:
Got the newsletter finished and uploaded to the club web server. Going to change a password and ran into what appears to be a virus on the server ("URL:Phishing"). Weird, first time ever, and I don't understand it. The server techs spent quite a lot of time investigating it, not yet resolved, but still pursuing it.
Parts from Moss delivered this evening, so planning on more work on the white MGA sometime soon.
Bad news, my computer crashed after 10-pm. Got slow not unusual), so I did a "Restart". Then it came up with a blue screen saying "Please Wait", but wait 20 minutes, and it never recovered. So restart, and "Please Wait" again, but still no-go. Rinse and repeat several times with same results, trying warm boot, cold boot, Starting in safe mode, etc, but still no-go. Call it quits at 2-am, need some sleep.
Thursday, November 10, 2022:
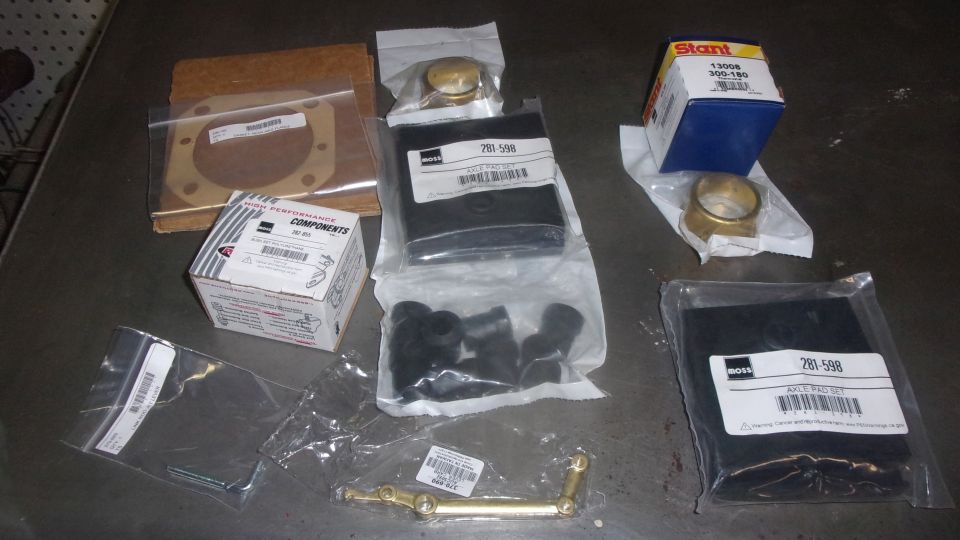
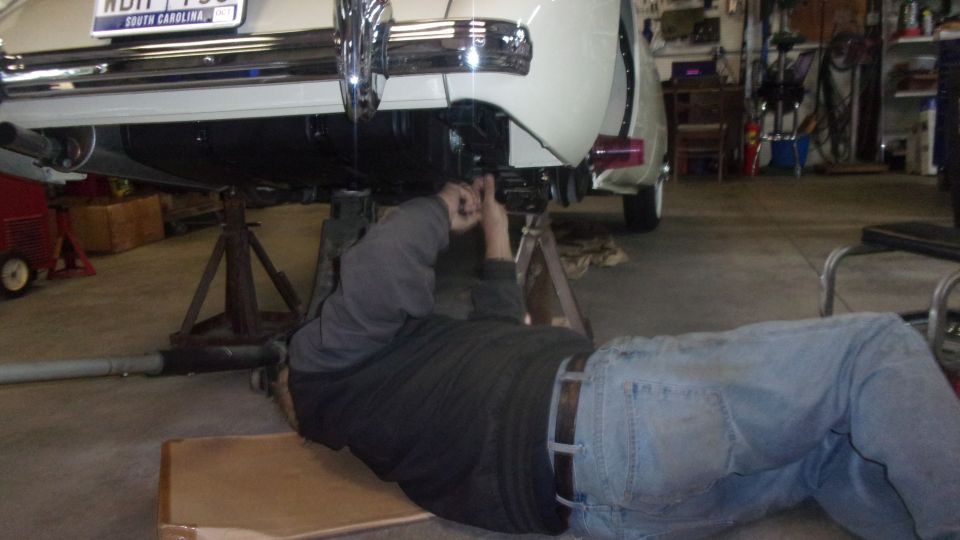
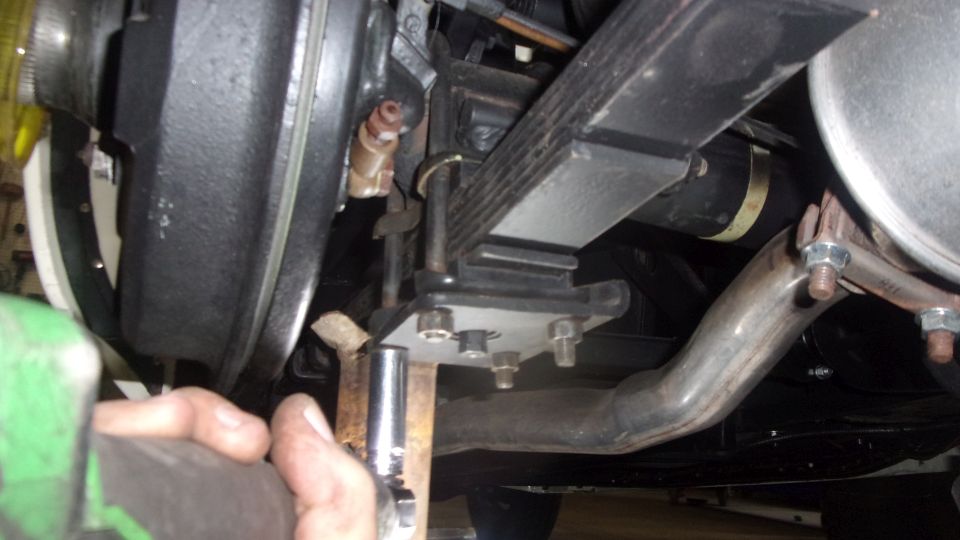
Messing with the failed computer for a few hours with breakfast, but not much progress. Started to rain by noonish, remnants of a hurricane that passed over Cape Canaveral (east coast of Florida), moving west, then north, and expected to go east again, hopefully going right around without hitting us. We hit a NAPA store and got lucky finding another pair of trailer wheel bearings, and a pair of Bearing Buddy grease caps. Wandered back over to Tim's place for some more work on the white MGA. Raining more by that time, and not likely to let up. Open the new parts packages and sort the parts, some for the while car and some for inventory. First chore up was to replace the rubber pads for the leaf spring to rear axle joints.
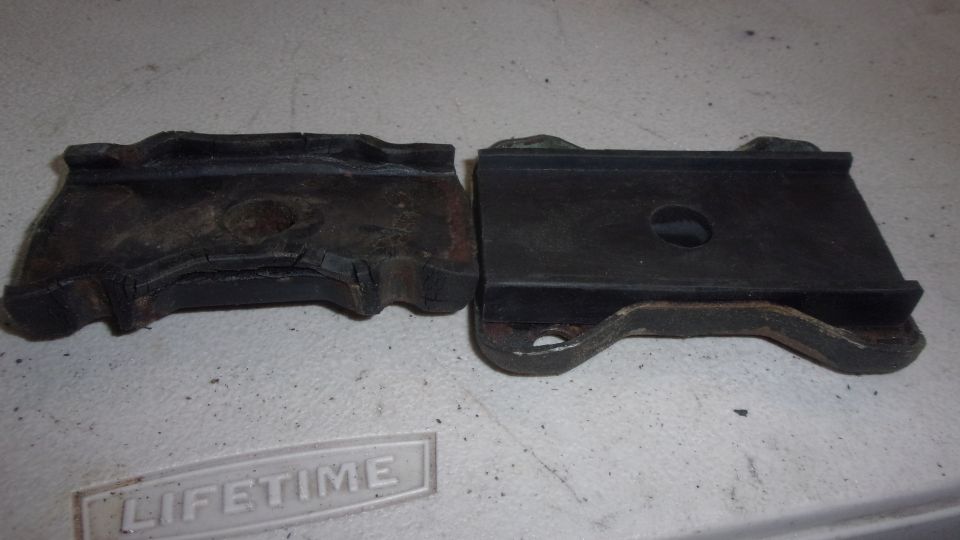
Pads we were removing had very little mileage, but now at least 25 years old and squashed and hard for a harsh ride. Nice to have new compliant isolation pads.

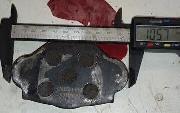
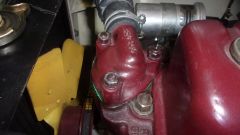
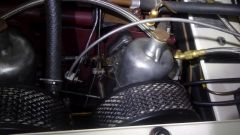
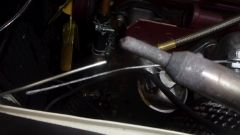
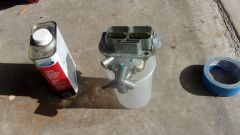
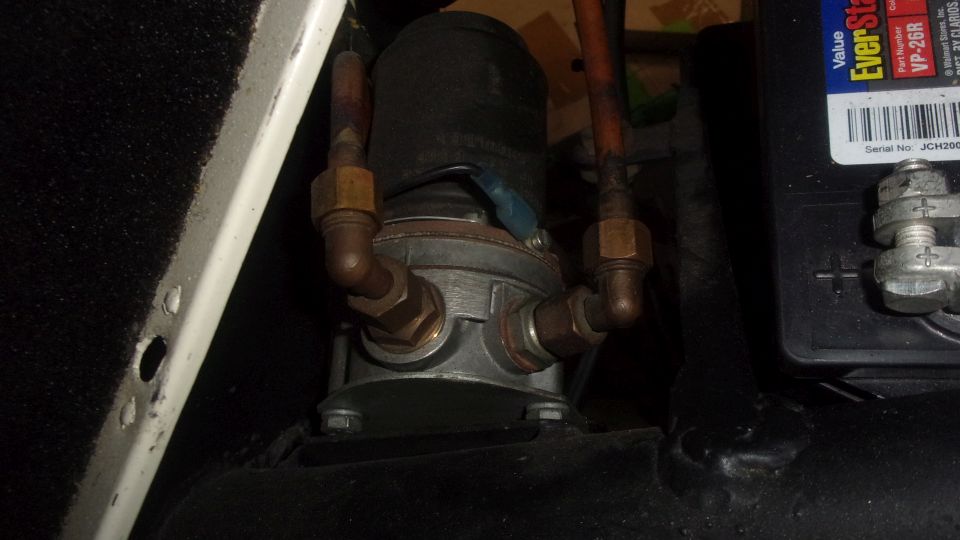
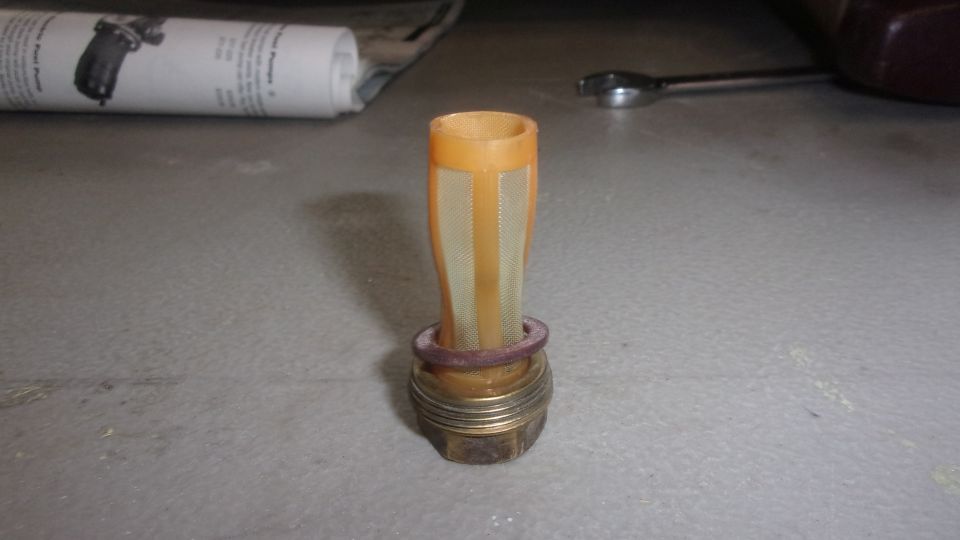
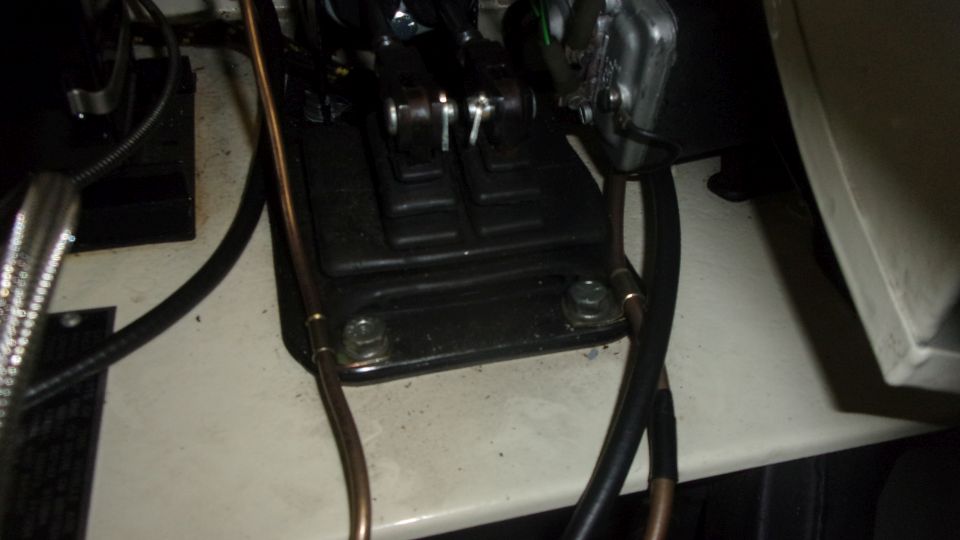
Someone mentioned fuel smell, and we soon found the source to be a drippy drain and filter plug in bottom of the fuel pump. Loose plug, maybe just needed tightening, but I wanted to check the filter while we were in there, and wanting to measure dimensions of the fiber washer for documentation (which I did).
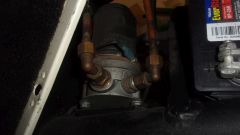


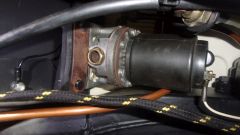
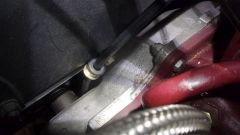
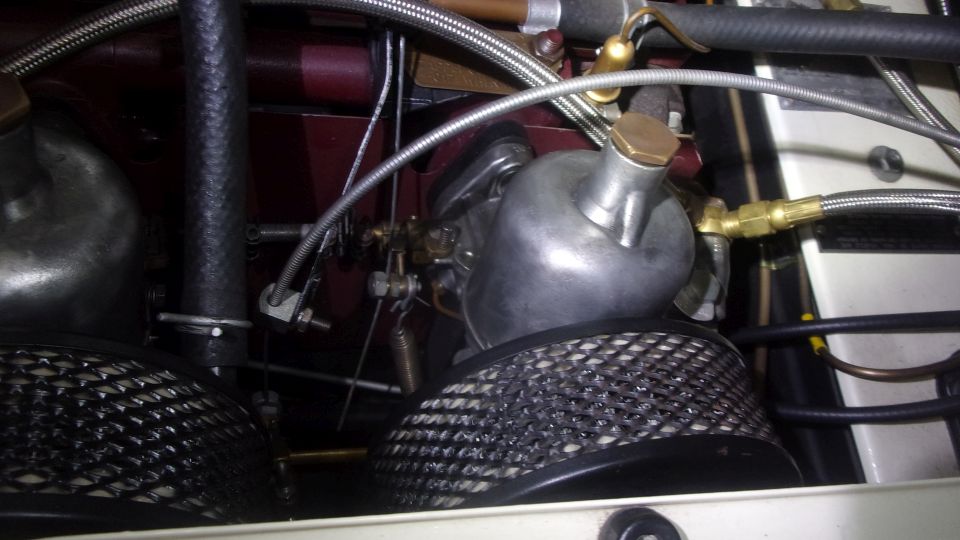
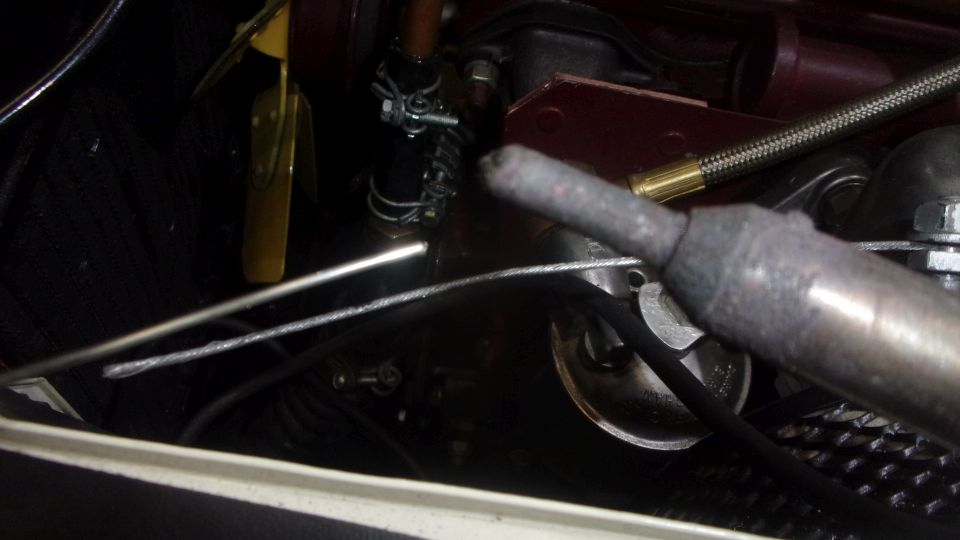
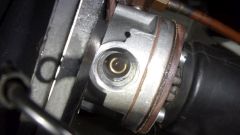 The pumping chamber was pretty clean, meaning not much crud in the fuel tank, so put it back together with a smile and a new fiber seal washer. I also relocated the grounding wire from the wiggle bolt in the rubber isolation mount to the correct bolt on the rear floorboard to chassis frame. Had to install a longer floor bolt and an additional hex nut for that connection. Nice to see this wire in the correct location for a change.
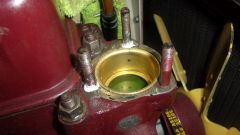
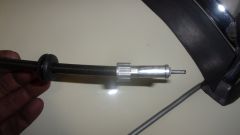
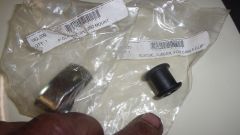
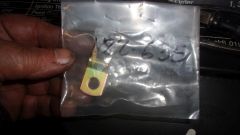
Going to install a new thermostat, because not sure what was in there and it was running a bit to cool. Took out a 165dF thermostat and installed a 180dF to get it to run at better temperature (expecting 185-190 on the road). Also going to install a blanking sleeve to cover the bypass port, because we were not going to use an original bellows style thermostat with moving sleeve (drill a small hole in the thermostat instead). But the new issue sleeve didn't fit in the counterbore in the cylinder head, so pause to investigate that. Counterbore in the head is 2-1/8-inches (plus 1/64' clearance =2.138"). Blanking sleeve flange was 2.183" diameter, so way oversize (faulty replacement part needing to be reported to the suppliers).

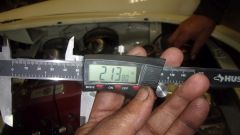
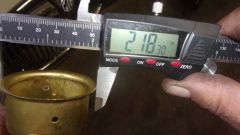
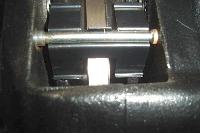
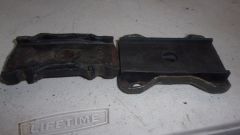
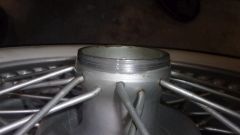
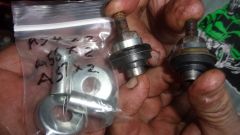
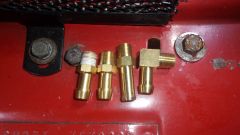
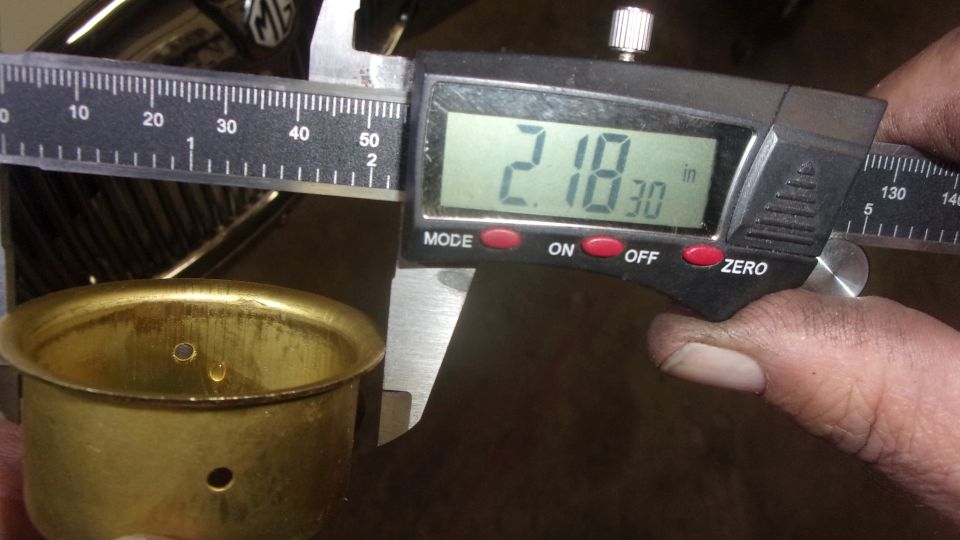
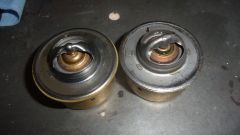 So off to the bench grinder to remove 1/32" from the radius of the flange all around, finishing it to 2.125" diameter (or a smidge less). I bought two, so we also ground down the second one for my spare part. Picture at right shows two thermostats sitting on top of the blanking sleeves, left one before grinding and right one after grinding.
Will get back to the thermostat later. Tim had to take a break, so I got to work on my trailer bearings again.
The Bearing Buddy's are grease caps with Zerk fitting to allow maintenance greasing without disassembly. These are primarily intended for boat trailers where you want to back it into the water without getting water in the bearings. Since I have been having trouble with leaky hub seals, this seems like good idea to try packing the hubs full of grease to keep the water out. I used to do this from 1997 (after first Alaska trip through 2017 (when the prior Bearing buddies were knocked off on rough roads). Just hoping the seals don't leak grease out when on the road. No pictures of changing the bearings, BTDT (too many times).
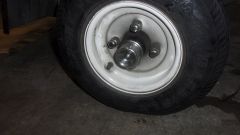
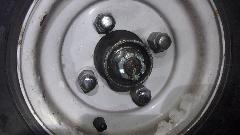
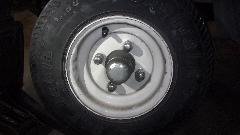
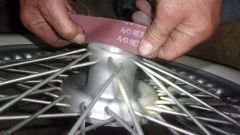
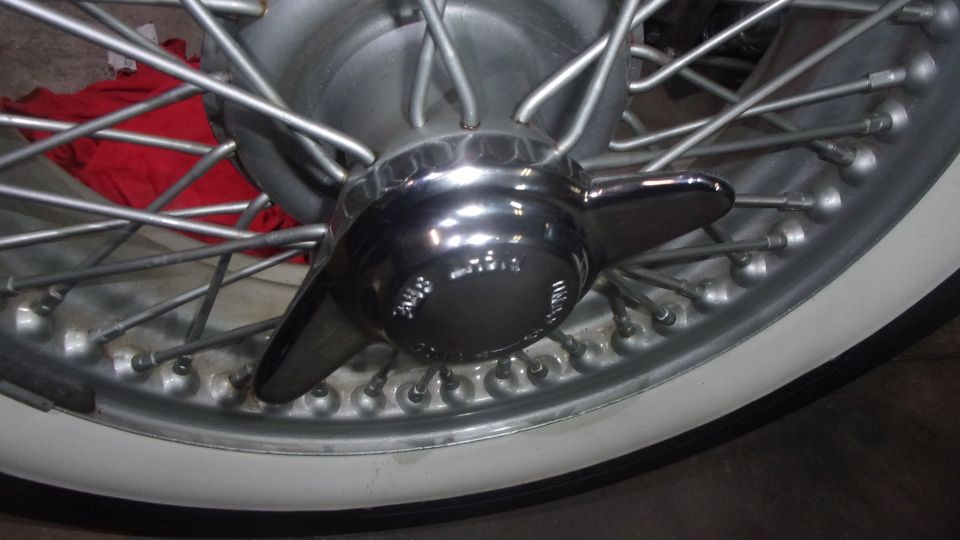
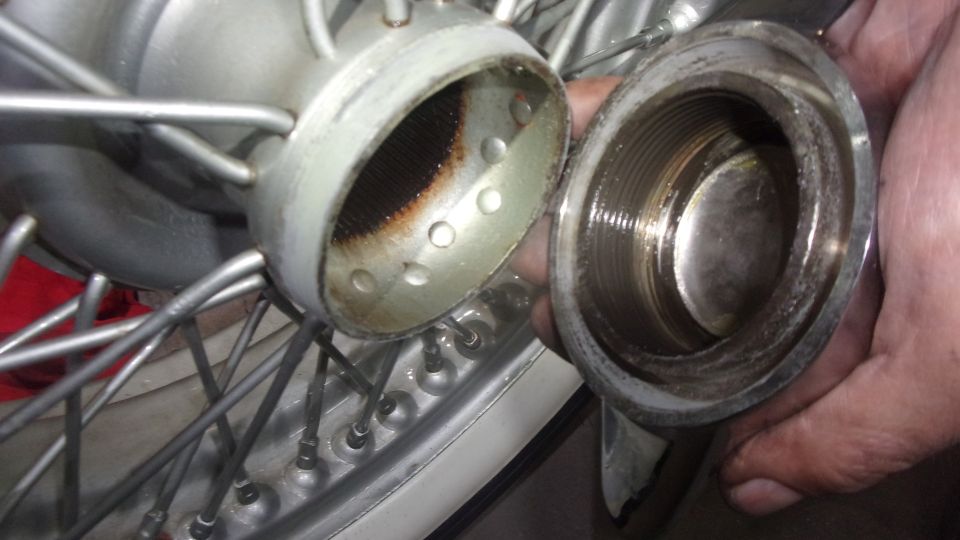
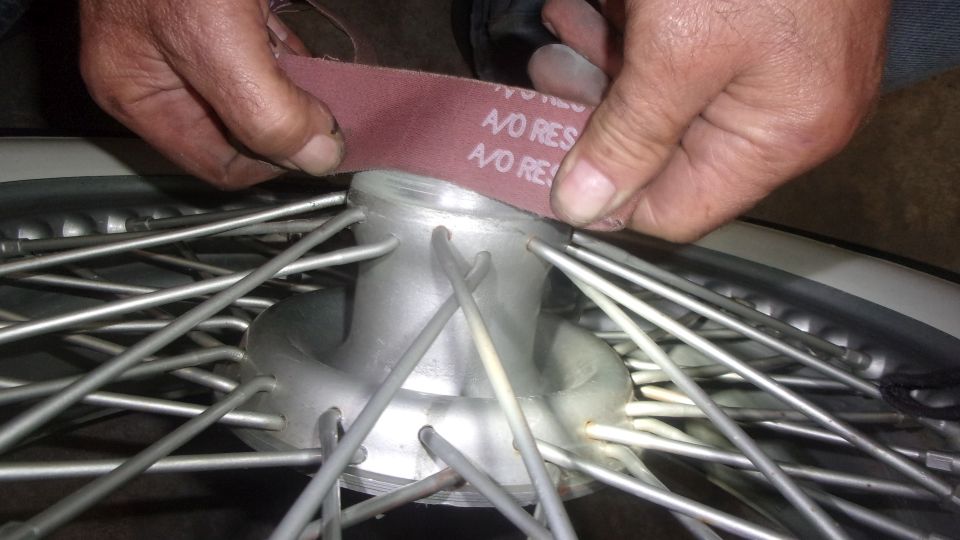
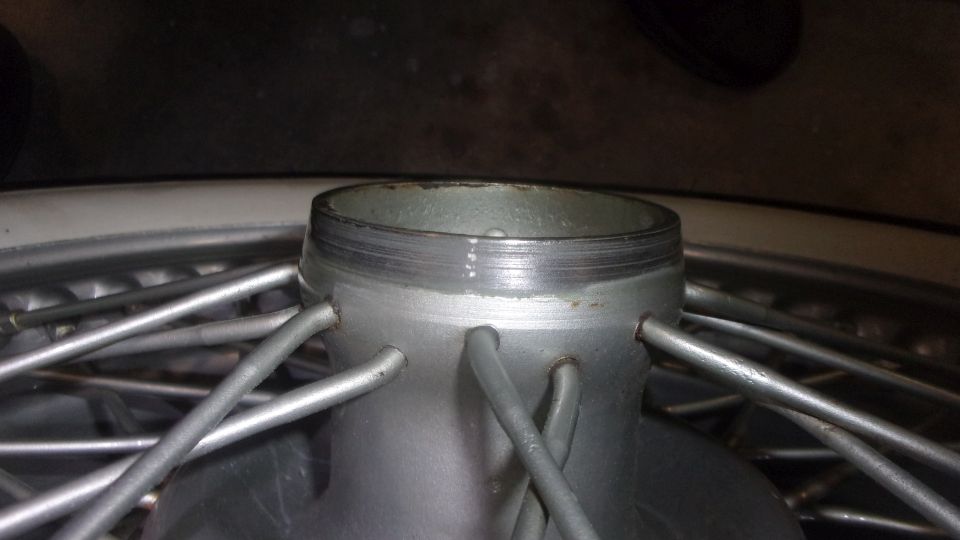
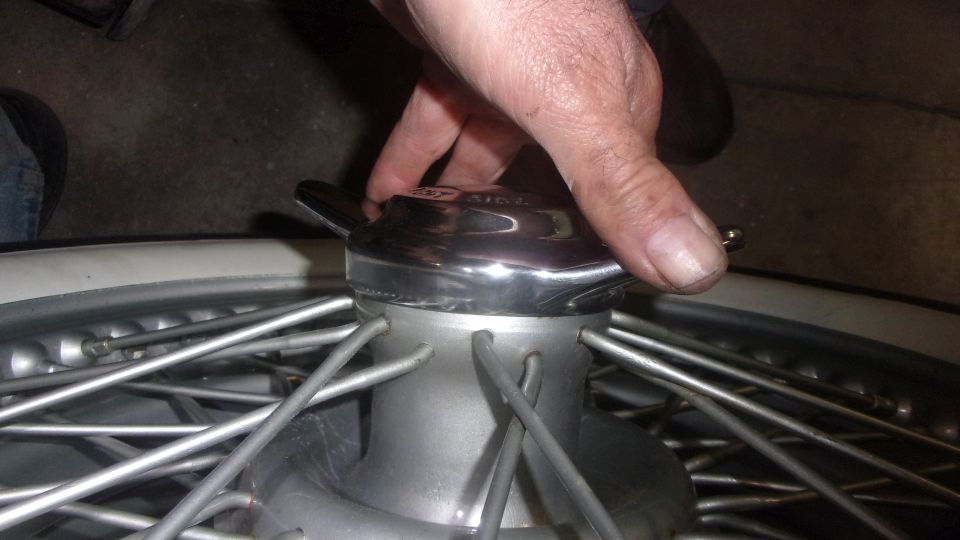
When Tim came back we wanted to figure out why the right rear wire wheel would not tighten up. With about 100 lb-ft of torque on the KO nut the wheel would still wiggle on the hub splines. That didn't make any sense at all, so take it apart for a look inside. Easy to see the wheels had been painted in assembly, and there was paint on the outboard cone surfaces. Boo, hiss. When installing the KO nut, as soon as it touched the paint it would seize up. No self-tightening here.
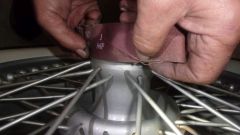
The only fix would be to remove the paint from the wheel cone. So followed half an hour of work with coarse emery paper and water, followed by lacquer thinner wipe to remove final residue. When the spinner could press against the cone and still turn by hand, it was good to be reassembled. After two wheels done, Tim said enough of that, and he could do the other wheels later.

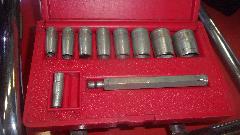
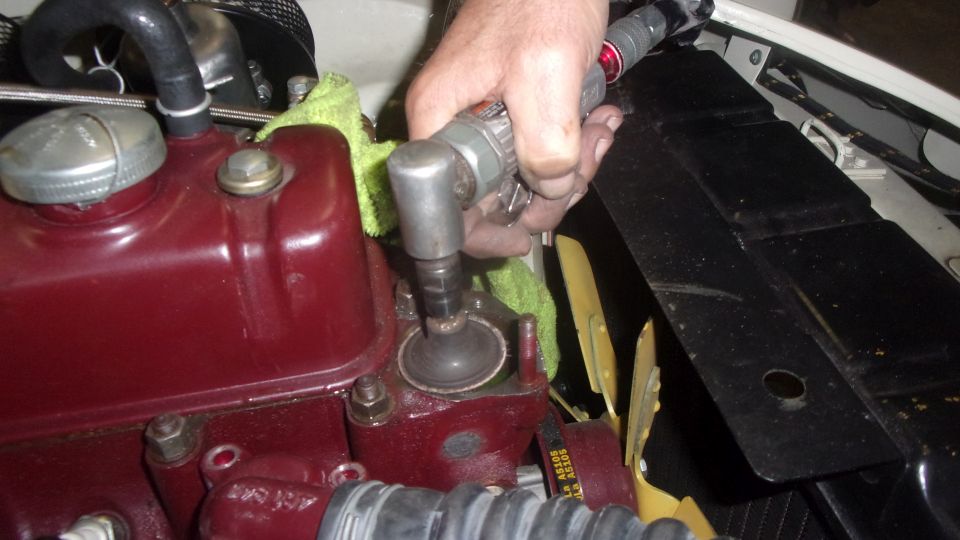
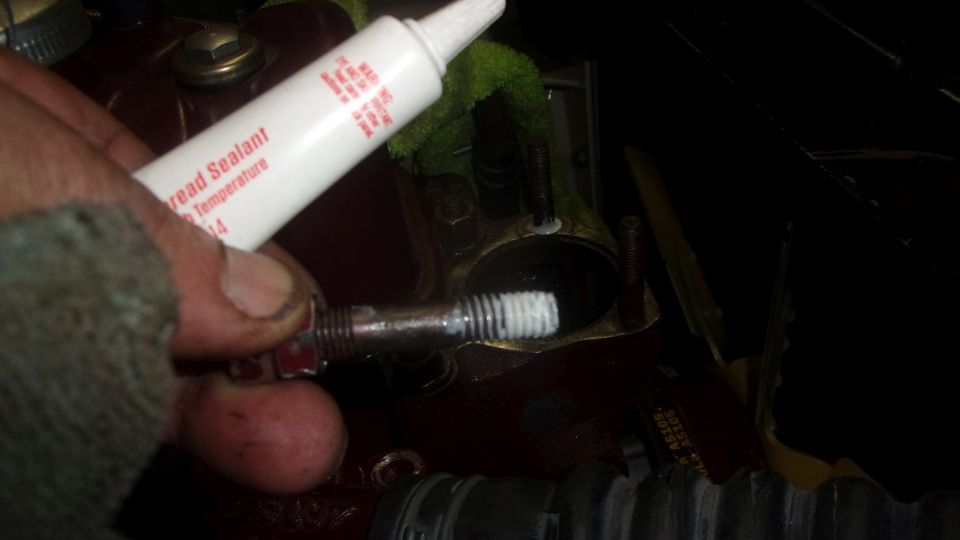
Finally back to the thermostat. Grab a stud socket and remove the two studs that run threads through into the water jacket. Polish up the gasket surface and the counterbore, wipe some thread sealer on the stud bottom end threads, and reinstall the studs.
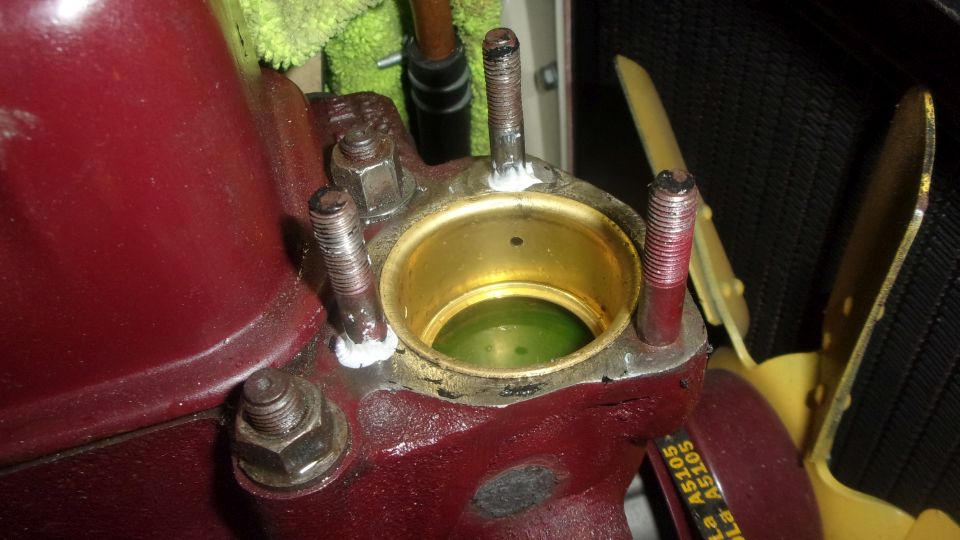
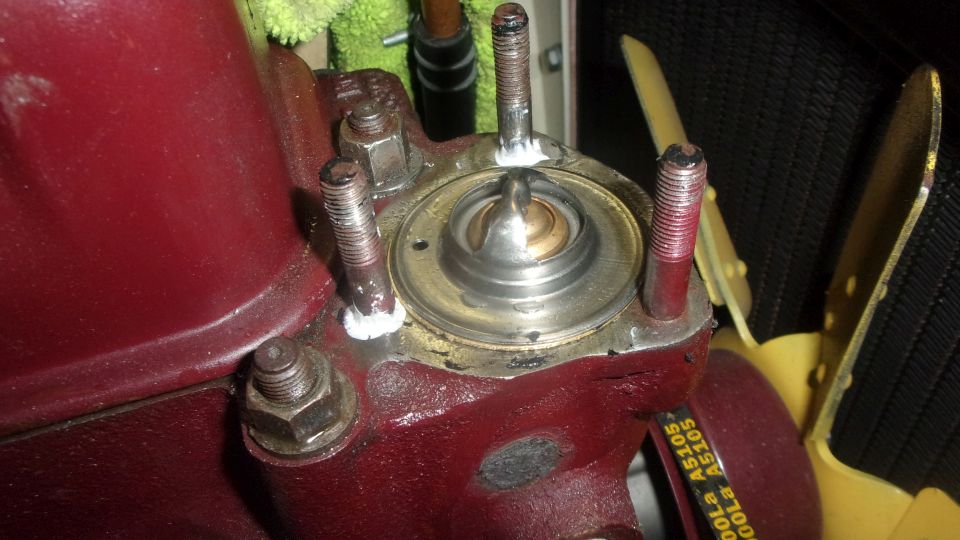
Drop the (reduced flange) banking sleeve into the counterbore, and install the thermostat on top of it (notice the drilled hole). A little sealer on one side of the gasket if you like. I normally do not use sealer on any gasket that goes between two machined surfaces, but in this case the thermostat flange stands slightly above the head surface. So either use a soft cork gasket or maybe some sealer on the Klingersil gasket to assure it won't leak.

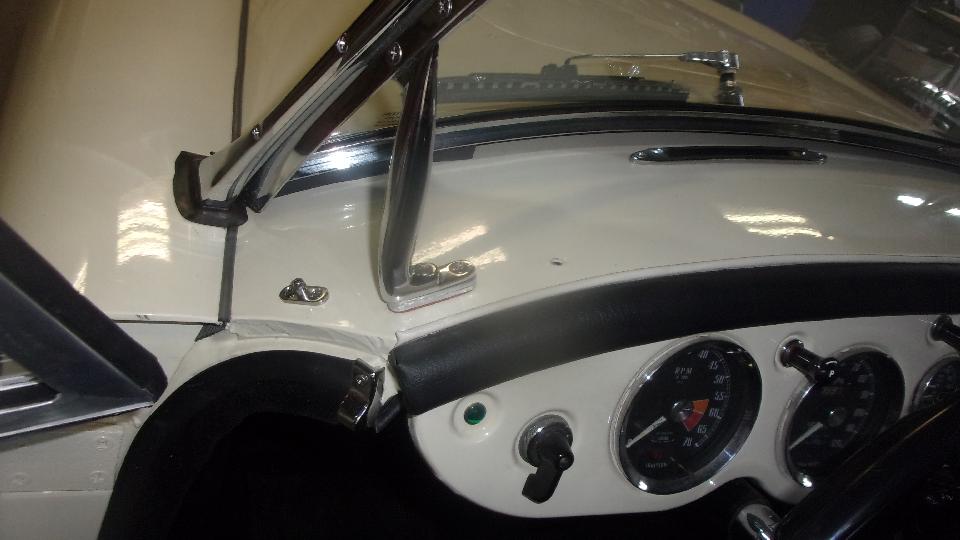
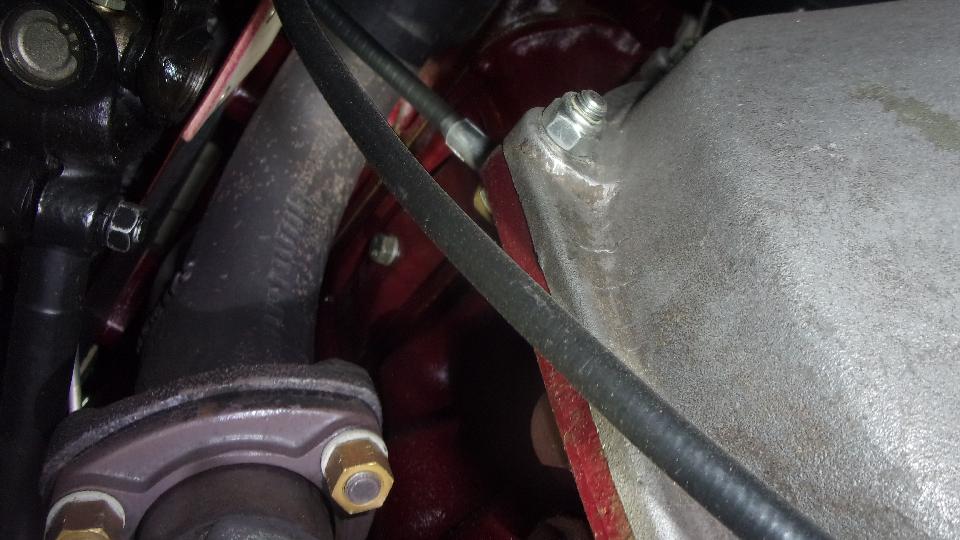
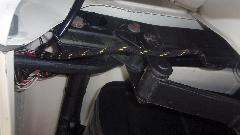
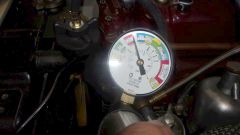
Fill the cooling system to the top with no air space, then apply the pressure tester at the radiator filler connection with 10-psi pressure, and wait a few minutes to assure it does not leak down. Score one for the good guys. Then we were on to relocate and adjust some control cables. First complaint was too stiff choke pull, which (as is common) turned out to be too many turns in the cable routing. We relocated the choke cable to take a more direct route from the pull knob through the bulkhead and gently over the top to the carburetors with minimum bends. Also shortened the cable several inches, and installed a rubber grommet in the firewall. And for good measure, put a touch of solder on the inner cable wire so it won't unwind and get frayed to cause future problems. Then similar treatment for the heater air control cable, slight re-route, clip and solder the wire end. Install a new grommet in the firewall, and put that back together.
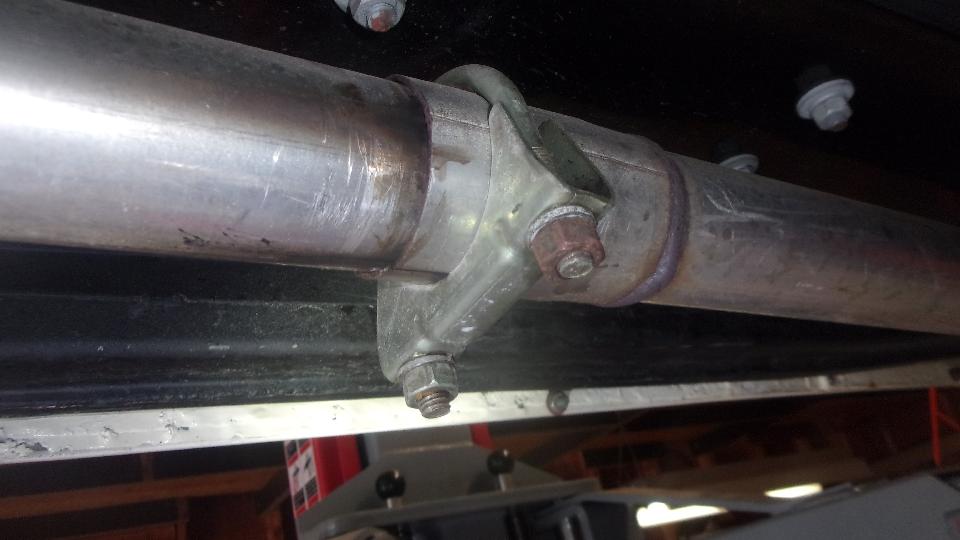
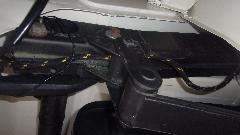
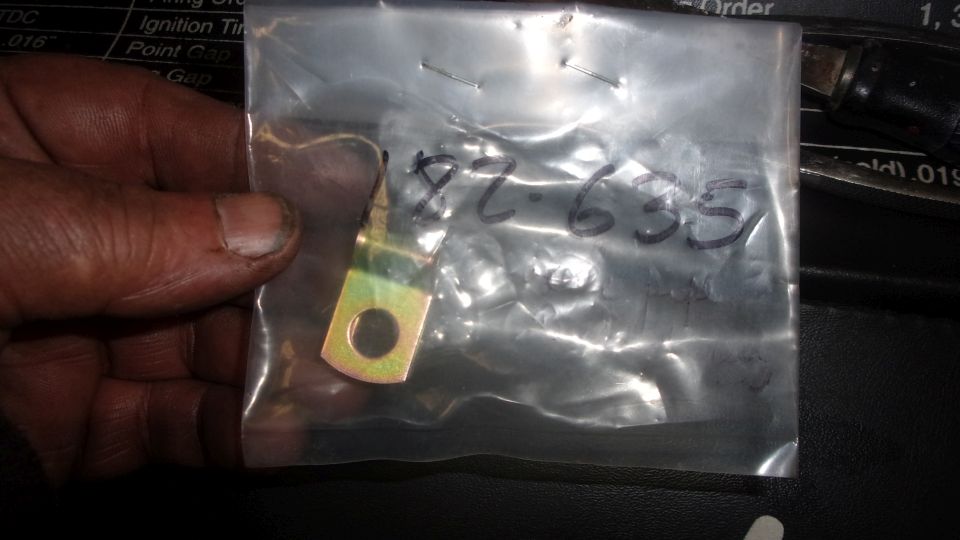
We really needed to re-route the speedometer drive cable, as it was passing low under the gearbox to rise on the left side, dangling loose to cause problems. Re-route to rise on the right side, inboard of the starter Bendix drive, against the bellhousing, with a rubber bushing lined P-clip attached to a bolt high on the tunnel flange (where it belongs). Needed a longer bolt with additional hex nut, and a few more bits from the Magic Trailer.
Then we installed another identical rubber lined P-clip for the speedo cable on the heater shelf, just to make nice. I don't recall right offhand if that was OEM, but it should have been. Again, similar treatment for the tachometer drive cable, and install new rubber grommets in the firewall for both drive cables. And finally a few more P-clips to secure clutch and brake hydraulic pipes so they won't wobble around and cause problems.

Long dang day, getting out of there late night, but we got a lot done so it felt good. Still raining, not likely to quit, and likely to be heavier rain all day tomorrow. Had a couple more hours fiddling with the failed computer with late night lunch. Navigator had been fiddling with it during the day at Tim's place, and had done a System Reset, which got it to light up and run again, but lost a lot of program installations. I was rather PO'd at the time, realizing it was going to take a lot of time to restore the missing programs and likely some day data files as well. Gave up after midnight to get some sleep.
Friday, November 11, 2022:
Rain day, all day, so good day to be inside trying to recover the failed computer functions. Managed to get a web browser working, and WiFi connections still worked, so I could check the bulletin boards. Couldn't get my old email program back, and I'm pretty attached to that one, so no email while we keep working on that. Got Open Office software working, and still had most of my data files, except my large spare parts inventory file may be corrupted and won't load up (that would be a bad one to lose). Managed to get the FTP program working, but still had the nagging problem that preceded all this, the virus report when logging into my web server account. Put an exception rule into the anti-virus program (white list), but that didn't work. Finally resorted to switching off anti-virus temporarily when logging into my "trusted" web site server, which finally got me access to upload data and web pages so I can upload new or revised web pages to my web site (including this trip log).
Could not restore the long standing LView Pro image editor, but did get a new program IrfanView to work. Somewhat different interface, but similar functions, will take some getting used to, but think I can live with that one.
Saturday, November 12, 2022:
Have an appointment mid morning, so not trying to fix email yet. Did manage to do some grunt work editing Thursday photos from the camera to resize and save, and post onto this web page. Not finished yet, but by the time you can read this they should be visible above. Already have more Saturday tech pictures, but will have to wait until I get some more sleep (late night Sunday by the time I'm posting this paragraph).
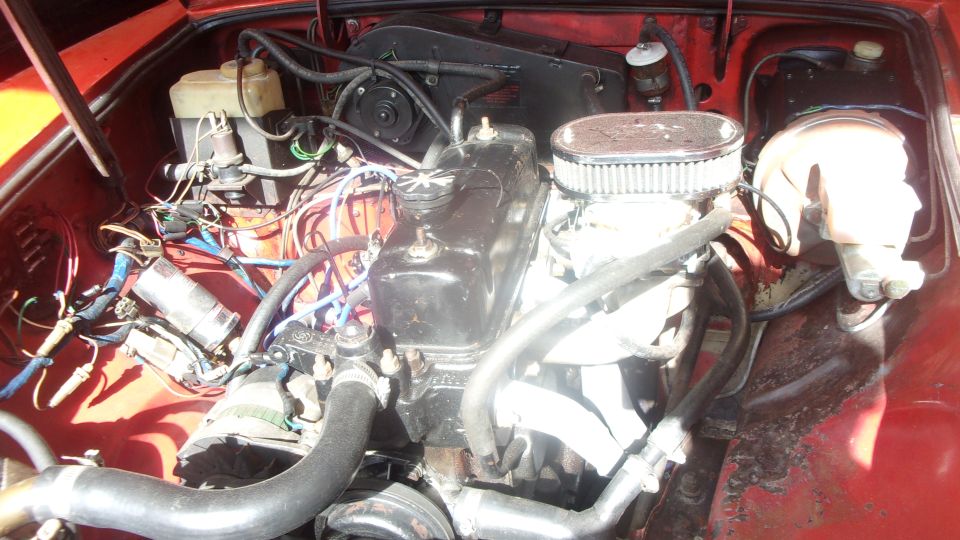
 Dropped in to visit Steven Kerner in Chapin, SC. He has a nice 1977 MGB (at least nice looking) with a Weber DGV carburetor conversion (which is almost always done wrong). He said it was running rough, and when we started it up he was right, running very rich and galloping badly. The idle mixture screw was turned way out, like maximum rich. Screwing it in was making improvements, until it ran out of travel and was still running a bit rich but not too bad. When switched off it had a case of run-on, which is exactly what I expected. This is due to the Weber carb installation having disconnected the breather line from carburetor float chamber to fuel vapor recovery canister, which defeats vapor recovery and anti-run-on functions. Uh, run-on? Does this thing have an "L" head? Yes it does. Lemme do a compression test. Wow, 160+/-5 psi for all four cylinders. So it is 1972-1974 spec engine with higher compression, larger intake valves and better porting. Nice. Pretty sure it would do even better with dual SU carbs.
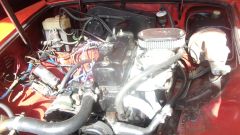 The original carburetor vapor hose was connected to the original fuel safety shut-off valve, which had no hose the other side, so doing nothing. The small vacuum pipe for the anti-run-on valve was no longer connected to the intake manifold but was connected to what I believe is a venturi vacuum tap on the carburetor (originally intended for distributor vacuum advance). The distributor that originally had electronic ignition and vacuum advance had been changed to a Mallory Unilite electronic distributor with no vacuum advance, and there as a Mallory ignition coil (which turned out to wired wrong, more on that later). I don't even want to speculate how one thing may lead to another to end up in this configuration. But hey, wanna fix some of this stuff? Yeah, sure.
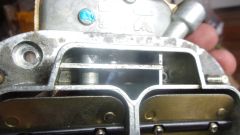
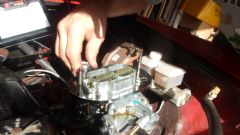
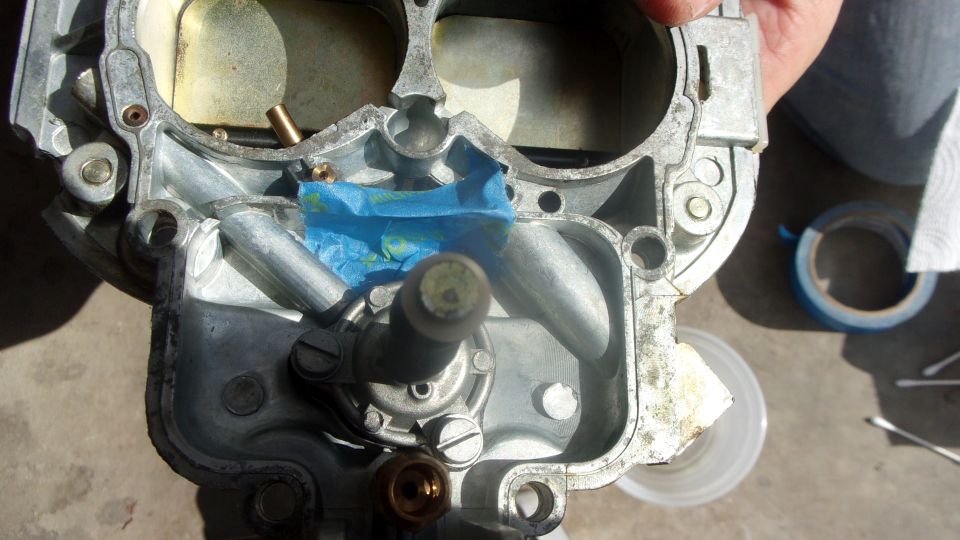
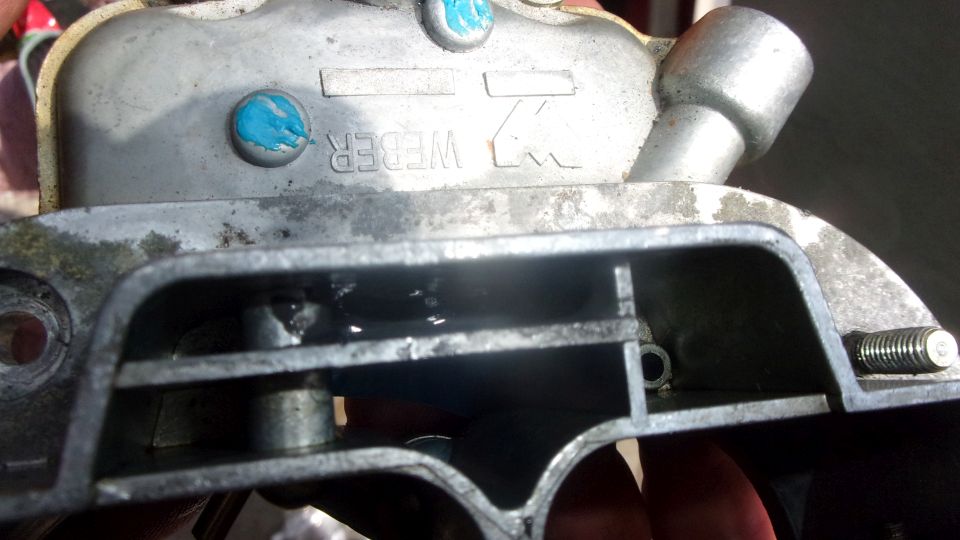
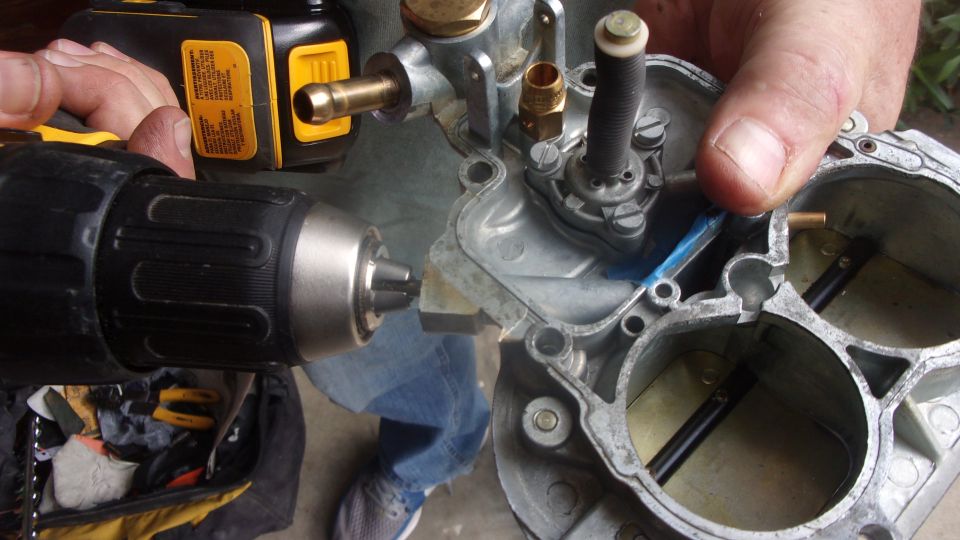
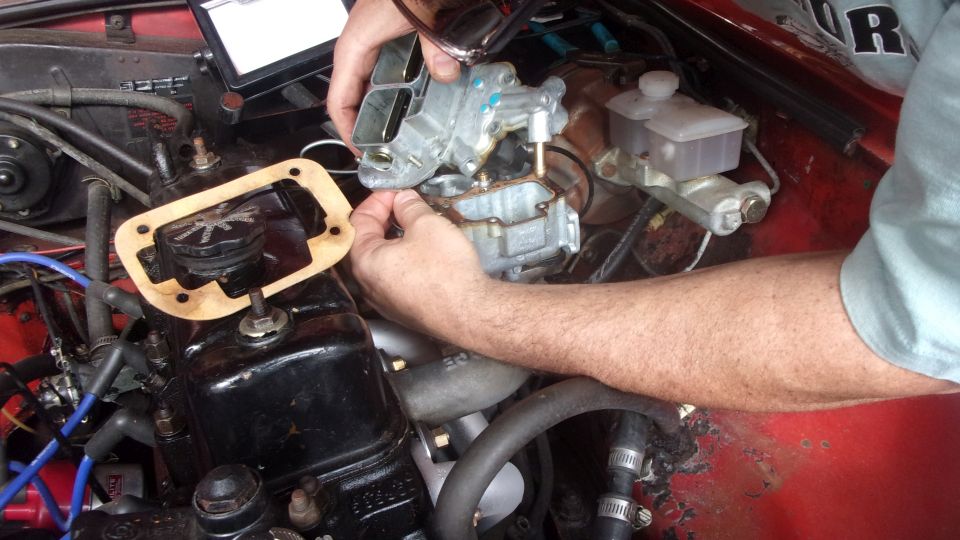
Okay, let's do the tricky bit first to modify the carburetor changing the open vent float chamber to sealed chamber with external port that can be connected to the carbon canister. Remove air cleaner and half a dozen screws to remove the carburetor top plate. The narrow rectangular slot in the top goes right down into the fuel chamber as an open vent, which we need to seal up. So wash it out clean with lacquer thinner and let it dry. Then flip it over and stick a piece of tape inside underneath to cover that rectangular vent hole.


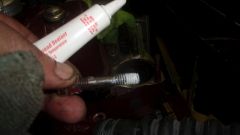
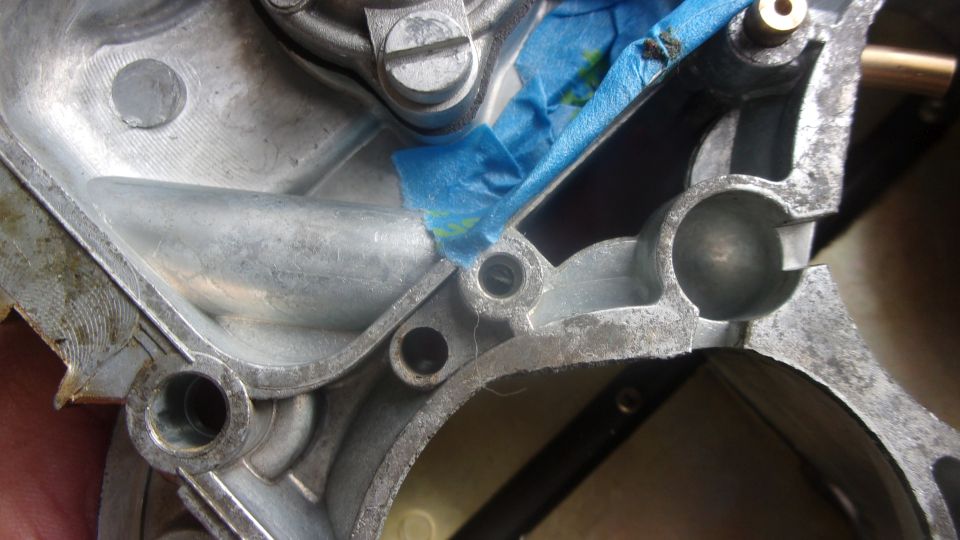
Then mix up a dab of JB KwikWeld (or any 5-minute epoxy) and pour or push it into the slot to seal up the vent port. While that's setting up, drill a 5/32-inch hole in the bottom of the external cast-in port going at an angle from the edge of the top plate. Drill through into the small vertical hole you will find underneath the top cover. That will be the new external vent port. In the picture below right you can just see the drill tip down in that small hole.

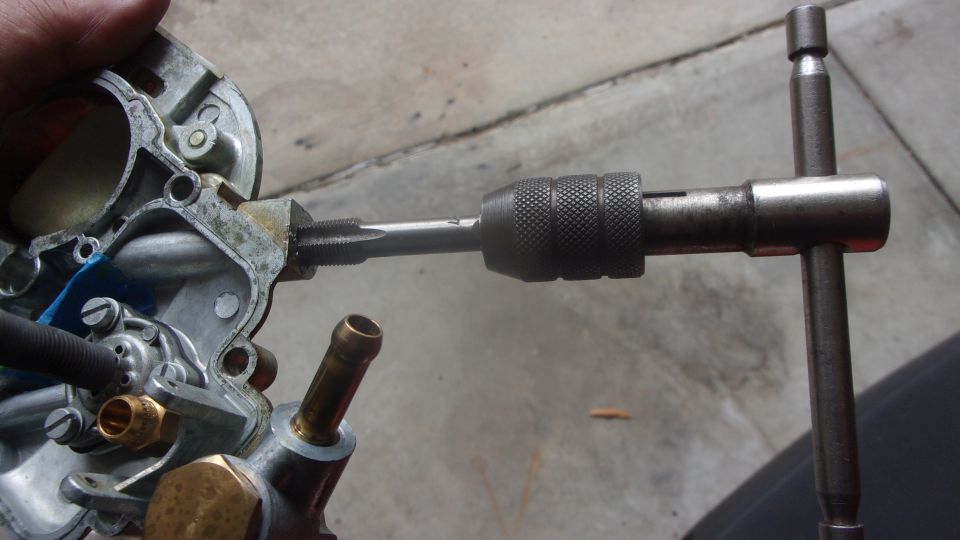
Run a 1/8-27-NPT pipe thread tap into the precast port (which is exactly the right size for tapping), going in until the tap hits a shoulder (which is also exactly the right depth for the tap). This port is going to accept a new 1/8-NPT x 5/16-inch thread hose barb. Then you can remove the tape to expose the fresh epoxy underneath, and flip the cover back right side up to see the epoxy in the rectangular hole, now nicely closed and sealed.

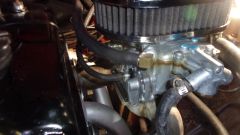
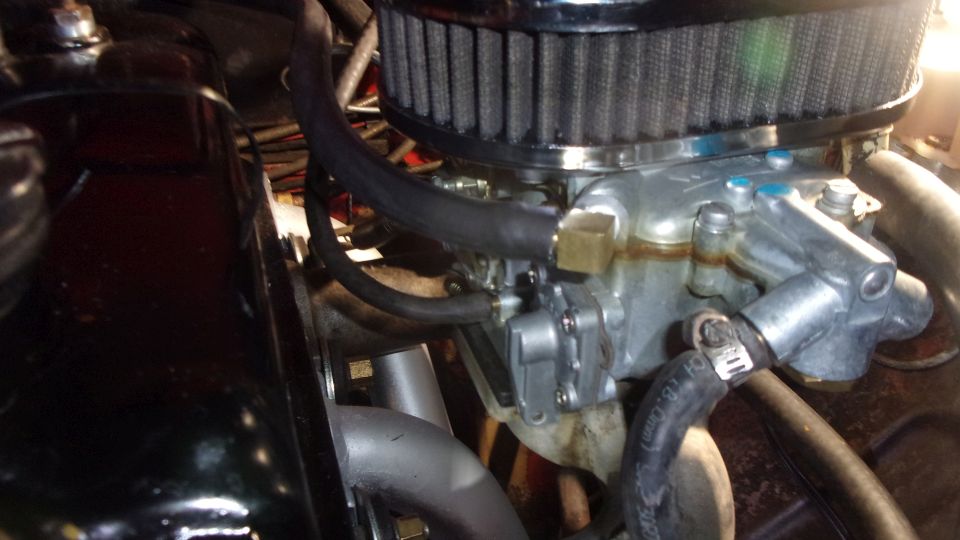
 Time to put the cover back on the carburetor and reconnect the choke link. Reconnect the fuel line, and start it up if you like, it still runs the same (still a little rough at slower engine speed). Before we ran off to buy some brass fittings and other bits, we took a look at the ignition side of the engine.
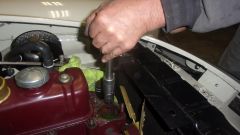
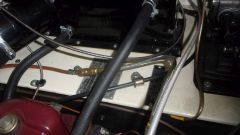
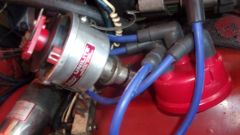
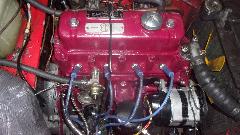
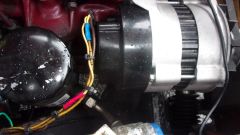
 This engine originally had ballasted ignition system with the ignition resistor being a length of resistance wire in the front harness, which is still there and still works. The big ceramic resistor mounted next to the ignition coil was suppose do be the distributor resistor (no longer used for that purpose). Someone had wired the ceramic resistor in series with the harness resistor wire on the way to the ignition coil. That doubles the resistance of the ballast resistor, cutting down voltage and current for the coil, in turn reducing spark energy by about a third. So we fixed that next, simply disconnecting the ceramic resistor and connecting the original White/Green wires directly to the coil input where they belong. We will leave the ceramic resistor there, in case someone might want to use it later for some electronic ignition function (check the Mallory Unilite wiring requirements). The open 3-pin connector in that picture is the connector for the original electronic distributor (no longer used). Start it up momentarily to assure that it still runs okay.
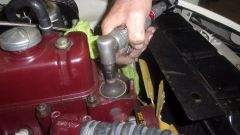
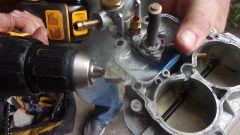
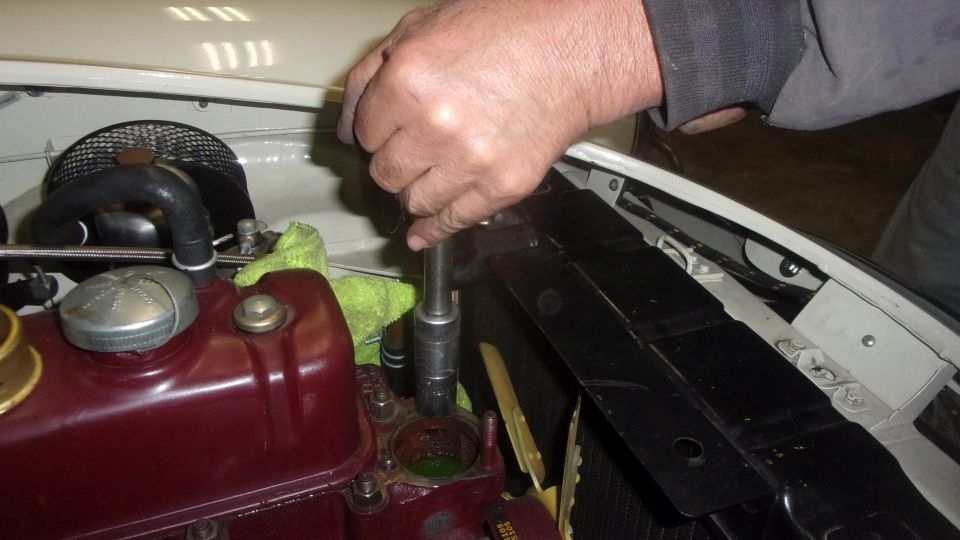
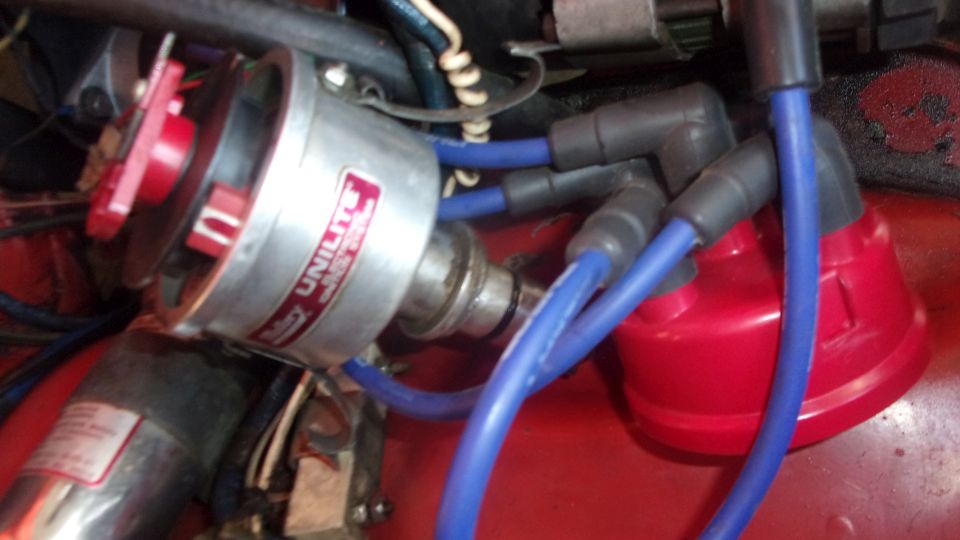
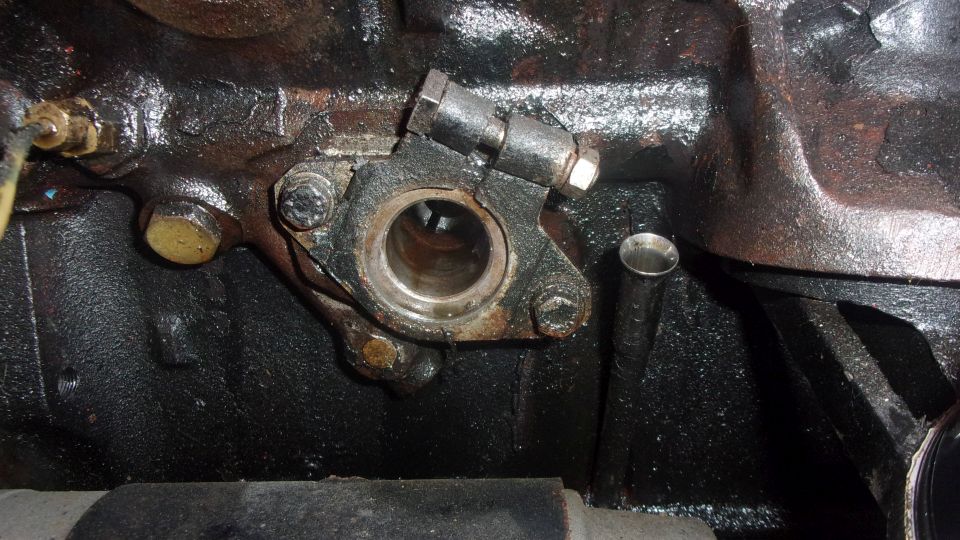
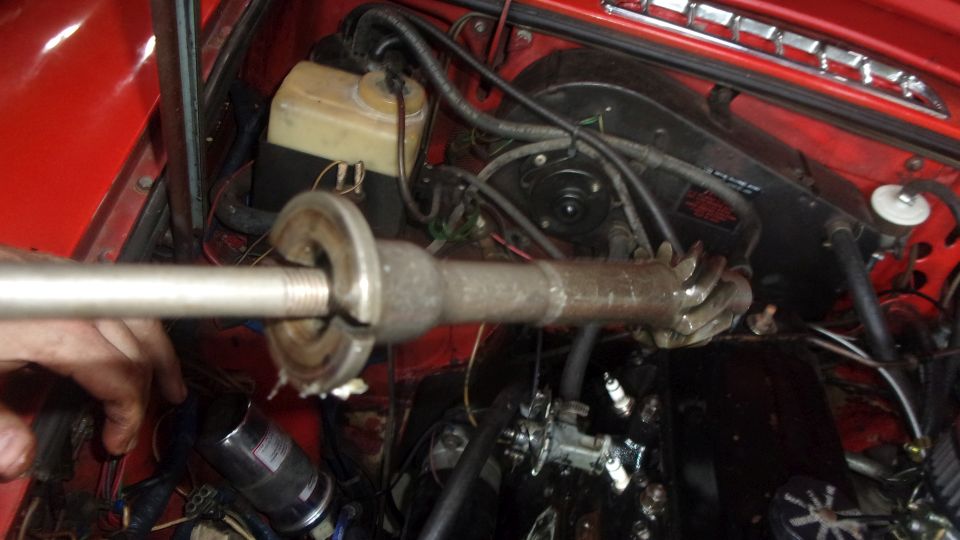
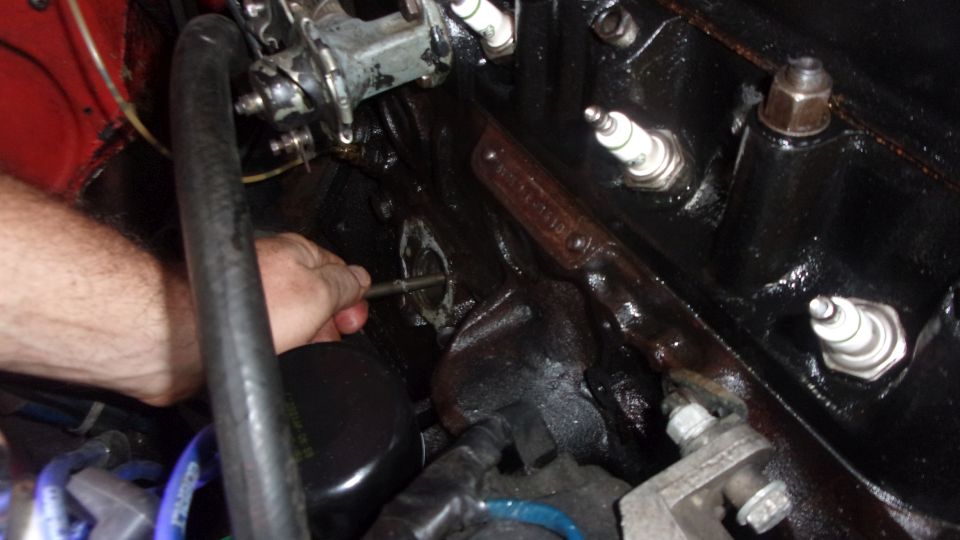
Before setting ignition timing we notice the spark wires are in wrong position on the distributor cap, meaning the distributor drive gear is installed wrong (rotor pointing in wrong direction), so might as well fix that while we're at it. Loosen base clamp and pull out the distributor. Extract two hex bolts to remove the base clamp (which was distorted from being overtightened). Took a short hike across the street to borrow a neighbor's large bench vice to straighten the clamp to make it fit the distributor so it would turn free, but could be clamped tight with a strong pinch of your fingers. Back to the engine, remove one flat head screw and tap/turn/pull to remove the flanged collar that holds the pinch clamp and also holds the distributor drive gear in place.
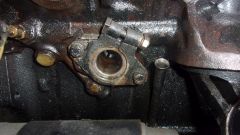
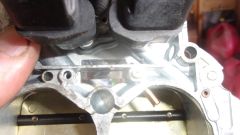
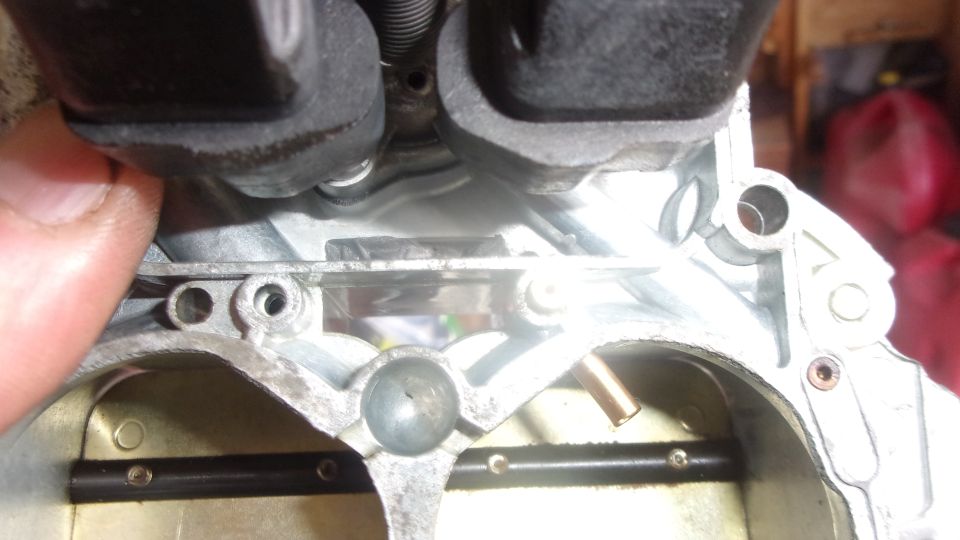
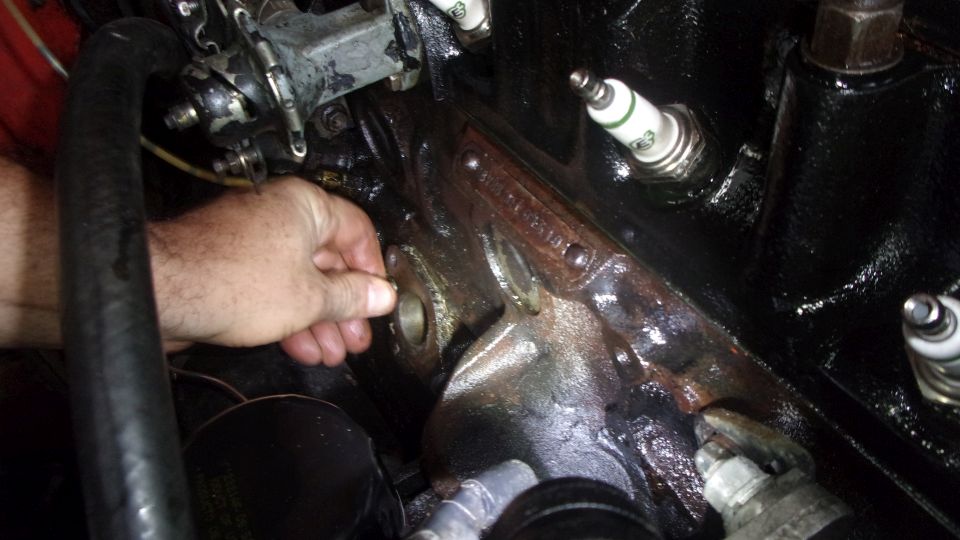
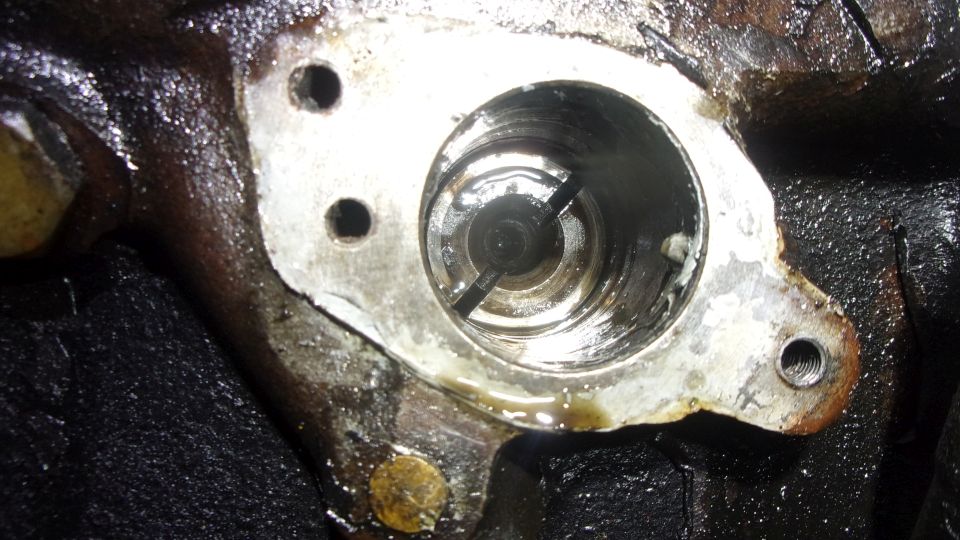
Then get a long threaded stud, 5/16-24-UNF (front rocker pedestal to valve cover stud works) to screw into the distributor drive gear to pull it out (being careful not to drop it into the engine sump). Rotate crankshaft to near top Dead Center (#1 cylinder on the compression stroke), then re-install the distributor drive gear. "Larger offset upward" (according to the British English language Workshop Manual). That means the larger crescent segment is on top when the key slot is slightly below center. Hold the gear with slot about level, so as you feel the way into the gear mesh and pilot hole and push it home, the gear will rotate a bit anti-clockwise. The key slot should then end up close to 1:30 o'clock, or more simply it should be pointing at the #1 spark plug.

.
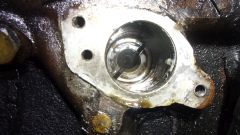 There you go, 1:30 spot on. Easier to get the camera in there than to get your head down that low. Reinstall the retaining collar with flat head screw. Then re-attach the base clamp with to bolts (left loose). Insert the distributor with rotor pointing at #1 spark plug, push and turn the rotor until the bottom key drops into the slot in the drive gear. The push and turn the distributor body while you wiggle the clamp until the distributor drops into the clamp, all the way to the shoulder on the distributor. Rotate the base clamp to approximately half way in the rotational motion (center of the slots in the clamp). Snug up one of the base bolts (whichever one is easiest for access). Then you can remove the distributor to tighten the two hex bolts. Then reinstall the distributor, rotor toward #1, bottom key engaged and dizzy shank in the clamp.
 All back together, it should look like this (picture borrowed from my MGA). If you have vacuum advance, the vacuum unit should point upward. If no vacuum unit, but it has a side entry distributor cap, then the HT Wire connections need to point roughly toward #1 spark plug. If no vacuum unit and using a top entry cap (like his Unilite distributor), you can rotate the dizzy any direction you like for convenience connecting the side wire (or wires). The HT Wire connections then start with the terminal nearest #1 spark plug running to #1, then anti-clockwise around the cap the firing order is 1-3-4-2. Ignition timing by the book, or ask me again later.
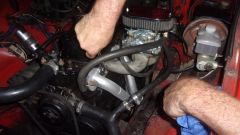
 Since we had the valve cover off to check rocker arms (while reinstalling the distributor drive), it was a good time to install new rubber grommets and the previously missing thick spacer washers (courtesy of the Magic Trailer). After setting ignition timing it still ran a bit lumpy at idle, and I was hearing a faint whistle around the left front of the engine. We tinkered around with the mechanic's stethoscope for a while checking sounds all around the engine (mostly for Steven's education). In the end we tightened up some manifold bolts near the front, and the whistle noise seemed to go away, so it may have been a leaking intake manifold gasket (which could account for the lumpy idle)
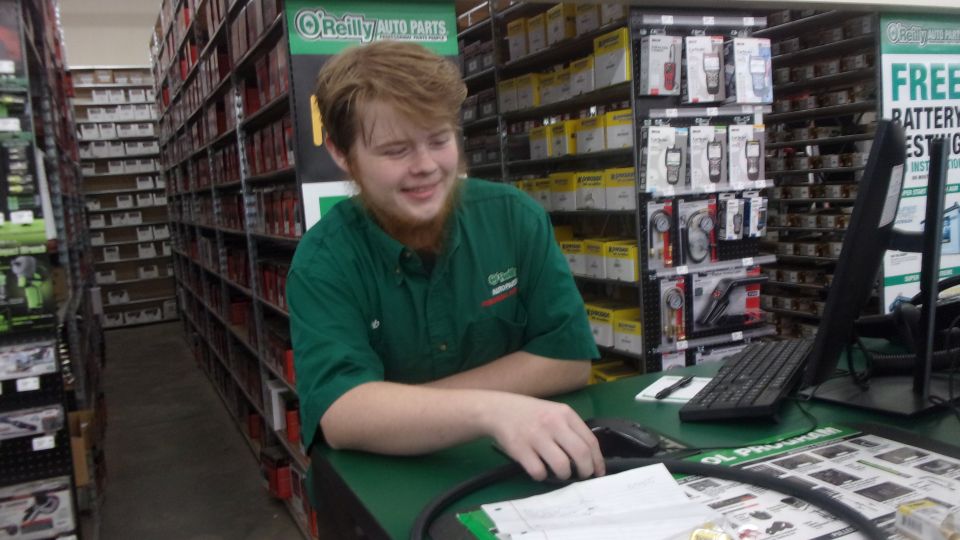
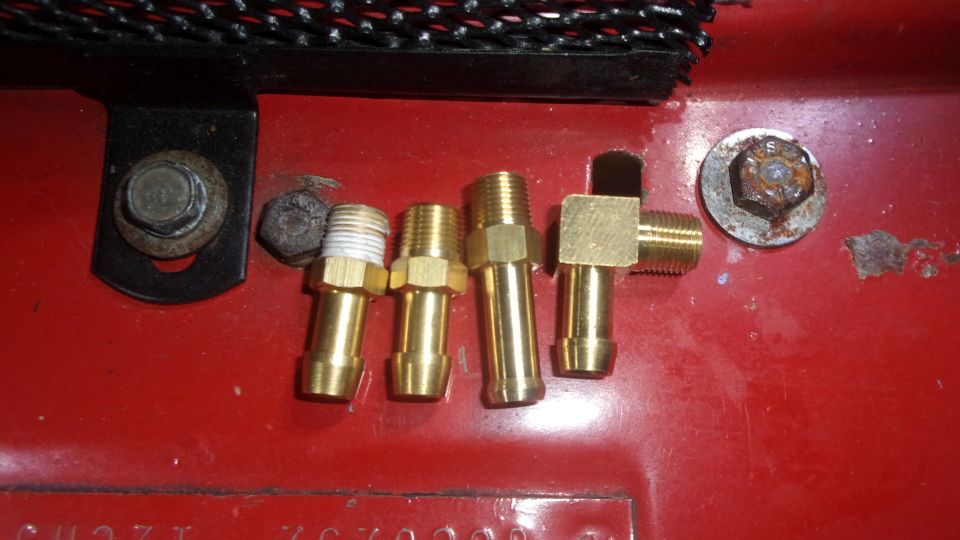
 Then we were finally off to O'Reilly Auto Parts to pick up some minor parts. Hey, we found a real live leprecan. Every day must be St Patrick's Day at O'Reilly's. We did get some brass fittings and rubber hose, and a pipe thread tap to add a vacuum port to the intake manifold (later). Did not find the best PCV valve at this time (because my computer was still shot and I didn't have the right part number handy). Back at the MGB, we at least got the brass elbow installed in the new vacuum port to reconnect the float chamber vent port to the carbon canister.

Enough for one day, might get back to this for more work one later. Must have been 10-pm by the time we found a good WiFi spot for very late lunch and a little more time trying to reconfigure software on my sick computer. And I think we are going to get frost tonight. Okay yeah, turned out we already had frost at midnight.
Sunday, November 13, 2022:
Day off (yeah, sure). Most of the day spent resuscitating my computer. Very close, but still no functional email, and I think my big spread sheet for parts inventory may be corrupted. but with a working browser, and a simple image editor, and FTP working, I can update web pages and update the trip log (yes, you're looking at it, now only 2-1/2 days in arrears
Monday, November 14, 2022:

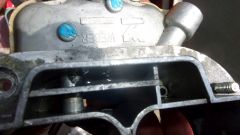
The MGA fan belt was squealing like crazy last night, and again a little this morning. Dang! More broken alternator brackets. Now this is really habit forming, and thinking there must be a cause somewhere. But it has new engine mounts, and plenty of space to lower the alternator to change a fan belt, so the alternator is nowhere near hitting the engine mount. Danged if I can see anything mechanically wrong here. Just put it back together with new parts and get on with life.
Still no email, and can't yet revive the spare parts list, but I can do some grunt work. Spent much of the day processing pictures and updating the travel log from yesterday's tech work, so now up to date there. Just ordered a new keyboard for my computer, and new batteries for my camera, to be delivered locally. So I recon we just committed to sticking around the Columbia, SC area for a few more days. Likely need that time to nurse my computer anyway.
Tuesday, November 15, 2022:
 After changing alternator brackets yesterday, we had no charging last night. Should have checked charging after fiddling with it. Looked at it this morning and found another broken wire. Managed to splice back together a couple inches of 14-ga wire using two 18-ga wires together. Not quite up to snuff, but will have to do for now, at least it's charging again.
Need to replace at least a foot long section of the wires connected to the alternator, as they have been getting baked behind the radiator and near the engine block and oil filter for 36 years. The PVC insulation is so brittle that tighter than 6-inch bend radius will crack the insulation. Then the wire flexes at the crack point and will soon break the copper wire. I may like to buy Teflon or silicone insulated wire for higher temperature tolerance. Something else to check on, after I get email working and salvage my parts inventory data file. All frustrating.
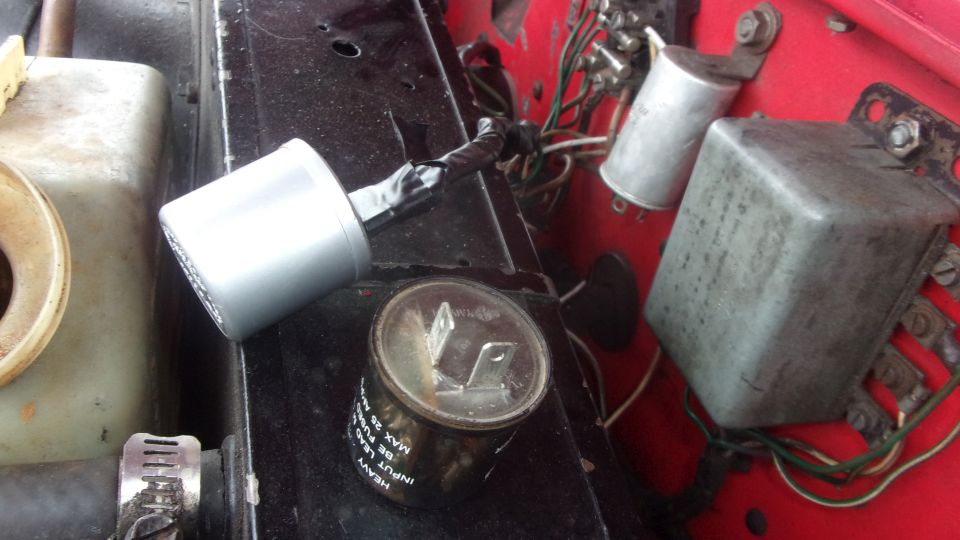
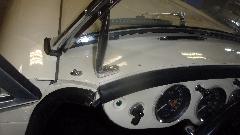
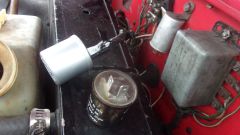 And no turn signals or 4-way flashers for last 24 hours (not related to the alternator). Brake lights work, so wiring for the pressure switch to turn signal relay are okay, and all wiring from the relay to the rear lights also okay. Switch in either left or right signal or the 4-way switch (powers both left and right signal relays at same time), and the t/s relays will click, but no output to the lamps. No power at the flasher input terminal of the relay unit, means no power from flasher to relay unit. All that diagnostic with a test light in one minute. Pick up the flasher unit to check there. Test light on electronic flasher output clicked twice then went dead. There was power into the flasher, but nothing out. Change the electronic flasher, and all is right with the world. A little odd, as those things are usually pretty reliable. Put another one on the shopping list for spare part.
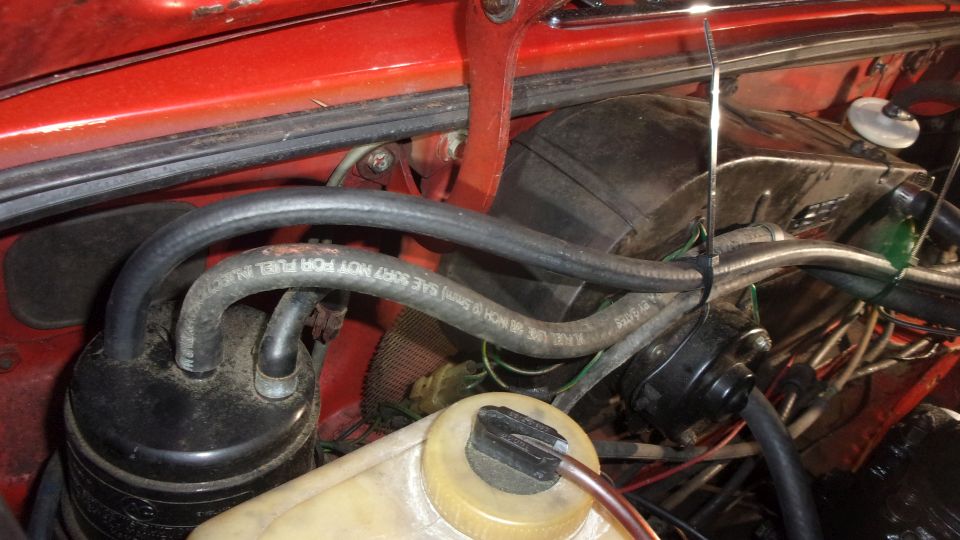
For the astute observer, the original 3-pin thermal flasher in the picture above is disconnected, for two reasons. (1.) The way I wired up 4-way flashers was simply to activate left and right turn signals at the same time. Original thermal flashers only work with exactly two bulbs connected, one bulb no flash, more than two bulbs not correct flashing rate. So I changed the single flasher to heavy duty type that will flash any number of bulbs from 1 to 6 (which of course is not available in the original style can). Also modern issue thermal flashers are now notoriously short lived, so I use an electronic flasher. And electronic flashers with 3 pins and Pilot output are not always available in the local stores, so I use a 2-pin electronic flasher (available anywhere).
(2.) To make the dash pilot light work, I long ago installed two diodes behind the t/s relay unit connected to the front turn signal terminals, then tied together with the pilot light wire that was originally connected to the original flasher unit (notice the white wire running down below the relay box). Works like a charm. Also having to repeatedly change the flasher unit (forget the fiddly little single screws), I had wired in a headlight connector for the modern flasher. That connector finally failed, and I more recently installed two Lucar connectors (because I didn't have another headlight connector handy at the time). I taped over the Lucar connectors to prevent shorting to ground, and it has been working okay, if it ain't broke don't fix it. Ah, the things we do to keep these old cars running with a few modern mods.
Better news today, finally. I got my email working again, and spent most of the day catching up with the 5-day backlog of email and tech questions. Although my inventory list spread sheet is totally trashed, I have a backup copy only two months old that can maybe be updated in a day or so with input from recent parts orders and recent trip log records of work on the cars. Late night, but feeling much better now.
|

 The pumping chamber was pretty clean, meaning not much crud in the fuel tank, so put it back together with a smile and a new fiber seal washer. I also relocated the grounding wire from the wiggle bolt in the rubber isolation mount to the correct bolt on the rear floorboard to chassis frame. Had to install a longer floor bolt and an additional hex nut for that connection. Nice to see this wire in the correct location for a change.
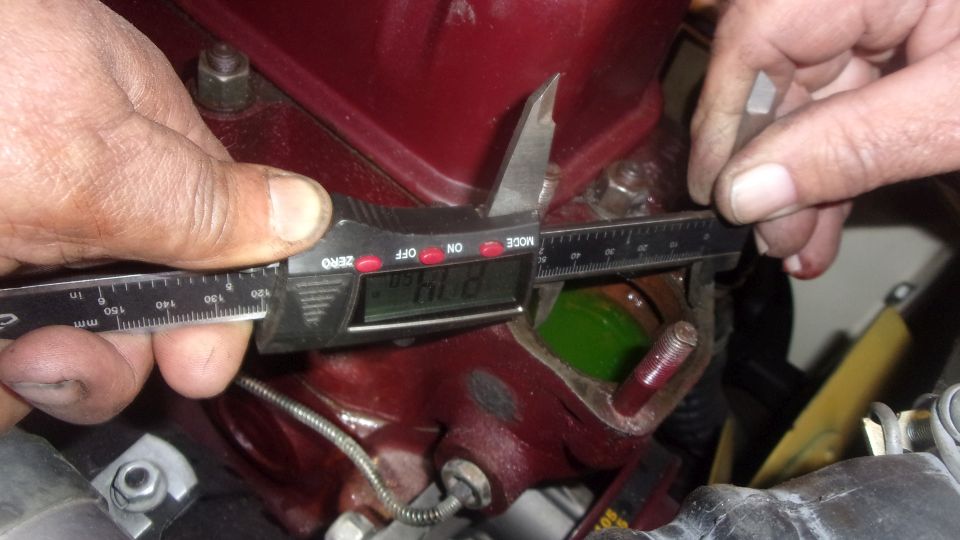

 So off to the bench grinder to remove 1/32" from the radius of the flange all around, finishing it to 2.125" diameter (or a smidge less). I bought two, so we also ground down the second one for my spare part. Picture at right shows two thermostats sitting on top of the blanking sleeves, left one before grinding and right one after grinding.
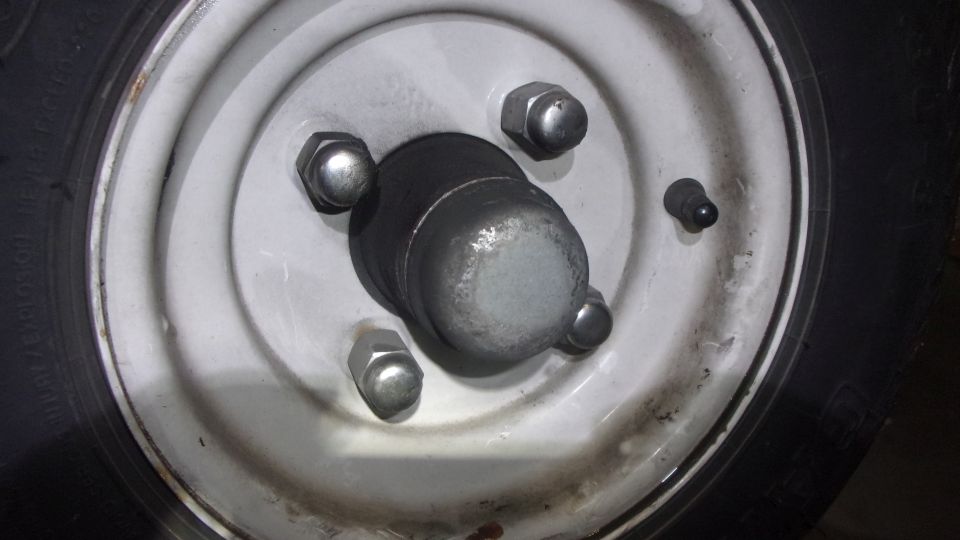


 Time to put the cover back on the carburetor and reconnect the choke link. Reconnect the fuel line, and start it up if you like, it still runs the same (still a little rough at slower engine speed). Before we ran off to buy some brass fittings and other bits, we took a look at the ignition side of the engine.
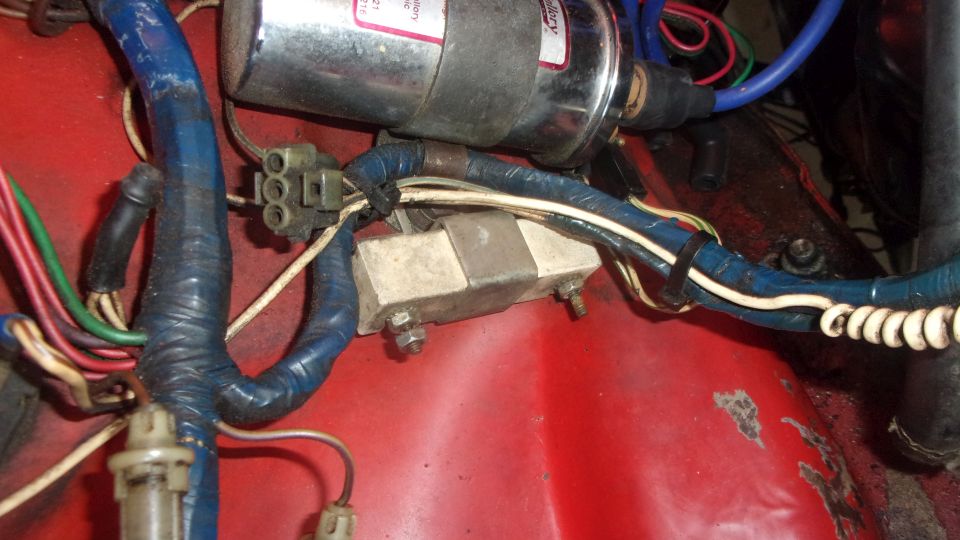


 There you go, 1:30 spot on. Easier to get the camera in there than to get your head down that low. Reinstall the retaining collar with flat head screw. Then re-attach the base clamp with to bolts (left loose). Insert the distributor with rotor pointing at #1 spark plug, push and turn the rotor until the bottom key drops into the slot in the drive gear. The push and turn the distributor body while you wiggle the clamp until the distributor drops into the clamp, all the way to the shoulder on the distributor. Rotate the base clamp to approximately half way in the rotational motion (center of the slots in the clamp). Snug up one of the base bolts (whichever one is easiest for access). Then you can remove the distributor to tighten the two hex bolts. Then reinstall the distributor, rotor toward #1, bottom key engaged and dizzy shank in the clamp.
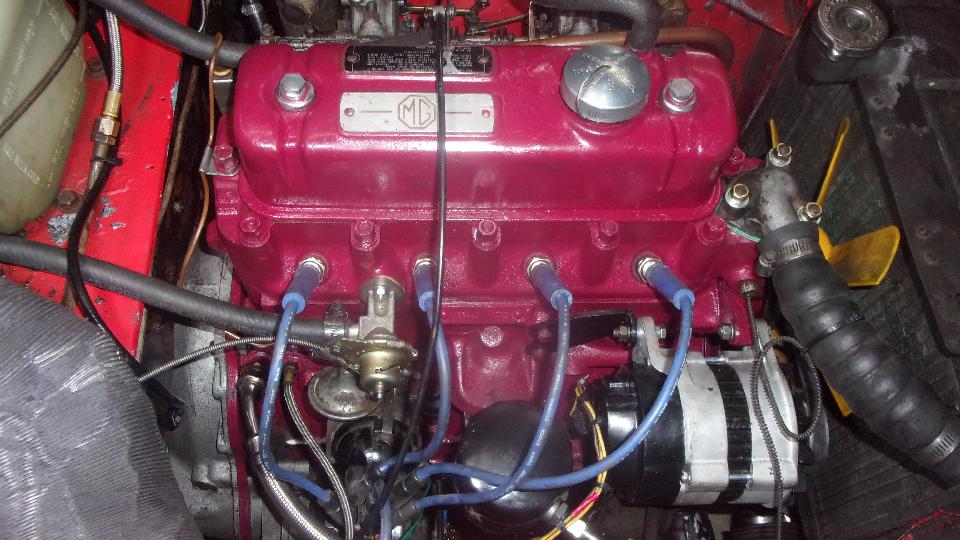


 After changing alternator brackets yesterday, we had no charging last night. Should have checked charging after fiddling with it. Looked at it this morning and found another broken wire. Managed to splice back together a couple inches of 14-ga wire using two 18-ga wires together. Not quite up to snuff, but will have to do for now, at least it's charging again.