The MGA With An Attitude
MGA Guru Is GOING MOBILE - (July 16 - July 31, 2022)
Saturday, July 16, 2022:
Someone asked what I thought about a new oil product called Castrol GTX Classic 20W50 with high zinc content for classic cars for $24.71 (with tax) for the 5-quart bottle. So I casually asked what he thinks about Super Tech 20W50 oil with high zinc content for $19.27 (with tax) for the 5-quart bottle. Wasn't much of a reply. I guess he didn't know about industry standards.
Sunday, July 17, 2022:
Maybe the only thing significant to happen today was a non-event. Someone reported a faulty part from Moss Motors that turned out by day's end not to be faulty. It seemed believable at first, until I pulled a spare part out of the Magic Trailer and measured it and compared it to one in my car, and there was nothing wrong with it. Turned out to be the mating part in the guy's car that was an incorrect part. It happens.
Monday, July 18, 2022:
Posted part numbers and sizes for MGA Twin Cam water pump bearings.
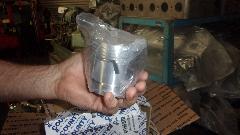
 Pistons were supposed to be delivered to machine shop by end of day today, but late night tracking information changed to show the package departing San Francisco USPS facility in the evening, so definitely no delivery today. Pistons were supposed to be delivered to machine shop by end of day today, but late night tracking information changed to show the package departing San Francisco USPS facility in the evening, so definitely no delivery today.
Tuesday, July 19, 2022:
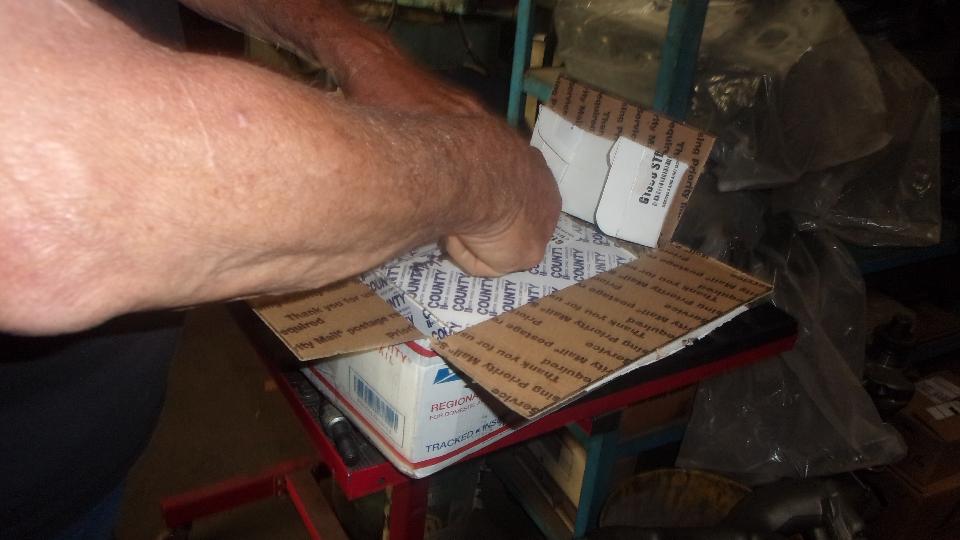
Better news today. Pistons reported to arrive at USPS facility in Petaluma, CA, early this morning, now in transit to destination (machine shop) today. But by mid afternoon we had report that they had not arrived, in spite of the tracking report saying they had been delivered "at the mailbox" in San Andreas, CA. But the machine shop in San Andreas has no postal mailbox, so the crap had hit the fan. The San Andreas post office reports that the shop has no deliverable postal address, so the package was returned to sender. Oops. Sure enough the package was back at the importer's shop in Petaluma, CA. Okay, enough is enough, drop everything.

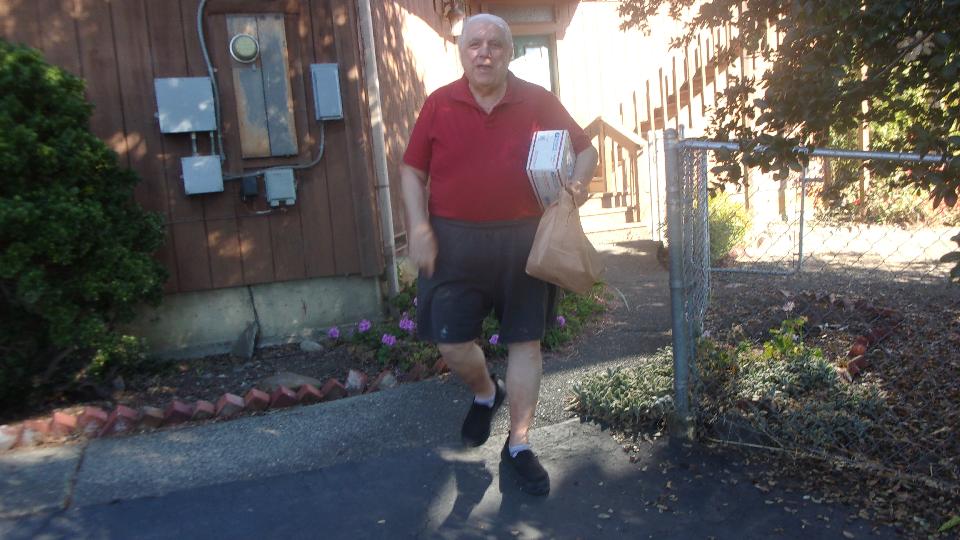
 We gassed up the MG and headed west 77 miles from Lodi to Petaluma to pick up the package. Say hello to Basil Adams, importer and Brit car parts distributor in Petaluma, California. We then returned to Lodi. We will personally deliver the package to the shop in San Andreas in the morning. Only 260 miles extra driving to solve that problem.
Wednesday, July 20, 2022:
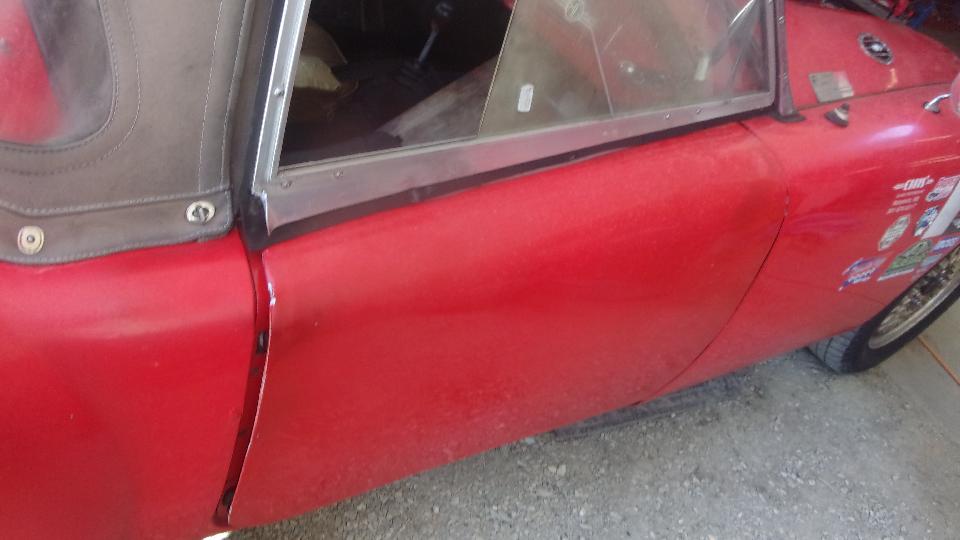
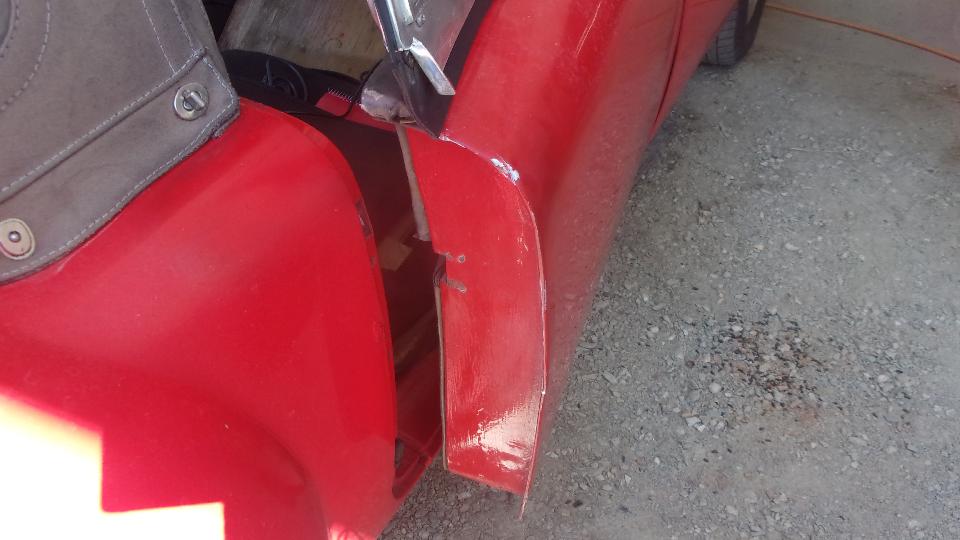
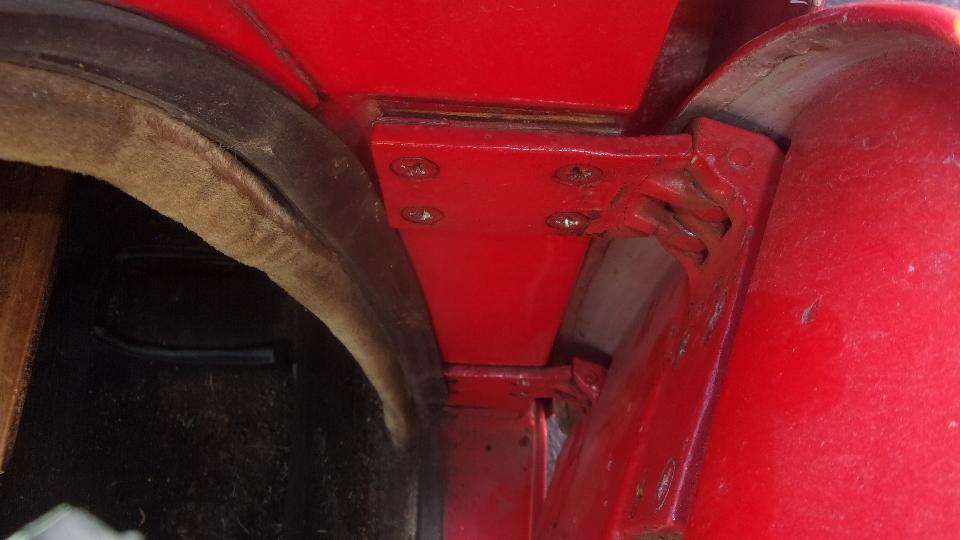
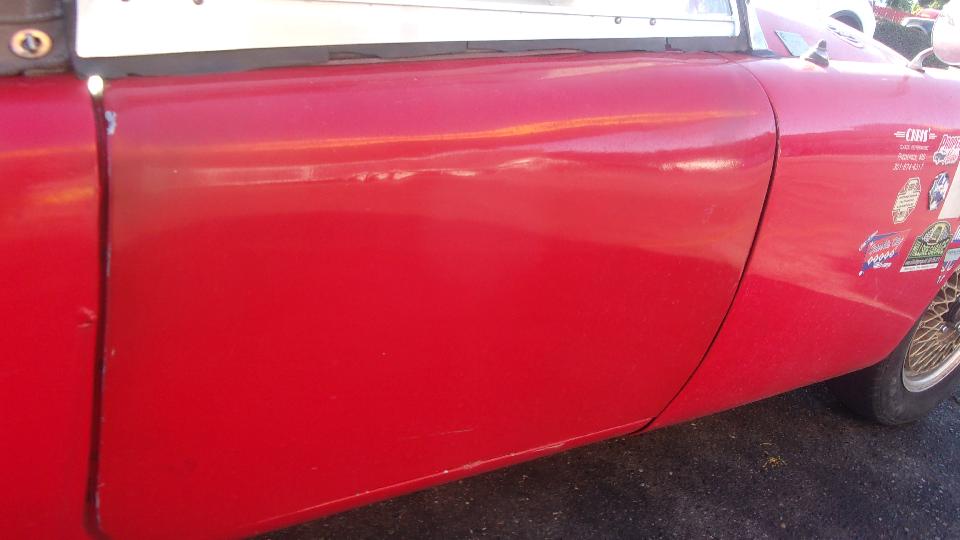
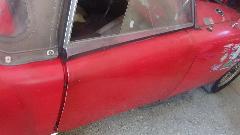
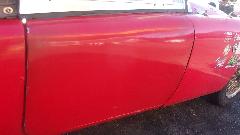
Today might best be described as, "didn't go as planned" (to be nice about it). Up early for breakfast, after which navigator decided to clean the windscreen before heading out. Passenger side door was open, but even with that the car was well within a well marked parking space when a vehicle towing a fairly wide trailer passed a bit too close and clipped the open door. Don't know if the driver noticed or not, but kept going, didn't stop to acknowledge anything had happened. The door was mangled a bit on the trailing edge, and the hinges were bent some, but it would close enough to latch on the first safety catch position. We were on a schedule this morning, so figure to tend to the damaged door later.

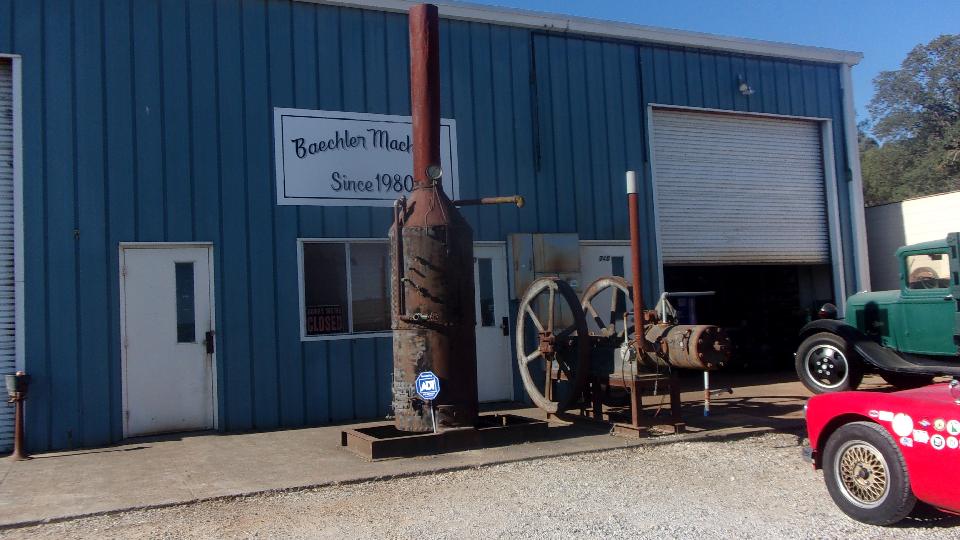
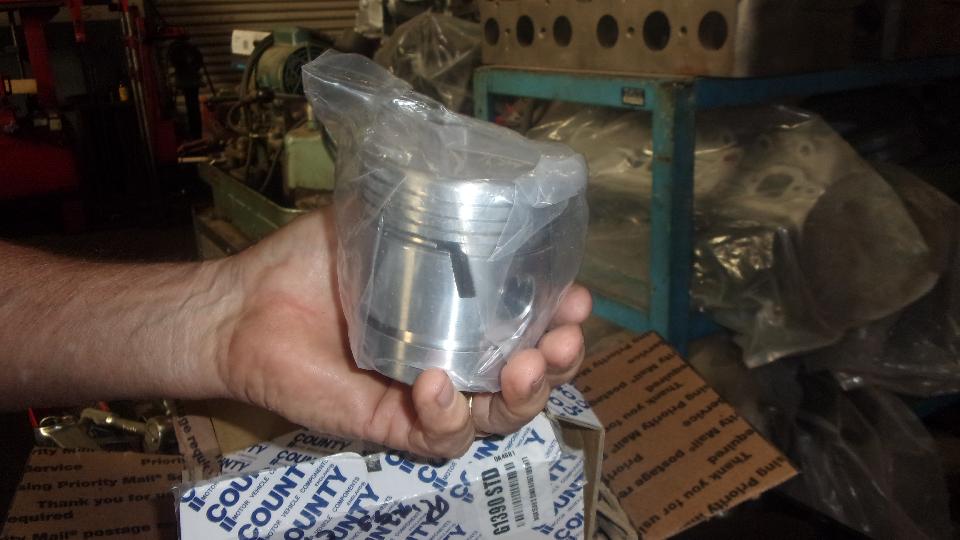
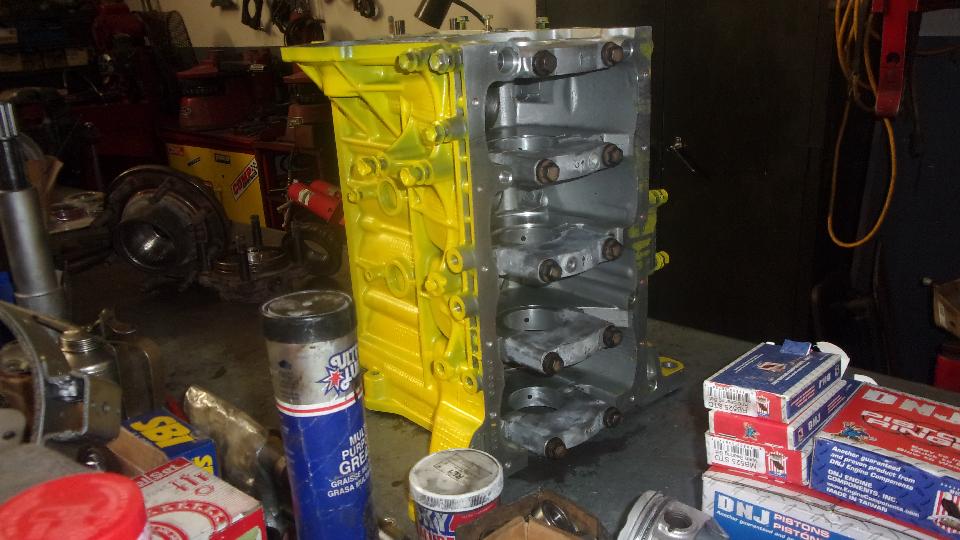
Heading out of Lodi, the first order of business was to deliver the new pistons to the shop in San Andreas, CA, so heading east for the one hour trip. No problem there, arriving as planned around 8:30-am, just had to wait a few minutes for the owner to arrive and open up for the day.

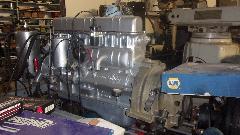
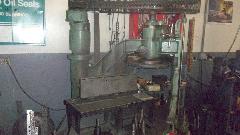
Then we got the nickle tour of the shop (which we missed last time here on July 8). Now let's see if I can remember what all the pictures were. The first treat was a two cylinder Ford engine from an early Model A, 1903 or thereabout, all of 8-HP. Sitting nearby for contrast, a big block Hemi V8 engine and a newer alloy 4-cylinder engine of oriental decent.


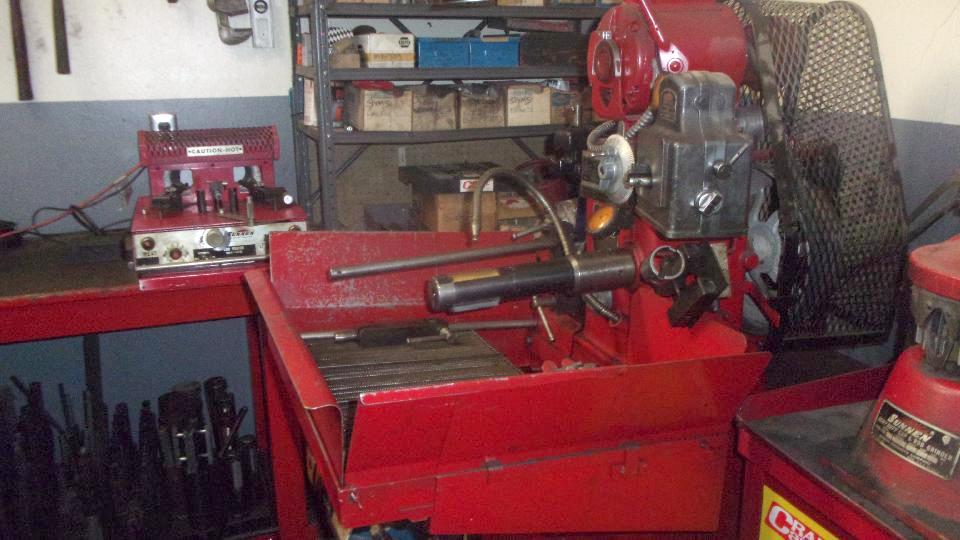
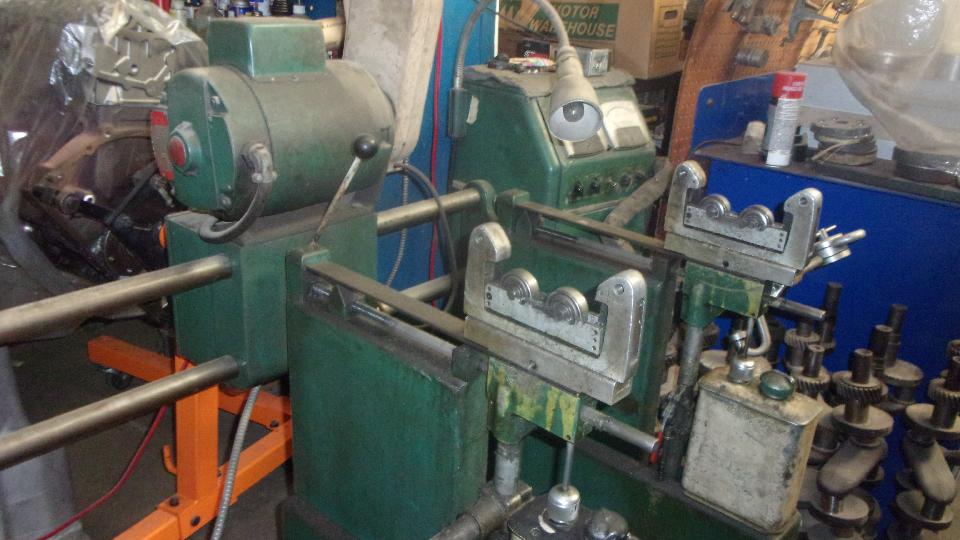
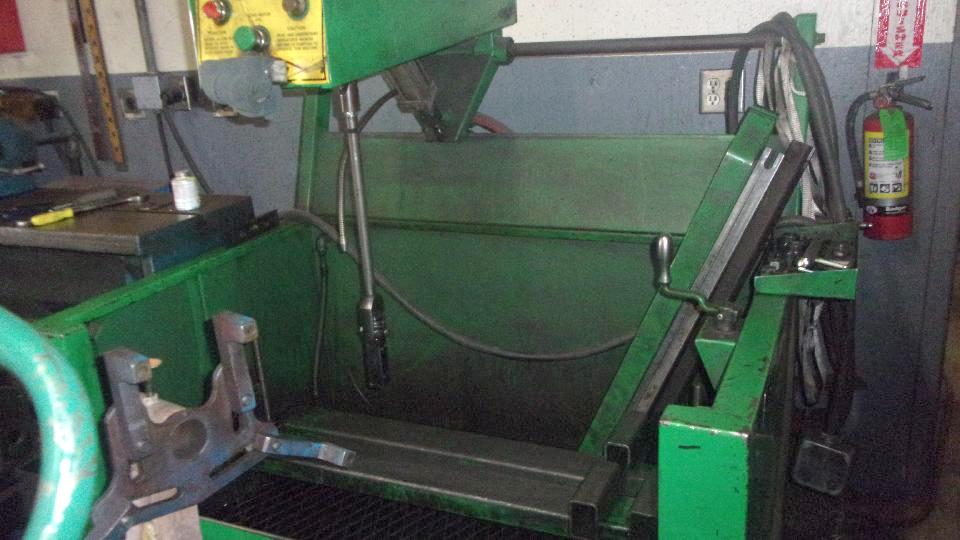
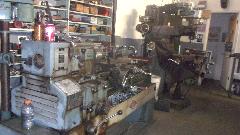
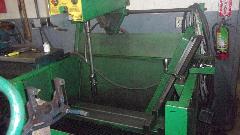
Then on to the machine tool toys, beginning with a honing machine for pretty much anything that needs to have a precision round bore, like connecting rods for instance. The next one (if I recall correctly) is a machine for re-lining babbitt bearings when you do not have replaceable bearing shells. Next is the spin balancing machine for crankshafts, and I suppose can balance flywheels and clutches on the same machine.
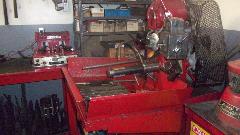
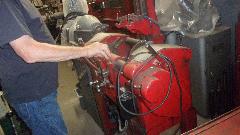
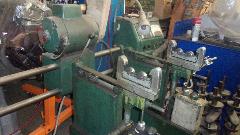
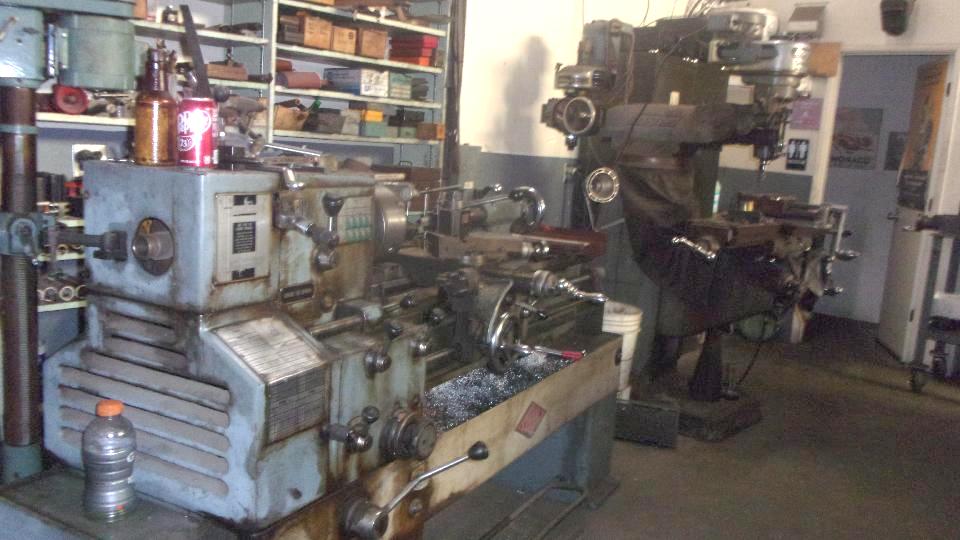
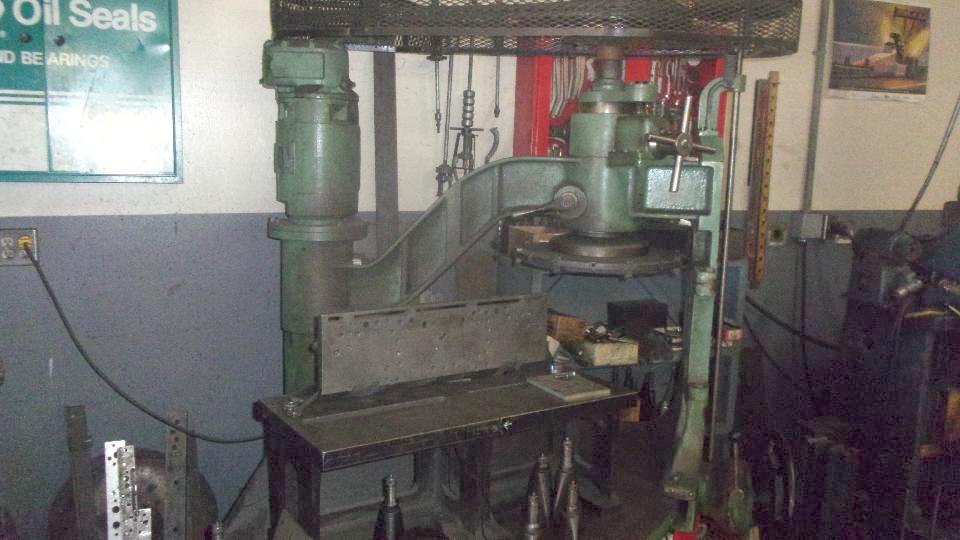
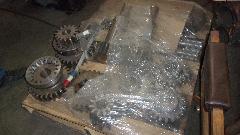
Just to the right of the large truck engine is a dynamometer for power testing of engines. Then a pallet load of reconditioned gears for a large truck transmission. And a rather large lathe and a milling machine for general machine work. I suppose my cylinder head will land there for replacing valve seats.
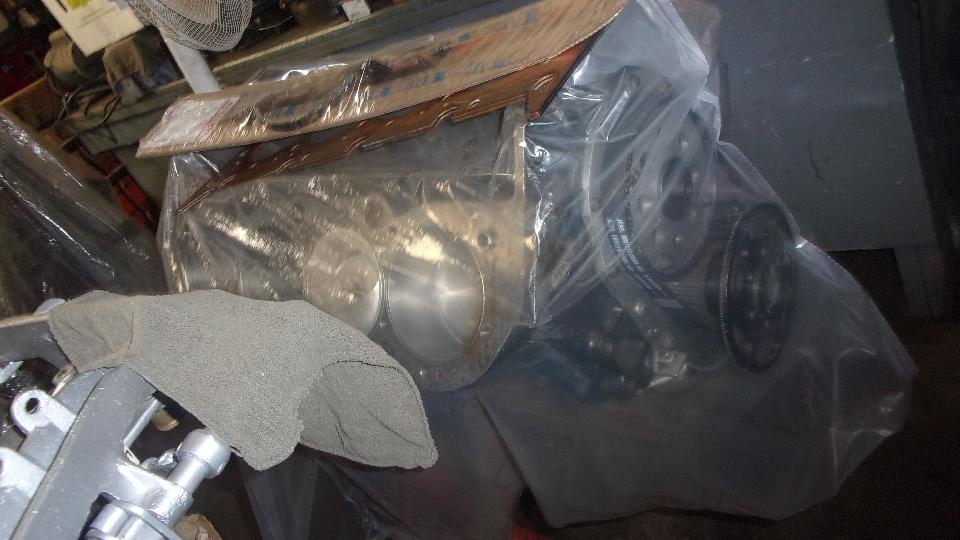
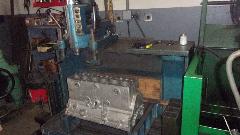
Next was a vertical boring machine for cylinder boring and sleeving. My engine block is destined to be sitting here soon. Next in line was a vertical hone for finishing cylinder bores. And the deck cutting machine for resurfacing engine blocks and cylinder heads.
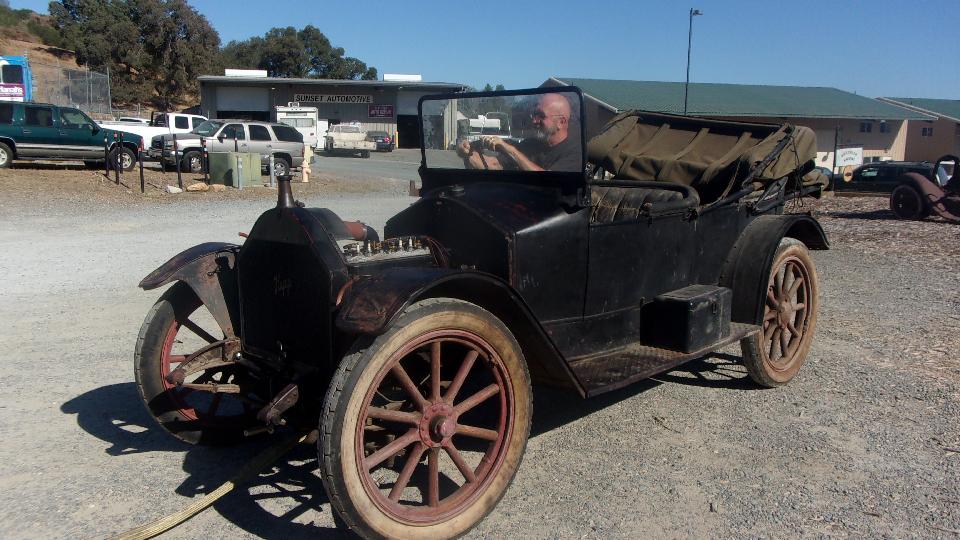
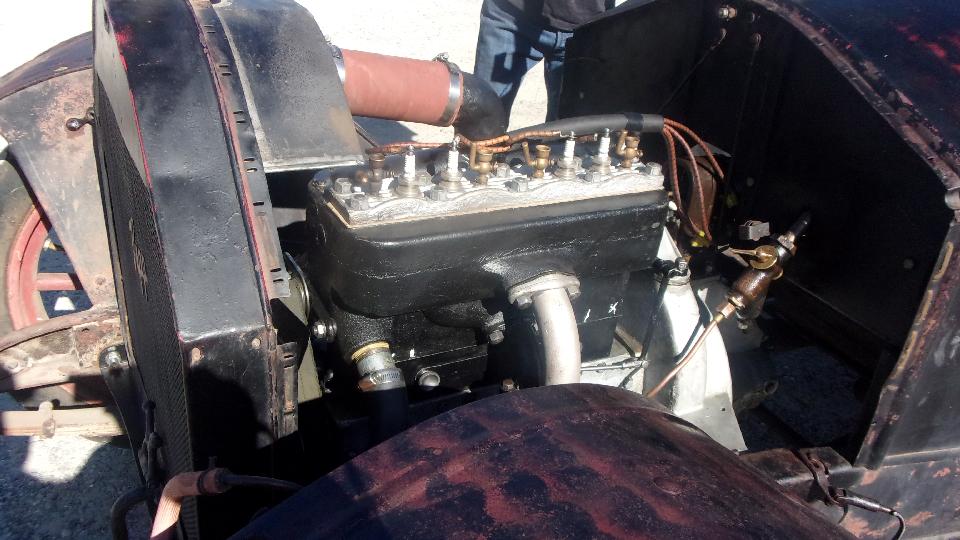
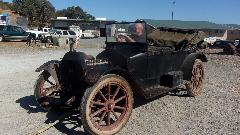
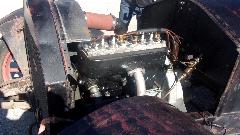
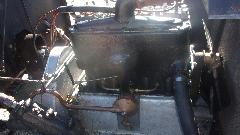
Finally we got to push the 1913 Hupmobile outside to allow space for moving other things around. The car runs and drives well, but it's a little tight with a fresh engine so they like to tow it for starting until they can get more running time on it. This is a "survivor" car pretty much all original, never restored.
The next thing that wasn't as planned (or hoped for) came when I asked about the schedule for machining my engine. Well, he is going on vacation for a week, so it looks more like two weeks before we get the engine back. Kind of a bummer, but California is a big state, so I'm sure we can find things to do to keep us busy that long.
.
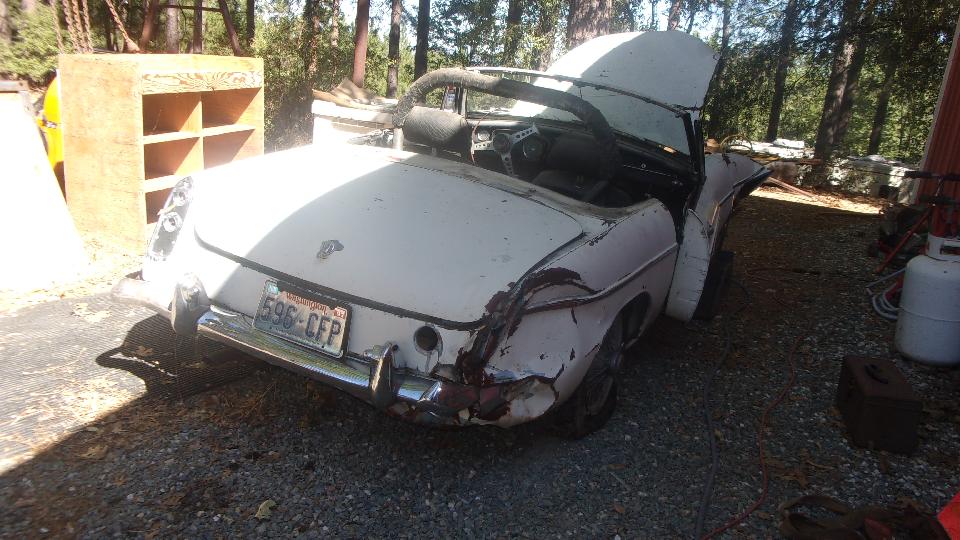
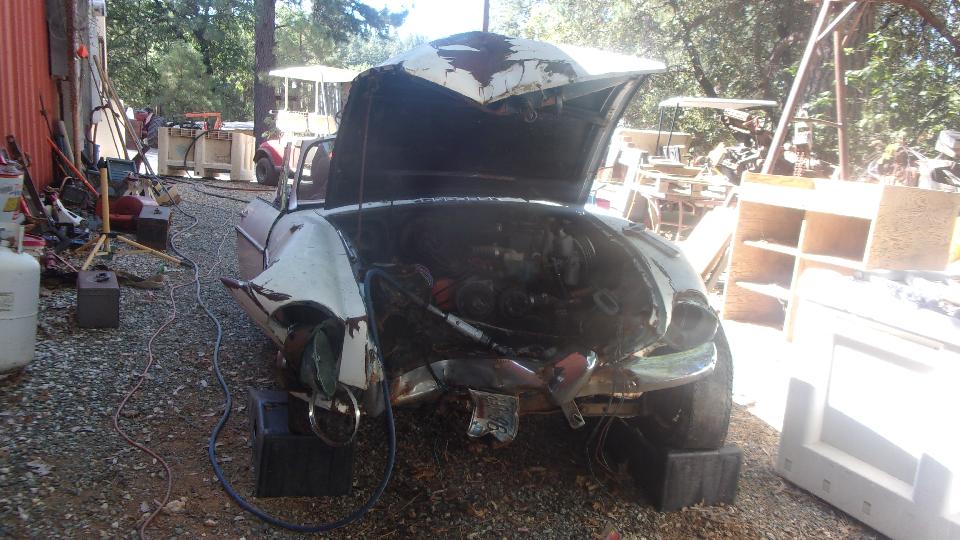
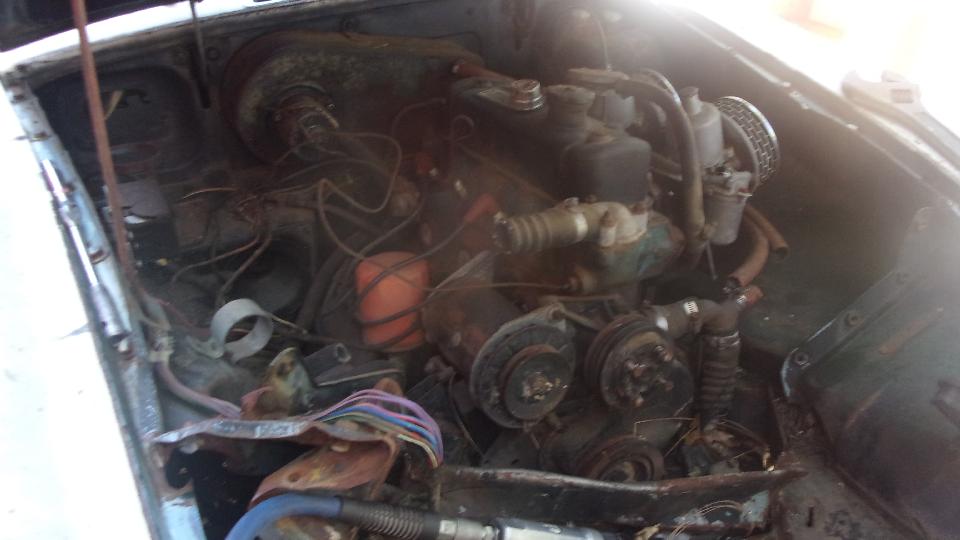
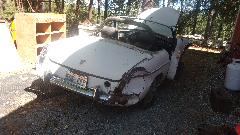
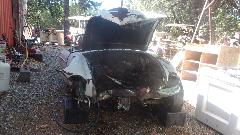
Since we were in the neighborhood, it was a good time to get back to out good friend Stuart Mast in Murphys, CA. Here we get a look at his latest acquisition, a pull-handle MGB (1962-1964). This car was in a serious accident decades back, but the owner always thought he wanted to restore it (fat chance). It was in paid storage for maybe 25 years (could have bought a new car for the storage fees). Then the storage fee payments stopped, and ultimately the car was given up for free, just get it out of here. The engine turns over with a wrench. Wanting to do a compression test, but need to pry the steering rack away from the crank pulley to do that. The car also came with a decent looking bolt-on hardtop, and another friend was dropping by to pick up the free hardtop, so I spent a little time liberating the hardtop attachment hardware from the hulk.

Finally getting back to one of our prime reasons for our current visit to California. Regularly since 2015
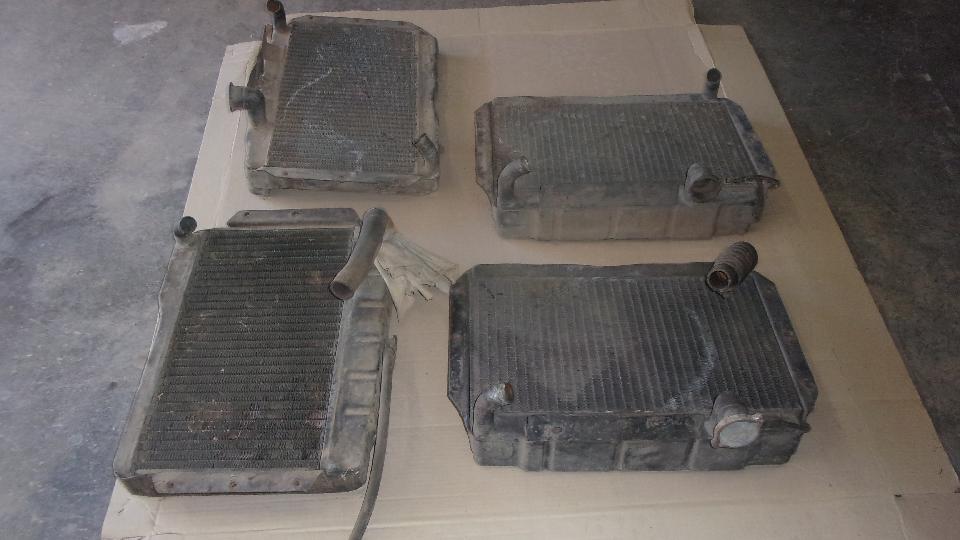
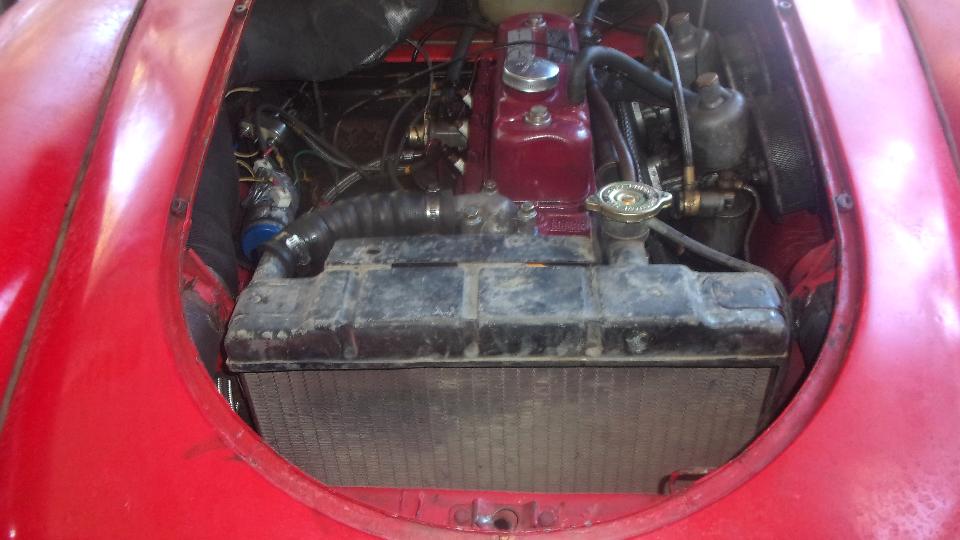
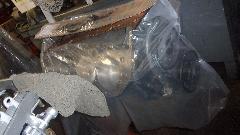
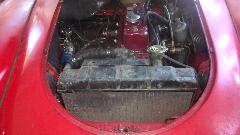
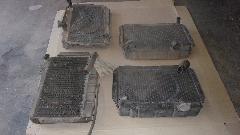 Stuart has been offering us an original MGA cell core radiator, free for the taking. But it has taken us seven years to set aside some time to take him up on the offer. The radiator at left front is from a post 1967 MGB with water inlet on the opposite top corner, but the other three are original MGA cell core radiators. We had picked up a bicycle inner tube for testing, and now was the time to get to it. Cut the skinny inner tube and stretch it over the water pipes on the radiator, close the drain valve and install a pressure cap. Apply a little air pressure, and dunk the radiator in a water basin to see if it leaks. We found two with serious leaks, but one that didn't.
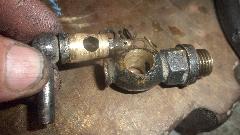 Having lucked out, it was time to do the radiator swap in my car. Navigator has been complaining for years about the awkward wing screw style drain valve in our car, and we found one original style petcock valve with one of these radiators, so it was time to change that as well. The petcock was stuck, and once we got it free to turn it was leaking some. So I took it apart for cleaning, lapped the tapered cones together with a drop of valve grinding compound, then cleaned it out and put it back together with a dab of silicone grease, and it was good to go.
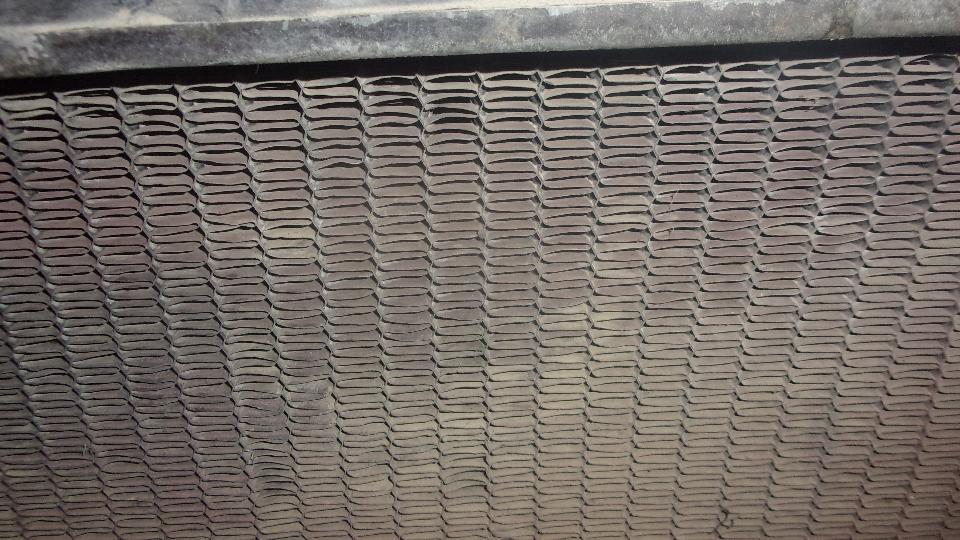
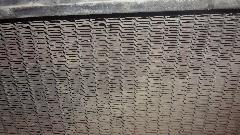
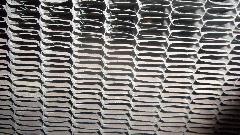
So there it is in the car, pressure tested, leak tight, all warmed up and ready for a test run, and it is not overheating while idling with bonnet down on a hot day. I'm already gloating. Just look at all the air flow space through the original cell core ribbon fins. Let's go!
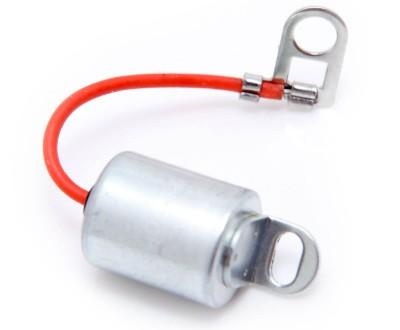
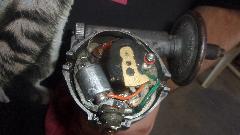
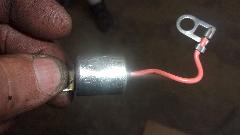
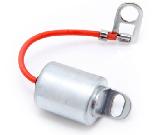
Well, maybe not. You know I said thing were not going as planned today. Before we could get to the road the ignition was crapping out with engine dying, not going anywhere, guessing a failed condenser again. Temporarily clamping up my test condenser, the engine ran well enough to drive it up the hill back to the shop. Disconnect the test condenser, and it would die. Pretty good indication of a failed condenser. It was hot today, and we were pretty pissed by this time, so sit down with a cold one while the car cools down. Then pull the distributor to change the condenser, after which it was running again. Center picture below is the failed condenser that was removed. Picture on right is the "Lucas" condenser from the Moss Motors web site, same part. My records show very recent installation, very short life, just crap parts, and multiple failures. I don't need this sort of fabricated problem with everything else going on. Avoid current issue Lucas condensers like the plague.
Once the ignition was fixed we headed out for the "thermal" test run with the very vintage cell core radiator. Did I mention it was 100dF in the foothills from 3 to 5 pm today? Out the drive and down the hill 4 miles to Murphys, CA. U-turn and head back up the hill, mostly flat out in 3rd gear with the 600 pound trailer in tow for 4 miles between 45 and 55 MPH. This was going so well that we blew right past Stu's place and kept going another half mile over the hill, and a mile down the other side. Then another U-turn and full throttle again 3rd gear back up the hill for a mile and over the top, back to Stu's place. Navigator had an eye on the temperature gauge, and it never went any higher than 215dF through the whole ordeal. Piece of cake even with plain water, but this had 50/50 antifreeze coolant in it, good for about 255dF boiling point with the 7-psi pressure cap. And the temperature went back to 200dF as soon as we got off the throttle and let it idle while parked. Call it good for now, certainly better than to "super tube and fin" radiator just removed (which we have been living with for the past 35 years).
After a little grin and feel good session it was time to get after the door that was crunched this morning, so it doesn't continue to bug us too much. Solution here was to install some shims on the A-pillar behind the bent hinges. Having a hand full of various thickness shims, we just kept stuffing them in until the door would close again. The top hinge got two sheet metal shims, one thick fiber shim, and one not so thick fiber shim. The bottom hinge got one less fiber shim, total of three I think. The top hinge was close to running out of space with the screws too short, barely getting threads to engage, but we did get it back together. Finally adjusted to near flush on outside panels, the door would close and latch properly on the second detent, so closed securely. And it didn't look as bad as I thought it might, so worry about paint touch up later.
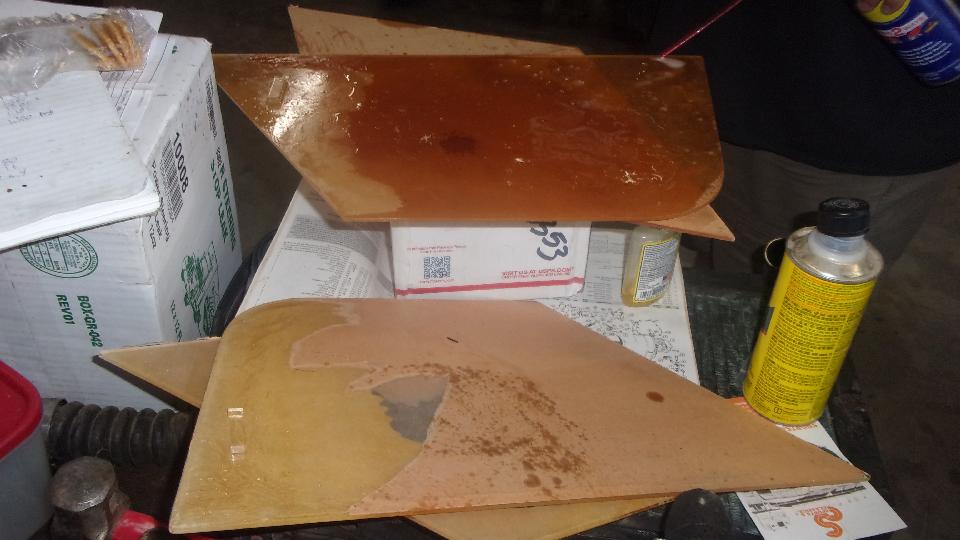
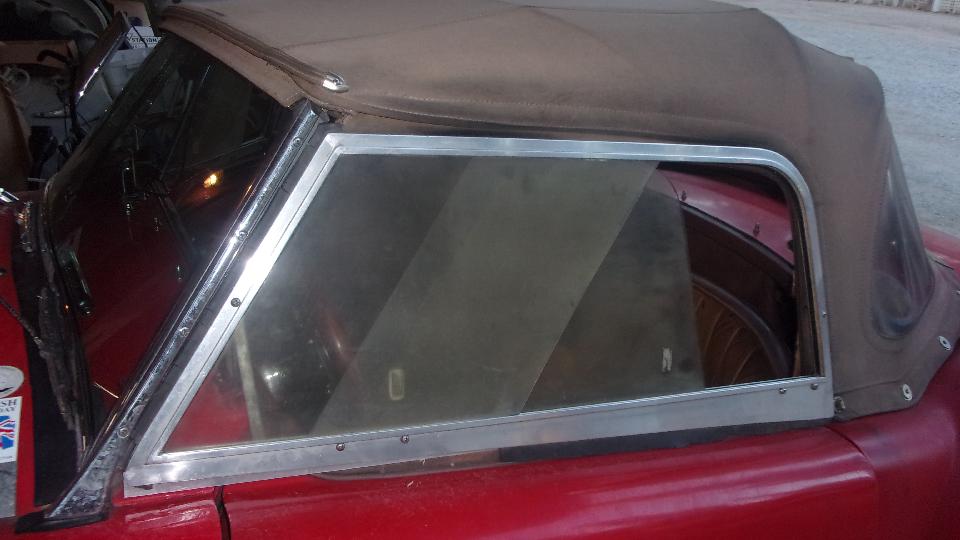
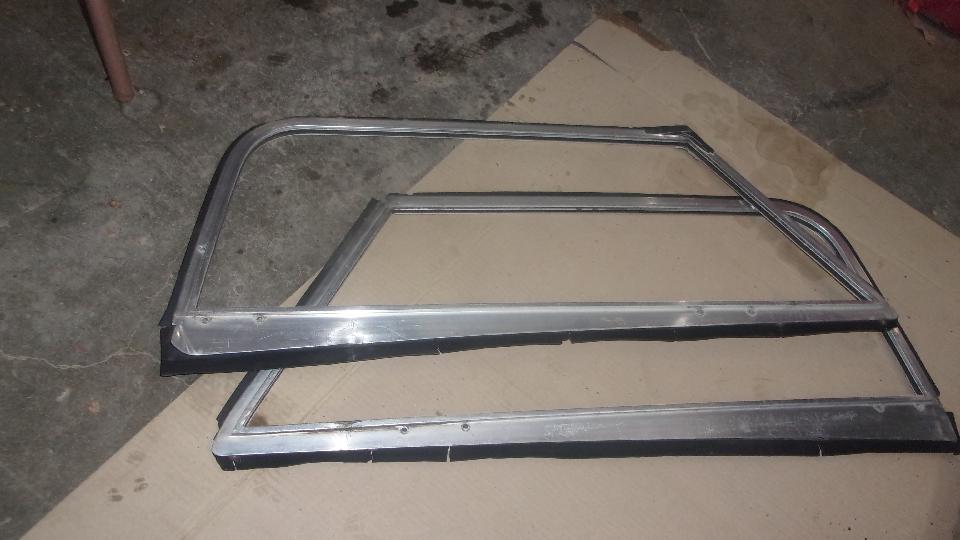
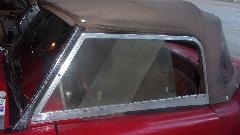
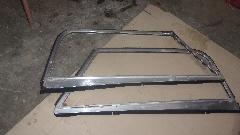
With a little daylight left we had another project in hand. Stu had been holding onto a set of side curtains, new in box, never installed, but maybe as old as my original restoration (mid 1980's vintage). They are same part as I had on my car, Moss Motors parts from the WayBack machine, but they were missing the mounting brackets. Original intent was to pop out the plastic panels to install in my side curtains. But since our right side frame was damaged this morning, the plan changed to swap the brackets from our old side curtains to the new ones, and they should bolt right up with no adjustment requires, since the brackets are the parts custom formed to make them fit. Just 12 screws total for the whole set. It didn't take too long, and they indeed did drop right into place without adjustment.
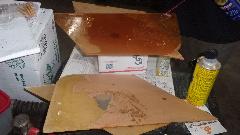
The other issue was trying to peel the protective paper off of the Perspex panels, having been drying in place for decades. Traditionally WD40 may soak off a window sticker, but not this time. We ultimately gave up and tossed the Perspex panels in a tub of water to soak. That was working, slowly. More than half of the paper finally soaked soft and came off, but more remained. So we left them soaking it the water, and installed our older scuffed up panels into the new frames on the car for now. We will come back later to see how well the "new" vintage panels will clean up.
Sun dropping low by 8:15 pm, it was time to pack it up for the day and head on down the hill. Nearest known good WiFi spot was Ripon, CA, 62 miles in 75 minutes, which was a quite pleasurable evening cruise westward on the winding country roads through the foothills and central valley flats. Landing about 9:30 pm, time for late lunch and a few hours to check email and BBS. Long busy day, not as planned, but it came out okay in the end.
Thursday, July 21, 2022:
We knew this was going to have to be a day off to catch up photos and notes from the day before, as well as the normal chores of email and tech questions. I needed to do a slight correction on a seal washers tech page to change the description of one of them from copper to fiber. Pain for the research, but easy for the page revision. -- Some discussion about oil pump displacement, oil flow volume, relief pressure, and related bypass flow and generation of heat in the oil. Bottom line is, don't increase oil relief pressure too much.
Friday, July 22, 2022:
Current engine machine work brought up some discussion about the worth (or not) of various minor engine upgrades. I was playing around with some of that 25 years ago when doing regular autocross competition, but by now most of it has reverted back to standard specification.
Saturday, July 23, 2022:
Someone back home in the Chicago area getting into repair of an MGA gearbox that was popping out of both 2nd and 3rd gears. That was a little weird, as the only thing they have in common is the bronze thrust washer on the main shaft between the gears. Sure enough, it turned out to be a broken thrust washer with lots of little bits of bronze in the bottom of the gearbox.
Sunday, July 24, 2022:
Hoping no one gets concerned about a stretch of quiet. The machinist is on vacation for the next week, so we get to kill some time.
Monday, July 25, 2022:
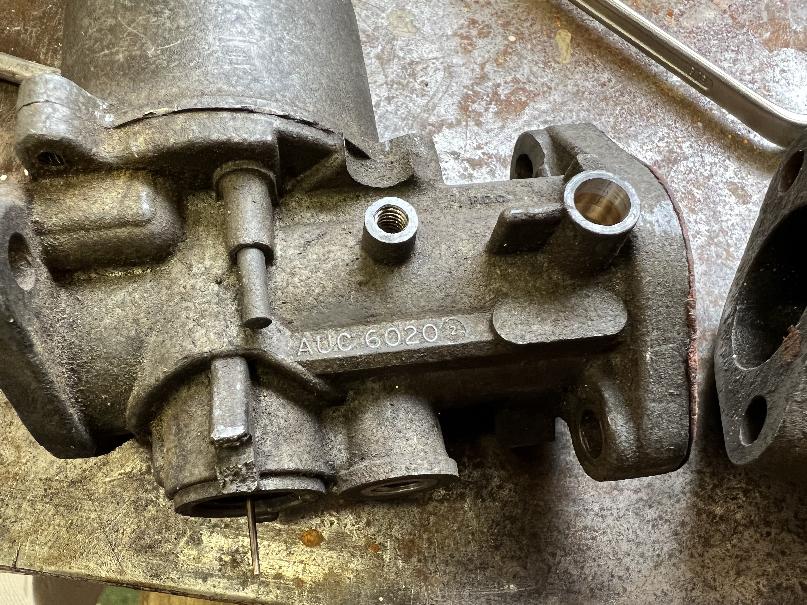
Tuned in on the John Twist UML evening Zoom meeting tech session with 141 people participating. I got to ask a question for a change to find our which SU carburetors had bushings for the throttle shaft, which ones were cast
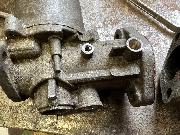 in place, which ones pressed in, and which ones had no bushings. Interesting bit of information, and I had to update a tech page for that one.
In the 30's and early 40's throttle bodies were bronze, no bushings required (but they did wear). MG T-Types and MGA (post war to early 60's) had H-Type carburetors with bronze bushings cast into pot metal throttle bodies (photo at right) and brass throttle shafts (where shafts would wear more than the throttle body). Early MGB and Midgets with HS carburetors. HS2 carbs had plain cast throttle bodies, no bushings (cheap), and brass shafts, and the shafts would wear a LOT. HS4 carbs in MGB had cast in brass bushings and brass shafts, and the bushings would wear more than the shaft. 1972-1974 MGB with HIF carburetors had a pressed in replaceable bushings, split steel sleeve with Teflon lining. The bushings didn't wear much and were replaceable, leading to long life and easy service.
Tuesday, July 26, 2022:
We were just out on the expressway in mid afternoon with ambient temperature in the high 90's. Encountered five miles of stop and creep in heavy traffic, and coolant temperature never went higher than 200dF, so it looks like the vintage cell core radiator is doing okay.
Someone asking about repair of an MGA magnetic fuel gauge. This one had been tinkered with, and much of the internal wiring was damaged, so hard to say if it would be (easily) repairable or not. Took a while to explain why gauge and sender are matched parts, and not easy to substitute parts from other model cars.
Someone in South Africa is restoring an MGA 1500 Coupe, wanting to convert it to front disc brakes, but the parts are hard to source. I don't think I can help much with local sourcing of vintage parts down there.
Wednesday, July 27, 2022:
Got a note about an MGA in Pennsylvania that had the carburetors rebuilt (by me) in fall of 2021 (although I didn't install them). Word now is one of the carbs appears to be not feeding fuel. Interesting issue, needs some investigation to determine the problem. -- Someone wanting to know how to convert positive earth to negative earth (should be an easy teach).
Thursday, July 28, 2022:
Someone with a Weber DGV downdraft conversion on an MGA having a problem with vacuum advance (or at least too much spark advance), which may or may not be vacuum related).
Friday, July 29, 2022:
Got word that S.W. Anderson has moved warehouse operations from Downers Grove, IL to Bolingbrook, IL. This is the outfit that has been supplying industrial fasteners for decades, including Dzus 1/4 turn fasteners that can be used for MGA (and MGB) battery covers.
Another note about how to repair broken screws and/or stripped out threads for bonnet and boot lid hinge fasteners in the MGA. The common answer is, good luck, and let me know if you figure out how to do it without disassembling the main body weldment. Followed by some suggestions on how to go about it.
Saturday, July 30, 2022:
Note about how to repair broken screws and/or stripped out threads for bonnet and boot lid hinge fasteners in the MGA. The common answer is, good luck, and let me know if you figure out how to do it without disassembling the main body weldment. Followed by some suggestions on how to go about it.
MGA Horn button wiring question today. Easy answer, but maybe not so easy diagnostics when it doesn't work.
Apparently I'm more than a few days behind updating the travel log here. Getting messages wondering if we're okay. Mostly just bored while waiting for engine machine work, but I'll get it up to date soon.
Sunday, July 31, 2022:
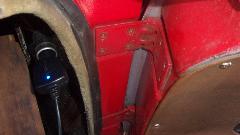
For about a week now the car has been getting progressively harder to start from cold (and it's never below 70dF morning or evening). It would crank and crank with only intermittent pop, then finally start and run fine. Late night it finally refused to fire at all, so this was going to be a good time for diagnostics and a fix. It turned out to be open circuit in the HT lead from coil to distributor cap. Original type side entry cap with screw in spikes through the wires in the cap.
This is a common problem with resistor wires with carbon string core. Had clipped the tail end off the wire a couple of times, which seemed to fix it before, but not this time. Clipped the end off a couple of times but still came up with open circuit, and the wire was then too short.
I try to avoid use of resistor wire with the side entry distributor caps. Don't recall how or when this happened, but some time past I must have needed to replace the center lead and used resistor wire in a pinch (then forgot about it). This is a relatively new distributor cap (November 1st last year) with brass terminals installed using prior HT wires, and only the center lead was resistor wire (go figure). This time I had some solid core HT wire in the Magic Trailer, and managed to use a right angle spark plug terminal end for the coil connection to get it installed. Back to easy starting again.
|