The MGA With An Attitude
MGA Guru Is GOING MOBILE - (July 1 - July 15, 2022)
Friday, July 1, 2022:
After a nice productive day yesterday, today was a total bust, and very disheartening. The parts order shipped Wednesday, supposed to arrive today in California, was shipped from the wrong coast. Coming from Virginia, now not scheduled to arrive until next Wednesday, a whole week in shipping (the day after 4th of July holiday). And the Moss automated email billing and shipping notification function has been broken for two years. so I have to call to get a tracking number. So it has been two days, and I called to get the tracking number to verify it would arrive today, and was notified that it was scheduled to arrive next week. Then following a couple hours negotiation trying to get them to duplicate the order and get it sent out today for next day Saturday delivery (even if I have to pay twice plus next day air shipping charges). But they only deal with UPS, and UPS does not deliver on Saturday, and they don't know any shipping service that will do Saturday delivery to our "rural" delivery address. So ship it Fed-X? Sorry, they refuse to do Fed-X. Well.if you don't know how to deliver it, call a courier. Sorry, they refuse to do anything other than UPS. So I'm stuffed. The best they can do is to duplicate the order and ship it out of Goleta, CA, and since this is a holiday weekend, it will not arrive before Tuesday (one day earlier than the first order). So I'm still stuffed. With multiple phone calls and everyone passing the buck, and not solving the problem, most of the day went way for nothing.
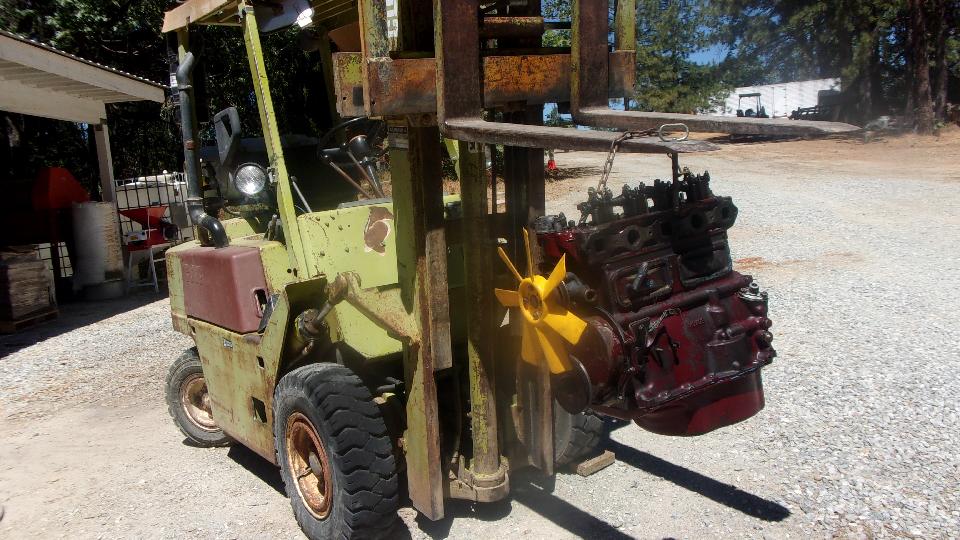
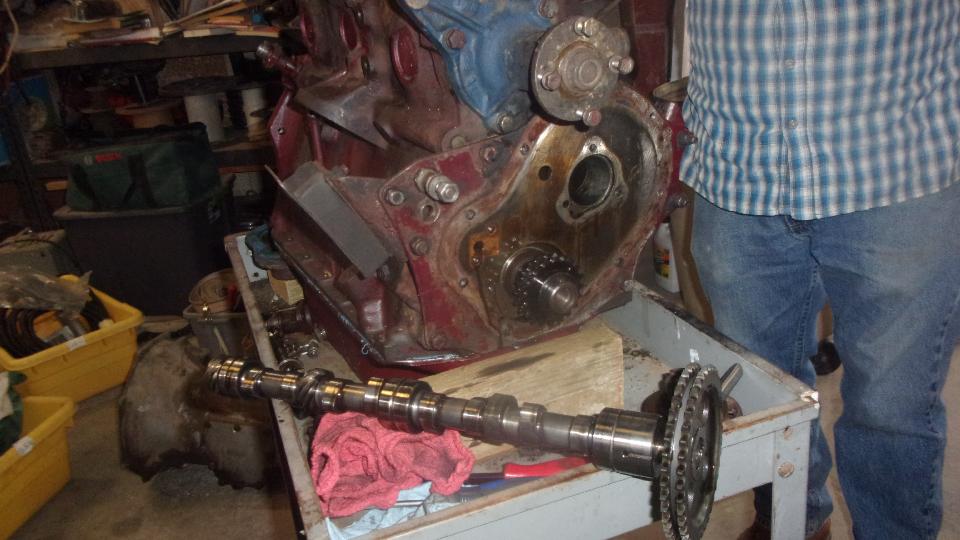
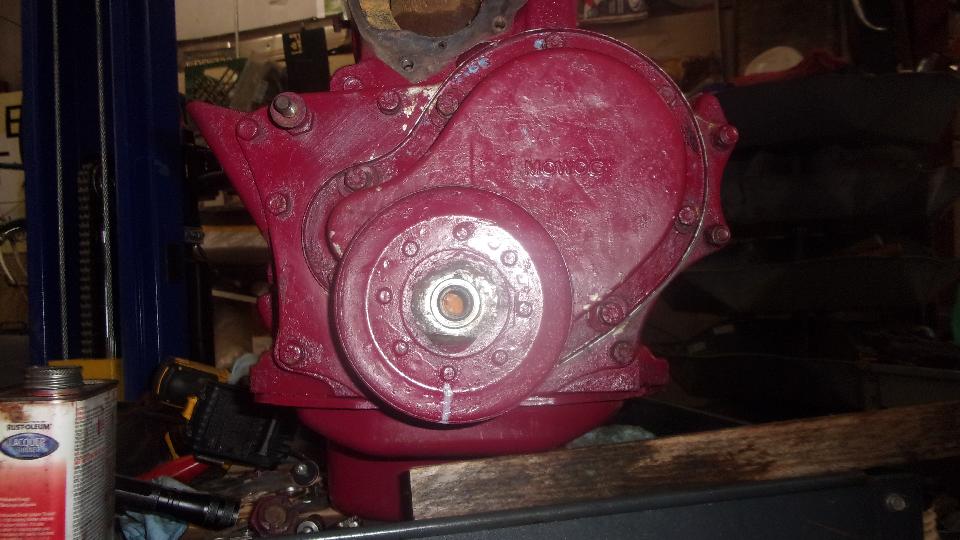
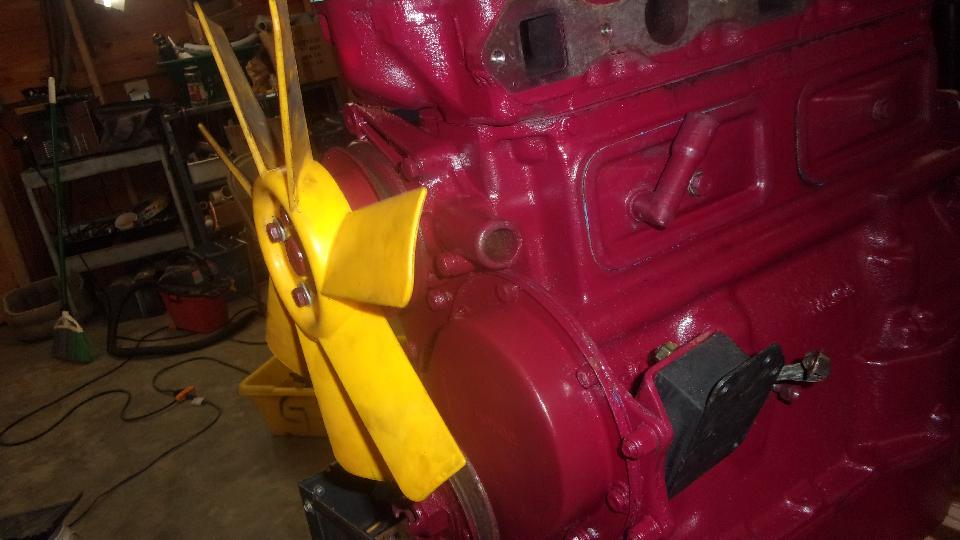
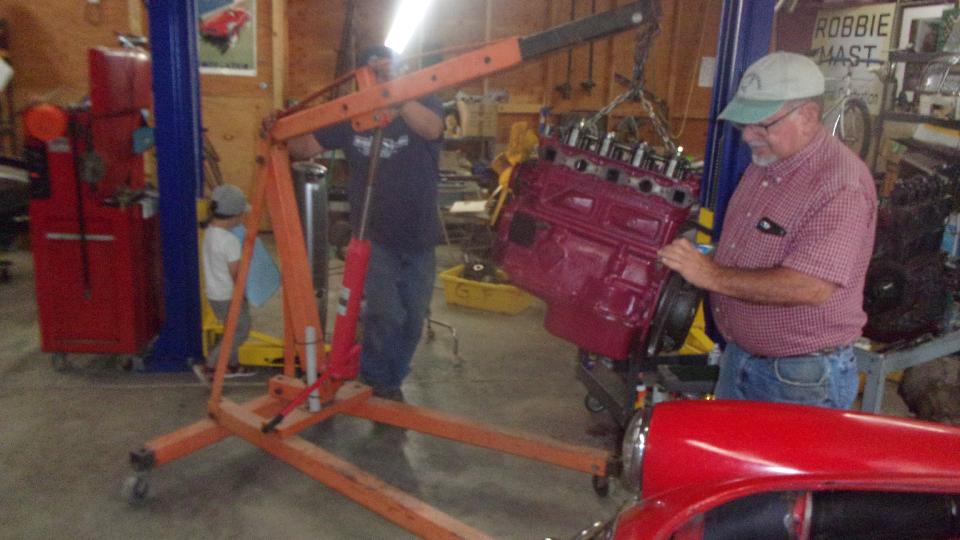
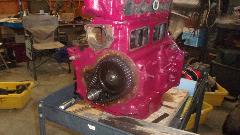
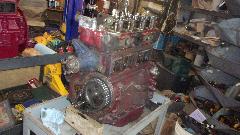
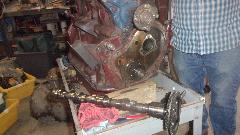
 Meanwhile, Stu had moved a couple engines around and had my old engine outside for power washing, Meanwhile, Stu had moved a couple engines around and had my old engine outside for power washing,
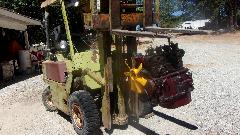 hanging on a fork lift truck. Plan-B is now to take the camshaft and tappets and pushrods (one year old) out of my old engine (don't mix them up) and put them in the new engine so I can get the car back on the road. That means additional labor to R&R the cam in the new engine (pity the fresh paint), plus having to disassemble some of the old engine immediately before getting the car back on the road. Then Stu was temporarily busy with something else, and I wasn't going to try wrenching on the old engine while it was still hanging on a chain, so that was it, the whole day shot for naught, go home.
Saturday, July 2, 2022:
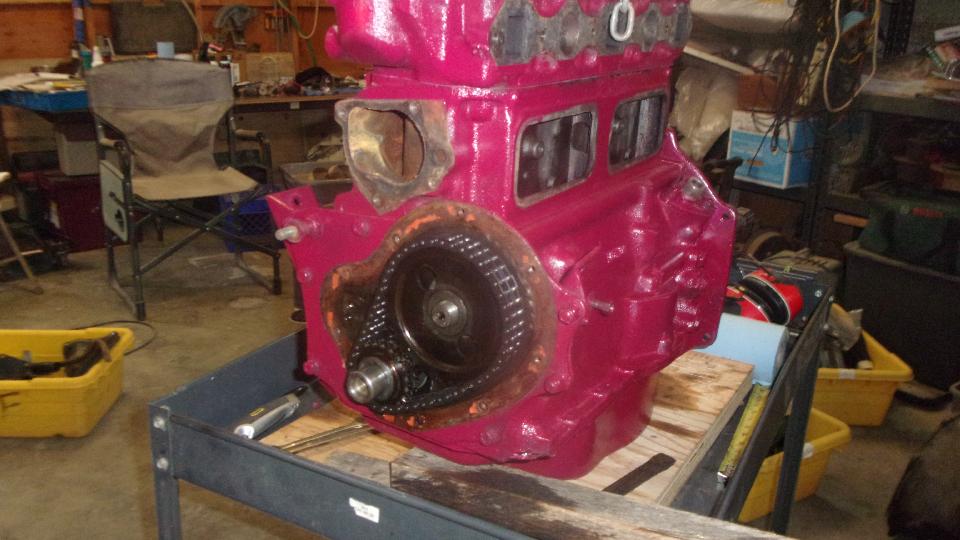
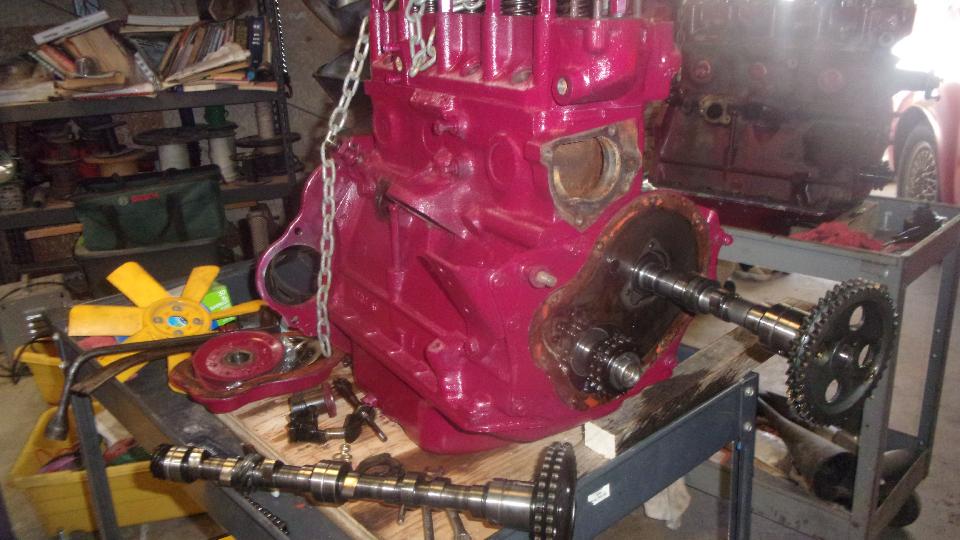
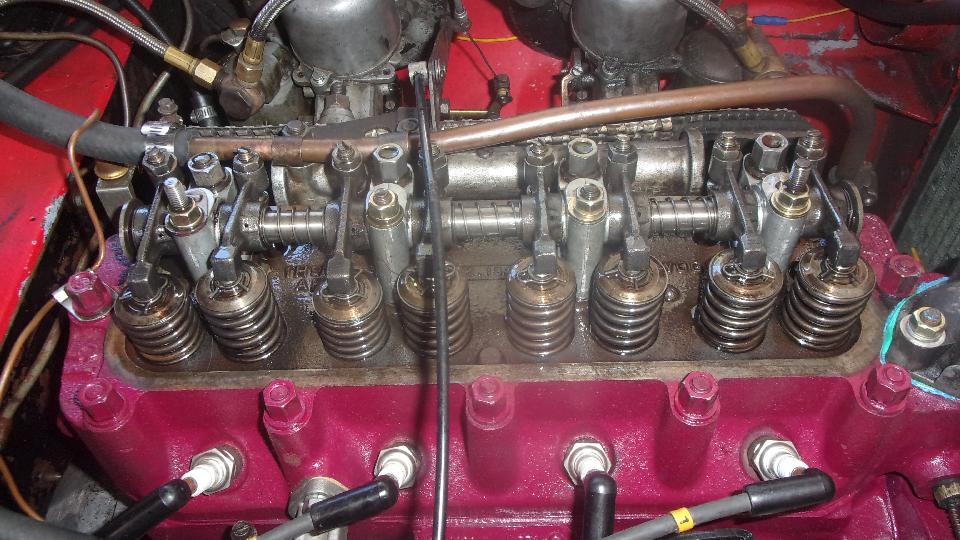
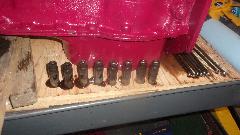
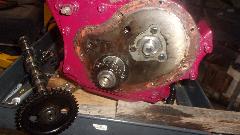
Time to swap camshafts between the two engines, because the new tappets and pushrods are not coming until next week. Remove crank pulley, cam nut and chain tensioner from both engines. Sprocket and chain off, and remove cam retaining plate. Remove distributor base clamp and base casting, and pull out the drive gear. Then the camshaft will pull out the front, no need to remove sump or oil pump or tachometer drive gear.
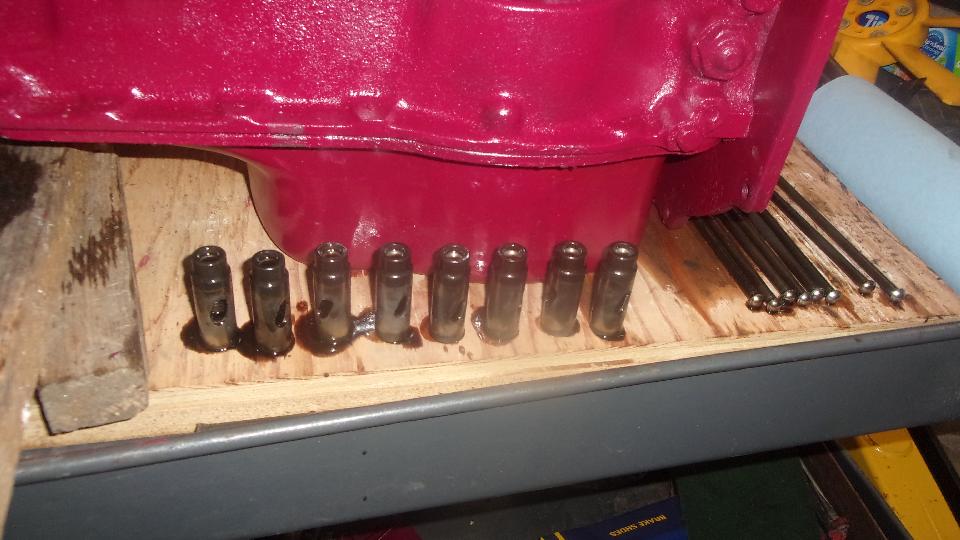
Remove pushrods and tappets from old engine, and set them in order near new engine. Pull cam from old engine, and install in new engine.

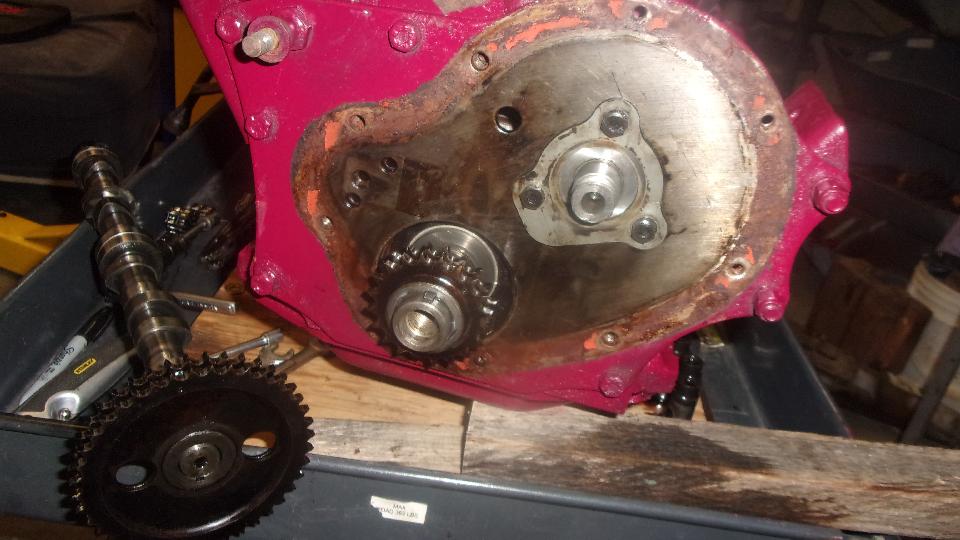
Install cam retaining plate, sprockets and timing chain (in correct orientation). Rotate crankshaft one turn to change from exhaust stroke to compression stroke on #1 cylinder. Install distributor drive gear (in correct orientation) and base casting (tight screw) and base clamp (loosely).
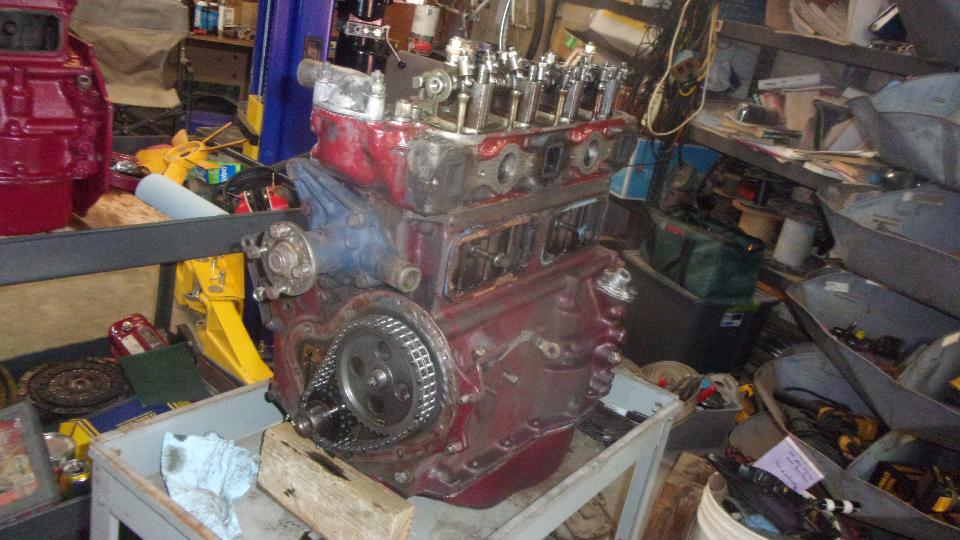
Grab some more parts from the Magic Trailer, and install timing chain tensioner. Oil the cam lobes and tappets, and drop them into their respective bores.
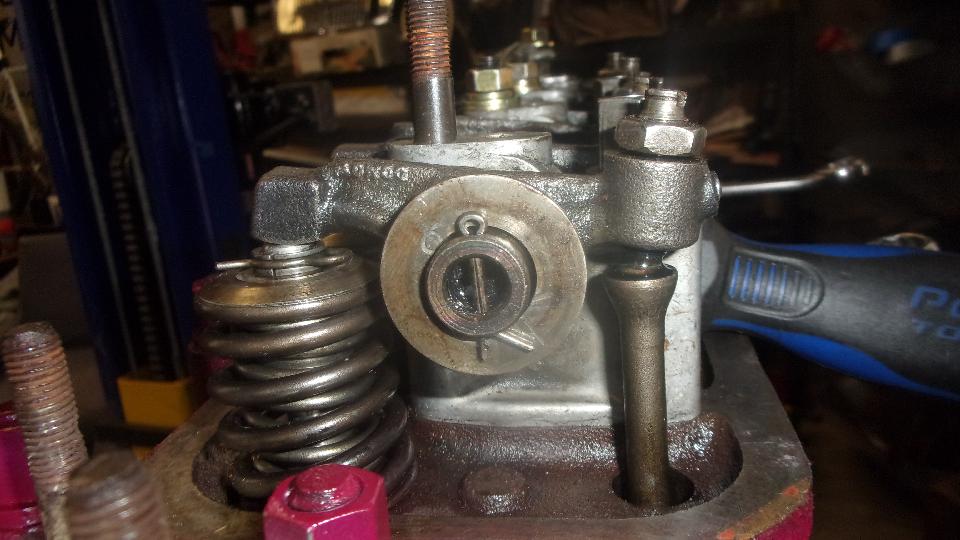
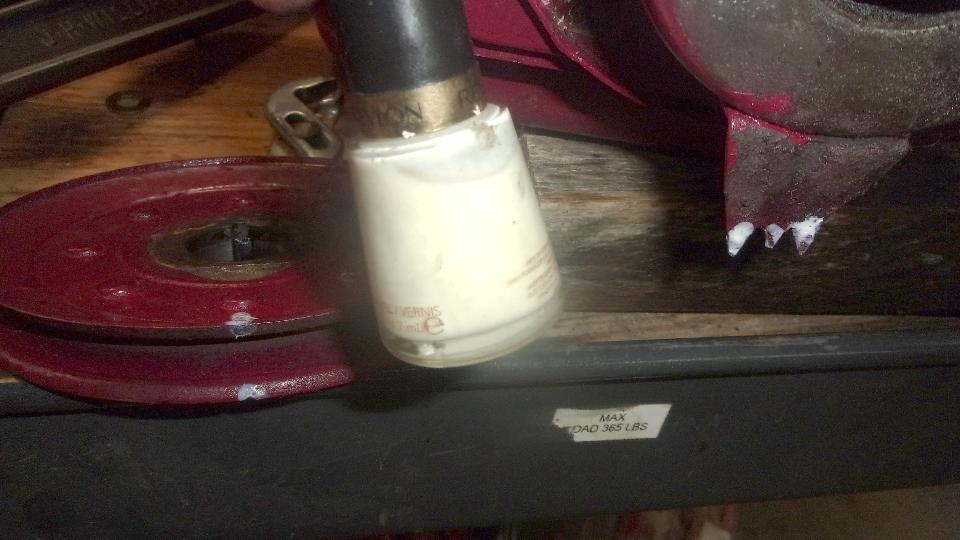
Back off rocker arm adjuster screws, and push rockers aside out of the way. Drop in the pushrods (in their respective order). Lever the valve spring down a bit to realign the rocker arms over the pushrods and valve stems. For front and rear positions the arms need to be removed, because they will not slide sideways. Grab the white nail polish and paint the timing marks (for convenience later).


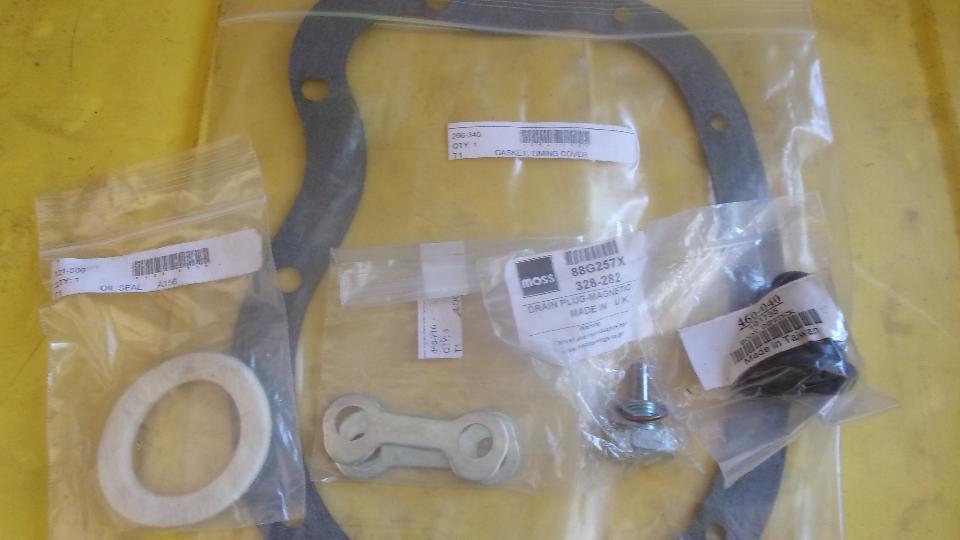
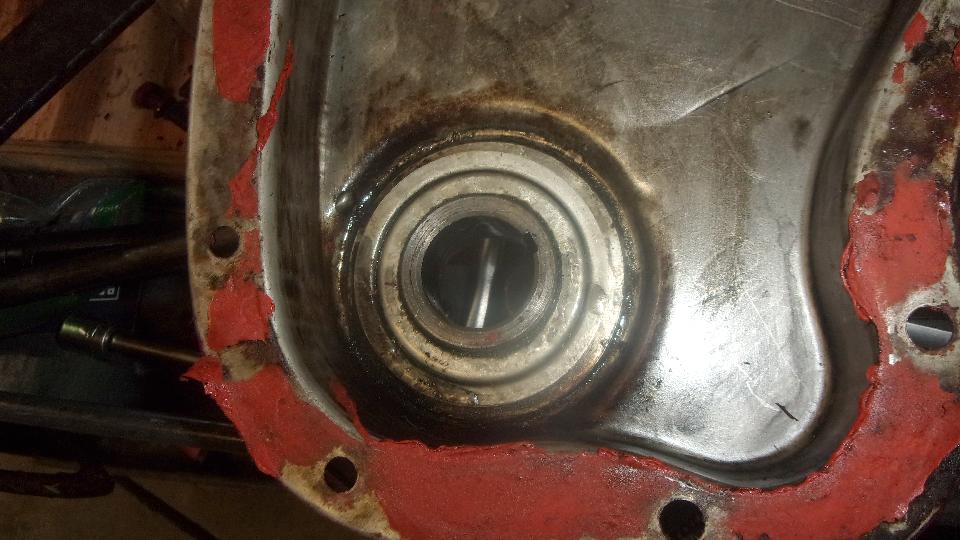
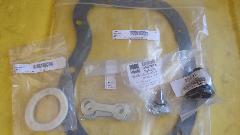
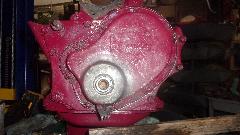
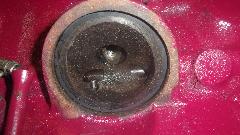
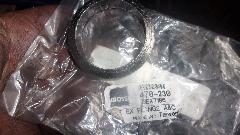
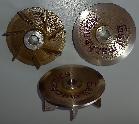
Time to install the new felt seal ring in the timing cover (not changing the cover to use rubber seal in this one (not yet). Saturate the felt ring with oil, and squeeze it into the groove with your fingers. Once in place you have to push it back far enough to get the hub of the crank pulley inserted into the felt seal (may be tighter than you think).
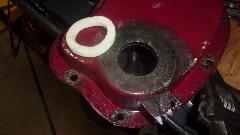
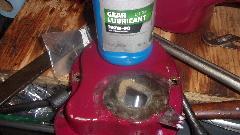
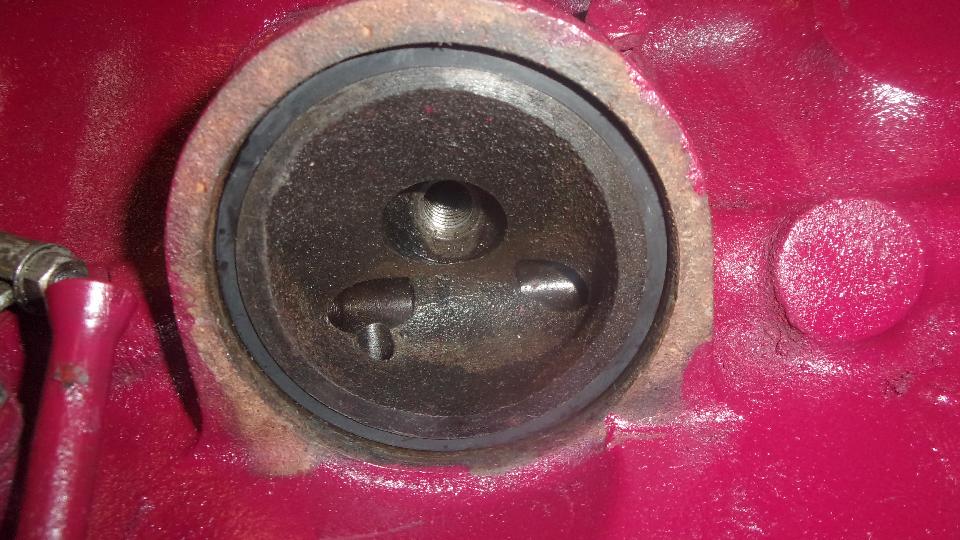
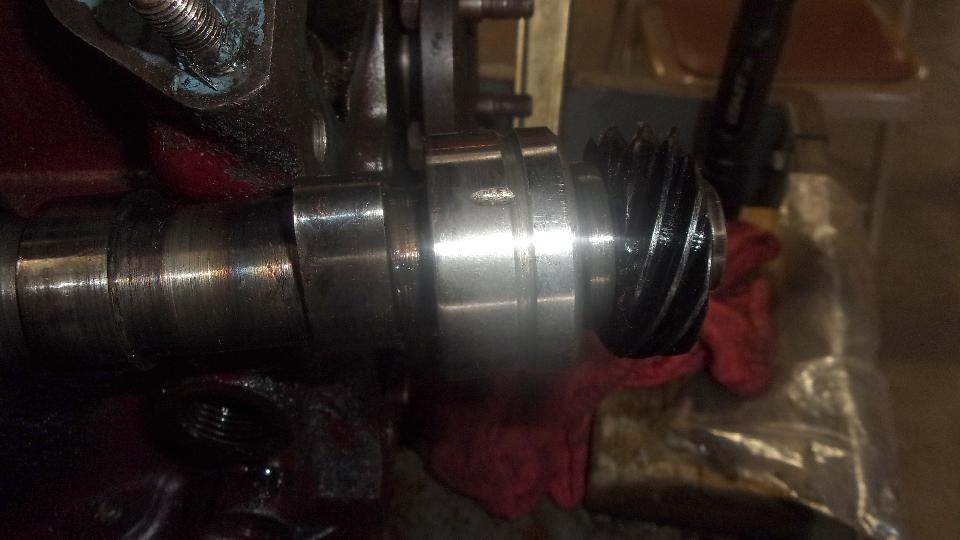
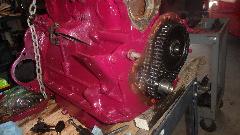
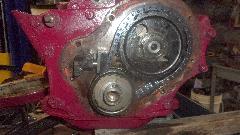
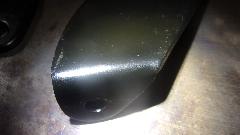
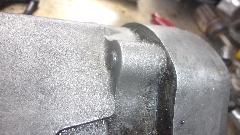
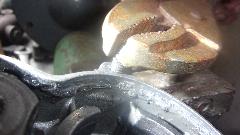
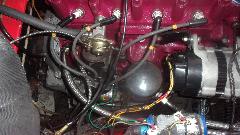
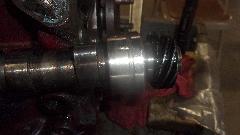
New felt seal an pulley in place, to be sure, before installing the cover. What it looks like on the inside, and what it looks like with the cup-shape oil thrower ring in place inside the cover.

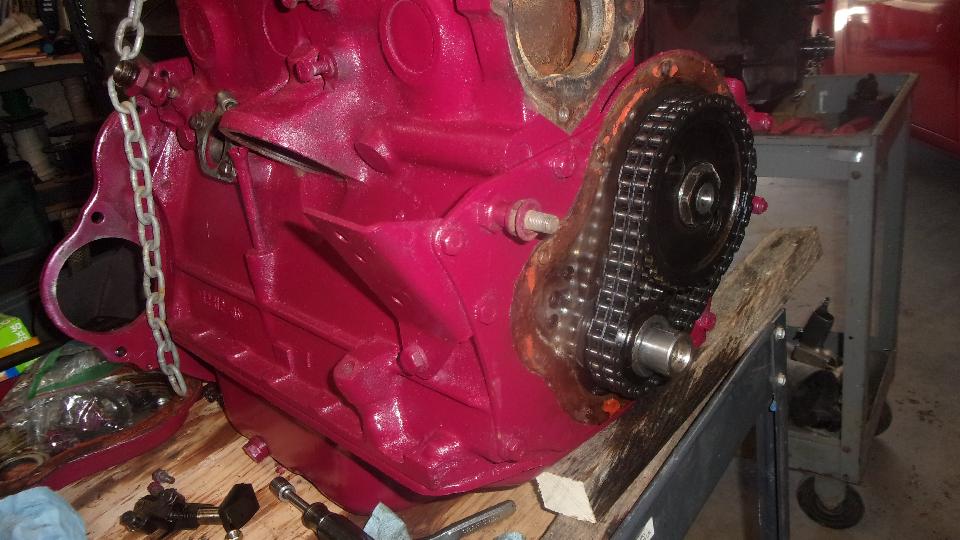
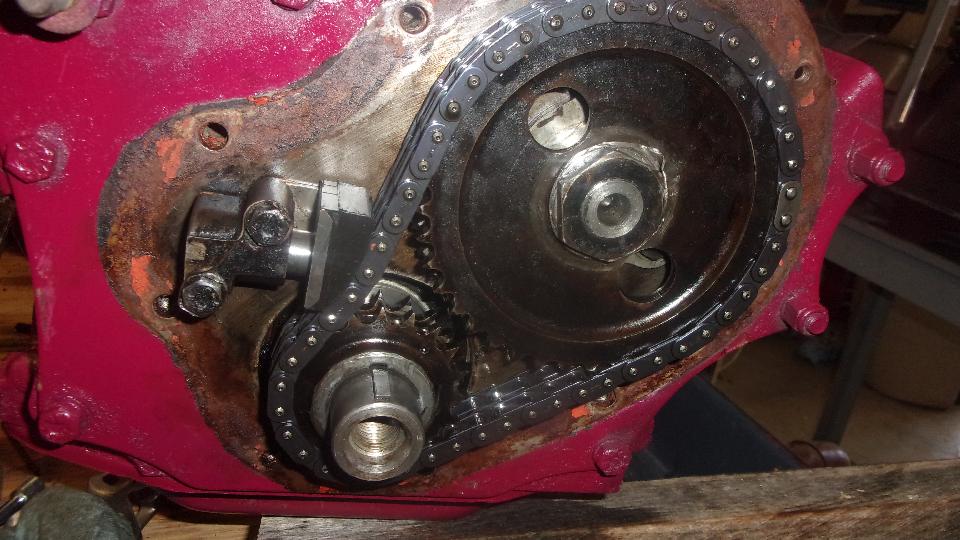
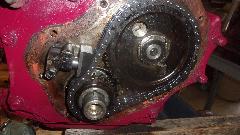
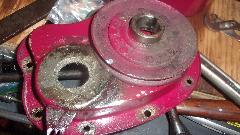
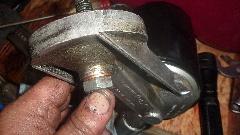
And there's what the timing chain looks like with the oil thrower on the crankshaft with flanged edge facing forward. The astute eye may notice the missing oil plug in the back end of the chain tensioner assembly. Yes I did get around to installing that plug and little lock tab, just not in this picture.
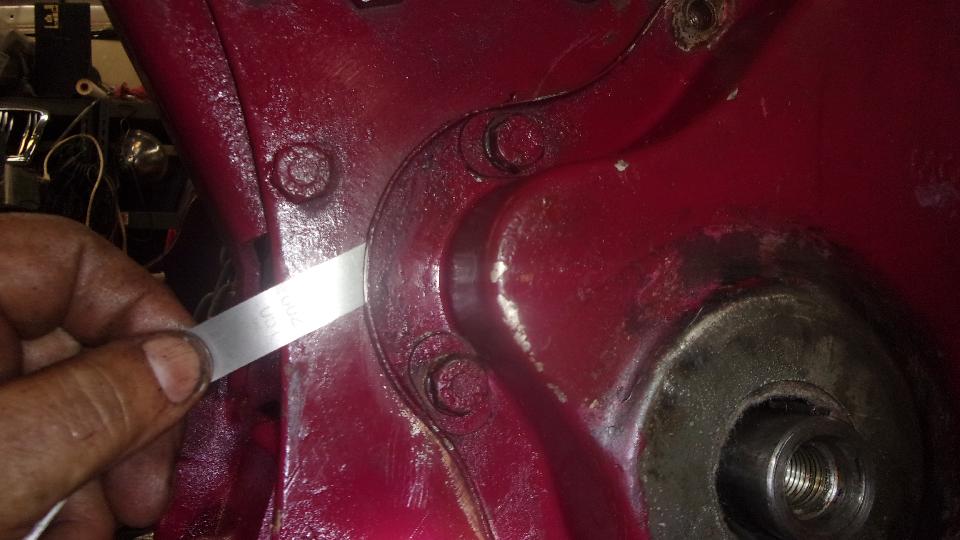
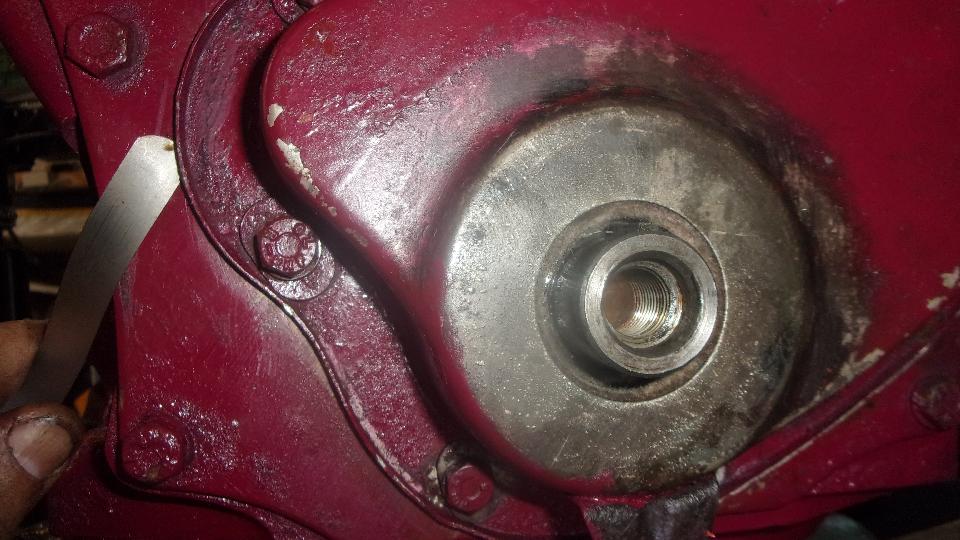
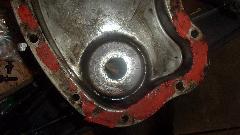
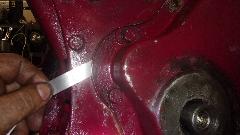
Then I tap down any protruding holes on the timing cover to make it fit flat. Bolt the bare timing cover in place with no gasket, and try to slip a 0.002-inch thick feeler gauge under the edges all around. Mark the flange anywhere the feeler might fit underneath. Then remove the cover, take to work bench, and hammer the flange down a bit where marked. Reinstall the cover and do the feeler gauge test again. This may take a few passes before you get it right, and the feeler will not fit under anywhere all around.
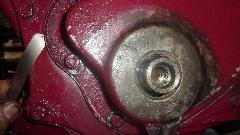
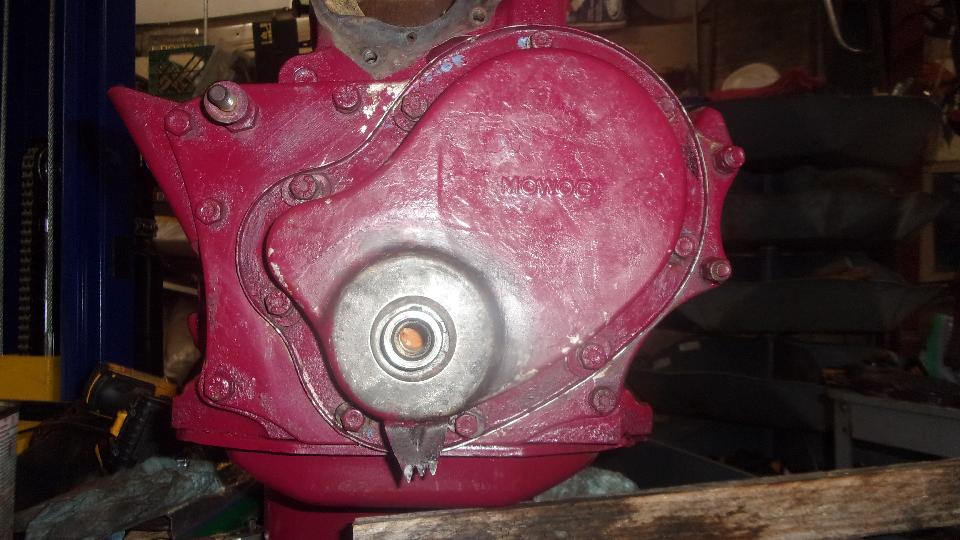
Clean up the gasket surface and inside of the timing cover. Apply a thin smear of sticky stuff to glue the gasket in place on the cover only (no sticky stuff on the other side of the gasket. Some people can't resist and glue both sides of this gasket, which leads to consternation next time it needs to be removed and gets bent up trying to pry it loose. Bolt the cover in place with very loose screws so it can move around a bit. Install the crank pulley to centralize the cover before tightening up the screws. Then remove the crank pulley to tighten the last two screws at bottom, and reinstall the pulley with locktab and the big crank nut, plenty of torque before bending up the locktab. Also be sure to hammer the flange of the locktab down into the machined depression on the front of the pulley hub.
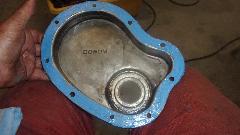

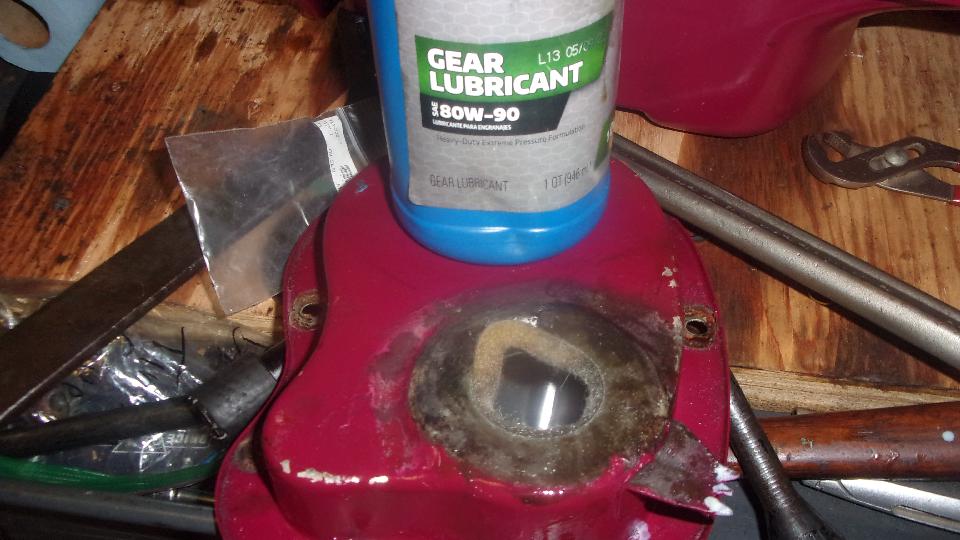
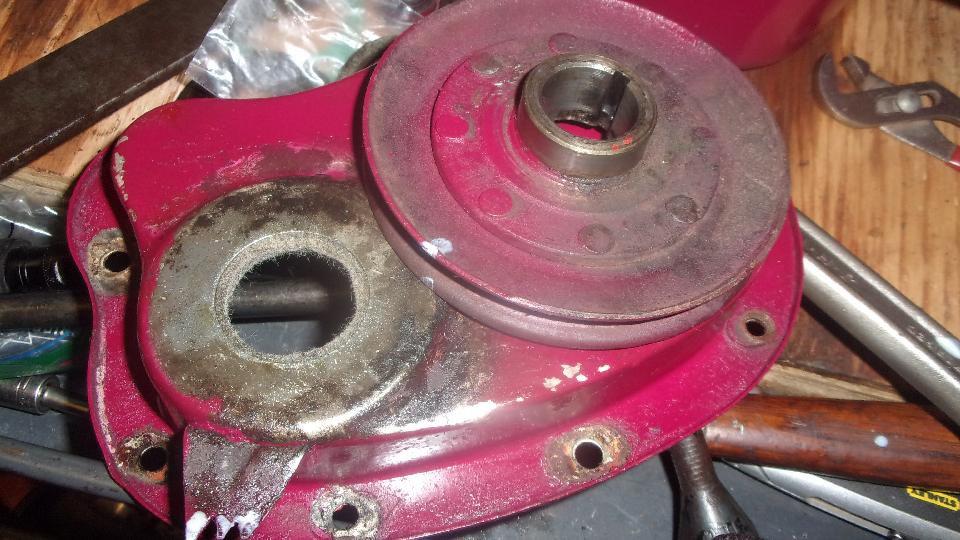
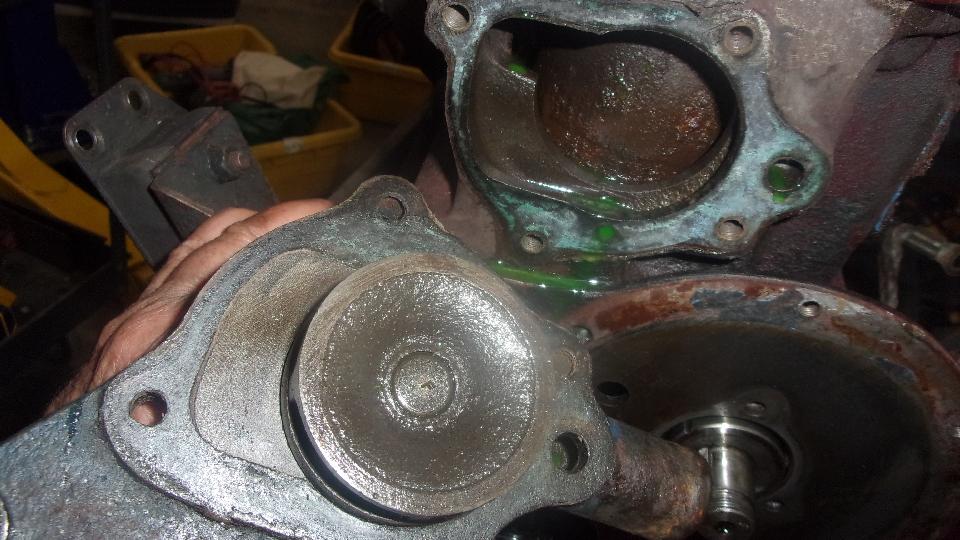
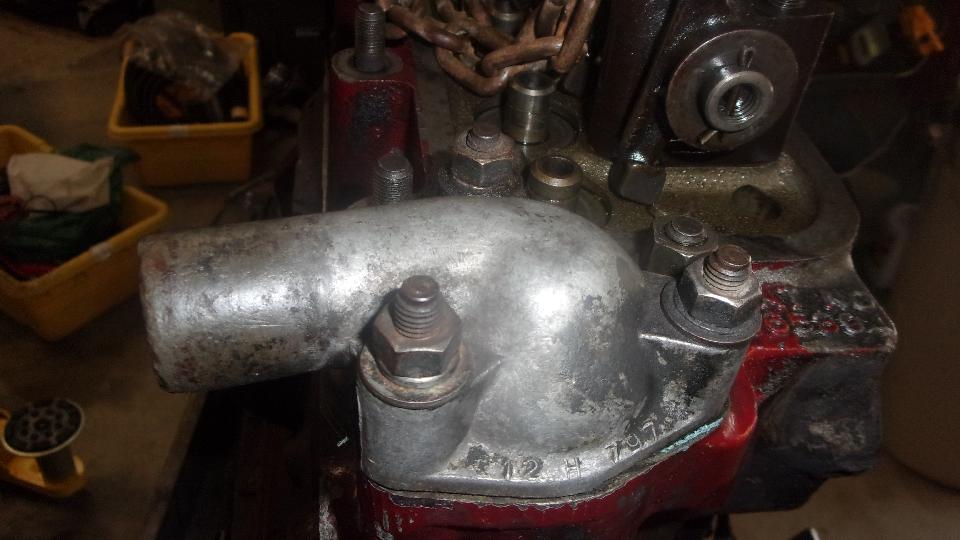
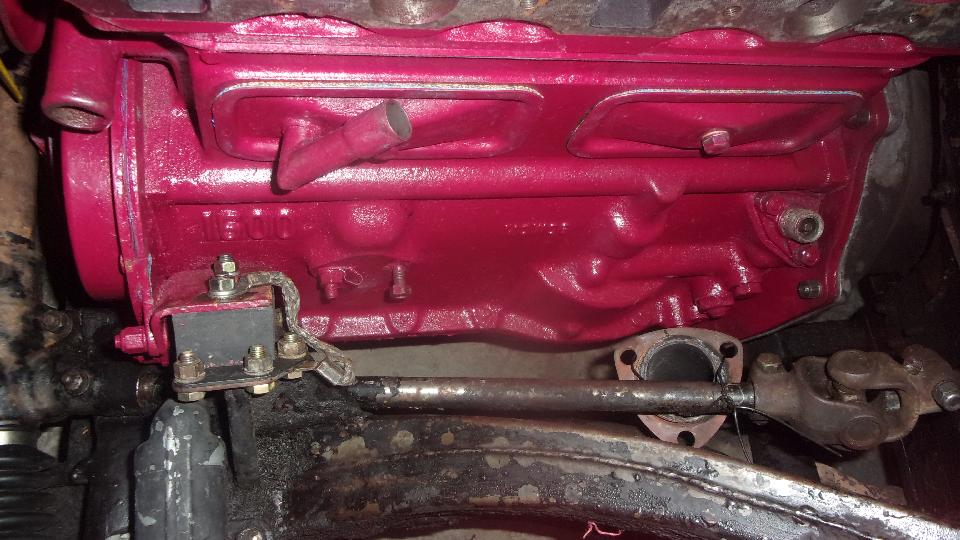
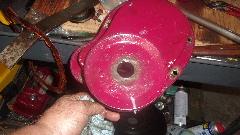
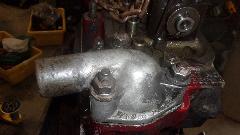
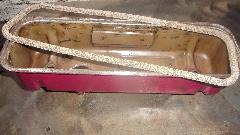
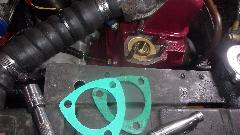
Finally grab the good cast iron water pump from the old engine to install on the new engine (after we ditched the
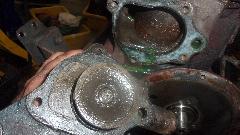
 funny aluminum body water pump that I didn't like because many of them have broken). I do have another iron water pump in the trailer. This thick paper gasket was in such good condition that I didn't change it, just cleaned it up and installed it straight onto the new engine. Do remember to put thread sealant on the water pump bolts, because some of these threads go through into the water jacket.

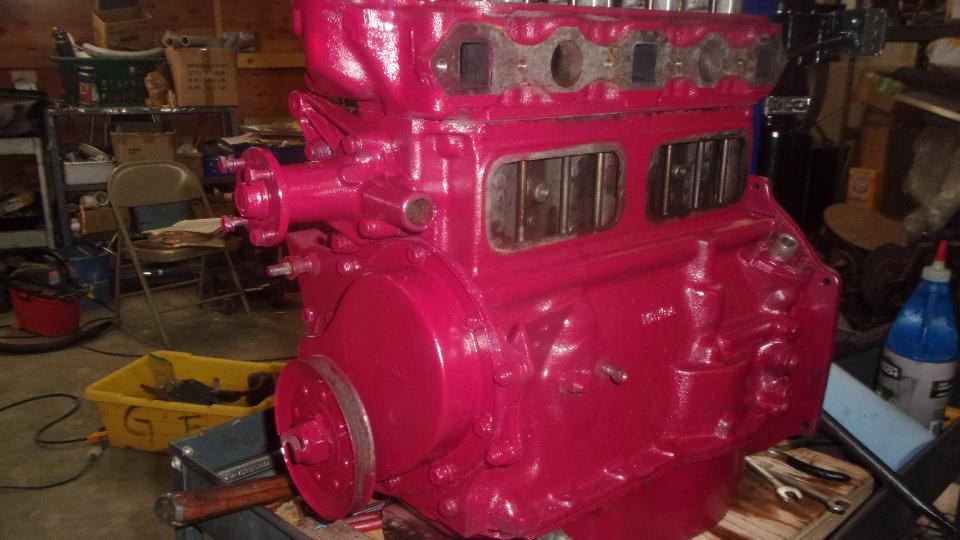
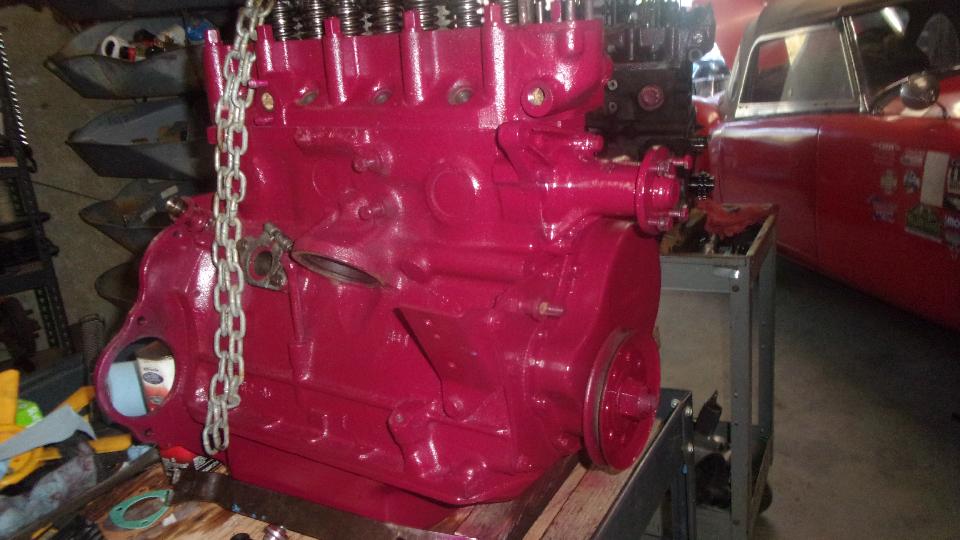
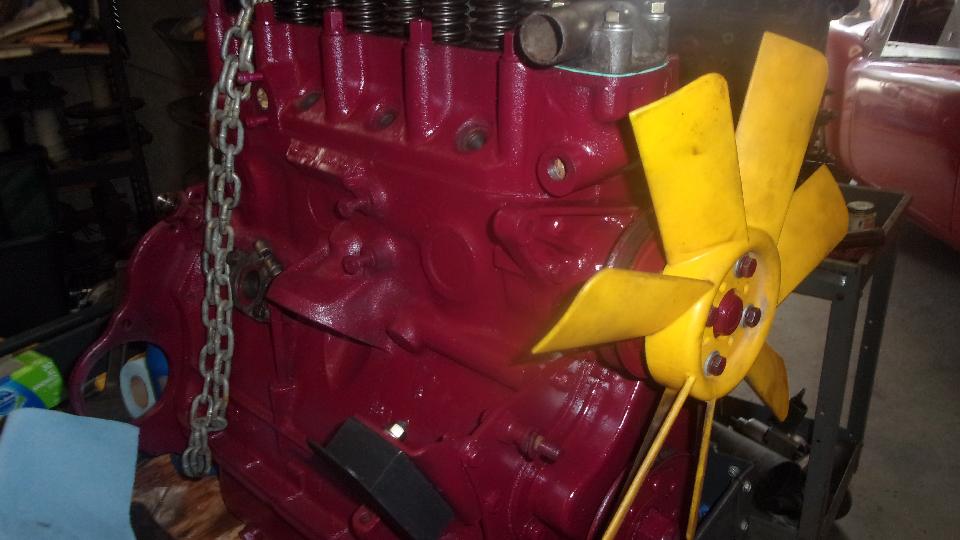
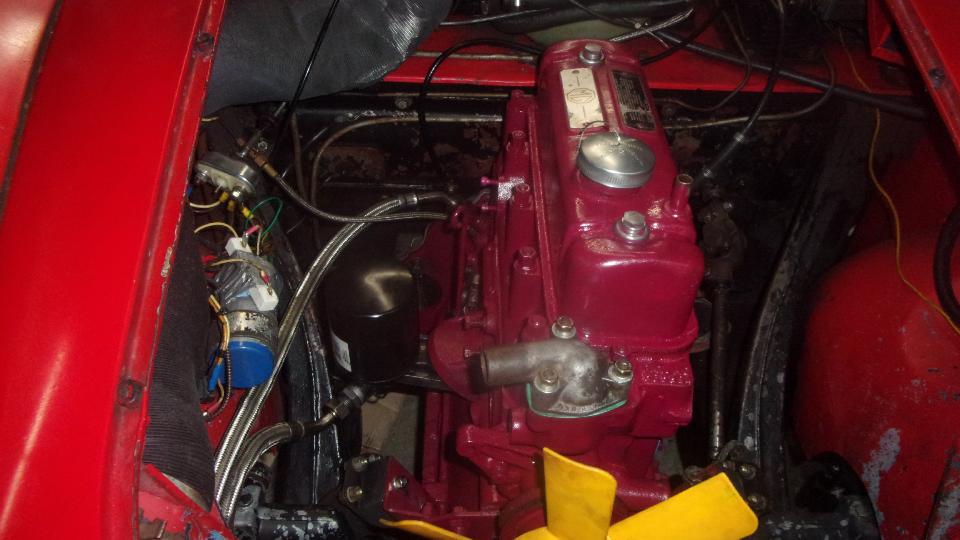
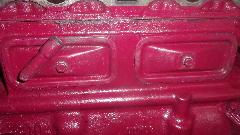
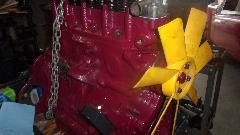
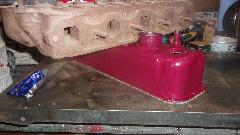
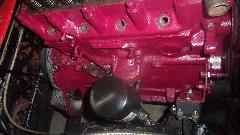
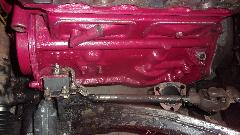
 All assembled, hit the front end with a little more cranberry paint. This will be the first time in many years
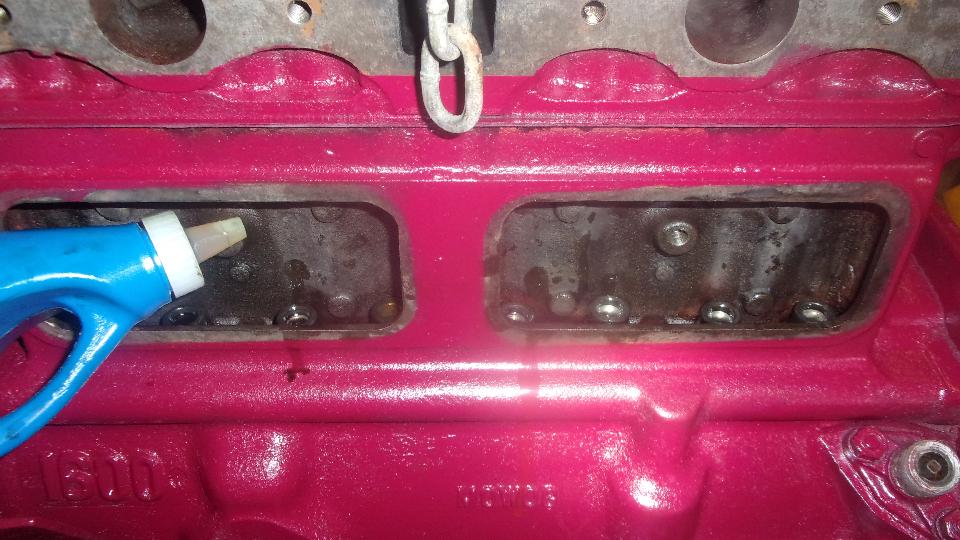
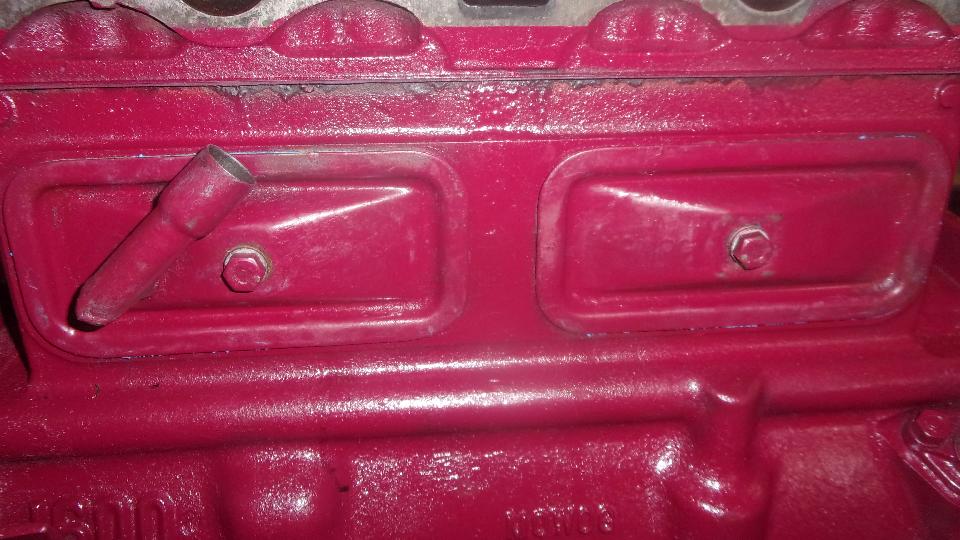
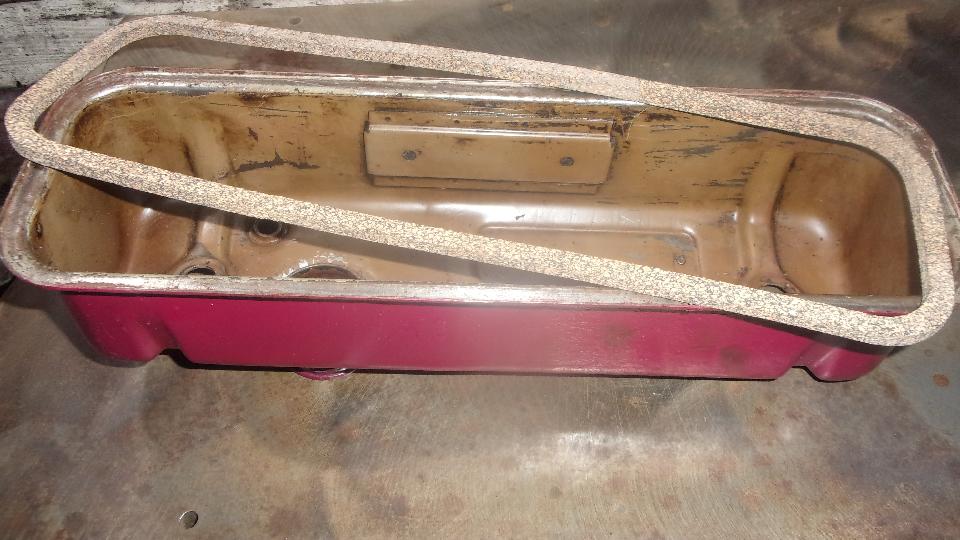
that the water pump will be same color as the engine block. Didn't get the tappet covers installed yet, because the gaskets are in the late delivery. May have to make cork gaskets to get it running before next Wednesday.
All assembled, hit the front end with a little more cranberry paint. This will be the first time in many years
that the water pump will be same color as the engine block. Didn't get the tappet covers installed yet, because the gaskets are in the late delivery. May have to make cork gaskets to get it running before next Wednesday.
`Then it was time to call it a day, grab a dinner ticket and enjoy the music concert in the park. Yeah they do that here at Brice Station Vineyards regularly all Summer long (plus a few weddings).
Sunday, July 3, 2022:
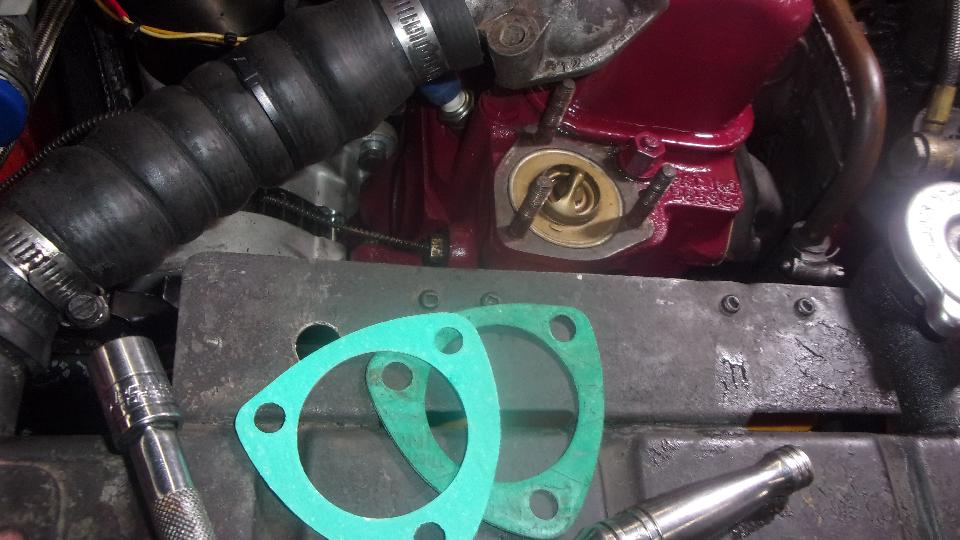
Bustin' tail to get my MGA running again. Finally found where I hidden the tapped cover gaskets in the Magic Trailer. Also retrieved some fiber washers to seal the bolts to the covers, and got those installed. Had a bear of a time getting the thermostat cover removed from the old engine, thoroughly stuck on the front stud, the one screwed into a blind hole and never supposed to go rusty. But finally got it off, cleaned out the holes, sanded it flat, and transferred the thermostat and cover to the new engine. Cleaned and painted the old dip stick for the new engine, because I like the earlier straight style stick.
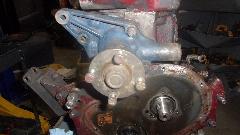
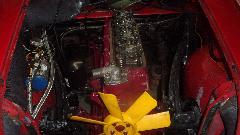
Water pump pulley painted and installed along with the fan and two new engine mounts.

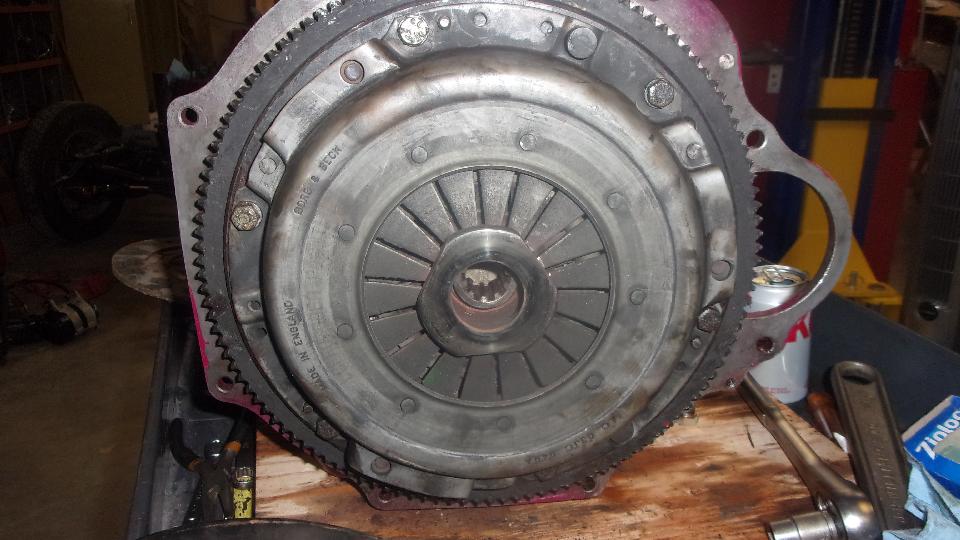
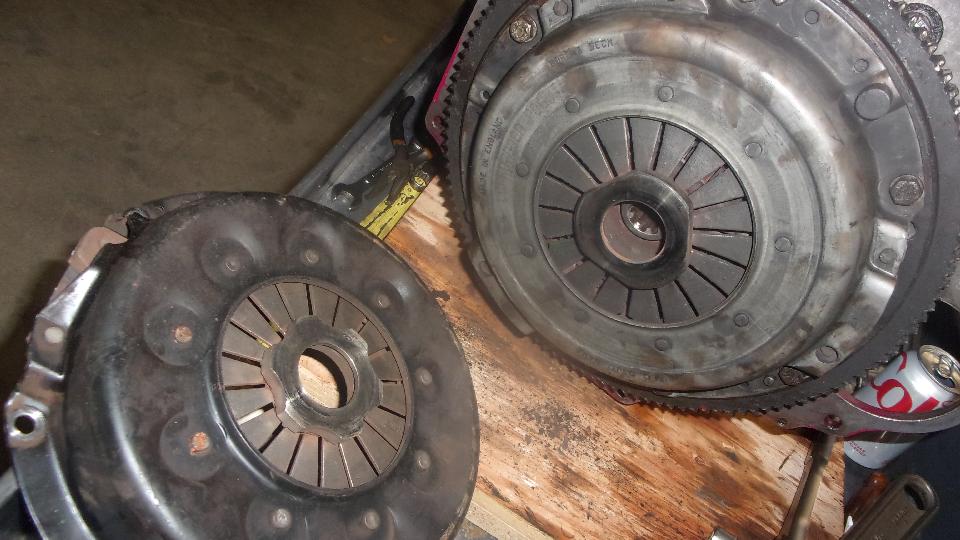
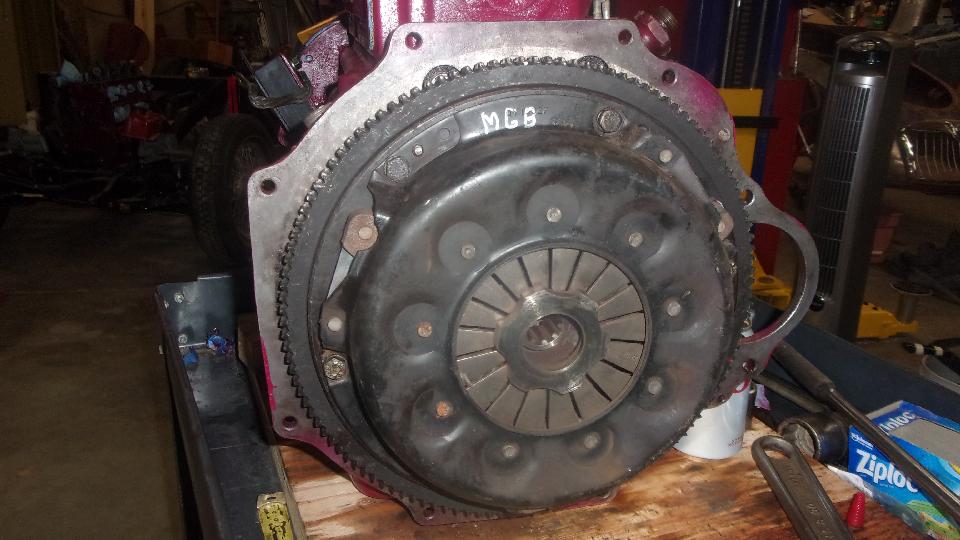
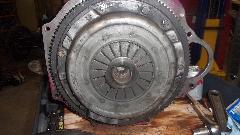
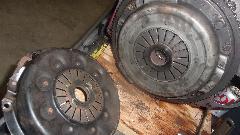
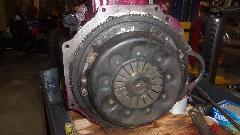
Spigot bushing checked okay, so leave that alone. Got the flywheel installed with new locktabs, and the old clutch assembly (which appeared to be in very good condition). But then a problem. The center thrust plate in the old MGB clutch was rattling around somewhat loose, like it might rattle all the time the engine is running (and maybe it was). Stu pulled out what looked like good used MGB pressure plate assembly with no wiggle at all on the center thrust plate. So we installed that one, after which it did have some wiggle, but not as much as the one we just removed. Note to self, order a new clutch assembly for spare parts.
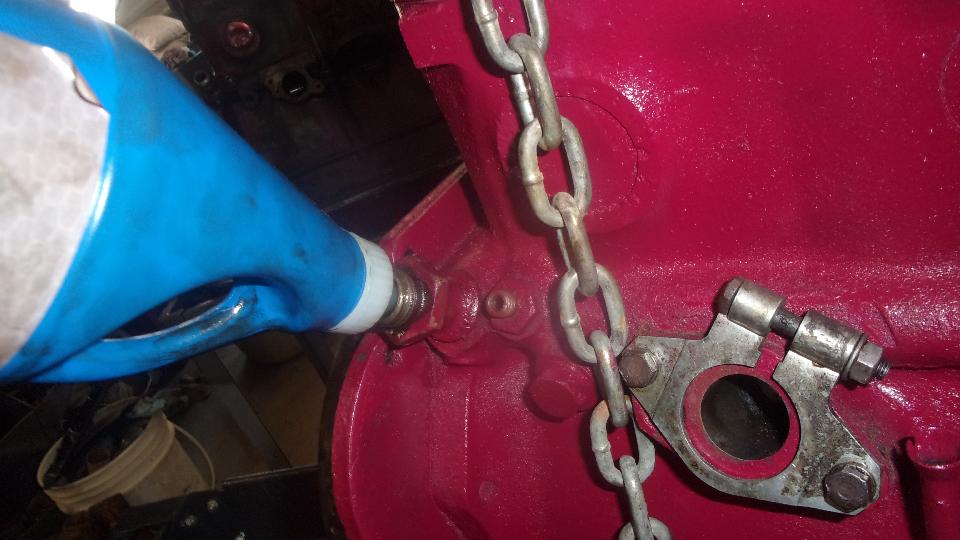
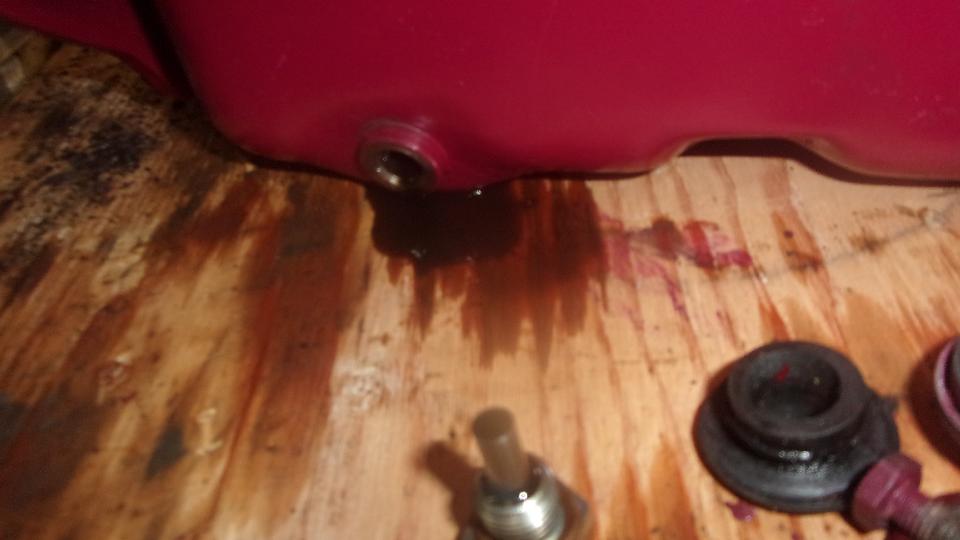
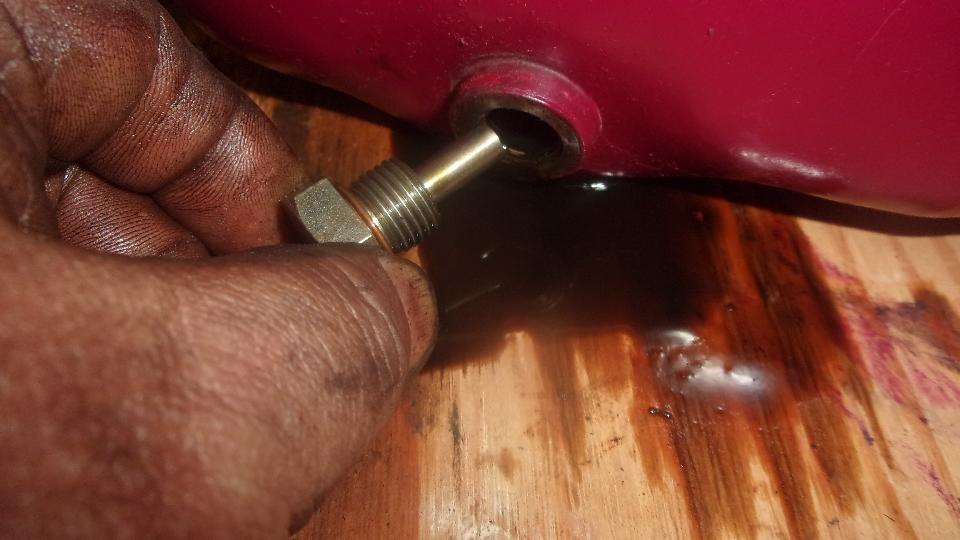
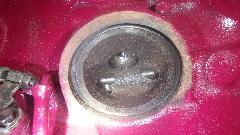
Inject oil into the block outlet port, and turn crankshaft backward several turns to prime the oil pump. Oil then coming out of the sump drain port to prove it worked, so stop there and install a magnetic drain plug.


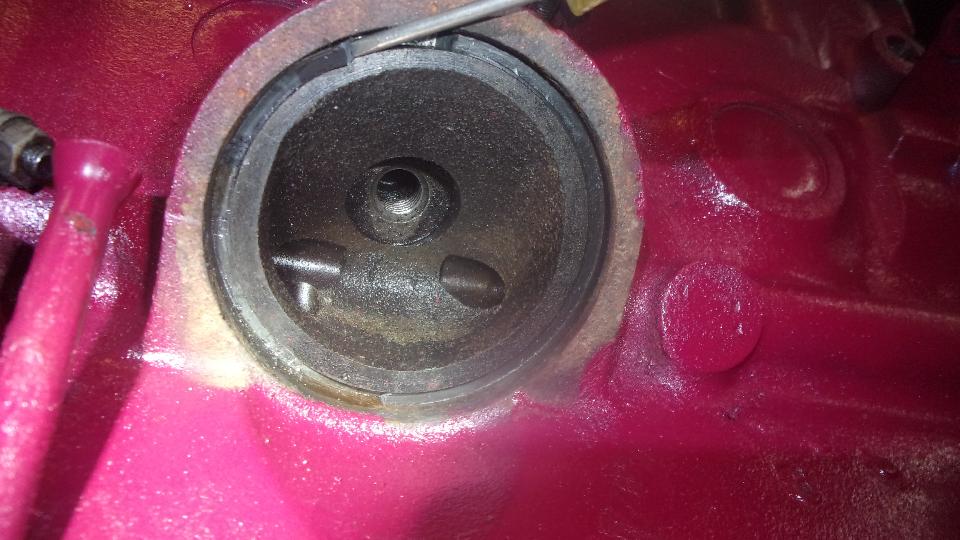
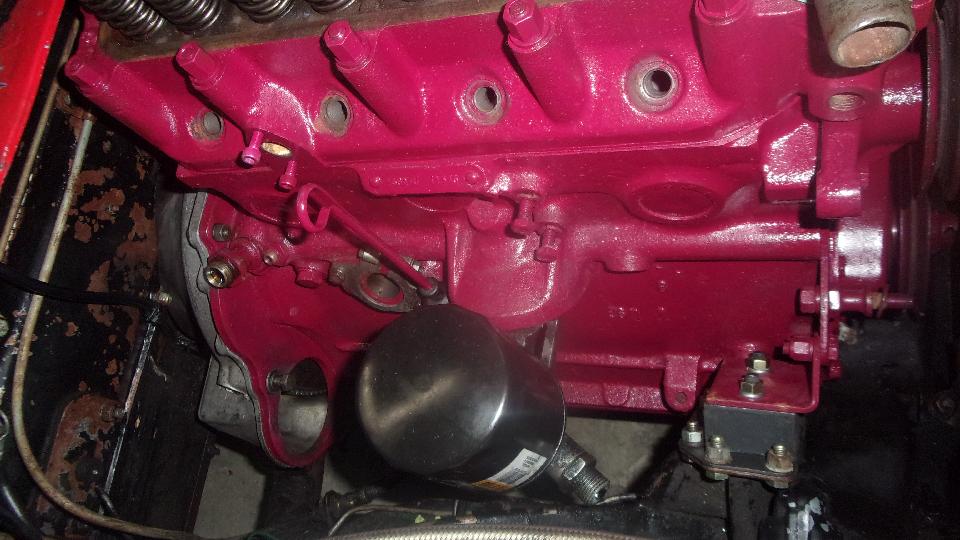
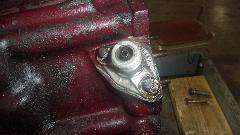
About to install the oil filter assembly, found double stacked seal rings. Oops. The first ring came out okay. Small screwdriver and big hammer to remove the second ring which was very hard and broke into many pieces, but finally got the gland cleaned out and installed a new seal.

Pulled out a new copper washer to seal the mounting bolt on the inverted spin-on oil filter adapter, and got that installed. Cleaned the valve cover bottom flange, glued in a new cork gasket, and set that aside to cure with a bit of weight on it.
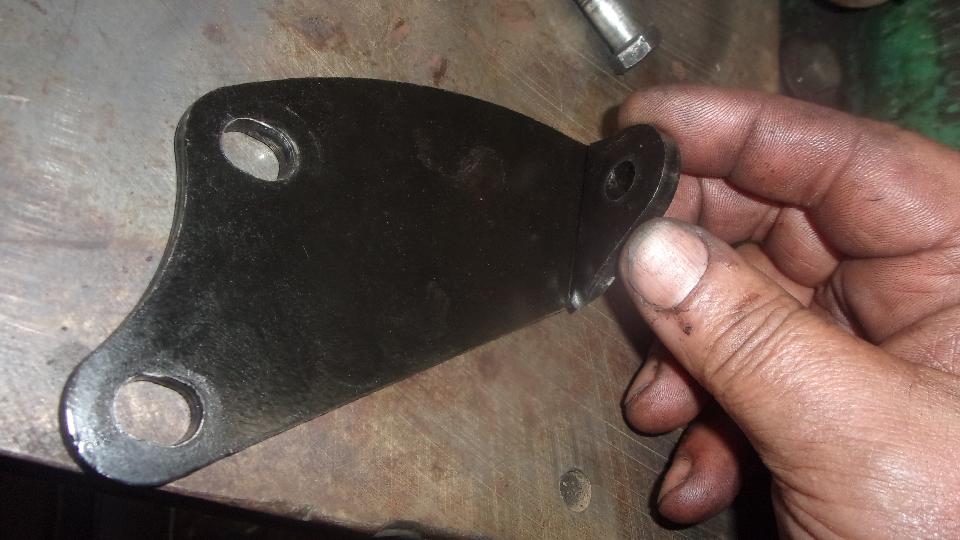
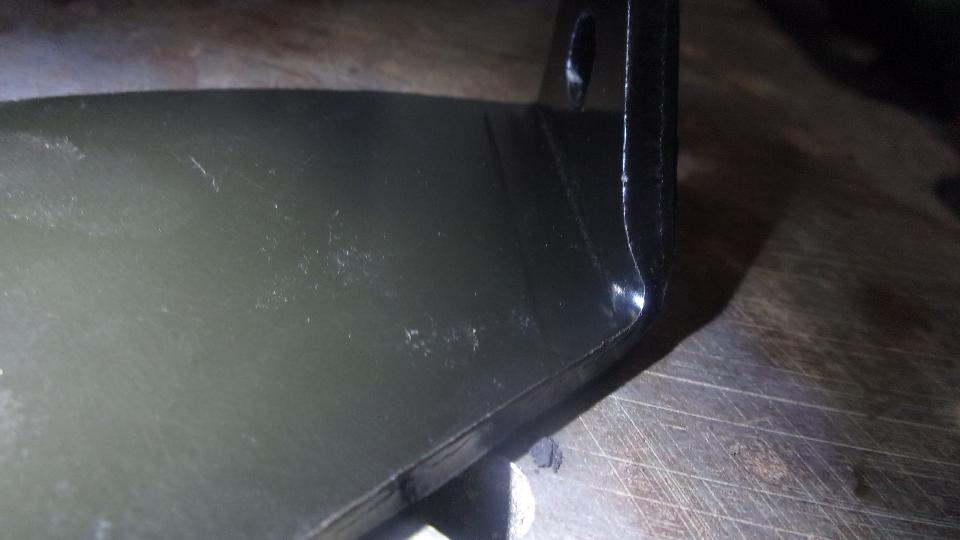
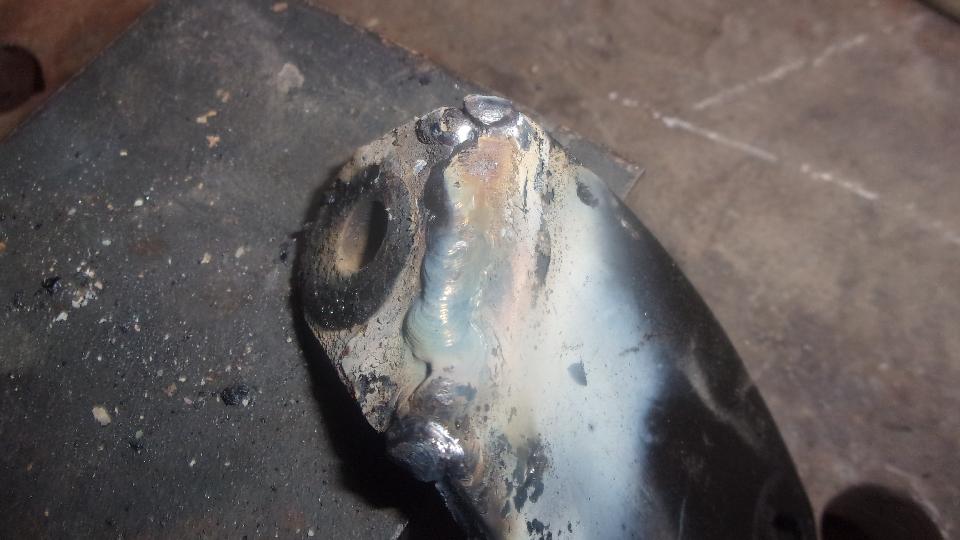
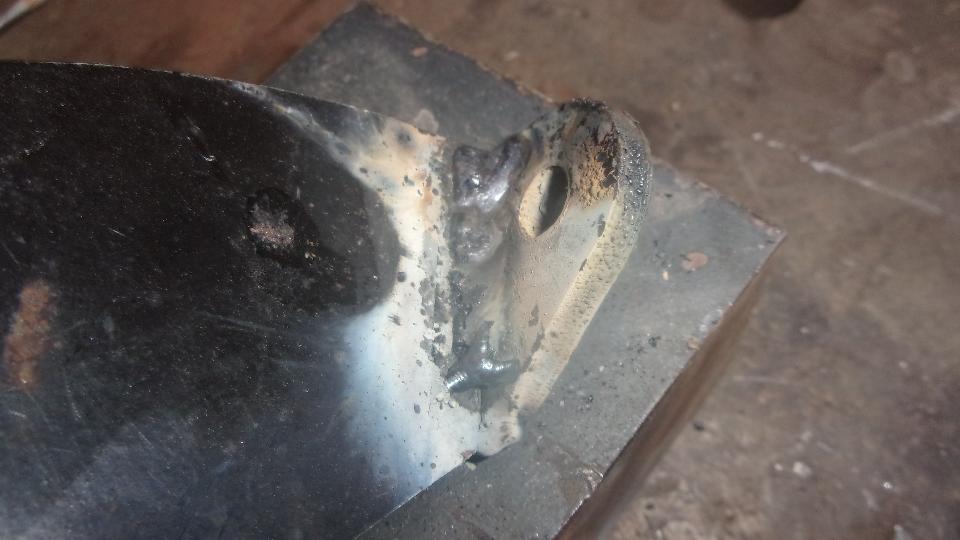
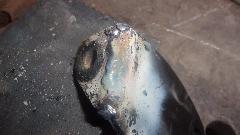
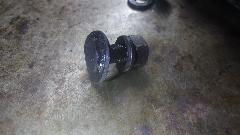
Then after the broken bracket for alternator rear adapter. We noticed this break on June 24th, 5 days and 700 miles after it was installed. I was right about the stress riser sharp corner.
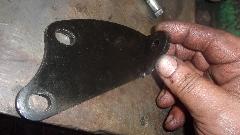
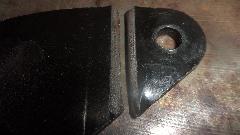
I have a second identical part purchased as spare. Now I think we need to put that one on the car to see how long it may last. I can't see any stress cracks in it with the bare eye (or camera).

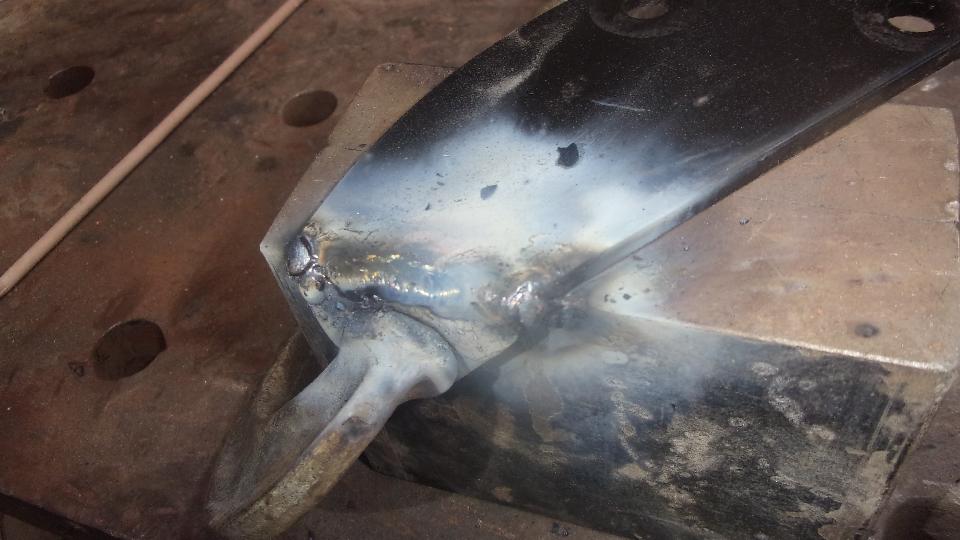
Not long to weld up the broken bracket, grind it down smooth and paint it, intending to keep it as a back-up spare. It may now be stronger than the original over-stressed part.


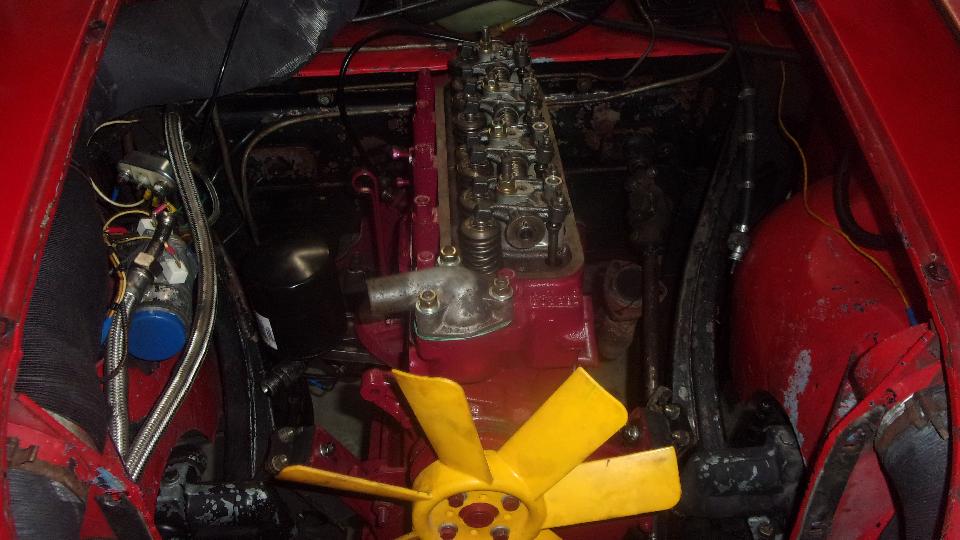
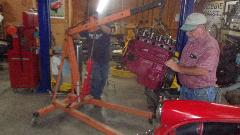
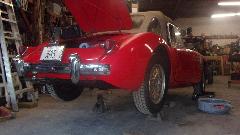
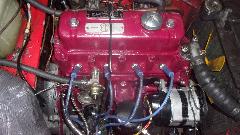
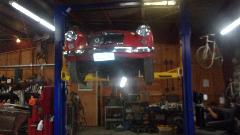
Finally a few extra hands helping to stuff the new engine into the car, mate it to the gearbox and bolt down the engine mounts.
Then I jacked up the tail end to change oil in the rear axle and gearbox (only a couple thousand miles overdue). Connected oil cooler hoses and oil signal hose, installed the valve cover and added engine oil. As the engine paint dries and fades darker, Cranberry doesn't look too bad. Beginning to feel like nearly finished (like 10-pm). After email questions and BBS monitoring, posting these photos and notes, nearly 3-am again (same as last night).

Monday, July 4, 2022:
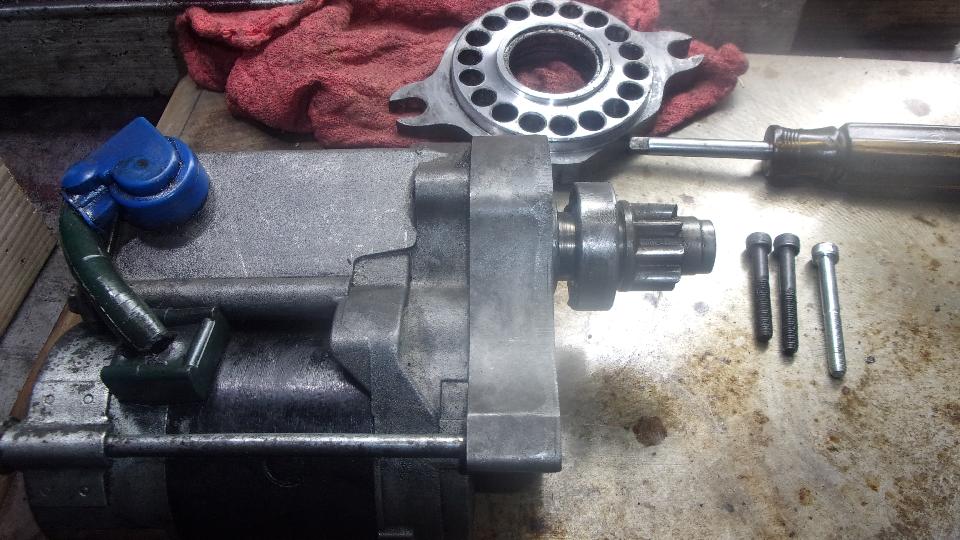
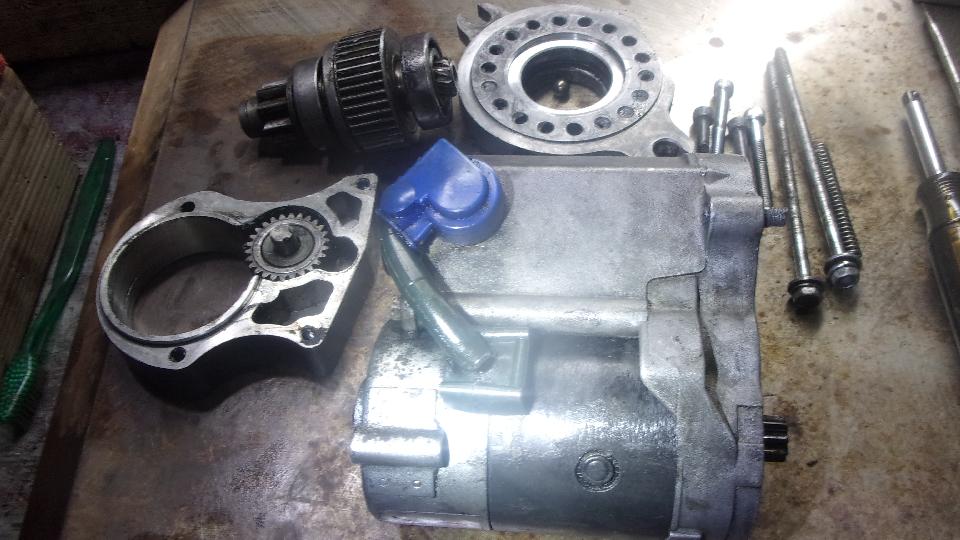
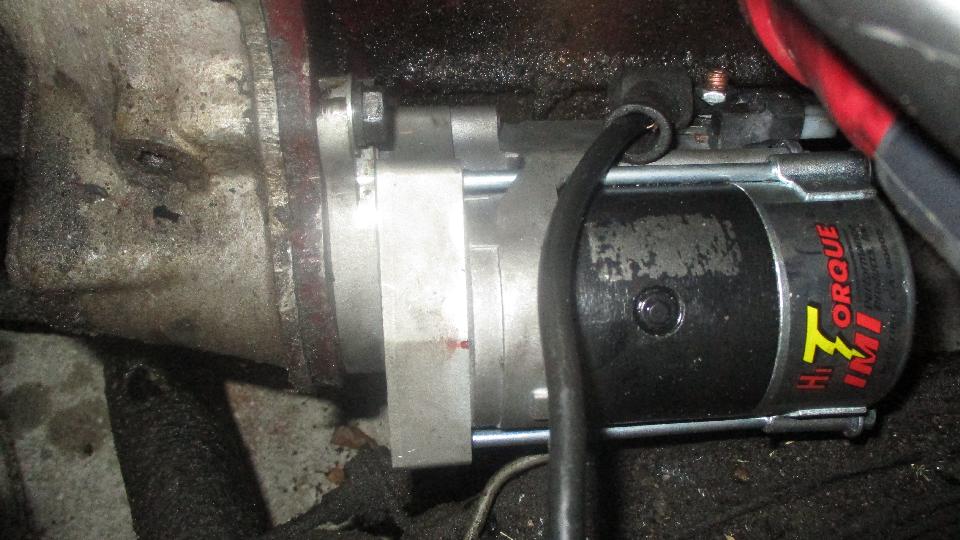
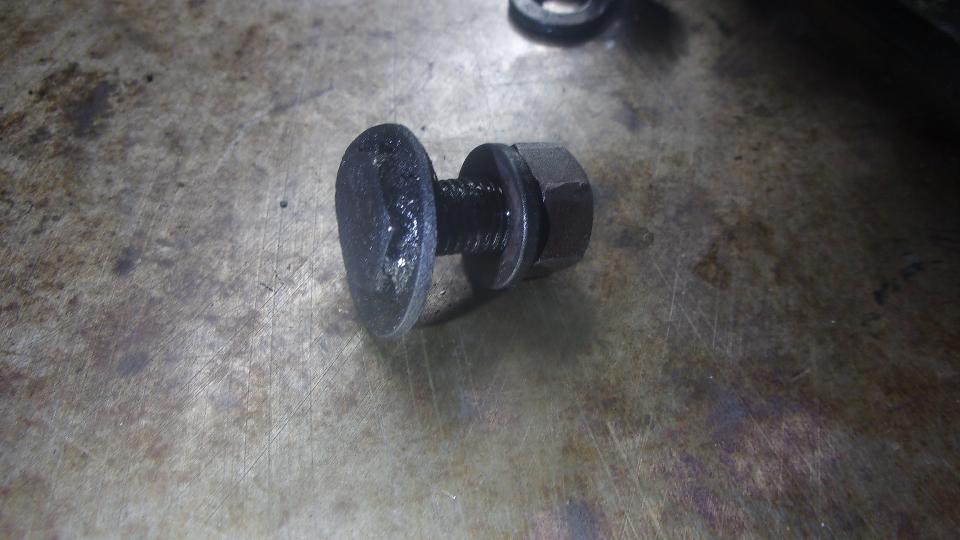
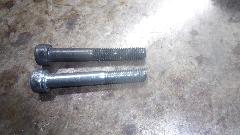
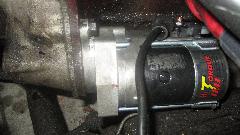
One early task today was to repair (replace) a broken bolt in the gear reduction starter motor. Broken for a while, we even had it out for a look some time ago but didn't have the right size screw. Now it's out again, so time to get serious and fix it. Kind of surprising how far it had to be disassembled to get to these screws.
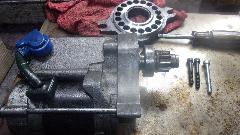

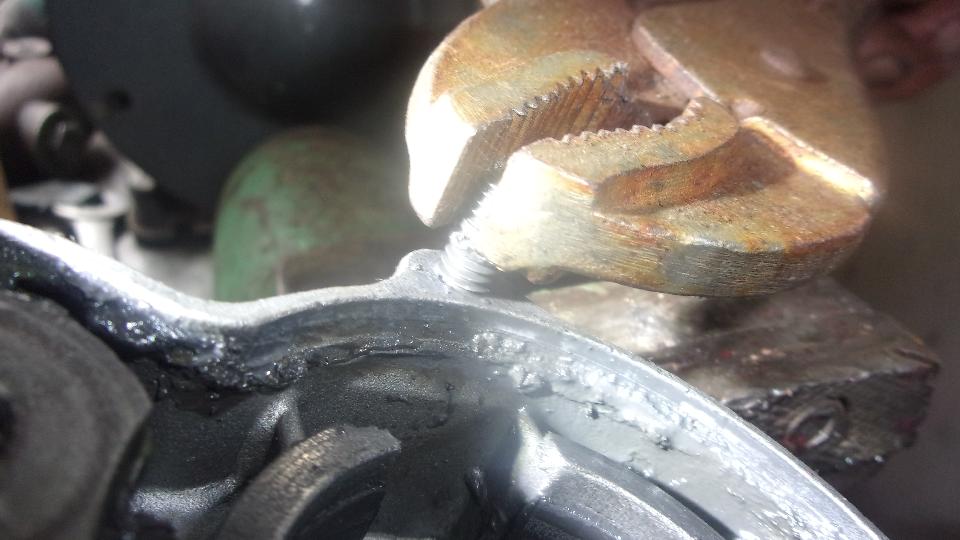
finally down to the main case we were lucky that the screw had enough of the broken end exposed to get it out with a Vice-Grip. Then on to finding another 6-mm screw, and it was soon back together.
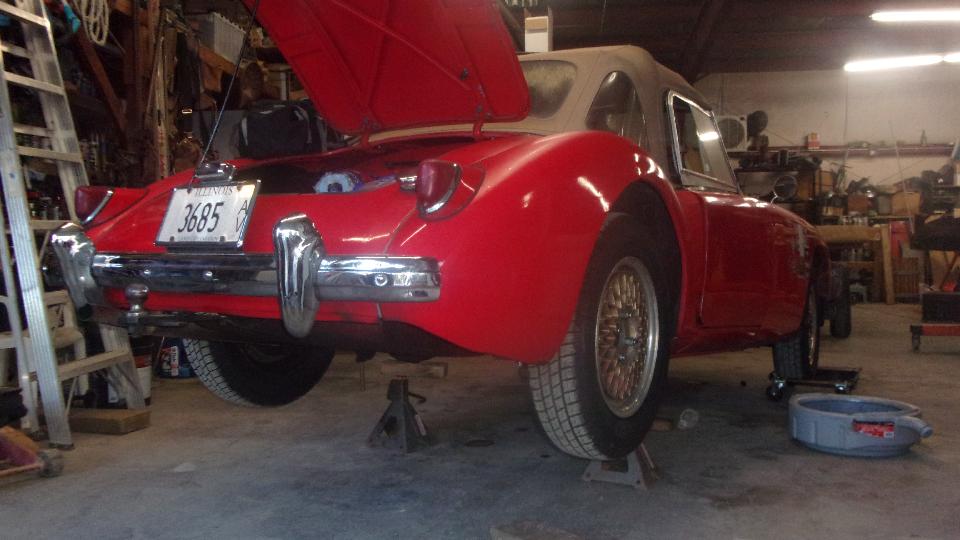
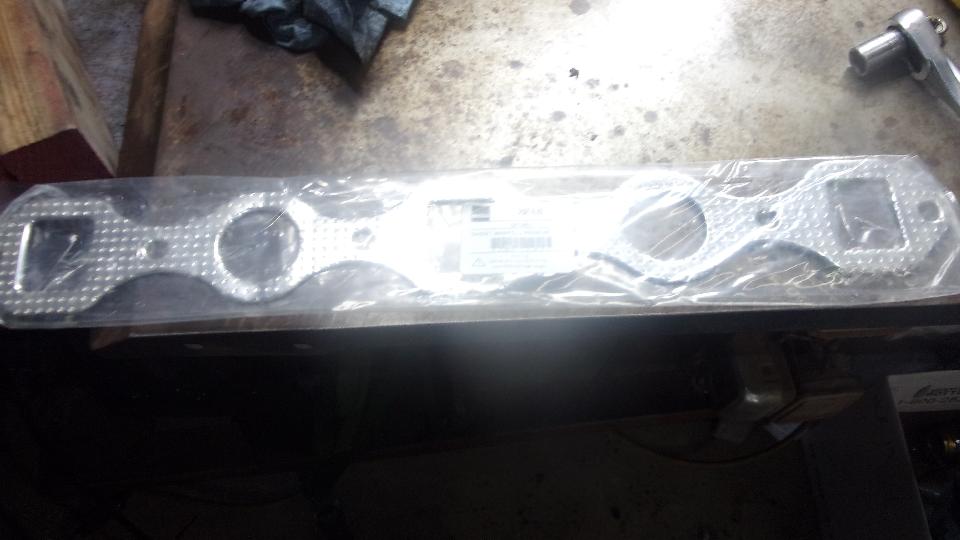
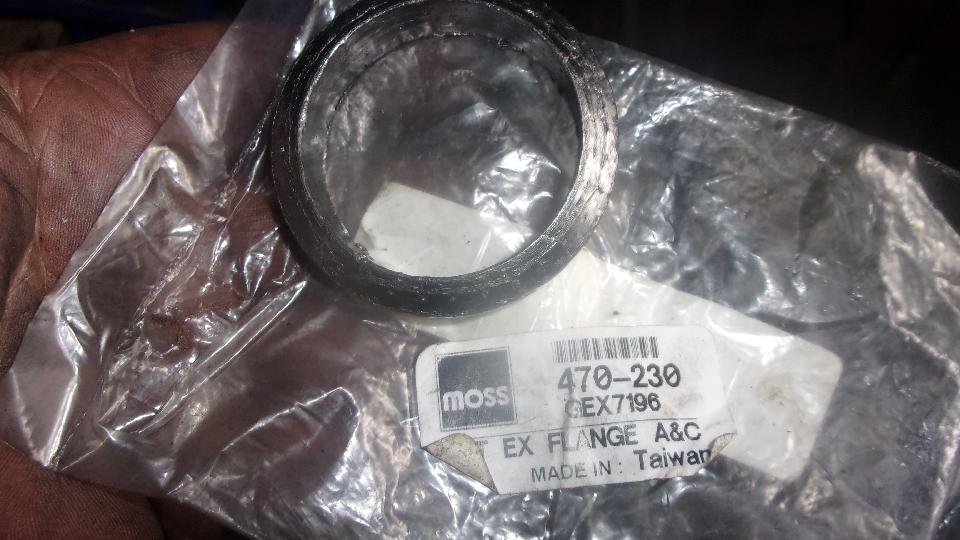
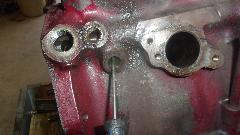
Next chore was to install the exhaust manifold and connect the exhaust pipe to the manifold, so I could install the last bolt in the bellhousing holding the pipe brace. More problems and more delays. The tapped holes in the head were all occluded with dirt and rust so the studs couldn't be installed. Remember this engine had been sitting for a while. Add a few minutes each for six holes to run a 5/16-24-UNF tap in and out to clean out the threads. Then a short bolt securing the exhaust pipe to the brace strap was being a bear. The hex head was very thin so a wrench could not get a bite on it. Finally got a grip on it with a BIG Vice-Grips to hold while removing the nut. Then drilled out the hole in the brace strap to fit a larger bolt, and eventually got that assembled, allowing us to get the car off of the jack stands and roller dollies.

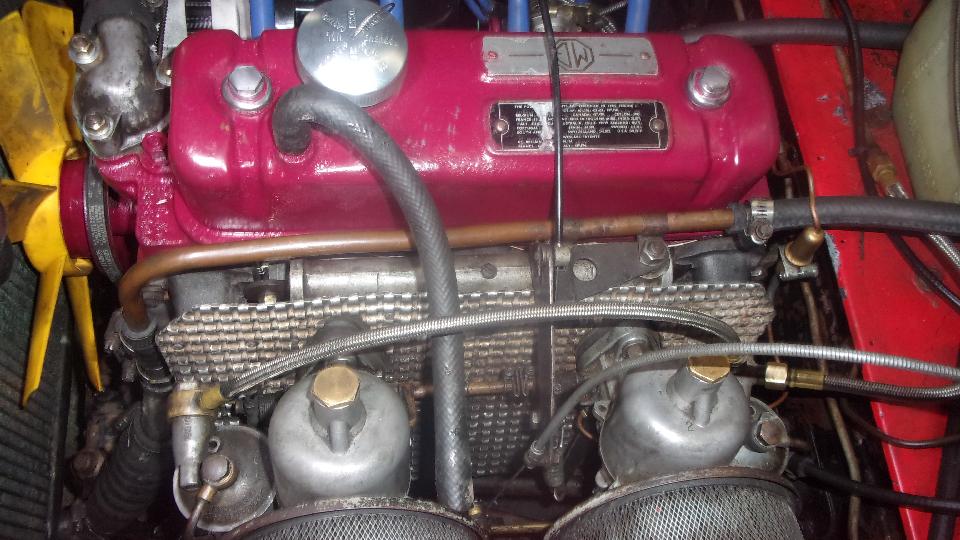
When the starter and manifolds were installed, we re-connected the battery cable and cranked the engine over to bring up oil pressure (so far so good). Then took the opportunity to do a compression test, which I would normally not do at this time, except this is a touched up used engine with some mix and match parts. First cylinder read 150-psi, a bit of surprise, as I have never had a stock engine with pressure that high. Scratching my head as I recall from a few days past the pistons in this engine seemed to have notably shallow dish, not flat tops but maybe less dish than normal. One cylinder read very low and chuffed when cranking. That turned out to be a misadjusted valve that was not closing all the way, an easy fix. No.2 cylinder was reading under 100-psi and also chuffing some. All valve clearances checking out okay, I was of course somewhat concerned. I tapped on the output end of the rocker arm to exercise the valve a bit pop open and snap shut), and compression improved to 110. Navigator said, "Tap it some more", so I did. Eventually we got compression up to 132-psi on No.2 when the others were all 150. Still chuffing a little bit, but certainly good enough to run. Concerned about finishing this today, we decided to leave it as is and check it again after it would be running.
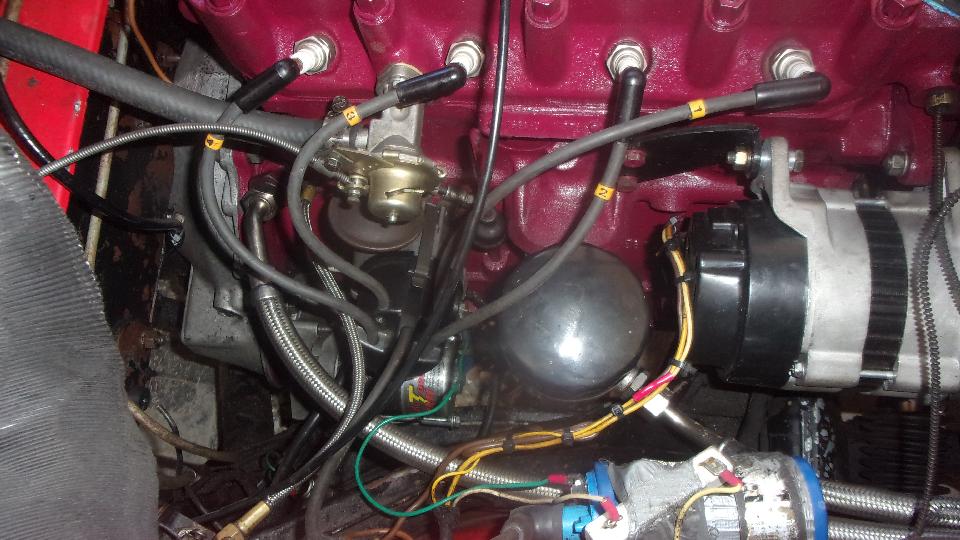
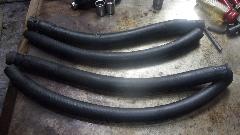
We took the opportunity to change two heater hoses that were looking soft and puffy, a bit of preemptive maintenance. Also installing the heater valve, distributor, alternator, carburetors, thermostat and radiator (fairly quick for the common stuff).

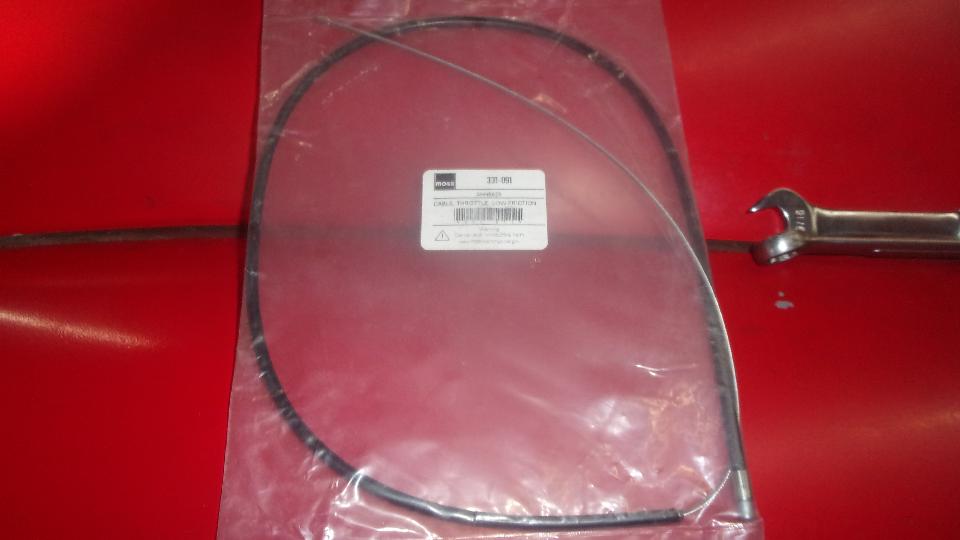
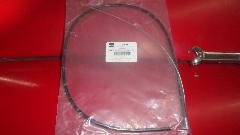
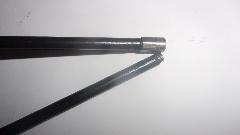
Nearing the end, had a problem with a frayed throttle cable, not uncommon, but another delay. The new Moss Motors throttle cable assembly (premium low-friction model) had a design change and a defect. The larger end fitting into the bulkhead socket had a larger one-piece fitting, where the earlier cable had a two-piece metal end inside of a sleeve (okay once we figured it out). But the output end was missing the crimped on metal ferrule so it would not stay in place in the trunnion above the carburetors. I ended using the new flex wire core with the old outer housing sheath. Pretty sure this is the second time doing the same thing, so now third life for the cable outer sheath (which is getting brittle and beginning to crack). Need to report the cable defect to Moss.
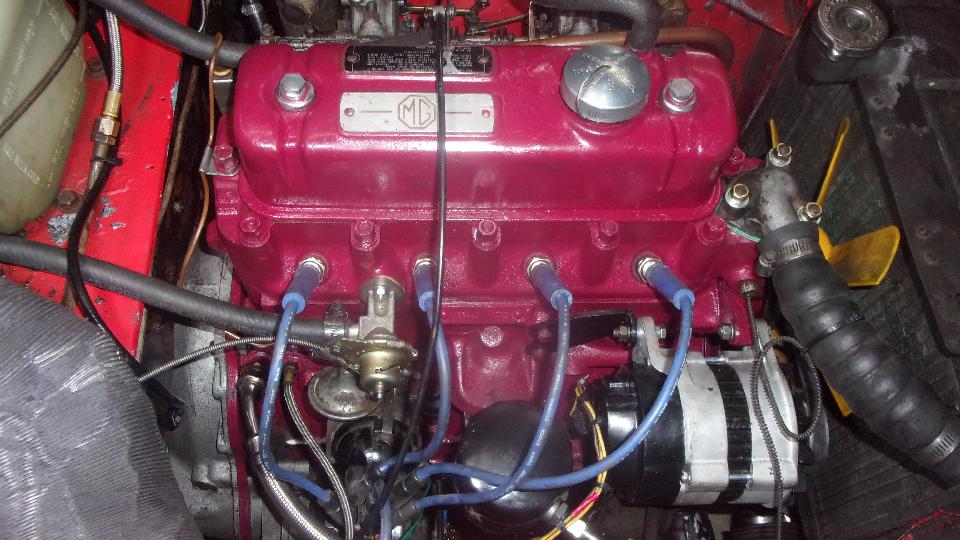
All together with coolant installed it was time to fire it up/ Everyone holding their breath? Crank, crank, zoom, right off with grins all around. Wait a minute, shut it off, cooling fan not turning. Fan belt was not on the crank pulley, easy fix, and try it again. Vroom, vroom, and settle down to a nice idle. Just thinking how nice it was not to need a higher speed 20-minute run-in, because the cam and tappets were already run several thousand miles in the prior engine.
 Wait a minute, shut it down again. Coolant weeping out around a thermostat cover stud. I was a bit ticked, because these were the studs I couldn't remove from the head last week. Was it a weeping thread, or a leaking gasket? Removed cover for inspection, nothing obvious wrong. Installed another gasket, gluing it on the bottom this time, and a touch of the "blue stuff" around the base of the problem stud, then reassemble. That worked, no more leak anywhere in the cooling system, and the coolant recovery bottle was also working as the temperature came up.
Been a long day, pushing midnight. Put the bonnet back on (quick with thumb screws). Pack away tools and toys and clean up the shop some. Will return later to tend to the old engine. Hitch up the trailer and roll it down the hill 12 miles to Angels Camp for the night. Man it feels good to be back in the saddle of the right car.
Tuesday, July 5, 2022:
Checked out a WiFi spot in Angels Camp, no-go, no power outlet to charge the toys. So after breakfast we wandered another hour farther southwest to a truck stop in Ripon CA. Spent nearly the whole day posting photos and notes from yesterday, updating inventory and parts ordering lists, BBS and email tech stuff, and sending off a couple of Faulty Parts reports to Moss Motors (alternator rear bracket and throttle cable). Good day to be alive, resting up after a week working on the car.
Wednesday, July 6, 2022:
Checking out possible WiFi spots this morning, 6 out of 6 duds, covered and locked electrical outlets and some
"No Loitering" signs (visitors not welcome in California?). Hour and a half later we ended up at another truck stop in Lodi, CA. Note to self: Still need to richen up fuel mixture on the rear carburetor lower altitude), and fix the defunct vacuum advance unit.
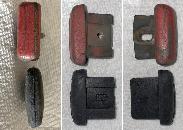
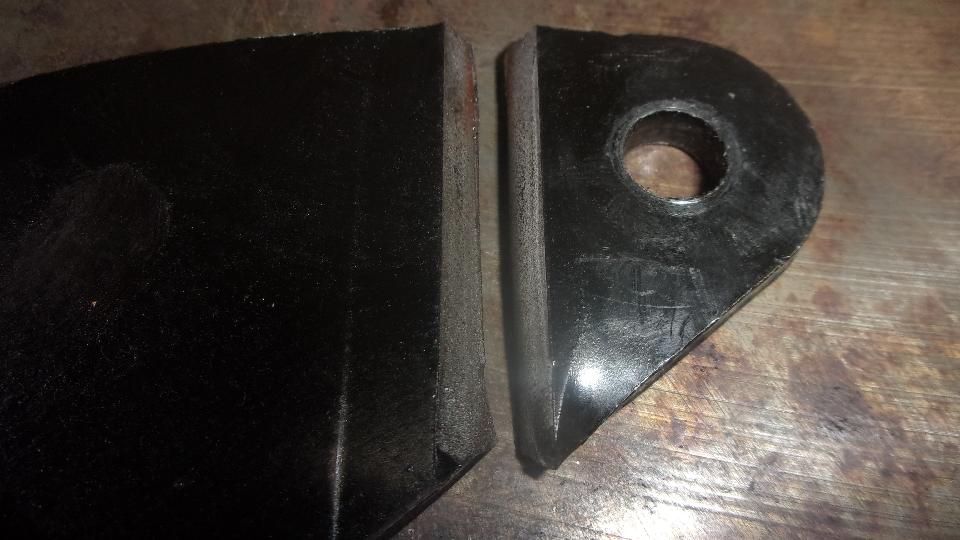
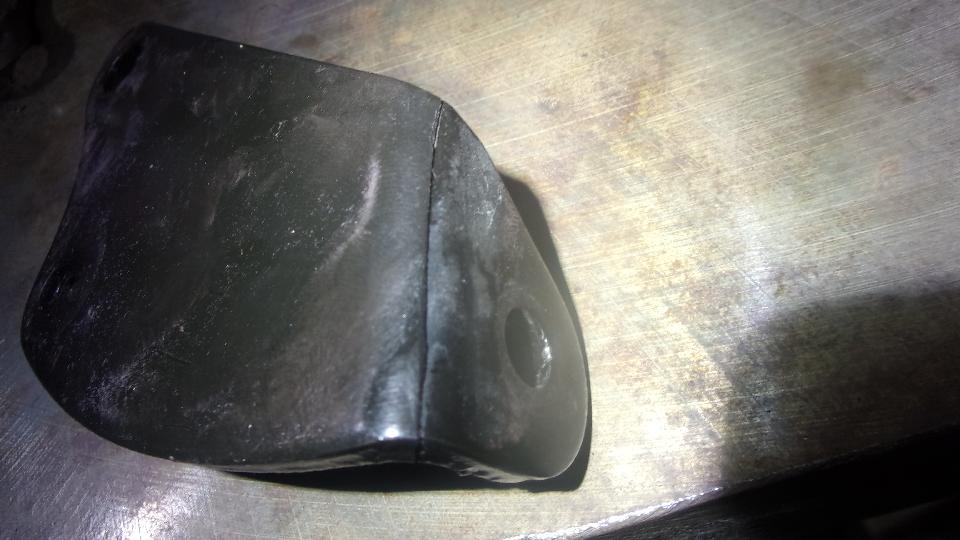
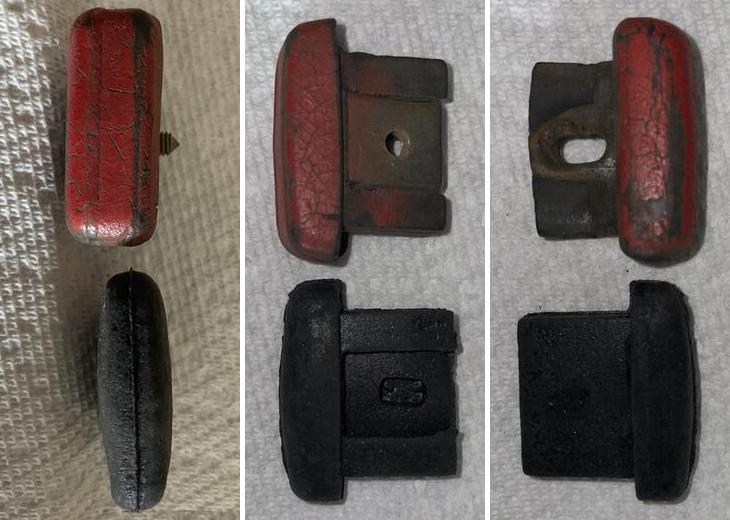
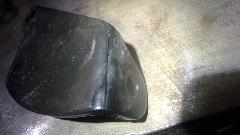
Added more pictures on a tech page of original style and current replacement
 style rubber door buffers. Apparently no one will supply the original style rubber parts at this time.
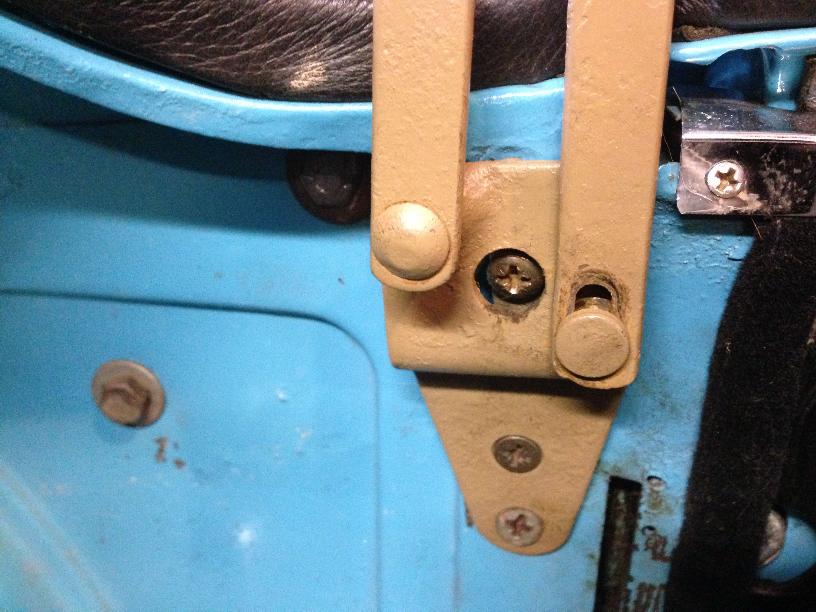
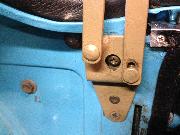
Another tech question today (often asked), what are the screws securing the convertible top frame to the inner body in the MGA? These screws are not listed in the Service Part List. Enough supplementary information here to create another tech page, including how to repair rusted screws and hidden captive nuts.
Some good news. The two duplicate parts orders from Moss arrived yesterday and today, first one accepted, second one returned. These are the tappets and pushrods I needed last Friday to put the engine together. Not having them caused extra work to swap (one year old) cam and tappets from old engine to new engine. The new parts now in reserve to mate with cam that was removed from new engine, ultimately to be installed in the old engine once it gets repaired (clear as mud). Also the first choice engine shop nearby is not too busy and will accept the old engine block and head for rework whenever we can get them delivered. Now I have an appointment to finish disassembling the old engine on Friday (and maybe get it off to the shop same day). Then it got past business hours before I could call Moss to exchange the most recently failed alternator, so that will have to wait for tomorrow (at least).
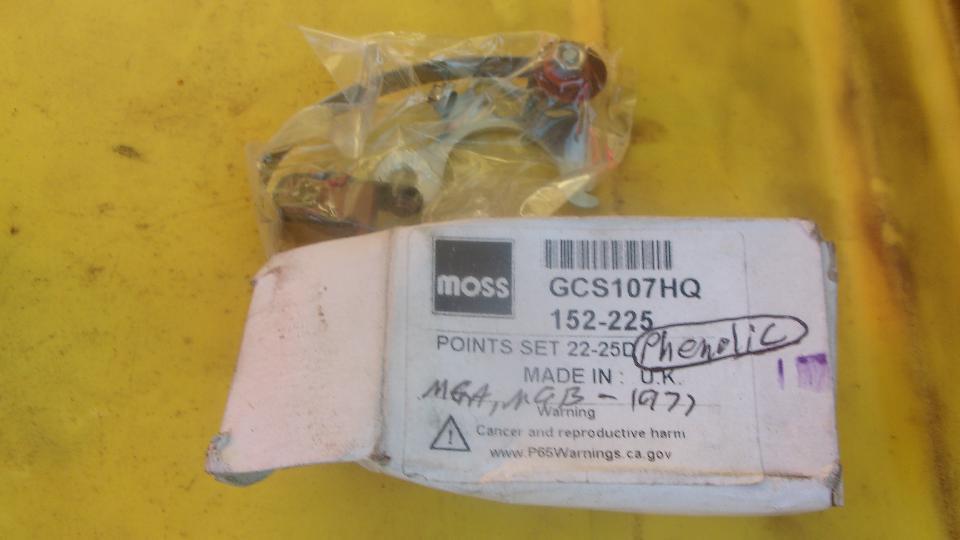
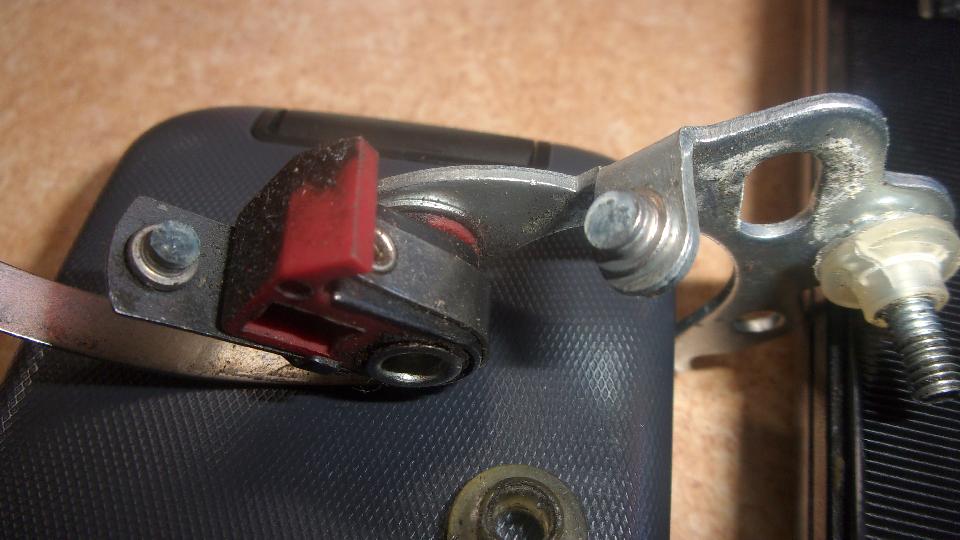
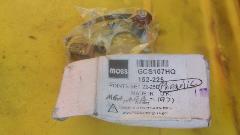
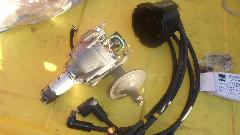
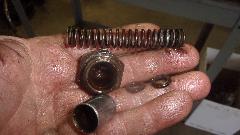
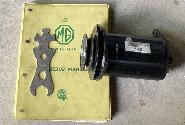
Before it got dark I wanted to reinstall the old distributor with good vacuum unit, but had to install a new set of points first, which is the only thing we didn't change when it was giving us problems a few weeks ago. I pulled out what I thought might be the best point set I had, Moss 152-225 Point Set, premium aftermarket (with phenolic rubbing block). Checked records, purchased in January 2022. WOW! That's a $20 set of contact points! Really? Now priced at $21, but back ordered.
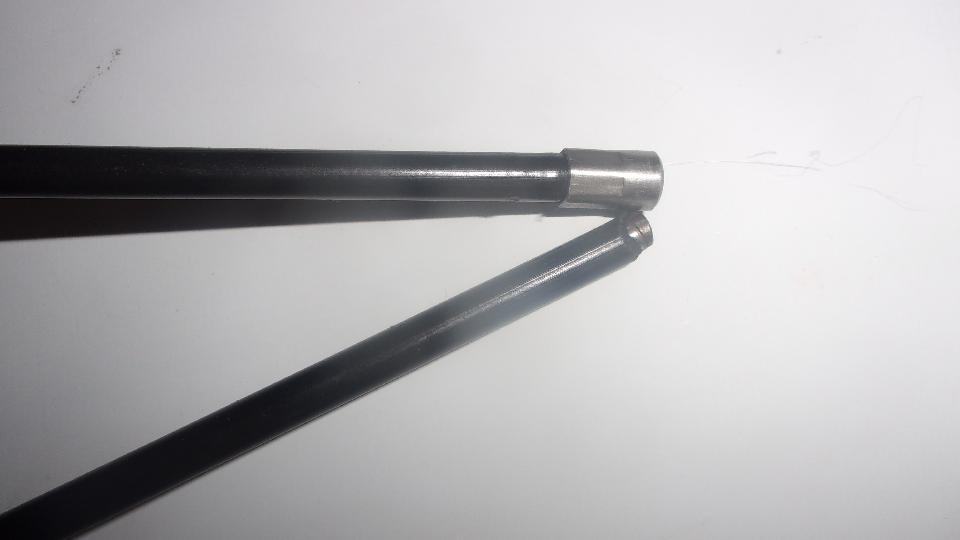
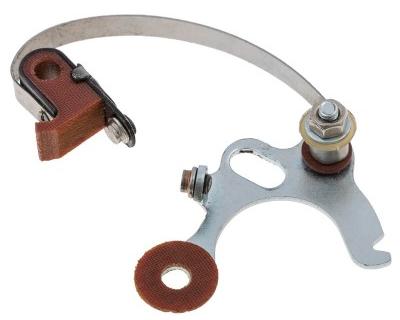
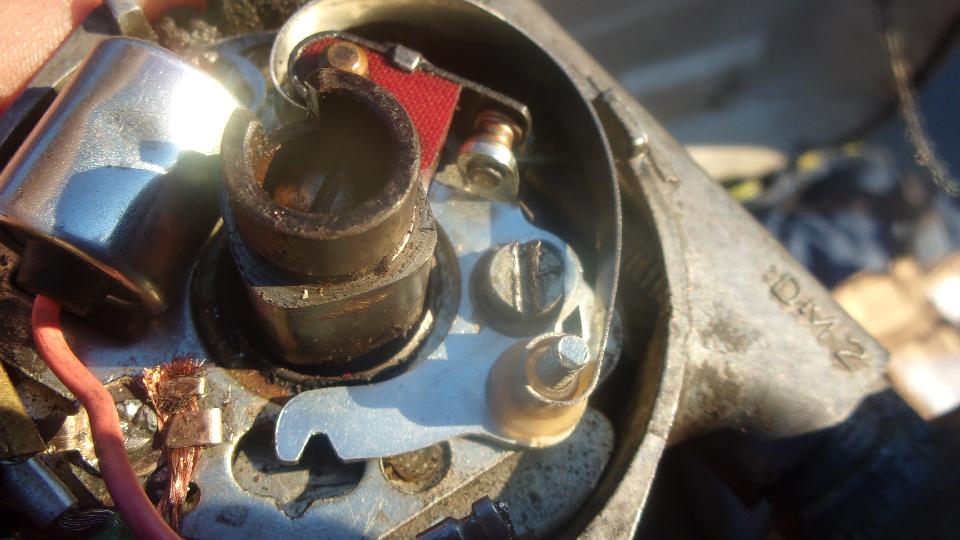
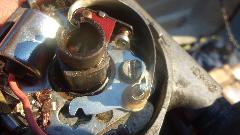
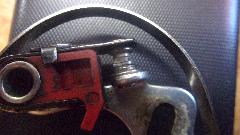
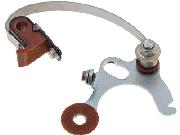 As received it was not configured like the picture in the Moss web site ad (picture at right). It had a nylon top-hat bushing on bottom, then the spring arm on that bushing, and on top a large phenolic washer, small phenolic washer, and the hex nut (convenience of packaging). Notice the rubbing block with moving contact is loose, hanging on the spring arm, because there is no pivot shaft on the base plate (where the large phenolic washer is shown in the ad picture). Of course there are no instructions or picture to show you how to assemble it. When installing it, the moving contact must be mounted on the fixed shaft in the distributor.
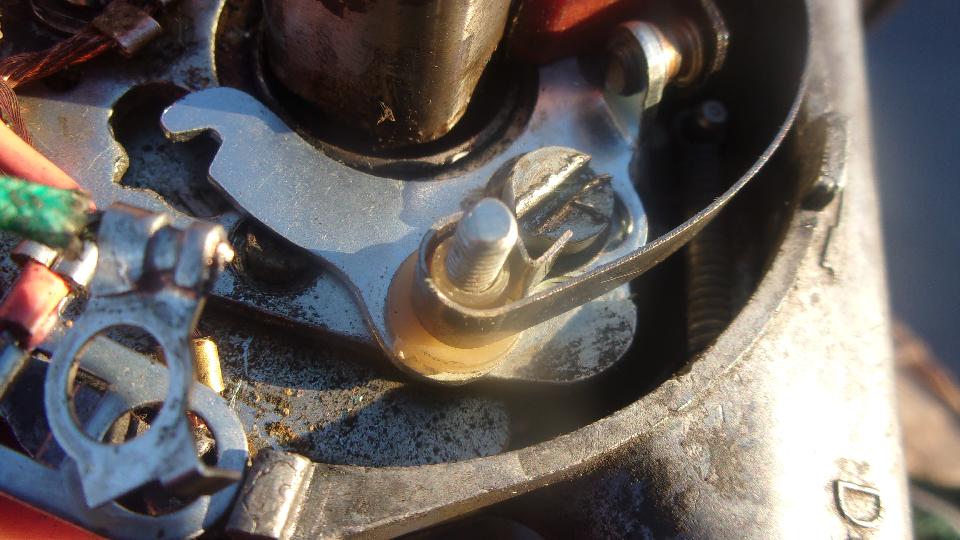
Pull out the old distributor that served faithfully for years before giving problems a few weeks ago. Look at the old points set that I was cleaning and adjusting and testing, and couldn't find anything wrong with them. Also a phenolic a rubbing block, but this one had a thin steel tube over the mounting post in the distributor, so the moving contact had a fixed pivot shaft as part of the base plate (easier to install).
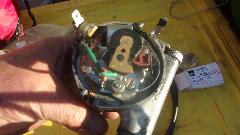
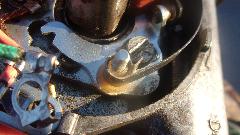
Okay, rotor off, old points out, new points in. Notice the nylon bushing under the spring arm. So lift the spring arm off to install the two wire terminals on the bushing, then put the spring arm back to contact on the wire terminals. I put the large phenolic washer on top, then the small phenolic washer and the hex nut (just as it was received). In retrospect, that might be wrong. Speculation is that the large phenolic washer should go under the moving points phenolic block (to make the contact points meet head to head). But I didn't notice at the time, and it does run, so I may look at it again later.

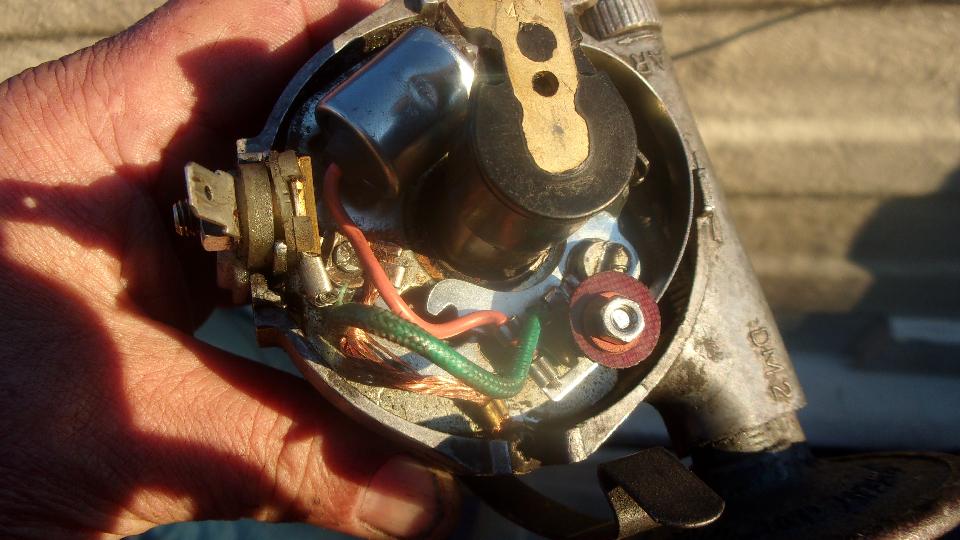
Known good distributor with known bad vacuum unit out, and prior failed distributor with known good vacuum unit in. Static time it close enough start, and I was almost surprised that it did start and run okay. Time it by ear
 for now, then get after enriching the fuel mixture on the rear carburetor before it got too hot to handle. Mixture set, both carbs check good for mixture via the lifting pin method. Set idle speed down to normal, then one last pass at adjusting timing by ear. Advance it to run faster until it begins to misfire, then retard slowly until it stops misfiring and begins to slow down a but (about 50-rpm drop), and lock it down there. Assuming it runs okay, I will check with a timing light later. Pack everything away, and take it for one halfway vigorous lap around the truck stop forecourt. Seems to run okay so far, so park it, and we'll see how it does on the road later.
Thursday, July 7, 2022:
Didn't go anywhere last night, so back in the truck stop at Lodi today. Didn't take pictures of anything, and didn't have time to do the trip log, so must have been busy doing something. Now Friday P.M. as I write this trying to remember what I was doing yesterday (Thursday). Oh yeah, mid morning call to Moss Motors to arrange for warranty return/exchange for the most recently failed alternator. Reply was, need to decide what to do about this, will call you back (but no word for the rest of the day). Some tech questions about cylinder head swaps, failing head light switches, why re-cored radiators don't work, and why original cell core radiators work perfectly well, negating most thoughts about using an aftermarket aluminum radiator. Late night receipt of the CMGC July newsletter in MS Publisher format. Need to transcribe that to HTML format for the club web site, but it will have to wait a day or two this time. It was time to head an hour and a quarter back up the hill to the east to Angels Camp in preparation for tomorrow's appointment.
Friday, July 8, 2022:
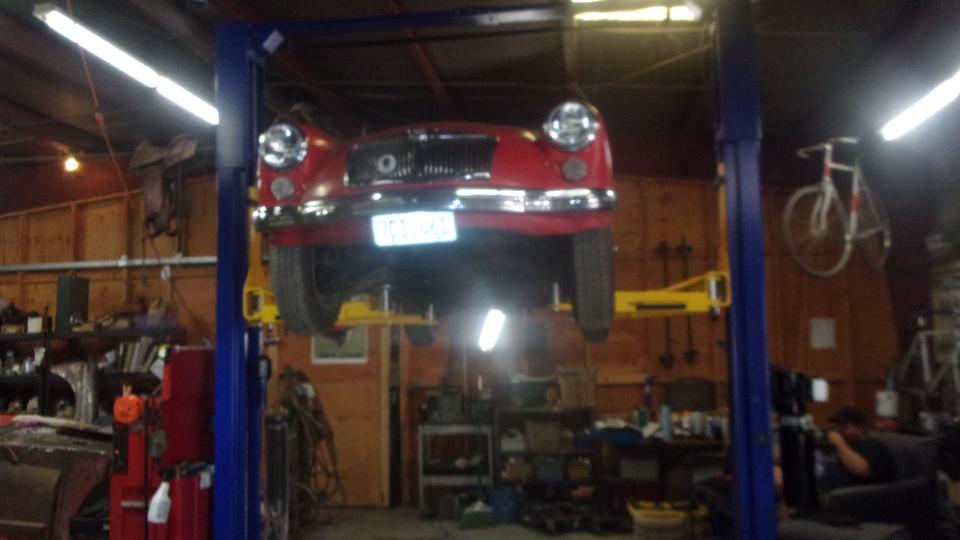
 Up early for breakfast, then 12 more miles up the hill (above 3000 feet) to Brice Station Vineyards just east of Murphys, CA. We were here today with our friend Stuart Mast to finish disassembly of the engine removed from my car to get the head and block off to a machine shop for rework. But first, pull the valve cover off the borrowed engine in my car and re-torque the cylinder head while it was still hot, and reset the valve clearances.
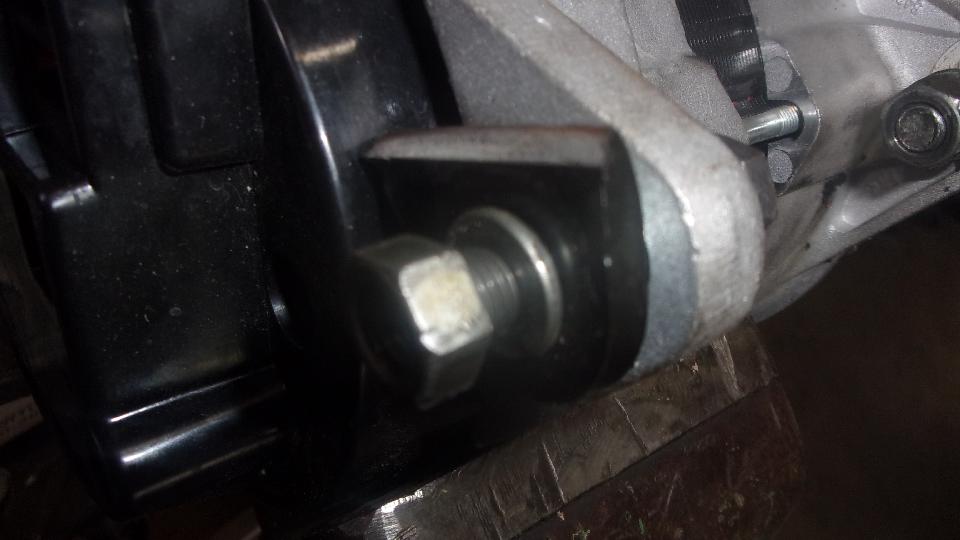
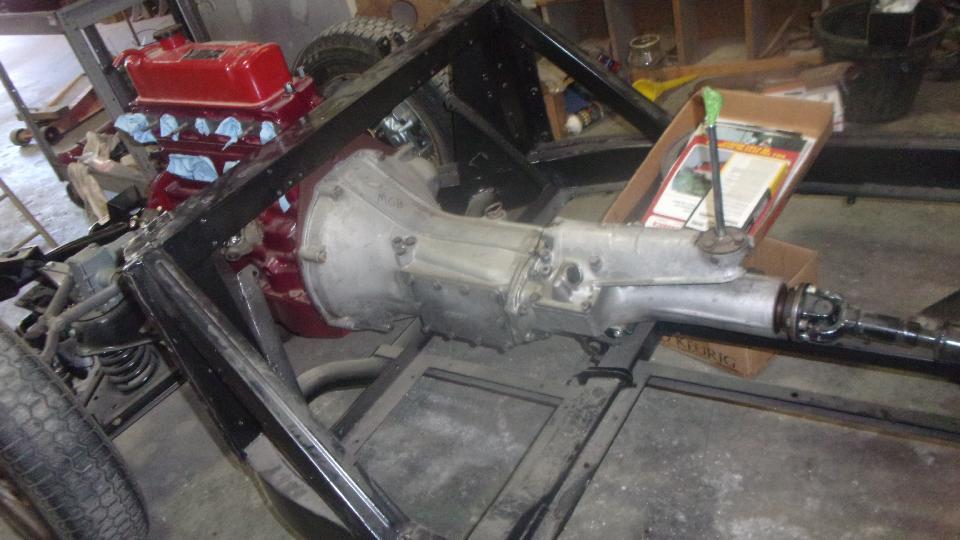
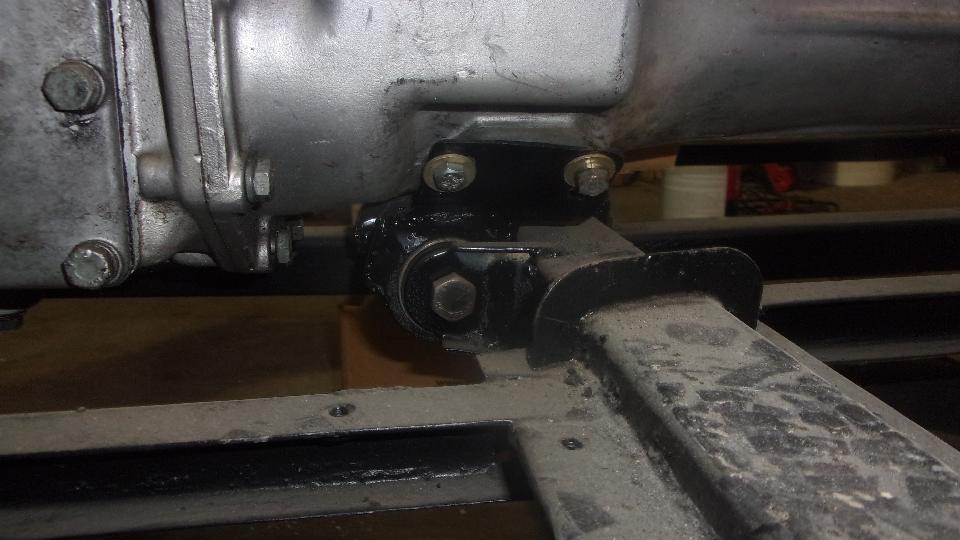
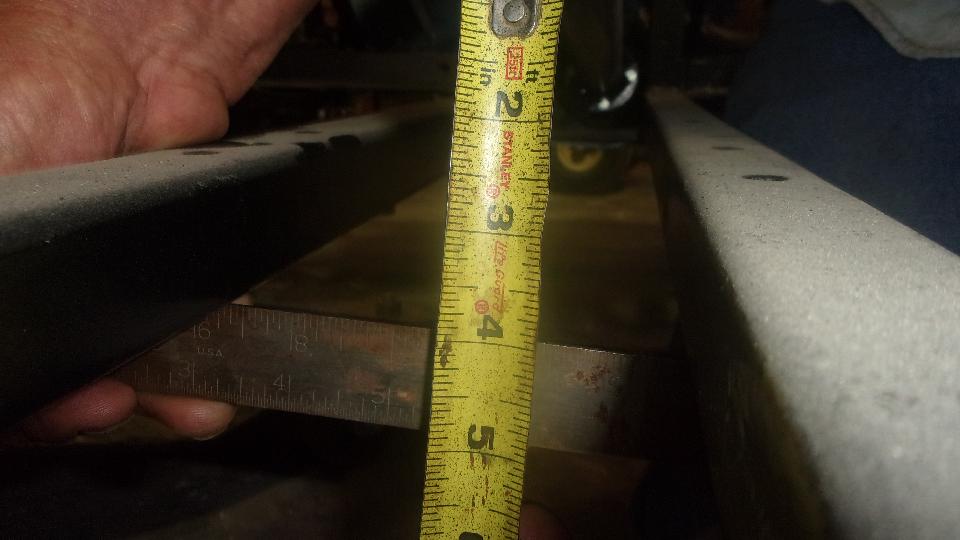
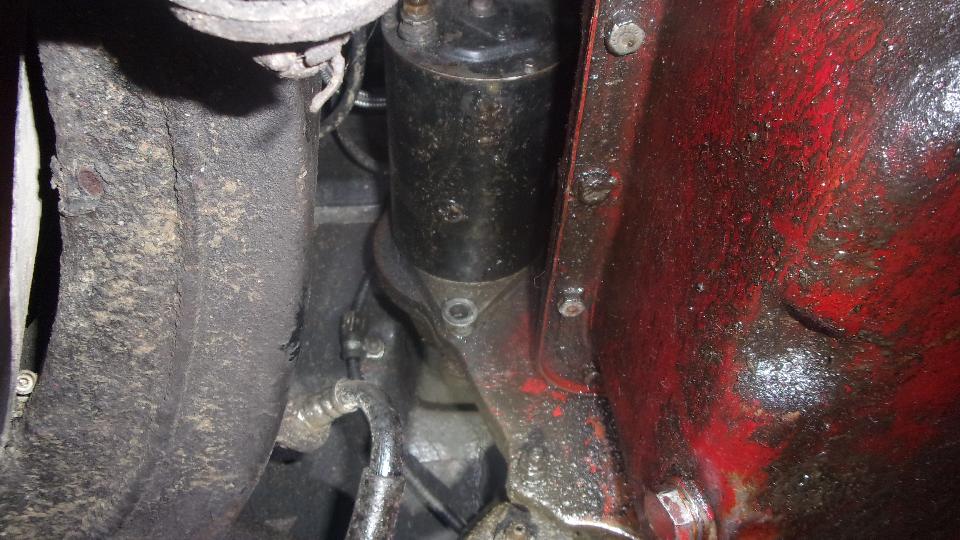
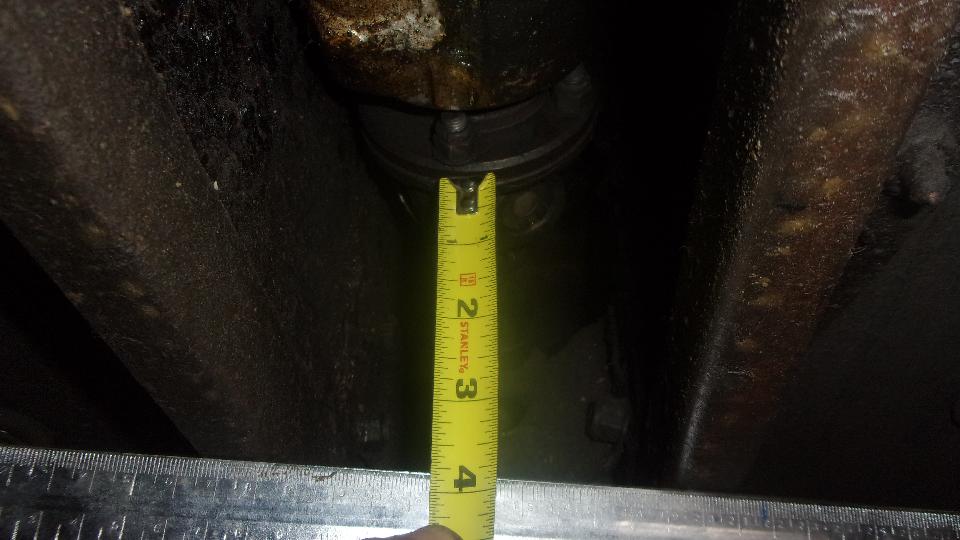
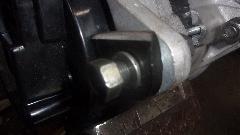
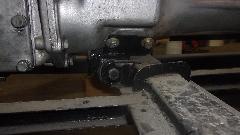
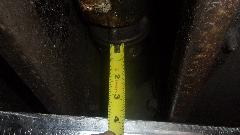
Then another short distraction, a good look at the gearbox rear mount where Stu had installed a 4-synchronizer MGB gearbox in the MGA chassis. To get the correct mounting height for the rear mount, he began by cutting the original 45-degree welded mounting ears off the frame. He relocated and welded these back in straight forward of the frame cross tube. Then parts of the original MGB U-shape bracket were welded to a new MGA rubber mount (the thick Silentbloc style rubber bushing with inner and outer steel sleeves). This positions the MGB gearbox rear mount very close above the MGA frame cross tube. We measured from bottom of the propshaft flange coupling to bottom of the frame for height reference, 3-7/8 inches.

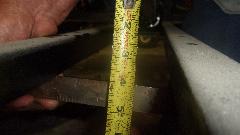
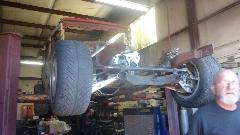
Then we had Stu's daily driver MGA (standard 1600 4-speed) up on his new hoist, trying to put a bolt back in the lower ear of the starter motor. Some MGA have fine threads in the bellhousing, while others have coarse threads. Neither fine nor coarse thread bolts would screw in here. I think the starter is just slightly misaligned so the holes don't line up, needing to loosen the top bolt for realignment. Meanwhile it was a golden opportunity to measure from bottom of propshaft flange to bottom of frame on this car, which also turned out to be 3-7/8 inches. Not a coincidence. I recon Stu hit this one right on the head for height of his new 4-synchro gearbox mount in the MGA chassis. Easy enough to remove for service as well (as long as it is not an overdrive gearbox).

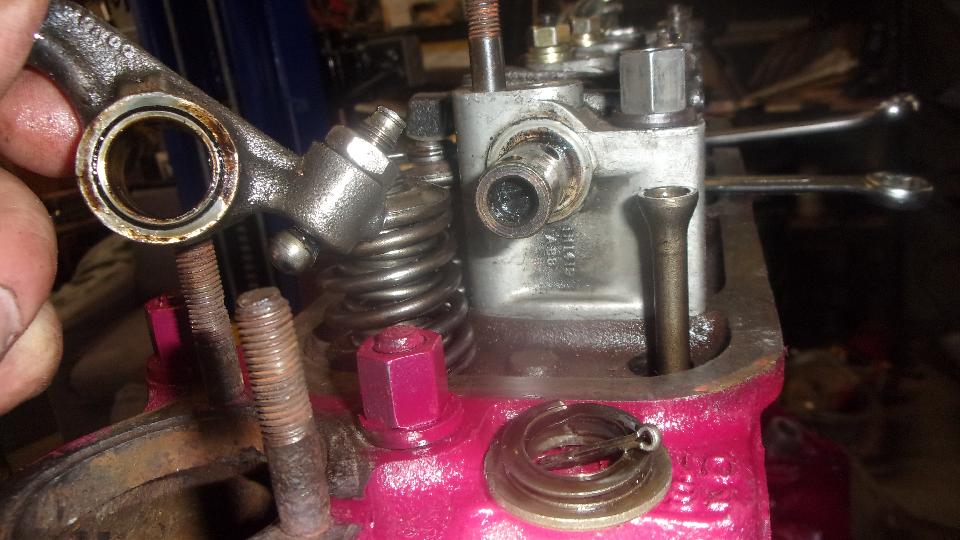
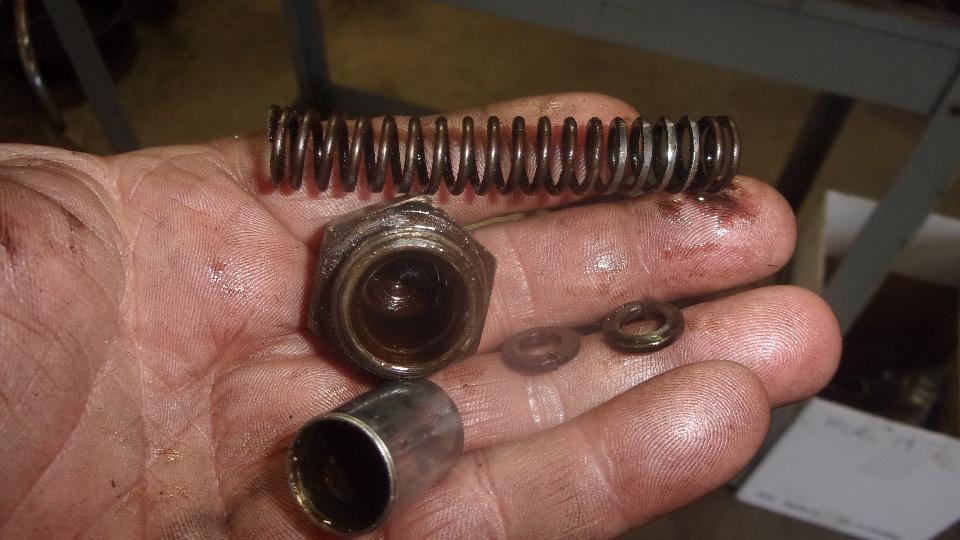
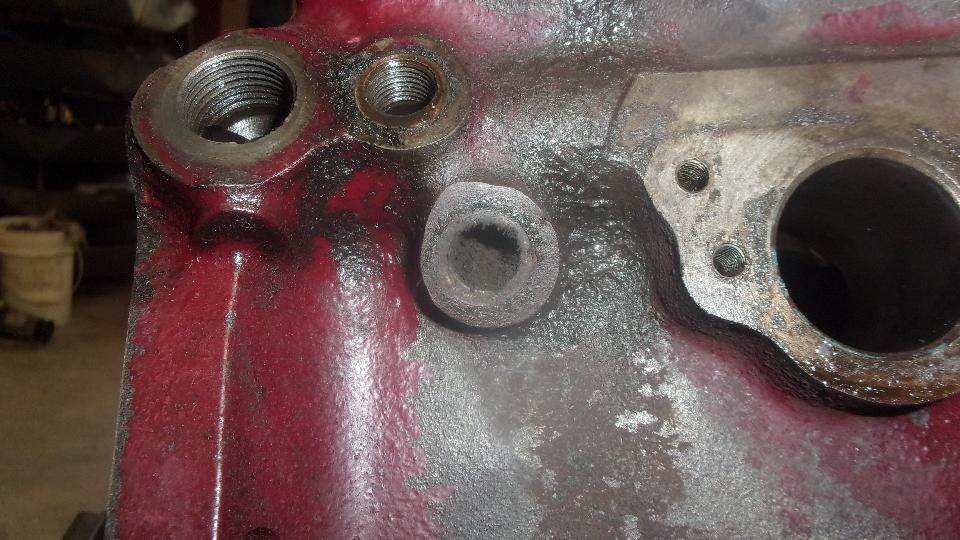
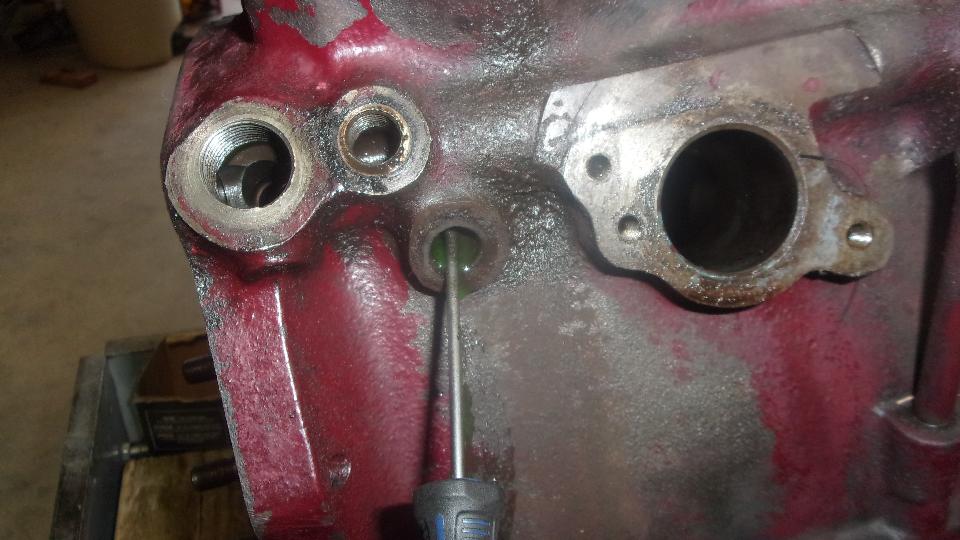
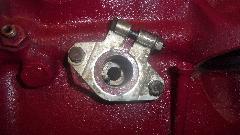
Finally back to the prime objective for the day, stripping my old engine down to bare block and bare head for machining. Remove engine mount brackets and front plate, tachometer drive and oil pressure relief valve parts. Note to self: spring is too short, so install a new spring exactly 3inches long with reassembly. The two 1/4-inch medium spring lock washers are packing pieces that will raise relief pressure 6-PSI for each one installed.

A quick review of the little in-line notch in the camshaft rear bearing journal that is there to meter oil slowly to the cylinder head for rocker shaft lubrication. So far I don't know the intended mechanism for the MG TD/TF engines that should accomplish something similar, but that needs to be resolved for Stu's MG TF (which dumps way too much oil onto the cylinder head). As usual, removing the engine block drain cock (or plug in this case) did not drain coolant out of the block. Lots of digging around with a small screwdriver did finally clear this port to drain it.

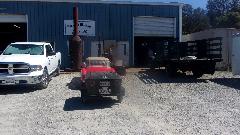
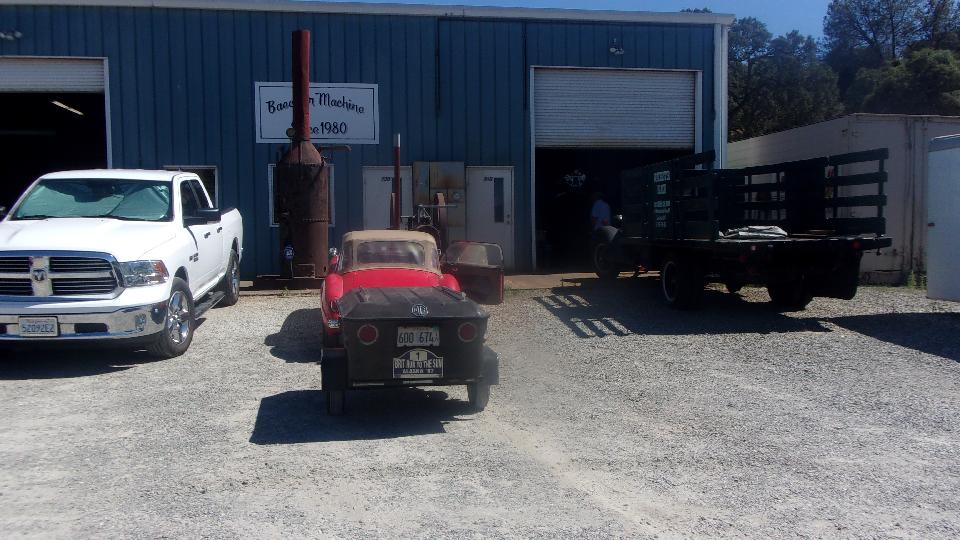
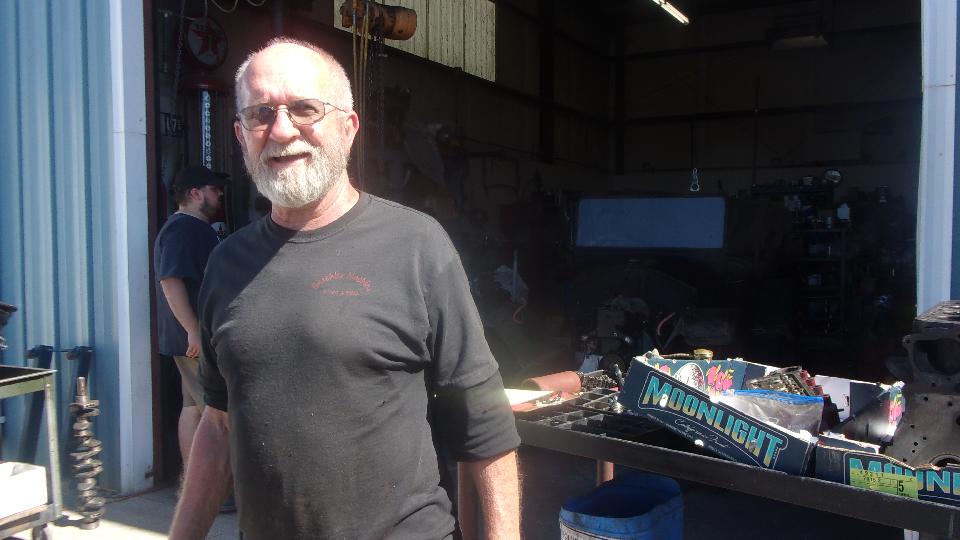
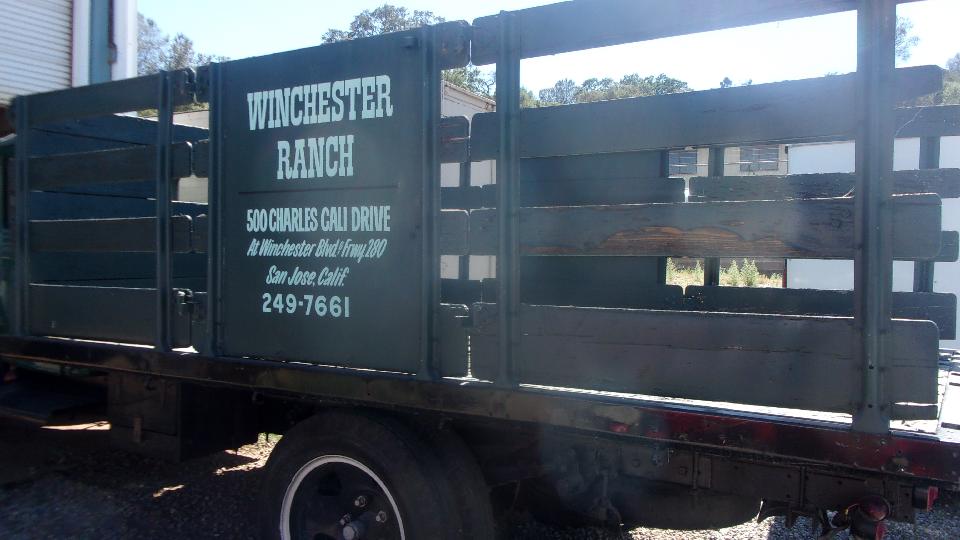
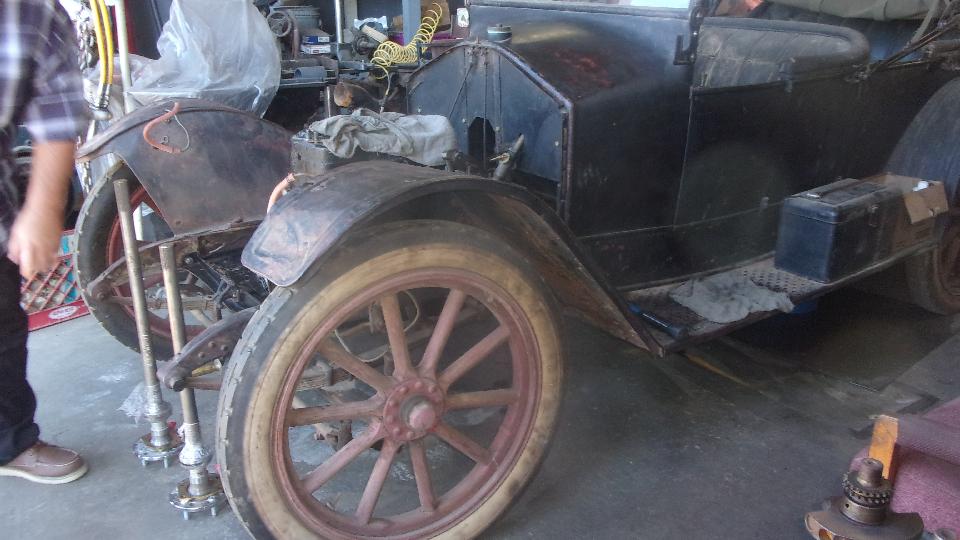
Okay, all stripped down, pack it up and head down the road to Baechler Machine in San Andreas, CA. Say hello to Willie Baechler who has been here more than 40 years. He cut his teeth working on vintage and antique vehicles when they were not so vintage. The Winchester Ranch flat bed truck is (I think) a 1940's something International.


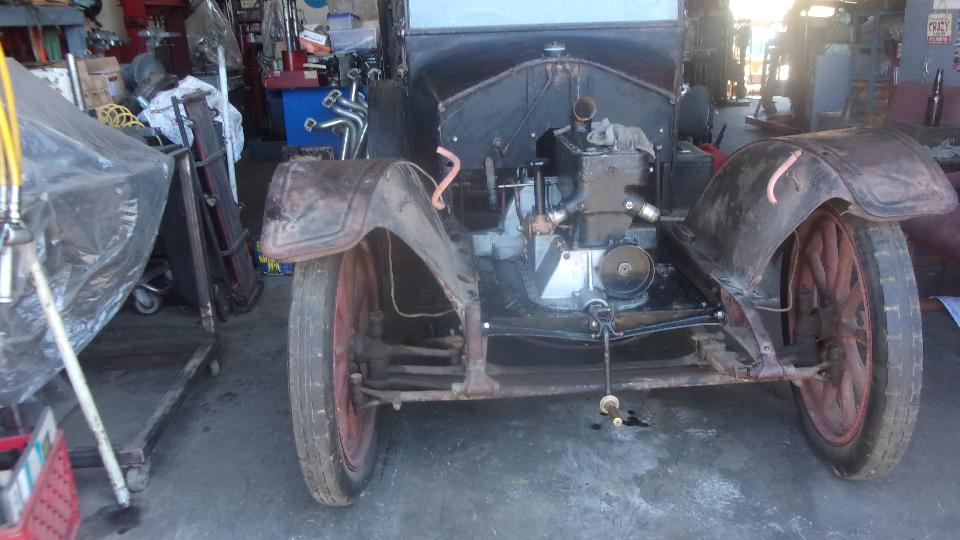
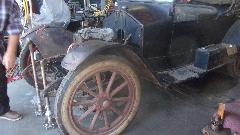
The car in the left bay is a 1903 Hupmobile that belongs to a customer. Few enough to begin with, how many of these cars are still left in the world? Willie swears there is at least one too may. I guess that means it is a bit of a pain to source parts.
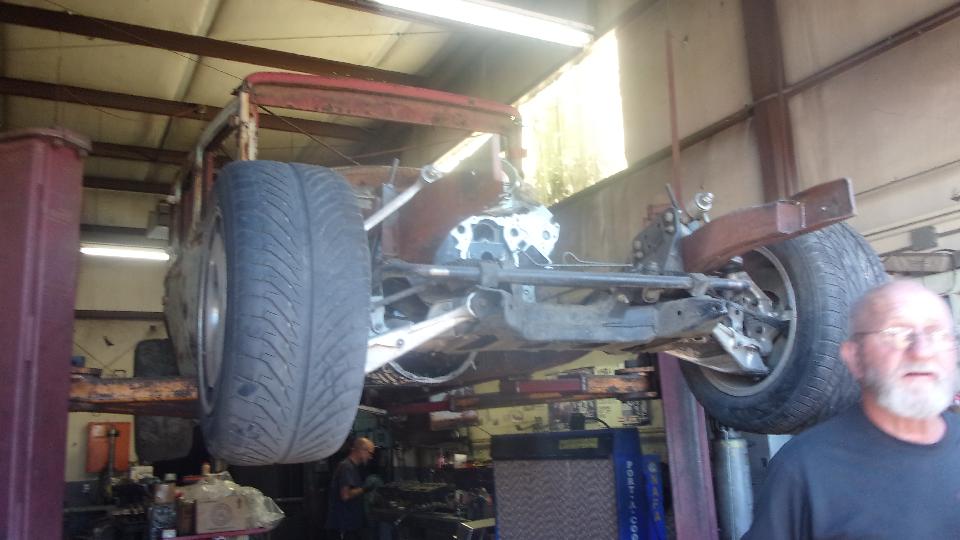
In the right bay, hey, his latest hot rod Ford project is not a flat head. He was seriously considering a vintage big block Chrysler engine, but finally decided to go modern with an LS1 Corvette engine including all the modern computer controls for max power and better fuel economy. Go Willie!

Enough fun, back to business. Scratch pad for notes, review our block and head current configuration and condition. 0.060 o/s and worn out again, order up four cylinder sleeves to restore standard bore (more meat for future re-bores). Also four new replacement hardened valve seats for exhaust valves, and standard valve job for all 8 valves, and leave it to Willie's judgement if it needs new valve guides (for the next 200,000 miles). Willie is easy to talk to. I recon he trusts me as much as I trust him, so this should go well.
He did ask for possession of the new standard size pistons, which most shops would not request. That is, I've rebuilt several engines, and only once before has a shop asked for the pistons before boring to a standard size or standard overbore size. Should be precision dimensions for interchangeable parts. But the last shop that asked to see the pistons found one that had been bent slightly and needed to be returned for a replacement part. Willie just wants to know the exact dimensions before final honing of the cylinders. I may ask late what he has in mind. He also wanted to know the piston ring types, if iron or chrome plated, and type of oil wiper rings, something to do with final honing stones. I may learn something new here by the time this is done.
Back to WiFi, but the nearest prospective spot didn't have a power outlet, so we gassed it up and cruised all the way back to the known truck stop in Lodi before late lunch (more like dinner time at 6-pm). By the time I got through today's email and tech questions and BBS review, dinner was long over. Then posting these photos and notes ran to 1-am, so the CMGC newsletter posting will wait for tomorrow.
Saturday, July 9, 2022:
One mission today, transcribing and posting the CMGC July newsletter to the club web site. Finished in one day.
Sunday, July 10, 2022:
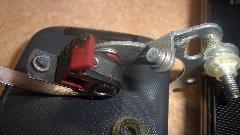
Start the day with a novel tech tip. Someone discovered that a standard bicycle wrench can work to hold the Lucas generator front pulley to R&R the pulley retaining nut.
 Added Baechler Machine in San Andreas, California to my Shops list, since Willie Baechler is now doing the machine work for my MGA engine.
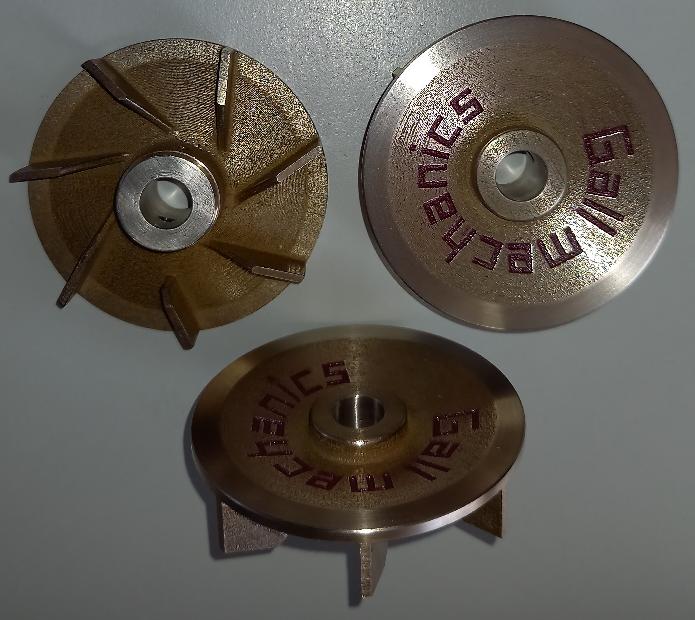
Also added Gall Mechanics (in Germany) to a links list for Commercial businesses providing parts for vintage British cars, as they are now manufacturing high performance water pumps and pump impellers for MGs.
About to order parts to reassemble my old engine, but no one has MG 1600 standard size pistons. Oops. Paying to have four cylinders sleeved back to standard size, not wanting to rebore it oversize, need standard size pistons. Posted a note to the BBS forum late night; got a nibble and a phone call; waiting to see if they can be procured from the UK.
Monday, July 11, 2022:
Good news, new pistons (1600 standard size) are coming from UK via DHL express, should be here later this week.
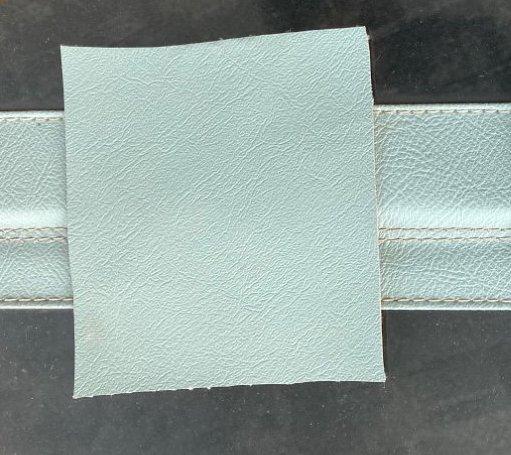
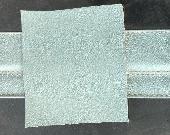
We have finally found a good color sample for The Elusive Ice Blue Vinyl Top for MGA side curtains and tonneau cover. Bob West in UK has had some vinyl paint made up to match the original, and Mark Wellard in Australia sent along a color sample.
Ordered a new vacuum unit for my spare distributor from British Vacuum Unit, plus a few spare tune-up parts.
Ordered nearly 40 line items from Moss Motors, mostly spare parts (to replace those used assembling the loaner motor, but a few more needed to reassemble my old engine after machining. That was a chore getting that order complete and correct, and getting it shipped from the left coast (because it is to be delivered in California).
Finally found time to investigate the failed contact points that were giving me fits a few weeks ago. I recon
 they were burned a lot more than I expected, and emery paper was not getting them clean. I need a more aggressive emery board. I suspect adequate contact for idle and revving with no load, but loss of contact (blocking higher current) as soon as it tried to drive with higher combustion pressure (not sticking open). They certainly don't owe me anything after 3yr 4mo 61,744 miles.
Tuesday, July 12, 2022:
Some discussion on electrical failures, turn signal flasher units and ignition switch failures, how to test a flasher unit, and fixing tail light wiring. Otherwise mostly a casual day off.
Wednesday, July 13, 2022:
Two Moss orders shipped. The important stuff coming from Goleta, CA should be here by tomorrow. Replacement alternator shipped from Petersburg, VA (dummies) likely to be delivered in California next Monday. -- Ah, verified new pistons are on their way, shipped from UK via DHL, already in San Francisco, CA this morning. -- Paid my car insurance for another year (stop worrying).
Thursday, July 14, 2022:
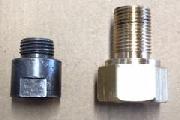
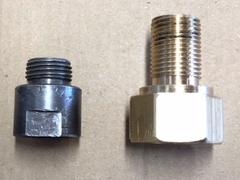
New tech page today for a custom made adapter for the temperature sensor screwing into the cylinder head (where there were damaged threads).
The pistons arrived at the importing dealer north of San Francisco, CA today. Then are already re-packaged and tagged to be shipped to the machine shop, likely to arrive there Saturday (maybe even tomorrow).
Friday, July 15, 2022:
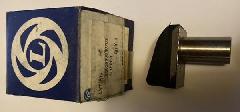
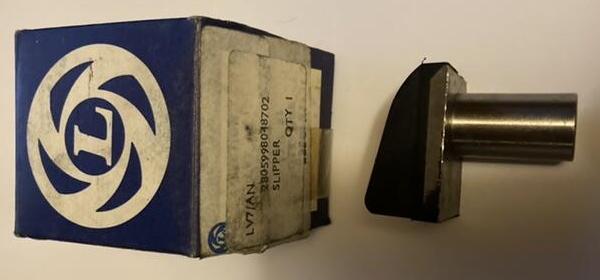
Someone found a stash of New Old Stock high quality OEM parts for timing chain tensioner slipper blocks. This provides a solution (while supplies last) for poor quality replacement parts falling apart prematurely that have been plaguing us since about 2010.
Discussions going for spark plug heat range, resistor or non-resistor plugs, cross reference numbers and recommendations.
|