The MGA With An Attitude
MGA Guru Is GOING MOBILE - (April 1 - April 15, 2022)
Friday, April 1 2022:
Another travel day, drive until noon for late breakfast, fill it up again in Canton, Mississippi.
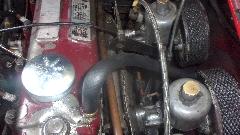
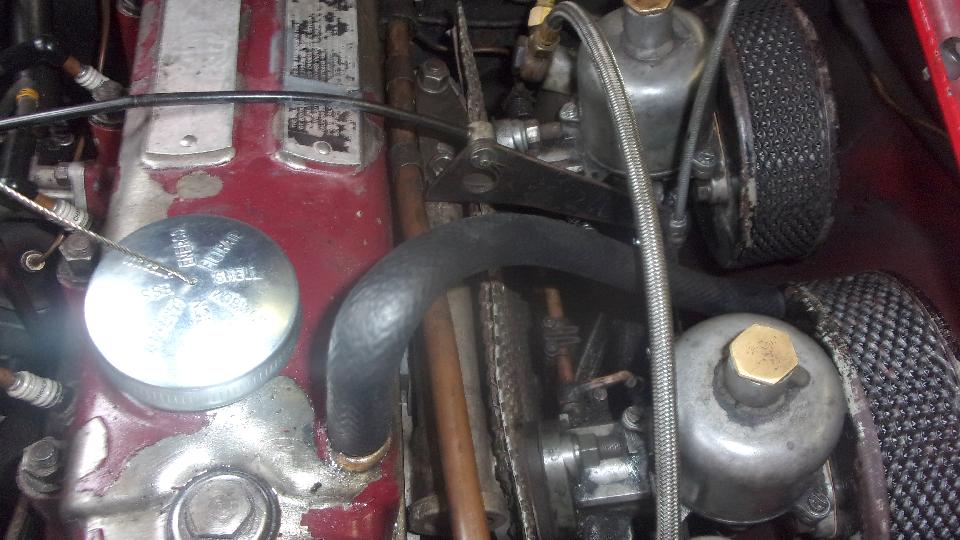
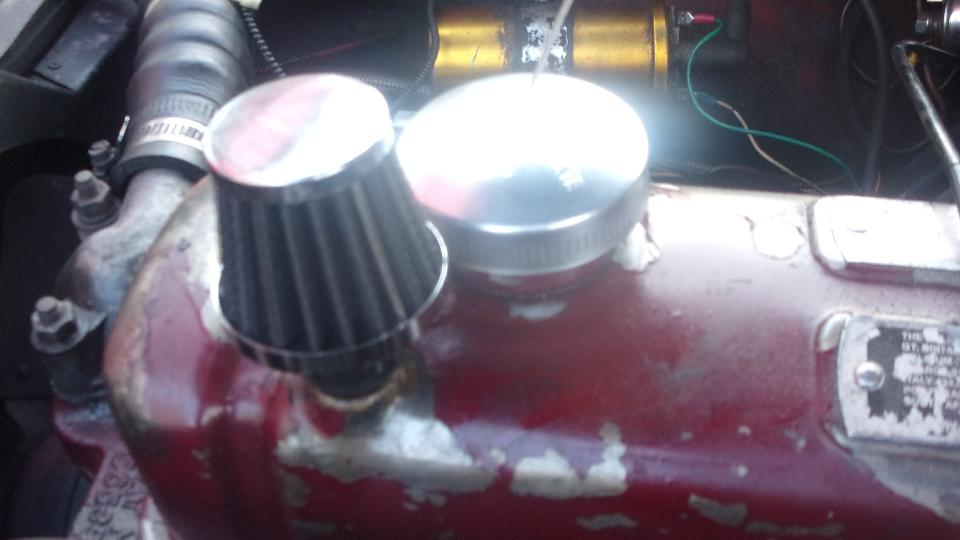
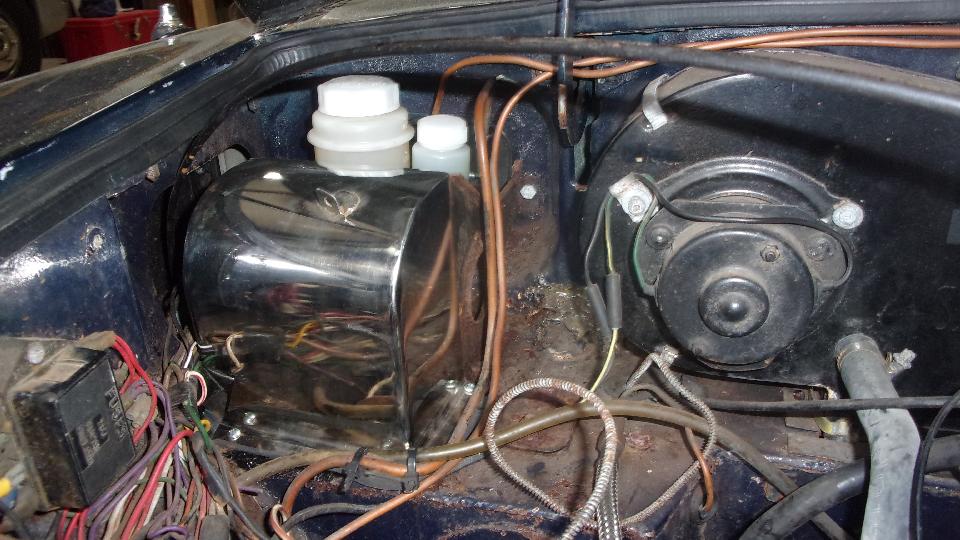
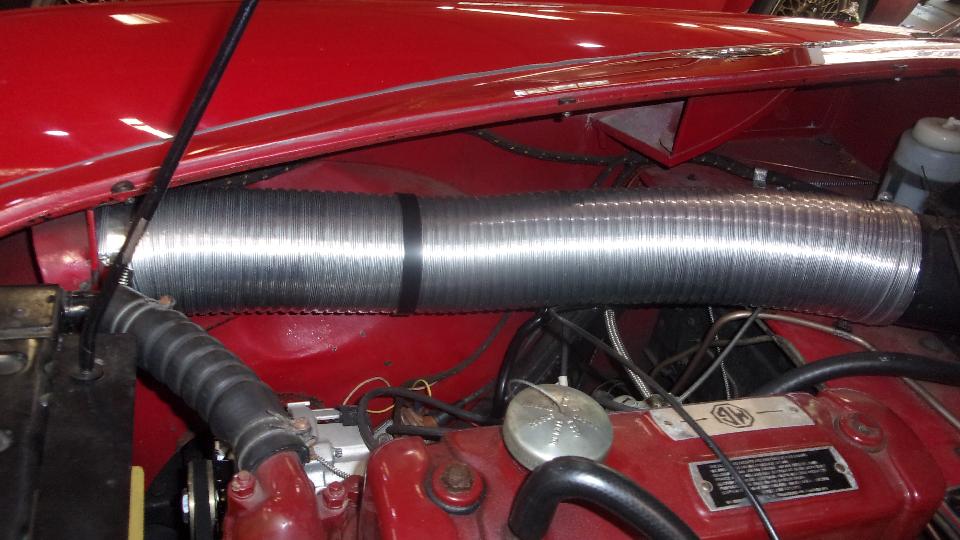
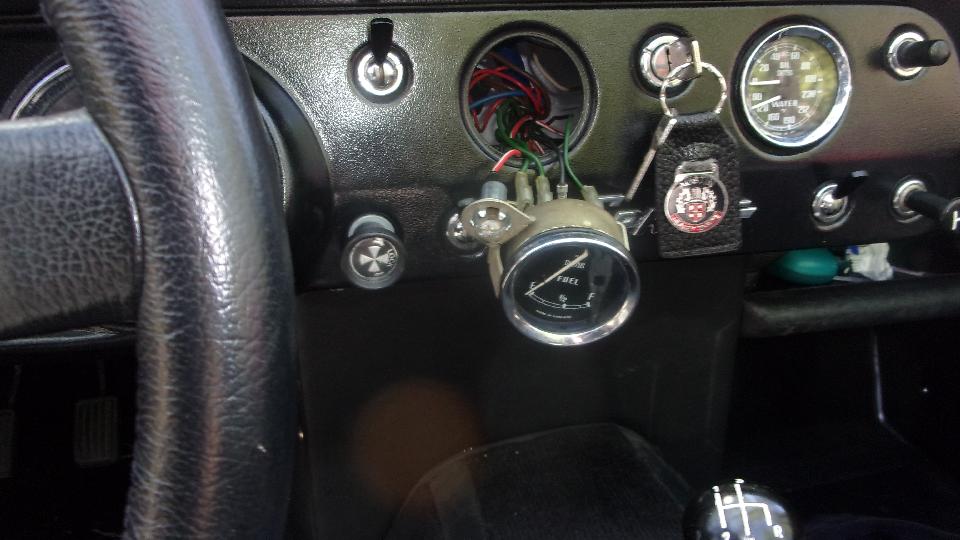
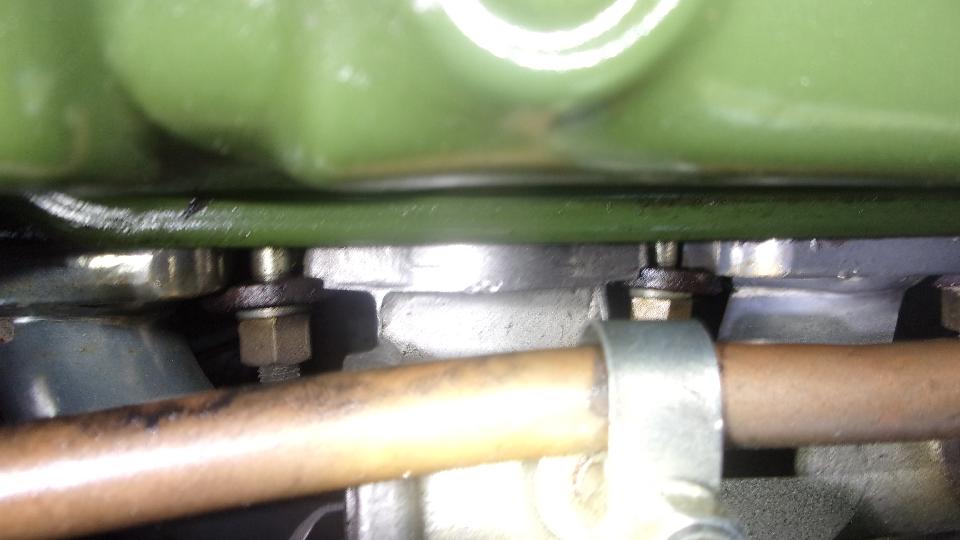
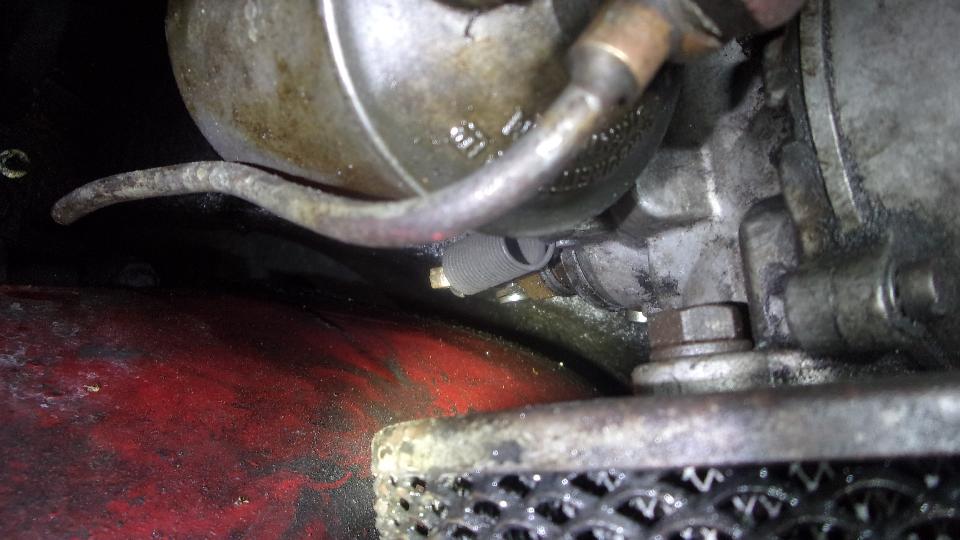
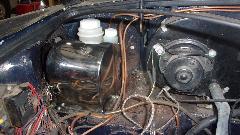
 Concerned about high oil consumption for some time, we now removed the small air filter from top of rocker cover and reinstalled the vent hose to the front air cleaner. Time will tell (maybe).
Late evening rolling again, arrive in Hammond, Louisiana late night. From south Florida to Chicago, IL area for 10 days, then back to the Gulf coast, just a little over 2400 miles in the last three weeks.
Concerned about high oil consumption for some time, we now removed the small air filter from top of rocker cover and reinstalled the vent hose to the front air cleaner. Time will tell (maybe).
Late evening rolling again, arrive in Hammond, Louisiana late night. From south Florida to Chicago, IL area for 10 days, then back to the Gulf coast, just a little over 2400 miles in the last three weeks.
Saturday, April 2 2022:

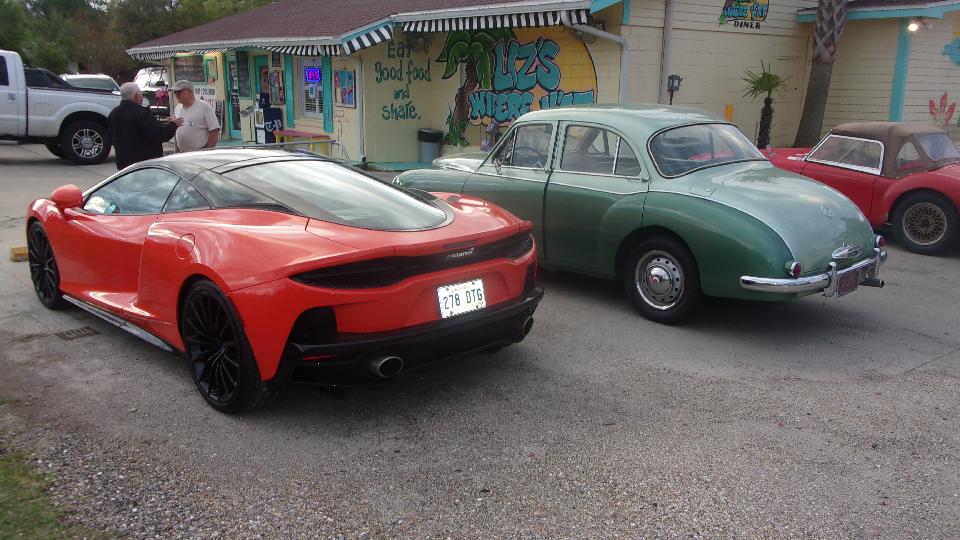
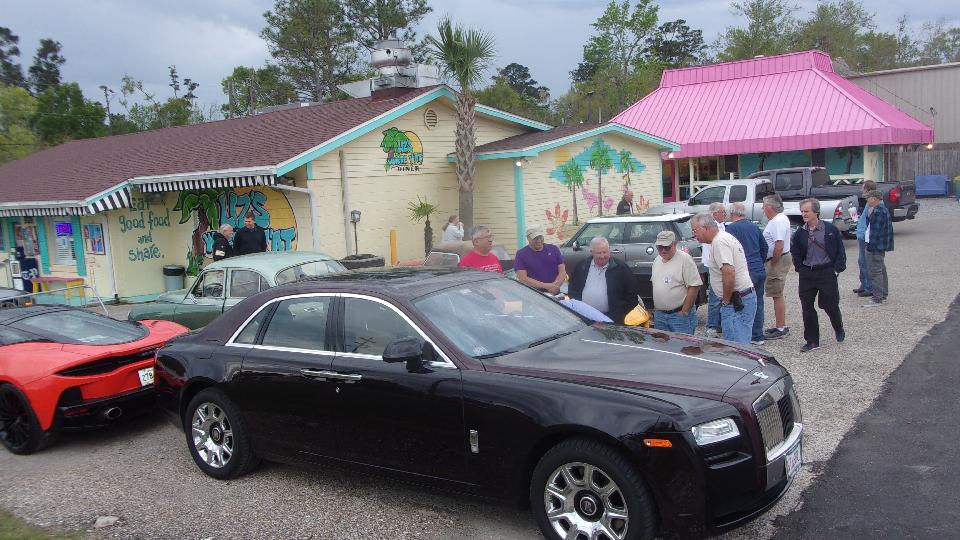
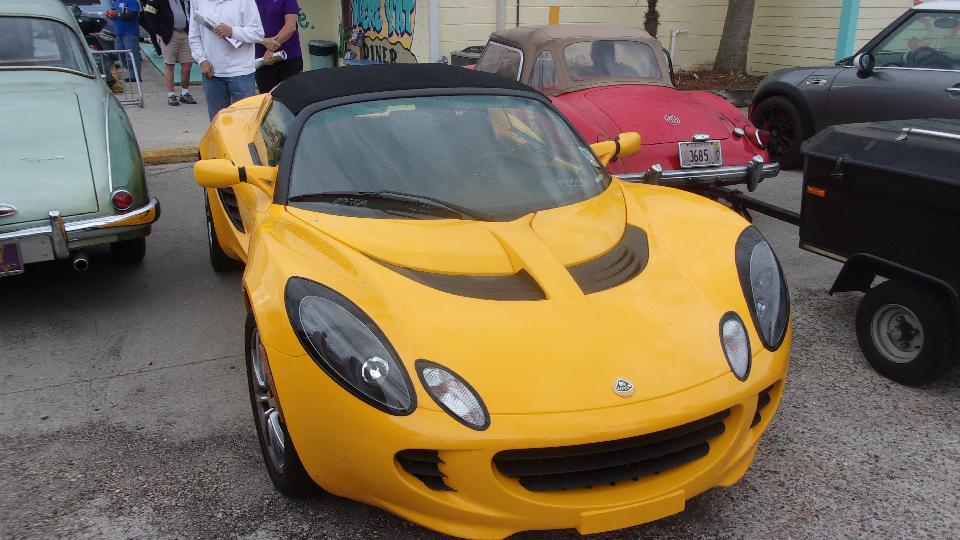
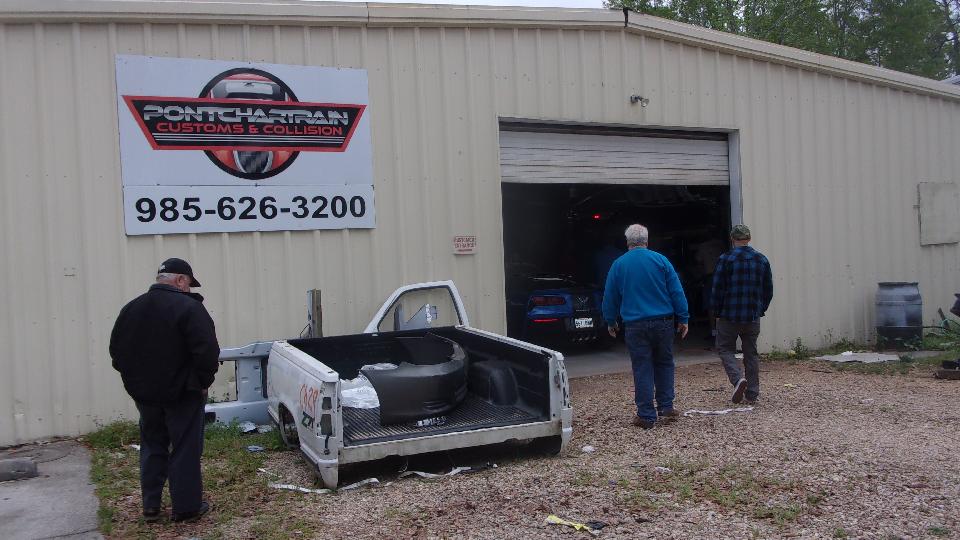
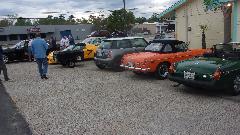
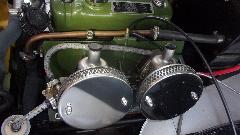
Off to Mandeville, Louisiana in the morning to Liz's Where Y'At Cafe for Cars & Coffee with the British Motoring Club New Orleans (North Shore group). We were a tad early, first ones in for a change, but the car park was then filling up fast. By the time we all were seated for breakfast there were at least 15 at the long reserved table, and a few spill-overs to the next isle. An hour later we were back kicking tires, and look what was hiding behind the big Rolls Royce, a little Lotus Elise.


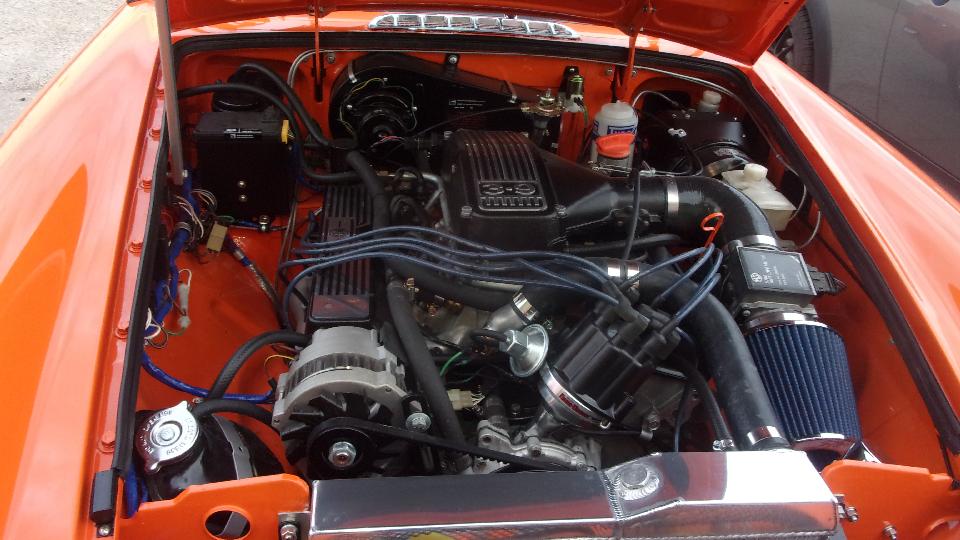
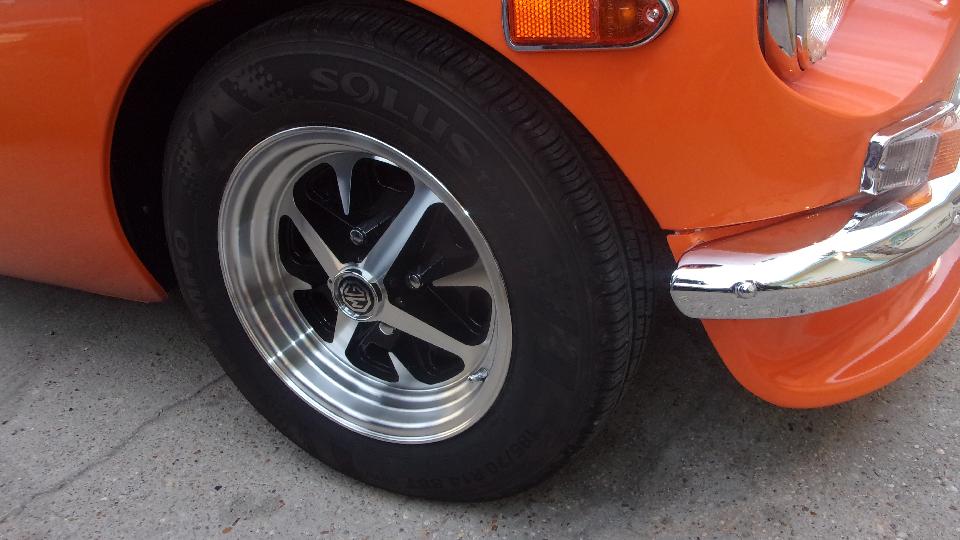
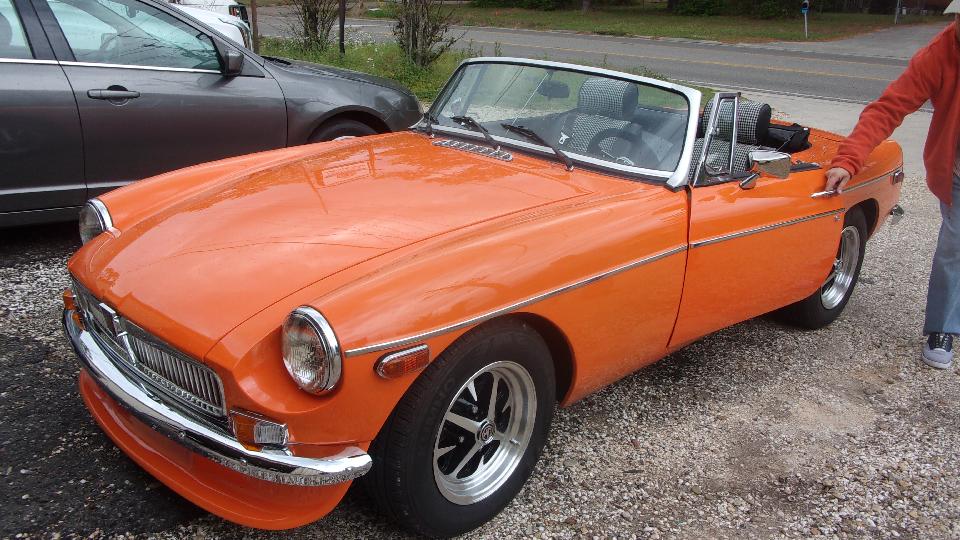
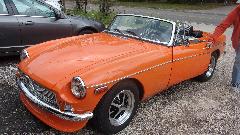
The orange MGB was a bit of a special with a Rover 3.9L aluminum V8, modern version with computer control and electronic fuel injection. Someone had to point out that the wheels which look like common MGB 14" RO-Style are actually 15" aluminum wheels from a modern Ford Mustang. Sweet.
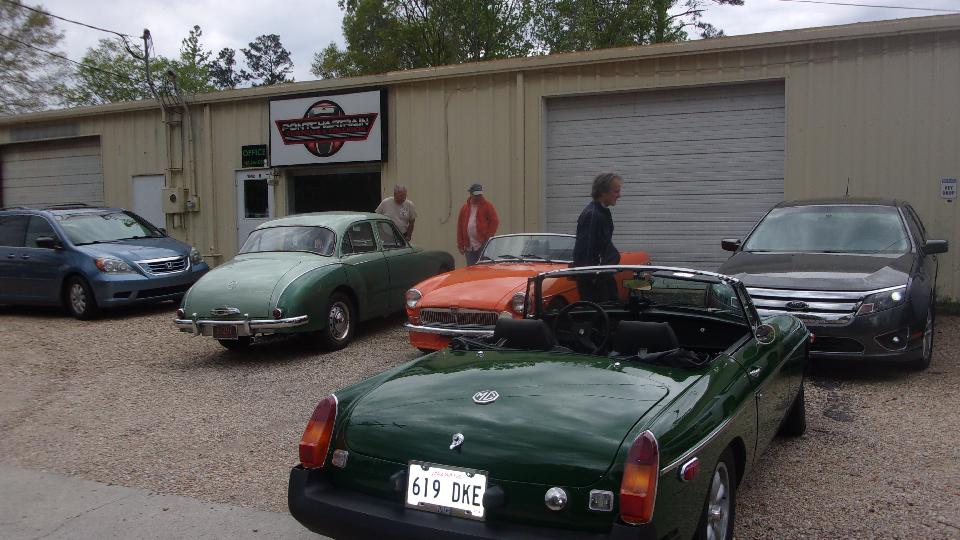
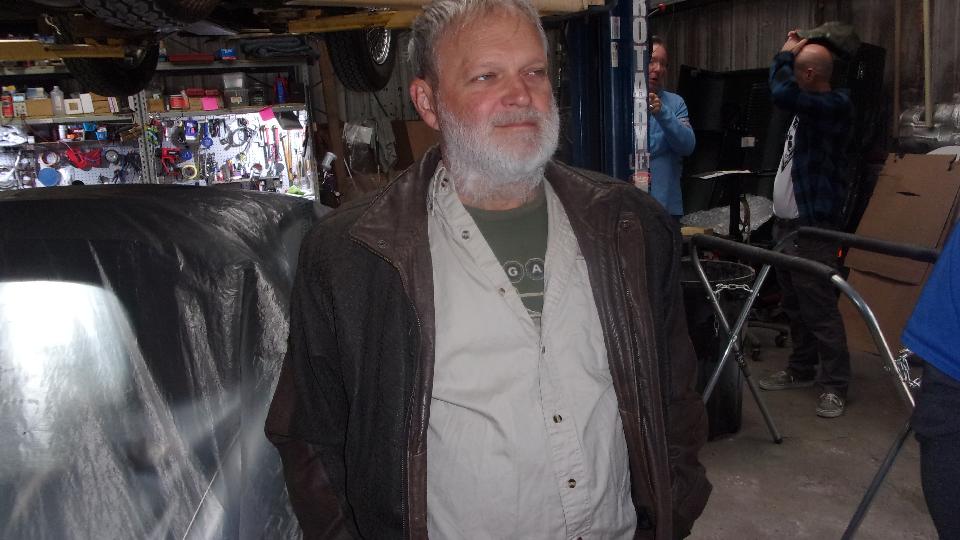
Then we were off the a commercial shop facility of one of the club members, Hugh Coleman. He is currently leasing space at Ponchartrain Customs & Collision in Mandeville, LA, but seriously looking for a building of his own, hopefully soon. Have to add this one to my North American Shops list.

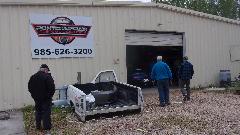

Jaguar E-Type Coupe on the lift, and Austin Healey 3000 underneath, both coming along nicely. All mechanical work being done here, with body and paint work farmed out to a nearby shop (for now), so one-stop shopping for full restoration. With his new shop (soon) Hugh intends to be doing all restoration work in house.
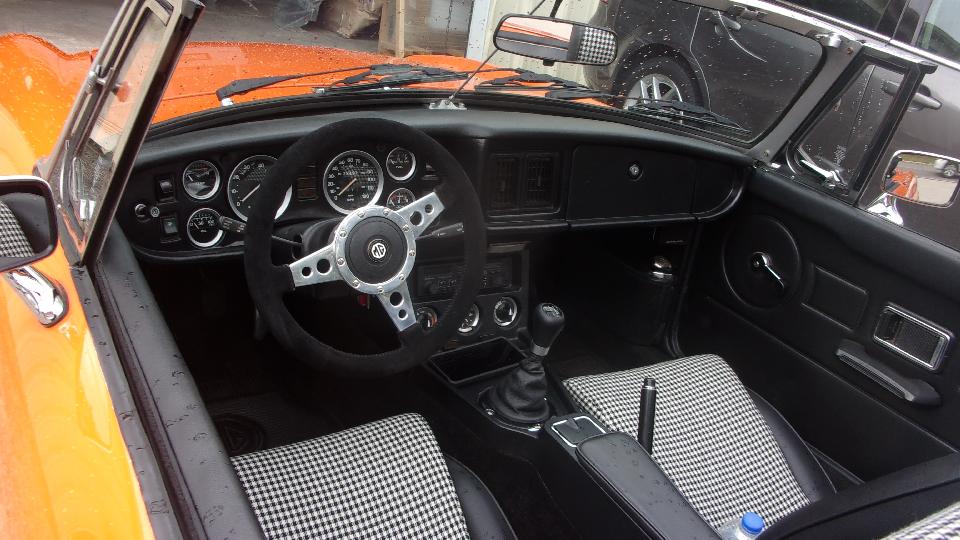
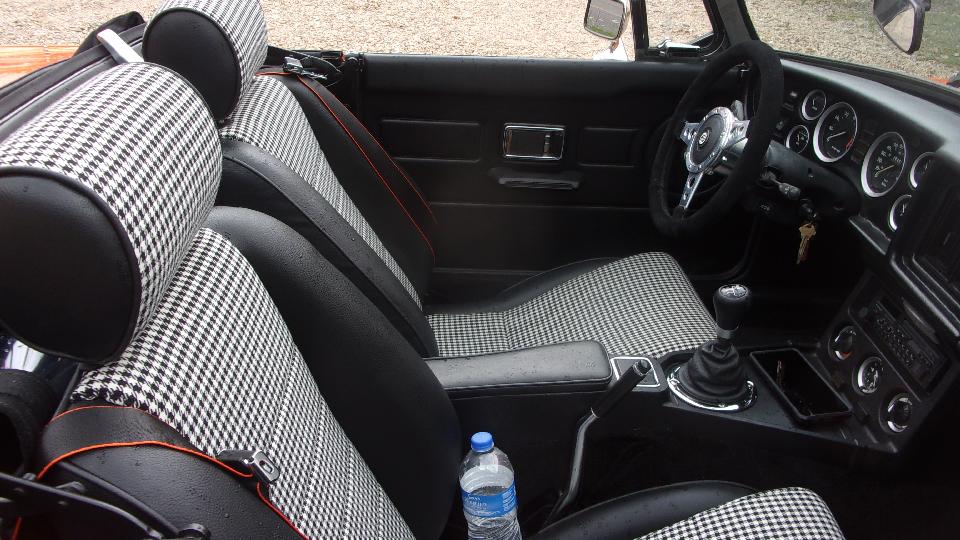
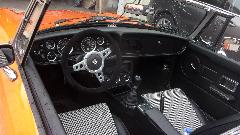
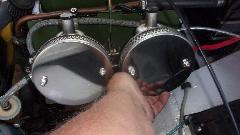
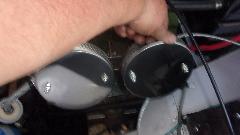
Same orange MGB (V8) we saw at the cafe. The owner took his time searching for just the right seats. These houndstooth seats are from a modern Mini Cooper. Really? Who'da thunk? Good thigh support, lumbar support, side bolsters and headrest, and good quality durable materials.

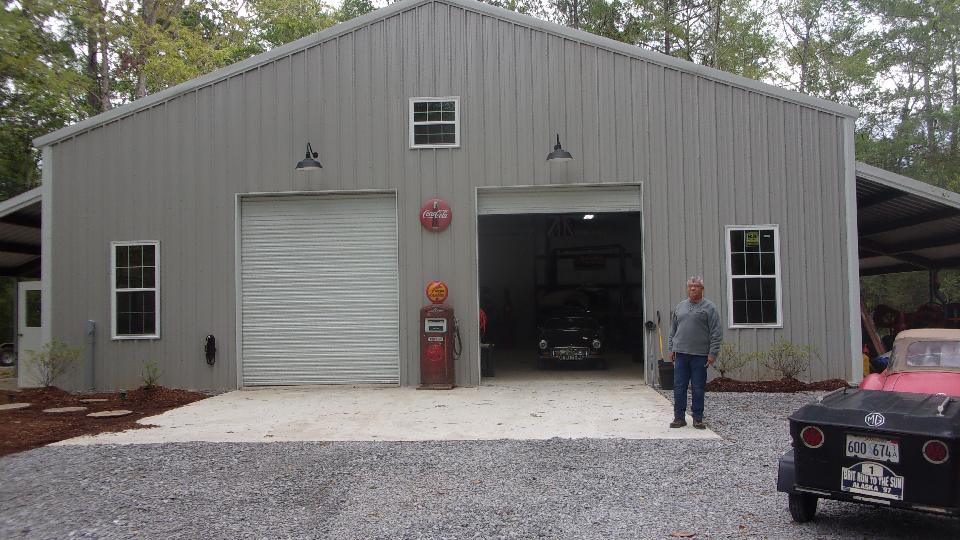
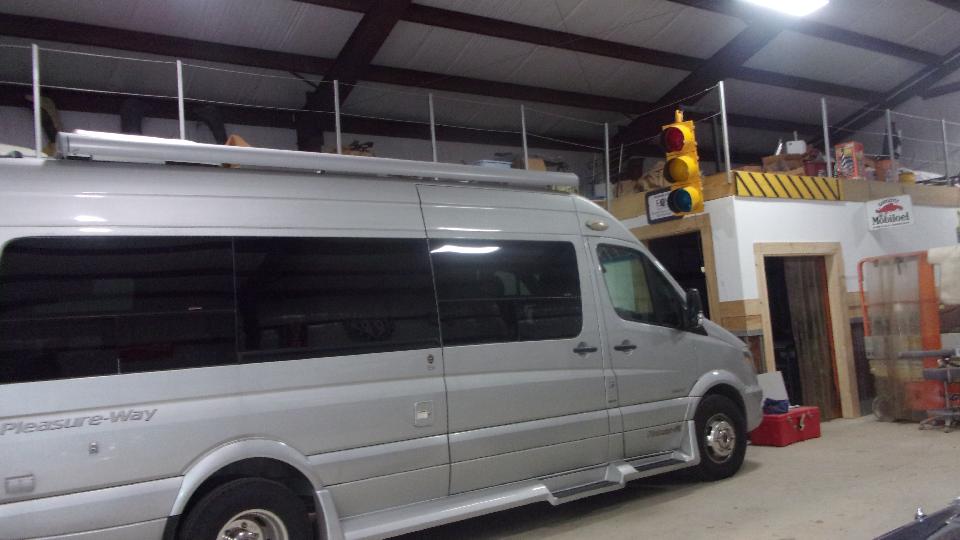
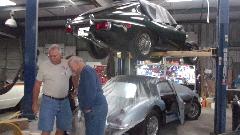
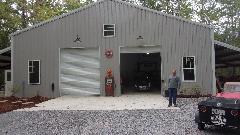
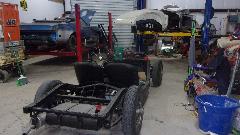
Not done yet. Off to visit Charles (Charlie) Foy in Covington, LA. The little "shed" here is his personal toy shop, not commercial, just built within the past two years. Under the left side awning is a nice shady patio for lounging. Behind the left window is a wood shop and a restroom. Under the right side awning is equipment parking with a work tractor (among other things). Inside is a huge hall, even bigger than it looks. Look left beyond and over the motor home van to see second level storage space front to back. I think the room in the rear corner is engine (mechanical) shop space.

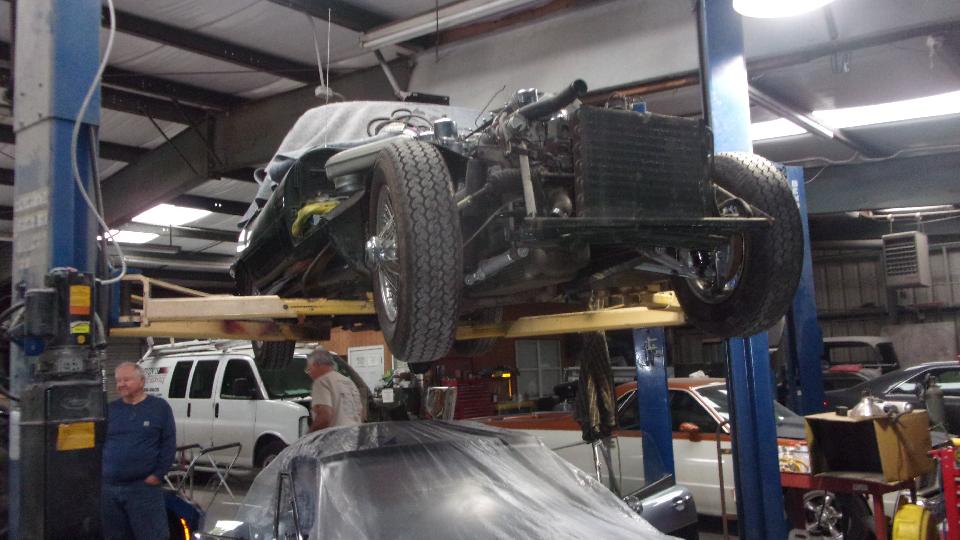
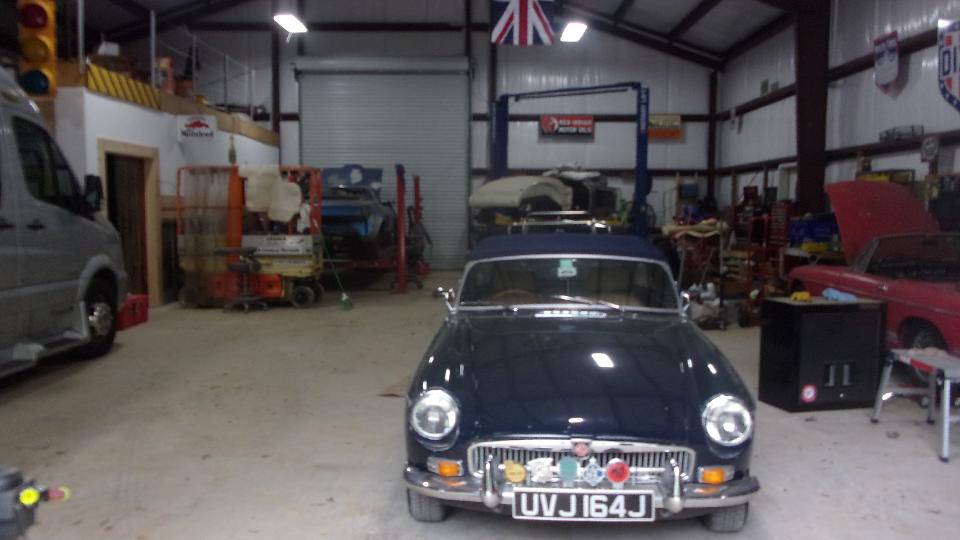
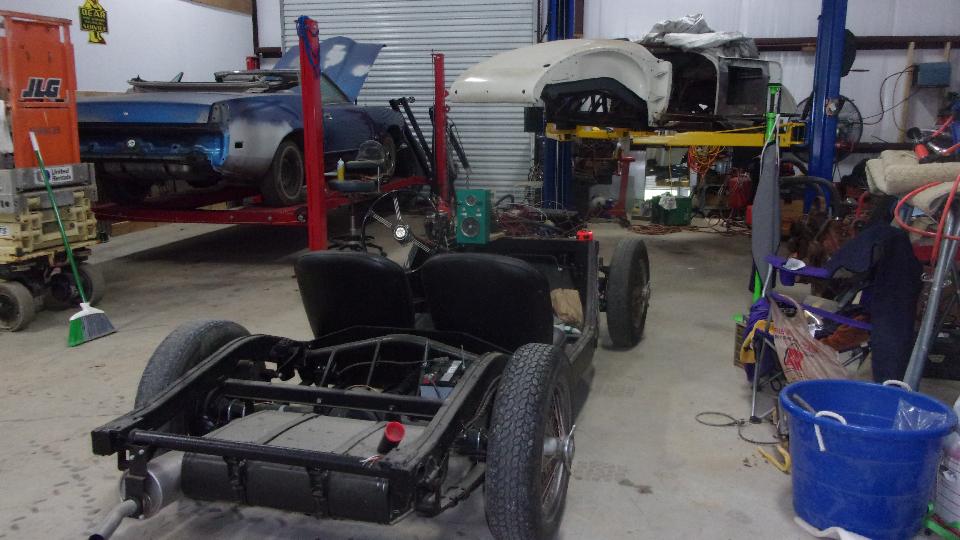
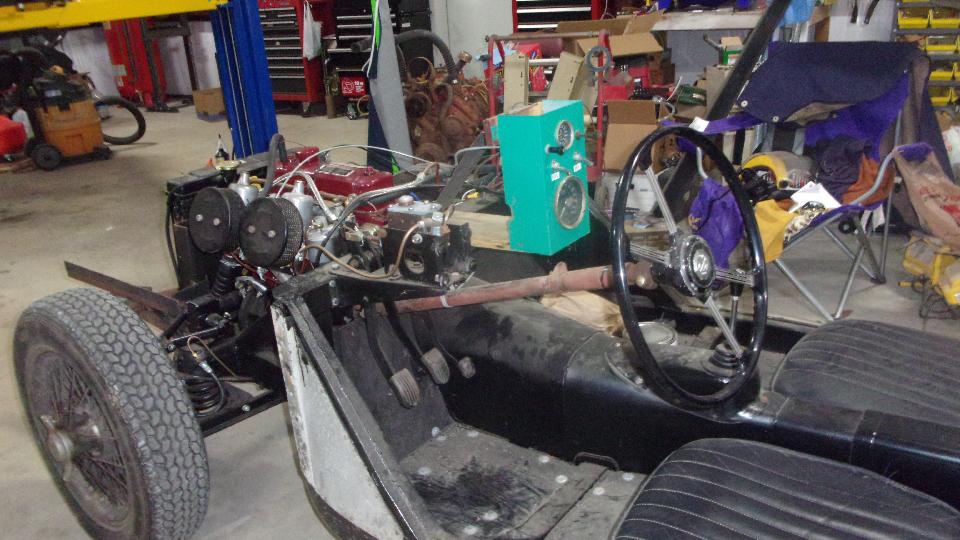
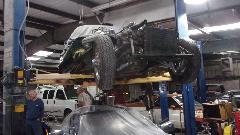
Two lifts, a drive on lift in the center bay and a frame hoist on the right. The blue car on the platform lift is an early 70's Mercury Cougar (upgrade sister model to a Mustang). On the frame hoist is Charlie's MGA under restoration. Don't miss the rolling chassis configured in go-kart mode, which has seen a few trips on the local side roads. In the front corner is a red MGB, which I didn't ask about, but the blue one is interesting.
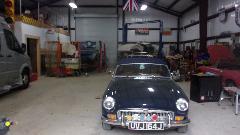
This is a British domestic model (early 70's) with right hand drive, not the same emissions equipment as our familiar North America cars. It has the common 18V 5-main bearing engine with dual SU carburetors but no air injection pump, no air ports in the head, no carbon canister for fuel vapor recovery, no anti-run on valve, but it does have a remote power brake booster (casually installed by a prior owner I suppose). I also noticed one incorrect carburetor dashpot cover (wrong orientation). The engine ran for a minute before dying and not restarting. Pretty sure it has a dead fuel pump, which will wait for later investigation.
We had a nice two hour chat with late lunch on the patio before matters of the real world broke up the party. Then off to find an evening WiFi spot (two or three tries down the road). Then a bunch of email and tech questions, so I didn't get these photos and note finished until the next day.
Sunday, April 3 2022:
Looking for morning WiFi spot, first two with closed dining room, so back to where we were last night, but that one now also closed dining room. Bummer. Next try was open, but no WiFi. Rats #4.
 Needing to fuel up before more roaming, and in the process navigator let out a "Say what!" while checking
the engine oil. Not bad this time, only a half quart low after weeks of using as much as two quarts per tank of fuel. Okay, four months to the day from when we removed the top vent hose and installed the little air filter on the rocker cover (to avoid oiling up the front air filter). But this is just one tank after removing the little air filter and reconnecting the vent hose from rocker cover to front air cleaner. So maybe there really is something to this idea that vacuum in the air cleaner is sucking reverse air flow up the tappet cover draft pipe, and having that sort of effect on oil consumption. Wow. If so, this going to stimulate lots more discussion in open forum on the BBS. Needing to fuel up before more roaming, and in the process navigator let out a "Say what!" while checking
the engine oil. Not bad this time, only a half quart low after weeks of using as much as two quarts per tank of fuel. Okay, four months to the day from when we removed the top vent hose and installed the little air filter on the rocker cover (to avoid oiling up the front air filter). But this is just one tank after removing the little air filter and reconnecting the vent hose from rocker cover to front air cleaner. So maybe there really is something to this idea that vacuum in the air cleaner is sucking reverse air flow up the tappet cover draft pipe, and having that sort of effect on oil consumption. Wow. If so, this going to stimulate lots more discussion in open forum on the BBS.
Okay, 15 miles back west on I-12 to the only known functional WiFi spot in this area at Hammond, LA. "Functional" means open dining room, A/C wall outlet for the computer chargers, and working WiFi. Been a long time since having so many dining rooms closed.
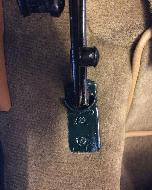
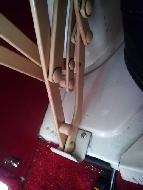
Start the "work" day by adding a new tech page for special stop brackets for the stowed convertible top, for use when the spare tire is not stowed in the original location (to support the folded and stowed rag top).

Then I finally got around to posting photos and notes for the past three days (everything higher on this page).
And a new tech page for installing screenwiper wheelboxes and drive casings, which were installed three weeks earlier but took this long to find the time to post the tech article,
Monday, April 4 2022:
Ordered a new windscreen glass this morning with rubber packing and a few other bits, hoping it may be delivered before the week end.
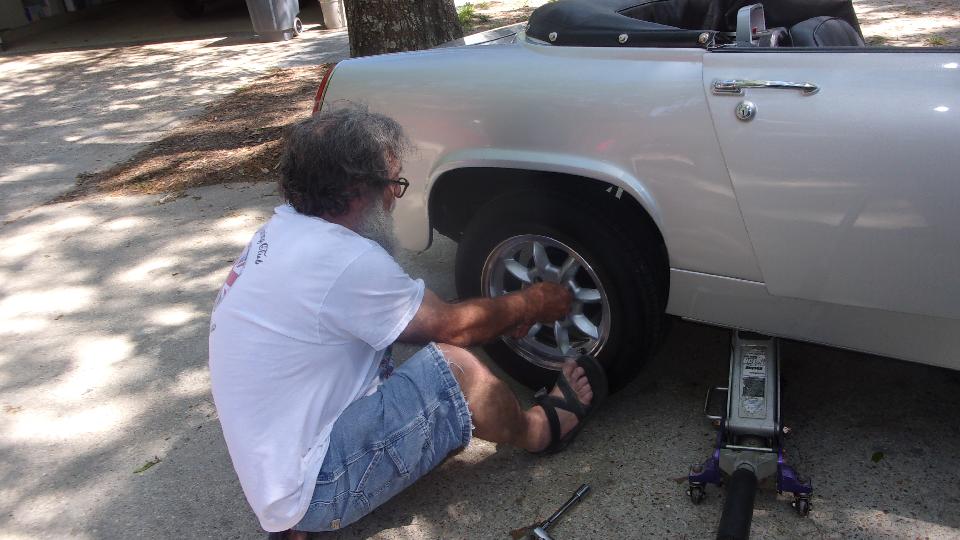
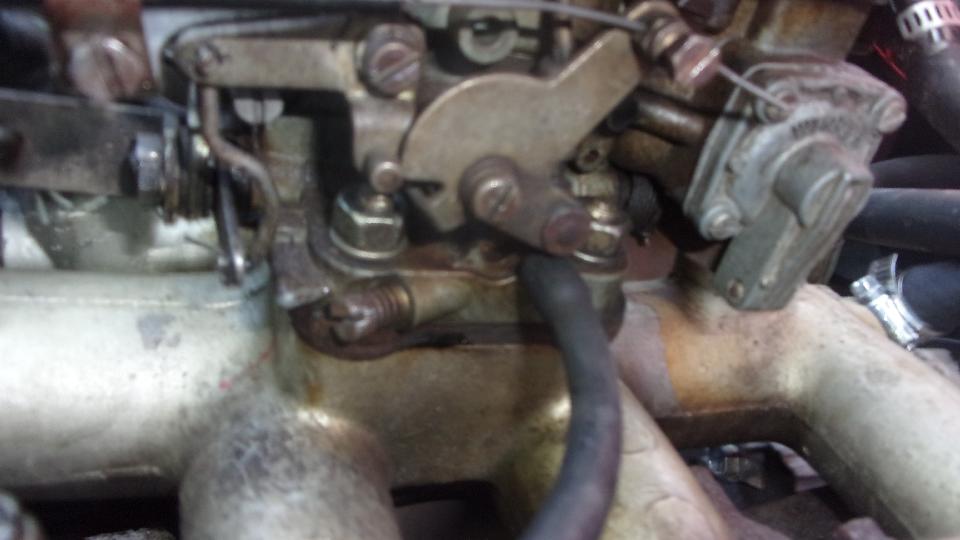
Then cruise over to Cliff Hughes place in Mandeville, LA, and let my car sit to cool down before working on it. The choke return spring is loose, like the spring is too long and won't pull the choke all the way up/off. And the fast idle link is disconnected (for a while now), having lost two push nuts and the trunnion for the lower wire link to choke arm. Later.
Had a look at Cliff's MGA with home store 4-inch heater air duct. He likes it, just because it's silver instead
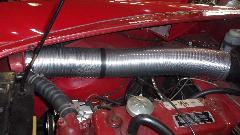
 of black paper over foil (and way less expensive). It's beginning to grow on me, because it seems to be stronger than paper over foil (and I have replaced a few in my car already). He has the felt pad for under the bonnet to seal on the radiator top tank, needs to install that. He also needs to procure and install the two forward 4-inch air tubes with large P-clips behind the grill.
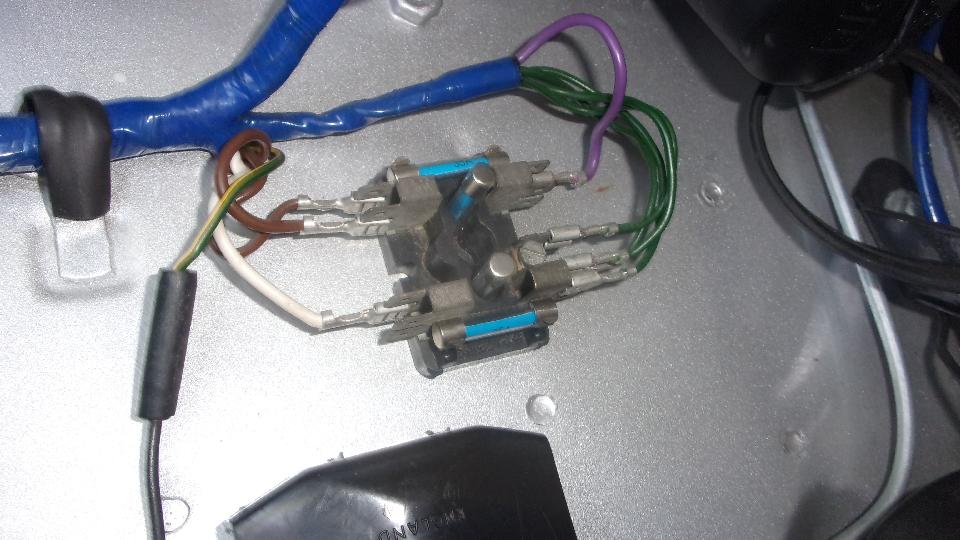
Benny Stiegler from Madisonville, LA brought in his AH Sprite with a couple issues. Fuel gauge was not working, always on "E" regardless of fuel level in the tank. Check the fuse (green wires) first.

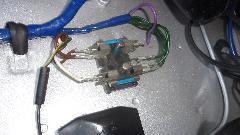
Then take the test light behind the dash, but space is tight, so remove the knurled nut and steel clamp to remove the gauge from dash for easier access to the terminals. Power, ground and signal wires attached, key on, and it jumps off the peg to point at "E", except there is some fuel in the tank. Pull off the signal wire, and the gauge goes hard against the "F" peg, as it should for a magnetic gauge with disconnect or too high resistance. Looks like the signal wire goes from gauge to tank with no intermediate connections, so the fault must be at the sender unit connection, or in the sender unit, in the tank of course. So jack up the right rear and remove the wheel for a look, but the tank is a top flange mount with the sender unit and wire connections on top. Rats. Need to drop the tank for access, so priorities rule, and he decided to live with inoperative fuel gauge, so put it all back together.
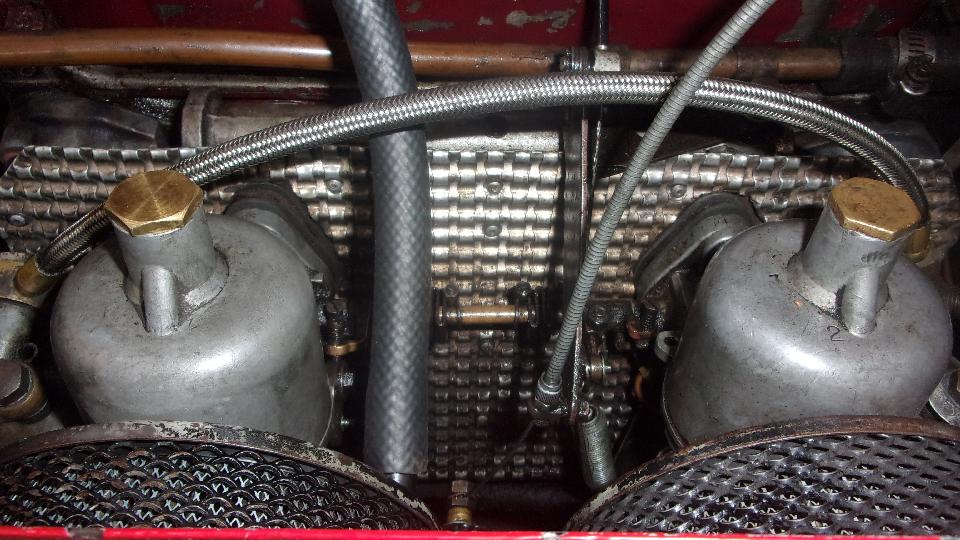
Next issue is idling a bit rough, so on to fuel mixture adjustment. Rear carb mixture nut is too tight for finger adjustment, so get out the SU wrench and have at it. Just about found the sweet spot when something odd happened, lean gently on the rear air cleaner, and the idle speed slowed down. Oh? Lift gently on the rear air cleaner, and the idle speed increased. Really.
 Okay, so there is a leaky intake gasket somewhere, either a carburetor base flange gasket (three for each carburetor with thermal block and heat shield before intake manifold), and/or the manifold to cylinder head gasket. Grab the wrenches and tighten the carburetor mounting bolts and manifold to head bolts, all nice and tight, but the problem persists. Well it runs pretty good, as long as you don't touch the air cleaner. So finish fine tuning and send him on his way with plans to R&R the carbs and manifolds later to replace all the gaskets (and inspect the mechanical parts while it's apart).

Colin McCormick from Mandeville, LA was up next with his Sunbeam Alpine. This one has a Weber downdraft carburetor conversion, not bad, just not perfect running. Not long to adjust fuel mixture and idle speed, so he was soon off with a smile, along with Benny in his Sprite.
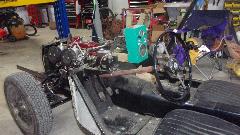
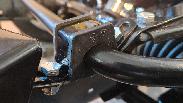
By that time my car was plenty cool, so have at the loose choke return spring and the disconnected fast idle link.
 Remove the breather hose up top, disconnect one fuel hose, remove one split pin from the lower choke arm link, loosen the throttle shaft accordion clamp, and two more nuts to get the front carburetor out and on the table. The loose throttle spring turned out to be a badly worn clip hole in the throttle body. Easier to shorten the spring by two coils and re-form the hook end than to weld up and re-drill or to bush the worn hole, so we modified the spring.
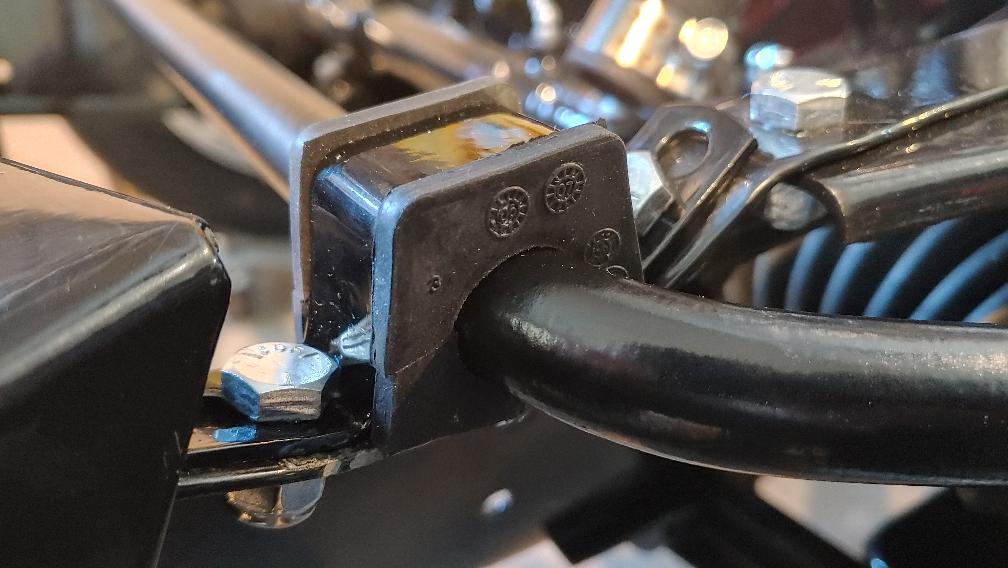
The disconnected fast idle link had lost two push nuts, a small one on the link, and a medium one on the trunnion in the choke arm, so naturally the trunnion was missing too. My inventory list says I should have these parts in the Magic Trailer, but Cliff had a bunch of old carbs and parts in a big box, so we looked there first. Sure enough we found enough linkage parts to have at least two of those link trunnions, so not long to retrieve one. Since the push nuts are so hard to install, and they are not supposed to come apart (without breaking them), I wanted to install new ones. Unfortunately those bits were not to be found in the (not so magic) trailer this time (ordered new ones but not arrived yet), so we had to fight for a while to remove a few of them from the used linkages until we had two that could be repaired well enough to work. Not long then to get it all back together.


The engine has been hard to start recently, so we did another compression test, expecting the worst (having somewhat low compression ever since we installed new pistons last July). Been a while since last checked, but I was guessing we would have one cylinder around 110-psi, and one very low about 60-psi, with two in the 90-100 range. Test readings were 105, 105, 90, 90. The lowest was not as bad as I thought, but of course anything under 100 makes it hard to start. No time like the present to fix such a serious issue, so lay plans to do a ring job again.
Tuesday, April 5 2022:
The car was REALLY hard to start this morning, so got the priorities right and ordered a new set of piston rings (and a few more spare parts), hoping for Friday delivery. Also a call to local auto parts store to order a new set of fine grit stones for the cylinder hone (since I think it was honed too rough last July).
And CMGC Editor just dropped the April newsletter Publisher file on me, so now I get to transpose that for the club web site. Actually didn't get very far on that chore..
Got billed for the windscreen order, so pretty sure it was shipped today, now expecting delivery Friday (but no tracking information).
Wednesday, April 6 2022:
Got a good start on the CMGC newsletter, but not finished. --- Got a shipping notice and billing from Moss, including a tracking number. Looks like it was shipped late Tuesday from Petersburg, VA, likely to arrive Friday. Then I see the billing charges for only half of the total I was expecting. Finally figured out the piston rings were out of stock in Virginia and were being shipped from Goleta, CA. Just shipped today, and it will be 4 working days from California to Louisiana, so will not arrive before Monday. Bummer. --- Picked up the new honing stone set locally. MGA getting progressively harder to start from cold, not sure it would start 2 or 3 times a day through the week end, hardly worth the pain. So we went back to Mandeville and parked it at Cliff Hughe's place, and borrowed his Chevy truck to drive for a few days. --- More progress on the CMGC newsletter, but not all finished yet due to current happenings interfering.
Thursday, April 7 2022:
Finally enough time, finished transcribing and uploading the CMGC newsletter to the club web site. Waiting for parts to arrive is like watching paint dry, nothing you can do to speed it up, so just have patience and wait it out. Meanwhile plenty of email and BBS forums to keep me buy.
Friday, April 8 2022:
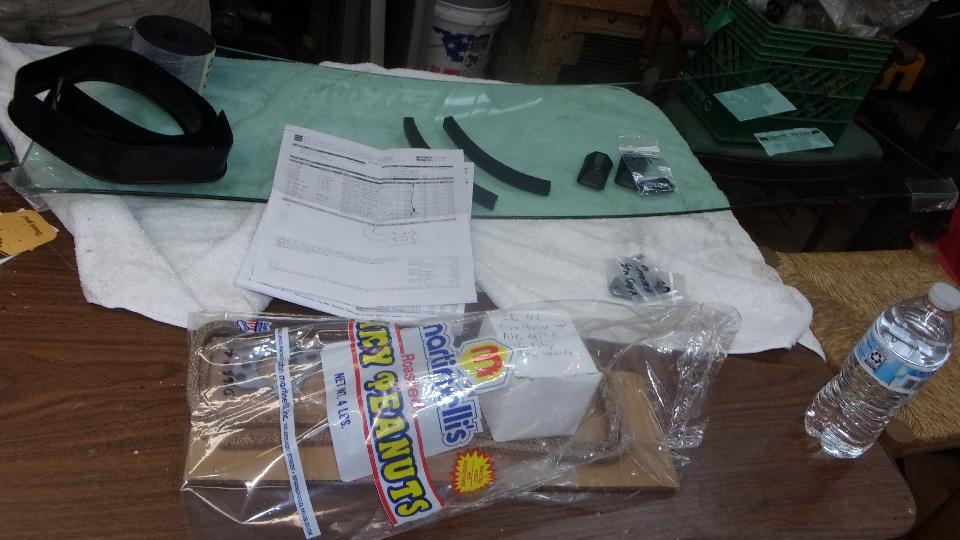
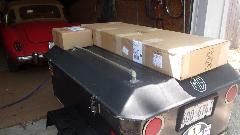 New windscreen glass arrived, so off it Mandeville, LA (storage facility) for pick up, then on to our friend Cliff Hughe's place to get to work. The larger box is the glass and related parts. The smaller one is bits from Moss Motors, everything I ordered Tuesday EXCEPT for the piston rings, which were shipped from west coast Wednesday, so not going to arrive until Monday earliest. But we can do something today. Start by unpacking boxes to check receipts, and file into inventory most things not needed for the windscreen.
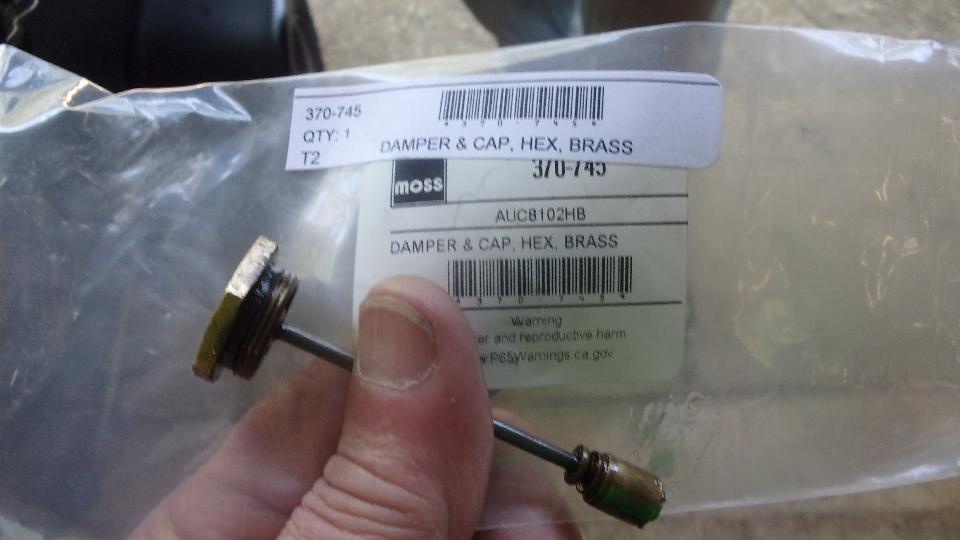
The first piece out of this stash was a new damper piston for the carburetor dashpot, a pricey little tidbit, needed to replace one that was way low on damping action (for no detectable reason). Quickly installed, so I don't have to stash that piece into inventory. And do see how far we can throw the old one so no one will ever be temped to use it again.

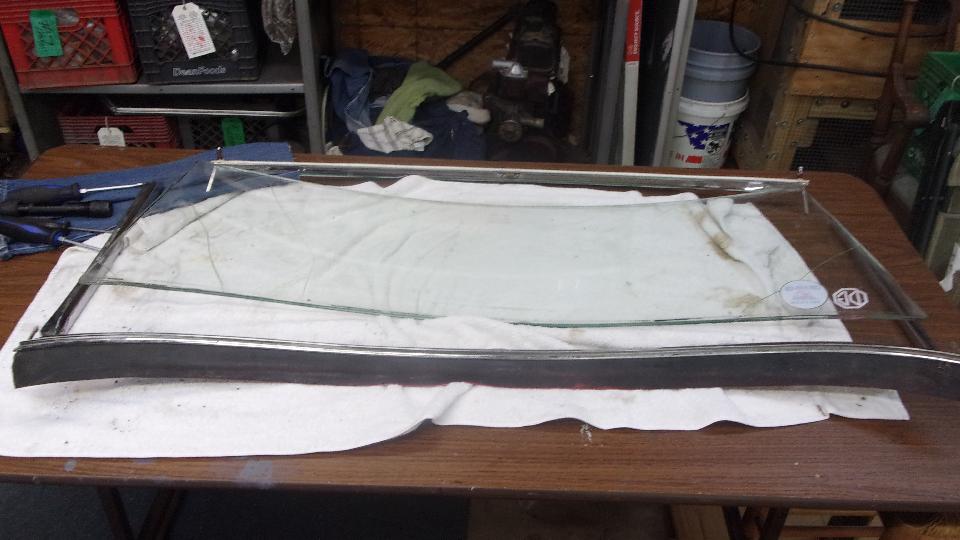
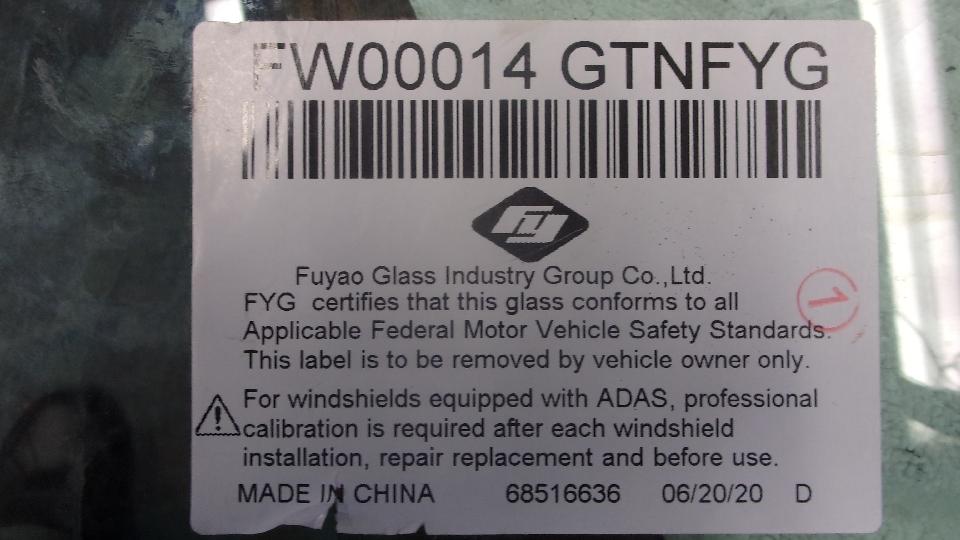
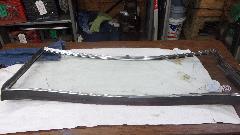
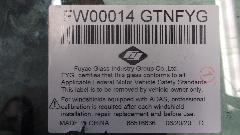
Not using Triplex glass this time, for the first time in 35 years, because it was not available when needed, The new glass is from Fuyao in China by way of a domestic supplier, tinted glass this time, just for kicks. Then on to
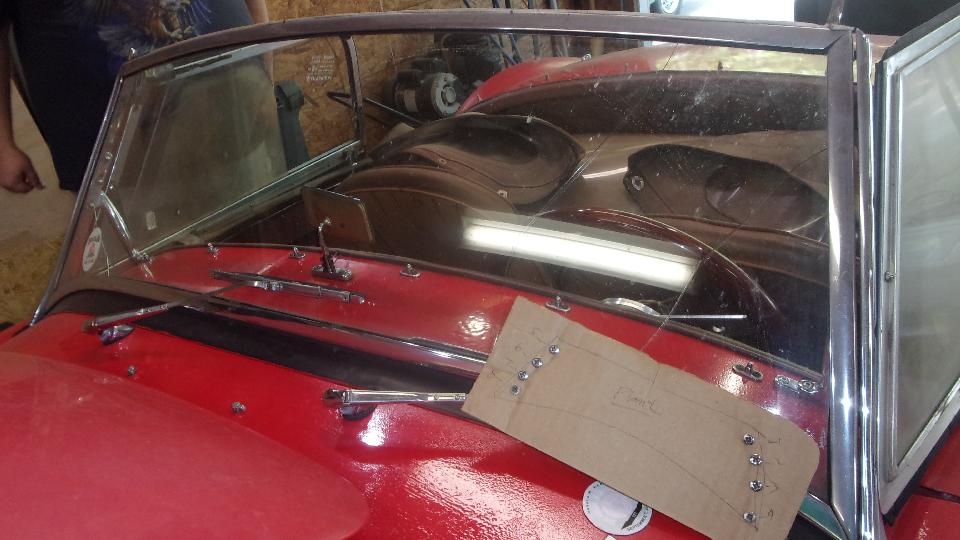
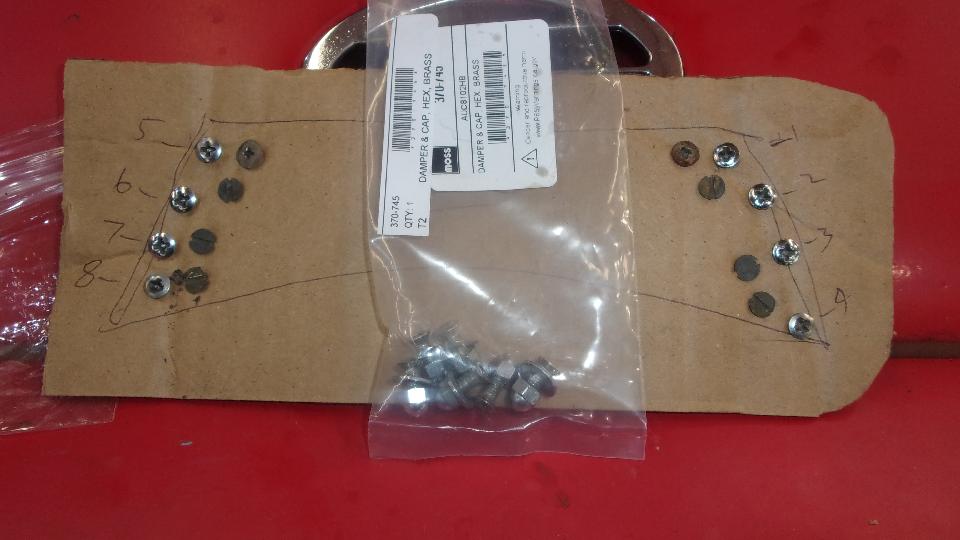
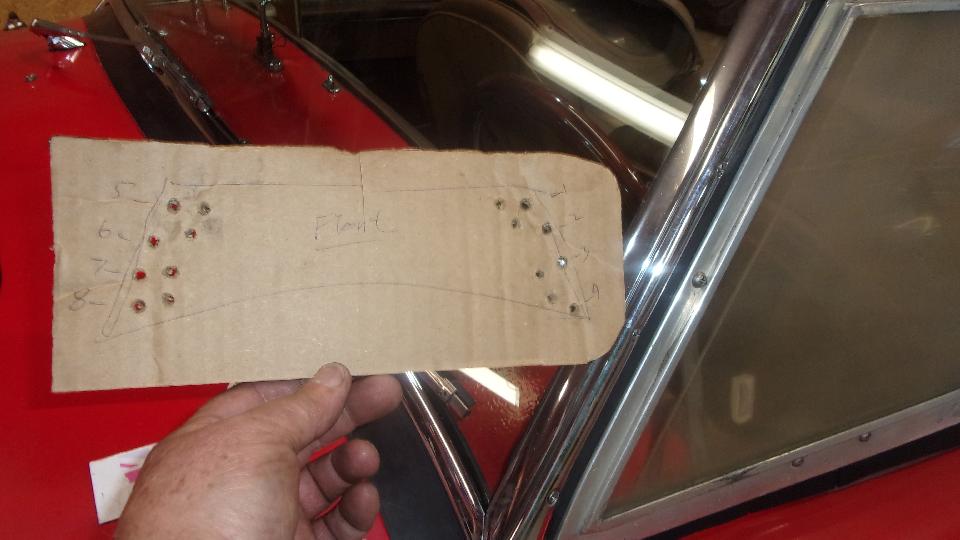
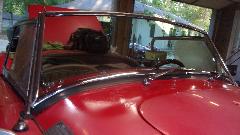
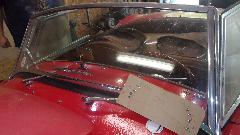 removing the windscreen from the car, on which we took some shortcuts this time. Not to touch the interior kick panels and stanchion bolts, we only removed 4 screws each side to free the windscreen frame from the stanchions, shown stuck in the diagram on the card in that picture to assure they will go back into the same locations when reassembled. Three more screws each to free the frame from the grab handles, and the 4-piece frame and glass assembly was off to the table that easy.
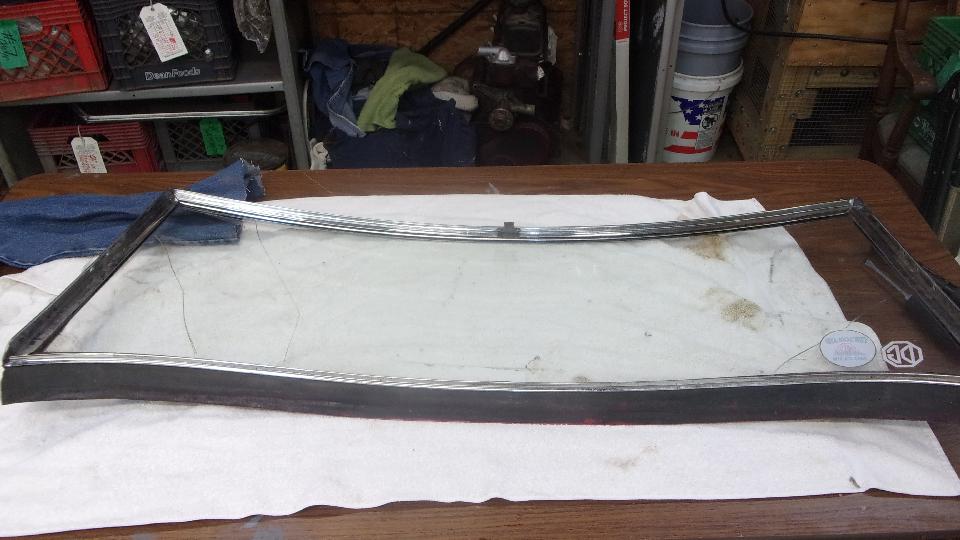
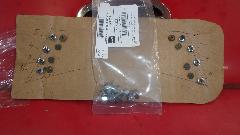
Not to disturb the top and bottom rails or rubber at top or bottom, or any corner brackets attached, only remove four screws from each end securing the side frame rails to the corner brackets. With a little careful prying and good healthy pulling, the 4-piece frame was soon separated, and the cracked glass was off to the dumpster (going to miss the window stickers). The card with simple diagram and punched holes holds the 8 screws removed from the stanchions, and 8-more screws removed form the corner brackets, while the baggie holds six screws with flat washers and acorn nuts removed from grab handles. This actually came apart fairly easy, because it was last disassemble for new glass 3-years 1-month earlier in this same friendly garage (thanks Cliff).
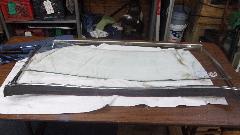
 Not using Triplex glass this time, for the first time since, well, maybe since the car was built in 1957. I like Triplex, but just not available at this time. So the new glass is from Fuyao in China, by way of a domestic supplier. Given the correct rubber packing it went together fairly easy, especially considering how hard it has been in past times when supplied packing rubber may have been a bit too thick. Turns out this glass seems to fit quite well. It did have a razor thin gap at one bottom corner, which was fixed by moving the bottom rail a bit, Then it had a razor thin gap at a top corner, which was fixed with one thump of my hand to move the top rail a bit. Looks okay now, just hoping it stays in that configuration after being installed in the car.

Then we were off around 8-pm to tank up fuel in the borrowed truck and find WiFi spot. At 11-pm the truck started, ran about 20-seconds and died, would not restart. Best guess is the electric fuel pump died, but the Check Engine light is also on, so no clue about cause and effect. Sleep here and make another call in the morning.
Saturday, April 9, 2022:
This morning the truck did the same as last night, started and ran for 20 seconds then died, no go. Couple of phone calls later the tow truck is on its way, and Cliff is also coming to pick us up, time for breakfast. An hour later when Cliff showed up, the truck started again, and kept running, go figure. But the Check Engine light was still on, so we didn't want to chance driving it, and let the tow truck take it (AAA paid). Then back to Mandeville to borrow Cliff's MG ZB Magnette. Trusty soul ain't he? Think we can break this one too?
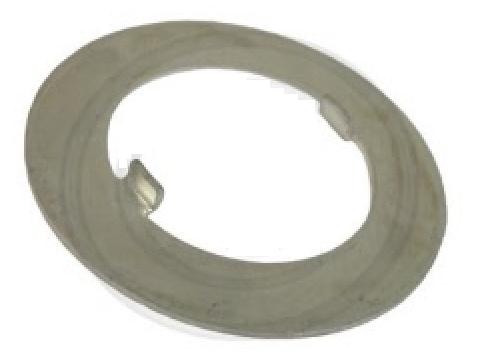
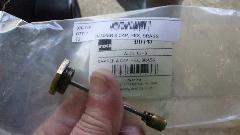
Time to catch up photos and notes, email, BBS, and updating parts inventory list. One new part is a sealing
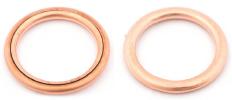 washer, copper crush type, not yet on the sealing washer web page list, so figure that one out to update the web page. Turned out to be the seal for heater return hose spigot to junction pipe at front of engine (coolant fluid). Part number changed between 1500 and 1600 parts list. plus Moss Motors USA has their own part number, and Moss Motors UK has another BMC factory type number (likely a newer secession number). So 4 new part numbers for sealing washers. And the Twin Cam connects heater with metal pipes using two aluminum seal washers, so one more part number. Now the work list has another task to measure these parts for dimensions for the web page. One little washer makes all that work?
Sunday, April 10, 2022:
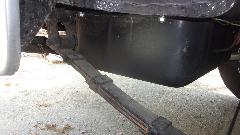
Got an update on the MGB sway bar installation on MGA from (March 20 on prior page). That came out nice, allowing for a 3/4" bar in pace of the original (optional) 5/8" bar.
Received message late yesterday about an MGA restoration where the body was removed and sent to a shop for some hammer work and repaint (not sure how much restoration work). Of course when it came back all painted like new it no longer fit on the frame, sitting an inch too high on one rear corner and a half inch too high on the other rear corner. I suppose if the rear was bolted down first, then it would sit too high at the front. I have seen this situation before, sometimes much worse. In the end required repair work to fix it could be more expensive that the first work session, having to tear apart a bunch of welds to realign the sheet metal, re-weld and repaint it again afterward. Moral of the story is, ALWAYS have the body on the frame or on a suitable alignment jig when doing body restoration work.
Monday, April 11, 2022:

New addendum to a tech page on Exhaust Heat Shields. The factory heat shield for a Morris Minor seems good for the MGA, and may be significantly cheaper than the aftermarket part commonly sold for MGA.
Cliff's truck is to be code tested today to diagnose no-start (likely a dead fuel pump). The ZB Magnette is doing fine, like the MGA, maybe not as likely to leave us stranded on the road as some modern computer cars. My MGA piston rings are scheduled to arrive today, but sent by snail mail, may not arrive until late in the day. Looks like shop space maybe available Wednesday (and Thursday if necessary).
 New tech page for The Elusive Front Bearing OIL BAFFLE in (some of) the MGA 1500 geaboxes. A mysterious part that I had never seen before, only used in 6250 gearboxes in mid 1500 production, and then discontinued. Maybe engineers thought it might be a good idea, then changed their minds to "lost cause". This also generated a new page in the MGA Part Numbers list.
Tuesday, April 12, 2022:
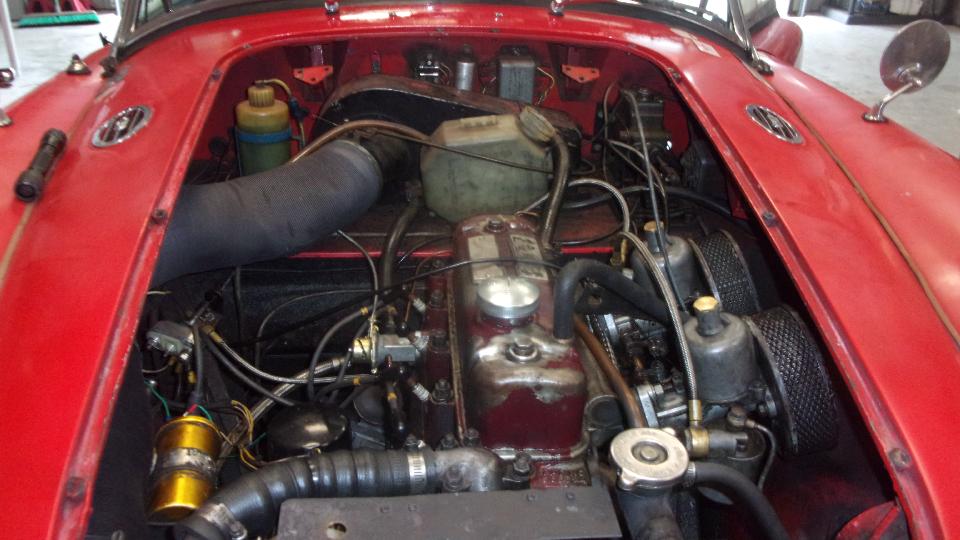
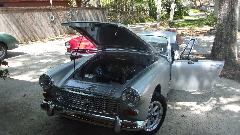
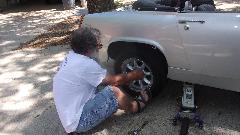
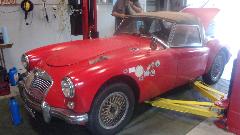
 Off to visit Jimmy Watts and his wife in Lacombe, Louisiana. The nice 1974-/2 MGB belongs to her, and she loves that car. She also likes the Sabrina overriders unique to the half year, part of the character of the car. But we weren't here for the social visit. We came to borrow the garage, and the lift, to go after replacing piston rings in our MGA, so this was destined to be a "get your hands dirty" work day.
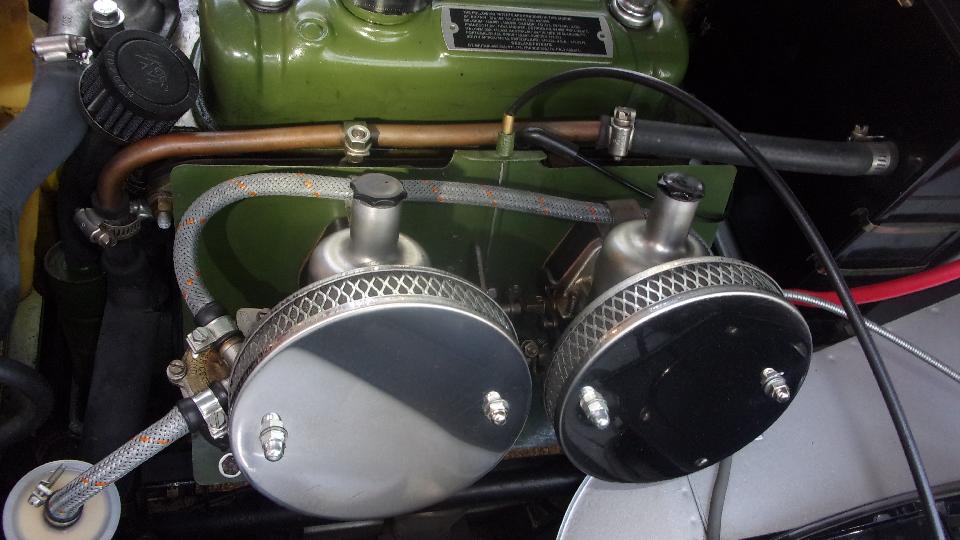
You might recall from a prior post the low compression readings, 105, 105, 90, 90-psi, and the fact the MGA has been using too much oil since installing new pistons and rings last July, which is why we decided to re-ring this engine again.
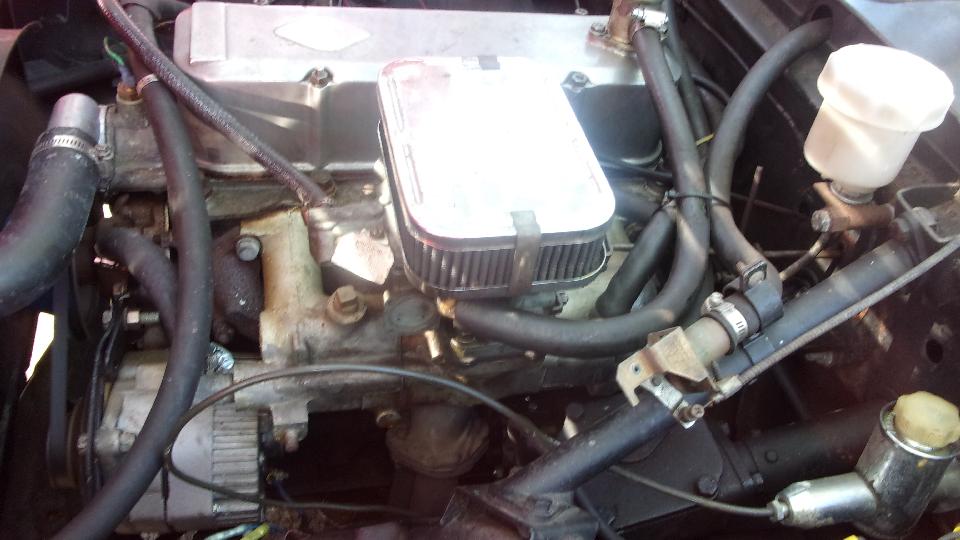
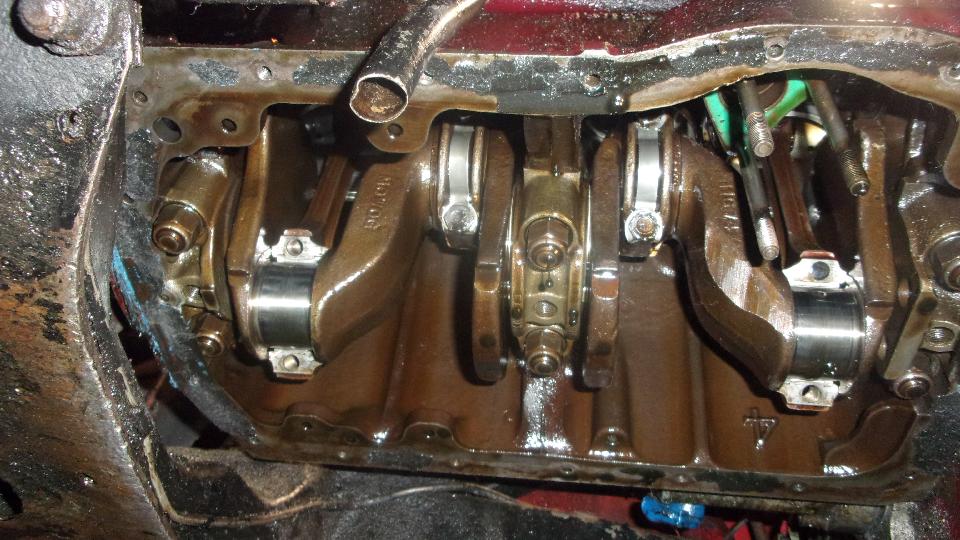
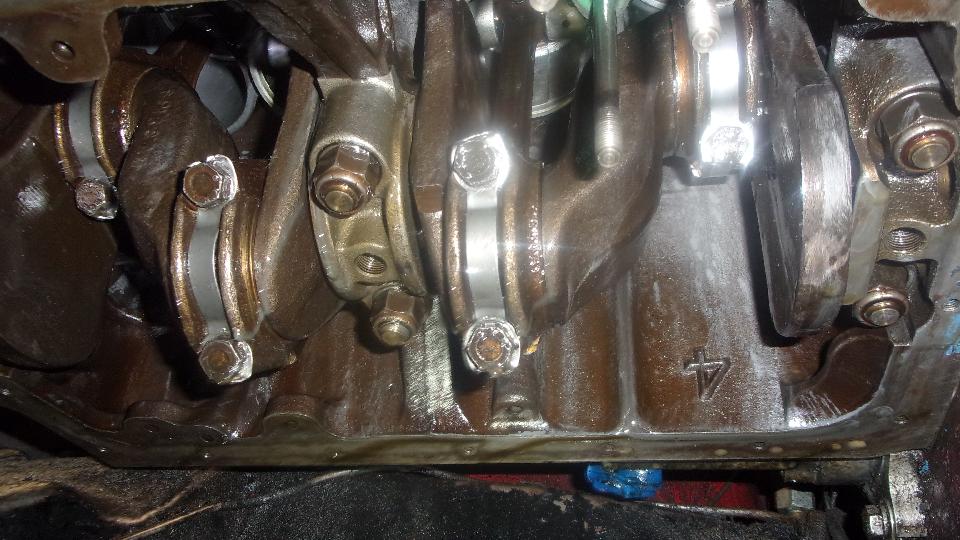
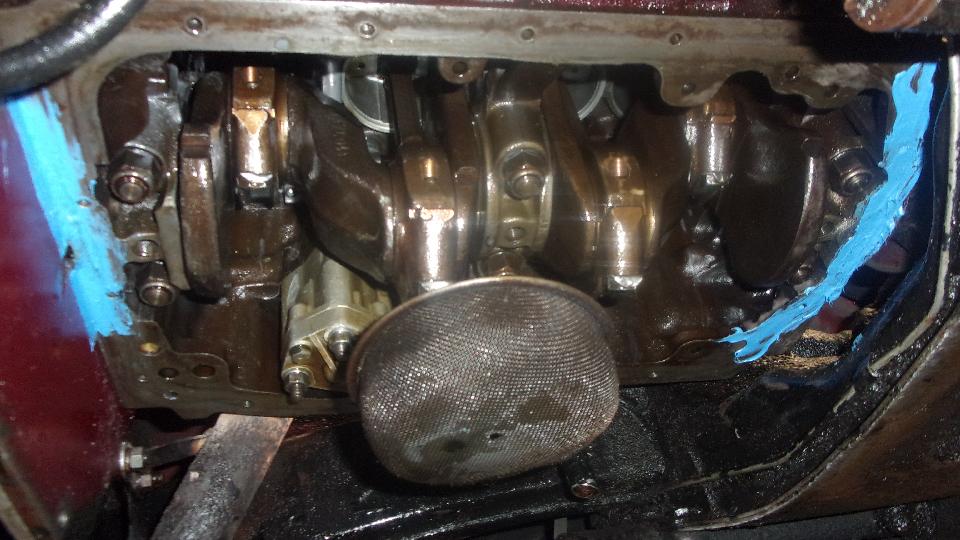
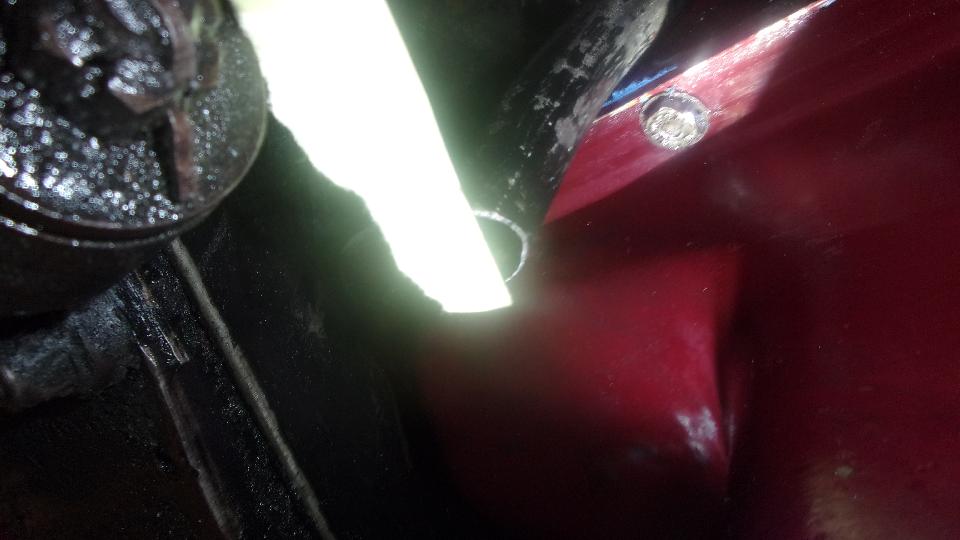
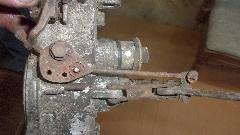
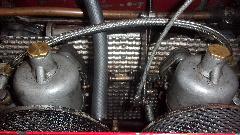
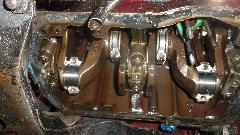
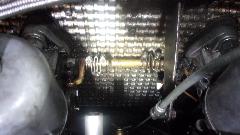
Late start at 2:30-pm, not long to get the car on the lift, and another five minutes with the magic thumb screws to get the bonnet off. First business then was to get a picture as promised to a BBS friend to verify there is no oil trap screen inside the valve cover vent (which undoubtedly contributes to oiling up the front air cleaner).
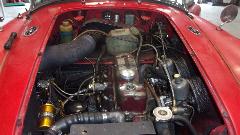


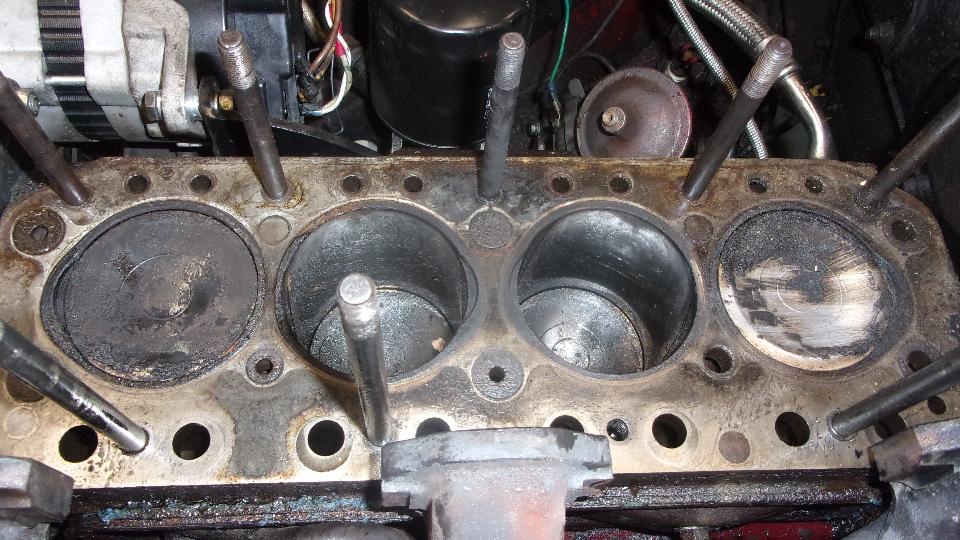
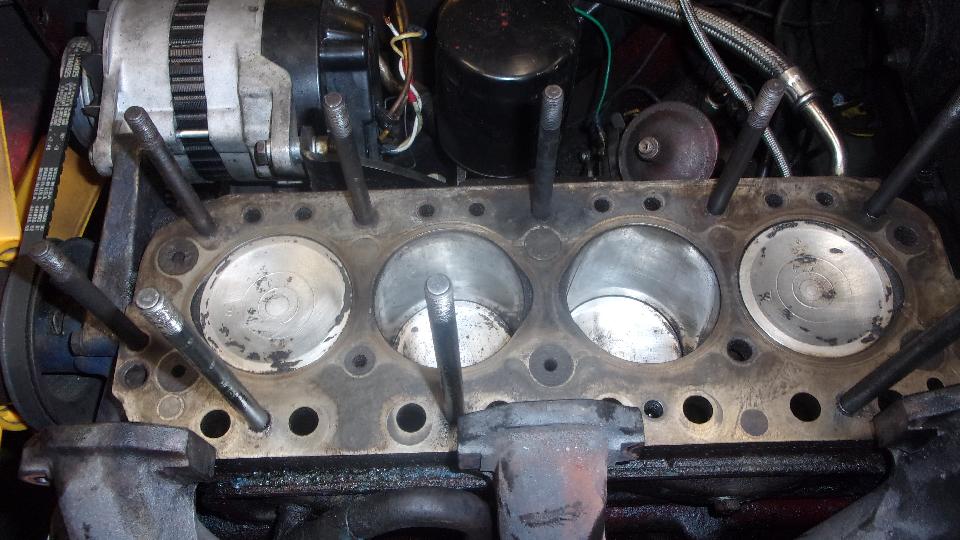
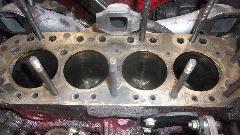
Standard fare to pull the carburetors and cylinder head. Five minutes with a soft wire cup wheel in a power drill to buff a little carbon off the pistons (easier to do in-situ than later with loose pistons). no scratches in the cylinder bores was the first good news.


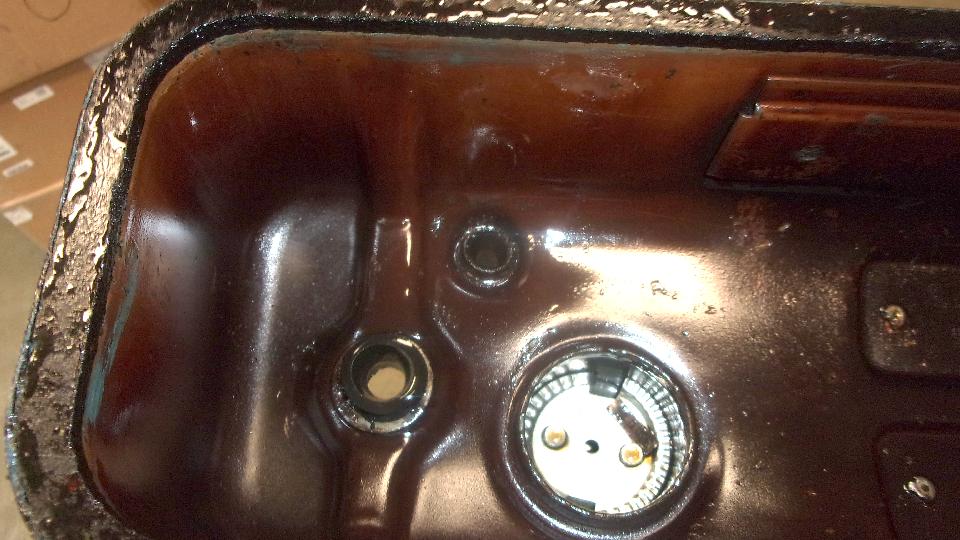
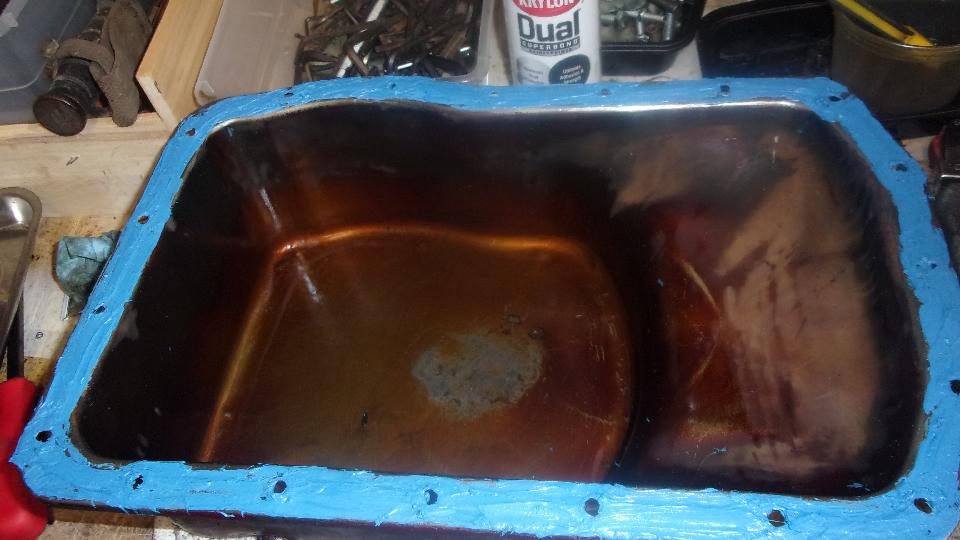
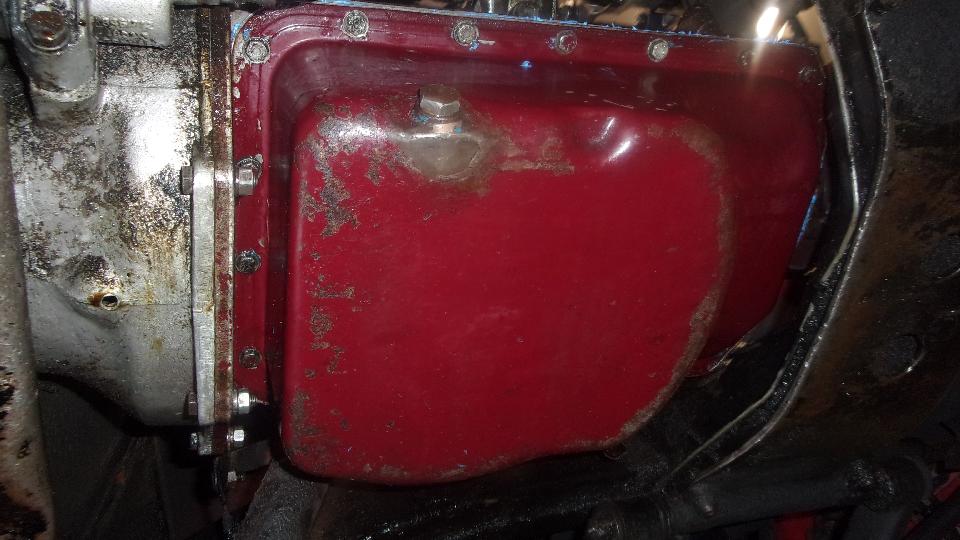
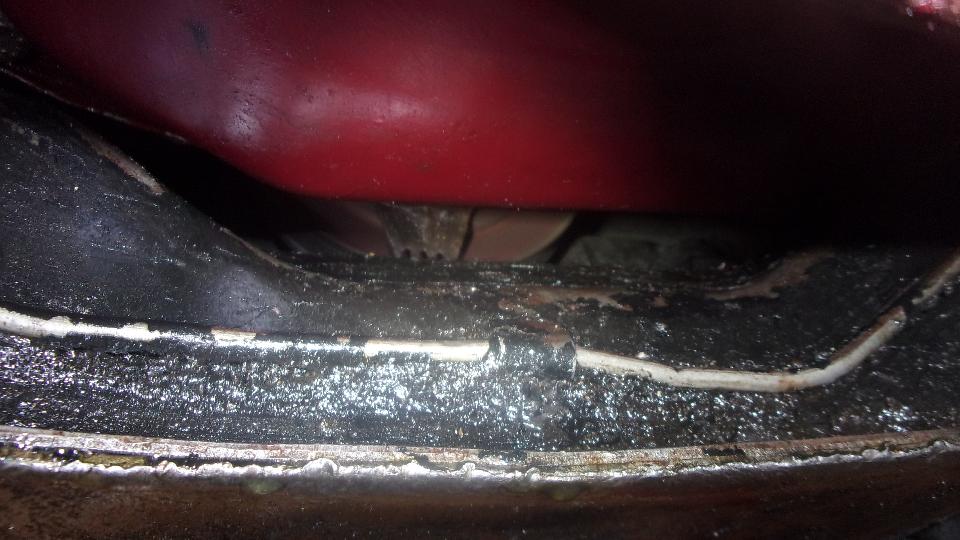
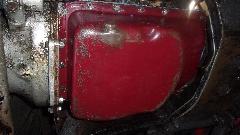
Then under the car to drain oil and remove the pan. Use the 1/4" drive socket wrench with U-joint to get the center three bolts in front. Then use the offset end wrench for the two front corner bolts closer to the frame cross member (about 5-minutes each). It will be somewhat harder to re-install these five bolts later with finger starting of the threads. Gotta tell ya, that magnetic parts tray is just the berries inverted underneath the car.

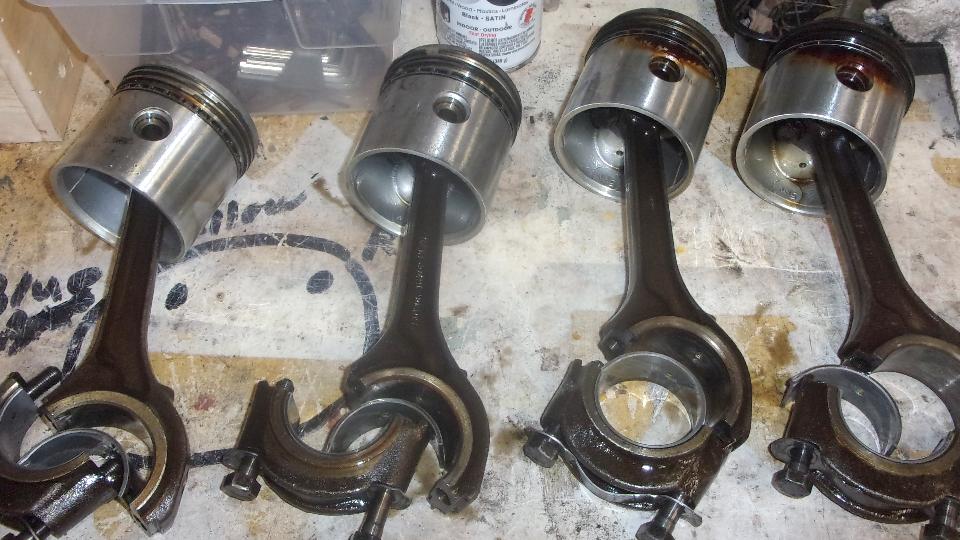
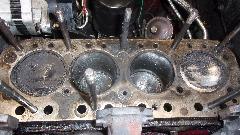
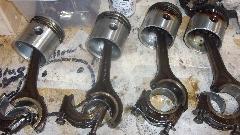
Once the pan is off, just three nuts to remove the oil pump as a matter of convenience. Knock back lock-tabs to remove big end bolts, and push out pistons two at a time. And yes, I am keeping the parts in sequence in matched sets. A quick wipe down for initial inspection shows clean bores, and the pistons are not scuffed, and no broken rings, all good news. The #3 and #4 pistons do show carbon on the sides indicative of compression blow-by, which was pretty much expected along with the low compression readings.
Not bad work for four hours fiddling. On suggestion of our host, 6:30 seemed like a good time to stop for the day, so clean up, and head off for dinner and WiFi to post these photos and notes. Tomorrow we expect to get back to work a little earlier in the day.
Wednesday, April 13, 2022:
Worked on the engine noon to 7pm today, very busy, and not many pictures. Lots of diagnostic measuring. Started with #1 top ring (used one) 1" down the bore, measuring the ring gap with thickness gauges. Then #1 second ring (used one) 1" down re bore measure ring gap. Then a new top ring 1" down the bore measure ring gap. And finally the new ring 3-1/2" down the bore to measure ring gap. And divide the variations by Pi to get variations on diameter instead of circumference.
Result, #1 & #2 bores are oversize 0.003" at top and 0.001 at bottom (0.002" taper).
Result, #3 & #4 bores are oversize 0.005" at top and 0.002 at bottom (0.003" taper).
Mind you this is 225,000 miles since it was last rebored in 2014, and it has been honed for new pistons in 2019 and again in 2021, so not as bad as I was expecting. But we are about to hone it again for the new rings, and will measure again after honing.

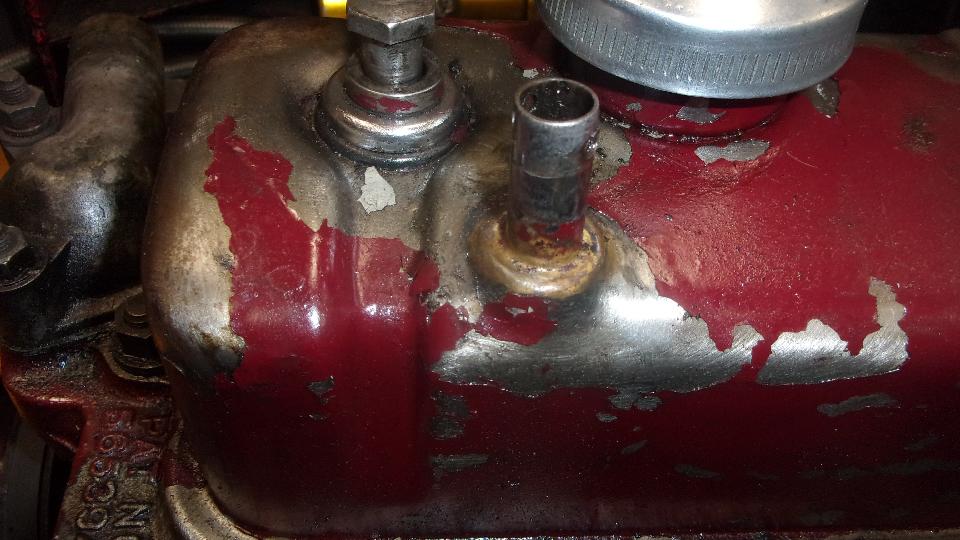
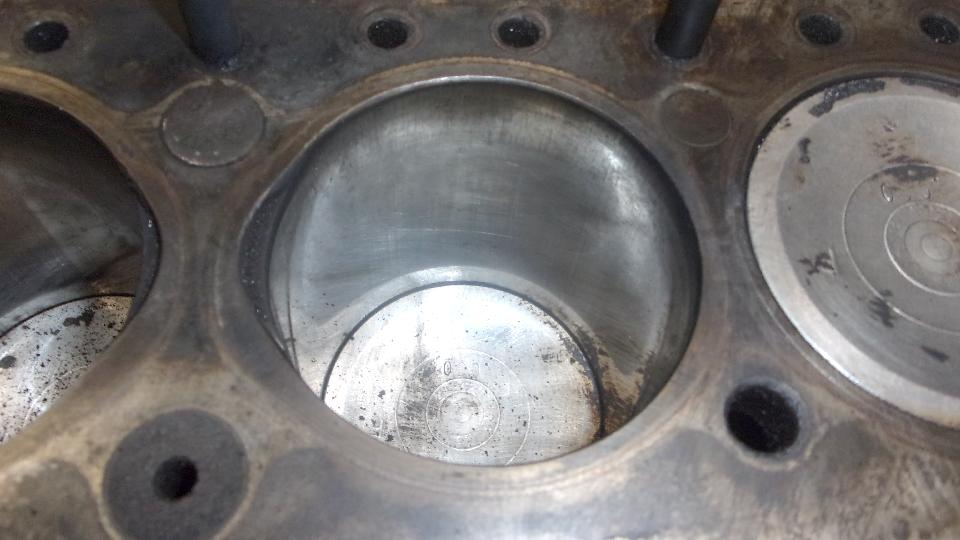
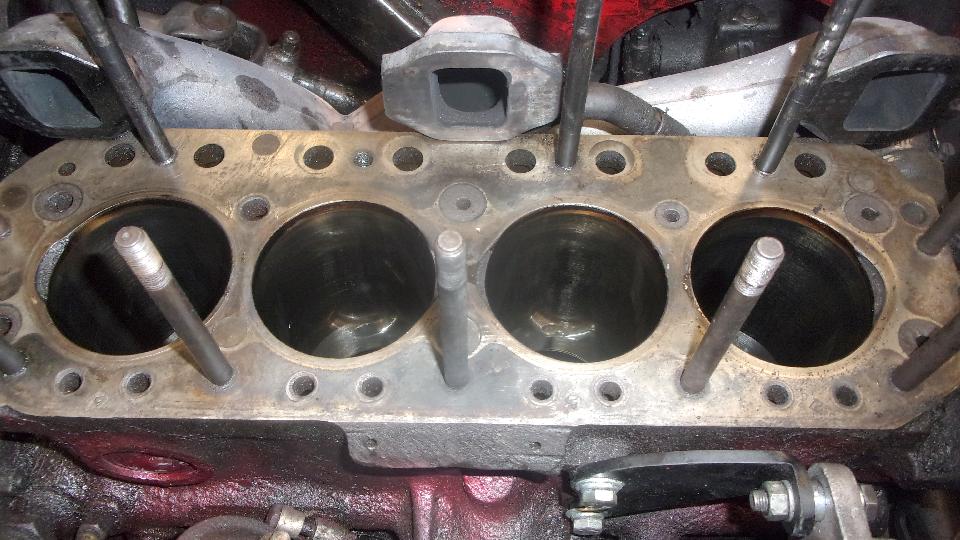
As I was expecting, I had to be overly aggressive with coarse stones last time it was honed in July last year, because there were still honing marks in the bores (photo at right) 13,000 miles later, and this is why we are doing it again now (didn't like excessive oil use. So I changed the stones on the hone from medium to fine (now 300 grit), and proceeded to hone it enough to remove the prior honing marks. Then we measured ring gaps again with a new ring to see how much larger it might be.
Result, #1 & #2 bores are oversize 0.004" at top and 0.002 at bottom (0.002" taper).
Result, #3 & #4 bores are oversize 0.006" at top and 0.003 at bottom (0.003" taper).
That means we just honed 0.001" out of the diameter, only 0.0005" off the wall, which is actually less material removed that I was expecting. But note to self, next time this engine needs surgery it will get rebored again (even if it has to be sleeved first).
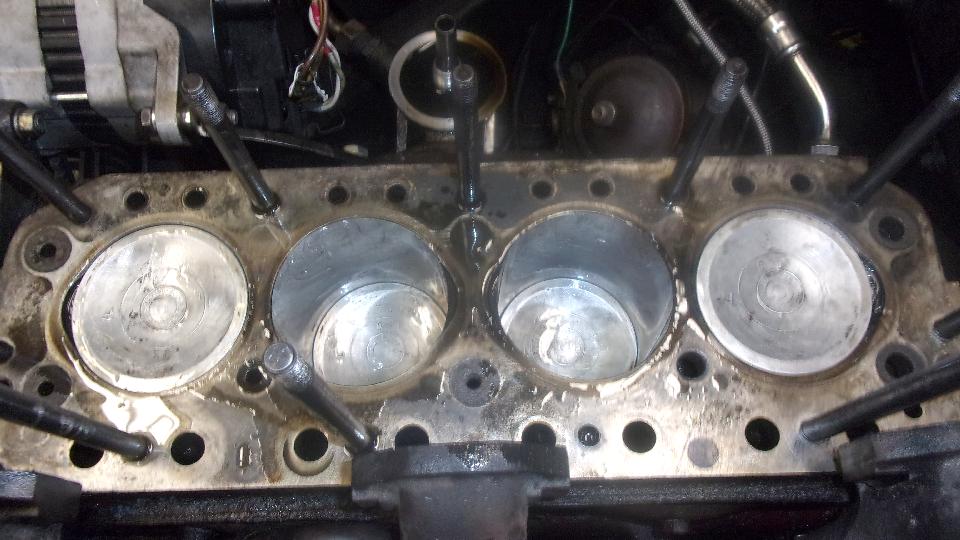
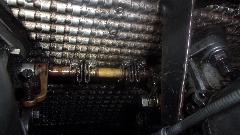
Time to wash it all down with solvent and water.detergent, remove rags that we had covering the
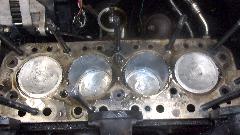
 crankshaft, and wash it some more underneath. Cleaned the pistons with carburetor cleaner and a Scotchbrite sponge, and they came out very nice. All new rings on the pistons, lots of oil on everything, and reinstall pistons with rods and big-end caps (reinstalling the 3-year old rod bearings of course). All pretty pretty with freshly honed bores and clean pistons, and then I could stop for a few pictures as we were shutting down for the evening at 7-pm.
Thursday, April 14, 2022:
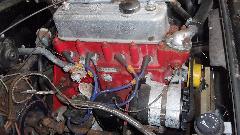
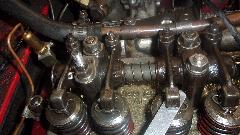
So today would be put it back together day, and we should have plenty of time, get the show kicked off at 10-am. Need to clean stuff up and scrape old gaskets, and be careful about reassembly, so it takes half again longer than disassemblty, but we get there eventually. Bottom side first, oil pump, pan gasket, and 19 little bolts.


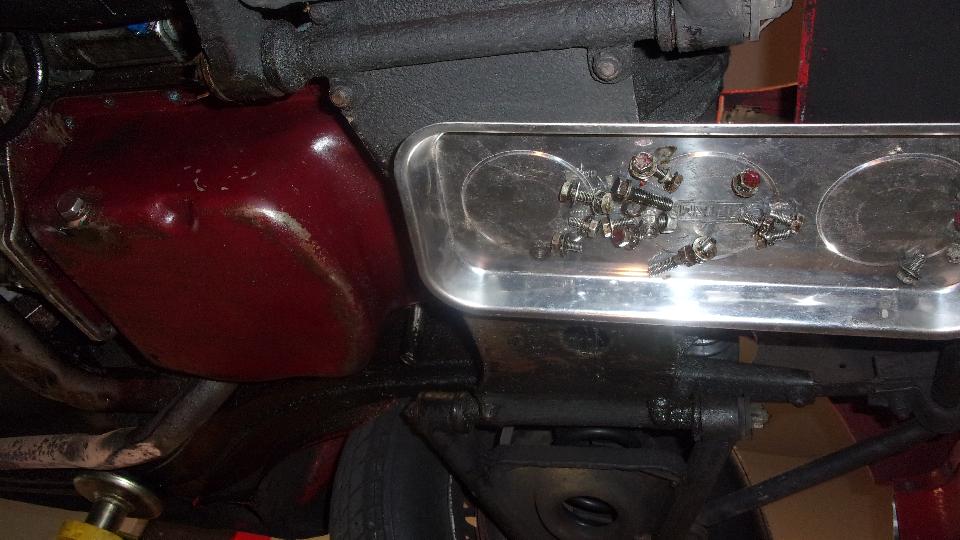
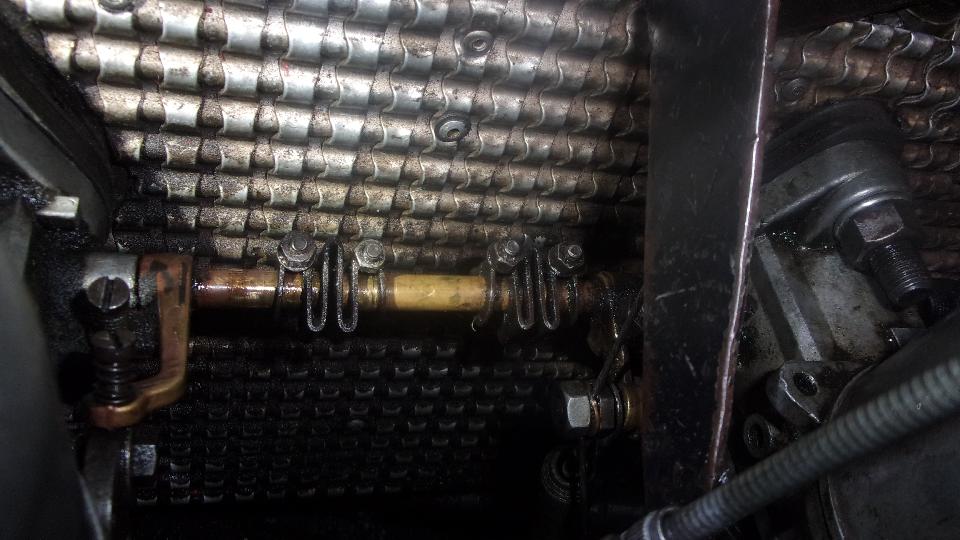
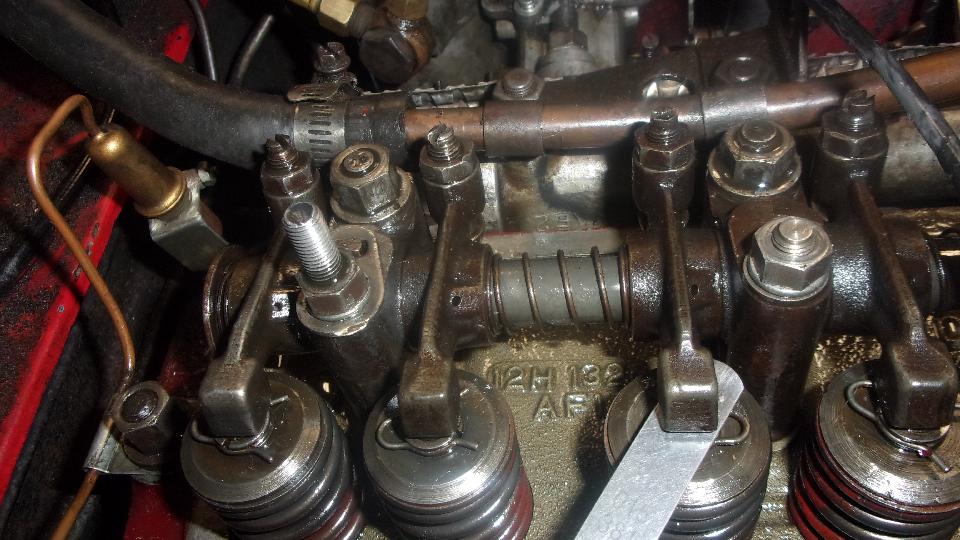
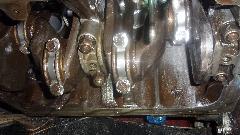
Up top, new oil filter, then the head gasket, head, rocker arm assembly bunch of head nuts and the valve cover. Scratch head once before filling up the oil, remove spark plugs, and crank it 45 seconds to bring up oil pressure. Peachy. Install spark plugs and distributor cap, reconnect temperature sensor, manifold bolts, carburetors, radiator and hoses, top up coolant. Check underneath, find a little drip, tighten one hose clamp, do coolant system pressure test just for good measure. Scratch head twice to assure we hadn't missed anything, shrug shoulders and fire it up.
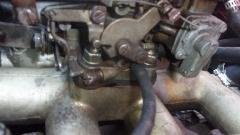
The high torque gear reduction starter spins it right over in spite of being a little tight with fresh honed cylinders and new rings. But fire it does, followed by a nice cloud of white smoke as it burns off all the oil on pistons and cylinder walls. Curious whistle while running, fairly loud, sounds familiar. Give a pull on the rear carburetor and it gets a bit louder. Give a push on the carburetor, and the noise stops. Grab the 9/16" wrench and tighten one nut on top of rear carb, and all is quiet. Big grins all around, put the bonnet back on (6 little thumb screws).

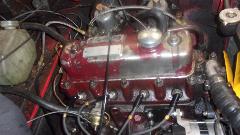
Our host has plans for the evening, so we will knock off at 5-pm sharp, and come back tomorrow to run to hot and retorque the head, pack up everything and clean up the shop. Meanwhile, off to late lunch and WiFi to bring you these photos and notes.
Friday, April 15, 2022:
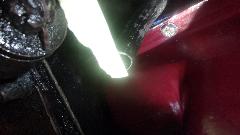
This would be pat it on the bottom and kick it out of the shop day. Fire it up to run on fast idle for 20 minutes to get it good and hot, then re-torque the head and reset the valve clearance. While it was warming up, good time for some inspection underneath. Put a thin bit of paper near the draft pipe. It would flutter faintly with impulses, but not blowing away, seemed to prefer staying close to the pipe end, so the air cleaner connection hose up top does seem to be pulling a little air into the draft pipe while idling.
Then I held a somewhat oily rag near end of the tail pipe. intending to check if it would soot up the rag, which it didn't do. What it did do was to "evaporate" the oil out of the rag making white smoke and cleaning the rag in the process (kind of neat). In upper left of the picture is a clean circle where I held it stationary over the pipe end for several seconds until be began to fuse the fibers, and it stayed perfectly clean, no soot, which is very nice (recon I got the fuel mixture right).

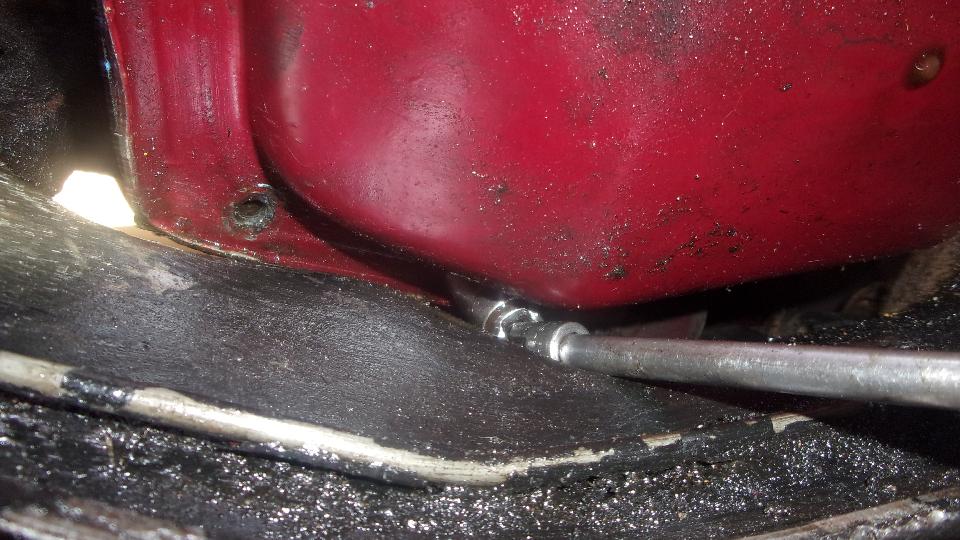
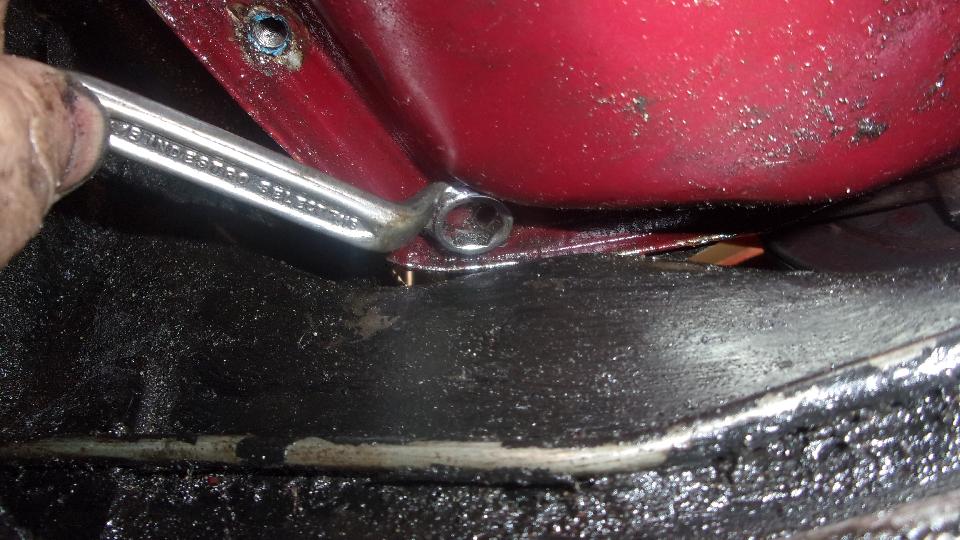
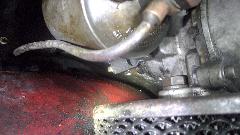
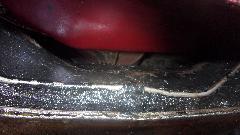
Then looking for any oil leaks. Front end of the sump is dry, and the crank pulley is also dry, so no leaking up front. Rear end of the sump also dry, and no drip from the rear plate or bellhousing. But we did find a leak dripping at the left rear corner of the engine block, 6 or 8 drops per minute (at fast idle speed), which could be quite a significant leak with constant driving. This was from the big acorn nut securing the pressure relief valve, where it is supposed to have two fiber washers (I may have only one there). A good pull on the 1/2" drive ratchet with a socket (maybe 50 lb-ft torque) seems to have stopped that leak, and nothing else found dripping. Big grins by now.
After 20 minutes, down with the hoist to slow it down and reset idle speed. Found I hadn't reattached one of the throttle shaft couplings after installing the carburetors, so take a minute to re-synchronize the throttles and tighten the coupling before shutting it down.
 Nice hot engine, time to re-torque the head bolts and reset valve clearance. Navigator is getting more into this stuff these days.getting the hang of putting a fist on a wrench instead of finger tips. He already knew how to run a torque wrench, and now he knows how to do valve adjustment.

Okay, that's it, kick the horse out of the barn and hitch up the cart. Pack away the tools, do a nice job cleaning up our friend's shop space, put used oil in a jug to take away to a local auto parts store. Move all of our personal booty from borrowed truck back into the MGA and the Magic Trailer, and call friend to be sure we have the correct arrangement to get the truck back to him. Then haul off to O'Reilly Auto Parts to dump the used oil and buy another oil filter for the upcoming 300 to 500 mile oil change after cylinder honing and new rings (and cash in a $5 O'Rewards coupon). Then another half hour drive, and after 40 miles reset idle speed (as the engine loosens up), fill the fuel tank, check that oil level is stil on the full mark. and stop at a known good WiFi spot with good feelings all around. Hope you enjoy the photos and notes.
|