The MGA With An Attitude
Body Sill Replacement - RT-634
Final Assembly
What, no report for a week? I took Saturday off for MG Open House, was catching up with shopping and e-mail on Sunday, had to mow the forest in the back yard Tuesday (among other things). Then I've been doing long hours on the car for four days, just now taking time to post some photos and notes. Master cylinder and pedals are in, also heater, screen washer, and everything electrical de-bugged and working (pretty easy with very few issues), every hole in the heater shelf and firewall has a grommet or plug (more work than it sounds), the engine is in (without peripherals), bonnet and boot lid are installed with hinges and latches. Since I didn't take the car for a drive on Saturday, some priorities and scheduling have changed. With a little more time available I have been doing some additional (and generally unnecessary) odds and ends, like cleaning and painting the trailer hitch, remodeling the body nose slightly to match the contour of the new grille, installing air horns (YEAH BABY), replacing a fuel pump that was working perfectly (but was in service 10 years and 100,000 miles), and trying to install an oil cooler bypass valve.
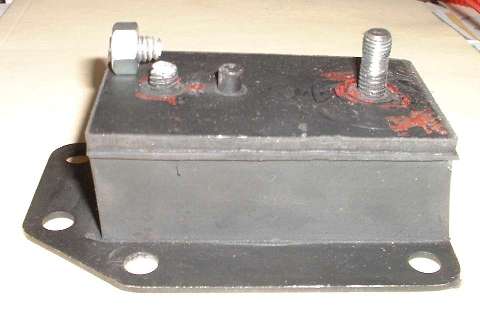
 I had to get the engine in before exhaust system, oil cooler, vent hoses, and final fitting up of the new grille. I hate last minute problems, but two of them bit me on the same day. The first item was a pair of new engine mounts I had in stock for 15 months, which you might think should never have any problem, but they did. The first two nuts didn't seen to be tightening properly, then one of the studs broke while I was pulling on it with a 6-inch wrench. Duh? I then took the part to the vice, installed four flat washers and a nut on the other stud, and tightened it slowly with a bending beam torque wrench. That stud stripped the threads at 210 lb-in torque (17.5 lb-ft), which means it was probably yielding at 15 lb-ft. Bummer. These 5/16-inch studs should take 25 lb-ft torque with at least another 30% for safety factor. So, scrap two new engine mounts. For the time being I pinched a pair of slightly used ones from my spare engine to continue on, but also lost more time making photos and a report to Moss Motors.
The next thing to bite me was my attempted installation of four new hoses for the oil cooler along with a thermostatic oil bypass valve for cold weather driving. I bought this bypass kit 5-1/2 years earlier, meaning to get it installed before winter (every year of course). So now was the golden opportunity. Unfortunately with hoses having fixed length the bypass valve wanted to occupy the same space as the radiator mounting diaphragm on the MGA body. Oops. Next thought was to put the oil cooler under the air pan (not a bad idea regardless), but then the bypass valve wanted to occupy the same space as either the shock absorber or alternator (or both). I will concede that I had procured the oil cooler bypass kit from the MGB catalog, thinking I could make it fit the MGA. It likely would fit in somewhere with the right set of hoses, but that must be a project for another time. Enough time wasted there, put the parts back in the box and make a note to order new standard oil hoses on Monday for 2nd day air delivery.
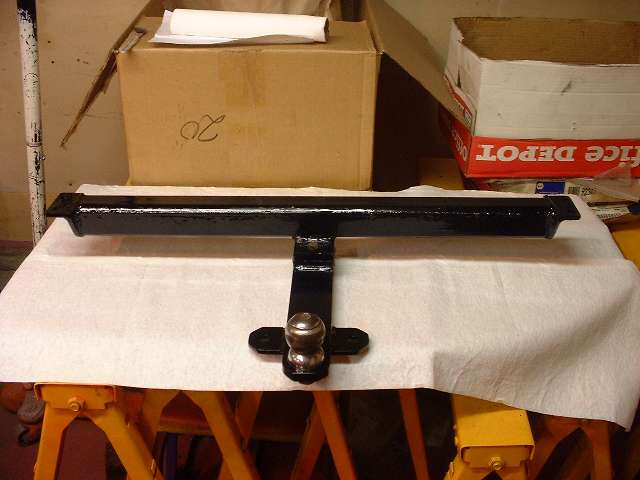
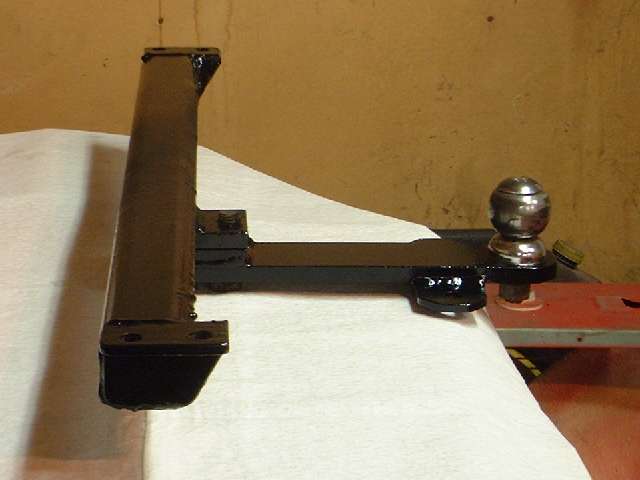
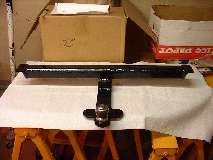
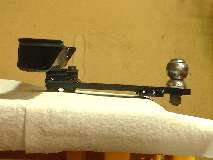
I installed the oil cooler (sans hoses) back on top of the air pan in standard location, then spend a couple hours installing new air horns. That prompted a quick run to the hardware store for some fasteners, wire ends, muffler clamps, lacquer thinner (cleaning fluid), and some plastic tubing (noted below). I installed the exhaust system leaving all the bolts loose until after the trailer hitch would be installed. That was the queue to clean and paint the hitch parts while there was still time for the paint to dry. Then I had to take some pictures, because someone lost the film negatives 20 years ago, and the hitch was never out of the car again until now.

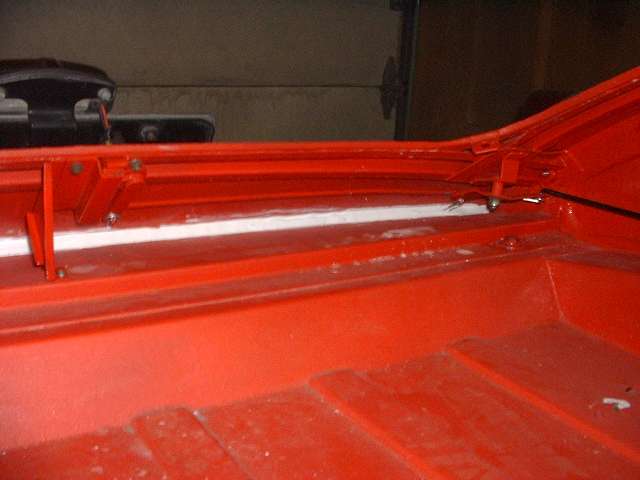
Looking forward to actually finishing this thing within a week, I got back to one of the necessary jobs, sealing the joint (big gap) between the boot floor and rear body valance. This was originally filled with a thick pad of horsehair that was stapled to the back flange of the boot floor during original body assembly welding. That packing had gone away with the first restoration work in 1977 when the body was dipped and etched by Ready Strip. My solution to filling and sealing this gap is the same as I did last time, but maybe I did a little better job of it this time around. I started by stuffing in a piece of plastic tubing 5/16 ID x 7/16 OD (about 3-1/2 feet long) to fill most of the space. Last time I did this all from inside the boot. This time it seemed easier to install the tubing from underneath.
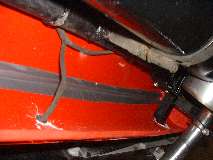
I pressed the tube into the gap until it was flush with the bottom of the flange on the boot floor all the way across.
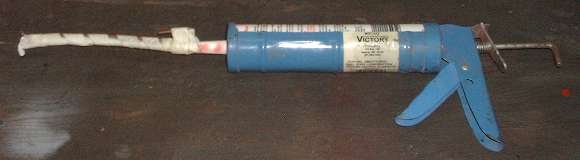
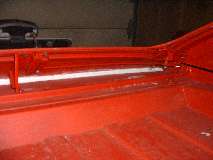
 I temporarily applied Duck tape underneath to keep the tubing in place and assure that no caulking could dribble out the bottom. Then I stuck an 8-inch length of the same plastic tubing on the nozzle of caulking gun to reach the gap from inside the boot. This tube was taped together with a piece of stiff wire to keep it straight. Once the caulk was applied a half-width paint stirring stick was used to smooth it in place. Give it a day to dry, and I will remove the Duck tape and may spray a little red on both sides to camouflage the white (just before installing the hitch parts).


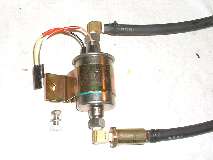
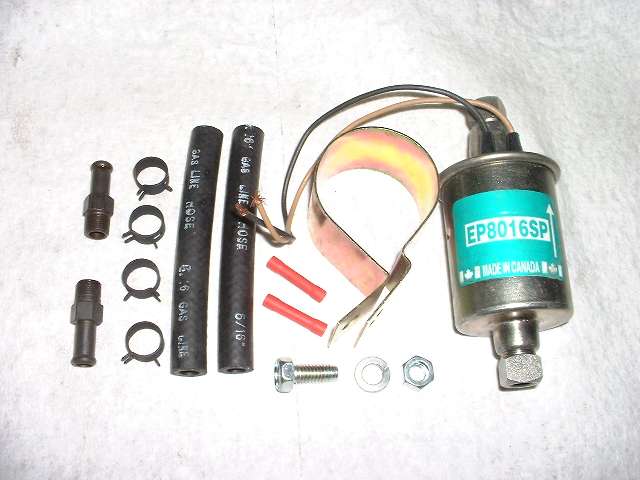
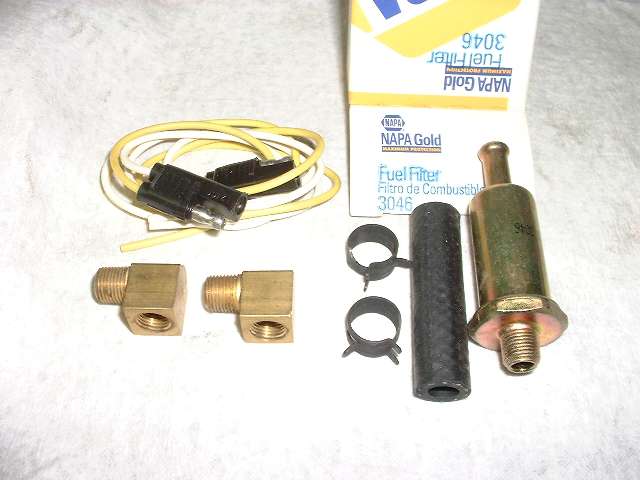
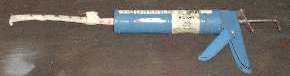
The next personal appeaser chore was to replace the 10-year old 100,000-mile (aftermarket) fuel pump. This was last changed at 3:00 AM in Anchorage, Alaska in 1997 after the last one had done 85,000 miles. I don't like that sort of inconvenience possibly popping up again, so this is a bit of preventative maintenance. Picture at left above shows what is included with the electronic fuel pump kit, The center picture shows the bits I have added. The last picture above shows the finished assembly with a 2-pole rubber connector soldered and shrink-wrapped (no butt connectors for this harsh environment), inlet filter installed, and rubber hoses attached.
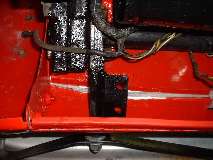
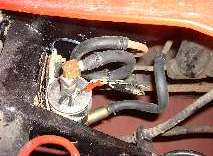 Picture at left shows the new fuel pump installed, including a tie wrap to support the wiring for strain relief. If you carry a spare pump assembled with the ell's and filter and 2-pin connector, it can be changed in 15 minutes without removing the battery or the rear tire. Lift the battery cover, disconnect the 2-pin connector and hoses (2 pinch clamps), loosen one bolt, and lift out the pump.
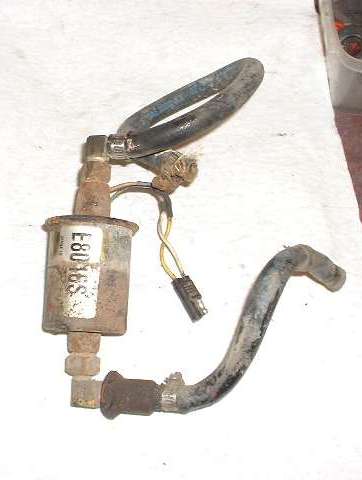
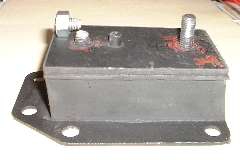
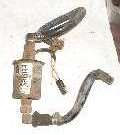 The new one goes in just as quick. Picture at right shows the old one that has served faithfully for the past 10 years. Notice that tiny little inlet filter was never clogged in over 100,000 miles. My "secret" to keeping a clean fuel tank is simply to drive the car all year round and flush a lot of fuel through it regularly. I may keep the old fuel pump in the car for a spare until the new one has accrued some running time. If you ever need a replacement it can be purchased off the shelf at any auto parts store.
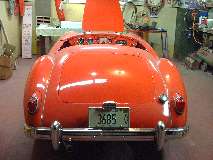
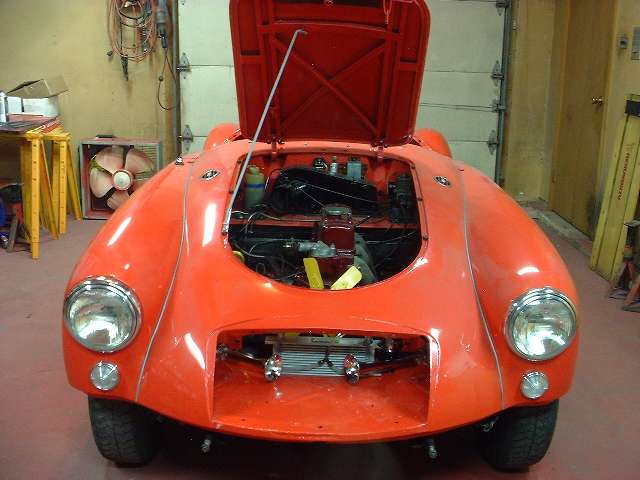
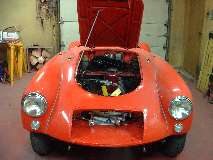 Look Ma, no radiator or 4-inch air hoses, but a clear view of the new oil cooler and those nifty air horns. I should have installed the valance panel for the picture, but it was already past midnight, and I wanted to post this web page. I will next install the valance panel and trailer hitch, tighten up the exhaust system, then roll it outside for a good wash and a final paint buffing (couple hours tops) before installing the new carpet. .... (4 July 08)
Saturday I installed the trailer hitch and tightened up the new stainless exhaust system (after a trip to the store to exchange some pipe clamps), then rolled the car outside for a wash and planned final paint buffing. I was worried about lots of dust of various sorts that had accumulated on the car in the last few weeks, and possible scratches as a result. But with a little detergent and lots of water it all washed off nicely without any noticeable damage. Woohoo, good news for a change, so I decided it didn't need buffing again. If I hose down the heater shelf I find water getting into the foot well around the heater base gasket. Bummer. Put it on the wish list to R&R the heater to caulk around the base, later of course (if ever). Chamois it off, mop up water from inside, shove it back inside to dry out. Considering all the dirt I just washed off the car, I think I will wax it now, before installing carpet and the rest of the trim. - (5 July 08)
Sunday afternoon wax job, rather fun for a change of pace. Sunday evening, remove seat belts and clean with a quick scrub of lacquer thinner and pat dry immediately. Power sand the slightly rusted bolt-in ends and paint those with Chassis Saver black. Rip out the last of the carpet and gluing in carpet padding including full length of tunnel and floor front to back. Clip and trim padding to fit. Padding in the Moss carpet kit goes from front of footwell to front of seats, and on the tunnel for 2/3 of tunnel length. I am adding carpet padding under seats (like last time) and on last 1/3 of tunnel between seats (hoping the seats fit okay after this). Applying goo to car panels with 3-inch fuzzy paint roller and a stubby paint brush for the corners. Applying goo to back of carpet with 3-inch roller. Press into place and roll down snug with 1-inch wood wall paper roller. Past midnight but done with padding. - (6 July 08).
Monday placed 2nd day air order for new oil cooler hoses. Then on to trimming and installing all main carpet and rear carpet (battery cover area). Side carpet is glued directly to frame rails. Rear floorboard carpet is glued direct to the board. Tunnel carpet front and rear is glued over tunnel padding. Tunnel center carpet section is not glued so it can be removed for access to tunnel cover (for gearbox removal). There's a bit of a trick leaving a void space under rear edge of front tunnel carpet for the center piece to tuck in. Floor carped under feet and seats will be left loose and secured with LTD studs (previously in place). Rear carpet is glued directly to inner wheel wells (a little tricky over the 3-D contour), battery shelf sides and battery cover, five pieces. Got to bottom of one gallon of carpet adhesive. Will need another quart of adhesive to do boot carpet (or may leave that for later). It's getting easier to keep an eye on the schedule these days, counting days on one hand now before it has to hit the road Saturday morning. So far I think I have at least one day to spare, maybe two. - (7 July 08).
Tuesday and Wednesday, too busy with the car to take pictures, but it's just assembly work anyway. I put in 24 hours work on the car in the past 48 hours (don't ask which 24 hours). Finished gluing in carpet main and rear (not boot). Carpet piece under seat is lay-in (not glued) for easy removal in case it gets wet. Ditto for carpet under feet, held in place with 8 LTD fasteners each side. Seat belts are back in as well as the tricky little accelerator pedal stop (atop a couple of T-nuts). Windscreen is installed along with eight 1-inch flush plastic plugs to close access holes on inner body. Cockpit trim rails installed (with SC stowage bag), then about 20 LTD studs for top and tonneau and the dash mirror. Front and rear kick panels, door pockets, door panels all in, and the auxiliary power jack (dual cigar lighter sockets). Defroster ducts are hooked up, battery cover seal and cover are installed, spare tire cover and hold-down clamp installed, and the rag top is on.
Still feeling comfortable with the schedule with at least one day to spare, so spent some time cleaning and painting seat rail bottom tracks, door panel reinforcement bars, and the Navigator's Desk mounting bracket. Funny how work expands to fill the time allowed. Don't be surprised if it isn't finished until the evening before departure. Oil cooler hoses arrived today on schedule, but it got late, so more to do after some sleep. - (9 July 08)
Thursday, got so busy I forgot to run to the hardware store to buy rubber grommets for the oil cooler hoses. That's almost a breach of scheduling protocol, but I managed to work around it. I fiddled with a few possible setups for the oil cooler and hoses. I almost put the cooler under the air pan with 3-inch spacers to allow continued use of the starting handle, then decided that change wouldn't fit in the schedule, so I put the oil cooler back on top where it was before. Since I can install the cooler hoses with the grille in place, the work around for not having the hose grommets was to install the forward 4-inch air hoses, the new grille, front valance, front bumper, navigator's desk, seats, steering column, and the fuzzy door seals. Boy those doors close and sound nice with the mass of all the fittings, soft seals, and perfect latch alignment. I will have to teach the navigator not to slam the door.
I also installed wing mirrors, splash seals with split rivets and four splash panels. About those splash panels being installed last? Okay for the big ones at the front wheels, but for the small ones ahead of the rear wheels one of the mounting bolts goes behind the rear kick panel. Oops. Remove a few screws and pull the tail of the kick panel forward to install that bolt. Glad I didn't have to remove the rag top frame again.
Oh, the MG badge on the boot lid I find it has two different size studs, 0.100" for the octagon and 0.090" for the letters. It appeared to be bent up somewhat, pegs not aligning with holes, and not lying flat. I managed to straighten it fairly well in short order, didn't even break any pegs. Then I found the Speed Nuts that came with it to be tiny little round things with about 0.080" hole. They are difficult to handle, easy to drop, and nigh well impossible to install even on the smaller (0.080") pegs. I was pushing the speed nut with a miniature socket wrench for all I was worth and couldn't get over the smaller pegs. Luckily I had just purchased the separate Speed nut set for Trim Mounting (20 pieces). Those are the rectangular push nuts that are so much easer to install, just with fingers only, so done, done, and done. - (10 July 08)
|