The MGA With An Attitude
Body Sill Replacement - RT-627
Outer Body Stripping and Priming
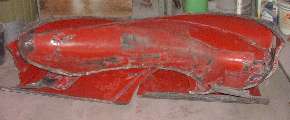
This is the day I finally concede that my Body Sills Replacement Project
has turned into a Body Restoration Project.
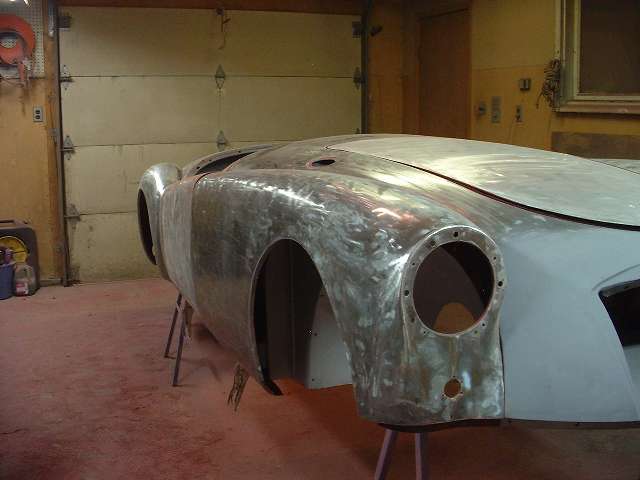
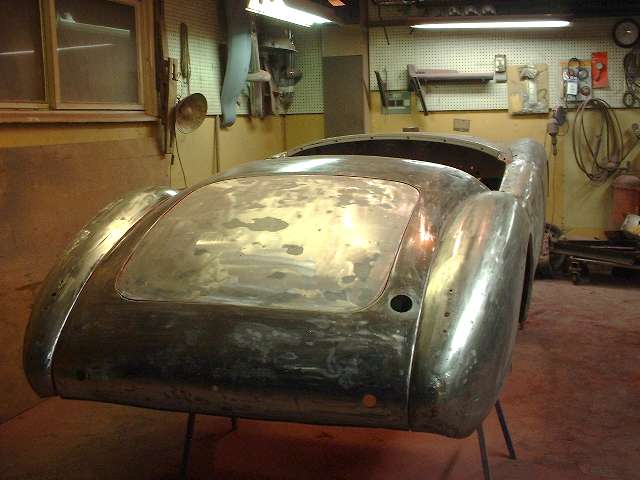
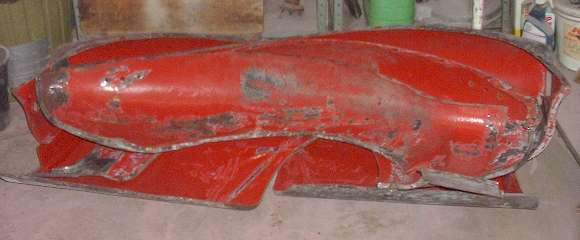
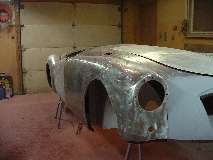
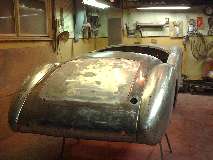
These pictures represent a certain amount of grunt work, but no special skill required. There were so many layers of paint on the outer body that the magic magnetic numbers wouldn't stay put and would sometimes blow off in the wind while autocrossing. Rather than make the problem worse with more paint I wanted to strip the outer body back down to bare metal before repainting. I certainly didn't want to chemically dip the whole body and give up the good underbody paint and the new paint inside the body sills. I also didn't feel like trailering the thing to a sand blasting shop or paying the professional bill for that service, so I started fiddling with power sanders (and a cotton breathing mask of course). Notice the footprints in the heavy layer of red/gray dust on the floor. You can only imagine what I looked like after a few hours of that work.
I tried a belt sander first, thinking that might be the quickest way to strip away the thick layers of paint, but not much luck. At first touch it looked like it might work okay, but any pressure used to speed the progress resulted in clogged up sanding belts. Apparently acrylic enamel may melt when it gets hot, but in any case it was clogging up the sanding belts so quickly that it might cost too much for enough belts to finish the job. Then I tried a disc sander with almost the same results. With a medium grit disc and light touch it would work for a while, rather slowly, but any pressure used to speed the job would clog the sanding disc.
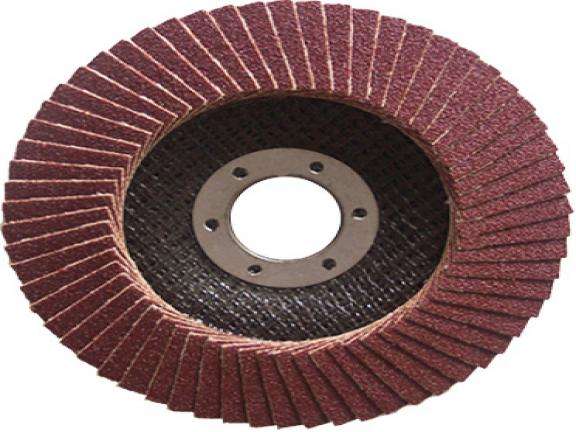
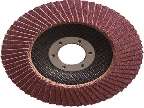 Then I hit on the right tool for the job. What finally worked was a medium grit 4-1/2 inch flap disk in a 4 inch angle grinder with the guard removed to work like a disc sander. Fine grit would clog up the flap disc, and coarse grit was too harsh on the sheet metal, but medium grit was the cat's meow. It would rip right through paint and body filler, throwing off a rooster tail of dust like it was kitty litter. It may have taken 45 minutes to clean off a front fender, 30 minutes for a rear fender, less than 2 hours to do the top body cowling front and rear. These sanding flap discs are about $3-USD each at Harbor Freight, and I used just 4 to do the outer body and fenders. I followed this with 150 grit sand paper on a 7-inch disc sander to polish off the last traces of paint and smooth out the steel surface. Primer paint and various forms of body filler were not clogging up the sand paper.
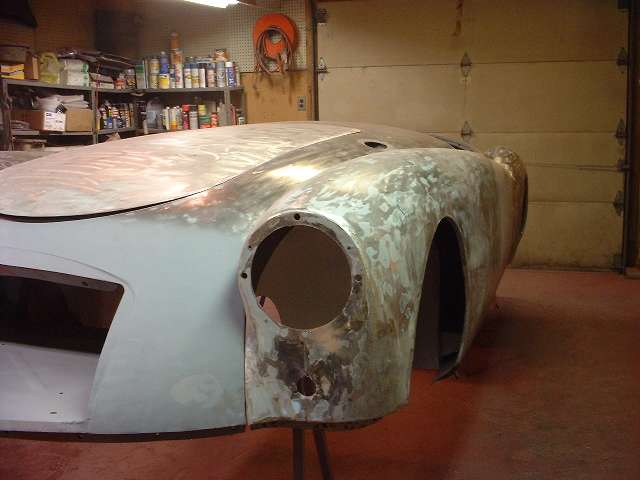
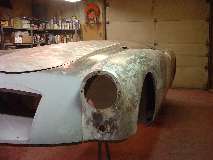
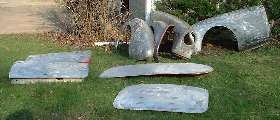
The flap disc was a bit too aggressive for the aluminum panels, so for the bonnet, deck lid and doors I settled for a little slower job with the 7 inch disc sander. 80 grit paper turning at high speed with light to moderate touch would clean the thick paint off one of these panels in about 30 minutes each. Then I ran another 10 to 15 minutes per panel with a 150 grit disc for clean up and surface smoothing. The primary concern here is not to have deep scratches in the metal that would give trouble with primer painting.
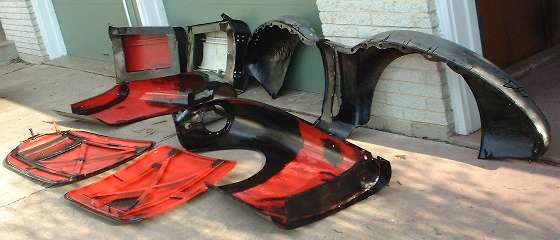
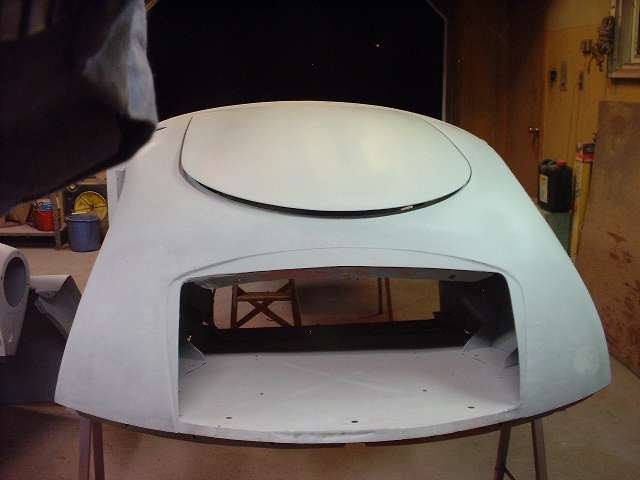
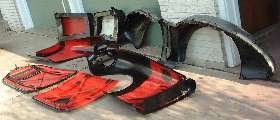
I did the doors first while they were mounted on the body, then removed them before doing the fenders. Bonnet and deck lid were done on a table top. Most of the surface of the four fenders was done while held on the body with a few bolts, then removed for finishing around the edges and tight spots. The top body cowling was done last. Shut face plates were polished off using the 2 inch disc air sander. When finished I dusted it all off and reassembled it with a few screws just to take these pictures. (19 Apr 08)
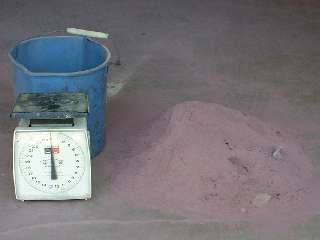


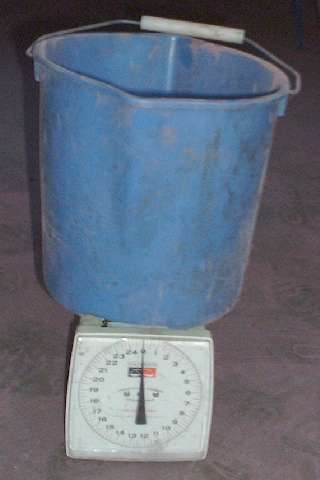
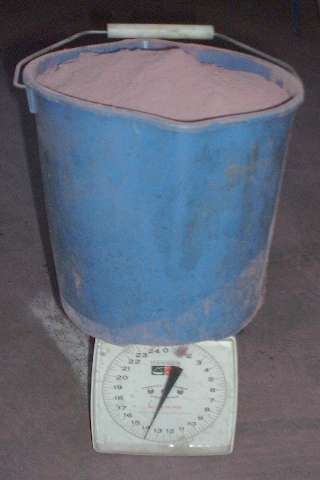
There is this little point of entertainment. I swept up the paint sanding dust from the garage floor and shoveled it into a bucket to be weighed. The 14 pounds of dust from the floor may be about 80% of what came off the outer body surfaces. The rest of the dust is still covering everything else in the shop, workbench, window sills, light fixtures and all.
I took the outer body panels outdoors (nice weather for a change) to scrub down the inner surfaces with petrol and a stiff brush, then pressure blast with a spray of Mr Clean to remove the dirty solvent. This was followed by a bit of 2-inch disc power sanding of inside surfaces to remove any lose paint (a little of that) or spots of surface rust (not much of that). (20 Apr 08)
 Next the loose panels get the Chassis Saver treatment on all inside bare spots and seams. (22 Apr 08)
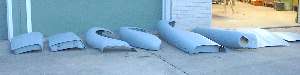
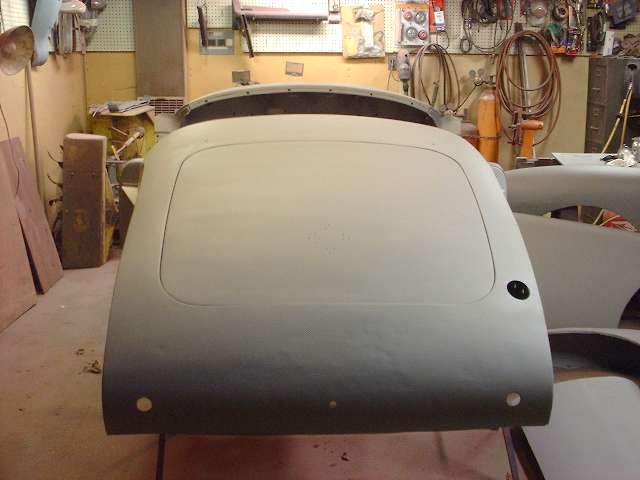
Followed the next day by gray primer inside and out on the outer panels and main body top side, and then it was gray all over.
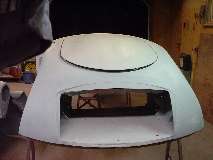
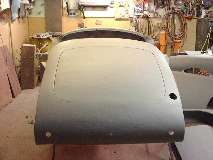
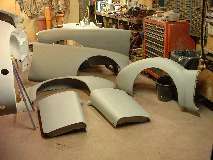
Look Ma, no more black, red, or bare metal anywhere (but plenty surface finishing still to go). (23 Apr 08)
|