The MGA With An Attitude
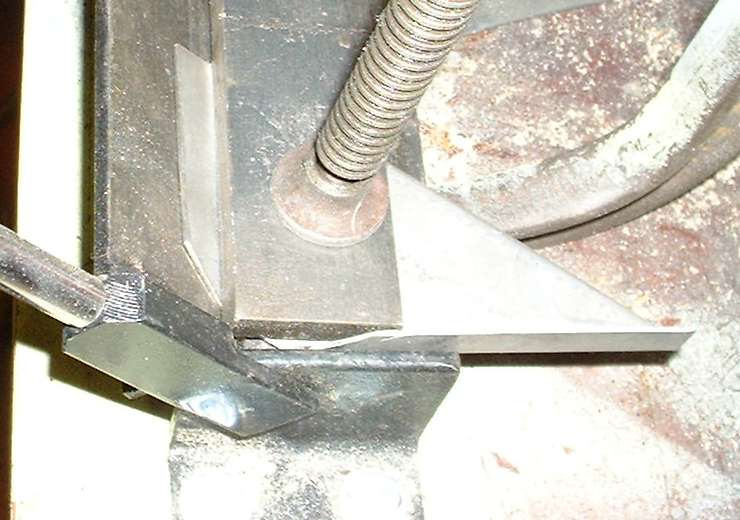
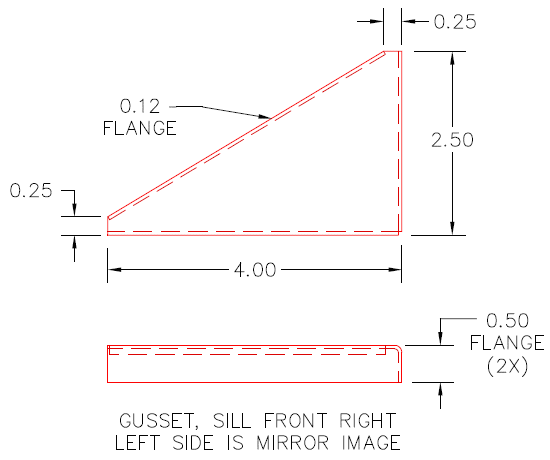
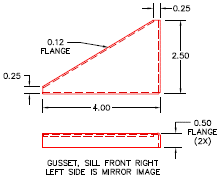
Body Sill Replacement - RT-611
Gussets and Panel Flanging

Here I have six gussets in four different shapes. The two at top left are identical parts opposite side up, with 45 degree flange at one end. The two at bottom left are identical parts (mirror of the first) also opposite side up. The two at right are mirror image parts with all 90 degree flanges, one with flanges up and one flanges down.
 Start by tracing the part shape on sheet metal, adding a margin where flanges are required, and cut it out with the hand held sheet metal shear (or your own favorite implement of destruction). Use a flat face body hammer to hammer the blank flat if it was curled during cutting.
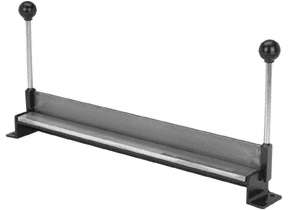
These parts were all formed (partly) using a cheap 18 inch bending brake and a few heavy C-clamps. Two bends in the same direction 90 degrees (or close to 90) from each other are not a problem. Form one 90 degree bend first, then reposition the part at one end of the clamping bar to form the second bend to any angle.

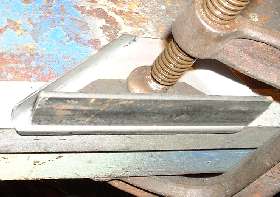
A third bend in the opposite direction along the hypotenuse of the triangle is a little more work. Here I place a piece of steel angle iron over the edge of my work bench to provide a crisp square corner. Then lay the sheet metal part on top, and cut another short length of angle iron with beveled ends to fit inside the gusset. Align the part with the desired flange width overhanging the edge, and clamp in place with the short angle iron and a stout C-clamp. Then gradually hammer the exposed edge of the sheet metal down and inward until the flange lies firmly against the vertical leg of the bottom angle iron.
 This may take a minute or two for a small part. I use the blunt end of a ball peen hammer here (the slightly crowned end) so as not to put crescent shape marks in the sheet metal. Then I finish it flat with a flat faced body hammer. For an optional final touch I may use a mini disc sander to dress the surface to reduce any possible remaining hammer marks.
When forming is finished I like to use the mini sander to clean off any burrs or sharp corners, thereby making the part more friendly for welding and painting. (12 Jan 08)
|