The MGA With An Attitude
Body Sill Replacement - RT-602
More body disassembly, shut face and rear wings
This started off easy enough, particularly since most of the outer body had been apart less than 10 years earlier, and most of the fasteners were treated with anti-seize. The rag top and frame, tonneau cover, seats, kick panels and interior parts were tucked away in a big box in another room. The doors were hung high on the pegboard walls to be out of the way. Next order was to finish removing the front cockpit trim rail, wiper arms and bezels and nuts and washer jets, then the windscreen assembly and hang that on the wall. Also remove all LTD pegs and rear rag top hooks, but I haven't touched the dash yet.
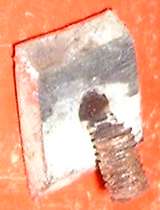 Removing the rubber door buffers was a niggly little challenge, as the 10 year young replacement tapping plates were aluminum rather than steel as original. That had a bad case of galvanic corrosion so the small bevel edge plates turned with the screws. Procedure there was to pull the rubber buffer out while turning the screw (and tapping plate), tearing a small piece of rubber out of the part like a notch to clear the screw. The rubber bits could be re-used in a pinch, but may be replaced for appearance. I then drilled the head off the screw, but the screw was so long that the tip prevented removal of the tapping plate. So grab the plate top and bottom with a pair of long nose locking pliers, then reach in the slot behind with an air powered saber saw (small Sawzall) and cut off the tip of the screw, allowing the plate to be removed. Remove a few #10 screws at the side, a couple of sheet metal screws at the bottom, and the striker plate, and the shut face plate is free. This reveals the first significant rust in the sill that will need repair. Pictures below.
Up on a jack, the trailer hitch has large bolts and hasn't been off for 18 years, but that was only a little grunt work along with the rear bumper and bumper to frame brackets, and then the front bumper. The bumpers were removed as assemblies and hung on the pegboard walls. Bumper brackets and bolts were placed in zip-lock bags and attached to the bumpers for temporary storage. The front valance panel was next, zipping the #10 screws right out with a power driver. It is a fiberglass panel, somewhat abused with some cracks. I will decide later if it gets repaired or replaced, so no pictures for now.
Front wheels removed, front splash panels removed and hung, then headlights and parking lights bagged and boxed. All mounting hardware goes into baggies attached to the associated parts. Bonnet and boot lid were removed and hung on the walls. Drain and remove the radiator and hang that on the wall. Then out came the grille (onto the wall), the three 4-inch air ducts and heater hoses. Not much left outside except the fenders. Put the wheels back on and head to the back.
Tail up, rear wheels off, remove rear splash panels and tail lights (bagged and boxed). Then remove front splash panels to reveal more rust in the sills, pretty much as expected. Kudos to anti-seize as all of the bolts came right out with ease, and the rear fenders were soon hung on the walls. This raised a couple eyebrows as the larger extent of the rust was revealed running part way up the rear door posts. Wow! Very little of that was there 9-1/2 years ago Such is life after 50 years and a few times around the odometer. I haven't pulled the front fenders or outer rocker panels yet, but it's time to pause for some photo posting.
|
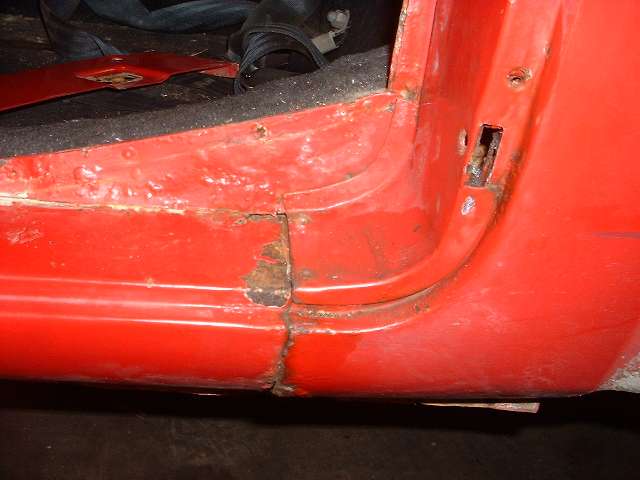
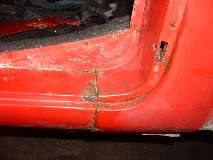
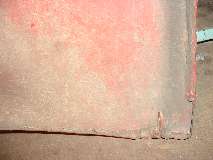
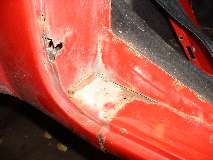
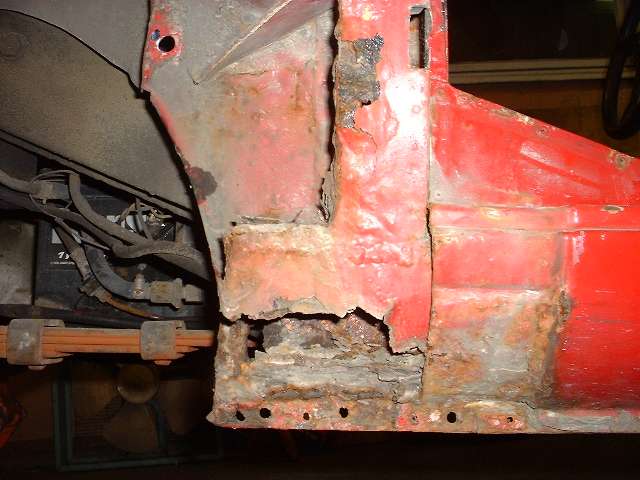
The shut face, dogleg and rocker panel didn't look too bad, until I had a look inside. Pull off the left side shut face to reveal rust on top of the rocker panel and a little up into the door post. That wasn't there last time I looked. I repainted this less than 10 years ago. Pull out the splash panel to reveal plenty of rust in the inner sill box section, and also part way up the door post. I knew some of that rust was there from poking around the inboard panel before disassembly, but I couldn't know how far up the post it would go.
|
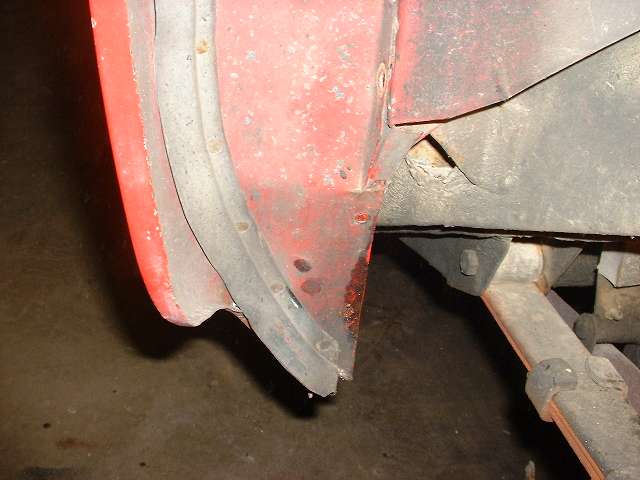
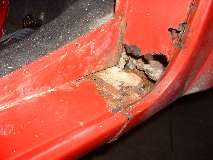
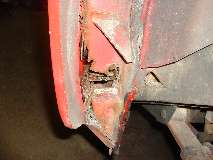
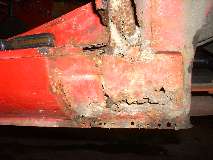
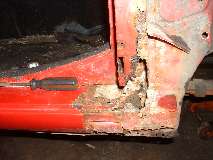
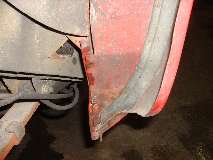
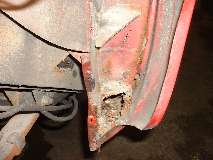
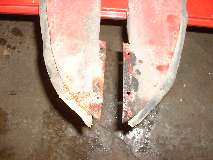
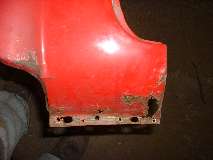
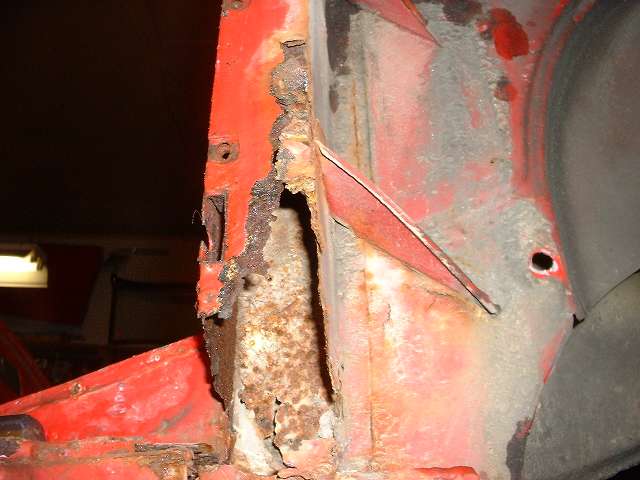
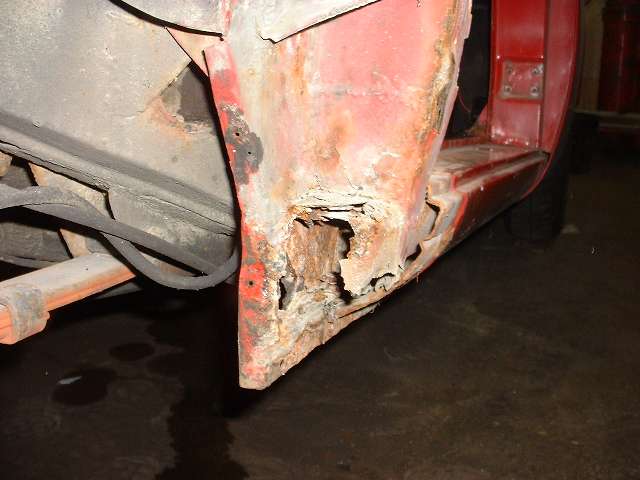
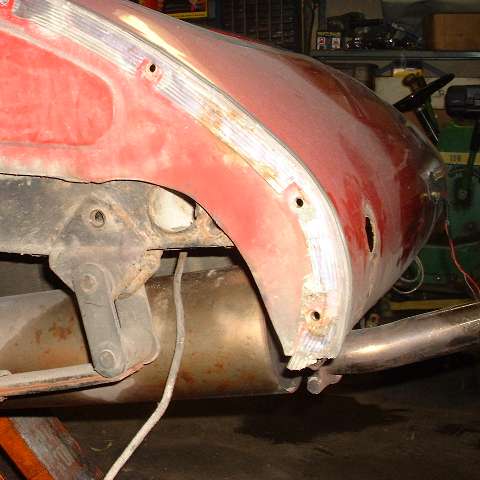
Photos below show the same area with the rear fender removed. Tail of the rocker panel has a bit missing. Outer sill box panel is mostly gone down low. Bottom few inches of the post is missing. The bit that bugs me most is rust extending several inches up into the rear corner of the post in the third photo.

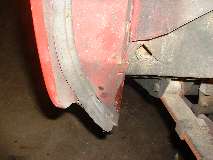
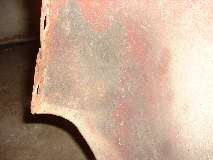
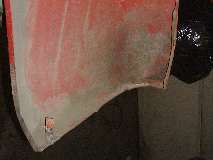
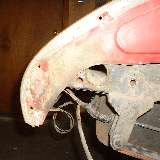
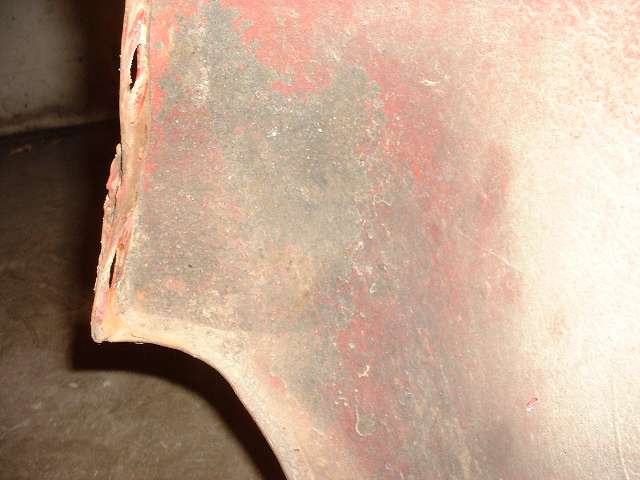
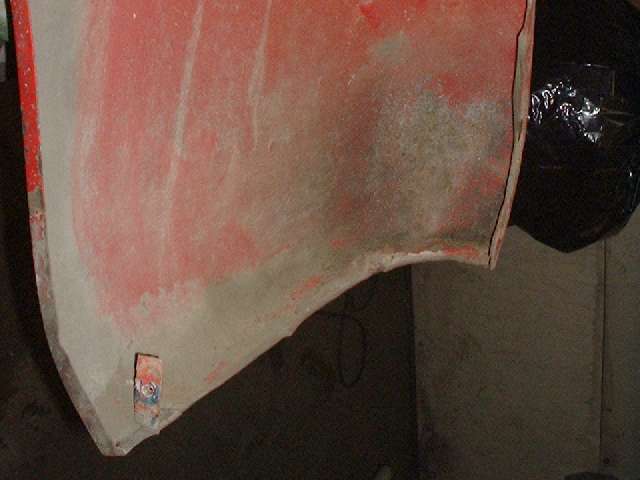
The fender itself is in surprisingly good condition, as it was painted well inside with the prior restoration, and painted inside again 10 years ago. Photos below show the rear end inside, then just aft of the wheel arch inside, and finally inside of the dogleg.


|
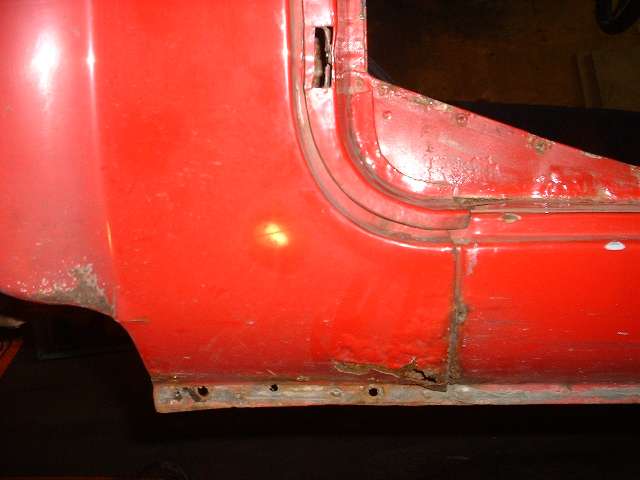
The right side dogleg had a little rust problem, obvious before disassembly, but with the shut face panel removed the rocker panel looked surprisingly better than the left side, maybe even clean enough to keep. Removing the splash panel revealed rust in the back end of the sill box, but not much in the door post. Well, so far so good.
|
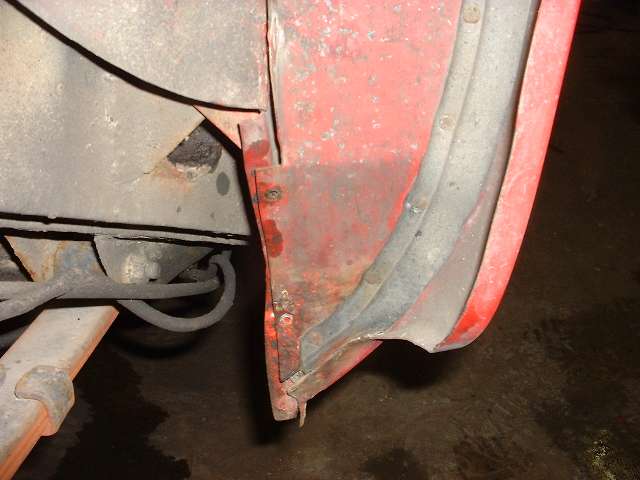
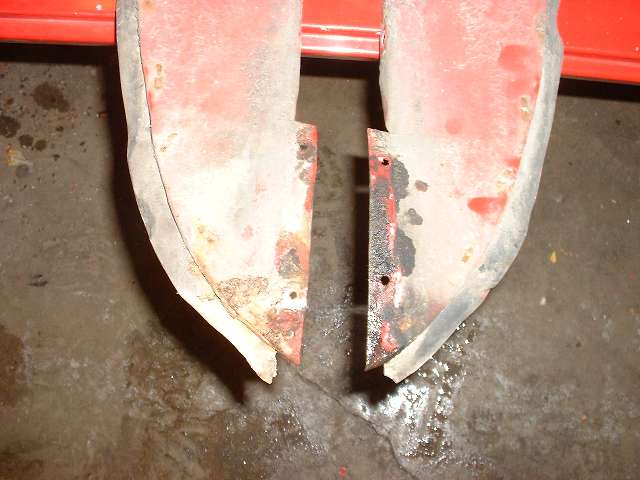
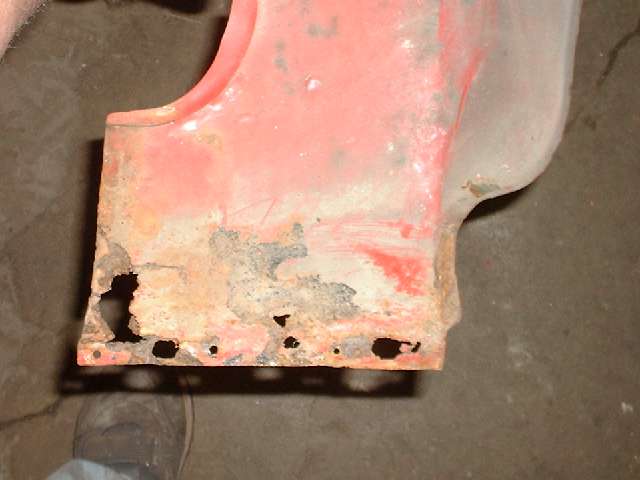
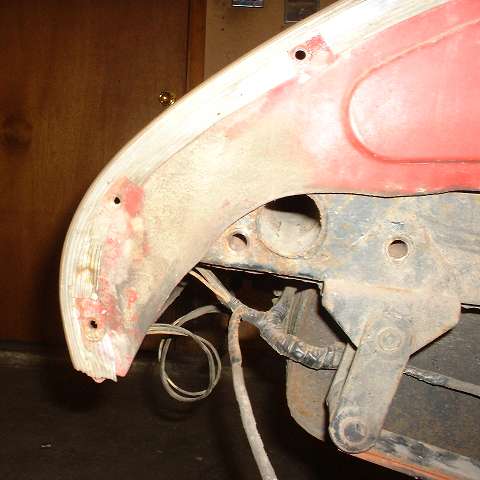
Photos below show the same area with the fender removed. The rocker panel still seems to be in tact. The right side door post has some rust in the lower end, but less higher up than on the other side. The third photo shows the back side of the splash panels. The left one has about an inch of the bottom end about to fall off, but the right one looks like it only needs cleaning and a repaint.


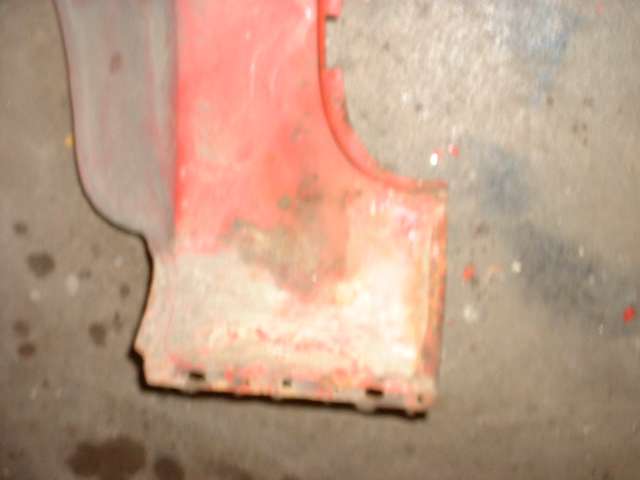
With the fender off that right dogleg doesn't look too bad. Here are outside and inside views, definitely repairable. Also the inside aft of the wheel arch is in excellent condition.

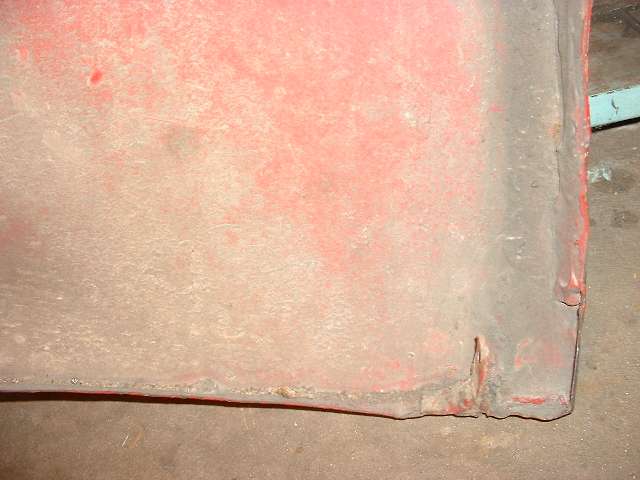
  The entire tail of the main body is in excellent condition, never damaged in 50 years. The visible red surfaces were repainted 10 years ago. The under side has been on the road for 21 years and 214,000 miles since it was last painted. Three cheers for the black Pettit PolyPoxy used on the chassis and as base paint on the underbody before being sprayed red. More pictures to come. (11 Dec 07)
|


 The entire tail of the main body is in excellent condition, never damaged in 50 years. The visible red surfaces were repainted 10 years ago. The under side has been on the road for 21 years and 214,000 miles since it was last painted. Three cheers for the black Pettit PolyPoxy used on the chassis and as base paint on the underbody before being sprayed red. More pictures to come. (11 Dec 07)