The MGA With An Attitude
MGA Guru Is GOING MOBILE - (December 16 - December 31, 2017)
Saturday December 16, 2017:
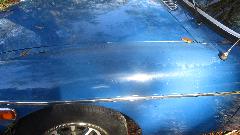
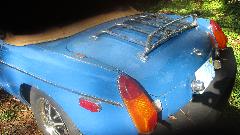
Back to Tech Central in Bonita Springs, Florida. First order of business was a send-off for the blue MGB, getting a new owner today. The car has not-so-nice patina, meaning the re-coat paint is peeling, and you can't hide the rust in the body sills. It did get a new rag top recently, and mechanical repairs to make it roadable, so the new owner will at least get to drive it home.

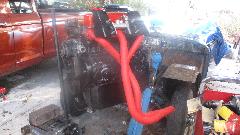
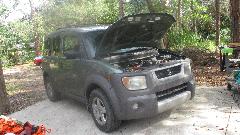
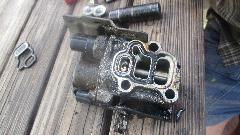
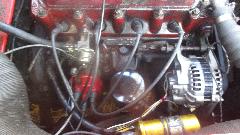
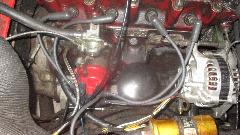
The tubular headers (extractors) being painted and baked yesterday made their way onto the Spridget engine this morning. The resident Honda Element with VTEC engine (variable valve timing) was getting a small rubber gasket transplant to cure a serious oil leak.
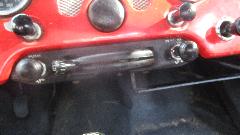
 Just when I thought no one else was going to show up today the UPS guy came by making extra Saturday deliveries (due to holiday season overload), and he brought my parts package that I wasn't expecting until Monday. Yeehaa! Something constructive to do with available time today. Start with the quick and easy stuff, installing the cable stop on the heater valve. Typical Chinese made junk with a thread so sloppy that I thought it might strip out while trying to tighten it. Also the hex size appears to be
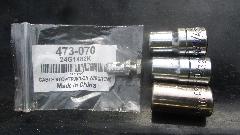 7-mm, and I don't carry metric wrenches, so 9/32 is close enough (barely). But this means I now have to use two different nut drivers to install and adjust the heat control cable, original 5/16" for the cable jacket bracket, and 9/32" for the cable stop. And a countersink to de-burr the cable hole is too deep making a nearly sharp edge that may shear the wire when the screw is tightened. How can they have so many screw-ups on such a simple part?
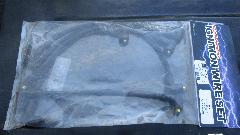
 The HT ignition wire set was better. I use the Mallory distributor with top terminals, and I don't like the straight-out wire ends, so I get the wires for late model MGB with right angle connectors. Nicer routing. The HT ignition wire set was better. I use the Mallory distributor with top terminals, and I don't like the straight-out wire ends, so I get the wires for late model MGB with right angle connectors. Nicer routing.
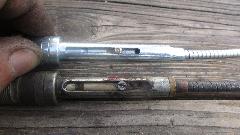
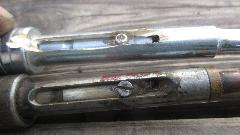
Then for a new demist control cable to replace the one that broke the wire at top end a week ago. Lots of extra length on the control wire and jacket. So I had to remove the keying screw to pull the wire out enough to cut the outer jacket. This revealed another Chinese quality screw-up. The key slot was too narrow to accept the screw head, so when the screw is tightened the assembly seizes up and cannot move. Need to assemble it with thread lock adhesive to leave the screw loose? Not me. I used an abrasive cut-off wheel to widen the slot to accept the width of the screw head so it will work like the original part. Why do we put up with this crap?
Next was a couple of little jewels, new #6 fuel metering needles for the SU carburetors. Story here is the car had a Nash Metropolitan cylinder head (very small valves) when I bought it, and also incorrect (very lean) needles in the carbs (likely also Met parts). I soon installed a better cylinder head, and a few years later (under duress) installed
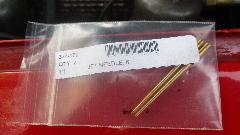 original (1500 type) GS needles to make it run well. Since then the engine has evolved with an MGB "18" head (similar to the MGA 1600-MK-II "16" head), a Crane fast street cam, a 1600 (+0.030") block, and more recently 1600 (+0.060) going back to stock cam. These diversions from original 1500 specifications want the #6 needles that were original spec for the 1600 and 1600-MK-II engines. This update is at least 20 years overdue. A small mixture adjustment was required. First impression with the first five mile drive is NICE, smooth running, good throttle response, good torque with no flat spots in the power curve. Will reserve further judgement until I have more driving time.
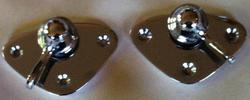
 Then navigator snuck these in when I wasn't looking. We have a new set of side curtain mounting plates/studs and nuts to replace the ones with stripped threads. Really? Yes, we seem to have worn out the threads on the parts that were new in 1986 (only 396,000 miles ago). Been holding thte side curtains on with hex nuts for the past few weeks. Then navigator snuck these in when I wasn't looking. We have a new set of side curtain mounting plates/studs and nuts to replace the ones with stripped threads. Really? Yes, we seem to have worn out the threads on the parts that were new in 1986 (only 396,000 miles ago). Been holding thte side curtains on with hex nuts for the past few weeks.
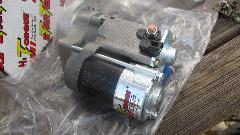
 Lastly, perhaps the more important task for the day, installing the new high speed gear reduction starter. The old starter being (I think) original 60-year old factory issue, not burned out but finally having worn shaft bushings so it was beginning to drag the armature on the field coils, or otherwise scream and chatter when cranking in cold weather. I appreciate the fact that it was robust and long lived and generally adequate for the job. But since I needed a new starter, this seemed like the golden opportunity to install and test the "new technology" equipment (the lots of people seem to be praising). Lastly, perhaps the more important task for the day, installing the new high speed gear reduction starter. The old starter being (I think) original 60-year old factory issue, not burned out but finally having worn shaft bushings so it was beginning to drag the armature on the field coils, or otherwise scream and chatter when cranking in cold weather. I appreciate the fact that it was robust and long lived and generally adequate for the job. But since I needed a new starter, this seemed like the golden opportunity to install and test the "new technology" equipment (the lots of people seem to be praising).
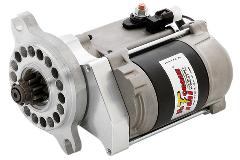
 Well, it didn't fit right off (nothing is easy with mods to these old cars). First I had to "clock" the end mounting plate to the right position where the small side motor would fit without hitting the engine block or frame, and without obstructing the mounting holes. That part was expected. Set the motor about 40 degrees anti-clockwise from straight up. But then it could not fit into the pilot hole in the engine rear plate because it was hard up against the engine block. Quick measurement showed the Well, it didn't fit right off (nothing is easy with mods to these old cars). First I had to "clock" the end mounting plate to the right position where the small side motor would fit without hitting the engine block or frame, and without obstructing the mounting holes. That part was expected. Set the motor about 40 degrees anti-clockwise from straight up. But then it could not fit into the pilot hole in the engine rear plate because it was hard up against the engine block. Quick measurement showed the
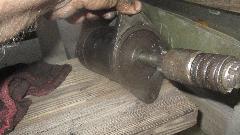 pilot diameter to be correct. But the original starter has no more than 1/8-inch margin between the pilot diameter and outside diameter of the end plate, and the new one has the end plate more than 1/2-inch larger than the pilot diameter (greater than 1/4-inch margin). Final solution was to use an angle grinder with an abrasive cut-off wheel to make a near tangent cut to remove part of the starter end plate around the 4-o'clock position.
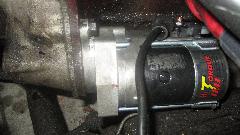
 When I ordered this part I asked the Moss Motors guy if they had one that would work with the MGA, and they said yes. The part number they quoted was listed for Triumph TR3, 3, 3A, 4 and 4A, TR6 and 250, but he said it was also for MGB and MGA. On arrival the included information sheet says it is for the TR's and MGB. but no mention of MGA. If they want to sell this for use with MGA there should be mention on the information sheet how it needs to be modified to fit the MGA 1500 (with low starter position), and a link to the information sheet on their web site. When I ordered this part I asked the Moss Motors guy if they had one that would work with the MGA, and they said yes. The part number they quoted was listed for Triumph TR3, 3, 3A, 4 and 4A, TR6 and 250, but he said it was also for MGB and MGA. On arrival the included information sheet says it is for the TR's and MGB. but no mention of MGA. If they want to sell this for use with MGA there should be mention on the information sheet how it needs to be modified to fit the MGA 1500 (with low starter position), and a link to the information sheet on their web site.
 In the end I got it to fit, not that big a deal, just a little head scratching, but I suppose pro shops in particular would be concerned about the extra labor time. Put flat washers under the bolt heads, because the mounting holes are slotted. The cable power post ended up inboard near the top, a bit tight for access under the distributor, but not too bad. That might be tougher with MGA 1600 and MGB with higher starter position, but then it might be clocked differently. I took the easy way out for wiring, leaving the starter cable on the output side of the original starter switch, and connecting the trigger wire to the starter input terminal. This leaves full starting current going through the starter switch, for now anyway. In the end I got it to fit, not that big a deal, just a little head scratching, but I suppose pro shops in particular would be concerned about the extra labor time. Put flat washers under the bolt heads, because the mounting holes are slotted. The cable power post ended up inboard near the top, a bit tight for access under the distributor, but not too bad. That might be tougher with MGA 1600 and MGB with higher starter position, but then it might be clocked differently. I took the easy way out for wiring, leaving the starter cable on the output side of the original starter switch, and connecting the trigger wire to the starter input terminal. This leaves full starting current going through the starter switch, for now anyway.
 So it works, with a distinctly different whining sound during coast down after cranking ends. Cranking speed (when warm) is about the same as with the original starter, about two revs (4 compression strokes) per second. I have been told it takes less current and may crank somewhat better under difficult conditions, like cold weather or low battery charge condition. Will let you all know after I have some real world experience with it. So it works, with a distinctly different whining sound during coast down after cranking ends. Cranking speed (when warm) is about the same as with the original starter, about two revs (4 compression strokes) per second. I have been told it takes less current and may crank somewhat better under difficult conditions, like cold weather or low battery charge condition. Will let you all know after I have some real world experience with it.
Sunday-Monday December 17-18, 2017:

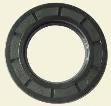 Give me a couple of days to spend with no appointments, and I may do something useful. This time it was an update on a tech page for MGA Coupe door handles, a new page on repairing an electric tachometer, and three new web pages for cross reference lists for differential front and rear pinion bearings and the pinion seal (mostly standard grunt work).
Tuesday December 19, 2017:
Start the day with a new tech page on assembling front suspension. Then it turned into laundry day.
Wednesday December 20, 2017:
Composed and uploaded a magazine article page "MG MGA, A true 100-mph sports car" from Car and Driver magazine January 1957.
Thursday December 21, 2017:
I think we just killed the day. Philosophy time? Sometimes it's nice to have a day off. Or, sometimes it's boring to have nothing to do. Too many of the first leads to the second.

Friday December 22, 2017:
Certainly something to do today. It's holiday party day at Tech Central. Just not so fast, as there are a few car things to attend to before the party. Get the tool box off the ground and onto the trailer to clear up some parking space. Then let the cars roll in until we pack the place, and start asking who needs what?


 First was the silver MGB left over from last week, the one with the sticking throttle valve in the rear carburetor so it wouldn't idle. Off with the air cleaners, some cables and mounting bolts, and remove the rear carburetor. Loosen screws in the throttle shaft to realign the throttle plate, square it all up, re-tighten the screws, and get it reinstalled on the car. After a little tinkering for standard throttle adjustment, it was synchronized and idling nicely just under 1000 rpm. Success.
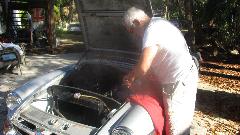
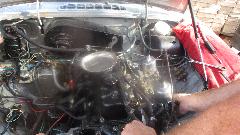
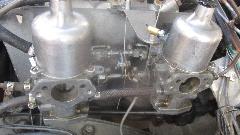
Next in line was a red MGB needing valve lash adjustment. Ideal opportunity for a quick tech session to show how to adjust valves without a feeler gauge. Loosen the jam nut, turn the screw (gently) down to zero clearance,
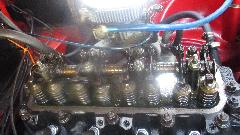 back it off exactly 1/4 turn, and tighten the lock nut. Like magic, 0.015-inch clearance, +/- 0.001. Do two valves that are up. Turn engine 1/2 turn and do two more valves. Ditto, ditto, 1-1/2 turns of the engine gets all eight valves adjusted. Not that they don't trust me, just that they like to verify it to see for themselves, so they checked all the gaps with a feeler gauge afterward. Six were verified within 0.001", two seemed to be off about 0.002", certainly close enough to run well, but we readjusted those other two just to be nice.


Then it was party time, dig in. Turkey, dressing, mashed potatoes, gravy, cranberry sauce, beverages and deserts, and a good time was had by all.
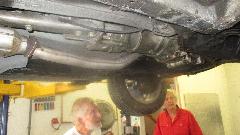
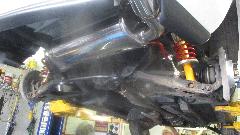
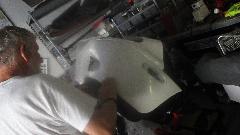
As the party was breaking up, we took a quick look at the resident Mazda Miata being reassembled on the lift. The story here is the car was low mileage in good condition, but the owner was disassembling it and
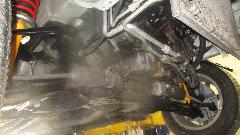
 buying parts ($5,000 worth of parts) to make it "perfect". For a variety of reasons it became a stalled project and changed hands at a very reasonable price. It was now being reassembled with very little additional expense. This is going to be very nice.
Saturday December 23, 2017:
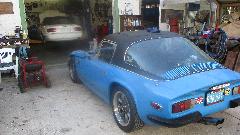
Back to Tech Central again, just to see if anyone might show up. TVR outside means the Miata is on the lift again today.
 I'm not particularly enthused about modern cars with hundreds of plastic parts, but it can be fun trying to piece together the large jigsaw puzzle.
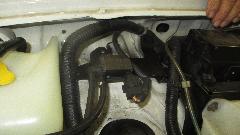 The solenoid valve was connected to fuel vapor recovery. The rather complex bracket it sits on appears to serve no purpose, as the valve could just as well be attached directly to the inner fender. But the bracket appears to have provisions to hold a few other devices under other circumstances.
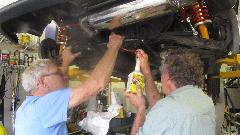
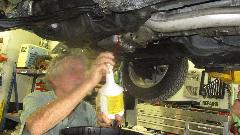 After putting oil in the gearbox and differential, we were installing a heat shield under the floor, above the catalytic converter. There were lots of other small parts yet to be identified, some light sheet metal brackets and a lot of plastic bits. Many of the plastic parts are so thin that I have no idea how they can survive a bumpy road without breaking up. Being a career machine design engineer, maybe I just don't understand modern consumer product, or the philosophy of making everything cheap rather than durable.
Sunday December 24, 2017:
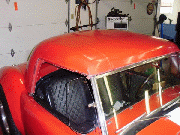
Good day. If nothing else, another aftermarket hardtop just graduated from unknown to known origin. It was made in the late 70's by Dynaplastics. The tally on aftermarket manufactures of MGA hardtops is now 20 known manufacturers and 11 more still unidentified models. Still searching for small square 12-volt batterys; none yet available in North America. Some discussion on connecting two 12-volt batteries in parallel (not recommended).
Monday December 25, 2017:
Merry Christmas. Just lying low, not to bug anyone on the holiday.
Tuesday December 26, 2017:
Tech update on a wrench socket for rear hub bearing nut that we thought would fit but really doesn't.
Wednesday December 27, 2017:
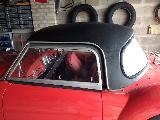
Couple new tech articles on gearbox design changes and updates. Someone with questions on failed brake lights with strange electrical issues. Added another new unidentified hardtop for MGA (they just keep popping up).
Thursday December 28, 2017:
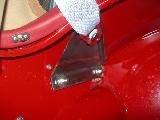
Today a another new tech page on seat belt shoulder harness mounting bracket. Good fun, but time consuming.
Friday December 29, 2017:
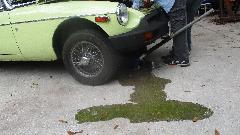
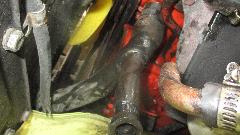
Back over to Tech Central. First issue today was replacing one of those 3-way molded/vulcanized coolant hoses on an MGB. I know it was a cost reduction for original production, but a bad idea for longevity and field service.

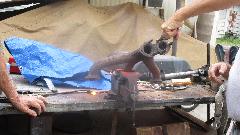
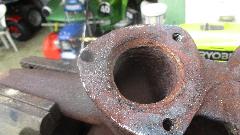
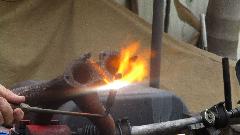 Then it was time to repair bottom studs in two MGB exhaust manifolds. In general, heat the iron flange with a torch, and unscrew the old stud with Vice-Grip (standard stuff). For one stud that was broken off flush, plug weld a flat washer, grind it flat, weld on a bolt, heat the flange and unscrew with Vice-Grip.
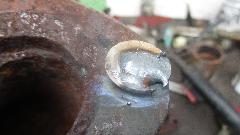
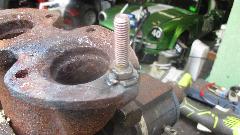
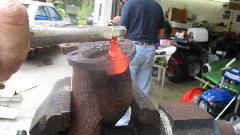
For one flange hole that was completely stripped out, drill it to clearance hole size, use the special oversize tap, then screw in a Heli-Coil and finish by breaking off the drive tang. The special tools and instructions come with the Heli-Coil installation kit.
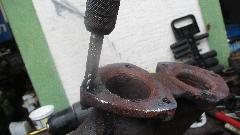
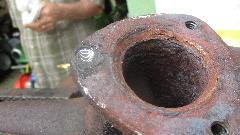
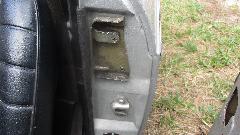
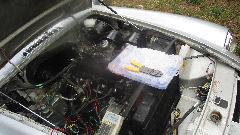 A little fun wiring a new digital volt meter into an MGB. That device was a little strange, seeming to shut off after about 10 minutes, and not come back on until you kill power to reset it. Also realigning door hinges and door latch striker plate.
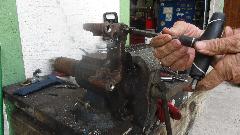
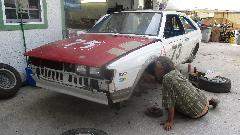
A bit of fun installing brake parts and wheel bearings on the race car.
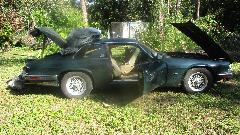
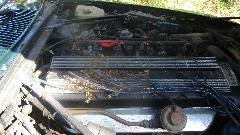
Then there was a new acquisition Jaguar XJ6 that hadn't run for several years, rolled off a trailer in mid morning, needing a lot of clean-up work, just for starters. Will see more on this one later.
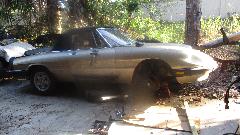
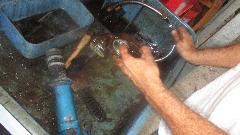
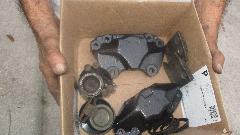
Near day's end there was a good start on reuilding brakes on an Alfa Romeo. Disassemble the calipers, cean and paint everything, and get rebuild kits on order. More later here as well.
Saturday December 30, 2017:
Had a turn signals and 4-way flashers crap out last night. A poke at the flasher unit got it working for a bit,
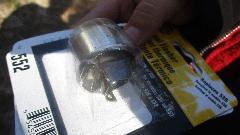 then fail again, and again, and again. If the expensive electronic flasher we bought in Alaska in July has crapped out in five months, we don't need another one of those. So we tapped the local NAPA for a new thermal flasher unit (a couple of them). Then back to tech Central to fiddle with the flasher. After a while we think it is a loose plug-in connector, pinch the contacts a little, reinstall the electronic flasher, and it seems to work okay.
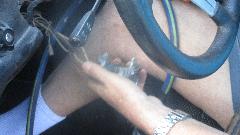
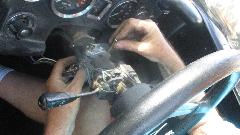
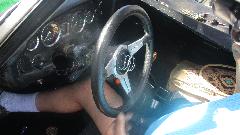
Then we had a late model MGB with a failed ignition switch, including the mechanical steering lock. Three-inch abrasive cut-off wheel made short work of removing the switch housing (with the security screws). A little tough disconnecting the 6-terminal electrical connector. Even tougher plugging the new one it, but in the end we always persist and succeed.
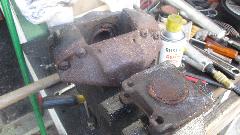
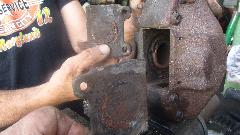
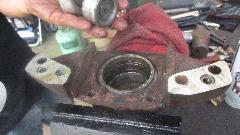
Then we moved the Alfa Romeo over a little to disassemble the brakes on the other side. Before day's end the next two brake calipers had been disassembled, cleaned and painted, ready for the rebuilt kits (which will be in after new years).
The Jag XJ6 was getting more attention for cleaning. Would be nice to get it running, but need to remove the stale fuel. Fuel pump not working, and the pump is in the tank, and the tank is in the trunk. Much of late afternoon was
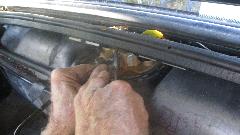
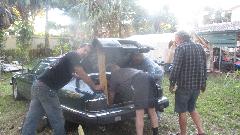 spent with a committee trying to figure out how to disconnect some trick quick assembly pipe connectors, trying not to break the plastic pipe or the couplers or the expensive (plastic) fuel pump and fuel level sending unit. One pipe off and one still connected, I think they ultimately retired to search for better instructions.
Sunday December 31, 2017:
A day off, kind of. After email and some tech stuff, catching up photos and notes for the last two days. I'm way late getting my monthly trip report off to CMCC, and not sure if it gets done tonight or not. I haven't received any panic note from editor, so hoping it's going to be okay.
|