The MGA With An Attitude
MGA Guru Is GOING MOBILE - (April 1 - April 15, 2016)
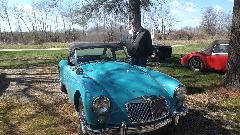
Friday, April 1, 2016
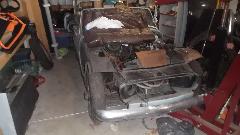
 We caught another passer-by in the trap today then dropped by his home to visit Ron Moore in Wheaton, Illinois. He has a 1974 MGB project car in process. Not intending to make a show car, he just likes to tinker with things. For this one he only wants to make it a driver car, and then likely sell it on and then get into another project. We had some serious discussion about how to get it back together on the cheap, followed by a light dinner it the evening before departure.
Then pointing it south we landed in Bloomington, IL before 11-pm, set up for a morning appointment.
Saturday, April 2, 2016
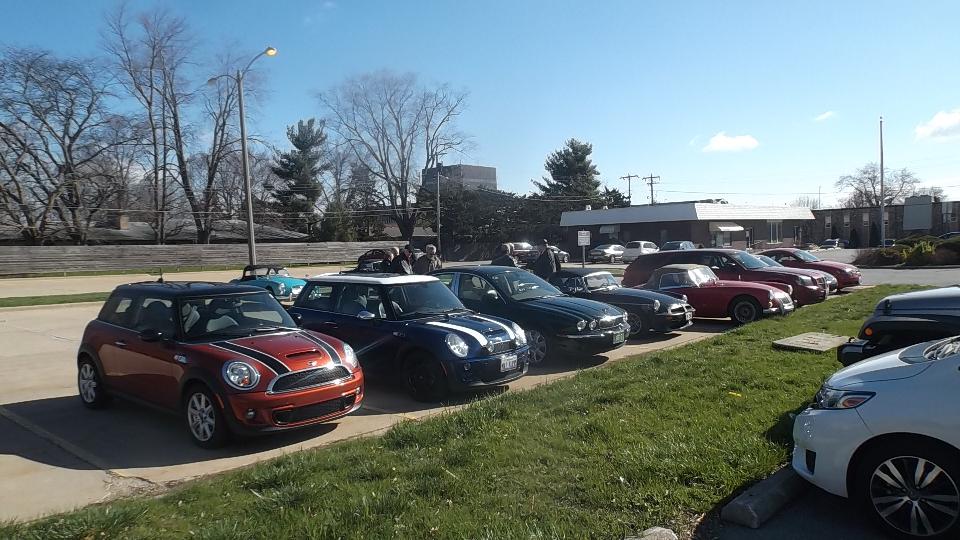
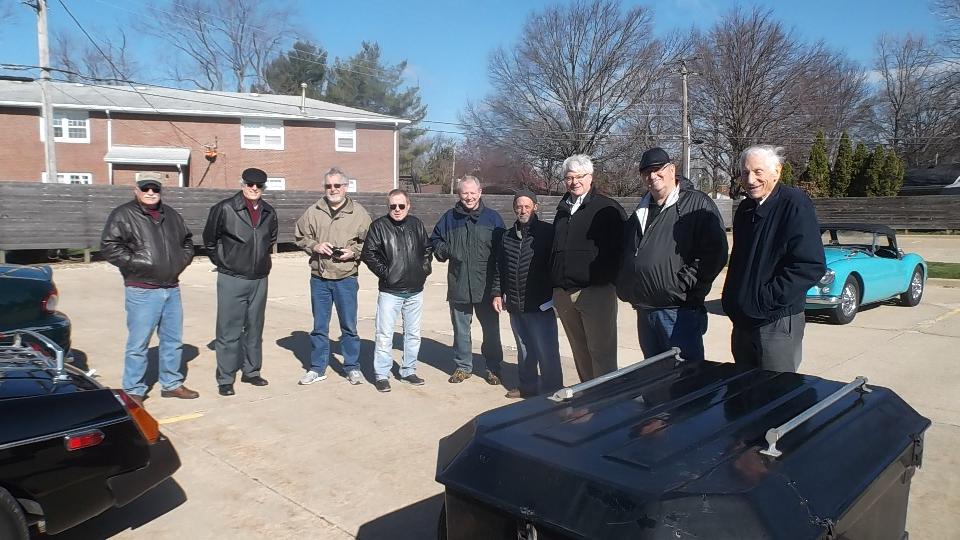
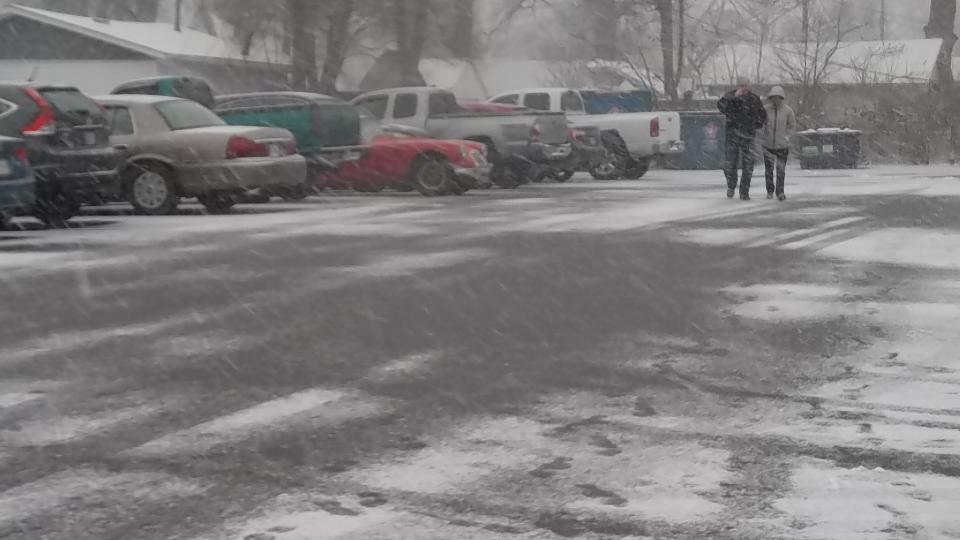
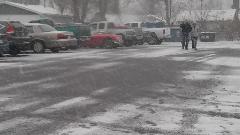
Start this day with a breakfast meeting with Illinois Flat Land British Car Club in Bloomington, IL. I think they surprised themselves with a bit larger turn out than expected, almost filling the dining room at Dunkin Donuts. A few ladies left early, but we got the picture of the loyal tire kickers in the car park afterward.


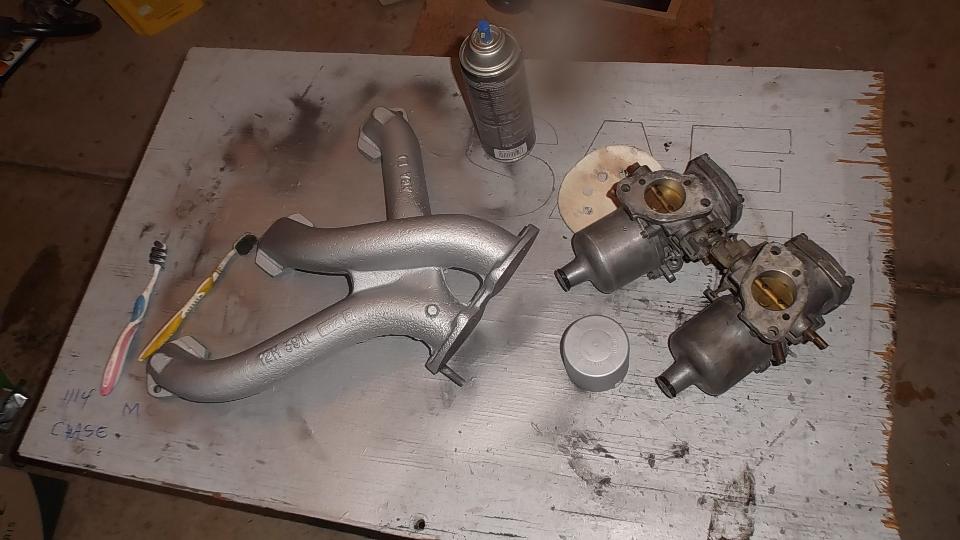
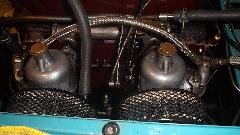
Then we had a 40 mile cruise east to Mahomet, IL to visit Denny Elimon who recently bought a (barely) running MGA 1500. He did drive it 45 minutes each way to breakfast and back, mostly running on three cylinders. So we got right to work on it. Good spark on all four plug wires good compression on all four cylinders. Number 1 plug was wet and had zero gap (maybe someone dropped it). I temporarily installed used Autolite plug in #1 port, getting it to run on all four. Then we found a spare NGK plug on the bench, put that in #1 port, and it was missing again (dud plug). Next I opened the gap on the NGK plug we had removed, and reinstalled it, and then it was running on all four again (but not great yet). Rear carb was slightly lean, front carb very rich and could not be turned lean enough. Also after full choke the fuel jets were sticking badly, and 100 cycles of exercise didn't get them free, so it was time to pull the carbs for disassembly, cleaning and adjustment.
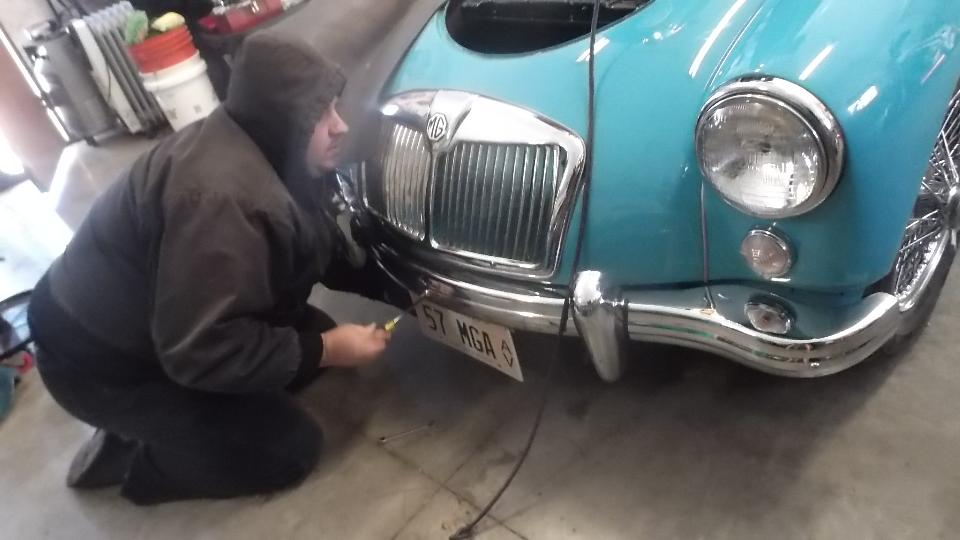
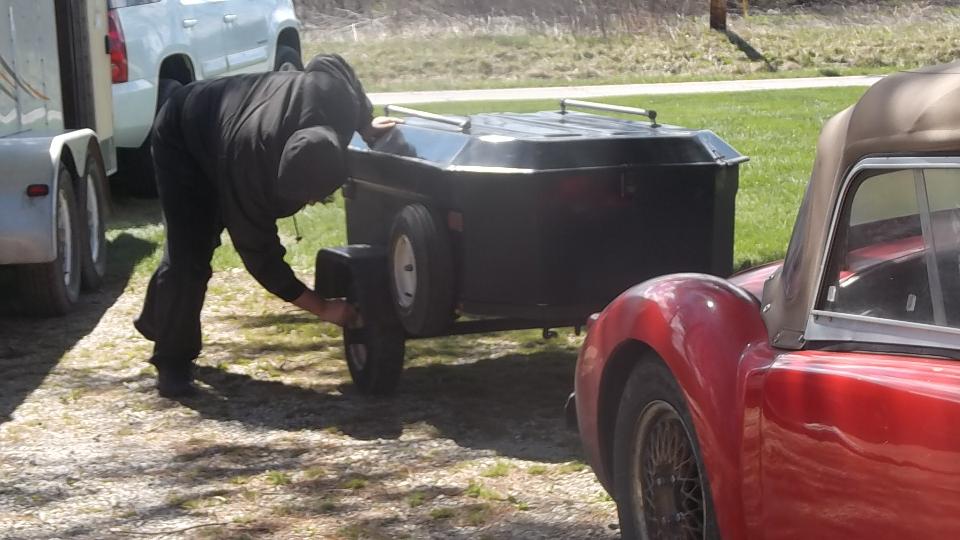
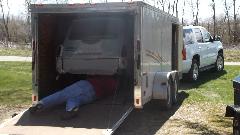
I couldn't resist the pictures of navigator doing a little car work, installing a license plate and adjusting air in the trailer tires. We may get him to come around to the dark side yet. The we were pushing an engine-less VW Squareback (belonging to Denny's son-in-law) into the trailer for move off-site to free up workshop space.

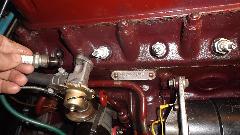
After a lunch break we had the carbs back together an tuned, running well (for the first time in months). Then we got after a serious oil leak coming from the hanging spin-on oil filter adapter. This beast looks familiar, being another copy of the defective design that has been on the market for decades and won't go away. We had to resort to a long handled chain wrench to remove the jammed in place spin-on oil filter. Problem is the hex fitting that secures the adapter in place and also holds the oil filter is too thick for the space allowed, so the filter will jam in place and cannot be removed (and sometimes they leak).
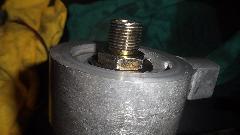
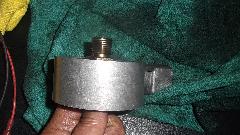

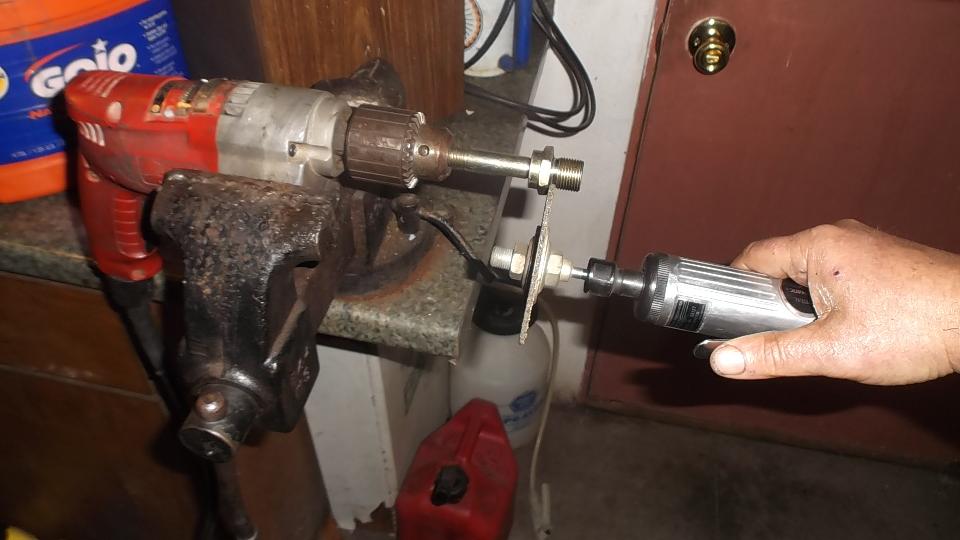
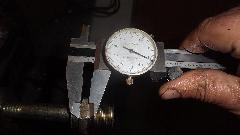
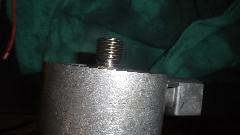
The field fix is to grind down the thickness of the hex fitting to allow more space for the filter end plate. Tools of choice today were power drill clamped in the vice as a makeshift lathe, and a hand held air powered grinding wheel. Spin the stud while grinding the shoulder, and it comes out nice and square and straight. In a few minutes it was reduced from 0.290-in to 0.230-in thickness, giving about 1.5 turns more screw-on space for the filter.
Late enough to call it a night so we will take this up again tomorrow.
Sunday, April 3, 2016
More of a challenge than anticipated today. We got the oil filter adapter installed, along with a short "Toyota style" oil filter. We used the short filter primarily because the longer one does not allow space for a wrench for removal. On first try the banjo bolt on the filter adapter leaked profusely.
 Fiddling with the copper sealing washers and lots of torque eventually fixed that problem. Then the filter (Unipart brand) was leaking at the rubber base seal. Tightening it more, even over-tightening it, did not stop the leak. Guessing perhaps a faulty filter, we made a trip to parts store to pick up another filter (Wix brand this time). That successfully stopped the filter base gasket leak. We then spent some time tightening sump bolts to stop some drips there, and also tightening the external oil pipe connector at the engine block end, finally stopping all noticeable leaks. After wiping everything down once, it ran half an hour without a drip. Very unusual I think, but quite pleased with the result.
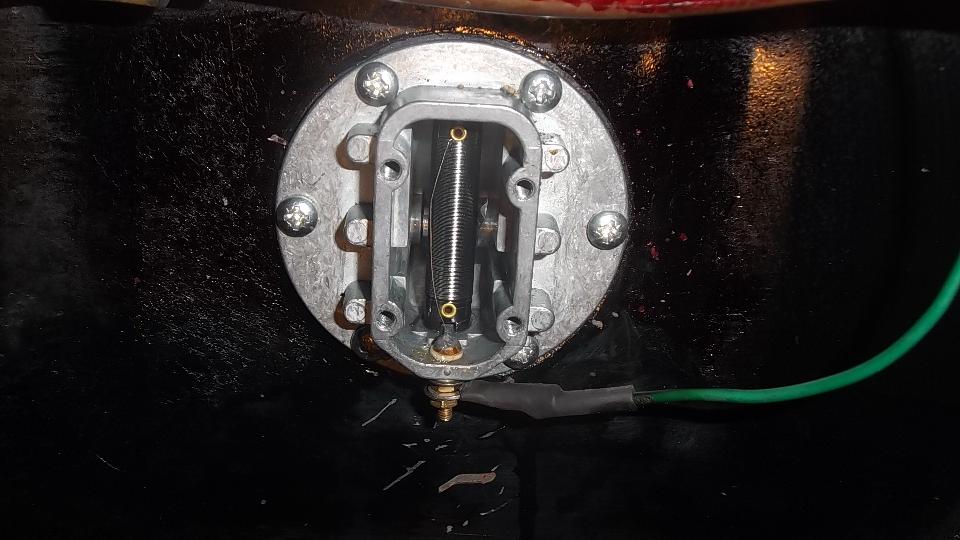
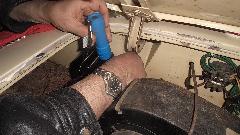
Next up was to fix a fuel leak at the tank sender unit. Half tank of fuel is optimal for this job. Jack up right side of car for fuel to flow left, remove wheel, disconnect sender wire, and remove sender unit from tank. Toss out the failed rubber gasket that had oversize screw holes. Cut a new gasket from 1/8-inch cork sheet stock. Drill holes with 1/8-inch drill, making the screws press fit through the gasket. Reinstall sender unit in tank. Reinstall wheel, lower jack, then jack up left side of car before checking sender unit. Find leak at the outer cover rubber gasket. Bummer. Lower left side, jack up right side, remove wheel, and remove outer cover from sender unit. Cut a new gasket for this joint, ditto undersize holes for screws, tighten seal nut on the terminal stud, reinstall signal wire and reinstall outer cover (with the cork gasket). Reinstall wheel lower right side, raise left side, and check the sender unit again. Success, no leaks this time, three cheers for cork gaskets.
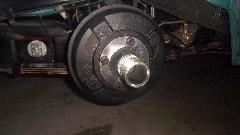

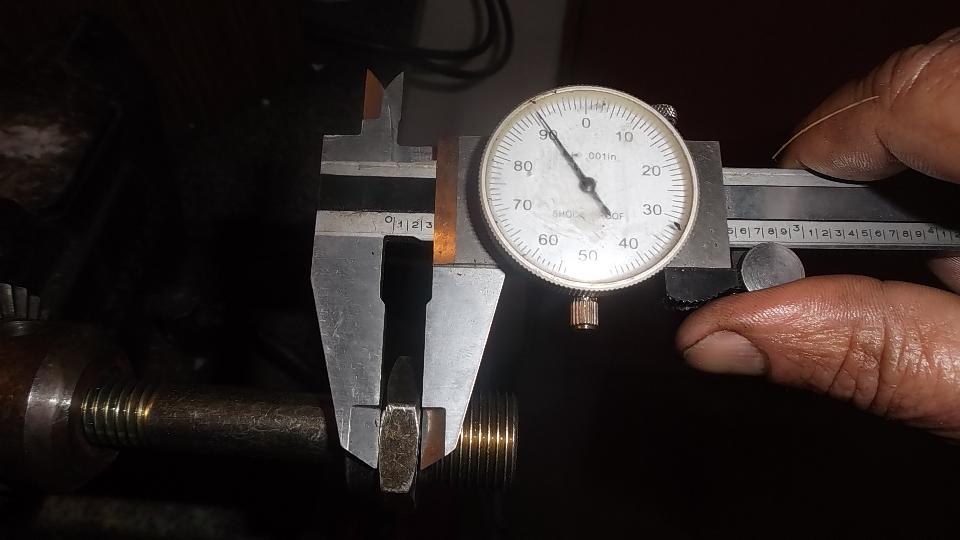
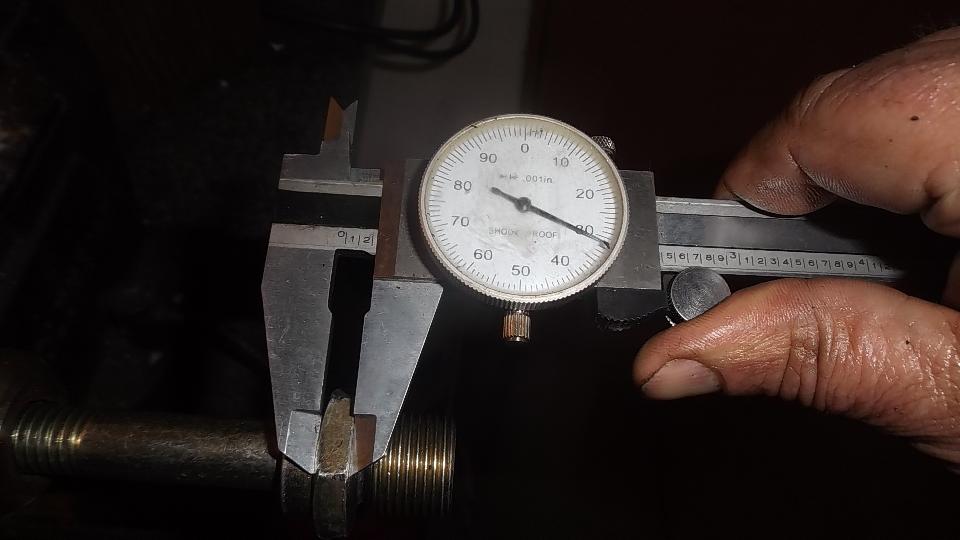
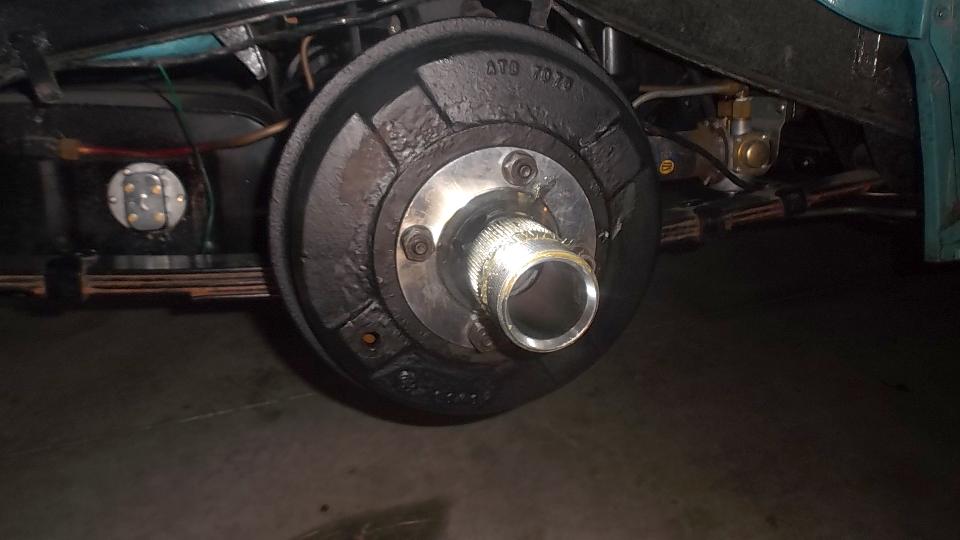
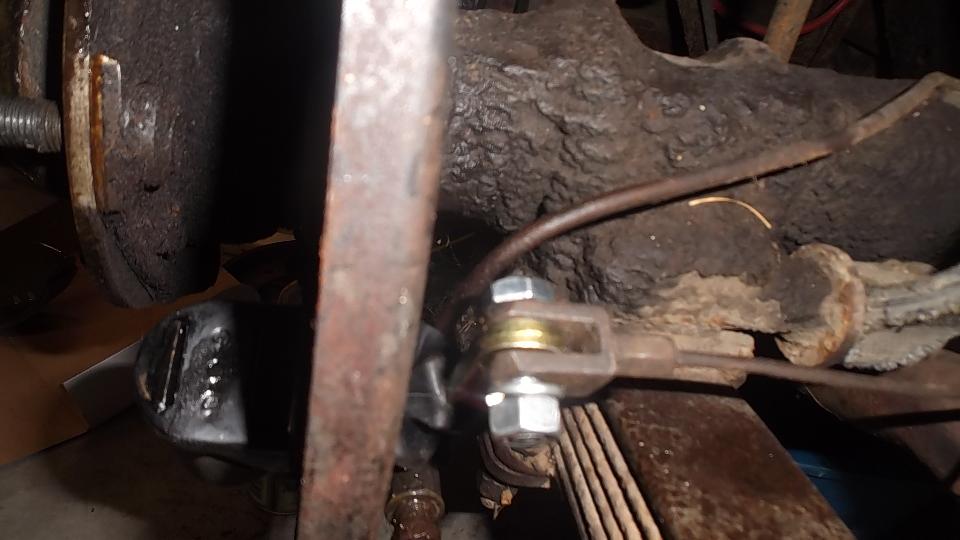
Then when adjusting brakes we found a brake drum that would wiggle when it should be solid tight, even when the splined hub adapter was tight. Huh? Remove four nuts and remove the splined adapter, finding two loose flat head screws that were interfering with seating of the splined adapter. Tighten flat head screws, and reinstall the splined hub and all is right with the world.
Last tweak of the day was to find out why no lights worked. One look under the dash revealed the lighting power wire was connected to output side of the ignition switch (oops). Move lighting power wire to input side of ignition switch, and all lights work as intended. No light in speedometer but find bulb socket dangling and plug it back into the instrument is a quick fix. Done for the day time for dinner and WiFi.
Monday, April 4, 2016
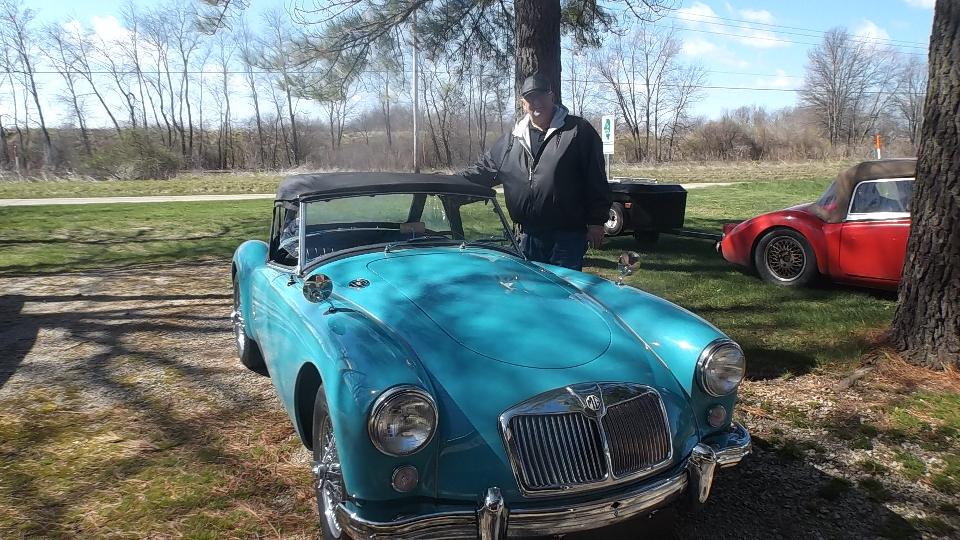
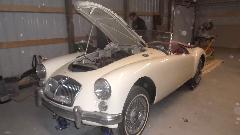
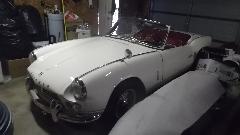
 A bit of WiFi work in the morning then took a two hour cruise east to visit Eric Nelson in Zionsville, Indiana (just north of Indianapolis). He recently bought a 1962 MGA 1600-MK-II. My first impression was, "Wow, nice stuff, mostly original. It has original radiator grille with slats that will not cut your fingers and that are so stiff you cannot bend them with your fingers. Also the original cell core radiator in excellent condition. It was reported to have no spark, but that was fixed before I arrived. It was repainted once with paint over piping, but looks better than most. This one will make a nice daily driver car without full restoration. Nice buy.
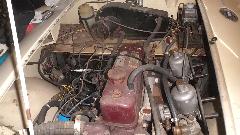
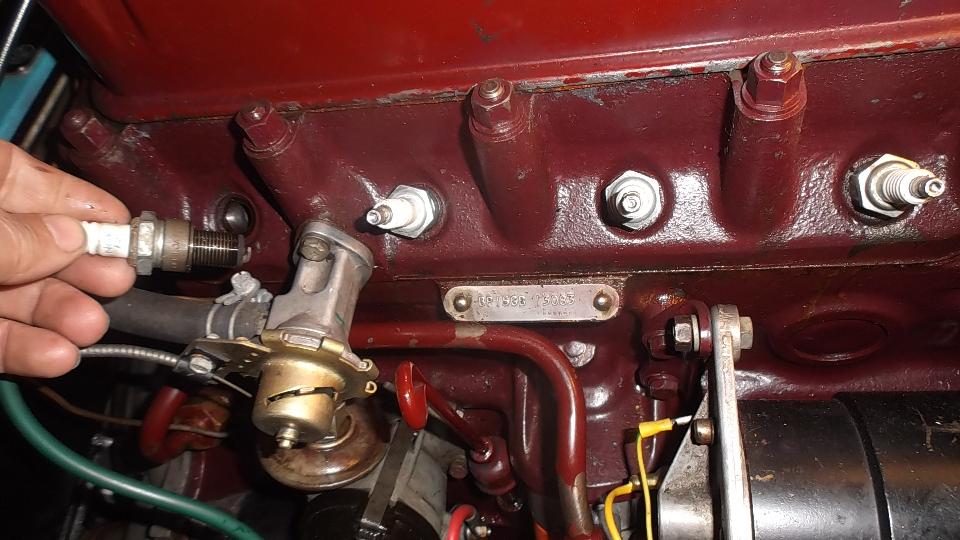
Functionally, it would start with a shot of ether but otherwise no fire. Plenty of fuel flow to the carbs but no fuel in the float chambers. We removed the float covers to knock the float valve loose, and it was soon running. A touch on the distributor killed the engine as the distributor popped up to disconnect the mechanical drive. We had to reshape the base clamp, but then when assembled the rotor was pointing the wrong direction, the drive gear having incorrect orientation. To get it going again we just relocated the spark wires (temporarily), please fix the drive gear later. Once timing was set, the engine ran very well, needing a little adjustment of the choke linkage, but fuel mixture being spot on. Lots of discussion over dinner about some needed brake work, front rotors and bleeding. When I asked Eric if he would like to drive it tomorrow, there was a momentary stare of disbelief. Really?
Tuesday, April 5, 2016
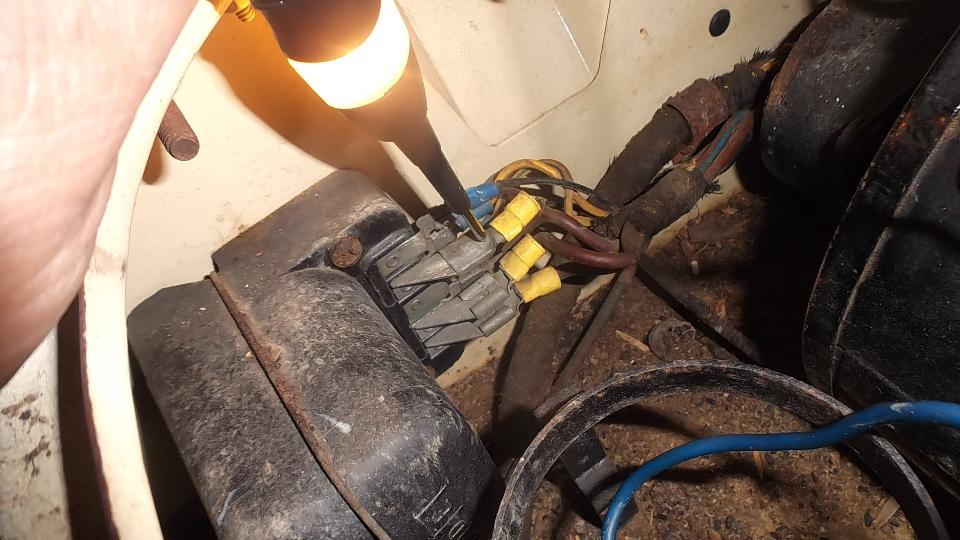
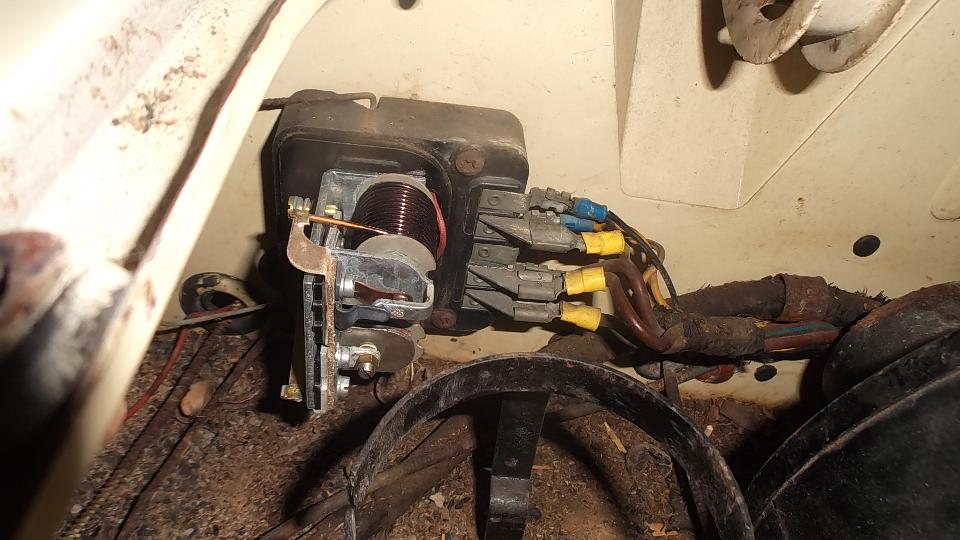
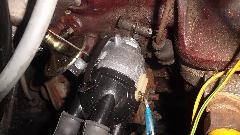
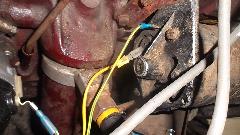
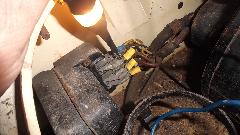
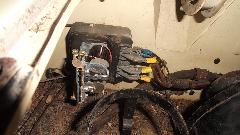
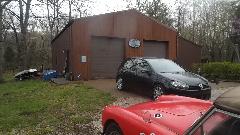
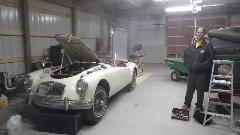 Someone asked about Eric's workshop, so here it is. As I recall, something like 32x54 feet, plenty of electrical power and lighting, lots of tools, and for the time being a couple space heaters. For those of you who never have enough space, eat your hearts out. We have a short list of remaining problems, the first being a red ignition light that won't go out. First test the generator, jumper two terminal together and check voltage with increasing engine speed, it easily makes 20 volts, so it's a good generator. Try same test at the other end of the wires at the control box, and no go. A test light is your friend. A little poking around reveals a disconnect on the "D" terminal of the control box. Pinch the Lucar connector to tighten it, and we have power and charging. But the charging voltage is too low, and cranking up the regulator relay adjustment does not improve it much, so it's a duff control box. One phone call, and we are off to town to pick up the replacement part.
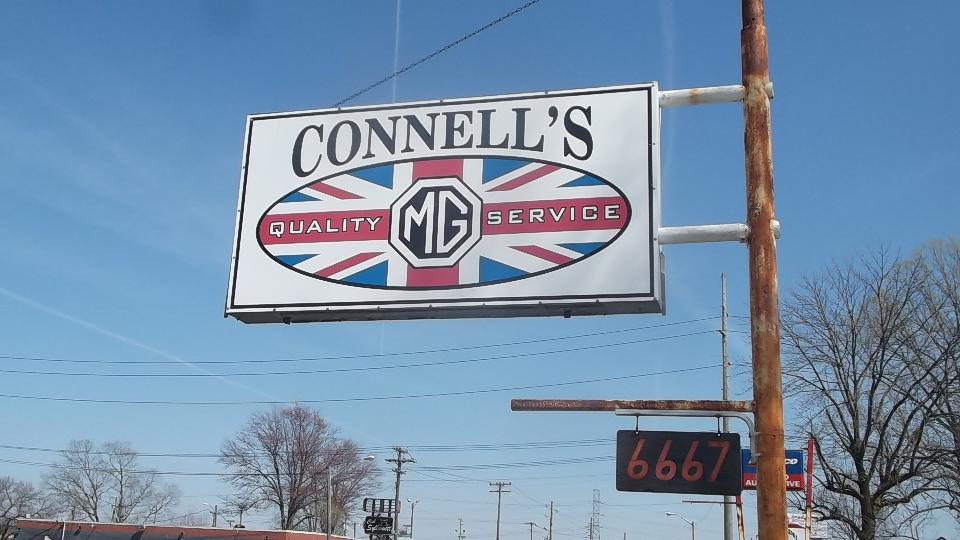
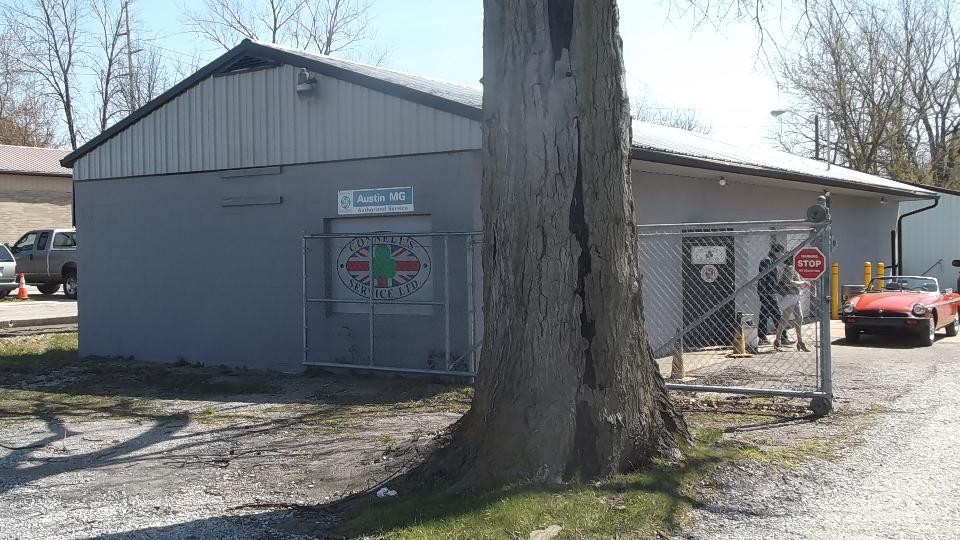
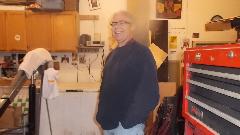
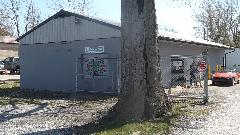
Welcome to Connell's MG Service in Indianapolis, and say hello to Bob Connell.


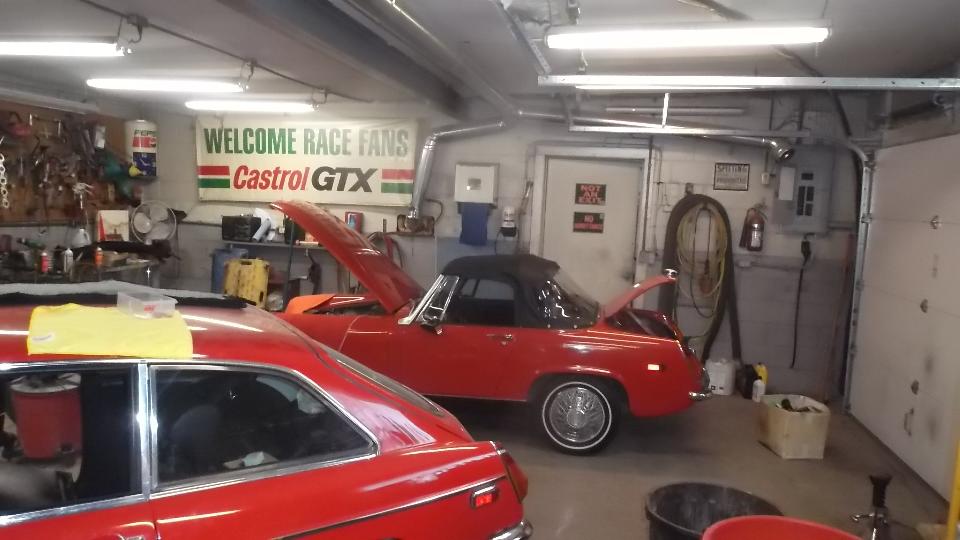
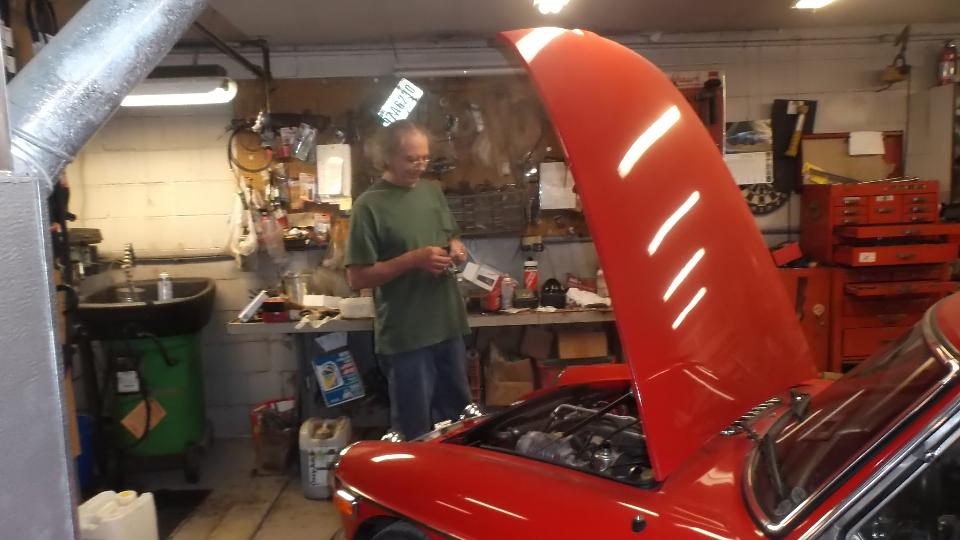
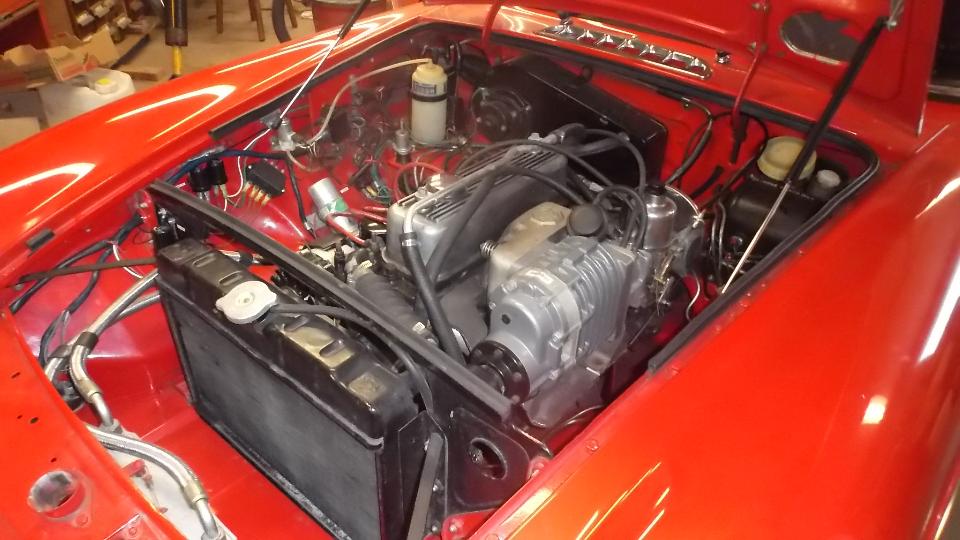
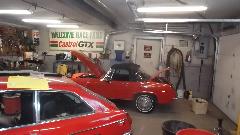
In the shop today we have an MG Midget and an MGB GT, with a shiny new supercharger. Up front we have, TA-DA, a new control box for the MGA.
 Back at Eric's place, we installed the new control box, and the red light is out, and the regulator is working well to charge the battery with the lights on, and not overcharging. Score one for the good guys. We had a bit of a late start, and had to knock off early for family reasons, so we will take this up tomorrow. I still want to drive this car.
Back to WiFi, and another important effort for today. Time is of the essence, getting kind of late to register for MG-2016 in Louisville, Kentucky in June. The tough part of filling out the registration form was checking off the tech sessions I want to attend. With five MG registers participating, there 13 tech sessions, some of them with multiple presentation times, but still some scheduling conflicts. Skipping all of the off-site tour events, I managed to sign up for 8 tech sessions (in two days). Somehow I also snatched one of the last two tickets for the Magnette/MGA Dinner, and the very last ticket for the Awards Banquet (with the special guest speaker). The process died after clicking the "Submit" button, but a long phone call got the job done, so I am officially registered, and looking forward to meeting lots of MG enthusiasts in Louisville. More WiFi for posting photos and notes, email, BBS, and done before midnight (for a change).
Wednesday, April 6, 2016
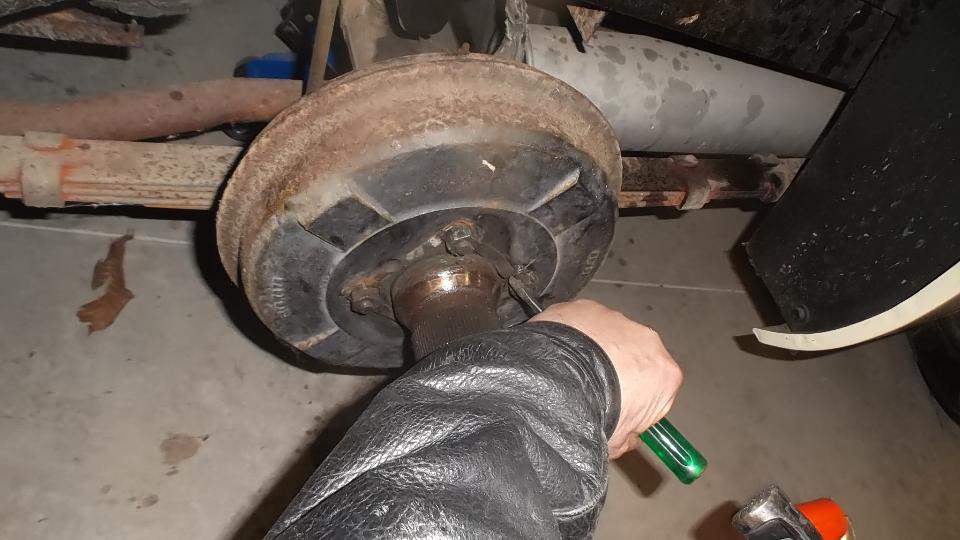
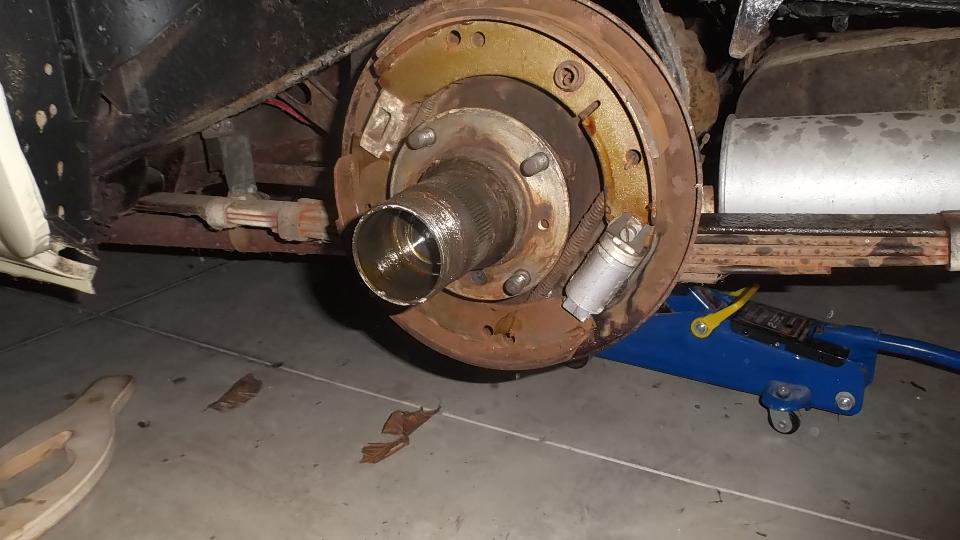
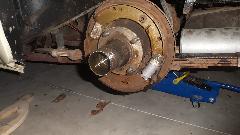
Back at Eric's shop today. All we really wanted to do today was to bleed the brakes (and clutch) so we might have a test drive. It started innocently enough, left rear, right rear, right front, left front, pump until dirty fluid is out, clean fluid and no air. Almost finished, but left front was not bleeding. Left rear did a nasty gurgle and dumped fluid on the floor. Bummer, but we have new rear cylinders in hand. Remove knockoff nut and LR wheel, knock back locktabs, remove nuts. Hard to turn, but rotate LR wheel until the adjuster hole lines up with the adjuster screw, turn adjuster CCW to release the brakes, and remove the drum.
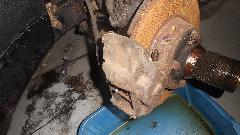
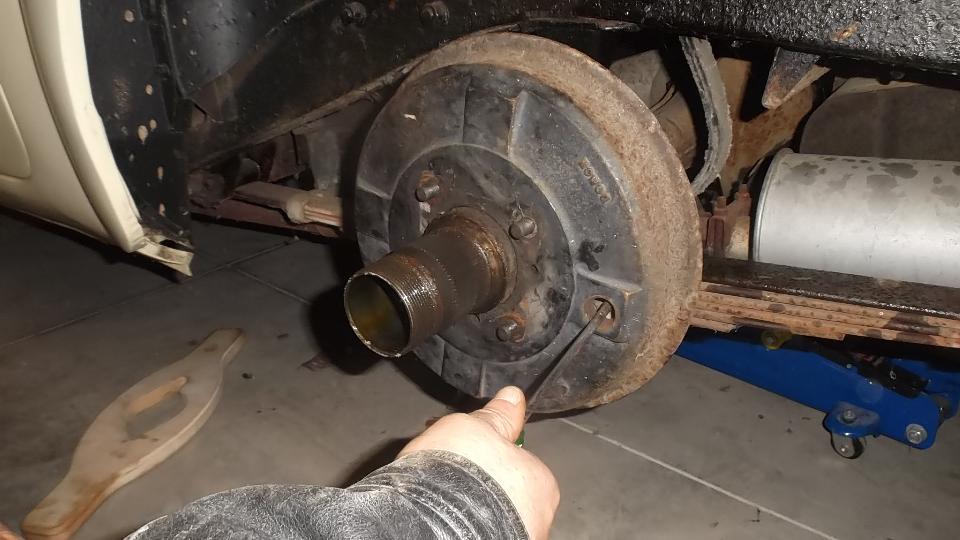
 Remove retainer clips, and pull hard on brake shoes to remove shoes and tension springs. Convenient that both parking brake cable ends were already disconnected and tied up so they wouldn't drag. We wonder how long the car had no parking brake. Remove banjo bolt and rubber boot, and remove the slave cylinder from the mounting slot. Reassembly with new slave cylinder is the reverse of disassembly (sort of). Install slave cylinder, rubber boot, and banjo fitting (with brake pipe still attached). Use new copper washers with the banjo bolt to assure leak free seal.
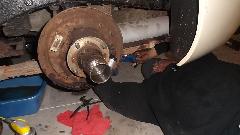
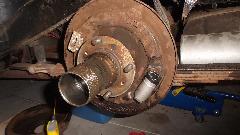
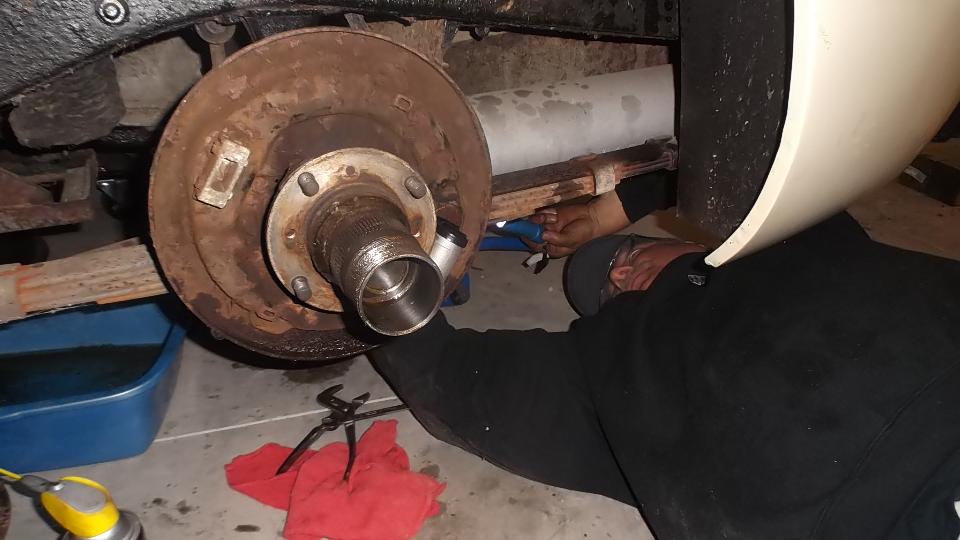
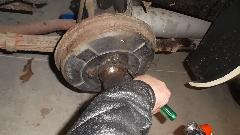
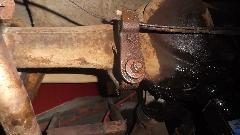
Okay, let's hook up the parking brake this time. Equalizer arm was frozen solid. Apply PB Blaster, remove nut and washer, use Channel-Lock pliers to muscle the arm loose for removal. Clean pivot part, apply oil, and reassemble. No clevis pins handy, so we used 5/16" bolts at cable to arm joint (put proper pins on shopping list). Lots of pulling on the cable, plus grease the center fitting, and more pulling, finally getting the cable loose enough to be functional. While assembling brake shoes we encountered the now notorious too-long hooks on the shoe retainer clips. Prescribed solution is to use a thin cut-off grinding wheel in the Dremel to shorten the hook a bit. Not having the tool handy I applied long nose Vice-Grip with a bit of finesse (lots of force and a few choice swear words), and ultimately got them assembled without cutting.
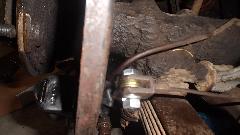
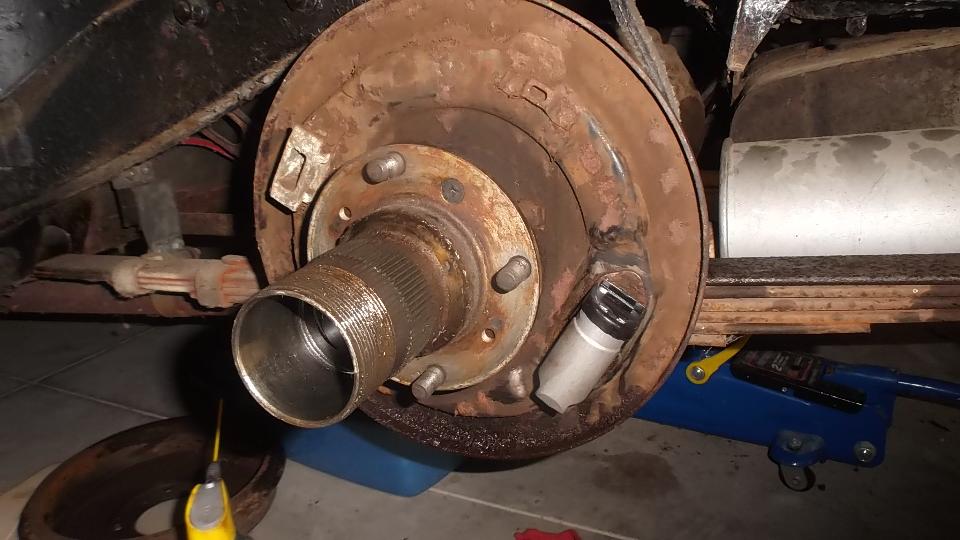
Reinstall brake drum, lock tabs, nuts, and crank up the adjuster. Ditto both sides. Back to bleeding at left front pump the pedal, nothing came out, but the left rear did a nasty gurgle and dumped fluid on the floor again. NOW what? The (rusted) steel brake pipe broke off right at the pipe nut on the banjo fitting. Bummer. This was about to put a sudden end to the work day. Remove the offending brake pipe, and make a trip to NAPA. Correct length not in stock, but order for next day delivery. Did I say all we wanted to do today was bleed the brakes?


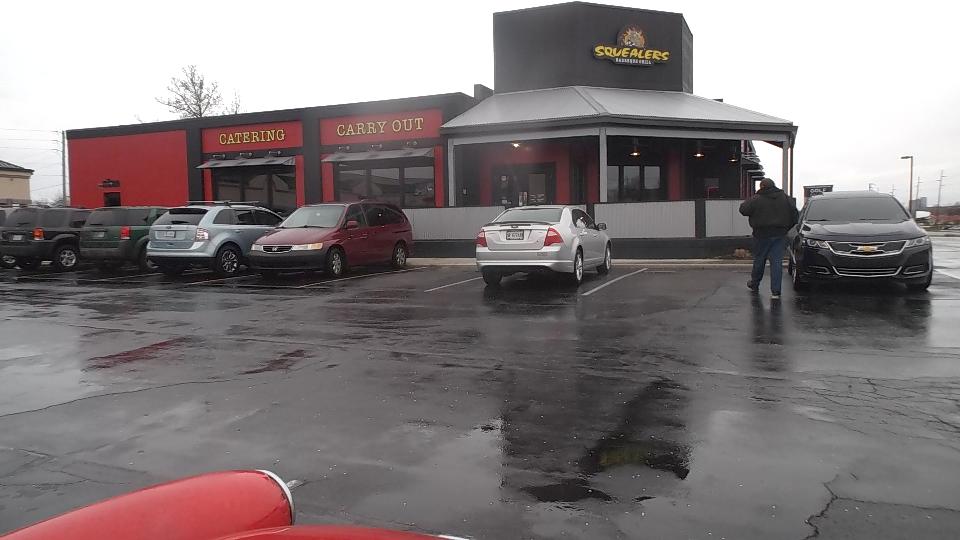
Time to knock off for the day anyway. We were off for a meeting with Indiana British Car Union folks who are laying plans for the next British Car show and the London to Brighton Run. We have names of six people, and the word is to meet at Squealers on 86th Street at 6-pm for dinner with the business meeting at 7 (verified by email).
 Slowed by rain and traffic, we popped in a 6:10-pm, and found no one there. After a bit we made one phone call to the only number we had, and left a voice message. Then we waited patiently until well past 7-pm, and still no one there. We laid the six names on the counter, but management did not recognize any of the names or the name of the club, and no reservations (but they don't normally take reservations anyway). The dining room was pretty empty and no one there resembling the description (not that we knew what any of them looked like anyway), so we packed it in and headed for WiFi to get some work done. Did I say it was raining? This day was not going well, but really nothing new for this adventure.
Thursday, April 7, 2016
Simple day. After the normal load of WiFi, the rest of the day was spent putting the April CMGC newsletter on line. (Whoopee). Fussing about a few evening show flakes, and midnight frost, at 1-am we pointed the rig north up US-31 to run from Indianapolis to South Bend, arriving there 3:30 or so, putzing around a bit to verify locations, then get some sleep from 4:00 to 7:30 am.
Friday, April 8, 2016
 Show up at Allie's Cafe in South Bend exactly 8:15-am as appointed, no one there to meet us, so we enjoyed a nice breakfast, then pointed it south and ran back to Indy. About then we asked, "What day is this anyway"? Uh, Friday? Isn't the South Bend meeting supposed to be Saturday morning? Yeah, you figure it out. Just getting back to WiFi when we got a call from ICBU folk saying they were at Squealers Wednesday night, just that we didn't know where to find them (not knowing anyone by sight), and they didn't know we were actually there (even though they had made the announcement that we were coming). So put them back on the planning list for another try later. "What we have here, is a lack of communication". Are we having fun?
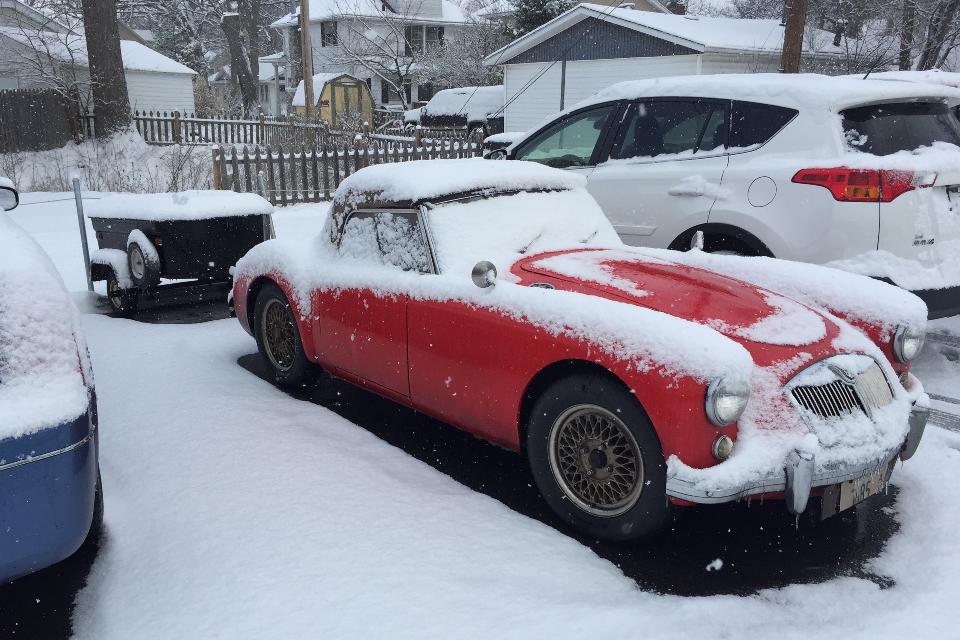
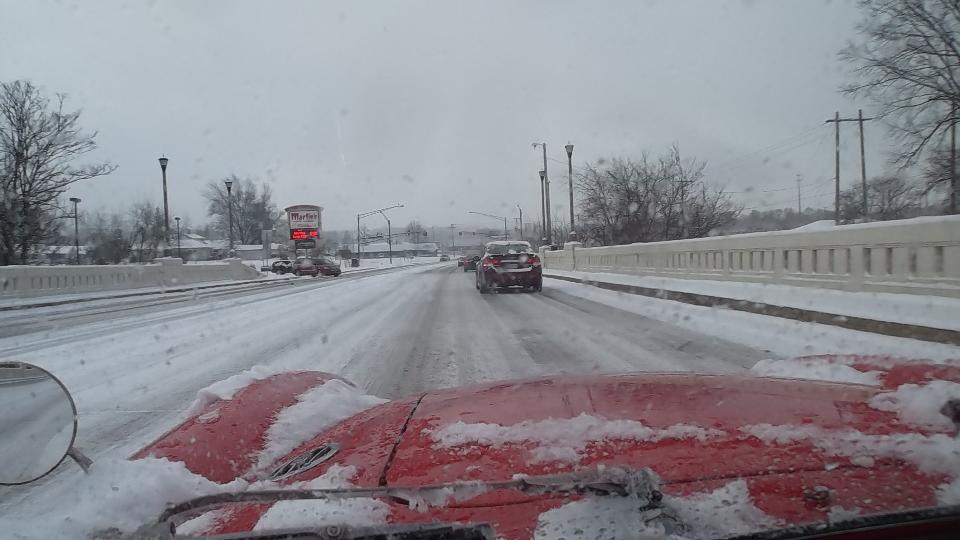
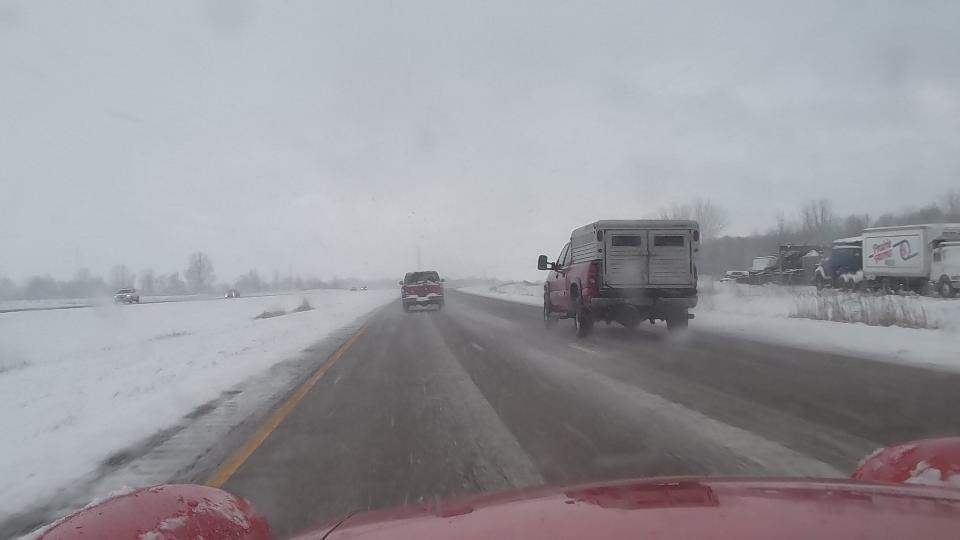
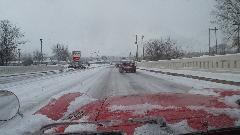
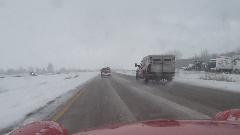
 Not finished yet. Late night, wipe a bit of snow off the windscreen and point it north up US-31, a couple hours earlier this time. Just north of Indy we knew this was going to be a fun drive, the first time we hit glare ice on a bridge. Easy does it, light throttle, no sudden steering motions, and for the next two hours we were doing 45 mph, passing everything on the road that was doing 30 with flashers on (except one big truck that went past us at about 55). Made it to South Bend, no problem, unlike a dozen cars we saw in the ditches. Not finished yet. Late night, wipe a bit of snow off the windscreen and point it north up US-31, a couple hours earlier this time. Just north of Indy we knew this was going to be a fun drive, the first time we hit glare ice on a bridge. Easy does it, light throttle, no sudden steering motions, and for the next two hours we were doing 45 mph, passing everything on the road that was doing 30 with flashers on (except one big truck that went past us at about 55). Made it to South Bend, no problem, unlike a dozen cars we saw in the ditches.
Saturday, April 9, 2016
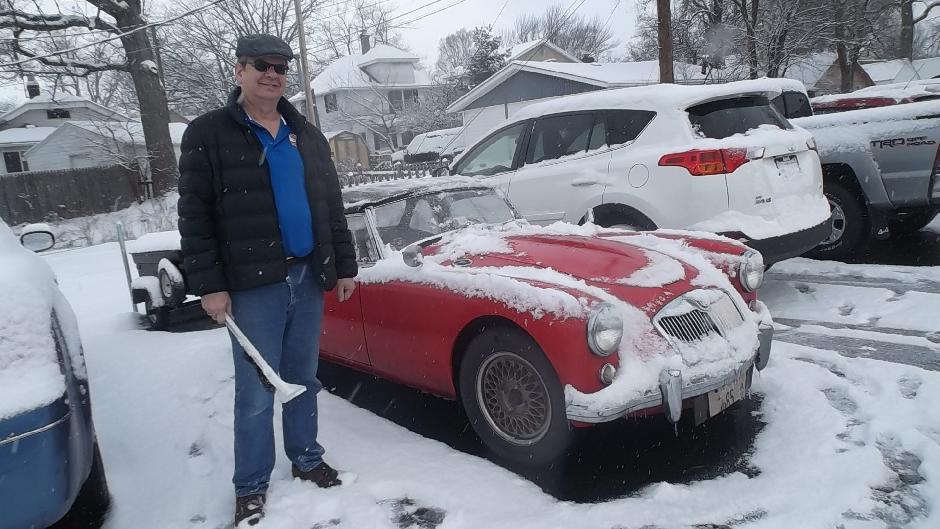
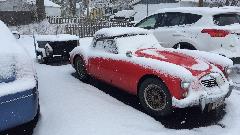
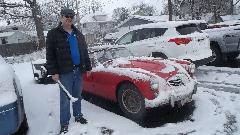
Now we're having fun! 8:15-am at Allie's Cafe in South Bend, here for the breakfast meeting with Michiana Brits British Car Enthusiasts. When all collected we had 18 die hard enthusiasts for breakfast, but our MGA was likely the only LBC in the car park. After the meeting, it seems everyone's LBC is still tucked away in Winter storage, nothing needing to be fixed, so we will head back south to get out of this white stuff.

Good that a friend had a snow brush. Getting out of town was a bit slow, but no problem.
 Cruise down the 4-lane was no bargain either, but still no problem. Back in Indianapolis, 130 miles on, it was sunny and no sign of snow. Just ignore the salt. Play time over, back to work then.
Later evening, cruise another two hours southwest to stop in Washington, IN, in anticipation of next appointment.
Sunday, April 10, 2016
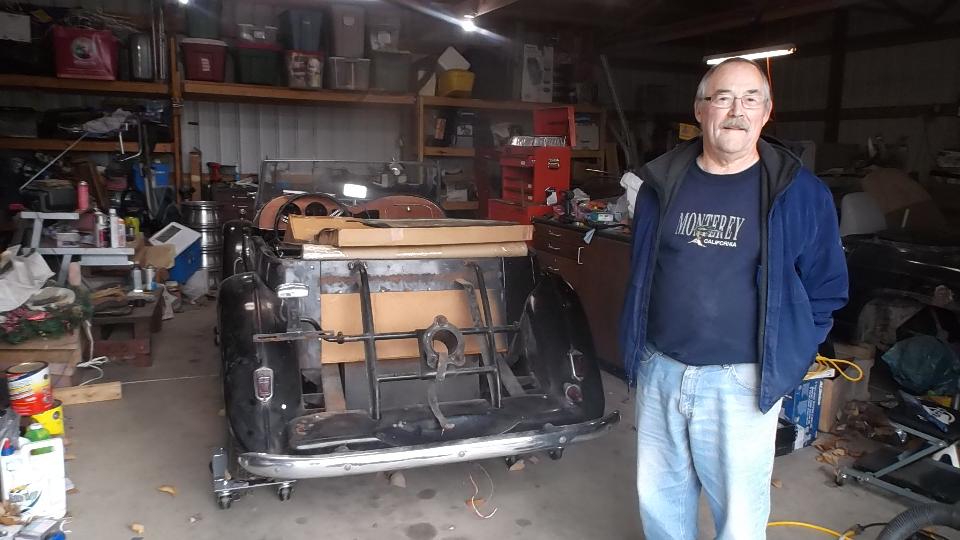
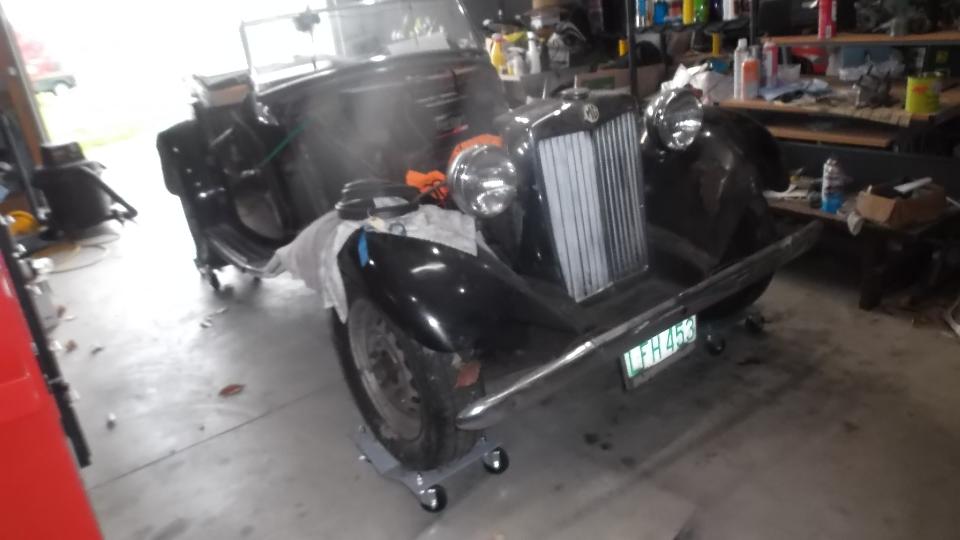
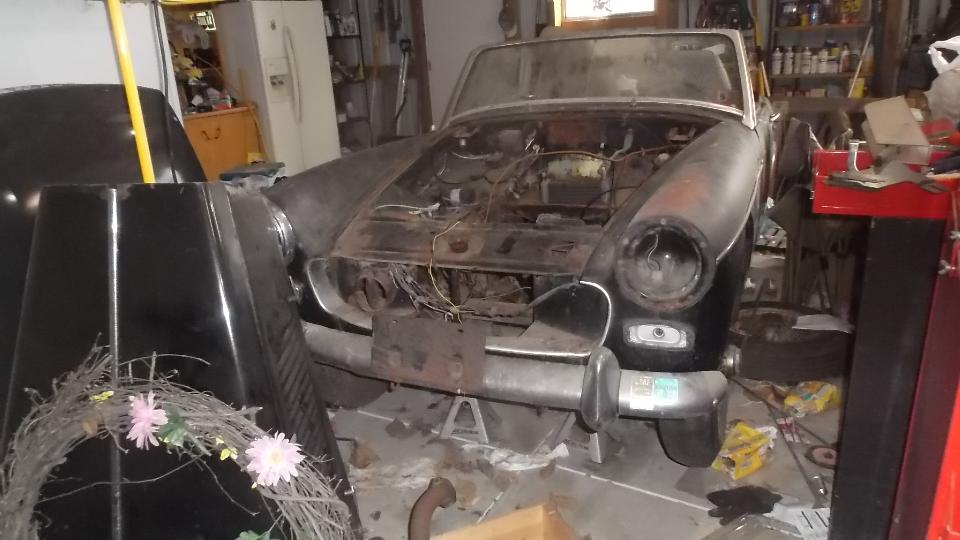
First leg today is just fifteen miles to visit Gary Graves in Petersburg, Indiana. He has a 1953 MG TD that came to him with an MGB 1800 engine, early MGA gearbox and propshaft, and original TD rear axle. It really wants restoration, but likely not in the stars for this owner. More likely he will get it running with the 1800 engine, then just drive it, and leave the decision about restoration for the next owner.


 Gary also has two MG Midgets, one 1966 and one 1969 (dual line brakes). One has decent mechanicals, while the other has a solid body shell. This looks like a two-into-one trick that will end up being one nice Midget.
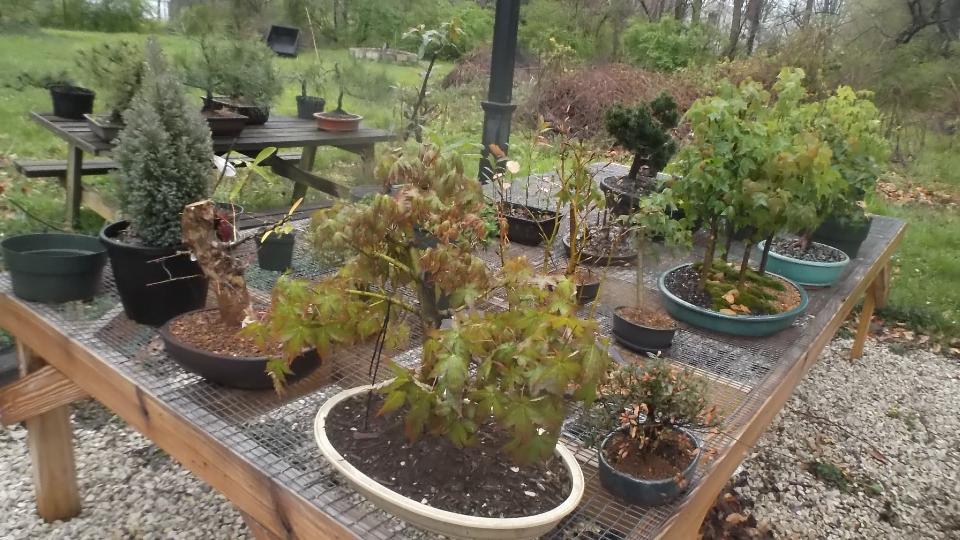
 If you think auto restoration takes a long time, try Bonsai trees for a hobby. For this you should start when you are young and have a lot of patience. One of his best looking project trees is now 25 years old, and still only a foot tall.

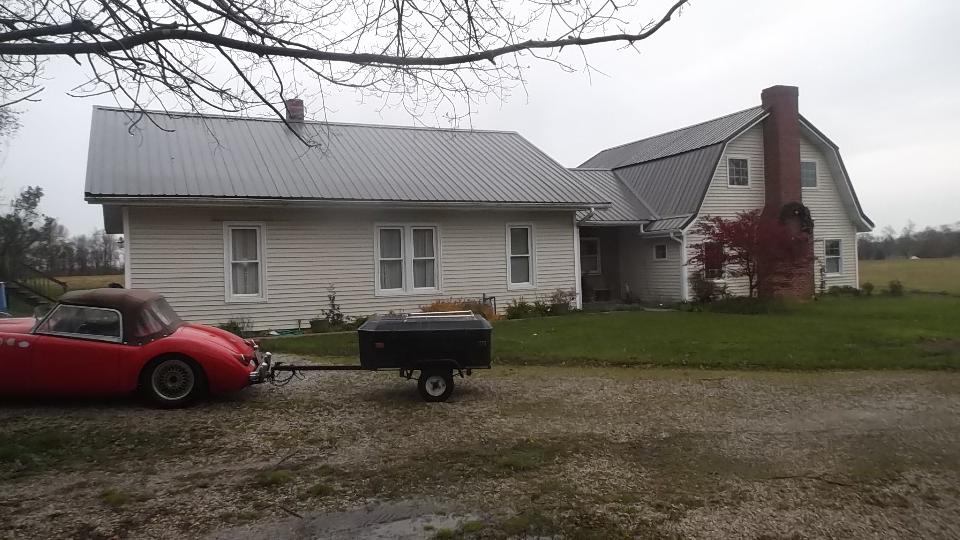
His house began life as a small dairy barn (the parton right in the picture). The part on left in the picture was built about the same time by the same people, but a couple miles away. Eventually the part on the left was moved to this location and the two were joined in the middle, finally finished to be one larger home.
Early evening we were off to town for a brief dinner and more MG chat. Then heading 20 miles farther east to Jasper, IN, for WiFi work (nd looking forward to a very busy schedule for the next week).
Monday, April 11, 2016
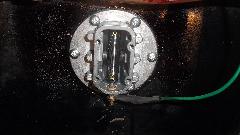
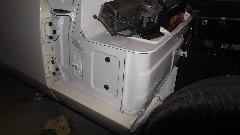
This morning we made a slight side trip to the home of Dave and Jackie Folka in rural Tennyson, Indiana to visit the MGB project car of Southern Indiana Region British Car Club. Just two hearty souls, Dave Folk and Vince Anderson sanding the latest primer coat in preparation for color painting. Ignore the rain today, but tomorrow predicts more rain and high of 58dF, so it looks like they will cancel the scheduled painting day. Photo below right shows two little mystery holes in the left front fender. A bit of internet search for pictures reveals this to be location of the Leyland badge on 1970 model MGB. A pair of these badges must be laying around somewhere, as they disassembled this car not too long ago.

I also got a look at Dave's Spitfire which was pieced together from parts of four different cars. Effort well expended, resulting in a nice car all around. Now he's contemplating selling it to make room for an MGA.

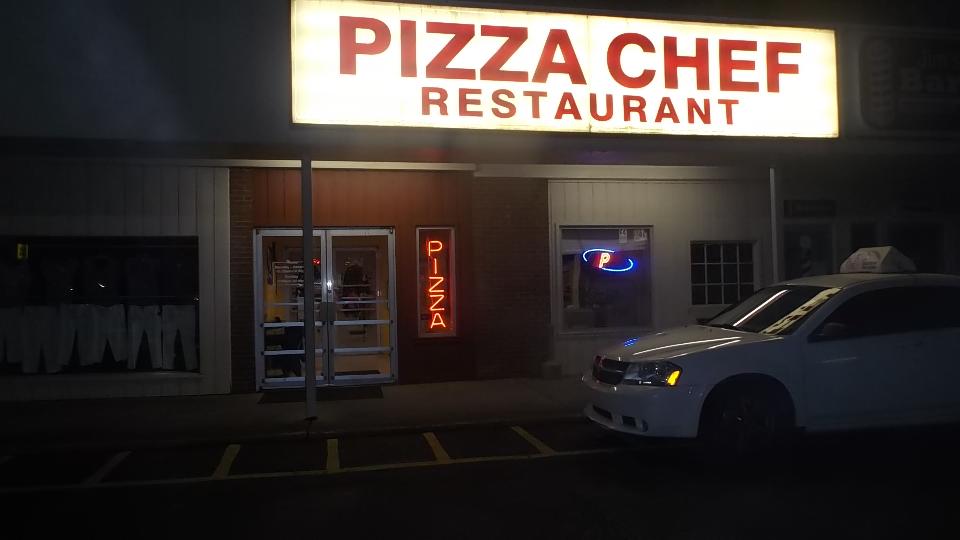
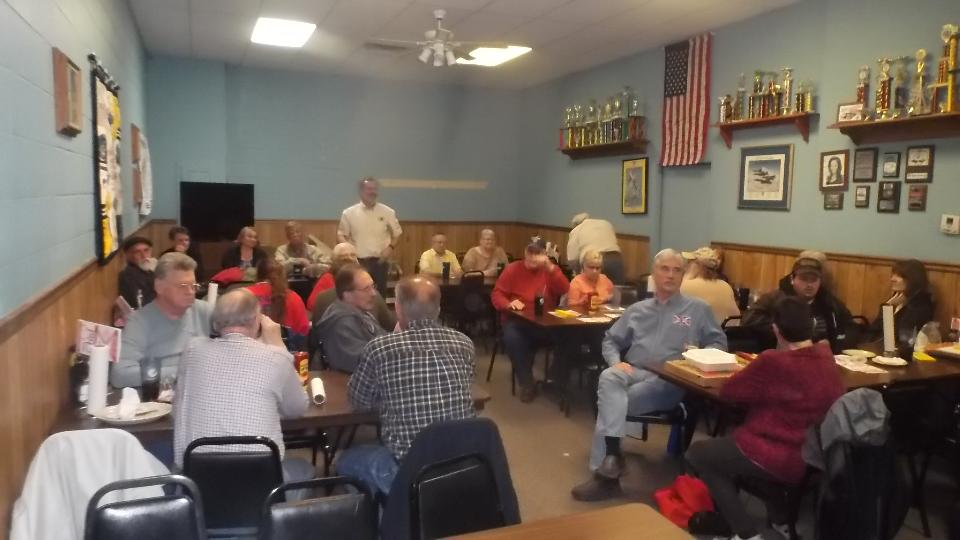
In the evening we were off to a club meeting with Southern Indiana Region British Car Club in Newburgh, Indiana. The designated place was Archie & Clydes Roca Bar, which may have been good if it wasn't "Closed for spring cleaning". So much for their reservation. We hadn't even gotten out of the car when a local club member pulled up to inform us that the party was shuffling over to Pizza Chef, and we followed the other car two minutes to get there. With 30 club members present there was discussion of current events, and the status of the project car, and plans to auction the car and contribute some of the proceeds to a charity. The Guru was requested to chat a few minutes about our travel activities.


When the meeting was over we pointed it north (sort of). First a couple miles west through Evanston, then north on I-69, west on I-64 into Illinois, a few miles up IL-1, and then follow IL-130 north another 90 miles to Charleston, Illinois. And then the fun began, just as we were about to stop for the night.
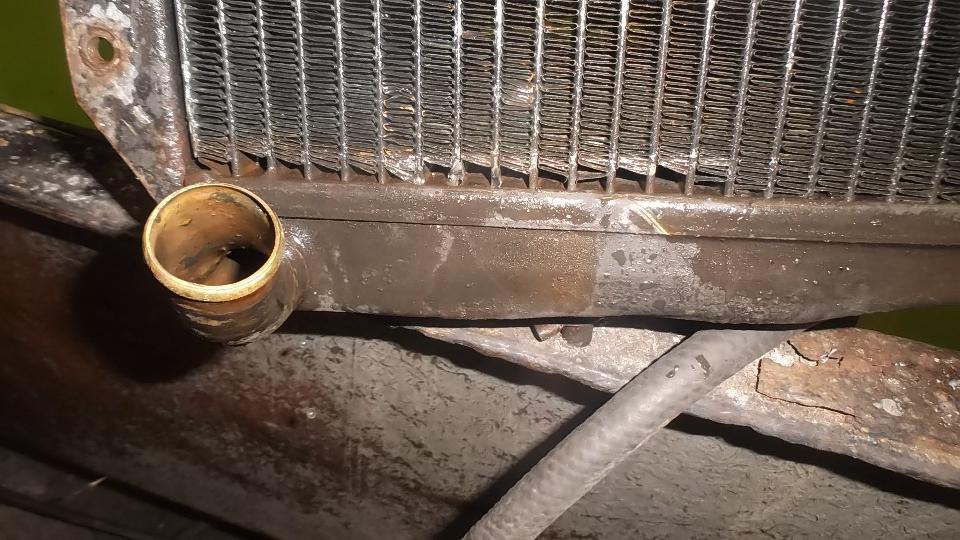
A few miles before town there was a small thump, perhaps a rock from the road. Just as we got into Charleston there was a cloud of steam, and the temperature gauge rose quickly. Bummer, but at least it happened where we may have access to services. Half past eleven (pm) there was a Pizza shop still open where we could get water. Filled the radiator, then looked for the source of the leak. Hoses were okay, but it looked like leak from bottom of the radiator core fast enough to drain the system in about five minutes. So we topped it up and drove half a mile to a McDonalds where we could use the WiFI (from the parking lot since the lobby was closed). Poke around the net for a while to find a radiator shop nearby and make some plans. Then top it up, take an extra gallon with us, and drive briskly west five miles until the temperature was rising again, and pull into a gas station to get more water (a very good place for a gas station). Then a few more miles west to I-57 where there are hotels and other amenities. Good place to spend the night.
Tuesday, April 12, 2016
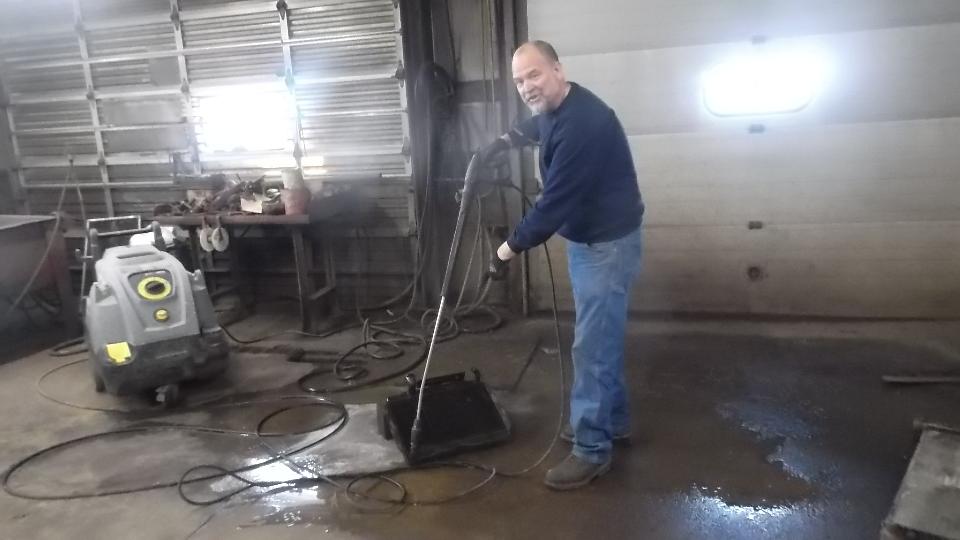
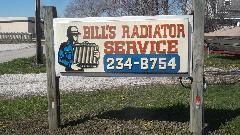
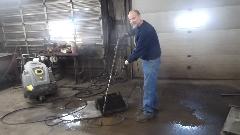
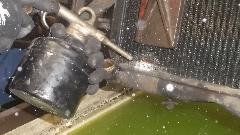
Good morning world, time to fix something. One phone call at 8:30-am, pour some water in the radiator, and by 9:00 we are a few miles along to visit Bill's Radiator Service in Mattoon, Illinois. Nice place with a dirty floor, I pull the car inside and remove the radiator in short order, and there's Bill giving it a quick pressure wash.
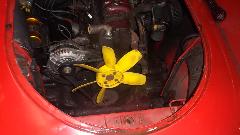
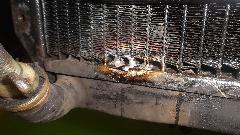
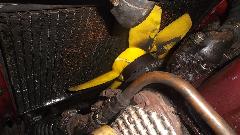
Cause of the problem is immediately obvious my plastic fan has tossed a blade (again). First time there was no other damage. This time the collateral damage is minimal. Even so, I don't think the fan should throw a blade just because it is plastic. I will have to think about this some before buying another plastic fan. Meanwhile, damage to the radiator is minimal. Three water tubes were cut just above the bottom tank. One was severed most of the way through, the other two dinged just enough to leak a bit.
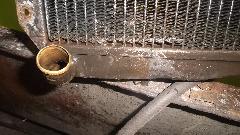
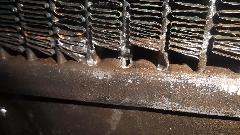
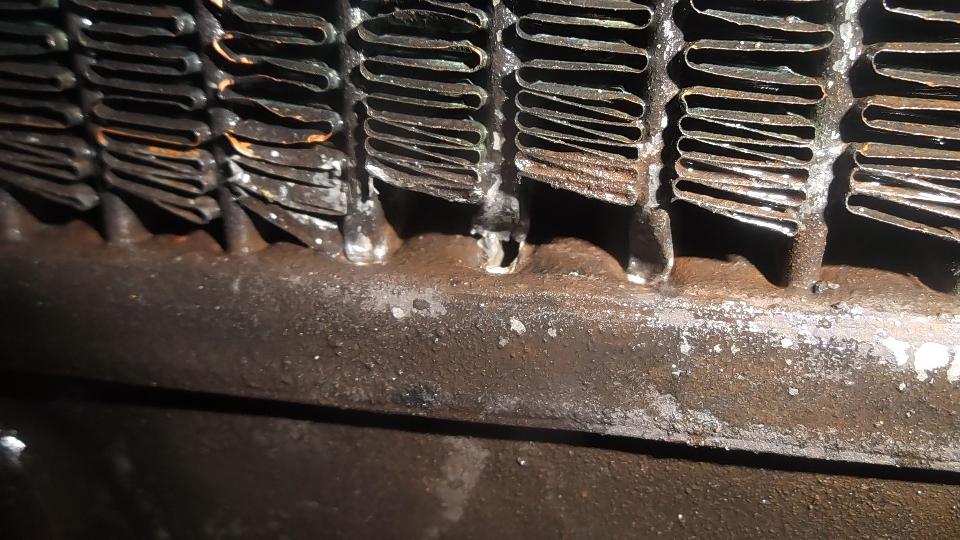
Naturally Bill is quick and handy with this stuff. Touch it with a torch to melt a little solder, and pry a few fins upward out of the way. Then a short shot with a little sand blaster to make the damaged area sparkly clean, and a minute later a bit of solder closes all of the holes. The one severed tube is totally closed, we think, while the other two probably still pass fluid. With 4 rows of 40 tubes, we will not miss the flow of 1 tube from 160. Not long to reinstall the radiator, 6 bolts, 2 large hoses, and 1 overflow hose.
This time I leave the fan shroud off, toss it in the trailer for future reference. I want to try it with plastic fan and with no shroud to see how it works. Also a lot easier wrenching without the shroud in the way. Last summer we ran a few weeks with 5 blades in hot weather, so I suppose it will do okay this time with 6 blades. The plastic blades are so light that loss of a blade does not even make it notably out of balance. This visit includes a bit of chat about old cars and radiators, long trips, and Bill's appreciation that we are still driving this little old car. In by 9, out by 11, and we will still make our next appointment on time.

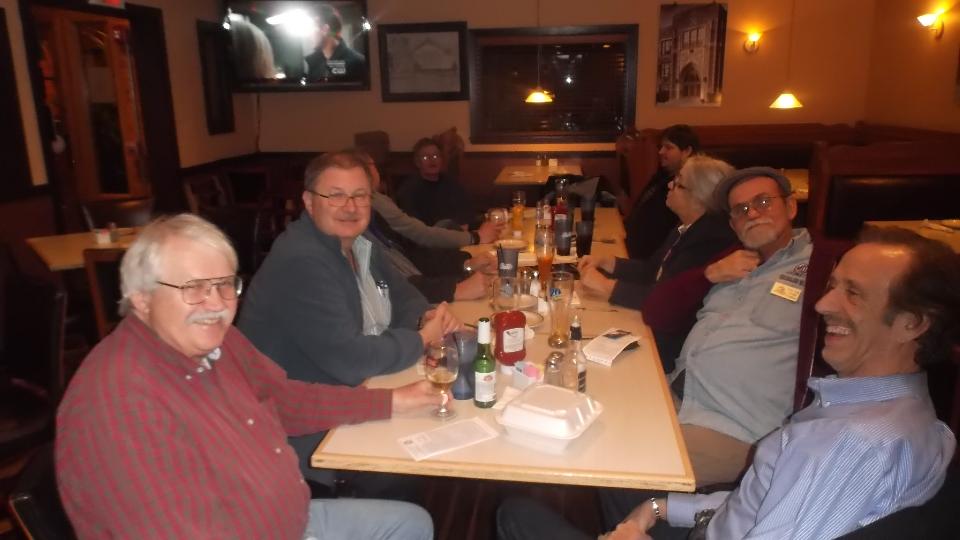
 So we had a nice lunch break, then rolled on a couple hundred miles more generally north, landing with at least 90 minutes to spare. We were meeting at DuPage Inn in Downers Grove, Illinois this evening for Natter 'n' Noggin with Chicagoland MG Club, about a dozen to the bunch tonight. Hmmmm, some of these folks look familiar. Oh yeah! The gang I used to hang out with until a couple years ago. Good to see a few old friends, and a couple new ones as well. We don't have to explain to these folks what we're up to. Sorry, no car photos. I think we were first ones to arrive and last to leave, so I don't know if there were any other LBC there. When the party broke up before 9 we did a quick hustle over to the laundromat to catch up with the photos and notes (double time an extra hour whenever we can get it).
Wednesday, April 13, 2016
Today the car is asking for maintenance. One exhaust valve ran out of adjustment and is not closing properly, so charge up the Dremel. While charging, I called ahead to World Wide Auto Parts in Madison, Wisconsin, to inquire about Shock absorbers (before driving up there). None for MGA in stock, but will place the work order, should be a couple days. When Dremel was charged, I popped the valve cover off, moved a rocker arm aside, and ground some off of the tip of the offending exhaust valve (rather a lot actually). But still zero valve clearance there, looked like the engine had "sucked a valve" (would not seat, no seal). So the head we had been nursing along since January decided it had enough, and the repair just changed from a casual option to an immediate demand. So I called a friend to arrange for workshop space, then called Glens MG Repair in St Petersburg, Florida to request expedited shipping of the rebuilt head we had ordered in January. It will arrive Friday morning. Meanwhile the car can still be driven, casually, just runs on 3-1/2 cylinders. Cancel tomorrow's scheduled trip to Indianapolis and back (more than 400 miles we don't need at the moment). Sorry Indy, but we will get back to you later.
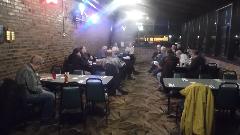
 In the evening we were off to a meeting with Vintage MG Car Club of Chicago in Northlake, IL. Seems like a pity it took us two years to go around the block, so to speak, but it was worth it. These guys are a jolly fun bunch, about 20 in the room (an unusually good showing for this club I think). After the business meeting, when it was time for the song and dance, the club members were all ears. I'm sure they enjoyed the travel stories, visiting clubs, fixing cars, repairing my MGA occasionally, and some tech questions. When someone whispered that we were supposed to vacate the room around 9:30 it was time to wind it down and say good night. Last venture for the day was to wind up the toy one more time and head northwest 37 miles to visit Vic and Penny L'Heureux in Crystal Lake. Kind of surprised at how well it ran, under the odd circumstances. No incident at all, and maybe that will be the last trip for the very tired cylinder head.
Thursday, April 14, 2016
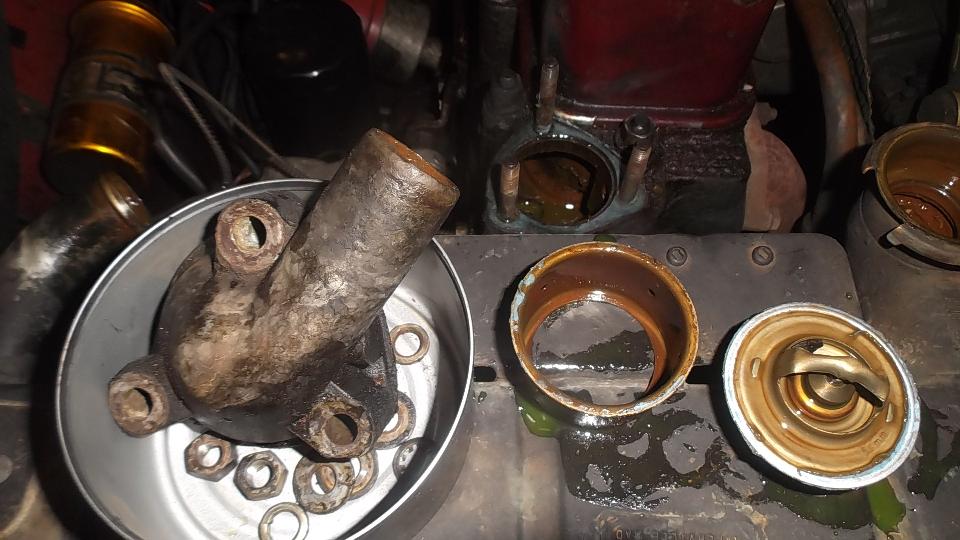
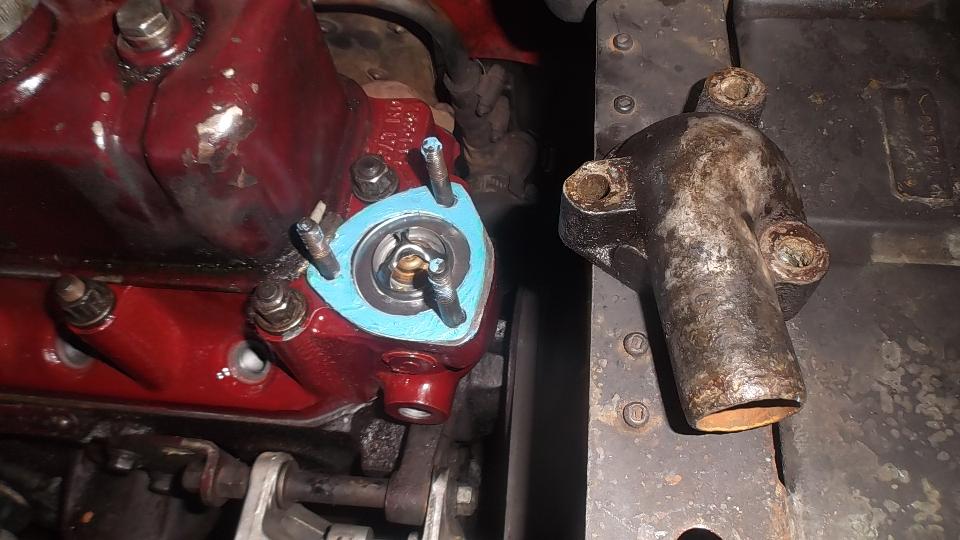
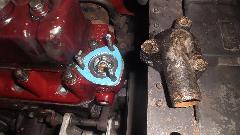
Half a day off, catching up email and tech questions, a bit of socializing, doing a bit of planning. Then it's time to take some things apart in preparation for swapping the cylinder head. Drain radiator, remove top hose,
 thermostat cover, thermostat, and blanking sleeve. The blanking sleeve was used to cover the bypass port in the cylinder head to force all coolant to flow through the radiator with no bypass hopefully to aid cooling. I have notice this has led to an odd functional characteristic. On cold start there will be no coolant circulation through the engine. This results in rapid warm up of the cylinder head, taking indicated coolant temperature up to about 205dF before the thermostat opens suddenly and drops indicated temperature quickly to 190dF as colder fluid from the block passes into the head. Good for early function of the heater in cold weather but not what was intended for cooling of the engine. When this is reassembled I will leave out the blanking sleeve for more testing, expecting to eliminate that abrupt hump in head temperature during warm up.
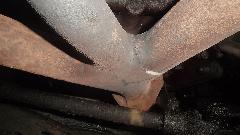
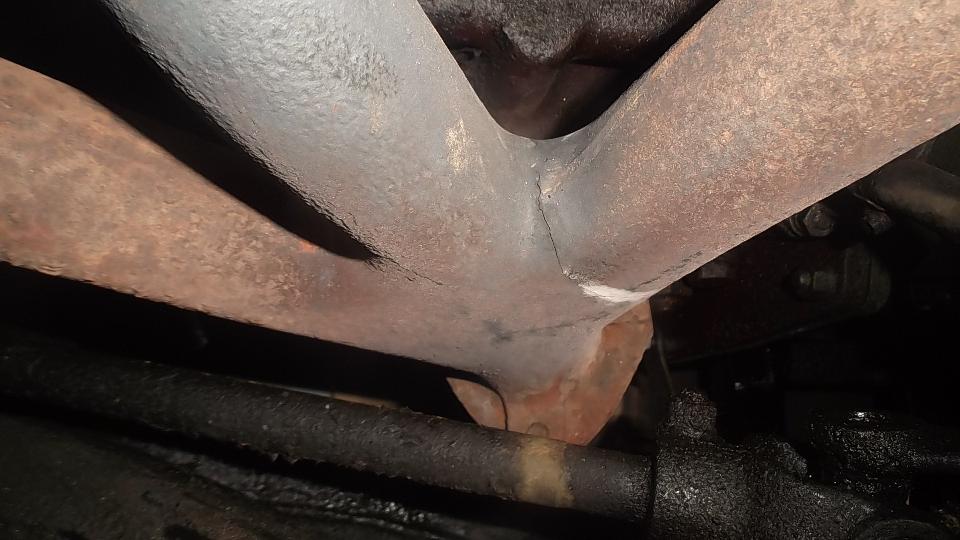
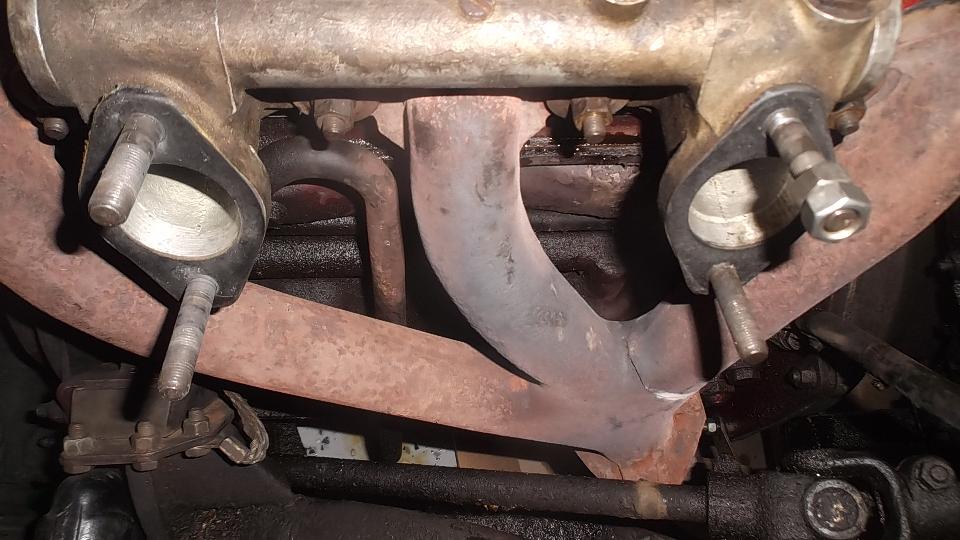
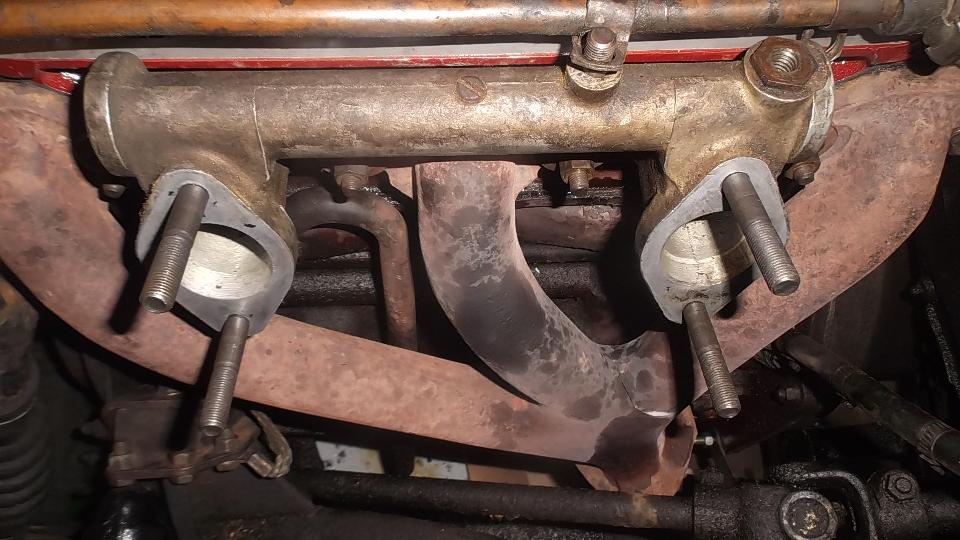
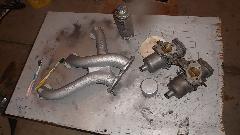
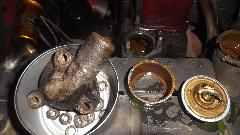
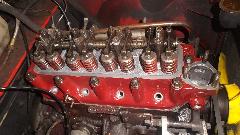
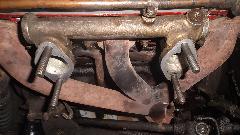
 Heater valve, carburetors and valve cover removed. Now notice a crack in the exhaust manifold at the crotch of the "Y" forward of the rear branch. This is a common problem with MGA exhaust manifolds. You might recall the one that was broken a year ago in March. This used replacement part lasted a year, 44,000 miles. I intend to leave it in place for now, being careful not to break it completely apart, and put a new replacement part on the next parts order.
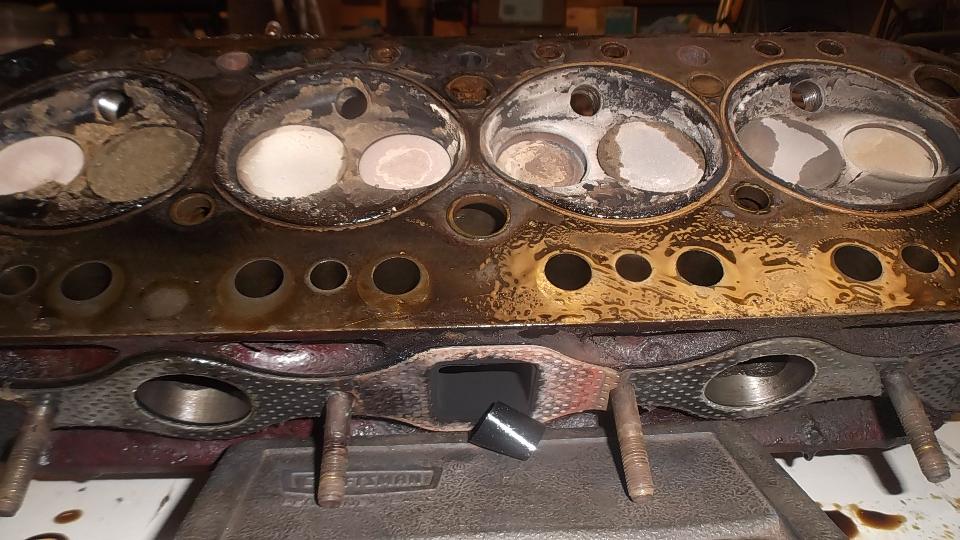
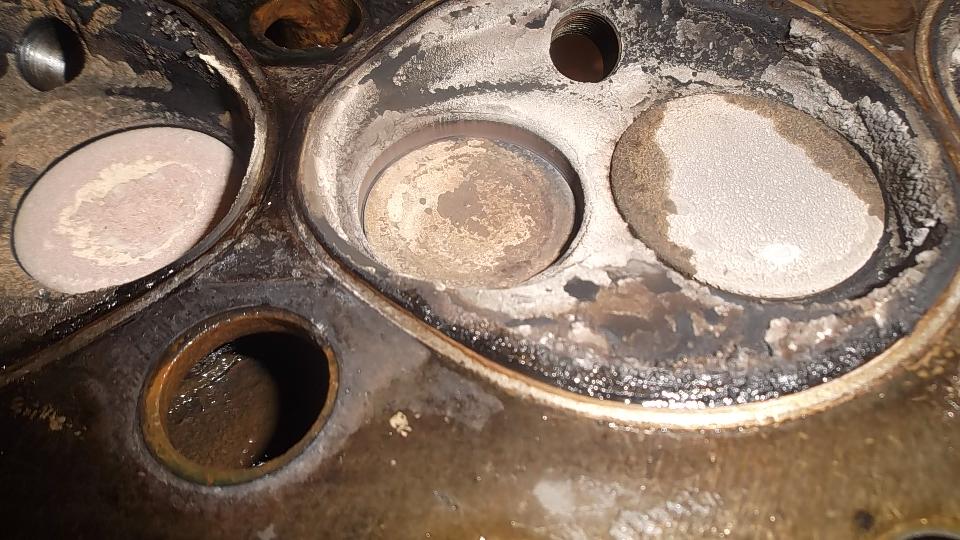
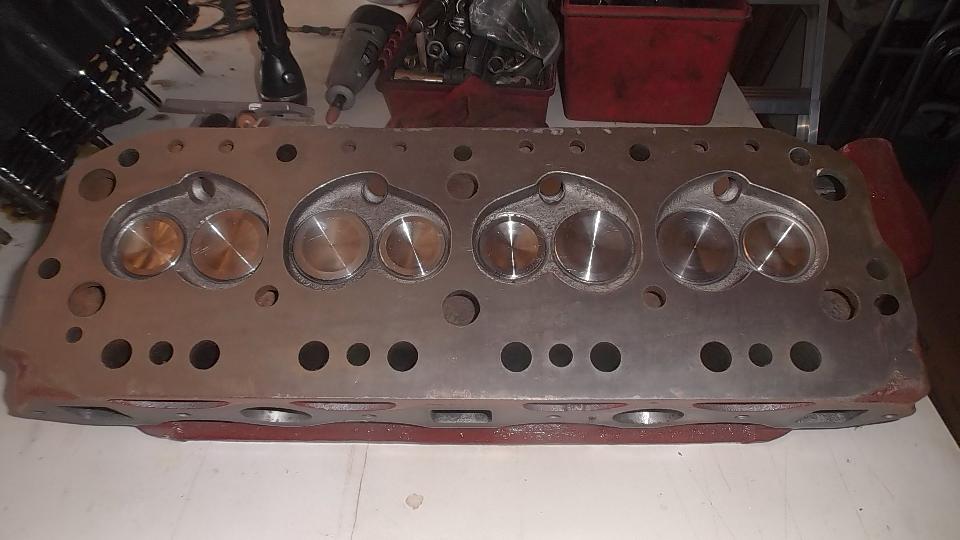
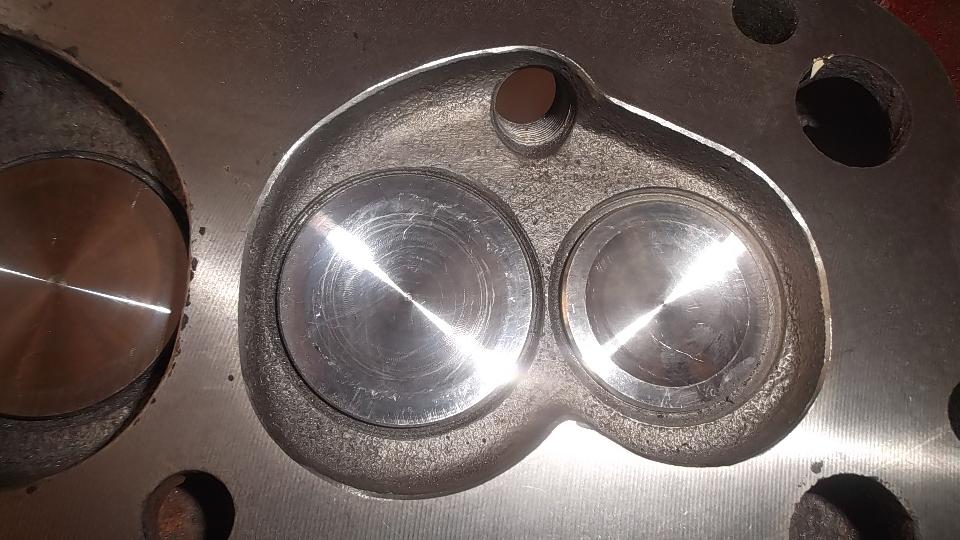
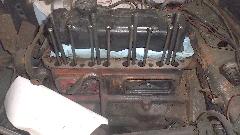
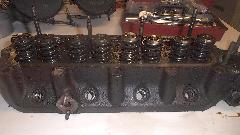
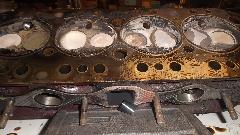
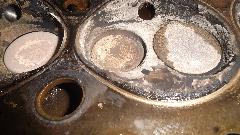
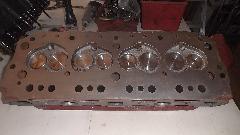
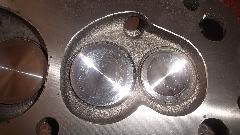
Rocker shaft assembly removed and cylinder head on the work bench. Notice exhaust valves (1,4,5,8) sit a bit higher than the intake valves. Number 2 cylinder exhaust valve in particular (4th valve from right) is sitting very high, the one I have been grinding the stem tip to get rocker arm clearance. Flip it over an notice #2 exhaust valve has a serious case of valve recession, having by now eaten its way completely through the hardened steel valve seat and into the softer iron beyond. This is the reason for now retiring this head. I recon I got my moneys worth out of this one, having been used on three different engines for about 200,000 miles.
Friday, April 15, 2016
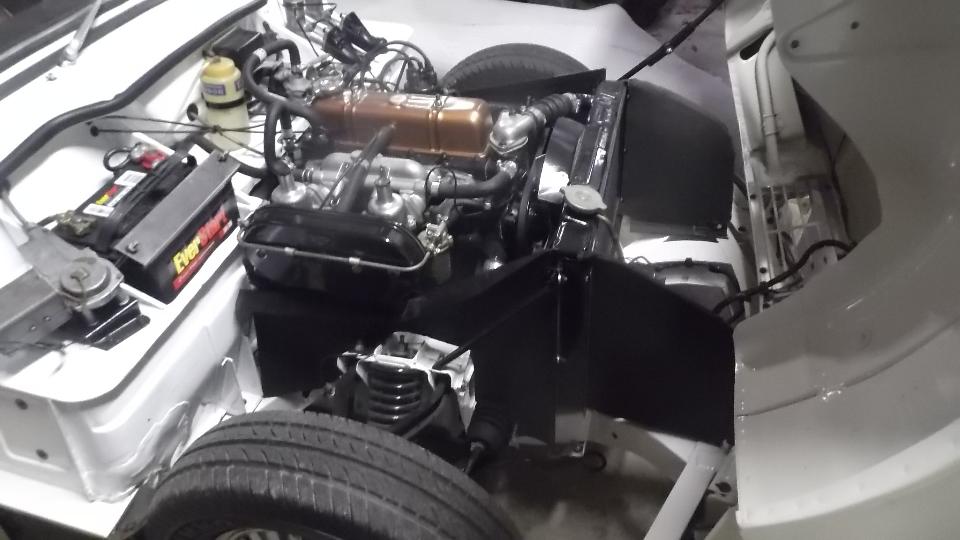
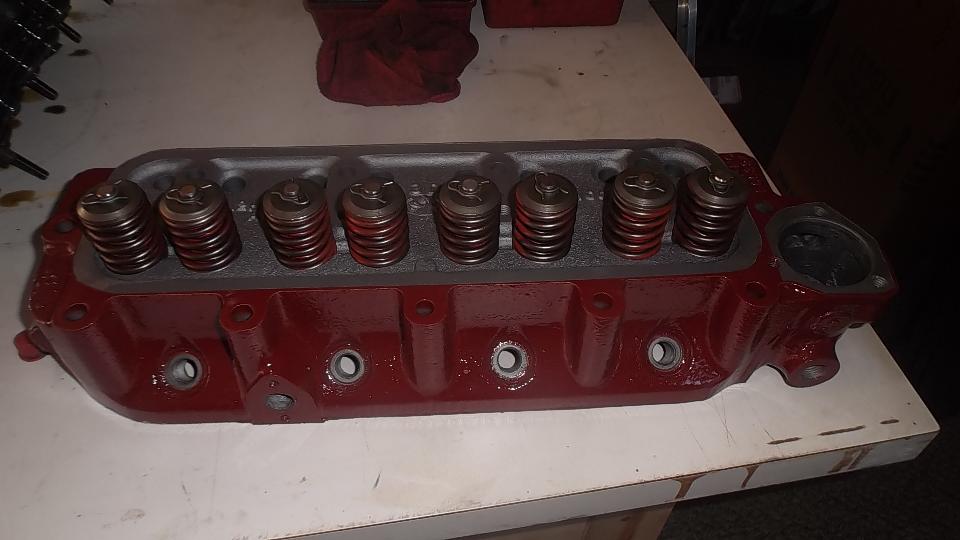
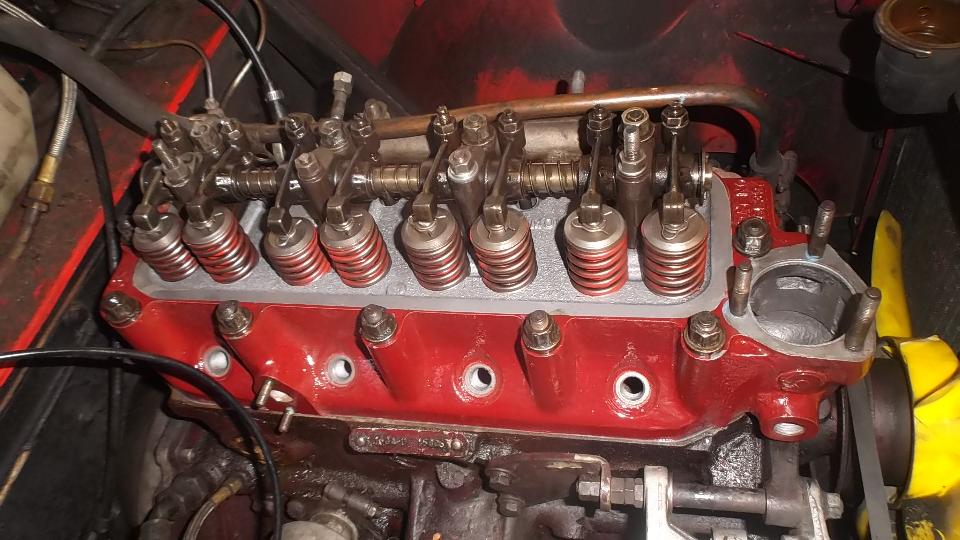
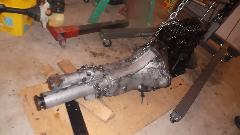
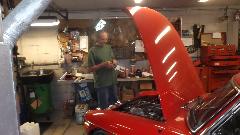
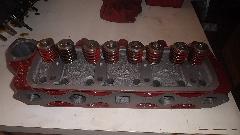
Grunt labor day today, installing the new cylinder head. It sounds straight forward enough, just ran into a few incidentals. Since the carburetors were on the bench, replacing the rear choke arm was a five minute job (three pins and a spring with fingers only). I replaced the front choke arm last summer, and have been carrying the new rear arm in the door pocket since a few weeks thereafter. Notice severe wear in the center hole (which should be round). The freshly rebuilt cylinder head is a work of art, thanks to Rick's MG Service in St Petersburg, Florida.
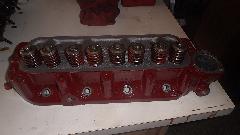
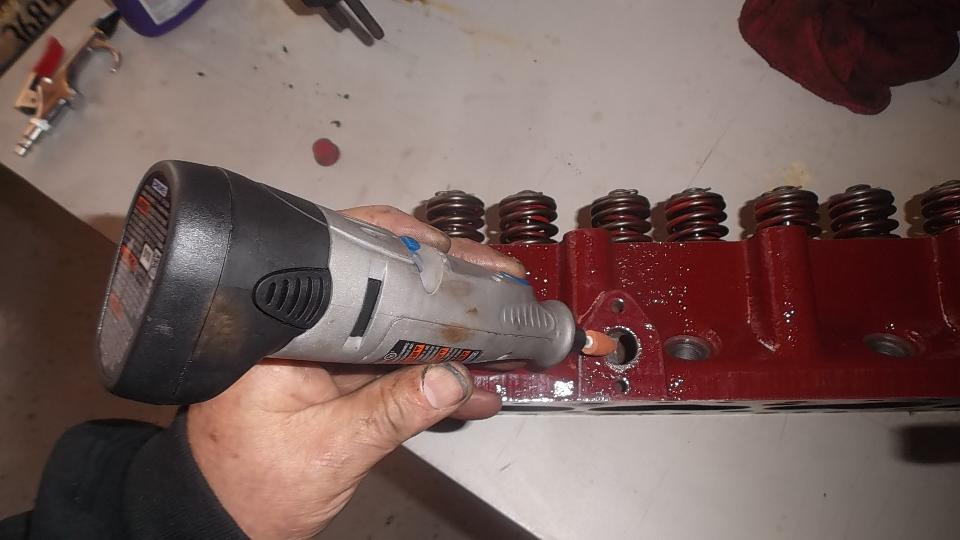
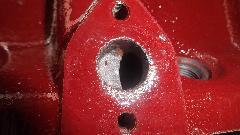
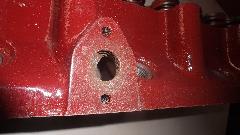
I didn't like the half obstructed heater water port, so got out the Dremel and opened it up some, resulting in a larger port opening than the hole in the heater valve.
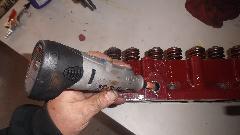
Some more Dremel work, removing sharp edges from the combustion chambers (which was a result of decking the head). Transfer 13 threaded studs from old head to new head, install rocker shaft assembly, and install head on engine. This begs for a touch of thread sealant for two thermostat studs that go through into the water jacket and four manifold studs that go through into heat bolt bores. Head torqued, and valves adjusted. Installed new Autolite spark plugs I had been carrying around for eight months (just because it was a new cylinder head). The old plugs had done 82,000 miles in a little more than three years, which incidentally was 9,000 miles more than the prior Halo plugs. The old Autolite plugs were not dead by any means, and a couple of them went into the traveling tool kit as serviceable spares.
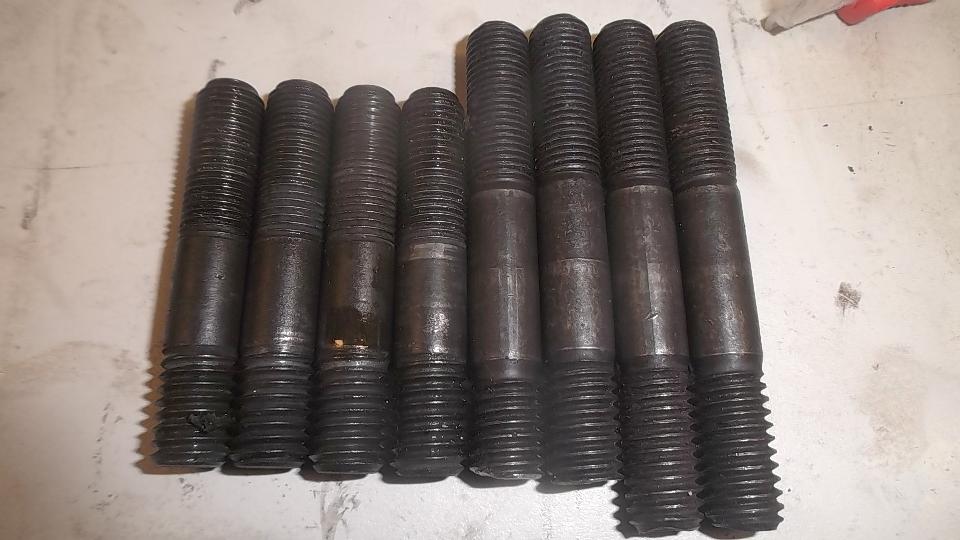
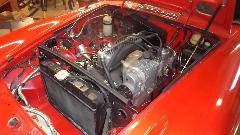
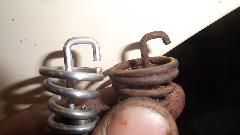
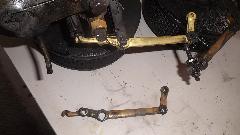
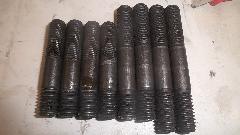
Another opportunity for a minor upgrade. Some years ago I doubled up on thermal isolator blocks for the carburetors. This left not enough stud length, so for years it has been running around with no lockwashers for the carburetors. Once last summer one of the carbs rattled loose. Today I finally got around to installing longer studs so it could use lockwashers. The studs are generic parts from any local auto parts store. Cut the tail off of two of the longer studs so they will not protrude into the crossover pipe on the intake manifold.
 I bought a new thermostat today. The last two that were rated for 180dF actually opened at 195dF and 190dF. The new one is rated 160dF, which (if it follows suit) I might expect to open around 175dF. Will have to see if this results in lower operating temperature or just a wider swing in the active range of temperatures. I also left out the bypass port blanking sleeve, wanting to see if it may eliminate the temperature overshoot during warmup just before the thermostat opens.
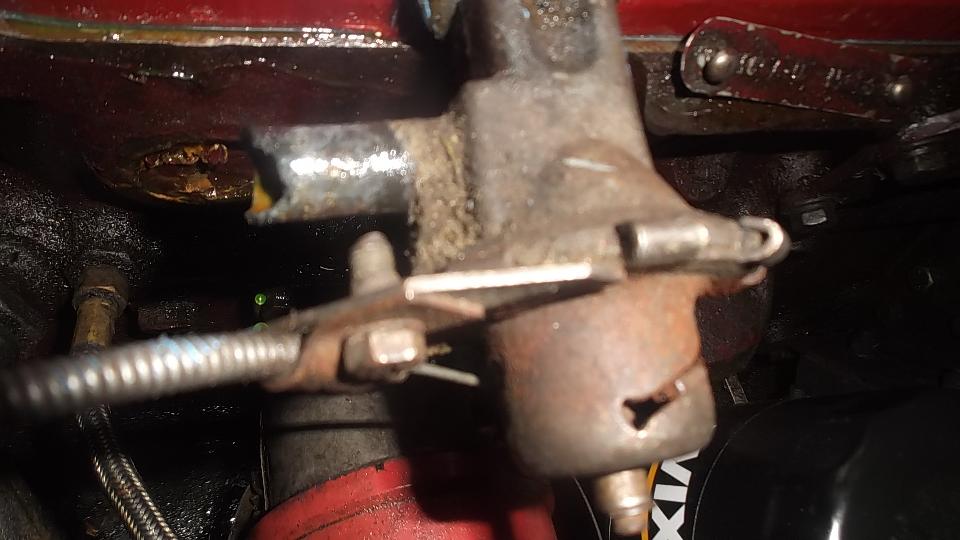
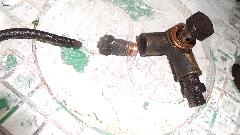
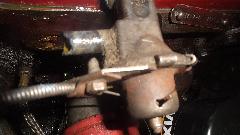
I had a bit of trouble with the temperature sensor bulb when the retaining nut bottomed out before the joint was tight. For this use a few #10 flat washers with a wide radial slot in one side for packing between the tube nut and the sensor flange (sorry, no picture).
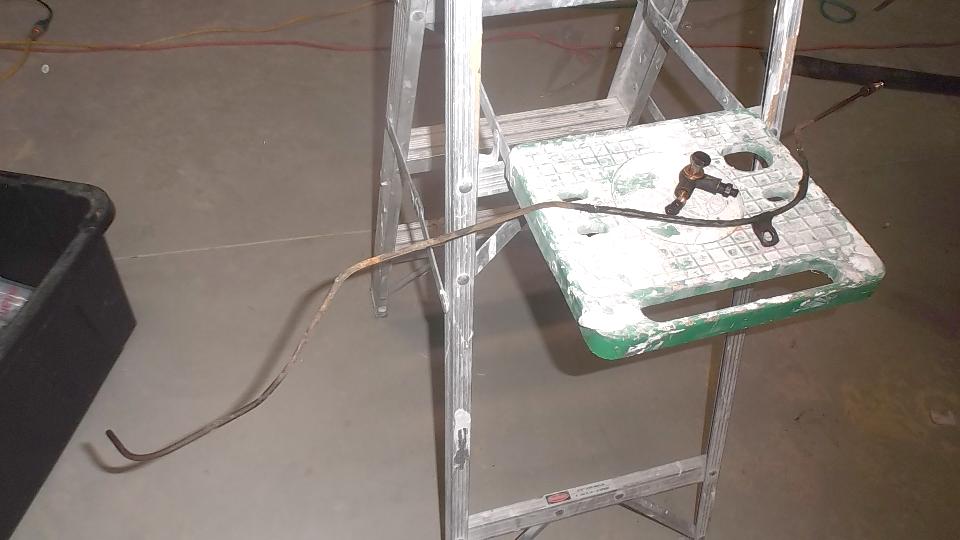
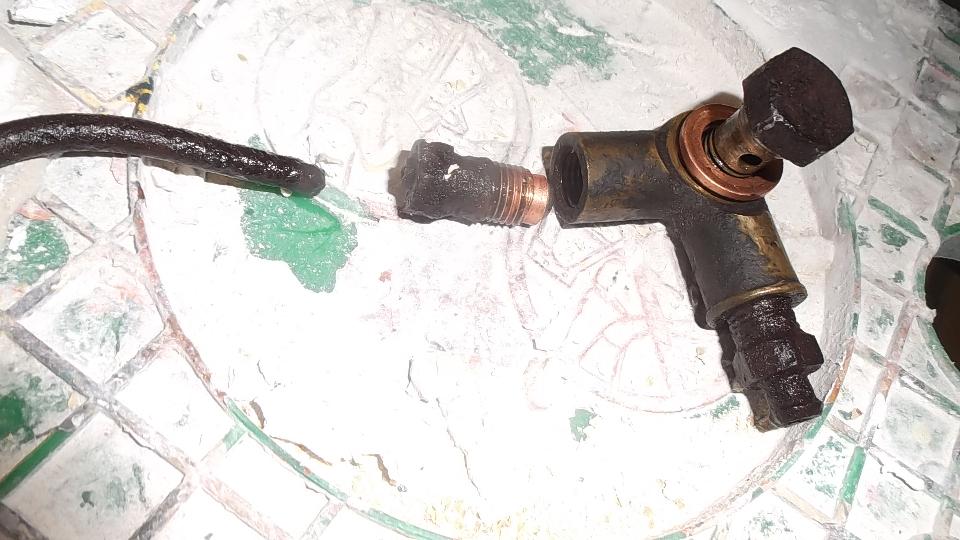
 Heater valve is corroded on the hose nipple, note to buy a new one. Back together and running, no leaks, road ready. Late night chat with friends, then WiFi for photos and notes, turn in at midnight.
|