The MGA With An Attitude
MGA Guru Is GOING MOBILE - (October 16, 2015 - October 31, 2015)
Friday October 16, 2015
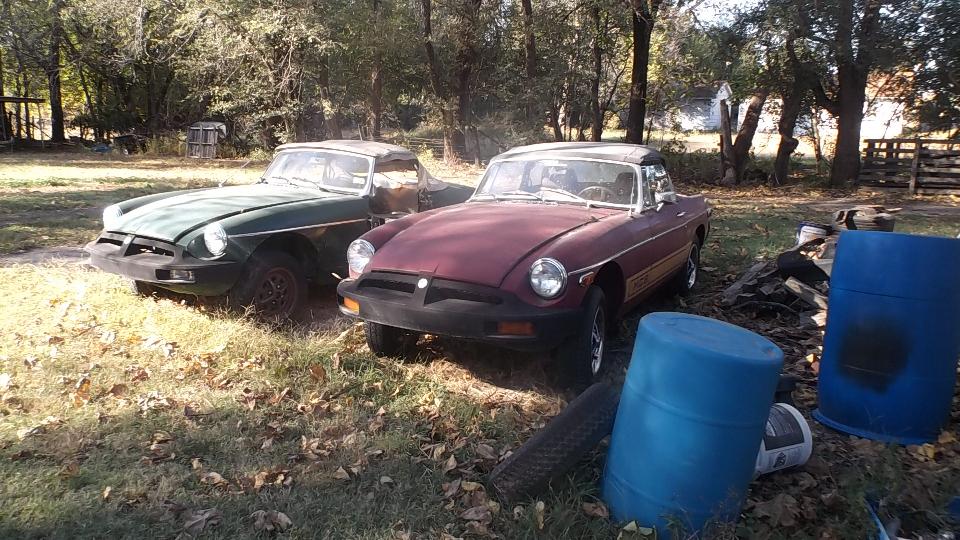
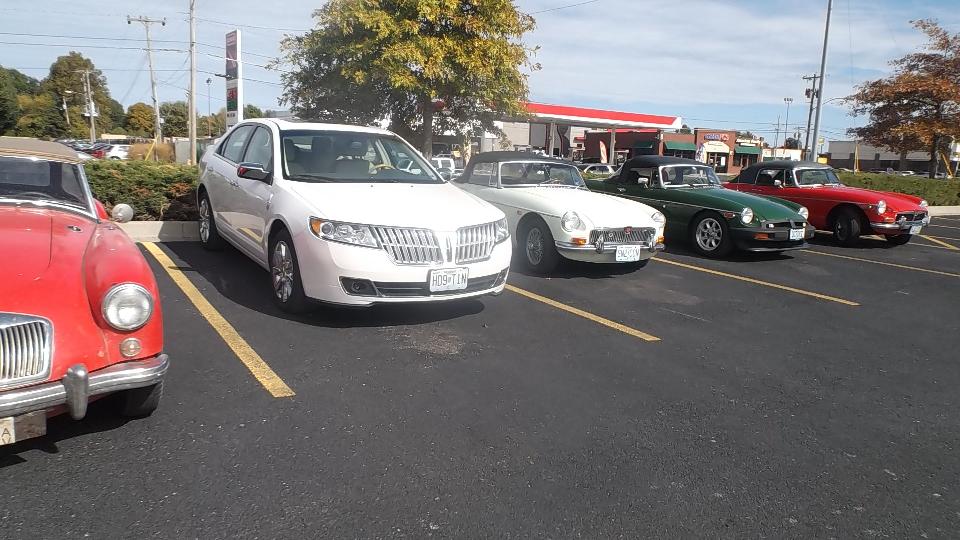
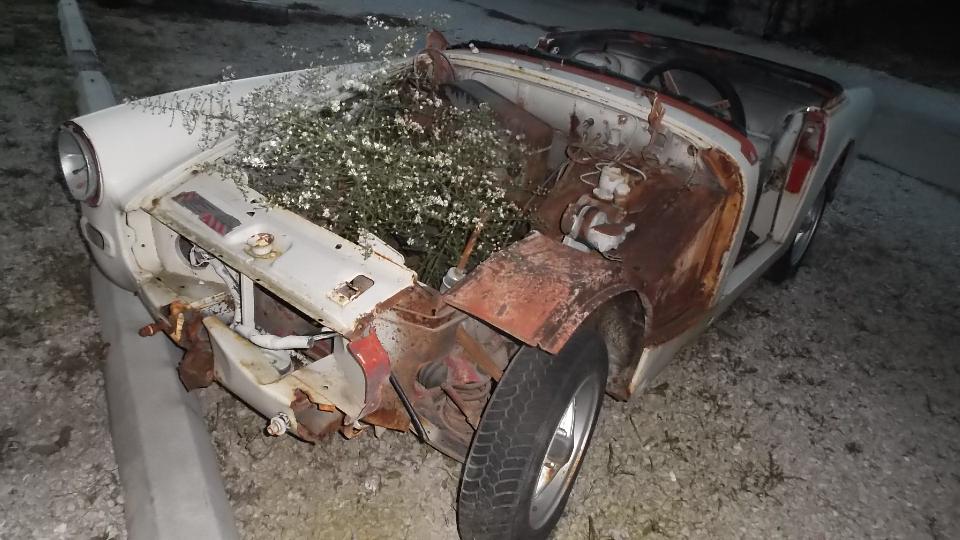
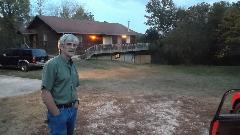
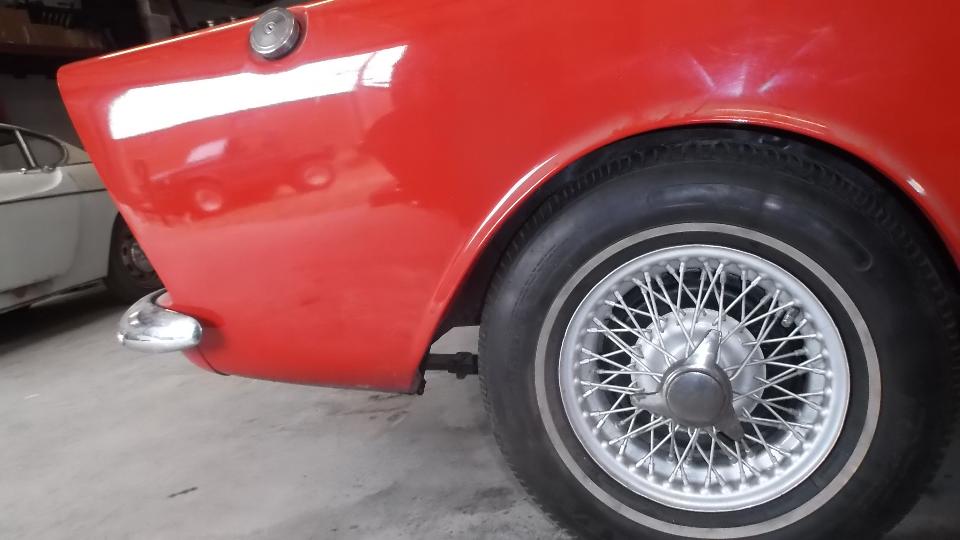
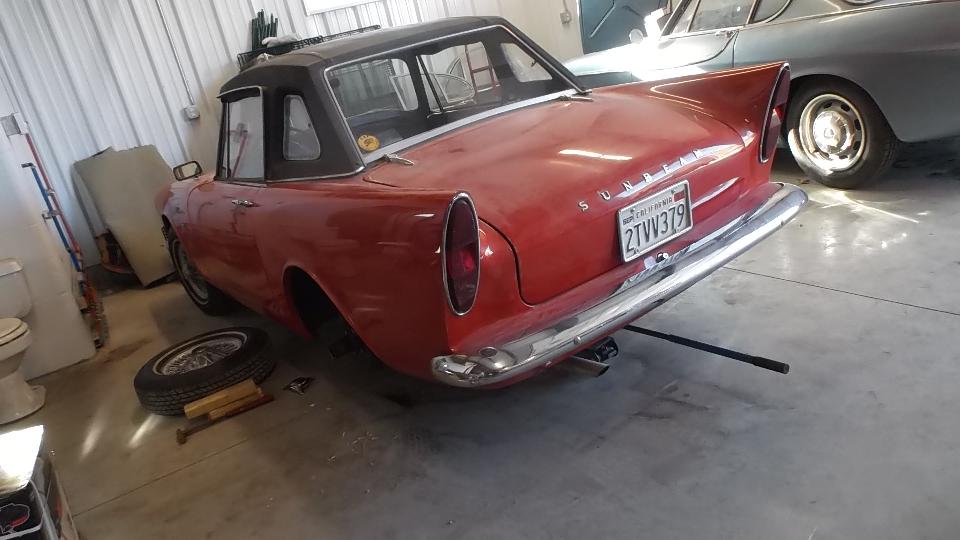
Today we had a visit to H&H Motor Company in Wichita, Kansas. We stopped here a month earlier, but they were closed for vacation at that time. There a lot of different cars here, including a specialty in British cars. We found a preponderance of MGs, a few Triumphs, and several Land Rovers. We believe the MGB was giving a jump start for the Land Rover.


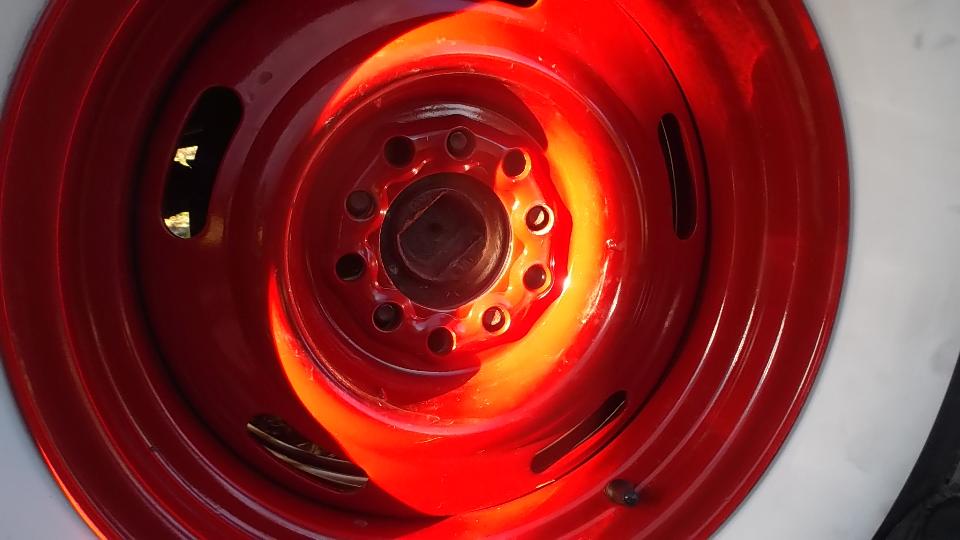
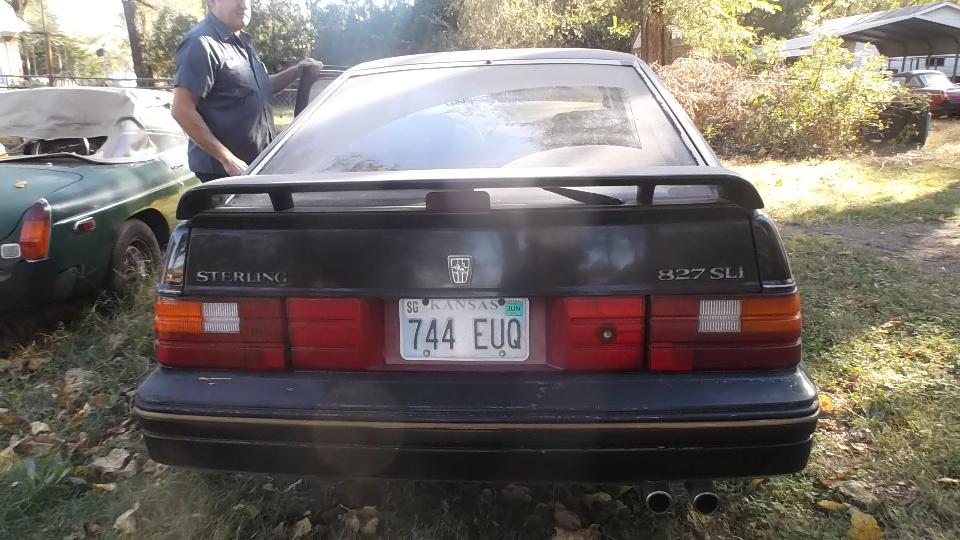
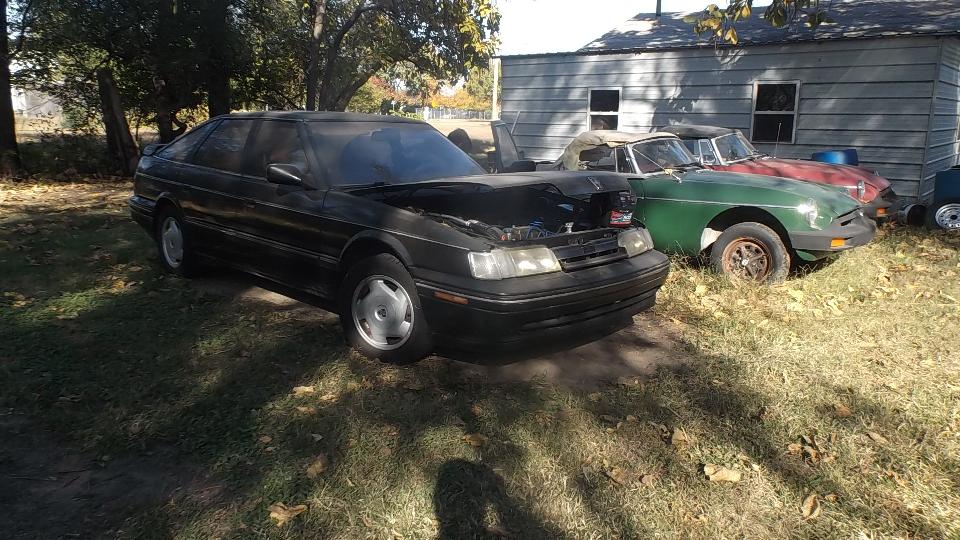
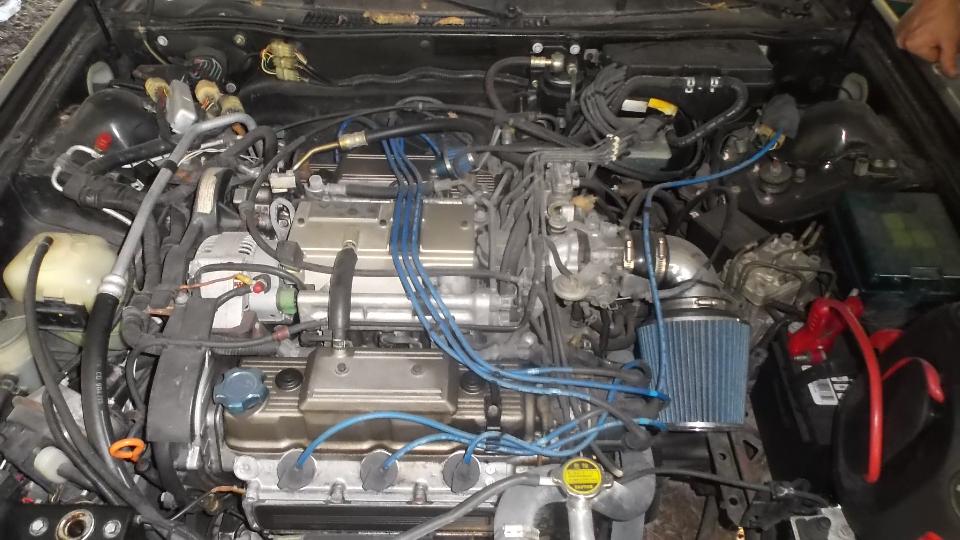
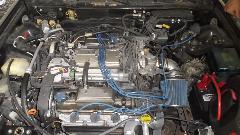
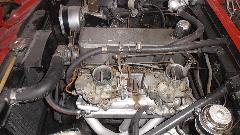
We also found this Sterling 827-SLi (1991 I think). This one being a bit more special than most, being a 5-door (hatch back) that was only available on the east and west coasts in North America (with the midland cars being primarily 4-doors). This one has a Rover fuel injected 2.7-liter V6 engine, all wheel disc brakes, leather interior, heating and air conditioning for the rear seat passengers.

By evening we were heading east from central Kansas and on into mid Missouri by midnight.
Saturday October 17, 2015
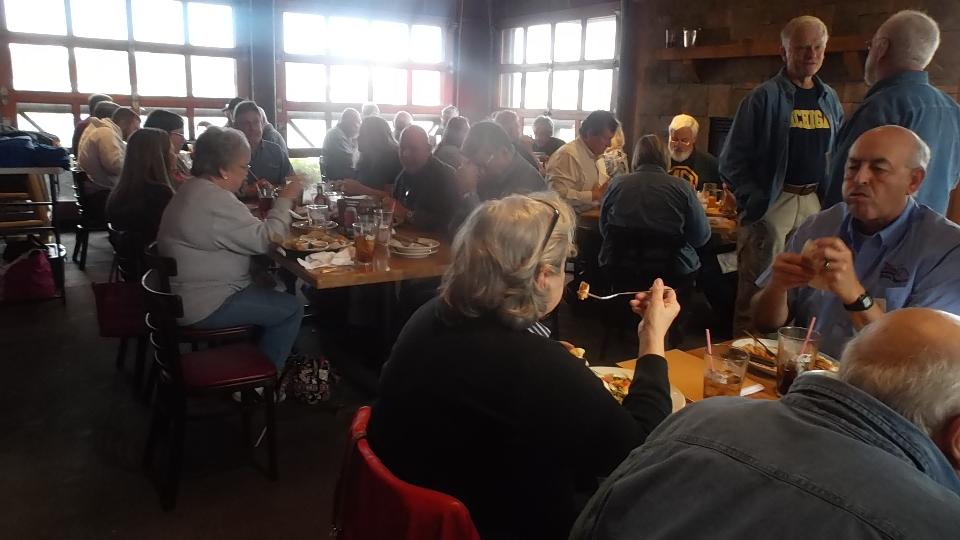
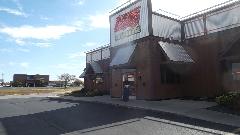
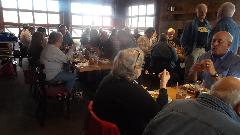
Today we were in Springfield, Missouri for a luncheon meeting with Greater Ozarks British Motoring Club (GO-BMC). We were last here nearly six weeks earlier when their "Ice Cream at Andy's" got rained out, so this another case of picking up loose ends. We were told that some people like to arrive a bit early for lunch around noon before the 1-pm club meeting. These few MGB in front were here before us. Inside we ran into a crowd (about 40 people), not having looked behind the building for the rest of the British cars. After lunch and business the MGA Guru had a bit to say about what we were doing, which seemed to raise a few eyebrows along with smiles and cheers. And then we had a couple more appointments to attend to.

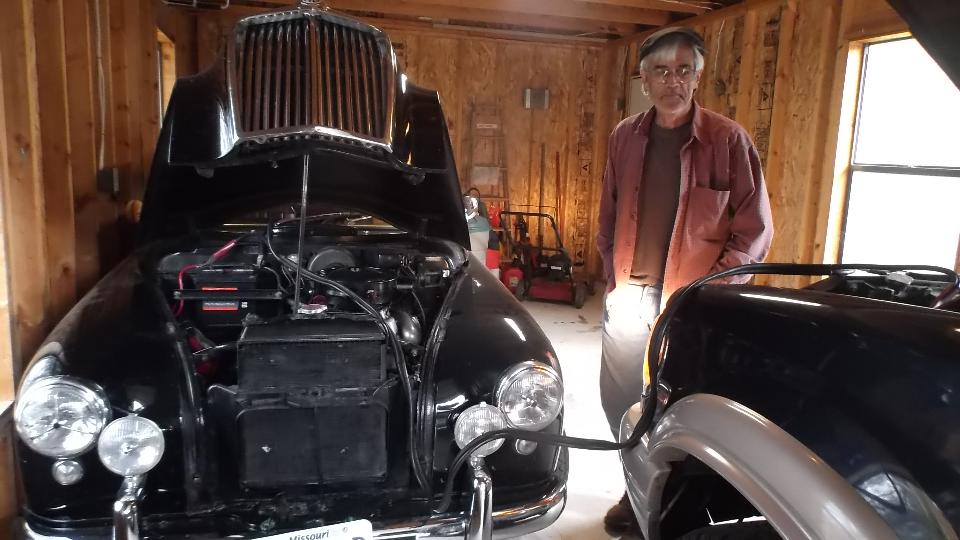
After a bit of WiFi time, we did a 30 mile sprint south down US-65, and a more casual drive 20 miles east on US-160, arriving to visit David Darby in rural Kissee Mills, MO. If you don't count the sport-ute, he as two MG ZB Magnettes (one running), an MGA Coupe project car, an MGA roadster (was running some years ago) belonging to his son, and an MG MGB-GT that also ran not so long ago. Given credit that the project car is "in process", we will see what we can do with the other three non-runners tomorrow. Meanwhile, nice dinner and late night chat,and we all need to sleep sometime.

Sunday October 18, 2015
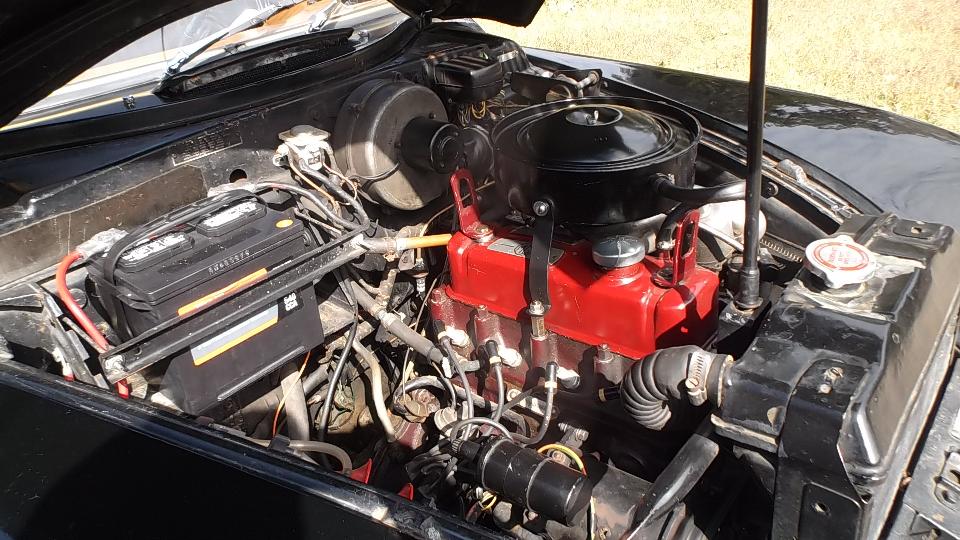
First task today, get the Magnette running. Battery charger was on all night, but battery is still dead. Scratch one duff battery charger, get the jumper cables. After charging the battery, easy start, no problem, give it a bit of sun light and get a picture.
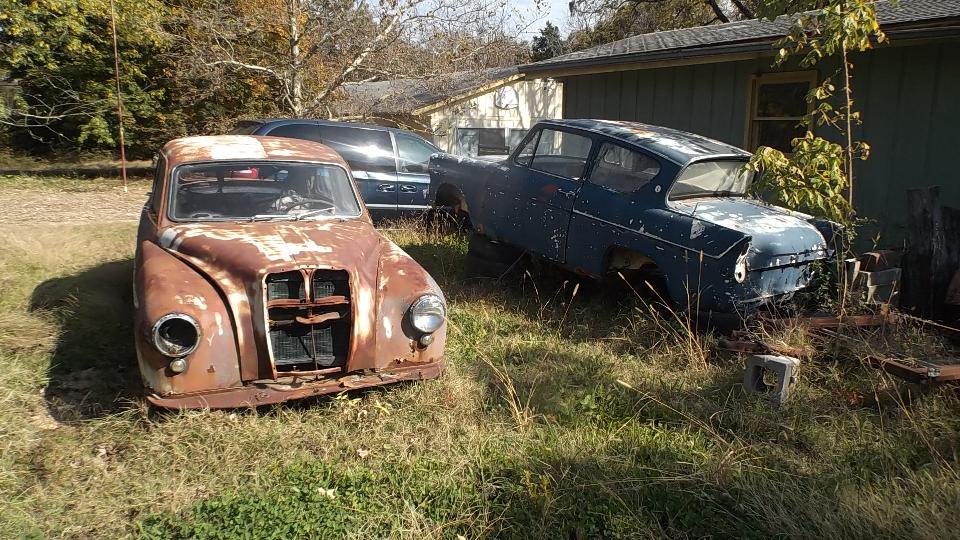
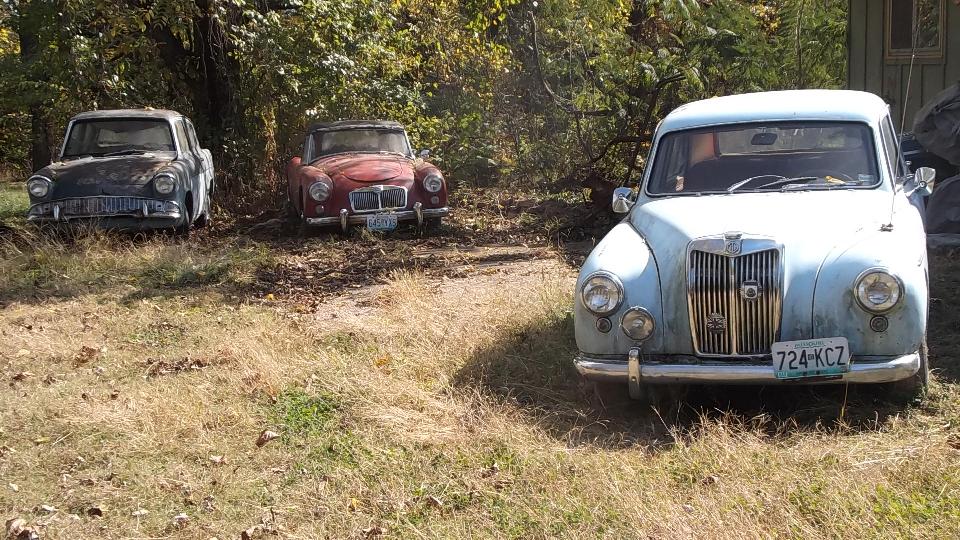
Then we were taking inventory of the rolling stock (and non-rolling stock). Two more Magnettes, one of which used to run when parked and could run again with a little work; two Ford Anglia (which he "really should do something with"); an MGA 1600-MK-II; an MGA 1600 Coupe with engine apart (his son's car).
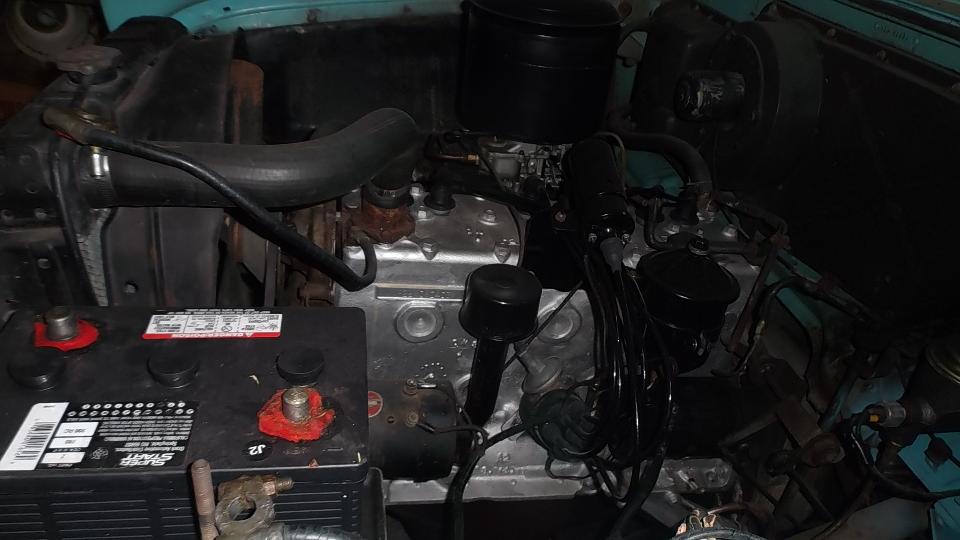
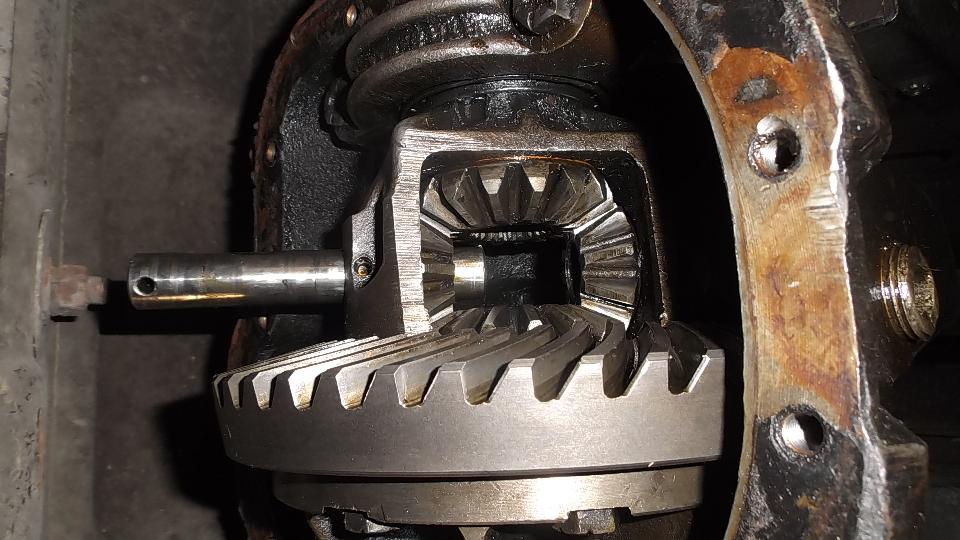
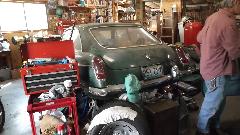
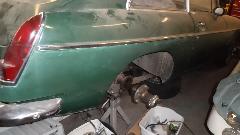
 There was a nice 1956 Plymouth with flat head 6 cylinder engine (almost finished), and a 1967 MGB GT with a problem in the differential. This is the one we decided to tackle next.
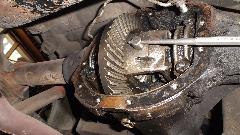
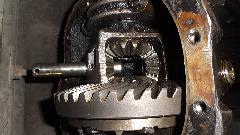
This had begun as a "simple" clunk removal procedure (replace thrust washers in the differential), but got stalled when the pinion shaft got stuck and could not be removed. We are persistent, so with ample application of punches and hammers and crow bars we were gradually forcing the issue, and the pinion shaft was moving a bit at a time. Problem was one of the pinion gears was severely binding on the shaft to the point that it had sheared the roll pin and the shaft was rotating in the carrier. Large vice grips did not hold well enough to pull it with a slide hammer. By day's end we decided best to weld a large hex nut onto the pinion shaft for a good purchase so we could pull it with a slide hammer. Not having a big hex nut handy, this would wait for another day.
Monday October 19, 2015

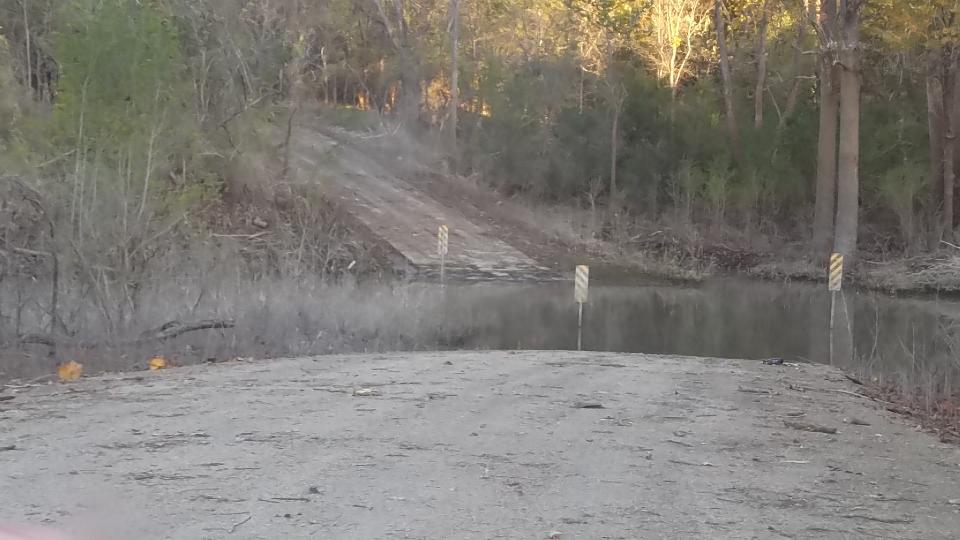
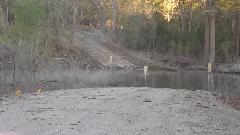 Heading back north toward Springfield in the morning had a bit of a problem right off. We were trying a short cut prescribed by Mapquest when there was a sign saying "Water On Road". Having seen these before, there is commonly no water on road during the dry season, but his time it was true. Judging from height of the striped marker signs, I suppose it was a bit too deep for the MGA to ford, so we chose to go back. It was a nice road otherwise.
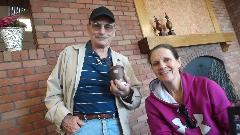
While sitting on WiFi in Springfield, a couple of folks saw the MGA in the car park and stopped in to chat for a while (about half an hour). Patty & James Stillings from Springfield, MO have a 1967 MGB tucked away in a garage, ran when parked, but after a few years may be buried under some "stuff". This may provide a chance to revive another one a couple of days later.
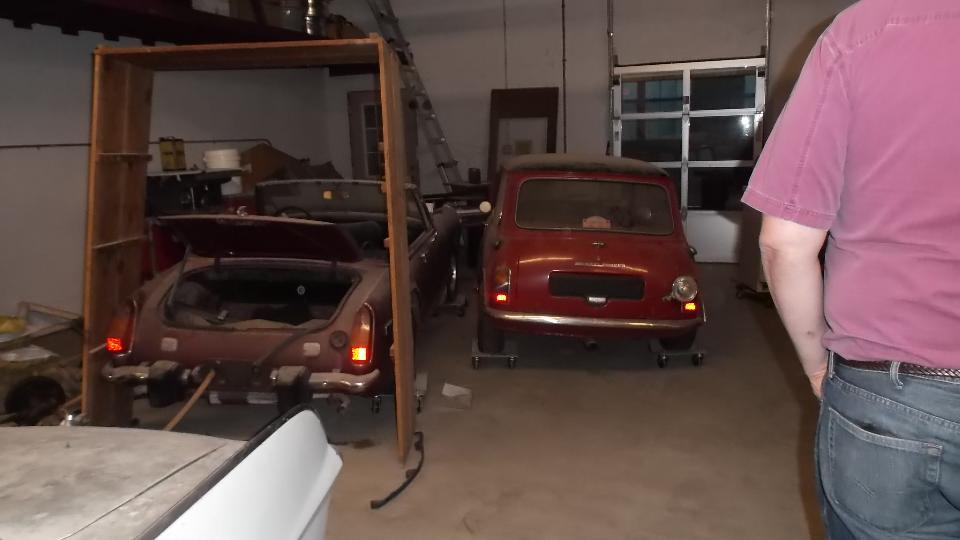
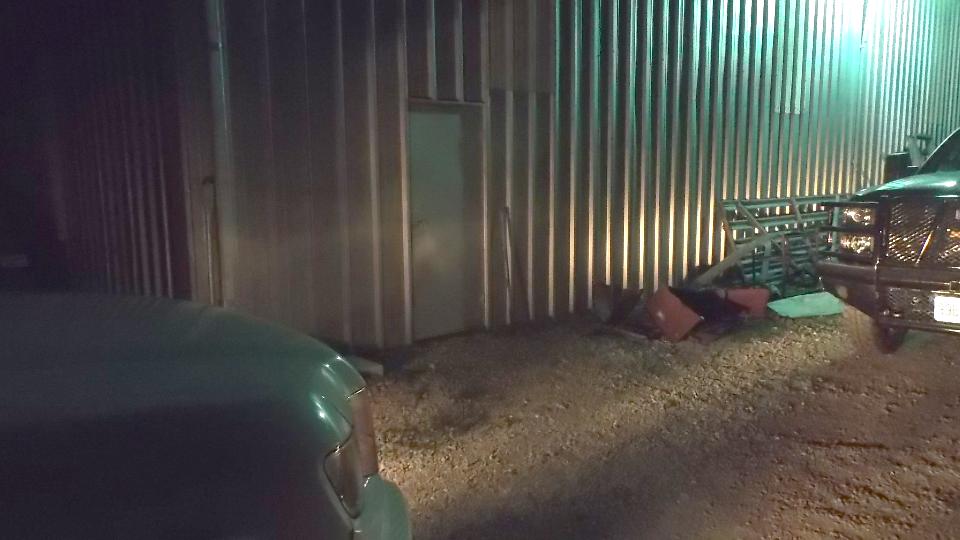
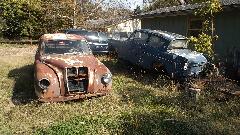
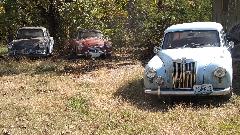
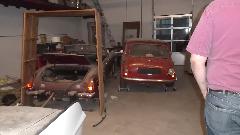
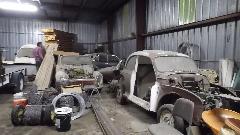
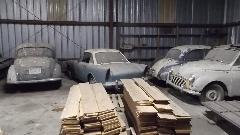
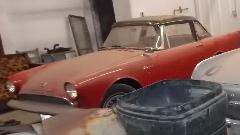
By late afternoon we were in Bolivar, MO to visit Thane Kifer. He has a rather extensive stable of LBC, most of which do not run, unfortunately. After a quick dinner we had an evening visit to a local store house. First outside was a lowly MG Midget (now a parts car) that had donated a 1275cc engine that was overhauled and is destined for installation in a Morris Minor. Inside one more Midget, condition mysterious but maybe not a restoration candidate (and that may be the last of the MGs). The finished 1275 engine is under cover in the third photo below. Next to the Midget is a Morris Mini, reportedly "ran when parked" (several years ago), hydrolastic suspension flat on one side now, but might be easily pumped up.

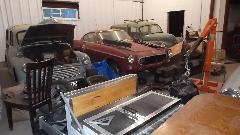
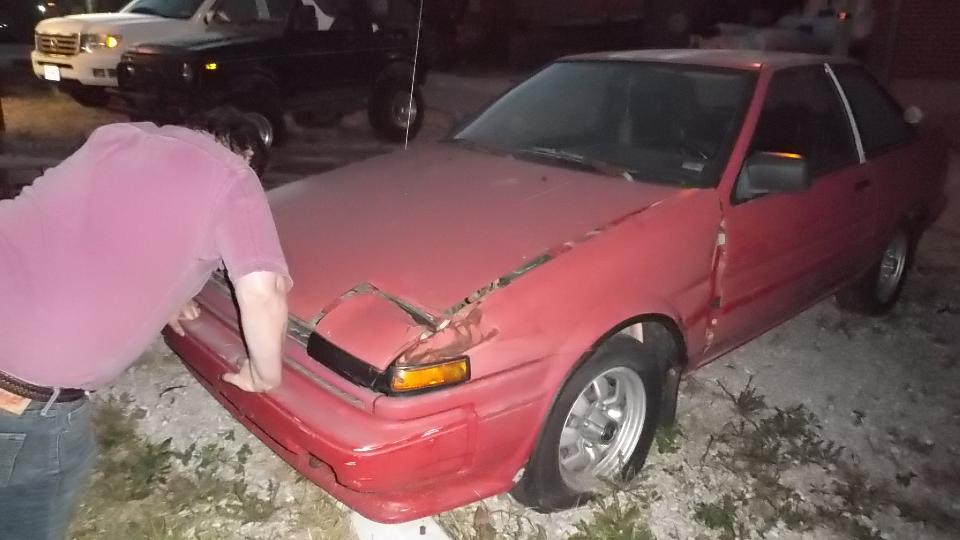
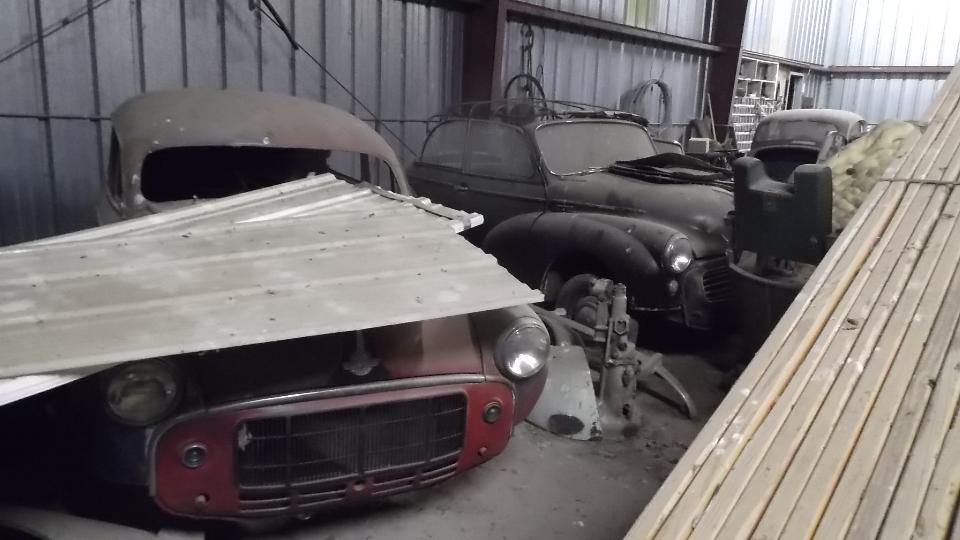
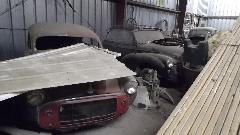
Now you can start tabulating. Morris Minor Traveller, Volvo P1800, another Morris Minor Traveller. Volvo P1800, Sunbeam Alpine, Volvo 1800S. Outside again, a Toyota Corolla STX which is said to have an engine which might be easily transplanted into a Morris Minor. Get where we are going yet?


 Then we truck on out to "the farm" for some more cars in storage. Morris Minor, Morris Minor Convertible, half of a Sunbeam Alpine, Morris Minor, Morris Minor Convertible, Morris Minor, Morris Minor, Sunbeam Alpine, Morris Minor, Morris Minor. There is reportedly a Morris Minor four-door out behind the building and another "car to be named later" in another location with no light at night. I think that makes at least 12 Morris Minor, 3 Volvo 1800, 2-1/2 Sunbeam Alpine, 2 MG Midget, one Morris Mini and the odd Toyota, none of which are currently running.
Ah, but there is also a Land Rover Diesel (no picture yet) that was running but needs a clutch slave cylinder. We may tend to that one first. No, we are not going to restore all of these cars, but I may take a shot at reviving a Volvo 1800 and an Alpine, and perhaps the Mini. Tomorrow will be another day.
Tuesday October 20, 2015
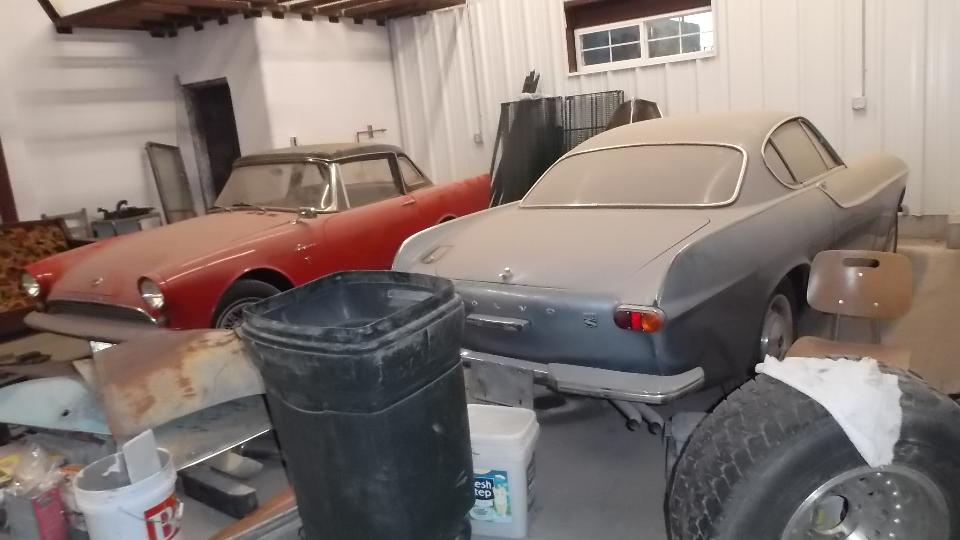
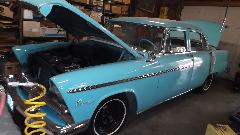
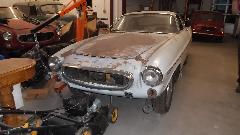
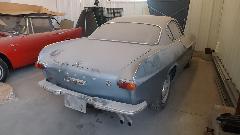
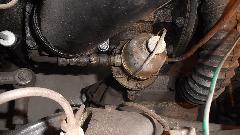
I took after the gray Volvo today. In late 1960 the P1800 body was produced by Pressed Steel in Linwood, Scotland; cars assembled by Jensen Motors in West Bromwich, England. Except for the brand name, it was British built. In 1963 production moved to Volvo's Lundby Plant in Gothenburg and the car's name changed to 1800S (goodbye England). This one is the mid 60's 1800S, built in Sweden (with good British heritage and dual SU carburetors). Parked for several years, fuel stank like turpentine, fuel hoses cracking, carburetors gummed up with chokes stuck solid, dead battery. Low fluid in the clutch master cylinder (but half full in the brake master cylinder). Where to start?
 Drained the old fuel, removed the cracked hoses, R&R carburetors to knock the main jets loose and clean everything. Found both air cleaners were upside down, so the two small vent holes were covered (oops). Reassemble with new hoses and fuel filter. The car rolls. Roll it in 4th gear and engine turns. Some encouragement. Will carry on tomorrow. Drained the old fuel, removed the cracked hoses, R&R carburetors to knock the main jets loose and clean everything. Found both air cleaners were upside down, so the two small vent holes were covered (oops). Reassemble with new hoses and fuel filter. The car rolls. Roll it in 4th gear and engine turns. Some encouragement. Will carry on tomorrow.
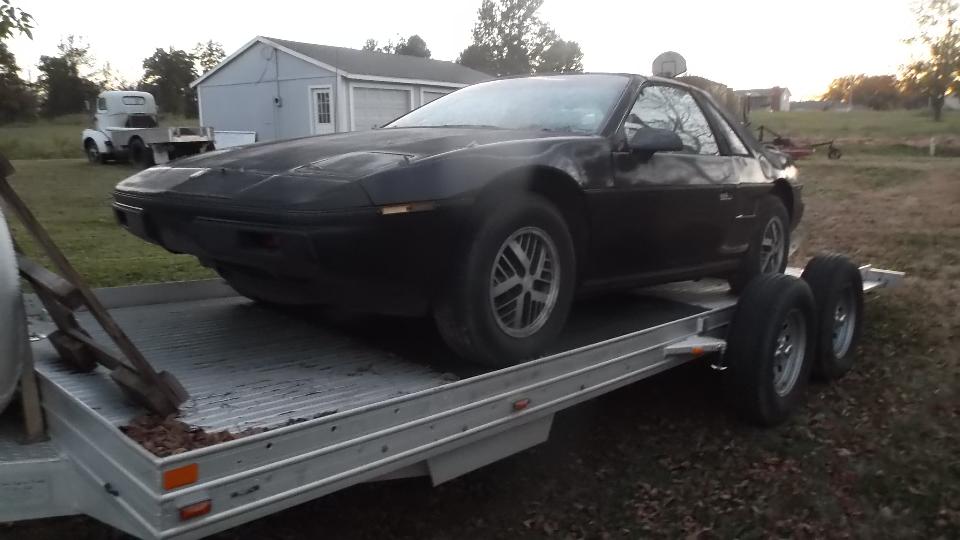
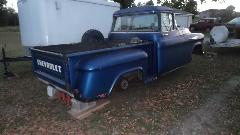
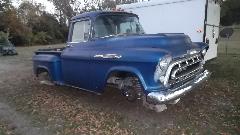
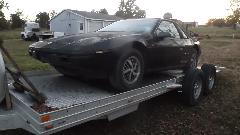
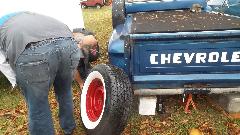
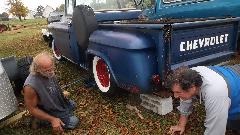
Stopping in time for dinner, we found a few more toys in Thane's back yard. I think the Chevy is 1957 Step Side truck. On the trailer, a Pontiac Fiero (seems to be looking for a new home). The white truck In the background is a 1946 Chevrolet Cab Over "Art Deco" model (look it up).
Wednesday October 21, 2015
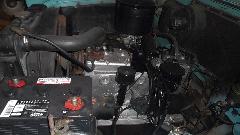
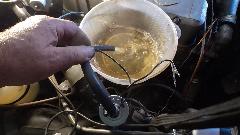
Back to work on the 1800S today, new battery installed, air cleaners on, plumbing and linkages connected. Feeding it some fresh fuel with supply hose in a can connected to mechanical fuel pump, hose off at carbs, crank to verify that the pump works (fuel to carbs). Connect hose to carbs, crank a bit more to fill the float chambers,
 pull choke, crank again, and it started right up running very well indeed. Once warmed up it only needed a final adjustment to fuel mixture, and purr! Switch off, move extra hose from input to output side of pump, connect hose from fuel tank to input side of pump. Put a gallon of fresh fuel in the tank, start it up and, catch the purging stale fuel in a pot for disposal. Once clean fuel was present, disconnect the dump hose and reconnect hose from pump to carbs, and the engine work is done (but will need an oil change).
Then to see if it would move. Top up the master cylinders, clutch pedal feels okay, brake pedal slow to depress but pumped up solid on the second stroke. Engine running, clutch down, but could not engage any gear. Switch off, shift to top gear, brake down, clutch down, crank engine, and it jumped once with a thump and resumed running in place. Yahoo, we win, the clutch works. Tried reverse, and it backed up with great resistance. Ditto first gear, forward with great resistance. Switch off, jack up front end, LF wheel turns hard, RF wheel frozen. Open bleed nipples, and both front wheels turn with only a little resistance. Conclusion: clogged brake hoses need to be changed, add to shopping list (along with a new clutch hose).
Contemplating taking a test drive, one more brake test, press brake pedal hard, and it let loose and went to the floor. Oops. Brake fluid running out of RR brake drum, so no test drive today. Add rear wheel cylinder rebuild kits to shopping list (and a clutch slave kit while we're at it).
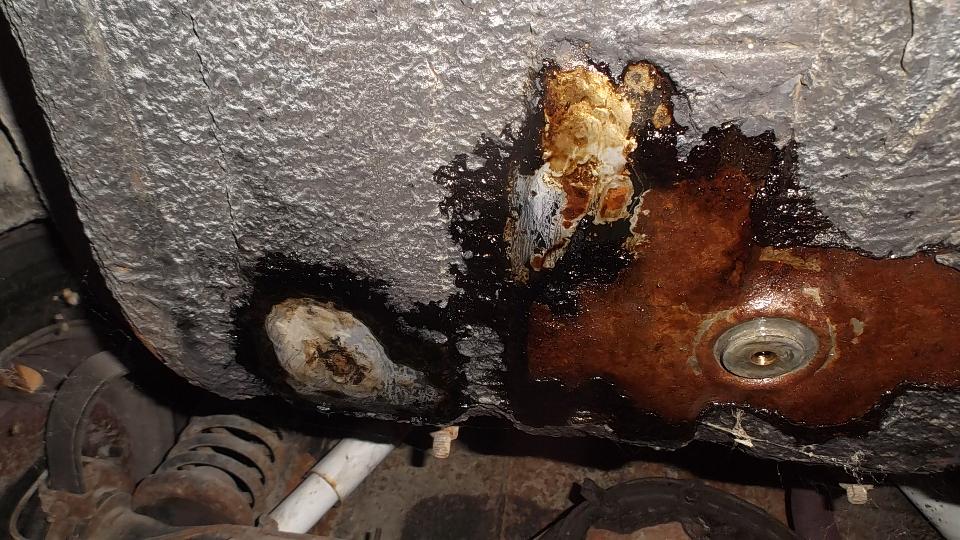
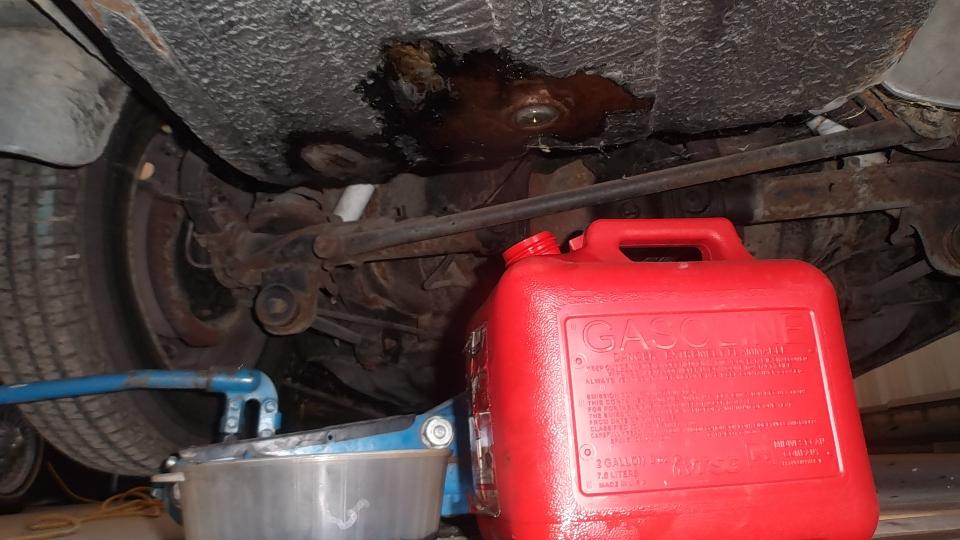
Then needing to tend to a small leak from the fuel tank. Jacked up rear, crawled under, scraped away some undercoating, sanded clean, and found a few pin hole leaks. Drain fresh fuel from tank back into can.
Off to parts store to pick up JB Quick Weld (not found, but they did have JB Weld, long cure). Wanting quicker results I found Permatex Instant Gas Tank Repair (willing to try something new). Cut a chunk of the 2-part epoxy clay, kneaded it until white and black combine to make gray and apply to tank. I suppose this stuff may have been past the "use by" date, because it was difficult to mix, very stiff, and would not adhere to the clean sheet metal. Tried mixing another glob quicker this time, but same results, no good at all. Rats! Back to parts store to get the JB Weld (which I know will work, as I have a patch of this stuff on my MGA fuel tank for several years). Quick work to mix up a glob of this stuff, apply to tank, sculpture to shape with a finger tip, and leave to cure (overnight in this case).
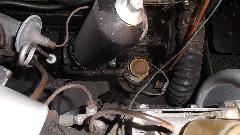
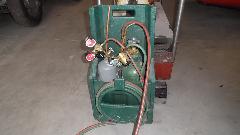
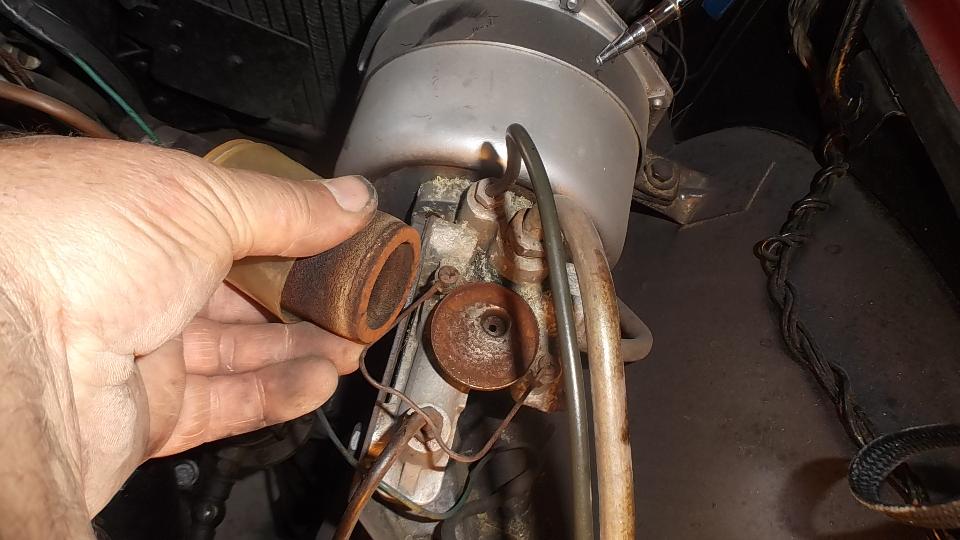
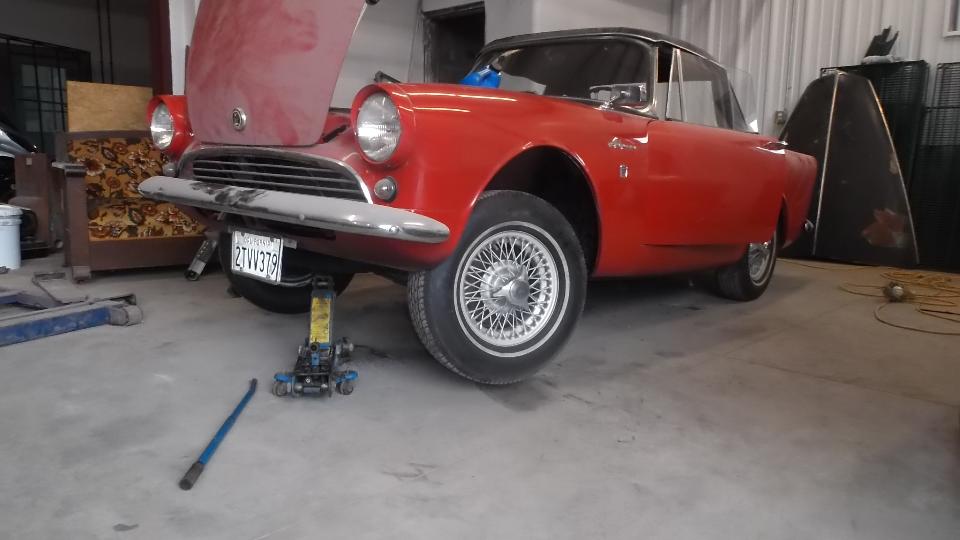
Come to a stopping place on the 1800S, I dusted off the Alpine for a closer look. Put a battery charger on it (not that I expect it to do any good). Under the bonnet I found dusty rust in the brake booster breather filter and blew that out with an air gun.
|
Found more rust powder in the sediment bulb fuel filter and blew that out. Discovered that fuel was piped from tank to engine with copper tubing hanging loose under the body, no flex hose at the engine (definitely not original).
Oil in the engine, no fluid in the brake master cylinder (bummer). Carburetor linkage was stiff, but loosened up some with a bit of manipulation. Contemplating how to feed it some fresh fuel. Time to break for the day.
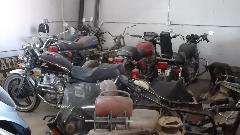
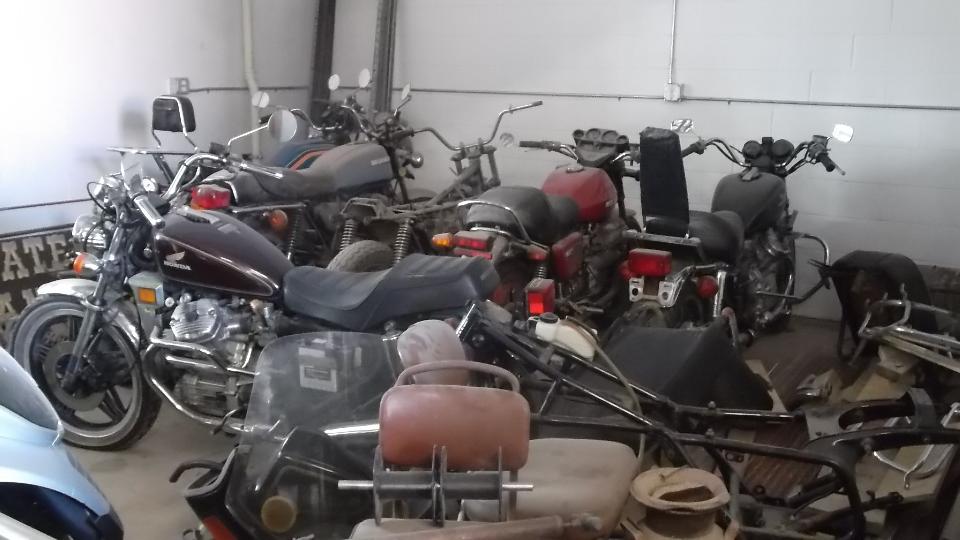
Did I mention that Thane has several motorcycles in his collection? Mostly Hondas with a couple Moto Guzzi, and this odd three wheeler thing I haven't figured out yet.
Thursday October 22, 2015
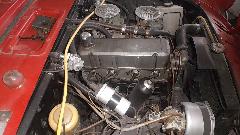
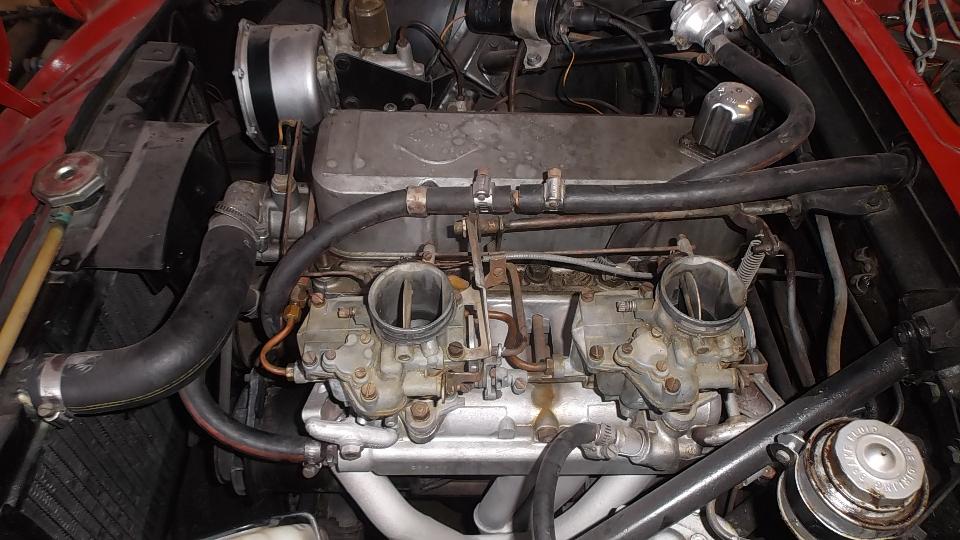
The Alpine looks better today with some of the dust removed. I was amazed that the battery took a charge and the engine would crank over. Needing to remove stale fuel, but the dual saddle tanks have no obvious drain. So I put one of my spare Airtex electric fuel pumps to work. In a few minutes the stale fuel was out, hard lines reconnected to pump, fresh fuel in the tank, and some engine cranking brought fuel to the carburetors. A bit of PB Blaster loosened up the carb linkages. Good cranking, but no start. Test light shows points doing the right thing (blinking when cranking), but having a very weak spark. Installed a new condenser and Rotor, and replaced the the (resistor) wire from the coil, but still weak spark. Borrowed ignition coil from the indoor MG Midget (ah-ha, MG content), and that got better spark. A shot of fuel down the carb throats got it running, and the original mechanical fuel pump finally kept it going. Yee-haa, we win again, another happy engine.

Topped up the master cylinders. Depress clutch, and it shifts okay. Clutch up wants to stall the engine, brakes are stuck (maybe from being parked with hand brake engaged). A little more vigor with throttle and clutch, and the rear brakes finally pop loose with a gentle thump. Itching for a test drive, but no brake pressure (need to bleed the air out). Will have to wait for another day, out of time now. Time for a late lunch before moving on to the next patient.
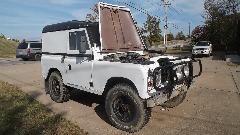
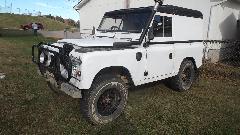
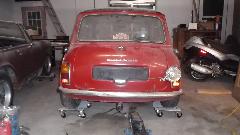
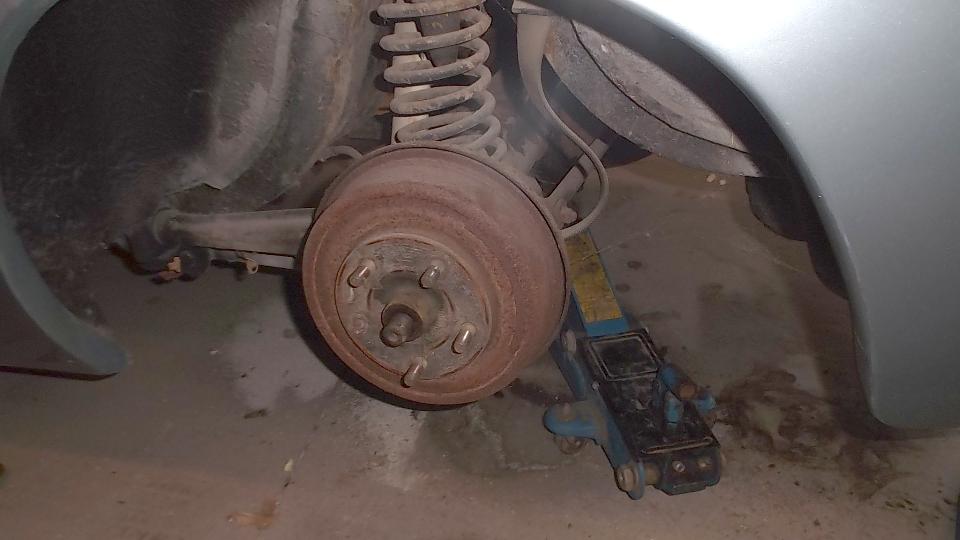
Then there was the Range Rover (finally got the picture), in need of a clutch slave cylinder. Aside from cramped space, changing the slave was straight forward knuckle scratching grunt work (but could crawl under without jacking it up). Topped up with brake fluid, several pumps gushed fluid out the bleed nipple. Closed the bleeder, pumped again, but no joy. Will have to wait for another live body (helper) for clutch bleeding.
Friday October 23, 2015
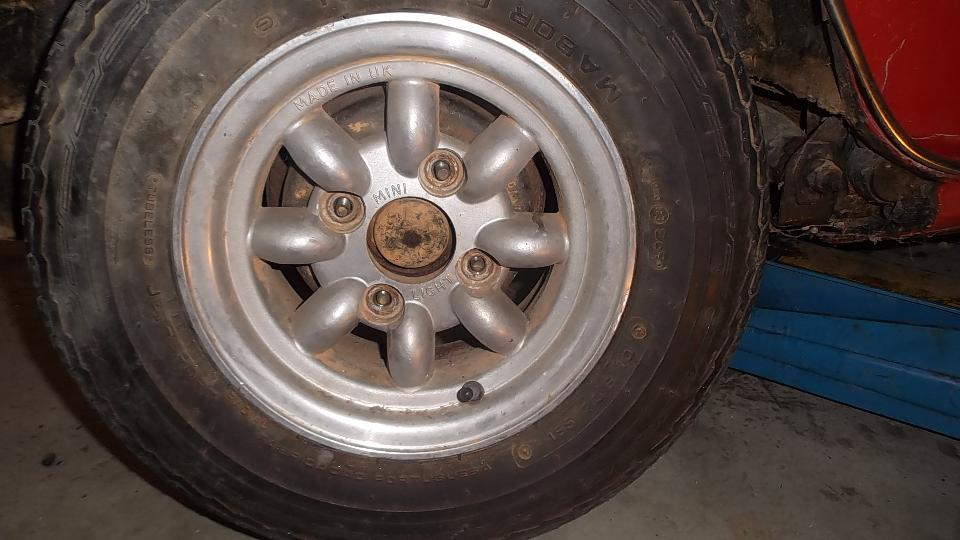
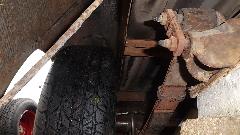
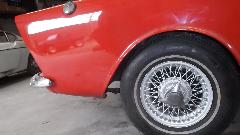
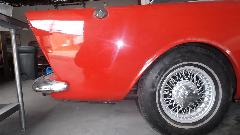
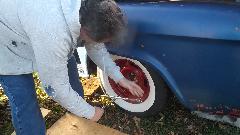
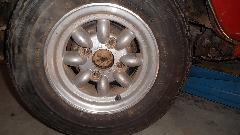
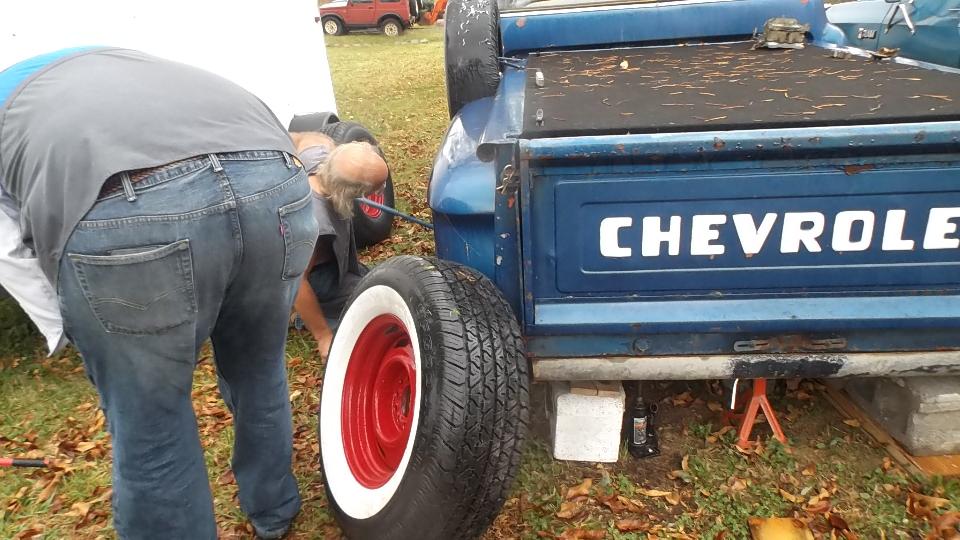
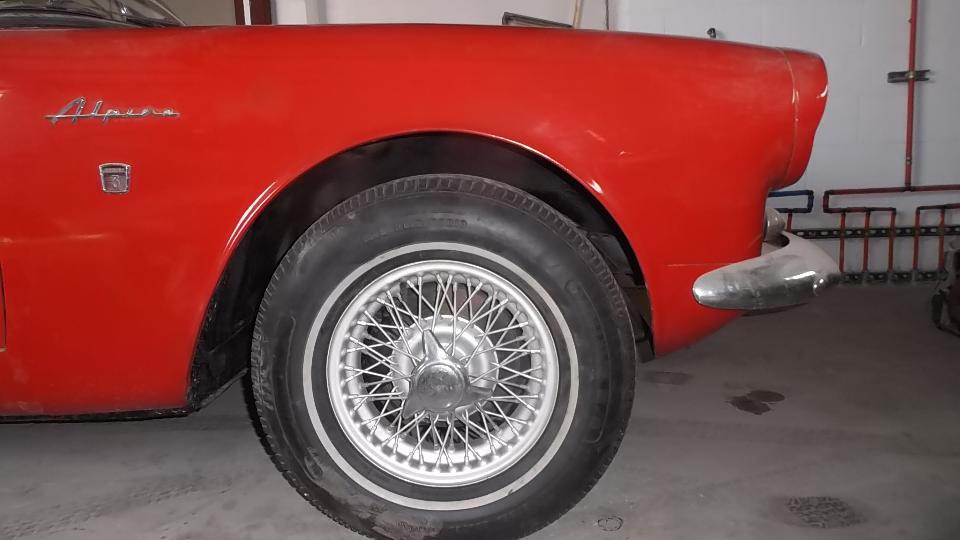
What's wrong here? Too wide tires. Let the air out to squeeze it between fender and brake drum, use a wheel spacer, and it's still too close inboard. Bummer. Should have smaller tires, as letting air out of the spare to change a flat could be a problem. To use these it needs a thicker wheel spacer and longer studs. Time will tell.
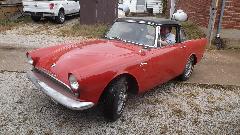
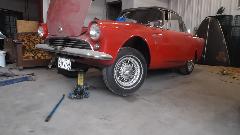
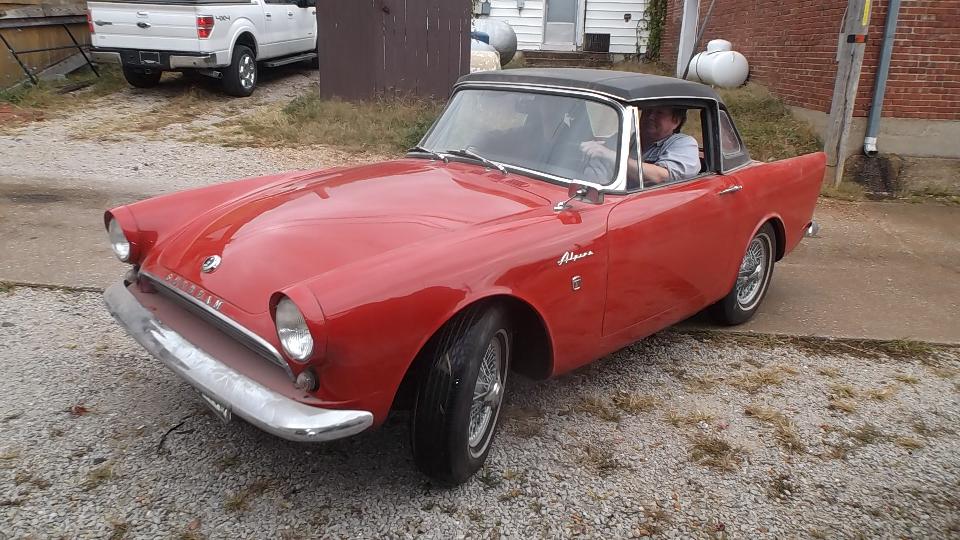
Back to the Alpine. Charge battery, purge stale fuel, add gas, prime carbs, and fire it up. Loosen up stuck brakes, bleed clutch and brakes, and take it for a test drive. Yee-Haa! Big grin.
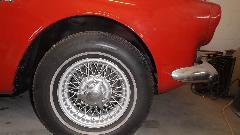
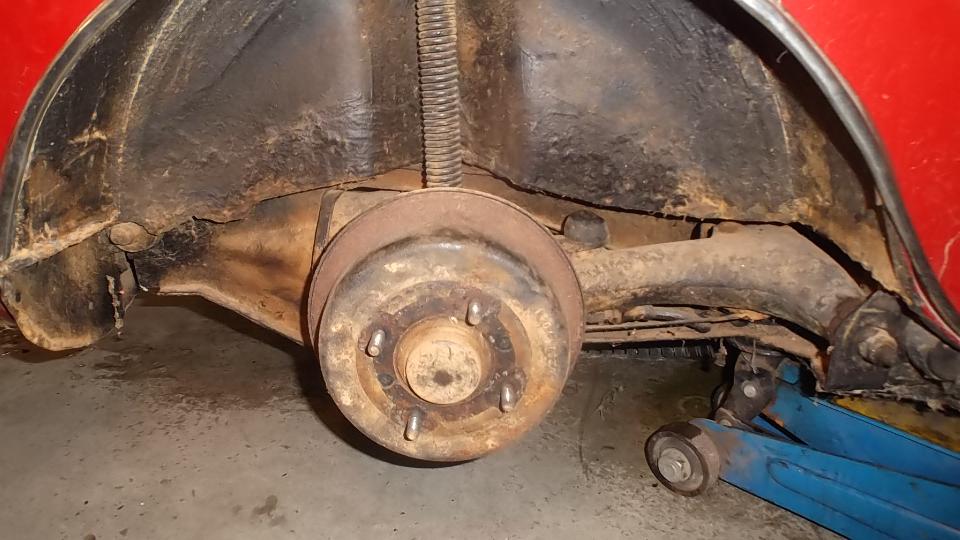
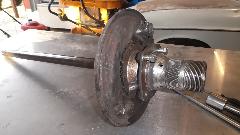
 What's wrong here? All four splined hubs and spinner nuts on wrong side of car, will be self-loosening rather than self-tightening. Major bummer. More grunt work required to switch all the hubs.
Saturday October 24, 2015
Midnight (early morning) run 30 miles for a banking stop, and finally washed the racing numbers off the car. Small hours of the morning doing monthly report for Chicago club newsletter. 6-am WiFI session to upload data and check email. Grab four hours sleep before noon. Waiting for parts, so, .... laundry day (among other things). Night time WiFi session, and the day is gone. Typical "day off". Sleep a bit earlier tonight.
Sunday October 25, 2015
Up early enough for breakfast WiFi session, then catch up a few more hours of sleep. Stir crazy I suppose, seems odd doing nothing (like watching paint dry). So let's do something this afternoon.
Finished bleeding the Land Rover clutch. Open bleed nipple and pump pedal until the reservoir is mostly empty. New trigger pump oil can and a bit of 1/4" hose, pumping fluid into the bleed nipple, watch air bubble up through the reservoir keep pumping until the reservoir is full, and its done. Small adjustment for clutch pedal top limit stop, and it was time for a test drive. We took a little run around 20 acres of the back pasture, up to 4-foot tall swamp grass and weeds, bumps and hills and chuck holes and ditches, jolly good fun. The 4-banger diesel engine seems a bit shy on torque at low speed, goes much better higher off of idle, might be a bit late on fuel injection timing, but not my area of expertise (yet). Would like to play a little longer, but other things are calling.

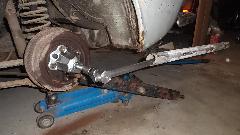
 Needing to swap splined hubs left to right on the Alpine. Start with the rear, as it may be more challenging. Jack up, wheels off, loosen the big nut securing the splined hub and pry for all your worth with every large crow bar handy, but it didn't come apart. No shop manual handy, not sure about the interface between hub and halfshaft, so disconnected brake pipe and cable and removed everything that came along with the wheel bearing and halfshaft. After inspection, one phone call and a trip to O'Reilly's to borrow/rent a large 3-jaw puller. Big boy wrenches, long brace bars, two guys holding it down on the floor applying lots of torque. The puller was rated for 7-tons, and I suppose we used about 8-tons worth of it. I told Thane when it goes off like a shotgun shell with a big bag, you win. About 5 five seconds later it went BANG, Thane jumped a foot or so, and various disassembled pieces fell on the floor. We won. The interface is a low angle taper with a big woodruff key. Dinner time, so we will take this up again tomorrow.

Monday October 26, 2015
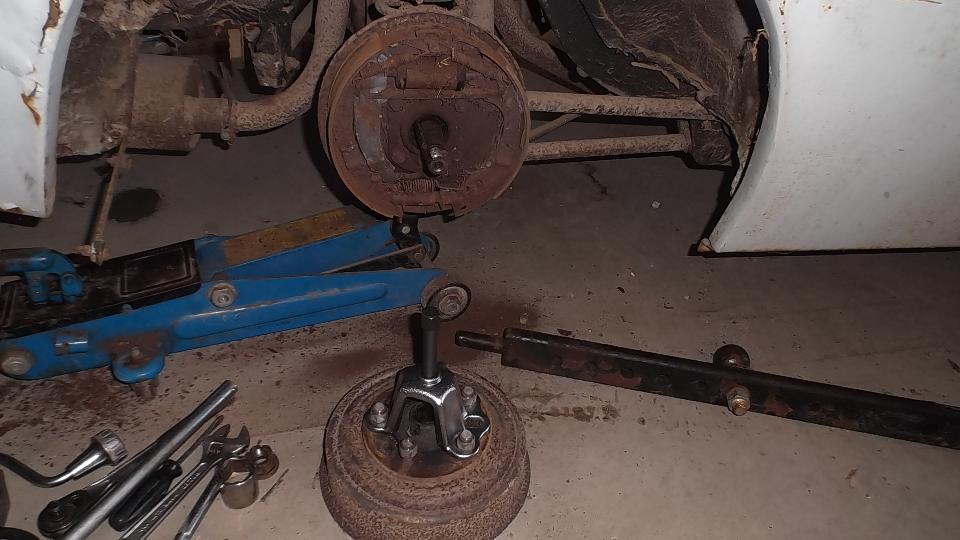
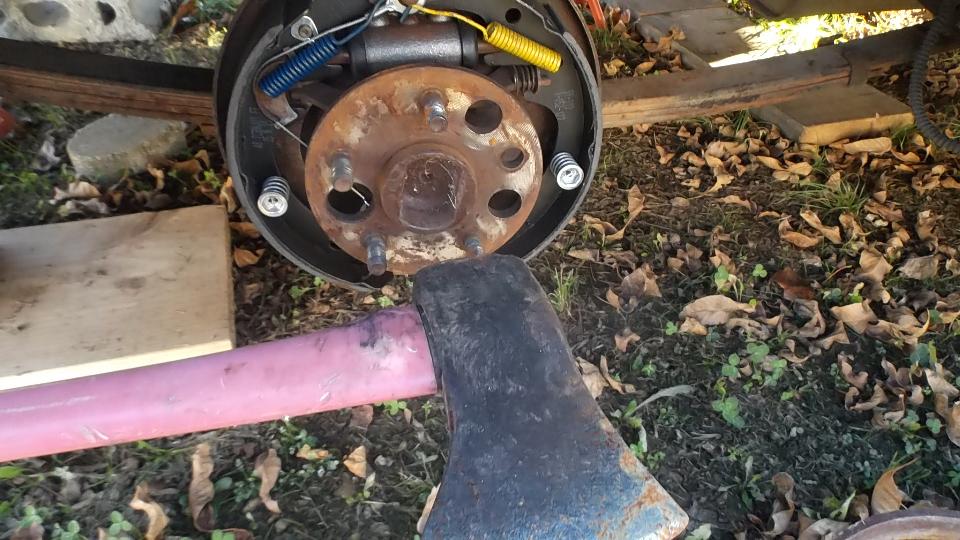
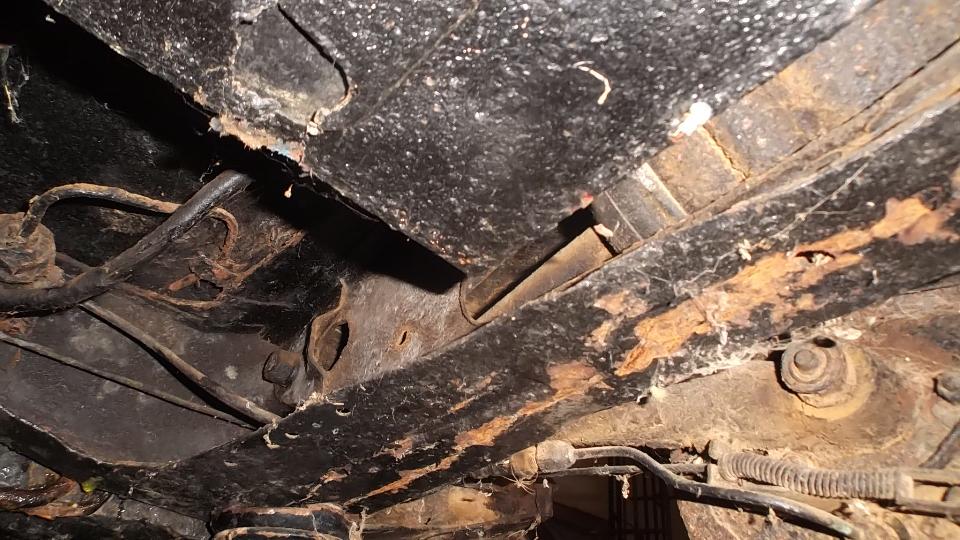
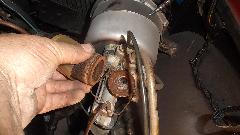
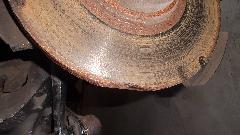
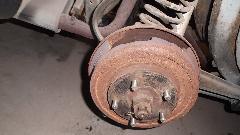
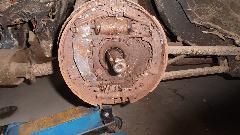
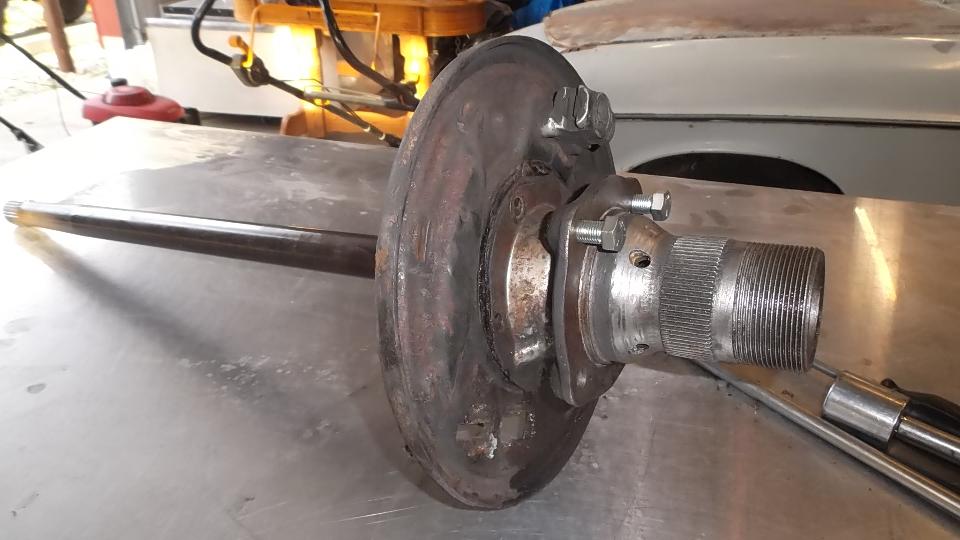
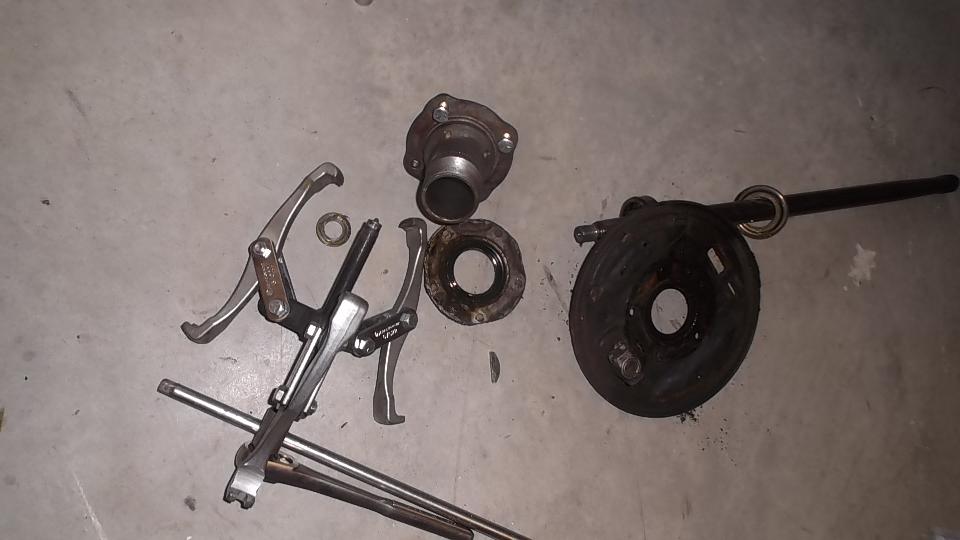
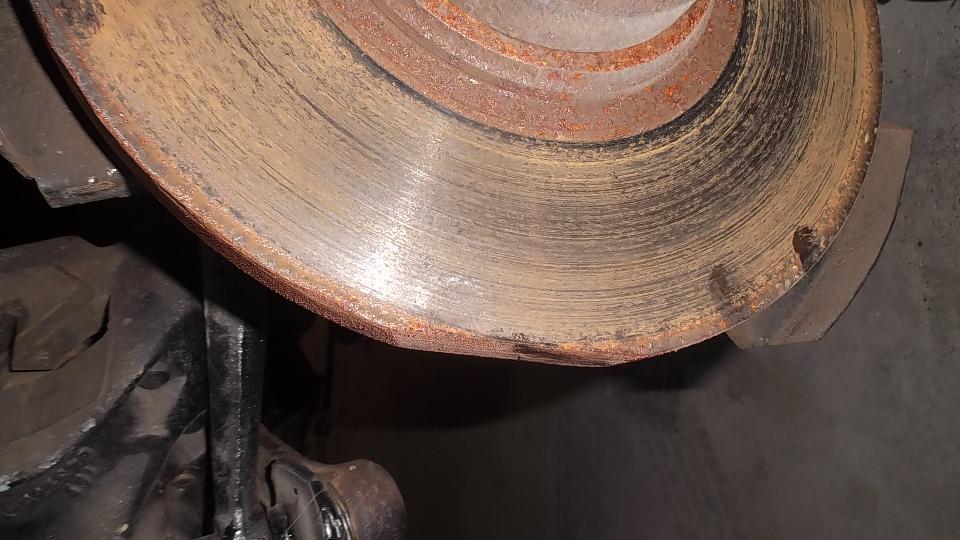
With a certain amount of grunt work, the splined hubs on the Alpine have all been switched to opposite sides, brakes refitted and bled, and ready to drive. In the process I found on the right front what is seen in the third picture below, proof positive that the RF wheel had once come off of the car in motion (and the damaged rotor was not replaced). The KO nuts were all hammered on so tight that the trailing side of the ears were all beat to crap, and they needed a tremendous amount of pounding to be removed.

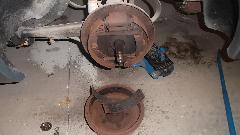
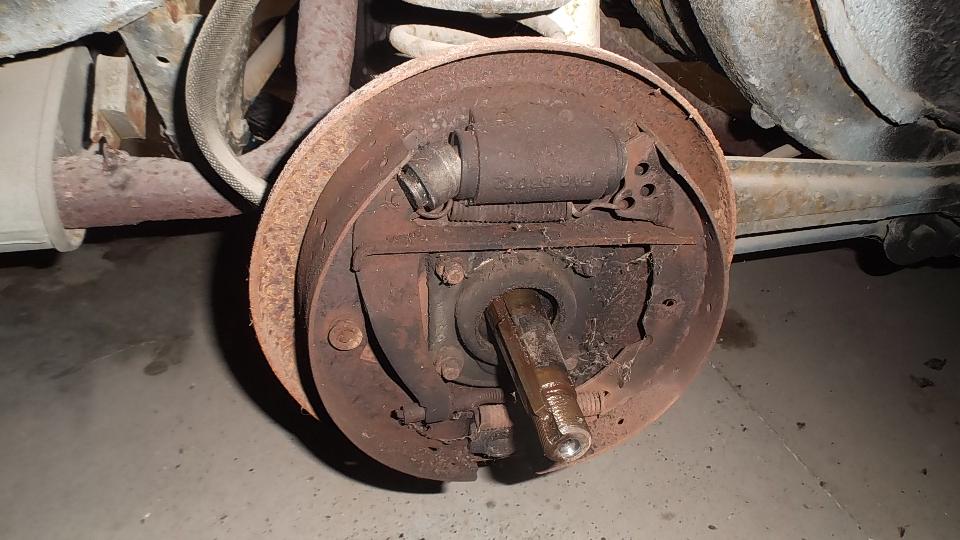
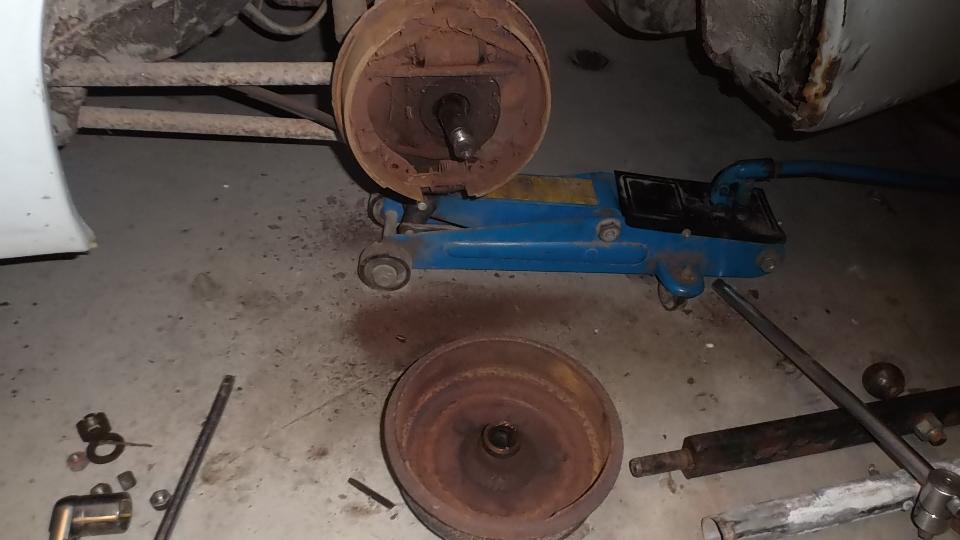
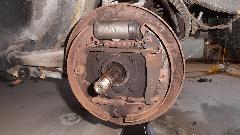
 Going to replace rear wheel cylinders on the 1800S. Removing the wheel reveals one broken wheel stud. Grunt work followed by the now familiar big bang remove the LR brake drum (using a different loaner tool). Loose friction linings indicate sever overheating of the brakes.

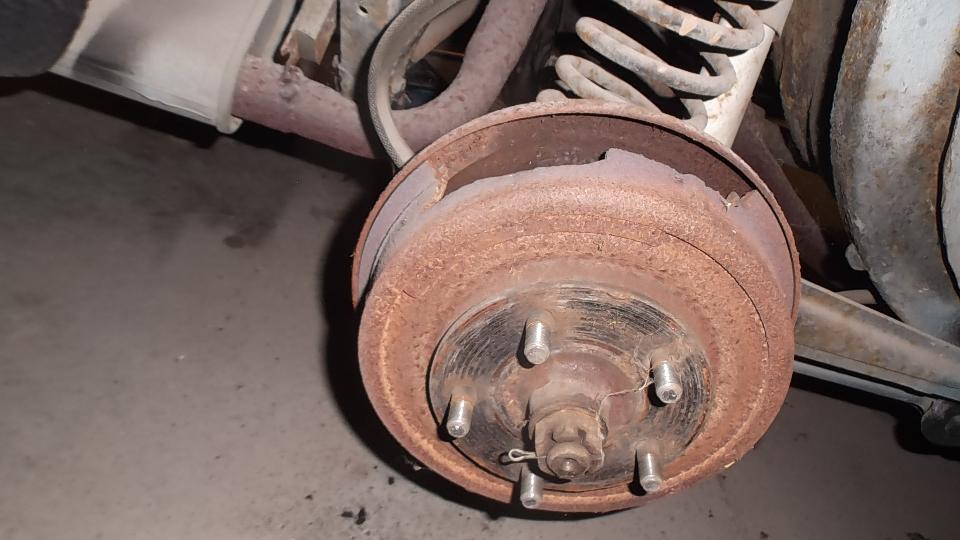
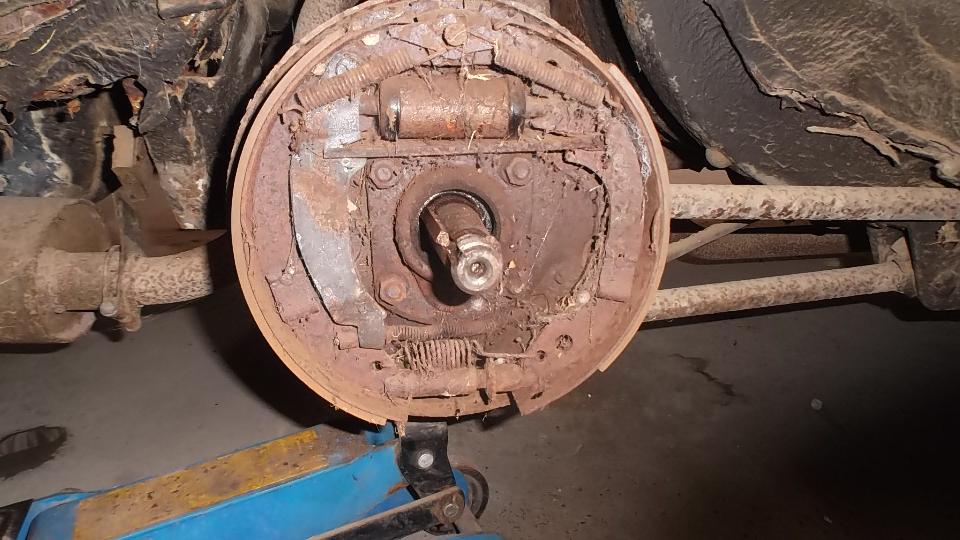
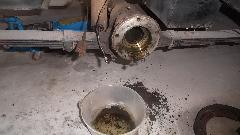
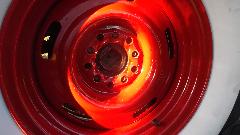
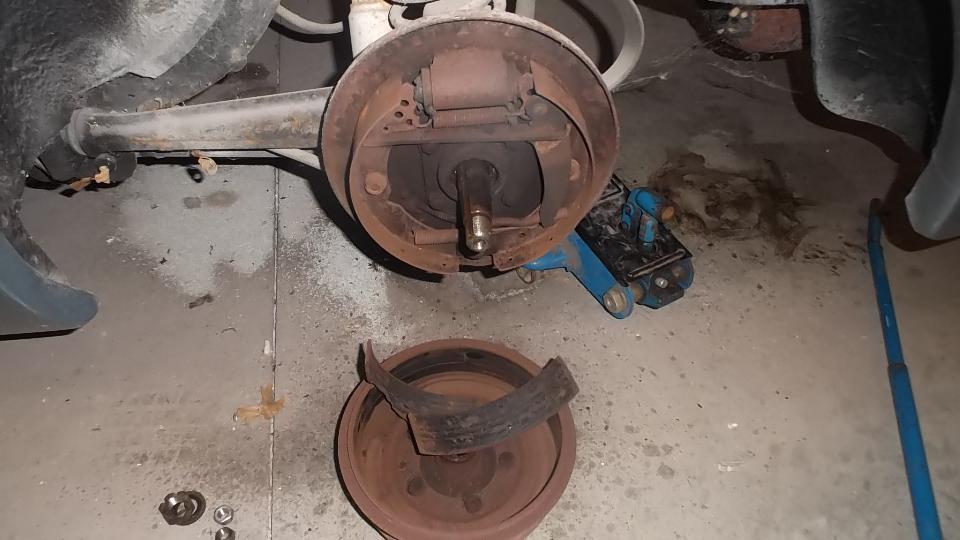
 Removing the wheel on RR immediately revealed catastrophic damage to the brake drum. After grunt and bang and removal of the broken drum, there was no lining at all on the right side brake shoes or inside the drum. This explains the observation of the last person who drove the car, "There was a loud BANG followed by a red hot piece of something falling out behind the car". That would have been a broken piece of the red hot brake drum. I presume the rear brakes were dragging badly and overheating accordingly. Not sure if someone drove it with the parking brake on, or perhaps the rear brake hose was clogged. This also explains why the RR wheel cylinder puked its guts and dumped brake fluid on the floor (over travel).
The local O'Reilly's does not have brake parts or wheel studs for this car. I tried very diligently to remove a wheel stud from the broken brake drum (and hub), deep socket backing resting on concrete, lug nut flush with end of stud, steel plate resting squarely on the nut and stud, and multiple energetic strokes with a hammer, but no joy. I have no idea how much press force might be required to remove these studs.
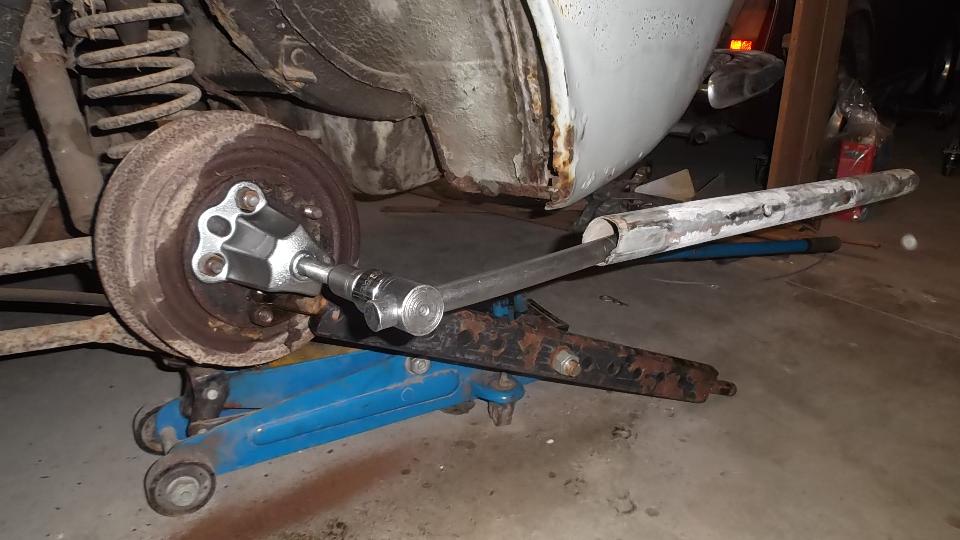
 One brake drum broken and the other one having a broken stud that might not be removable (badly overheated anyway). Time to attack one of the parts cars to see if there may be serviceable drums there. Start on the left side (just because it's handy). This is a 3/4-inch drive T-bar with a pipe extension, and a tractor draw bar being used as a reaction arm. I was standing on the pipe with vigor (me over 200-lbs mass) applying great torque to the robust little puller tool, but this time in spite of all the grunt, no bang. Time to knock off for the night, so we left it there with torque applied. With some wishful thinking it might be magically disassembled for next visit. (Yeah, sure).
Tuesday October 27, 2015
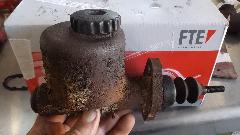
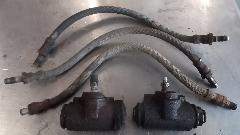
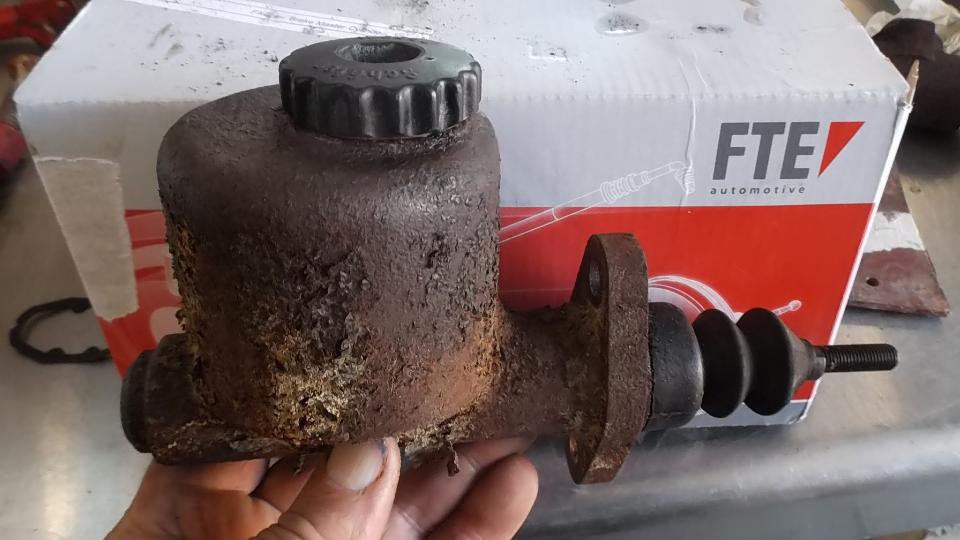
Looked at the parts car and stepped on the breaker bar a couple more times, but no-go on the brake drum removal. So back to work on hydraulics on the running 1800S. Removed two burned up rear wheel cylinders and installed new ones. Also installed three new brake hoses and a new master cylinder. Then back to the parts car, it will either come loose or break something. Stepped on the breaker bar a few more times, broke the puller tool screw just below the hex head. Bummer. Start the phone calls looking for an acetylene torch, and order another puller tool.
Wednesday October 28, 2015

Bring out the big boys "blue wrench". Leave the highly tensioned (broken) puller in place, and heat the center hub of the brake drum. It only took a minute, and with a big bang the brake drum (with puller still attached) flew a few feet and smacked a hoist. Just keep repeating to yourself, "Failure is not an option".

Install one of the bad brake drums from the running car and the wheel to set the parts car down. Kill a few hours (on WiFI) waiting for the new puller to arrive. Then on to the right side. Loosen lug nuts, jack up, remove wheel, remove hub nut, apply the puller tool, and crank up the tension. Tight enough, no need to over do it, get the blue wrench. A minute later, bang, and the drum with puller tool flew a foot and dropped on the floor. Life is easier when you have the right tools.
 Then considering if we can salvage more brake parts from the parts car, but no go here. The running car is 1965 with manual adjuster brakes, but the parts car is 1967 with automatic adjusting brakes, so most of the internal parts are different. Too bad. At least the brake drums are same and good to use. Install the other bad drum and wheel to set the parts car down to retrieve the floor jack. Rest of the day off, as we need to find internal rear brake parts (and hub seals)
Thursday October 29, 2015
Playing around a bit with the '57 Chevy with Ford rear axle. Tires nearly rubbing inside sidewall. Two 5/16-in wheel spacers gives 3/4-in inside clearance. but studs are too short. Knocked out one stud for reference, and spent some time shopping for longer studs and thicker spacers, but so far struck out.

Friday October 30, 2015
Waiting for parts, and things were a little slow. I've had my eye on that Austin Cooper S (Mini) for a week and a half. Low suspension on the right side bugged me, so time to check it out. The Mini has Hydrolastic suspension using rubber fluid displacers filled with antifreeze solution. Front and rear units on same side of car are connected with a pipe. It had obviously lost some of the fluid on the right side.
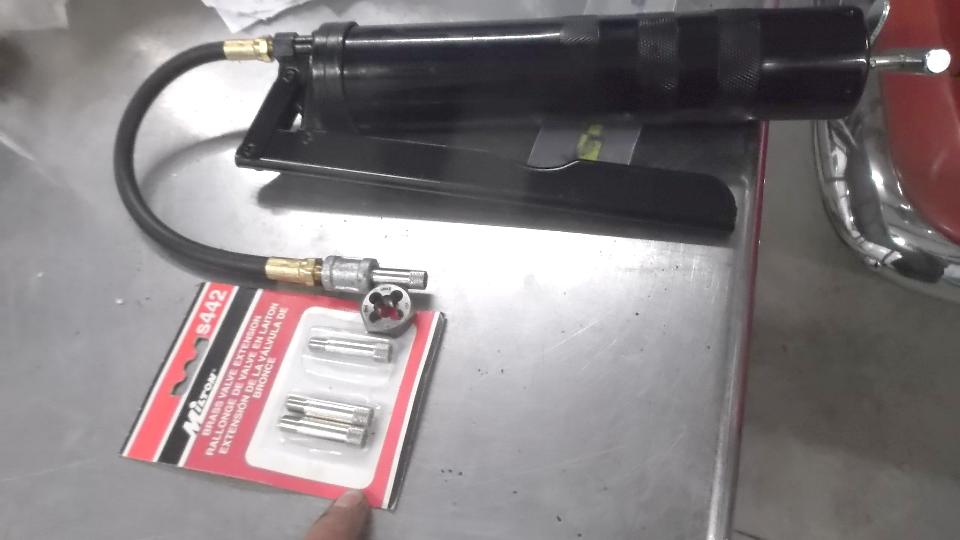
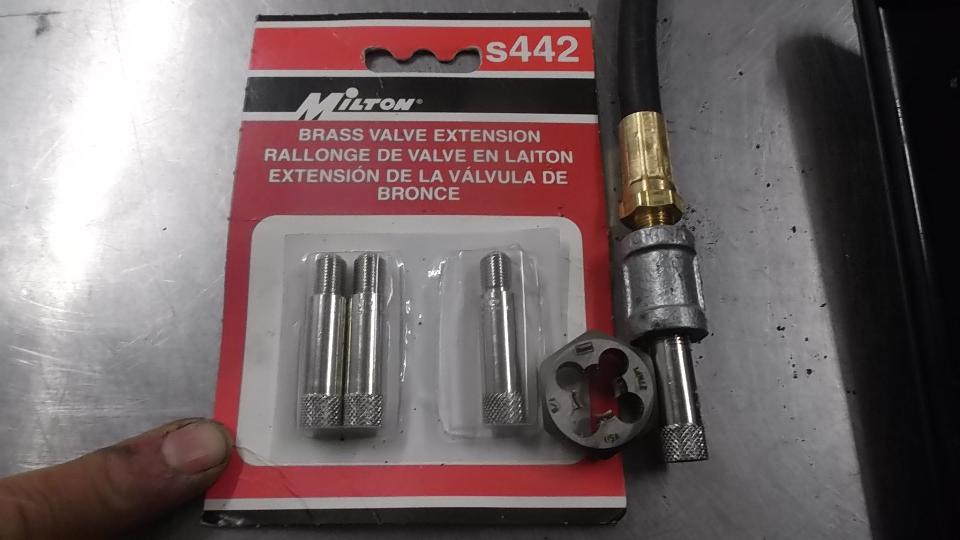
Thane and I spent a couple hours running around town to find the required bits. The primary tools are a gallon of pre-mix ethylene-glycol antifreeze, a hand pump grease gun connecting with a flexible hose and a 1/8-27 NPT pipe coupling and a (metal) tire valve extension with a pipe thread cut onto it. The Schrader valve connection is on the rear subframe just forward of the rear valance panel.
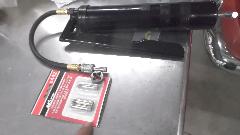
Jack it up a bit for access and find the connector. Fill the grease gun with antifreeze, burp the air out of it, screw it onto the suspension connector, and pump until your arms are numb. 250 to 300 strokes moves about 22 ounces of fluid. Joy by golly, the suspension was rising some. Refill the gun, reconnect it, and pump some more. Just when I thought it was about finished after the second load was delivered, it leaked half the fluid on the floor (close to a floor drain), fairly rapidly actually. Bummer. Jack it up some more and take the wheel off for better viewing underneath. Hey, I'm impressed. Those are real Mini Light wheels, and I think they may be magnesium, very light. Refill the gun and deliver a third full load. Not hard pumping, but 800-900 strokes gives sore arms.


Tough to get good pictures of the fluid suspension parts, as they are hiding inside the subframe. As it turns out, the leak is in the interconnecting pipe running from back to front. This pipe passes above the rear subframe, then follows the underbody forward. Not an expensive part, just large bore tubing with flare nuts at both ends. But it looks like at least a full day's work to drop the exhaust system, R&R the rear subframe, and hand form a replacement pipe. Time to set it aside for more consideration.
Saturday October 31, 2015
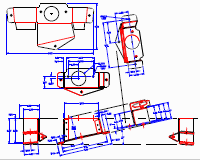
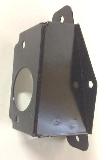
Spent a lot of time (more than half the day) continuing work on a drawing of the MGA 1600 LHD dipper switch bracket. Its a tricky little bugger. About 95% done, just needing final dimensions for hole locations.
Spent rest of day BEGINNING posting CMGC newsletter on line. http://chicagolandmgclub.com/driveline10/1115
|


 What's wrong here? All four splined hubs and spinner nuts on wrong side of car, will be self-loosening rather than self-tightening. Major bummer. More grunt work required to switch all the hubs.
 Needing to swap splined hubs left to right on the Alpine. Start with the rear, as it may be more challenging. Jack up, wheels off, loosen the big nut securing the splined hub and pry for all your worth with every large crow bar handy, but it didn't come apart. No shop manual handy, not sure about the interface between hub and halfshaft, so disconnected brake pipe and cable and removed everything that came along with the wheel bearing and halfshaft. After inspection, one phone call and a trip to O'Reilly's to borrow/rent a large 3-jaw puller. Big boy wrenches, long brace bars, two guys holding it down on the floor applying lots of torque. The puller was rated for 7-tons, and I suppose we used about 8-tons worth of it. I told Thane when it goes off like a shotgun shell with a big bag, you win. About 5 five seconds later it went BANG, Thane jumped a foot or so, and various disassembled pieces fell on the floor. We won. The interface is a low angle taper with a big woodruff key. Dinner time, so we will take this up again tomorrow.
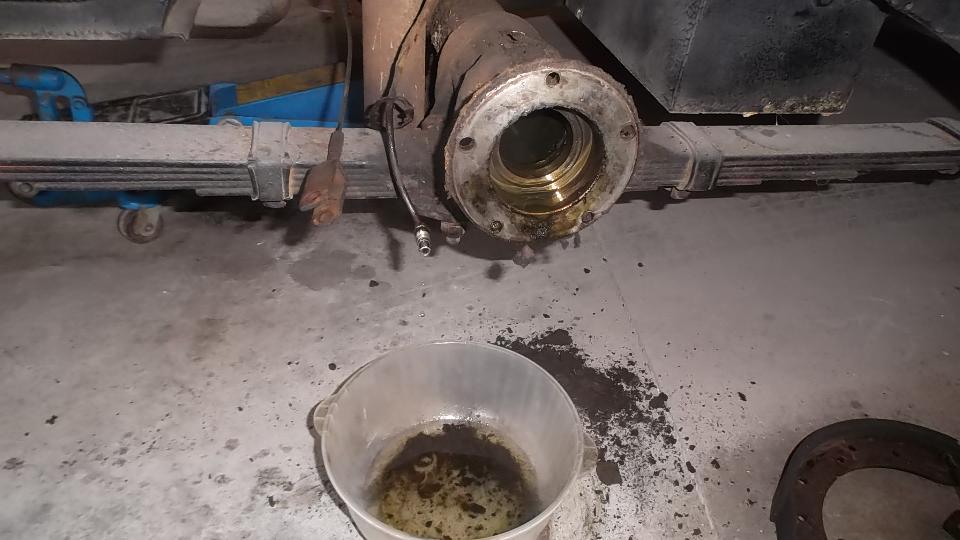
 Going to replace rear wheel cylinders on the 1800S. Removing the wheel reveals one broken wheel stud. Grunt work followed by the now familiar big bang remove the LR brake drum (using a different loaner tool). Loose friction linings indicate sever overheating of the brakes.