The MGA With An Attitude
MGA Guru Is GOING MOBILE - (April 1 - April 15, 2025)
Tuesday - April 1, 2025:

Can't believe guys on the BBS are still fussing about concours details for the dual horn accessory wire harness, and now the clips to secure the harness to the front frame. Rubber or steel? Maybe they were brass. Finally dug up an alternate part number and a better picture for the brass version of this clip. One good tech question about Twin Cam clutch disc thickness, and spacers between the clutch c0ver and flywheel. Some interest in Moss Motors Trophy stainless steel exhaust system. I have no personal experience with that one, but someone has been stuffing the muffler with wire wool. Now I suppose there must be some grounds to the reports of loud sound output.
Wednesday - April 2, 2025:
Another tech question about Twin Cam coolant reservoir tank remote pressure relief valve. Those Twin Can guys are a chatty bunch. Someone confused about wiring up a new 123 Ignitions electronic distributor. If the instructions are not clear, ask the manufacturer, or the supplier who sold it. If they can't tell you how to make it work, send it back.
Thursday - April 3, 2025:
Laundry day. A question about wiring a wiper motor after conversion to negative earth. Same as before conversion, as the wiper motor is not polarity sensitive. NAMGAR did a slight update on their web site, and I finally finished my registration for GT-50, first week of June in Traverse City, Michigan, and room reservations for the host hotel (with some confusions).
Friday - April 4, 2025:
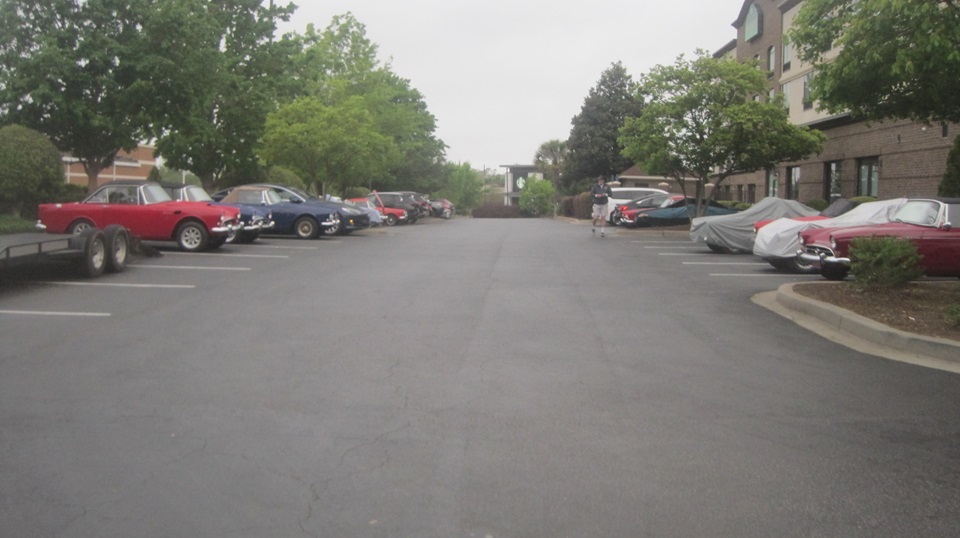
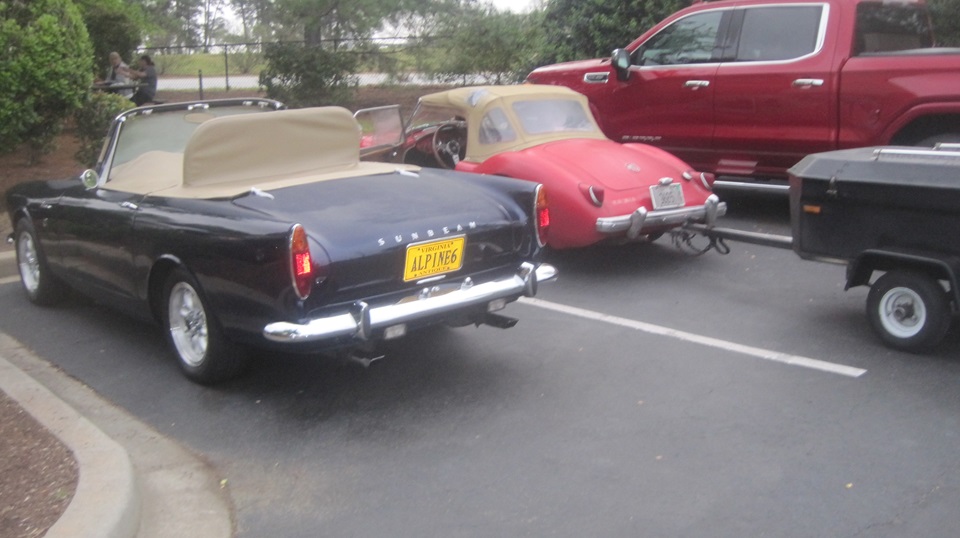
Travel day. Ducking morning and mid day rain storms, heading south by mid afternoon. West Virginia, Virginia, North Carolina, South Carolina. One fuel stop in Fort Mill, SC. Landed in Lexington, SC before sundown. Got another invite to visit Australia. Well, probably not this year. We haven't found the road to get there yet. -- Late night at a local hotel, we notice a variety of vintage British cars in the parking lot. Don't know why they are here, but we will find out, later.
Saturday - April 5, 2025:
Good morning, sunshine. Got a few pictures. Turns out there is some sort of Scottish fest somewhere in the area, including a British Car Show, so that's where these cars are going today. But not us.


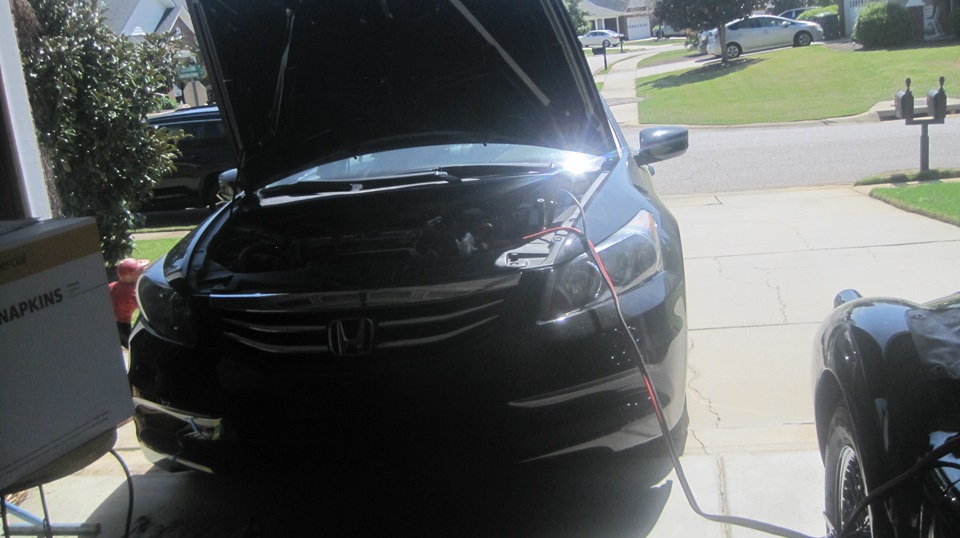
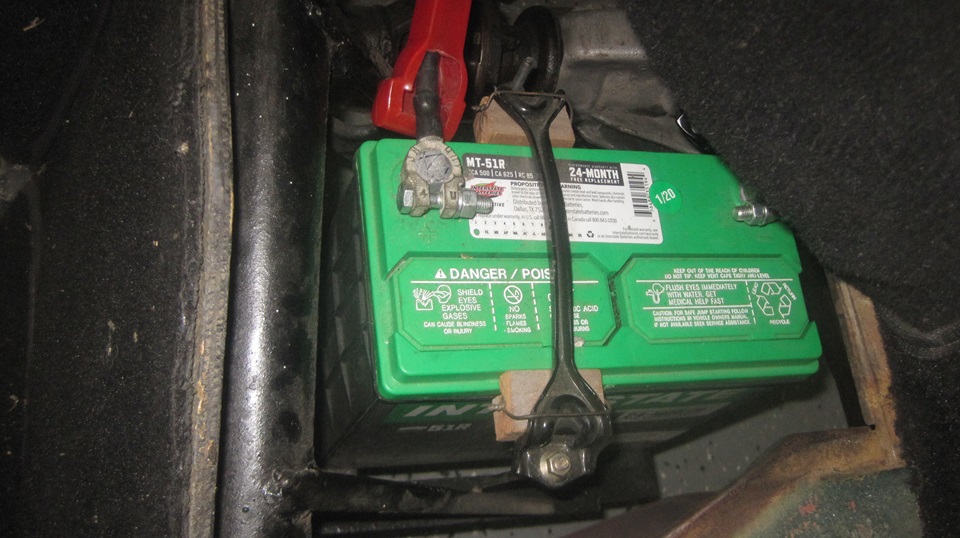
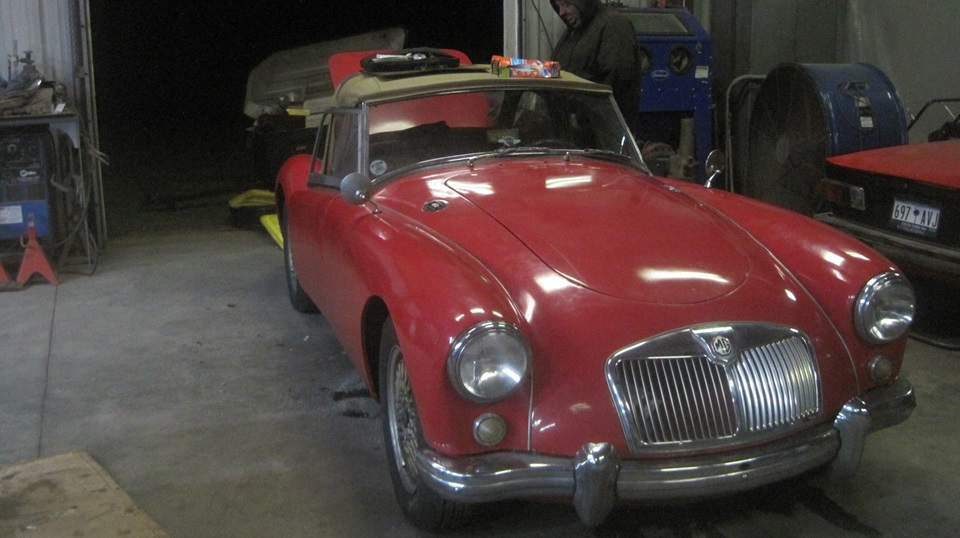
Bit of work on Dave Daniels MGA. No start, trying to use jumpers to charge battery and get it going, no go. Figure out his cheap jumper cables have open circuit at one end clamp, bummer. Set those aside and borrow his neighbor's jumpers for better success. Run battery tests to find dying battery.


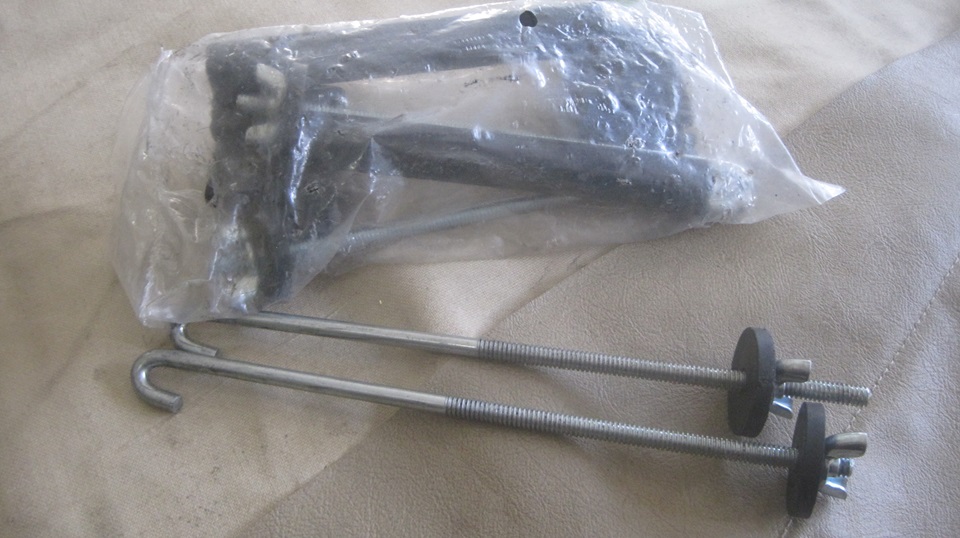
Swapping in new good quality rebound straps on the rear axle. Car on jack stands, lying on back underneath for a hour or so with hard to reach upper stud nuts. Eventually persistence pays, and we got lucky when the nuts came loose so we didn't break any of the studs. Make plans to buy a new battery. Pull a new battery hold down clamp out of the Magic Trailer. -- Nice chat time before calling it a night. Got past some WiFi issues, and finally got my trailer license sticker renewed (should arrive at home address in Illinois in in about 10 days.


Sunday - April 6, 2025:
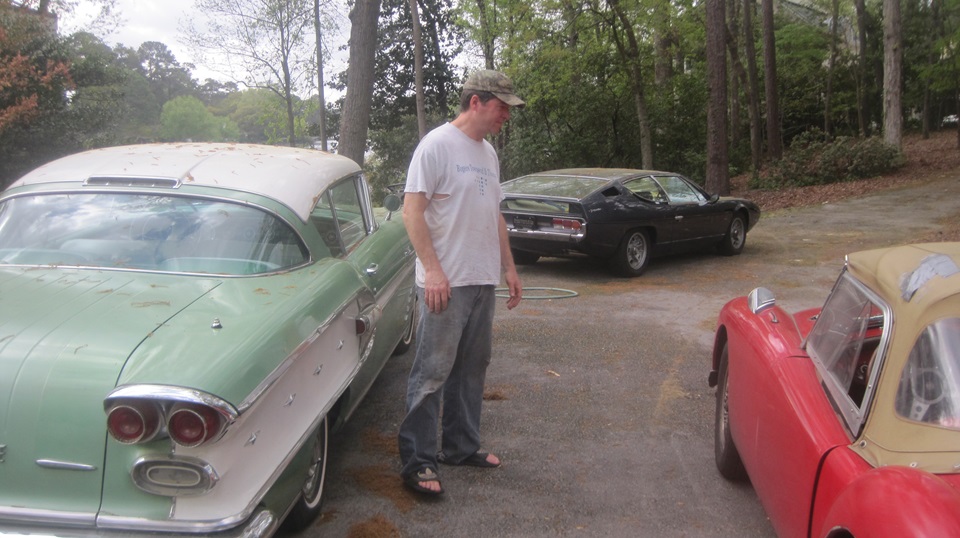
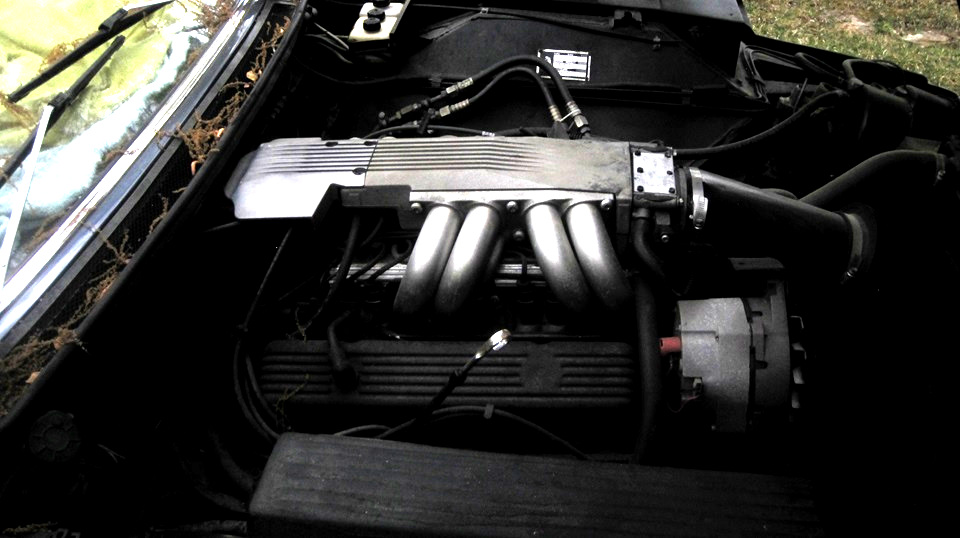
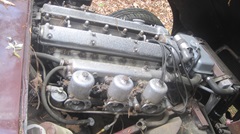
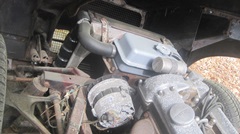
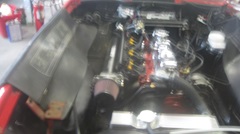
A three hour visit with Hawood Hamilton in Columbia, South Carolina. He has a neat classic American Oldsmobile (could almost put the MGA in the boot). there was n Aston Martin with an American V8 (probably Corvette) under the bonnet in place of the original V12. Seems like an odd arrangement to me, but apparently it is a desirable combination.

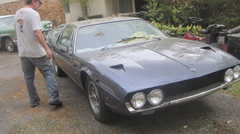
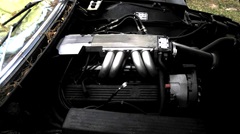
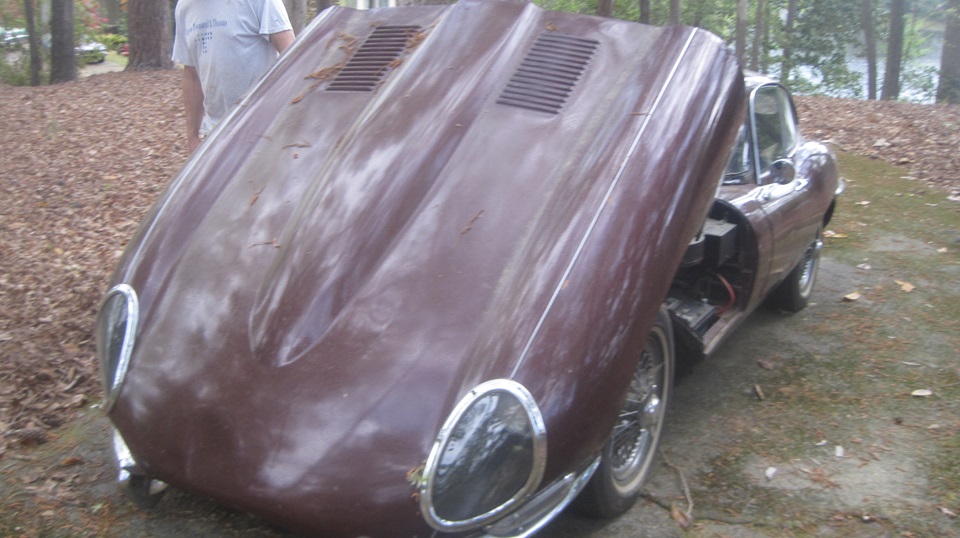
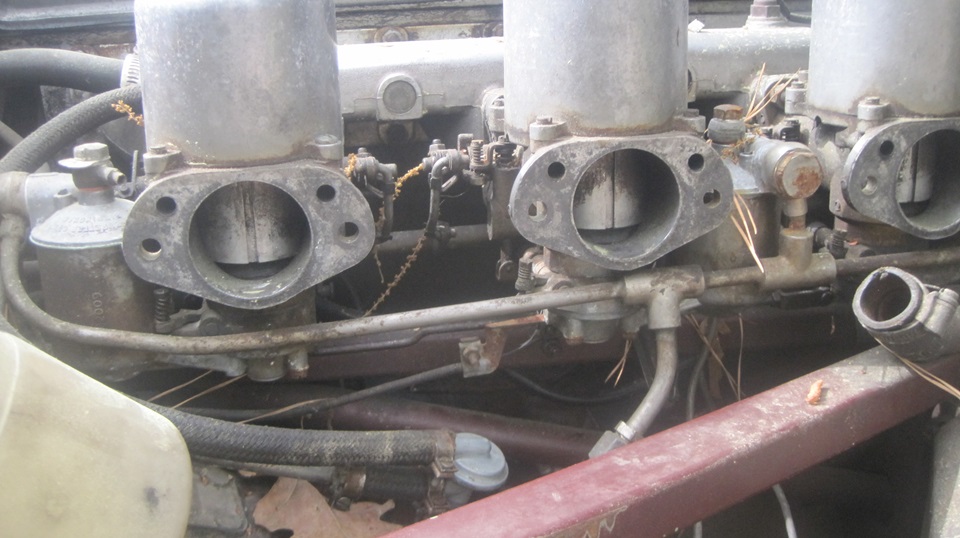
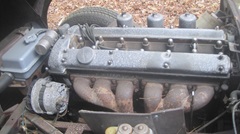
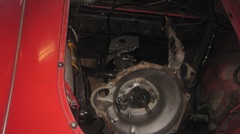
There was a a Jaguar E-Type, not currently drivable due to a significant carburetor fuel leak, and a blown exhaust header pipe seal. (We might (or not) be be able to fix the leaky carburetor with some kit parts he has in hand, just not in the time available today (He's heading out at 1-pm).


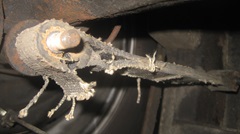
No one knows how long the exhaust system has been in place untouched, but the flange nuts and studs look convincingly rusted. The car needs to be on a hoist for underneath access to even think about torquing on the rusty studs, and no hoist here, so that's not happening today. If you break one of those studs, the manifold has to come off for repair.

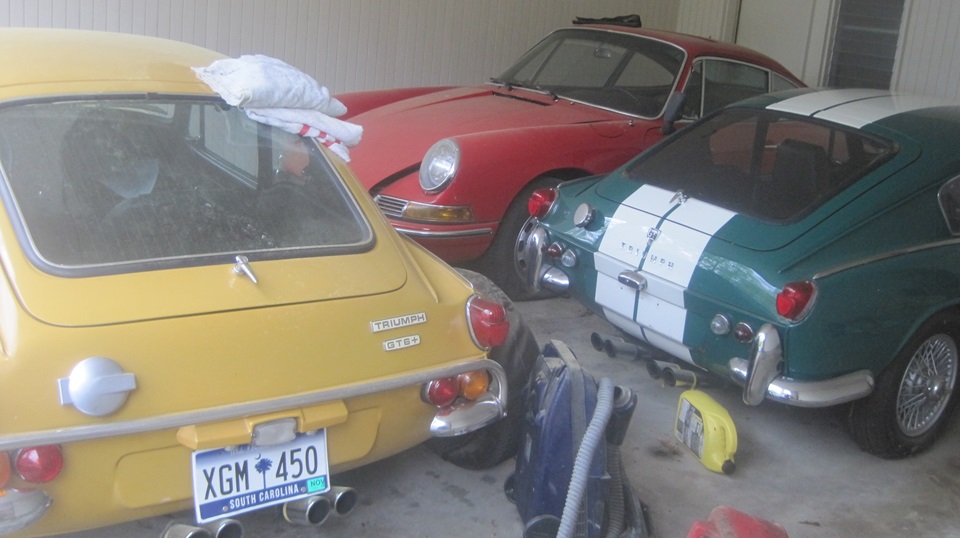
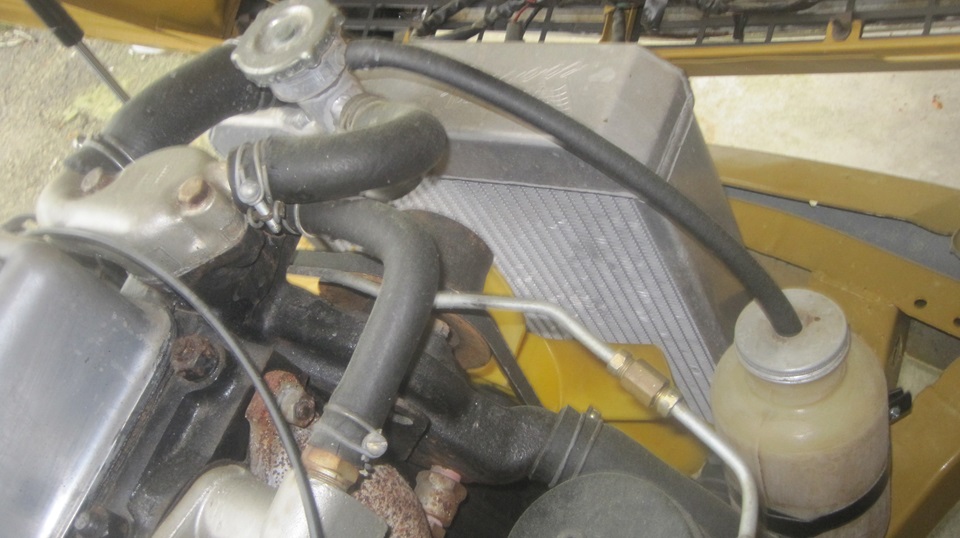
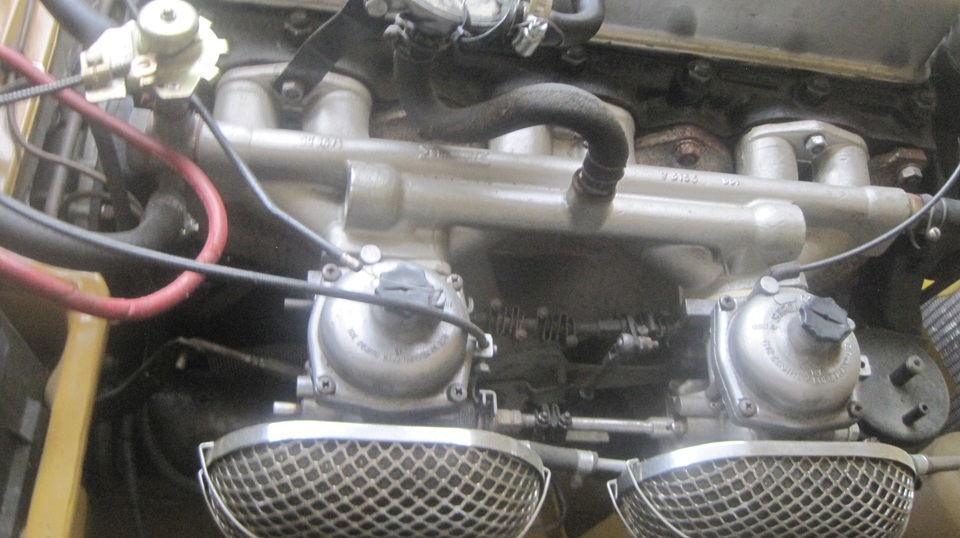
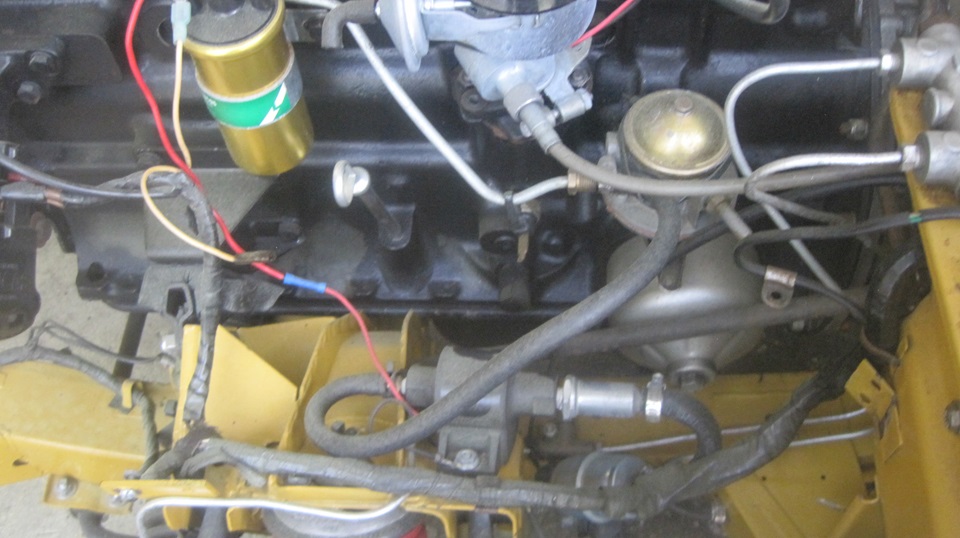
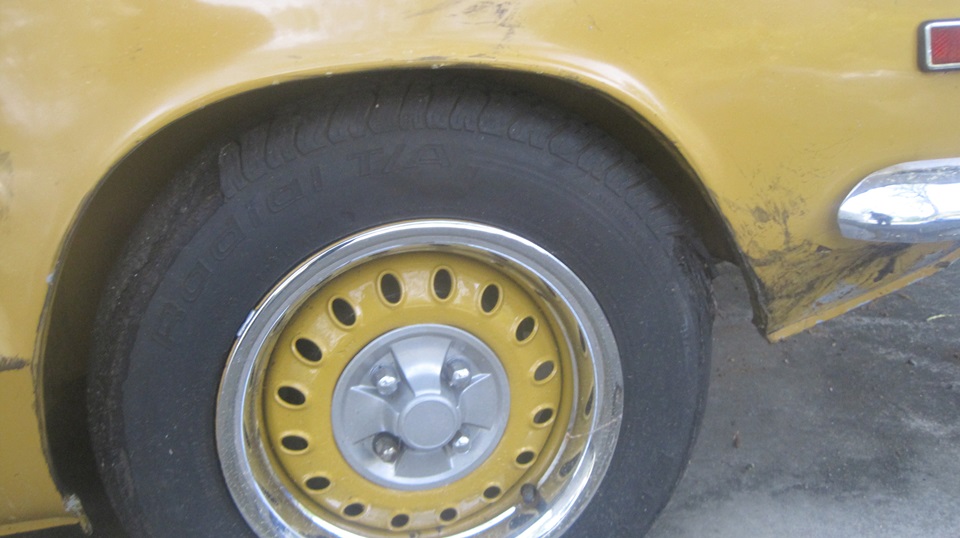
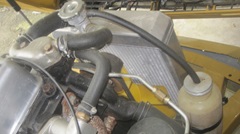
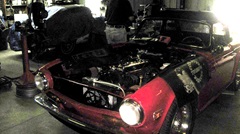
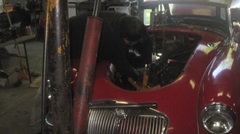
The green car is a TR GT6 with a leaky radiator and likely stale fuel. Considering how to drain the fuel tank. The red one is a Porsche 911, and there were two 912's, maybe slightly neglected (too many toys)? The yellow one is a GT6+ which recently threw a tire tread, , aged out we think. ., Now due for a little body repair and partial repaint, along with a new set of tires of course.


Somewhere off site, a Volvo P1800 with repeat clogging carburetors, likely a polluted fuel tank. More discussion, and we all know what that one needs. About then Hawood had to run, and we had other things to do.
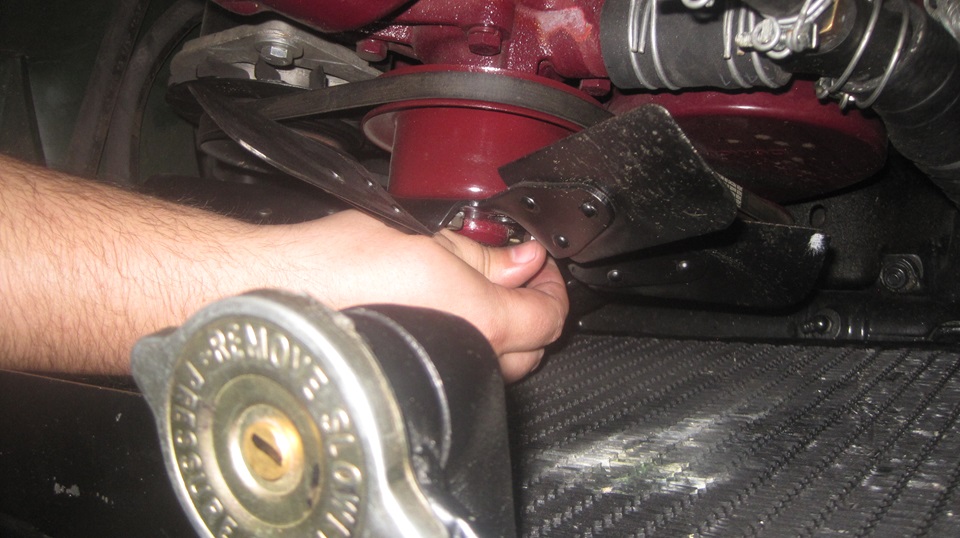
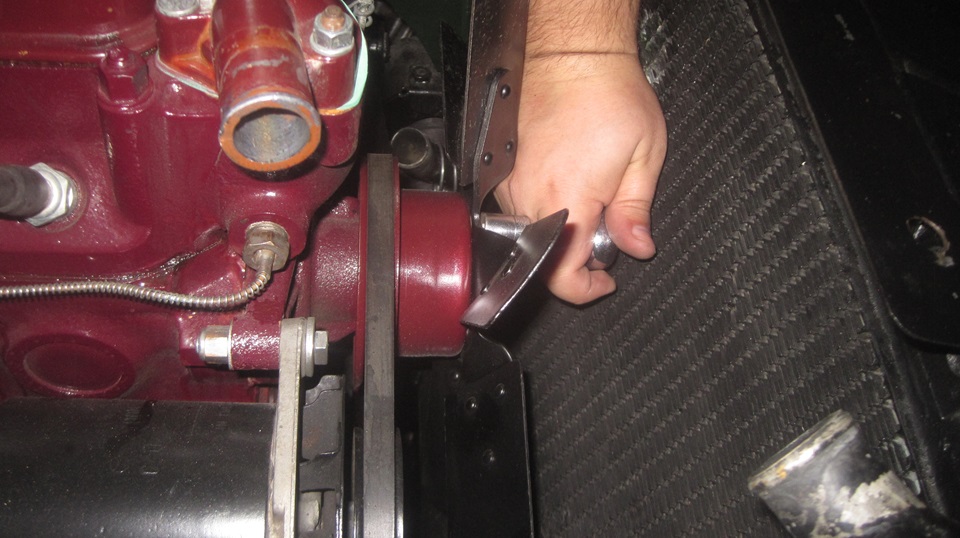
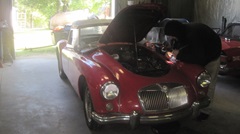
 Back to Dave Daniel's MGA by mid afternoon. He was picking up a new Group 26R battery this morning, so we installed that in short order. -- Then on to jacking up the front end to drain the radiator, remove hoses, unbolt and lean it forward a bit. Remove and reverse the misoriented cooling fan, and put it back together. Suppose we got a few skilled knuckles in the process, but no damage to the radiator. Put the coolant back in and pressure test it. it.Time for a test run, once around the block before dusk. -- He still has a pair of accessory aluminum threshold plates to install, but not today. Back to Dave Daniel's MGA by mid afternoon. He was picking up a new Group 26R battery this morning, so we installed that in short order. -- Then on to jacking up the front end to drain the radiator, remove hoses, unbolt and lean it forward a bit. Remove and reverse the misoriented cooling fan, and put it back together. Suppose we got a few skilled knuckles in the process, but no damage to the radiator. Put the coolant back in and pressure test it. it.Time for a test run, once around the block before dusk. -- He still has a pair of accessory aluminum threshold plates to install, but not today.


Off to a truck stop for dinner and WiFi time. On a rumor, and a bit of a whim, we made a call, and we have another appointment tomorrow.
Monday - April 7, 2025:
Rain day. No, I mean RAIN DAY, and lots of it. After breakfast, ducking between showers, we tried sticking to paved roads to go
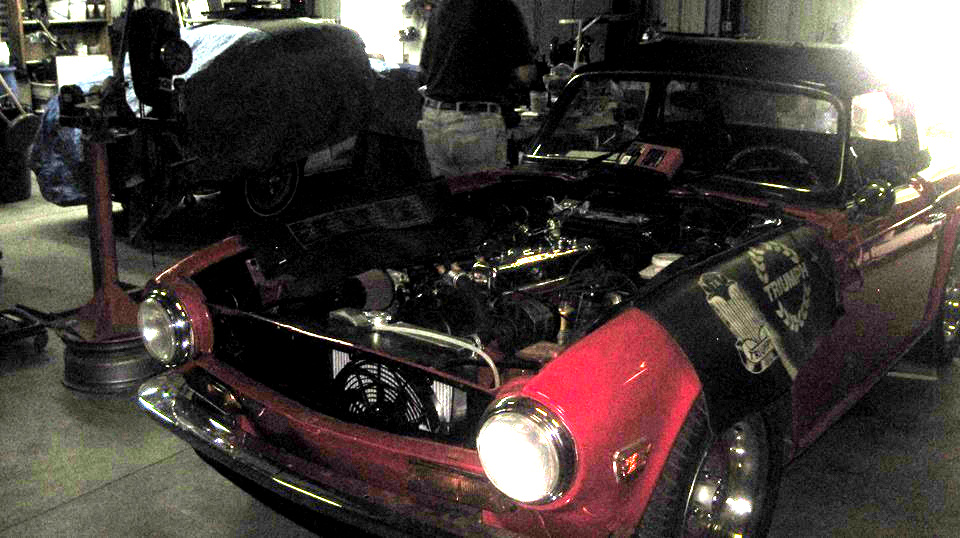
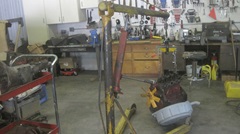
 visit our old friend Tim Melton in nearby Gilbert, SC. He has a TR6 in process for a friend (customer?), installing computerized fuel injection. That one is stuck because the computer is not communicating properly, and he is waiting for a different computer to arrive.
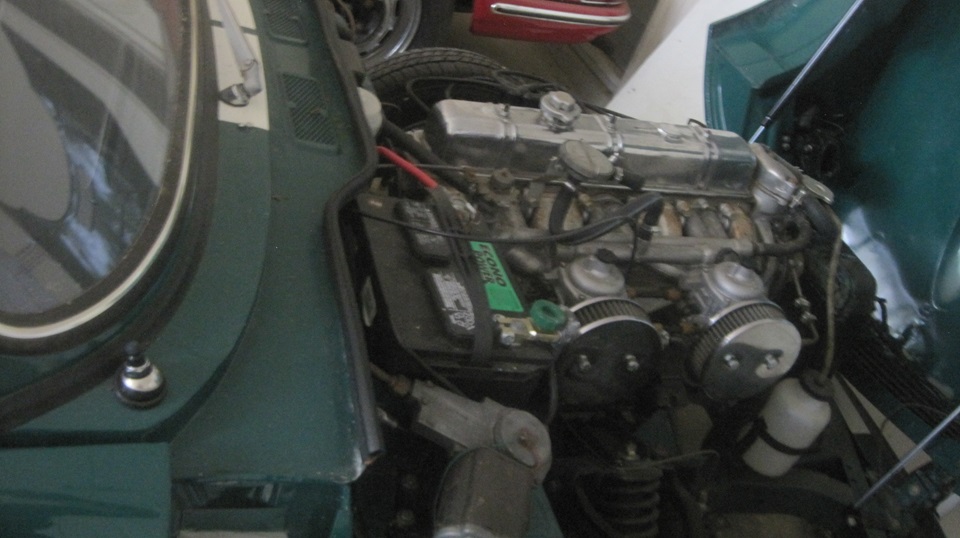
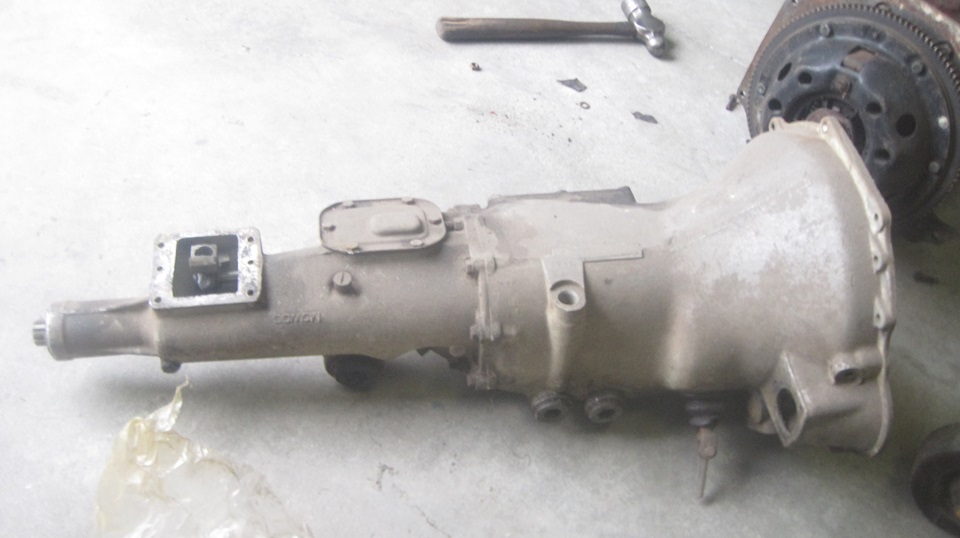
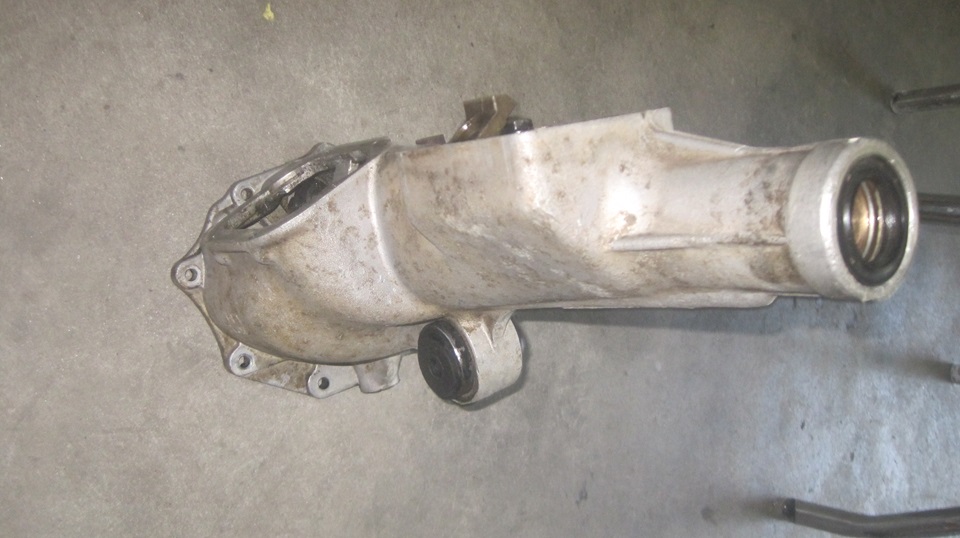
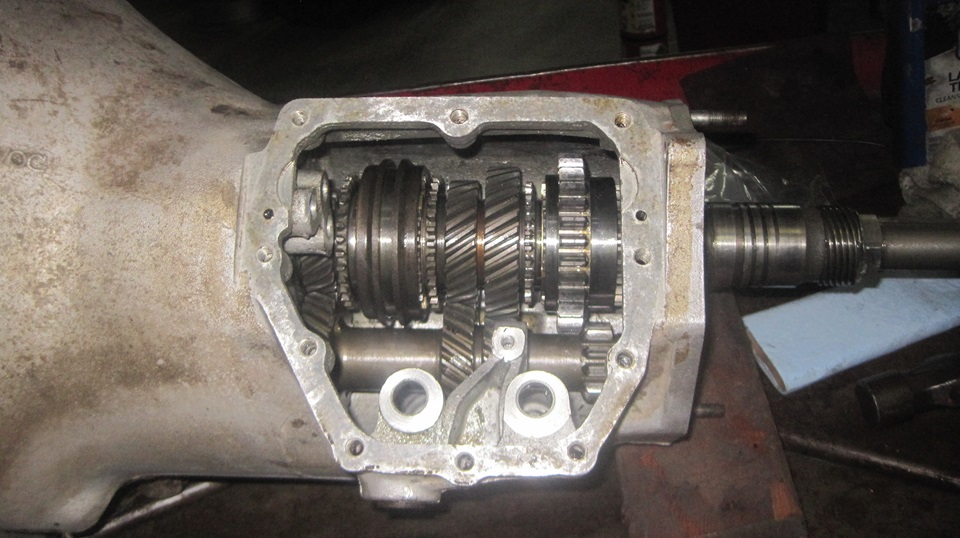
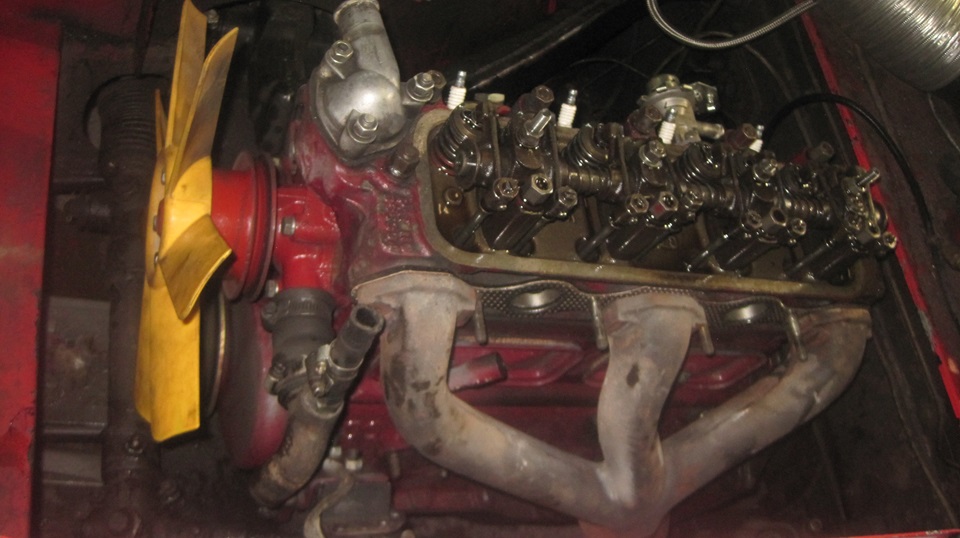
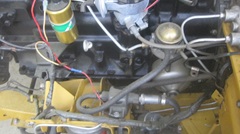
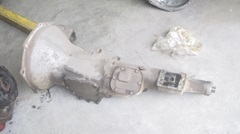
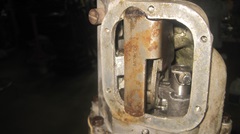
Meanwhile, there is this MGA 1500 engine and gearbox sitting around, looking for a good home. This apparently came along with the George Lawson's white MGA (really long story if you were following this travel log for the past 10 years). They think it came out of a rusty parts car that was disassembled about 30 years ago. It has one endearing social value, the gearbox being the right model for my car. The box in my car is getting long in the tooth, 7 years, 143,000 miles since last rebuilt. This looks like the opportunity to rebuild another one so we can swap it out in a day. The price is right (maybe free)

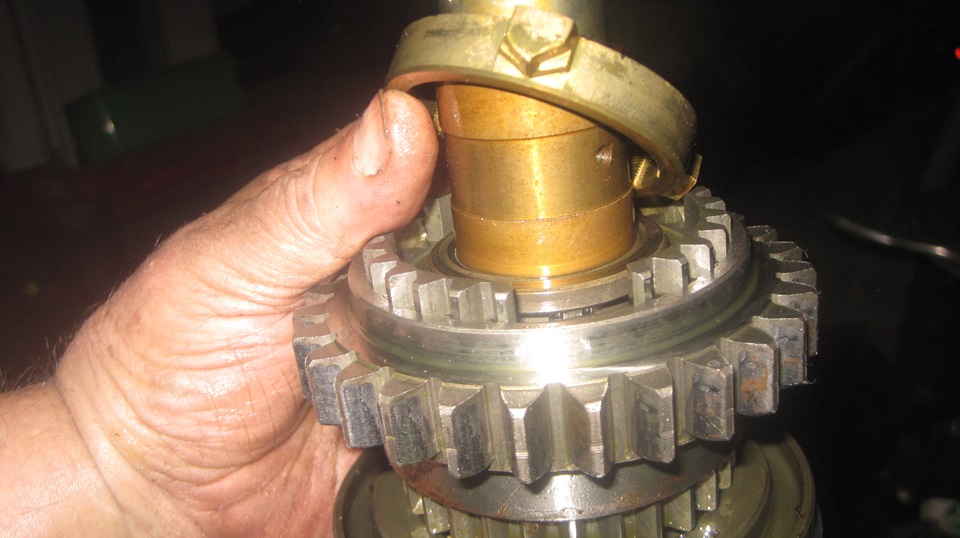
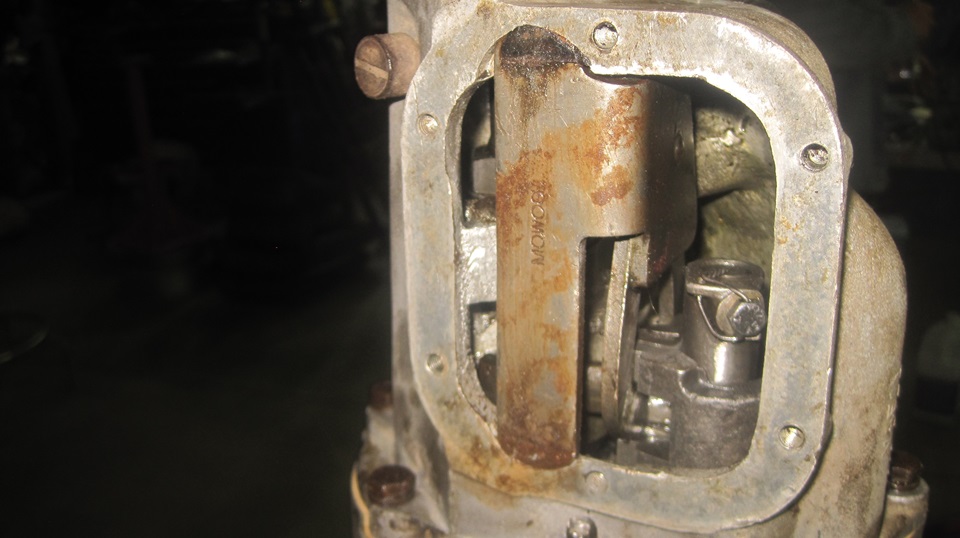
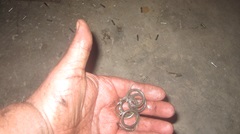
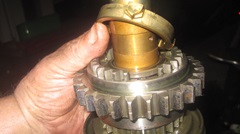
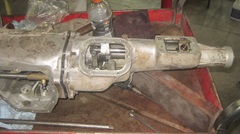
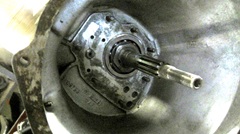
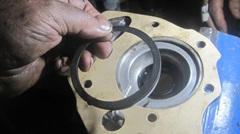
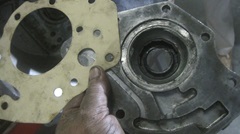
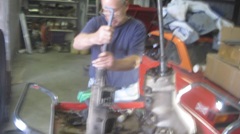 So we proceed to disassemble it for inspection (doesn't take long). Half the work was knocking the needle bearings our of the lay gear. This went fast, so not enough pictures. No preconceived expectations. Slightly better than average for a used gearbox, wild guess, maybe 50,000 miles on original assembly, never opened since it left the factory. Selector gates in very good condition, little wear. Likewise little wear on the three shifting forks. Gear teeth all perfect, normal wear on layshaft and 2nd gear bulk ring, needs rubber seals , a clutch lever boot, and a rear rubber mount. Okay, it's a keeper, we will rebuild it.
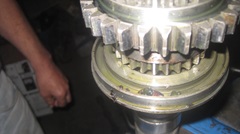
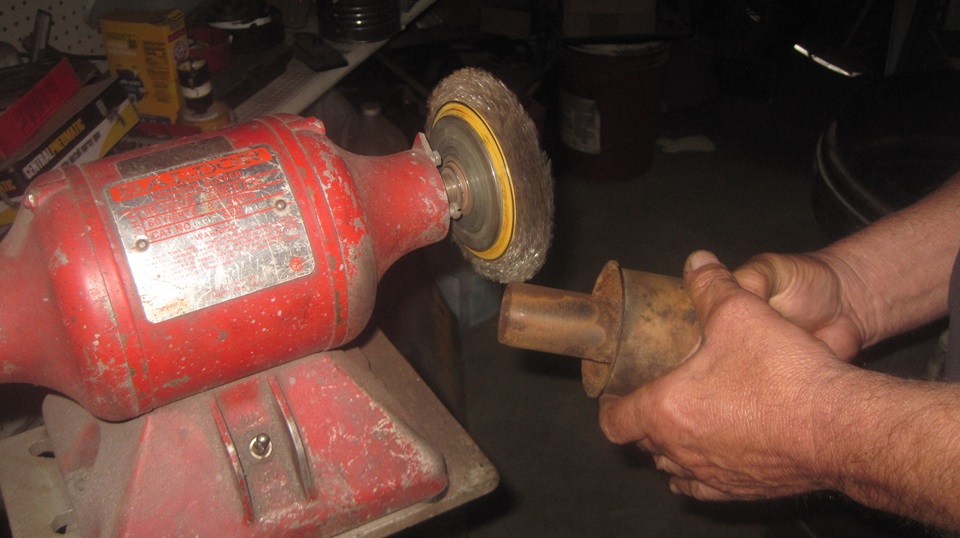
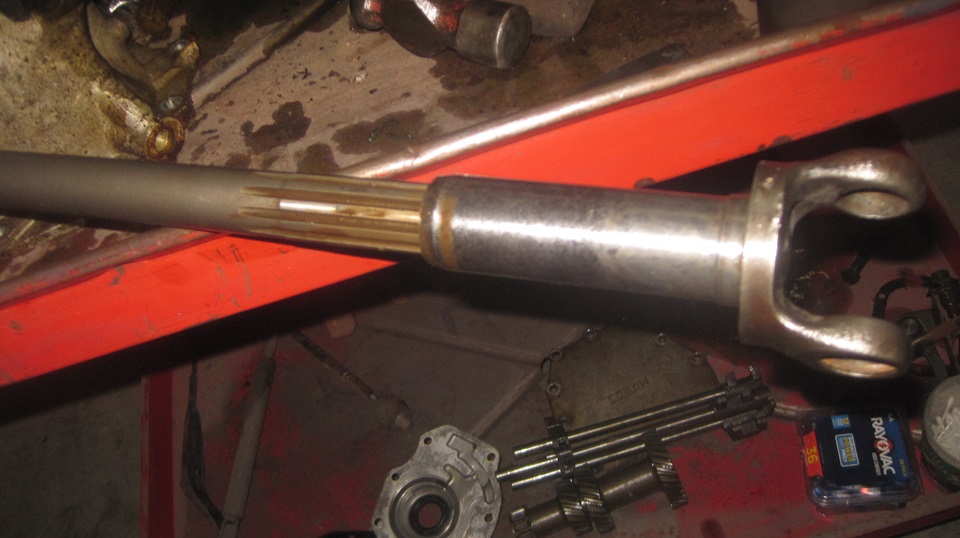
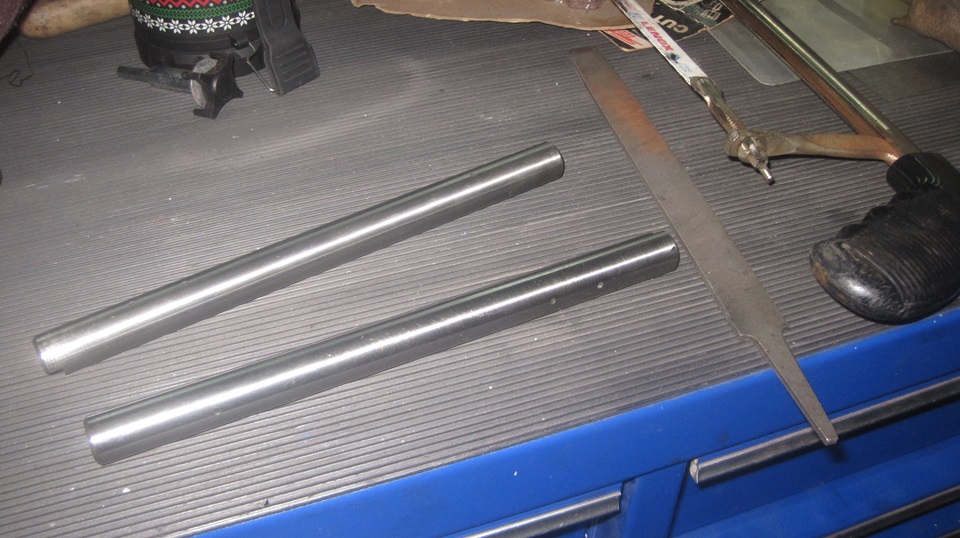
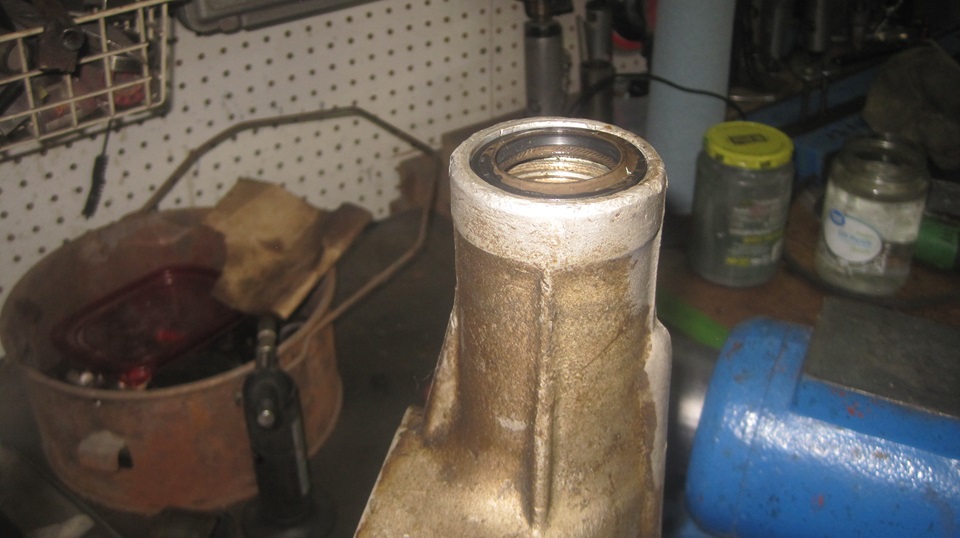
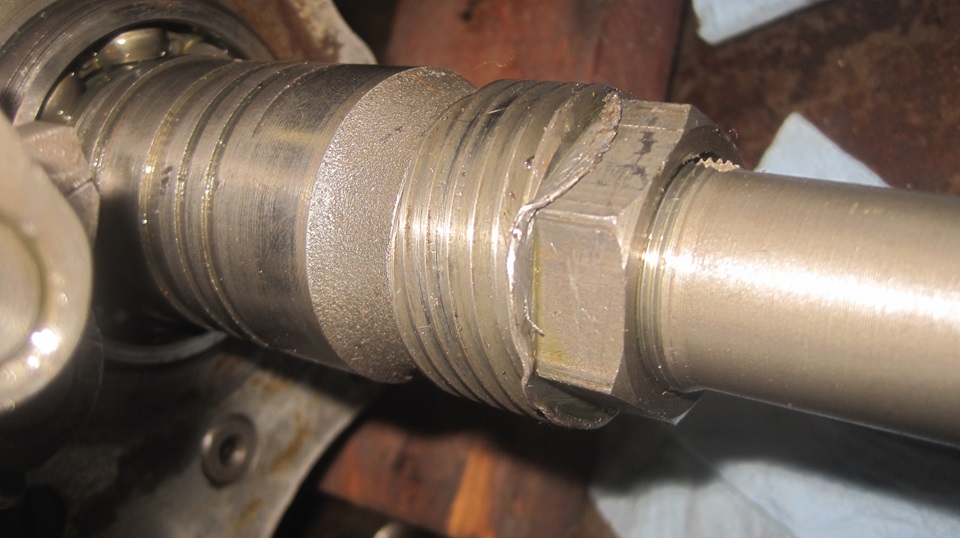
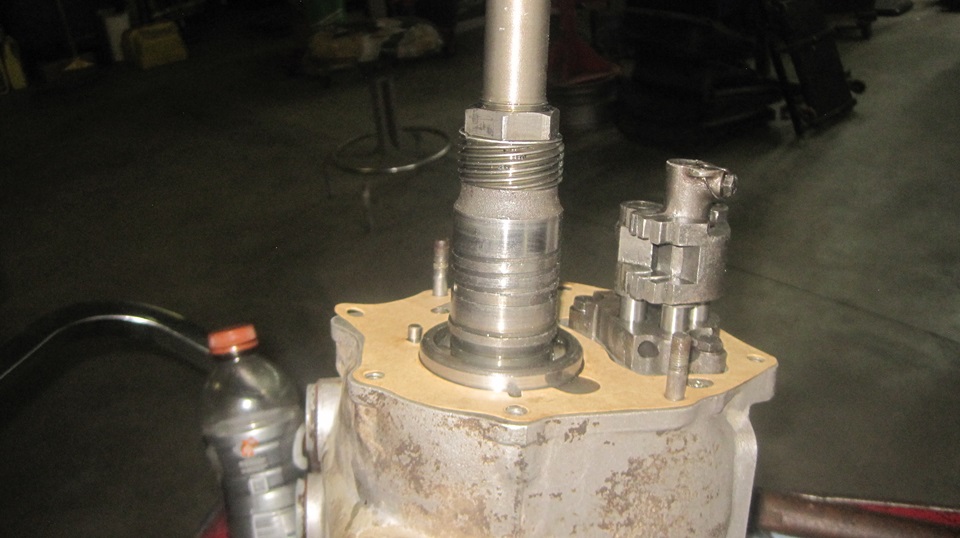
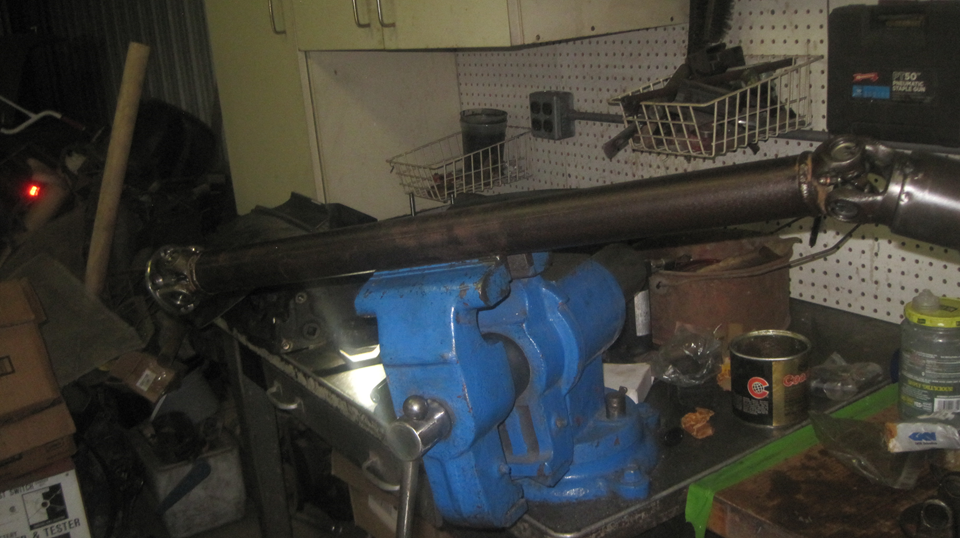
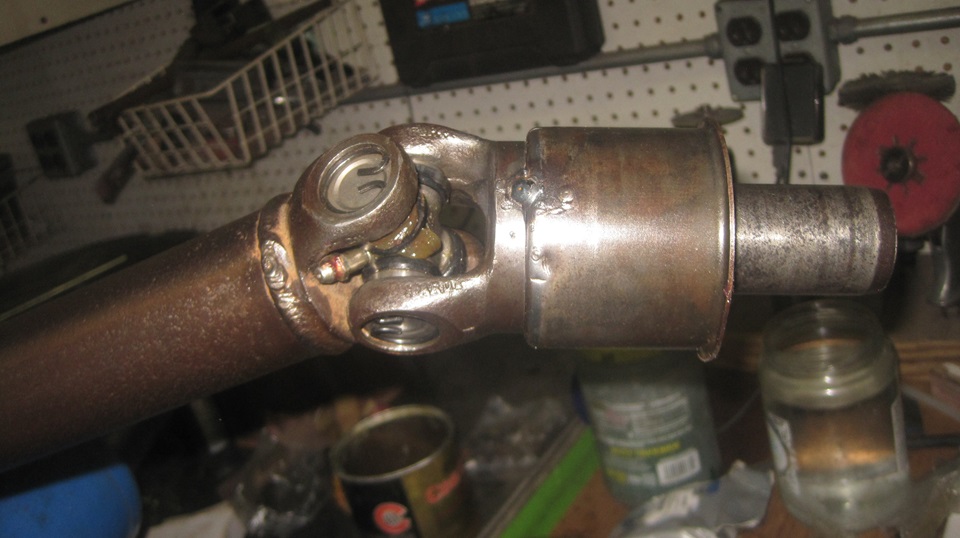
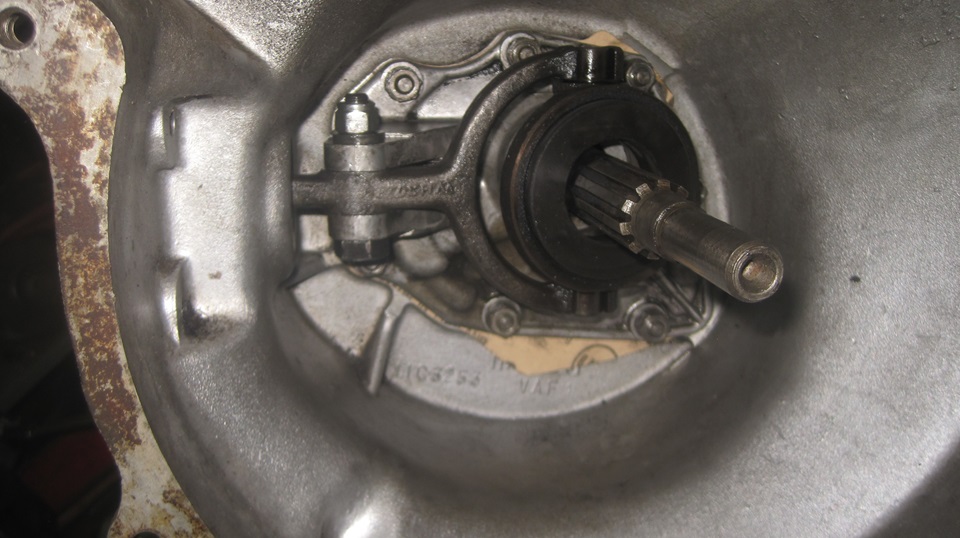
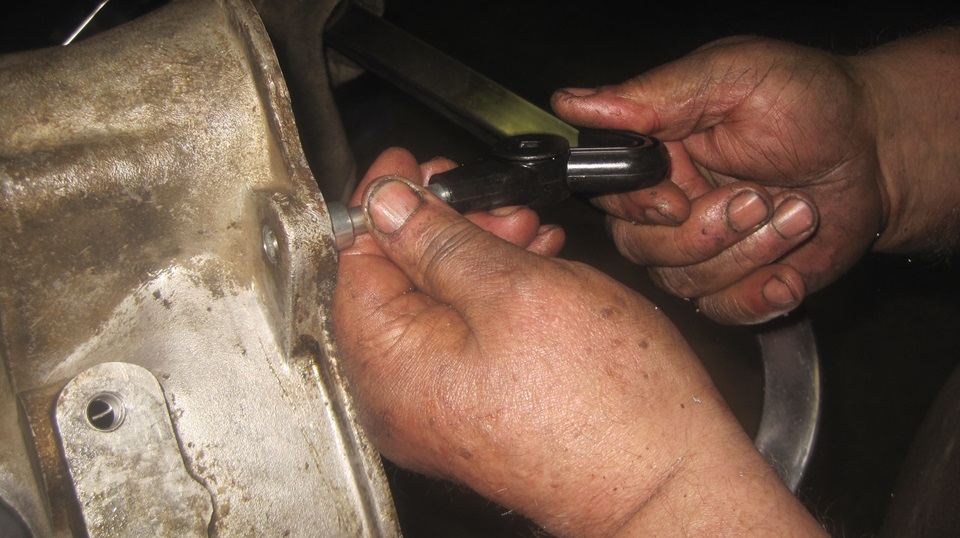
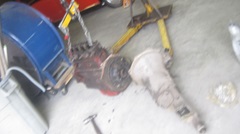
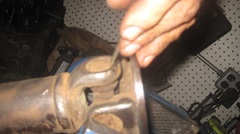
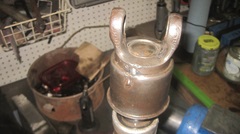
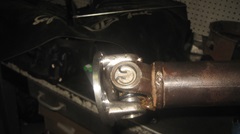
But we will also need a different propshaft. The box currently in my car is early 1500 type, where this one ismid1500 type (different output splines and rear seal). Searching around a bit, we found the matching 2nd style propshaft outside in the mud. A little rusty, but it was cleaning up okay. Needs two U-joints, so we proceeded to disassemble this too. Grind out two small tack welds to remove the dust cup, and polish away at the smooth OD for the journal bearing and seal surface. That came out okay, looking serviceable.

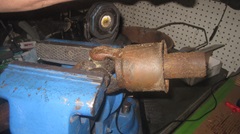
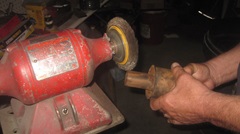
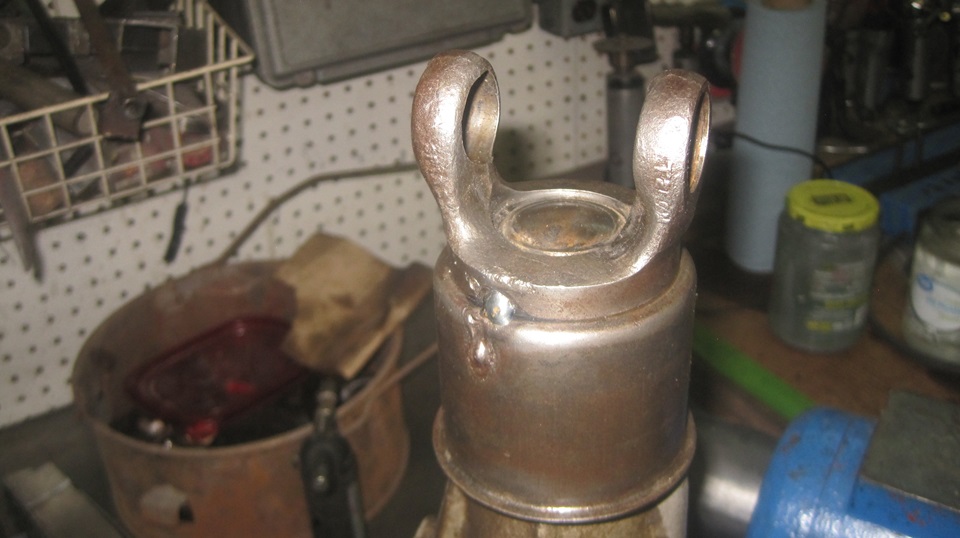
A bit more work to clean out the female splines, get it oiled up and sliding well on the gearbox output shaft. Fitting it into the tail housing reveals the gearbox will need a new tail bushing, Too much time on the rear flange where someone had damaged the ears around the U-joint bearing cups, so put a new flange on the shopping list.

Done for the day, now needing to check our inventory and order a few more new parts. This is hell of a long way from last night's phone call on a whim.
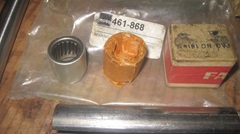
Tuesday - April 8, 2025:
Checking inventory we have in hand the bronze bushing liners for the tail bearing, so that will be one less parts order. We also have the layshaft full compliment needle bearing kit, but not the shaft. Ordering the hardened steel layshaft from Moss Motors. and that has to ship from west coast, so make it second day air please. And while we're at it, throw in a second hardened layshaft and another full compliment needle bearing set (expensive parts) for our inventory, so we won't be caught short again (if there ever is a next time). -- Then Moss doesn't have the brass 2nd gear balk ring we are also missing, so call in another order to Scarborough Faire for two of those, and a new rear flange and gearbox mount and a few more minor bits. UPS ground will do for 2-day delivery to South Carolina. If this turns out as planned, everything we need should be here by Thursday evening. -- Spend the rest of the day (what's left of it) recording the parts orders and catching up the photos and notes. In theory we should have the next two days off.
Wednesday - April 9, 2025:
Cleaning up my spread sheet for inventory parts (some of it from last December).
Thursday - April 10, 2025:
By coincidence, another little project we have been working on for a month. A friend who is rebuilding his MGA gearbox lost the spring loaded locking pin from the mainshaft front thrust washer (Ping!). By cooperative effort, we have worked out the dimensions, and he has made a proper drawing, machined a new pin and installed it to prove it works. Now we have a new Part Numbers tech page for this 1G3268 Peg -thrust washer locking.
Made two phone calls to get tracking numbers for incoming parts. Good news, both packages delivered by 2-pm, so off we go to pick up the parts. Then over to Tim's shop to begin assembling the new gearbox. First business was to grab a file and a hacksaw, and try to scratch the new layshafts (yes 2). Good news, no scratches, so the new parts should be good for long wear life.
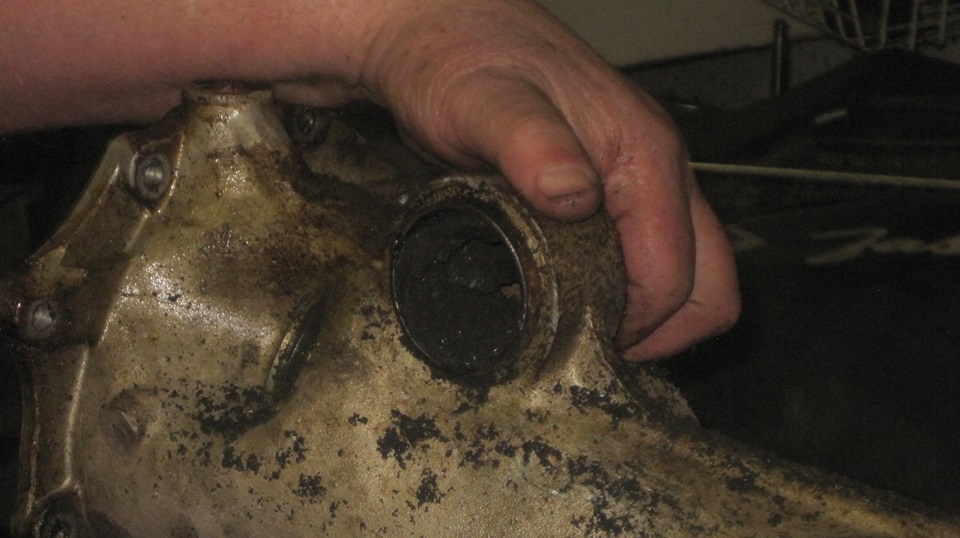
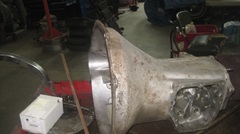
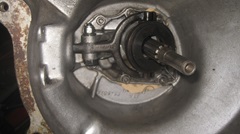
Needing to replace the rear mount. Grab a power drill with 3/8" drill bit to drill out all of the old rubber to remove the center steel tube. Then use a hacksaw to cut through the outer steel tube from the inside, and knock it out. Measure the new bushing carefully. In years past some have been too large on the OD, and others have been too short in length of the center tube.

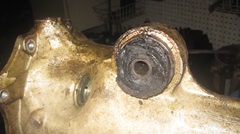

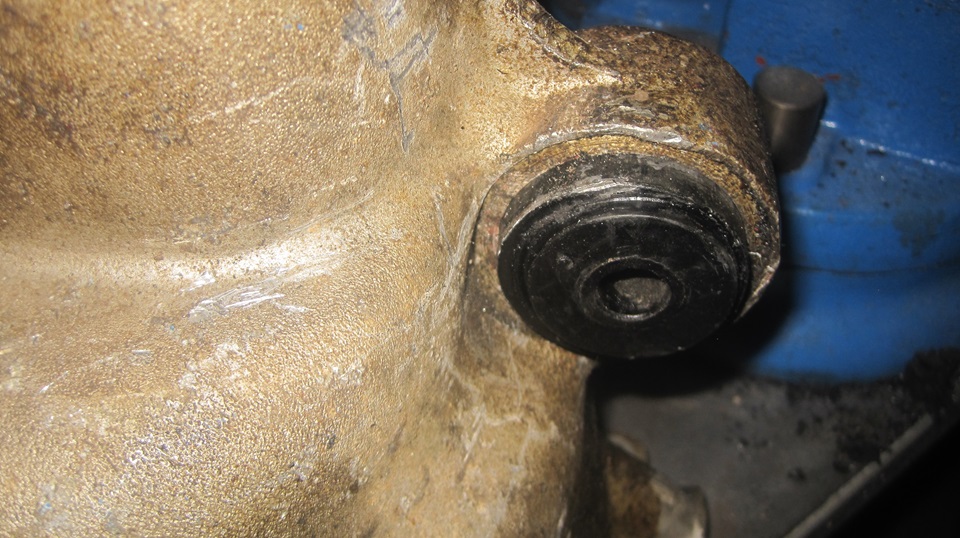
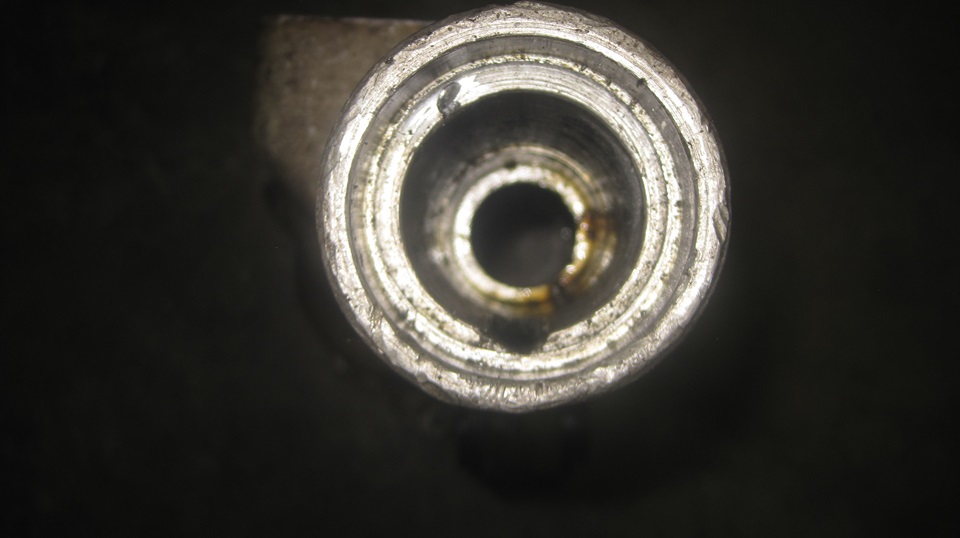
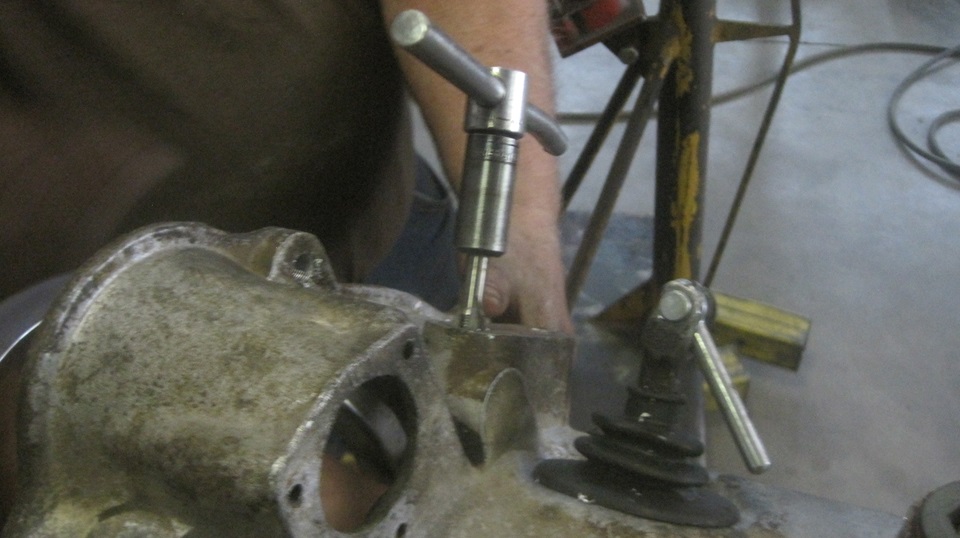
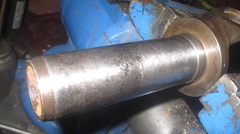
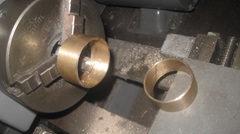
Do not push on the center rubber core. Use a large wrench socket to push on the outer steel shell. I have set the alloy housing on a round tube jack stand for back up while hammering the new bushing into place. Next was to remove the worn bi-metal bushing from the tail end. It is possible to make a special double-D washer to insert behind the bushing, and pull it out with a long screw puller (like the screw from a coil spring compressor). Or you can use a tapered punch with a chisel point to collapse one side of the bushing inward, then pull it out with Vice-Grip on a slide hammer. Another ploy is to use a long 1/2" drive socket extension, grind the wide end flat to have sharp corners, and use it as a punch to drive the bushing out from the inside. This one was particularly stubborn. We ended up using the tapered punch, and the Vice-Grip puller, and the long punch from the inside.

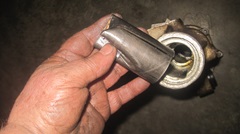
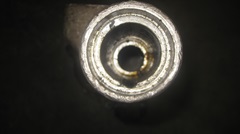
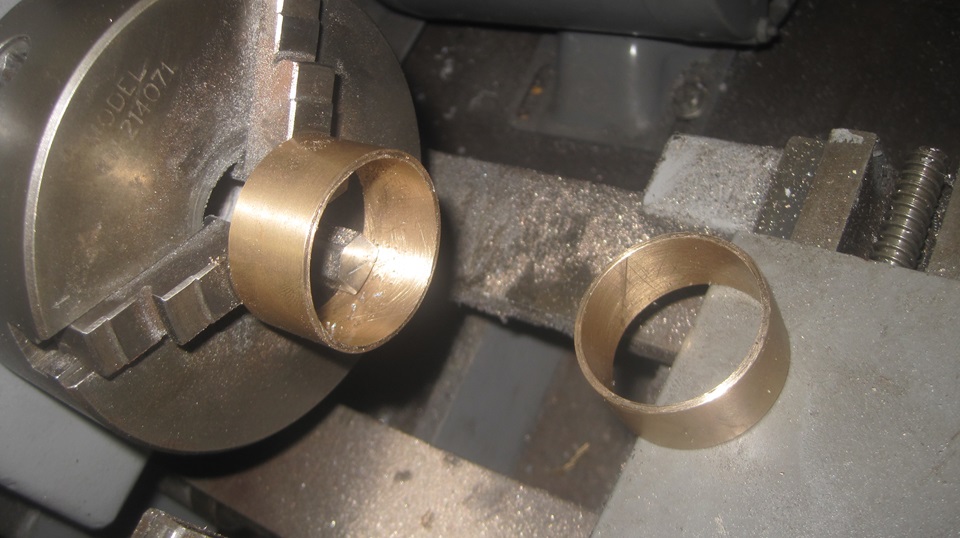
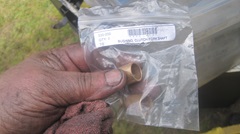
The original style replacement bi-metal bushing has not been available for decades. I use 660-bronze plain sleeve bushings. These are available in 1-3/8" ID, 1-1/2" OD, 2" long. We need 2-3/4" long, so buy three pieces. Cut 3/4" long piece from each end of one piece. Insert one 3/4" piece and one 2" piece to makeup the required 2-3/4" length. Three 2" long bushings can thus make two 2-3/4" long assemblies to repair two gearboxes. Fix one and keep the other parts for spares.
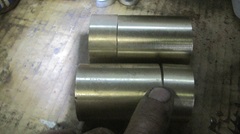
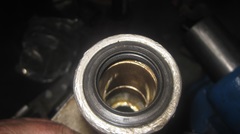
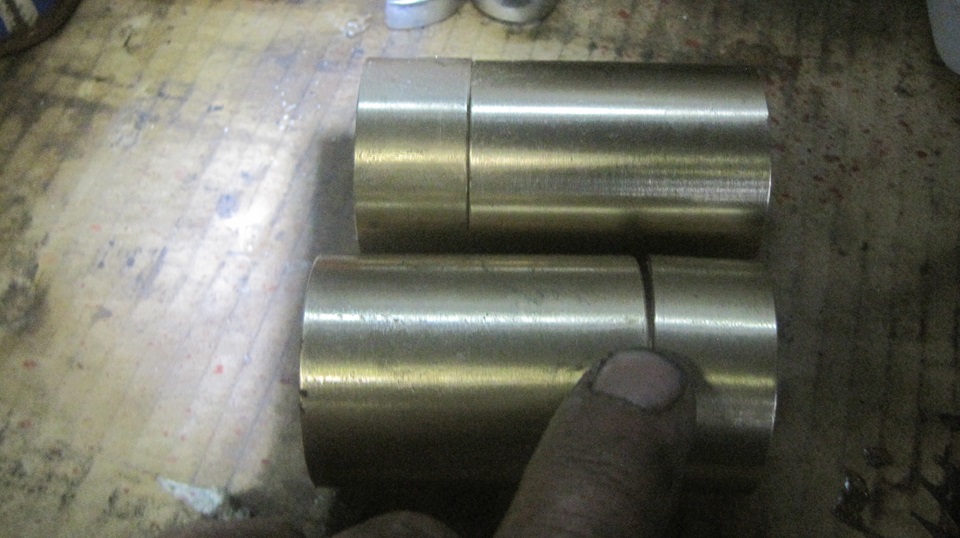
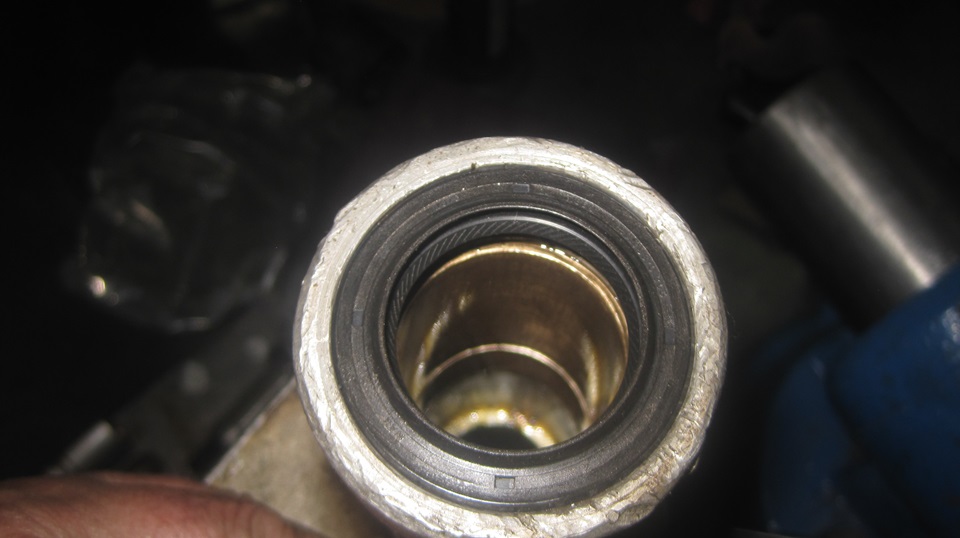
Beware (or be aware) that this may end up being interference fit. You may need to hone out the bushings with a brake cylinder hone, or sandpaper on an appropriate mandrel. Best to do this to make the bushings fit on tehe propshaft front end spigot before inserting the bushings into the tail housing. We honed out all three 2" pieces before cutting the shorter pieces. After installation check the fit again to be sure the spigot will still slip into the bushing and turn freely by hand. install the rubber seal last.


Friday - April 11, 2025:
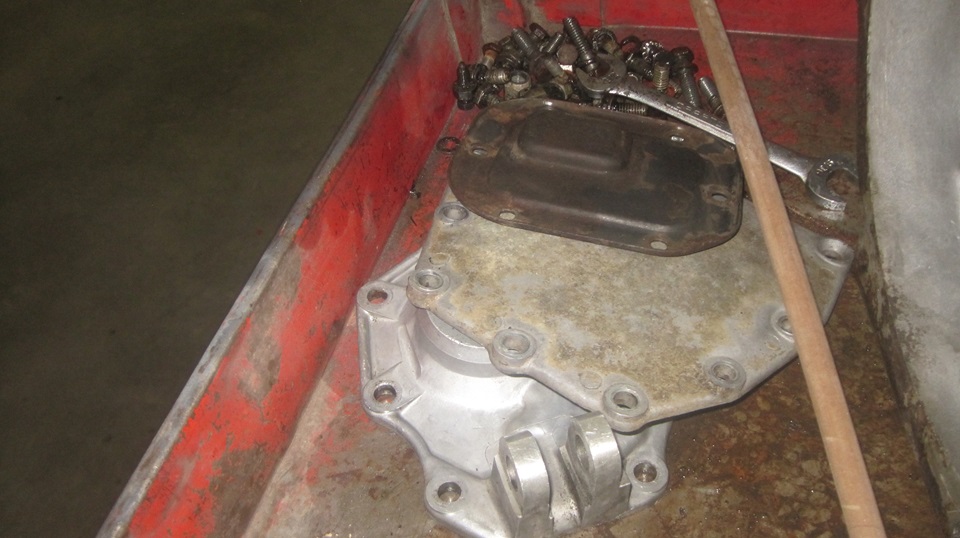
Determined to get the new gearbox assembled today, start with a good cleaning of the front and rear housings, plus three covers and lots of fasteners.


First assembly is to install the new 18-roller full compliment needle bearings into the laygear, three bearings, one bearing spacer, and four snap rings. The laygear assembly then goes into the bottom of the box with the front thrust washer pinned in place with a scratch awl (or other small diameter instrument of your choice). The rear thrust washer can be inserted later in the process. -- Another 18 loose needle rollers go into the input gear with grease to keep them in place, and insert the input shaft assembly (with front main ball bearing) into the front of the box. -- Take the mainshaft to the bench to install the new 2nd gear synchronizer ring, 2nd gear, interlocking thrust washer, 3rd gear bushing, 3rd gear, and the front locking thrust washer with radial spring and peg. Add the 3rd/4th gear sliding hub assembly with the two additional synchro rings, correct orientation please. Then push the entire mainshaft assembly into the box from the rear, engaging the front end spigot into the needle roller bearing in the input gear, and the center main bearing into the back of the main box. -- That was an appropriate time to tighten the large hex nut securing the helical groove oil pump spool (spacer). Whomever was last inside this box had left the nut loose. Not nice, because this nut also secures the center main ball bearing on the mainshaft, preventing fore/aft float of the mainshaft assembly. -- Then lift the laygear upward into place engaging the input gear, 2nd and 3rd gears on the mainshaft. Then insert the rear thrust washer while the new layshaft is inserted from the rear. The layshaft gets pushed through the rear thrust washer, all through the laygear bearings, then through the front thrust washer (centering that as the scratch awl is removed). Install the front cover temporarily to hold everything up front in place. The front cover will be swapped out later when the box is being installed in the car, because this car uses all MGB clutch parts (including MGB gearbox front cover).


Temporarily install the rear housing while we measure and cut shorter one of the two fixed studs to make it easier to install the nut later). Remove the rear housing while we install the three shift rods along with the detent block assembly. Install the reverse gear and shaft with locking stud and locktab.install three shift forks as the shift rods are pushed into place, adding the three locking bolts with jam nuts. Position the remote shift rod front lever into the selector gates,and install the selector interlock arm, followed by the top cover with gasket. Then we can install the rear housing (with gasket) and cinch that up tight. Then install the side cover with gasket, to get the box closed up. Okay, we didn't install the speedometer drive output gear yet, but otherwise it looks like a complete gearbox ready to be installed in the car (less the remote shifter assembly). We did use a 3/8" drive socket extension as a hand tool to shift the gearbox through all gears forward and reverse to assure it will work properly once installed.

Late afternoon was time to install two new U-joints in the matching 2nd gen propshaft, get that cleaned up and give it a quick shot of black paint.


Tough day for an old man standing on the cement all day but we're still survivors. A quick pass by Walmart for more black paint, lacquer thinner, oil, shop towels (and new jeans for navigator), then back to the truck stop for dinner and WiFi to bring you these photos and notes. And I think it's past midnight again.
Saturday - April 12, 2025:
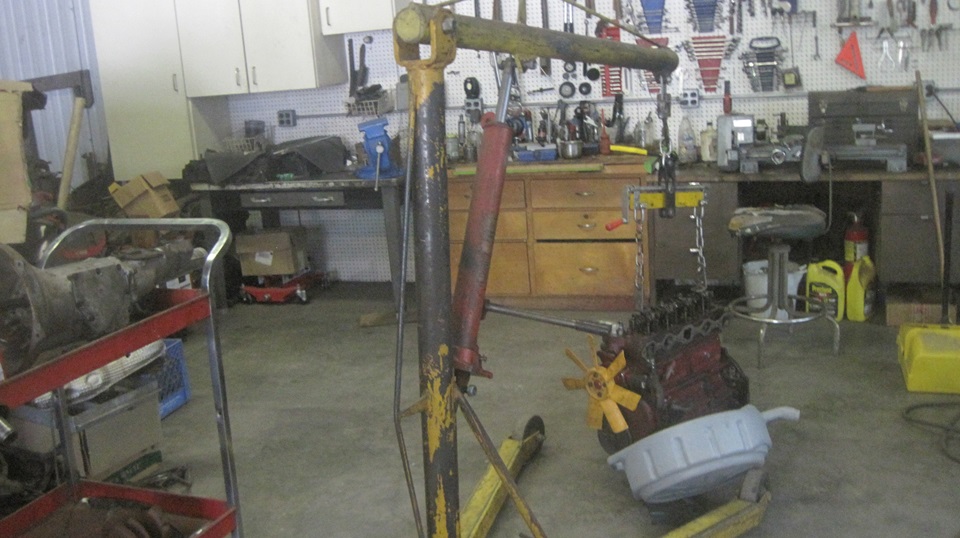
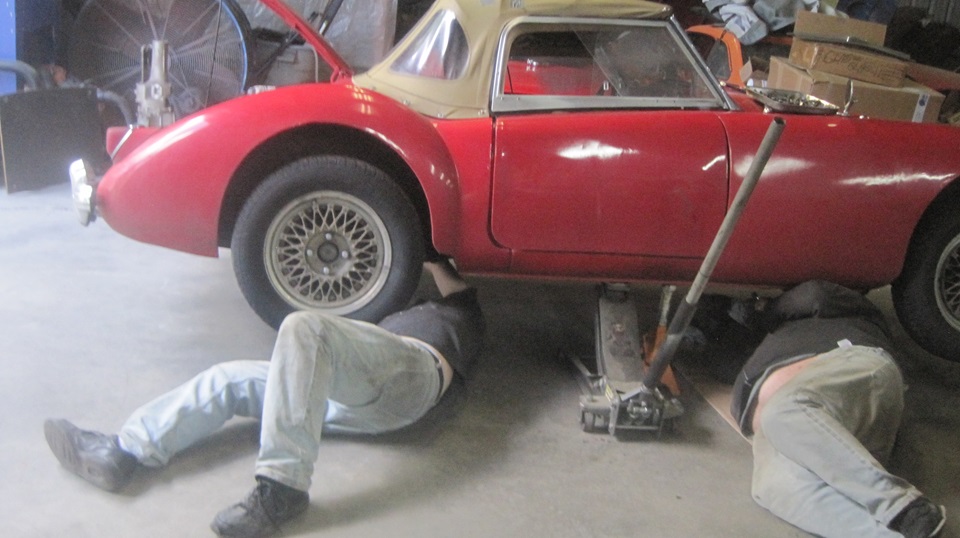
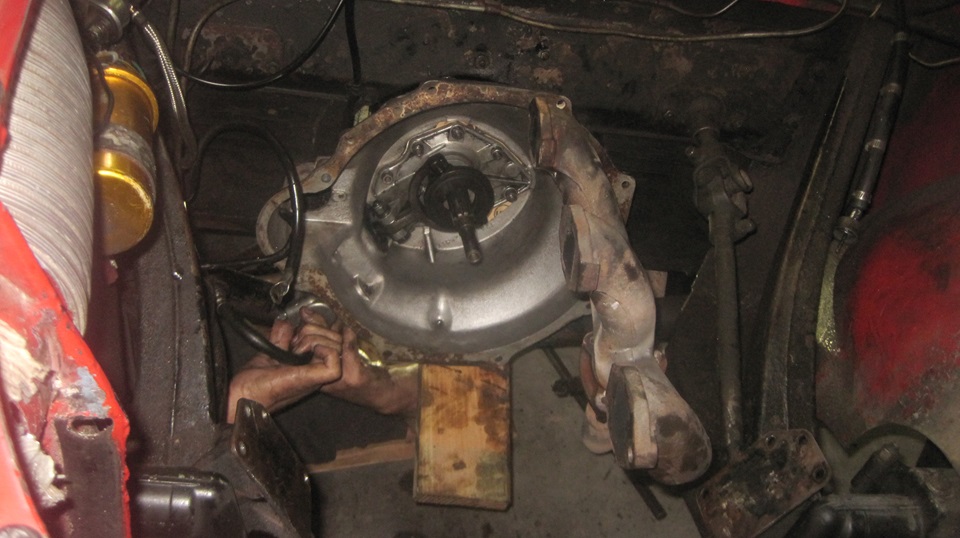
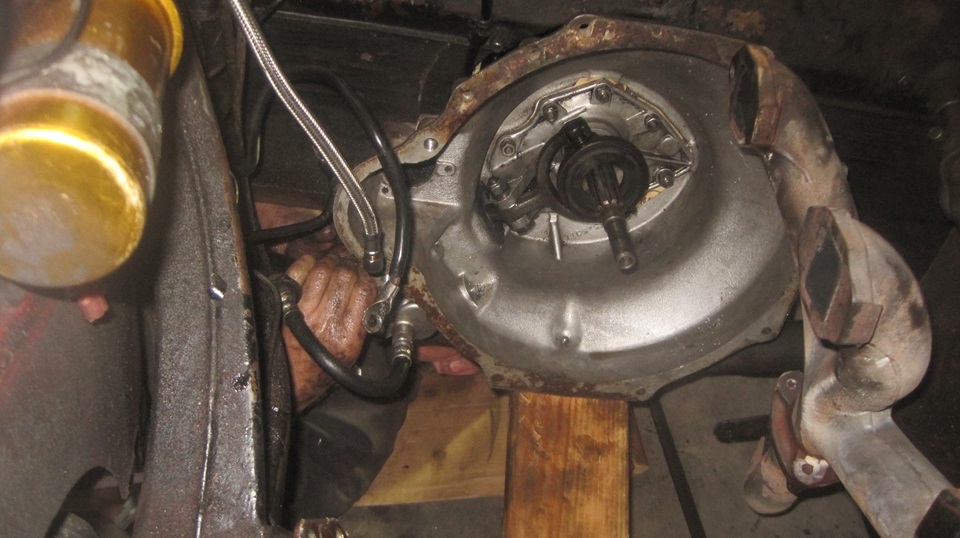
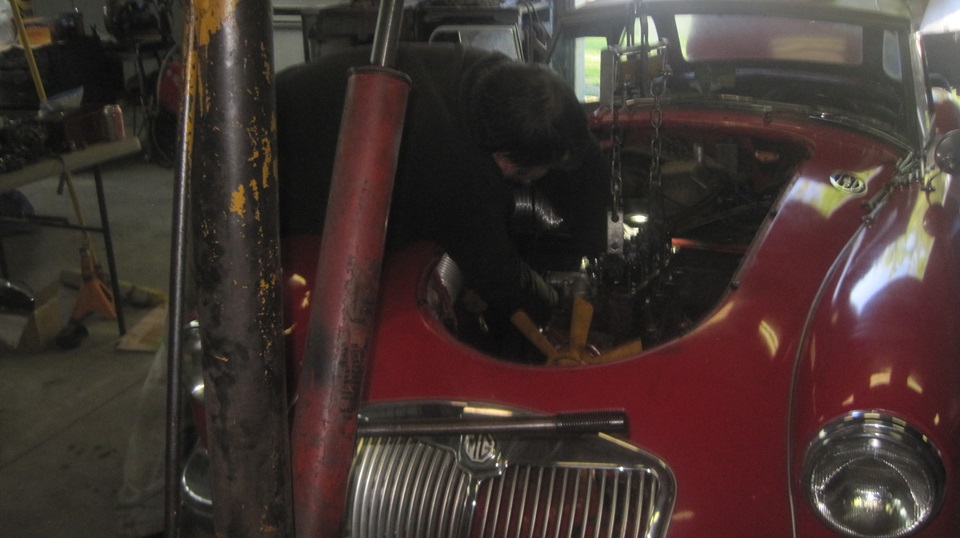
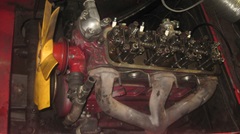
Gearbox swap day from hell? We knew this was going to be a long work day, but it got longer as it progressed. In retrospect, we made a few mistakes, and I think we should have spent another half day with the gearbox before starting to pull the engine. But here we go. Drain coolant, remove radiator, disconnect heater hoses, remove the hanging spin-on oil filter (because it won't clear the engine mount pedestal on the way out). Remove alternator, starter motor , distributor, and disconnect the oil pressure signal hose from engine (bot no oil cooler hoses this time). On the other side, disconnect fuel hoses and control cables, and remove carburetors, intake manifold and draft tube. This is where we (I)made a bad decision for an attempted shortcut. We unbolted the exhaust manifold from the cylinder head, but left it connected to the exhaust pipe, thinking maybe we could sneak the engine out past the exhaust manifold. Bad idea. -- Remove lower bolts from engine mounts, and most of the bellhousing bolts. Attach engine hoist and lift gently, long enough to remove the last bellhousing bolts, then lift engine and pull forward and upward. This is where we got the first slap in the face for the shortcut. The engine rear plate pushed the exhaust manifold up against he steering column just as the sump flange was hitting the engine mount frame pedestal on the other side. But we persisted to force it past, and soon the engine was sitting on the floor out of the way.
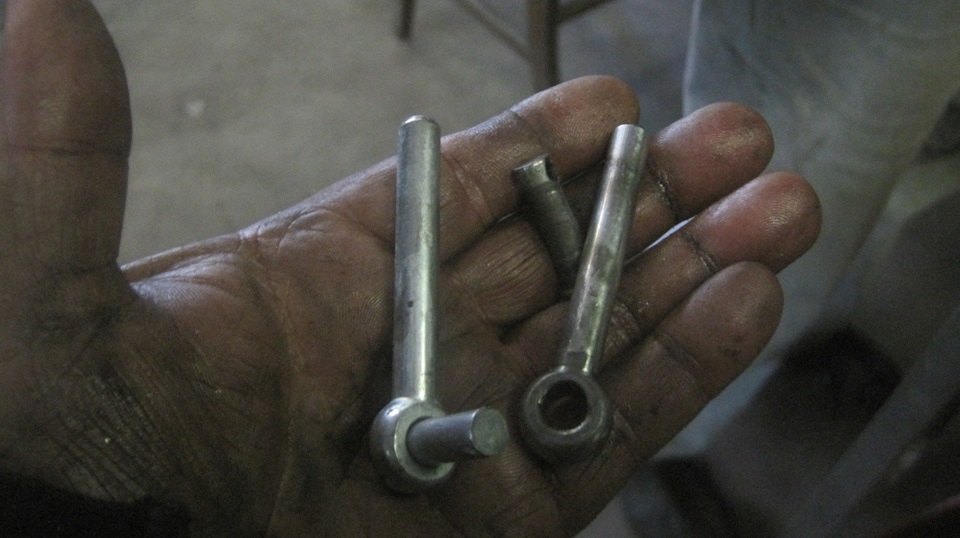
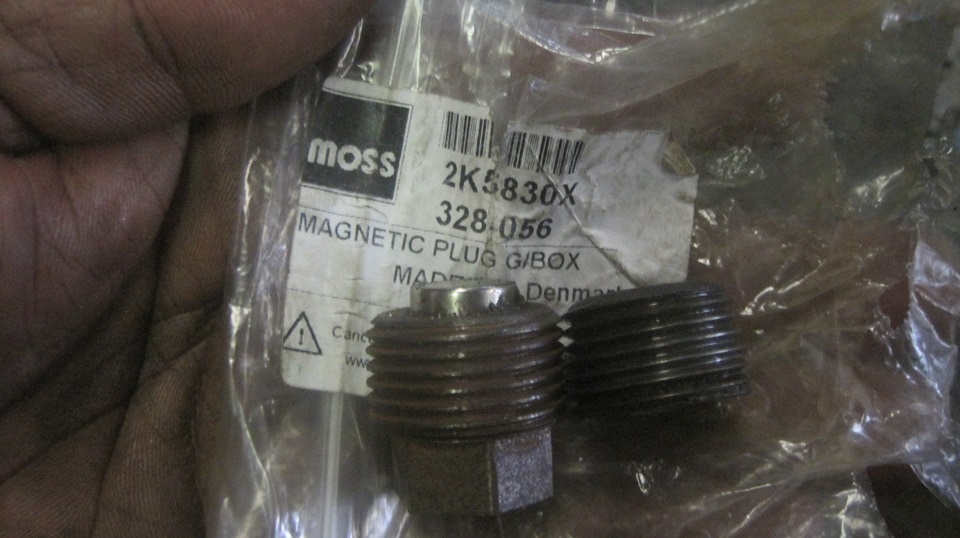
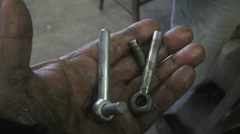
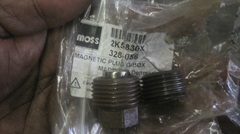
After a short feeling of euphoria, on with the chores. Dismount the clutch slave cylinder and let it hang, Drain the gearbox oil, disconnect the speedometer cable, remove the propshaft, remove gearbox mounting bolt, and pull the gearbox forward. Second slap in the face, cart before the horse, forgot to remove the shift lever, preventing gearbox extraction. Remove the shift knob, pull out the tunnel center carpet section, eight screws to remove tunnel top cover, four bolts to remove the shifter extension assembly. Then we could pull the gear box forward and upward, out over the body nose and set the box on the work cart. Not too bad with three pairs of hands to manhandle the 65 pound gearbox without needing the power lift. Needing to transfer a few parts from the old gearbox to the new one. Grab a new clutch slave pushrod and clevis pin from the Magic Trailer to replace worn parts. Also grab a new magnetic drain plug which we had procured for this special occasion, but quickly discover it is too big to fit the threaded drain port. Curses, have to call Moss Motors about this part later. but for now reinstall the original drain plug and get on with it.

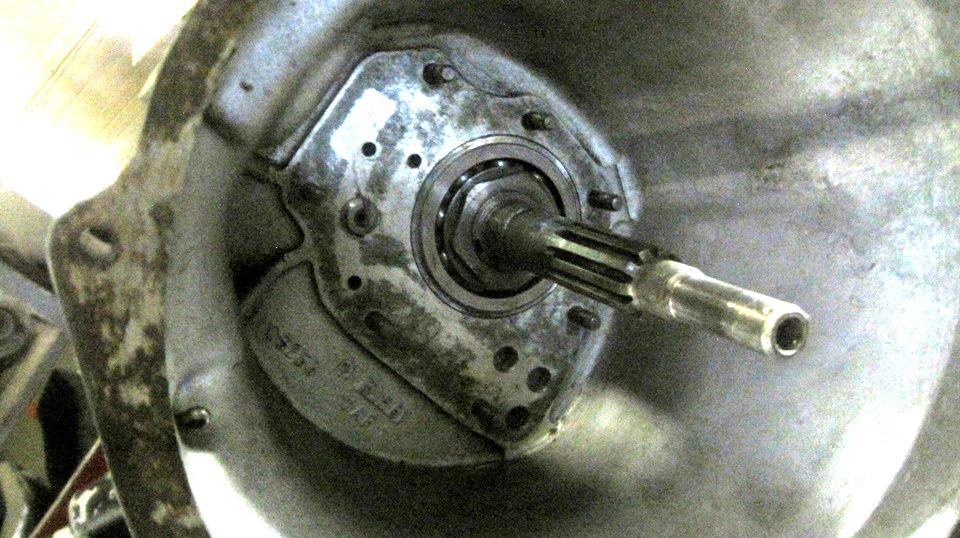
Remove MGA front cover from the new gearbox, and the MGB front cover from the old gearbox. install the MGB front cover on the new gearbox. This is to accommodate the MGB clutch this car had been running since the mid 90's. Time spent here carefully measuring height of protrusion of the front main bearing from face of the gearbox (exactly 0.125"), and depth of counterbore in front plate with joint gasket in place (exactly 0.143"). For the 0l018" difference, install 0.017" of shims, leaving 0.001" for end float of the front bearing (assuring the front plate gasket will crush and seal). Remove the old front seal and install a new one in the front plate. Grease the shims to hold them in place while installing the MGB front plate on the MGA gearbox.
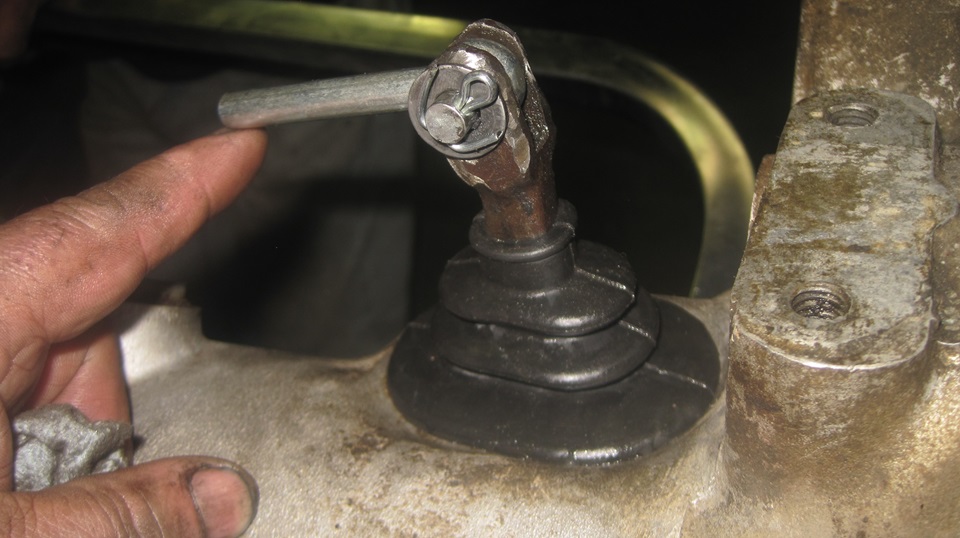
Install a new Oilite bushing in the MGB release arm, filling the bushing with oil and pinch to make it sweat first to assure full oil saturation. Press old bushing out, and new bushing in, mount the MGB release arm with a new pivot bolt, install a new dust excluder boot and the new pushrod and clevis pin.

About to get the cart ahead of the horse again. Slip the new gearbox into the car and install the rear mounting bolt. About to install the clutch slave cylinder when it dawns on us that the fine thread bolts won't fit in the coarse thread holes. This is a regular problem, because the factory changed the threads part way through production. I should have known better, and we should have taken care of this before. Remove the mounting bolt and pull the box back out of the car, back to the work cart.


Drill and tap and install stainless steel Heli-Coils, two for the clutch slave bolts, two for the starter motor bolts, and four for the remote shift extension bolts. This is partly to avoid the need to find new coarse thread bolts. But more for the desire to have the steel threads in the aluminum casting. This comes from the day 30 years past when the starter motor fell our, jammed up the flywheel, broke the crankshaft, and and caused very expensive damage to the engine. The theory here is, any time you need to R&R bolts in an alloy casting more than once, you should install the Heli-Coils for long tern durability of the threads. This was about the time we were thinking we should have spent another half day with the gearbox before pulling the engine.
-- Okay, gearbox back in the car, rear mount bolt installed, reattach the clutch slave cylinder, install the new propshaft, lift the gearbox to contact top of tunnel while the engine is lifted back in to be refit.

--Oh gawd. Remember the problem with the exhaust manifold and steering column interference? We're not fighting the same problem going back in. Bite the bullet and take time to disconnect the exhaust pipe from the manifold and get the manifold out of the way.Then the engine goes back in much easier. Snuggle it all together, install bellhousing bolts, then the engine mount bolts. the rest is just grunt work, installing manifolds and carburetors. Time out to reinstall the shift extension on the gearbox, reinstall the tunnel top cover. rubber shift boot, shift knob and center carpet.
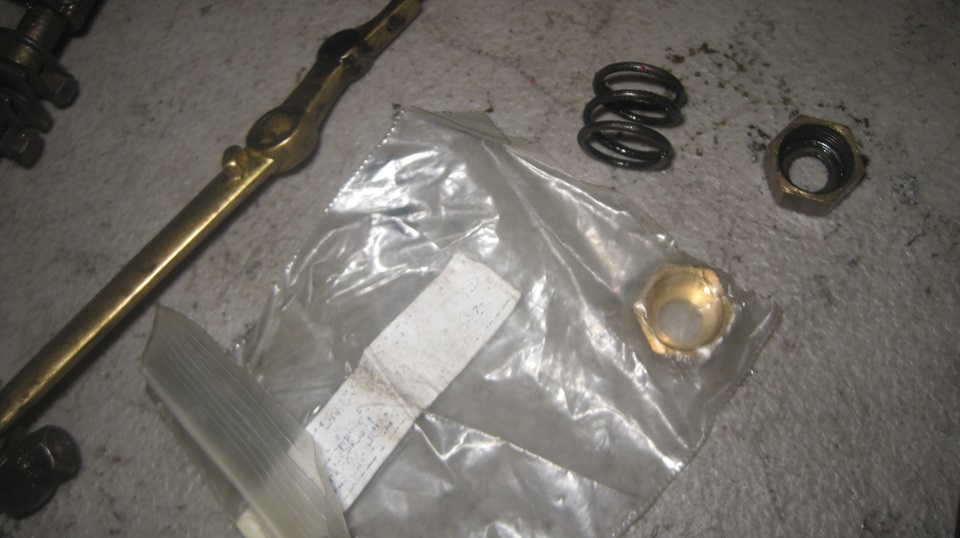
-- Been having an issue with sticky choke on the rear carburetor, so disassemble the choke arm, loosen and re-tighten the jet retaining nut while centering the jet. Nice, but the choke still sticks, so pull out the jet and polish it with oiled fine grit emery paper. Oil the jet and reinstall it, works freely again. Then the mixture nut popped off, having stripped the fine threads in the brass nut. Nothing new, and we did have a new mixture nut in the Magic Trailer, so not long to fix that. Reassemble the choke arm, reinstall the rear carb and the vacuum pipe, front carb, interconnect linkages and air filters. Reinstall alternator and radiator with hoses, reconnect heater hoses, and water valve control cable. Reinstall the temperature sender, and refill coolant (no leaks this time). Feeling better as we get closer to run time. Must be about midnight.


Sunday - April 13, 2025:
After midnight. Navigator had been bugging us all day (yesterday) about installing new points in the distributor, so that was next. While I was fiddling with points installation, he was fussing with putting oil in the gearbox. Getting late, and tired, so somehow we mispositioned the funnel and managed to pour two quarts of oil on the shop floor. Damn! I haven't done that in at least 30 years. Tim was then dumping lots of oil-dry (kitty litter) on the mess while I was installing the distributor. -- Finally all the fluids in, and time to try firing it up, but no-go,, no spark, back to fiddling with the distributor again. Turned out the new points had no contact between the contact buttons, so file the points, readjust it, and put it back in the car again. Good spark, but kick-back with cranking. Retard the timing some, and try again. Zoom, fired right up, good oil pressure, nothing leaking, adjust timing, runs okay. at 1:30-am.-- I wanted to sleep, but navigator wanted to reinstall the bonnet, so we did. Then back the car out of the shop. Tim was still cleaning up the oil litter mess (took a long time) as we were packing up tools and trailer. Finally out by 2:30-am. What the hell was that, a 17 hour work day? -- Back to the truck stop at 3:00-am for very late lunch, got to sleep at 4-am.
Slept in til 10-am, six hour snooze was not too bad considering the circumstances. Good breakfast and the day off for personal recovery (and posting the photos and notes). Shopping around for another replacement Garmin GPS, but not committed yet.
Monday - April 14, 2025:
Sleep time 2am to 9-am, 7 hours is little better, and today my feet and legs feel a lot better. Mid morning trip to a parts store for a bag of oil dry, another spare oil filter, another flasher unit, and a new brake cylinder hone. Then on to Walmart to pick up a new Garmin GPS which will keep navigator busy for at least half day downloading most recent data files for North America. Engine running a bit rich, so get after the recently tampered rear carburetor to lean it out some, perfect adjustment, runs well again. Then over to Tim's place to drop off oil dry and brake cylinder hone, and help with little more clean up and tool organizing. This time we seem to have misplaced our 1/2" drive ratchet wrench, which may be the largest tool we have ever lost. No one can find it anywhere, no big deal, we will just buy another one and count it as part of the new gearbox cost. Sat down for social time with Tim for another hour before going back to the truck stop for lunch, and take the rest of the day off. John Twist Zoom tech session at 7-pm, beginning with light bulbs, running into other electrical issues and miscellaneous stuff, signing off at 9:40pm. Time for late dinner before late night runs out. We may actually get enough sleep tonight.
Tuesday - April 15, 2025:
The best news is, good sleep,woke up feeling good, and the feet are working well. The new Garmin data download is still slow, took another 10 or 11 hours before it was finished. Navigator finally had smile as he plugged it into the car to try it out. Beginning to look like we can be heading out tomorrow.
|