The MGA With An Attitude
Tuesday, August 16, 2022:
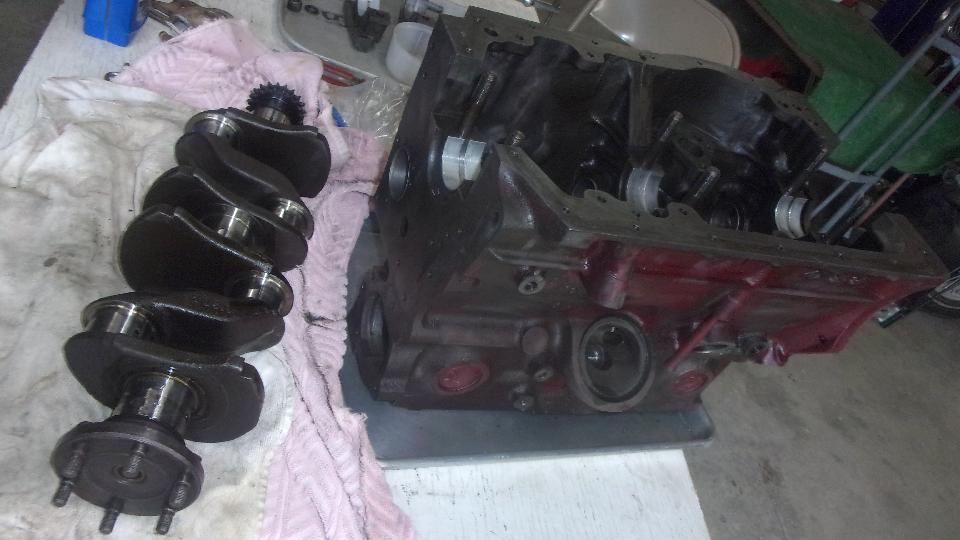
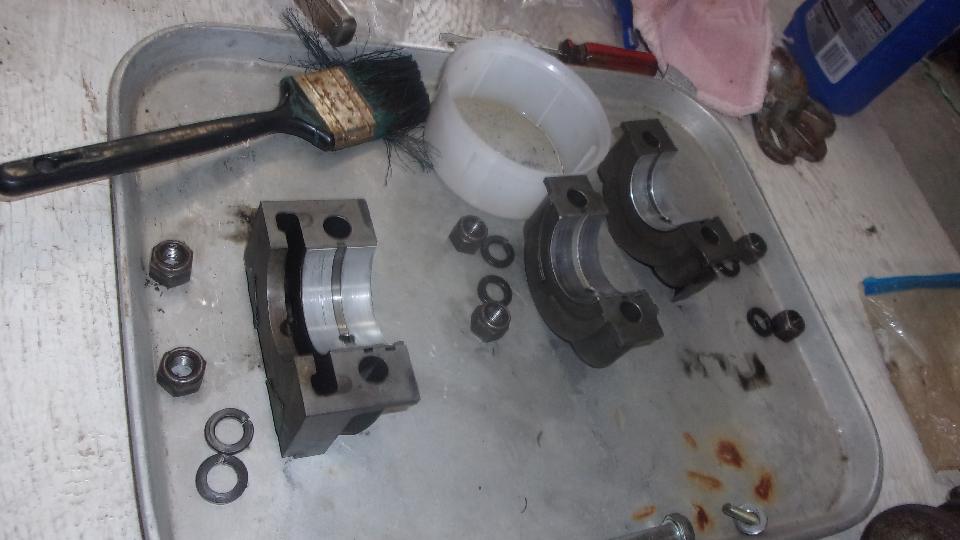
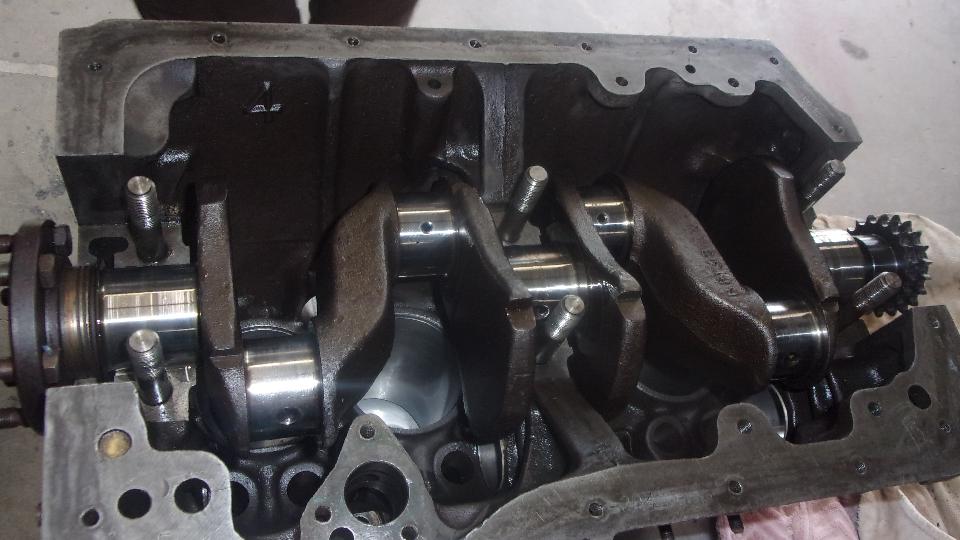
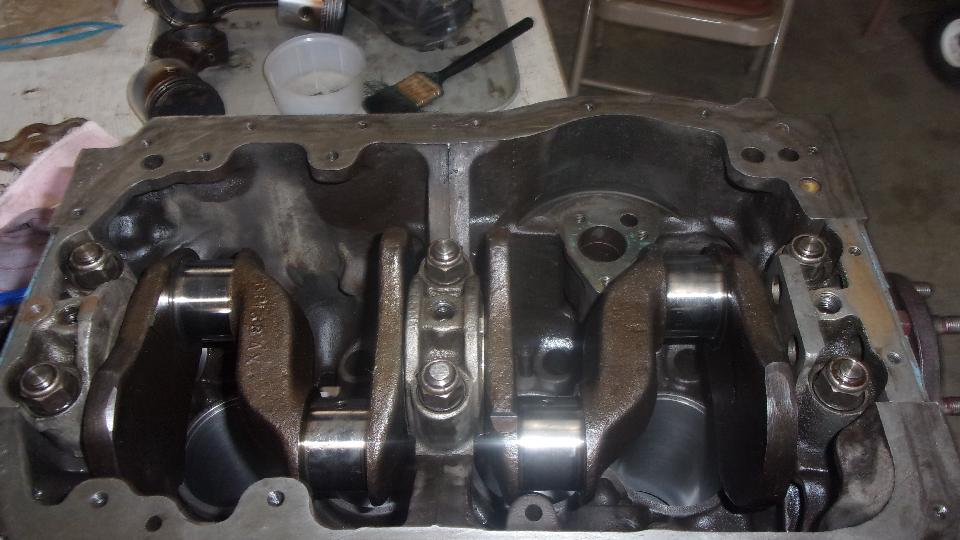
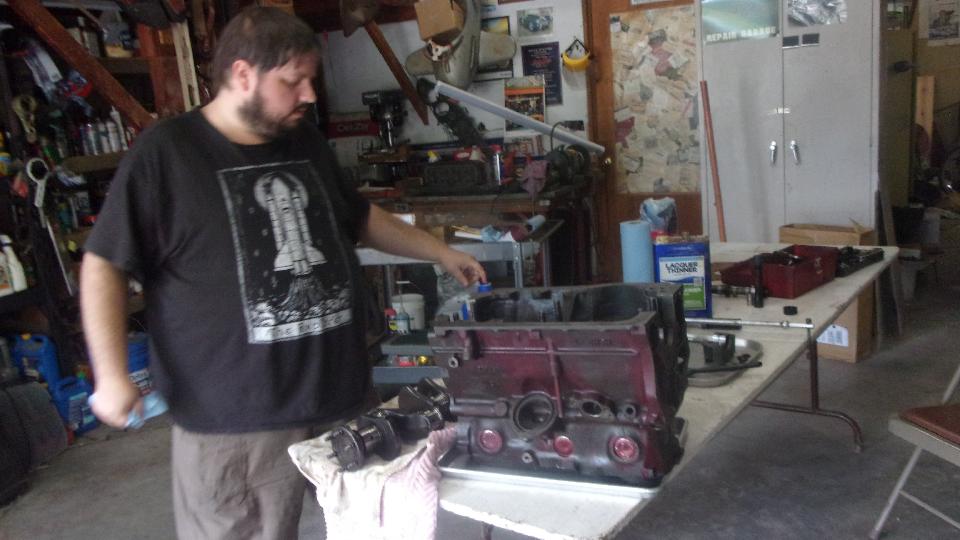 Set the crankshaft in place, install thrust washers and center main bearing cap, then the front and rear main bearings and caps, giving it a little whirl at each step to assure it still spins freely with finger tips. Then torque it down, and spin it again. 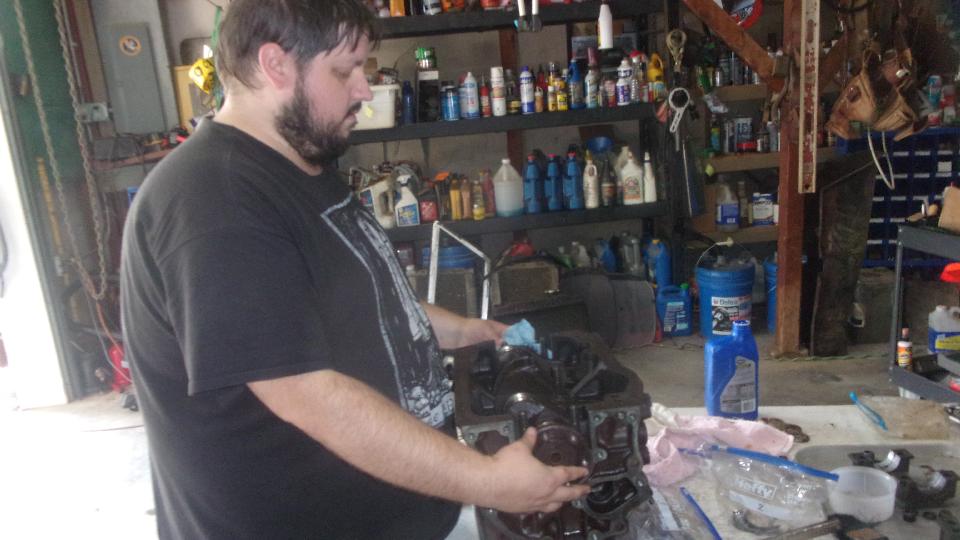
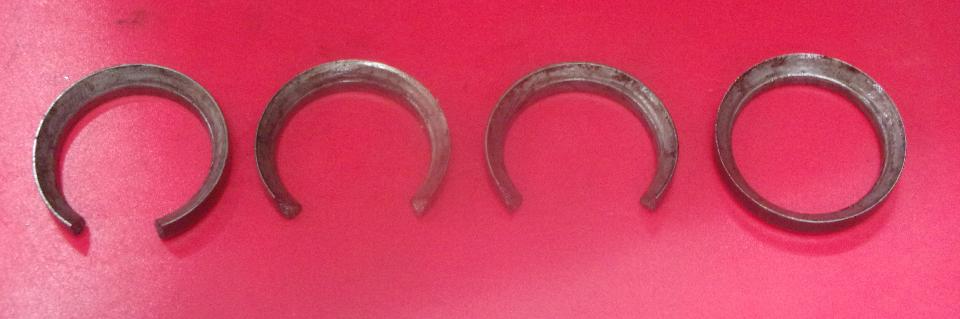
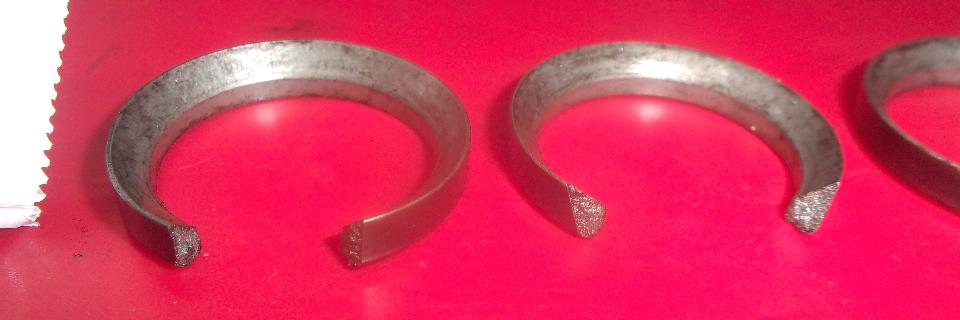
 Easy to separate old pistons from connecting rods, and put the new pistons on the rods (front way around for all parts). Then the rings were a little tricky. There are County brand 5-ring pistons, which I hadn't used since the mid 90's. 5th ring at bottom of the skirt is a one piece cast iron oil wiper ring with sideways "U" cross section, symmetrical with no note for top side, no problem. 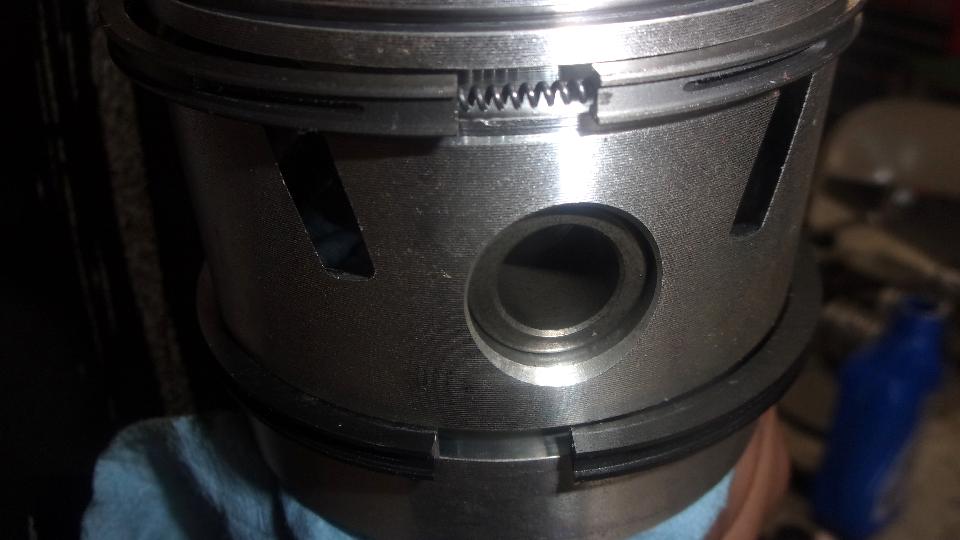
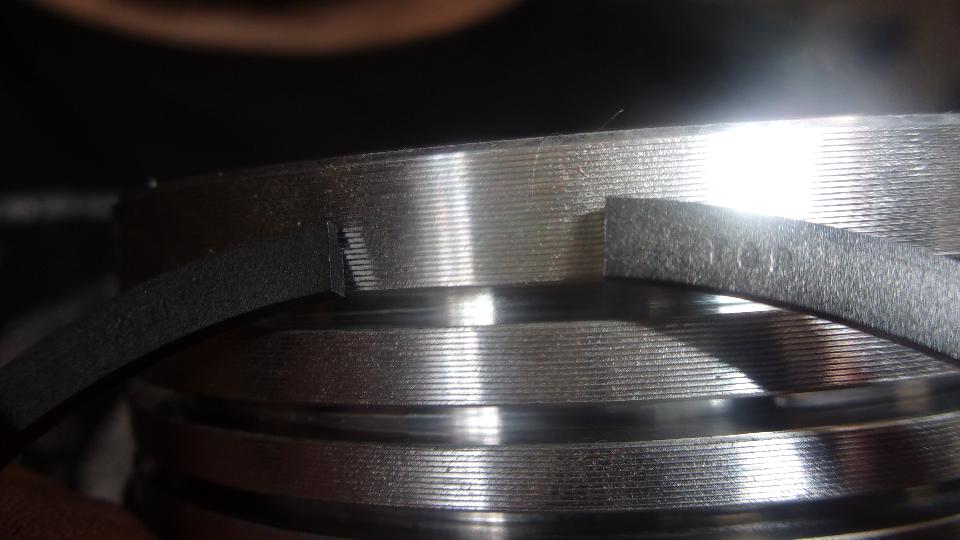
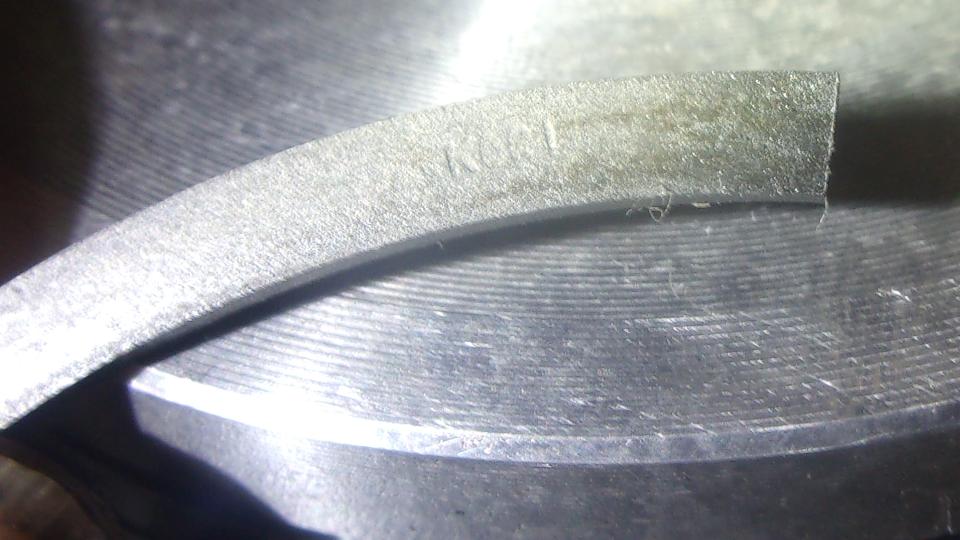
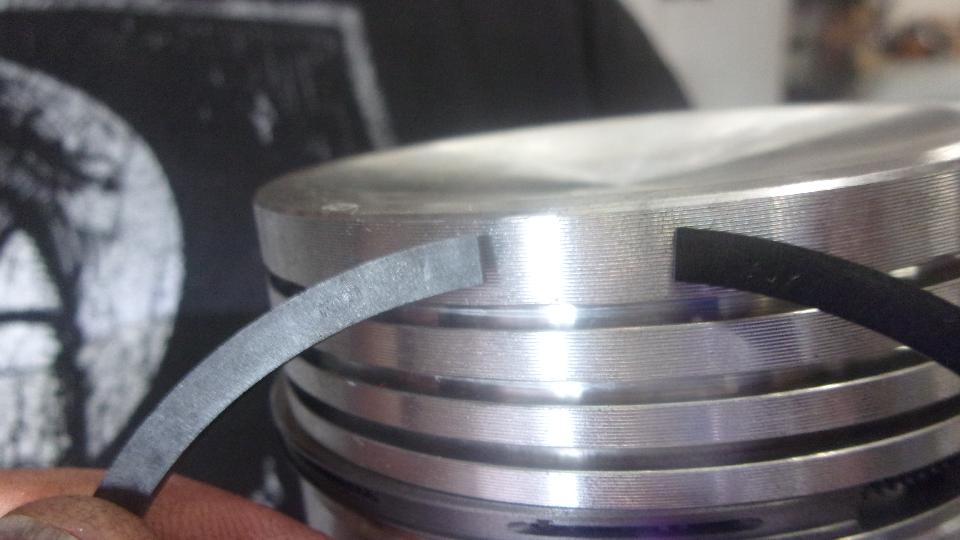 The top two compression rings are also one piece cast iron but rectangular cross section with no markings for top, so eight ring very plain. We did finally get a half decent picture of what I think is manufacturer's name logo on top of the rings just to the left side of the gap. It looks like KORI (maybe), but definitely not County. 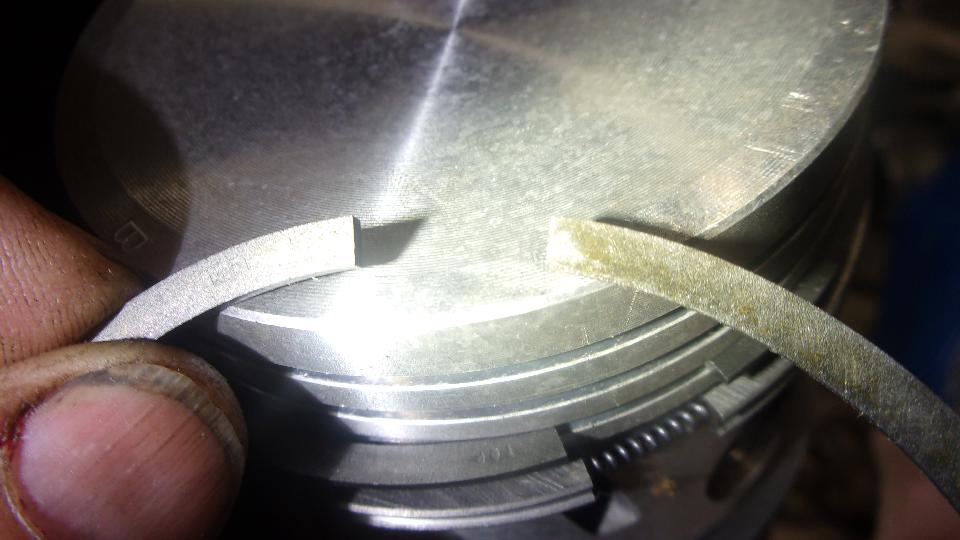
 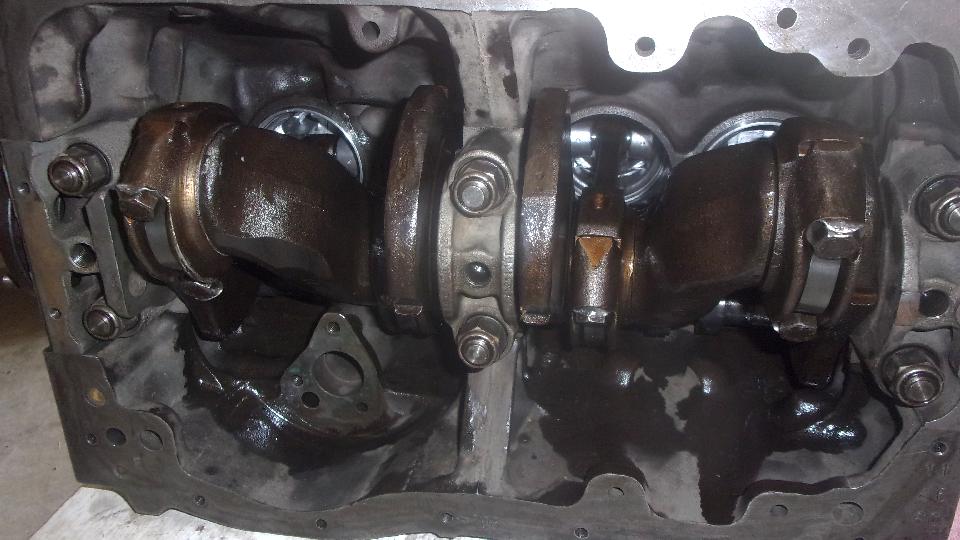
 All pistons and rods installed, big ends torqued down and lock tabs turned up. No oil pump or sump yet.
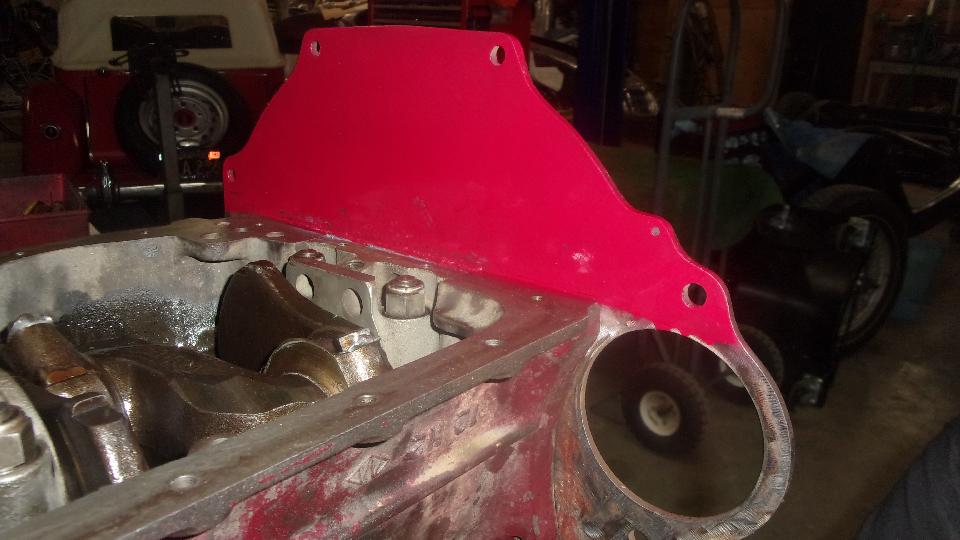
Then time to install the camshaft and the engine front and rear plates.
All pistons and rods installed, big ends torqued down and lock tabs turned up. No oil pump or sump yet.
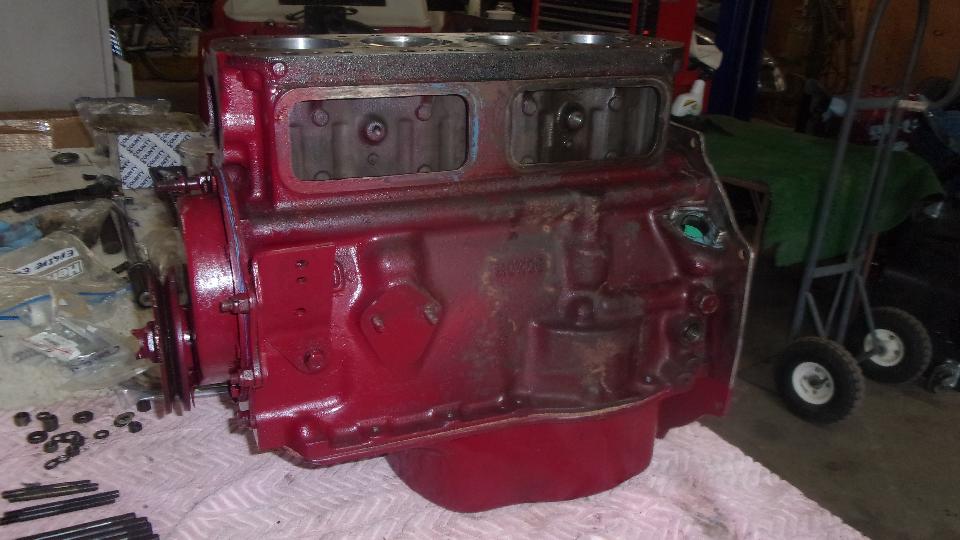
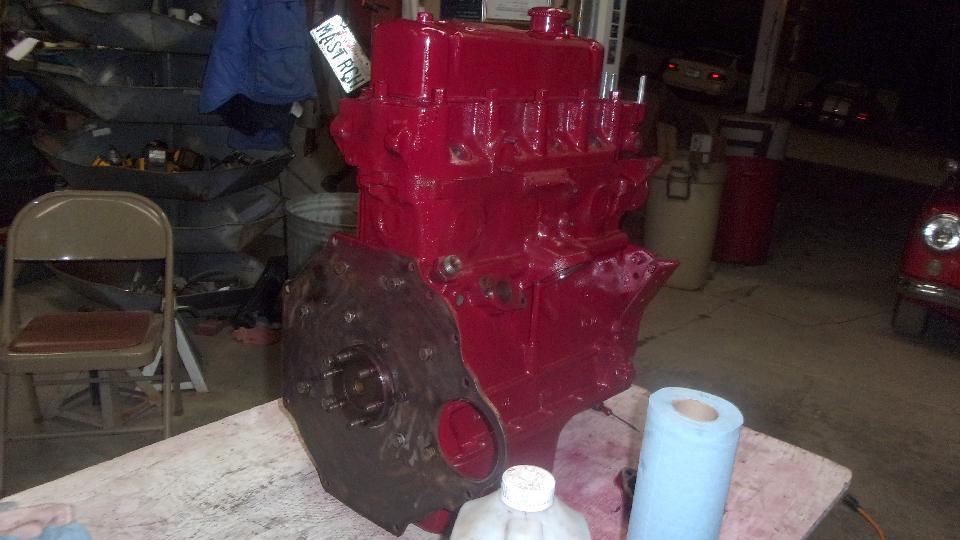
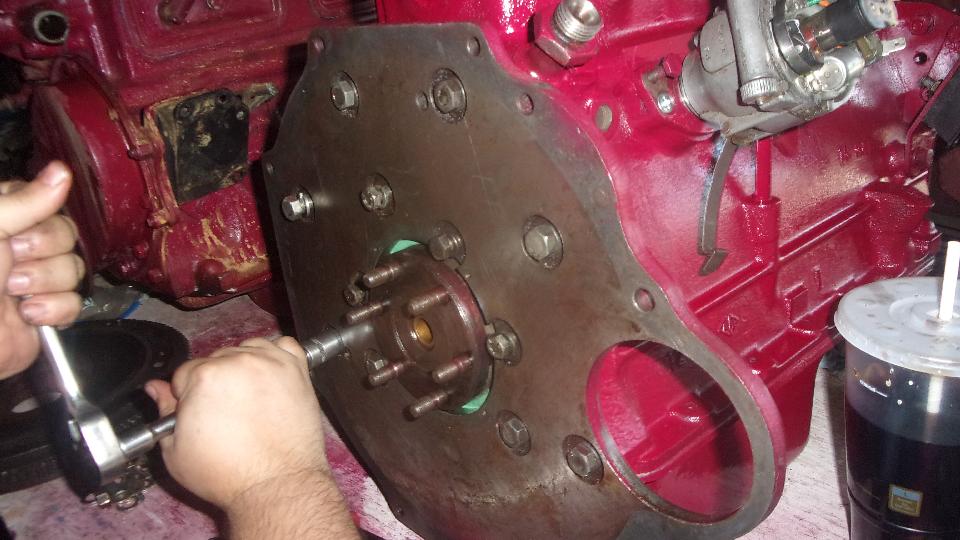
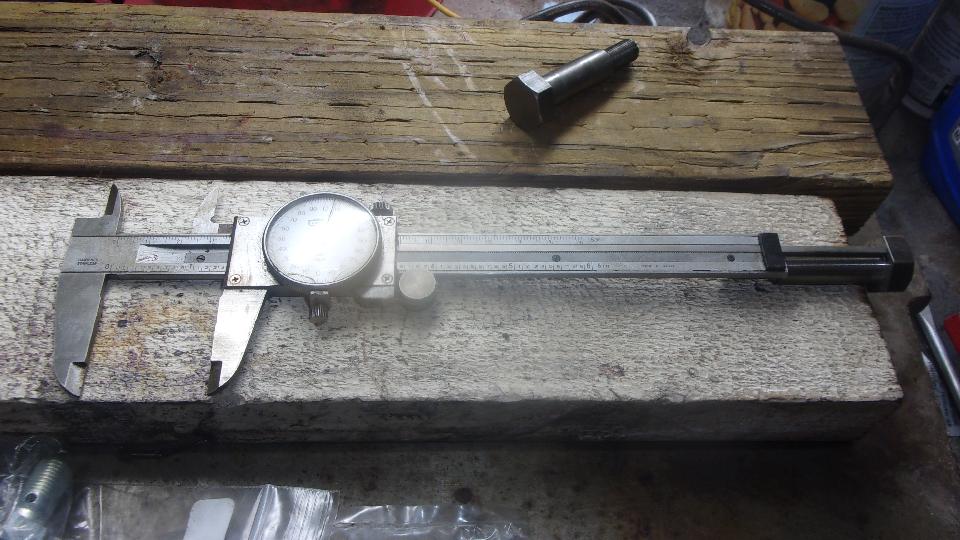
Then time to install the camshaft and the engine front and rear plates. Cleaning parts and scraping gaskets takes too much time. We found a spare engine rear plate with  low starter position in Stu's shop, so maybe wouldn't have to remove mine from the borrowed engine when it would come out of the car. That plate had lots of surface rust, so I spent time power sanding both sides (and the edges), and got it installed with a new gasket. I thought this one was maybe thinner than the original back plate, and the bolt holes were not counterbored, so I measured it. Original plate was 0.400" thick, but this one was 0.200" thick. Scratch head. That would put the engine closer to the gearbox, likely deform engine mounts and place the engine slightly farther aft. Well. install it for now anyway.
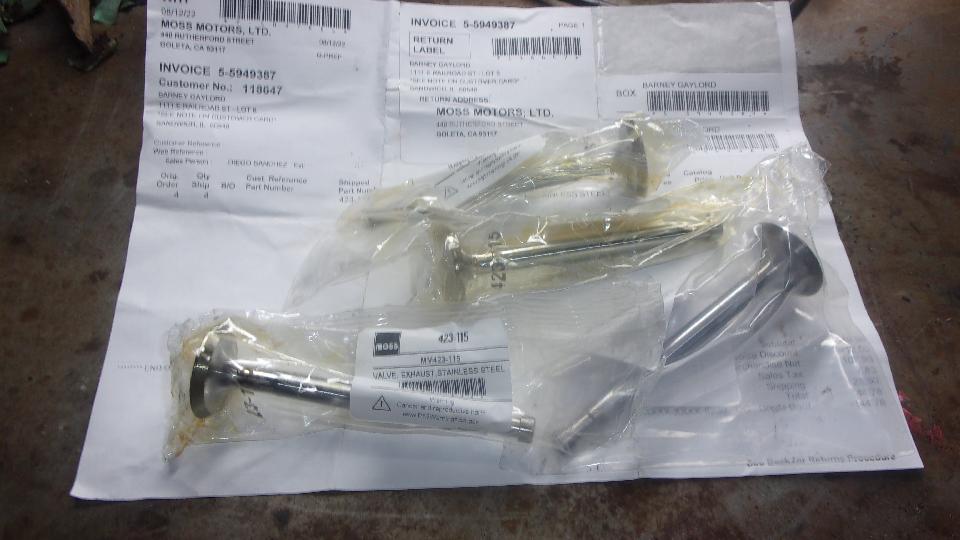
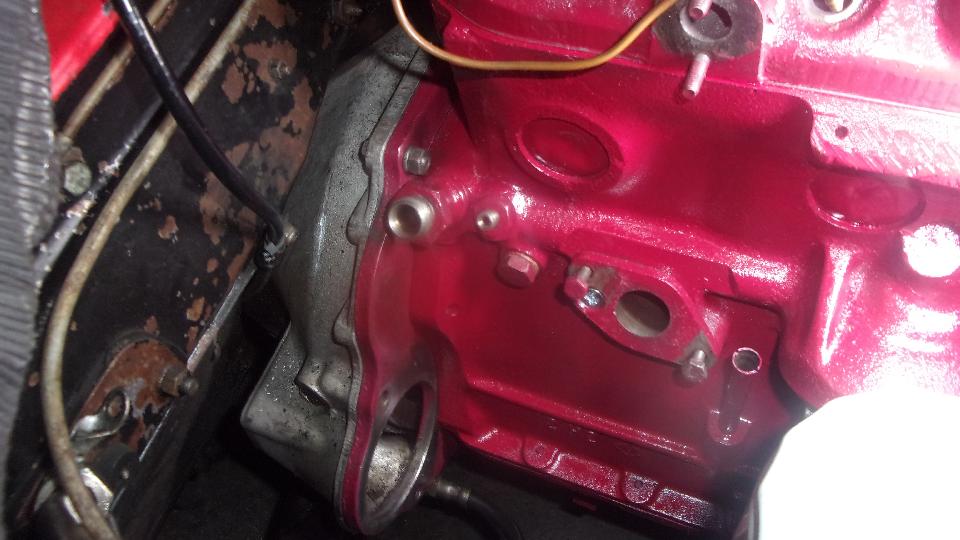
 That was when it dawned on me that the low starter position in the rear plate may be a little bit too low and too close to the block. We picked up an original MGA starter motor, and it did fit, but very close to the block (almost touching). Then picked up my little gear reduction starter, and that was not going to fit that close to the block without more modification to the flange on the GR starter. instant decision, this rear plate will have to be changed when the loaner engine comes out of the car. Painted sides of the block near the front, and inboard sides of engine mount brackets before the front plate was installed (to avoid R&R of the engine mount brackets from the front plate).
 . 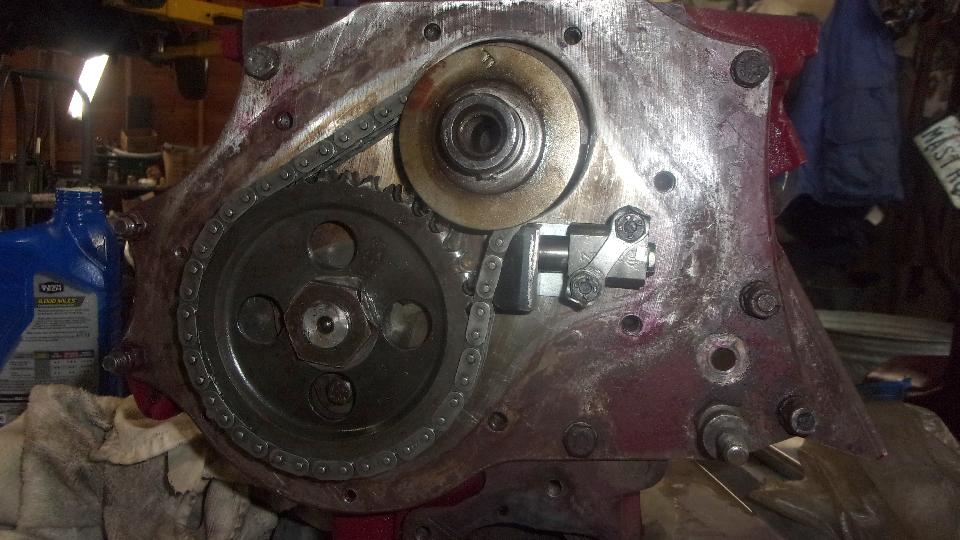
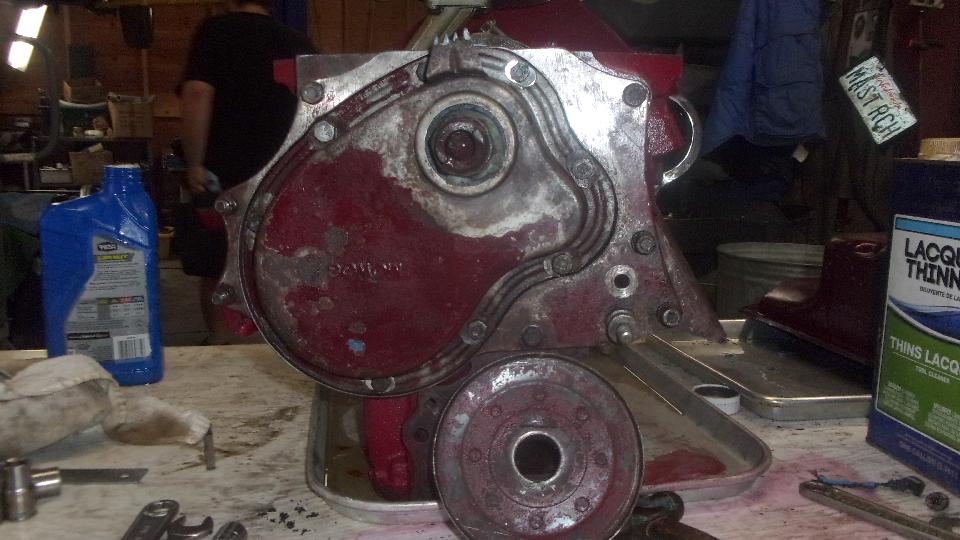
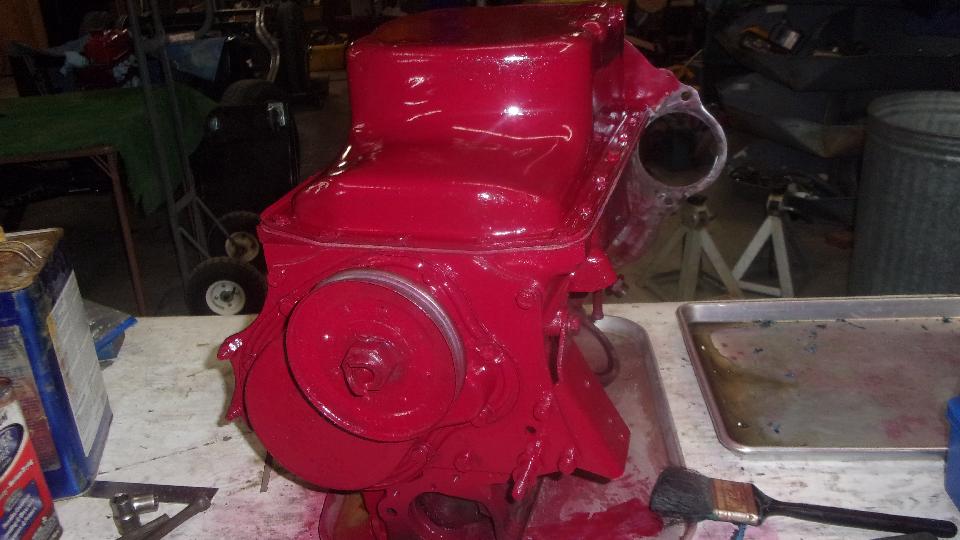 All of this while the engine was upside down without the head (fun doing the cam timing upside down). Finally installed the oil pump and screen and the sump, and painted the sump and a bit more that is easy access when inverted. That's where the engine would sit for paint to dry overnight. 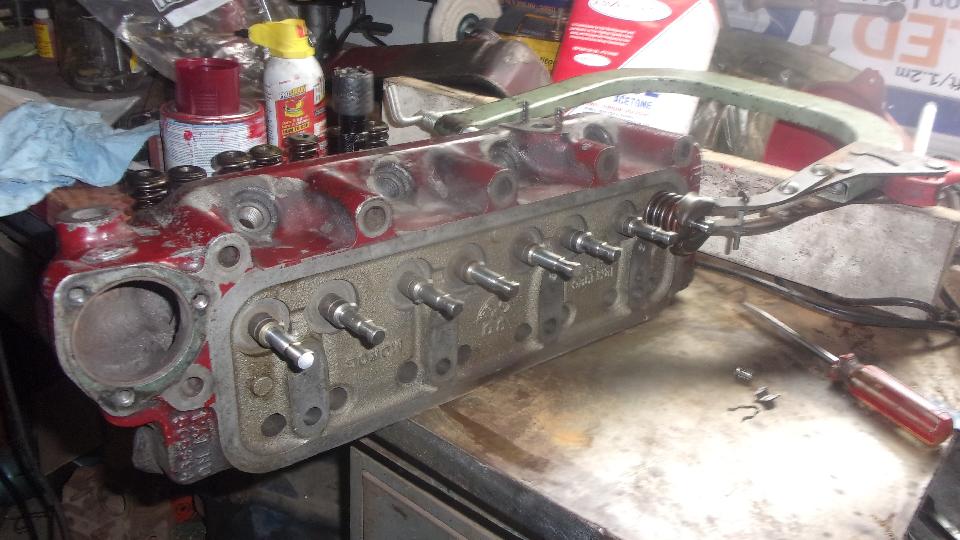
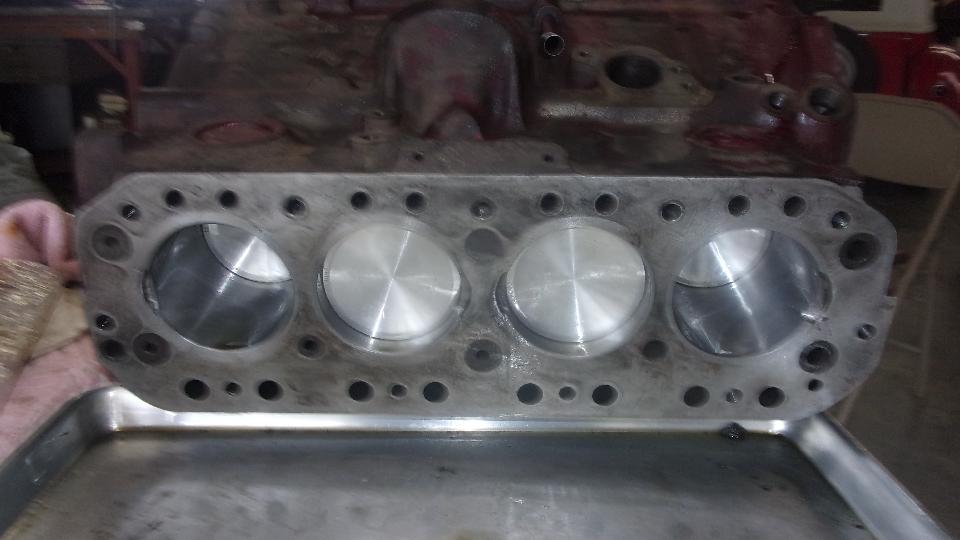
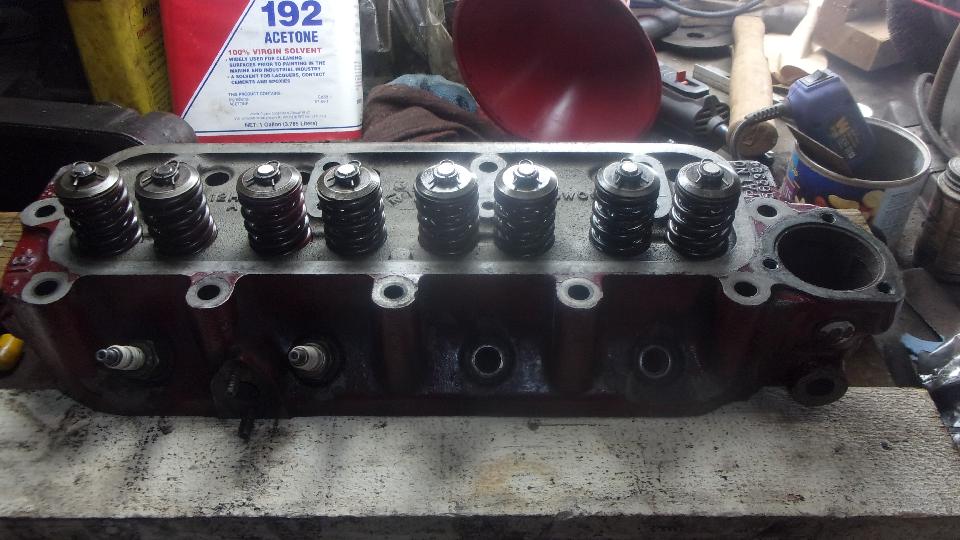
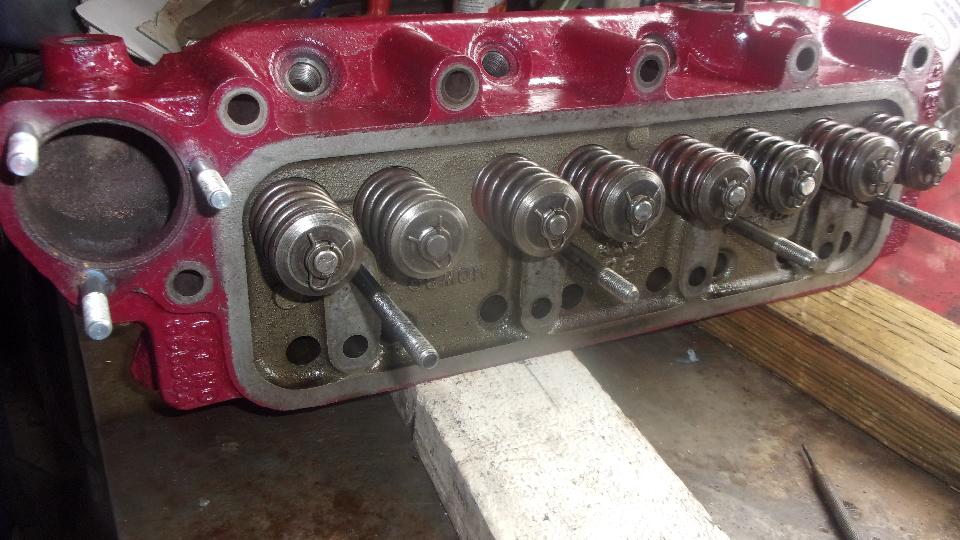
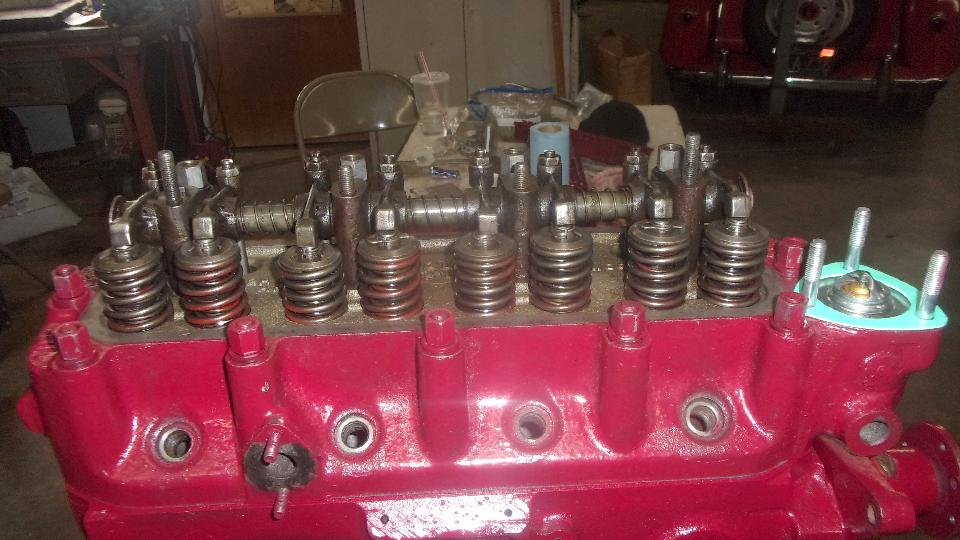
Thursday, August 18, 2022: Here are a couple pictures of the rebuilt head we finished late last night. Then it was time to finish last bits of the short block assembly, begin by flipping it right side up. 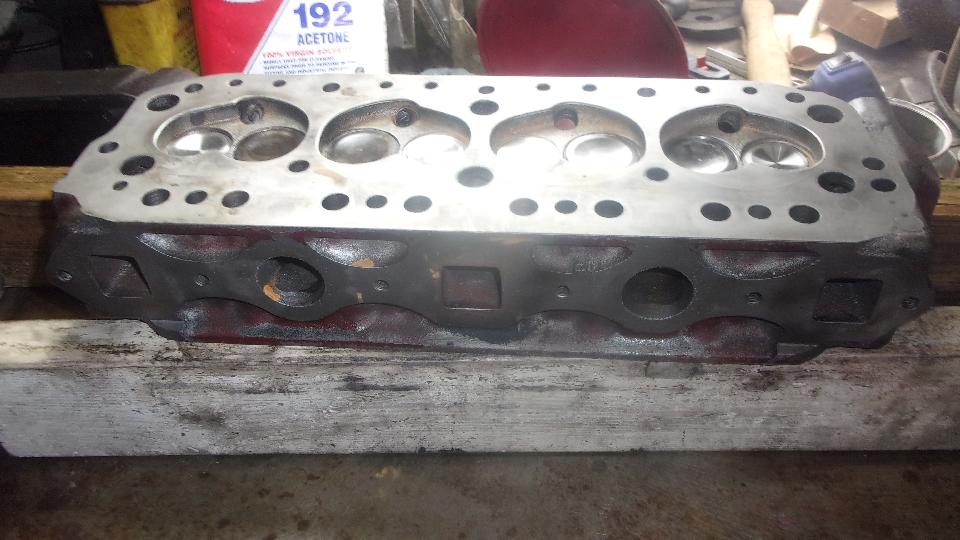
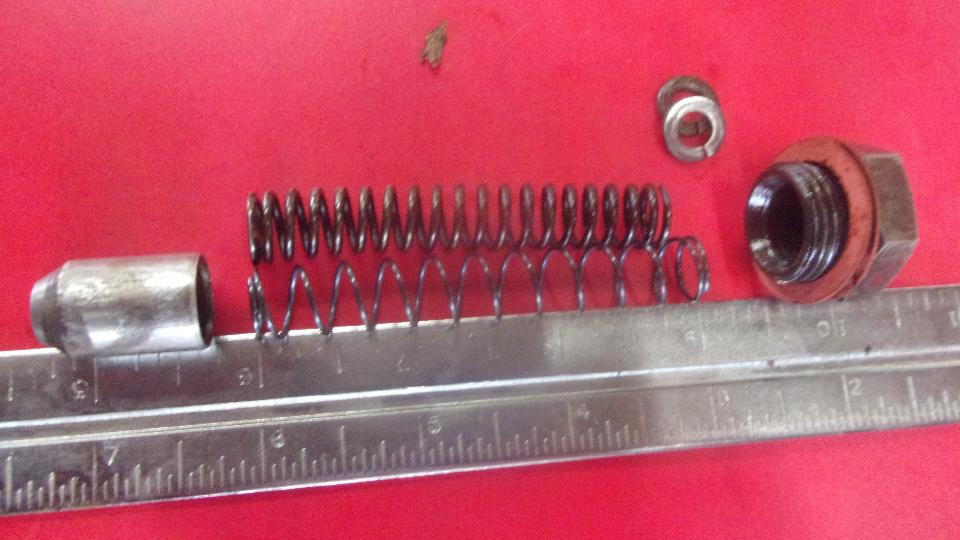
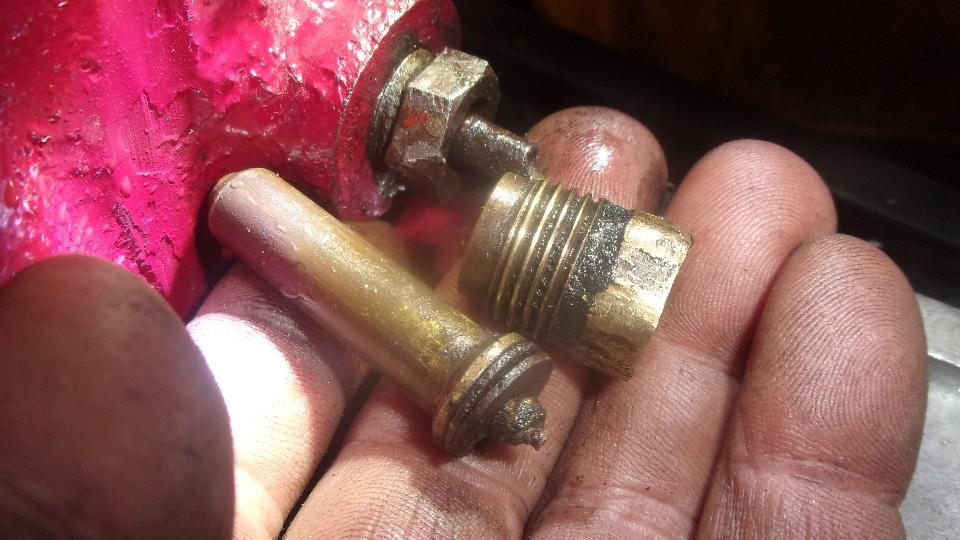
 Screw in all to head studs, then go after the pressure relief valve. The old spring measured 2-3/4" long (plus two packing washers from the prior rebuild) when it should b 3". The spare spring we had in inventory was incorrect configuration with too small wire and not enough coils. Kick myself for misindexing it, as it turned out to be the spring for the hand brake thumb button. Oops. Add the correct part number to the wish list, and buy two. Then we changed two packing washers to four (two at each end) to bring it up to the correct 3" overall length. Put two fiber washers under the cap nut (as original), and good to go. 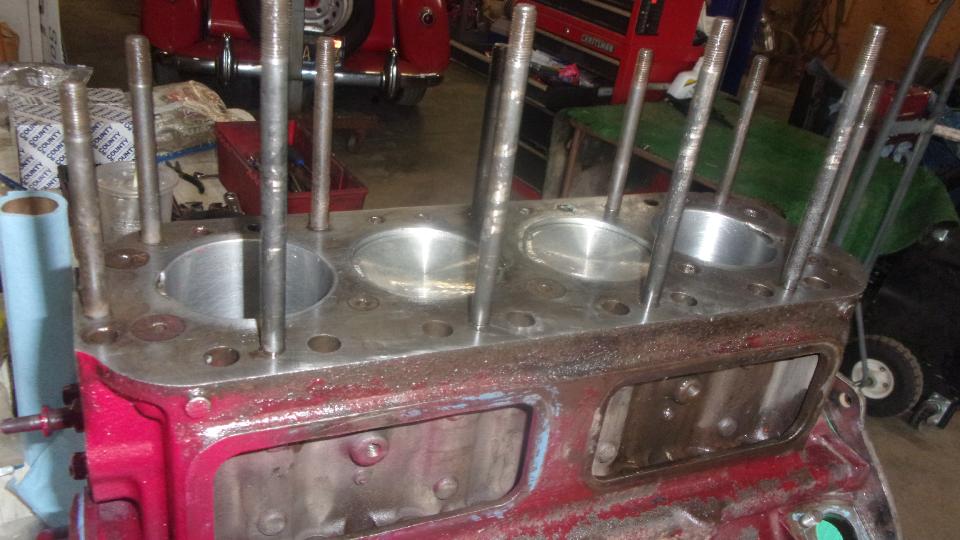
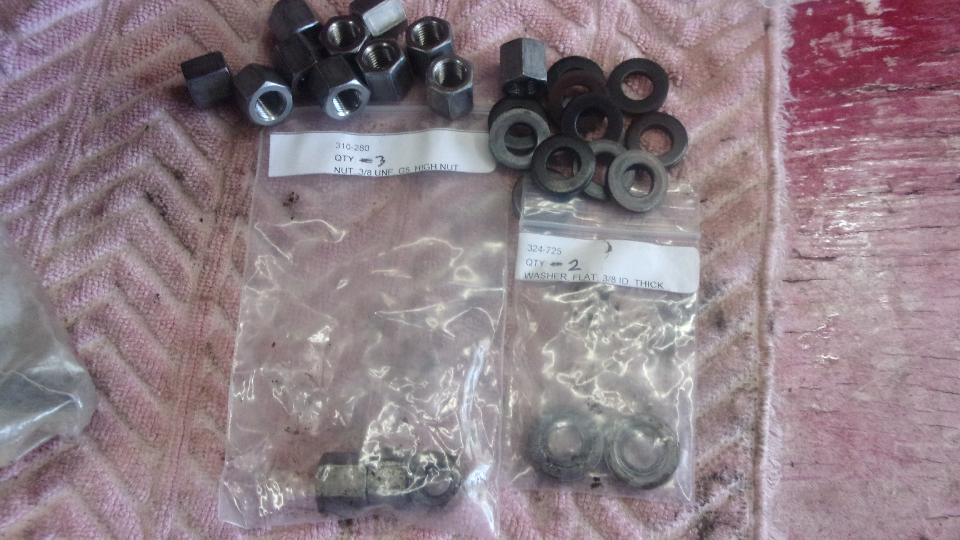
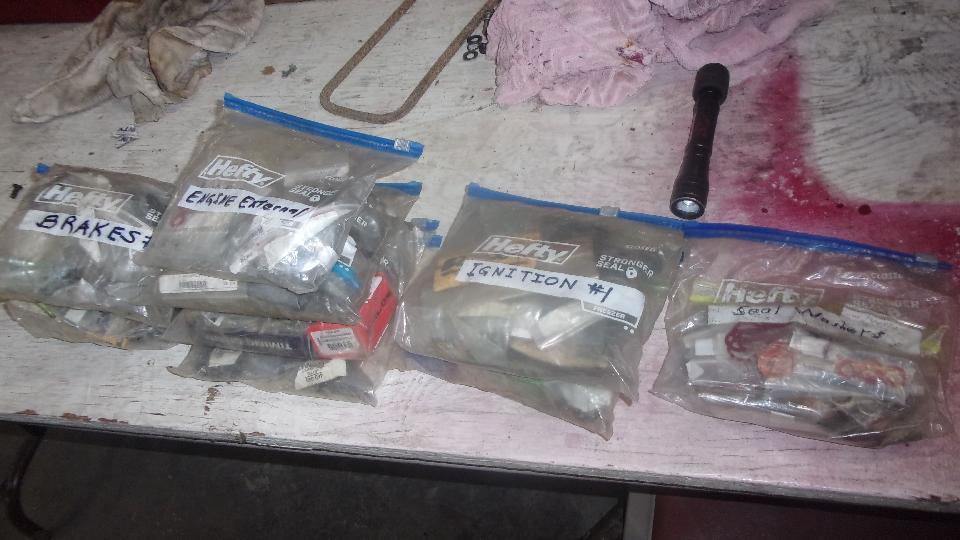
 About that time the Moss parts we ordered last Friday arrived late, because they weren't shipped until Monday. Now having packages from three or four different orders, we took some time to check the contents against the invoices, and collate all the new parts (about 25 line items) into their proper nooks in inventory. The last picture is what it looks like just before they get tucked away in the tote boxes in the Magic Trailer. 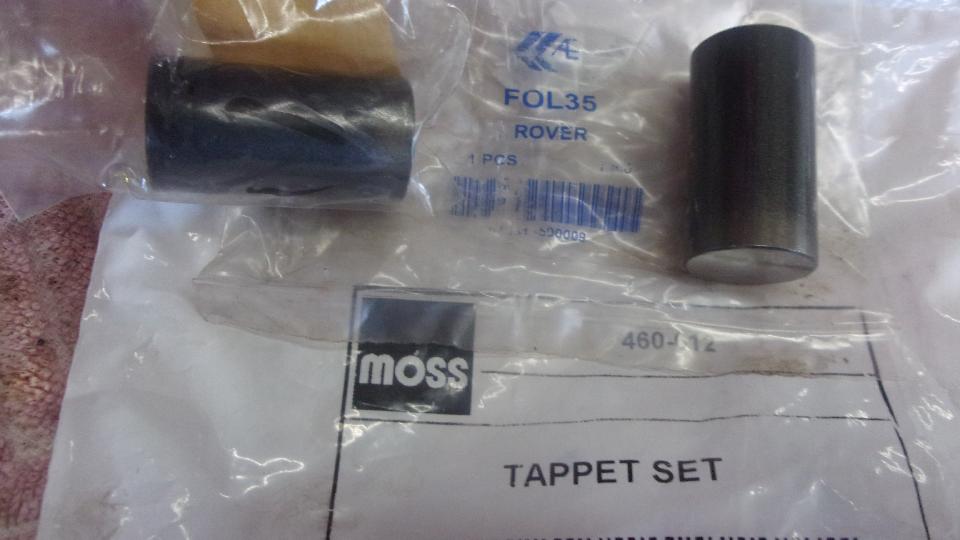
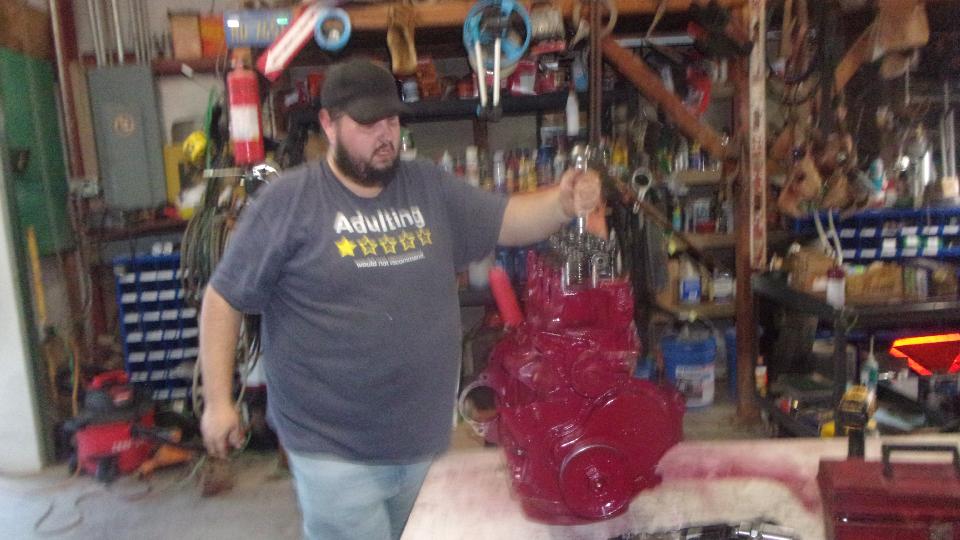
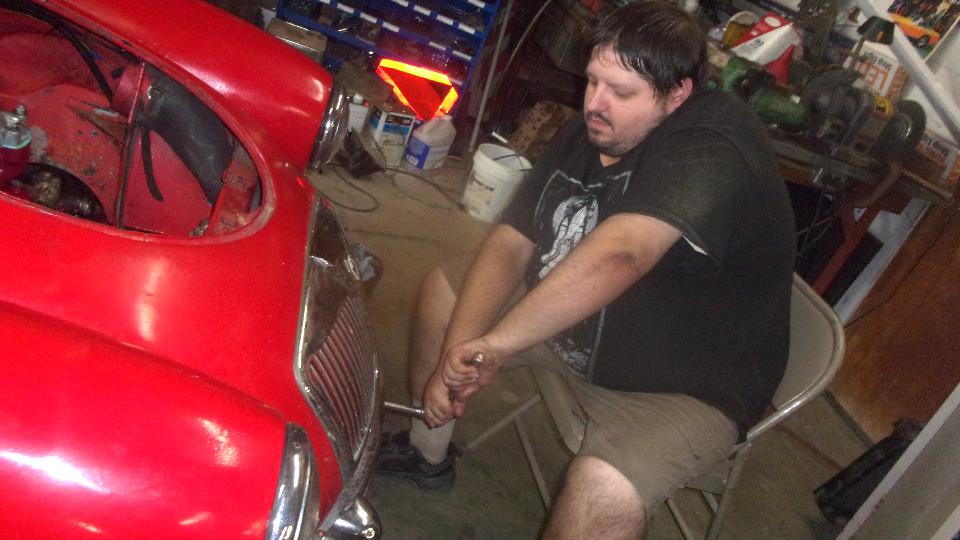
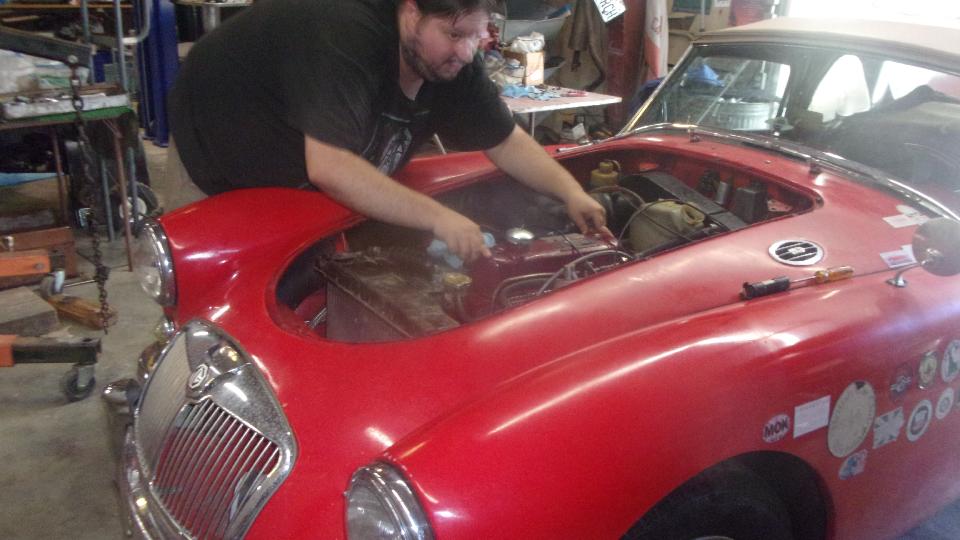
 After assembling tappets, pushrods, head gasket, cylinder head and rocker shaft assembly, navigator Elliot is doing his thing with the torque wrench. Our friend (and shop host) Stuart Mast insists there should be a picture of me somewhere, as I was installing the final covers and what we thought might be a good used water pump off the shelf (because navigator couldn't find the spare one in the trailer). 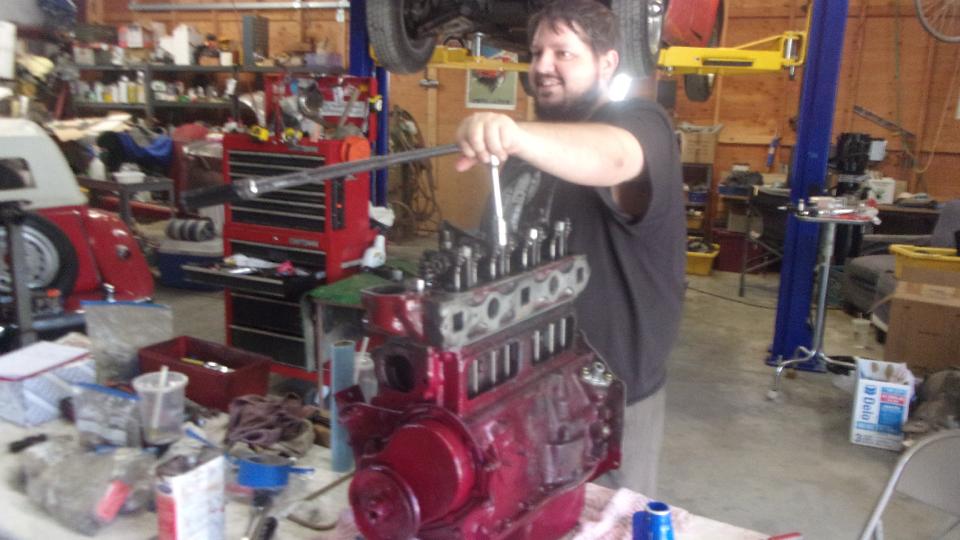

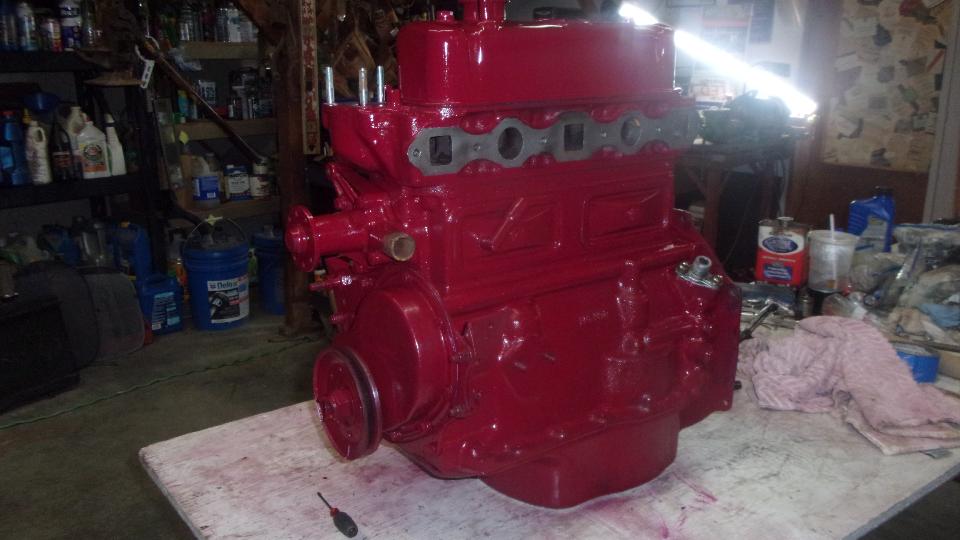
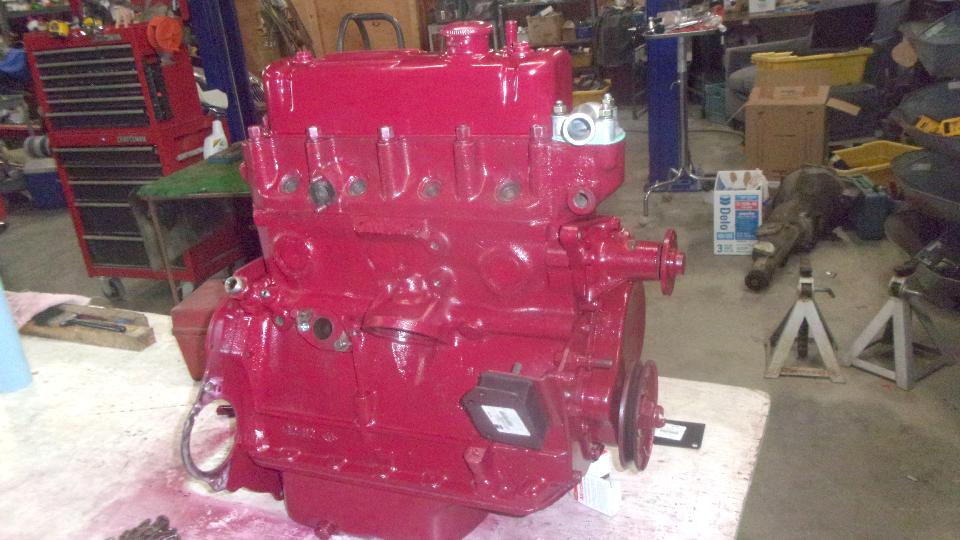
 Half an hour masking and paper plugging holes, 10 minutes with a spray bomb, 15 minutes wait for partial dry, 5 minutes to pull off the masking, and there is is in all its glory. Mind you it still has the wrong rear plate, but that's easy to swap out before installation in the car. 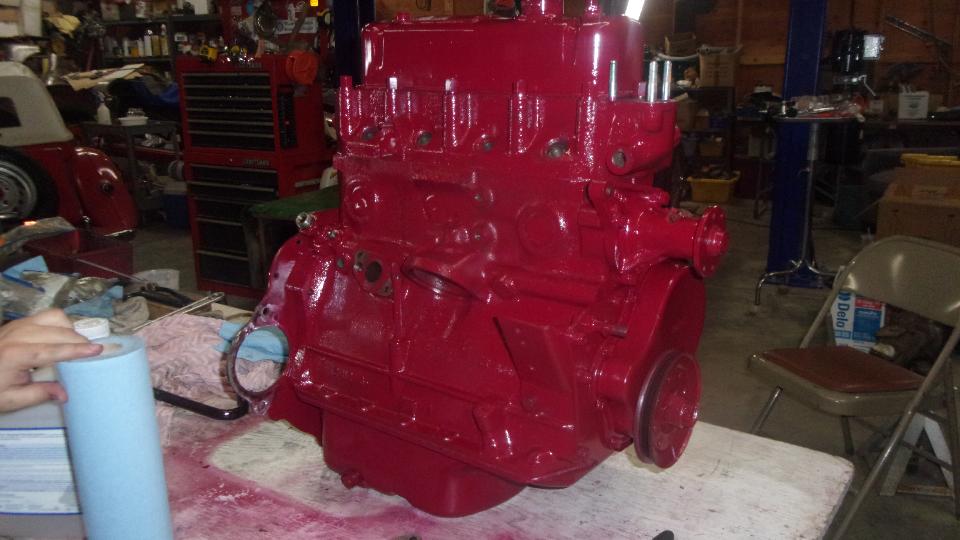
 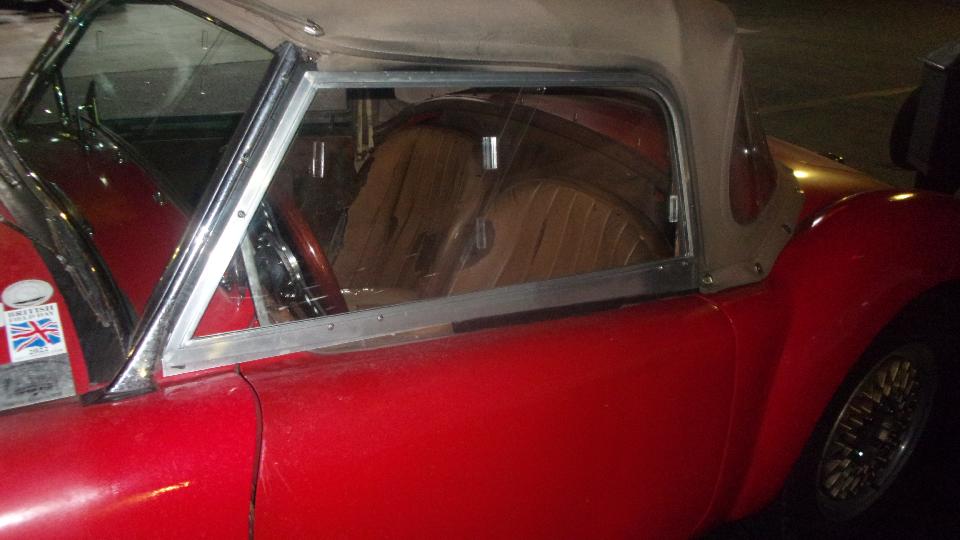
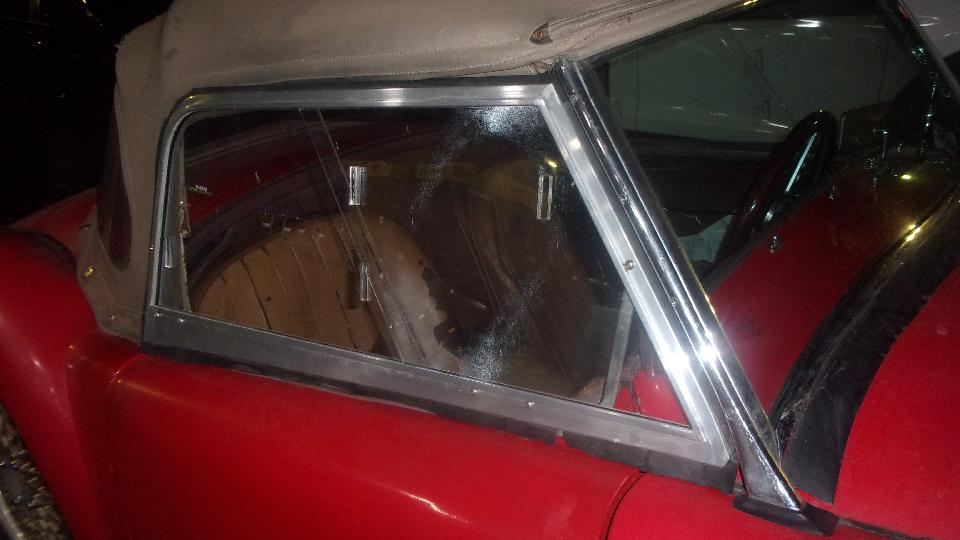 While paint was drying a bit we were cleaning up, and navigator was finally installing the nice pop-in plastic panels for the side curtains (nice change). After 11-pm it was time to roll it down the hill again, 90 minutes back to Ripon for the 24-hour truck stop with good WiFi and wall power. 10 miles from destination the left turn signals stopped working, just dead, no light. Still had brake lights and RR turn signal. Late dinner first, then some sleep, and fix it tomorrow.
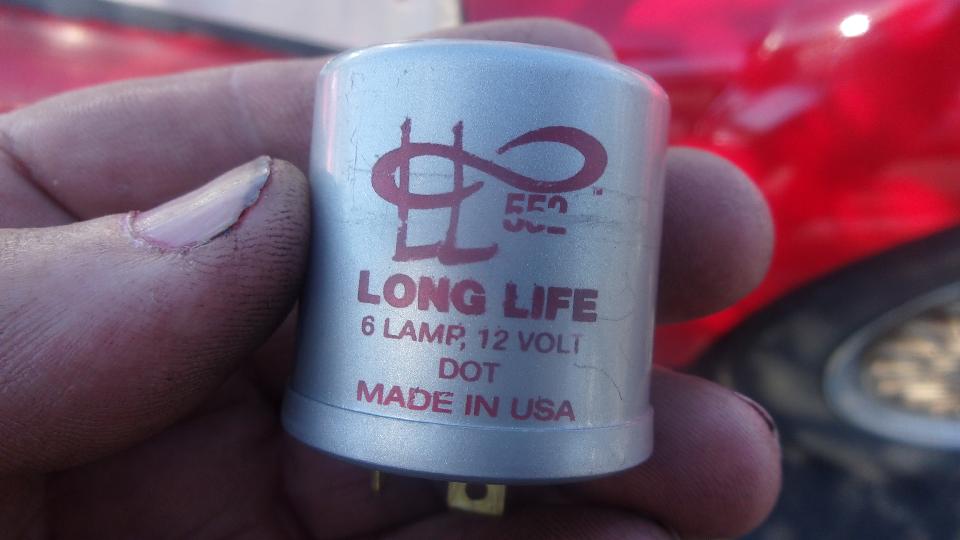
 Friday, August 19, 2022: 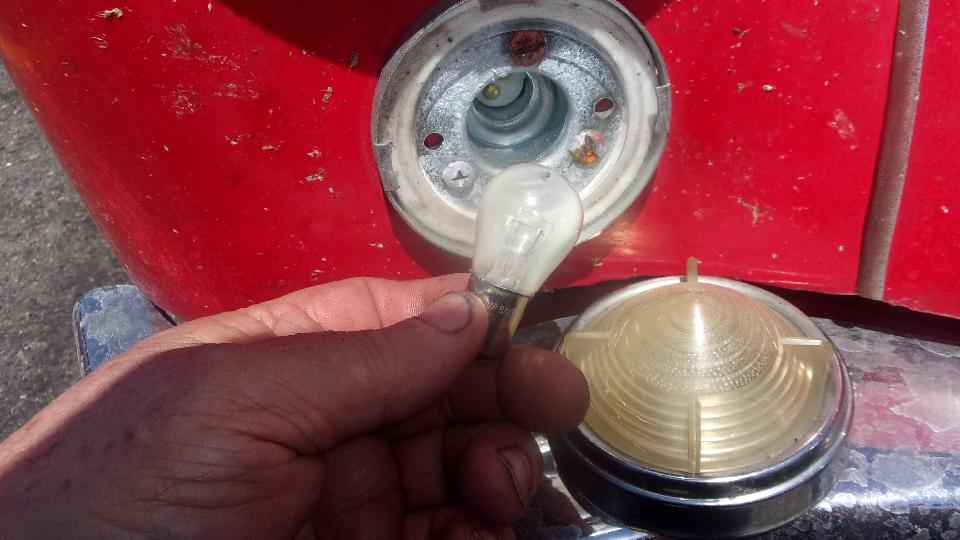 Sleep in a bit, late breakfast. Then some errands to run, but fix the RF side light first. A quick change of light bulb fixed that but then the left turn signal was intermittent, and the pilot light on the dash also quit, so maybe a bad flasher unit. Pulled a new flasher unit out of the trailer and tried to plug it in, but one of the spade terminals collapsed, so the new one was junk. Electronic Chinese junk this time. Off to an auto parts store (three in a row actually) for supplies. Bought another new flasher unit, plugged it in, and still no go. Beginning to look like a failing relay in the turn signal relay unit, no time now. Reinstall the old flasher unit, and keep the new one for a spare. A stop at Walmart for more supplies, and a stop at a bank (two of those because first one was gone). Then back to the WiFi spot for AC and a late lunch. 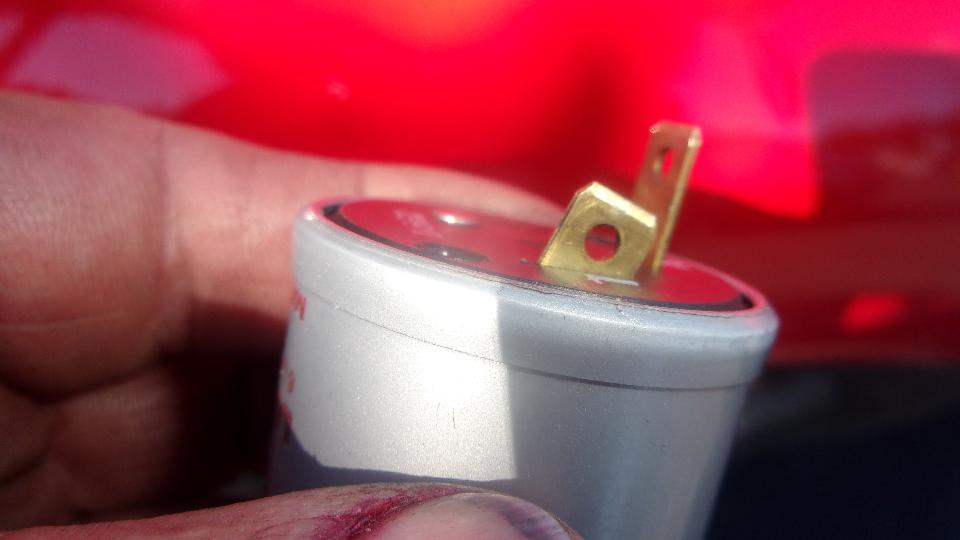
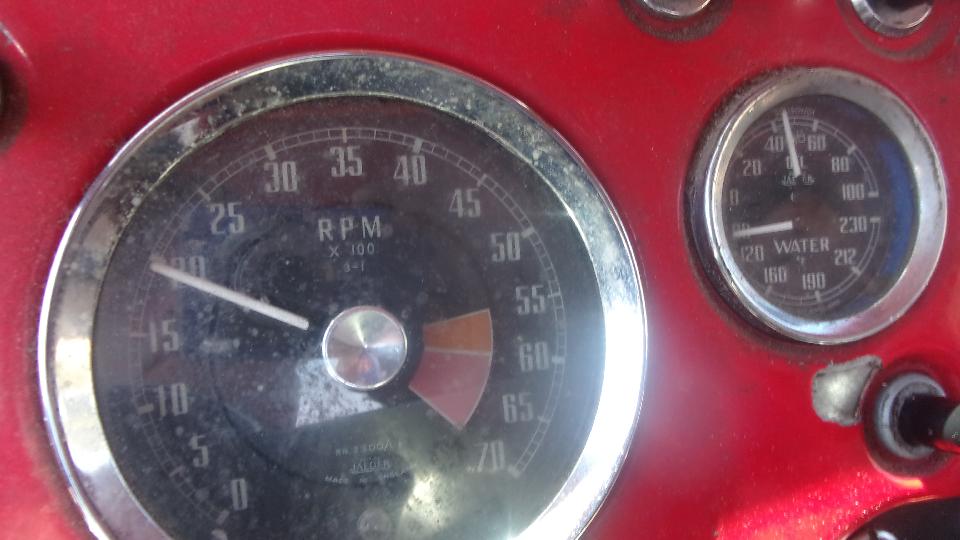
 Day to catch up BBS, email and other web site business, photos and notes. Looking at weather forecasts, Saturday was going to be HOT, like 103dF, so we planned to take another day off before doing the next engine swap. Make the call and reschedule that for Sunday (when it may only 95dF). Saturday, August 20, 2022: Saturday, huh? Moss not shipping on weekends. The local shop in Stockton, CA closed on the weekend. Next best option was our friend Basil Adams 110 miles away on the west coast. He didn't have new MGB exhaust valves, but he did have a serviceable set of used ones. So we gassed up the car and headed west at noon. The intended 2 hour drive turned into 3 hours of sometimes stop and creep traffic in 100+dF heat and full sun. Happy to report the cooling system was doing well with the original style cell core radiator, never went higher than 205dF peaks at the worst times. Then about a half hour before our destination the temperature gauge died (broken fluid pipe I recon). By then I had enough confidence in the radiator that I stopped worrying about it and continued on. 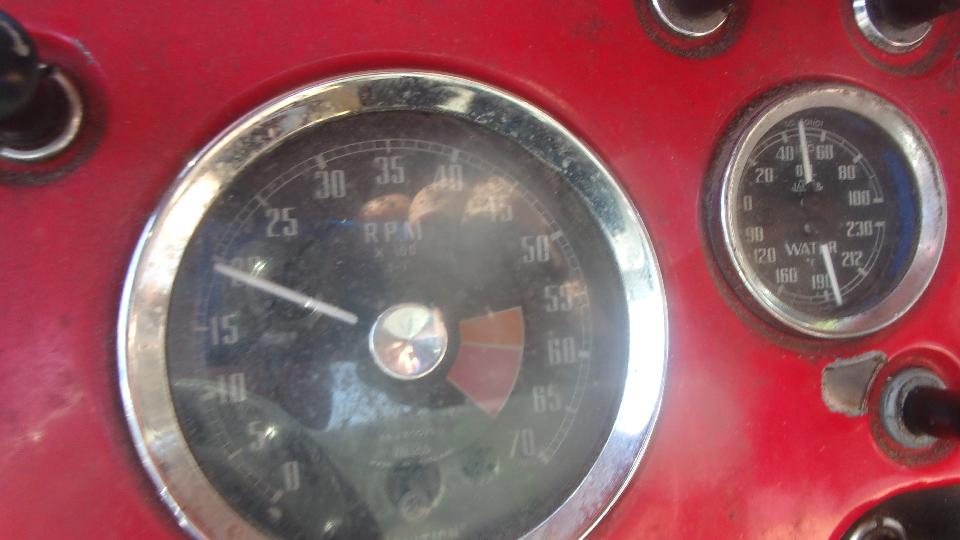
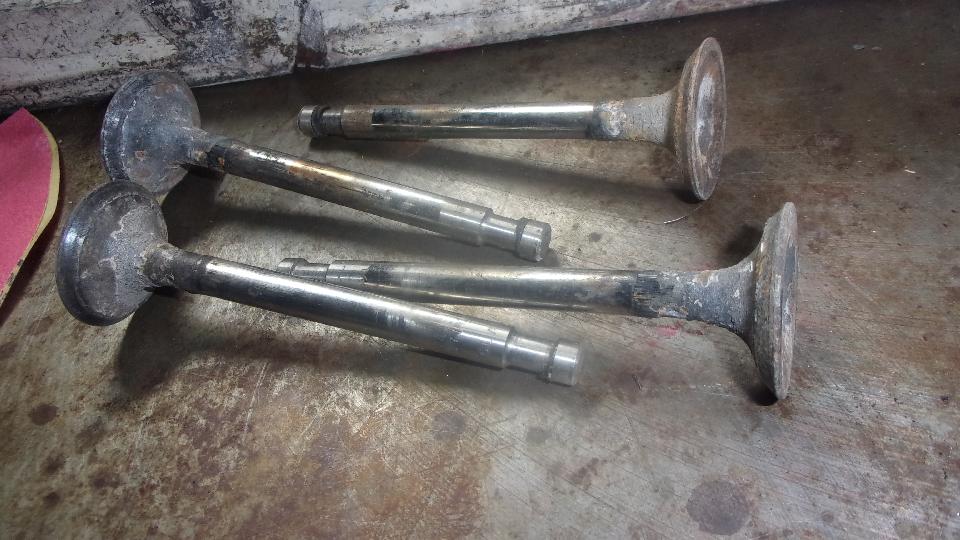
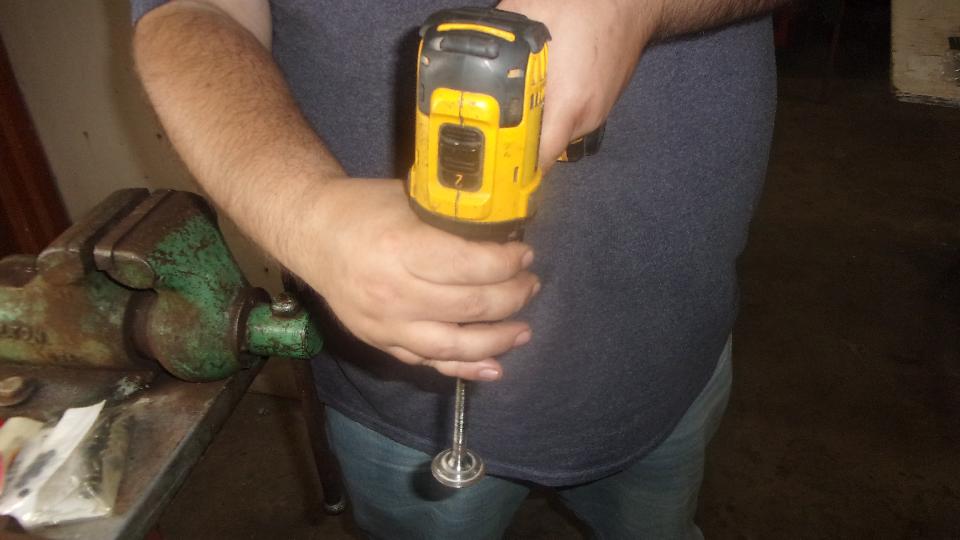
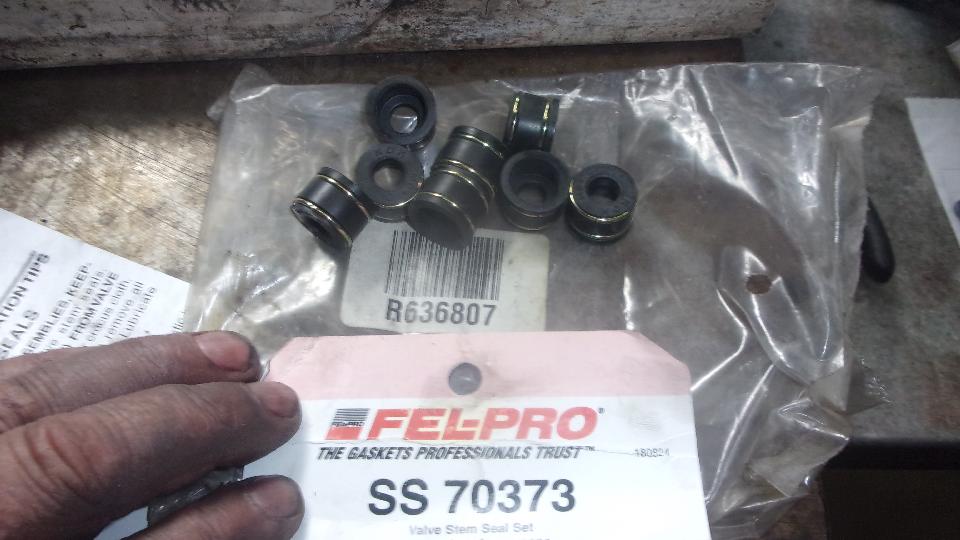
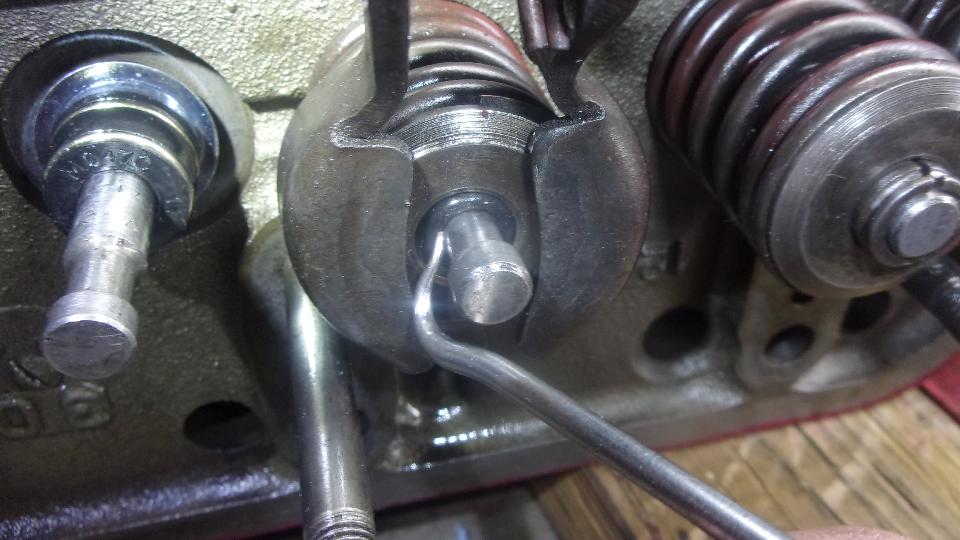
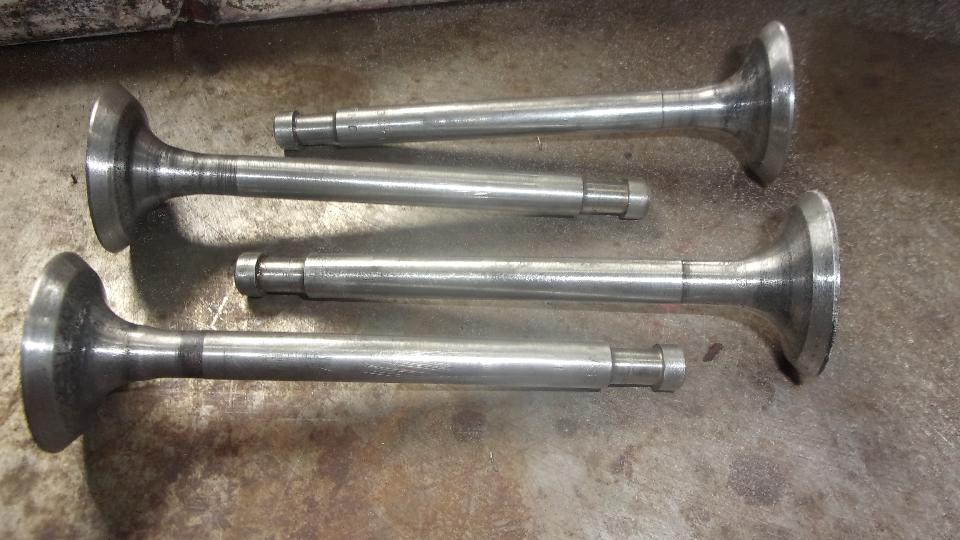 Lapping the valves into the seats took longer, being careful to check for clean buff mating ring marks all around both seats and valve heads, but the patience is worth it (and sweat equity saves money at the machine shop). Only had to lap the exhaust valves today, as the intakes were already done. Thoroughly clean the parts to remove all lapping compound (no more gritty grinding allowed). This time I did remembered to install the umbrella seals If you want to use these, the early production splash shields must be removed. When splash shields are deleted, the spring cap changes part number with larger pilot diameter to keep the inner spring concentric at top. All this was done many years ago. There is a spring base collar (like a step washer) that will center the inner spring at the bottom, while the outer spring is centered in a counterbore at the bottom. Then just push the umbrella seals home. 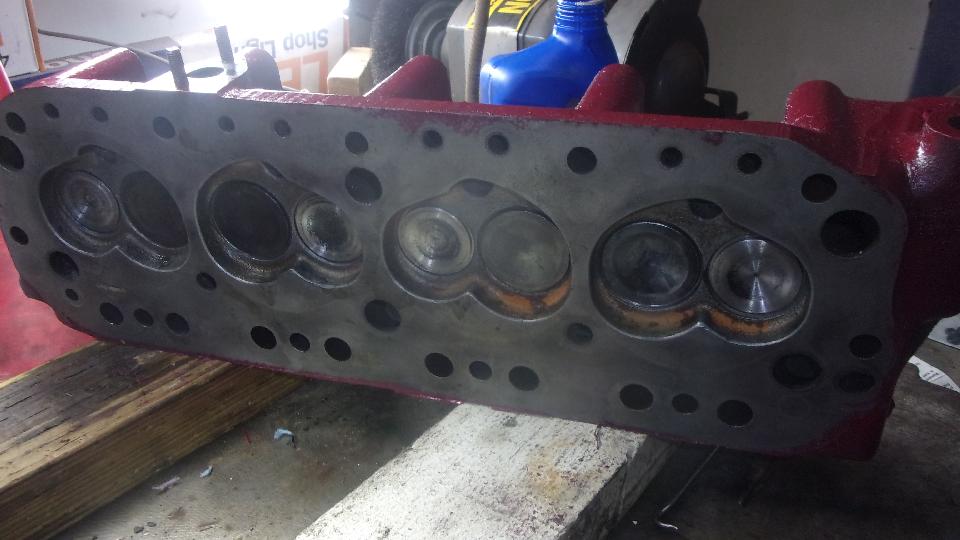
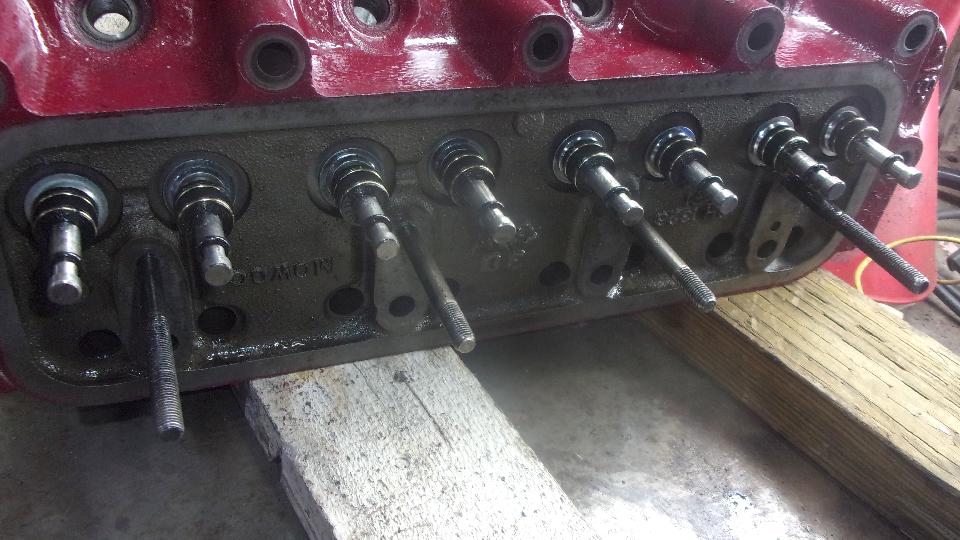 Install the dual springs with spring cap, and push them down with a spring compressor tool. Then install the original style seal O=rings, which fit at the bottom of the groove in the valve stem. Then install the valve cotters (split locks) which will sit on top of the O-ring. The rubber ring serves to prevent oil from running down the valve stem through the gaps in the cotters. 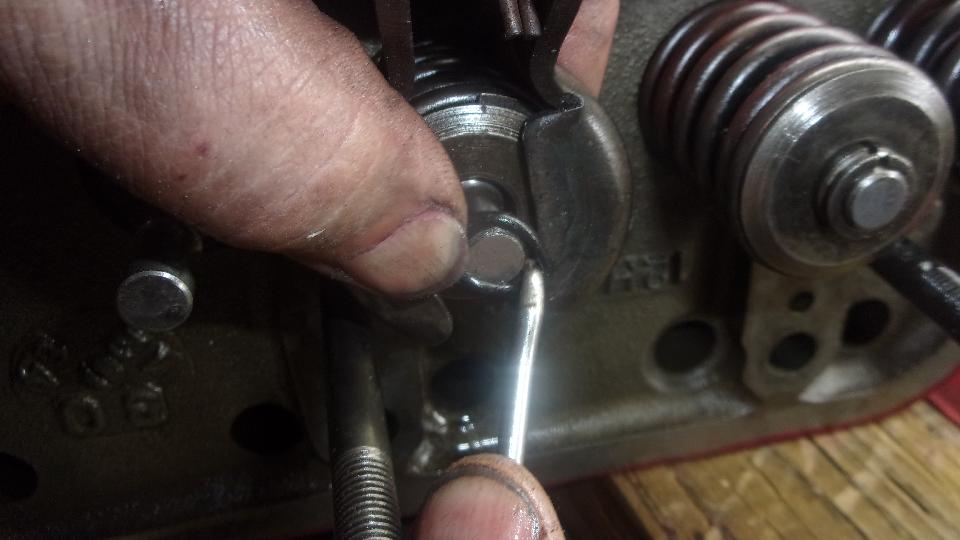
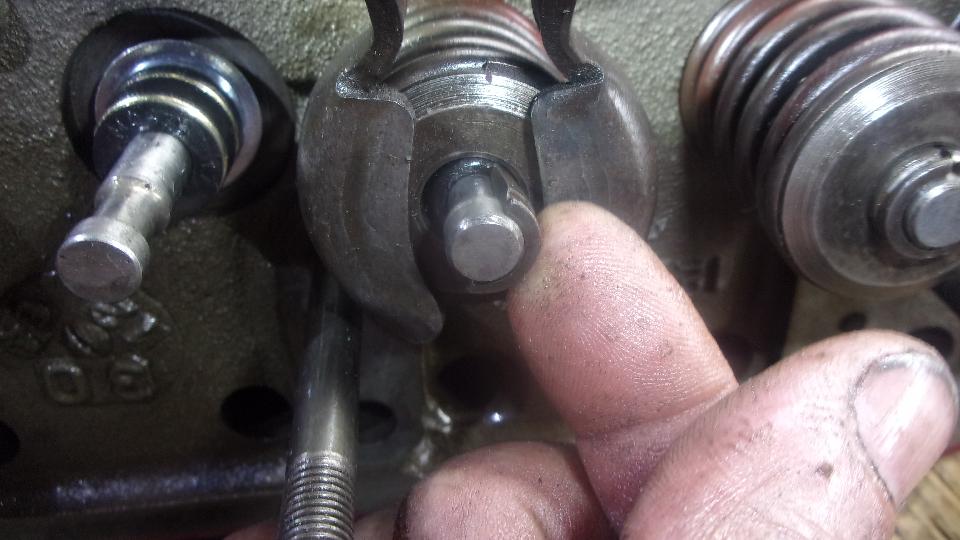 With the twin cotters in place, release the spring compressor (carefully) to lock it all together, and install the hair pin clips (just to be original, I suppose). Later production engines with type-B valve grooves and cotters do not use the clips. 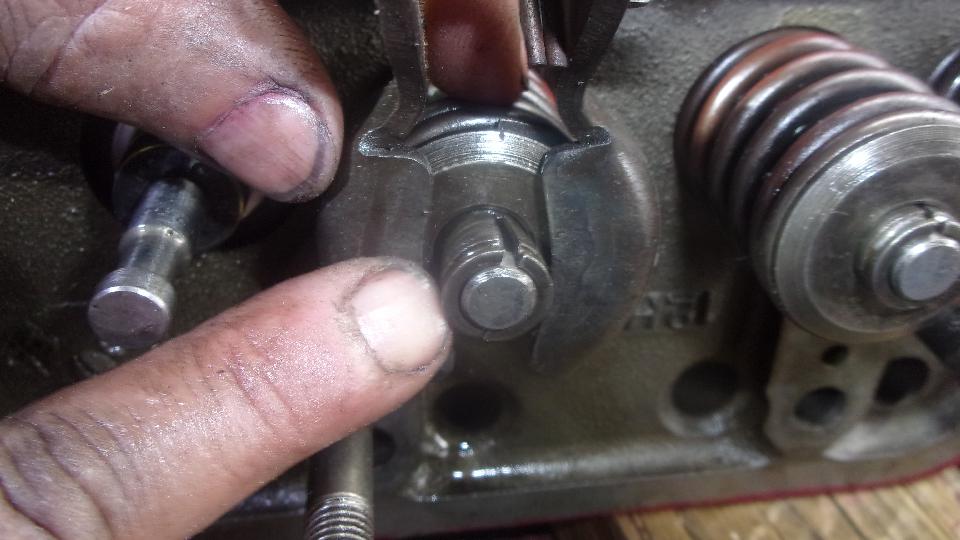
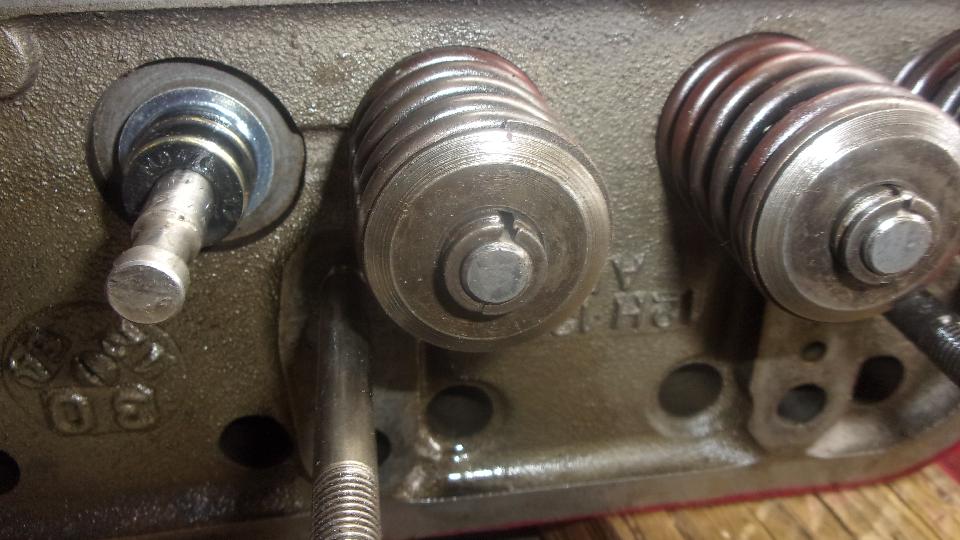
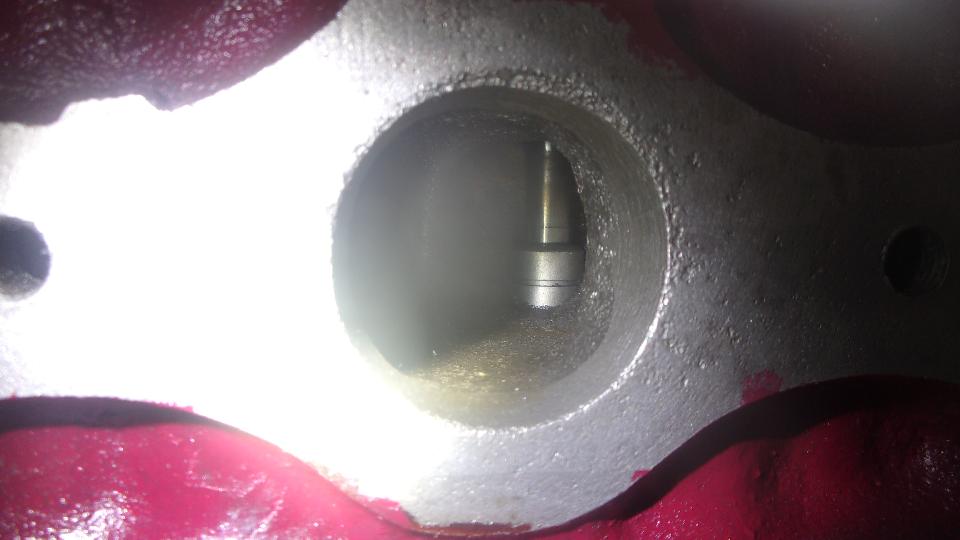
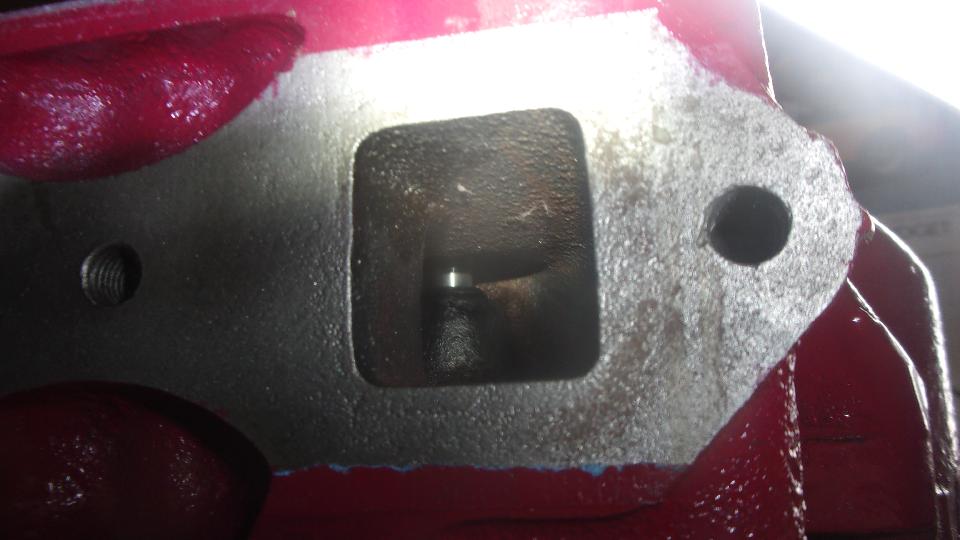
 I like to check to be sure the valves don't leak. Turn the head upside down and set it level on a couple of 2x4 boards on edge. Install spark plugs to close those ports. Pour water into the combustion chambers nearly full, and wait about 5 minutes to see if any water might drip through into the intake and exhaust ports on the side. You have a right to smile when it does not leak. 
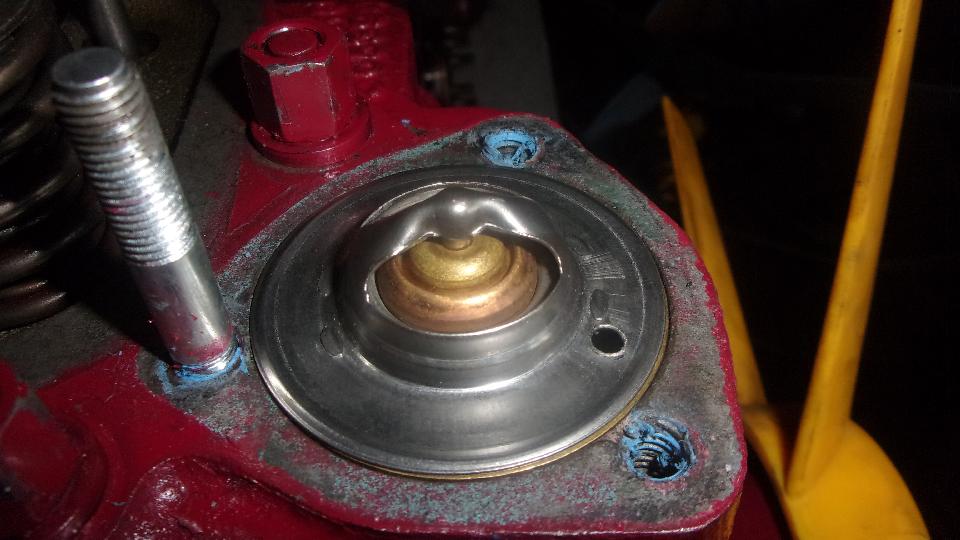
 Not long to set it down on the same head gasket, which had never been wet or heat cycled, and get it torqued down (again). Then I discovered the hard way that the brand new thermostat studs from Moss are still soft (not properly hardened) and will strip the threads around 12 lb-ft torque. No more spare studs on hand, so apply a bit of sealer on the gasket, double nut the one stud that was stripped, and keep the torque down to 10 lb-ft. Note to self, order more studs (but not from Moss this time). 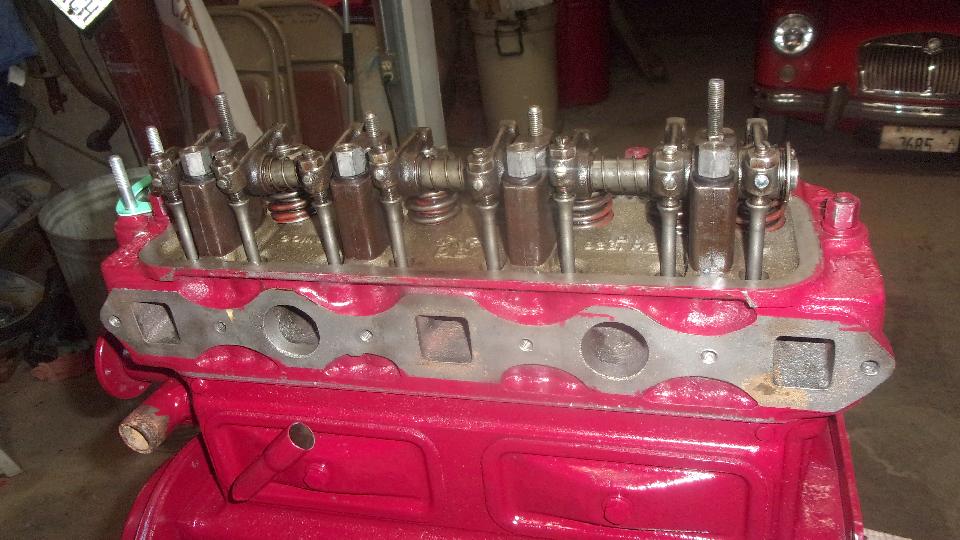
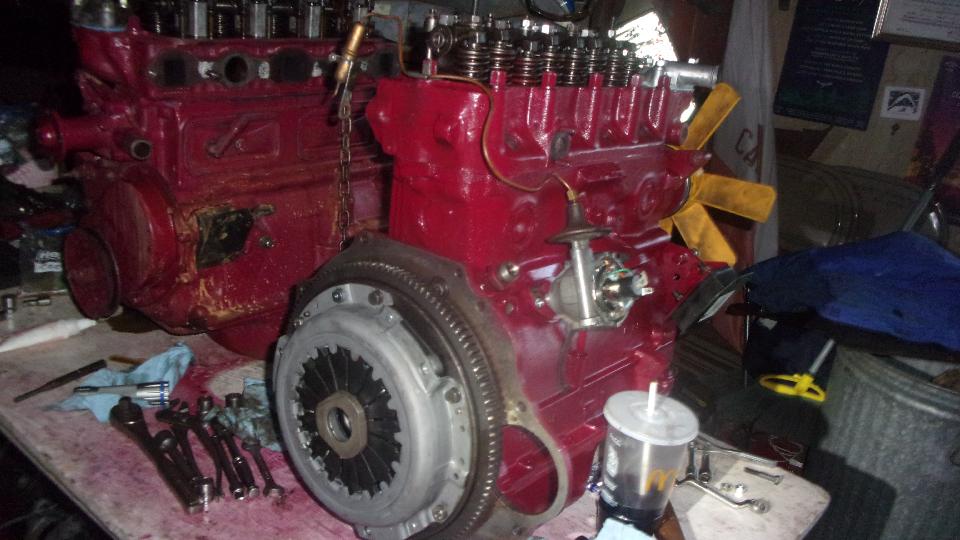
 Long hot day, and we were tired, so time to knock it off and call it a night. Sunday, August 21, 2022: Scheduled day to at least begin doing the engine swap to remove the loaner engine and reinstall my original engine (now rebuilt). We have a pair of engine mount spacer plates recently arrived which are intended to raise the engine enough to make the hand crank fit to work again, but these will be set aside until it's time to set the new engine in the car. We have the freshly rebuilt engine, sitting on the table, and the now cooled down car getting fluids drained and engine disconnected for removal. 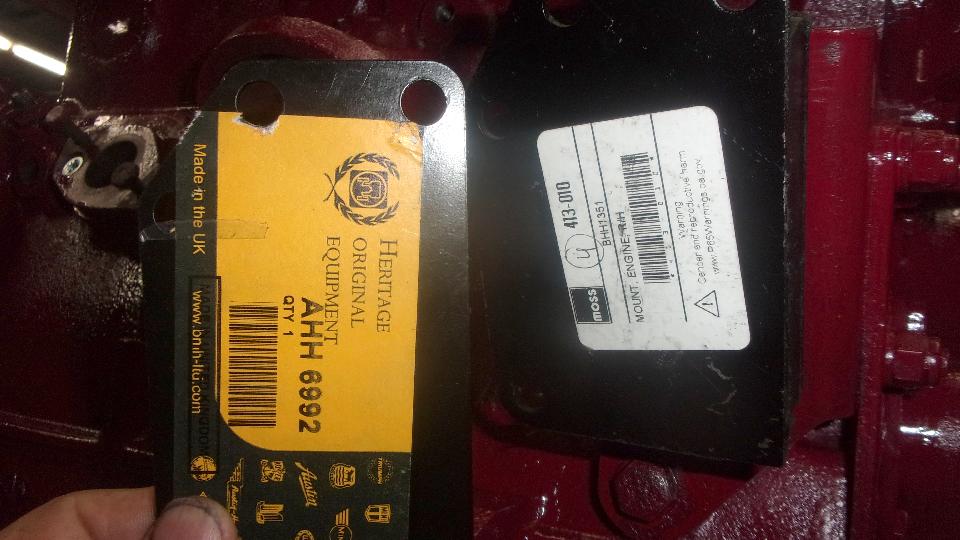
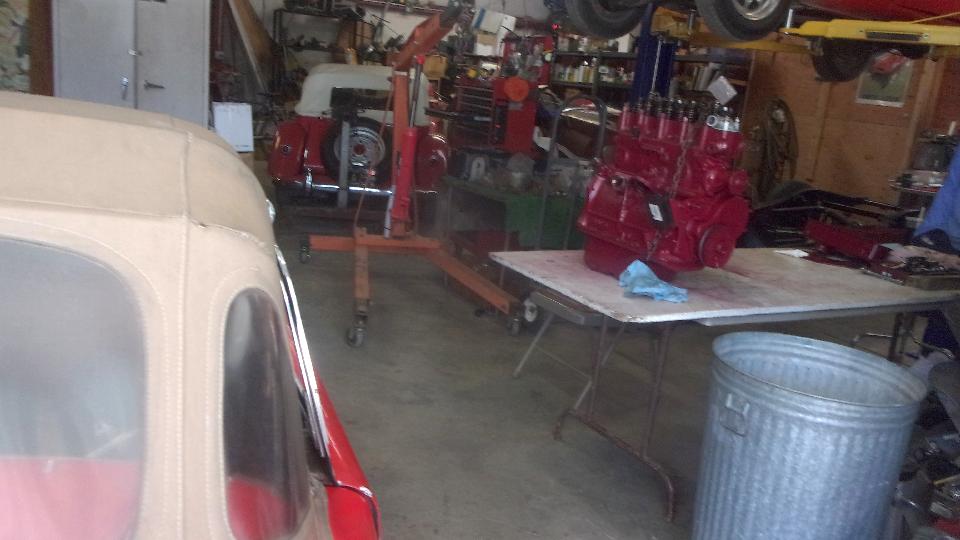
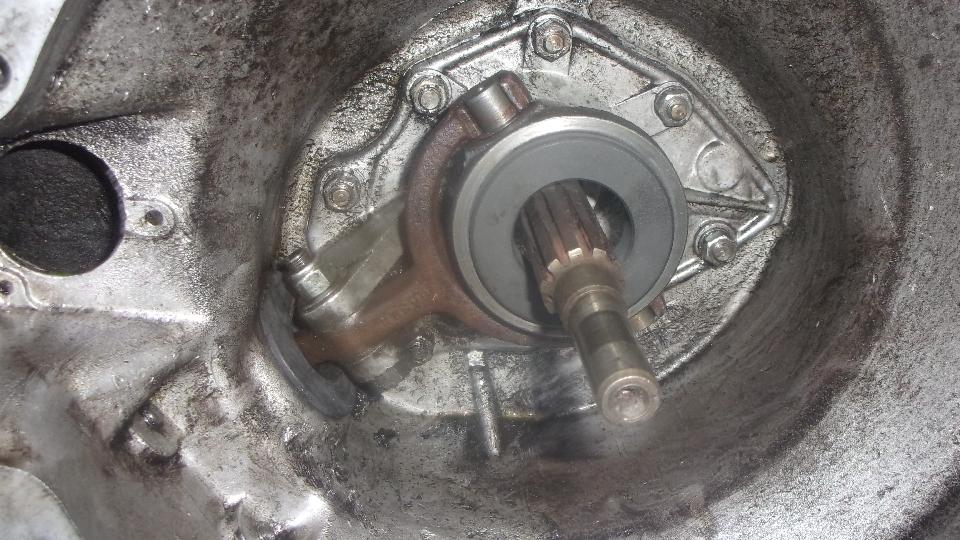
 Then it is out, and there are two engines sitting on the table, the rebuilt one in front and the extracted loaner engine behind it with clutch already removed. Not long to remove flywheel and rear plate, get a new gasket and have the rear plate snugged up on the new engine. There is only half enough light in this shop to begin with, but this is about the time the power went of leaving us in a darker shop without the swamp cooler, one large garage door open, and working with two small flash lights when needed (which was fairly often). My favorite $30 camping flashlight is a Halogen lamp, lots of light but it eats a pair of AA batteries in an hour of continuous use. We have gone through two dozen batteries in the past few working days, and now running out of batteries (can't afford to feed the thing). And yes it is 95dF with limited breeze, but we are still in the shade. 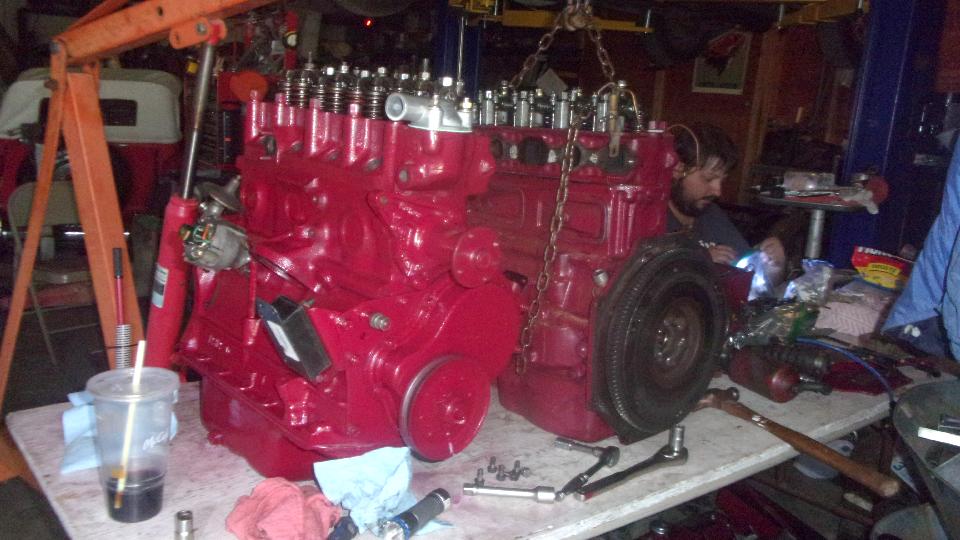

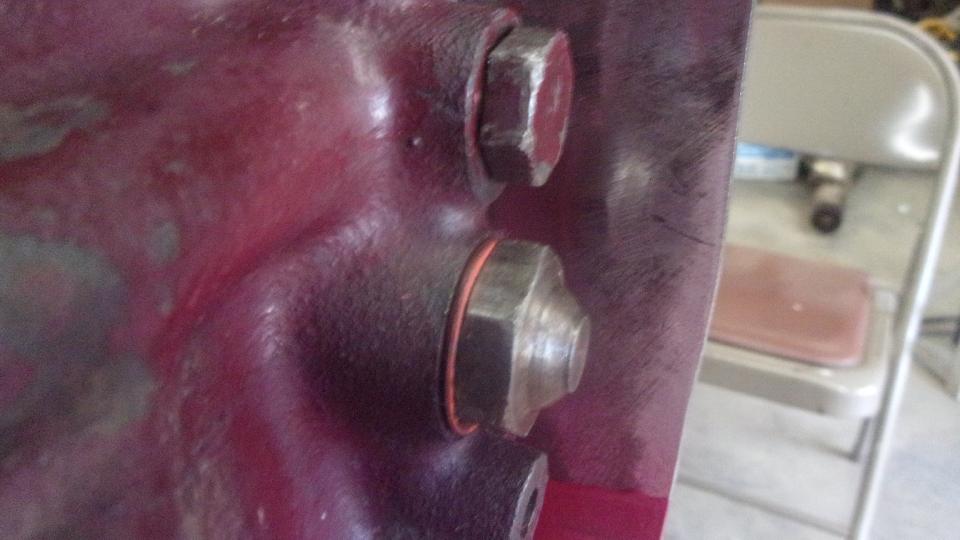
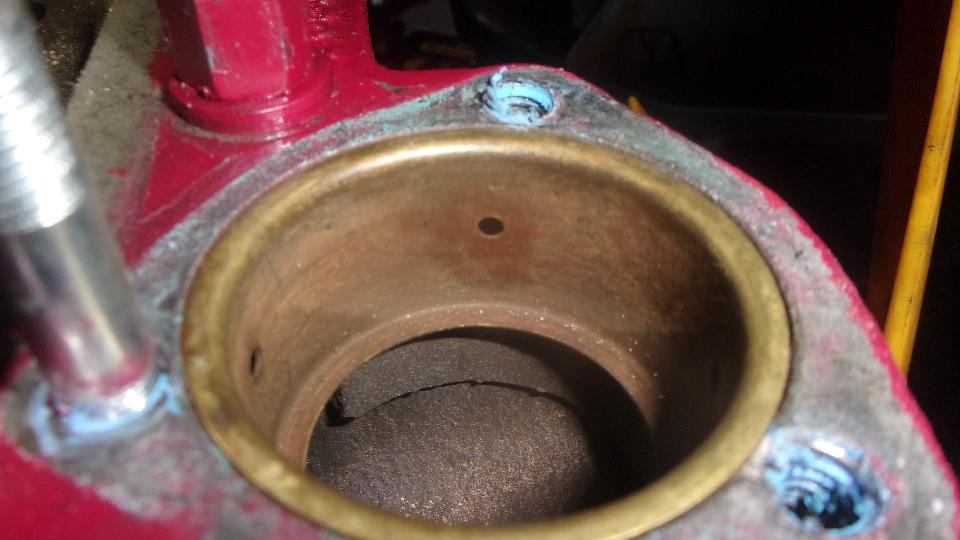
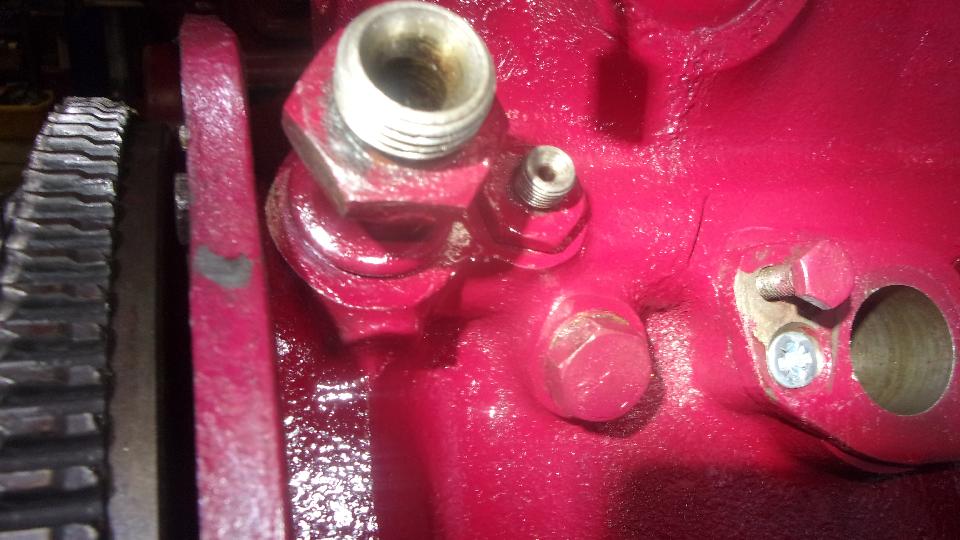
 Time to R&R the new thermostat we just installed yesterday, because I found the spare blanking sleeve in the trailer and want to install it. Quick removal with one nut coming off and two studs coming out, which is okay because I finally have proper thread sealant to use (rather then the blue stuff RTV). Drop in the blanking sleeve and the thermostat (with the desired breather hole drilled in the skirt). Install the three studs, and a new Klingersil gasket, slap the cover on, tighten the nuts, and promptly strip the threads (again) on one stud while using a standard 6-incb hand wrench. 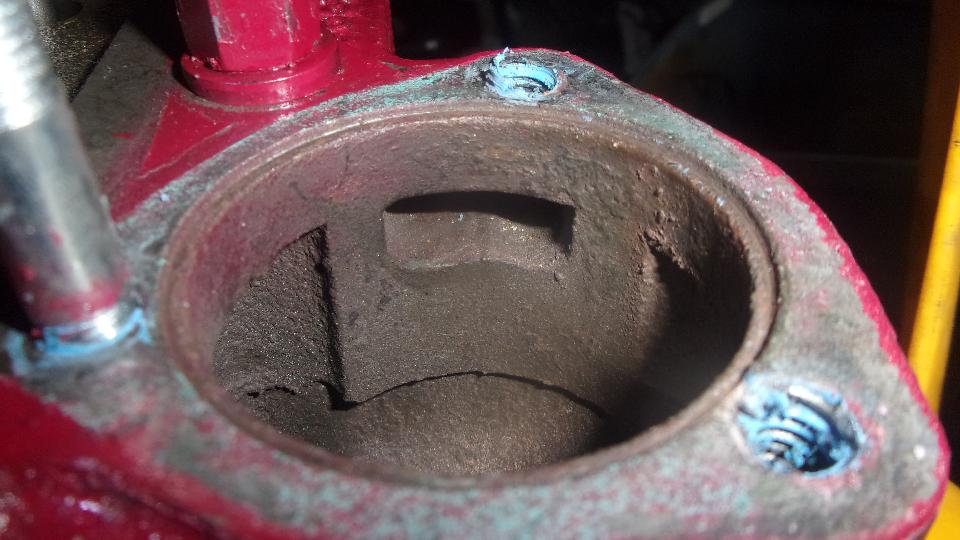
 These 5/16" studs stripping at 12 lb-ft torque has been a problem for more than 10 years, and doesn't 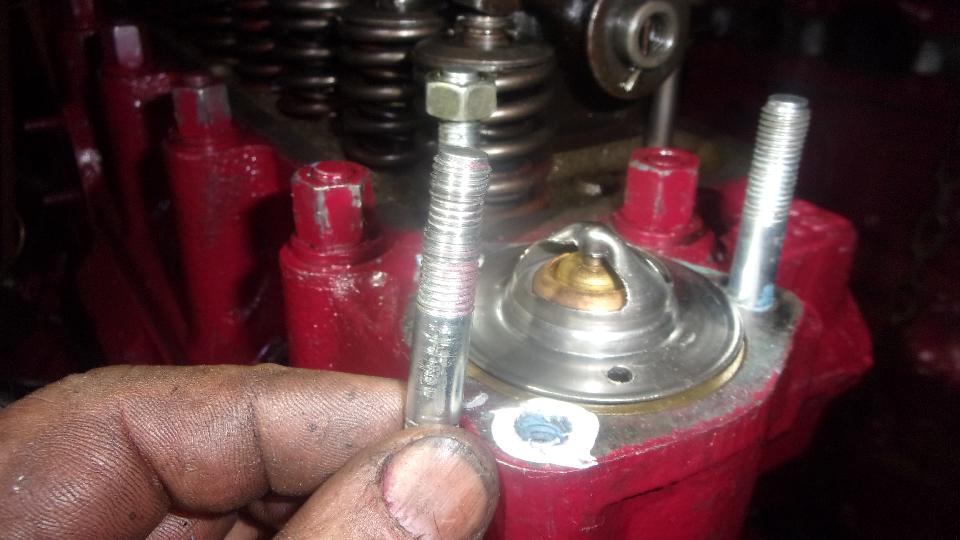 go away. The manifold studs in side of the head have UNF fine threads on both ends (also not hardware store issue). But the very similar studs on top for the thermostat have odd threads, most likely 5/16-BSF in the head and 5/16-24-UNF threads on top end. You can't buy these studs at Ace Hardware, and after building up two engines I don't have any more spares just now. The expedient solution is to use a touch of gasket sealer, limit torque to 10 lb-ft, and double nut the one stripped thread with second nut higher up on better threads.
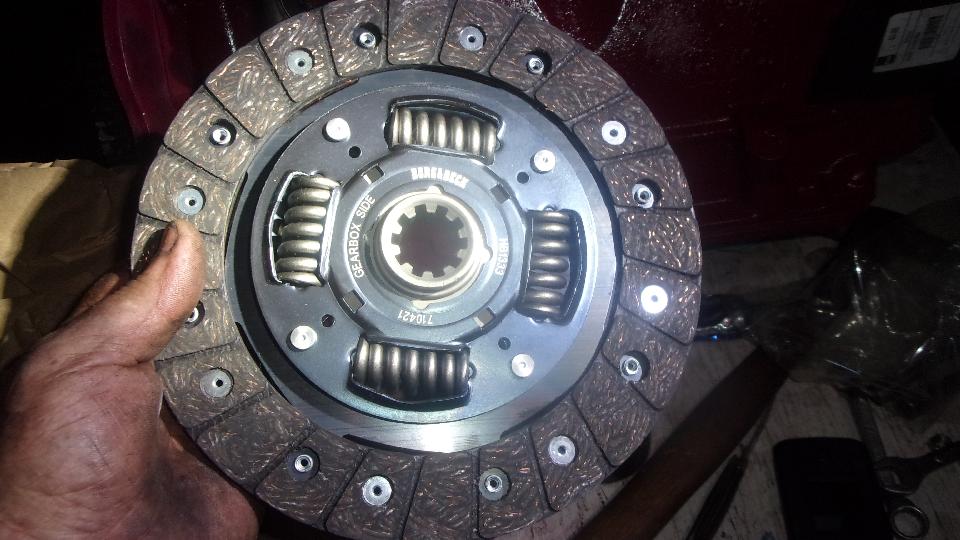
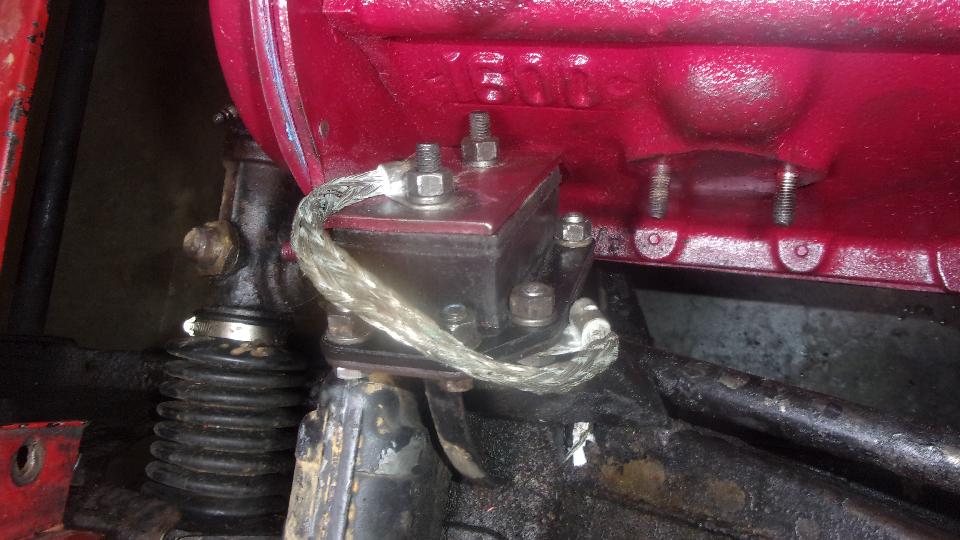
 Pull a new grounding strap out of the Magic Trailer so we can leave one on the loaner engine for future convenience. Snatch my well used oil filter adapter from th loaner engine, planning on doing a hanging spin-on adapter for that one later. Snatch the hex head plug from the other engine because no spare. The story there is when I install a magnetic oil drain plug, the oil plug moves to left side of block for the oil cross port (above the pressure relief valve), and the hex head plug with copper washer from there moves to right side of block to plug the water jacket drain port (because this plug has the required shorter thread). All BSPS threads (British Standard Pipe Straight threads with copper washers), fun, huh? 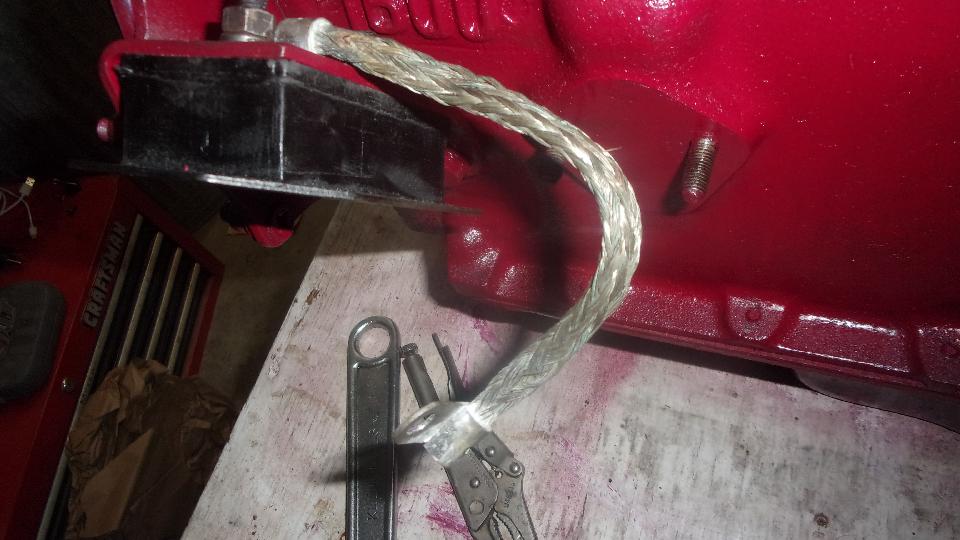

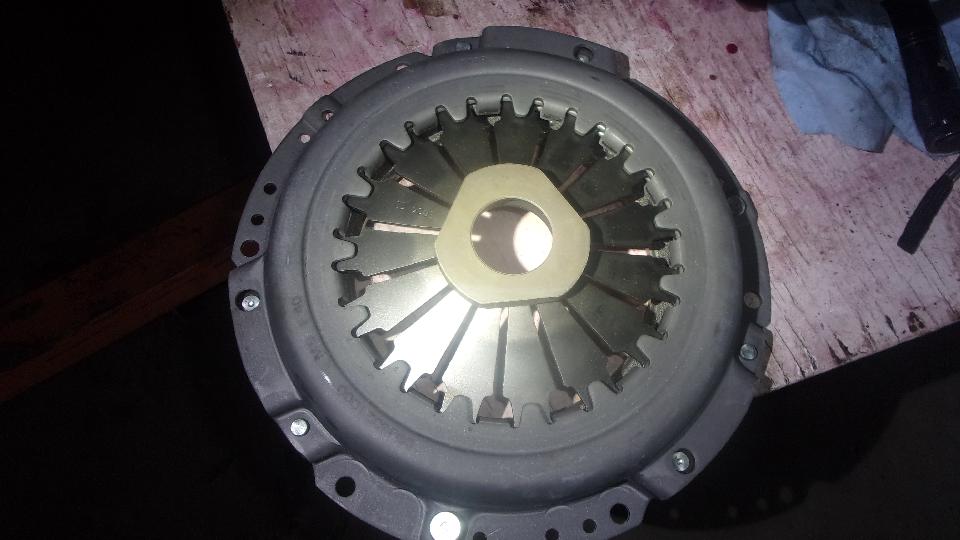
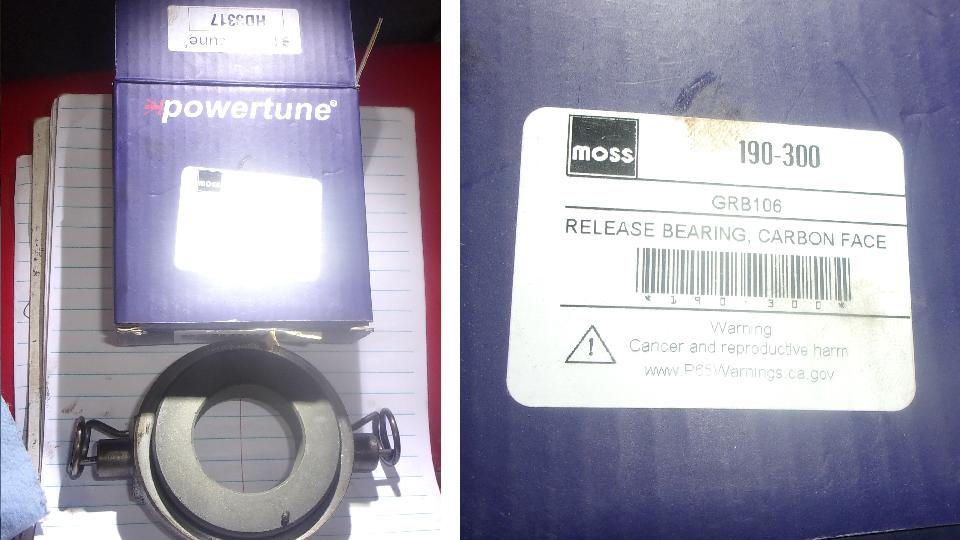
 At quarter of eight PM we were just beginning to feel like we might get the engine in bolted up to gearbox and engine mounts tonight when the next monkey wrench hit the floor. I pulled the worn MGB release bearing out of the MGB fork, then picked up the new bearing just received for comparison. The new one is the cheaper one from Moss Motors (a lot cheaper), and this time I recon we got a lot less than what we paid for, another piece of Chinese junk that cannot be installed. 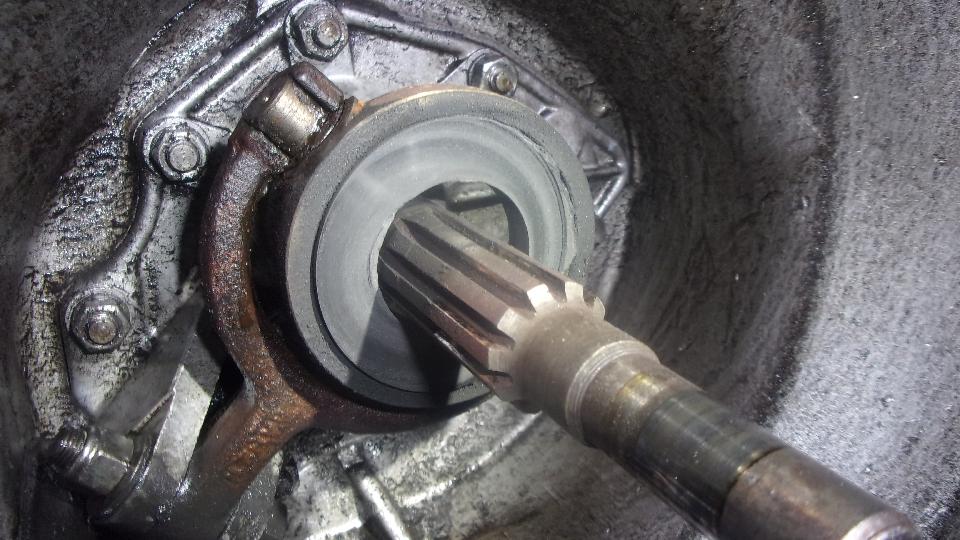
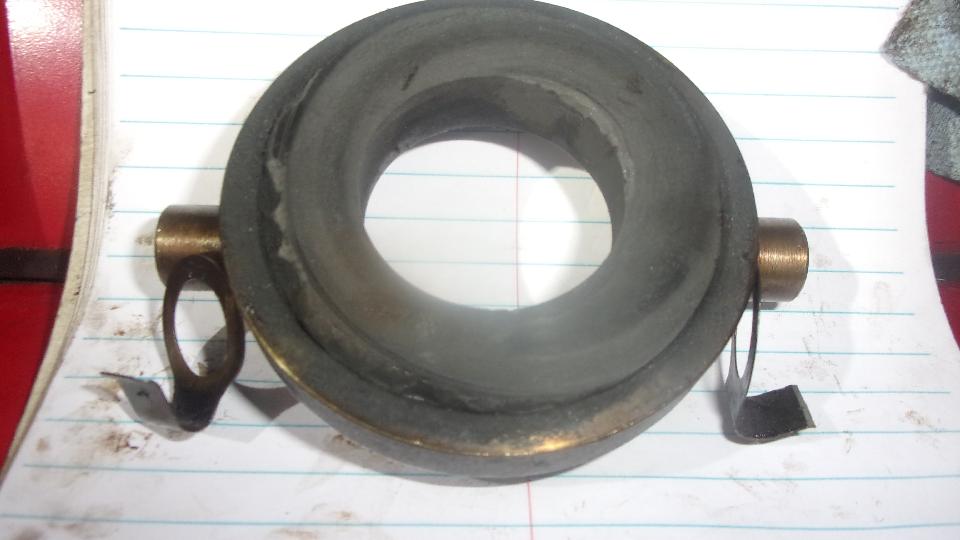
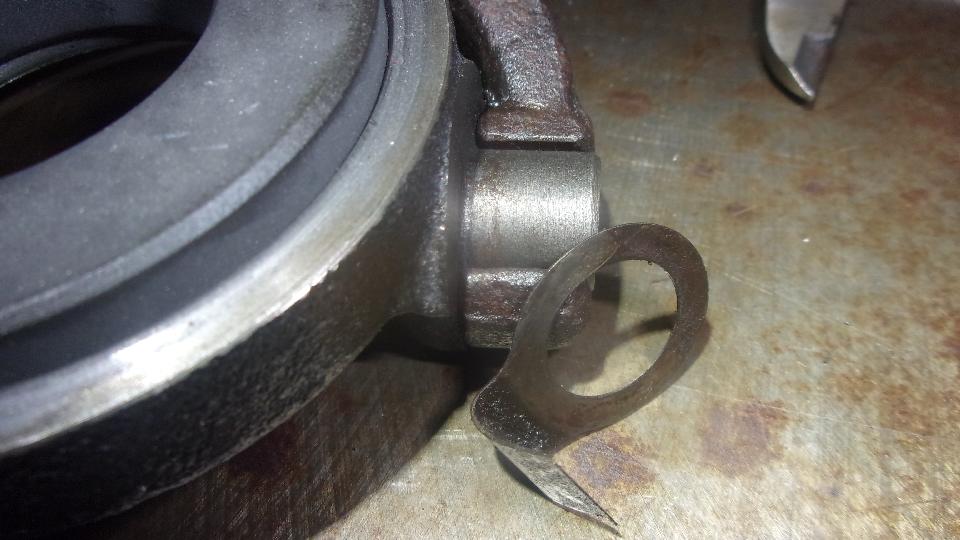
 It comes with MGA stye wire clips rather than the MGB style spring steel shim clips, just the first point of suspicion to raise your eyebrows. The MGA clips will not lock into the MGB release arm (no detents in back of the arm). And it is too wide to fit into the MGB release arm cradle when mated to the correct MGB clips, so that's also a no-go. 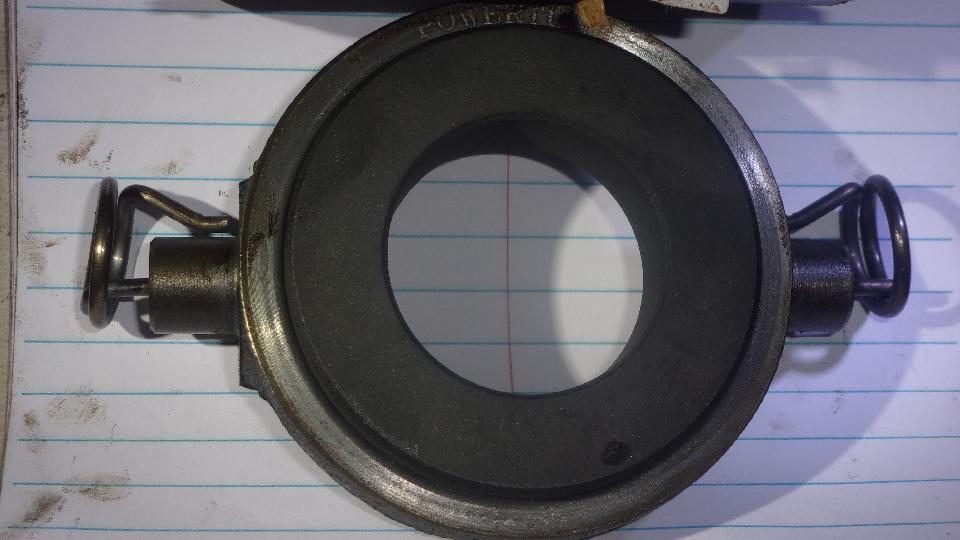
 It will fit into the cradle (just) with only one shim clip, but that's a no-go too. Follow this with an hour of head scratching and cursing at Moss Motors and failing to figure out how to get it to work without bastardizing a perfectly good factory style release arm to allow use of the junk replacement part that should never exist. 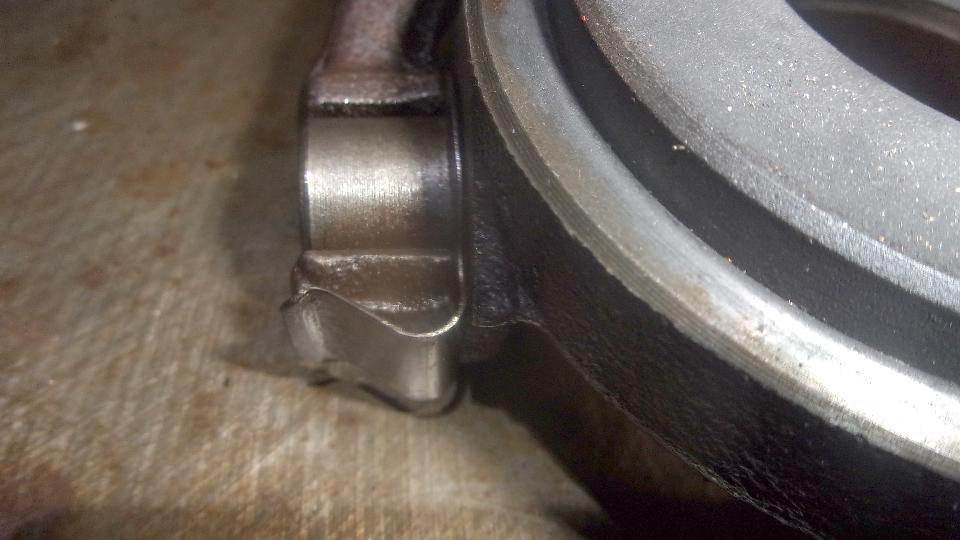
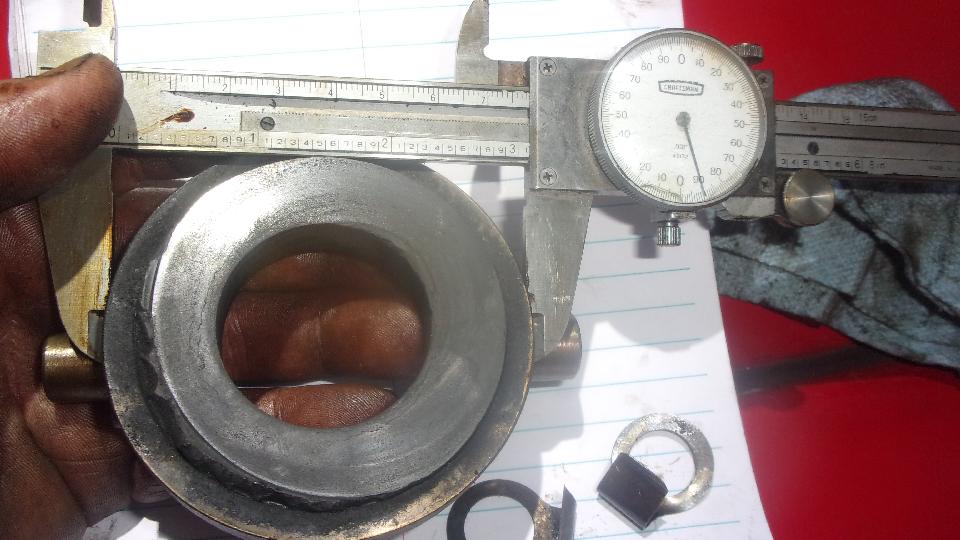
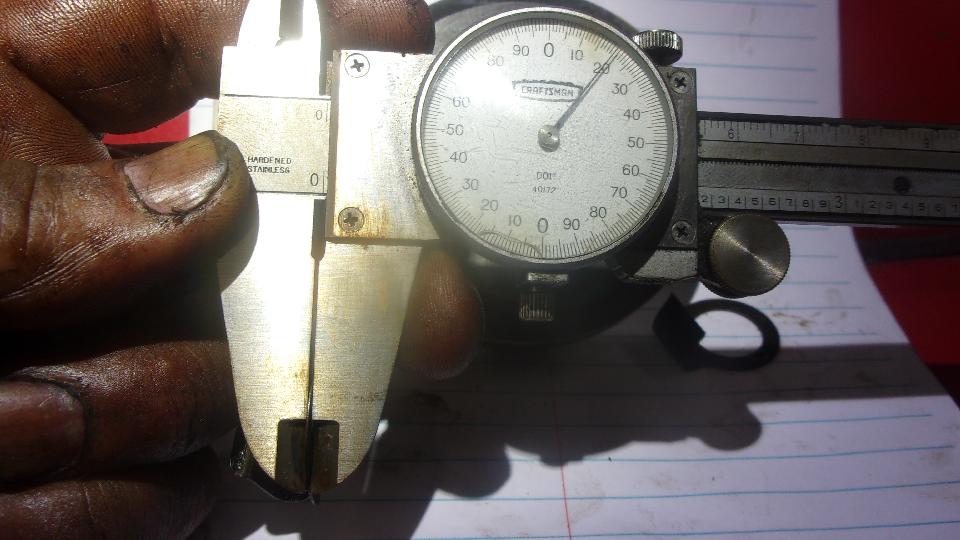
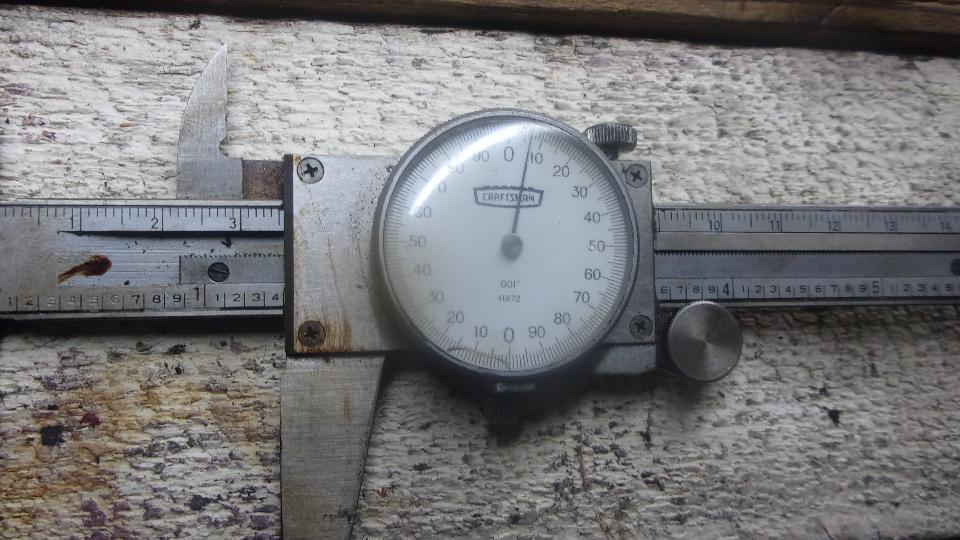
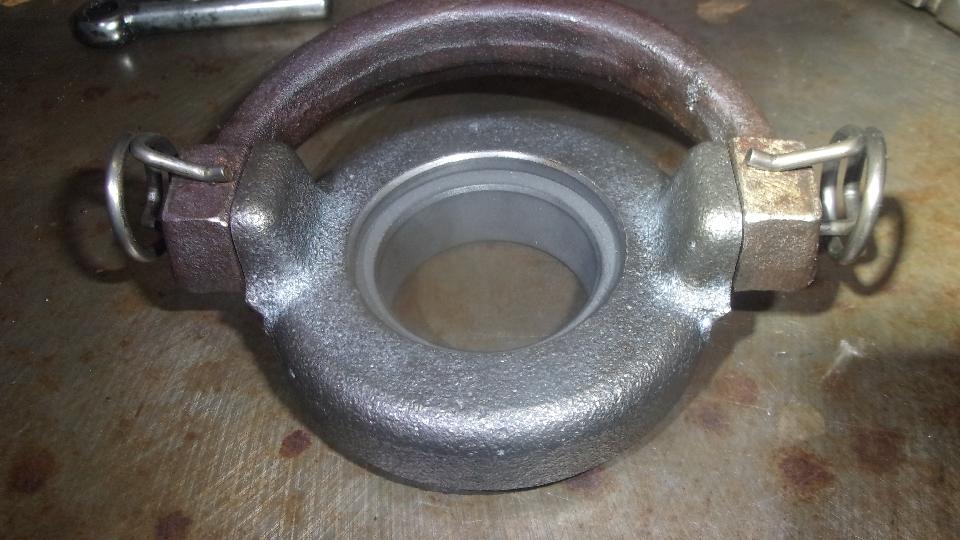 Okay, that would be a good time to call it a night and sleep on the problem, so we did. Monday, August 22, 2022: Good morning. Well, it was noon by the time we got started today, but on with the show. After sleeping on the problem, I have decided to do something that is generally against my morals, and bastardize a perfectly good original clutch release arm in order to use a faulty replacement part. There is a lathe available here, so I could re-machine the new release bearing to make it right, but time is precious, and it is going to be easier and quicker to hand grind the inside surface of the release arm. Measurements are like this:
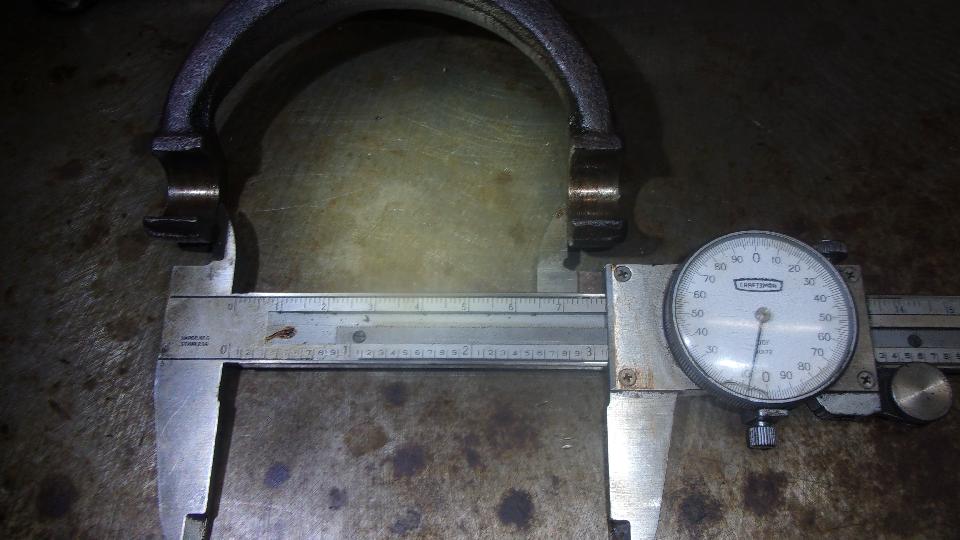

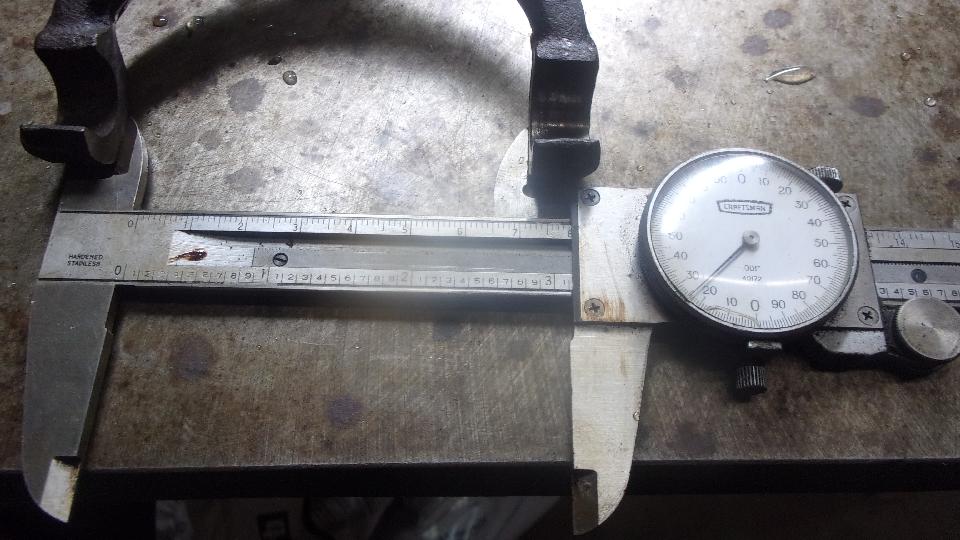 
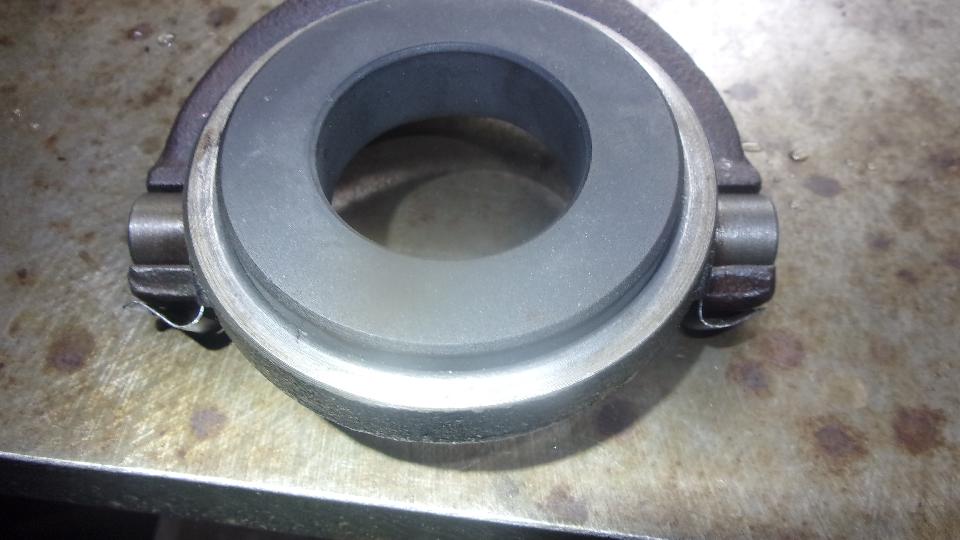 Damn, I'm good. Perfect fit. But next time I buy a new release bearing with correct dimensions, I will also have to buy a 0.025" shim washer for correct fit. How many people will have to waste time on this faulty part?
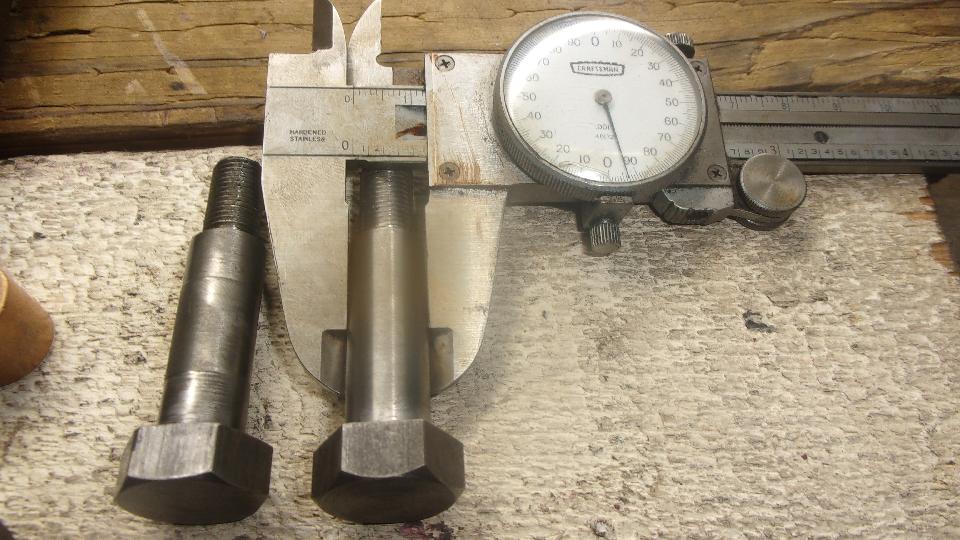
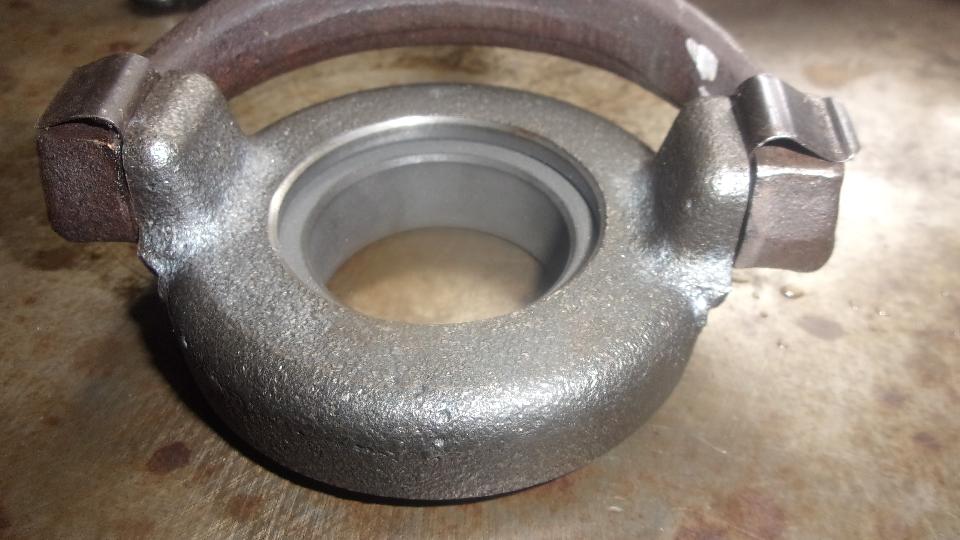
 Pushing our the old worn bushing, using two standard wrench sockets. The bushing drops inside of the larger socket, while the smaller socket OD is slightly smaller than the bushing OD. Align carefully in a vice, and given a gentle squeeze it slides right out. 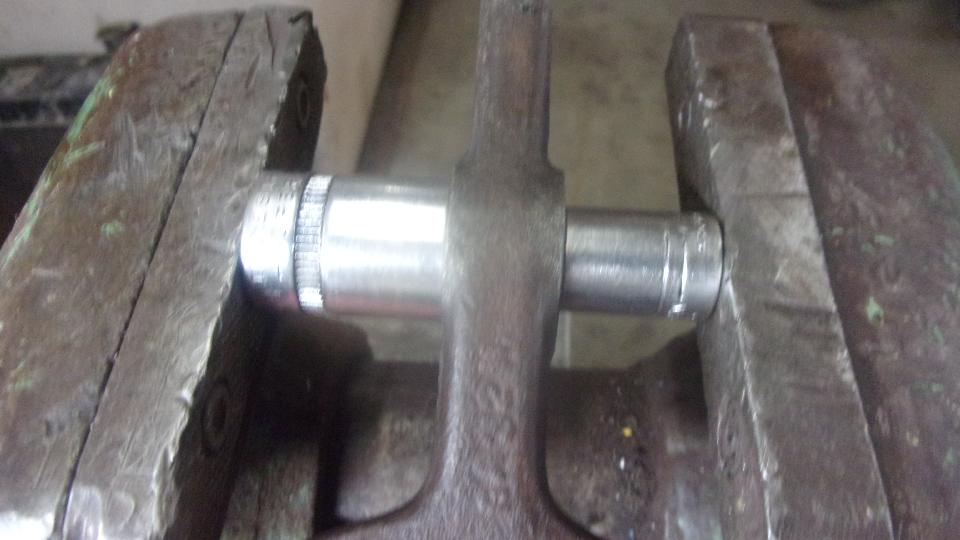
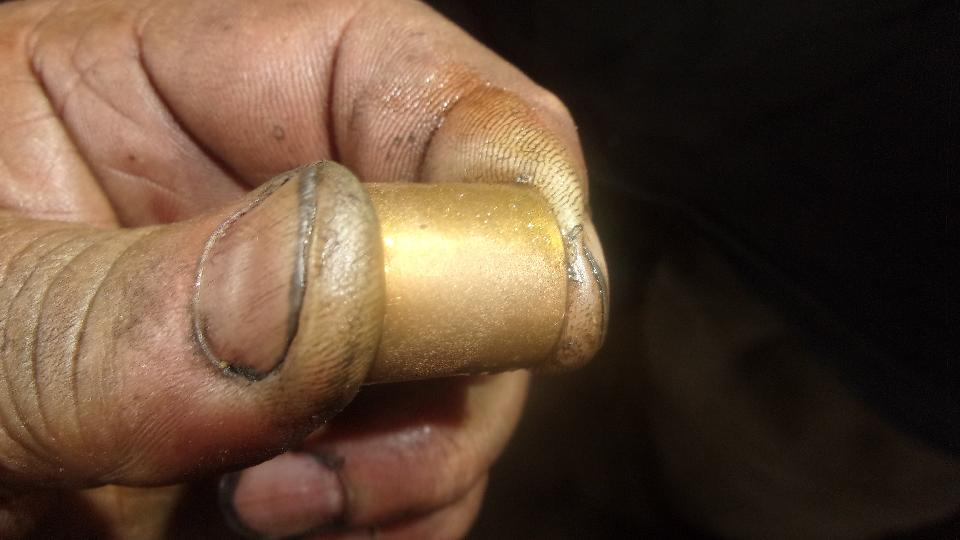
 Check and oil the new bushing before installation. Standard thought is to soak the Oilite bushing in oil for 24 hours, but in fact it should pre-oiled. Just to be sure, oil it anyway. Hold upright on one finger, and fill it with oil. Put thumb over top to seal the central cavity, and squeeze to put some hydraulic pressure on the oil. In a few seconds you should see oil begin to "sweat" out of the bushing OD.meaning the porous sintered bronze bearing material is saturated with oil, good to go. 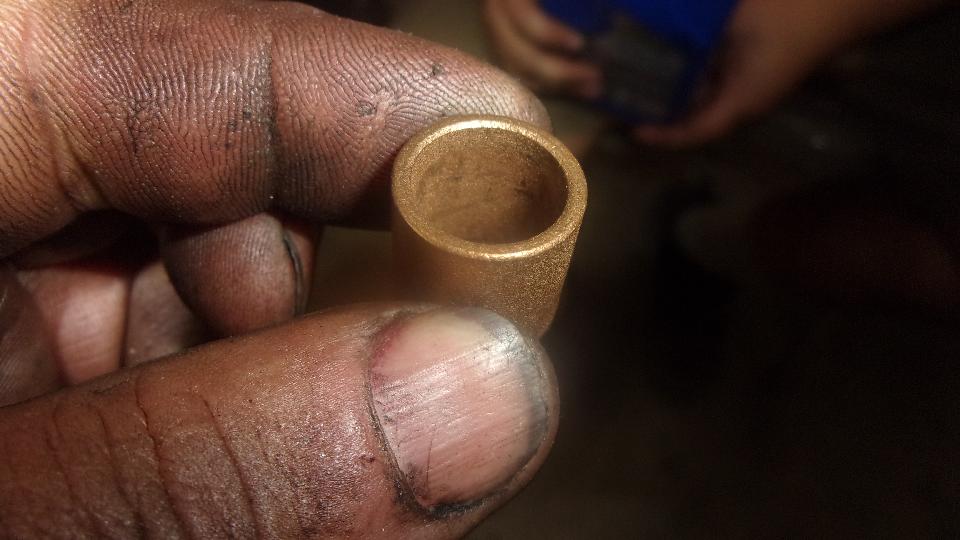

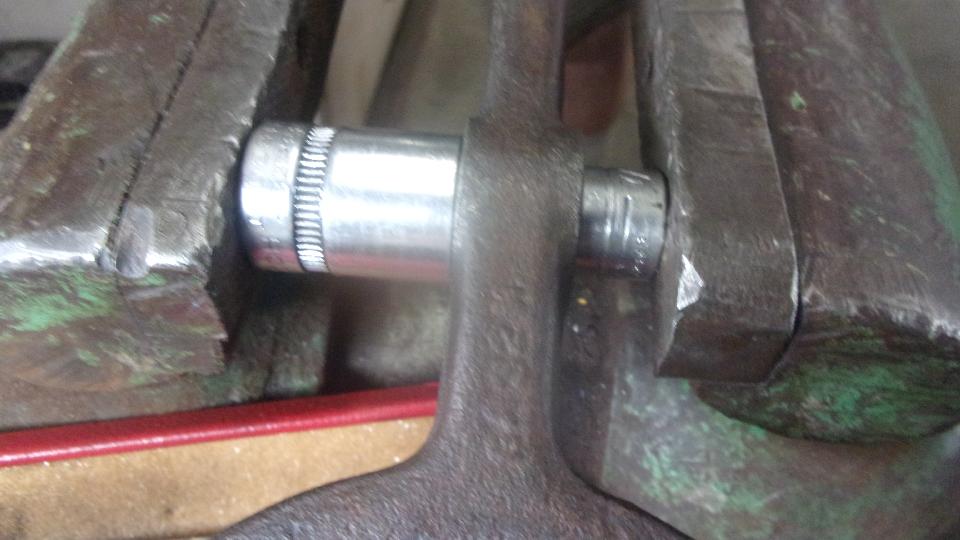
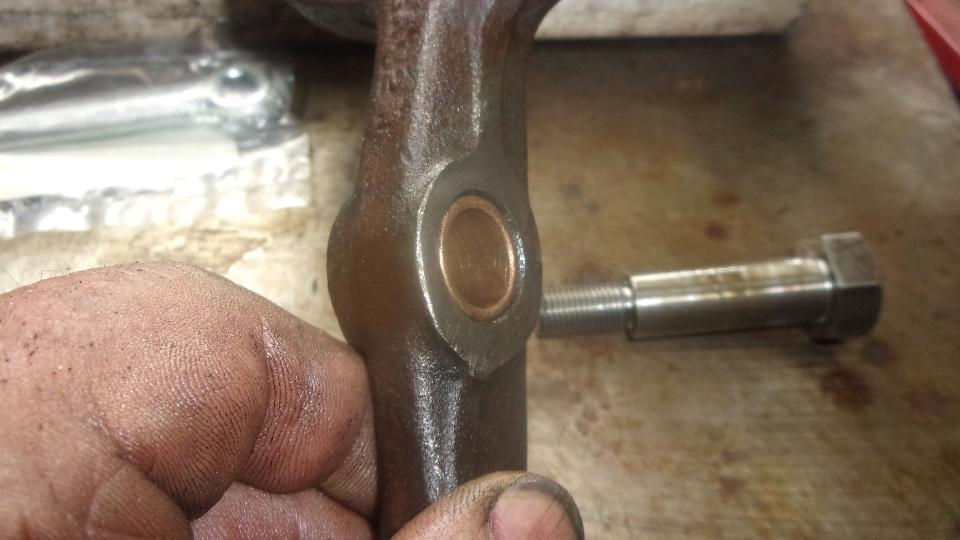
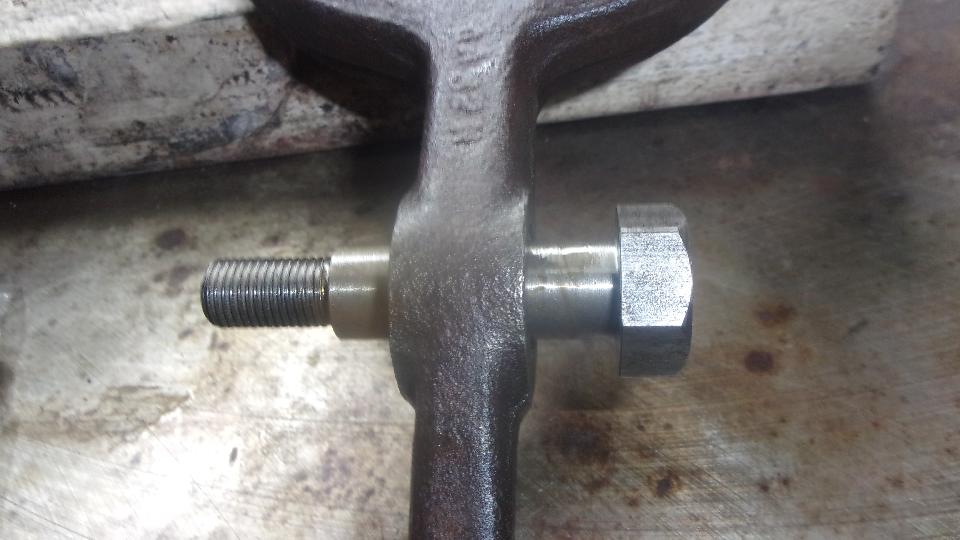
 The shoulder bolt makes a good driver for the bushing, with a deep well socket on the other side, just squeeze it in the vice, and it goes together as easily as it came apart. Perfect fit. 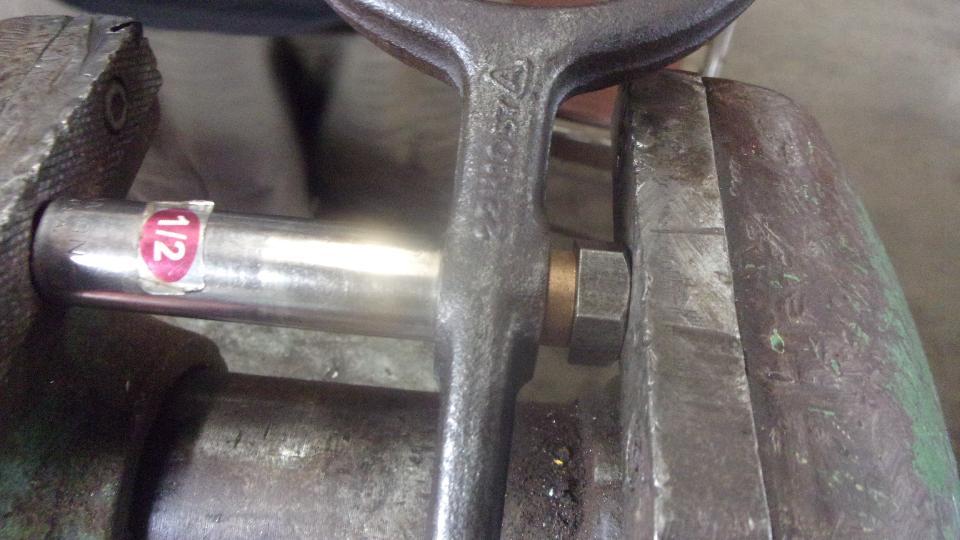
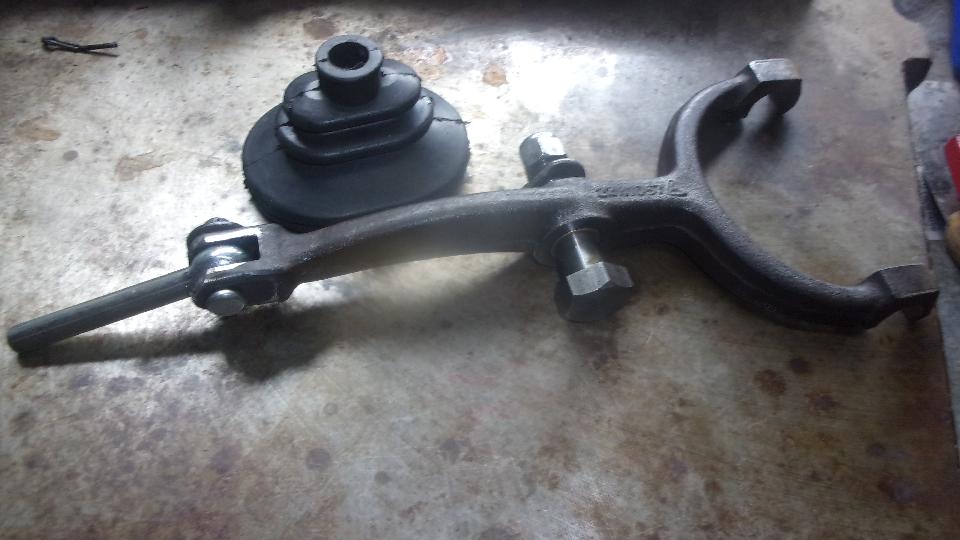
 The clutch slave pushrod and clevis pin will be badly worn, so always replace those parts. Good time to replace the rubber excluder boot as well. I like to grind the release arm square end to round off the corners, making it easier to push the boot over the arm when you're under the car. All assembled once just to be sure the required part are all there and won't be lost before assembly. 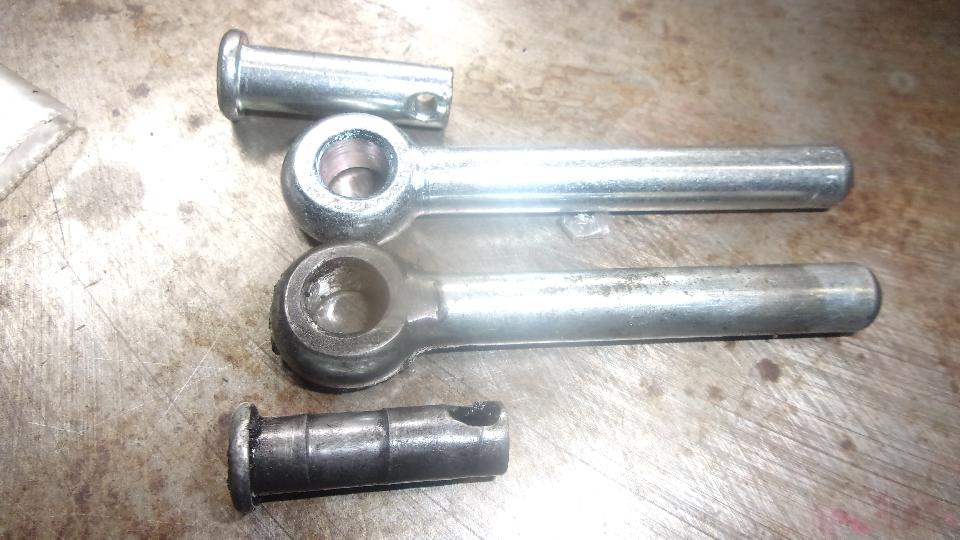
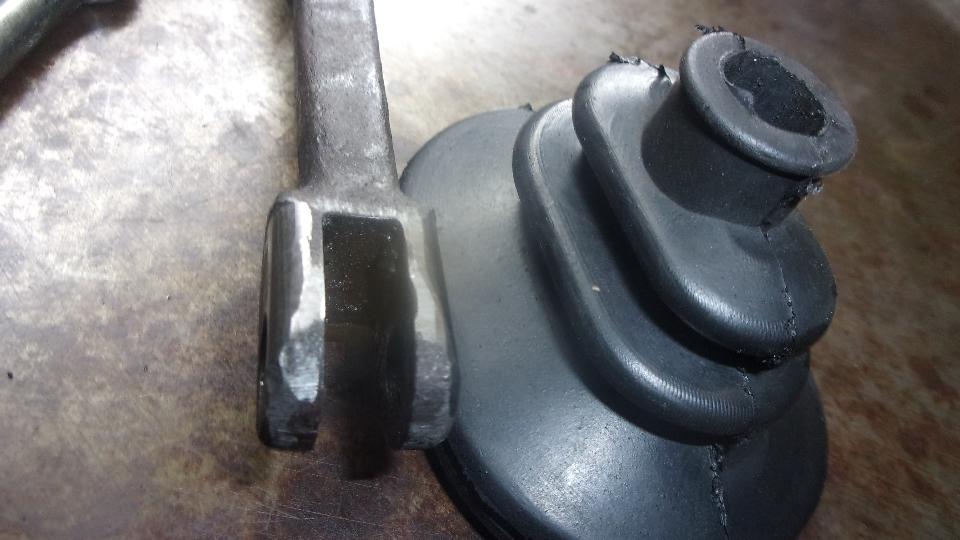
 Yes, that is the old rubber boot, totally turned to sticky mush in only 4 years with exposure to oil 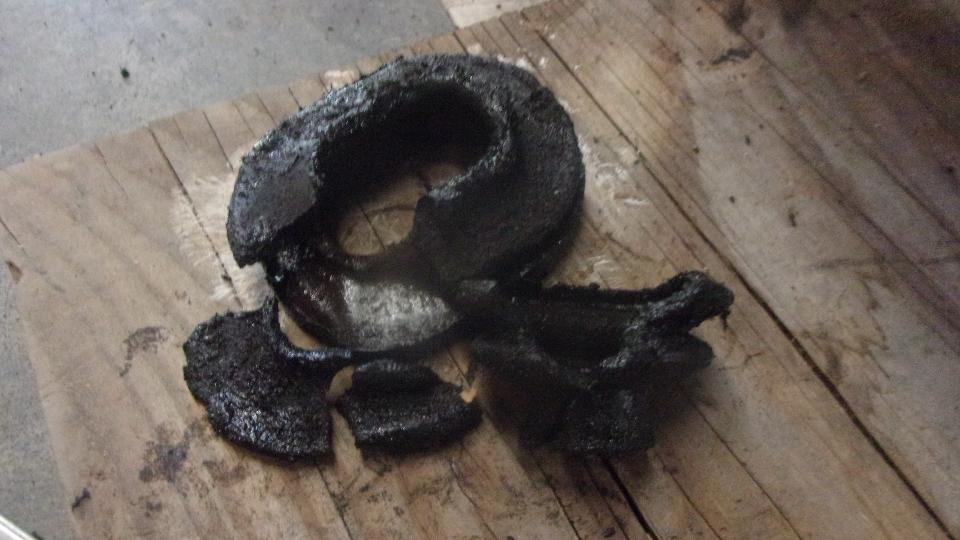 under the car. Obviously another faulty replacement part made with the wrong (cheap) elastomer material.
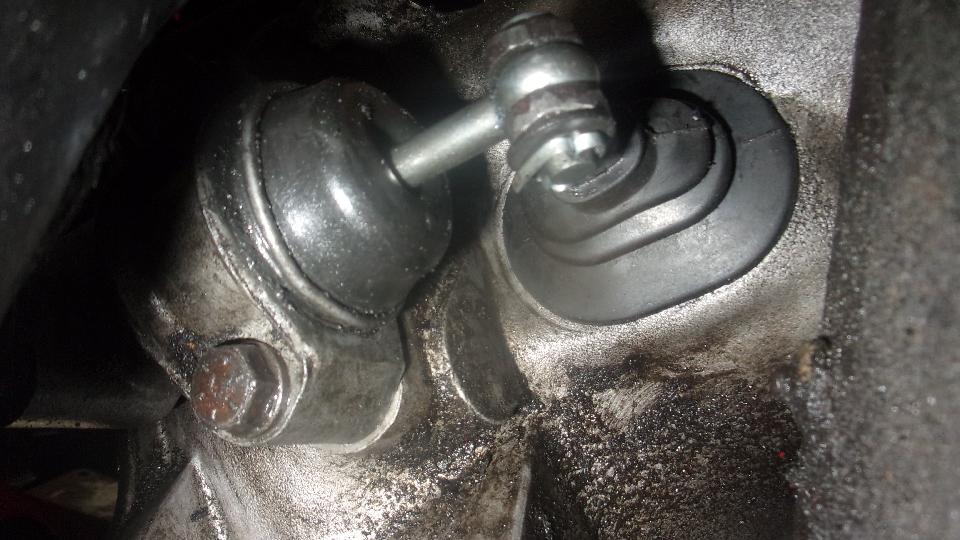
 install the release bearing and clips while there. Installing the rubber boot can be a bit of a fiddle underneath. I removed the clutch slave cylinder (only 2 bolts) to have easier access for my hands. If the gearbox was previously out of the car, it would be best to install these parts while on the work bench.
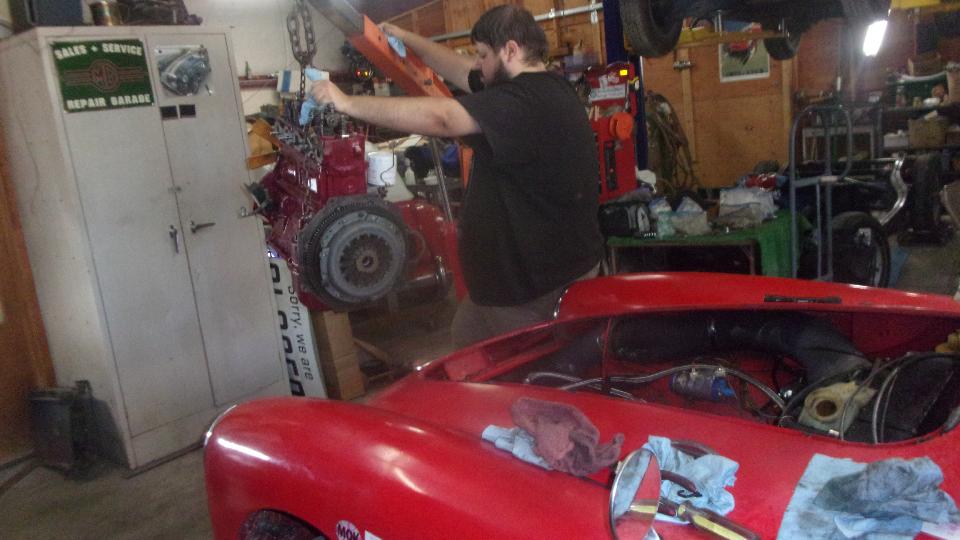
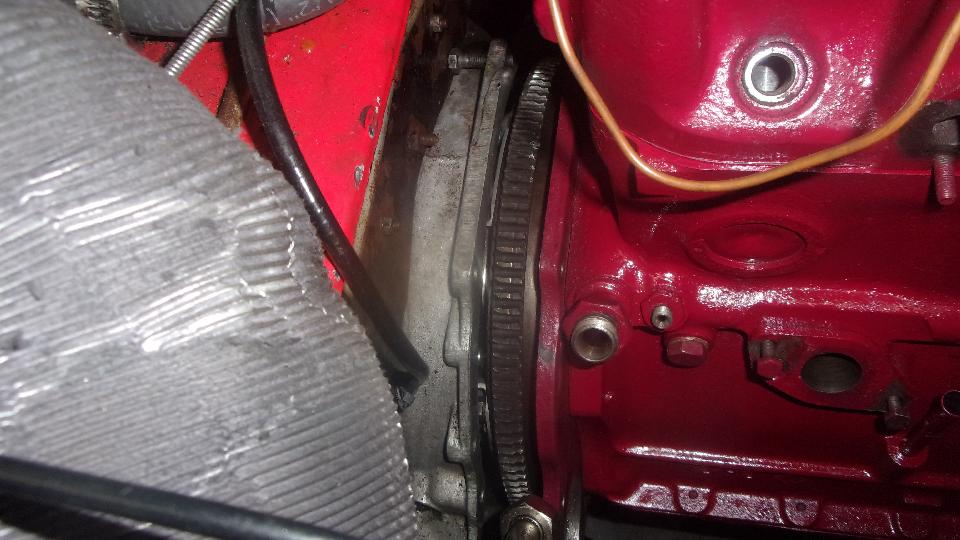  Closed up with the two alignment bolts in place. The bolt you see near the oil outlet port (upper right of engine) and the one 180 degrees opposite (lower left of engine) fit into slightly smaller clearance holes in the engine back plate and gearbox bellhousing. Put those two in first, and you can tighten them right down, and then the rest of the bolts will fly right through with no fuss.
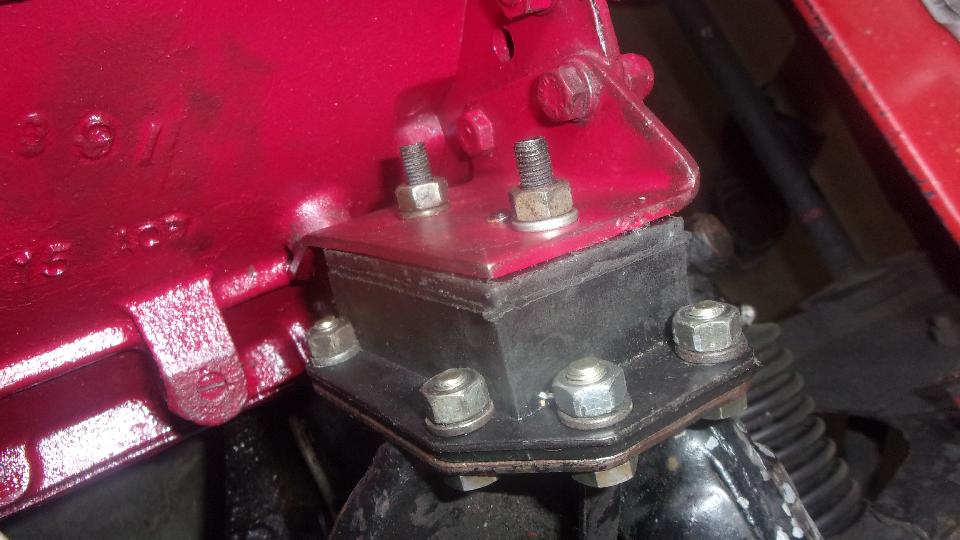
 The next three pictures represent a three hour fight. Remember the engine mount spacer plate I showed you early Sunday, just before we pulled the loaner engine out of the car? I was determined to install two of those, one on each side, to raise the engine so the stating handle (hand crank) would fit in above the steering rack, as it did originally from the factory. I suspect replacement engine mouts have been thinner than original spec for the past several years (maybe farther back). With seven bolts in, the bottom one on left side would not go, not even close. Bottom bolt firse, and at least one of the others would not go. Had to take both sides apart and start with the left side, finish on the right side. Lesson here is to always install the bottom bolt first. Two engine mounts usually take 20 to 30 minutes, could be just a little longer with one spacer plate, but two plates is a killer.
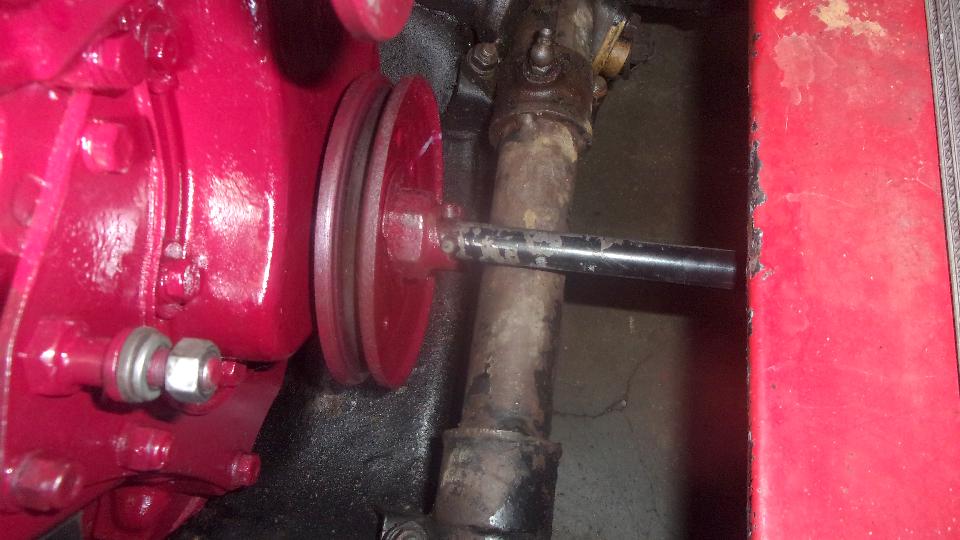
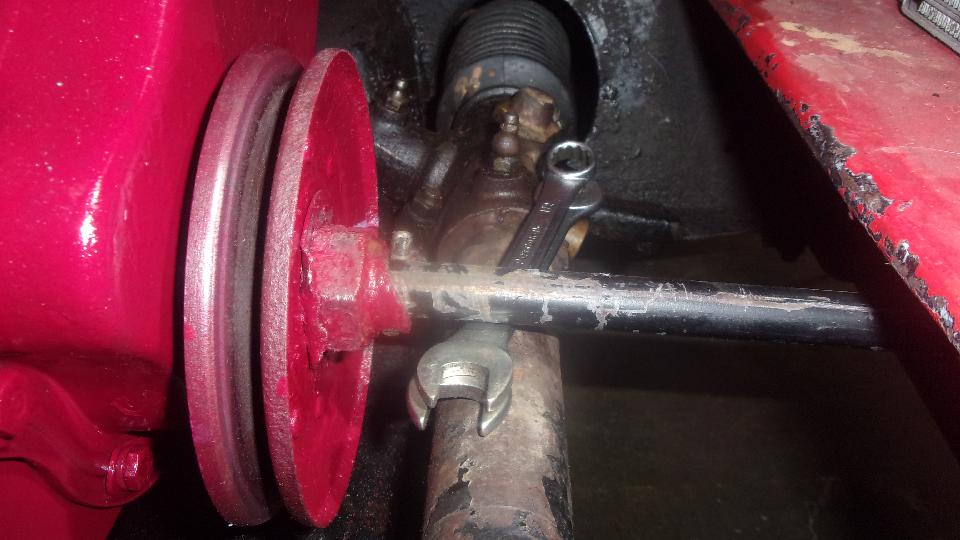
 Then the fun part, giving the hand crank a whirl. Boy was that easy. Two flat wrenches on top of the steering rack demonstrate the space to spare. Plenty allowance for future engine mount sag.
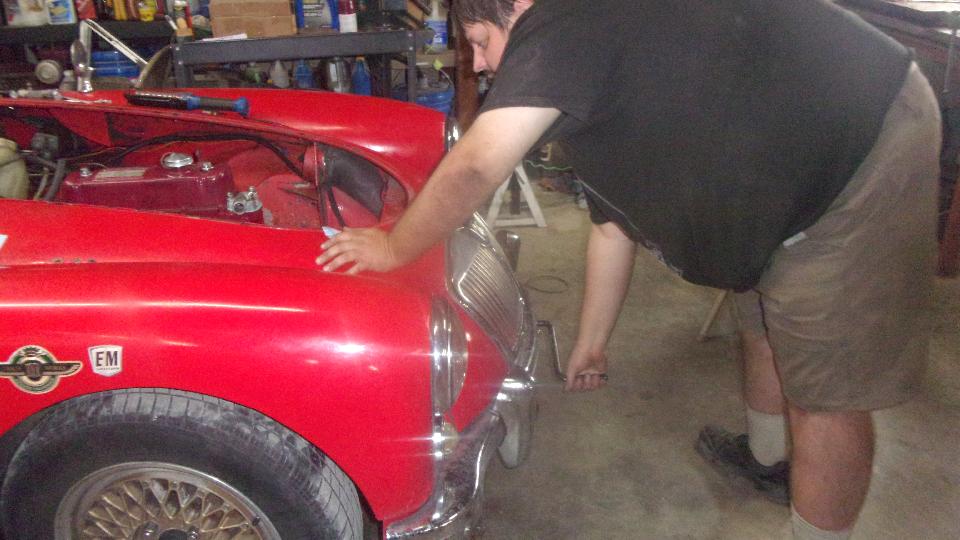
 Ten PM clean up time, and not nearly as much done as I had anticipated, but I'll take it as a success all around. Clean up and head out for late might snacks and drinks before snooze. Tuesday, August 23, 2022: Slept in, and catching up some clerical work, so work start was mid day. Need to finish dressing the engine and get some oil into it. Going to reverse feed to prime the oil pump first, just to be sure it will prime and pump on first crank-over. The small black squeeze bottle holds 6-1/2 Fl-Oz, and we keep it around primarily for filling shock absorbers. Today it be injecting oil into the port at right rear of the engine to back fill the oil pump. The oil pump displaces 1/2 Cu-In or 0.9 Fl-Oz per turn, which is two turns of the crankshaft. Do the, and we turned the crankshaft backward 14 turns to suck in that bottle of oil. Turning forward then immediately pushes oil out of the port to prove it is well primed. 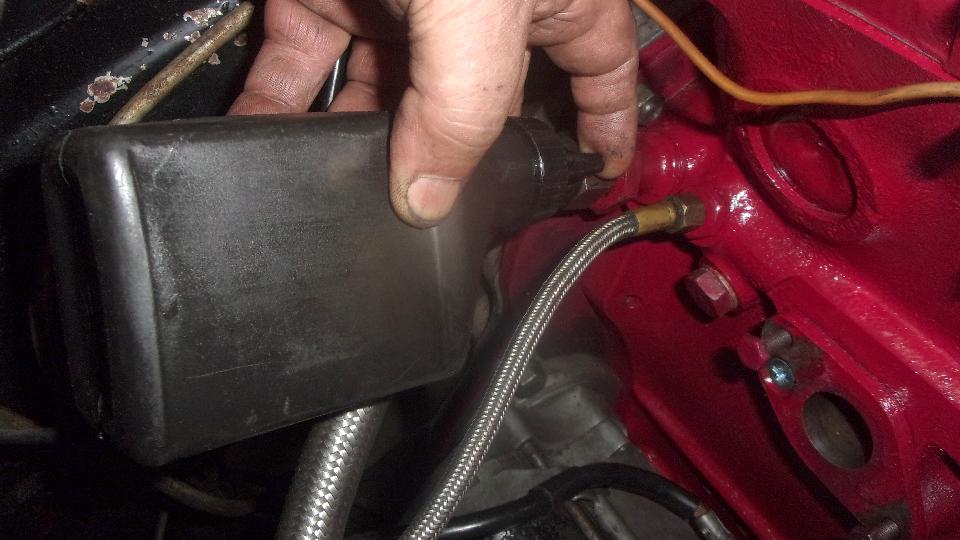

 Installed a new heater valve, and then there was the crankcase breather tube connecting to the front tappet cover. Can't believe we forgot to install that immediately after engine mounts and before the manifolds, but I did manage to get it installed from underneath. 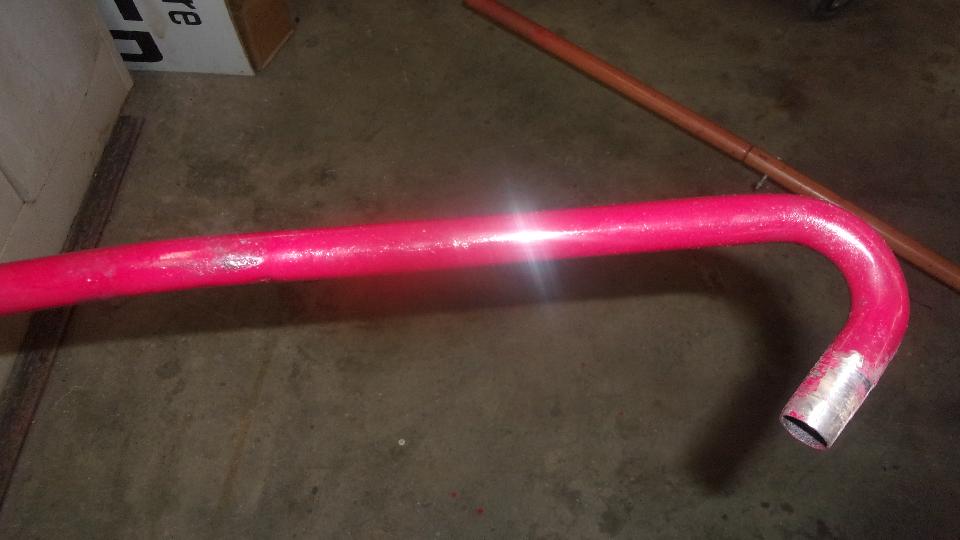

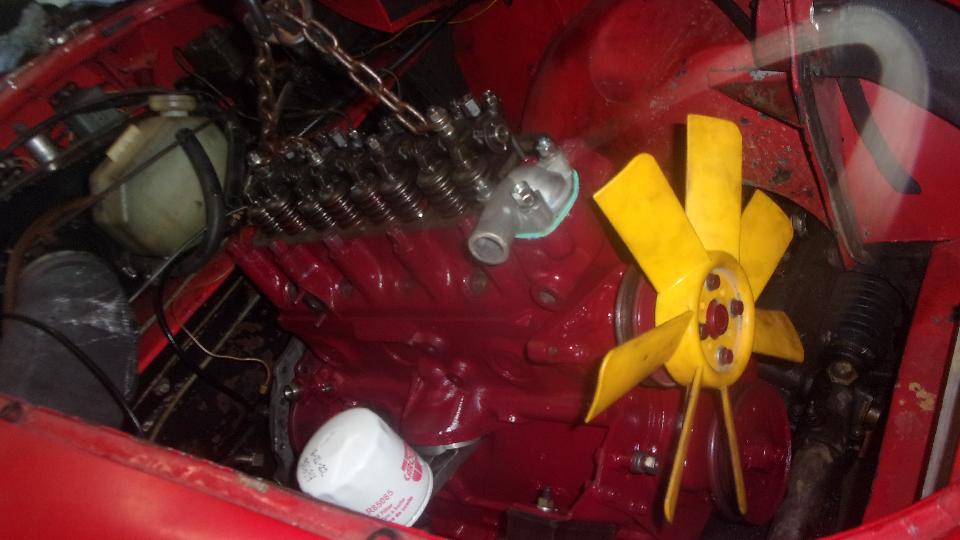
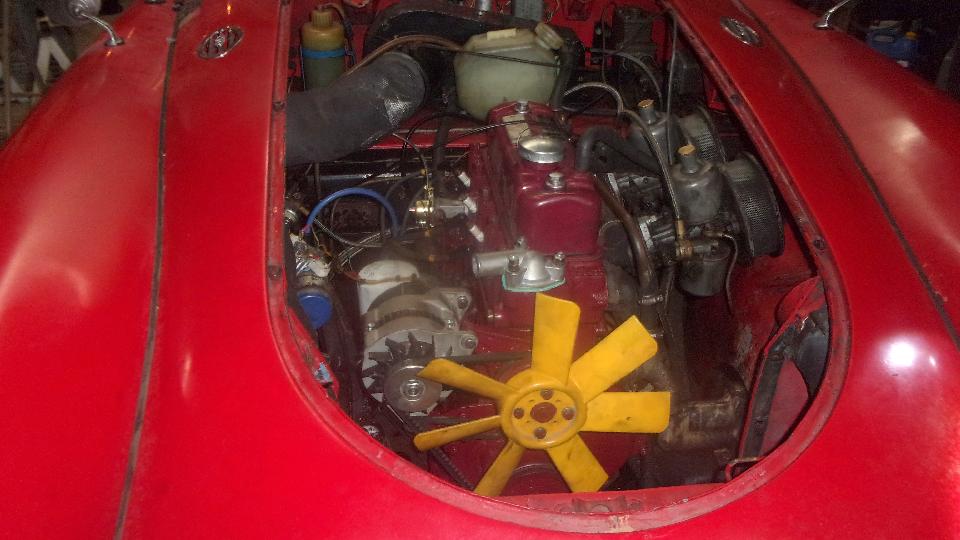
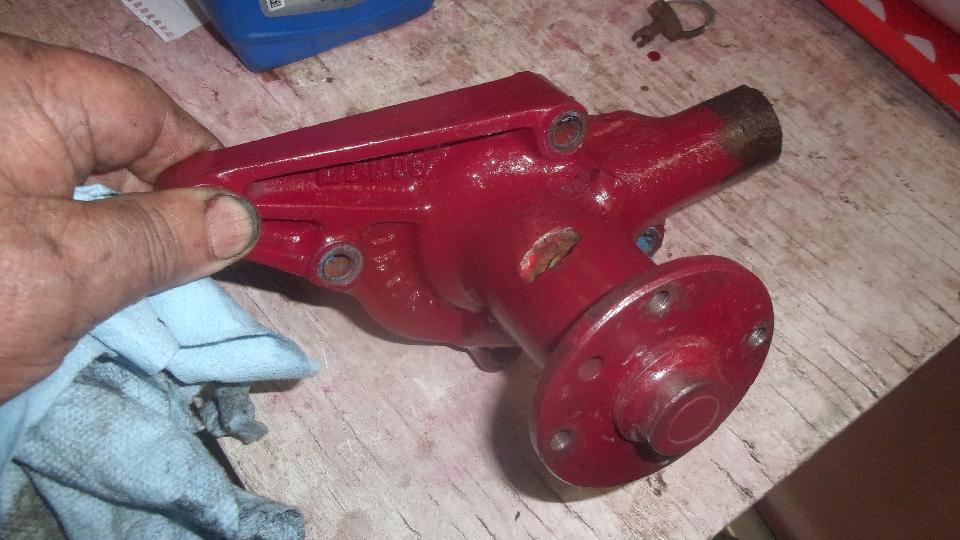
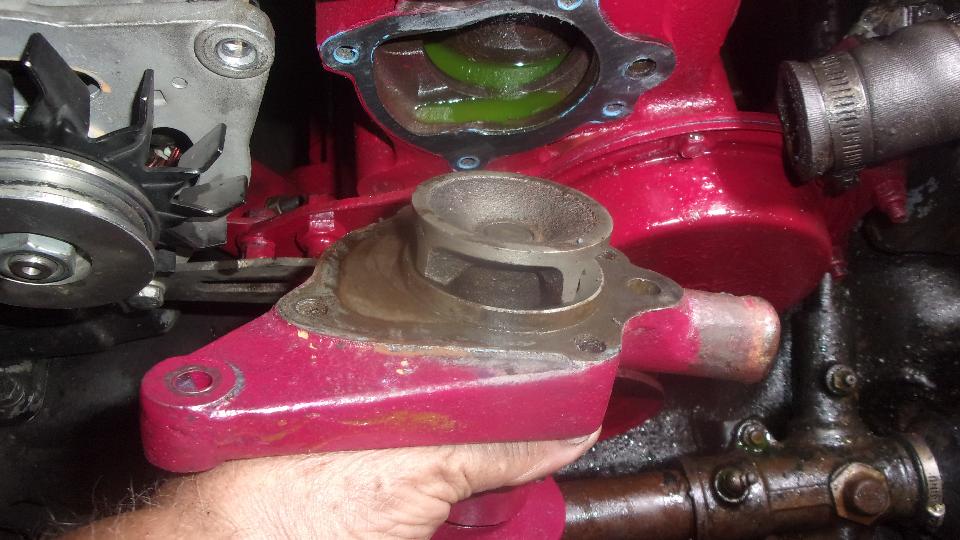
 Here's a good chuckle. Stuart was picking through parts for his MGA restoration project when he picked up this heater air inlet duct stuffed up with a mouse nest. Got the engine fully dressed just before installing the radiator, then while re-checking everything noticed the fast idle link was missing. Dang those little push nuts hard to install, impossible to remove without breaking but easy to fall off when you're not looking. Had to R&R the front carburetor again to install a new link with the tiny push washer clips. Then radiator in with hoses all tight, filling with coolant just before start up, and coolant was running out on the floor. Oops. The free-spinning used water pump we picked off the shelf had a leaky seal, so pull the radiator out again and mop up all that antifreeze. 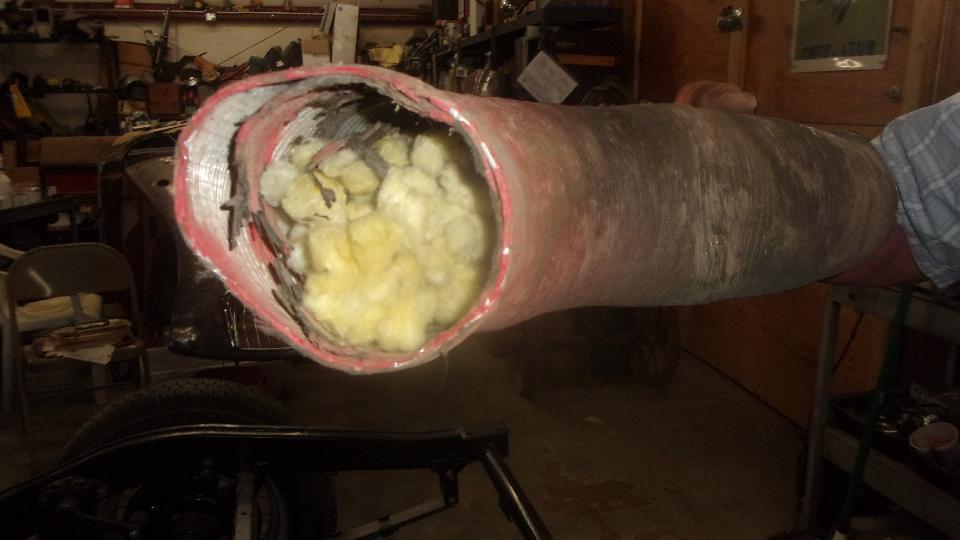
 Yank out the duff water pump, and pull the good one off of the loner engine. We know that one is good, because it's the same one that was running on this engine in the car when we came limping in nearly to months ago and transferred it to the loaner engine. So now it's back home again. 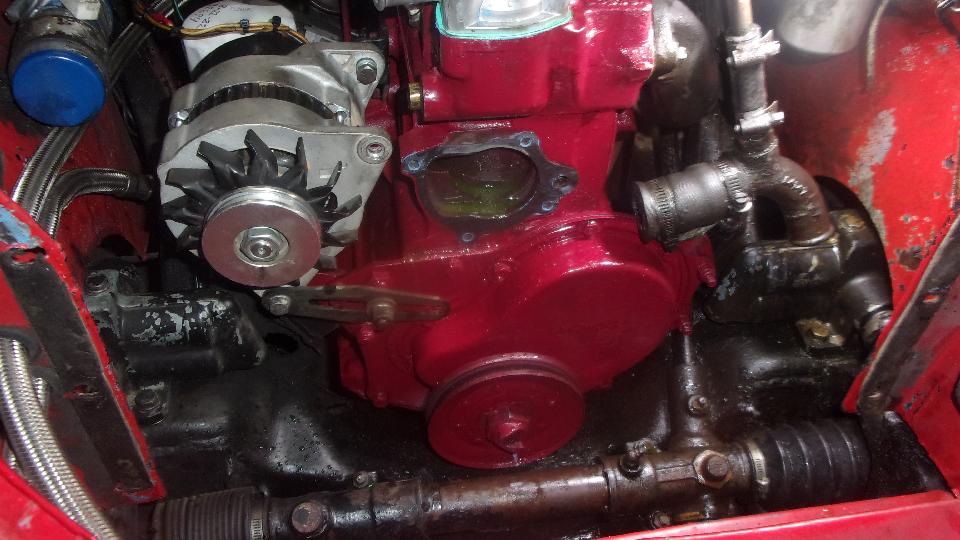
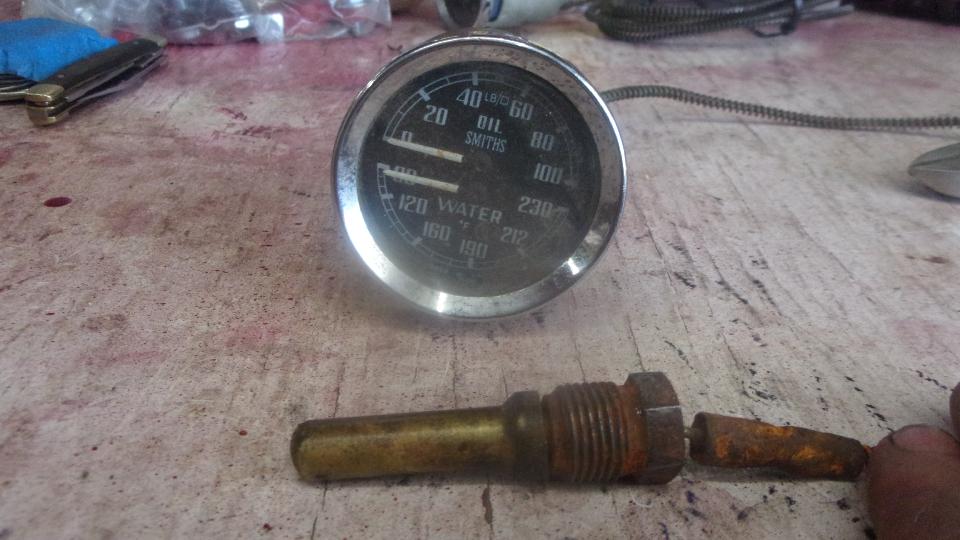
 Okay, radiator back in, hoses all tight, fill up the coolant and check everything again. Another leak? This time it's the temperature sensor port in the cylinder head. Since the temperature gauge had failed with a cracked fluid pipe, and the brass nut was buggered anyway, I had just cut the sensor end off and used it to plug the port in the head. Tired of dealing with the rounded off brass nut, I grabbed another failed gauge that needed to be repaired and cut that one to retrieve the sensor bulb and good brass nut to plug the port in the head. Come on, get creative in a pinch. Top up again, no leak.
 Since it just hit midnight, we weren't going to fire it up now, so knock of, clean up, and go for a late night snack before snooze. Wednesday, August 24, 2022: I'm sure we slept in this morning, had breakfast, checked email and a few other things. But hey, if the first picture is setting the valve lash, that means we already gave it the cam and tappets bed-in run at 2500 RPM for 20 minutes and this is the final head torque and tune-up to get it out the door. We drove it a several miles in the hills for a test run and initial run in before fine tuning the fuel mixture and idle speed. Runs like a champ as a stock 1600 with slightly shaved "18 head. 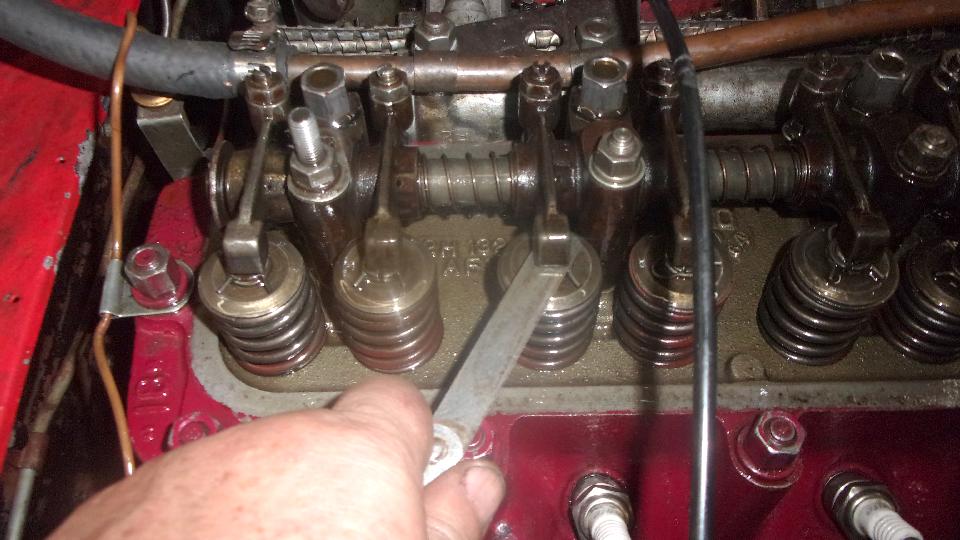
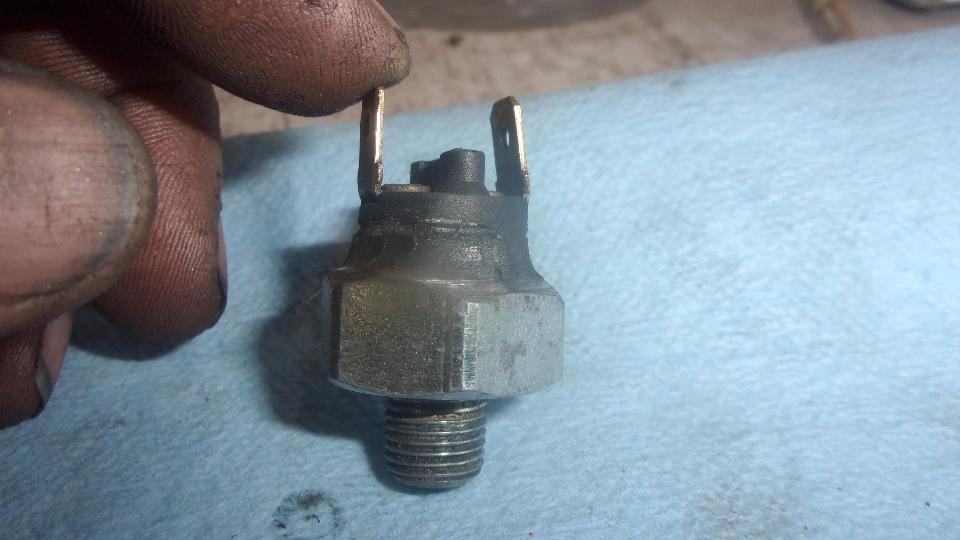
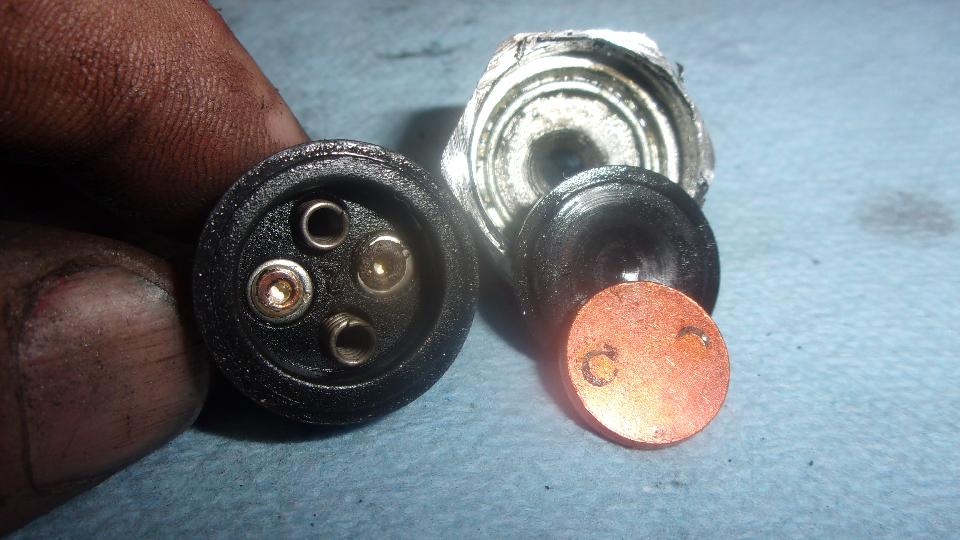
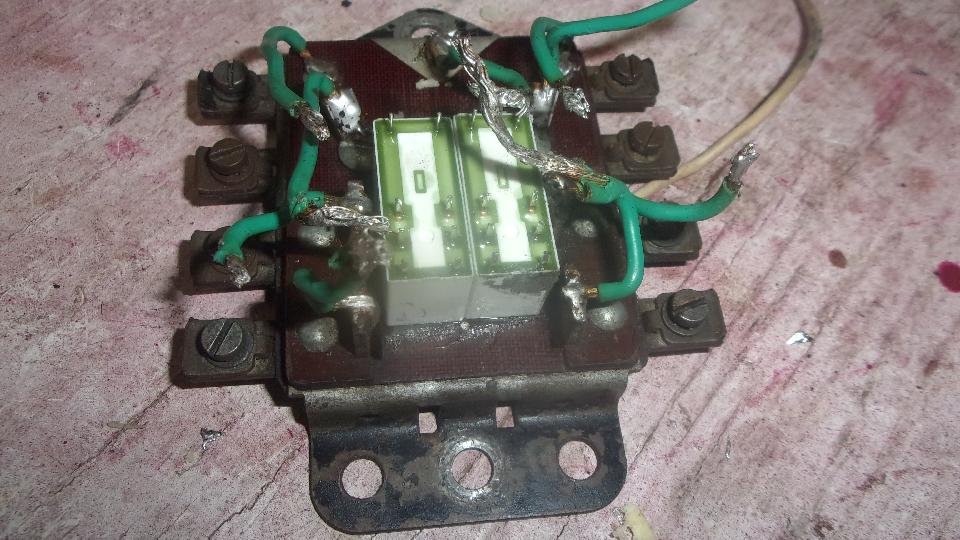
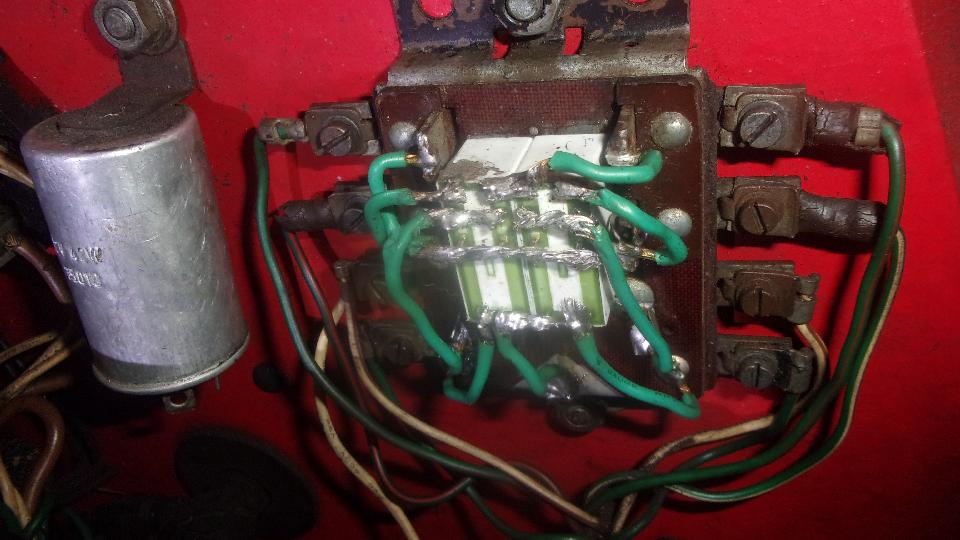
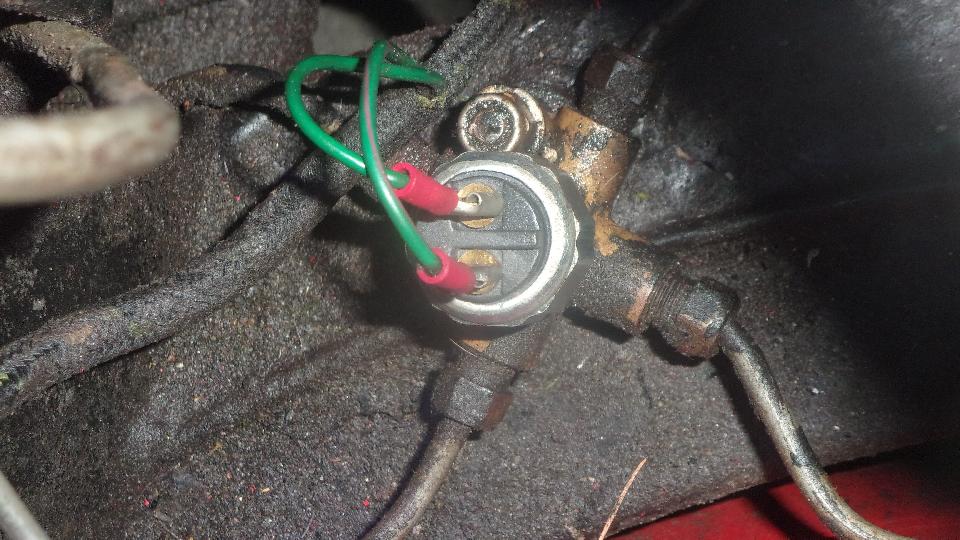 I knew what we would find in there before I cut it open, same burned contacts as all the others, because they are all the same bad design with slow make and slow break contacts. 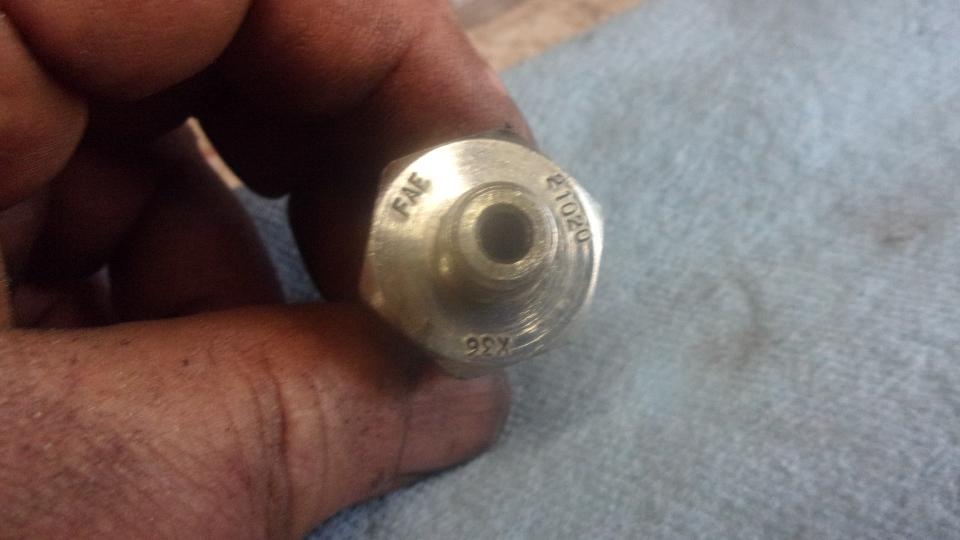
 The next chore was to change the miniature relays inside the turn signal control box (for the 4th time). Last time was July 29, 2020 when they had last time they lasted 9-1/2 years, 231,544 miles, not bad. Then I changed to relays with higher temperature rating, and now one of those failed in 2yrs with only 30,485 miles. So much for higher temperature rating. But I do have some spares, so I will change them again anyway. 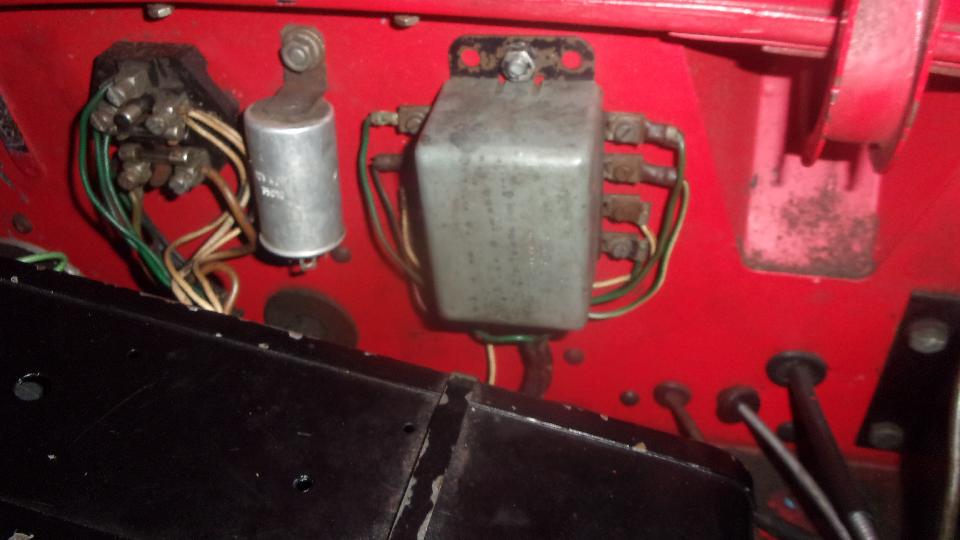 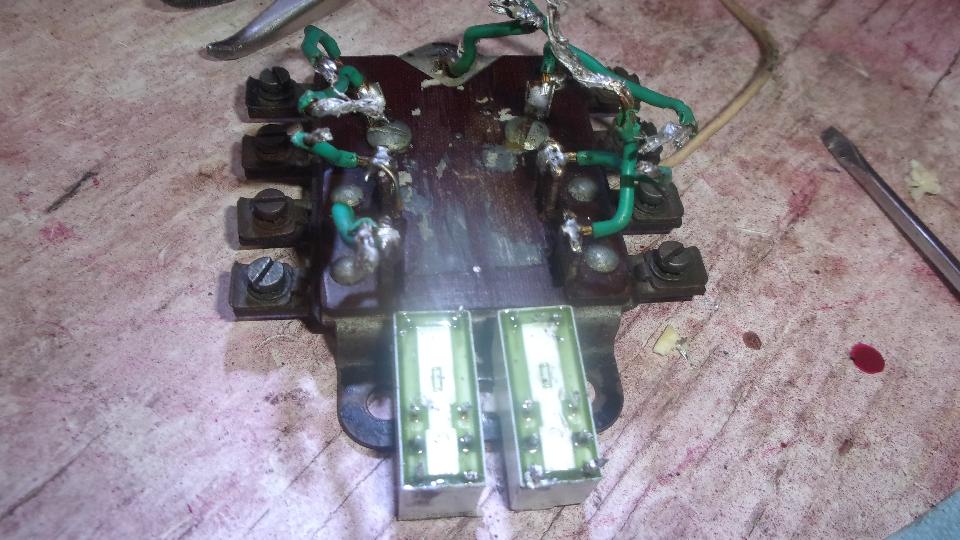
 A few minutes to put the bonnet back on the car about 4:30-PM. Then spent something like 5 or 6 hours organizing spare parts and making notes for inventory records. Seems like the world got rather scrambled with several parts orders and doing two engine builds and two engine swaps in two months. Spent an hour re-organizing the shop and cleaning floors before we left around midnight. Thursday, August 25, 2022: I am posting notes for this day four days in arrears, because we just spent the prior five long days in the shop working on the car (about twice as long as it should have taken). Now there is (was) a backlog of hundreds of photos to sift through and process for this web page, and backlog of days worth of email and tech questions and BBS review, and posting a few new tech pages (in the next few days below), and a load of clerical work for the spare parts inventory list for the Magic Trailer. It will take (took) through the 29th to get caught up. Then we have at least one more day to work on the car (beginning on the 30th below). We haven't been so hectic busy for a long time. Friday, August 26, 2022:  Good morning, and say hello to a nice 1065 Lincoln convertible.  -- Someone sent a write-up on repair of torn holes for front shock absorber mounting in the MGA chassis frame, so time to post a new tech page for installation of Time-Sert 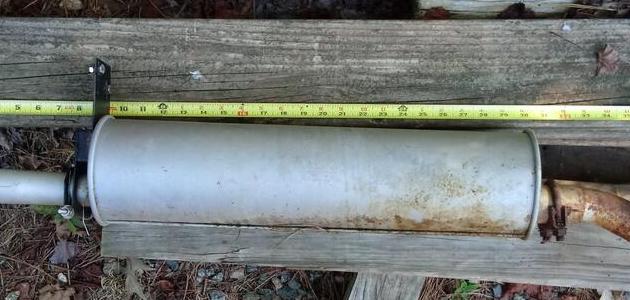 threaded inserts.
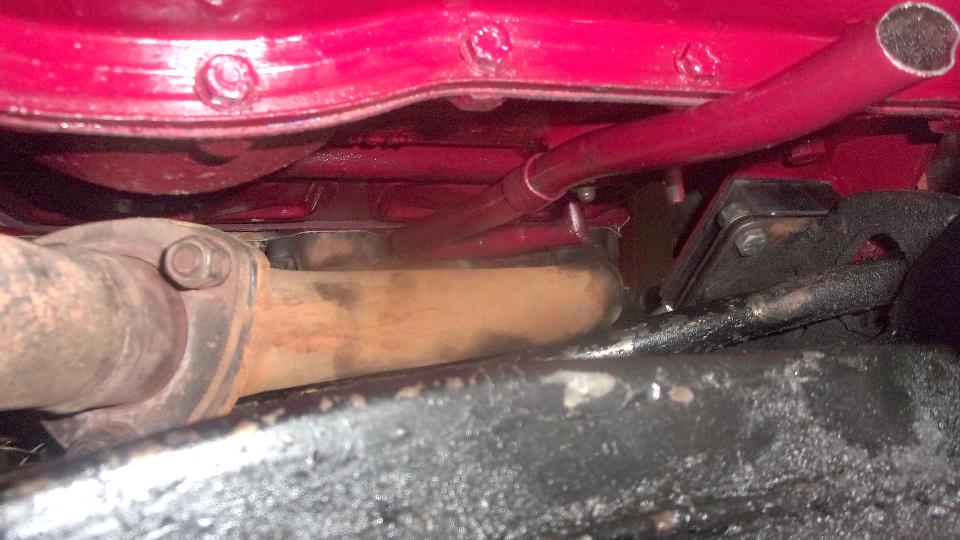
 -- Also added to tech page muffler dimensions and possible part numbers for replacement muffler. -- Otherwise much of the day spent catching up photos and notes from Sunday's long hot drive and engine work. Saturday, August 27, 2022: Some new trivia. It now appears that some CKD cars (Completely Knocked Down) were assembled in Southern Rhodesia (news to me). That report, and some associated research, led me to post a new tech page for MGA built in that country. -- Otherwise much of the day spent catching up photos and notes from Monday's engine work. Sunday, August 28, 2022: 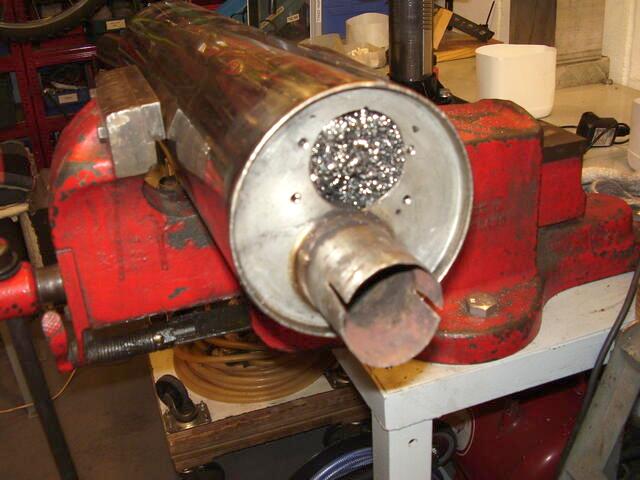 Amended a tech page to show another way to repack a blown out muffler with steel wool rather than fiberglass.
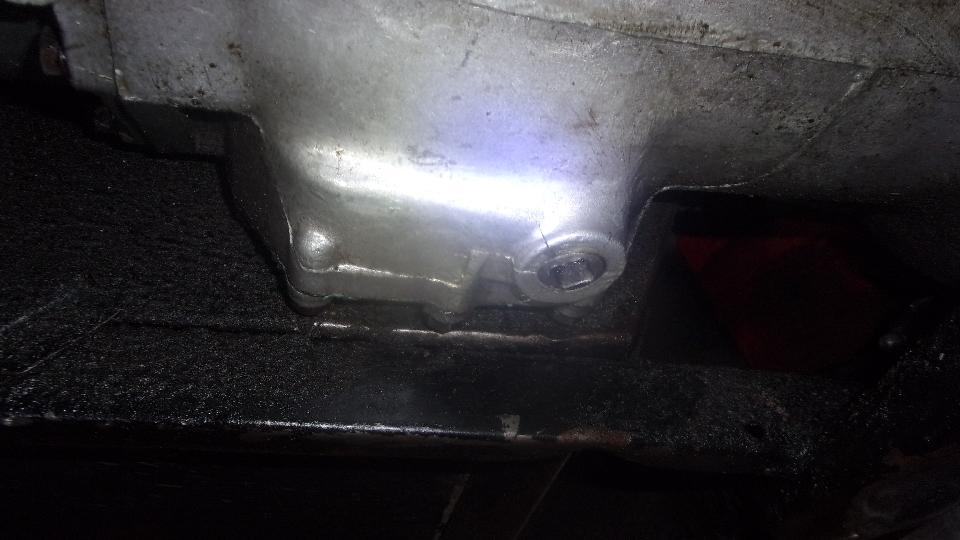
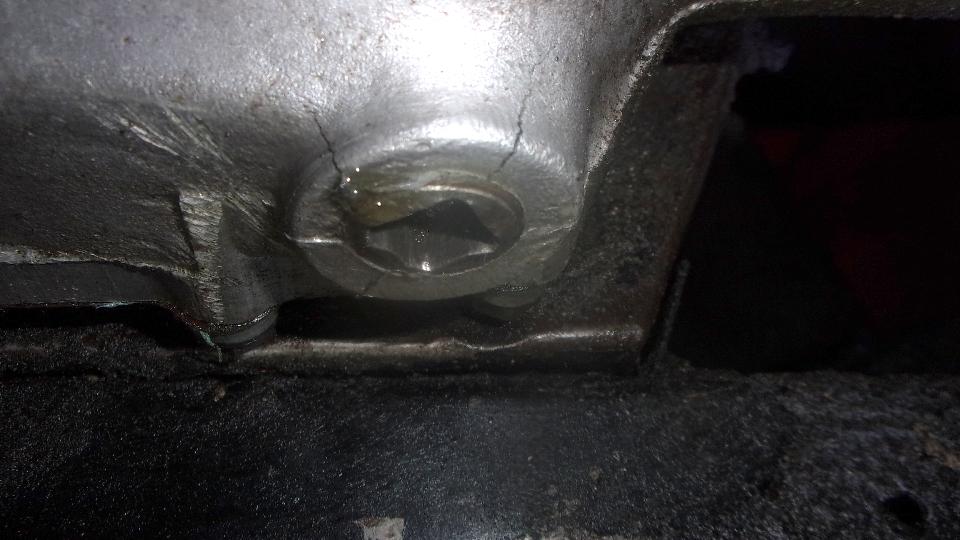
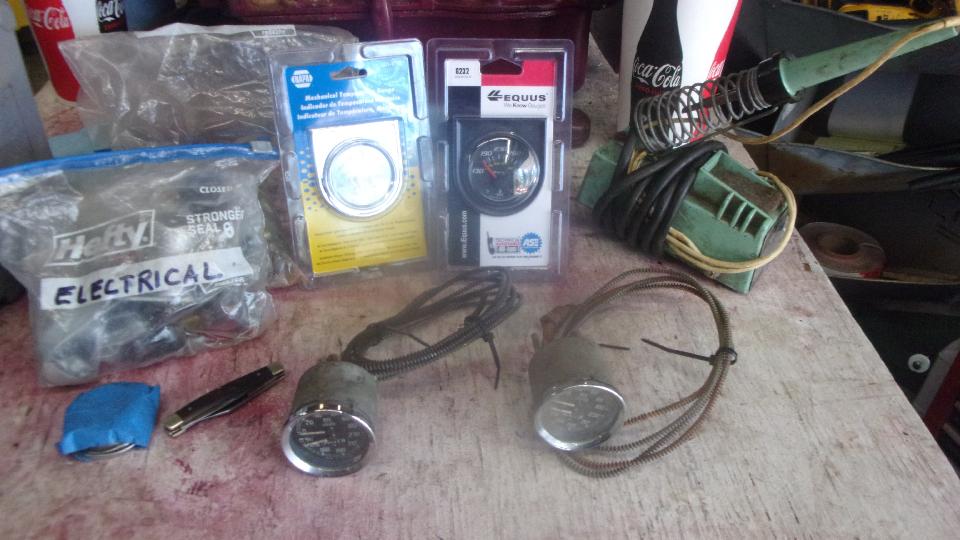
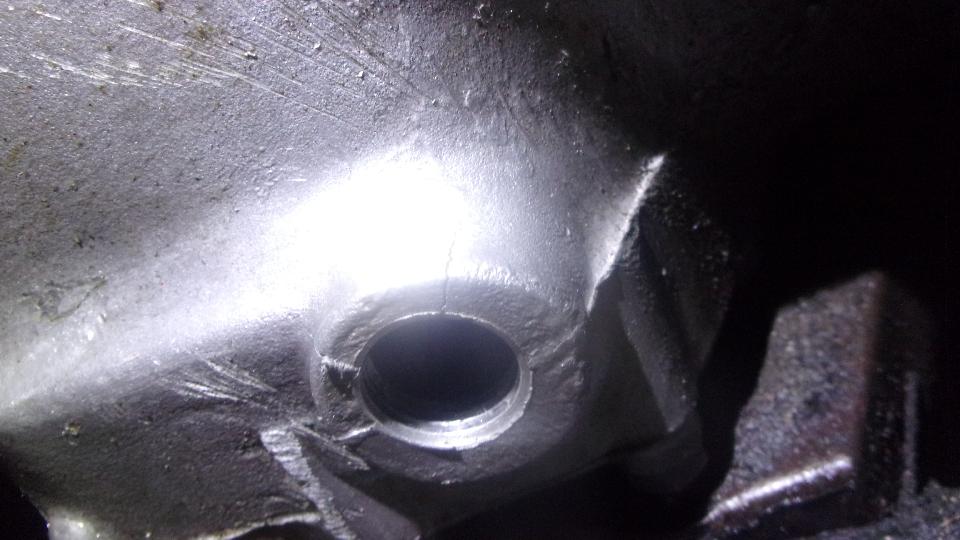
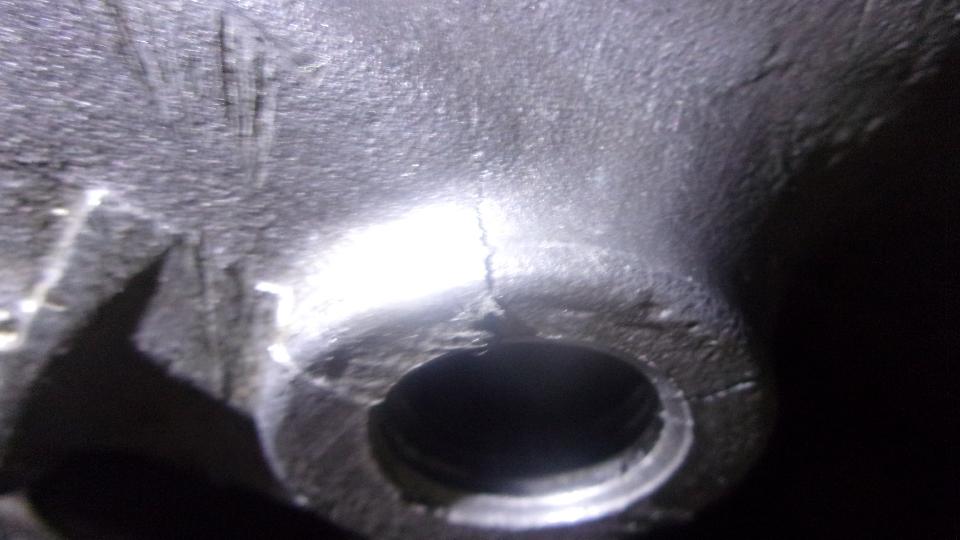
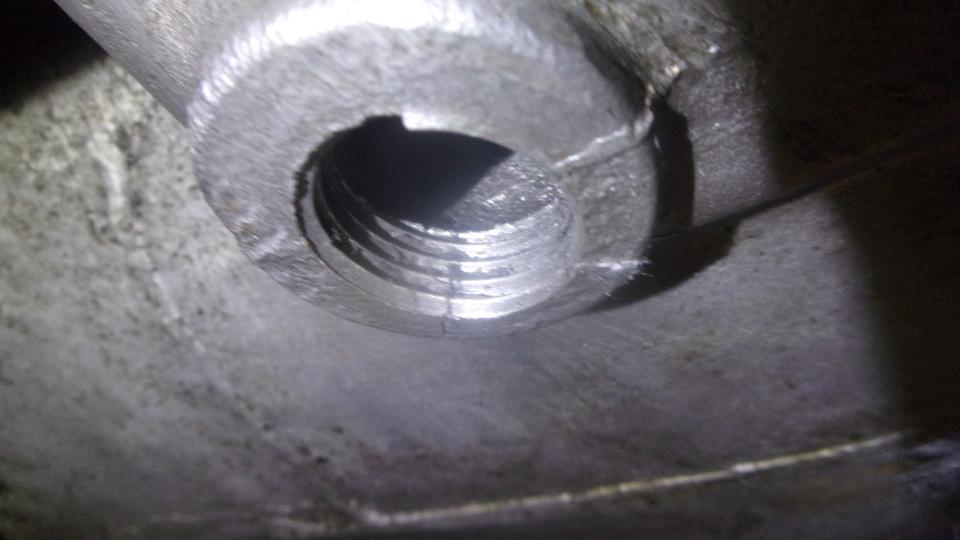
 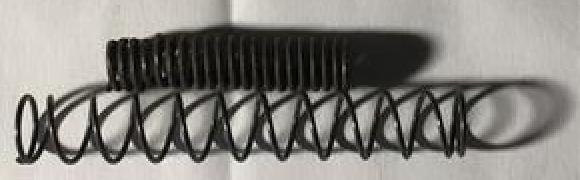 Posted two new part numbers pages for the AAA515 (or 80641) spring under the hand brake thumb button. Monday, August 29, 2022: Gone shopping for a couple of cheap analog temperature gauges to use a donor parts to repair the vintage gauges, oil filters and oil and other supplies. Dang hot in the central valley in California in summer, lots of parked cars with car shades in the windows, 95dF and full sun is a cooker. Back to A/C more catch up and planning. Going back to the shop for more work on the car tomorrow. Tuesday, August 30, 2022: Start the morning with a BIG American Car, about 1941 vintage restomod hot rod. Got the picture, but didn't find the owner. ten we were back into Stu's car shop on Murphys, CA to attend to a niggly little problem that has been bothering us since the first engine transplant when we also changes oil in the gearbox and differential. The car has been leaking one ounce of oil per day from the gearbox drain plug. Taking a close look now, there are two cracks in the housing that look like I must have over-tightened the drain plug, no idea when. Now I need to take a shot at fixing it, and I really do not want to R&R the engine and gearbox to do a gearbox housing transplant. So drain the oil and let it drip for a while, and more on this later. 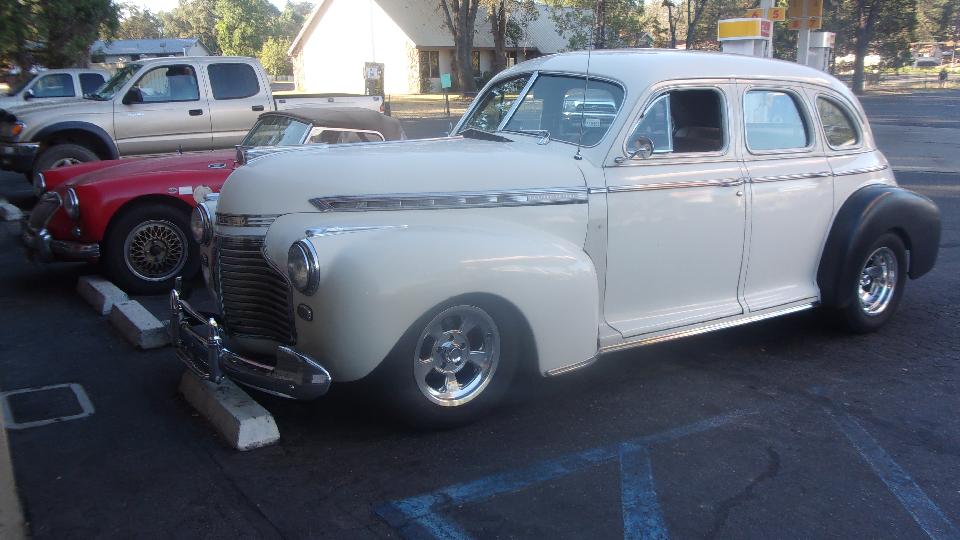
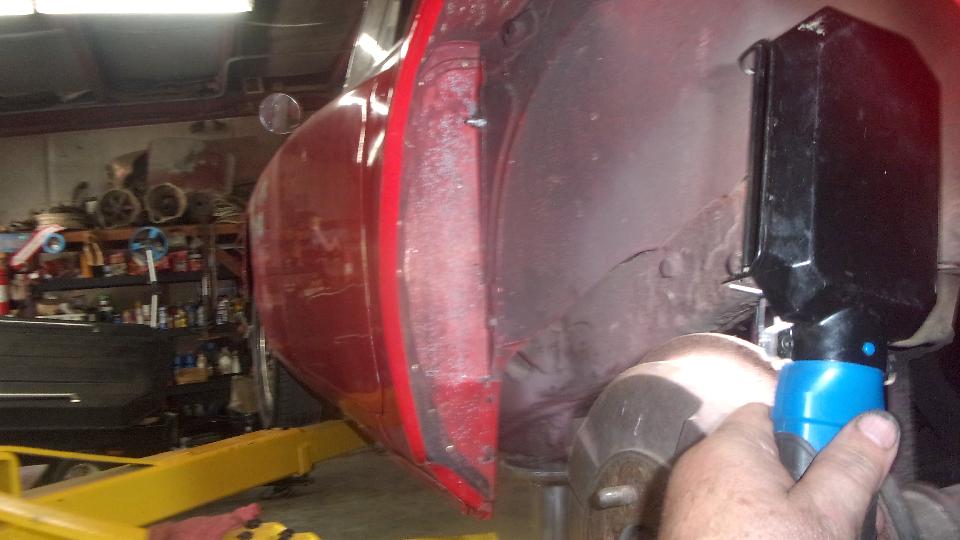
 While oil was draining, we finally got around to re-installing the LF wing splash panel that was removed for the dogleg dent repair that was done Aug 8-9. Then had to R&R the rag top frame bracket (again) to reinstall the LR interior kick panel. 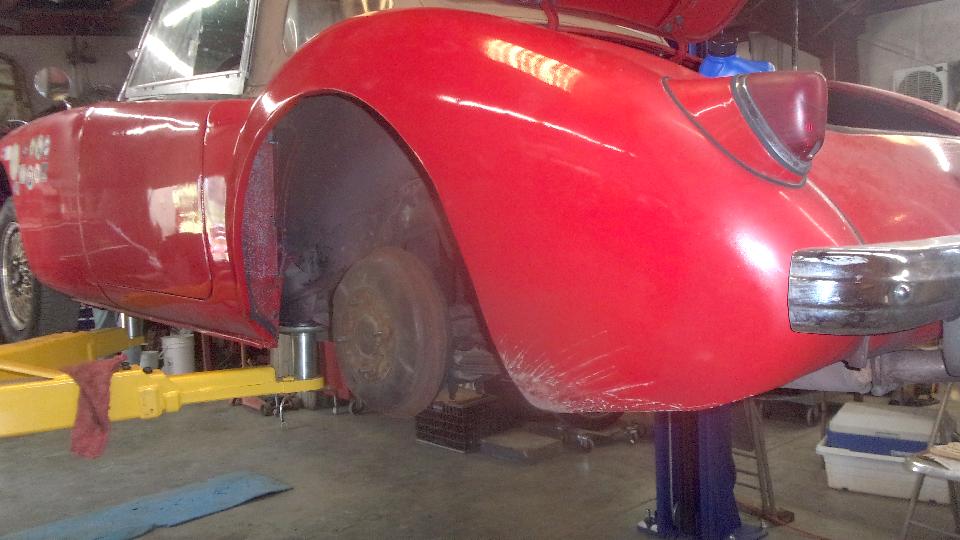
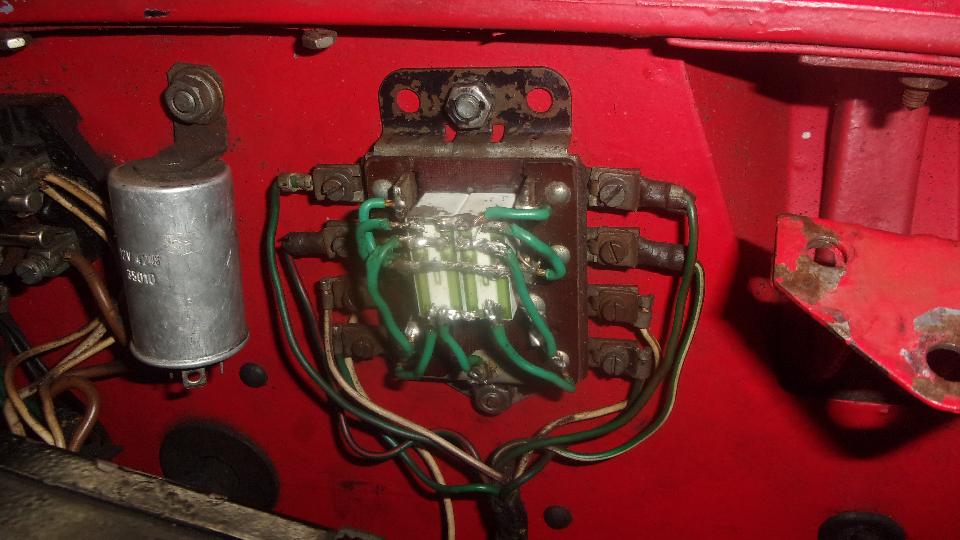
 Then we got another shot at the turn signal relay. After replacing the relays and re-soldering all the wires, it was working well for five days, then went wacky yesterday. It was bewitched, doing various strange tricks, like flashing the brake lights when everything we switched off, and allowing one turn signal either left or right to work or not work, and brake lights would not work when the rear lights were flashing. We unplugged the flasher unit as a quick fix so we could drive it to the shop today (just no turn signals). 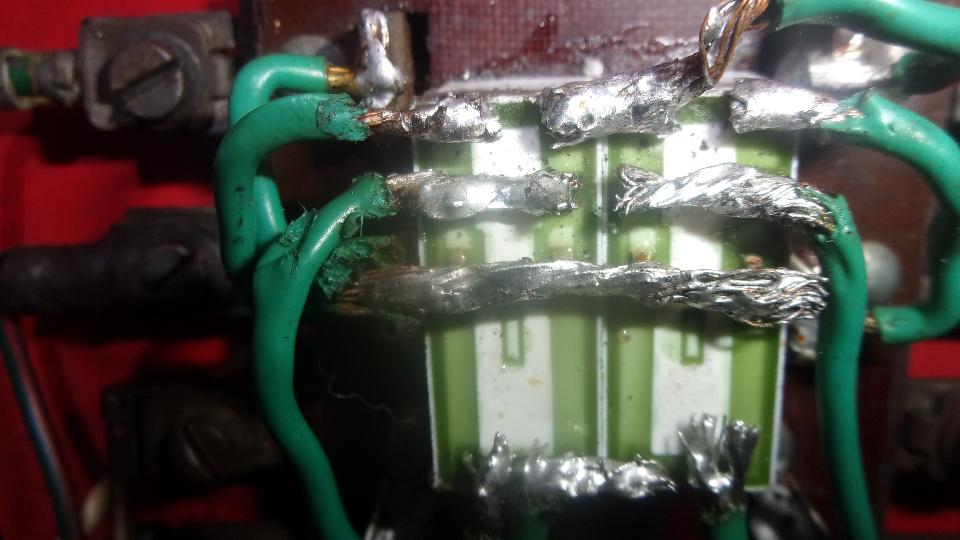
 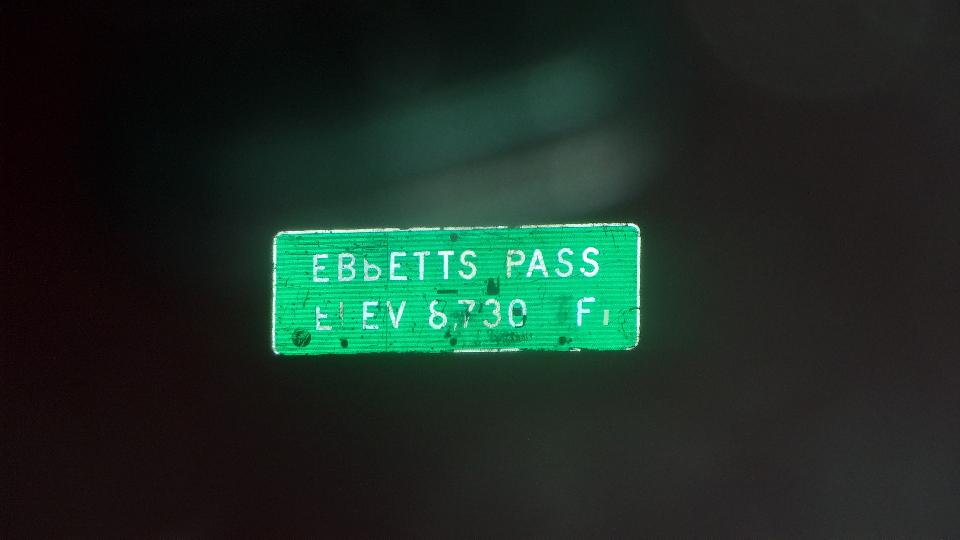 We crested the summit at 11-pm, 8738 feet altitude on the sign (although the GPS called it a little higher). Then on the steep downgrades through more tight twisties similarly 2nd gear for a while for engine braking to avoid over-using the brakes. It gradually eased off into 3rd gear downgrades, and didn't level off much more until nearly at our destination. A bit more than 80 miles through Ebbetts pas in the dark, jolly good fun (if it doesn't scare the bejesus out of you). Crossed the state line and pulled up for the night in Minden, Nevada just shy of 1-am. Hey, we are officially out of California. May plan on returning next summer for all the stuff we didn't get to do in the past two months.
 Wednesday, August 31, 2022:  Good morning. We saw this same blue Ford in Minden, NV when we were going the other way on June 25th. Nice way to start the day. Need to catch up on a bunch of photos and notes today, as well as some more parts inventory detailing. |