The MGA With An Attitude
MGA Guru Is GOING MOBILE - (January 16 - January 31, 2021)
Saturday, January 16, 2021:
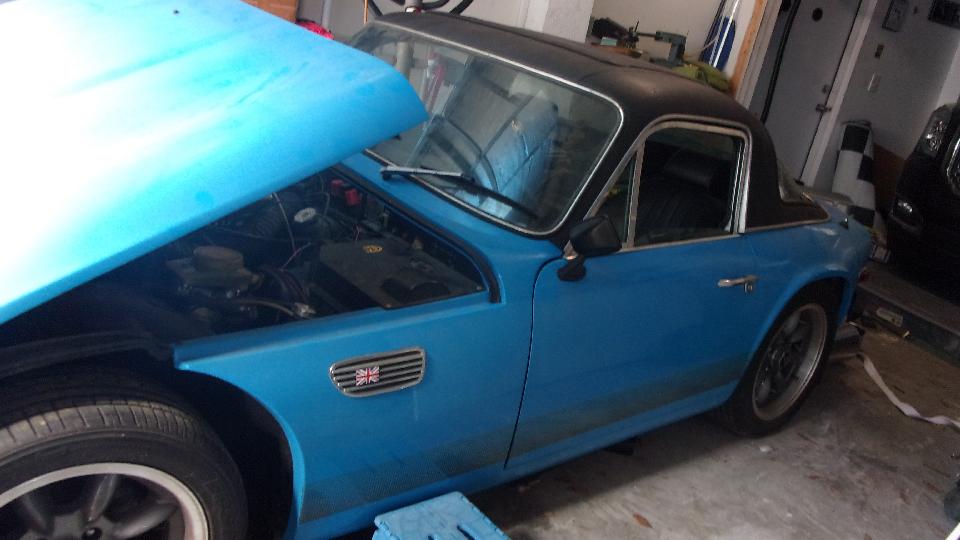
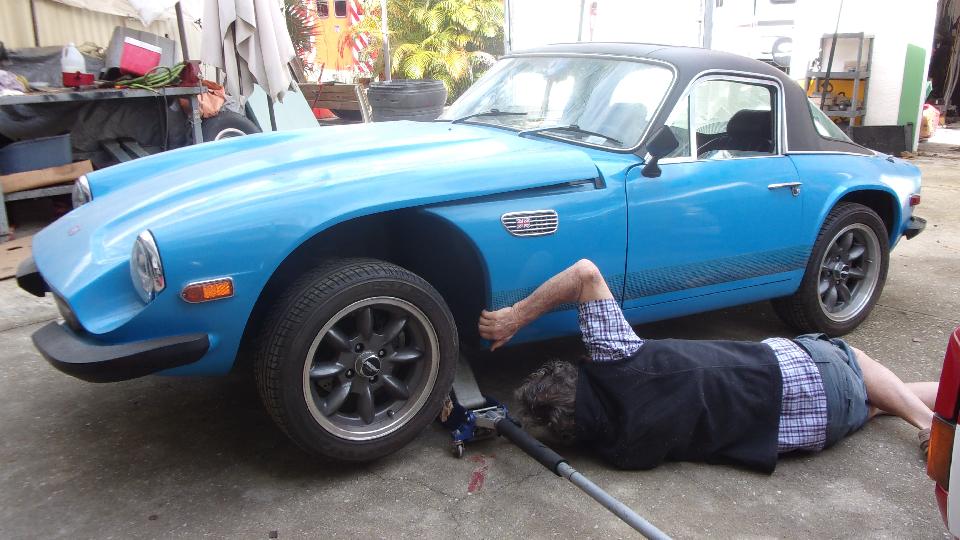
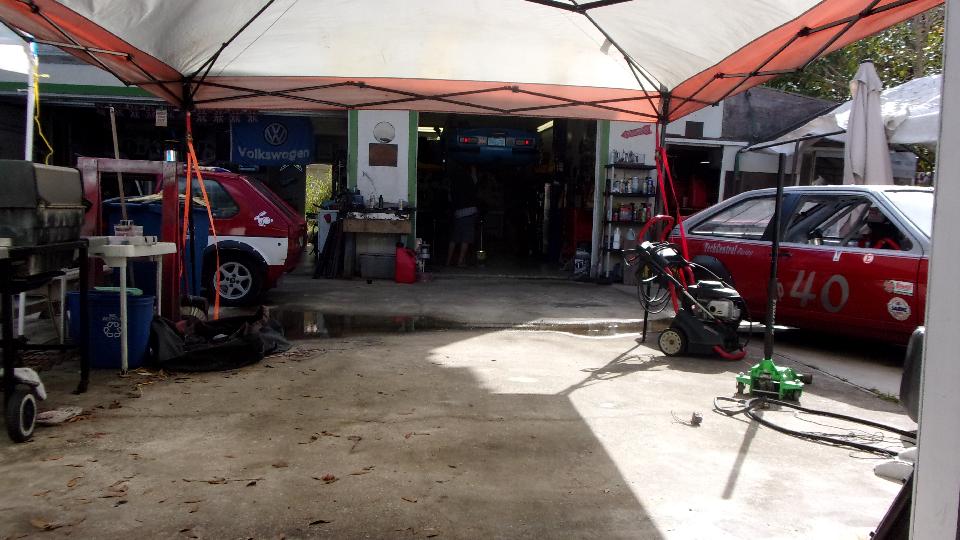
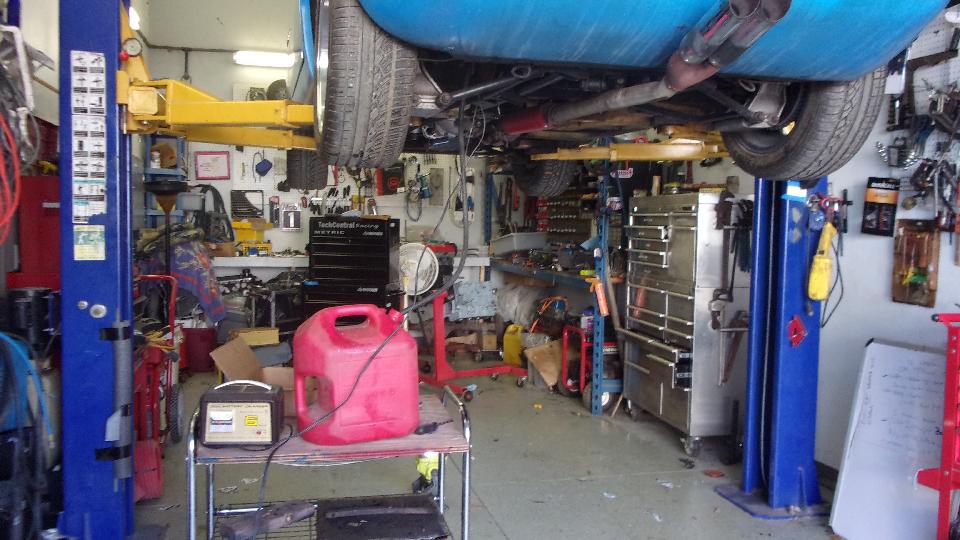
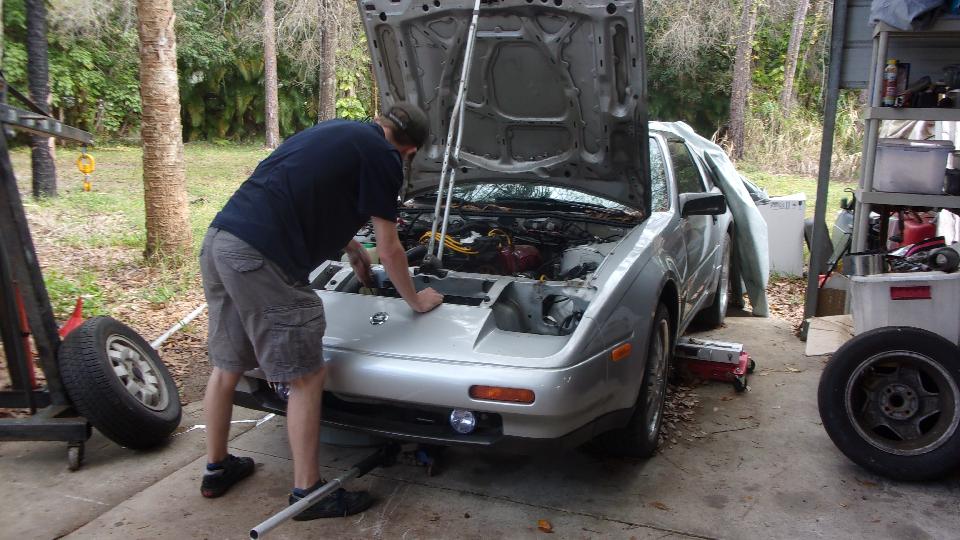
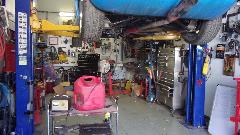
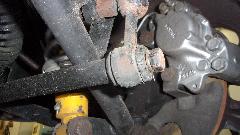
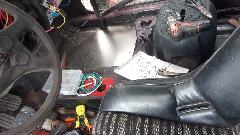
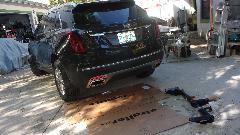
Back to Tech Central today specifically to lend a hand with Kyle Vanbuskirk's 300ZX, or one of them, whatever he decides to attack first. He wasn't there yet when we arrived, so we got side tracked with Jerry's TVR 2500M. Needing to get the TVR running, but it has been sitting three years since last driven and parked. Car close to the ground, the bonnet doesn't open much, but enough to connect a drain hose to the fuel pipe do hopefully drain out the stale fuel. Switch on and get a tiny trickle of fuel, no good. Roll the car out for better access, jack up, crawl under, now where did he put the aftermarket electric fuel pump?


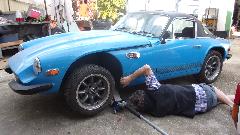
We found the fuel pump high up in front of the rear suspension, but need more space to work. So kick the race car our of the shop to use the hoist. Beginning to think too many toys here.
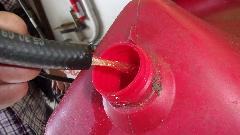
Disconnecting output hose at the pump, we hooked up a battery charger to run the pump, connected a hose from pump to fuel can, and eventually pumped out 8-1/2 gallons of stale fuel. Man the stuff stinks. Oddly enough, we had a pretty good flow of fuel this way, so maybe the fuel pump is okay and we should look for a problematic fuel filter.
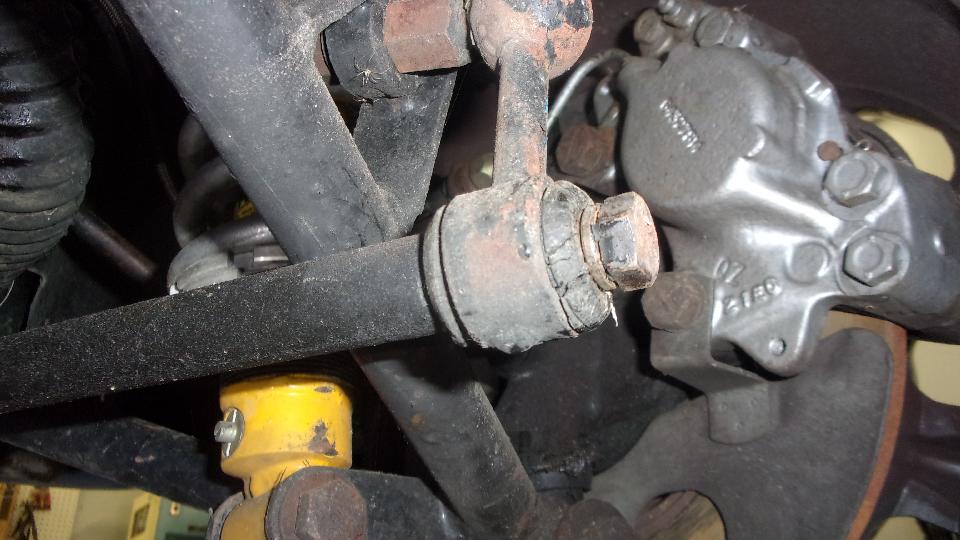
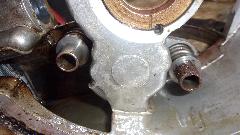
Finding a filter high in the tunnel near the gearbox, we pulled that out to install a new filter. The old filter didn't seem to be clogged, so then were puzzled about the slow flow at the output end of the pipe. Maybe the pump has reasonable flow with gravity assist but won't push fuel up hill? Will check this again later, after we get some fresh fuel into the tank. While waiting for the fuel to drain, we fixed a little problem with the sway bar. The vertical links were slipping nearly off the ends of the bar. After tapping them back into place we found hex bolts in the ends of the bar. Okay, not long then to R&R the bolts to add a flat washer on each side, fixing some DPM bodge.
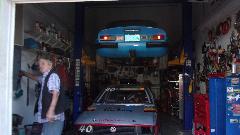
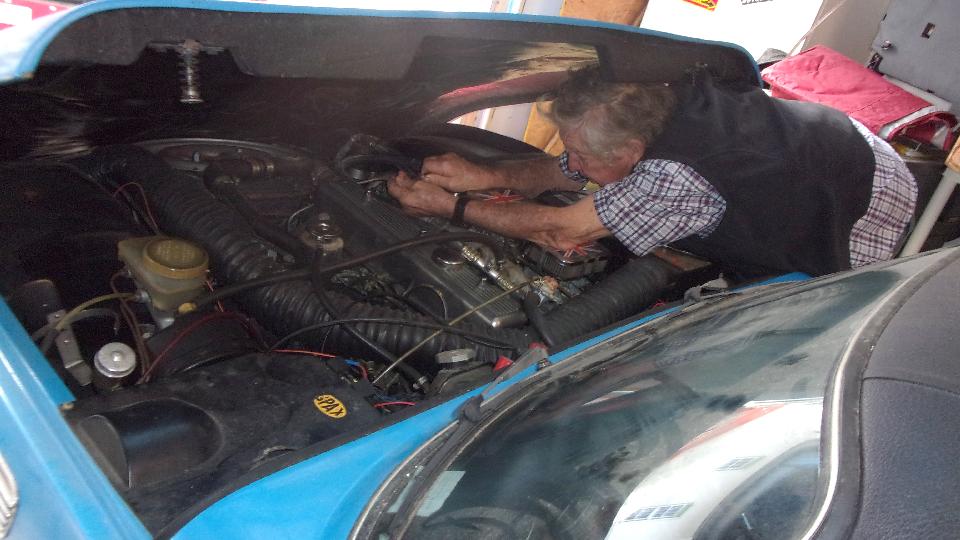
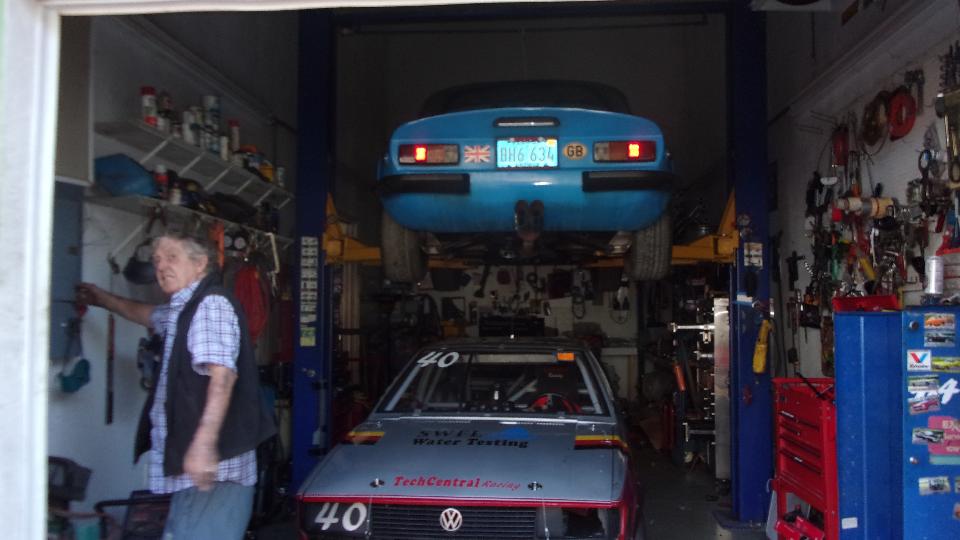
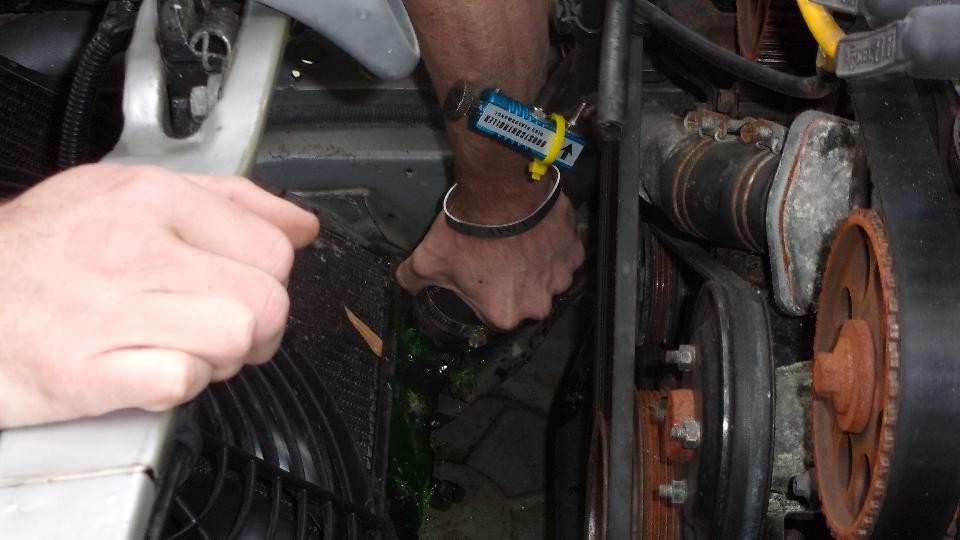
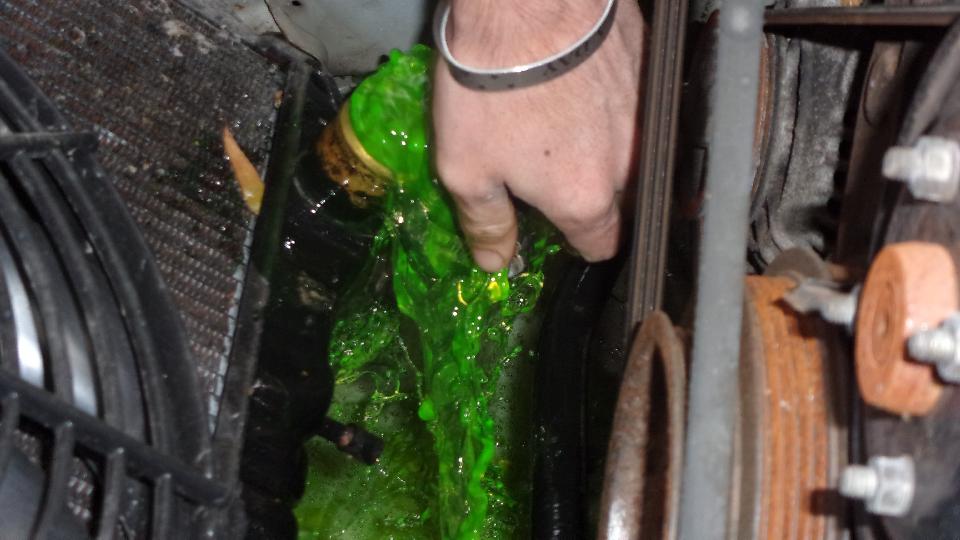
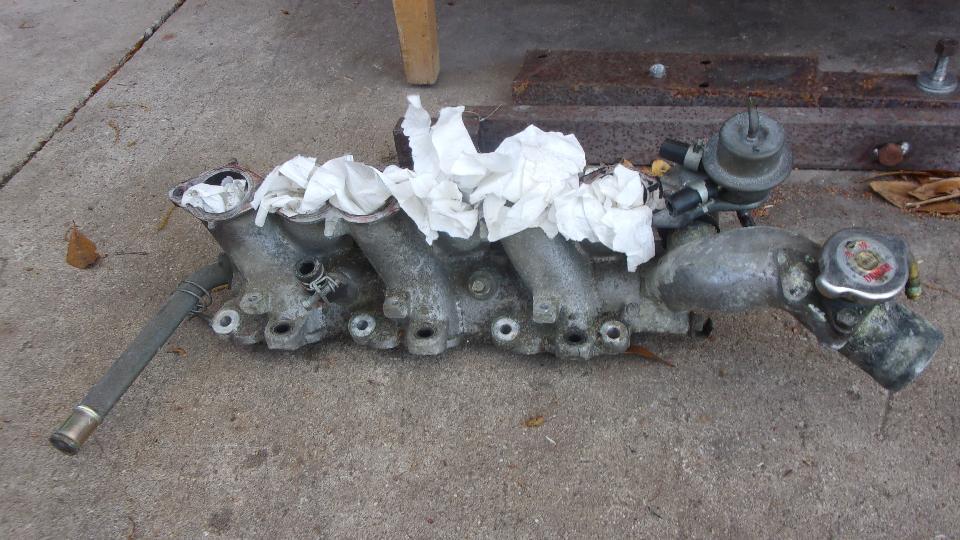
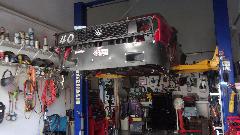
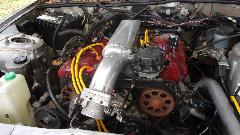
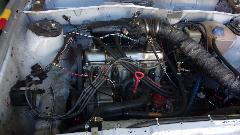
Enough for one day, leave the TVR on the hoist, push the VW race car in underneath, and close down for the day. Meanwhile, Kyle showed up (late start) and got to work on the silver 300ZX. Time to do the expedient thing to get it running, so forget about changing the cylinder heads, but do drain the coolant. That was jolly good fun, pull off the bottom radiator hose and watch the geyser.


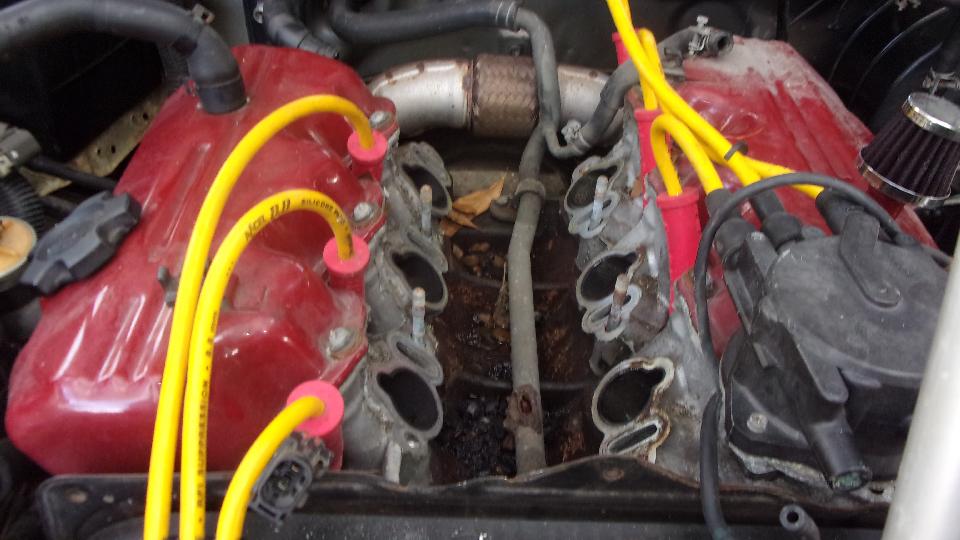
Remove some bolts and cut one rotten hose to lift off the air plenum. Going to change to a later style, and be ready to install new fuel injectors. That's as far as we got today. Need to order intake gaskets and hoses, and new fuel injectors. Then we hooked up with Kyle and his dad and headed for dinner, good chat to kill a few more hours, and then post these photos and notes for your entertainment.


Sunday, January 17, 2021:
New tech page today for routing the sensor line for temperature gauge in the MGA standard model and for the Twin Cam. That was rather involved and ate up half the day, with a lot of input from Mark Wellard in Australia.
Monday, January 18, 2021:
A tech question, when did the MGA change from 5 to 2 Dzus fasteners in the battery cover? Nobody knows, not even the Service Parts Lists, but apparently very early in production. Also, can we convert a later type battery cover to the early type? Probably, but likely easier just to install the later cover on the earlier car.
 Two Zoom meetings tonight, John Twist of UML 7-9:30-EST, always a good discussion show, and Chicagoland MG Club 7-pm CST, limited to 40 minutes, as usual not much accomplished. Started with John Twist for an hour, jumped to CMGC for 40 minutes, then back to John Twist. Twist always makes us feel good. Two Zoom meetings tonight, John Twist of UML 7-9:30-EST, always a good discussion show, and Chicagoland MG Club 7-pm CST, limited to 40 minutes, as usual not much accomplished. Started with John Twist for an hour, jumped to CMGC for 40 minutes, then back to John Twist. Twist always makes us feel good.
Tuesday, January 19, 2021:
Had an interesting question today about an Austin Healey 100 BN1 having a "hesitation" around 2500 RPM. Not sure I can solve this one, but we're off to a good start on diagnostic work.
Placed a parts order for new seat belts, a few carburetor and ignition parts, and some parts to repenish inventory, including spare clutch slave cylinder.
Another Zoom meeting this evening with BMTA (British Motor Trade Association). I have been member of this group since 2018. I'm not in the trades, but I have a vested interest in what they do. It started with faulty replacement parts reported on my web site, but once I got into this group I got more involved with their issues servicing the vehicles. Tonight they were chatting about oil burning MG TD engines caused by obsolete piston design being revived for replacement parts, when more modern design pistons are much better. Also some concern for the most recent Borg and Beck clutch pressure plate assembly for MGA which now rubs inside the bellhousing of MGA 1600 type gearbox (see notes January 13, 2021). And there was a new problem with standard clutch discs not working properly with a Fidanza aluminum flywheel. All good discussion, which is exactly why this group has their heads together, discussing all sorts of issues with the shop operations.
Wednesday, January 20, 2021:
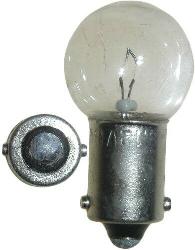
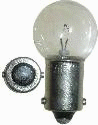 Day off, but got note about a typing error on a web page. In process of fixing that, a question came up about the front parking light bulb for the MGA 1600 cars (and license plate lamp bulb for all MGA), which motivated me to post a new tech page for that bulb. That led to updating my new MGA Part Numbers index page to list and link all of the individual parts description pages so far posted (which will eventually be a very long list). I think my next push will be to identify the manufacturers' generic type for all the light bulbs in the car, so we can buy them at the local auto parts store. That should keep me busy for a while.
Figured out how to remove the knob from a Lucas battery cut-off switch. Just remove a little snap ring from the back, and pull the shaft out the front. That's if you want to install the switch body behind the panel rather than in front. Added a tech page for Powerspark electronic ignition, similar to Pertronix but cheaper.
Thursday, January 21, 2021:
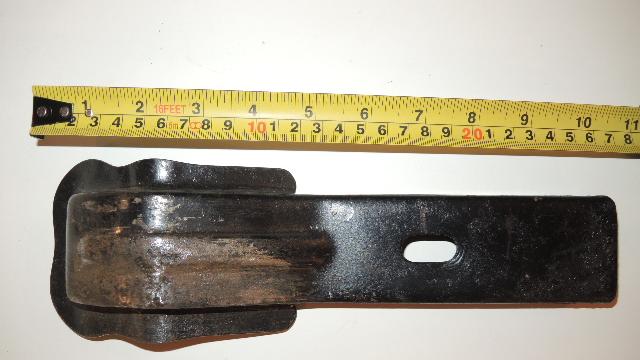
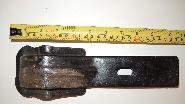 Notified a few minutes after midnight that parts order shipped almost the same day ordered). Someone inquiring where I found good brake shoes, correct size that actually fit and work. That would be Custom Spares Ltd, 997 Route 22, Brewster, New York 10509-1526, Ph: 845-279-7300. Someone mentioned that a Morris Minor spare tire clamp can easily be modified to work with MGA, so requested pictures to update a tech page.
Friday, January 22, 2021:
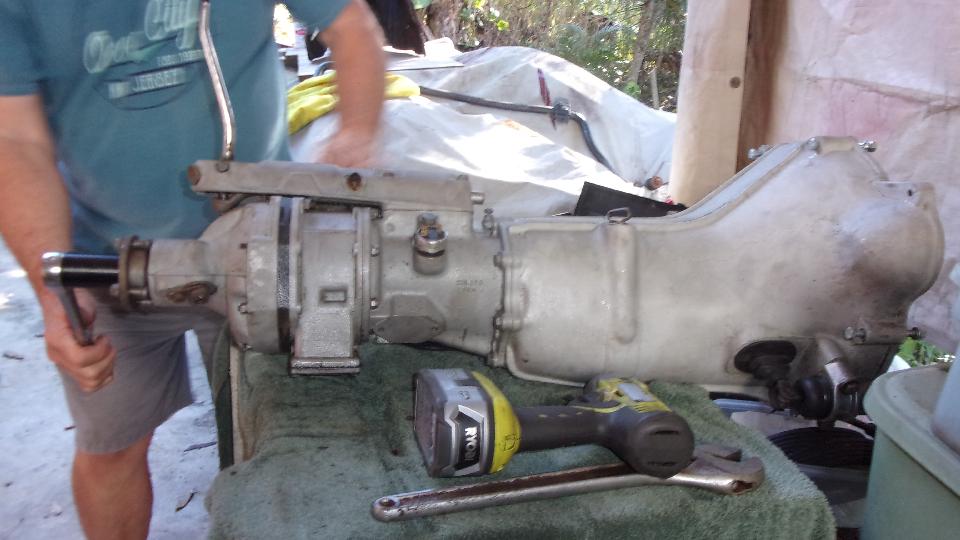
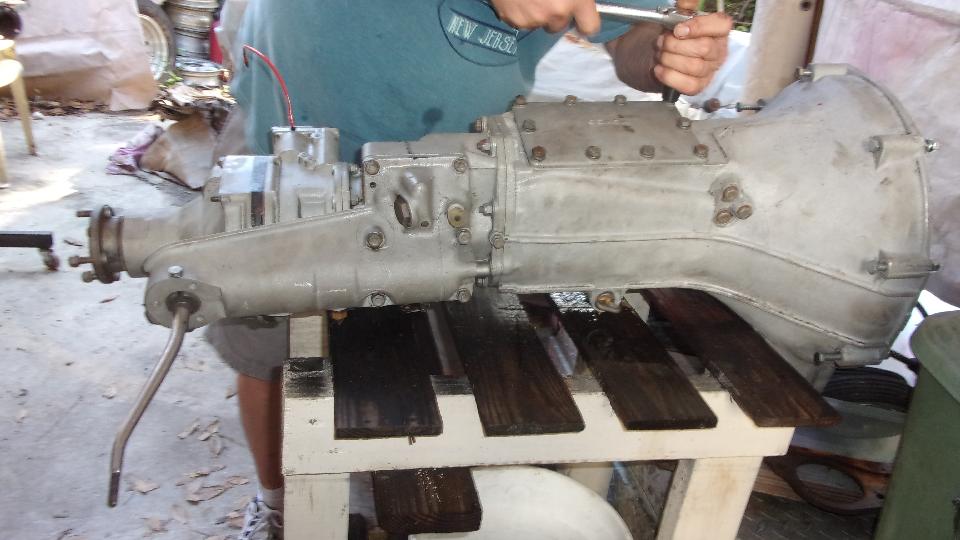
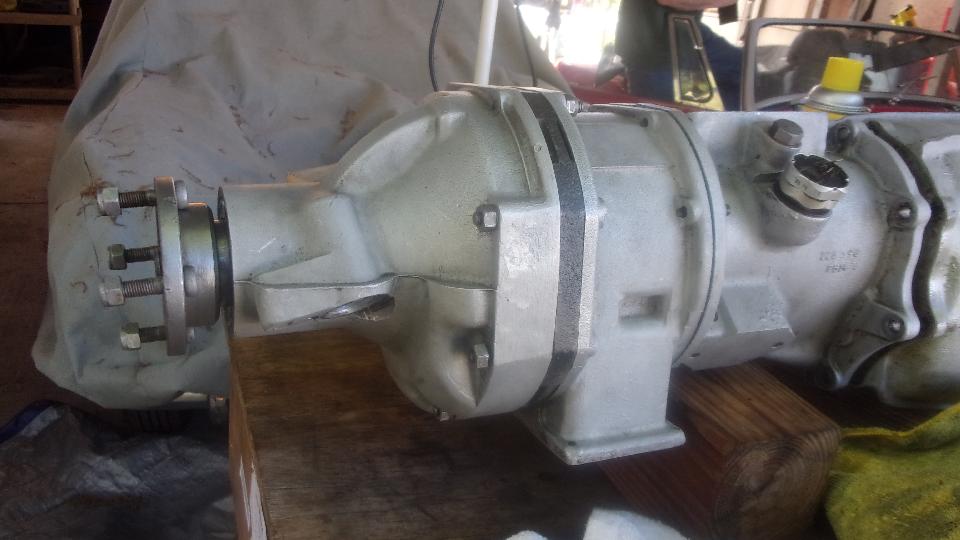
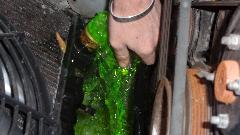
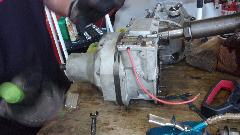
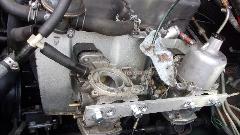
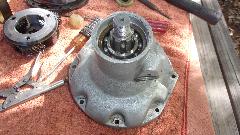
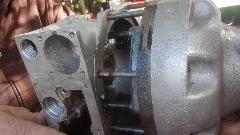
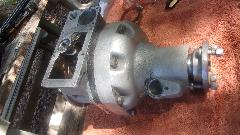
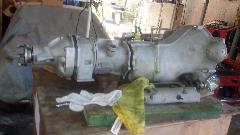
More fun at Tech Central today. The MGB 4-synchro overdrive gearbox had been soaking in kerosene for a week, but it still had sticking synchro rings, not shifting, and very stiff to turn through the overdrive unit, so it was time to drain the kerosene and begin disassembly to see what was wrong inside. So off came the side cover, the rear flange, and the overdrive unit. Working with the core 4-speed gearbox (sans overdrive), it was soon evident that most of the synchronizer rings were sticking on the cones of the mating gears. They could be pried loose with a screw driver, only to stick again with the next shift into the same gear.
But persistence pays off. After repeatedly spraying the cones with penetrating oil for cleaning, and then lots of oil for lubrication, and more shifting in and out of all the gears, we did get the synchro rings to behave themselves, so it looks like the 4-speed part will clean up and work okay without further disassembly.


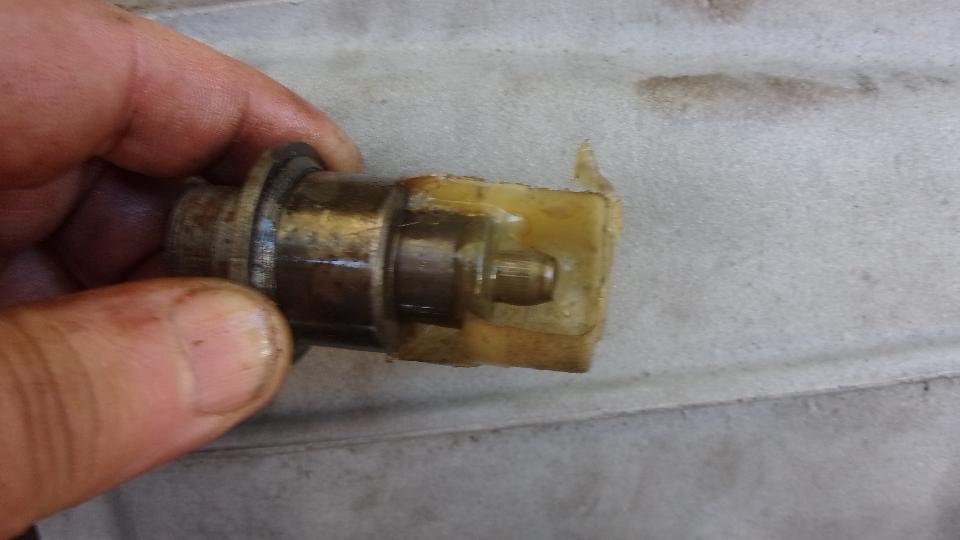
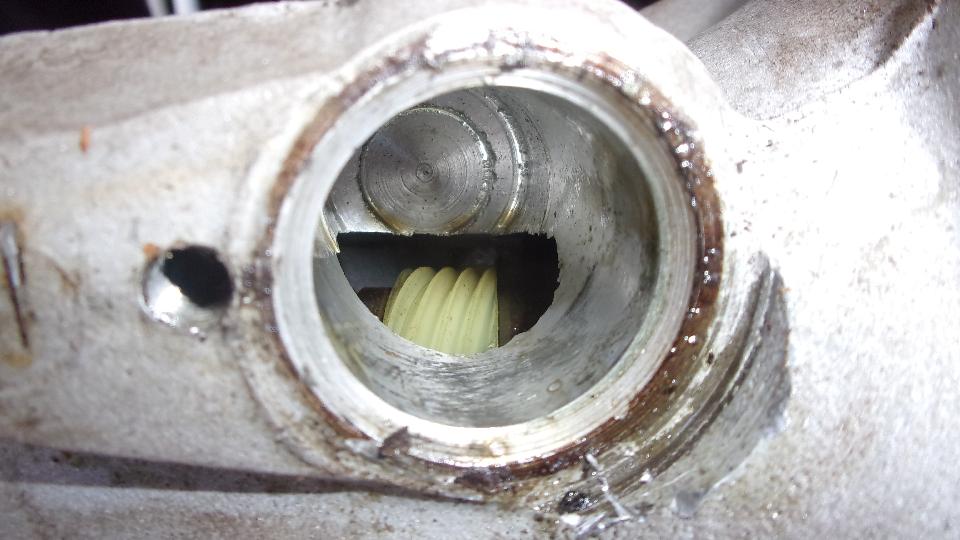
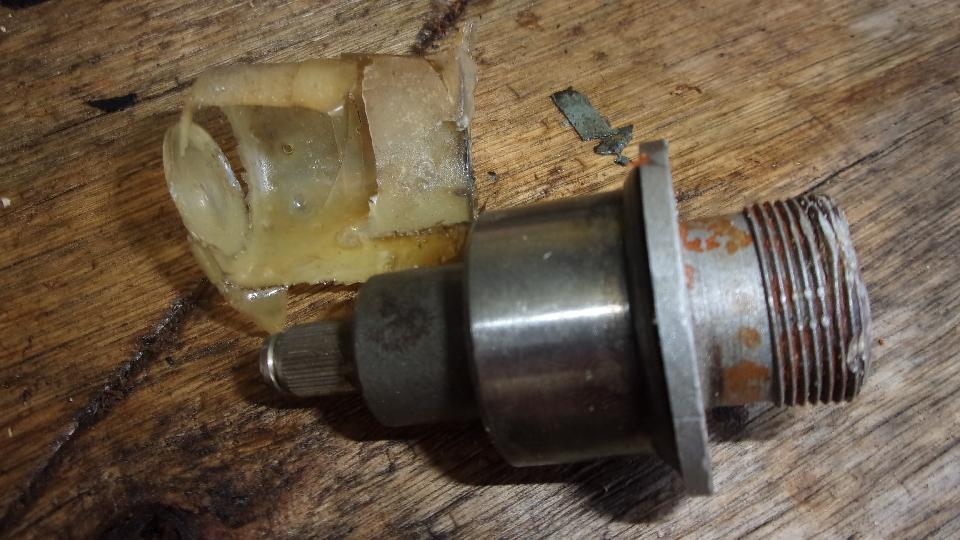
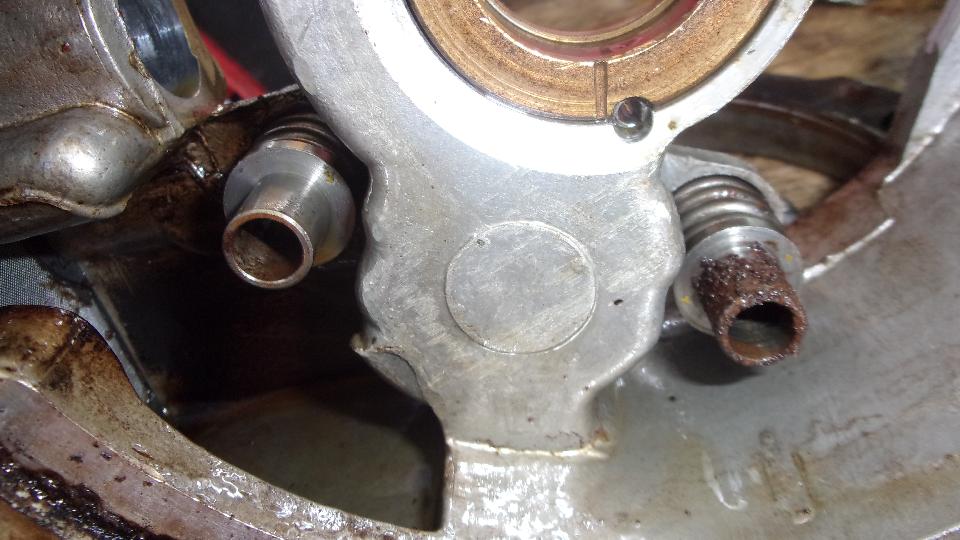
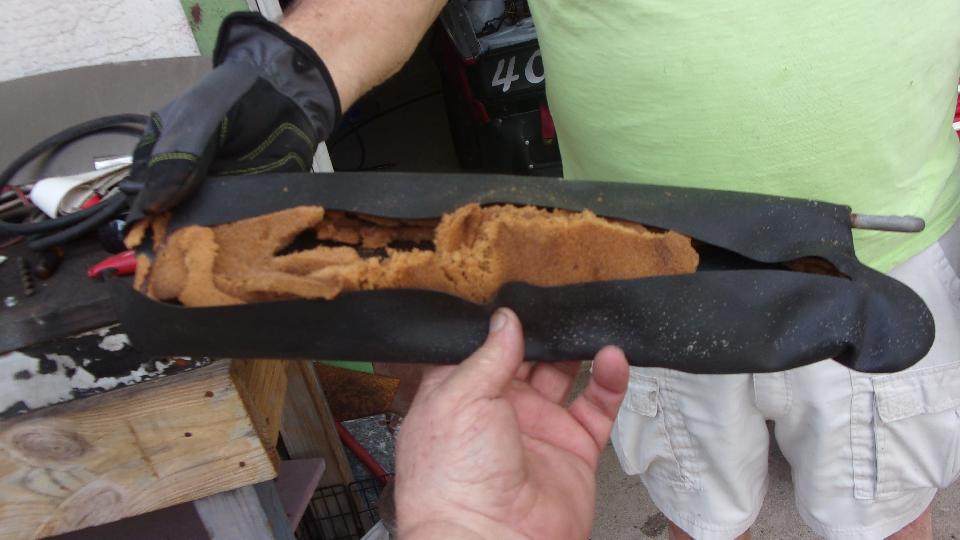
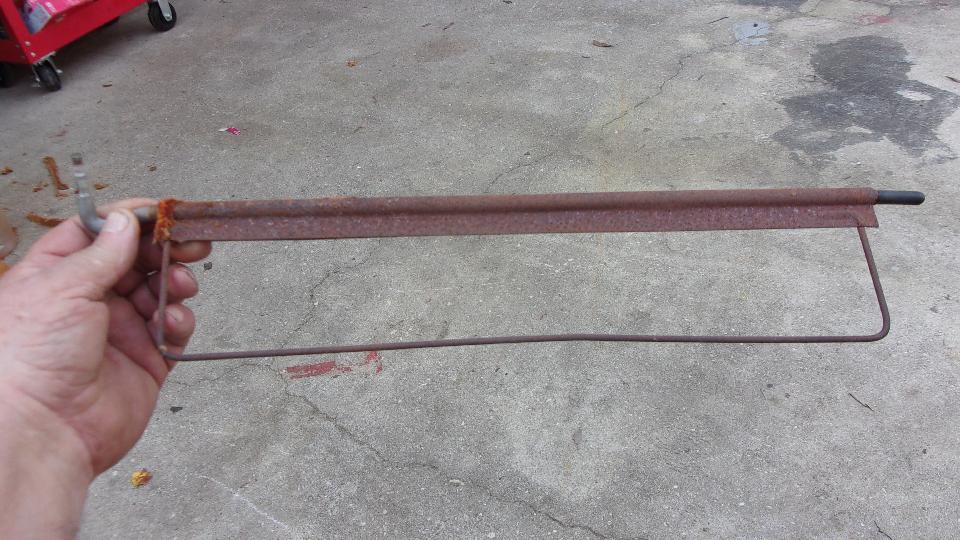
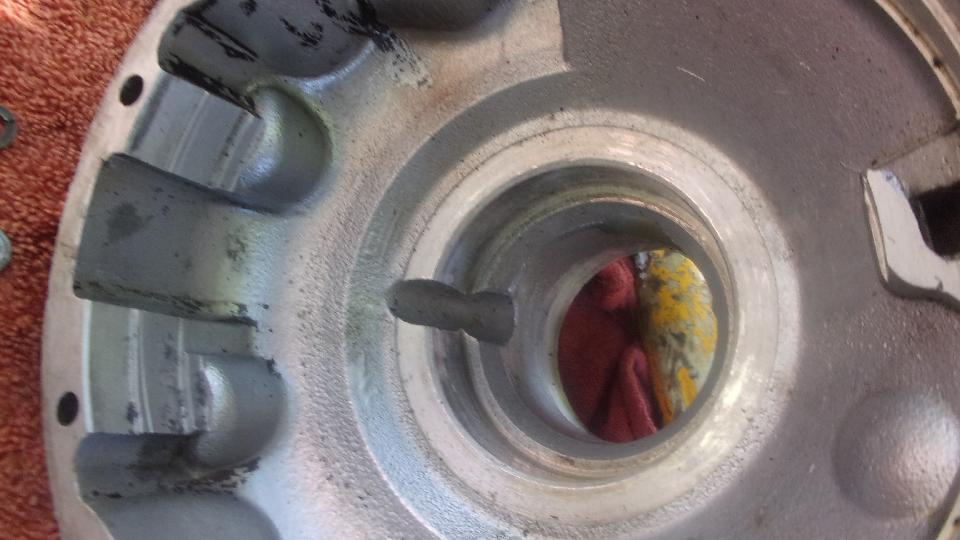
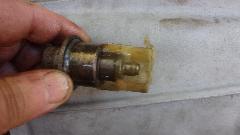
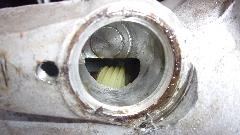
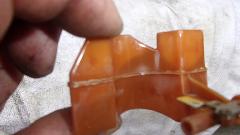
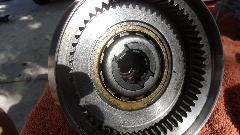
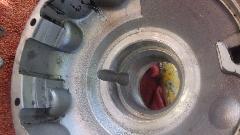
Before disassembling the overdrive unit, we pulled out the speedometer drive. What we found there was a bit of a shocker. That yellow plastic bit was the remains of a melted nylon driven gear. That was the clue telling us this gearbox had been run with no oil inside, because the speedo drive gears are normally flooded with oil, so this gear could not have melted if there was oil in the box. So what is the melting temperature of nylon?

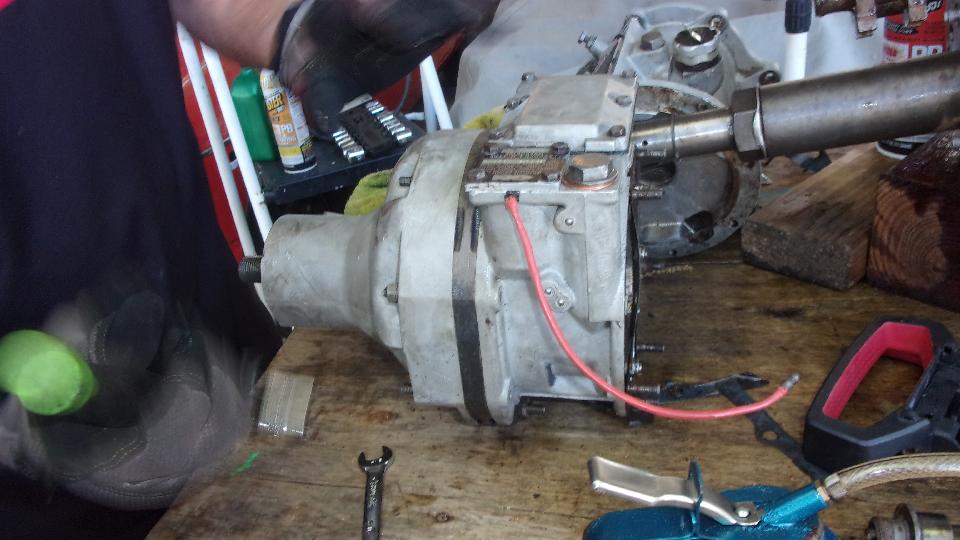
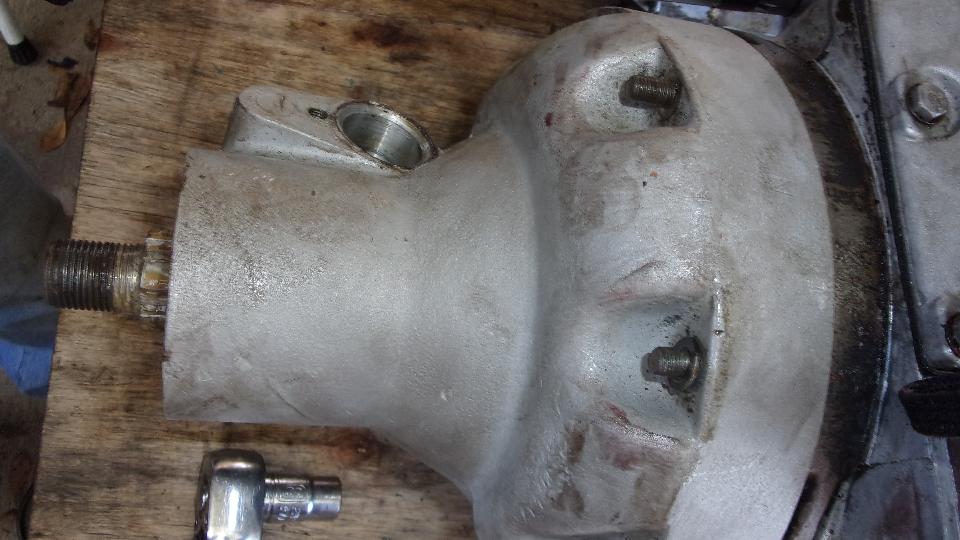
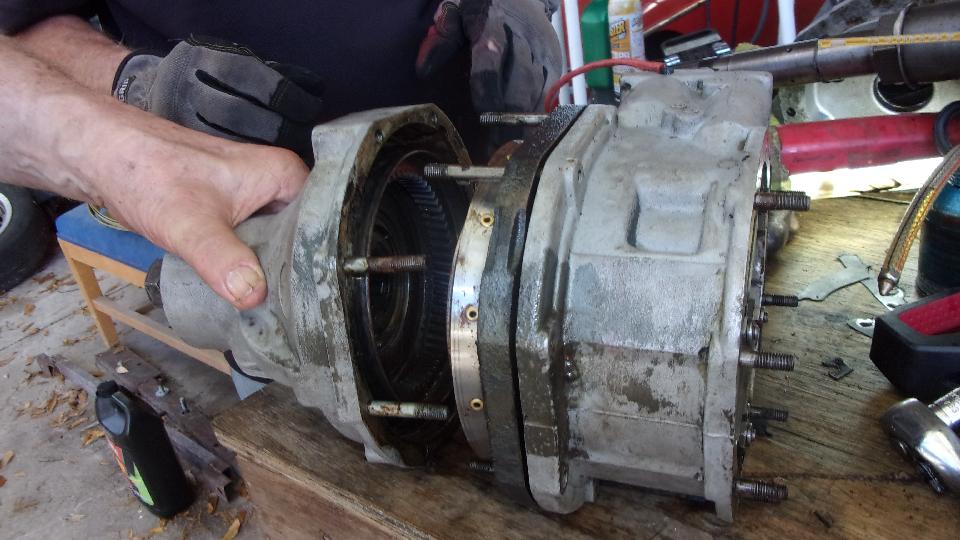
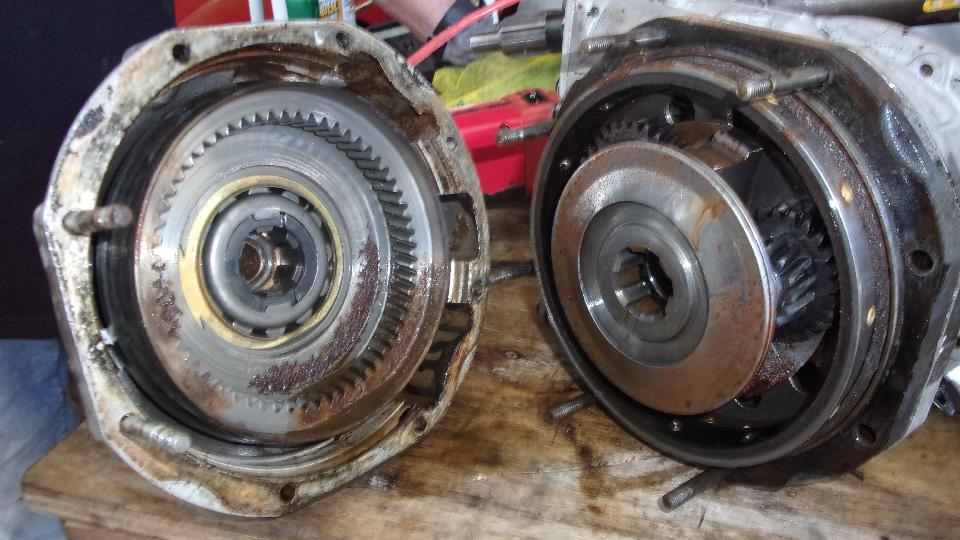
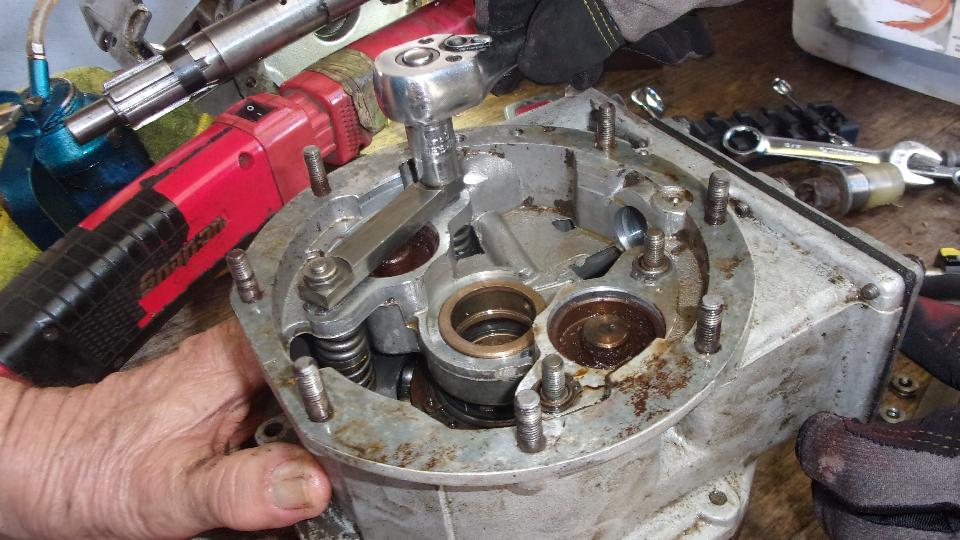
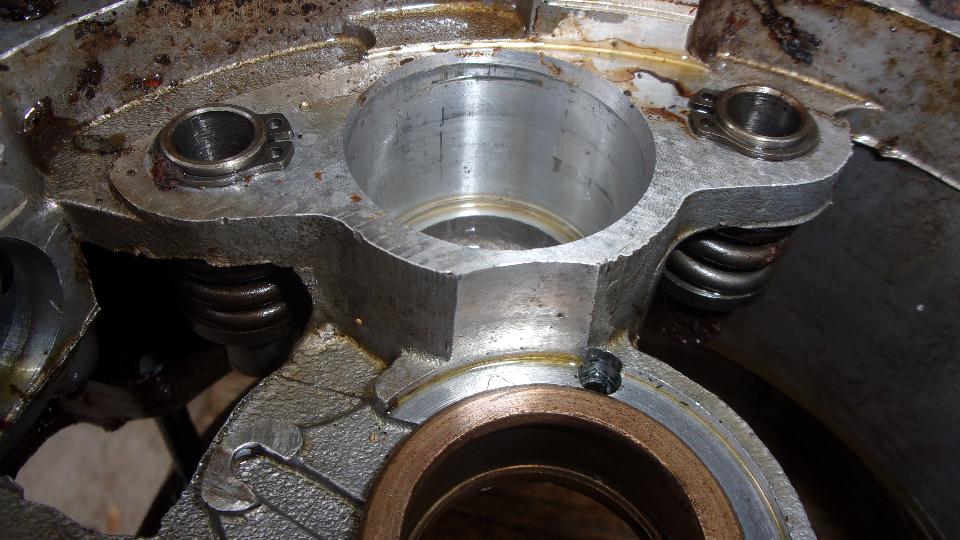
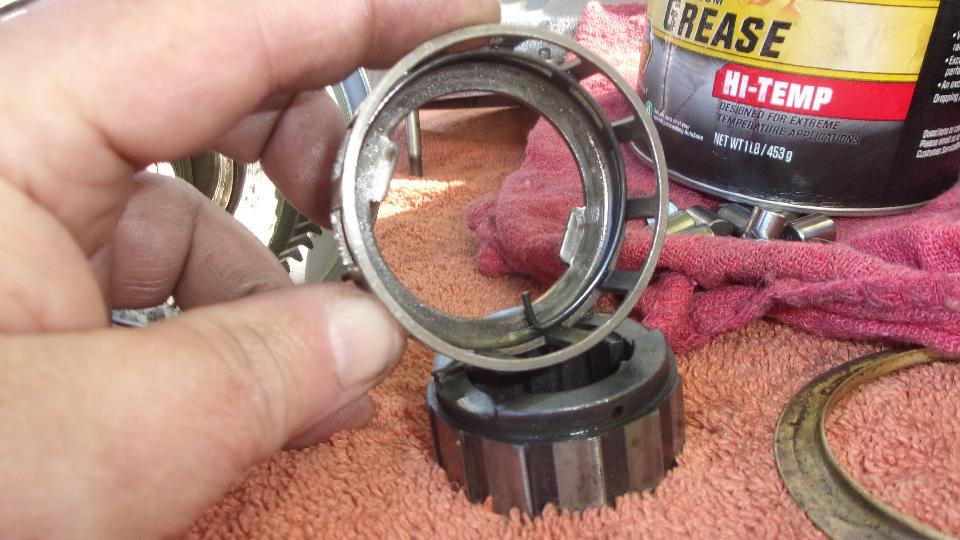
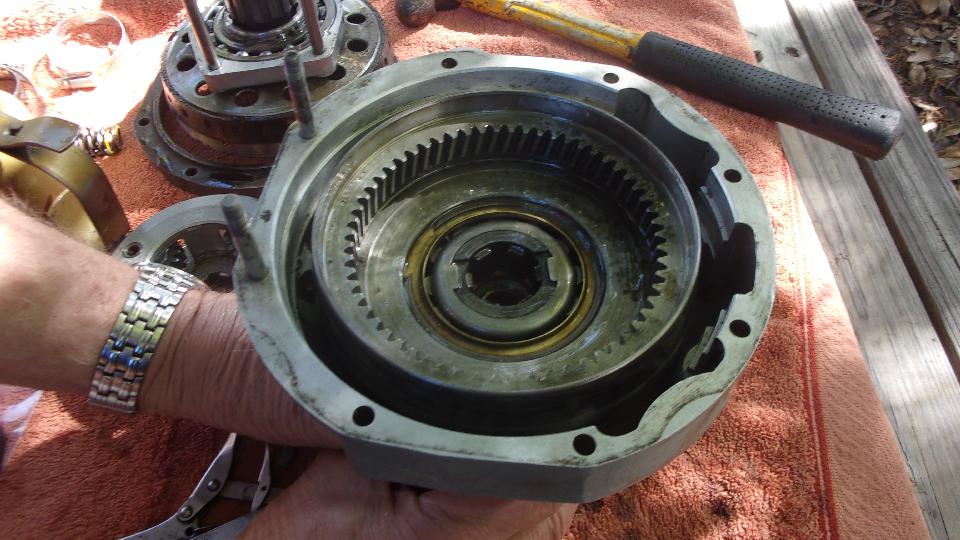
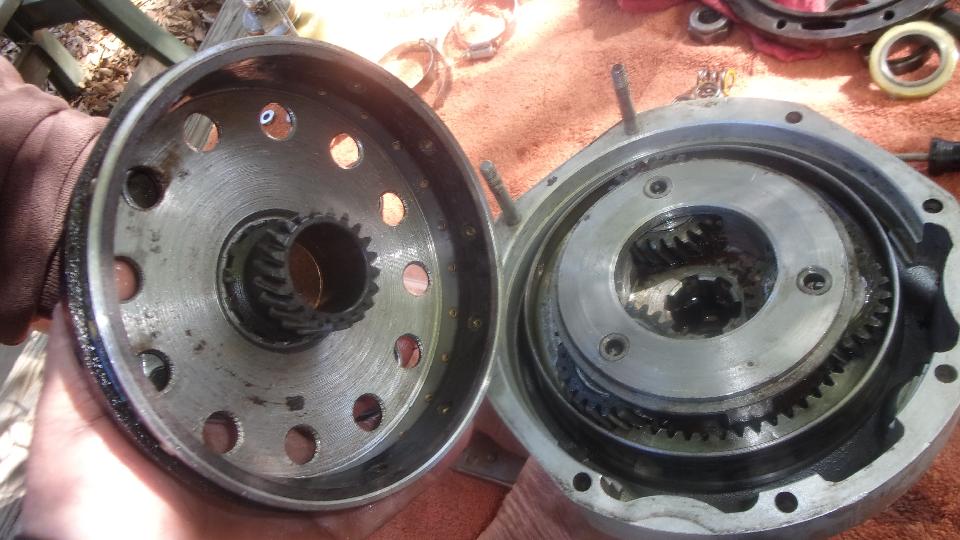
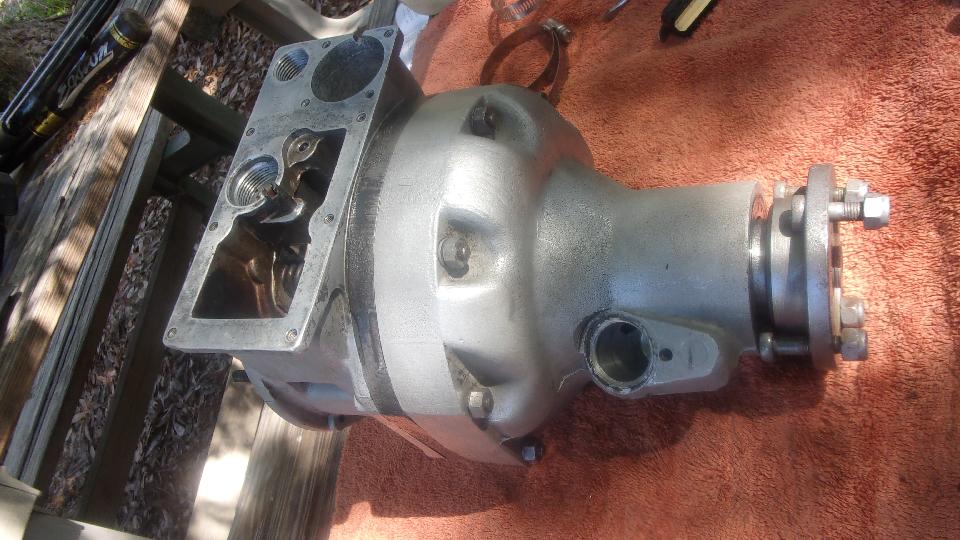
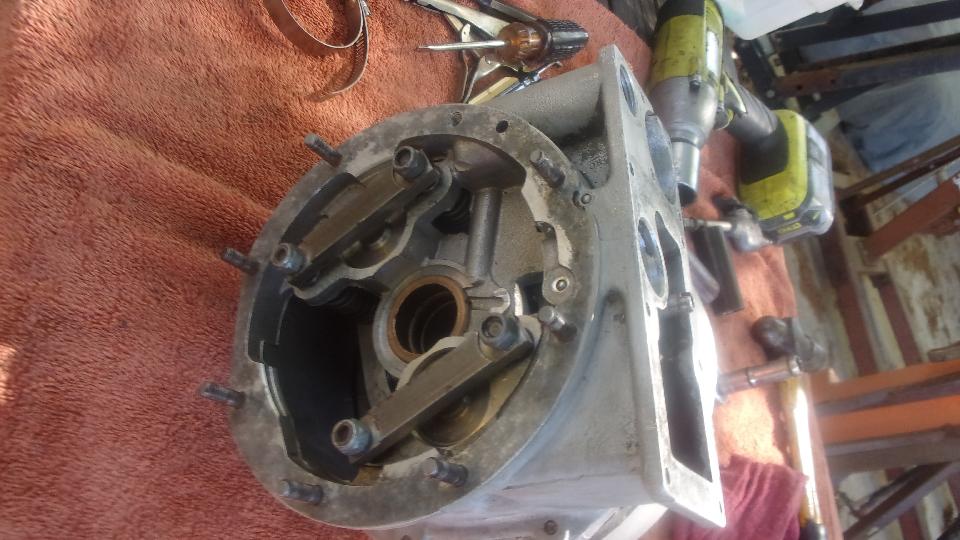
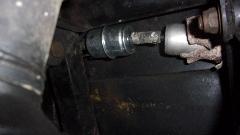
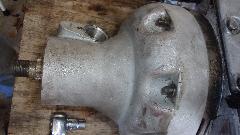
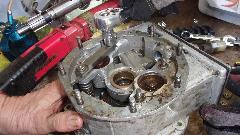
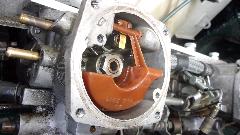
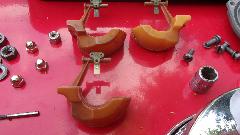
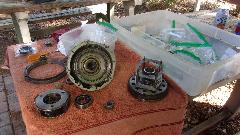
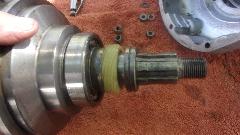
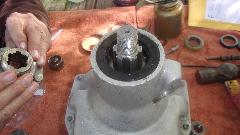
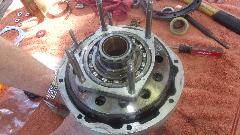
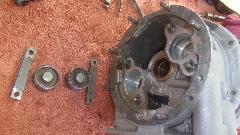
Then we got into the part that most people never see, opening up the overdrive unit to see why it was dragging in the gears or clutches. First off was the tail housing carrying the output shaft with the sun gear and male driven cone. To the right in same picture is the planetary gear assembly (which pulls out easily at this point), and the female clutch cone with friction lining. This cone clutch is normally engaged under spring force when at rest (with no oil pressure), giving direct drive (overdrive not engaged).
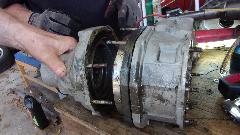
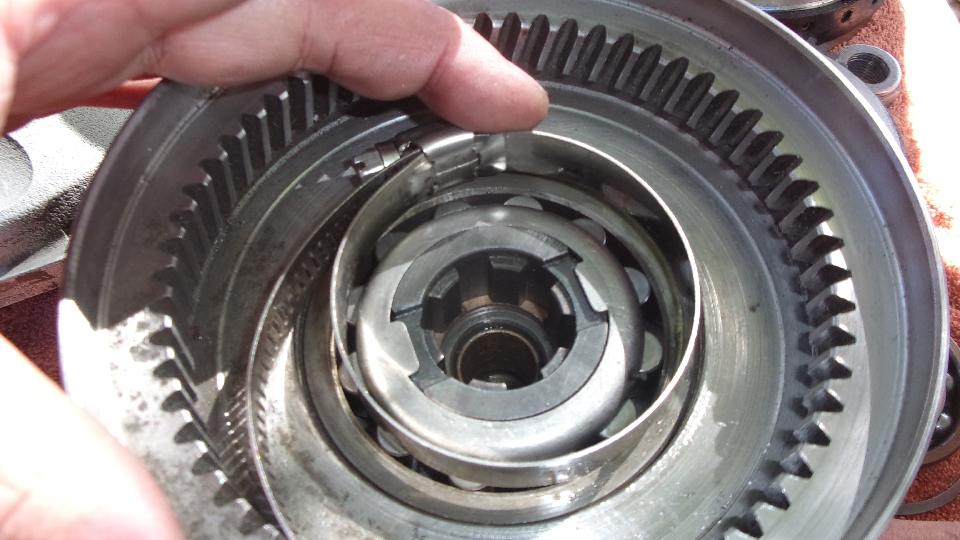
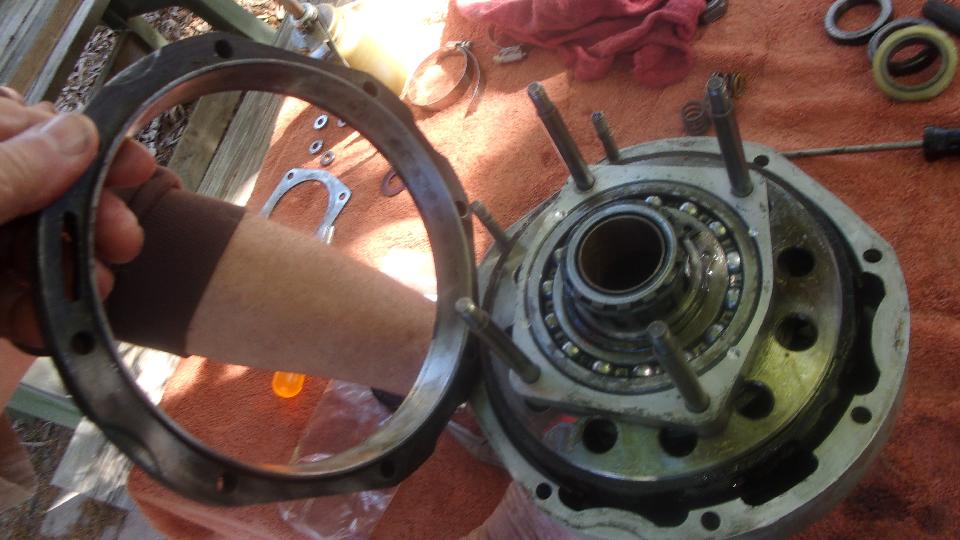
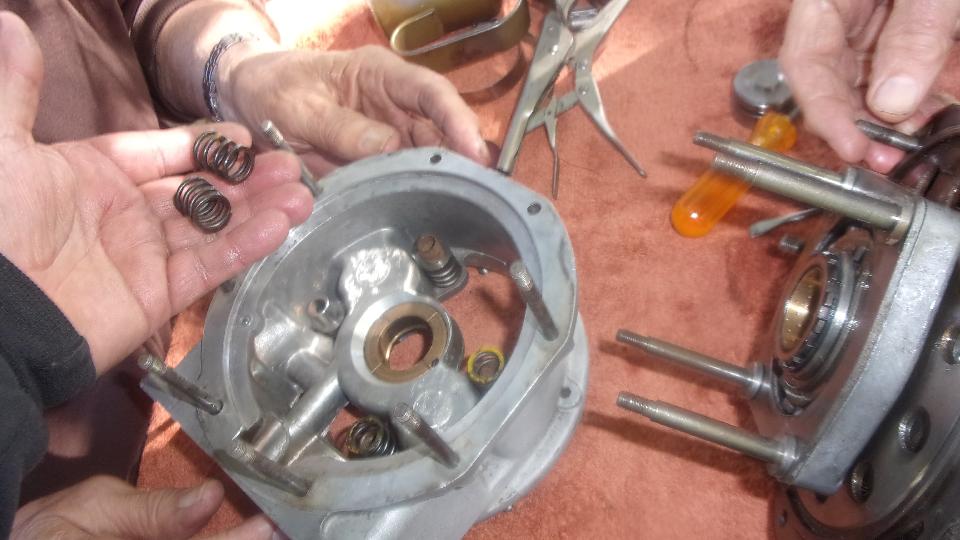
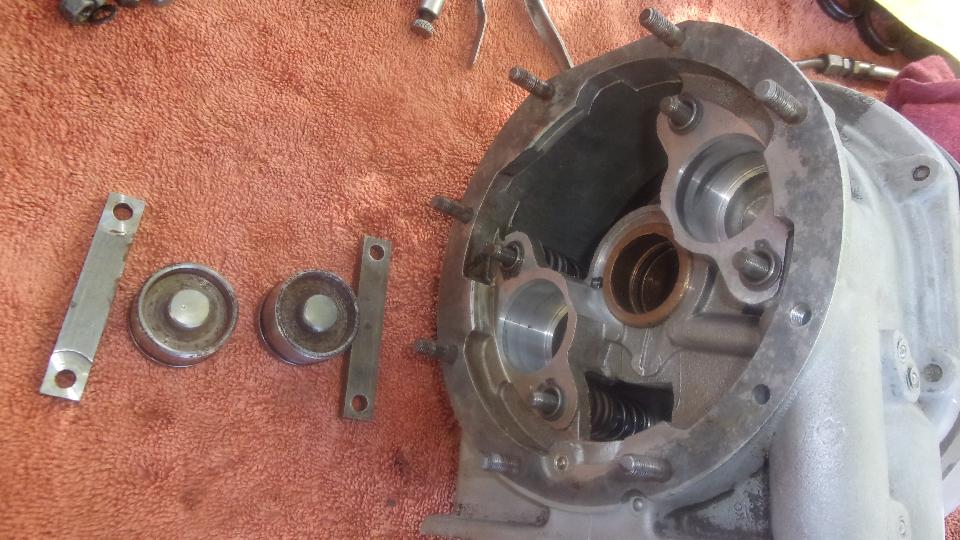
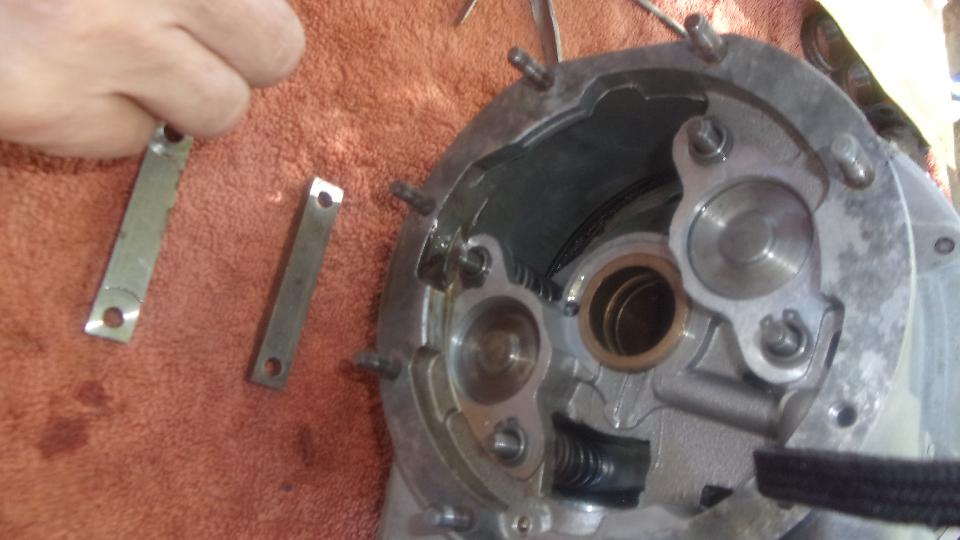
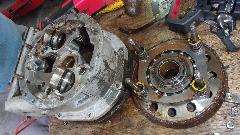
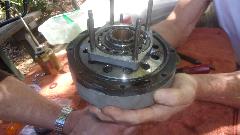
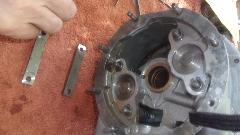
In front we remove lock nuts (pictures below) holding two cross bars with through studs holding the aforementioned compression springs that normally hold the rear cone clutch in direct drive position. Behind the cross bars are two pistons that will push forward on the bars when hydraulic pressure is applied to pull the clutch cone forward. Center photo below shows the pistons pulled out of their bores, and the moveable part of the clutch with its carrier bearing. Outside diameter of the clutch has the second clutch male cone friction lining that will engage the female cone in the fixed plate (the black piece).
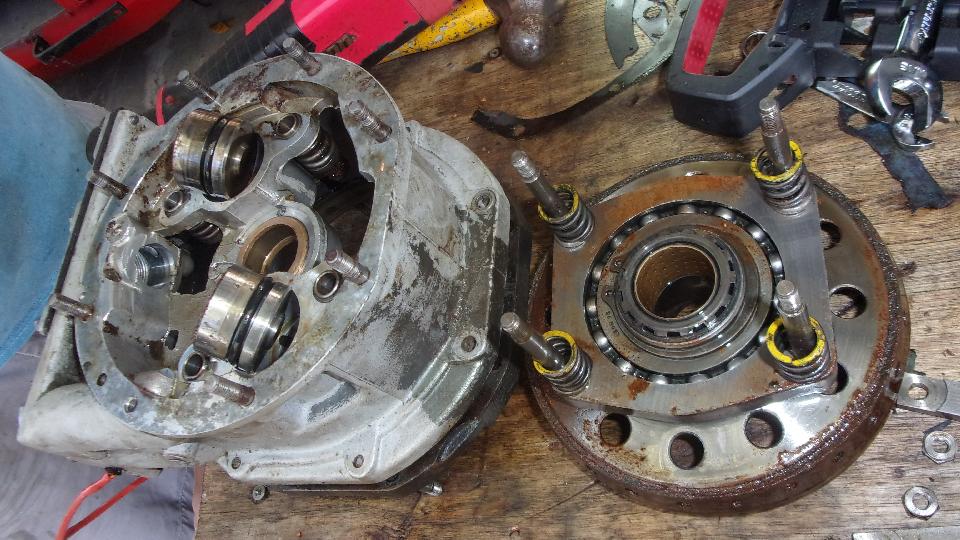
When the clutch is pulled forward it stops rotating, forcing drive to go through the planetary gear set to increase speed of the output shaft. Also inside of the moving clutch, along with the carrier bearing, is a one-way sprag clutch. Not visible here, that part looks much like a ball bearing, except it has slightly tilted hour-glass shape sprags in place of the balls, so it can only turn one direction. This is the feature that dictates that you SHALL NOT engage reverse gear when in overdrive (or shall not engage overdrive when in reverse gear).

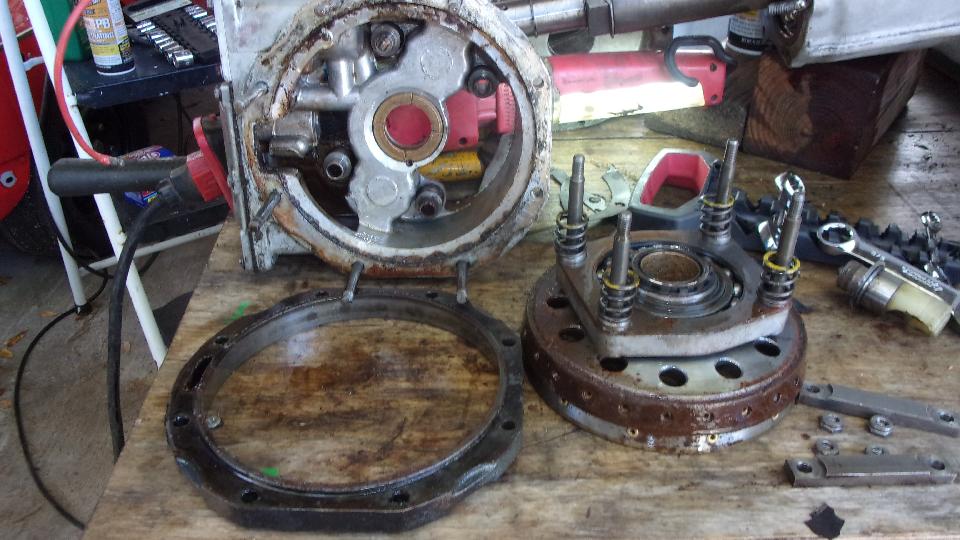
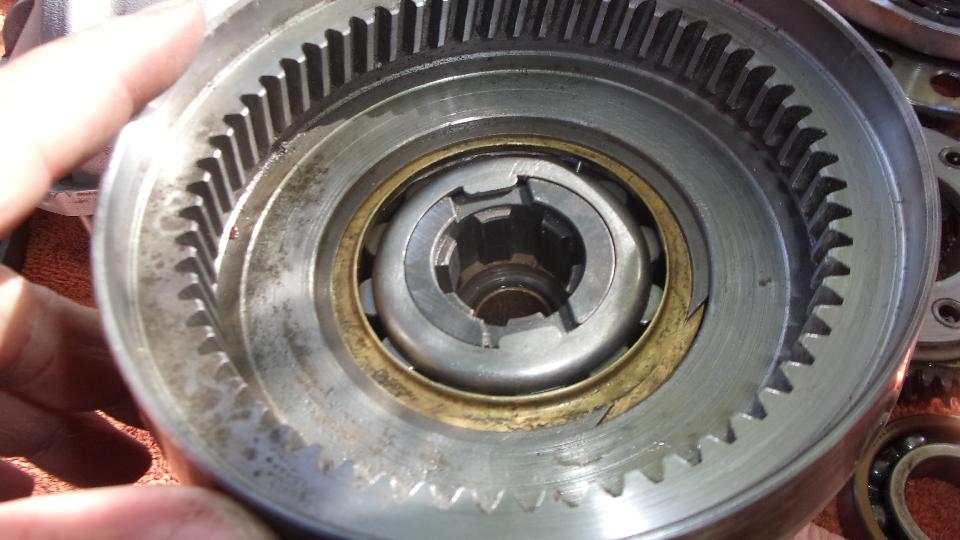
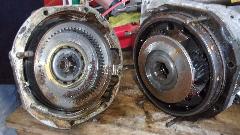
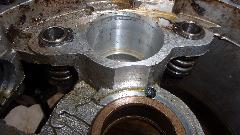
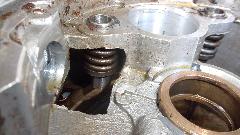
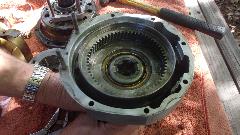
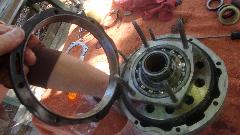
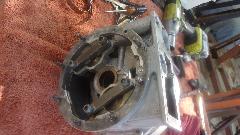
You should notice two sets of compression springs. One set holds the rear cone clutch in engagement with no oil pressure, while the other springs hold the front cone clutch in engagement with oil pressure applied. Also notice one of the guide sleeves is clean while another is rusty. This is because at some point the gearbox was about half full of water (sans oil). More rust can also be seen on lower half of some of the clutch and planetary gear parts in prior pictures. By day's end all of the overdrive parts were packed up to go home with one of the guys for cleaning. The good news is, it looks like all of this will work okay once de-rusted, cleaned up and re-oiled.
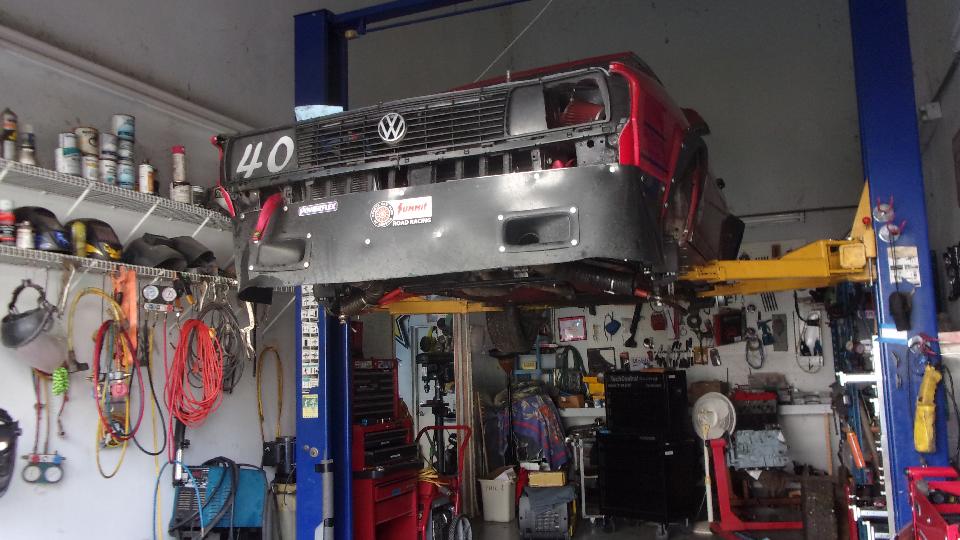
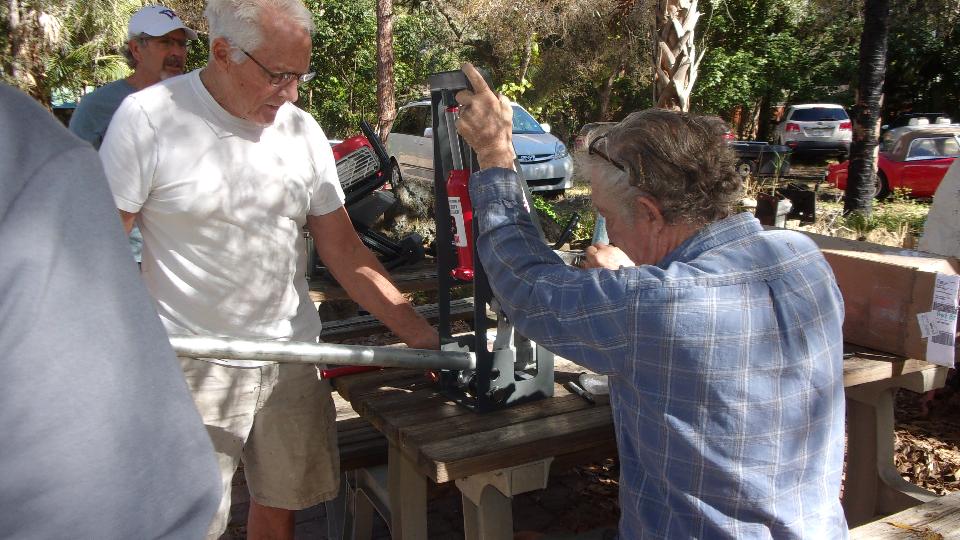
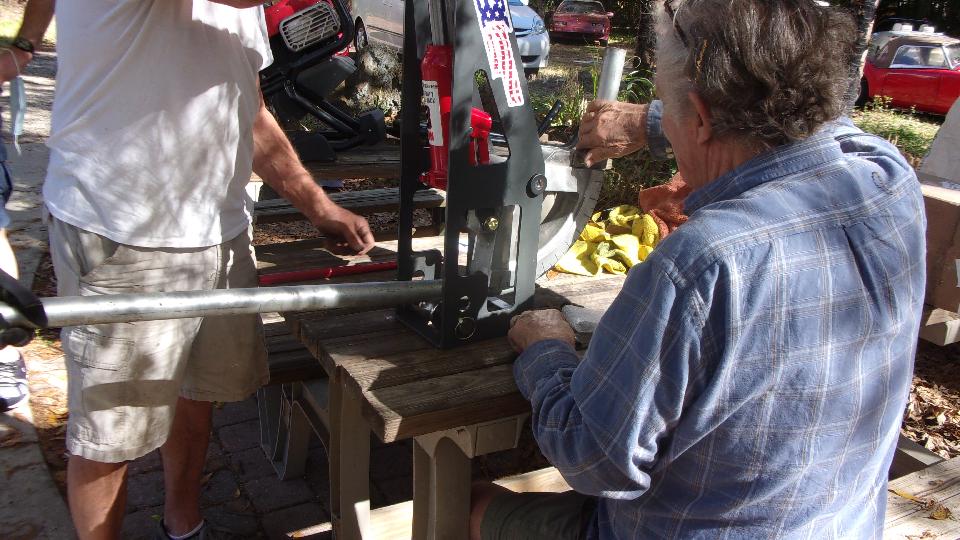
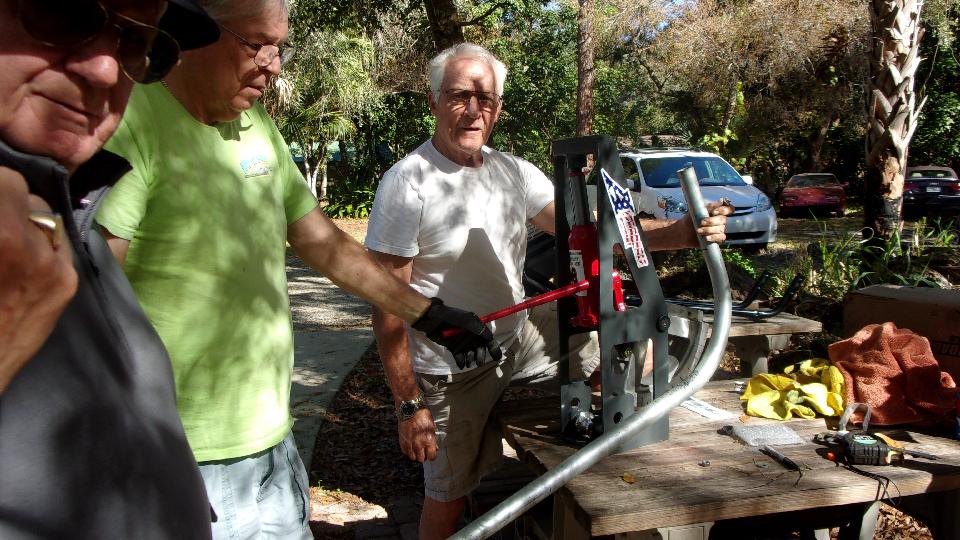
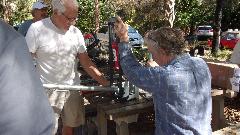
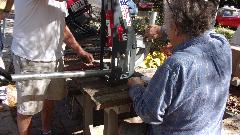
Meanwhile, some other guys were playing with a new toy, the "Affordable Bender". The 8-ton bottle jack supplies the motive force to bend tubing up to at least 1-1/2-inch outside diameter, including tubing to be used for a roll bar or full roll cage in a race car. This works without even being bolted down on the bench. This may look like a Harbor Freight tool, but it cost several hundred dollars. Chuckle. The guys in Chicagoland MG Club don't have one of these. I recon the first use will be to build the roll cage for the MGB wannabe race car just an arm's length away.

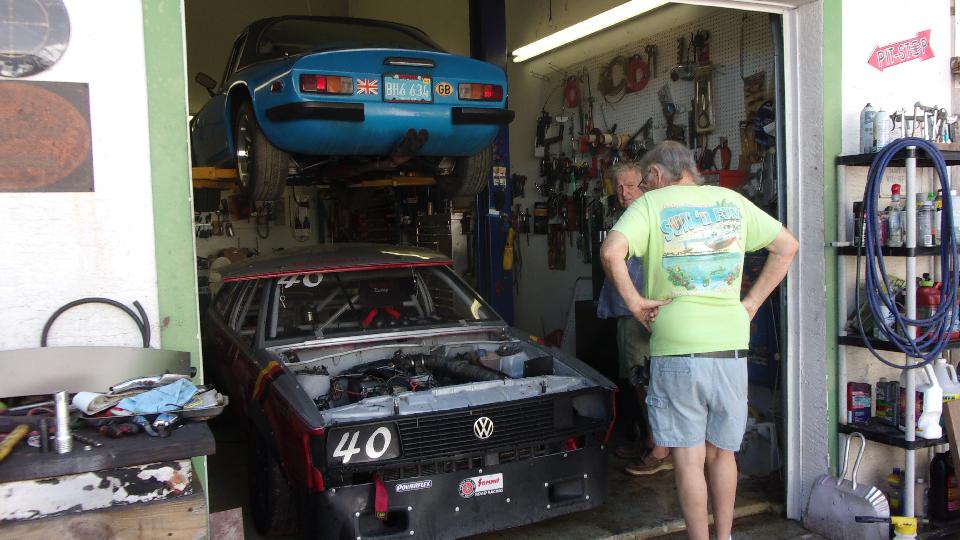
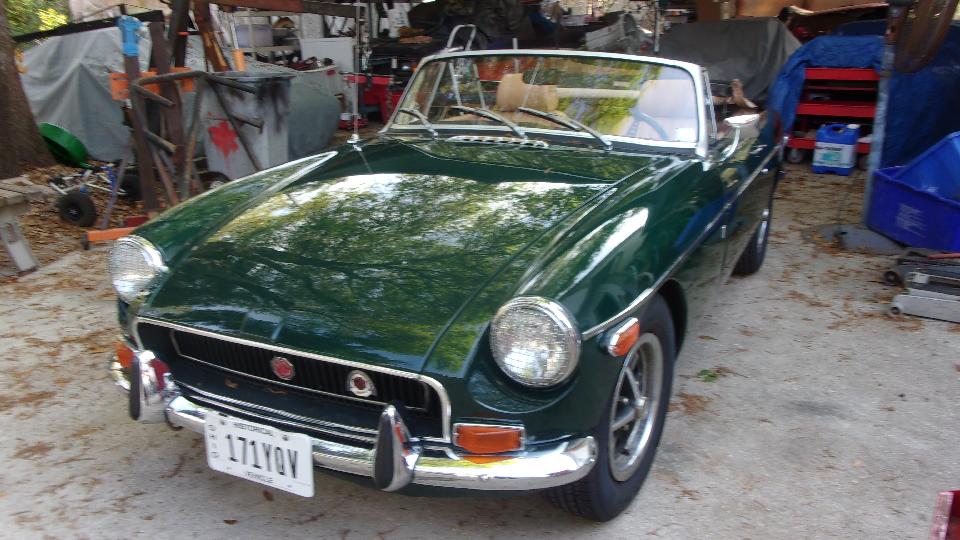
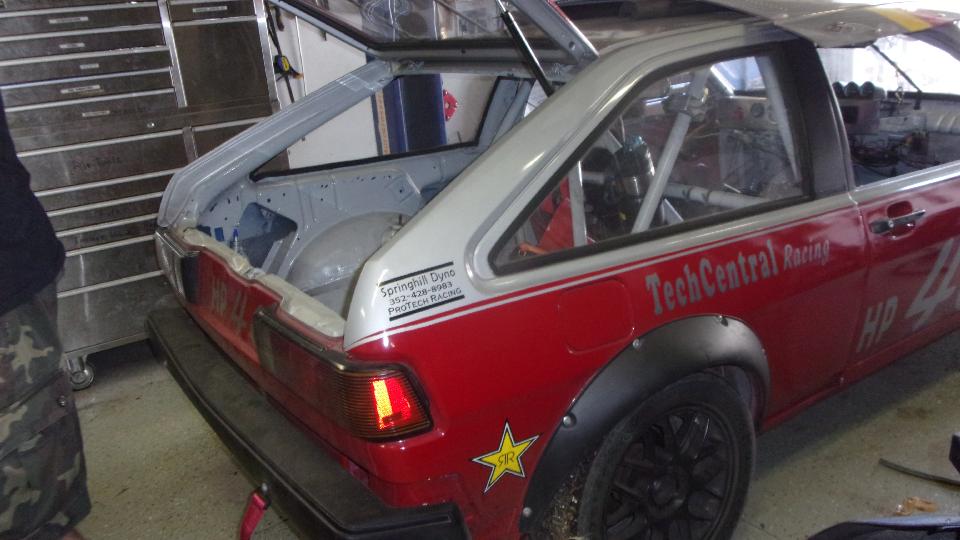
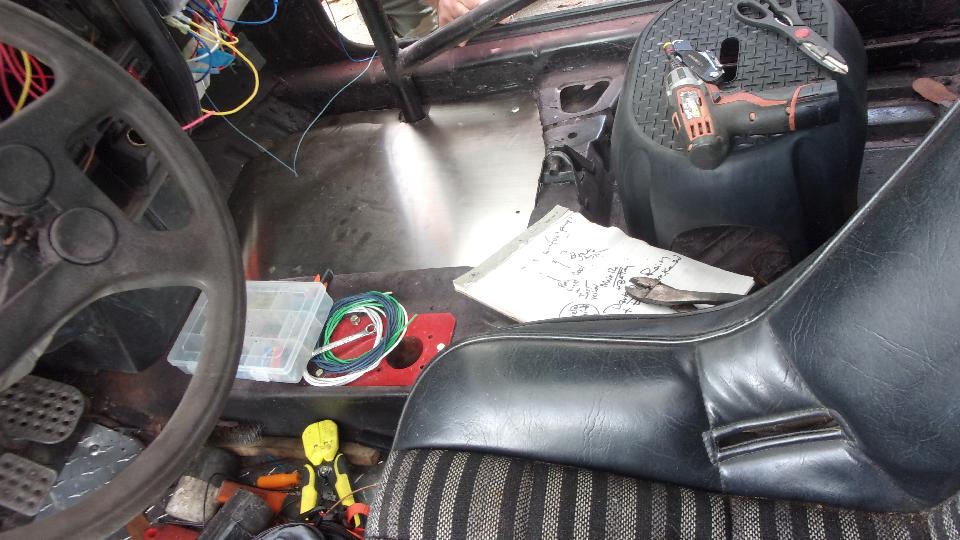
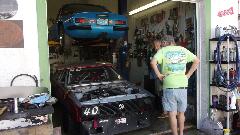
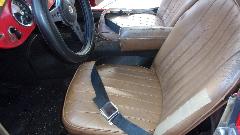
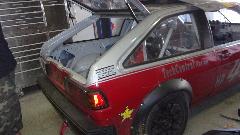
The VW Rabbit race car (the one with an engine), is just about back together with the new clutch parts installed, just needing fluids and the bonnet to be installed. It has an appointment to go racing next week end (and our new younger club member, the guy with the Nissan 300Z cars) is going along as part of the pit crew. My MGA got another oil change and new seat belts today (thanks to a timely UPS delivery).
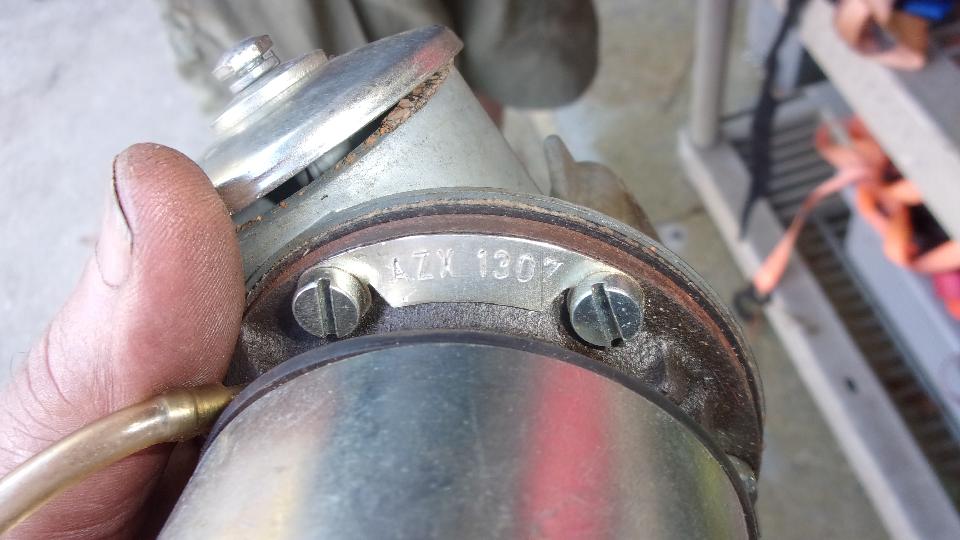
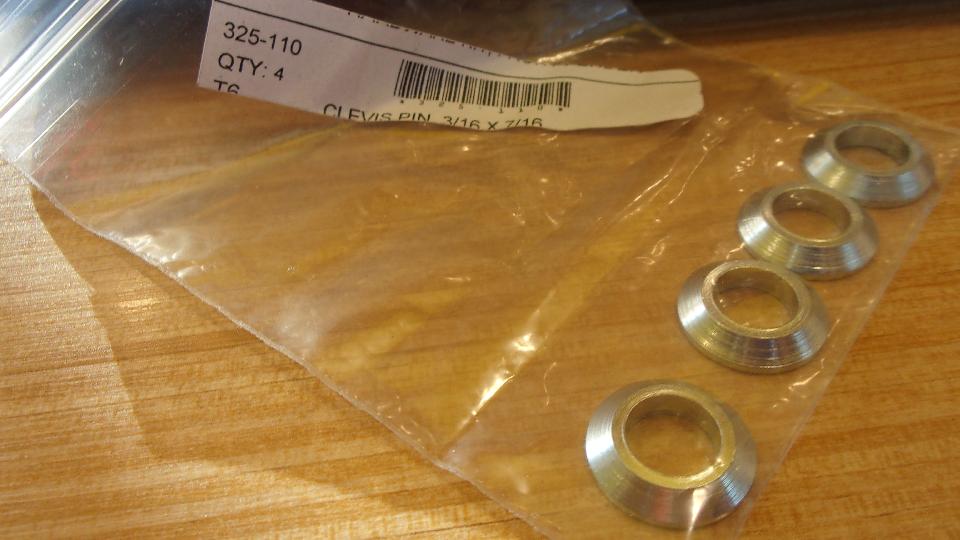
At day's end we were fussing over an SU fuel pump, probably an MGB part, that just arrived with a box of used parts. Guessing it is defunct, likely to be tossed out once we chat with the guy who dropped it here. And one of my new replacement parts will need replacing again, as these don't look like small clevis pins.

Saturday, January 23, 2021:
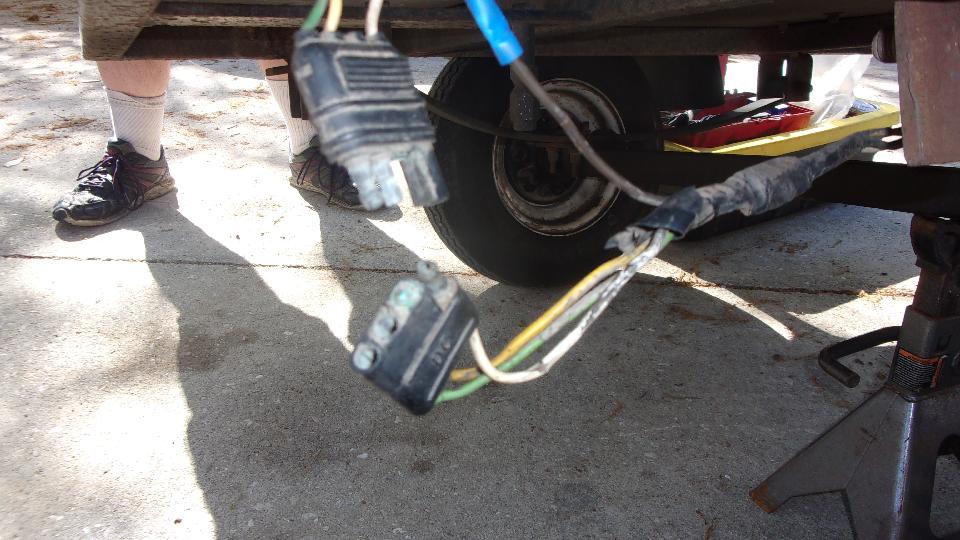
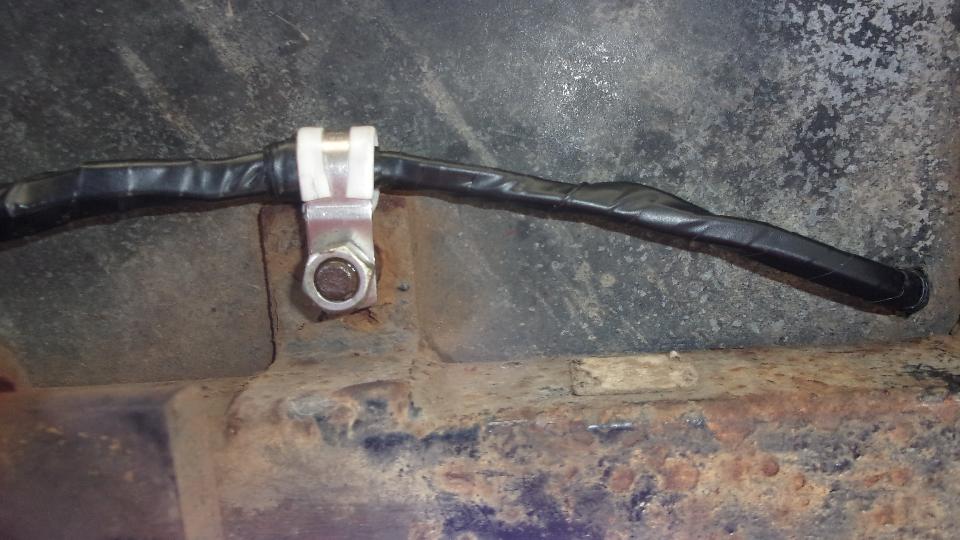
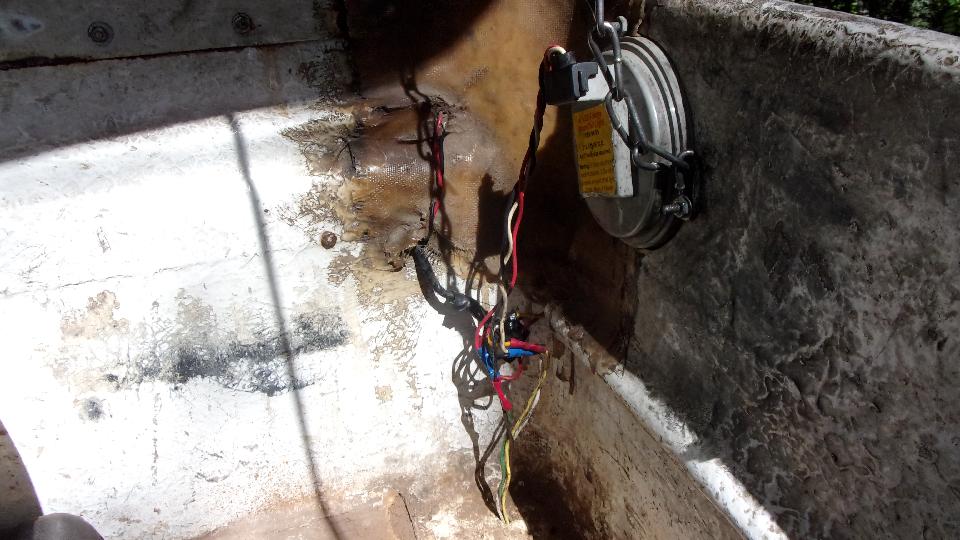
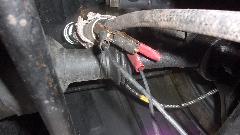
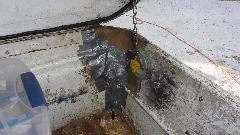
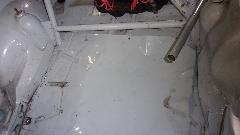
We had a particularly introverted project today, repairing wiring in the magic trailer, which had two specific problems. The first was a 4-post rubber trailer connector under the right rear corner of the box. As new (in 1989),
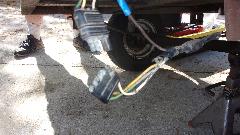 this connector was intended to mate the box with the chassis frame. Most likely it was done as a convenience for factory assembly, so the frame could be wired separately from the box before final assembly. This did allow me to remove the box once in spring 1999 for restoration of the trailer (after the first Alaska trip). Since then the box has not been off the frame, but this connector has failed and been replaced a couple of times, mostly because it is right behind the right side tire where it is constantly splashed with water when it rains (while on the road). It most recently broke a corroded pin while I was trying to disconnect it for electrical debugging. So I finally decided the connector is more bother than it's worth when it fails and needs to be replaced more often than it needs to be unplugged.
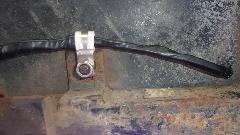 The best solution is to delete the connector. I had half of a new connector left over from a prior repair, so I clipped that off and saved a long length of multi-colored 4-wire cable. Below the box I cut the frame cable just forward of some splices from the prior connector replacement, and soldered in the new cable with shrink tubing to cover the solder joints, plus tape cover the new cable. Then push the new cable up through the existing hole in floor of the box, and install one nice P-clip to keep the cable out of harm's way.
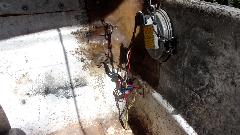
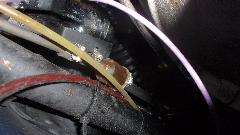
The second problem was inside the right rear corner of the box, where the wiring is exposed to abuse from luggage. The most recent repair here left an ugly bunch of butt connectors and loose wire exposed. This needed to be repaired and protected. Again I clipped off all prior butt connectors to leave only stripped wire ends, followed by soldering the wires, covering the joints with shrink tubing, and tape wrapping the wires to make a wrapped harness.
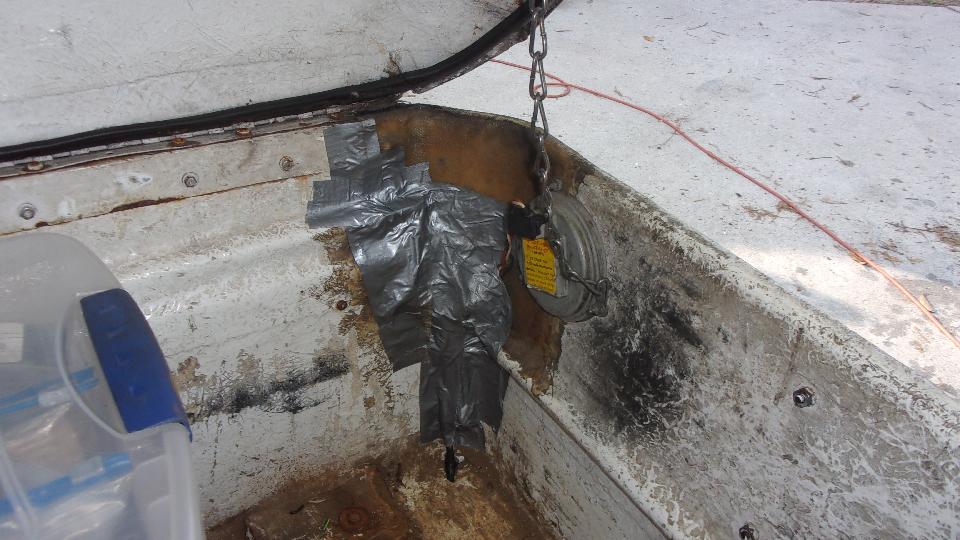
The follow-up to this was to cover the harness with a few layers of Duck tape to protect it from internal abuse. If this may ever get damaged again, the next move would be to create a hollow pocket in this corner, and cover it with fiberglass. Original construction included a pipe down both sides and across the back as viaduct for the original wiring. Just that the right rear corner area had not been well thought out.
One additional problem turned up after all this wiring was finished, but before it was taped over (a real brain teaser). The right side tail lamp on the car had a bad connection for the ground wire in the lamp itself. This causes the tail light to go out when the brake light or turn signal is activated (kind of a common issue). But with LED lamps exclusively in the trailer, this also caused a weird sneak current for the trailer lamps. Tail lights worked, and right turn signal worked, but triggering the left turn signal made the left side flash while the right side was full bright (like the brake was applied. It didn't take long to fix the ground connection in the car tail light, but I still haven't wrapped my head around cause and effect with the trailed lamps.
Oh, remember the TVR 2500M that didn't want to run last week? It helps if there is a rotor in the distributor. It ran when parked, so someone must have borrowed the rotor for a different car. You know, there is a Triumph GT6+ race car under a tarp right in front of the shop office. Hint, hint. And the fuel pump that only had a trickle works okay after changing the in-line filter and draining the tank. Vroom, vroom.
Sunday, January 24, 2021:
Spent some time collecting a list of light bulbs used in all MGA. It wouldn't be so bad, except a lot of them changed part number once or twice. Now I want to cross reference these to standard part numbers you can buy at a local auto parts store, along with pictures and dimensions.
Monday, January 25, 2021:
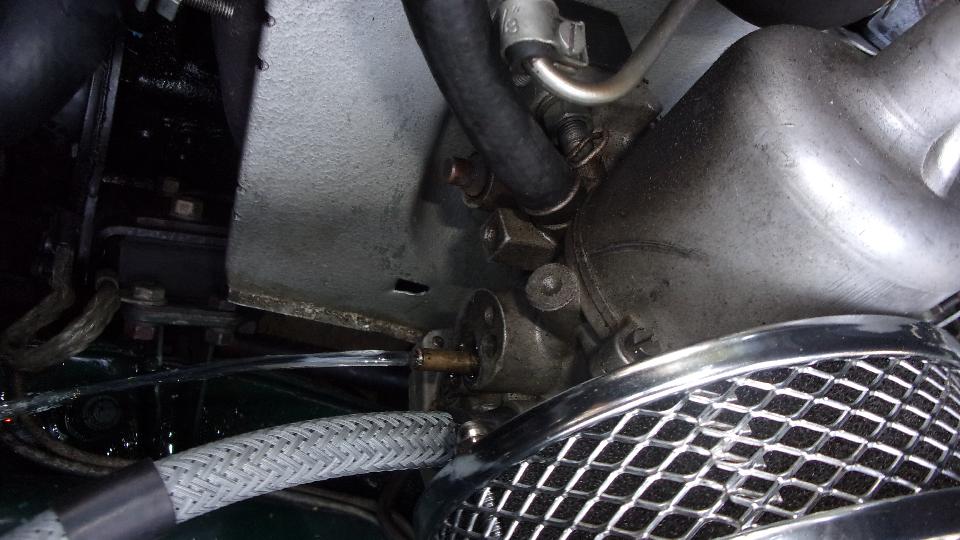
There was a 1972 MGB that came into Tech Central on a flatbed Friday after everyone had left. We had to push it a little out of the way when working on trailer wiring Saturday. Then someone said they might be working on that
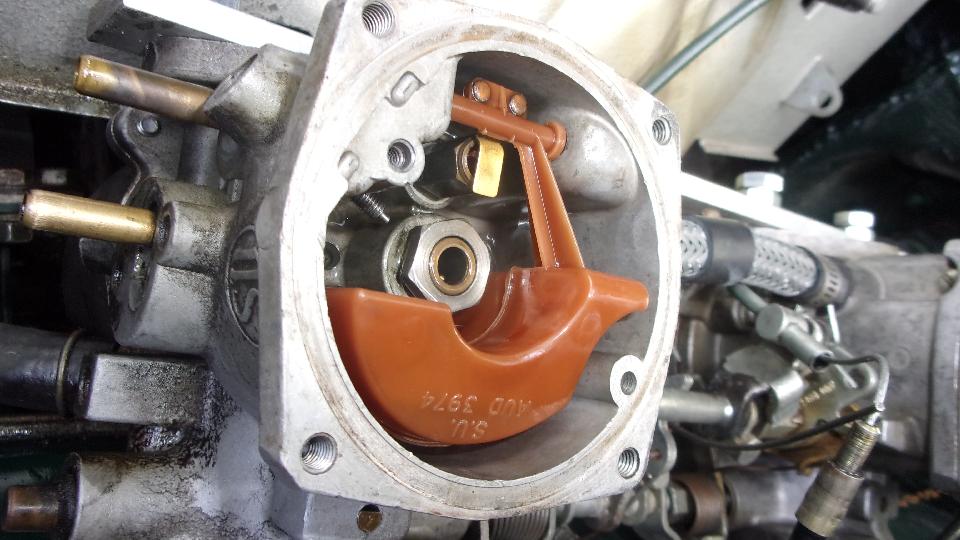
 MGB come Monday, so here we were. Hey, it was a conspiracy. The problem was flooding of fuel out of the front carburetor. With HIF carbs the front float chamber vent is connected to the rear float chamber vent, with a T-fitting, and from there connects to the carbon canister (originally intended for fuel vapor recovery). Liquid fuel then floods the rear carburetor float chamber as well as saturating the carbon canister. With float chambers overfilled, both carburetors were dumping fuel through the main jets into the intake manifold, and fuel was dribbling out of the carbon canister bottom vent (no anti-run-on valve here). All of that is bad, and the engine was not going to run.

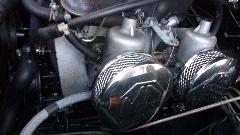

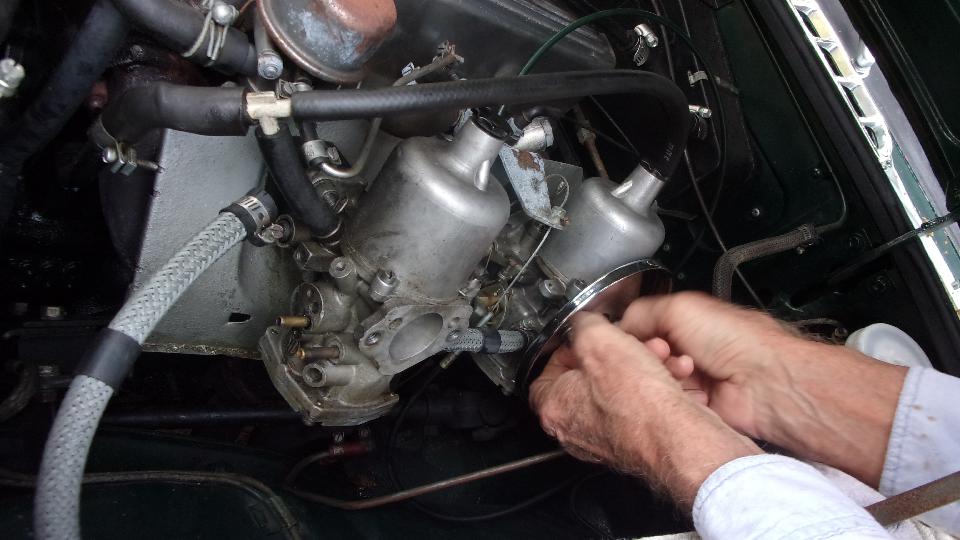
First impression was, the front float valve was stuck open, so give it a sharp whack with a handy tool, to see if it could be jarred loose to work (which didn't work). So it was time to bite the bullet and remove the carburetors so we could turn them upside down for access to the bottom cover and float chamber parts (yes, HIF type carburetors). After removing the air cleaners we attached the "magic tool" to hold the two carbs together with all linkages in place, kind of like one large two barrel SU carburetor. That trick works very well, so the carbs were soon inverted with the front one open from the bottom. Time for lunch break?
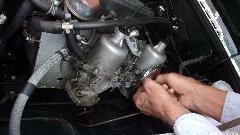
During the break I casually suggested testing the float valve under fuel pressure before reassembly, but that didn't happen.
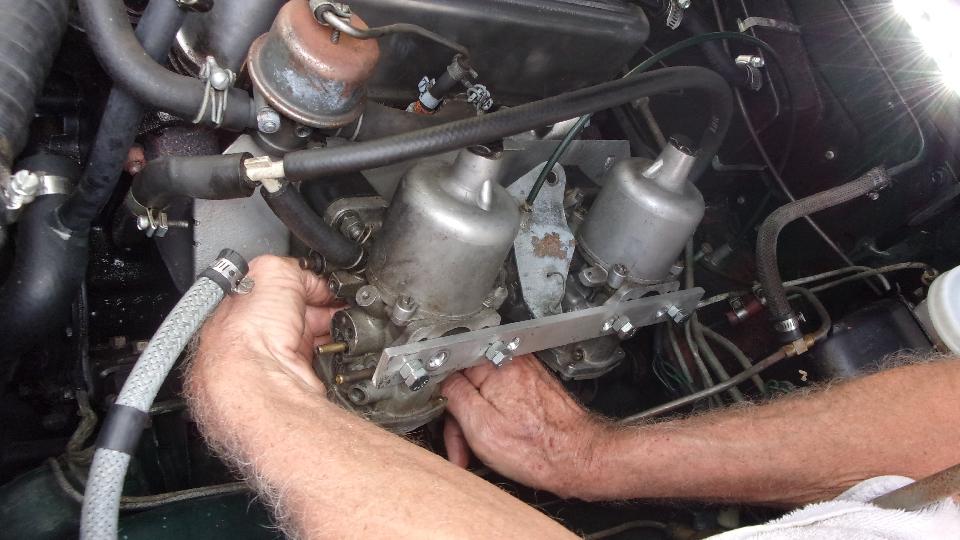
After the break someone got busy adjusting the float level, and assuring that the float valve was not
 sticking open or closed. And with some more fiddling the bottom cover was reattached, carbs turned right side up, being reinstalled. About that time the car owner arrived with the opportunity to get his fingers into the act and learn a few things about his own car. So he got to fiddle with reinstalling the lower carb mounting nuts and some springs. Switch on for fuel delivery, try to give it a start, and the end result was, fuel pouring out of the overflow vent on the front carb. Bummer. Back to square one.
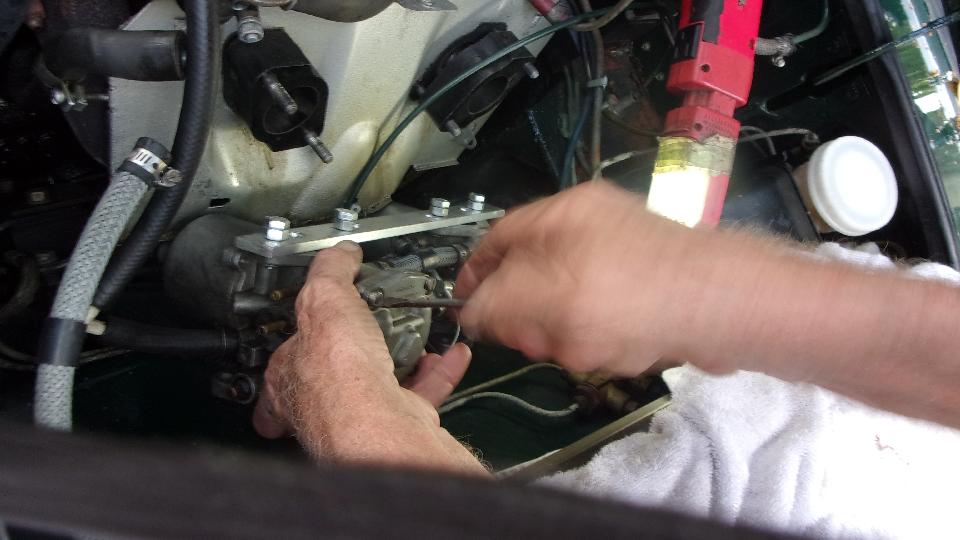
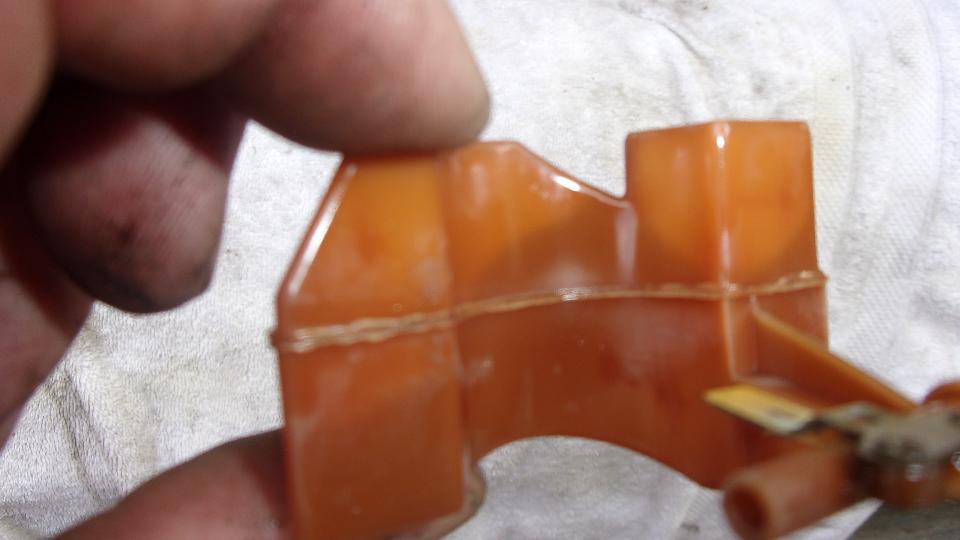
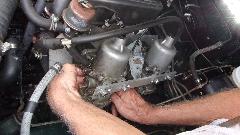
My next observation was, if the float is properly adjusted, and the fuel valve works, then the float must not be floating. Did anyone check to see if there might be fuel in the float? No. So it was going to have to come apart again, which was about the time most people called it a day and began to leave, but someone did come up with a pair of good used plastic floats.
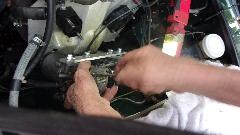
So there was myself and the car owner with some determination removing the carbs again, flipping them over, and pulling the bottom cover off the front carb. Just a few seconds of poking around revealed the front float to be about 80% full of fuel. It made some funny gurgling noises when tipped end to end. But no matter which way it was tipped, no fuel ran out. We never did find a leak, and the fuel was still inside the float at day's end. After that, just a little more grunt work. R&R the long screw that serves as the pivot shaft to change out the float, verify correct float height, and get it reassembled and the carbs back on the car. We even put oil in the dashpot dampers. Much quicker the second time around.
Switch on, fuel pressure up, nothing overflowing this time, so we re-connected all the hoses for fuel supply, vapor recovery, and crankcase ventilation. Pull the throttle cable, hit the key, and it fired right up. No great surprise it was

 running a little rich on the rear carb, and a lot rich on the front carb. Given a few minutes for minor adjustments, it was running so well we had to back off the idle speed some. Put tools away, get the victory pictures, and watch the car drive off into the late afternoon sun. Always nice to have a good ending.
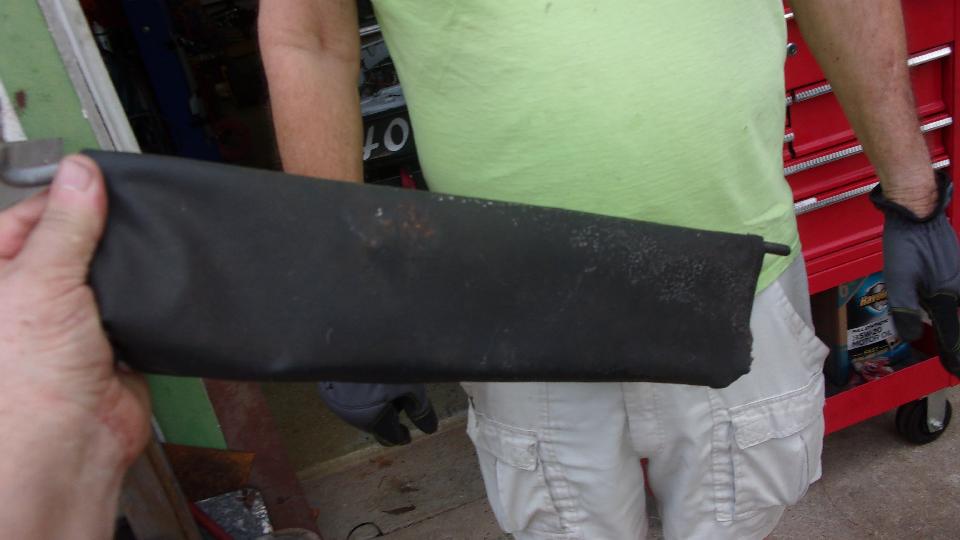
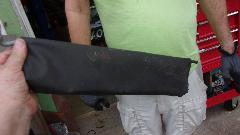
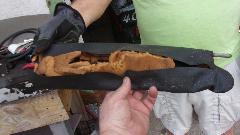
There were a couple other things going on earlier in the day. Someone disassembled a crusty pair of MGB sun visors to see what was inside. Wire frame with tube spine wrapped around a pivot shaft, all that wrapped with some pretty crummy foam rubber and covered in thin vinyl. They did manage to make things cheap in the 70's. Maybe these could be rebuilt with better materials.
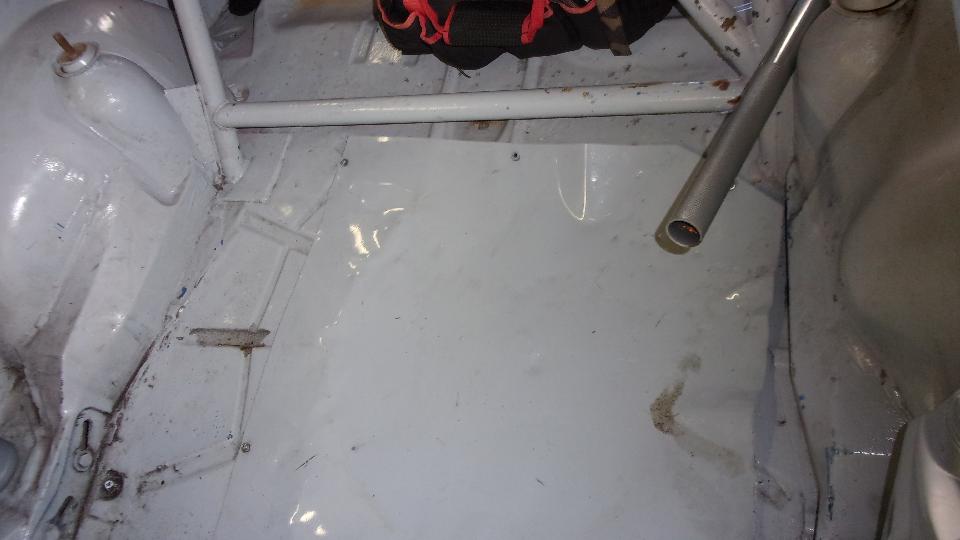
And a couple guys popping some floor panels into the VW race car. You think maybe they don't want the passenger's feet to fall through? Not my area of expertise, so I was leaving them alone on this one.
Evening internet Zoom session from John Twist with 175 sit-in visitors, some from Australia, Mexico, Canada, and parts of Europe. These sessions are very popular, and now scheduled for 2nd and 4th Mondays each month.
Tuesday, January 26, 2021:
Received a new "preliminary" 2021 schedule of events for CMGC. That killed half a day updating the club web site.

Wednesday, January 27, 2021:
I posted a new tech article this morning, contribution from Johan Goudsmit in the Netherlands. He has fabricated an accessory attachment tow bar for front end of the MGA so it can be pulled up onto a flat bed truck or trailer without damaging the front valance panel. I was just suggesting a small change to improve front end ground clearance for the hitch bar for less interference with the approach ramp.
Thursday, January 28, 2021:

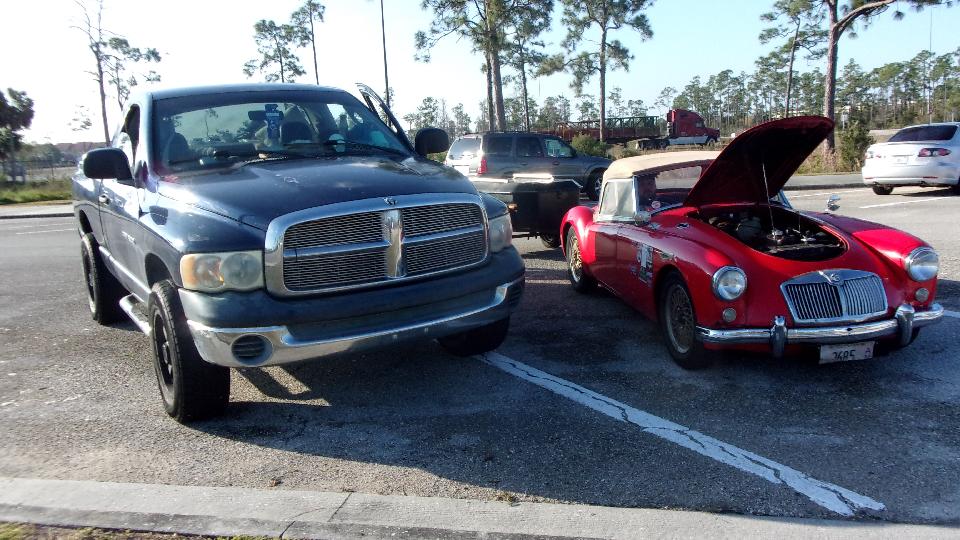
Almost forgot (but got the picture this time). There was an older Dodge Ram truck needing a jump start this morning. And yes, the MGA does have a Lucas alternator. The truck battery was absolutely dead, but we let the MG idle for a few minutes with jumper cables, and the truck fired right up (so knock off the Lucas jokes).
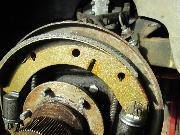

Then there was a report from Greg Reynolds in Minnessota that Moss Motors may have finally sourced some MGA brake shoes in the correct size, so the brakes may actually work. Apparently they fit with only minor tweak of the adjusters. No markings on the parts, but the label on the box tells the story.
Friday, January 29, 2021:
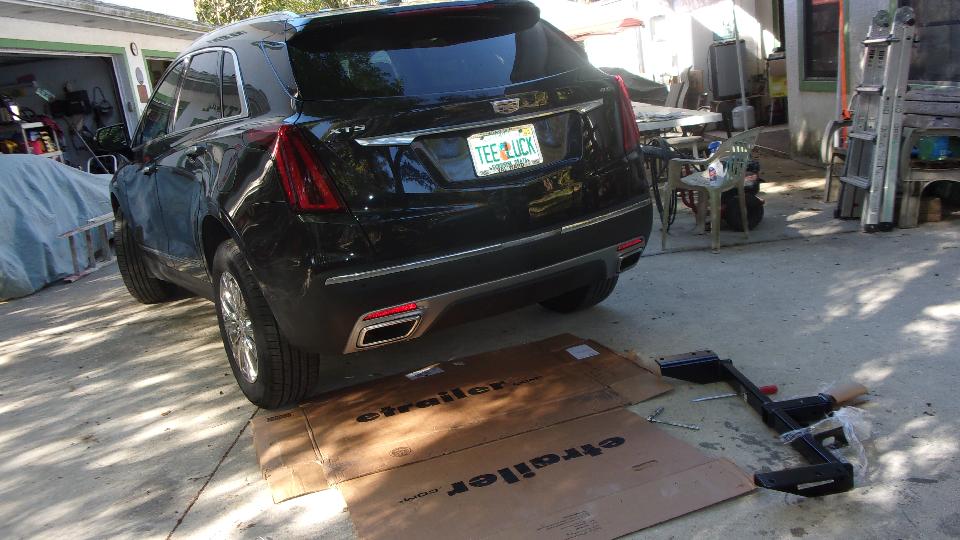
Traditional Friday visit to Tech Central, with a few small jobs on the side. Someone finishing up a small electrical repair on the MGB, a tow hitch being installed on the sport-ute, and one of the restored Midgets finishing up interior trim, very close to hitting the road.
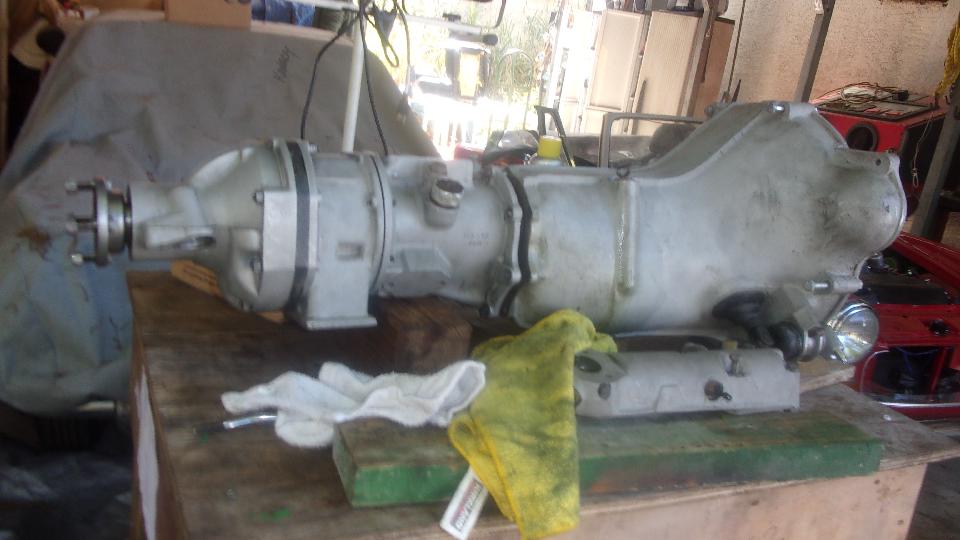
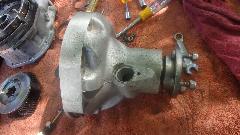
But the real job today would be reassembling (mostly) of the MGB late model overdrive unit that was
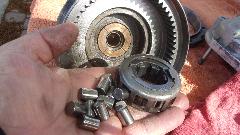
 disassembled last week for inspection and cleaning. The one-way clutch parts were not disassembled, and the center splined hub of this unit does not turn in either direction. Having some dirt or rust inside, it needed to be disassembled for cleaning. So remove the snap ring and brass washer, pull the assembly out, and watch it do the "rapid scheduled disassembly". There are 12 cylindrical hardened steel rollers. The inner splined hub has 12 slightly angled ramps. The cage has 12 windows and a thin torsion spring inside.

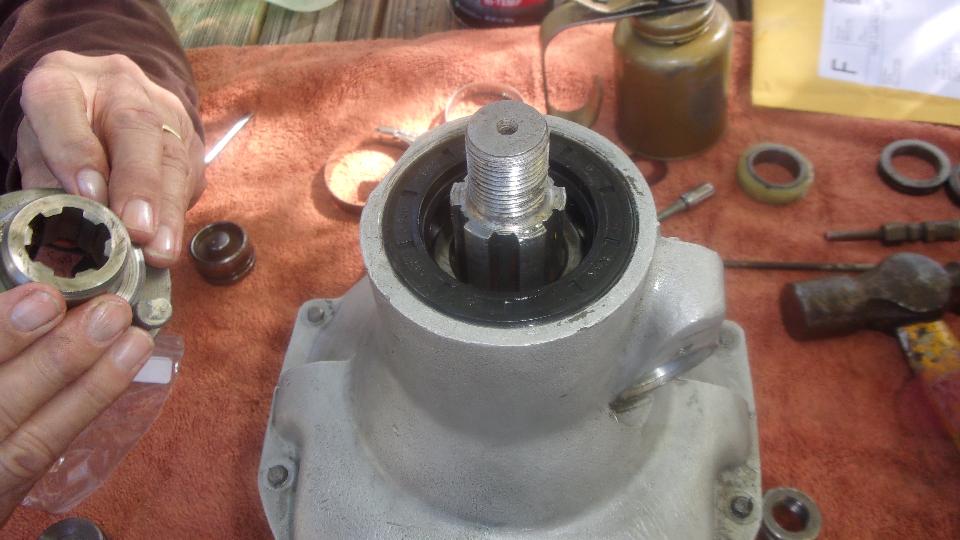
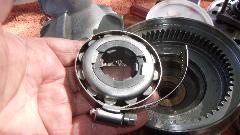
It all cleaned up nicely. For reassembly there is a small radial hole in the hub to accept the end of the torsion spring. Hook up the spring to hub first, then insert the rollers. Install a band clamp loosely, twist the hub against the light spring force and hold it while the band clamp is tightened to move the rollers inward. Then insert the one-way clutch into its nesting bore, and give it a good push go in while the band clamp pops off. Install the brass washer and snap ring, oil it well, and give the splined hub a twist to assure it will turn freely in one direction only.
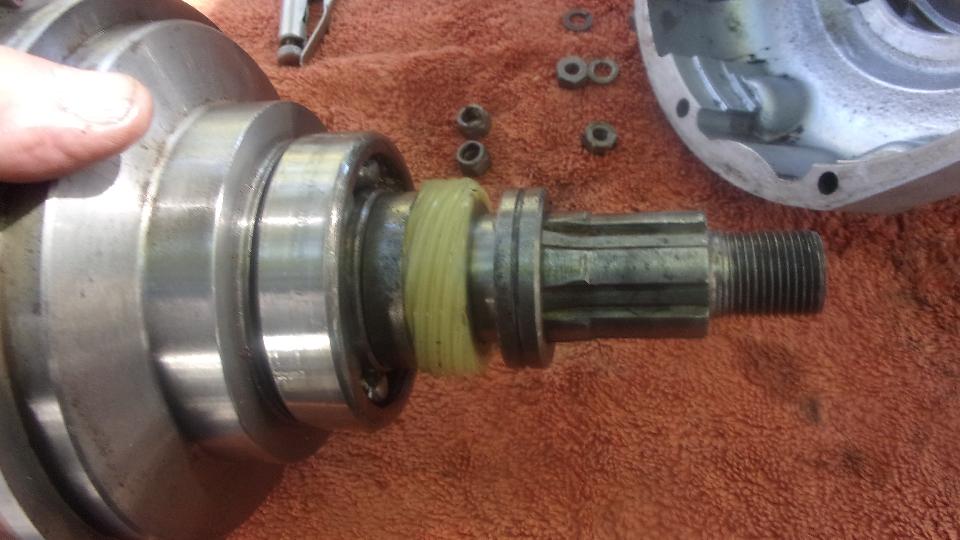
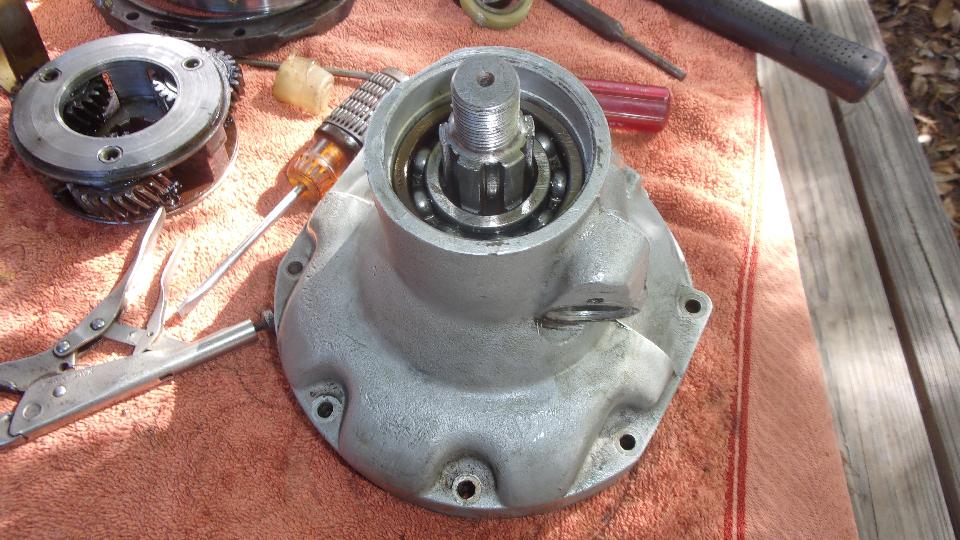
Turn this output bell and shaft assembly the other end around, and oil the ball bearing and assure that it will spin freely. Install the speedometer drive gear with two additional shaft spacers. The solid spacer goes on first, followed by the nylon gear with steel sleeve inner liner, and then the spacer with the nice groove for easy identification. There is no shaft key. These parts will ultimately be held securely on the shaft by the rear flanged hub (once the retaining washer and rear nut is tightened securely). Drop this assembly with the front bearing into the rear housing. You may have to press it or tap it gently into place to seat the ball bearing in the housing.
Turn it around to install the rear ball bearing, which you will oil and spin to assure it turns freely. Again likely needing to press or tap the bearing gently to get it in and seated. Finally install the rear seal (with a little oil), followed by the rear splined flange, flat washer and "prevailing torque" lock nut (which you can drive to seat and torque with an impact wrench). Do be sure the four flange bolts are in place before the flange is installed.
 Once assembled the shaft with clutch bell and rear flange should spin freely. As an assurance check you can stick your thumb into the side hole to hold the nylon gear while you turn the rear flange. The nylon gear must be secure and must turn with the shaft. If the gear can slip or free-wheel, the rear nut is not tight enough. It is not good to get the gearbox assembled and in the car with the engine, then find out the speedometer drive doesn't work.

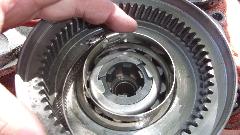
 Then turn it around and go back to building from the front again. Oil up the planetary gear assembly, and drop it into the clutch bell. Turn the gears a bit to align the gear teeth until all three planer gears are mated, and the planet assembly will drop into place.
Next up is the double sided friction cone clutch with male and female friction linings, bearing hub, and mated splined hub with inner bronze bushing. Oil the bearing, the female friction lining and mating male cone on the rotating bell, and drop the friction assembly into place. The male splined center hub must then be wiggled and pushed into mating the sun gear to the planet gears.

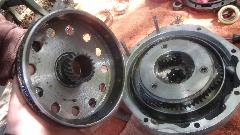
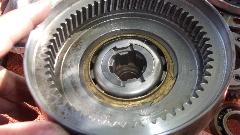
 Oil the male friction cone and the female steel cone ring. Install a paper gasket and the steel ring, mating the cones.
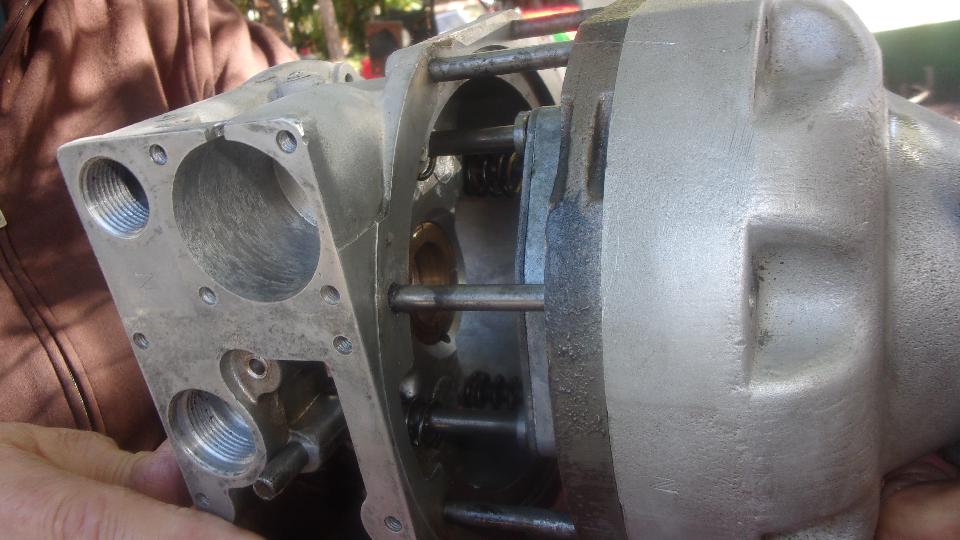
Then we get to the front housing for the overdrive unit. This has four sliding guide tubes with eight springs, and four snap rings. There are also four thrust washers that simply slide over the guide posts on the cone clutch assembly (far right of first picture below). The sliding guide tubes go into the front housing with one spring each, secured with a snap ring on each tube. Then place the second spring on each tube, and hold the whole assembly horizontal so nothing falls off. If in doubt, consult the Workshop Manual to verify position of these parts. Install a paper gasket on the steel cone ring, and push the front housing assembly over the guide pins. Washers and nuts on the rear housing can then be installed to close this assembly

Back to the front, two hydraulic pistons with O-rings are to be pushed into the cylinder bores. Then two cross bars are installed on the guide pins, passing over the pistons, to be secured with lock washers and self-locking nuts. In operation, when overdrive is to be engaged, hydraulic pressure pushes the pistons forward, pushing on the cross bars, which in turn pull on the guide rods to pull the friction cones forward. That disengages the female friction cone from the rotating planetary bell (which was direct drive) and engages the male friction cone with the fixed female steel cone. That stops rotation of the bell causing drive to go through the speed increasing planetary drive.

 When the overdrive unit is mated to the intermediate housing of the gearbox (with another gasket), the oil pimp drive cam must be included on the mainshaft. The rest of the oil pump parts can be installed in the overdrive housing from the bottom, along with the electrical solenoid (and little bearing ball), and the bottom cover with screens (and supposedly a couple of magnets).
For the casual observer, this has been assembled with loose screws and no gaskets, because the gasket set was on back order, so we will get to disassemble and reassemble some of it again later to install gaskets and new lock nuts. Practice makes perfect?
Saturday, January 30, 2021:
 Bad day on the phone today. Not conversation, just a dying phone, nothing to do with cars, so tune out now if not interested. Apparenty the battery has been steadily dying in the past few weeks, and getting worse by the day. It used to last a few days on stand-by if not used much. Now it goes from 100% to 25% charge level in about 10 hours, so it has to be plugged in charging twice a day (and it gets pretty hot when charging).
My first cell phone was $10 in 2014 from Best Buy (and got a $10 credit on the first monthly phone service bill). Two years later (2016), after the phone went for a swim, the next one was $15 also from Best Buy. Four years later (April 2020) I needed another replacement when the charging connector failed, but Best But said they only sell phones for new accounts, so have to go to Verizon. The Verison solution then was $100 for a new phone, because the 2G standard has been abandoned, and new phone must be 4G capable. Okay, I get it, pay the piper and get on with life, even though I felt like I was being ripped off.
 Trip to the Verizon phone store today says the phone works okay, just the battery is dying. Good news? No. Verizon's solution is $200 for another new (cheapest available) flip phone, because they refuse to sell batteries, they swear this model phone is obsolete so they don't have a replacement for it, and there will be no batttery available for it. And by the way, my same model of phone is still on the Verison web site for $99.99, not obsolete, and the battery in my 9-month old phone is 2-years old, so it was 15 months old when the phone was supposed to be new. Sorry, but no sale, not paying the shysters $200 for a new battery. At least I had the satisfaction of five minutes of swearing at them loudly in the presence of a few customers in their show room.
Now the good news? New batteries are readily available on the net for $17 to $29 delivered. Got one on the way for next Thursday delivery. Verizon can "bug" off, and I hope I never have to go there again.
Sunday, January 31, 2021:

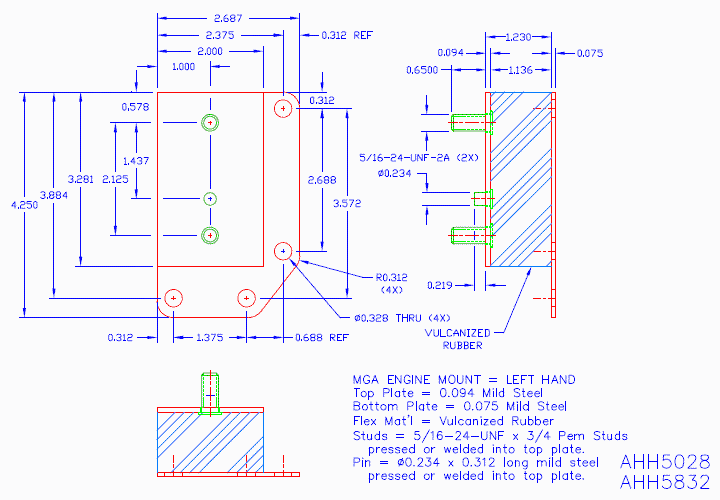
 Made a CAD drawing of an engine mount, because it was on the way to making a drawing of the factory Shim Plate for the engine mount, used to raise the engine slightly. Still need to finish the new web page(s) for the shim installation.
|