The MGA With An Attitude
MGA Guru Is GOING MOBILE - (June 16 - June 30, 2020)
Tuesday-Wednesday June 16-17, 2020:
Still plunking away on the new parts numbers index. Got through section H (propshaft).
 Front bumper parts arrived Wednesday, and I have appointment to drop the MGA off at the body shop Monday. Front bumper parts arrived Wednesday, and I have appointment to drop the MGA off at the body shop Monday.
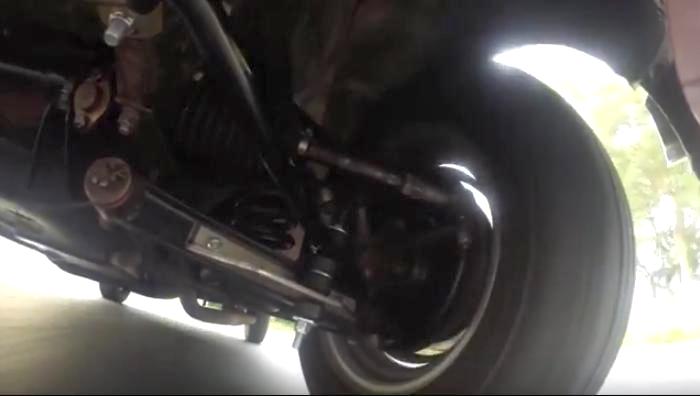
 Received a video showing installation of a front sway bar on MGA. It is a 222-MB data killer, so I need to figure out how to shrink it before uploading it to my web site.
Spent some time commenting on pictures of an MGA someone is interested in buying (probably not as nice as he first thought).
 Received a message from Lindsay Porter, the writer of some of our favorite LBC technical books. Nice to hear from another "celebrity" in the British car hobby. He recently bought an MGA, imported from USA to the UK, and is well on the way to refurbishing it. Says he only recently found my web site. Seems odd that he didn't know about it a long time ago. Anyway, we had some email chat about BA screws and Pozidriv screws (when they were introduced).
Thursday June 18, 2020:
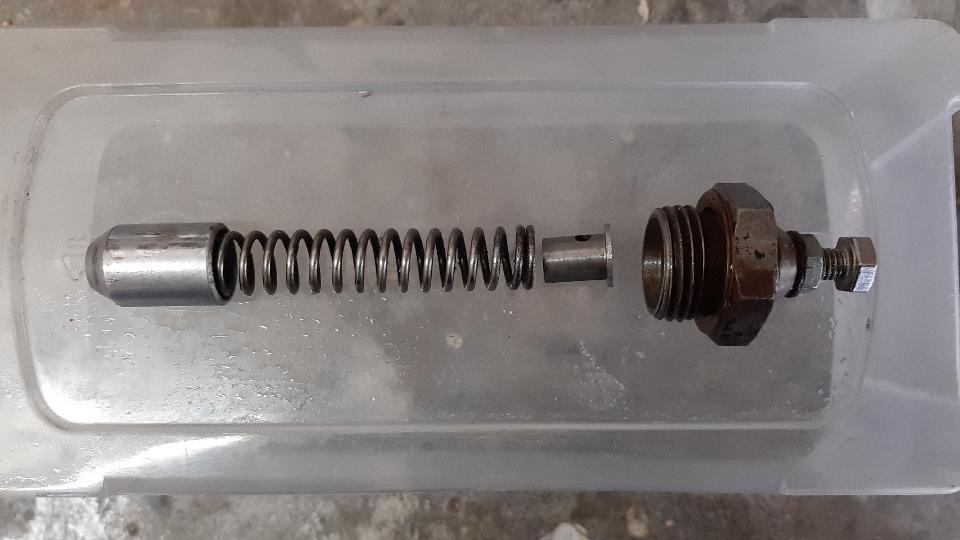
 Good start for the day, posting a new tech page for adjustable oil pressure relief valve.
Spent more time commenting on pictures of another MGA someone is interested in buying, a much nicer one this time.
Friday June 19, 2020:
Happy birthday to me. Okay, got that out of the way. Received the electronic Publisher copy of the CMGC June newsletter (a few weeks late this time), and spent the whole day (at least 10 hours) getting that transcribed into web pages for posting on the cub web site.
Saturday June 20, 2020:
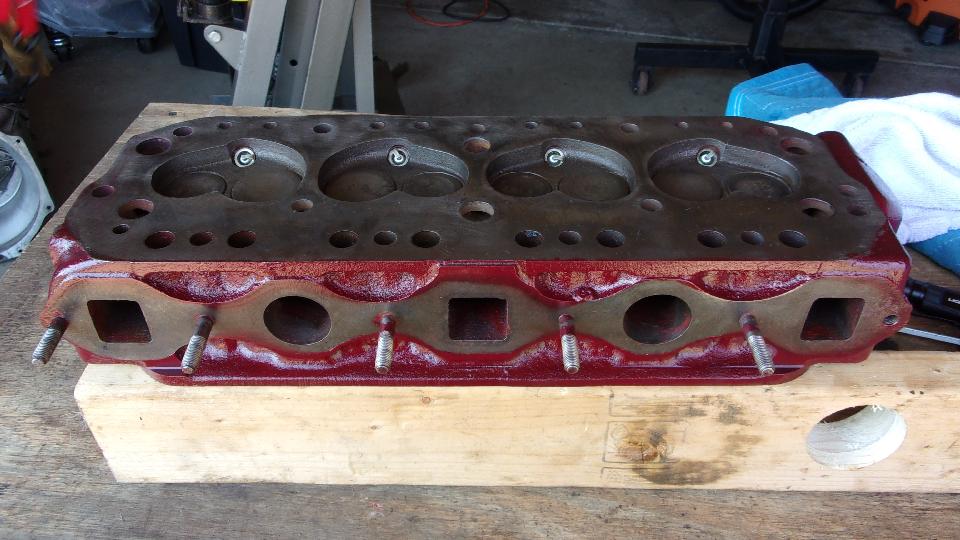
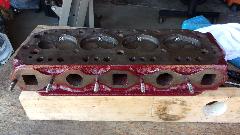
Hot day in Columbus, Ohio for the first day of summer (high temperature 92dF). And it was a work day (play day with Marc Chapman's toys). After breakfast, out to the garage to look at his MGA 1600-MK-II in process. The "16" cylinder head was off the engine, so we started with an inspection. Flip it over and prop it up level, pour water in the combustion chambers, and wait. At first it seemed to be perfectly fluid tight, even though he knew one cylinder was low on compression before disassembly. After five minutes #1 exhaust valve left a drop of water in the intake port, and another drop half a minute later. Not perfect, but very good.
This engine obviously had some mileage on it, and it had been worked on before being laid up many years earlier. The intake valve heads were upstanding somewhat, not quite like new, but decent for a driver car. The exhaust valve heads were a little lower, but still a bit above the combustion chamber floor, not ideal, but serviceable. We found traces of valve lapping compound on the exposed ends of several of the valve guides, enough to pull out with a screwdriver for a finger tip rub test. This implies that that it had a hand lapping job on the valves before being buttoned up again, and likely was never run since then. This one may go off to the engine shop for professional inspection and opinion.
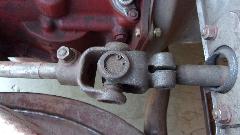
 Then we fought with the steering universal joint for a while with penetrating oil, pulling hard, prying with a couple big screwdrivers, and finally got the steering column out.
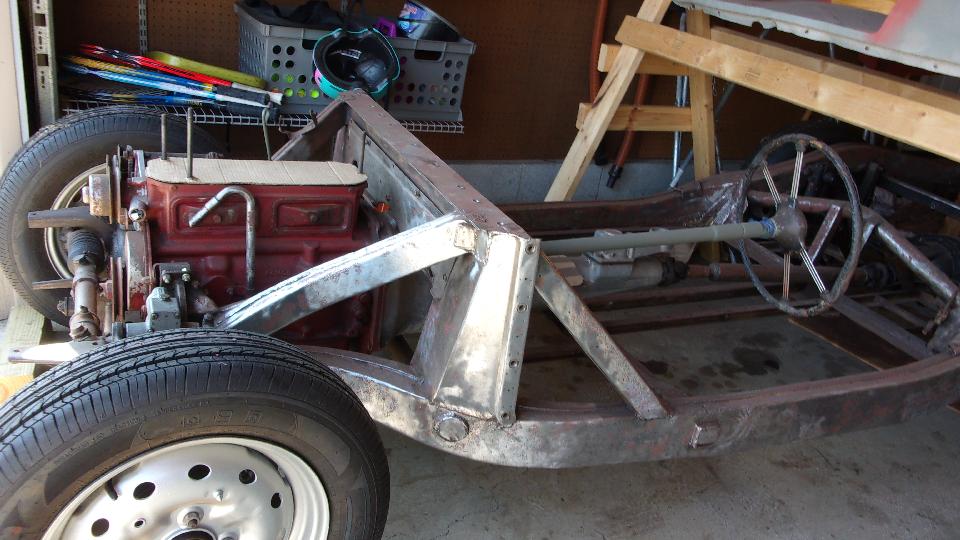
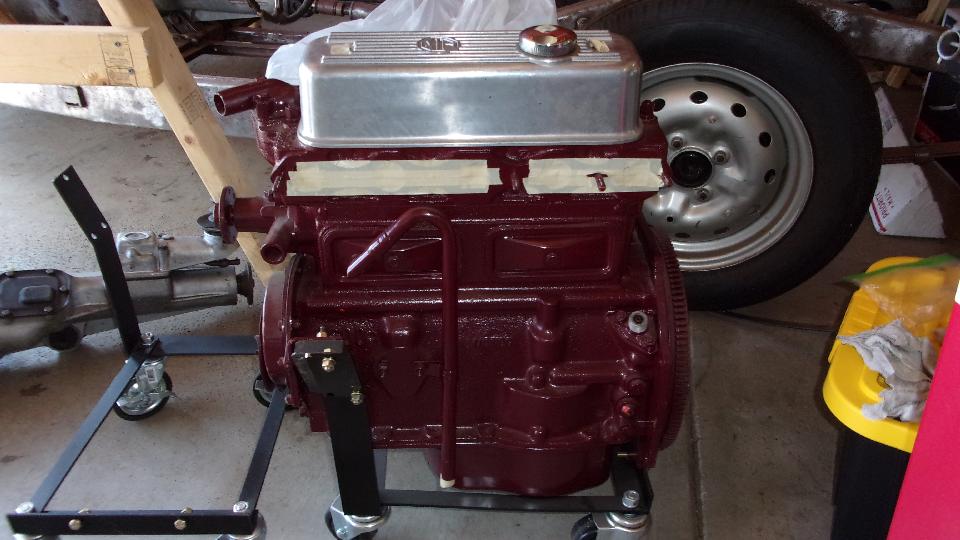
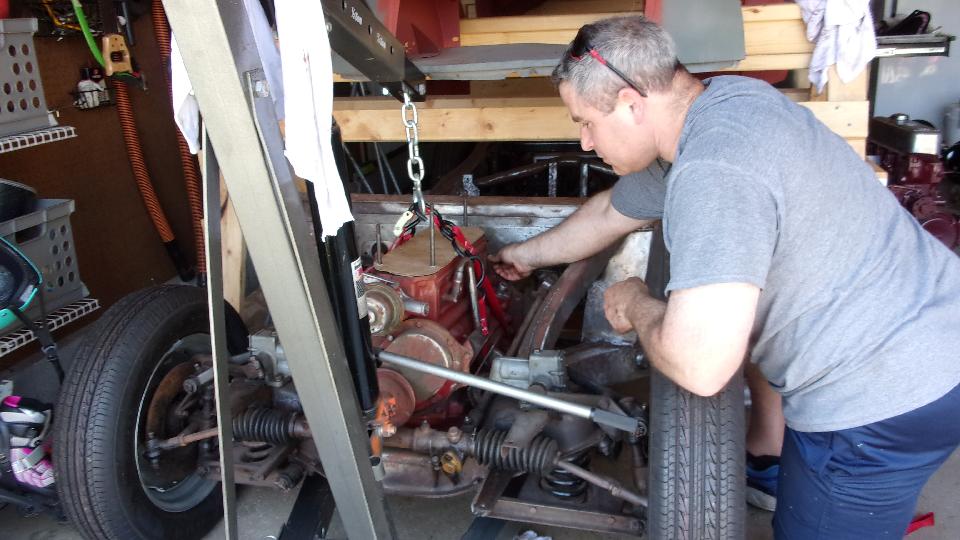
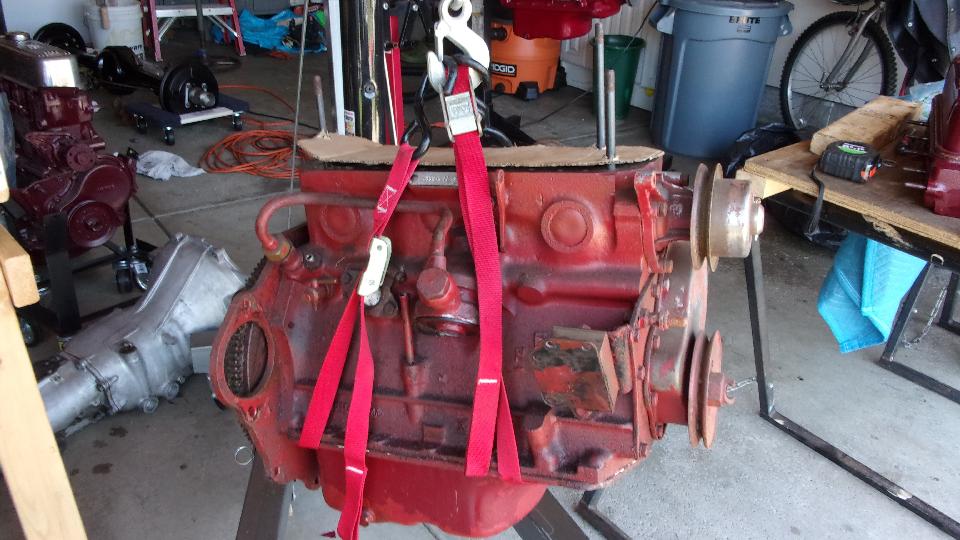
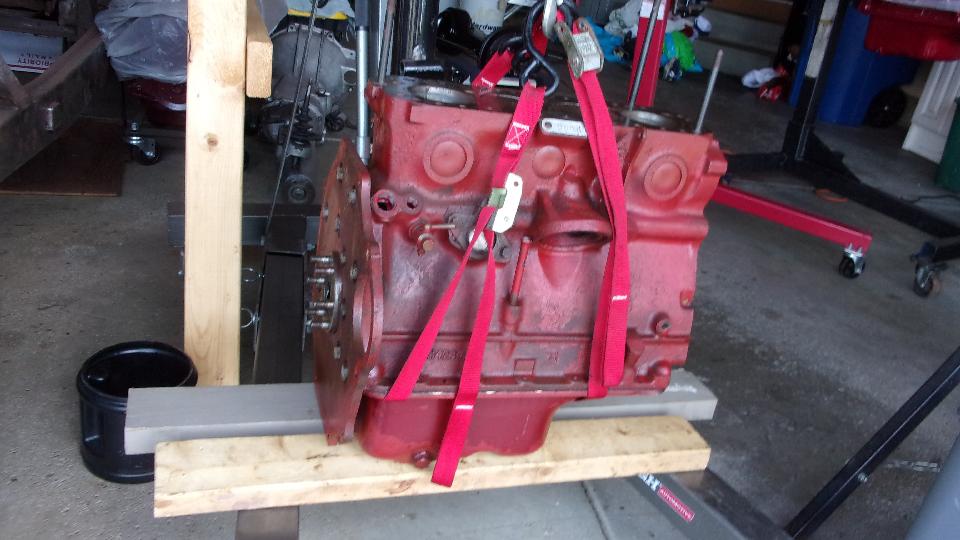
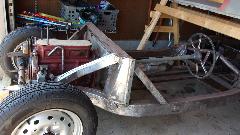
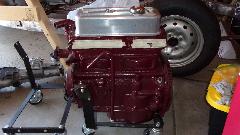
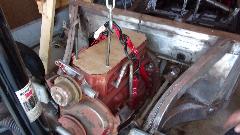
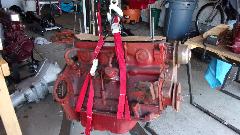
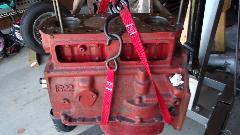
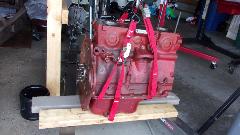
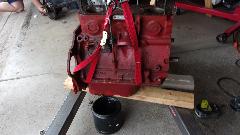
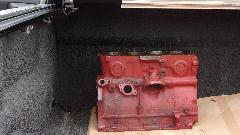
Then I got distracted for a minute taking picture of two other 1600 engines, freshly painted. One is from a second MGA that may eventually be restored for Marc's father. The other was a spare picked up for cheap, one of those deals you just can't pass up, and it may be sold on to someone else who may need it. Truth be known, I was more interested in two engine stands and two roll around engine dollies. But then we got back to pulling the 1622 engine out of the rolling chassis. Not a big deal, just remove the hanging canister oil filter, loosen two engine mounts a several bolts in the bellhousing.

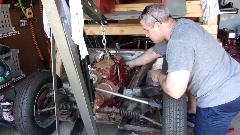
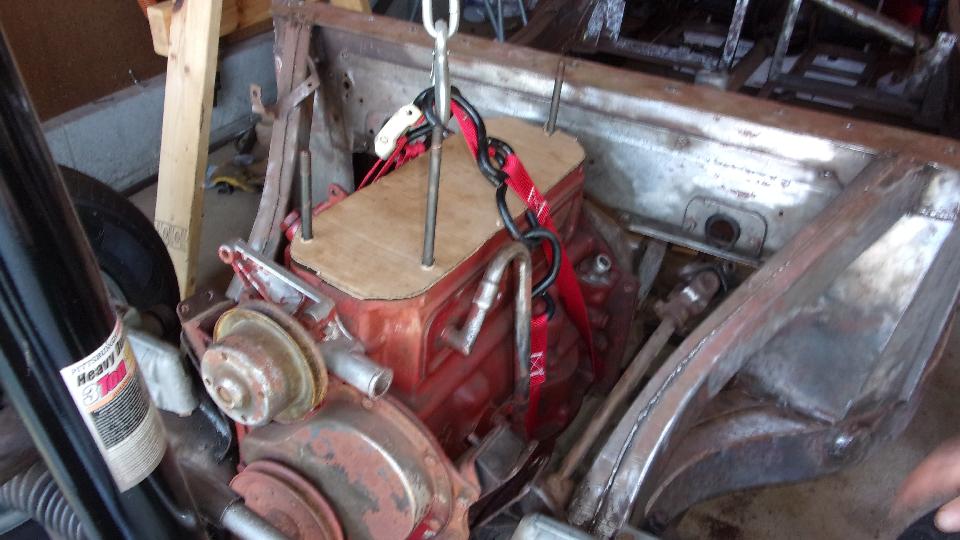
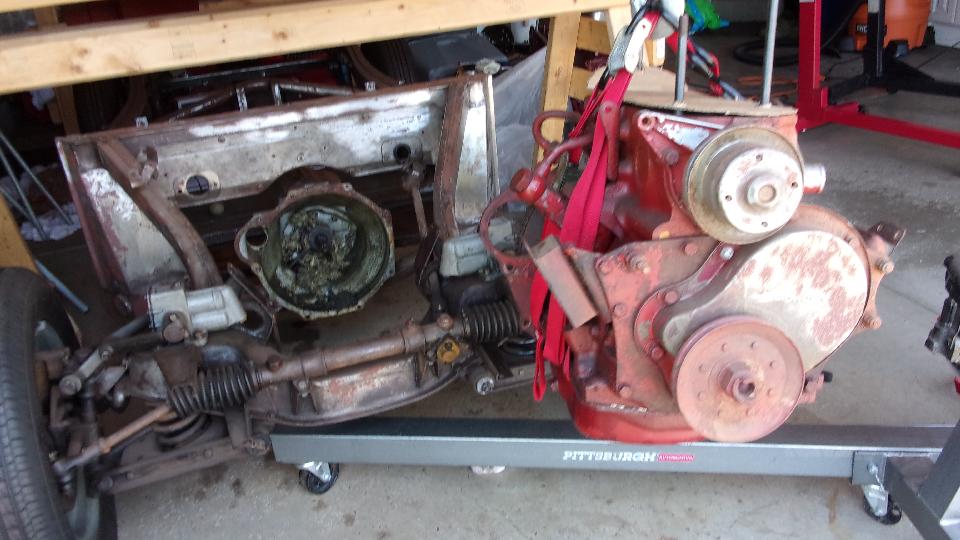
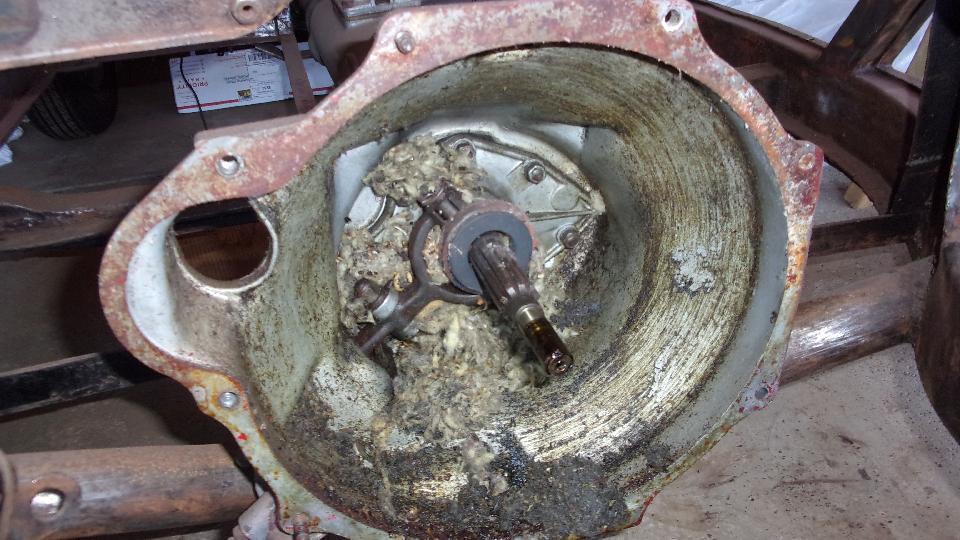
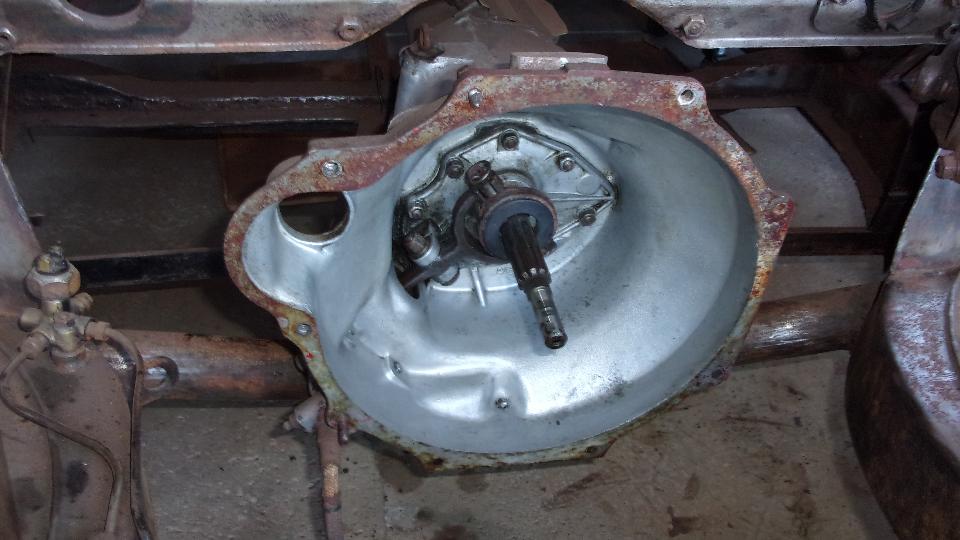
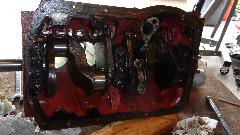
Not long to lift the engine out, immediately revealing the big mouse nest composed mostly of building insulation. Marc already knew about this from prior inspection, when he noticed the clutch release arm rubber boot was missing. But the quantity of the stuff inside was still a surprise.
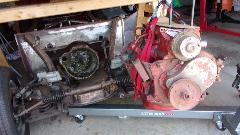

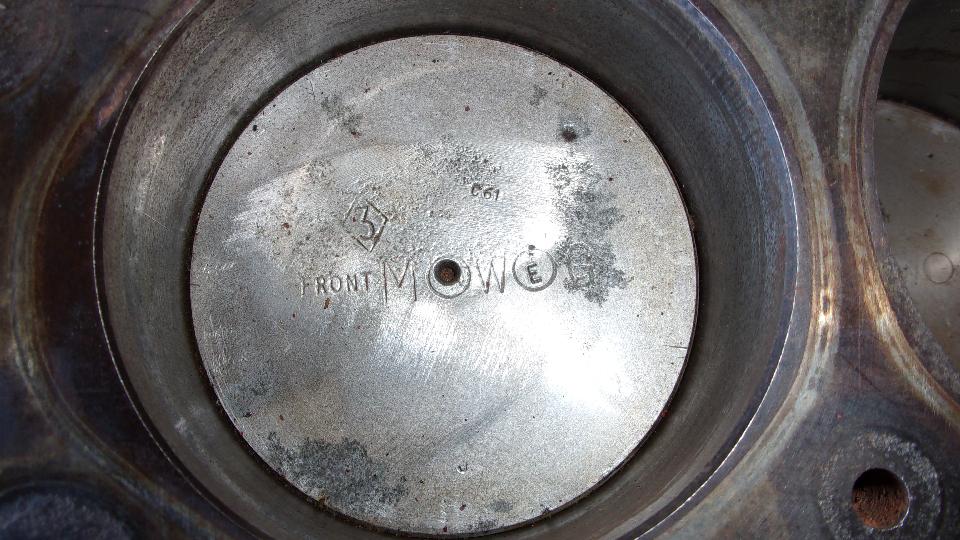
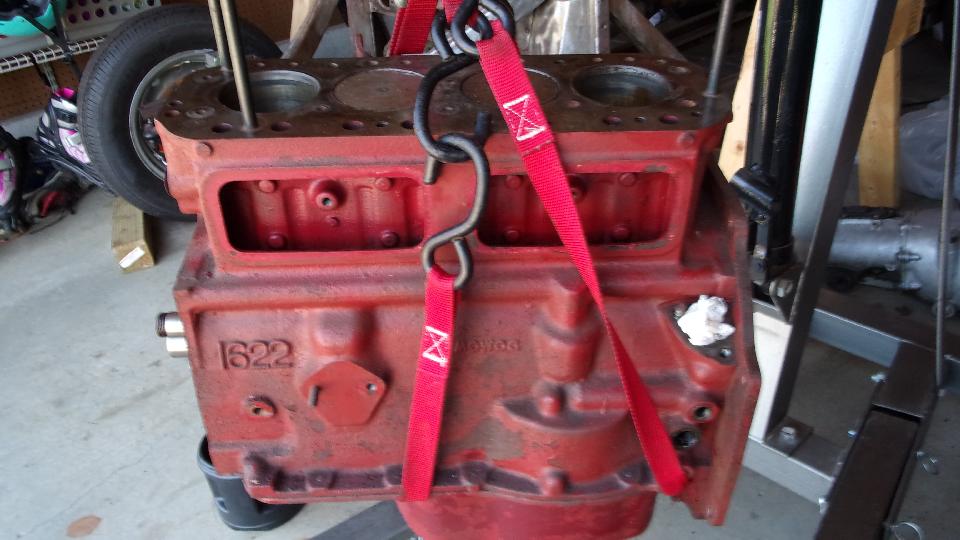
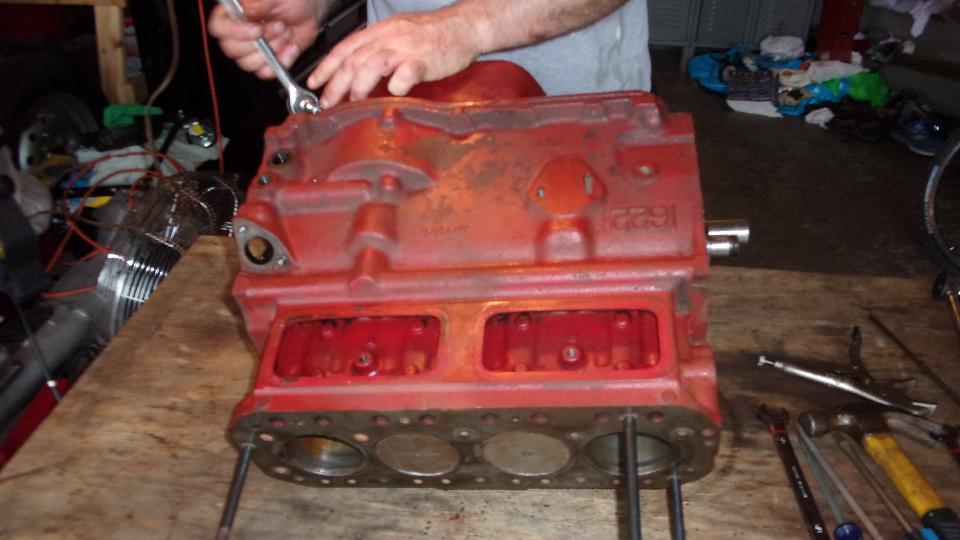
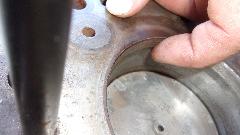
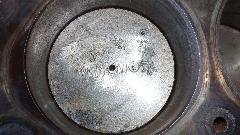
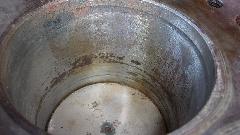
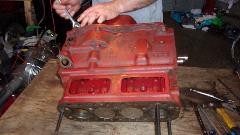
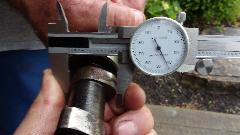
Then we were on to inspection of the 1622 engine. First up was a generous ridge in the cylinders, implying this
 engine may have 100,000 miles or so in its prior life. All of the pistons have the diamond numbers matching the numbers stamped on top of the block, so this all looked like original factory parts. Down the bores each cylinder had some corrosion and pitting from moisture accrued in long term storage, and some scuffing of the cylinder walls. Considering the amount of wear under the ridge, and the pitting and scuffing, it was kind of a no-brainer to decide this one needs a re-bore and new pistons, so we continued with disassembly.
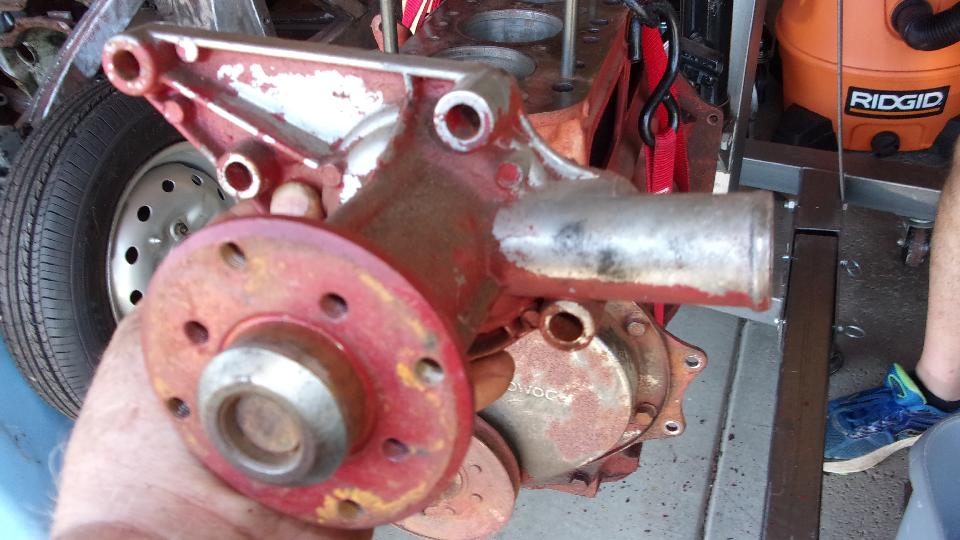
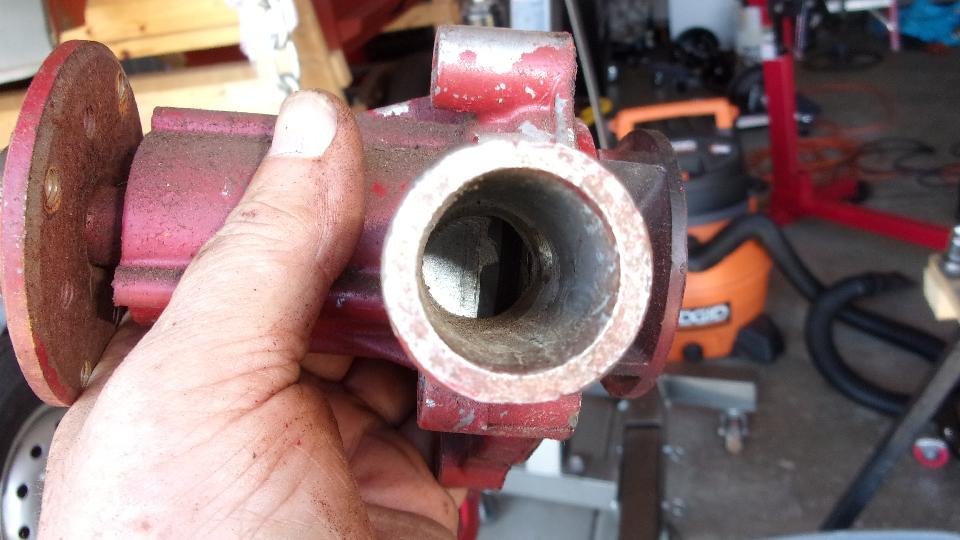
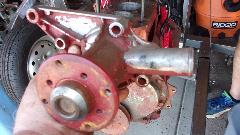
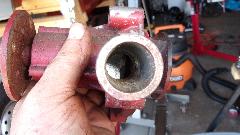
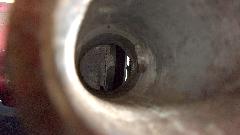
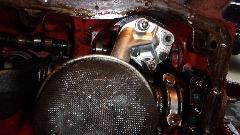
I spotted the aluminum water pump right off, which raised my curiosity (from prior experience). Sure enough it was mid to late 1980's issue with the 2/3 obstructed inlet port. This was improved a few years later with more open flow area. Either way, the generator mounting arm is thin and weak, tending to break off regularly, so this one will be assigned to the dust bin.
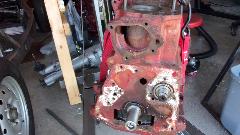
By day's end we had the block pretty well stripped on the outside, still needing to remove the drain cock on right side and the rear plate before going to the engine stand. In the process we found a couple of tab washers that were new and had not been bent upward to locking condition. The tappets looked somewhat the worse for wear on bottom end, so they need to be replaced. That implies that the camshaft may also be near end of life, so will have a good look at that once we get it out. We also found a brand new timing chain and chain tensioner, and maybe new clutch disc, likely with zero miles on them, which reinforces the idea that this engine had some minimal replacement parts just before it was last parked.
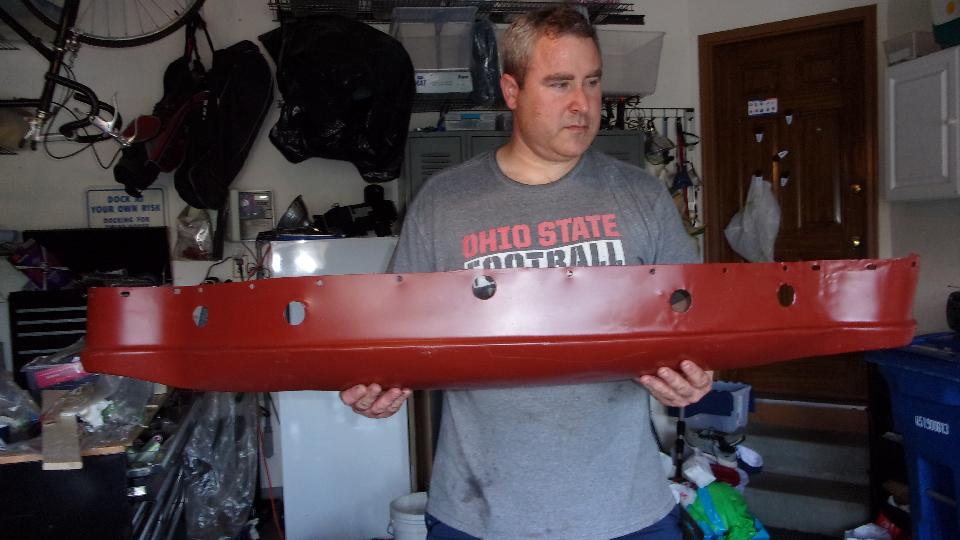
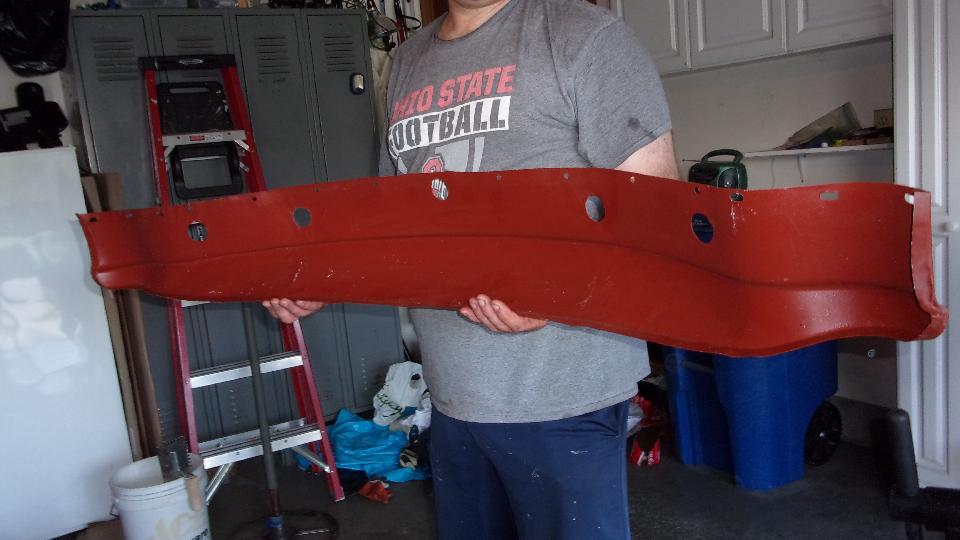
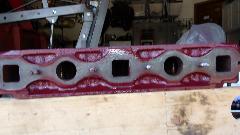
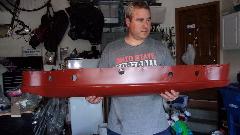
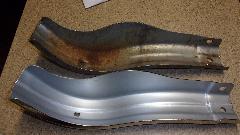
We had a late lunch break, but didn't get back to work much more, except Marc was cleaning up the bellhousing (nice job there). Then Marc was showing off his original sheet steel front valance panel. Not as nice as it looks in the pictures. This one has a lot of creases and ripples in it from being bent and straightened, maybe more than once (quite common). Time to call it a day.
Sunday June 21, 2020:
Back to Marc Chapman's place to borrow his garage (stay out of the hot sun), and I get to work on my own car today. Had to pull off the front bumper and valance panel in preparation for body work on the LF wing. Removing the bumper wasn't too bad, just four large hex nuts and six smaller bolts for the side brackets.
 But the valance panel turned out to be a pain, and I got to swear a little at the DPM friends who worked on the LF wing and repainting the car in 2015. Looks like they may have lost 4 or 5 of the #10-32 hex head screws and installed a variety of Phillips head and straight slot screws, some of which may have been coarse thread or metric, and therefore cross threaded, a couple with hex nuts behind the captive cage nuts. But it gave up and came apart eventually, and we washed it up for a good look-see. I will have some Fiberglas work to do here sometime in the next few days.

Evening run for foraging to re-stock the larders in preparation for a week without a car.
Monday June 22, 2020:

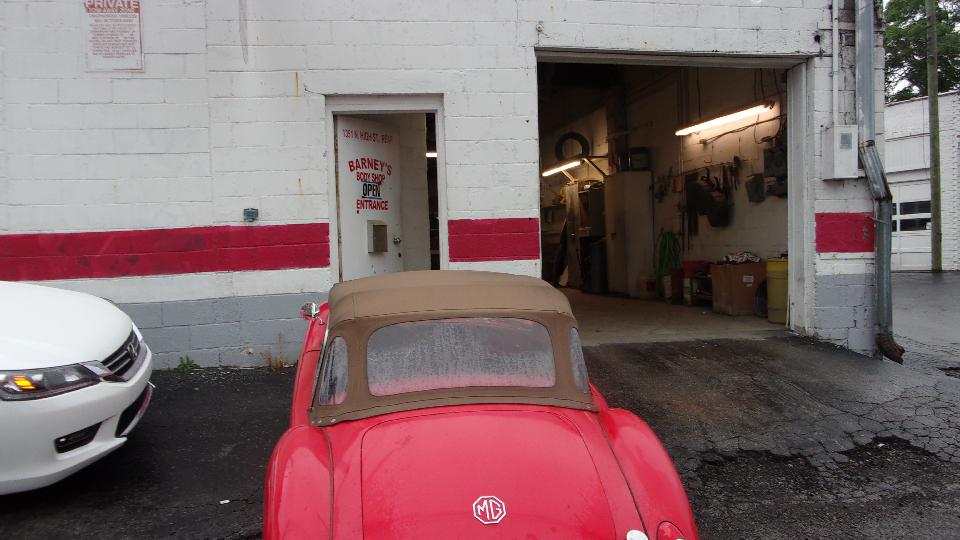
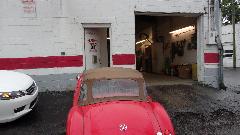 Raining this morning, but have to get out and go. Taking the MGA to Barney's Body Shop to get the LF wing straightened out and repainted. Expect the new paint to be drying late in the week. Friend met me at the shop for return trip to the hotel.
Fooled myself today. Took a nap mid afternoon, then up and involved in some web site work, go to be late, and I thought for a while that I had just blown away two days and might have trouble getting my valance panel repaired in time for paint later in he week. Then navigator reminded me it was still Monday. Really?
Tuesday June 23, 2020:
Uh, so I do still have a day to spare. Okay after a quick breakfast, back over to Marc's place to finish
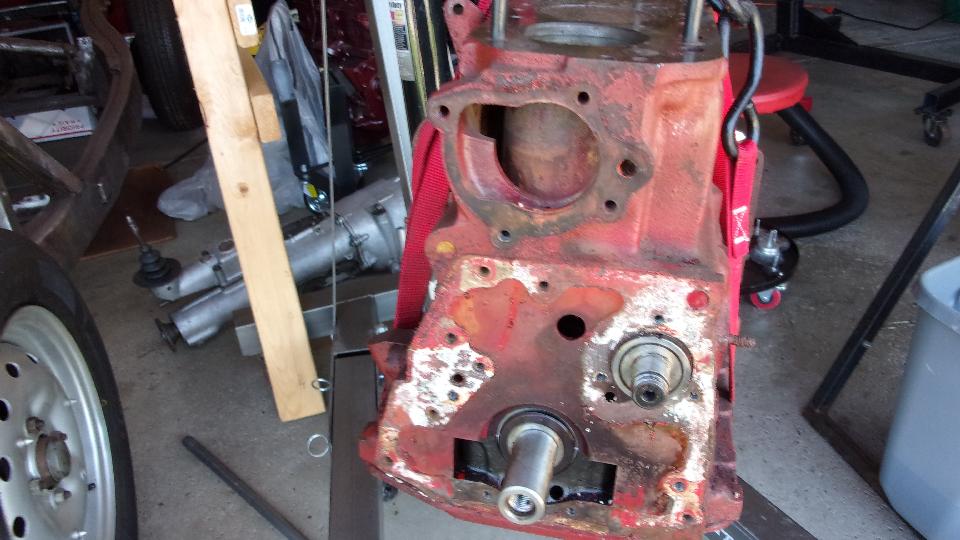
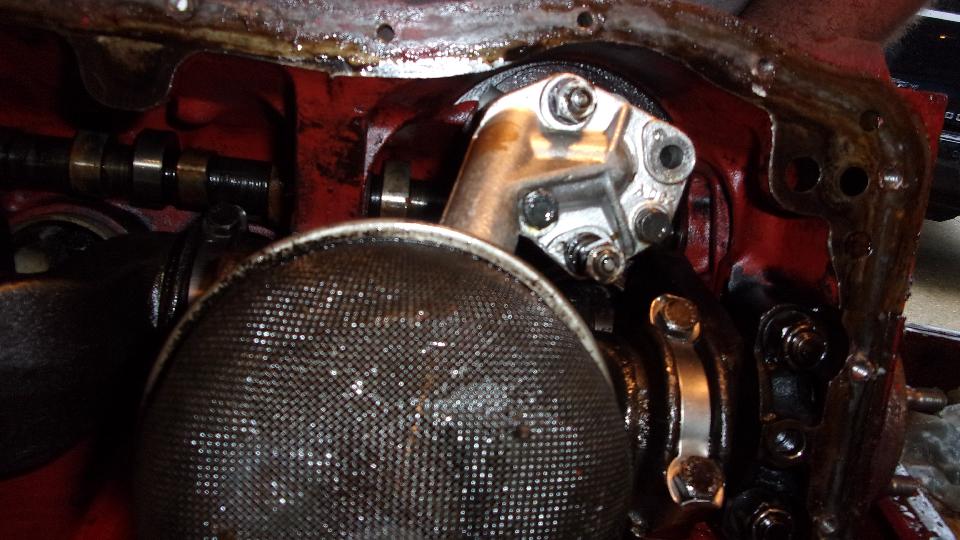
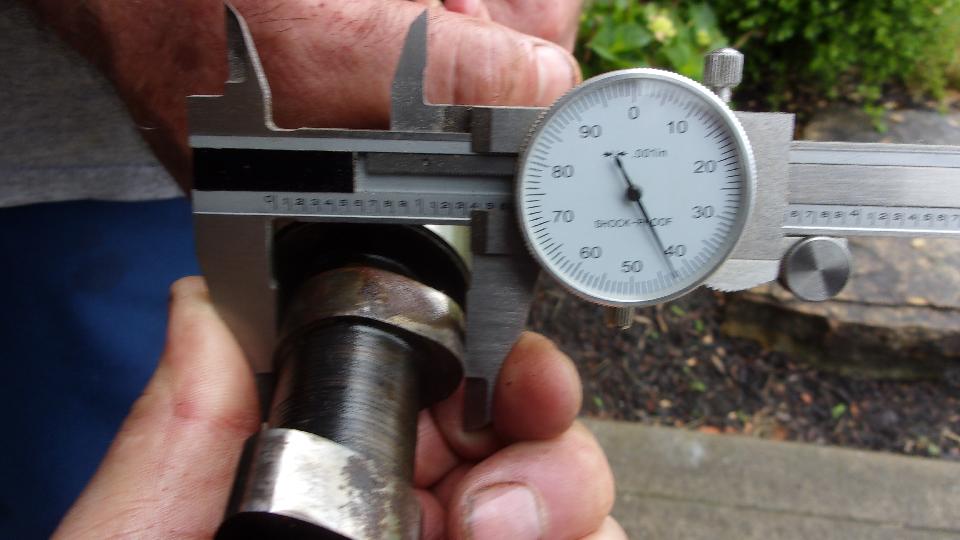
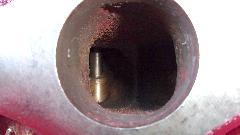
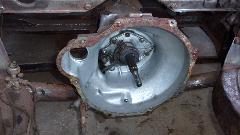
 disassembling his engine, and start by draining the oil. Still needed to remove the rear plate and a few bits on the right side, like coolant drain cock and distributor mount. Then we decided not to waste time putting it on the engine stand, just set it on the table, roll it over on its side, remove the sump, and proceed to disassemble it. First surprise was one of the oil pump mounting studs was missing, and it was not in the sump. Cute. After extracting the oil pump we removed the the camshaft and proceeded to measure the cam lobes, finding a couple of them worn down 0.020" to 0.030", so put a new cam and tappets on the shopping list.
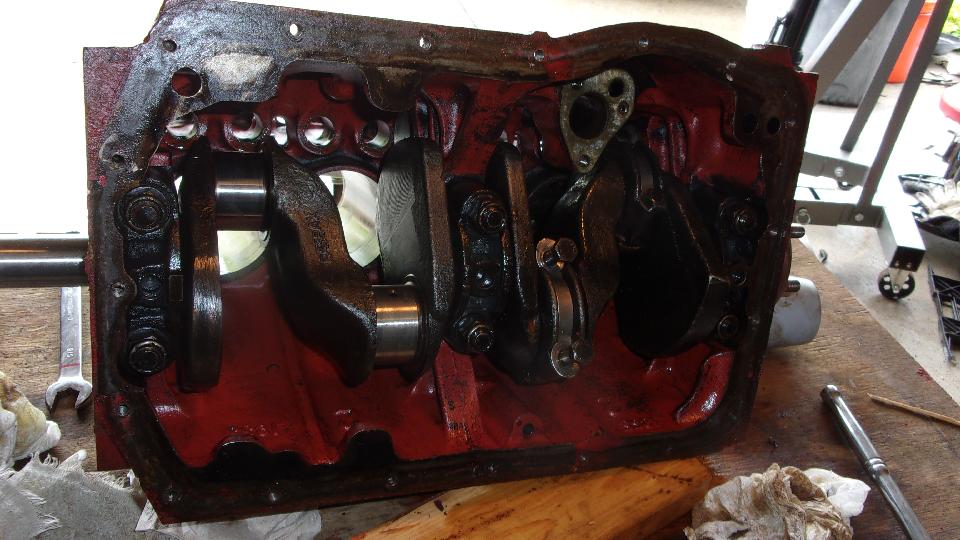
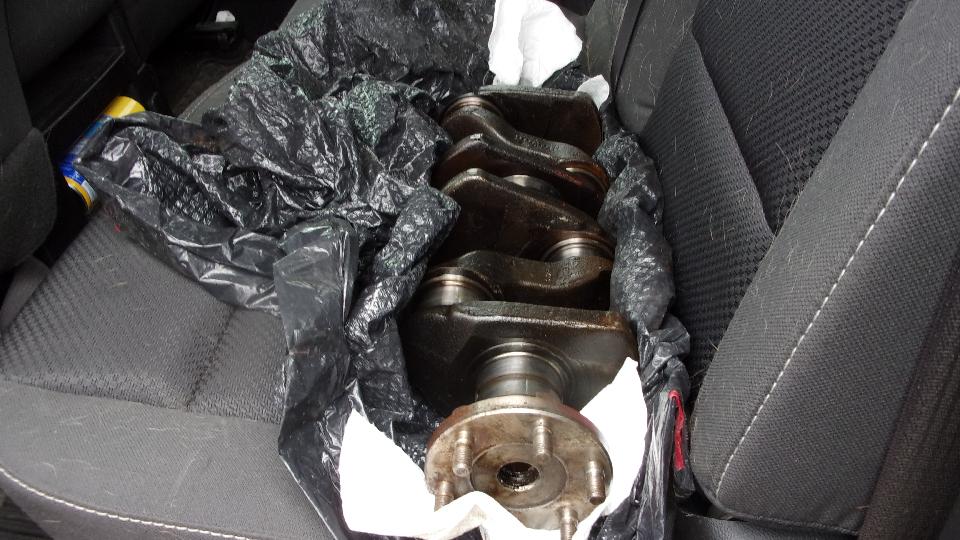
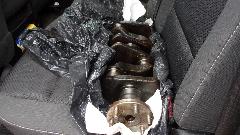
Not long to knock down some lock-tabs to remove the big end caps and pistons one at a time, finding nearly new big and bearings, and the crank journals looking surprisingly good. Main bearing nuts off, caps out, and remove the crankshaft, and the main journals also looking pretty good. Time for a delivery run, put the engine block, crankshaft, cylinder head and flywheel into the truck, and off the engine shop for a little presentation and negotiation. Ridge in cylinders, obviously needing r-bore. Crankshaft might polish up okay without regrind, but will measure it to be sure. Cylinder head will get hardened steel valve seats, valve job, maybe a couple new valves if needed, and maybe shim some springs to correct set-up pressure. Flywheel will be machined to remove 8 pounds, bringing it up to later production 20 pound spec (and balancing of course). Shop owner was happy to see we had reinstalled the main bearing caps and removed all of the studs to make his life easier, thinking he was dealing with someone who knows what they are doing. That's nice. I think we will get on just fine here. Backlog of a few weeks in the machine shop, so expect it to be done sometime in late July.
Couple of side trips on the way back, to pick up some bolts, grease fittings, a thread tap and drill bit, and a brake
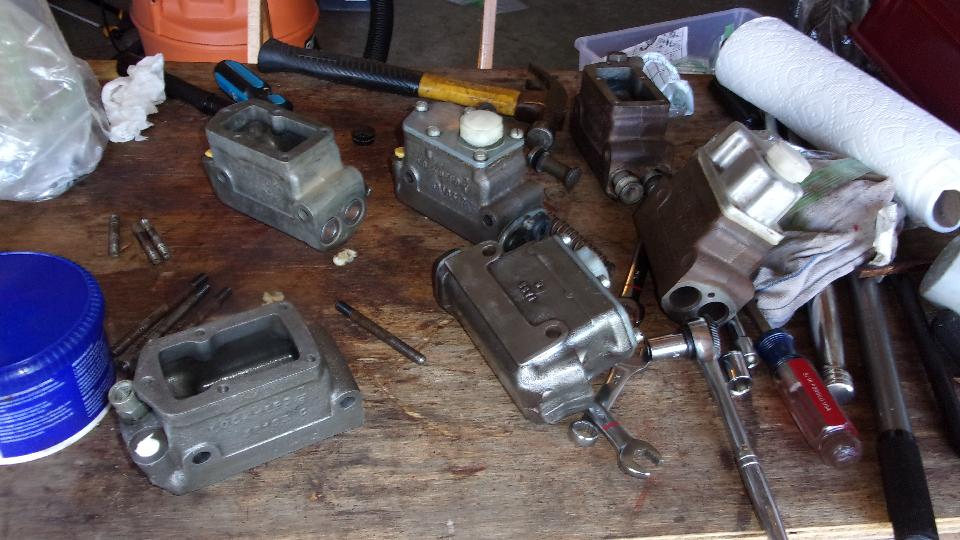
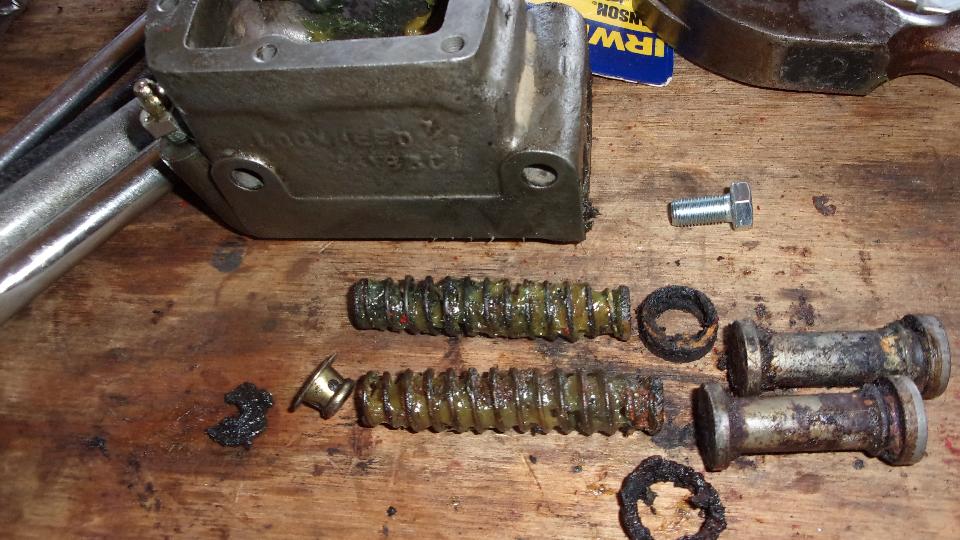
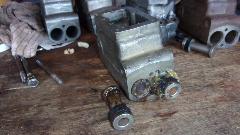
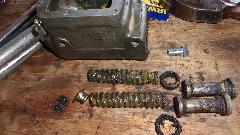
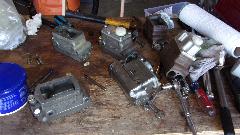 cylinder hone (after a few false starts and referrals). Then back to the garage to "attack" half a dozen master cylinders to see if we might be able to conjure up two or maybe three workable units. We started with the one that came out of Marc's car, because it looked easy to disassemble. Stop momentarily for a chuckle when we found all of the rubber cups and pistons installed backward, so figure that car hadn't been driven since the last brake work. Every car has its own stories, but this one in particular has a lot of DPM issues.
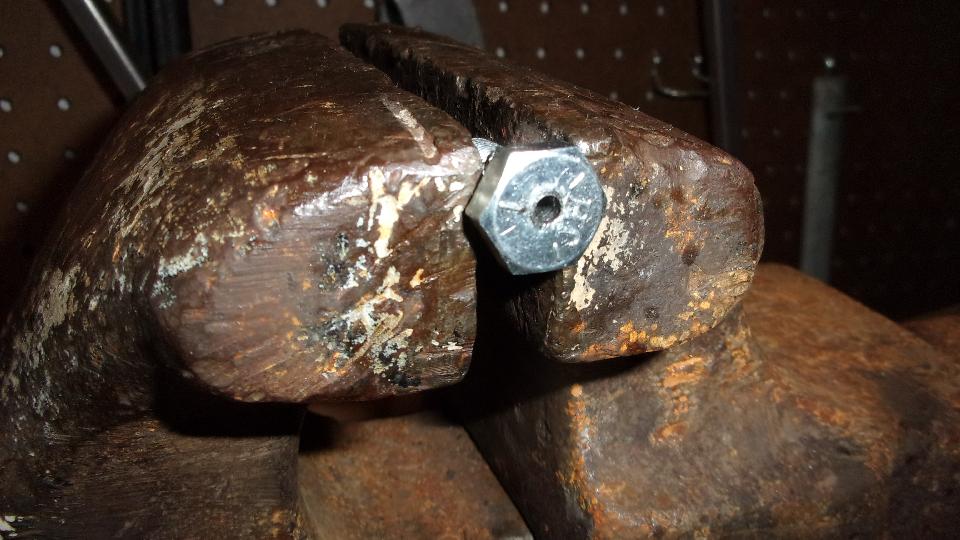
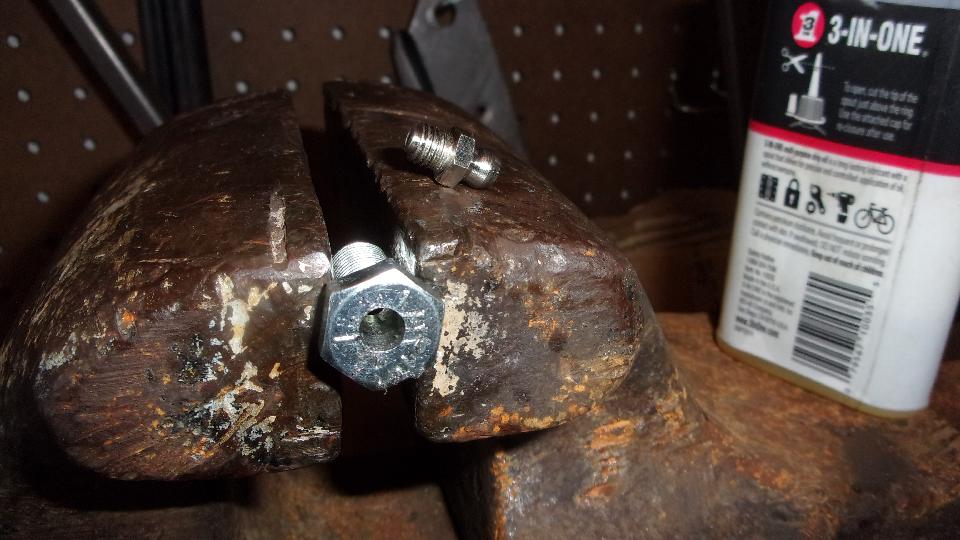
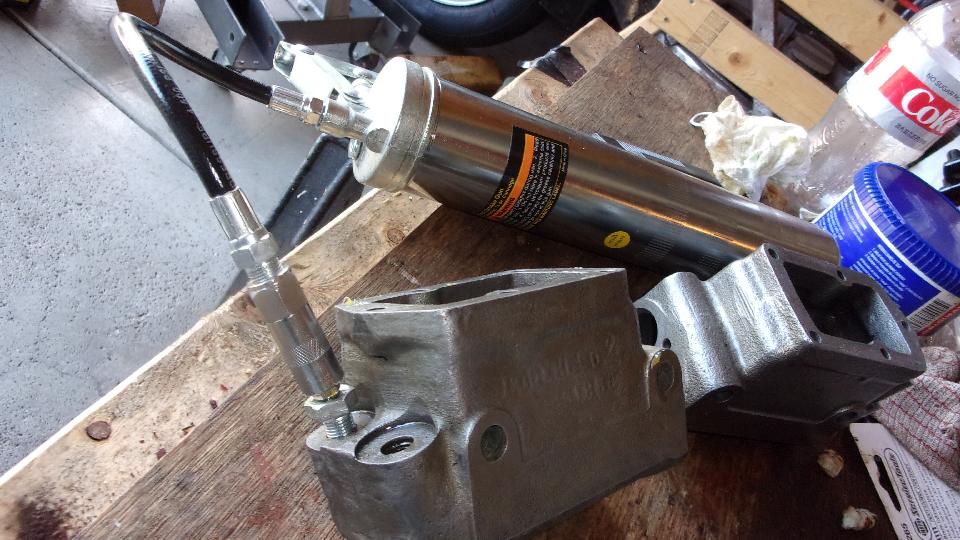
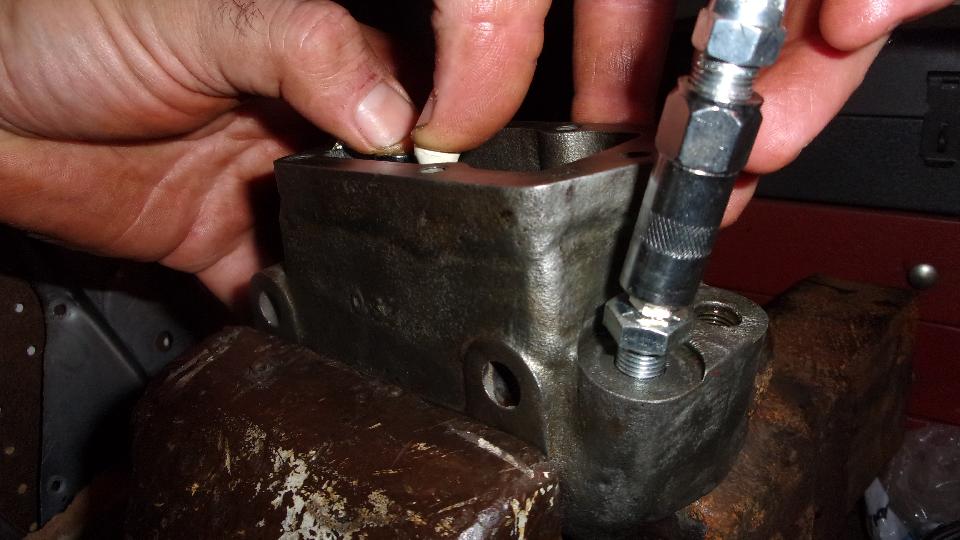
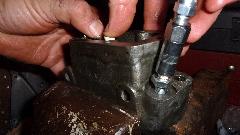
Put a 3/8-24-UNF x 3/4 hex head bolt in the vice, center punch the top, and drill a small pilot hole through the full length of the bolt. Drill that out to 1/8-inch through, then go #3 drill half inch deep, tap a 1/4-28-UNF thread, and install a grease fitting. You can screw this bolt into the outlet port of the master cylinder (or a bleed port of a wheel cylinder) to connect a grease gun, then pump away at it to push out any stubborn stuck piston.


When a master cylinder piston gets back to normal rest position, the grease will come out of the rear most reservoir bottom port. You can plug this hole with a golf tee, and holding it down with your thumb can hold back 500 to 1000-psi pressure (because the hole has such a small cross section). If the primary rubber seal cup fails, the grease may come out of the more forward reservoir port, which you can also plug with a golf tee.

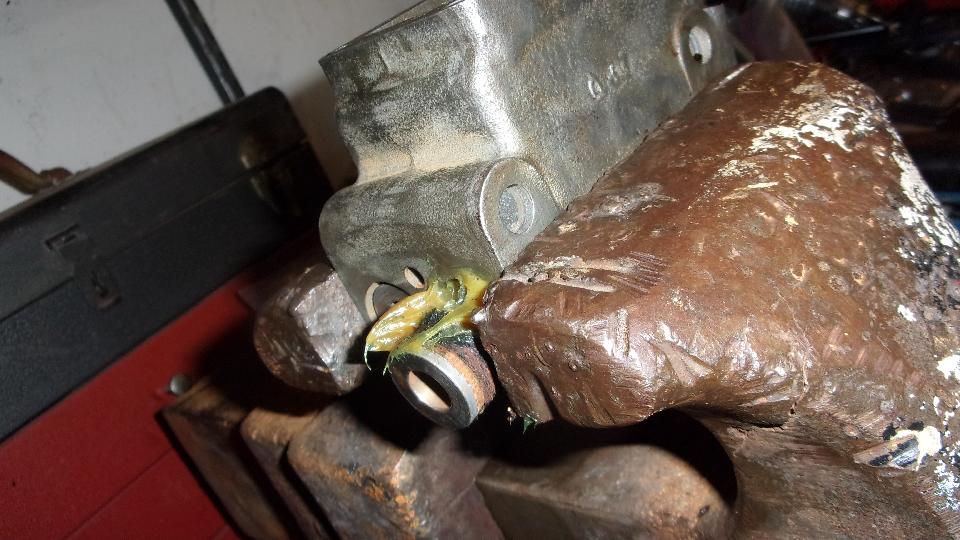
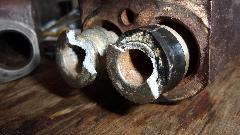
In the end we were mostly winners, as most of the pistons came out one way or another. The joker popped up when one master cylinder had pot metal pistons rather than steel pistons. Would like to kill the DPM who thought that was a good idea (just to clear the human gene pool). These pistons appeared to be half way out of the bores, but were in fact thoroughly stuck. Hitting with a hammer would not budge them a hair, just breaking the ends of the pistons. Untold hydraulic pressure ultimately blew out the cup seals releasing the grease pressure, at which point we called it quits. It would be easy enough to drill out the pot metal pistons, if you have a drill press to avoid drilling into the cylinder bores. But I figure if the galvanic corrosion is that bad, the bores will likely need to be sleeved. Marc was washing grease out of all the liberated parts when it was time to break for dinner.
Wednesday June 24, 2020:
Started the day by posting a new web page for the beginning of transplanting a Chevy 3.4-liter narrow angle V6 engine (and 5-speed gearbox) into an MGA. Photos and notes compliments of Charlie Lumb in New Milford, Connecticut.
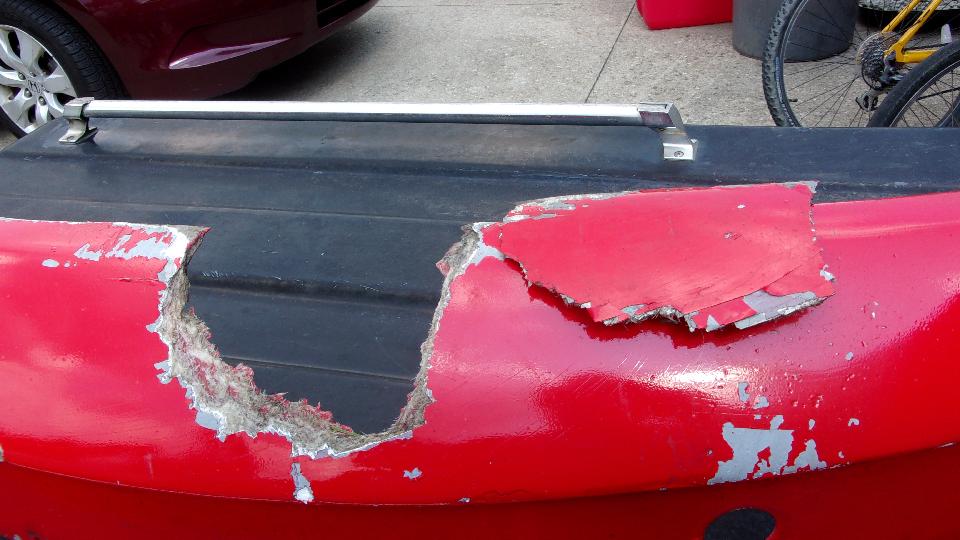
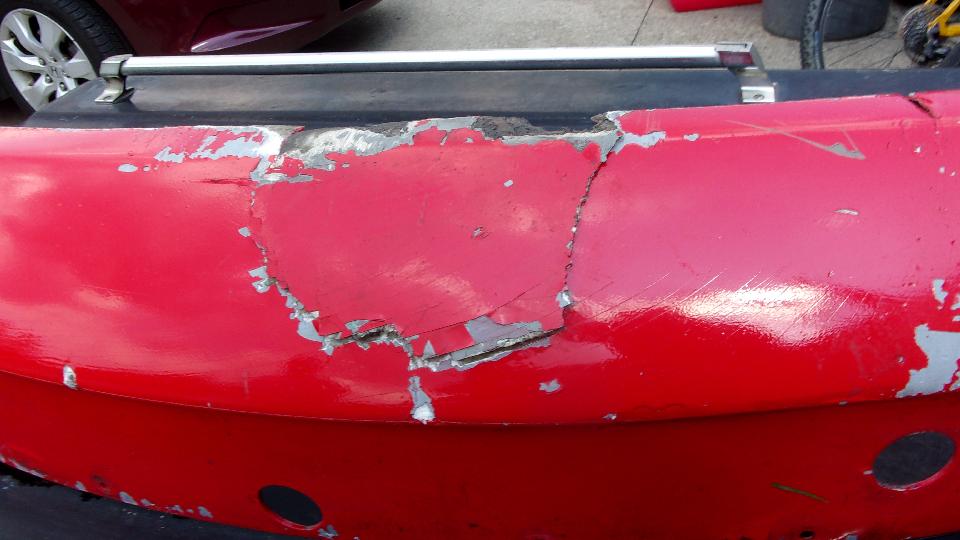
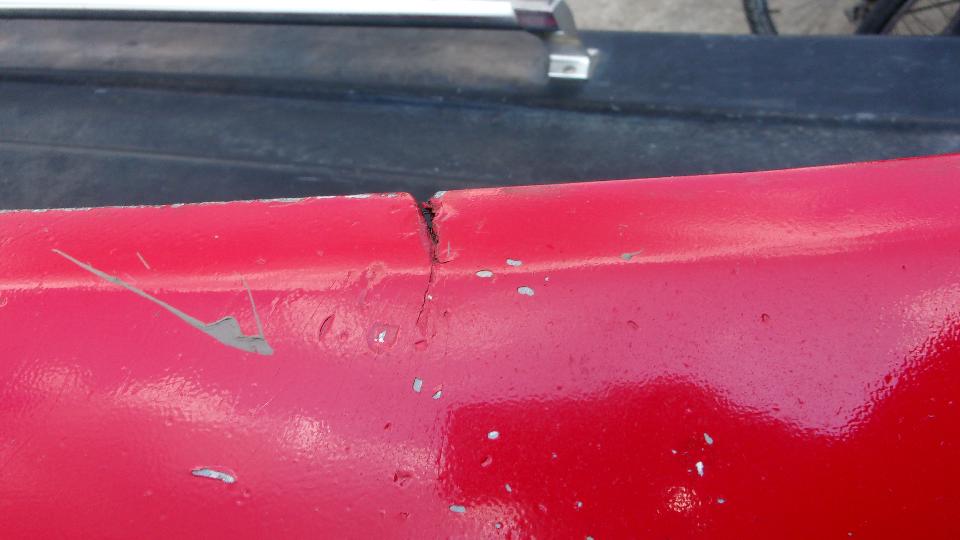
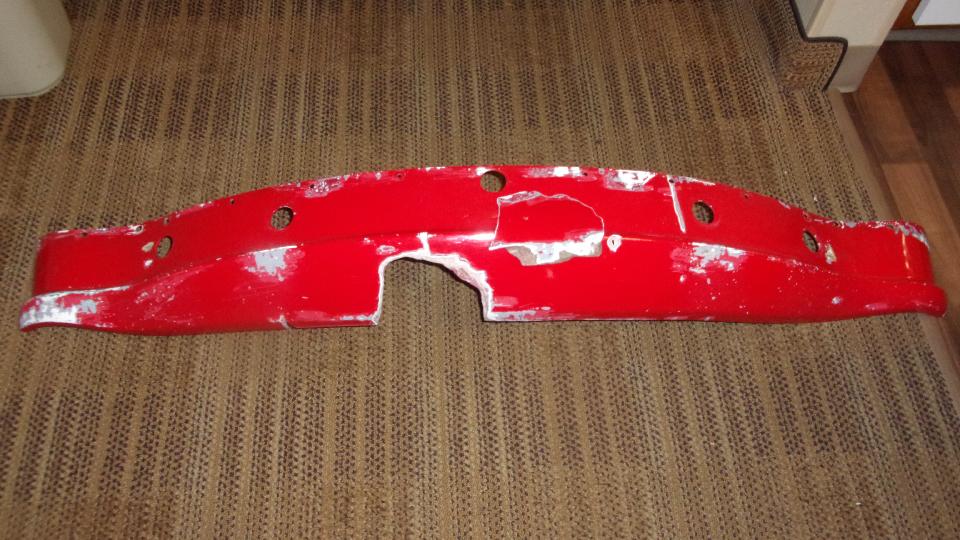
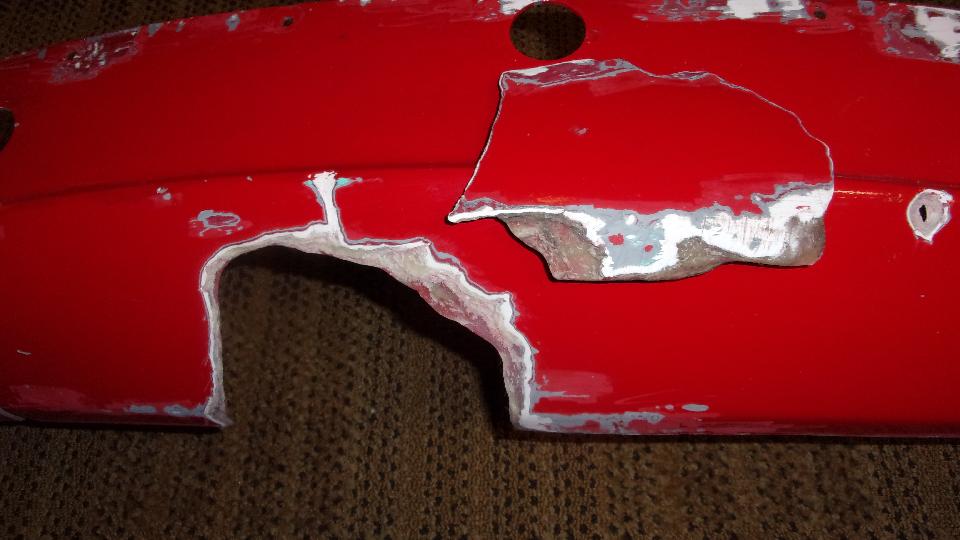
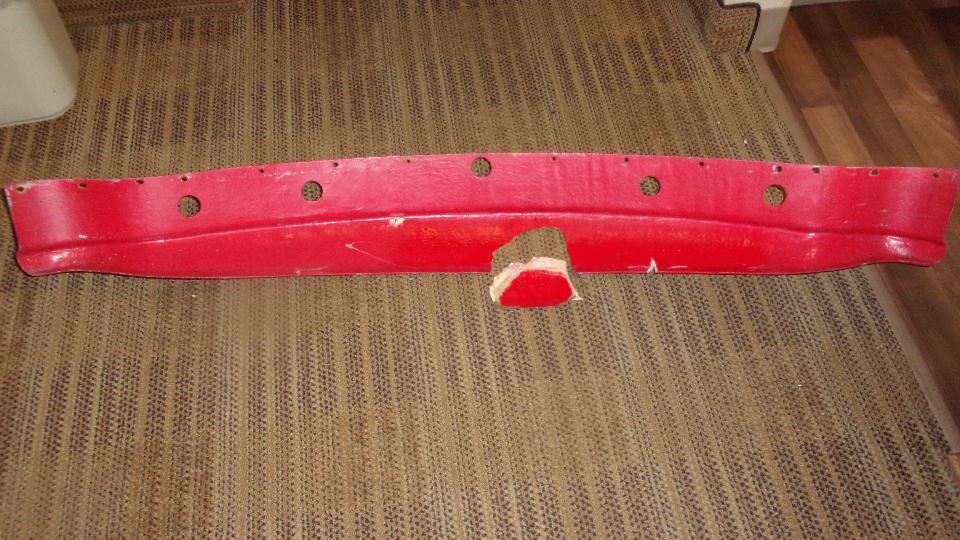
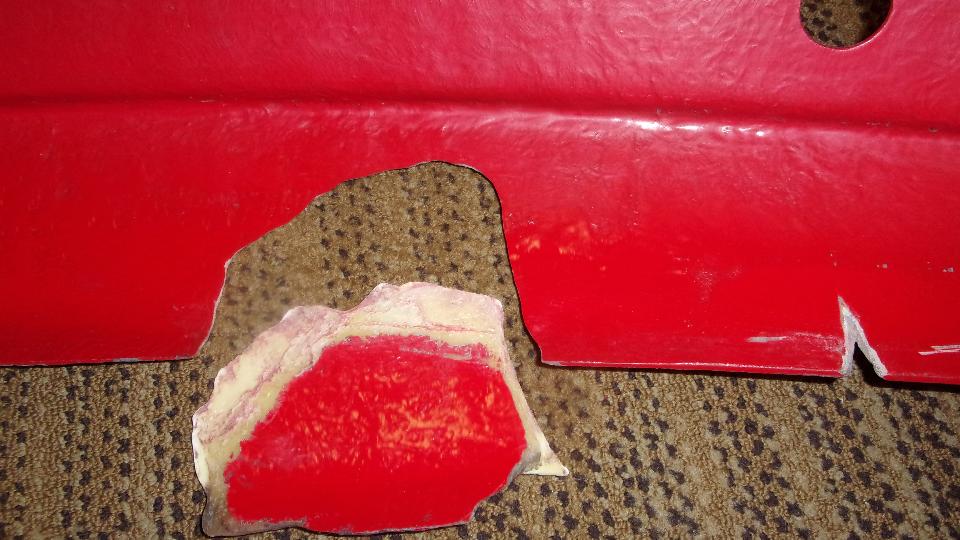
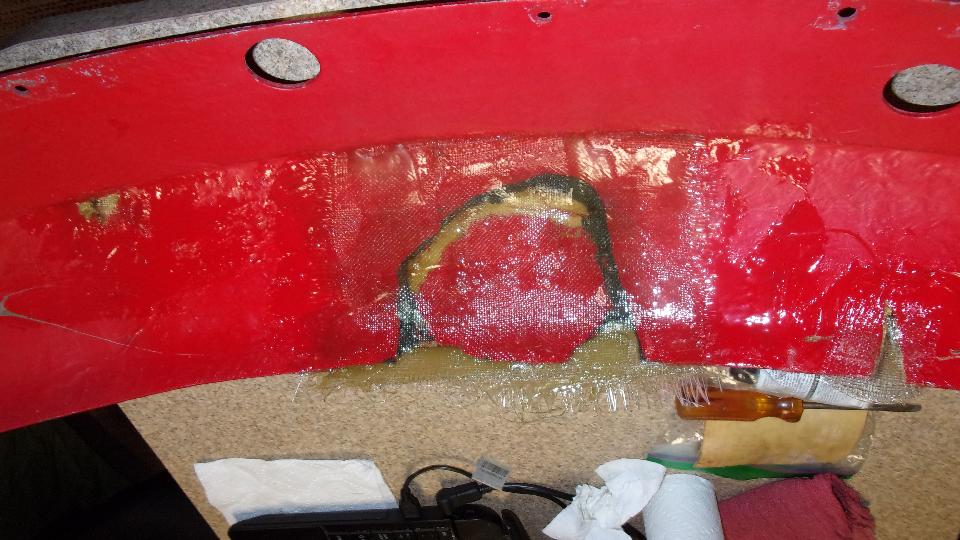
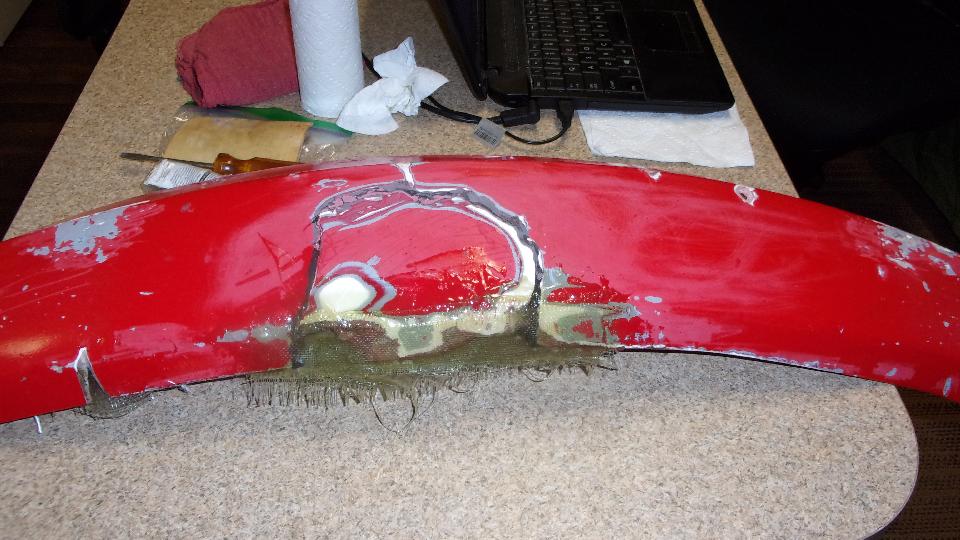
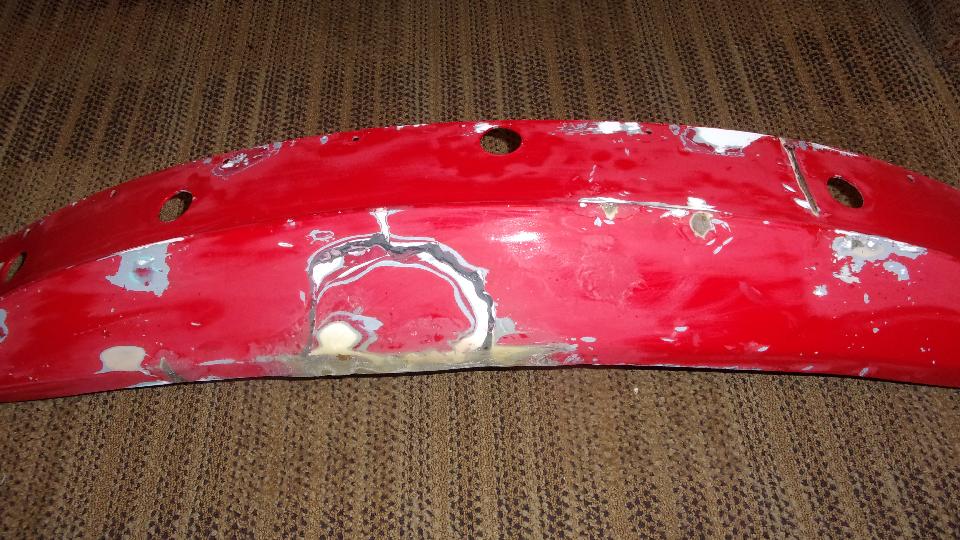
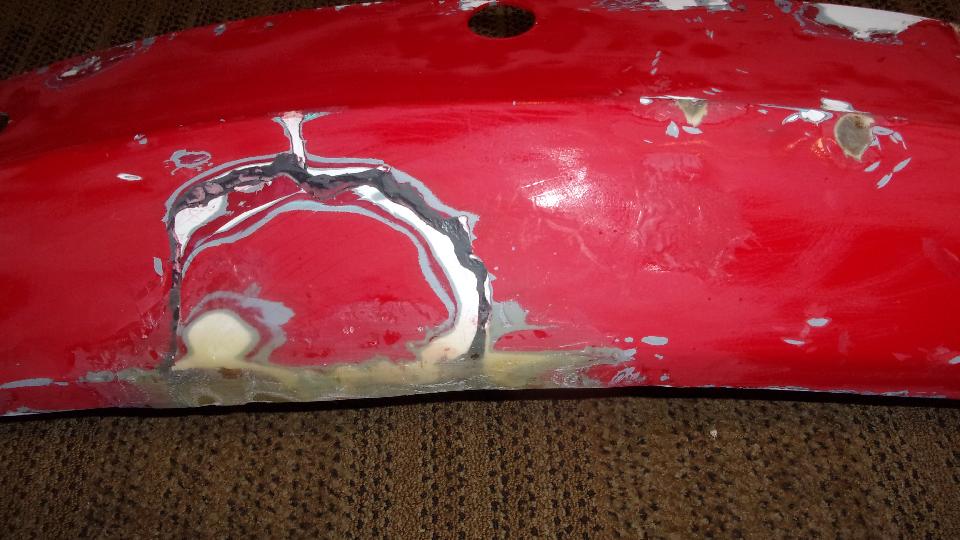
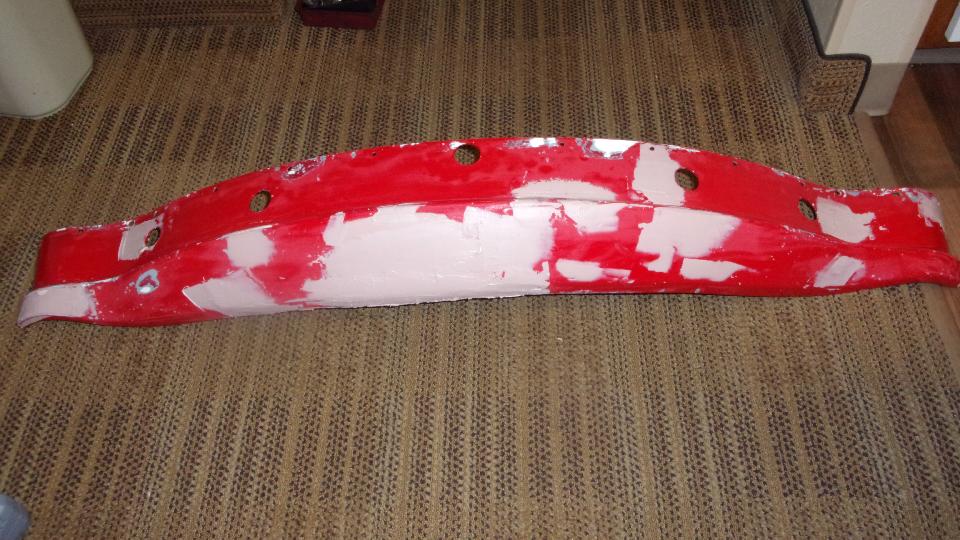
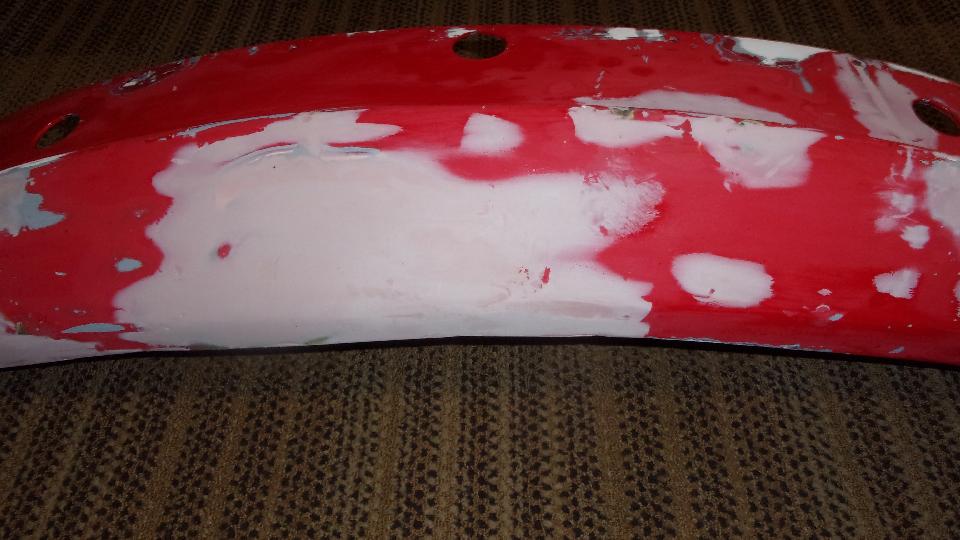
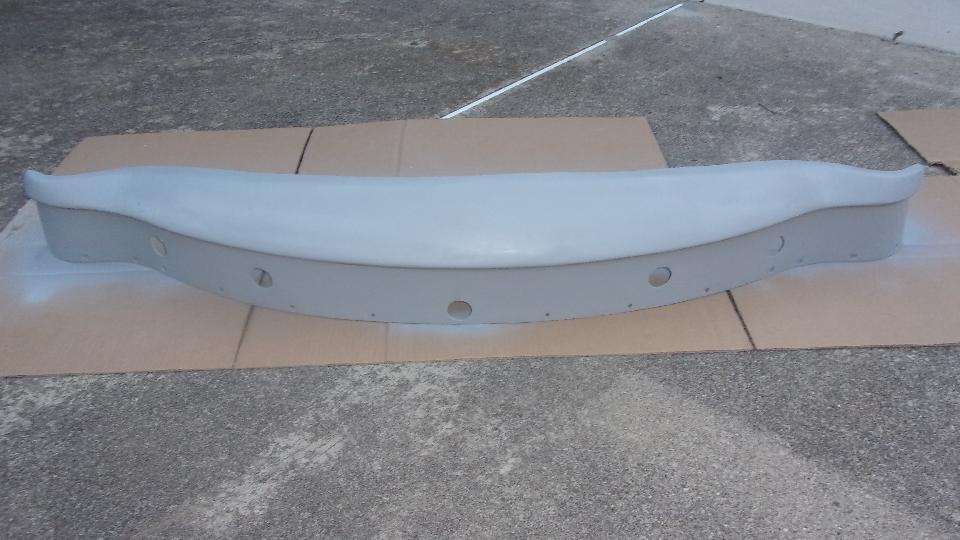
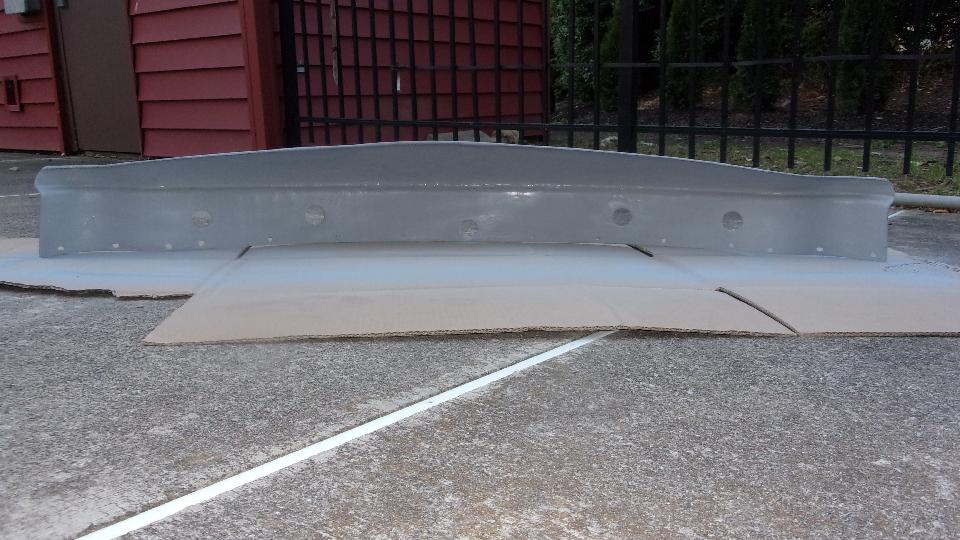
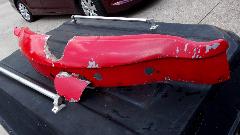
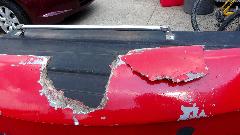
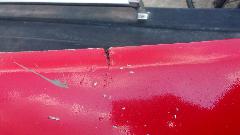
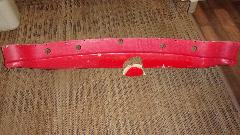
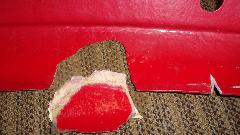
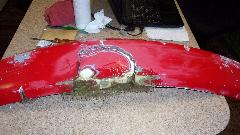
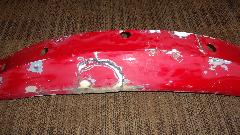
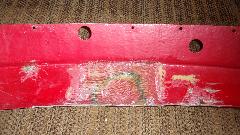
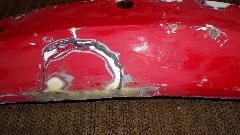
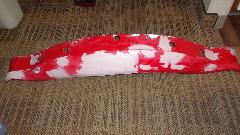
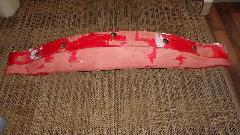
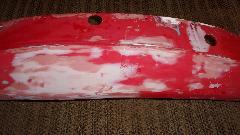
Then it was time to get motivated and work on repairing my long neglected and broken Fiberglas front valance panel. This is the one that was not repaired when the car was last repainted in 2015. I think that makes the last repair and repaint of this piece from the time of body sill replacement in 2008. So after 12 years and a quarter million miles (and hundreds of parking curbs), I guess I shouldn't complain about the condition. This is a tough little part for maybe three pounds of Fiberglas, and not too difficult to repair.

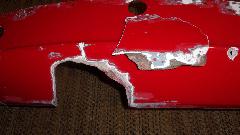
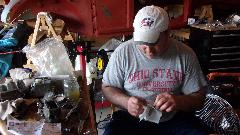
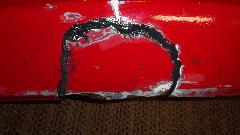
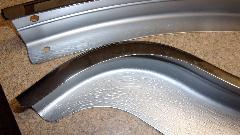
I started with a sanding drum in a Dremel hand grinder to grind away all loose Fiberglas fuzz and delaminations from the fractured joints. Front faces before, above left. Front faces after grinding, above center and right. Rear faces after grinding below left and center. Aside, I was doing this in the hotel bathroom with the door closed (think lots of dust and a cloth breathing mas). Fortunately bathrooms are designed for easy cleaning, so finish by wiping it all worn with a wash cloth. Unfortunately I couldn't find my 5-minute epoxy, so I slapped it back together with J-B Kwick-Weld. Not my greatest artistic effort, but it worked. My primary concern was that it should be completely sealed with no voids that could later become air bubbles or permanent voids in the finished part. But now I think it is going to need many hours to cure before it can be sanded.
Thursday June 25, 2020:
This was destined to be a long and hectic day. Was working on the front valance panel by mid morning, determined to get it finished so it could be painted at the body shop along with the LF fender. Well that wasn't going to happen, as by mid day I got a phone call from the shop saying that the body work and painting was already finished and ready to pick up, like yesterday even. Swift service, finished two days earlier than expected. So I arranged to pick it up Friday morning when I would drop off the repaired valance panel so it could be painted, and then go back to pick that up in the evening.
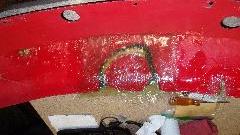
The schedule turned out to be more of a challenge than expected, with a few unanticipated time delays. First move was to trim the JB Weld epoxy flush on the inside with a pocket knife, then lay on three layers of fiberglass cloth with the epoxy "syrup" being applied with a paint brush (including a few smaller holes and cracks). Then another time delay as the epoxy resin took longer than I remember (several hours) to set up enough to continue work.
Then around front to apply one layer of cloth saturated with resin, pressing it onto all depressions to eliminate any air pockets. Then continue to fill the depressions with repeated smaller patches of cloth until the pockets were filled flush, followed by one more larger cloth overlay to cover everything. All that followed again by several hours of curing time before the epoxy was set enough to be sanded.
Friday June 26, 2020:
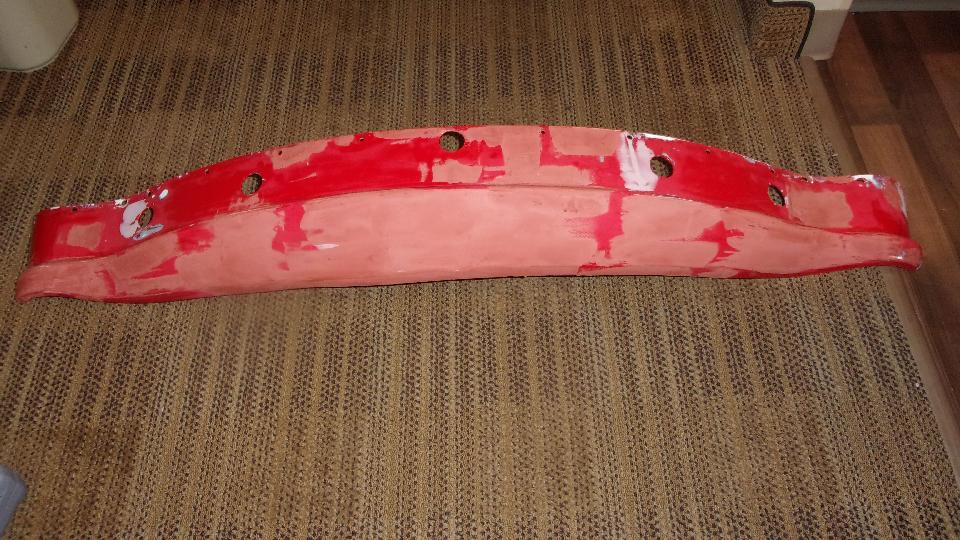
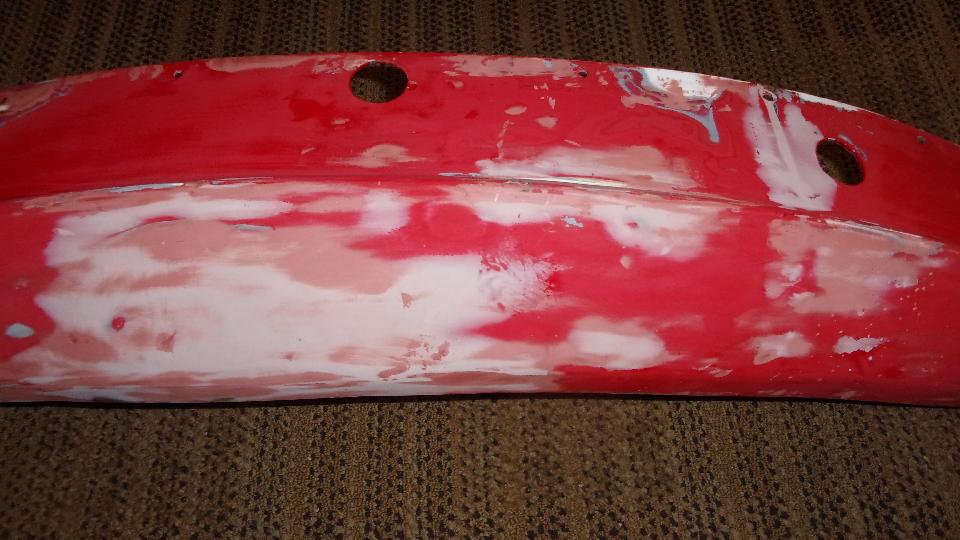
By this time it was past midnight, and I was significantly concerned about clock time to get all this finished in time for morning delivery to the body shop, so keep on keeping on. I used a carbide grit in fiberglass abrasive disc with a Dremel tool to trim the new fiberglass patch flush at the lower edge of the panel, then a little grinding in back to remove any burrs and smooth the edges of the cloth overlays. That was all that would be required on the back side before painting. Then more carefully grinding on the front side to smooth down anything protruding to be flush. Finally mix a little Bondo body filler to spread on the front side for filling any remaining depressions. This was going much better (quicker), as working time with the filler was only a few minutes, so I had to mix and spread a few times, followed by a half hour curing time.
Then I was into wet sanding, more pleasant as it makes slightly muddy red and white water rather than dust in the air. Using 320-grit paper on a sanding block, sand a little, rinse the paper, and repeat until getting down to the primary surface to feather the edges. Wash and dry, then on to a bit of spot filler squeezed out of a tube like tooth paste. That stuff contains several fast evaporating solvents giving maybe 10 to 15 seconds of working time before it begins to clog up on the spreader tool, then wipe the spreader and get a little more of the paste to continue. But this filler is very thin (low viscosity), so it is good for filling pin holes and paint chip divots. Another 20 minutes is enough drying time to either dry or wet sand the spot filler, giving the final smooth surface ready for primer.

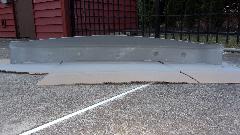
Instructions with the aerosol primer/sealer says minimum 50dF and maximum 60% relative humidity. At quarter to six this morning we had 65dF and 75% relative humidity, but we were out of time, so take it outside and give a shot anyway. Lay the panel face down on cardboard and spray the edges and holes and inside surface first. Then flip it over and spray the front side, and take a rest brake for 10-15 minutes while it dries enough to handle. Then with fingers through the clearance holes, take it back into the hotel room to finish drying (with window open and bath exhaust fan running).
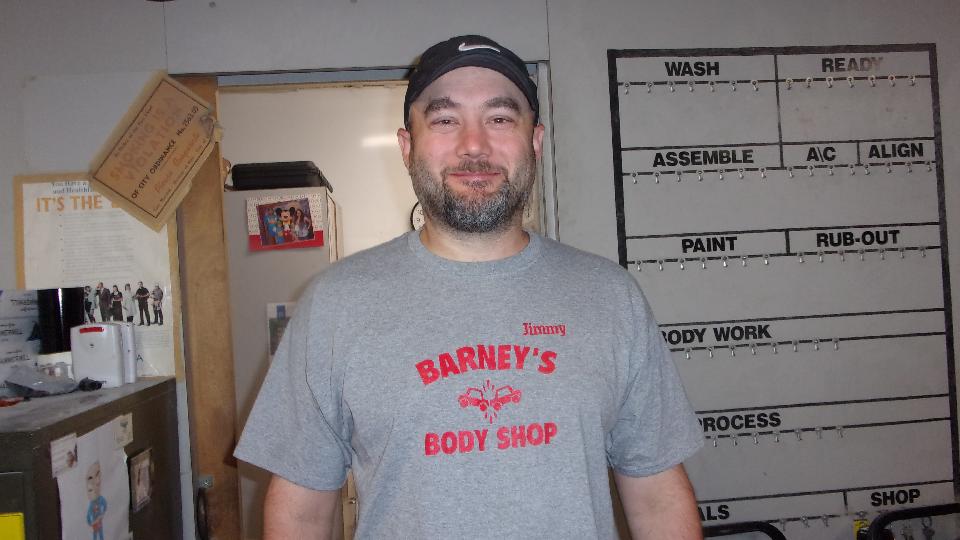
7:30-AM appointment for friend to give me a ride to the body shop to drop off the valance panel and pick up my car. Say hello to Jimmy, auto painting artist and owner of Barney's Body Shop in Columbus, Ohio.


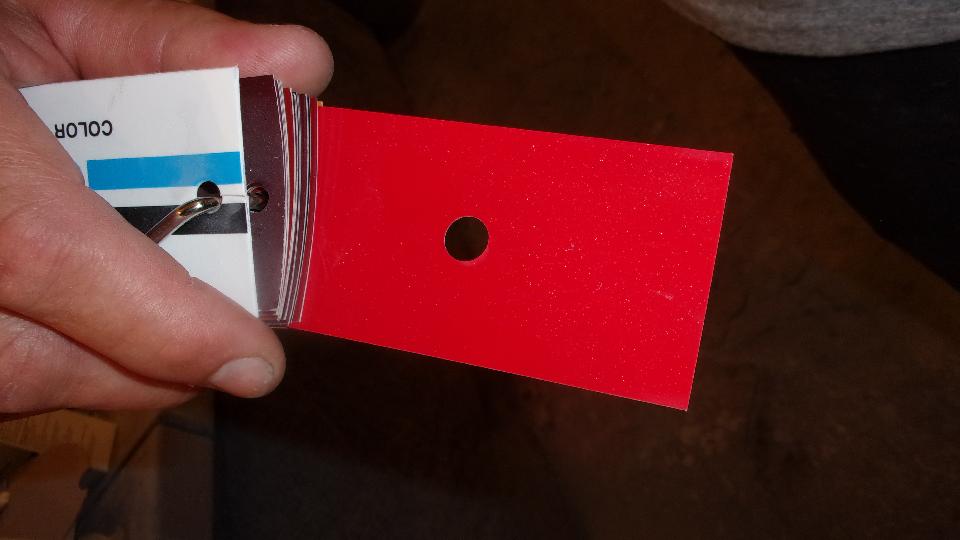
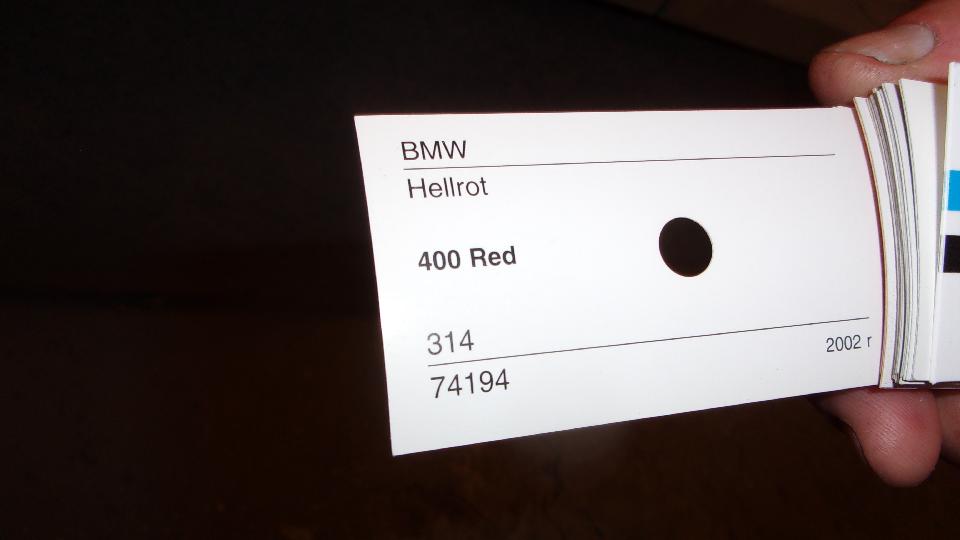
In 2008 I re-painted my car with the standard MGA color Orient Red, but the dark red colors commonly fade darker with time. In 2015 we did a painted panel to color chip eyeball match, choosing some color that was just a close match to the 7-year old faded red. Last winter (December 2019) a laser scan matched the then current (more faded) color as a close match to a standard BMW color). Jimmy and his paint matching friends now came to the same conclusion as the prior laser matching, that the color of my car is a good match with a standard BMW color, so nothing special required. Body work and new paint on the car is quite good, but I was preoccupied at the time and didn't get a picture (but I surely will later). I paid the bill, dropped off the valance panel in primer, picked up the MGA, and headed back to the hotel for a good shower and several hours of sleep.

Then back to the shop to pick up the freshly painted valance panel before 5-PM. Jimmy had lightly sanded the primer (on the face side of the panel), shot it with a seal coat, then 2K base coat and clear coat, followed by curing time and buffing. Amazing how fast modern epoxy coatings can cure to reduce shop time. Will have to check later to see how the clear coat and buff matches up to the prior single stage enamel with catalyzing hardener and slight orange peel finish (never waxed).
No assembly work today, as I now intend to place another parts order for a new screw kit for the valance panel (expect ship Monday and arrive Wednesday). Rest of the day was catch up with BBS and email and posting the past two days worth of photos and notes. Now sneaking up on midnight again, so I think will sleep and get back on the day shift. Yes, the past few days have been pretty hectic, but all in all, this has turned out to be a very good day.
Saturday June 27, 2020:
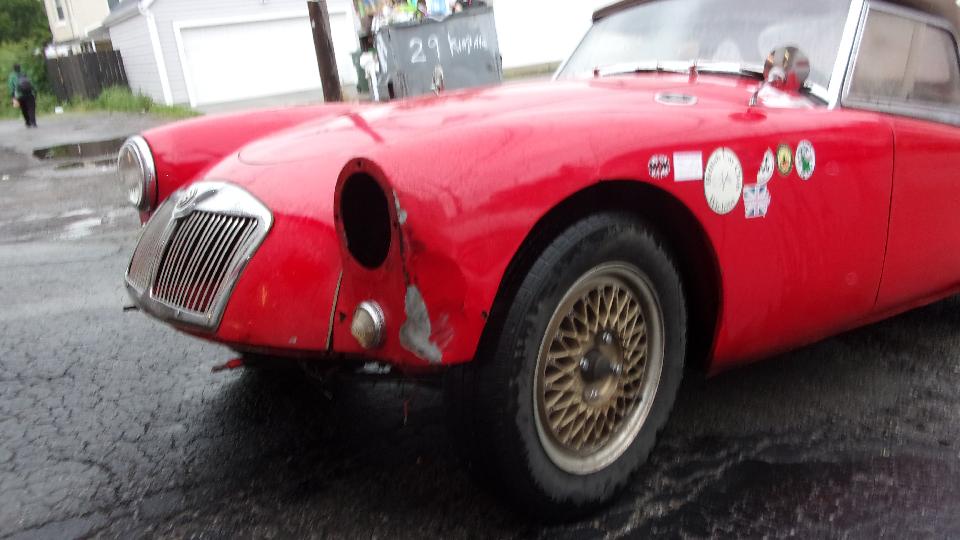
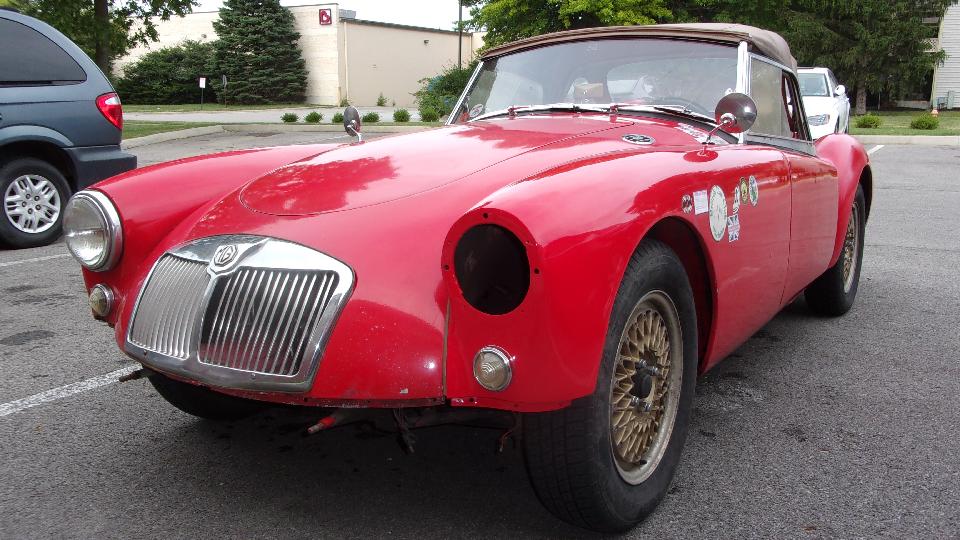
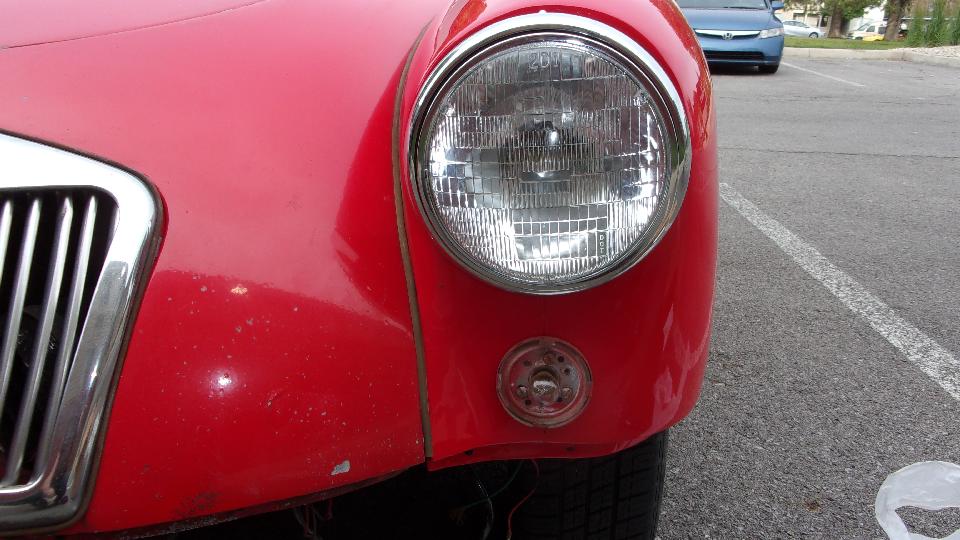
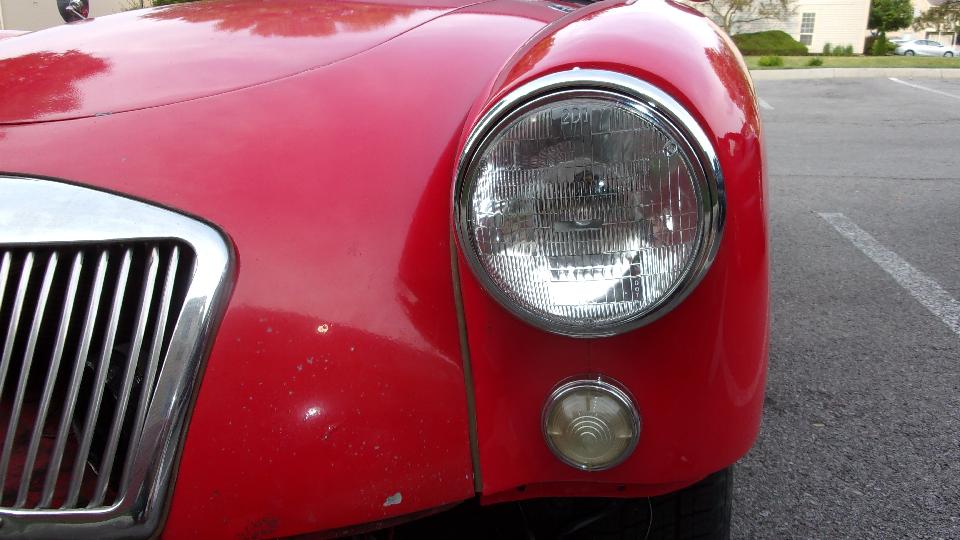
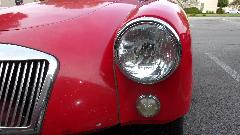
If I didn't do anything else notable today, at least I got the new headlight installed, along with a new LF corner lamp. The headlight was only a little tussle, having to clean paint out of the screw threads and out of the clearance holes for the adjuster screw holes in the fender. The new parking light gave a little trouble when the holes for the mounting screws were too small for #10 screws, and I had to open them up a tad with a small rat tail file. This is my first touch on the substitute fender front end that was installed five years ago by friends. I suppose the screw holes in that were damaged in a prior life, drilled out and re-tapped from #6-32 to #10-32 thread, now needing the larger screws. Didn't get the wiring connected yet, but that's supposed to be the easy part. Maybe tomorrow.


Sunday June 28, 2020:
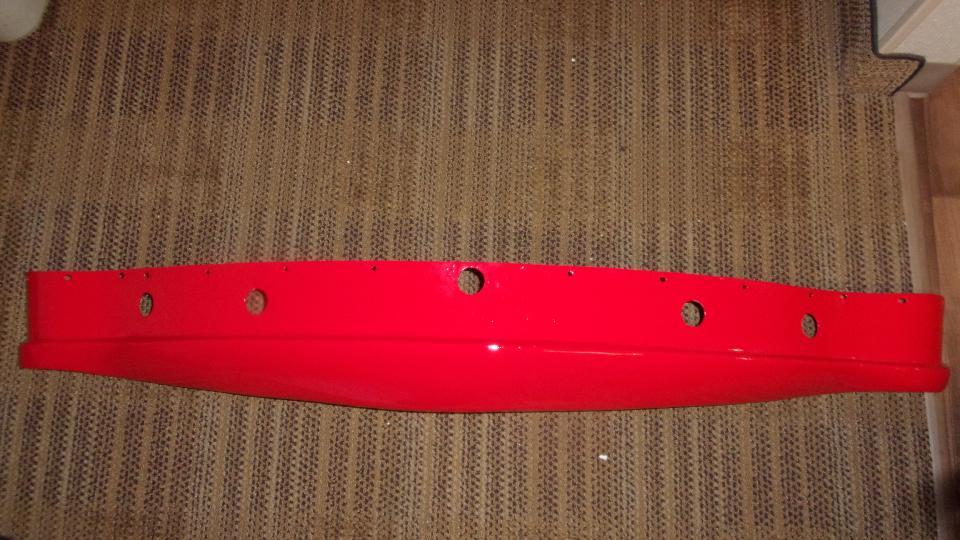
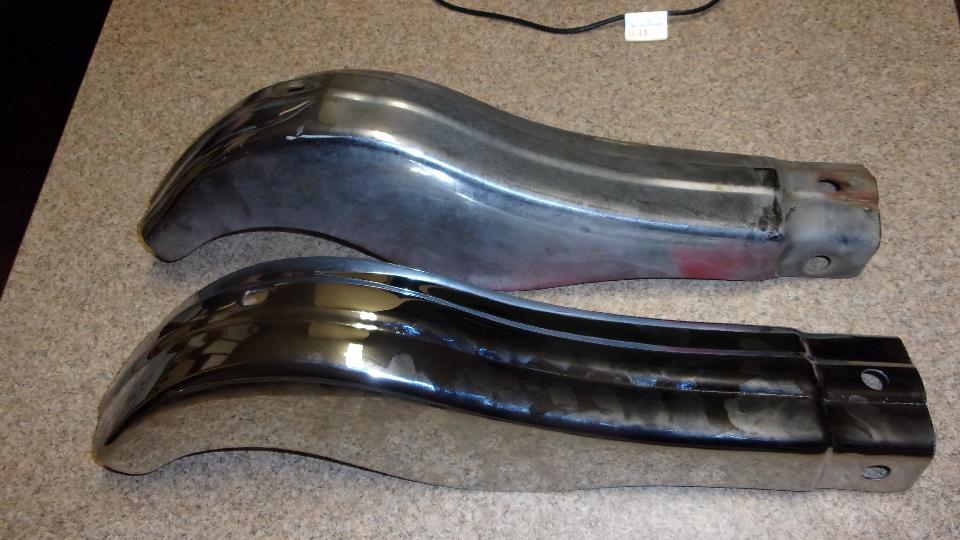
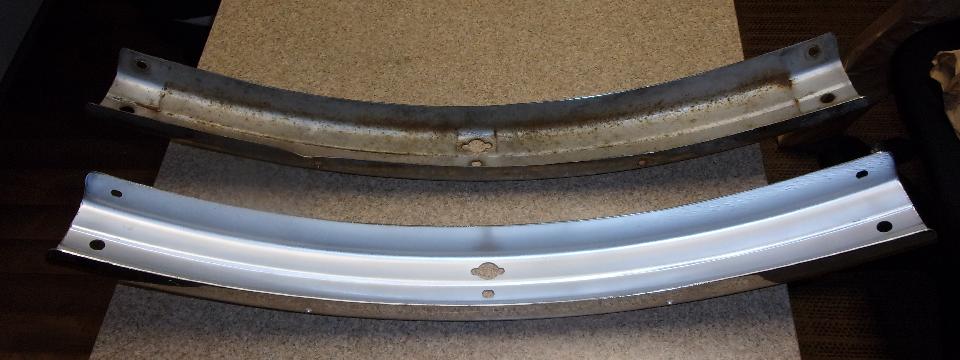
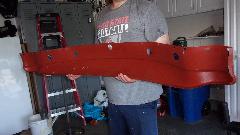
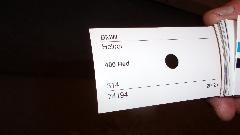
Had plans for afternoon tinkering with friend's master cylinders, but that was cancelled. So I spent some time with my front bumper. We disassembled the old one to see how much of it could be re-used. Already had in hand new 3-piece facebar, two new overriders and packing strips, and one spring bar (one old one still okay). Need to buff down and repaint the license mounting plate and small brackets, and one spring bar. Also going to order up some new chrome bolts, so it is not going to be reassembled just yet.
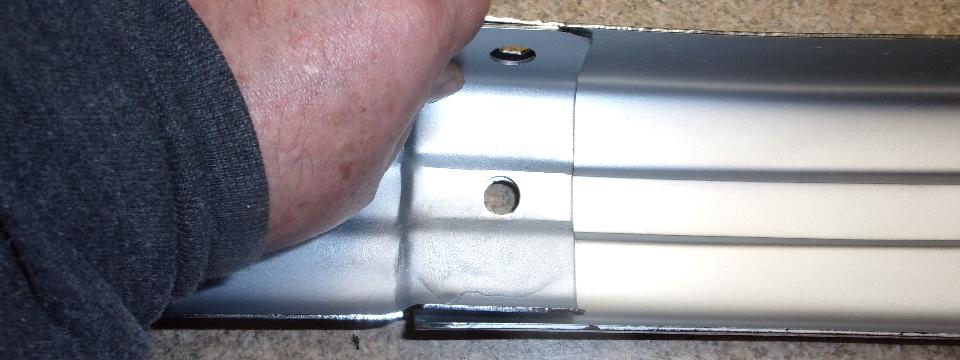
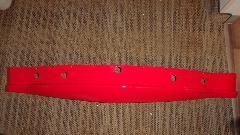
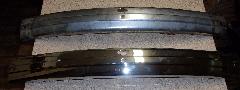
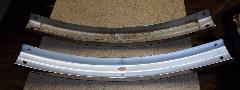
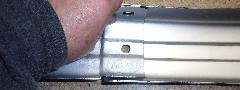
But I did inspect the new chrome parts and got some pictures for report on parts quality. The new facebar has some serious bite marks on underside of the top flanges, all three pieces. I suspect this is intentional tooling marks, like anti-skid on the tooling to hold the parts securely during forming. Inside, underneath, out of site, this should be acceptable even for a show car, but the rest of it is definitely "consumer quality", meaning affordable and not show car quality. It also strikes me as being thinner than OEM parts from back in the 60's, but would need to measure some early parts to verify that. My older facebar is 0.060" thick, and the new one is 0.063" thick, so both 16-gauge (wishful thinking that the difference might be a little extra plating thickness (but probably not).
My records say the facebar was replaced in 1998, so I won't complain too much about the amount of rust inside after 22 years and 344,000 miles. Hoping the new facebar plating is of similar durability. The lap joint between center and end pieces is pretty loose, but then the older bumper was similar, so likely that doesn't matter much once the overriders are installed.
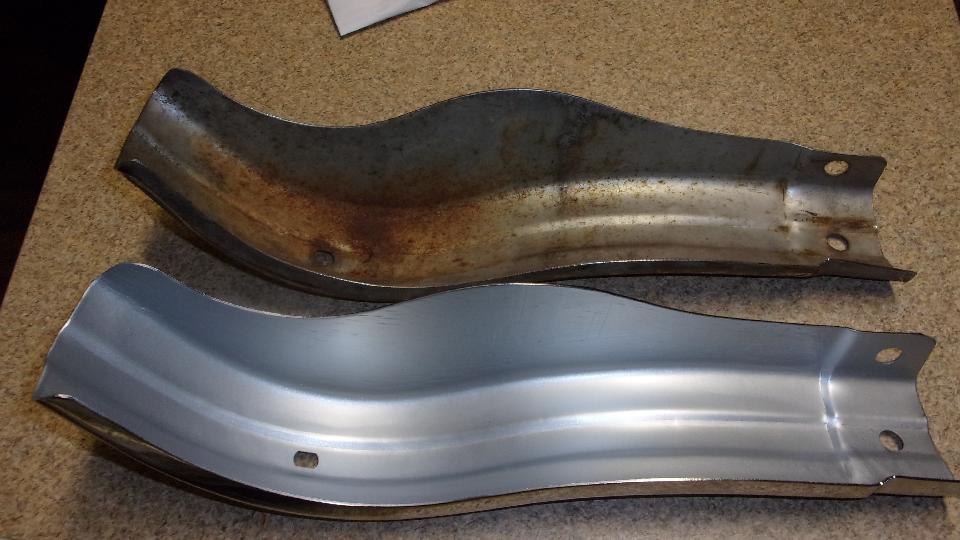
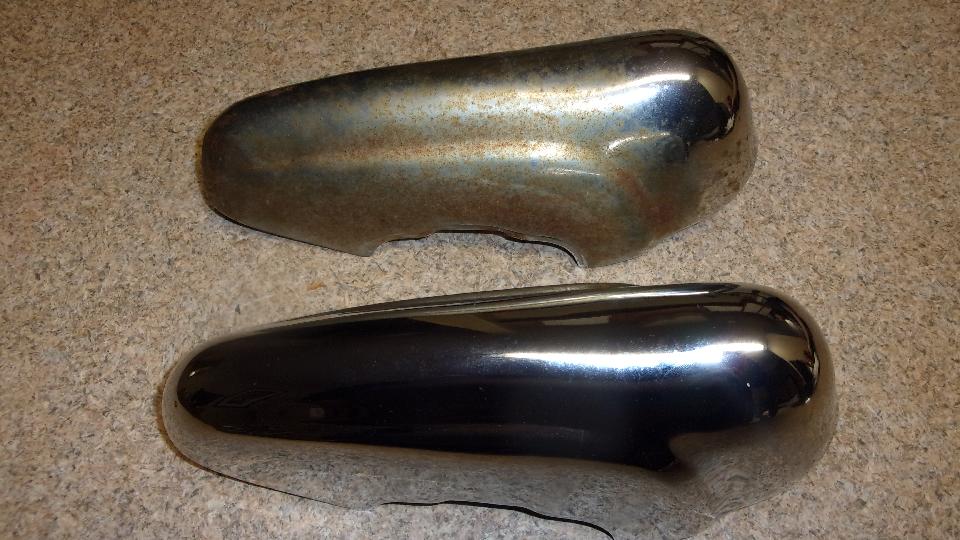
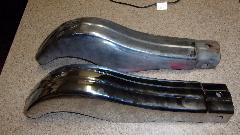
All four overriders on this car were replaced in November 2016 (purchased several months earlier), and they are
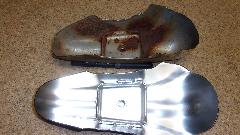
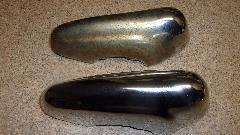 notably rusted outside and severely rusted inside after less than four years in service. I recon those were a waste of money in 2016. Even for cheap consumer quality parts that plating is (or was) despicably bad. The new overriders seem to be pretty good quality with decent fit to the contour of the facebar, and apparently better plating inside. I certainly hope the plating is an order of magnitude better than the prior parts. Time will tell.
Monday June 29, 2020:
Spent most of the day working on the new Parts Index for MGA, finishing another section of the SPL. Also composed and called in a substantial parts order to Moss in the evening. Hoping it may ship Tuesday (but not holding my breath while waiting).
Tuesday June 30, 2020:
The electronic Publisher copy of the CMGC newsletter came in on time (for a change), so I spent much of the day converting that to HTML format to upload to the club web site. Not a bad way to close out a month. No charge on my credit card for the Moss parts, and no confirmation email or tracking number, so I suppose they have not shipped yet.
|