The MGA With An Attitude
INSTALLING the Twin Cam Engine - TC-328
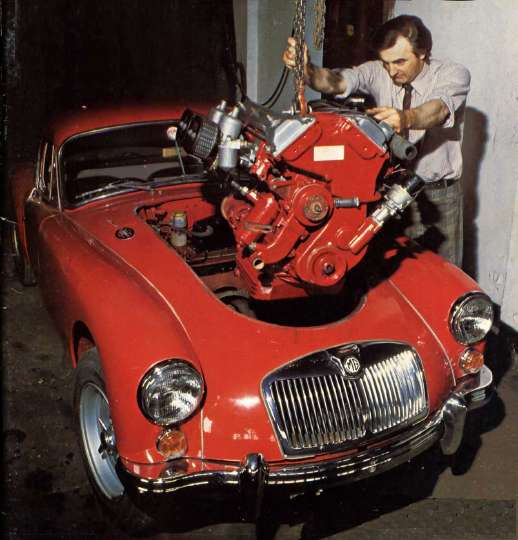
 At right, cover photo from "Thoroughbred & Classic Cars" magazine, October 1979 issue. I suppose everyone can agree that this is a posed picture, and that the MGA Twin Cam engine could never be installed in that manner. The following notes are courtesy of Mick Anderson in Australia.
 "My method allows you to fit it with one person in a few minutes, although other people do it differently. I find that you should remove the Distributor and the air cleaners, but leave the SU's fitted. When you try to lower the engine the cylinder head touches the body at the heater shelf at the same time that the wider Twin Cam oil pan hits the engine mount brackets on the chassis. You might get it in if you had the engine almost vertical but I do not know how you would line up the gearbox. I remove the oil pan, the oil pump and the crankshaft pulley. With the crankshaft at 90 degrees BTDC the conrod big ends and the crank webs are all level. It just goes straight in and easily mates with the gearbox. "My method allows you to fit it with one person in a few minutes, although other people do it differently. I find that you should remove the Distributor and the air cleaners, but leave the SU's fitted. When you try to lower the engine the cylinder head touches the body at the heater shelf at the same time that the wider Twin Cam oil pan hits the engine mount brackets on the chassis. You might get it in if you had the engine almost vertical but I do not know how you would line up the gearbox. I remove the oil pan, the oil pump and the crankshaft pulley. With the crankshaft at 90 degrees BTDC the conrod big ends and the crank webs are all level. It just goes straight in and easily mates with the gearbox.
The oil pan is easily removed and replaced if you have the five holes in the front cross member for the front oil pan holes (some early Twin Cams did not). You must firmly attach the gasket to the oil pan with drying gasket glue and only smear the top surface of the gasket lightly with grease. If this is not done the gasket will move at the side or front where you cannot see it and the gasket holes will not line up. You need to shorten a standard spanner (wrench) for the side bolts.
As it mates with the gearbox you find that you need to have the front pulley removed, and then you do not need to move the steering rack. Also you should use the glue and grease method on the camshaft cover gaskets are they are close to impossible to line up, as there are no locating edges". -- Regards, Mick
On 7/17/2012, Dirk Van Ussel wrote:
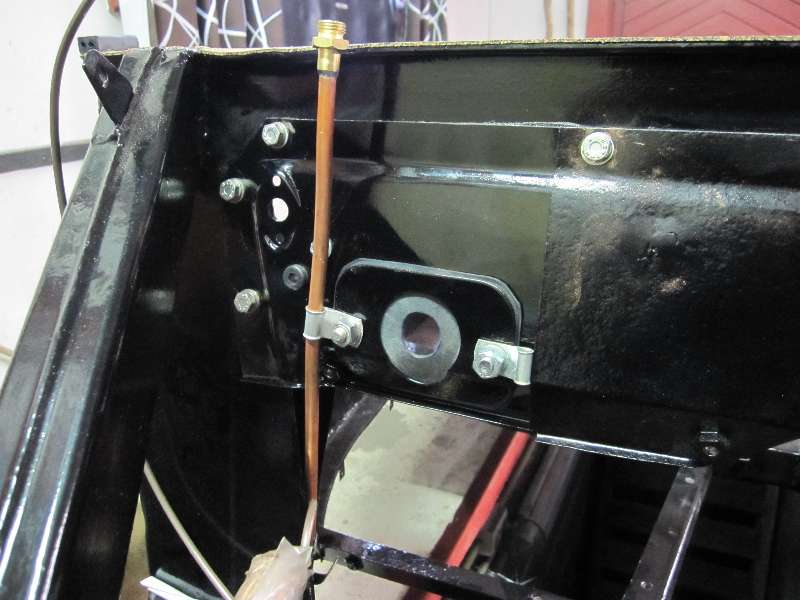
"Body attached. Normal gearbox with nothing changed, except that the gearbox cover sits on top of the floorboards and that the front upper fire wall is divided in two parts to avoid having to move the steering shaft.
"The only thing I have to do is to take tail of the gearbox, lift it up, out of the ears, and move it about 1 foot or 30 cm to the left. I put it then on a piece of wood. The engine then slips out of behind the front engine supports and can be lifted, needs to be done quite at an angle. I have done this alone several times, no alterations needed. Sometimes the rear of the head touches very nearly the heater shelf. That's why when dismantling I usually take the head off first. Putting the engine back in is easier.
"Handbrake lever is a fiddly job. First time I removed metal from the gearbox cover, but that is not necessary. You could cut about 1 cm above the flange and spotweld the flange the thickness of the floorboards higher. Front firewall part is cut beside the steering shaft, small strip of metal spotwelded on it and new nuts welded on at the back".
Of course that means you have to modify the tunnel bottom flanges and front flanges and the lower bulkhead closure plate during restoration work. You also have to remove carpet, tunnel, lower bulkhead plate, and left side seat to R&R the engine. This implies there will be some restrictions on how you install the carpet, carpet padding and/or sound deadening material.
|