The MGA With An Attitude
TACK STRIPS FOR COCKPIT CORNER RAILS -- INT-105A
Early copies of the MGA roadster door trim rails were one piece wood from end to end (for about one year of production). After roughly one year of production these were superseded by a shorter wood rail with the curved part at the front being cast aluminum. The wood and aluminum parts are connected with a lap joint and a pair of wood screws. The cockpit rear corner trim rails may have always been aluminum castings. Cover material for these parts was originally leather (although front and rear trim rails were covered with vinyl). To facilitate attachment of the cover fabric, the alloy rails were originally fitted with a 5/32-inch thick leather strip attached to bottom of the rail with small flat head machine screws. This article shows how decades old deteriorated leather can be replaced using thin wood veneer.
On 5/3/2010, Larry Mazoway in York, Maine sent these photos and notes:
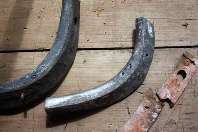
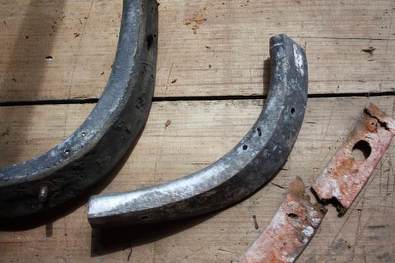
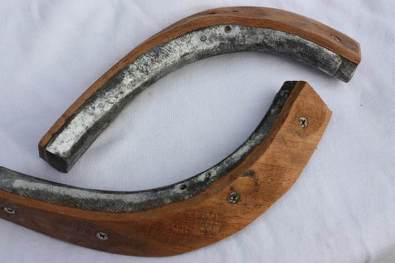
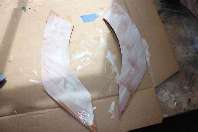
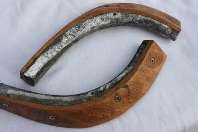
Original corner rails with the tired backing. Replacement is pretty easy to do but a bit tedious. However, since you have to do it once every 50 years its not so bad. |
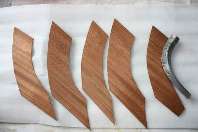
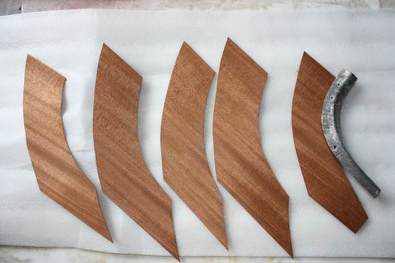
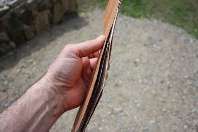
Using 1/32 mahogany veneer (available from wood working shops) trace out the approximate size needed. Note the grain is running the same on all pieces. This is important.
[ 5 x 1/32" = 5/32" finished ] |
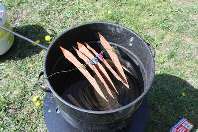
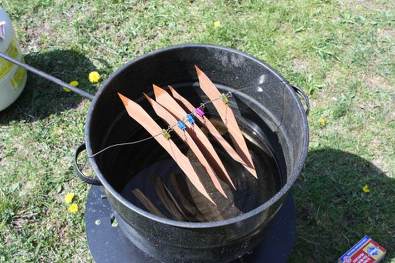
Steam (not boil) the pieces for about 15 minutes. This makes them pliable and most importantly helps swell the wood. Note: if you skip this step the moisture from the wood glue causes the wood to expand and it will cause it to buckle. |
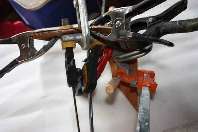
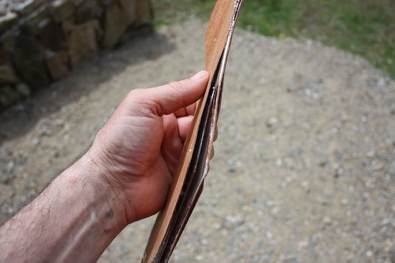
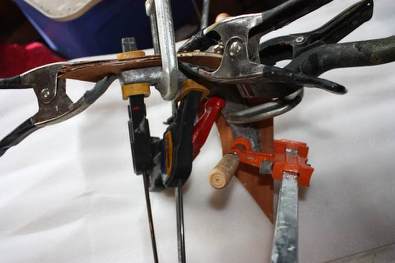
Next, place the pieces on the corner rail and clamp into place without glue. Let dry overnight. This helps form the pieces to the finished shape. Its the same step you will be doing later but with out the wood glue. Consider it a practice run. |
Glue both sides that touch each other. Dont plan on the glue from one migrating to the other. Wont happen. |
When you get them all glued up align them the best you can. No glue needed on the outer faces. |

Get as many clamps on the rail as you can. You can never have enough. Let sit overnight. |
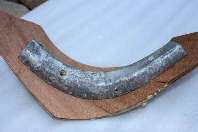
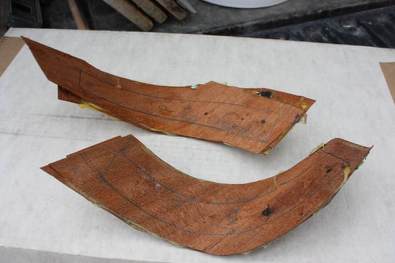
After clamps are removed the wood lay up should mold perfectly to the underside of the corner rail. |
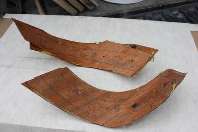
Trace out the outline of the corner rail. Trim a little over size. The final sanding occurs after the new wood backing is fastened to the corner rail. |
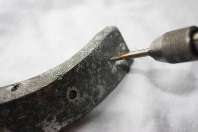
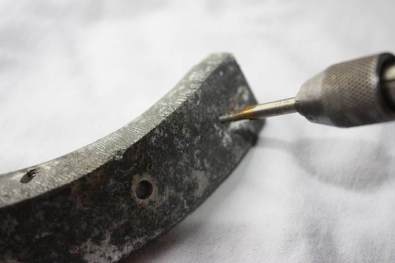
First, I place the new wood piece on the bottom and then drill thru the wood into the aluminum corner rail with a # 36 drill bit. Here I am tapping for a #6-32 Stainless Steel Machine Screw |
I drilled one hole and then tapped and placed the screw in before drilling the next hole. I start at one end and work my way to the other. The corner rails that are on the rear bulkhead I used 4 screws. After all the screws are in place then sand to the finished size. |
It even looks like leather - but better. |
|