The MGA With An Attitude
RECOVERING THE COCKPIT REAR CORNER RAILS -- INT-105
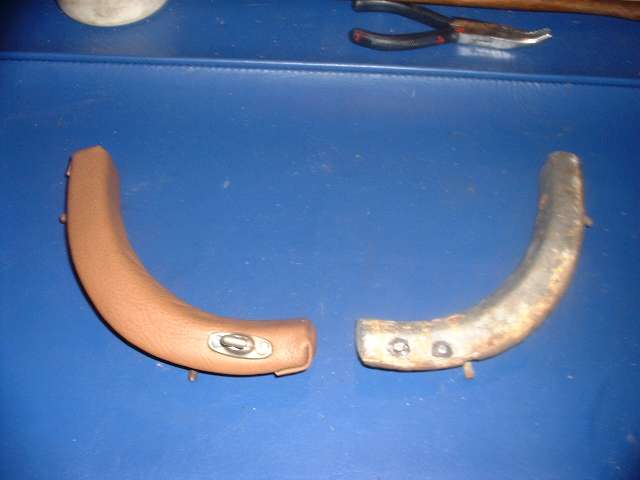
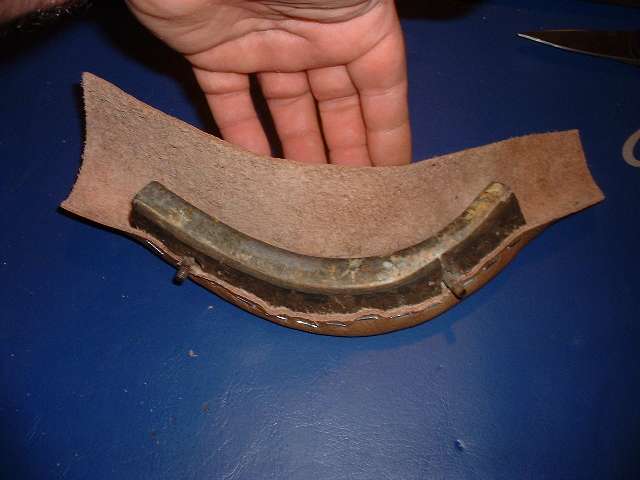
Having survived your rights of passage with the door rail covering, you might think this looks easier, but it's not. The part is overall smaller, but the curvature goes though nearly a full 90 degrees with a 45 degree twist. It is also a little thicker in the middle and has some odd angles on the sides. The model maker at the factory must have had a field day free handing this part to look right on the MGA pre-production model. And I hope they paid the design draftsman overtime for figuring out how to dimension the detail drawing.
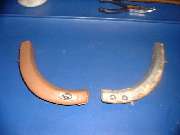  Like the door rail, this part was originally wood for the first year or so of production. I suppose it may have been milled to shape using a pantograph tracer over a guide model, or possibly turned on a tracer lathe similar to making a gun stock. At any rate, I can see why they would supersede it with a casting, probably to save production time.

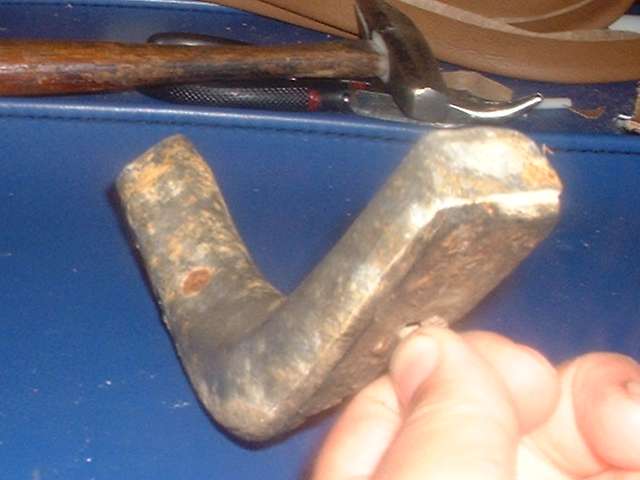
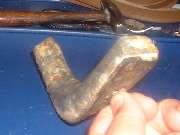
If you are doing this in conjunction with a full restoration, you might be two steps ahead to start. If you are about to remove this part from a fully assembled car, hang on to your seat. In the pictures above, notice the location of the mounting stud on the bottom near the front of the part. Then in the picture at the left you may notice this stud is tucked in behind the top edge of the rear kick panel, being impossible for access until you remove the kick panel. That means you must first remove the frame for the rag top, which is another tech session all by itself, as the mounting screws may be badly rusted into the captive nuts which are hidden inside the door post. You may find the dissertation on that little project under removing a rusted bolt. But for this session, I will simply say remove the rear corner rail from the car, and we will go from there.
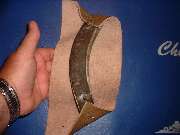
In the first picture above left, notice the location of the quarter turn fastener on the corner rail. This is secured with two finishing head machine screws. As the base part is aluminum, the steel screws may well be fused as one with the part after decades of galvanic corrosion. If they are not readily removable, you may have to grind the heads off, toss the quarter turn fastener in the trash, and then maybe try to remove the screws using penetrating oil and ViceGrip (locking pliers). Failing that, maybe grind the screw top flat, put a punch mark in the center, and use a short drill bit in a drill press or milling machine to drill the screw out, and re-tap the thread. Drilling a hard screw out of a soft aluminum part is risky business. If the drill wanders off center it can dig into the soft aluminum, catch on the hard screw, and break the drill bit. Failing that attempt, you might pay a shop to burn out the screw (and maybe also the broken drill bit) with an ELOX machine.
Okay, so you already know I'm lazy and cheap and I don't want to do any of those things. So when I can't get one or both of the screws out, I may just grind it flush with the surface of the part, and drill and tap another hole nearby. This is how the covered rail on the left [first picture above] came to have the quarter turn fastener dislocated slightly clockwise with the one screw a little higher than the other. I seem to recall that the first time around, with the 19 year old car, I managed to unscrew all four of these screws. Not so lucky 26 years later with the 45 year old parts. This time only one screw came out easily, I managed to successfully drill out two more, then broke the drill bit on the last one. Just be sure you have all of the screw problems resolved before trying to install the new covering. About here I was feeling a little luckier, as the original mounting studs and leather strips are once again still in serviceable condition.
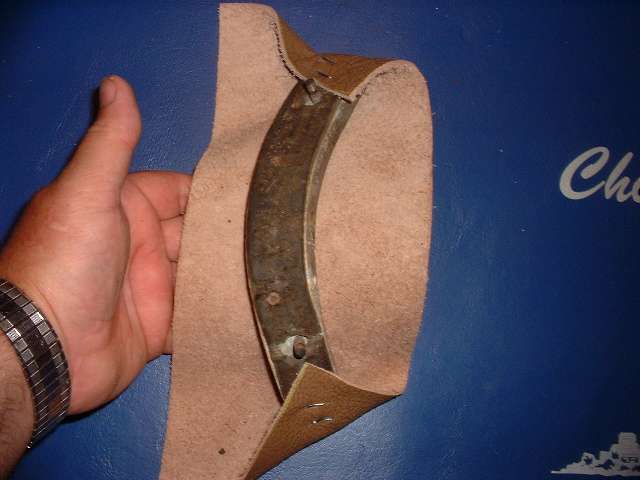
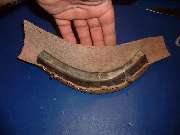
The heavy leather staple strip may be deteriorated and in need of replacement. You can cut the old one off, then try penetrating oil and ViceGrips to remove the small screws. If you end up breaking these off it's not a big deal, just grind them down flush, then drill and tap new holes in a different location using small flat head screws. The material is rawhide about 1/8-inch thick, like tough leather with no special surface finish. You should be able to find that locally if you have a leather works store, or if not you can order some from Tandy Leather Factory. Rawhide is quite flexible when damp, so soak it in water until you can bend it to shape for installation and trimming. When dry it will be quite hard for holding the staples or tacks.
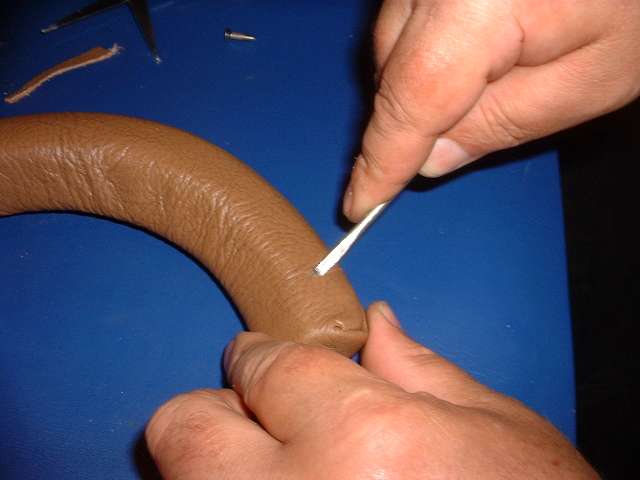
Before installing the new leather covering, see notes on previous page about soaking the leather in water to make it supple and easier to stretch.
At 07:09 PM 4/30/05 -0400, Fred Stankovich wrote:
I saw your advice for "wetting" the leather before fitting it on the curved rails. I was having a devil of a time getting one of the rear corner rails to look good. I just wet the leather on the rough side only in the area that I needed to stretch. I put it under the faucet 2 times and left it about an hour. It then was real easy to fit on the corner rail. It looked so good I went back and removed the staples from the door rails and just wet the curved sections. Great results.
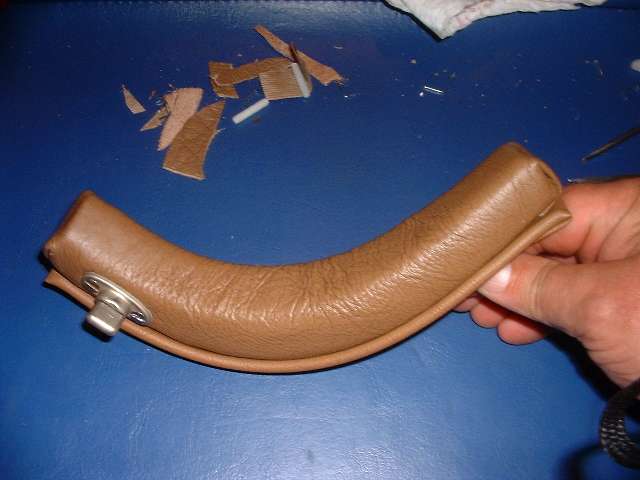
  Start the covering process by laying the rail face down on the leather strip to align the material into intimate contact with the rail, and tack the ends down temporarily. Then start in the middle of the rail on the outside of the curve, wrap the leather up and around the part to tack it to the leather strip. Continue wrapping and stretching and tacking on the same side, working from the middle toward both ends, and pull the ends of the fabric loose when you get there. All the while keep in mind that the material needs to be stretched a bit to lie down without wrinkles. This is fairly easy to do on the outside of the curve, as the surface there is close to being flat in a single plane (see second picture at top of web page). But if you keep the fabric pressed against the top surface (final top surface of part) while you work, there will be less stretching to do later. Keep the row of staples to the outer half of the rail, and trim the excess material at the centerline of the rail after it's tacked into place.
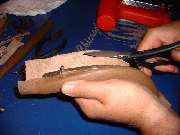 From there you get into the long and trying stretching phase with the finger cramps and plenty of personal breaks. If you trim off some excess fabric before wrapping the inside of the curve, it can proceed easier. But for goodness sake, do not trim off too much, or you may not have enough material to finish the wrap and get it stapled into place. Again, start in the middle and work your way to the ends. Here you may need to remove and redo a few of the first staples near the center as work progresses, and you see what's required to make the fabric lie down without wrinkles after some stretching.

You have previously learned the lessons of stretch and staple and trim, followed by folding and trimming the ends, tapping the folds down into pretty position, and installing the last staple at each end. Once the covering is complete, you have the fun little task of finding the two tapped holes to mount the quarter turn fastener. It helps if you do one rail at a time so you can use the other piece for reference to get started in the ballpark. You can use the corner of a small screwdriver to poke around on the fabric, find the depression of the tapped holes underneath, then use a pointed razor knife to trim out small holes in the fabric.
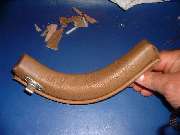
Same as on the door rails, you install the piping last, snug against the outside of the curve, flush with the bottom surface of the part, trimmed about 1/8 inch short of the ends of the rail, tucked under at the ends, and stapled nicely into place. Having done this before, this should take all of five minutes (but allow ten minutes anyway). You might also roll down any remaining puckers on the top side of the rail with your favorite little rubber ball, and the part will be ready to install on the car.
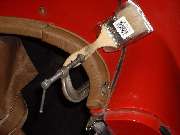
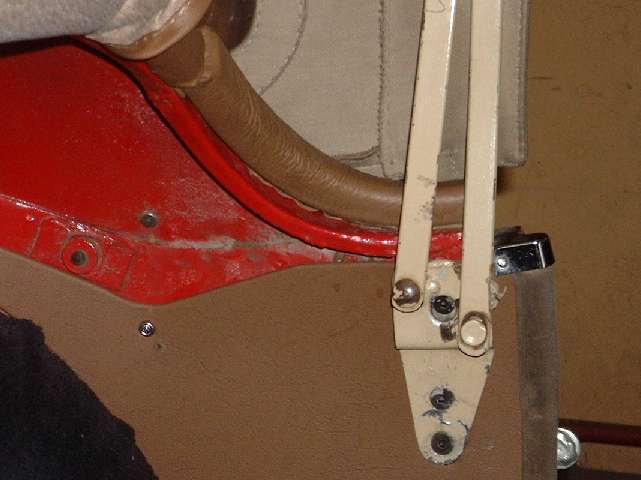
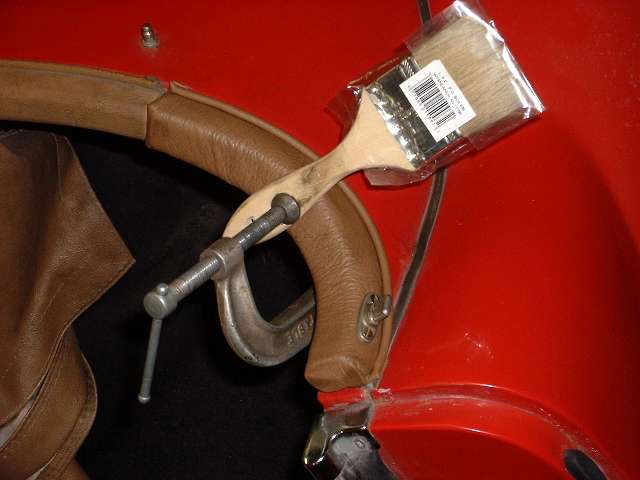
This last picture might be self explanatory by this time. I used a bit of smooth wood as an anti-mar buffer, and a c-clamp to hold the part in place on the car during test fitting and final alignment. As noted before, this corner rail may be positioned as close as practical to the door rail without touching it when the door is closed. The other end of the corner rail may be snuggled firmly against the end of the rear cockpit rail, as there is no relative motion at that point during use. And I swear, after this, recovering the front and rear cockpit rails will be a breeze.
|