The MGA With An Attitude
Worn Pedal CLEVIS PIN HOLE REPAIR #2- HT-110A
On 3/2/2017, Wlliam Shivelle wrote:
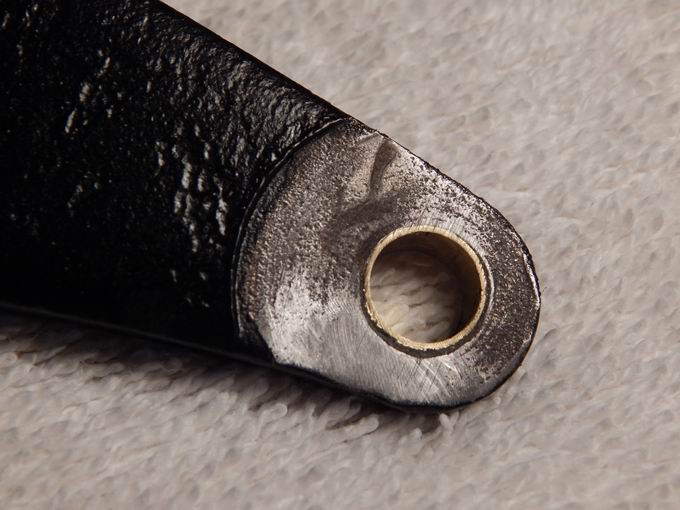
"I recently removed the brake and clutch pedals when replacing the master cylinder. I discovered extreme wear on the clutch pedal in the hole that the clevis pin connects the pedal to the push rod fork. I had moderate wear on the brake pedal. The clutch had enlarged by more than 1/8th inch and brake pedal about 3/32nd. Apparently replacement pedals are not available. The following is the repair I used and I thought others would like to know about it".
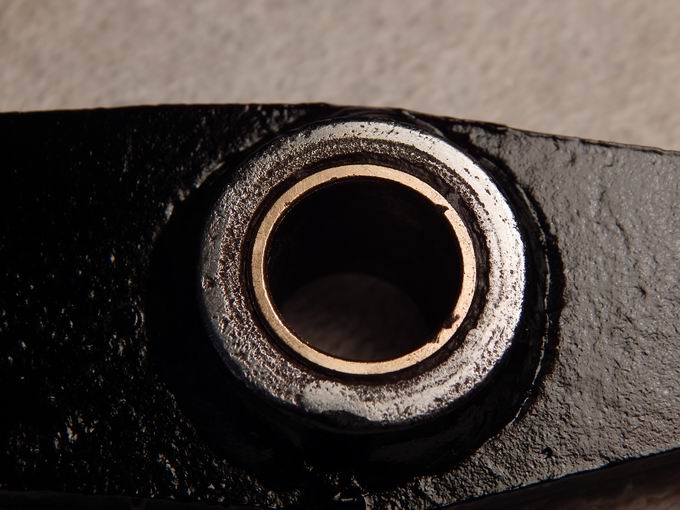
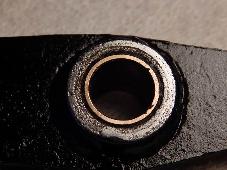
1- Get a piece of brass tubing (at local ACE hardware or?); 11/32" OD and 5/16" ID.
2- Drill out the pedals with an 11/32" drill bit.
3- I recommend using a drill press to ensure drilling square to the pedal and in the location you want. In my case, I centered the bit on the brake pedal hole and on the clutch I centered in the area of the original hole so it would remove the least metal.
4- Cut 2 pieces of tube about 1/16' longer than needed and ensure that there are no burrs on the ID edge.
5- Sand or clean with a small file plus worn areas that are not showing bright steel.
6- Clean holes with MEK or lacquer thinner. Place a piece of masking tape on one side of the pedal end to cover and seal the hole.

7- Mix epoxy glue (I used JB ClearWeld 4,400 psi strength).
8- Coat inside of drilled surface. Insert tube, rotating tube slightly to spread epoxy, if possible. Fill epoxy in any open worn area between tube OD and pedal. I did the clutch first.
9- After epoxy sets, remove clutch masking tape to see if gaps exist between tube and metal.
10- Repeat process for the brake using a new batch of epoxy and fill any clutch gaps found under the tape on the clutch at this time.
After epoxy is cured:
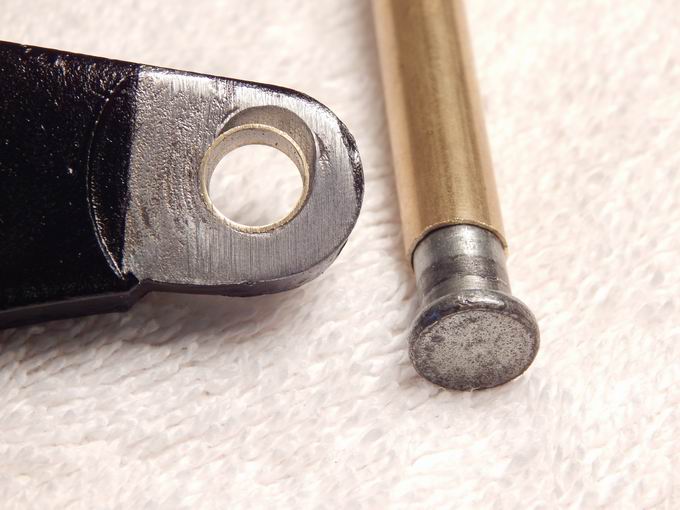
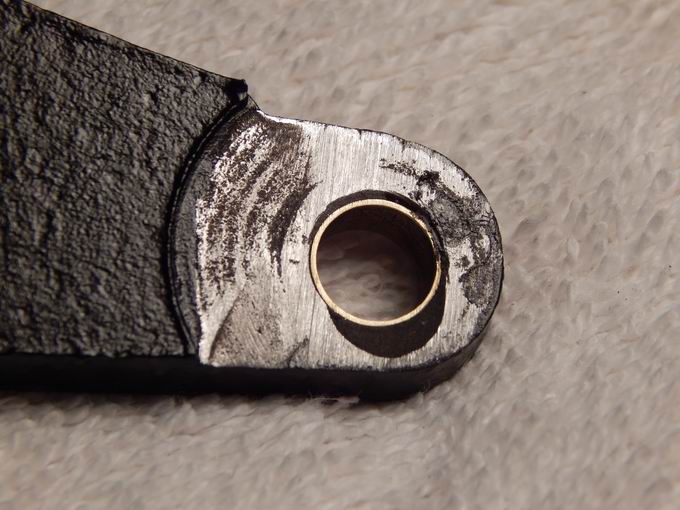
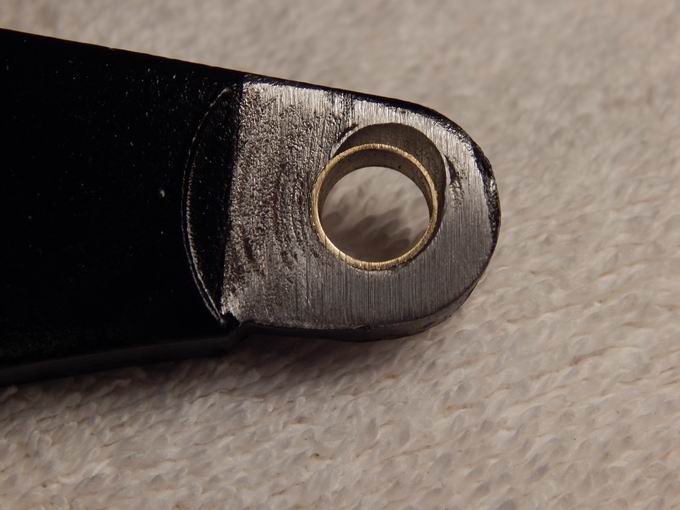
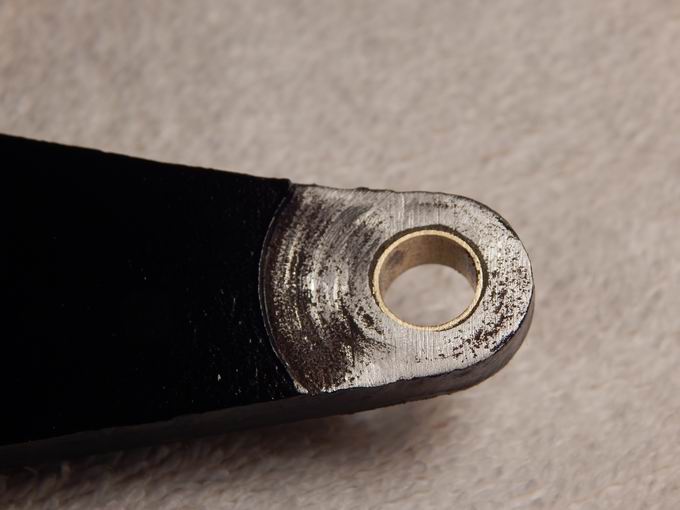
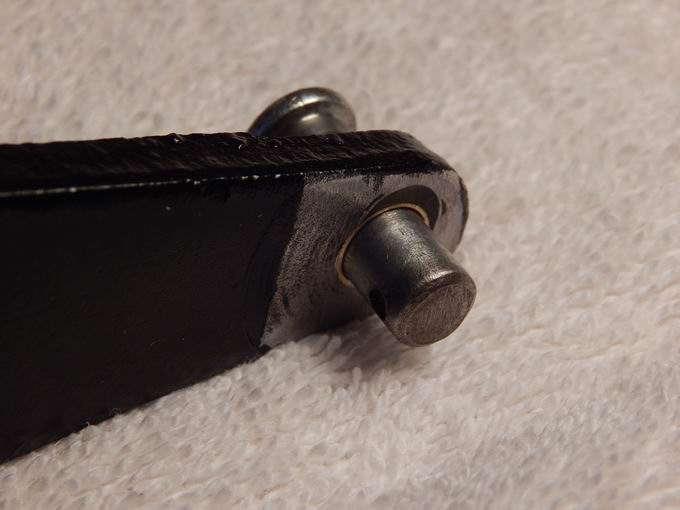
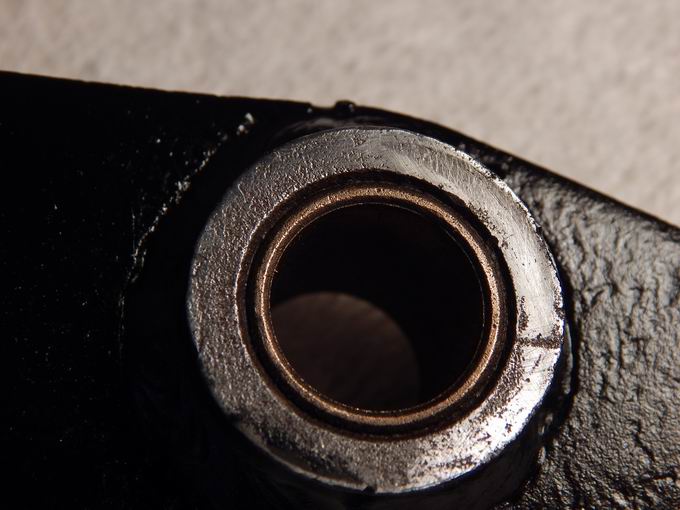
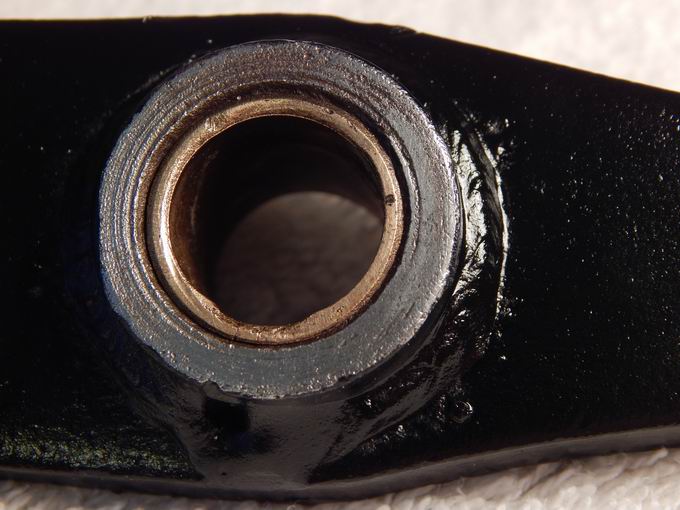
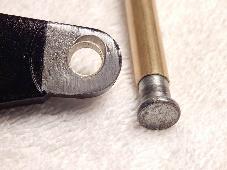
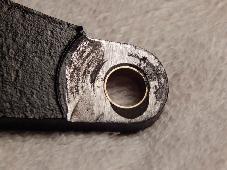
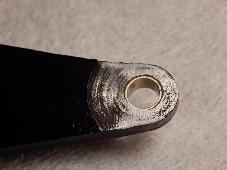
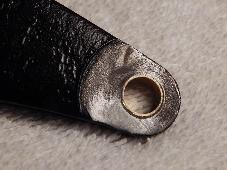
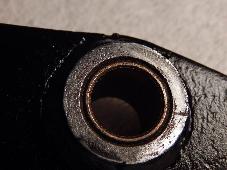
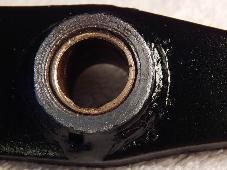
1- Sand or file tube ends so they are flush with the pedal. See photos # 2 -5
2- Make sure any burrs at the ID edge are removed and be careful to file or sand at an angle so the brass tube bearing surface is not damaged.
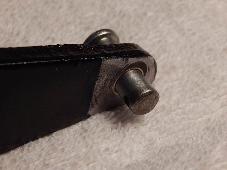
3- Test fit the clevis pin and check that the pin has no burrs (especially around the cotter pin hole). They should easily slide in and out.
I assembled everything with Moly grease including the bronze bushings.
A note about the bronze bushings; both my clutch and brake bushings were installed too far, causing the inner steel sleeve to not be tightened and thus causing the pedal to bind. On the high bearing side I filed the bushings until it was flush with the pedal shoulder. Now, the inner sleeve will lock against the center distance washer and the mounting plate sides.
A way to test is to assemble pedals on the mounting bolt using a wide flat washer on each outer pedal side, then add lock washer and tighten. Pedals should move freely and the center distance and outer washers should not move.
|