The MGA With An Attitude
MGA HEATER, Removing - HR-102R
At 06:37 AM 12/31/04 -0700, Peter Aldrich wrote:
>".... there is no need for the heater in South Florida, and I don't like the way it looks (especially the python-sized intake), so I would like to remove it, ...."

You might reconsider that, if the urge was simply to change the appearance. The presence of the complete heater assembly has no detrimental effect on operation of the vehicle, aside from a bit of weight. Presence of the air intake hose is not much of a hindrance for access or maintenance. I can tell you from experience that some form of ventilation of the passenger compartment is quite beneficial in even moderately warm climates. The radiator and engine and exhaust manifold kick off a lot of heat. Much of the forward firewall is single skin sheet metal and not insulated (except in the Coupe). Sometimes the tunnel carpet may be glued to the tunnel with no padding (no insulation). In this case your feet and legs may be quite uncomfortable any time the outdoor temperature is above 70dF, and ventilation in the foot well is definitely welcome.
Also the complete heater assembly is a very good aid for demisting the windscreen in high humidity conditions, such as on initial start up on a damp morning with dew on the glass, or just normal driving with top up and side curtains installed when it's raining. When you set it for demist, adding just a touch of heat to the intake air does wonders for lowering the humidity and enhancing the demist function (when it may otherwise not work at all).
>"an apparently simple task involving a few hoses and hardware. Is this as straightforward as it looks, or are there lurking MGA gremlins rubbing their hands in anticipation?"
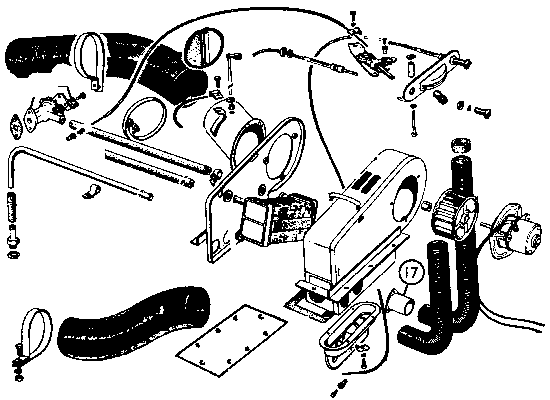
Removal is straight forward, even fairly easy. Disconnect all cables and wires and remove the dash control panel. Reinstall panel mounting screws to secure braces at bottom of dash. Remove the demisting hoses and the hose connectors from the front of the box at the bottom. Removal of the upper demist nozzles is optional (they were standard equipment even without a heater), but the chrome finishers on top should always be retrained. Remove the intake air hose, the water valve, water supply and return hoses, copper return pipe, front return hose and the front hose connector. Plug the top port in the coolant elbow fitting near the water pump intake where the front return hose connector was removed. Install a blanking plate and gasket where the water control valve was removed. Remove screws from heater shelf, lift out heater assembly, and replace with blanking plate and a new gasket.
Save all of the parts removed as a complete heater installation kit, in case you change your mind and want to reinstall it. If you are determined not to ever reinstall it, then you can sell it to someone who may dearly need it.
In any case, heater or not, insulating the tunnel and firewall is a good move in either warm or cold climates. Carpet padding on the tunnel from the firewall to the front of the seats will make a big difference in both summer heat and winter cold. It will prevent your lower leg from being fried in hot weather. There is also an insulating pad available for the heater shelf and upper bulkhead. This was original equipment in the Coupe (personal survival necessity), but always omitted from the Roadster for weight reduction (and economy of original manufacture). Installing this insulation pad in the Roadster makes a nice improvement in reduction of summer heat or winter cold in the cockpit, as well as significant noise reduction.
See additional notes for Heater Delete on the following page.
|