The MGA With An Attitude
CAM BEARINGS -- CM-103
The fitting of new cam bearings in the engine block
and finishing procedures that may be necessary.
At 09:14 PM 11/8/98 -0600, David H. Cole wrote:
> I had my machine shop put in new cam bearings I purchased from VB. The machinist said he didn't like split bearing design, but that he didn't have too much trouble installing them.
Smart fellow, I don't like them either. The stock cam bearings are made from flat stock rolled up to make a ring, three bearings, three different diameters, not very good tolerances, so they are intentionally a tad undersize and need to be reamed after installation. If you just ask the engine shop to install cam bearings they will order seamless bearings that are pre-finished (precision made) and can be installed without reaming. They may even charge you less for the parts than you pay VB. There is nothing unusual about the parts. They are used in a lot of different engines (just don't ask me which). They are Federal Mogul #1307M for the three piece cam bearing set to fit any Austin B-series engine.
 Addendum 4/6/06:
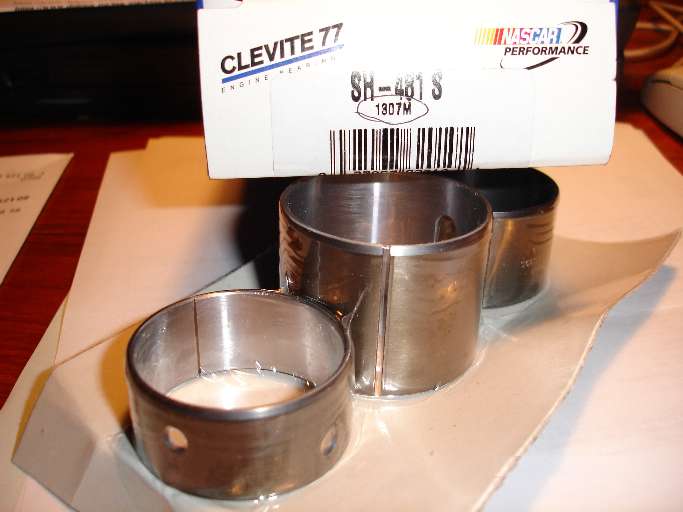
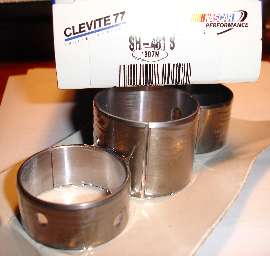
I have been told that the Federal Mogul 1307M cam bearings are no longer available, but you can substituted Clevite SH481S which is a functionally smilar precision bearing set which can be installed without reaming.
Addendum 4/26/06:
See picture of Clevite SH481S bearings (click for larger picture). These bearings turn out to be split rings, but they are precision machined and should be capable of installation without further machining. If anyone has information to the contrary, do tell. (Thanks to Ole Kval for the picture).
Addendum 12/23/06:
At 11:39 PM 12/23/2006 +0100, Ole Kval wrote:
"The machine shop removed the old bearings and installed the new ones. I installed the new cam and it slid right in. No reaming or honing necessary."
Continuing from David H. Cole:
>I measured the new (remanufactured) cam, was in specs, cam isn't bent, bearings measured within specs, taking into account running clearances; if the Haynes manual can be believed. When installing cam, cam binds in front and rear bearing and turns with difficulty.
Pressing the bearings into the block shrinks the bore a bit, and the split ring bearings may not be perfectly round, maybe have a little aberration in shape near the ends of the ring. Binding is common. They are actually designed that way with the intention of being machined after installation. The split bearings are a little cheaper to manufacture, and in production it's no big deal for an automatic machine to run a 3-step reamer through in one quick pass. For rebuilding an engine, get the solid ring cam bearings and skip the reaming job.
> .... This current problem has me bugged, mainly because if I take it to a machine shop and have it reamed in, how do I know if they reamed it properly? How do you check running clearances?
Just give the cam to the machine shop, and they will machine the bearings to fit (if necessary). Rather than line boring or reaming the bearings they might just hone them a bit. With a drop of oil in the bearings you should be able to turn the cam easily with your fingers, and should have no perceptible clearance (slop) in the bearings. The proper fit is actually 0.001 to 0.002 inch clearance on the diameter. Otherwise, it may be cheaper to throw the split ring cam bearings away and get new solid ring bearings than it is to have the shop do the machining on the split ring bearings.
If you have a lathe handy (or a friend with a lathe) you can make your own cam bearing puller tools. See TS-206 for materials and instructions. Once you have the tool R&R of cam bearings is a cinch, and there are a few advantages for doing it yourself.
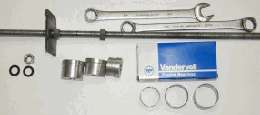
To remove a cam bearing, insert the shoulder puller of appropriate size into the bearing, and slip a threaded rod through it to protrude at one end of the engine block. Slip a large flat washer plate over the rod and position it against the end of the engine block. Install a hardened steel washer and hex nut at each end, and turn with a wrench to pull out the cam bearing. Pull the front or rear bearing toward the inside of the block. The center bearing can be pulled either direction. Removing the cam bearings before hot tanking can improve clean out of the oil drillings in the block at the back of the bearings.
You can install the new cam bearings with the same tool. If perchance some DPM has used a hand punch and buggered up the corners of the journals in the engine block, you may need to use a hand grinder to remove any raised burrs. A quick touch with a ball hone can clean the journals in the block and remove any small burrs. A drop of oil also helps the new bearing to slide home gracefully. Place the shoulder puller of appropriate size into the new bearing ring. Position the bearing against the face of the journal in the engine block. Insert the threaded rod through the puller to extend beyond the end of the engine block, and install a hardened steel washer and hex nut at each end. Turn with a wrench to pull the cam bearing into position. Pull the front or rear bearing from outside the end of the block toward the block. The center bearing can be pulled either direction.
You do need to pay attention to getting the oil feed hole in the cam bearing aligned with the oil supply hole in the block. Alignment does not have to be perfect. If you get about 3/4 of the open hole exposed it's close enough. If you get it wrong, just pull the bearing out and start again. Oil flows from the crankshaft main bearings to the cam bearings. At the rear cam bearing oil also has to flow upward from the bearing to the top of the block where it will ultimately feed through the cylinder head and into the rear rocker shaft pedestal to oil the rocker gear.
Once the cam bearings are installed in the block you should test fit the camshaft. Attach the cam drive sprocket to the cam for a handle, and insert the cam into the block, being careful not to scratch up the bearings with the cam lobes. There may be high spots in the bearings that bind the cam a little. These spots would then appear as small bright spots inside the bearing. You might first try going over them with a kitchen scouring pad which scuffs them up just a little and normally does the job. If there is still a tight spot, look for the shiny spot on the bearing, and carefully remove it with a bearing scraper. In a pinch a very light touch with a cylinder hone can make short work of it, but do be careful not to hone out too much material and end up with a loose fit.
|