The MGA With An Attitude
Dash Light DIMMER Repair -- DT-220
These photos and notes are courtesy of Russ Sharples in New Jersey, USA
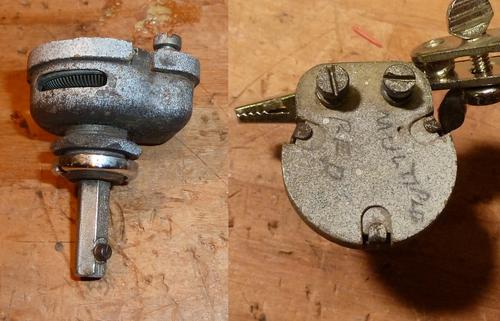
1) What the dimmer looks like. One of the two screws should be connected to the resistance coil inside, the other should be connected to the wiper. Neither screw tested as if it was connected to the wiper in any position except the extreme counter clockwise position. Neither screw tested as connected to the resistance coil. The two screws are connected to each other at the CCW limit.
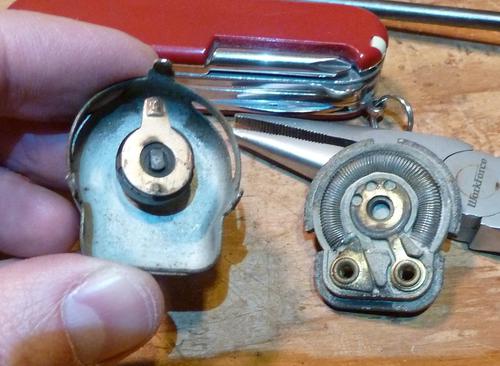
2) Bend up the tabs and open it, this is what's inside. The wiper can move freely up and down on the shaft and is held by a spring against the wire coil. The gunk on the wiper was thick enough that it was hard to get a continuity test on it. I used a Dremel with a small wire wheel to clean everything up.
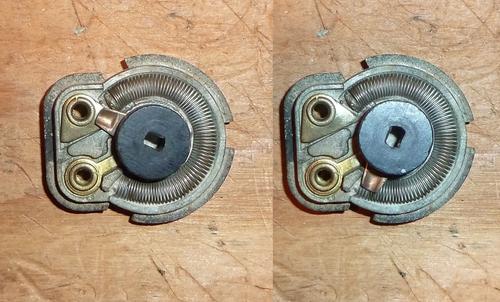
3) This picture shows the two extreme positions. Only the CCW position shown in the left picture worked.

4) Here is the problem and solution. The end of the resistance coil (probably nichrome wire) is melted where it attaches to its screw terminal. There was probably a short to ground in one of the instrument lights and this wire acted as a fuse melting. As we know, there is no fuse on the lighting circuit (hmmm, maybe there should be). The solution was to solder the copper wire you see added on the right side here to the terminal and to the end of the resistance coil.
After soldering the wire and reassembling the dimmer it worked beautifully. Minimum resistance is zero, max is about 15 or 17 ohms. Installed in the dash the lights get between 12v and 6.5v based on dimmer position. 8.5~9v provides a nice illumination with the Radio Shack 7.5v bulbs [different topic], so they might last longer than a few hours. We'll see.
Russ
|