The MGA With An Attitude
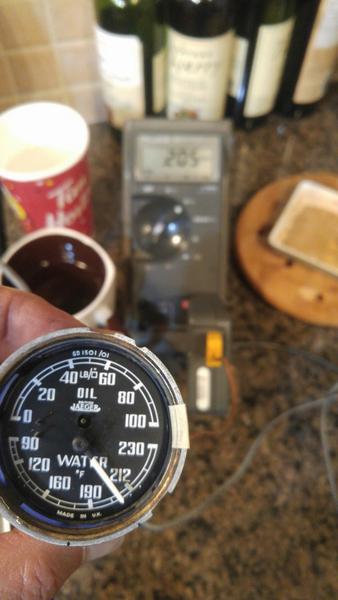
TEMPERATURE GAUGE CALIBRATION -- DT-102
At 09:31 PM 8/14/04 -0400, Steve Demko wrote:
>"The temp needle on my Oil/Temp gauge does not read any lower than about 155 degrees when the engine is cold prior to start up. The gauge does rise and reads about 220 degrees when running and often goes to 230 degrees when going up a hill. I am using a 180 degree thermostat."
Got to be out of calibration.
>"Is there a way to adjust the Temp gauge so that it reads properly?"
Yup. Place the sensor bulb in a vessel of boiling water. Pull the needle off the shaft and put it back on pointing at 212dF or 100dC on the dial face. If you get nervous when it points at 220 when you're driving, pull the needle off and put it back on pointing 20dF lower on the scale. Instant fix for an MG overheating problem.
With a 7 psi pressure cap and 50/50 antifreeze/water mix, you can peg the temp gauge at 230dF without boiling. With a fan shroud it should never go any higher than 220dF in the hottest weather while idling in standing traffic, and should run somewhat cooler for any other driving condition.
Check here for more information on cooling system operation.
Addendum Oct 13, 2021:
Above is the short and simple explanation. 17 years later we have this additional information for linearity adjustment.
On Oct 13, 2021, Ahmed Ahmed A in Calgary, AB, Canada wrote:
 "After refurbishing my dual oil/temp gauge (literally assembled it out of bits!), I checked the calibration of the temperature gauge in hot/boiling water at different degrees. I could only get the gauge to read correctly either on the high end near (212F) or at the low end (90F-120F). So, if I re-position the needle to be accurate at the high end, it would sit away from the peg at the lower end. And if I adjust it at the lower end, it would be short of the boiling point and wouldn't reach. "After refurbishing my dual oil/temp gauge (literally assembled it out of bits!), I checked the calibration of the temperature gauge in hot/boiling water at different degrees. I could only get the gauge to read correctly either on the high end near (212F) or at the low end (90F-120F). So, if I re-position the needle to be accurate at the high end, it would sit away from the peg at the lower end. And if I adjust it at the lower end, it would be short of the boiling point and wouldn't reach.
After a bit of fiddling and trying to understand how it works, I found that the range can be adjusted by manipulating the wire section that moves the needle actuator. This wire is attached to the end of the Bourdon tube (the coiled section). In summary, if you move/bend the wire to be closer to the center of the gauge, it will increase the needle range of movement, and if you bend it to be closer to the edge of the gauge housing, it will decrease the needle range. That and shaping the wire to be in close contact with the actuator got the gauge to be spot on across the whole range.
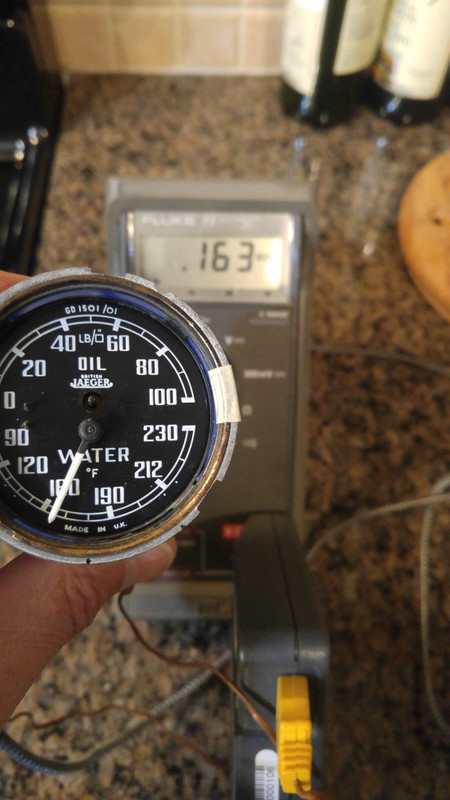
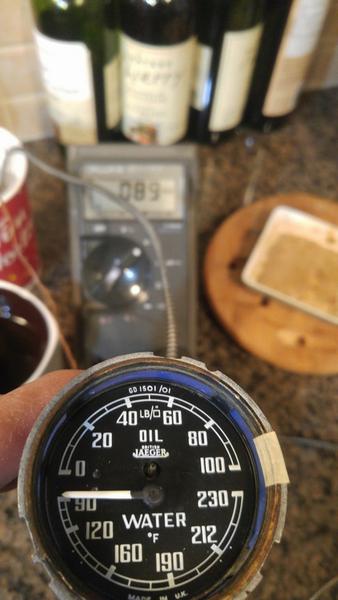
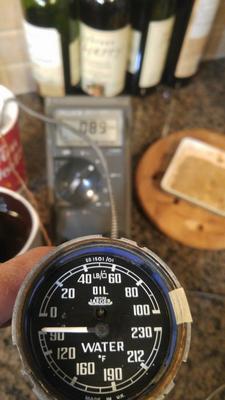
Here are some photos at different temperature setting points. The reference temperature reading (using my multi meter and thermocouple) is seen behind (sorry for the fuzzy focus).
Note: water here boils at 206F only because Calgary's altitude is approx 3500 ft
At 205F
At 163F
At 90F


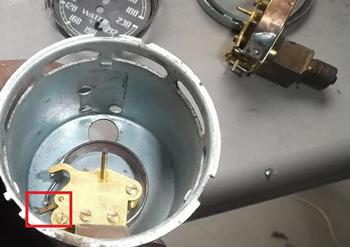
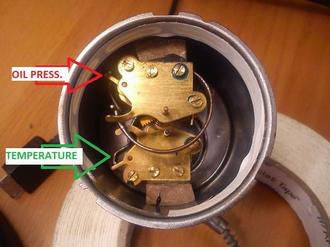
The photo below left shows the wire and actuator in question. It also shows the approximate position for a calibrated gauge, so it is a good starting point. --- I got a question about locating the Temperature gauge wire with the assembled gauge. I found a better photo (below right) to show its location (GREEN arrow).
If the same is to be done to the oil pressure gauge, then its respective wire is shown with the RED arrow
A few notes that may help:
1- It is kind of tedious to install and remove the face plate repeatedly as adjustments are being made to the wire. For this reason, I made 3 dots with a Sharpie on the gauge housing corresponding to arbitrary 3 points (at 90, 180 and 205). You can see them in the photos. After you're happy with the results, remove the needle and install the face plate aligning it back to the dots you made on the housing.
2- There is no need to push the needle solidly into the shaft while making adjustment since you will be taking it on and off in the process. Just put it on the shaft so it is easily removable by pulling gently but yet doesn't wobble while moving.
3- No need to remove the oil gauge innards. You can do adjustment to the temperature gauge while it is still in place. Since the Temperature coil tube is at the bottom of the gauge, it is handy to have a "longer-than-usual" long nose needle pliers to reach in and adjust the wire.
4- Two metal cans (sauce, soup..) will be needed, one on the stove for hot water, the other on the countertop with tap water. Switching back and forth between them you can get the needle to move from end-to-end to quickly to make adjustments.
|