The MGA With An Attitude
Electric COOLING FANS (Dual) -- CO-111
On 02 November 2009, Niel Ferguson in Victoria, Australia wrote:
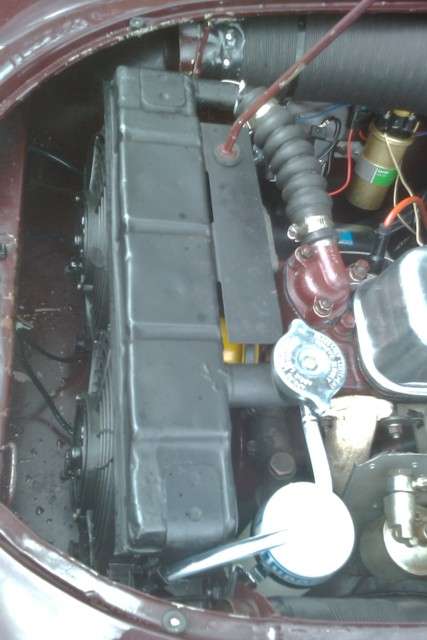
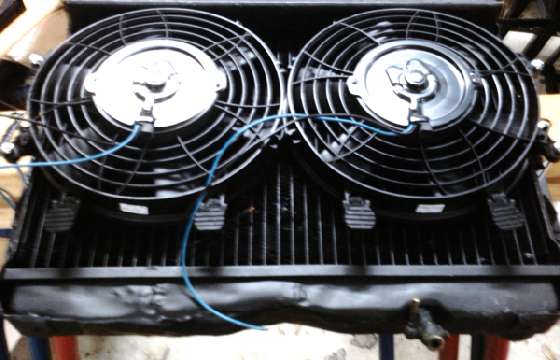
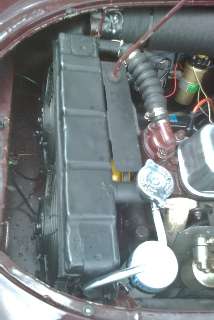 "I have just finished fitting two Davies Craig 9in fans and a single Davies Craig control system. The fans fit fairly neatly under the radiator top reservoir ledge, and controls fit under the heater air inlet duct at top of pic. I set the control to kick in at about 193dF (water thermostat is 180dF sliding sleeve type) and went for a hilly drive. All was very stable. Fan cuts in and cools the water down about 3dF and then cuts out after about 45sec, as per spec.
"At bottom of pic you can see the Tudor plastic atmos overflow bottle. Its cradle is connected to a small bracket bolted to the radiator mounting flange. Water flowed in and out of bottle. Now need a really hot day"!
"The element (electric thermostatic control) is fitted as per the Davies Craig leaflet, i.e. under the hose at the radiator end. I suppose one problem could result if the radiator loses water ( expansion ) and this hose could run part full".
On 08 November 2009, Neil Ferguson wrote:
 "Whilst looking for fans on the net I did come across other companies that sold 9-inch, some in US, try Googling. I chose Davies Craig as they are close here in Oz and have good support service as well, but they are far from unique. The important issue is the max OD of the fans as they need to fit snug to the radiator and above the metal apron below, a distance of only 26.5cm on my car (10.43 inch, be sure to measure your own. The width is important but if you make the height the width seems to make it and you can have a very slight overlap each side, and it helps to secure the unit to the radiator flange. It is an impossible job in situ and you need to take the radiator out and fiddle with location and orientation and marking etc. to get all the supports in position".
On 27 April 2010, Neil Ferguson wrote:
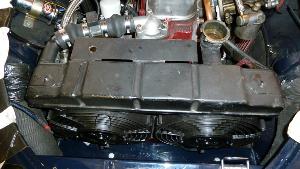
"An Update for those who live in a civilized climate. I have operated through the Oz summer with the system and with no reliability or temp problems. The ambient temp max over this summer in Southern NSW was a relatively low 32sC (90dF), so no real extremes, but the reaction of the system leads me to believe it will cope with all expected conditions. Traffic crawls created no problems.
"Another comment would be that I had to remove the radiator during my recent work installing the 5 speed box and the radiator came out and went back in fine with the two fans in place on its face, and hook up of the controls went without hitch. Very pleased with the kit"!
On 28 April 2010, Neil Ferguson wrote:
"Points:
 1) The fans were placed hard up against the underside of the top reservoir of the radiator (need to do this to get the required assembly max height of 26,5cm (10.43in) as per my car. The fans were almost flush with the radiator front and looked very neat. Check your own distances as you may need to trim a wee bit of plastic off the fixings (see 6 below). 1) The fans were placed hard up against the underside of the top reservoir of the radiator (need to do this to get the required assembly max height of 26,5cm (10.43in) as per my car. The fans were almost flush with the radiator front and looked very neat. Check your own distances as you may need to trim a wee bit of plastic off the fixings (see 6 below).
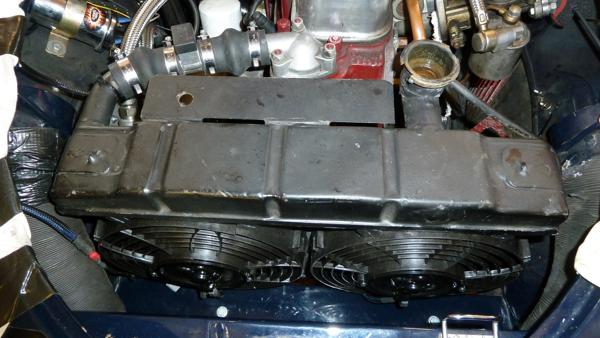
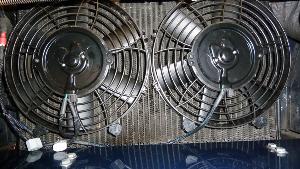
2) The outside edges of the fan housing (but not the fans) overlap the edges of the radiator. In particular two of the fixing holes protrude beyond the radiator edge. This is very useful (see 4 below).
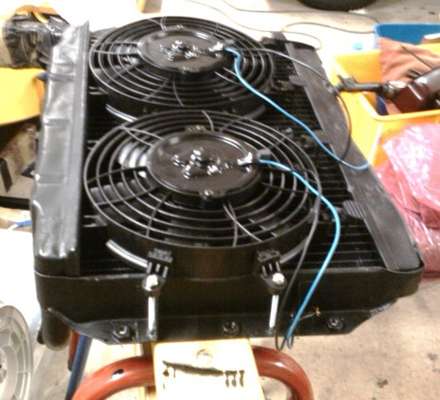
3) I bought additional metal mounting kits (options) with the two fans. This came with metal threaded screws, nuts etc and cushion pads. Standard kits supplied with the fans have a Nyloc type rods with push on end fixings.
4) On each side of the radiator I marked out two holes for the metal rods (referred to in 3 above) to penetrate the flanges of the radiator and drilled such. You can see these rods in place on one of above photos.
5) Two fan fixing holes were close to the underside of the radiator top reservoir and at that location there are no horizontal fins and good clear gaps to fit the rods through without real contact. I fitted two metal rods at the top of each fan and made sure they were very well cushioned/load spread on the other side of the radiator.
6) For the two lower fixings on each fan I used the plastic rods (referenced in 3 above) and threaded them very carefully through the radiator, again cushioning them on other side. You can see the ridged heads of these four rods in the front of the photo, and I had to cut a few mm off the heads to make the 26.5 cm distance.
7) I worked very much on the principle that I wanted no risk of relative movement of the fans to radiator, so all up each fan is secured with 6 rods (4 metal and two plastic).
8) Since 4 small metal screw heads are now on the back of the radiator mounting flanges I inserted a double thickness of hard rubber gasket with cutouts between the radiator and car flanges. I used glazing rubber (Moss Motors part 280-735). The thick hard one not the soft squidgy type. It is about 2mm thick, but nothing magical here, anything that will bridge the gap. Moving the radiator forward this small distance gave no problems.
9) One point, .... I mentioned that the back of the fans were supplied with rubber seals and this was not so. I found some edging rubber in my garage and fitted it on the back of the fan shrouds where they butt up against the radiator.
Addendum April 22, 2018:
Colyn Firth in South Yorkshire, UK has installed twin 9" Davies Craig fans using common plastic dart fasteners through the radiator core. No special brackets required, fans semi-permanently attached to the radiator, so the fans come out along with the radiator with no extra maintenance fuss. This will make it difficult to clean bugs and dirt from the face of the radiator.
|