The MGA With An Attitude
S.U. Carburetor TOOL KIT Instructions - CB-130


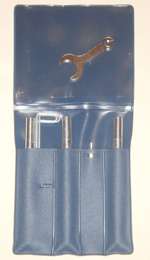
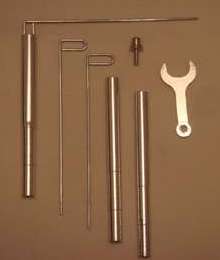
Above: Tools in package and spread out
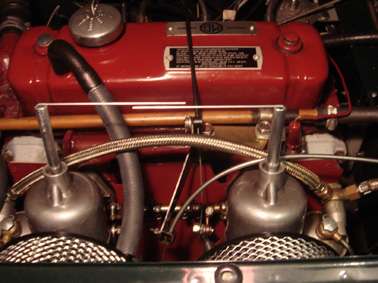
Below: Rods set up in the carburetors

TUNING TOOL SET


Instructions for
checking and adjusting
S.U. Carburetors
1. Piston for free movement
in the suction chamber
2. Synchronizing
3. Mixture strength
4. Centering the jet
5. Fuel level
General Instructions: The vacuum controlled piston in the suction chamber automatically adjusts the air passage to a nearly constant vacuum at the jet. Any change of R.P.M., load or throttle opening will also change the height of the piston to provide the correct mixture strength at any driving condition. At idling R.P.M. the piston is lifted only approx. 1/16", and if it is not perfectly free, it will not balance but "stick" at a different position every time after deceleration and upset the mixture strength. It is therefore useless to attempt synchronizing or mixture adjusting until the piston is moving freely in the suction chamber, especially at the lower level (idling position).
To attach the tuning tool to the carburetor, simply remove the damper on top of suction chamber and insert the test rod into the hollow piston spindle. The slotted end of the test rod should fit tightly for lifting the piston to the top level. The pointers fit into the test rods and will help to compare the movement of the pistons. The test rods should also be attached through the procedure of disassembling and replacing the suction chamber. Control the free movement of the piston while tightening the chamber screws evenly.
To remove the test rod, lift it up, turn and pull. Before refitting the damper, check the oil level in the hollow piston spindle. Very thin oil will permit the piston to be lifted without delay and cause a lean mixture during acceleration. Thick oil will hold the piston down longer for a richer mixture during acceleration. Because of this delayed opening of the air passage, these types of carburetors do not require an accelerator pump.
Adjusting the fuel level: The shaft of the test rod is used as a test bar
 to fit between the hinged lever and the lid face when the needle valve is closed. The round test rod is used as 3/8" test bar and the oval for 5/16 and 7/16 test bar diameter. The jet adjusting wrench can be used as a 1/8" gauge for the HS type with nylon float (refer to the manufacturers manual for the correct test bar diameter).
Flow meter for balancing multiple carburetors:
For precision synchronization, use our "Unisyn" (part #386-200) flow meter along with this tool set: It will not upset the mixture strength. This permits synchronization and mixture adjustment simultaneously.
1. To check the piston for free movement,
 let the engine run at idling R.P.M., lift the piston with the test rod to 1/16" (1.6mm) only and let it balance back to former position. Then press it down and let it balance back again. A free moving piston will always level back to the former position. If the piston is sticking, it must be corrected before tuning the carburetors. Common faults: The jet is not centered, the suction chamber and piston need to be cleaned, the suction chamber screws are not equally tight. Since the mixture strength on each carburetor can easily be checked along with testing the piston movement, it is suggested that the mixture be re-adjusted at this stage.
2.The synchronizing of two or more carburetors should be done prior to the final mixture adjustment.
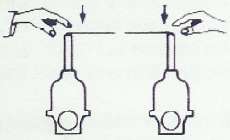
 For precision synchronizing, a "Unisyn" should be used along with the tuning tool. Since the pistons are lifted equally by the air flow, it is possible to synchronize without flow meter by comparing the height at which each piston is lifted at idling and at higher R.P.M. The synchronizing at idle speed should be checked by pressing the pistons down for a very short moment (one at a time). The pointers will help to compare the level to which the pistons are lifted. If a piston is lifted higher, this indicates that this carburetor has a higher air flow. The throttle stop screw for idle speed or the by pass (on some carburetors) must be adjusted until the air flow is equal on all carburetors. Accelerate several times and compare the movement of the pistons to detect a sticking linkage or throttle shaft and to check the synchronization at higher R.P.M.
3. The mixture strength is correct if the R.P.M. does not change (normal to rich setting) or if the R.P.M. drops only very little (lean setting),
 while the piston is lifted with the test rod approx. 1/32" (0.8mm) only. Always remember: by lifting the piston, the air passage is increased and the engine runs leaner at this moment. A smoother and faster running engine will now prove that the adjustment is too rich. Consequently, a slower running engine indicates a lean mixture. On some S.U.carbs., the jet will be lowered by pulling the choke for cold starting. Before adjusting the mixture, the jet must be completely pushed back to the adjustable stop screw. Turning the screw clock-wise raises the jet, leaning the mixture. By turning counter-clockwise, the jet lowers for richer mixture. If the mixture adjustment on your carburetor cannot be made by adjusting the jet, refer to your car manual to locate the mixture adjusting screw. while the piston is lifted with the test rod approx. 1/32" (0.8mm) only. Always remember: by lifting the piston, the air passage is increased and the engine runs leaner at this moment. A smoother and faster running engine will now prove that the adjustment is too rich. Consequently, a slower running engine indicates a lean mixture. On some S.U.carbs., the jet will be lowered by pulling the choke for cold starting. Before adjusting the mixture, the jet must be completely pushed back to the adjustable stop screw. Turning the screw clock-wise raises the jet, leaning the mixture. By turning counter-clockwise, the jet lowers for richer mixture. If the mixture adjustment on your carburetor cannot be made by adjusting the jet, refer to your car manual to locate the mixture adjusting screw.
Centering the jet:
 Remove suction chamber with piston and replace the jet needle with the centering pin. Lower (or remove) the jet to the lowest position and slacken the jet locking nut. Refit the chamber and piston, slide the centering pin into the jet bearing and tighten locking nut. If the piston cannot be moved with the centering pin in the jet bearing, slacken the locking nut again and repeat the procedure until the centering pin can be moved in and out of the jet bearing. This insures that the jet needle is not touching the jet and that the piston is moving freely in the suction chamber. Check if the needle is bent by rotating the piston in the suction chamber.
|


