The MGA With An Attitude
Fixing DRIPPY SU H-Type CARBURETORS -- CB-106
At 07:10 PM 5/9/05 -0600, Earl Chilton wrote:
"You mention that SU-H4 carbs with the side float will at times, have a minor leak."
They could leak at the rubber grommets between the float chamber and the carb body (banjo bolt mounting). For that problem, replace the rubber grommets. You may need to do this every couple of years or so, as modern issue rubber bits don't seem to last long. It might otherwise leak a bit around the main jet and drip off the bottom end at the clevis pin.
"My front carb has a very slow, minor leak, a drop about every 30 seconds".
Fix it. It's not nice to drip fuel on the hot exhaust pipe when it's running.
"Should I try to tighten the hex bolt, if so, does this adversely affect another part of the carb?"
See Section view of the main jet area. The bottom brass nut is for mixture adjustment. This is retained with a spring, and should never be "tight". You should be able to turn this with your fingers for adjustment. If it drags a bit you may use the little jet wrench.
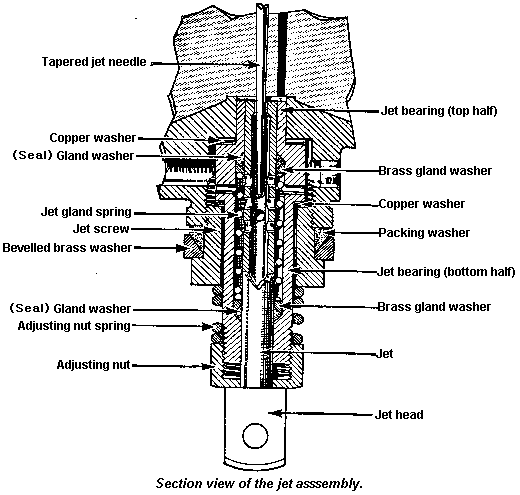
The larger hex just above it is the "jet screw", a retaining nut with male thread. This should be tight. It presses up on a thick "beveled brass washer" (might be aluminum in some cases) which compresses a cork "packing washer" against the bottom of the carb body. It would seldom ever leak at this point, but if you disassemble it you may need a new packing washer anyway.
Concentrically inside of the jet screw is the "jet bearing" bottom half. This is sealed at the top of the jet nut with a copper washer. The "jet bearing" top half is sealed at the top against the cab body with another copper washer. Concentrically inside of the jet bearing is the "jet". This is a hollow tube with polished OD. There are seals called "gland washer" between the jet and the jet bearing, and this is where it will commonly leak.
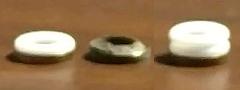
The seals (top and bottom) are originally cork or a rubberized cork material, contour molded to fit the space, shaped like a donut with conical top and bottom. They are each retained with a thin brass cup washer. A spring presses the cup washers against the seals to compress the seal to make it constrict against the jet. When left to sit for a long time, these seals can dry out, drag, and possibly leak and/or make the jet stick (with choke full on). Even when the car is used regularly, these seals can ultimately wear out on the ID and cause a leak.
If you are on a tight budget, you may be able to fix it with little or no money. Remove the clevis pin(s) and drop the choke arms out of the way. Use a large wrench to unscrew the "jet screw", which will allow all of the internal parts to drop out the bottom. Don't lose the little bits. Be sure you account for everything up to and including the jet bearing top half and copper washer.
Look at the large packing washer. If it sticks up above the top edge of the beveled washer you may be able to re-use the packing. If the packing piece is smashed flush with the top edge of the bevel washer, the packing piece would need to be replaced.
Pull out the jet. Clean and polish the OD of the jet which slides inside the seals. Try 600 grit emery paper, and water or oil of your choice. The liquid is to carry away the swarf to prevent the abrasive paper from getting clogged. Polish until it is a uniform bright finish. Use a drop of oil for assembly. If it sticks, push the jet up/down repeatedly to burnish the seal, and try another drop of oil. If it still sticks, then you have to replace the jet seals.
Separate the jet bearing top and bottom halves, remove the spring and the brass cone washers, and extract the seals (gland washer). Place the seals on the jet to see if they will slide freely. Add a drop of oil or soak the seals in oil to encourage initial lubrication (assuming they are dried out). Look at the outside edge of the seal. If it is smashed very thin to a sharp edge it will need to be replaced, as the brass washer would bottom out against the end of the bore in the jet bearing and not be able to compress the seal any farther. If the seal still has some thickness at the outside edge, you could try re-using it.
Put it back together with a drop of oil between the jet and seal(s). Be sure you have the correct assembly order, placing seal in the bearing first, followed by brass washer (hollow side toward seal), the spring to bear against the brass cup washers, and thin brass washers on the outside. Insert this assembly into the body and secure it with packing washer, bevel washer, and jet screw. When the jet screw is tightened the spring inside should squeeze the seals to constrict them against the jet. If all goes well, the leak is banished.
During assembly you need to center the jet at the top end so the needle will enter in concentric manner without dragging on the bore of the jet. It may be possible to do this with a little hit and miss fiddling according to Section D.12 of the shop manual. But it is much easier with the proper tool. The SU carburetor tool kit contains a jet centering pin. This is a small round button with a thin shaft on top and bottom. Being creative you might make your own guide pin. Top end of the guide pin has to be the same diameter as the shank of the needle. Bottom end of the guide pin needs to be 0.090-0.089" diameter to fit closely inside the jet.
 Remove the needle from the air float, and install this centering button in its place. Assemble the air float and top cover in normal position, and the centering button will provide a guide to center the jet. Starting with the jet screw loose, press the air float down and press the jet up to engage the jet onto the guide pin. When the jet and pin are engaged, tighten the jet screw at the bottom to secure the jet bearing assembly in the centered position. Then remove the centering tool and replace the needle with shoulder on the needle flush with the bottom of the air float.
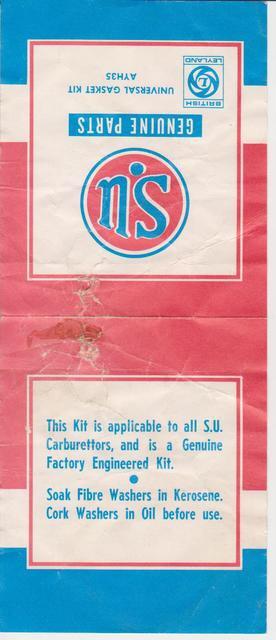
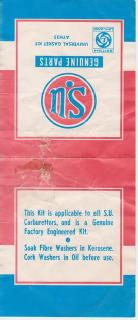
If it leaks after reassembly with old seals, you would need to install new seals. New jet seals should be soaked in oil before assembly. The jet has to be free enough to slide upward to rest with only the force of the tension spring on the end of the choke arm. Slide the jet up/down a number of times to free it up if necessary. Instructions on the SU seal kit shown at right say to soak fiber washers in kerosene, and soak cork washers in oil.
For some years now I have been using a substitute jet seal. It is possible to install two Teflon O-rings in place of each jet seal (8 O-rings required for 2 carbs). The Teflon O-rings allow free sliding from the git-go and should never leak for the life of the engine, or at least until the brass throttle shafts wear out and need replacement at about 100,000 miles.
 I bought these in December 1997 from:
Tom Bryant, P.E.
272 New Meadows Rd.
W. Bath, ME 04530
(207) 443-6338 (eve)
He advertised in the NAMGAR magazine MGA! "Teflon seals for Type H SU jets, 1/4" ID, $1.50 each". Each "Teflon seal" is actually two small Teflon O-rings, $0.75 each, eight required to rebuild two carbs, $6.00 total. Cross your fingers and hope he's still supplying these parts.
I measured a few, and they are .239" ID, .070" thick, .379" OD. If anyone needs a large quantity, they are McMaster-Carr part number 9559K15, $9.68 for package of 25 pieces (March 2033 update). Good for temperature -100 to +500dF. PTFE O-Ring AS568A Dash Number 010. This may be written as BS.10, BS.010, BS-010, BS 010/E. Nothing special except being Teflon rather than "rubber", they are widely available anywhere you can buy seals. Try your nearest bearing supply house.
Since someone asked, you can also get O-rings in this same size with Viton material, and they are cheaper. McMaster-Carr part number 2857T116, $5.80 for package of 5 pieces (March 2023 update). Good for temperature -15 to +400 F. Viton ETP Fluoroelastomer O-Ring AS568A Dash Number 010. I haven't tried them, and I don't know the friction characteristics (if the fuel jet might stick). Viton is chemical resistant for current motor fuel, but I have no information on actual life expectancy in this application.
In late April 2017 I replaced Teflon O-rings that had been in my carburetors since December 1997, nearly 20 years, 229,000 miles. Good parts.
|