The MGA With An Attitude
Door Latch Repair Kit for the MGA -- BD-103C1

1962-'64 MGB Door Latch Repair Kit
Replace all of the wearing components of the early "pull out" handle door latches with this marvelous kit which enables the latch assemblies to be rebuilt to new operating condition. Kit fits left and right latches. One kit required per latch.
Moss Motors USA
Part No: 401-117
Click for Supplimental Instruction
Sheet for MGB latch
|
|
Moss Motors lists this door latch repair kit for the early pull handle MGB latch (which may not be available as a complete assembly). This kit was listed at $19.95 in fall of 2004, still $19.95 in February 2015 (repairs one latch). This was about 35% less than a replacement MGA latch assembly in 2004, but the price of the complete MGA door latch has since been reduced to $21.95 (February 2015). The MGB latch is different, but this kit may work to repair the MGA latch as well. The kit also contains the replacement die cast socket (which can wear to an oval hole in perhaps 100,000 miles of use).
On February 13, 2015, John Udy in Sydney, Australia wrote:
"I have just repaired both the door latches on my 1958 MGA. I sourced these kits from NOS Locators off eBay, but it looks like the same kit contents as the picture in your web page. [Not the same source as the picture above].
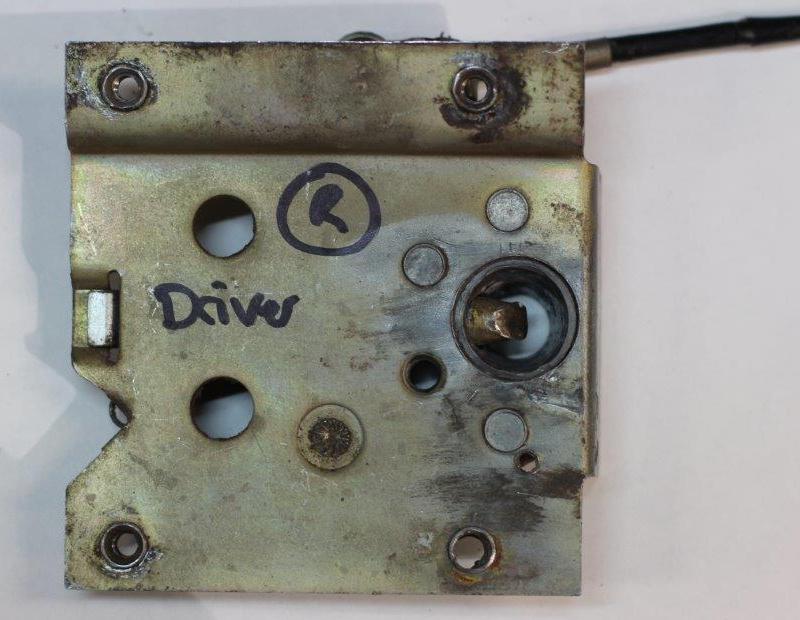
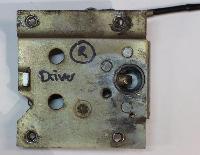
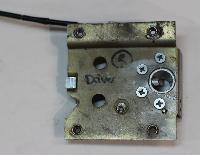
The latches on the two doors were different, it appears that the drivers door latch has been replaced at some stage (right side of the car for us in the land of Oz). The newer latch uses a tab and slot arrangement to eliminate one screw and also provide self-location during assembly. This latch is much less worn than the one on the passengers side, which looks like it has had a bit of a tough life: the pin was rather worn, and the hole in the die-cast socket was worn to the point that there was no material left on the wearing side of the hole. The end of the spring and latch pin pressed housing was also cracked on the Passengers latch at the end opposite the latch a bigger problem just waiting to happen?
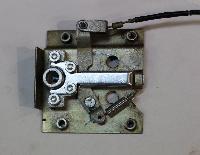
Photos are attached of both locks. Note the use of zip tie by DPO when the rivet pulled out of the release lever connection to the pull cable. Dodgy but seems effective it has lasted at least the 2 years I have had the car.
The disassembly was pretty straightforward: drill out the rivets and drive these out with a pin punch, clean off the dried out grease and gunk, then inspect the parts that will be reused, which is really only the back plate and the release lever.
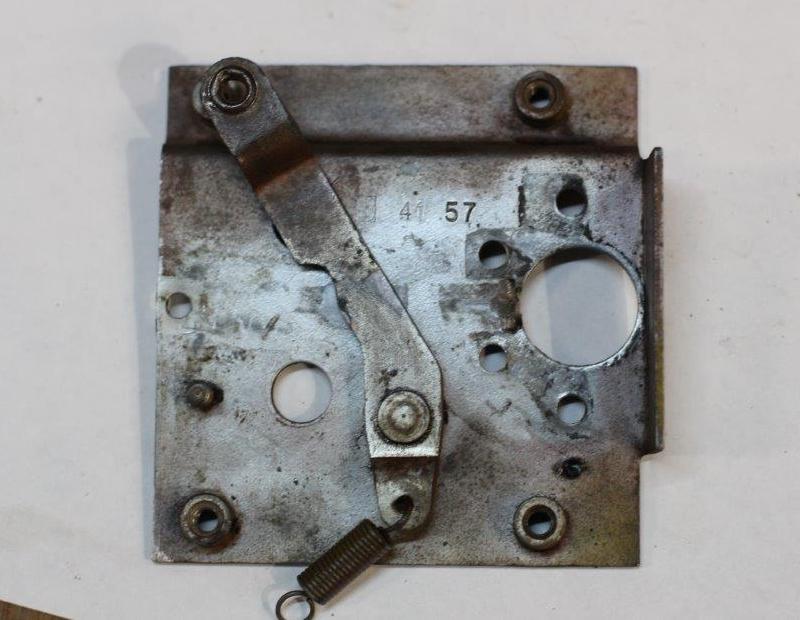
On both the latches, the backing plate was fairly worn where the latch pin contacts the back plate. Given that this is only a 5000 mile per year car at the moment this should last quite a while, however this could be a limiting factor for repeated latch repairs on high mileage cars. Another interesting thing was the numbers stamped on the backing plate of the older latch 41 57 which could be the week and year of manufacture of the latch (week of 7th October 1957). This would be consistent with the date that my car left the factory as a CKD kit to be built up in Sydney Australia: My car was one of a batch of 16 CKD kits dispatched from the KD Department, Cowley, UK on 19th November 1957 - information courtesy of MGCC Victoria MGA Registrar.
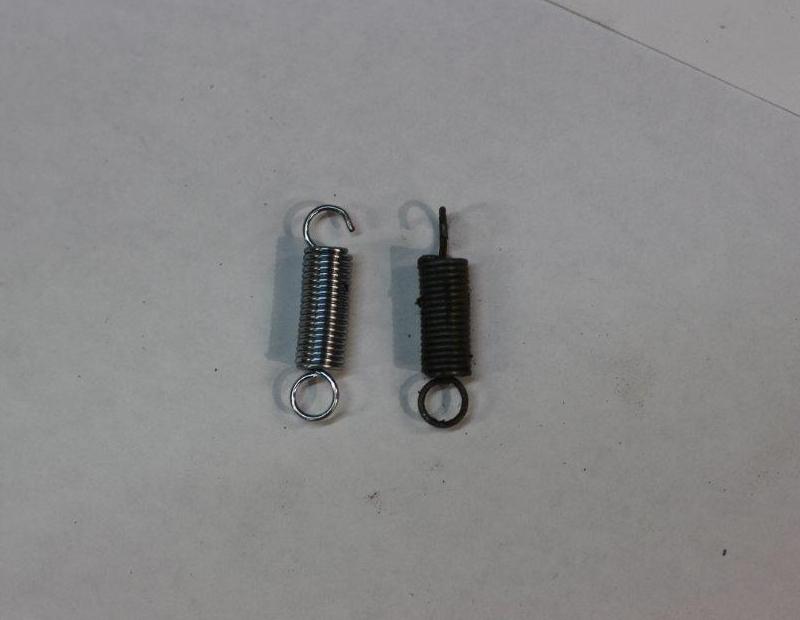
Close inspection of the new die-cast parts showed some casting flash, I did not think this would be too much of a problem, so I did a trial assembly ... and found that the latch pin was binding badly. After a couple of assemble test inspect file reassemble cycles I got the latch pin running smoothly after carefully filing off all of the casting flash around the path of the latch, and also filing down the latch pin as this was binding between the backing plate and the pressed latch pin cover. After filing, I gave the latch pin a quick finishing rub with fine sandpaper on a flat surface to give a smooth running surface. A couple of careful strokes with a second cut file were enough, but I was a little surprised that it did not have the required clearance out of the box. This could be due to some very minor distortion of the backing plate or the wear on the plate. The release lever return spring has a different orientation of the end loops (picture attached); however, this does not appear to be a problem, the spring seems secure on the post. Final assembly included a light smear of synthetic grease (should not dry not for a long time). For the older latch, I had to drill the hole for the screw at the back end of the latch pin / spring cover, as the part supplied kit did not have this hole. As per your web page (bd103c) I touched each hole with a countersink rose to allow the screw heads to lie a bit more flush with the surface.
In summary:
- Much cheaper than a replacement latch.
- Took about an hour per latch, including restarts and mucking around..
- Be prepared to fettle the die casting and possibly also the fit of the parts.
- The original rivets were quite a tight fit in the die casting and had to be tapped out with a pin punch. The #10-32 screws were a clearance fit, however with the pressed countersink in the back plate, I dont think that alignment of the parts is likely to be a problem, and will be the same as the repair you have done on the latch pin.
- I did not replace the rivets provided in the kit for the pivot of the release arm as there was not much play here.
- While I was dressing up the parts, I cleaned up the striking face on the pin, as this had some machining marks where I thought the part would be better off smooth.
|
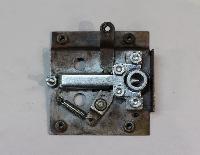
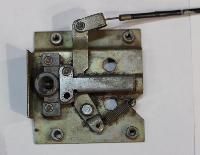
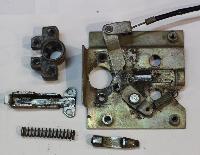
I have included a few photos of the kit of parts, the latches before, during and after the repair.
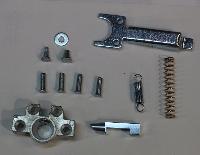
Parts Kit
|
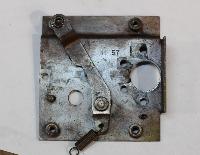
Number on left latch
|
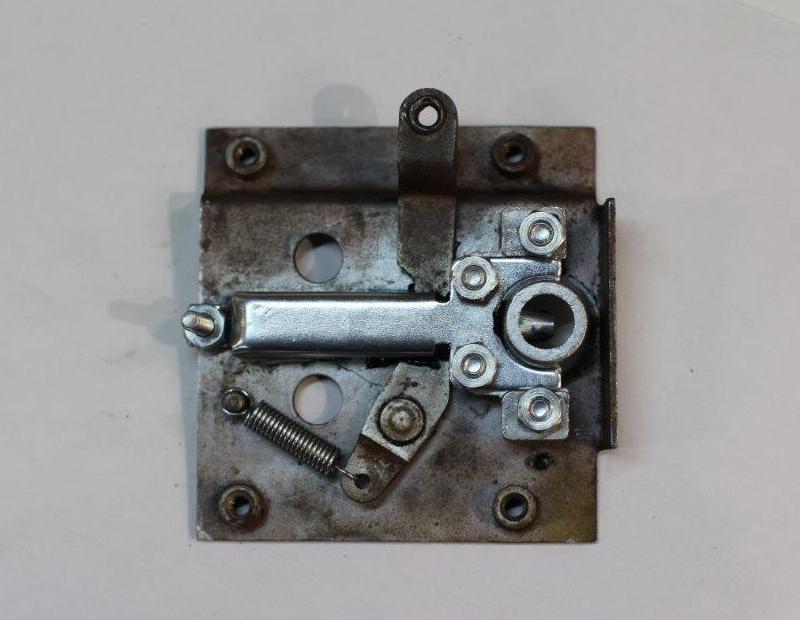
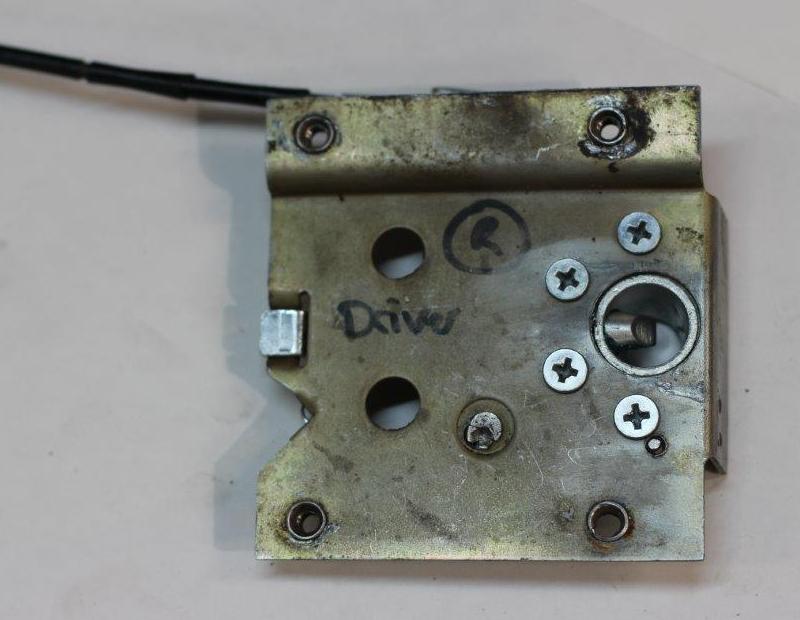
Left latch after repair
|
Right Latch before repair front
|
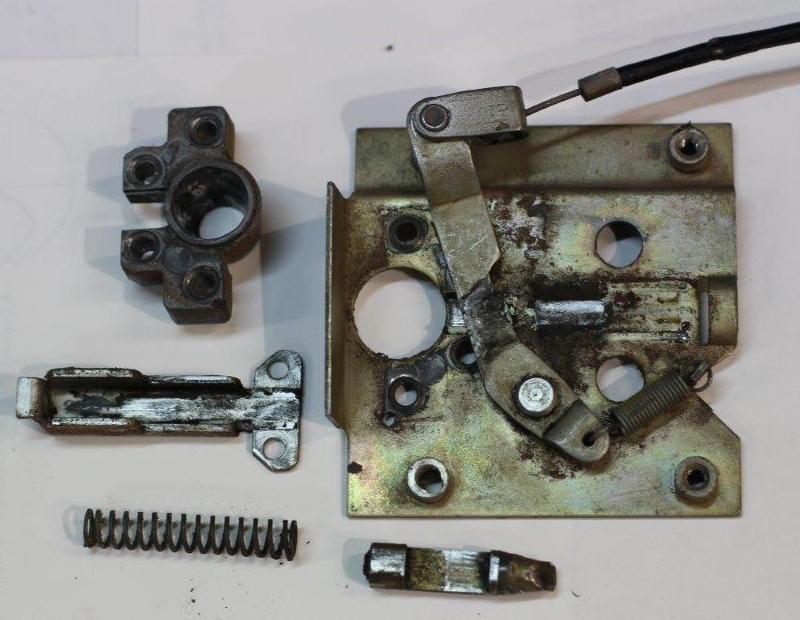
Right latch mid repair
|
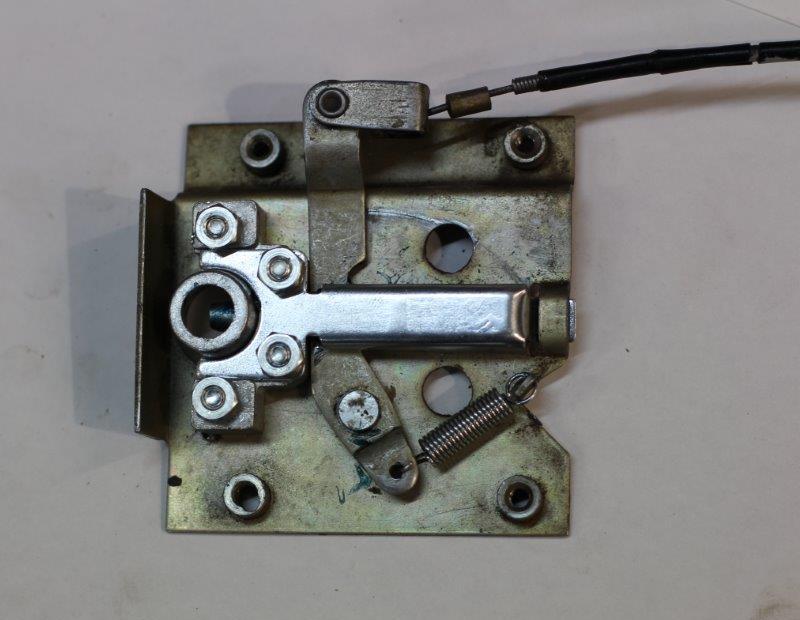
Right latch after repair front
|
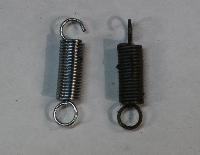
Springs are different
|
Right latch before repair rear
|
Right latch after repair rear
|
|