The MGA With An Attitude
Door Latch Repair for the MGA -- BD-103C
At 03:11 PM 10/1/04 -0500, Arnold Counts wrote:
>".... Some months back I found some repair info' (on the Internet) for MGA door latches, wherein the rivets were drilled out and the tapered latch pin could be removed. The pin could then be built up by MIG welding and then by grinding & filing to an as new shape!! Do you know of which I speak?"
Uh, nope, I don't know the link. But I have BTDT myself a couple of times in years past (within the first 100K miles after restoration). Drill out the rivets for disassembly, weld up and reshape the tip of the latch, pin, and reassemble with machine screws. Be sure to use good lockwashers or lock nuts or thread adhesive to be sure it doesn't come unscrewed in use.
The latch pins are apparently soft steel and wear out a lot faster than we would like. I used to replace the driver side striker about once a year, and the latch every second year, when I was driving 15K to 20K miles yearly. Not only can they be repaired by welding the tip, but you might get some increase in the life of the latch pin by using a stick welder and a hard facing welding rod. The harder steel welded tip is tougher to file by hand, but quite easy to re-shape with a bench grinder.
During my Alaska trip in 1997 my car broke a latch pin, snapped in half in the middle, and wouldn't open. I had to crowbar the boor open, broke the striker in the process and had to weld that. Then knowing what was amiss I closed the door and just stepped over it for a few days. I ordered a new latch and striker from Moss Motors for second day air delivery to the UPS depot in Fairbanks. A few days later I crow-barred the door open again to replace it. After return home I ordered another latch for a spare part, and kept it in inventory for a while.
Less than a year and not so many miles later the new latch had the pin badly worn so the door wouldn't stay latched. Seemed like it had failed much sooner than expected. I installed the new one from inventory, then proceeded to attempt the weld repair on the failed one just removed from the car. When I touched the welder to the tip of the pin it literally vaporized into a cloud of green smoke. Lo and behold, the latch pin was made of aluminum, or maybe die cast pot metal, a real POS. And the other new one just installed was the same.
A call to Moss revealed that they knew about the problem, were having new latches made with steel pins, but wouldn't have them for a few more weeks (or maybe months). Meanwhile they would replace any failed parts under warranty, and would also send a new one when the steel pins were available. Not appreciating frequent repairs, I would rather install a steel latch pin. Having tossed out the old latch in Alaska a year earlier, I didn't have a worn steel pin to repair, so I proceeded to make one.
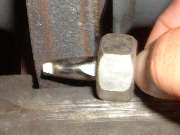 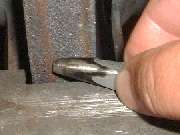 
From local hardware store I bought a 12" length of 3/8" square key stock for about $3. Select a 5/8" coarse thread hex nut, having minor diameter of thread (tap drill size) of 17/32", which just slips over the 3/8" square bar stock. Use the hex nut as a "spindle bearing" to support the square bar on the steady rest of the bench grinder. Hold bar at angle and rotate while grinding to make a pencil point end at the appropriate angle. Place the part on the steady rest and grind the angled flat on the tip. Then hold the part in a vise and make two saw cuts to define the location of ends of the side slot.
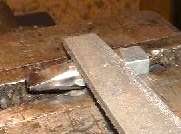 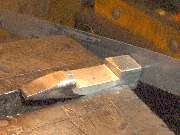 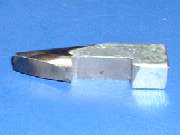
Do as necessary to remove material between the saw cuts to finish off the rectangular side slot (sawing, filing, grinding or whatever to remove the material). Saw off the part to finished length.
It took me 45 minutes to make the first one by hand. In the next 45 minutes I made three more from the same piece of key stock. The conical nose and cut off would be easier in a lathe. The angle cut and side slot would be easier in a milling machine. But I have neither of those machine tools in my home garage. I also tried to flame harden the tip, but I don't suppose that helps much with mild steel.
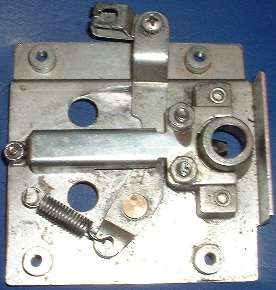 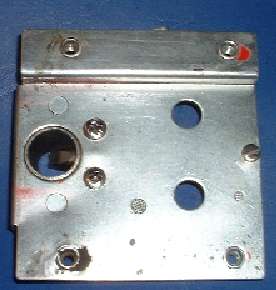
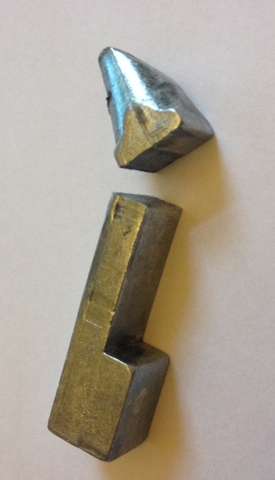
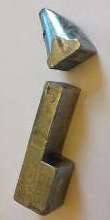
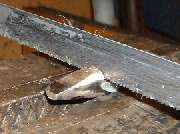
The reassembled door latch is shown here. Drill to remove three rivets securing the stamped steel cover plate. Remove cover along with latch pin and spring. Install the new or repaired latch pin with spring and cover, and attach with machine screws. The two larger screws are #10-32 UNF x 3/4 long flat head or grommet head screws with lock washer and hex nut. You may need to countersink the holes in the main plate a little deeper to make the screws heads lie near flush, as this area of the latch lies against the door shell when installed. The small screw at the tail end of the cover is a #6-32 UNC x 3/8 long binding head screw with a self locking Nylok nut (Elastic Stop Nut, or aircraft nut). There may be insufficient lateral space here for a lock washer. If you don't have a self locking nut, use thread lock adhesive. It can be VERY inconvenient (even hazardous) if this falls apart inside of the door.
You may notice at the top of the left picture, the pull tab is secured to the lever with a screw. This is not an intentional modification but a repair after the original shoulder rivet pulled out. This rivet was not staked in very well in some replacement latches in years past, and I don't know if there has been any improvement in recent years. It is a bit of an annoyance (to say the least) when this joint pulls loose. If you repair this with a screw where you have to leave it loose for the pivot action, do be sure to use a good self locking nut or thread lock adhesive to secure it. It is a royal PITA to have to R&R the inner door panel for access to reassemble this when the pull cable comes loose.
I replaced the worn aluminum pin with one of my new steel ones, and put the rest into inventory. About six months later I swapped the repaired latch into the car for the next worn latch (with faulty aluminum pin), repaired that one and put it back into inventory. A few years later I swapped out the latch again, and replaced the pin. Now a few more years have passed and it needs replacing again, so I will be down to my last new latch pin in inventory. If the current one makes a few years, and the last one makes a few more years, I may be good until about 2010 before needing more new (or rebuilt) latch pins.
By historical record the mild steel latch pins seem to last about 30,000 miles in the driver side door. I'm still not real happy with that, so the next time I need new ones I think I will make them out of M2 tool steel and harden/toughen them with heat and oil quench. I suppose a hardened tool steel latch pin may last about three times longer, and the striker would then be the next weak link and candidate for similar improvement. It would be nice if replacement pins and strikers could be made with hardened steel, might cost a few dollars more retail, but well worth it for someone who intends to drive the car regularly. Just don't hold your breath waiting for that to happen in the commercial market arena.
Addendum February 2015:
In October 2006 I replaced bothersome incorrect door seals with correct door seals as original. This eliminated the problem of having to slam the doors to latch, and lessened the problem of doors popping open with road bumps. In 2008 I replaced body sills in my MGA. In the process the door fit was much improved, so it no longer pops open with rough road bumps. The door can now open and close with one finger. As a result, the door latch seems to have much less wear with time, and latches have not needed to be replaced in over 100,000 miles. It just wants a drop of oil on the latch pin about once a year if it shows signs of being difficult to close.
|