The MGA With An Attitude
MGA Guru Is GOING MOBILE - (July 1 - July 15, 2024)
Monday July 1, 2024:
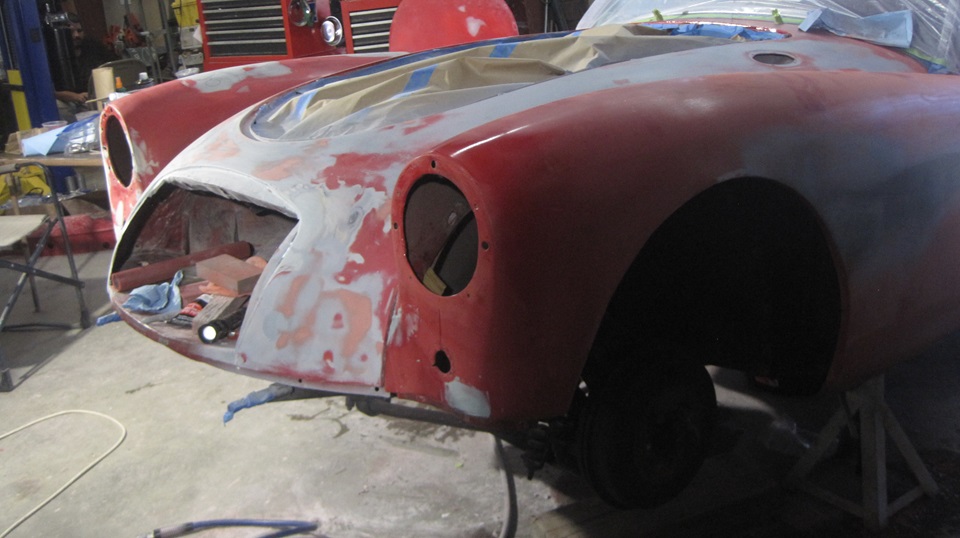
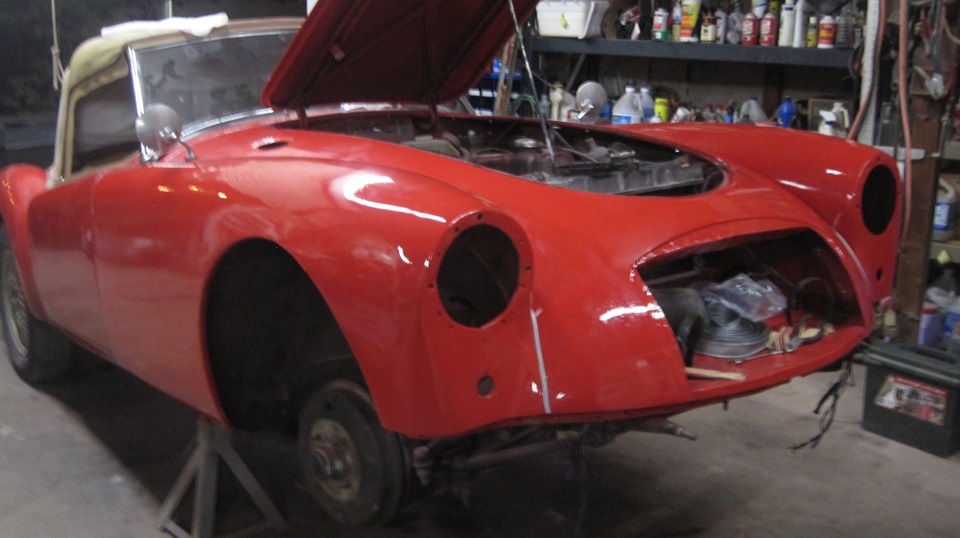
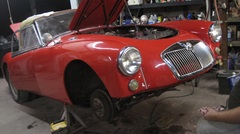
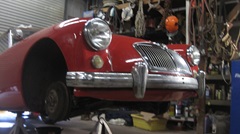
Start the day with fresh optimism, and get to work sanding off the excess primer overspray. it wasn't as bad as I thought it might be, just took some elbow grease and patience to sand it down. One remaining slightly low spot at top corner of the grill aperture, so one more quick pass with a bit of Bondo to fill that, and a quick session with a touch of spot putty to fill pin holes and scratches. Then we decided to put the wings back on with three bolts each and few layers of paint stick shims to space the wings out from the main body. Before a filler primer coat on the wings, a quick trip three miles down the hill to pick up some 1-mil plastic sheet and masking tape to cover the car from windscreen back (should have done that earlier).


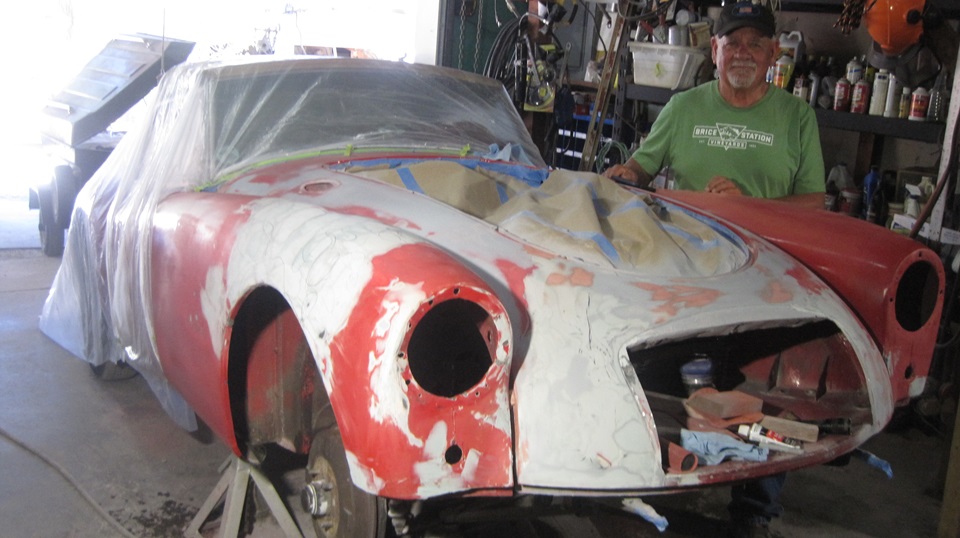
Take a moment to say hello to Stuart Mast at Brice station Winery in Murphys, California. He doesn't get in these pictures nearly as often as he should. He is on my Saints list for allowing us to use his shop space when we're in the neighborhood, and boy do we take advantage of that generosity. He picked an opportune moment to walk in as we were prepping the front wings before final primer.
The wings were straight enough that we opted for a spot putty and sanding session before shooting he primer. That worked out well. We also dropped the finished bonnet back in place so we could final primer the whole front end at once, which we did.


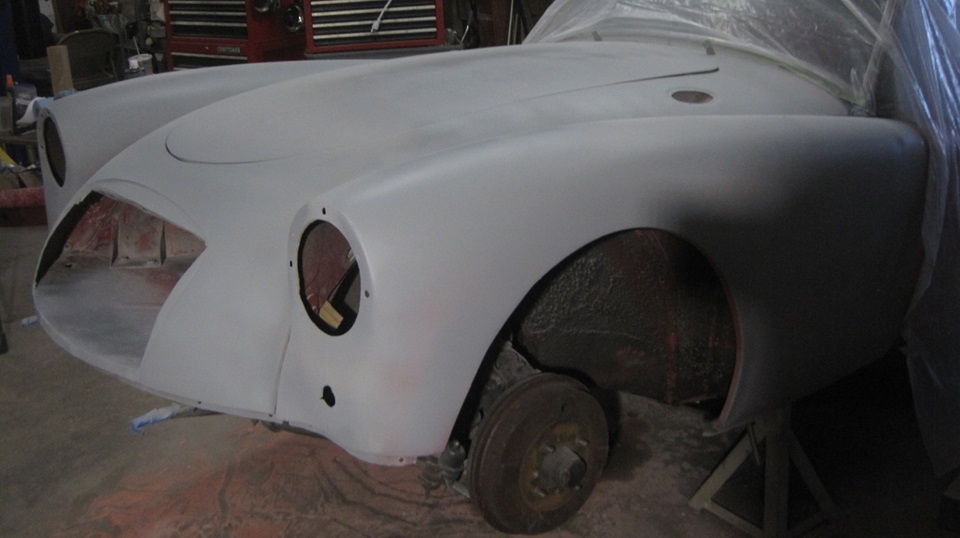
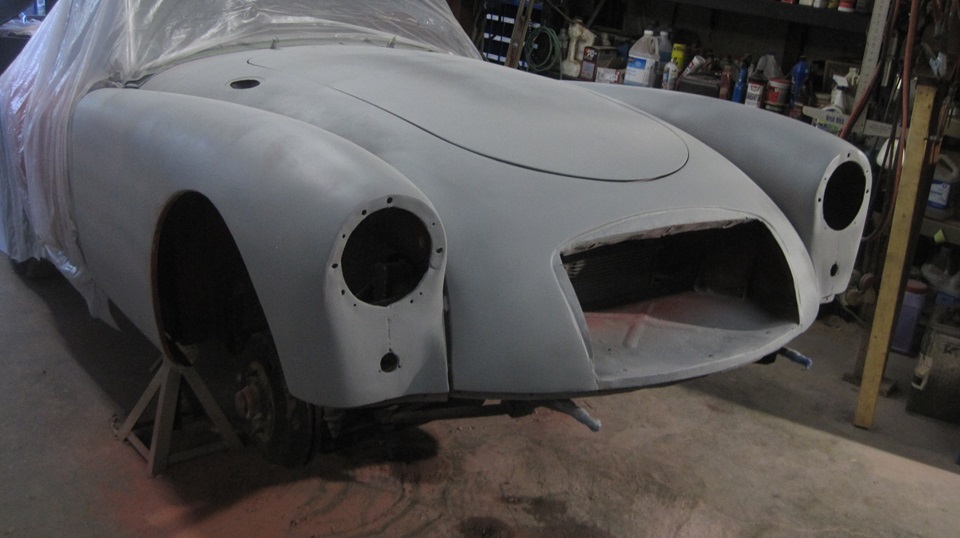
I screwed up enough courage to mix a full quart gun of 50/50 primer (kind of expensive and all we had left). Standing on a chair to reach over while navigator was following me and chaperoning the air hose, it was soon a done deal with the whole front clip in primer.
Disassemble the paint gun to clean it all up again, and reassemble it ready for next use (with more confidence it will work properly). Time for dinner, WiFi, BBS and email, photos and notes from the past two days. Tomorrow we get to sand it down again, and if it comes out good enough, then see if there is time to shoot it red.
Tuesday July 2, 2024:
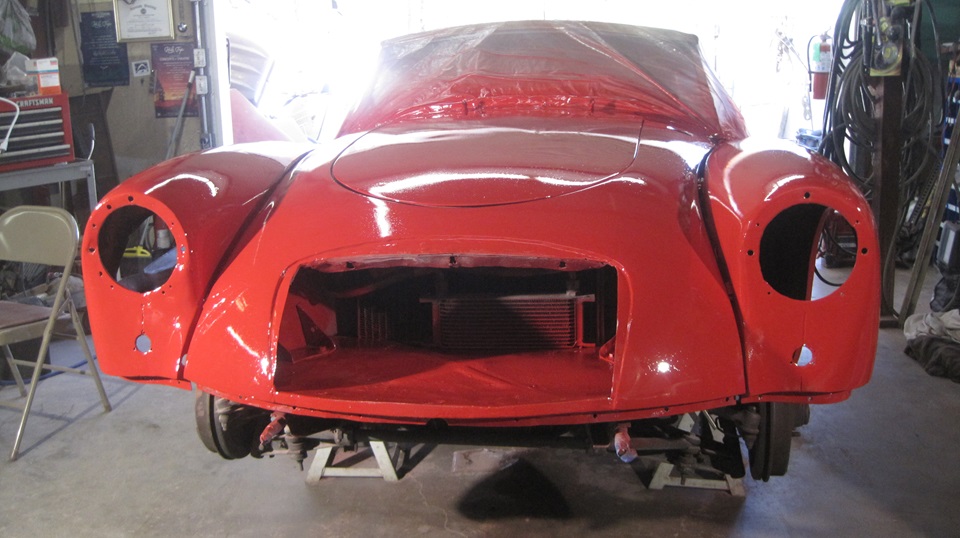
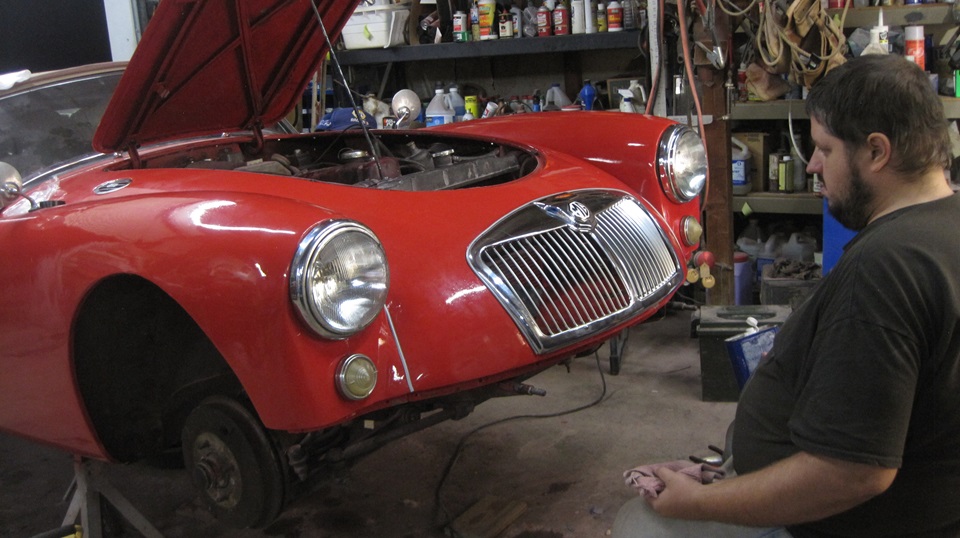
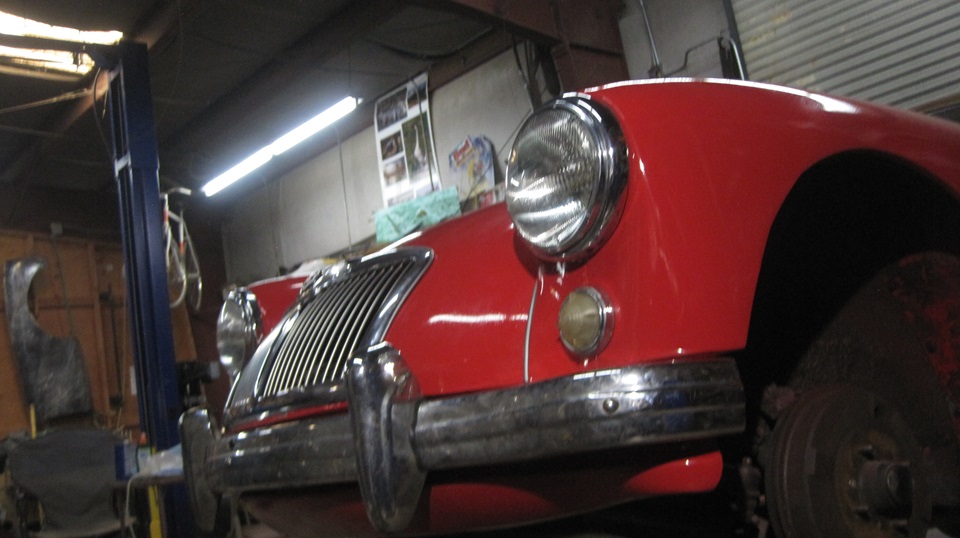
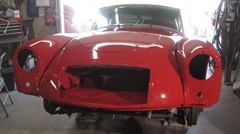
Good morning with high hopes tempered with some reservations. At 10-am we were sanding the primer with 400-grit paper and a gentle touch. For the most part we were removing overspray, converting it from scratchy to smooth, and it didn't take long. Wipe the dust away onto the floor. Blow off any remaining dust and wipe again. Sweep the floor a couple times while waiting for dust to settle, and wipe it again. The bonnet was inverted on a table outside, so take the opportunity to lightly spray around the edges from underneath (using a touch of Rust-Oleum Sunrise Red from Walmart). Touch up a few strips of masking tape that had come loose in the past few days, and drop the bonnet back on top.
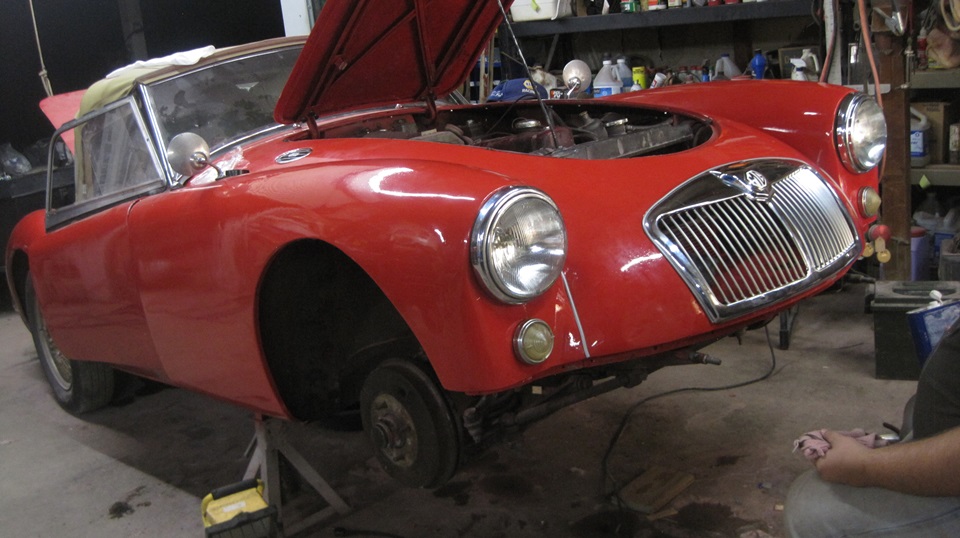
Satisfied it was clean enough to paint, we mixed 18 ounces of Rallye Red (Nissan 72402) with 3 ounces of Very Slow Activator (hot climate) and 3 ounces of Single Stage Hardener (6-1-1 mix) for total 24 ounces going into the gun canister. Spray a brief test on cardboard to set the paint flow and fan spray settings, good to go. Repeat the line dance with me spraying and navigator carrying the are hose, and in another 10 minutes it was red. Step back and don't touch anything.

At the beginning I was standing on a chair. Near the end I had an elbow on the floor while spraying bottom of the wings, gun tilted 45 degrees sideways, with gun beginning to spit a bit of air, nearly out of paint. About 3 ounces left in the gun, and I'd rather be lucky than good any day. While we were busy not touching anything we spent the next hour disassembling and cleaning and reassembling the paint gun. Good time for lunch break, and a few hours later the wraps were off. Did someone say this thing hit a deer? Next challenge is to stay away from it for at least a day. Boring, but easy.

Wednesday July 3, 2024:
Stay away from the new paint. Record temperature today, like 103-dF in the shade at 4000-ft by mid afternoon, so we tried to stay under an umbrella with an occasional breeze. I felt like a sun dial moving in a circle opposite the sun to stay in the shade.
Thursday July 4, 2024:
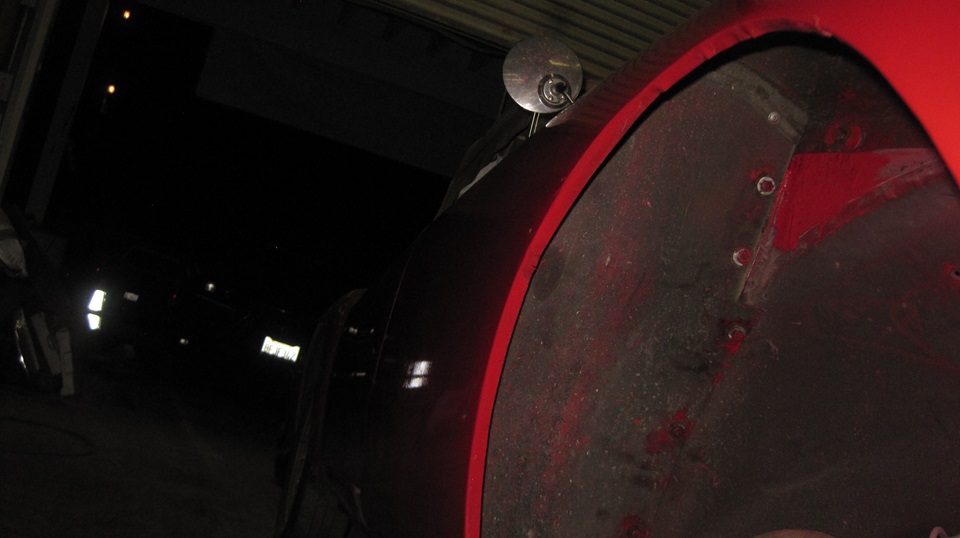
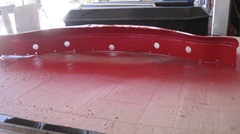
Holiday my eye. Today's the day we get to start putting the car back together. We started with removing the RF wing and brush painting inside and outside a few repair spots we had done with small internal sheet metal patches and JB Kwik Weld. Then we installed 12 rubber bumpers for the bonnet with the somewhat inconvenient #6-32 machine screws, with the tiny lock washers and hex nuts underneath. For additional insult, add two #10 flat washers under each rubber bumper, because the parts supplied by Moss Motors are too short for the bonnet to be flush fit.
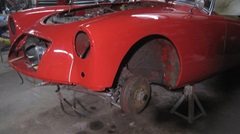
Then we installed the the bonnet with the convenient thumb screws at the hinges. Also reinstall the bonnet latch pin with cup and spring and get that adjusted to assure the bonnet latch works properly before installing the new grille. Then I got top sit down to work for a while. Put the front wiring harness back into the nose with proper rubber grommets in the air pan. Reinstall the two cheap aftermarket hooters in the front corners above the air pan (not recommended after experience). Four small bolts to re-attach the oil cooler. And a couple small bolts for the large p-clips for the forward air hoses (themselves a PITA for later). I was rather busy and not taking pictures just then. That was about the time we noticed we were leaving some smudge marks (like palm prints) in some of the new paint, so thought it would be a good idea to leave the front wings for another day.

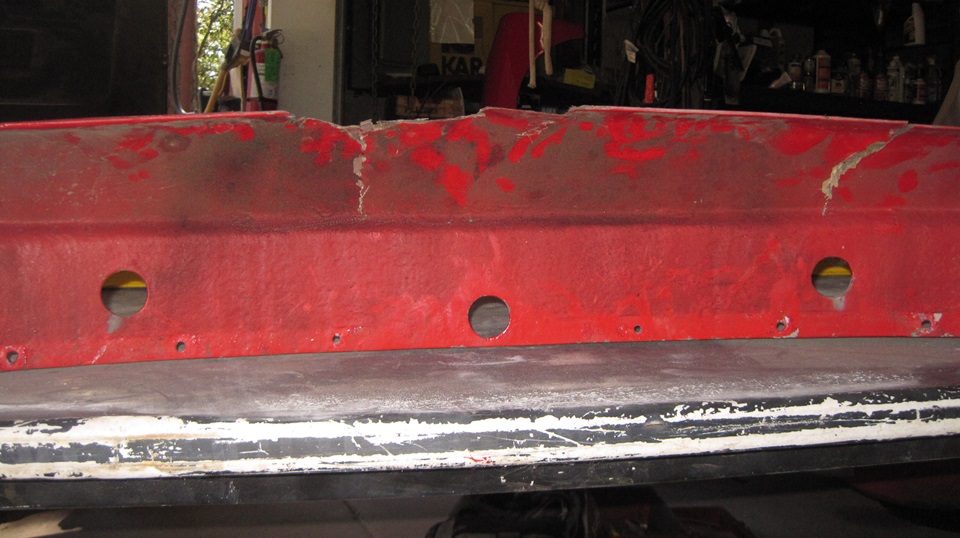
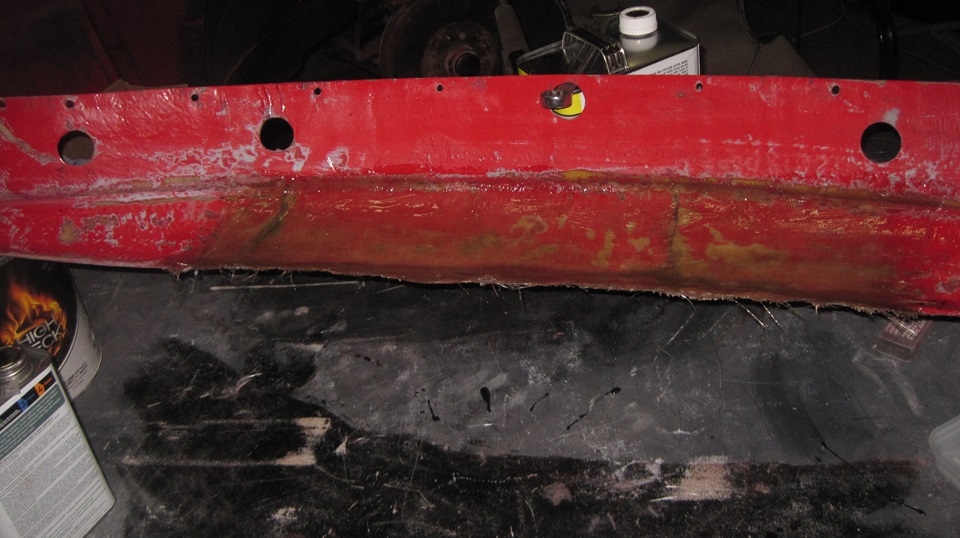
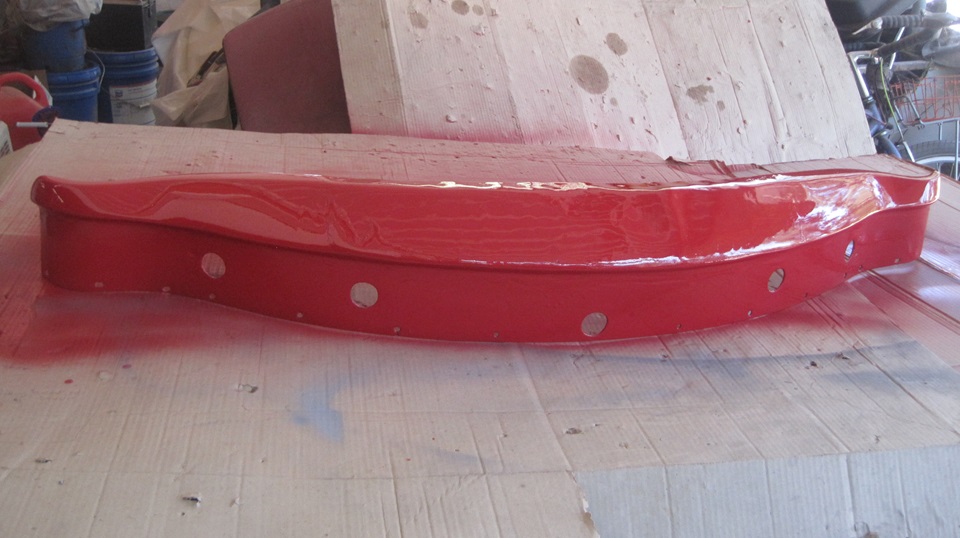
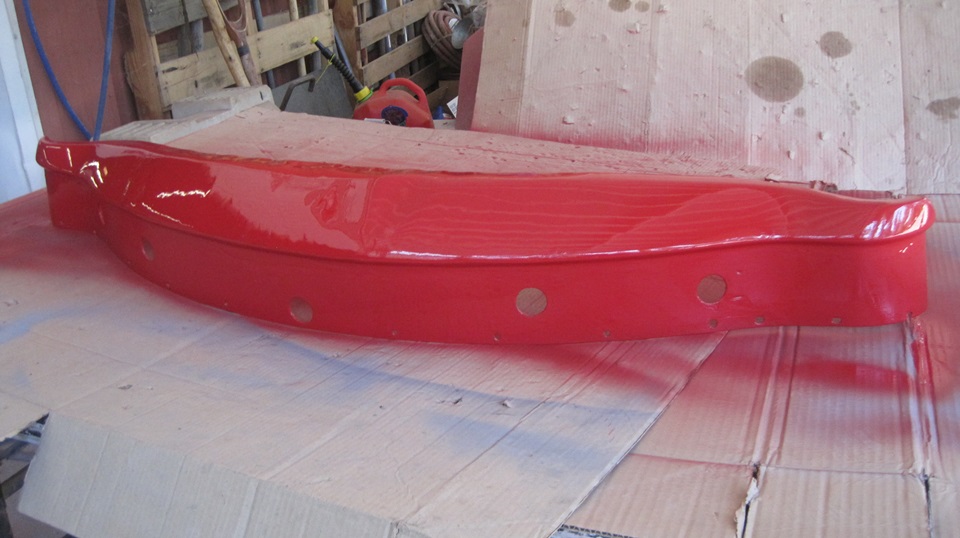
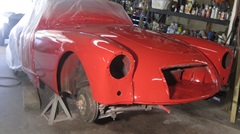
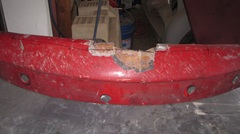
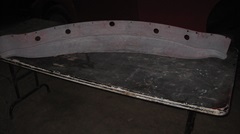
For a fill-in job, this could be a good time to try repairing and modifying the fiberglass front valance panel. This thing has in recent years taking a regular beating on interference with parking curbs that may be a built taller than necessary. The most recent incident was getting hooked over/behind a curb, then broken when backing up. The idea here is to cut away some of the bottom edge of the panel to give more ground clearance, and laminate it back together with the bottom edge flat and parallel to the ground, at least an inch higher than original. We flipped it upside down on a table top and made some eyeball estimates on where to cut it. We picked spots about 15 inches from each end, to preserve much of the original structural shape outboard. Then grabbed an angle grinder with a sanding flap wheel, and proceeded to grind away the part of the panel we didn't want to keep.
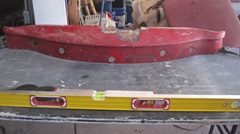
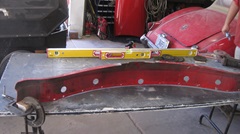
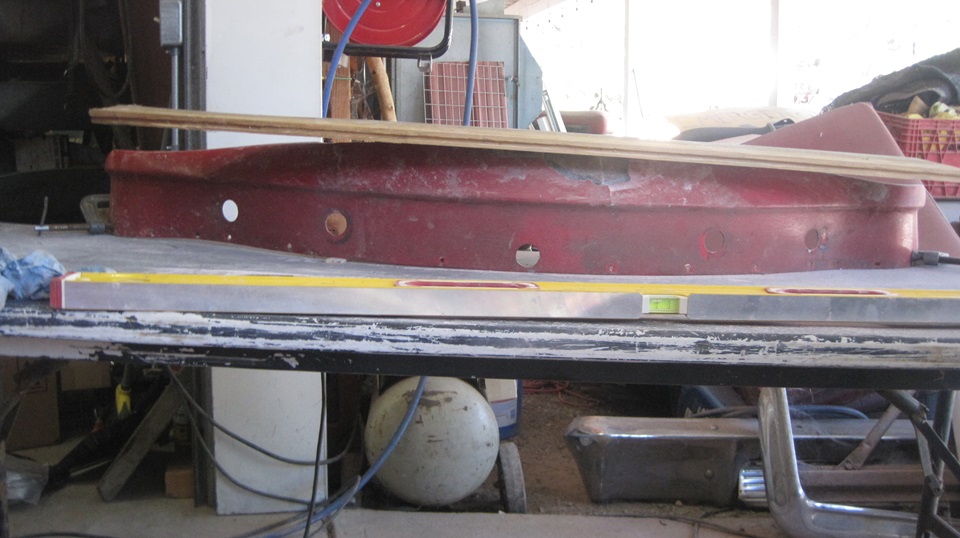
 We found a siding board the right size to serve as a bottom plane reference when grinding the bottom of the panel. After grinding, the board would sit flat and level perched on the bottom edge of the panel.
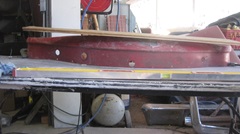
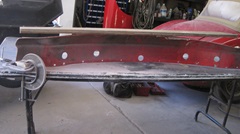
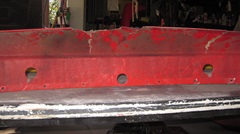
The siding board had a slight edge to edge curvature, and one slightly rough sawn surface on the concave side. I liked the concave side for the bottom edge form, so we covered the board with a few layers of brown paper to smooth out the rough sawn surface. Then wrapped it with two layers of 1-mil plastic sheet to serve as a separator surface after laminating. Lay the wrapped board flat, set the panel on the board, and install two wood screws through the panel bottom lip to secure it. Grab a black Sharpie pen and draw a free hand arc to represent where I wanted the bottom flange to be wider near the center for extra strength. This would be a guide where we would laminate the new fiberglass over the plastic sheet. We had in hand a fiberglass repair kit with 3-sq-ft of cloth and just enough resin with hardener to do that much. This was just enough to lay two narrow strips across the bottom flange, and two wider strips running from the rib near top of panel to the extreme edge of the bottom flange. So far that's four layers thick at the bottom flange, but there will be more to come.


We have in hand another pack with 8-sq-ft of cloth, which should be enough to finish this project. We were considering a quick trip to the store to pick up a quart of resin with hardener, but it's a holiday with stores closed, so that will have to wait for tomorrow. Meanwhile, it's setting up nice and solid tonight.
Friday July 5, 2024:
Trip top a local small hardware store this morning, and they actually had the resin we needed. Back to the shop and get busy.
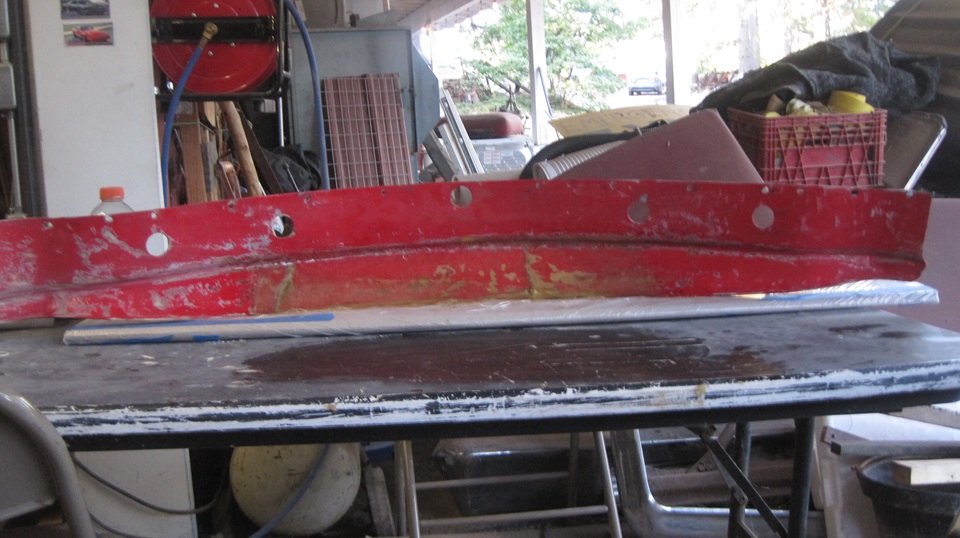
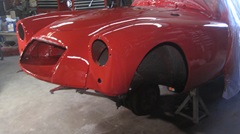
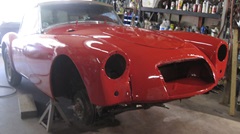
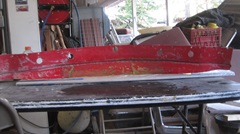
 Paste in some shreaded cloth to fill a couple of vertical racks on the outside of the chin. Laminating many layers of cloth to fill in half the thickness of the valance panel in a 10-sq-in area where a piece had broken out. Then two layers of cloth on the outside for 40% of the length on the chin surface to cover the more recent large cracks. After a few hours it had set up enough to handle, so we turned it over to rough sand the inside, then laminated two strips a few inches wide to increase thickness and strength of the new bottom flange, plus one more layer from the bottom flange to the central groove(front side horizontal ridge) reinforcing the most recent cracks. A few hours more had it set up enough to handle (without getting too sticky), and by then I could rap on it with my knuckles. Now very near the final shape, and it looks like it will be plenty strong. Sorry I didn't get more pictures, as this has been an amazing transformation. Tomorrow we should trim the edge of the new bottom flange, sand it down and get it in first pass primer.
Saturday July 6, 2024:
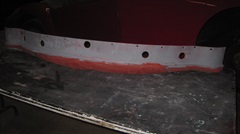
Fairly early star. Grab the modified and now fully cured fiberglass front valance panel, trim the lower lip to remove rough
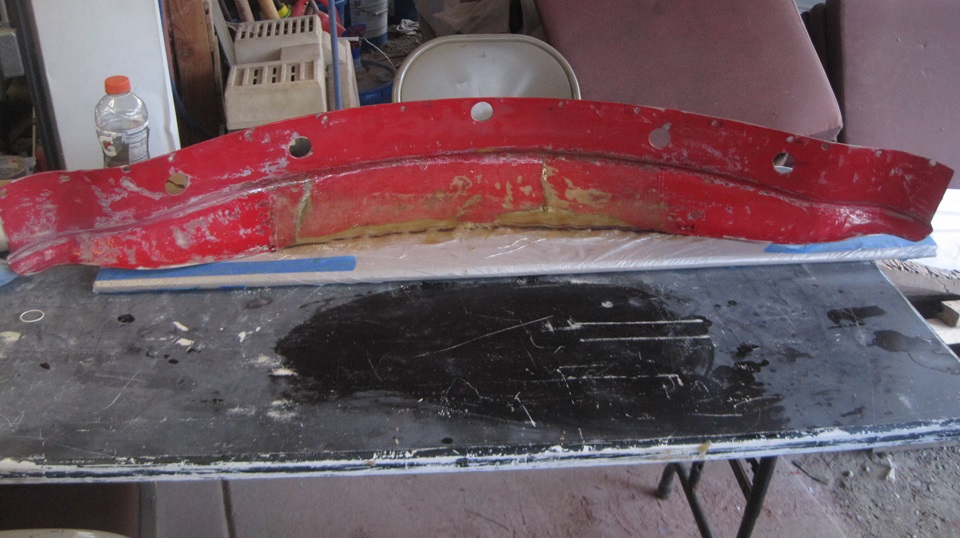
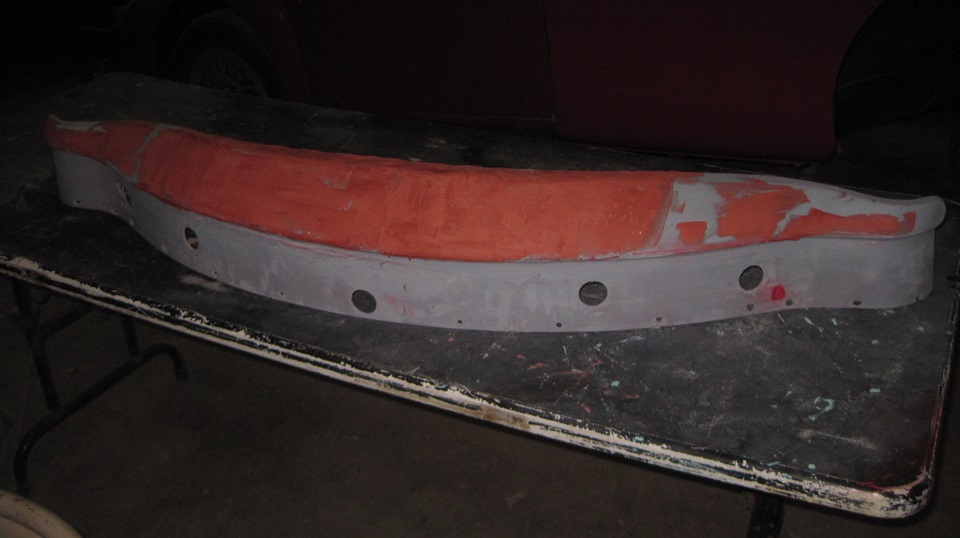
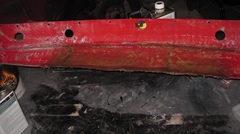
flash and square up the edge of the new flat lower lip.Sand the inside and outside to remove rough overlap edges from multiple layers of new fiberglass cloth laminate. 400 grit sand it to provide suitable surface, shoot it with primer all over, and set it out to dry. -- Then we installed the RF wing with about 20 bolts and new piping, and the splash panel. Quite a chore, but it came out nice. -- Fetch it in the primered valance panel, and lightly sand 400. An expected knee-jerk reaction to some porous cloth pattern surface had me treating the outer surface of the chin (below the bumper) to half a tube of spot putty to smooth out the micro-waffle pattern. Set it out to dry again, and take a short lunch break
We had intended to pull it back in mid afternoon to sand off the spot putty, and give it another coat of primer. Then a few hours later light sand the primer and shoot it red. This is some concern, considering where we need to be in about 8 days, running out of calendar days, and knowing how long it takes to dry and cure the red enamel. Getting this piece painted and cured is the current critical path. But we just missed another day. -- There it sits at day's end, with the ugly spot putty still on it. That will be high priority in the morning. You might notice how it now sits up straight on the new flat bottom lip.
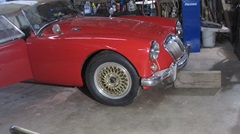
Meanwhile, the reason we didn't get the valance panel finished and painted, was because we were installing the LF wing, doing well, and didn't want to stop. By day's end we had installed both front wings with new piping and the wing mirrors and splash panels and body sill trim strips. Hey, it's beginning to look like a car again. Time for clean up and late dinner.


We skipped the Saturday night concert again, but caught a few wisps of the music filtering through the woods. As the concert was breaking up and cars leaving late night, I was processing these photos and notes (past midnight).
Sunday July 7, 2024:
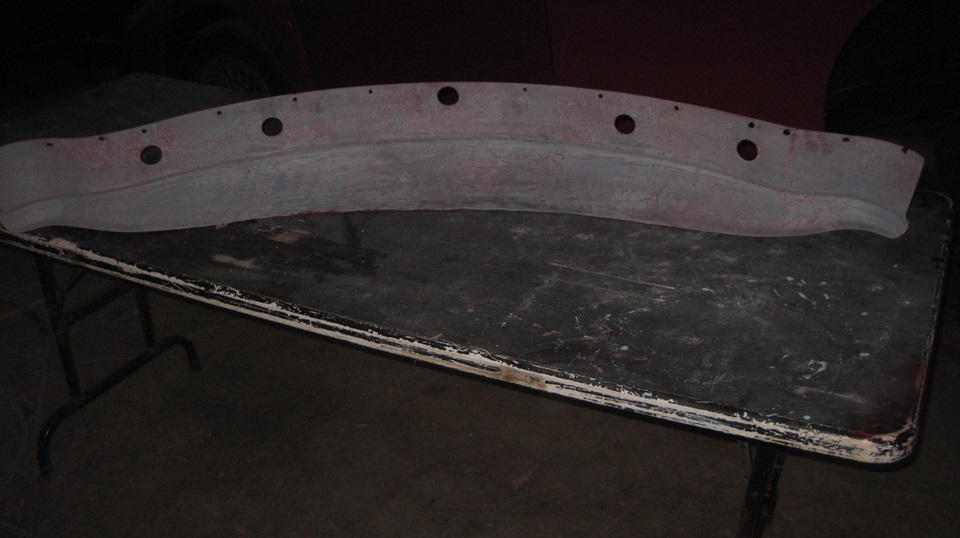
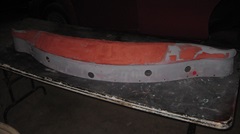
Priority rules, so up early to sand down the spot putty on the valance panel and give it another coat of primer. After 20 minutes drying time we set it out in hot California sun to cook for 2-1/2 hours, until we would burn our hands on the table when carrying it back inside. Beautiful primer coat, so just a few minutes for light touch sanding 400 grit before shooting it with the red enamel. That would set outside in the heat and light breeze, but not direct sun, hoping passing vehicles wouldn't kick up too much dust from the gravel road. That came out okay too, and by sundown it was dry enough to run a finger lightly across it without smearing anything. That will sit in the sun all day tomorrow, and we'll see if the fresh paint might be stout enough to install it.


 While the paint was drying we were back to work on the car. Elliot was reinstalling the front kick panels while I was installing the head lamps and parking lamps. Physical installation done it was time for a late lunch break (no WiFi). Then it was team work passing tools and crimping wire terminals to reconnect all of the front lighting. Everything worked on the first try, except for the LF turn signal, which turned out to be a burned out bulb, easy fix. Those darned electronic flasher units don't warn you when a bulb burns out, so you need frequent lighting checks to catch and fix any glitches before they might cause a road problem. A few more small things, like reinstalling the screenwiper spindle bezels and nuts and the bonnet rel;ease draw rod return spring.
Hey, waddaya know, the WiFi seems to be working again after 3 or 4 days of dead air, so late night I get to post up these photos and notes, and upload a few days of delayed data to the website server. hope y'all weren't missing us too much.
Monday July 8, 2024:
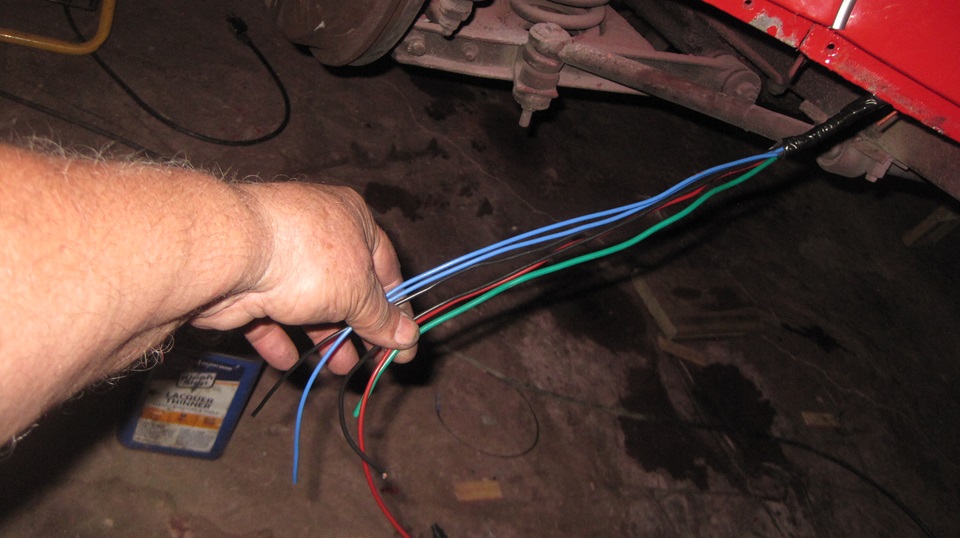
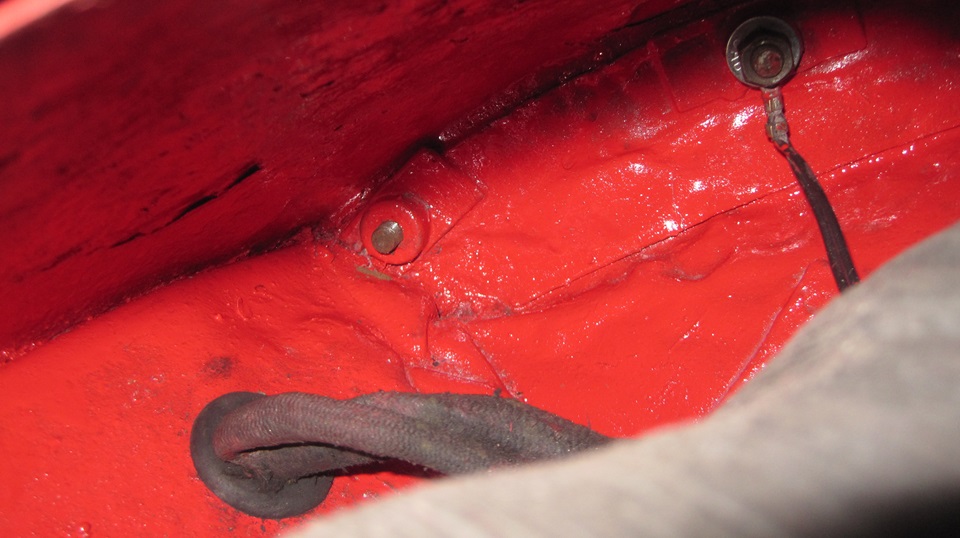
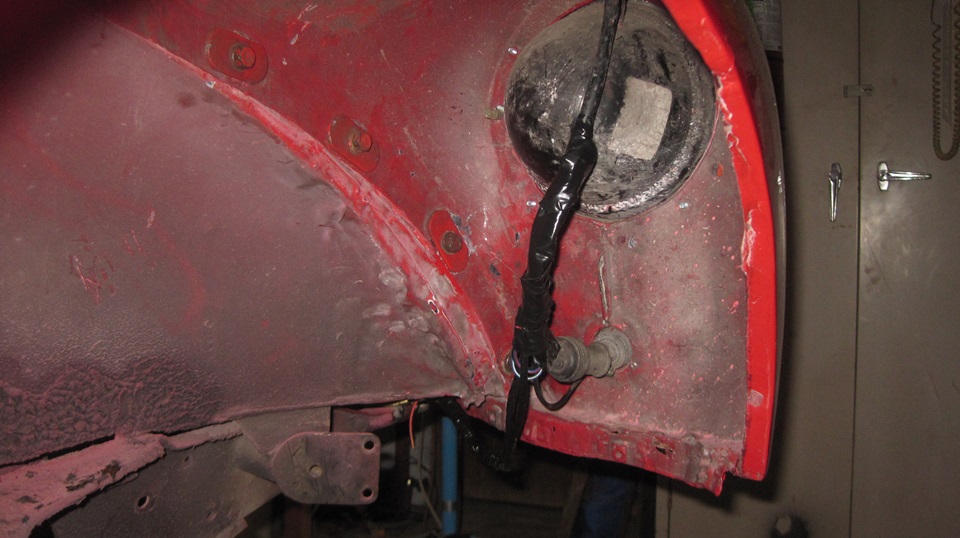
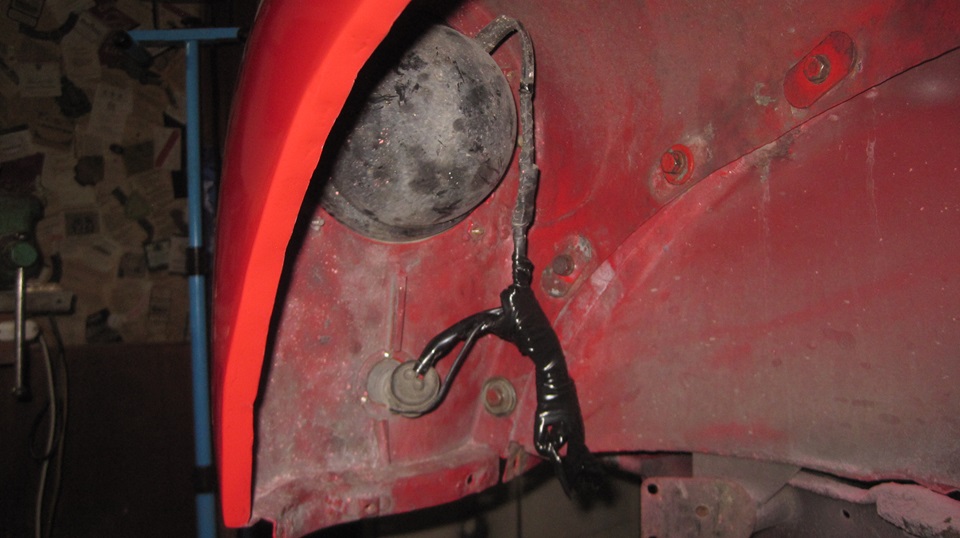
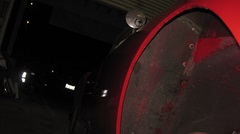
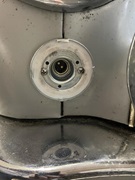
Set the valance panel in direct sun early morning, and keep it there all day. Good baking temperature seems to work well. -- First picture below shows where the main wiring harness goes down through the grommet in the air pan inside the RF corner of the body nose. After having some difficulty re-connecting short harness wires yesterday, it was obvious these wires had been cut and reconnected tooo many times in past years, so it was time to splice in some extender wires. Two blue and a black for the headlamp, plus green, red and black for the corner lamp )parking light and turn signal). This was a new harness, 38 years and 685,000 miles ago. so it deserves a little maintenance for future preservation. The extender splices were all soldered and covered with heat shrink tube, followed by harness wrap with vinyl tape. The third picture shows where the front harness goes through the grommet at LF corner of the air pan. We put extender wires there a few years ago, so nothing needed there this time.
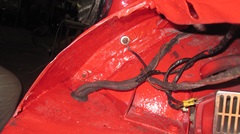


Main harness through a new grommet in RF corner, plenty of extra length now, looking much better. The reason we do all this wire splicing is to eliminate all of the original bullet connectors, which are a regular source of electrical problems in these cars. This is what the front corner wires look like when fully dressed. ready for many more years of trouble free driving


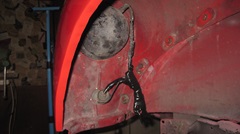
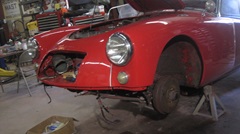
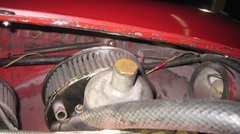
-- Before we install the new grille, we need to re-install the 4-inch air hoses (royal PITA parts). The one from RF corner was
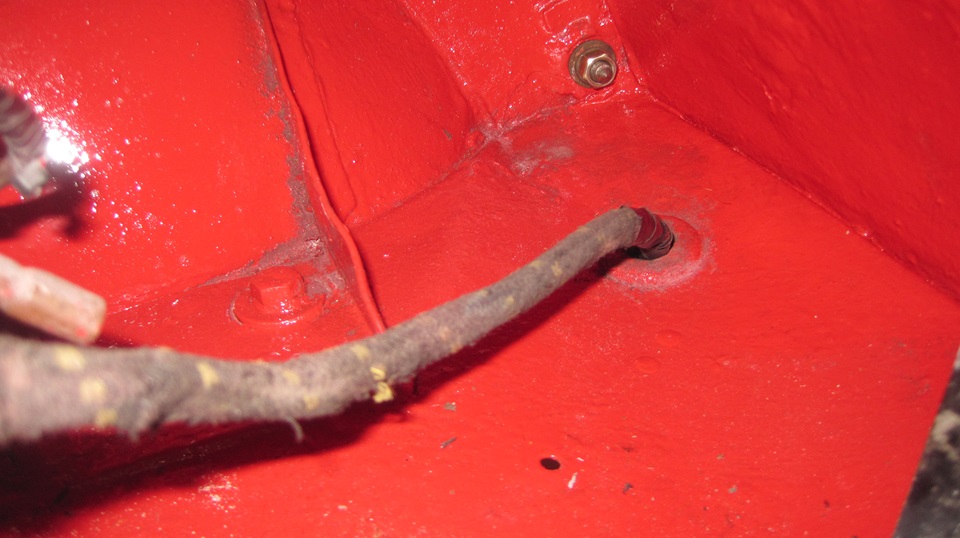
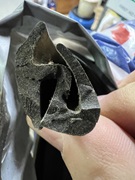
 destroyed while removing it, The one from LF corner was reformed to be installed at RF corner. the longer paper and foil hose from radiator panel to heater box was gratuitously massaged back into semi-serviceable shape and reinstalled for now). That one gets crushed every tine I have to reach in to adjust the distributor. The LF hose will remain missing for now, but the 3-inch bilge blower for carburetor cooling is still there in the left side pass through the radiator panel. Gawd I hate these paper hoses, got to find a better more sturdy substitute. Someone recently suggested hoses from a Chevy Corvair engine to heater ducting.
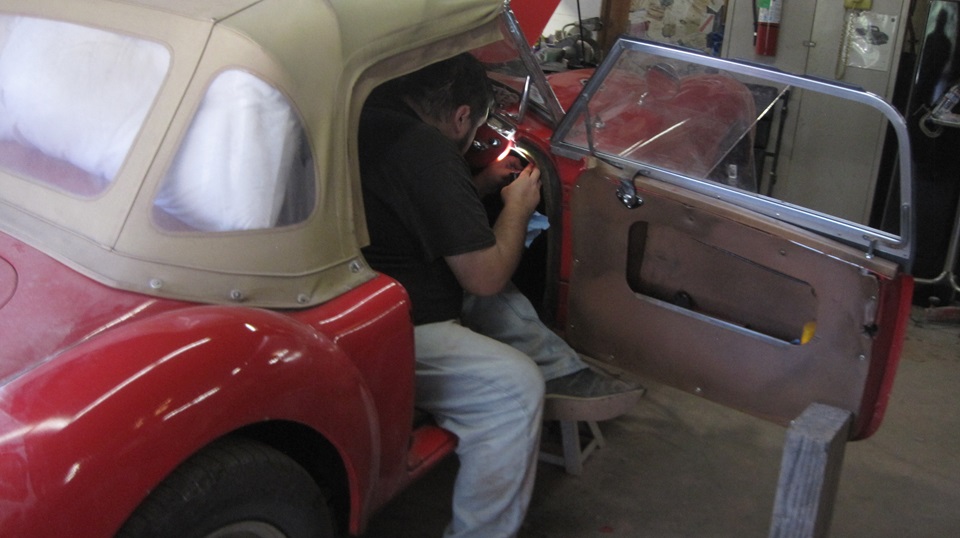
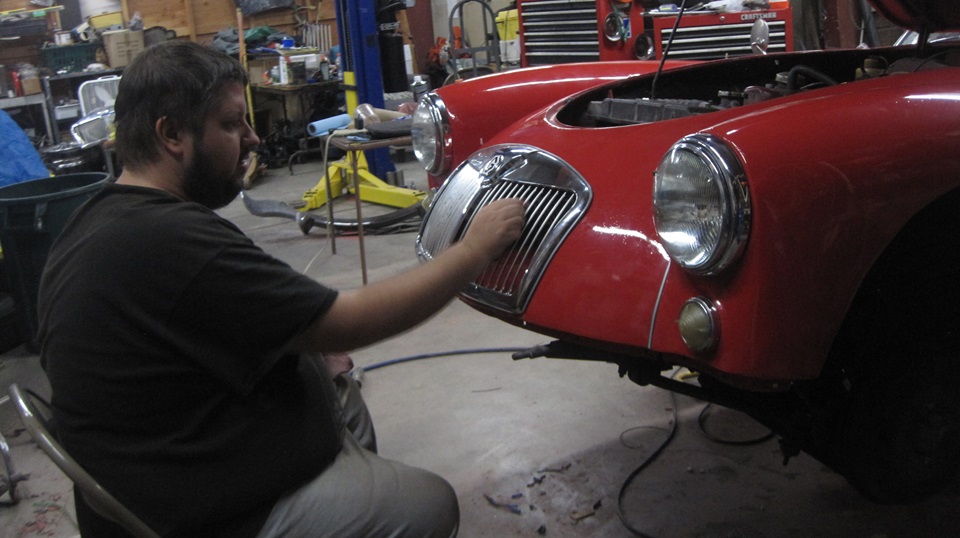
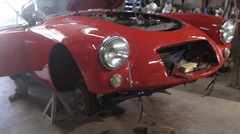
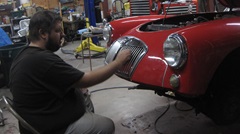
We took a 3 hour pause for late lunch and to sit in on John Twists on-line Zoom UML tech session. This one was primarily about MGA's (so I felt kind of obligated). -- At 6:30-pm local time (PDST) we were back to the car to install the new grille. Bad enough this is a tricky job as original, but after the nose has been bashed and pulled out and Bondoed over several times, this chore keeps getting progressively tougher. But with some persistence, a little swearing and some scuffed knuckles, three hours later it was done.

It will surely be past midnight posting photos and notes, so the front valance panel and bumper will have to wait for tomorrow.
Tuesday July 9, 2024:
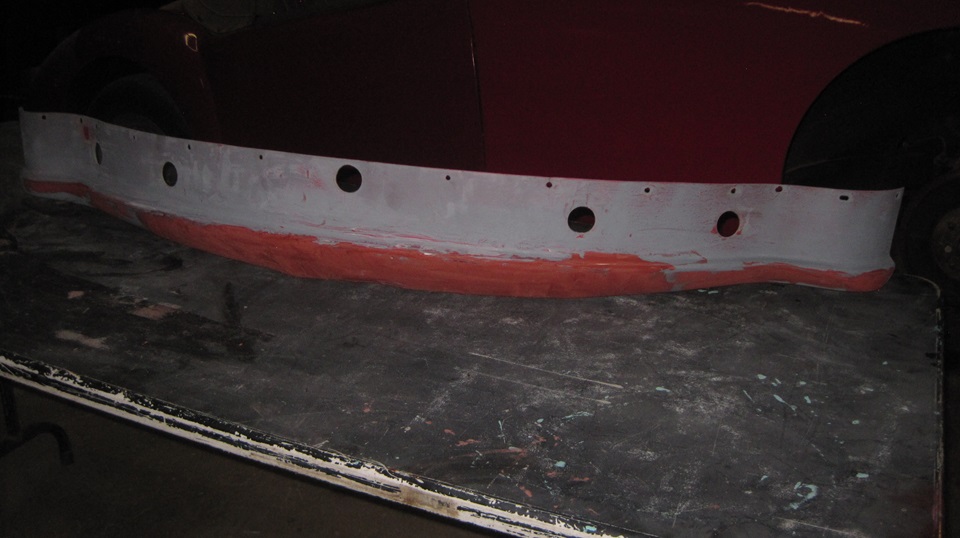
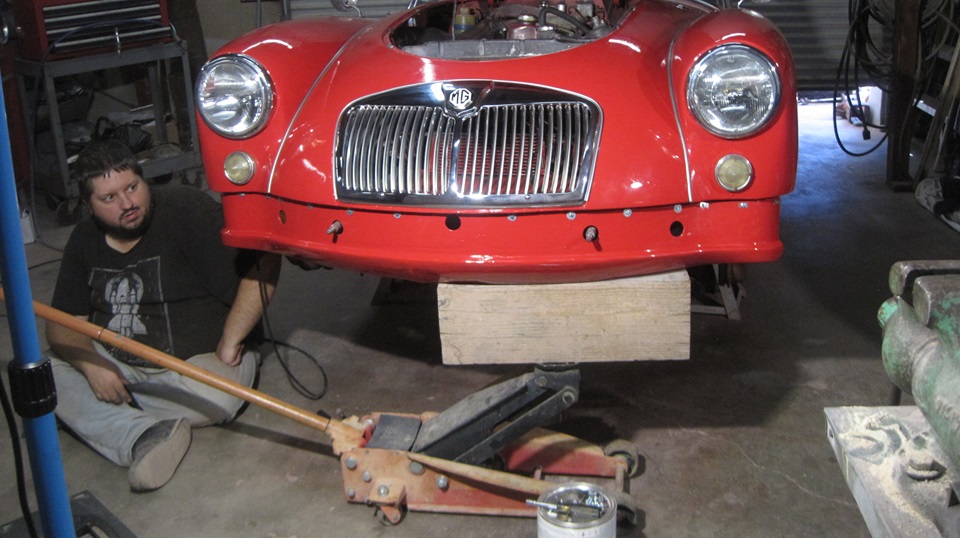
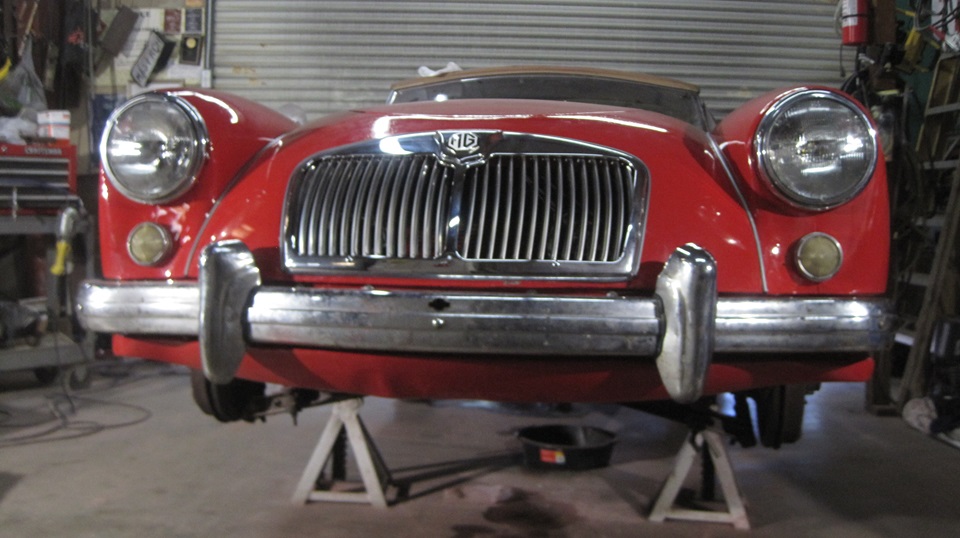
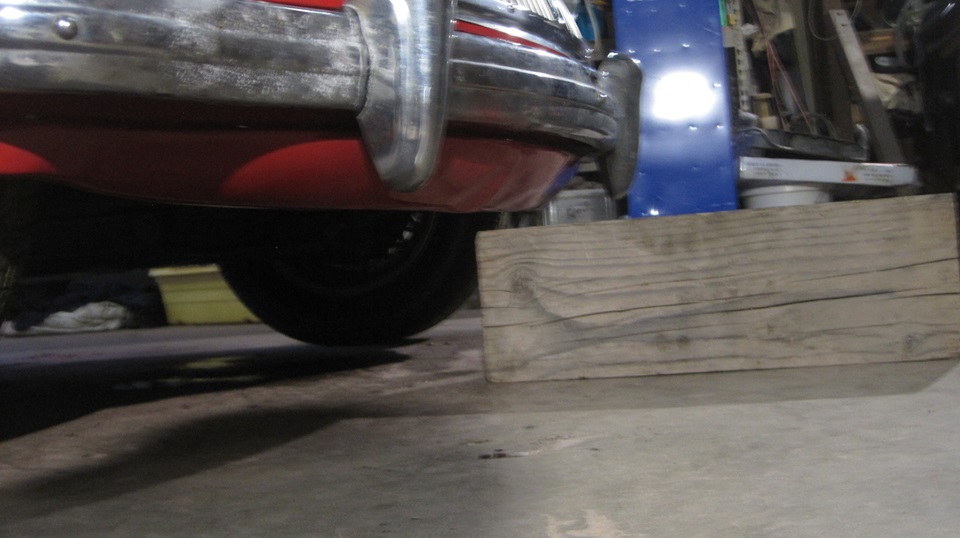
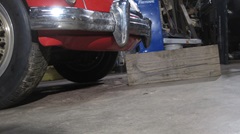
Okay, you know what's coming, front valance and bumper. The primary problem with the valance installation is that many of the captive cage nuts are stripped threads or missing, so the mounting kit is only half useful. Some of the screws need to be longer to accept a flat washer and nut in back, and the longer screws will not be hex head as original, so we will end up with some non-standard screw heads (no biggie). Notice the 4x8 wood block that we have been kicking around and standing on for the past few weeks. It makes a good spacer block on top of the floor jack for holding the valance panel at the desired height. And it helps that the valance panel is now flat on the bottom. Fourteen screws installed in short order, and we can get on with the bumper installation. -- Bear in mind that the 3-piece bumper with overriders and spring brackets was previously removed as complete assembly. So now we just stick it back on the car with the two angled side brackets, half a dozen small bolts, eight large flat washers, four large hex nuts with lock washers, and some rubber grommets. Just get the bolts in and leave it all loose. Notice a large gap between face bar and underside of the body nose for the right third of the bumper (last picture below).
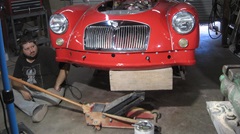

Been there, done that, and we know where the sagging point is. Put the floor jack and wood block under the face bar near the left overrider, and lift until the face bar touches bottom of the body nose and wings. Tighten up all of the fasteners, remove the jack, and we have near perfect fit on the first pass Yes, it was nice that the deer hit didn't affect the bumper.Isn't that sweet.
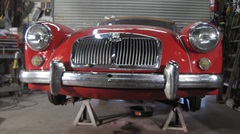

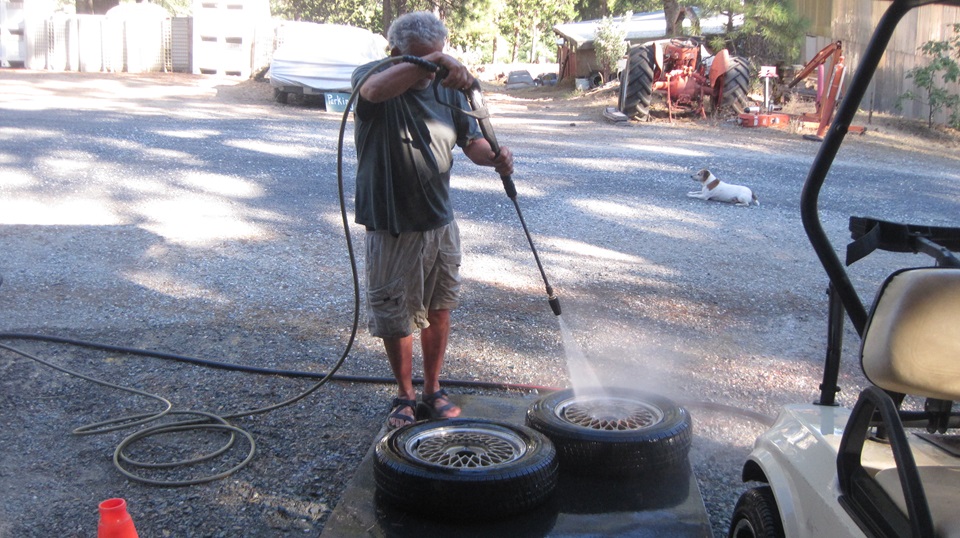
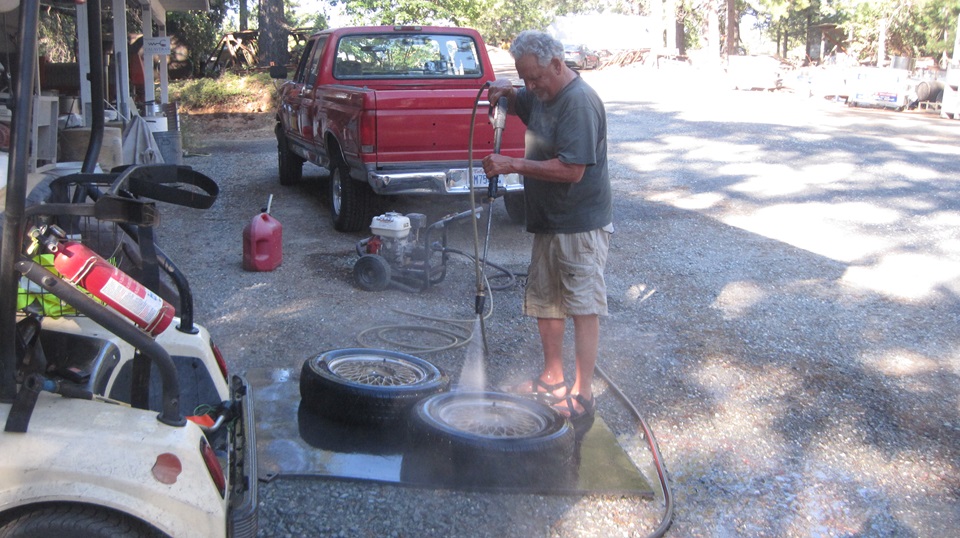
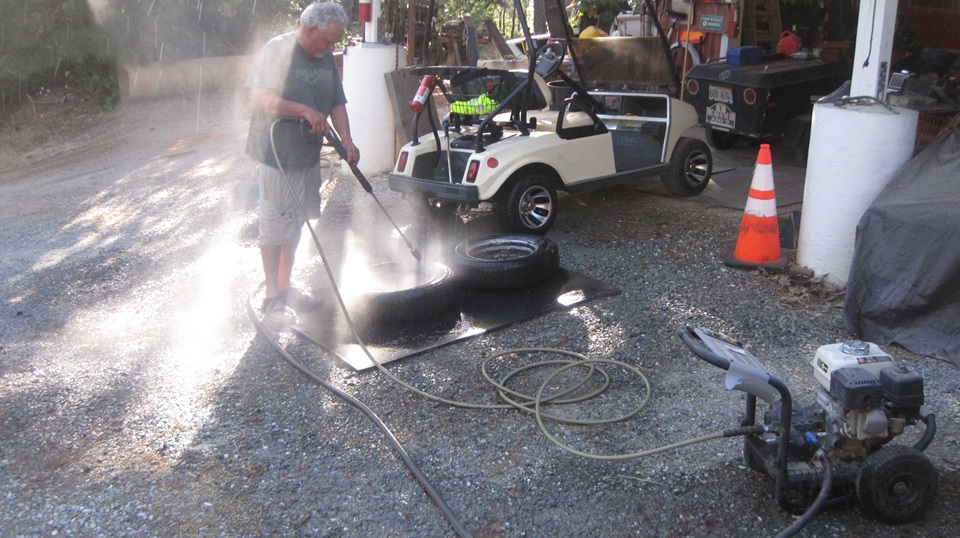
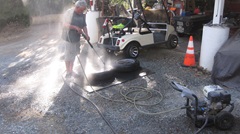
The front wheels and tires were pressure washed nearly two weeks past. Quick front brake adjustment, just one click each side, install the wheels and get the car off of the jack stands. Jack up the rear to remove the wheels to adjust rear brakes, three clicks needed one side only, which could explain prior weak action of the parking brake. Meanwhile the rear wheels got their turn at power wash, and were quickly back on the car.


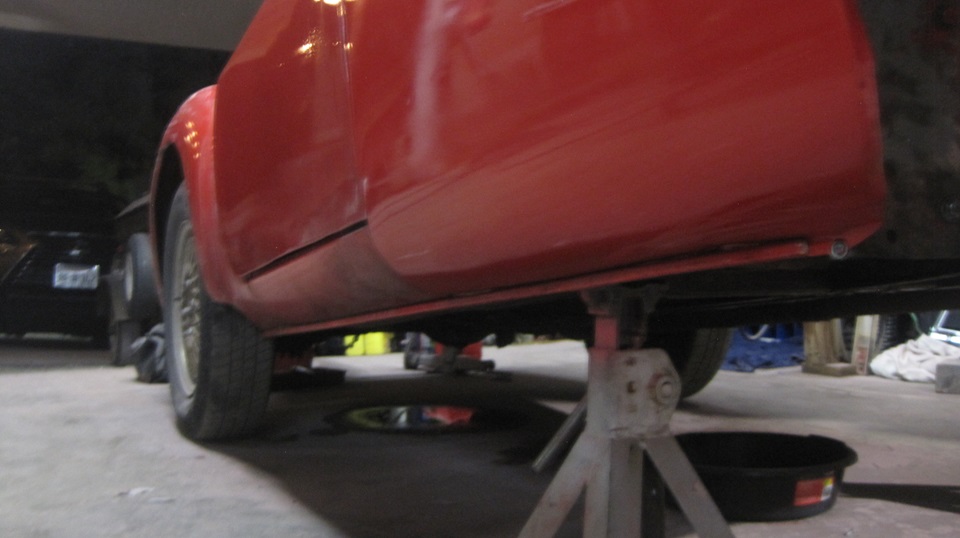
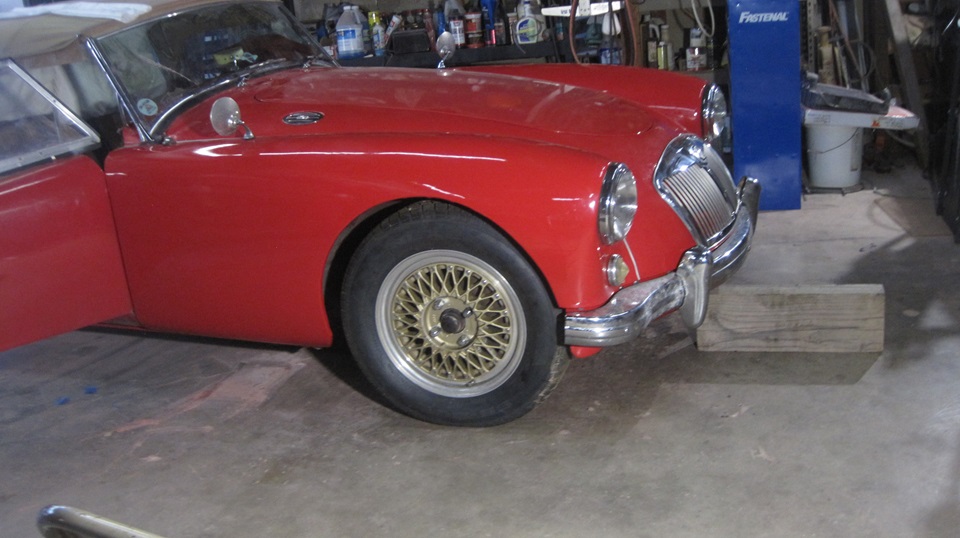
With the car sitting freely on four tires, no passengers, I get to check the ground clearance under the front end. I placed a 1-inch thick board on top of that 7-1/2" block for total 8-1/2" gauge block. I can put one thin or thick finger under the board and measure again to get the final height. so pretty good measurement of ground clearance. I have 8-3/4-inches under the modified flat bottom valance panel, and 9-inches under the overriders. I'd call that a win, almost exactly what I was shooting for with the valance modification. that should now clear most parking curbs.

Time for dinner and WiFi work, and we have a lot of clean-up and packing to do. I recon we will stay here in Murphys, CA one more night.
Wednesday July 10, 2024:
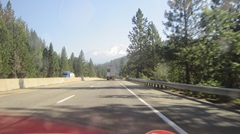
Order of the day was to pack up all of our tools and materials and get them back into the boot and Magic Trailer, pick up and toss out trash, put all borrowed tools back in their proper places, top up the gearbox oil, get the car out of the shop, clean up a couple of oil spills (gearbox rear seal and differential gasket leaks), sweep the place out, and in general leave the place in better condition than it was when we arrived. Stu was smiling with approval (sorry, no pictures). -- Pulling out of Murphys CA at 5-pm, get it off the mountain, down into the central valley, and head north. Brief fuel stop in Elk Grove CA, running a bit rich, lean out the carbs some and drive on. Another 75 miles, heading up I-5, dehydrating and dripping in the 100+dF heat, we stopped 8-pm at Loves Travel top in Williams CA for dinner and a lot of re-hydration (and some WiFi time). Feeling better by 11-pm, think north=cooler, keep going? So we drove another hour north, getting close to Redding, CA by midnight.
Thursday July 11, 2024:
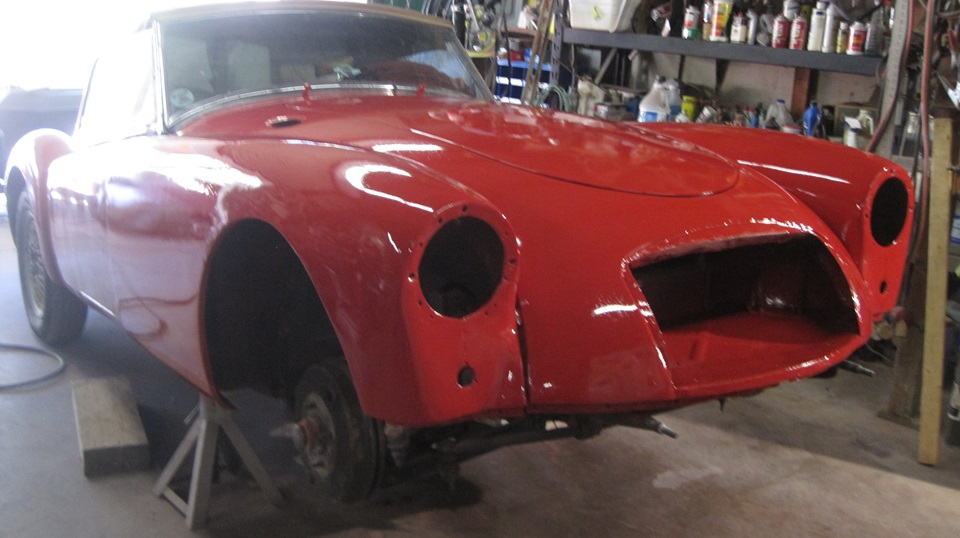
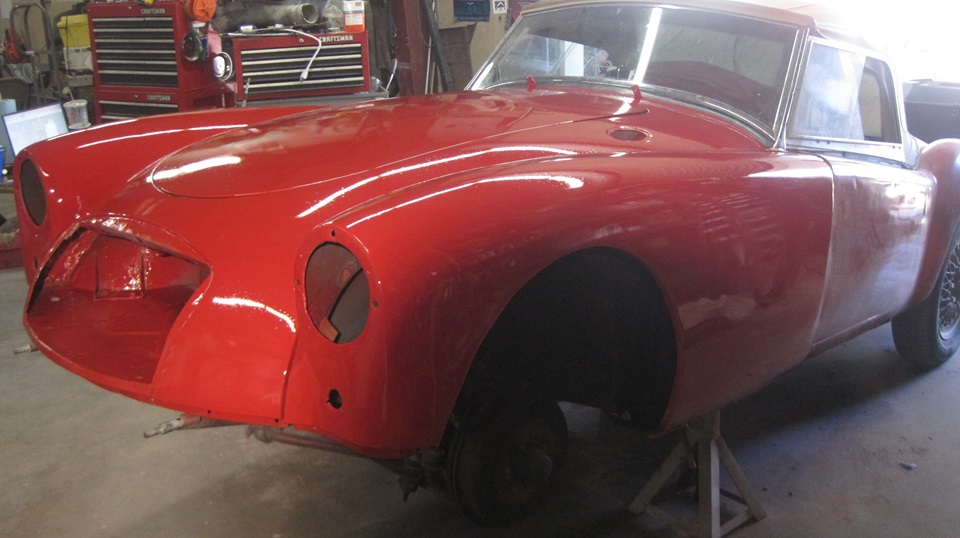
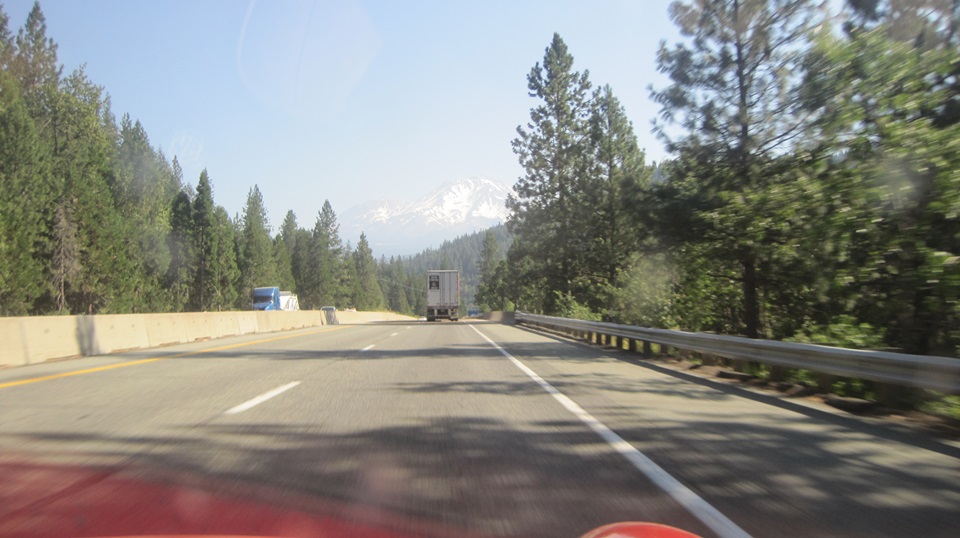
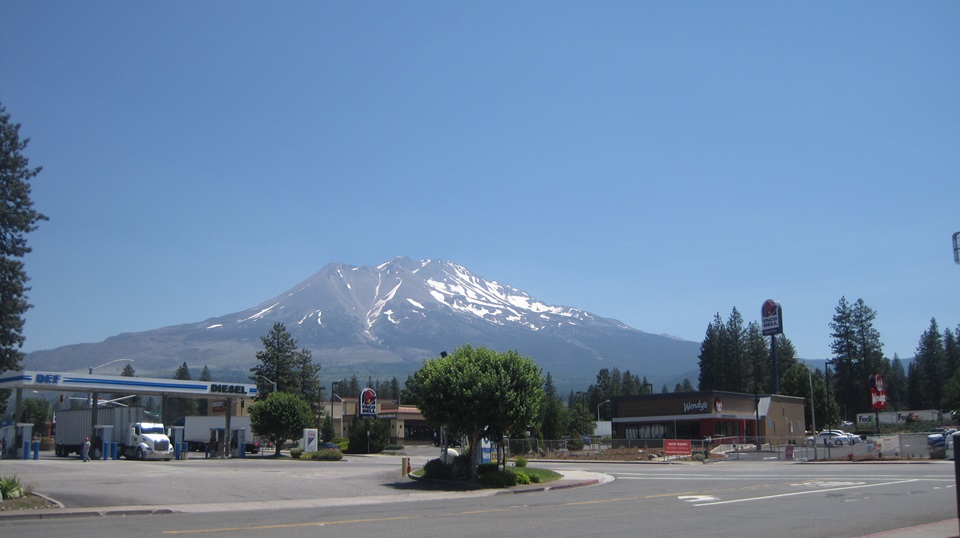
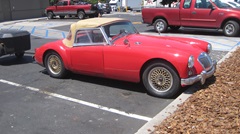
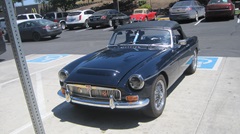
Another 100 miles north this morning, past Redding, and this is finally better. Out of the dessert valley, some nice 3rd gear 6% grades in the mountains. Fuel stop in Weed, CA, not quite so hot, and we made it in time for late breakfast. Great view from the car park, and good opportunity for a full sun shot of the car after the body repair. Looks like a very good color match fore and aft of the windscreen. And a good example for why we modified the front valance panel with flat bottom and more ground clearance.

Friday July 12, 2024:
A little farther north, goodbye California, sitting in Kalmath Falls, Oregon most of the day. Not so hot here, and air conditioning, and a couple days to spare, so no rush. -- Posted a tech page addendum showing installing a 1500 parking lamp on a 1600 fender. No modification required to the sheet metal going that way (if you install the lamp upside down), but a 1600 [amp will not fit on a 1500 fender without sheet metal work. -- Got rousted out of our morning WiFi spot, so we moved a few blocks to another functional WiFi spot, still in Kalmath Falls, OR. Noticed no turn signal pilot light flashing on the dash. Quick investigation reveals the turn lights do work, just no pilot light, and it was hot in the afternoon sun, so this will wait for later. -- Late night cruise another half hour north.
Saturday July 13, 2024:
Good morning cooler day, checking again on the pilot light problem. The expensive electronic flasher unit had failed its output contact for the pilot light (14-mo 24K-mi). We replaced the electronic flasher with a spare "heavy duty" thermal flasher unit to get it working, and on our way again, put another spare flasher unit (or two) on the shopping list. -- More north, to La Pine, Oregon for breakfast, and time to catch up some photos and notes. -- While doing a data upload, I accidentally deleted the "tales" folder from my hard drive (big oops). Took 4-hours to download the data files from the server computer to reload the data to the hard drive (recovered, back to normal). Mid day run to parts store for spare flasher unit,fan belt, bulbs, misc. -- News of a shooting at a Trump rally, looked like an assassination attempt, putting a damper on the day (to put it mildly).
Sunday July 14, 2024:
 Sitting in Madras, Oregon this morning, only 75 miles from tomorrow's destination in Welches, OR. Had enough time to update an existing tech page on Restoring the Aluminum Hardtop #4 to add information for the rubber rear seal. -- Then we had a walk-in, actually a bunch of them. People who knew us, and a few whom I knew, stopping for lunch on their way to NAMGAR GT49 in Welches, Oregon. We will meet them again tomorrow. In fact it seems we have a tech appointment to lay hands on that MGC, which is reported to have "no brakes" (which makes me wonder how the car got here).
Monday July 15, 2024:
Still in Madras, Oregon for breakfast, but soon on the road north. Just 75 miles, but there were some hills and nice scenery.


The NAMGAR web site has not been updated for a while, so it has insufficient information for the current GT49 event. No schedule of events for the GT, so we don't even know what time to arrive to not miss some possible scheduled morning event. We arrived at 9:45-am to pick up our registration packet, and find nothing scheduled until 1-pm, so we got to kill three hours. Got into the Hospitality Room at 1-pm, found some new friends, got o kick some tires while fielding some tech questions.


bailed out of there to go claim our reserved room at a different resort down the street at 4-pm, but not ready yet. Side trip to a local store to grab some food stuff to stock the fridge, before checking into the room. Then back to the Hospitality Room) at 5-pm for a courtesy visit to the First Timers Reception . Quite a few newbies this time.


Stayed in the same place for all attendees Orientation at 6-pm, followed by dinner on your own. In other words, hang out and socialize all day if you can find friends who are aso doing nothing else.
|