The MGA With An Attitude
TURN SIGNAL SWITCH - TS-101 - Pg 5 of 6
Now comes the fun part of making the time delay work again. On the back of the piston there is a leather cup held in place with a thin steel washer and a rivet. When this leather cup dries out it can lose the seal against the bore of the housing, resulting in a fast return with little or no time delay regulation. The object here is to clean the housing, and to clean and lubricate the leather cup to return it to its original soft and supple condition where it can relax and make intimate contact with the housing. When the leather cup is dry it can be very brittle, so take great care when handling this part.
During original manufacture the leather cup may have been installed without a lubricant, or it may have had a coating of Neatsfoot oil or other leather preservative. At some time over the last 40 years or so someone may have applied a coating of grease of undefined type, and any or all of these materials may end up dry and caked on the internal parts. It is important to remove any such caked on materials, as they can interfere with the operation of the seal.

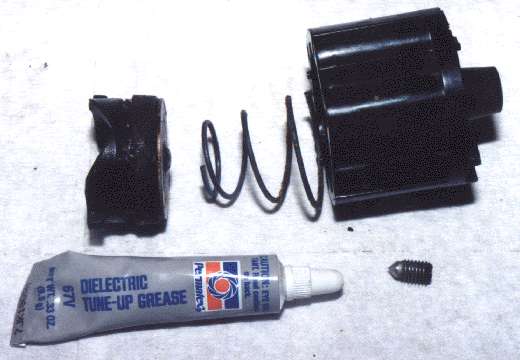
For the final seal lubricant I like to use silicone grease, also known as dieletric heat sink grease or tune-up grease. This silicone grease is a good preservative for the leather, a good sealing compound for the vacuum, and will not dry out for many years to come. Apply a liberal coating of the grease to the leather cup and to the inside of the housing. Install the spring and the piston into the housing and press the piston fully down. Then place one finger over the center hole in the back of the housing to seal off the vacuum port, release the force on the piston, and see if it stays in place or moves back up the bore. The piston should stay down as long as you keep the vent port covered, and should move up fair quickly when you open the port. You must be able to achieve these results if you expect the unit to function properly after assembly. If at first you don't succeed, be persistent. It's all a matter of getting the leather cup soft and supple enough to seal well against the bore of the housing.
Sometimes the working edge of the leather cup has compressed or worn thin such that it does not want to make a good seal with the housing, even with the silicone grease. In this case you can cut a strip of thin paper card stock, slightly narrower than the length of the lip on the leather cup. Gently pull the edge of the leather cup away from the piston, and insert the strip of card stock between the leather and the piston, tucking it nicely into the step in the piston. Press the leather lip back into place against the piston. The paper strip will then be securely trapped behind the leather lip, and will stay there indefinitely. The card stock then serves as a shim to bring the leather lip closer to the cylinder wall, effectively making up for the reduced thickness of the leather lip. If it still doesn't seal in the cylinder, maybe try a thicker piece of card stock. If it sticks in the cylinder, try a thinner shim. I repaired mine with a strip of index card, and it is still working perfectly several years later.
You will also be reinstalling the set screw in the back of the housing about this time. Note that there should be a small piece of cotton packing in the hole under the point of the set screw (originally a white felt button). This bit of cotton acts as a filter to keep dirt out of the cylinder, but it is also important in regulation of the air flow. The air flow rate is very slow, so the adjustment of the set screw can be quite tricky, being nearly closed when the final setting is obtained. A little wad of cotton placed under the tip of the set screw acts as a flow restrictor, so the final gap under the screw tip can be larger, making the adjustment range greater and the actual act of adjusting the time delay a lot easier. If there is any bit of the old packing left in the hole it should be removed, as it would have been thoroughly packed down over the years and either badly leaking or badly plugged up. Replace the packing with a small pinch of random cotton fiber from the end of a Q-tip or from a cotton ball. You might be able to massage and re-use the original packing wad. Roll the cotton material between your fingers to make a small ball just large enough to fit down inside of the threaded hole, then install the set screw.
Here's hoping that you have success if you attempt this endeavor. All comments welcome, and greetings from the MGA with an attitude.
|
