The MGA With An Attitude
DUAL FILAMENT BULB Polarity Connections - ET-107A
How do you know which contact on the base of a dual filament bulb is for the low or high filament? This question comes up fairly often when MGA corner lights may be bright when they should be dim and vice versa. This affects front parking lights and turn signals, rear tail lights and brake lights, and also rear turn signals on the 1500 model. The problem occurs when wires or base contacts are switched in the lamp fixture. For the front corner lamps this can happen if the contact plate in the lamp socket is rotated 180 degrees from normal. The cure there is to push wires forward from the back to bring the contact plate forward out of the socket, rotate the plate a half turn, and push it back into the socket. The rear lamps have bullet connectors inside the lamp assembly which may be inadvertently switched.
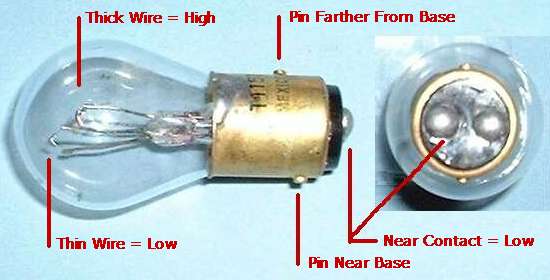
Dual Filament Light Bulb for Corner Lights
To determine which contact is which, hold the bulb sideways in front of you, glass bulb to left and contact end to right. Rotate it until you see the two pins on sides of the base. One pin is close to the base end, the other pin is farther up the base closer to the glass. Rotate it so the pin closer to the base is at the bottom, and the other pin is at top (a little to the left of the bottom one). The contact closest to you is the low filament contact for parking lights and tail lights, the other is for the high filament for turn signals and brake lights.
Look also at the filaments inside the bulb. One is thinner and will have higher resistance to draw less current and give less light. The other is thicker wire with less resistance to draw more current for brighter light. I think the thinner low light filament is always closer to the end of the bulb (but I wouldn't guarantee it).
You can use two jumper wires to make the connections while holding the bulb in your hand. One wire goes on the metal shell for common return (earth or ground). Touch the other wire to one of the end contacts (one at a time). Switching between the two contacts it should be obvious which is high and which is low. There is more than 3X difference in power draw, light output, and HEAT. You can tell by the heat alone when you switch on the high filament. It is 21 watts vs. 6 watts for the standard dual filament bulb.
Be careful if you do this with a Halogen bulb. Halogen tail light bulbs are typically about 20 watts X 50 watts, and the 50 watt bulb gets real hot real fast, so don't burn you fingers. Also you're not supposed to touch the glass of a halogen bulb with your fingers, because oil from finger prints can be enough to crack the glass from thermal stress when it heats up quickly. If you do get your fingers on the glass of a halogen bulb, wipe it down with a clean cloth and alcohol or lacquer thinner and let it dry completely before switching on.
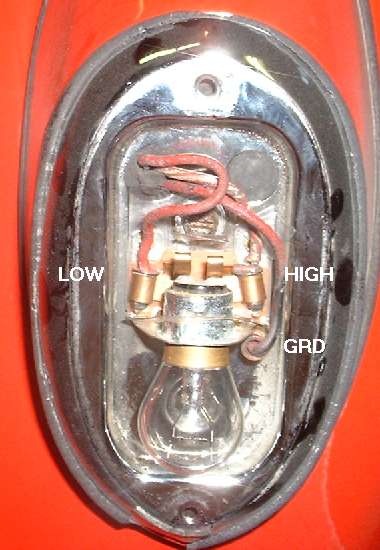
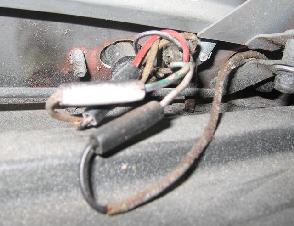
Picture at right is labeled for the wire connections in the MGA tail light.
While the 1600-MK-II fixture is different, the wire connections for tail light and brake light in the dual filament bulb will be similar. Difference here being that the 1600-MK-II rear lamps have bulb sockets with color coded pig tail wires to connect to same color wires inside the boot (much easier). See photos below.
 (Wire connection photos for 1600-MK-II are compliments of Nick Kopernik). (Wire connection photos for 1600-MK-II are compliments of Nick Kopernik).
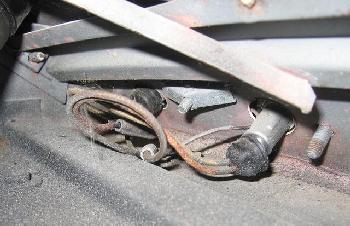
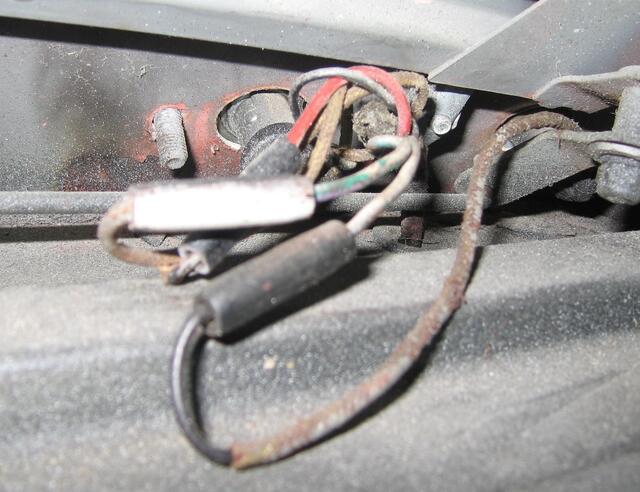
Please do not throw luggage on these wires in the rear corners of the boot space. And do be careful with placement of the wires so the boot latch release pull rods and bell crank do not rub on the left side wires. Tricky business, see the last photo, click for larger image.
|