The MGA With An Attitude
WINDSCREEN WASHER Pump 3 -- AT-105A3
On Dec 10, 2016, Russ Sharples in New Jersey, USA wrote:
"The manual washer pump worked for about 2 years, and then stopped. I noticed that when pumping it would move fluid back and forth in the hoses, so that indicates a check valve issue. This is what I found inside.
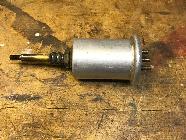
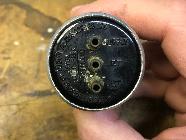
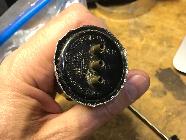
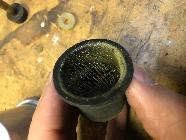
Getting it open required the can opener blade on my pocket knife. Then I was able to use a small screwdriver to work it all the way around. Pulling the back off revealed this. That is the check valve sitting on the screen with the check valve spring visible in the back. Then there's the screen which is bonded into this rubber bulb. Here the empty housing and the plunger.
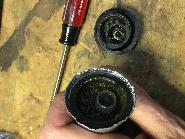
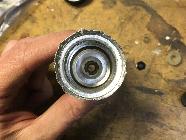
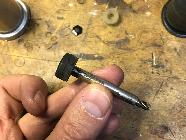
Here's the problem. Best as I can tell, the check valve is held into the back plate by being pressed up against the screen and the screen has torn allowing the spring to push the check valve out and so it no longer functions.
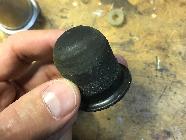
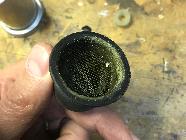
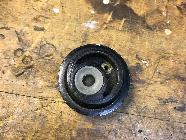
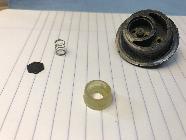
Some details on the design. There are 3 hose connections on the back plate. There is one feed in from the bottle and two feeds out to the jets. This check valve operates on the jet feeds while there is a check valve in the bottle that operates there. When you depress the plunger, the check valve in the bottle closes and the fluid is forced through the check valve in the back plate, pushing down on the black 6-sided washer (made from stiff rubber) and depressing the spring and passing through to the jets. When you release the plunger, the rubber bulb restores its shape, sucking on all three fittings. The bottle check valve opens and jet check valve should close so the suction acts on just the bottle.
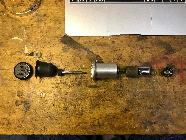
 Here's the complete breakdown and the jet check valve parts. As you can see, nothing holds the white valve housing in the back plate, it's a loose fit. Given the screen failed, that approach isn't going to work anymore. Here's the complete breakdown and the jet check valve parts. As you can see, nothing holds the white valve housing in the back plate, it's a loose fit. Given the screen failed, that approach isn't going to work anymore.
So ideas:
1) I can't replace the screen as it was bonded into the rubber, and I'm sure if I put any screen in there up to that sealing edge, it would leak all over. I'm planning to operate without a screen as there is a filter in the bottle, and that should be sufficient.
2) The back plate seems to be Bakelite, so I could drill tiny holes in that in the crux of the "Y" on either side of the valve body and put tiny screws into it that would hold the valve body down (maybe with washers or a metal strap between the screws), but that would be tricky work.
3) Remove the check valve and use external fish tank check valves on each jet tube.
Getting the bulb sealed to the back plate will be tricky too. I expect there is no way for me to adequately re-crimp the housing, so I am planning to use silicone glue to glue the bulb to the back plate. If this doesn't work, Moss sells a replacement that I will try.
|