The MGA With An Attitude
HELICOIL THREAD REPAIR -- UT-105
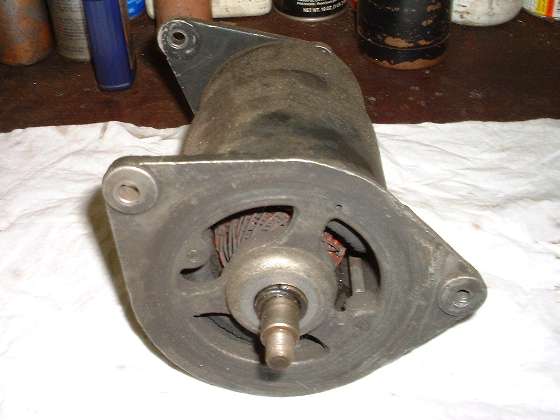
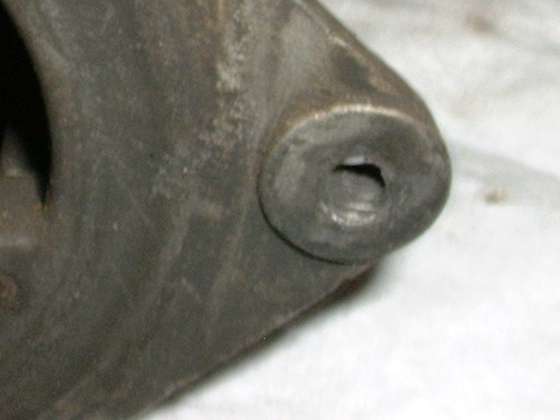
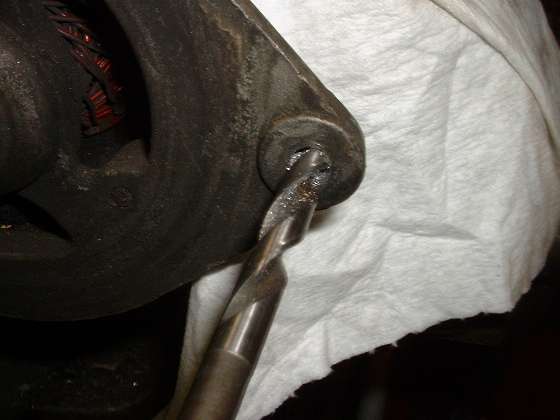
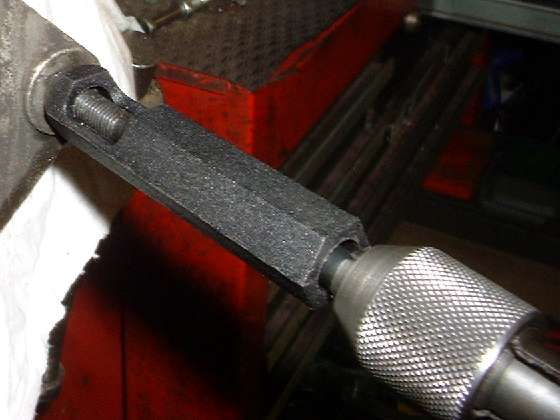
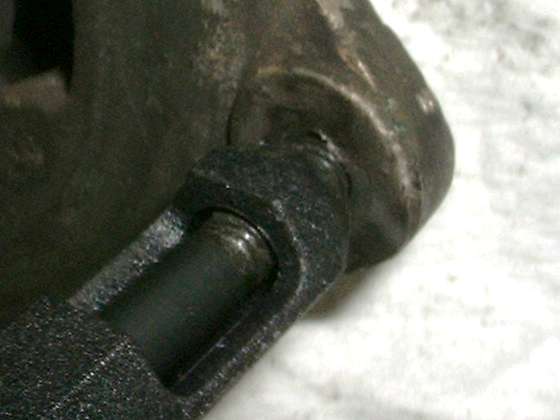
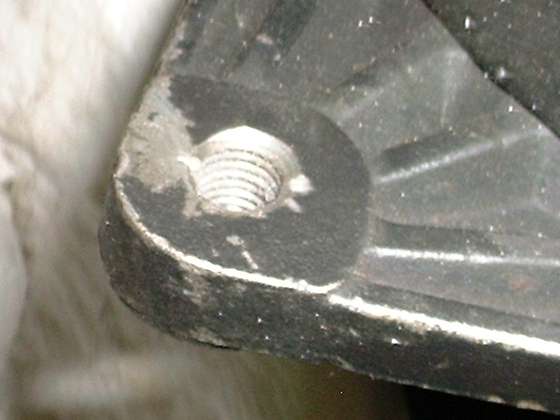
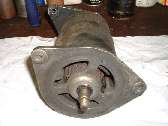
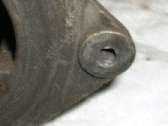
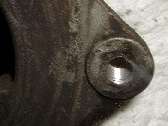
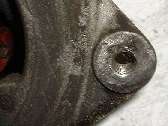
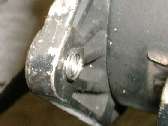
Here we have an easy way to repair a stripped out female thread, or to install a nice strong stainless steel thread in a softer part like an aluminum gearbox case. Immediately below is a picture of a generator where the tapped thread for the belt tensioner adjuster link bolt has been damaged by cross threading a coarse threaded screw into the original fine threaded hole. The second picture is a close up of the damaged. thread. This will be repaired with a stainless steel HeliCoil thread insert.
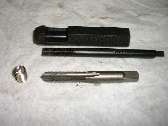
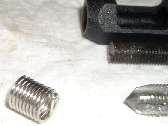
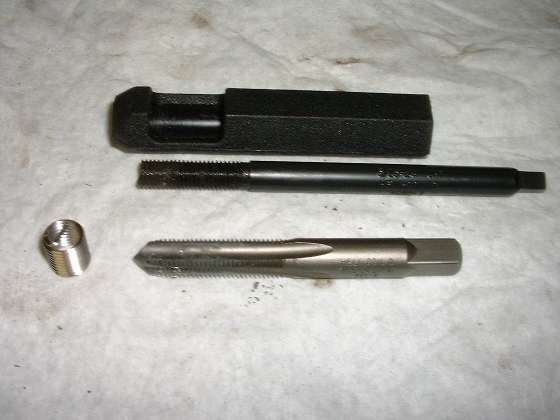
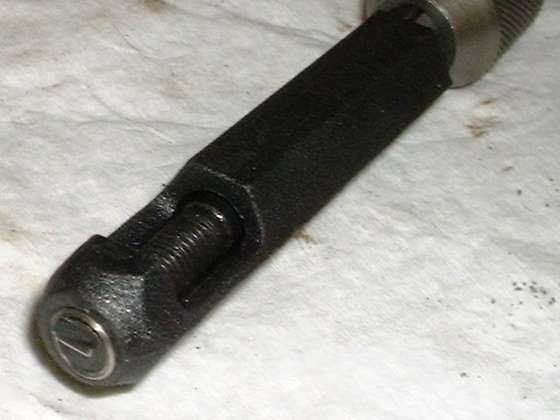
On the right above is a picture of the HeliCoil insert and the three piece installation tool kit. The installation tool kit consists of an oversize tap, a hard plastic coil guide, and a threaded driver with a notch on the end to catch a tab on the threaded insert. You will also need a tap driver handle. The HeliCoil kits are available for most standard thread sizes, inch sizes and metric as well as a few other odd sizes. Kits with the tools and about 10 inserts may cost $10 to $40 depending on size and where you buy it. Additional HeliCoil inserts are generally less than a dollar each in packs of 10.
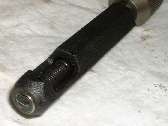
Above far right is a closer view of the HeliCoil insert. The HeliCoil is a diamond shape wire wound into a closely spaced coil, similar to a spring with the coils nearly touching each other. The diamond shaped wire has a 60 degree angle on each of the four surfaces to match the standard angle of the screw thread. At the front (or bottom end of the coil) the wire is formed into a straight tab extending across the center of the coil. The wire is coined with a notch just before the tab such that the tab can be easily broken off after installation. The repair tap is the same pitch as the original thread (picture below left), but slightly larger diameter to allow for the small space to be occupied by the new insert.
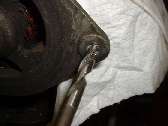
Start the repair by drilling out the hole to the major diameter of the desired thread size. In this case it's a 5/16-24-UNF thread, so I use a 5/16 inch drill bit. For a critical application like a cylinder head bolt you should use a drill press to keep the hole perfectly straight. For this application I can use a hand drill and keep it straight enough to serve the purpose. If the thread was completely stripped out to begin with, you can skip the drilling step, because the hole will already be at the correct diameter for tapping for installation of the HeliCoil.
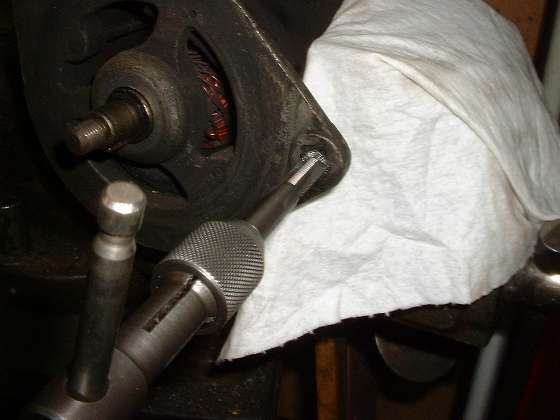
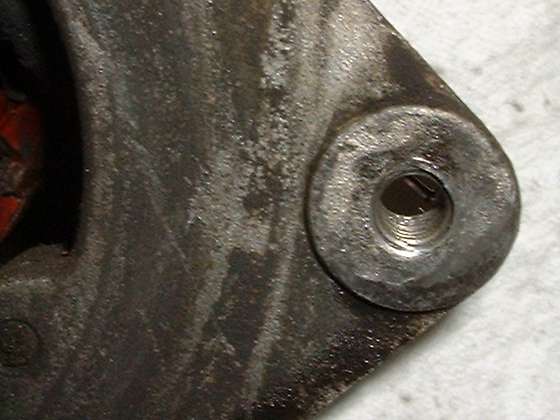
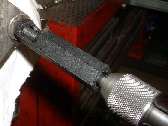
Tap a new thread into the part to be repaired in the same manner as tapping any other hole (use tapping oil to preserve the tool). For a blind hole you must have a complete thread to a depth at least equal to the length of the HeliCoil. For a through hole you can run the tap all the way through for a full thread. The last three pictures above show the drilling and tapping and the new oversize thread.
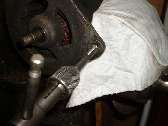
Drop the HeliCoil into the side of the coil guide, and insert the threaded driver through the barrel of the guide into the HeliCoil. Screw the HeliCoil into the guide with the driver until the first thread of the coil is exposed at the end of the guide as shown in the first picture on left above. Place the coil and the guide against the face of the part to be repaired, and screw the coil into the newly tapped hole while holding the guide stationary (second picture above). Continue to turn the driver until the coil escapes from the end of the guide, at which time the guide may be retracted a bit to give a view of the tail end of the coil (third picture above). Continue turning the driver until the tail end of the coil goes just below flush with the surface of the part, then stop and unscrew the driver, leaving the new insert in place (far right above).
When the tapped hole is deeper than the length of the HeliCoil (normal installation) you will need to break off the driver tab to get it out of the way. Reach into the hole with a flat faced punch, place the end of the punch on the bottom tab of the coil and up against the wall at the point of the sharp bend of the tab. A light tap on the punch with a hammer will break off the tab, leaving a clean thread.
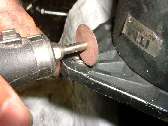

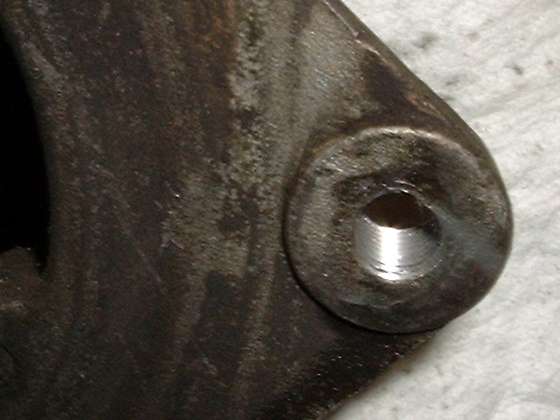
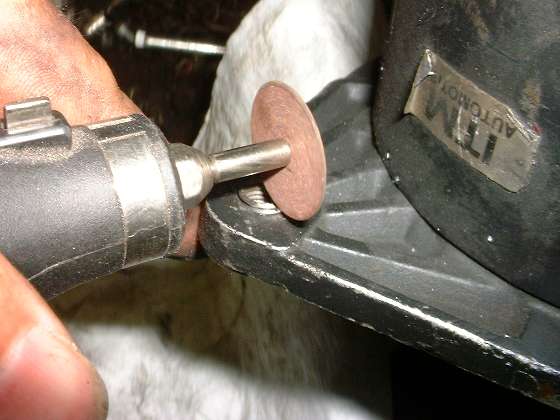
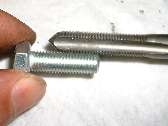
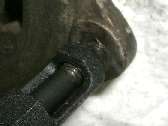
The HeliCoil inserts can be purchased in various lengths. Shorter coil lengths are convenient for installation in thinner parts such as this generator end plate, but I don't always have the shorter coils on hand. In this case the standard length HeliCoil extends through the part and a few turns out the back side as shown in the picture at far left above. If you try to pull or break the wire it will either pull completely out of the part or will deform the thread such as to make it bind on a new screw. As such, the appropriate means to cut off the excess wire is with an abrasive cut-off wheel (second picture above). Here too you want the coil to finish flush or below flush with the surface of the part. You could cut the wire close to the surface and finish by grinding it flush. In this case I'm not terribly particular about appearances, so it's easier to simply cut the wire below the surface, leaving a small notch in the edge of the threaded hole (third picture above). If you were installing an extra length HeliCoil in a shallow blind hole, you could cut off the remaining exposed tail in a similar manner.
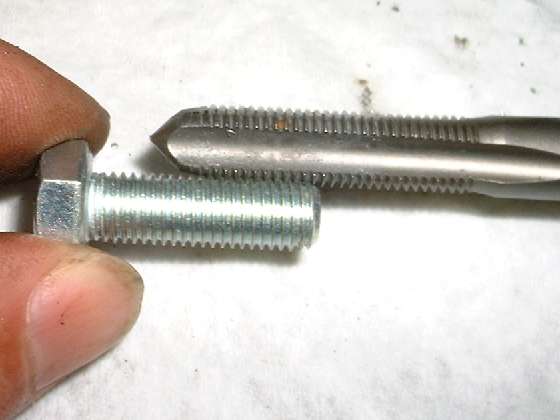
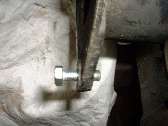
The last picture shows the new bolt screwed into the fresh thread, and it went right through with no binding, no burrs. In the case of a cast iron or brass or aluminum parent part, the new stainless steel thread will be stronger than the original material. This is especially good for critical fasteners such as a bolt holding a starter motor and threaded into an aluminum bellhousing (verified the hard way). This is also a great way to reinforce the threaded holes on that expensive new aluminum cylinder head. It is sometimes said that any time a screw is to be assembled more than once in an aluminum part it should have a threaded insert.
Addendum August 2, 2010: Here is an off-site video showing installation of a HeliCoil.
|