|
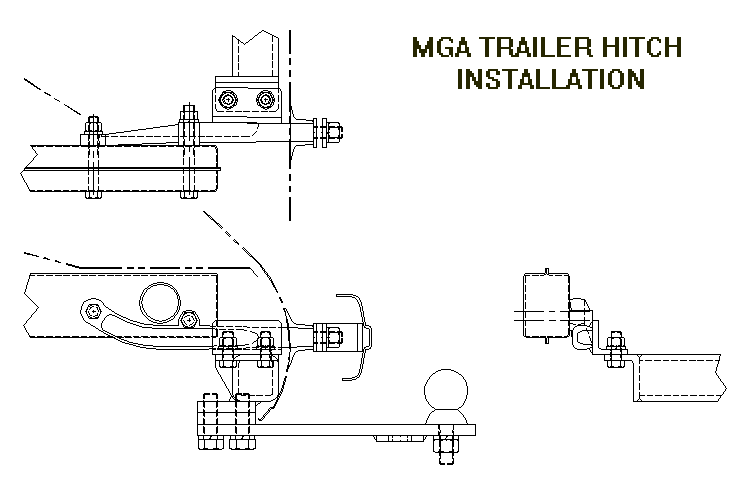
Installation technique: Over the long life of these cars, many have had the body removed or otherwise worked on. As a result, not all rear valences and bumpers will line up the same way. You would like to keep the cross bar as far to the rear as possible, just inside the sheet metal. The rear extension bar should be positioned 1/8 to 1/4 inch below the edge of the sheet metal, so that if you want to unbolt the extension piece, the rest of the assemble will be completely hidden inside of the rear valence. And, the rear exhaust hanger (if stock) may have to be reversed to clear the left end of the cross tube where you see the angle on the bracket. With this in mind, when installing the hitch on the car, it is best not to drill the holes in the top angle brackets until after the final alignment in the vehicle has been done.
You can use four small c-clamps to hold the assembly in place while you get it properly aligned. Clamp the top angle to the bumper bracket with one clamp, and clamp the upper and lower angles together with the second clamp. Do the same on the other end. When you get it all aligned and level, scribe a line on the underside of the top angle for alignment reference. Then remove the lower clamps, leaving the top angle pieces firmly clamped to the bumper brackets. Then you can remove the bumper brackets from the car to weld the angle to the bracket. After welding, place the cross bar angles against the bracket angles in the position marked by the scribe marks, and use the holes in the cross bar angles to transfer location to the bracket angles for drilling. Then you have just a couple more steps left. Paint it the color of your choice (black recommended), and install it.
|
|
