The MGA With An Attitude
RESTORING 1600-TYPE SIDE CURTAINS - TT-212
With Fabric Covered Steel Frames
This experience on restoring MGA 1600 type fabric covered side curtains is provided by M.J. Moore in Cheshire, UK.
I have had a go at recovering them, in fact I've had three attempts but none to my liking.
I bought the set of frames on Ebay with some vinyl still present but not really enough to use as patterns so I bought a set of fabric pattern drawings from Todd Clarke. Unfortunately, whereas these patterns give the shape of the seven pieces of vinyl (per frame) they neither give the position of the stitches nor the order of assembling them. Both these are vital for a neat end result.
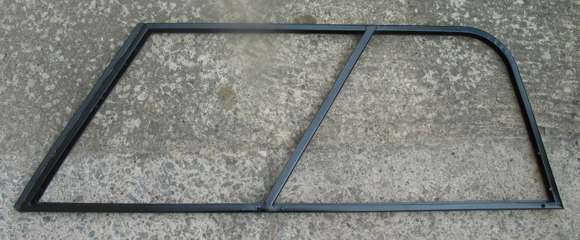
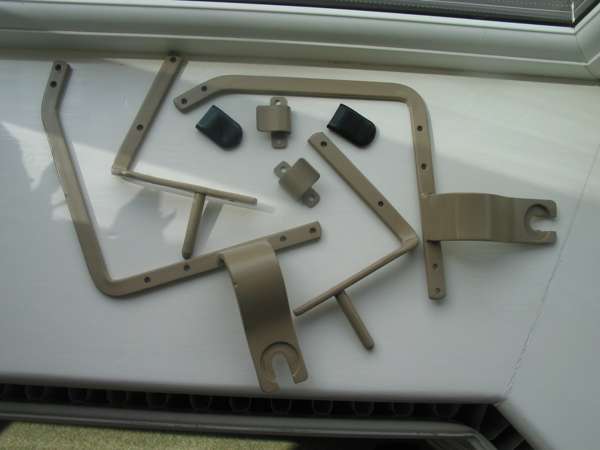
From my old bits of original vinyl it appears that the fabric was not glued to the frame but the free ends were tucked into the channels and held in place by the close fitting window channeling. The steel frame itself is not riveted but welded at the bottom and top front corners. The brackets, which were painted the same color as the hood frame, are all pop riveted to the frame after covering. The anti blowout bracket was covered with a rubber sleeve to protect the chrome on the windscreen.
The front windows are fixed and the rear edge fits into the diagonal steel strengthening brace. The window material is quite thin, Todd Clarke sells 1/32" but I measured some of the original at closer to 1-mm. The original plastic was not UV resistant and hence they yellowed over time. I have bought 1-mm polycarbonate which has a UV absorbing layer on one surface so you have to mount them with this layer to the outside. As it is impossible to prevent some light entering from the back I'm guessing that eventually this material will darken also but perhaps take longer. It is possible to get completely UV resistant polycarbonate (Makrolon is one brand) but I was not able to find a supplier of 1-mm sheet.
The rear windows are 1/8" perspex (acrylic)) and I've bought 3-mm sheet for these.
There is a drainage hole in the bottom right of the frame and an eyelet is pushed through this hole again after covering.
There was a 1/2" rubber molding glued to the front (before covering) of the frame to fill in the gap between the frame/windscreen.
There were originally edge flaps built into the fabric covering; to the top and rear this flap was 1/4" wide, whereas at the bottom the flap was just over 1" wide. Presumably this wide flap had a tendency to curl in service so they built in a waterproof strengthening layer - as buckram is built into some clothing hems. One interesting and complicating feature of these flaps is that the wide bottom flap is positioned towards the outside of the car and the top flap is towards the inside so there is a crossover point for the flap. This crossover point on my old ones was half way down the rear edge but I have seen some other original frames where this point was at the top rear corner and these did not appear so neat.
When I failed in my attempts at making these coverings I thought I'd give the job to an expert but after 'phoning several MG trimmers nobody said they offered the service. I spoke to someone who had had their frames recovered at Bob West so this may be a possibility if I fail on my fourth attempt.
It's not a job not to be undertaken lightly. For me it has proved to be the most difficult job of all in my restoration. -- Mike
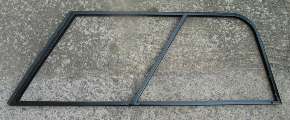
 Above is a picture of a left hand bare steel side screen frame with the half round rubber molding glued along the front edge. Note the drainage hole at the bottom right.
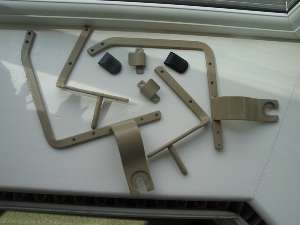
These are the painted brackets (right).
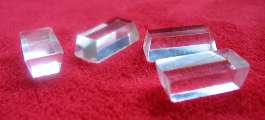
Also the 1" x 1/2" x 3/8" trapezoidal acrylic window knobs (above right). Note the tapering with the smaller area glued to the window. These are copies of original knobs that were fixed to a pair of aluminum Weathershield frames. I'm not sure, however, if Weathershield made the fabric covered frames. -- Mike
|