The MGA With An Attitude
Tonneau Cover STUD LOCATIONS - TT-100B
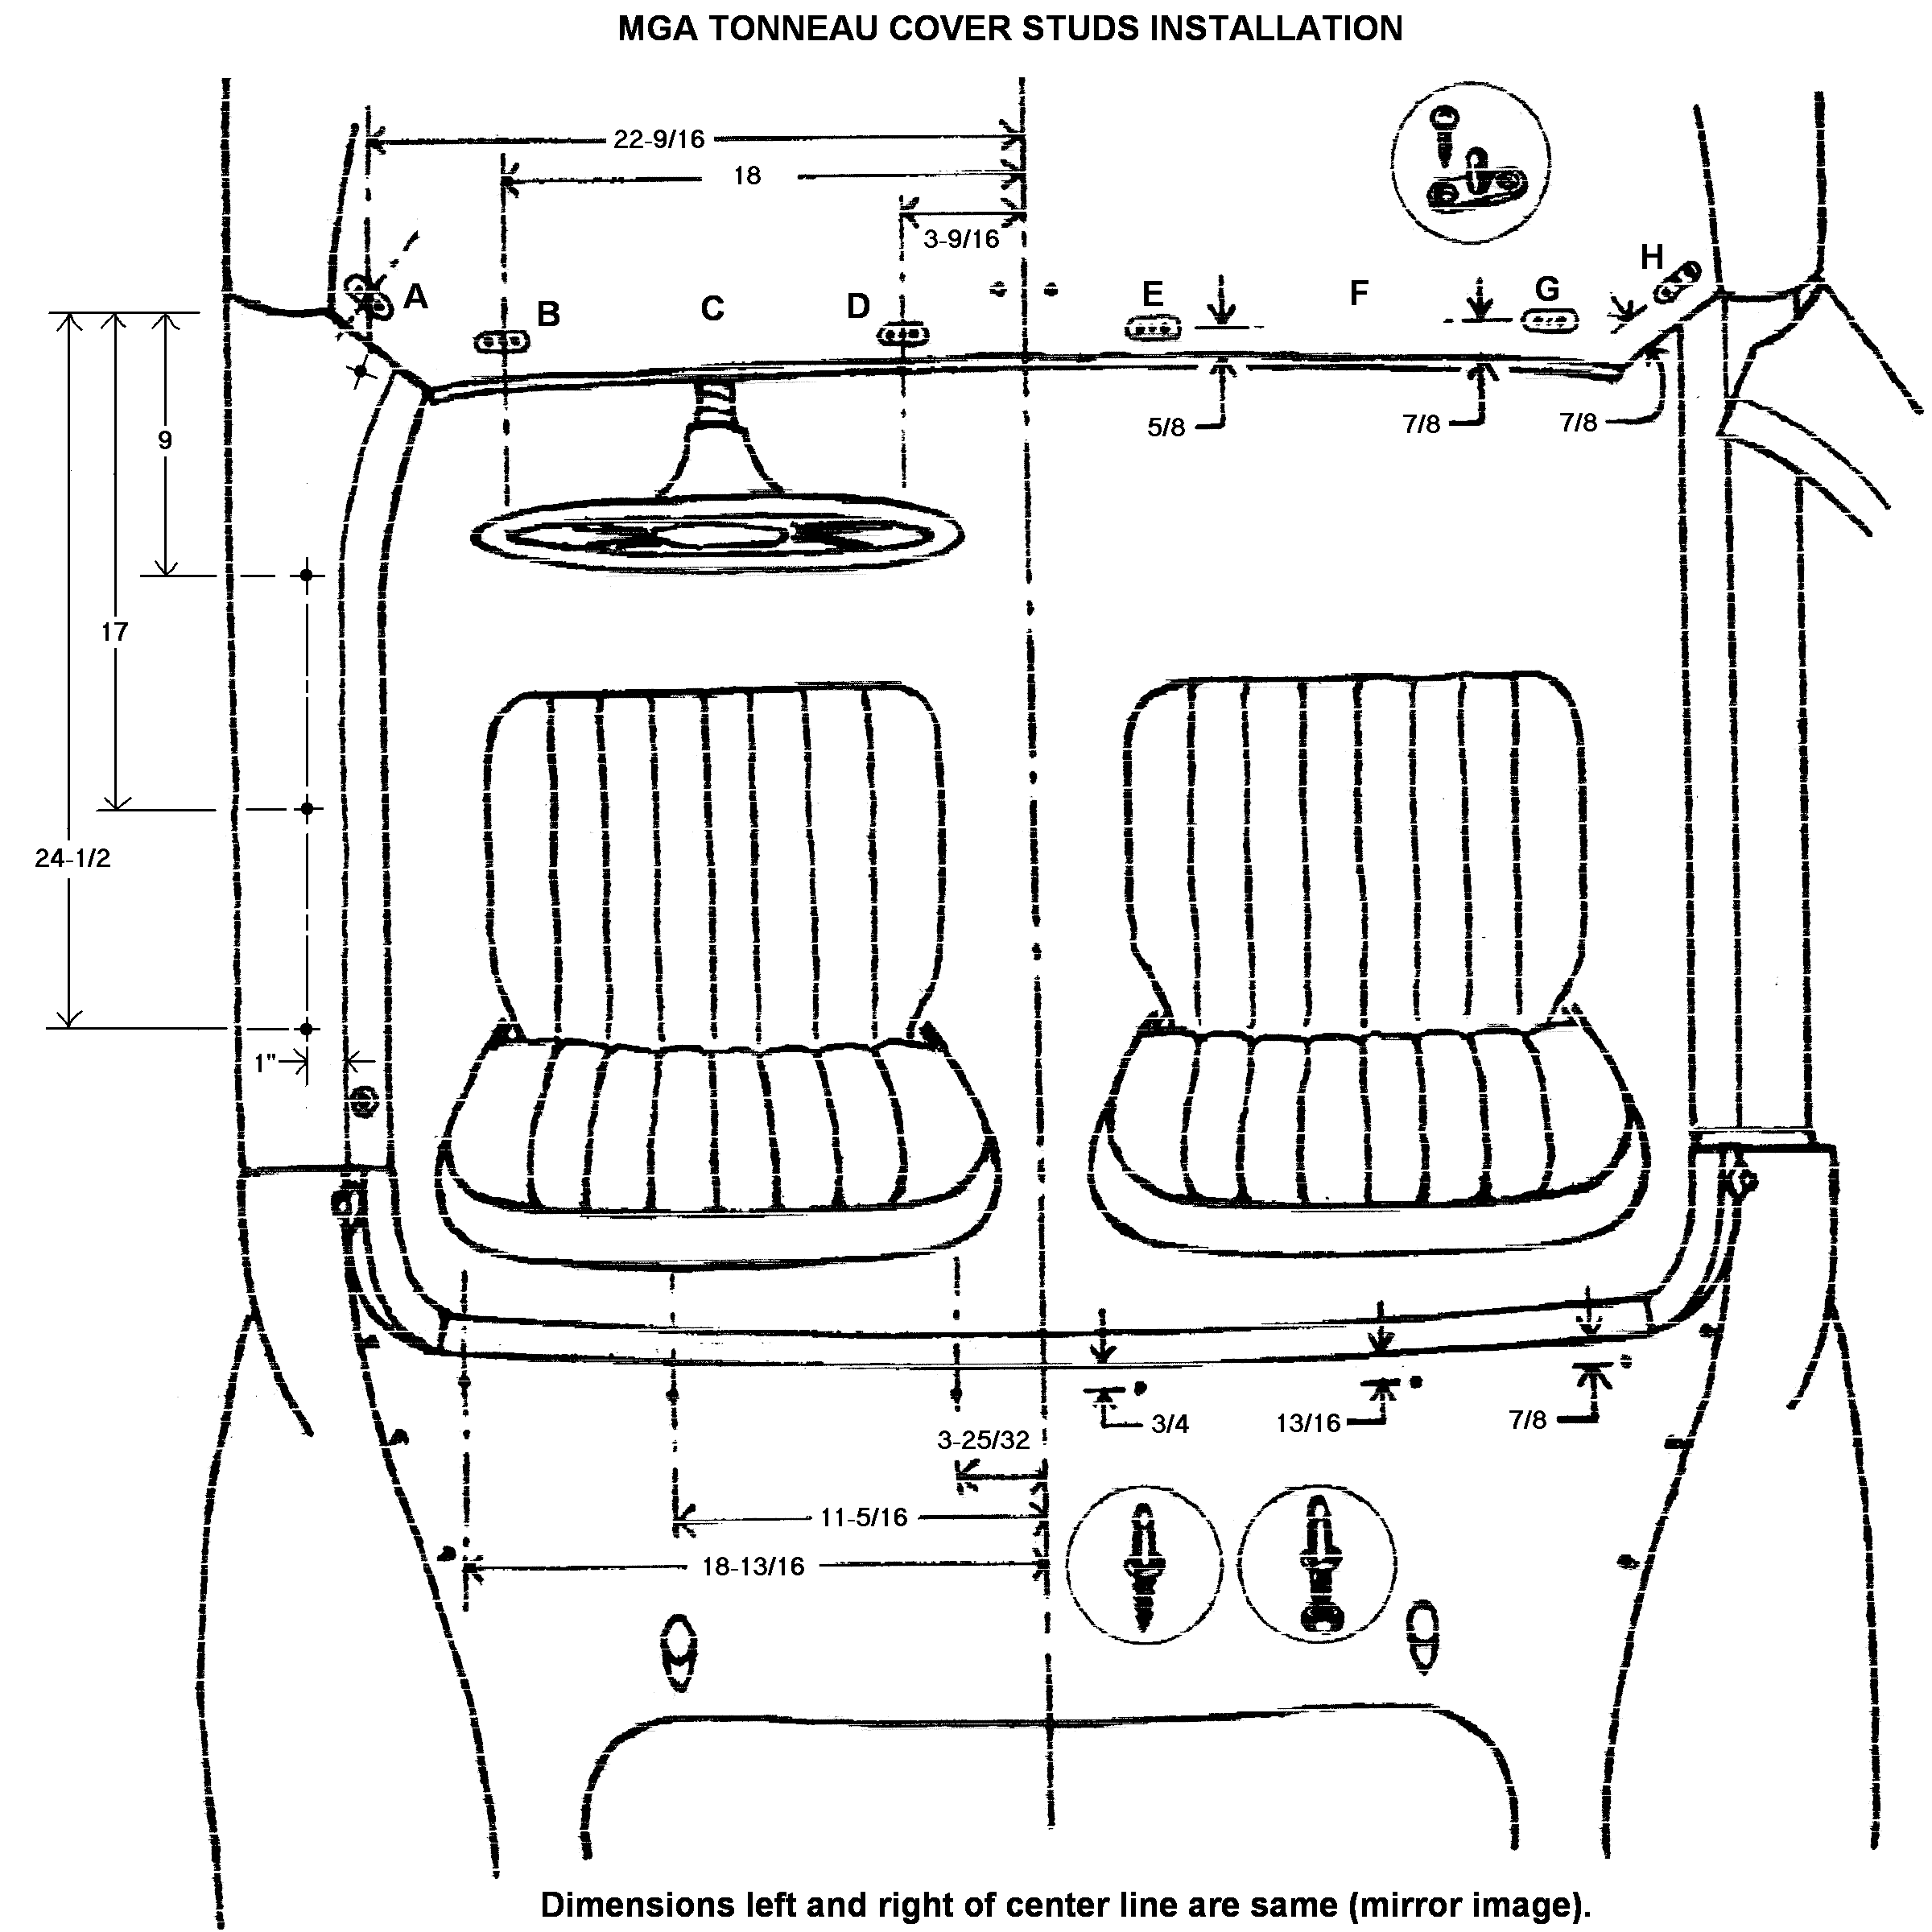
Prerequisite for this course is TT-100A discussing types and quantity of LTD studs in which general locations. The diagram below gives the "standard" dimensional locations of the tonneau cover studs. Click for larger printable image. This diagram shows stud locations for the most common "long" tonneau cover (attached aft of the rear cockpit rail) with no studs on the door tops. Earlier covers were wider with four studs on each door and the rear studs on the cockpit rail. The tonneau cover was always an optional extra, not included on many new cars. When it was dealer or owner installed, an aftermarket installation could have significantly different location for the studs. As such, most replacement covers will be supplied with the LTD fasteners separate to be located and installed at time of tonneau cover installation. Find more detailed notes below.
All roadsters came from the factory with the two side turn buttons and six LTD studs located near the rear fender to deck seams. Early 1500's had four studs on top of each door, which are commonly deleted during restoration work. Early cars may not have studs in locations A and H, or those studs may be added or deleted at the owners discretion. Early cars also had studs (factory standard when used) in locations C and F, but those were deleted for later production. For the early style "short" cover, six studs aft of the cockpit should have same left to right locations, but move forward onto the rear cockpit rail. When installing the aftermarket extra long cover that attaches at the rear body hooks, the six studs immediately aft of the cockpit must be deleted. The required body hardware is as follows:
Short Length pattern (early cars):
Front: Six 2-hole flanged studs (B thru G) and twelve tapping screws.
Doors: Eight machine thread LTD studs.
Rear: Six self tapping LTD studs.
Short Length pattern (early cars modified):
Front: Six 2-hole flanged studs (B thru G) and twelve tapping screws.
Rear: Six self tapping LTD studs.
Long Length pattern (early cars):
Front: Six 2-hole flanged studs (B, C, D, E, F, G) and twelve tapping screws.
Doors: Eight machine thread LTD studs.
Rear: Six machine thread LTD studs.
Long Length pattern (later cars):
Front: Six 2-hole flanged studs (A, B, D, E, G, H) and twelve tapping screws.
Rear: Six machine thread LTD studs.
Extra Long Length pattern (early cars):
Front: Six 2-hole flanged studs (B thru G) and twelve tapping screws.
Doors: Eight machine thread LTD studs (may be deleted).
Rear: Six machine thread LTD studs.
Extra Long Length pattern (later cars):
Front: Six 2-hole flanged studs (A, B, D, E, G, H) and twelve tapping screws.
Rear: Six machine thread LTD studs.
These arrangements of studs may be different for any aftermarket installation, or may be changed at the owner's discretion. If you wish to change style of tonneau cover or location of existing studs, the best time to do it would be during body restoration work and before painting.
|