The MGA With An Attitude
SEQUENCE OF RESTORATION - RT-102E
Part E - Reassembly
Reassembly is the fun part, and you can wear white gloves much of the time if you like. Clean the shop well as a treat. Engine may be installed any time, before or after the body. Start by chasing all female threads in the body and on the frame with clean-out taps before beginning body assembly or body installation on the frame.
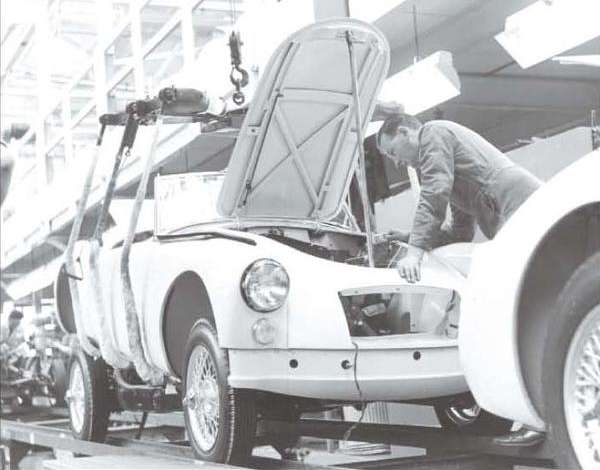
The body may be almost entirely assembled on the sawhorses, including most of the wiring harness (side harness goes under the frame), lighting fixtures (not the grille yet). Or drop the bare inner body onto the frame first (two people), followed by installation of the outer panels and external fixtures and trim. Body goes onto the chassis with appropriate packing, some caulking, and a couple dozen bolts in one day. Packing between body and frame is noted in article RT-103. See more body installation details in RT-632.
After body is on the chassis, you get to assemble outer body panels (if not already done). Install oil cooler (if used) sometime before grille. Front valance panel and bumper installation goes well after installation of the grille. The grille may be test fit at any time, but final installation should be delayed until everything else up front is finished, especially assuring that the bonnet latch works first. Install rear wiring harness before installing tail lights, as wires run through the tail light plinths. Install rear bumper any time after body is secure on frame, but maybe before hanging the muffler. Install (or re-install) fuel tank after body is secure. Windscreen wiper drive needs to go in early (but not pedals yet). Any interior insulation, under dash pad (recommended), carpet padding, carpeting, battery cover, spare tire cover(s), boot carpeting (optional but nice). Be prepared to get a little sticky with glue for a day or two. Center arm rest is supposed to be part of the tunnel rear carpet section.
Insulating pad for under heater shelf and back side of firewall (if used) should be installed before anything else is attached to the bulkhead. Cockpit trim rails need to be installed early on before installation of dash and interior kick panels. All fenders and splash panels and windscreen must be installed, and carpeting should be installed before interior kick panels. Install door pockets and inner door panels, then door seals, followed by front and rear kick panels (cut holes in rear panels for top frame bolts). Front kick panels are easier installed before the dash. Do use plastic snap plugs to close holes around windscreen bolts before closing front kick panels. You might delay windscreen and front kick panels until after installation of wiper drive, heater, and everything else that attaches to the heater shelf and firewall (and radio antenna if you have one as the cable normally goes behind the kick panel). Also easier if the windscreen and bonnet are not in place while assembling things to the bulkhead.
Wiring can easily be installed after the body is on the frame. The primary reason there are fists full of bullet connectors at front and rear of the side harness (going under the frame) is because the factory thought it was more efficient in production to assemble parts of the harness to body and frame before the body was installed. It also makes it a bit easier to R&R the body from frame without disassembling the rear wiring from rear lighting fixtures or side harness from frame (but I don't know if anyone has ever done that for field service). Bullet connectors at front and rear of side harness also facilitate some 3-way wire splitters.
After under dash pad, install all devices attached to the bulkhead and the main wiring harness and securing P-clips. Get bonnet hinges and latches working before installing the grille. Do all front electrical wiring and install the 4-inch air intake hoses and 4-inch P-clips before installing the grille. All of this is easier with engine out, but can be done with engine in place. This is why the factory installed the harness in the body before installing the body on chassis with engine already in place.
Working at night or in a dark garage, place a bright light under the bonnet and then check from within the cockpit to spot any light showing through the bulkhead. Be sure every hole in the bulkhead has a rubber grommet or a hole plug, and that no light can get through. Any hole the size of your pinkie finger can let in hot air in summer, cold air in winter, and engine fumes and noise at all times.
There is a separate small sub-harness for about half of the dash wiring. See ET-100C. Working on the bench, all of the devices (except perhaps the safety gauge) can be installed in the dash panel, and the dash harness can be installed and connected prior to installing the dash in the car. Then sit on the tunnel with dash assembly face down on knees while connecting main harness to dash prior to mounting dash to body. Install dash to body with three top screws and four bottom braces. Include heater control (if fitted), other control cables, and finally the safety gauge which requires lines run through the firewall.
Install seats and steering column, side curtains, tonneau cover, convertible top (all very abbreviated here).
Somewhere near the end, install oil cooler (if fitted) and horn(s). Be sure the bonnet latch works before final installation of the grille, then the front valance panel and all bumper parts (while you curse a lot). If not done earlier, the engine may be installed, followed by the radiator last. A new engine will require a cam run-in session of 20 minutes at 2500 rpm, followed by re-torque the cylinder head and readjust valve lash.
If you have done it all right, you may take your number one squeeze along for the test drive. For me the first time out of the garage was once around the block to be sure everything works, followed by a 20 mile loop on the expressway and a stop for breakfast (after the all night session to install the engine).
|